I tried using the production switcher 'ATEM Mini Pro' which is compact and lightweight and has a picture-in-picture function and a stream distribution function.
ATEM Mini | Blackmagic Design
https://www.blackmagicdesign.com/jp/products/atemmini
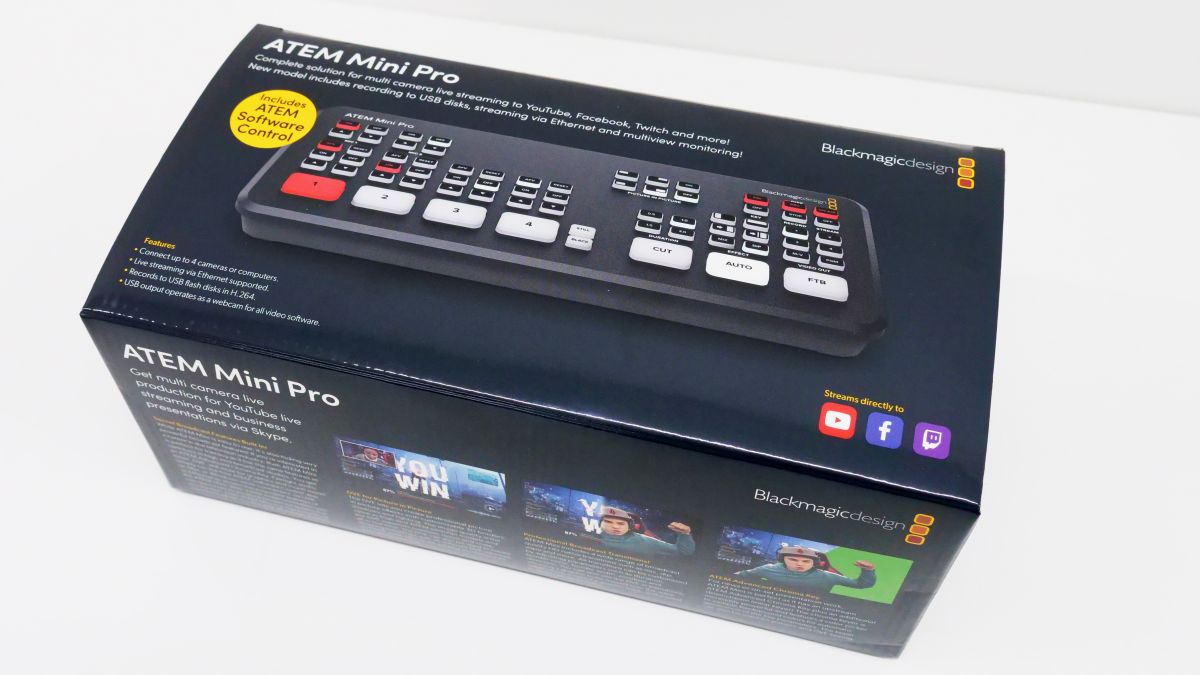
The outer box of ATEM Mini Pro looks like this.
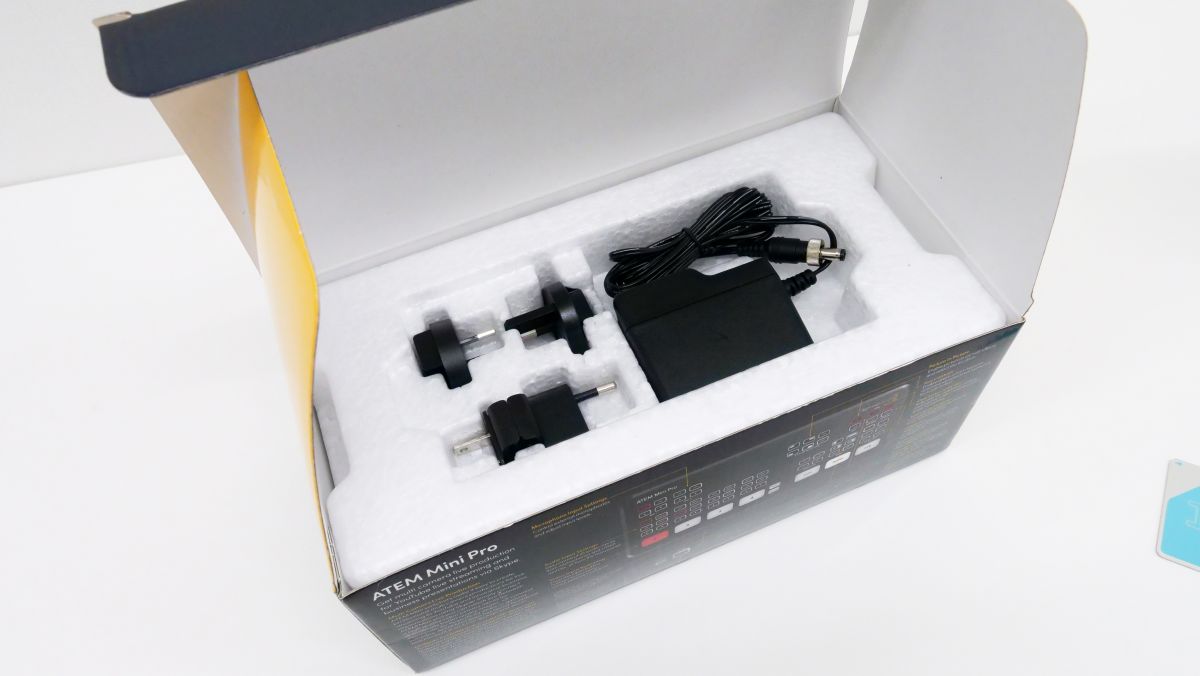
When I opened the box, the power adapter appeared.
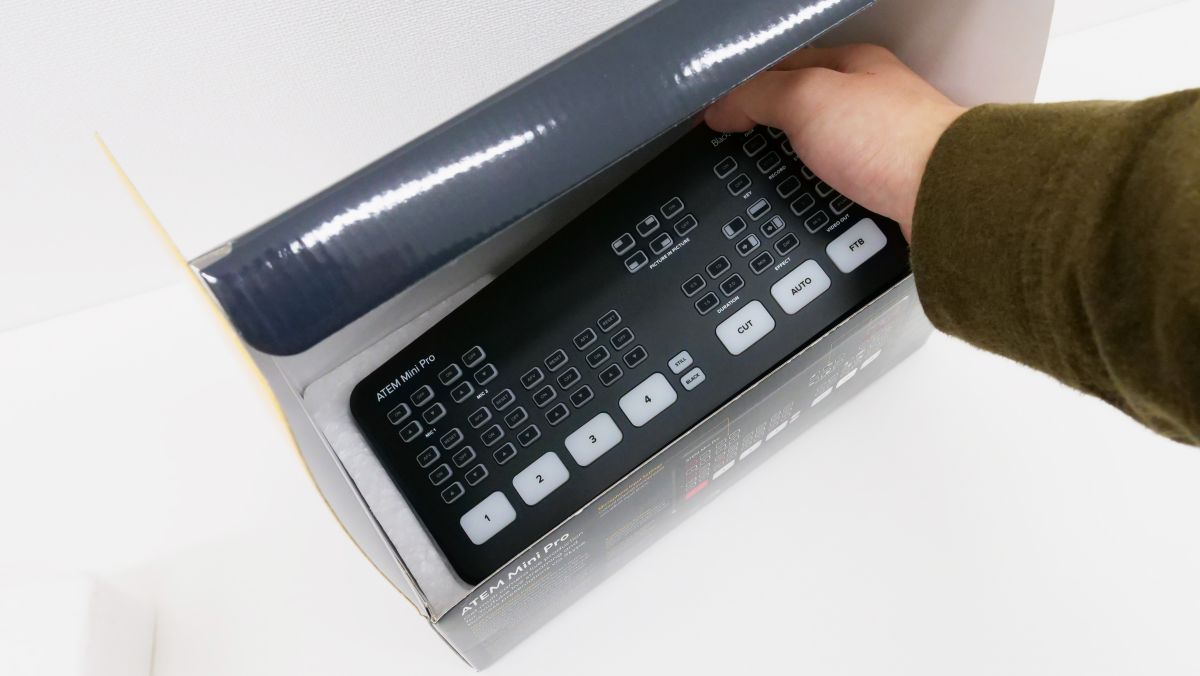
Remove the power adapter and remove the ATEM Mini Pro body from the bottom of the box.
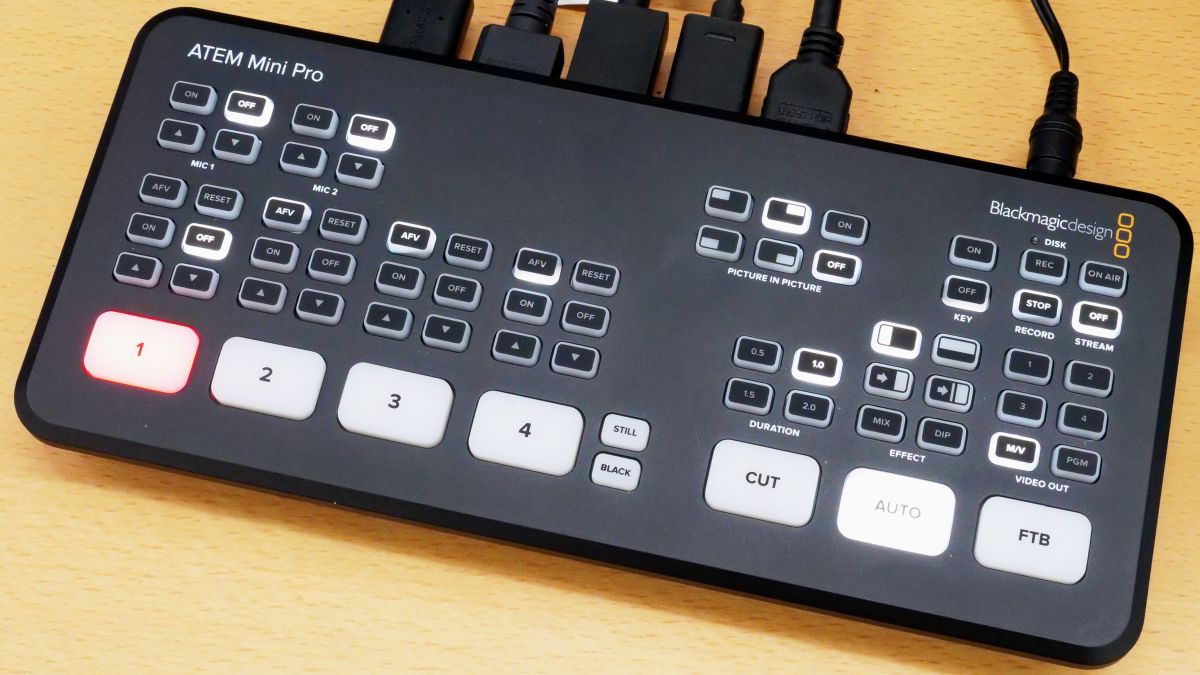
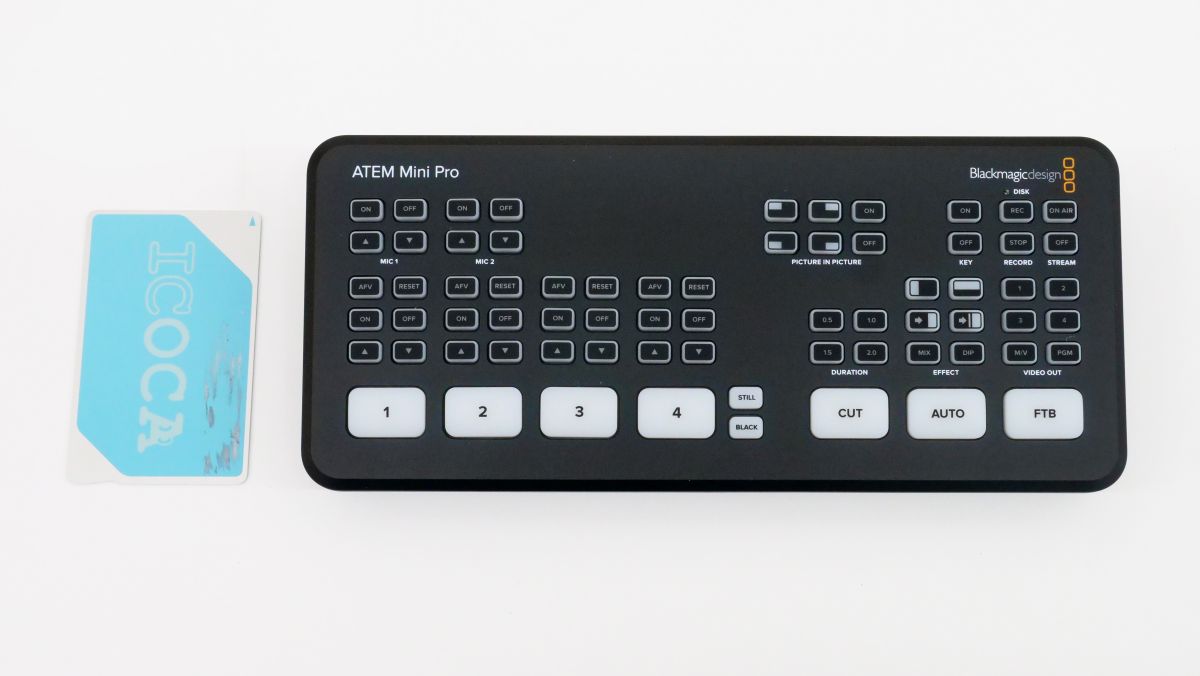
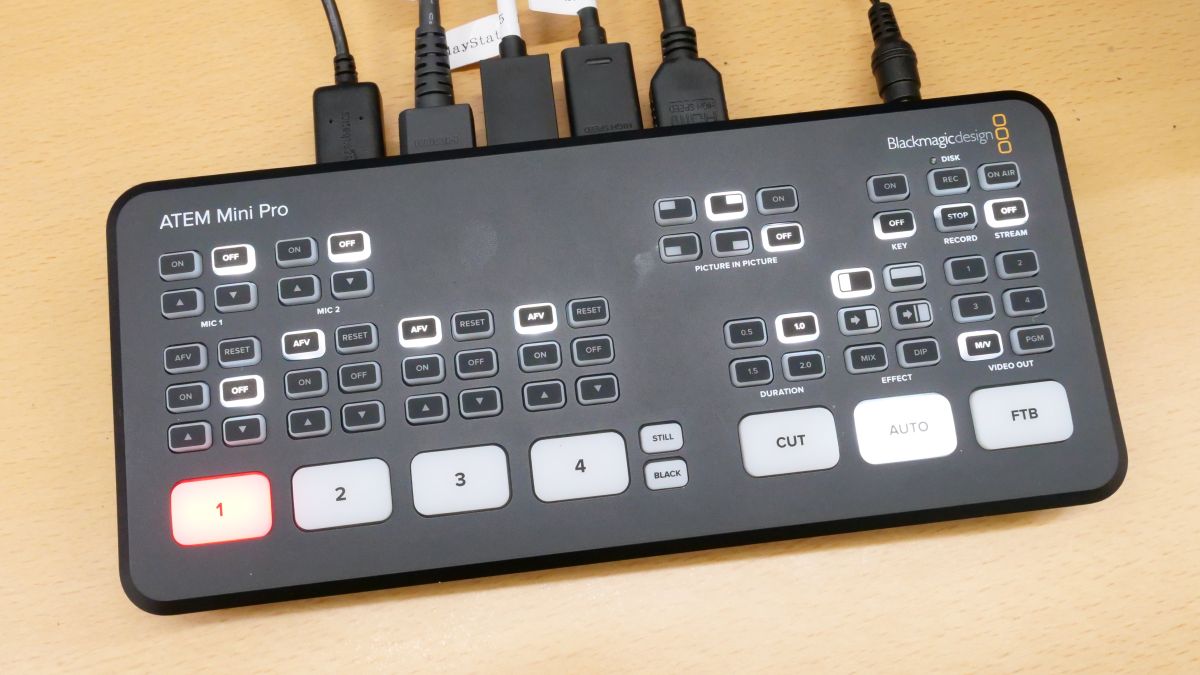
The body of ATEM Mini Pro looks like this.
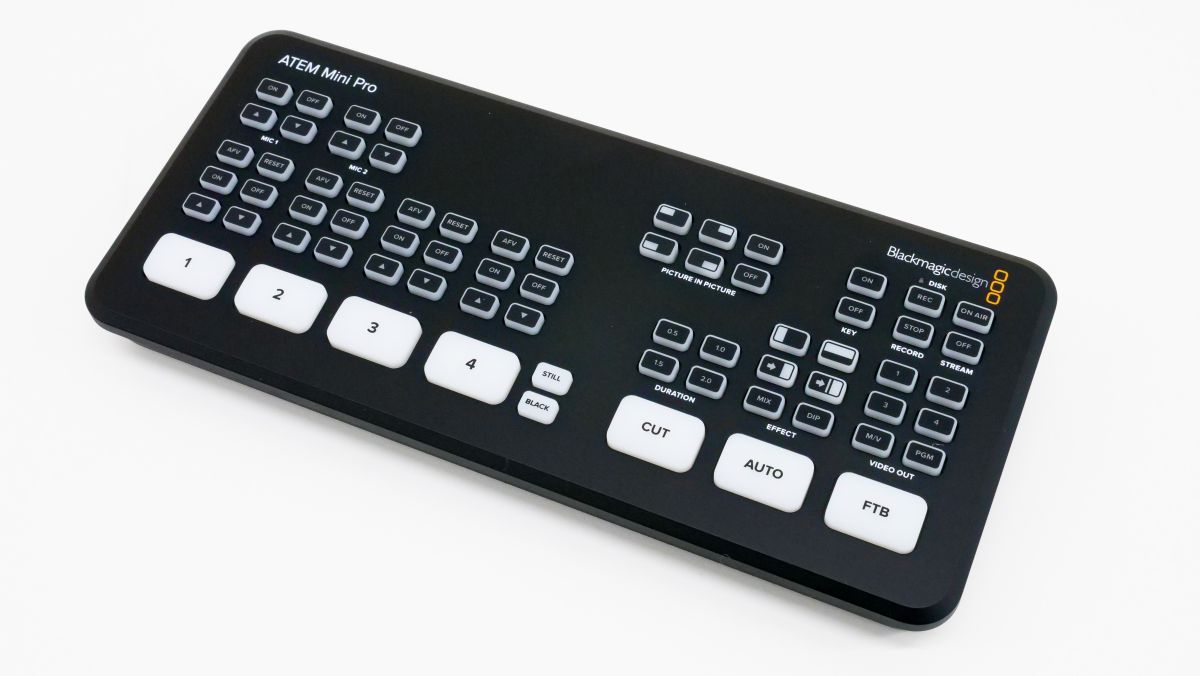
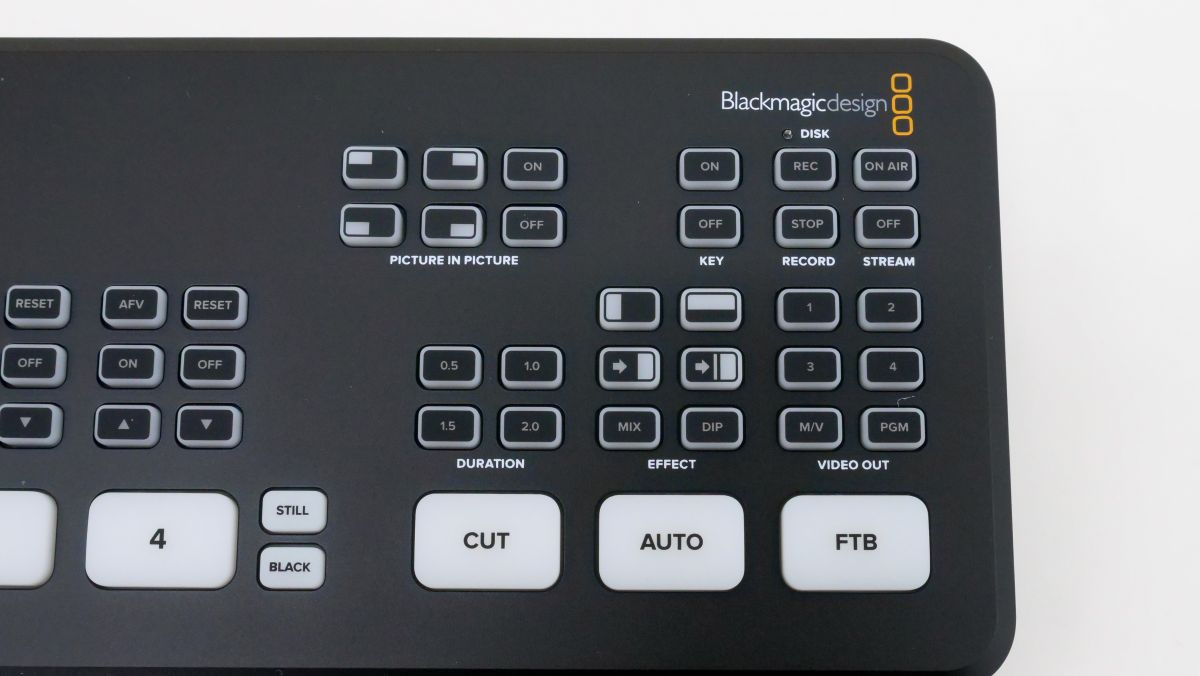
ATEM Mini Pro supports 4 HDMI inputs and 2 mic inputs, each of which allows you to adjust the volume and turn it on and off.
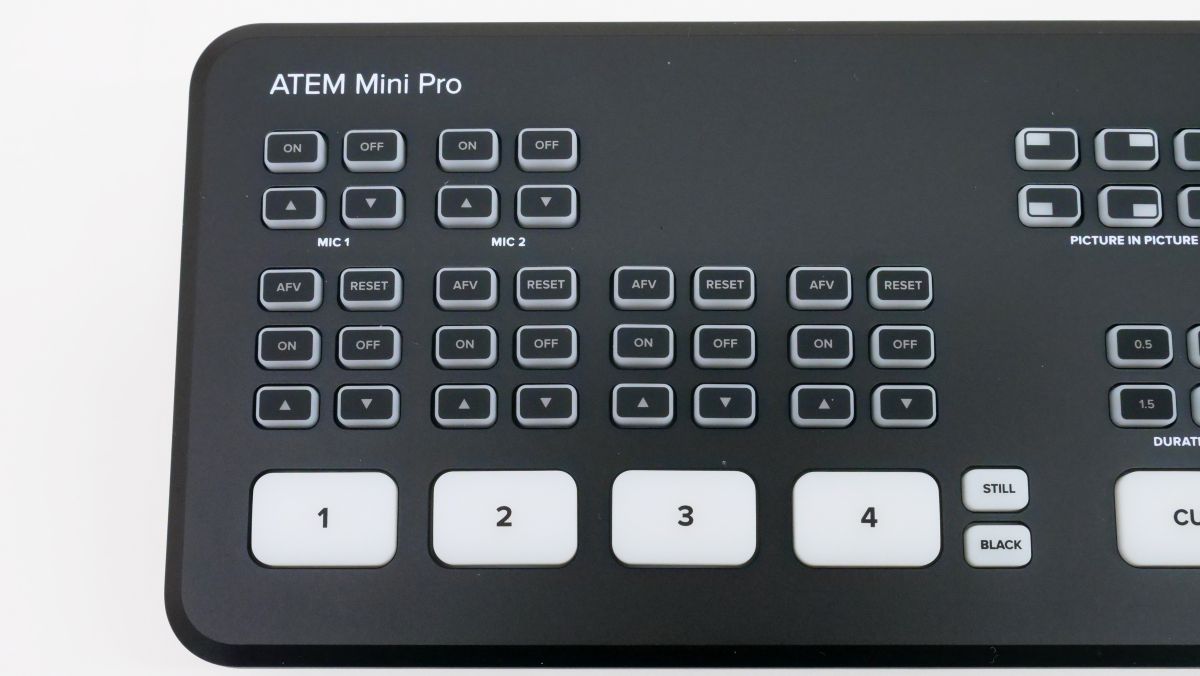
In addition, you can use the buttons on the main unit to set effects for switching images and picture-in-picture settings. The software described below is required for detailed settings, but basic operations can be completed only with the main unit.
Comparing the size of ATEM Mini Pro with a transportation IC card, it looks like this. It is small as a switcher that supports four video inputs.
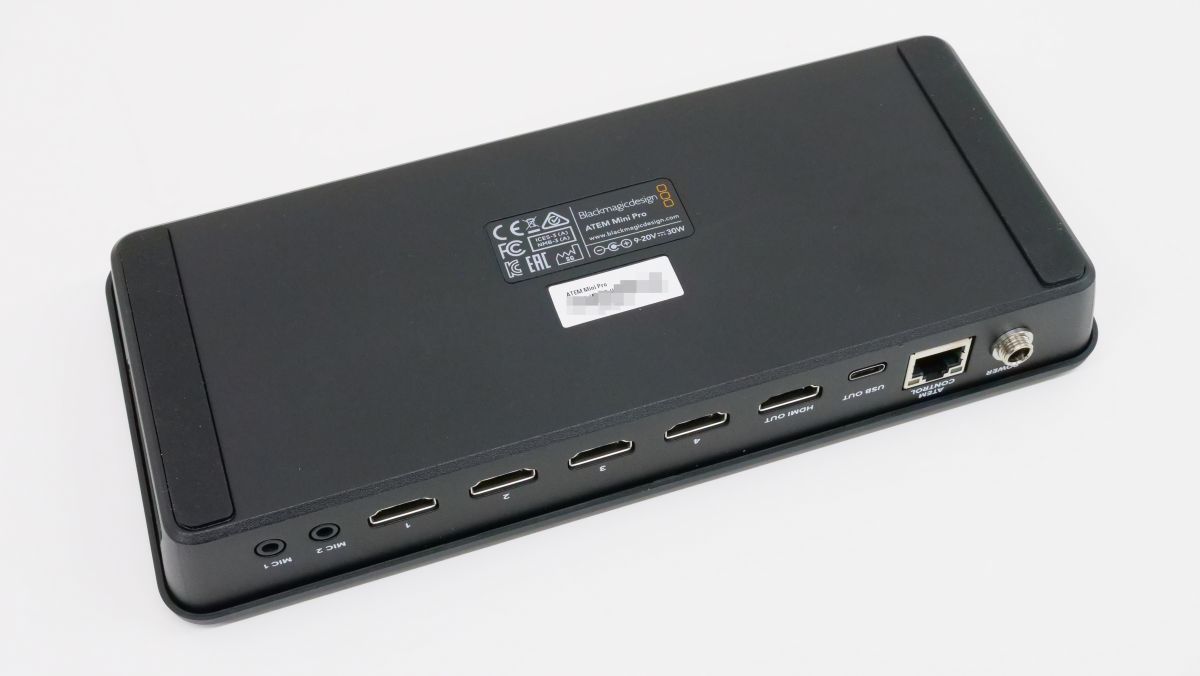
There is a rubber grip on the back.
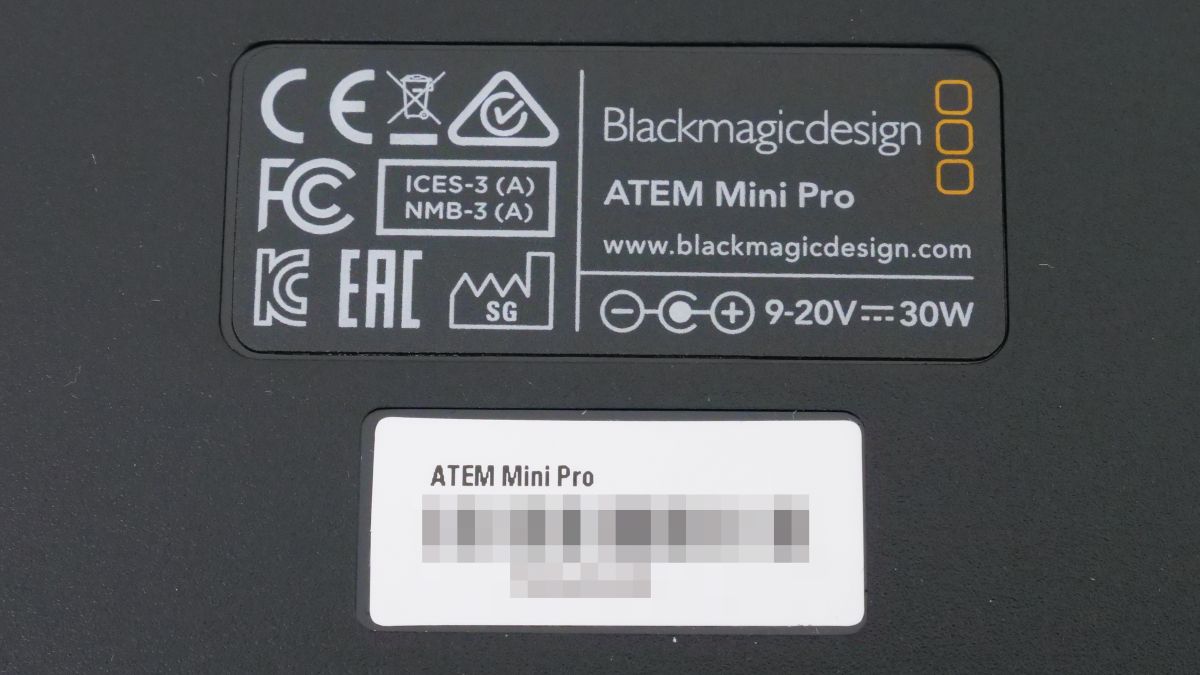
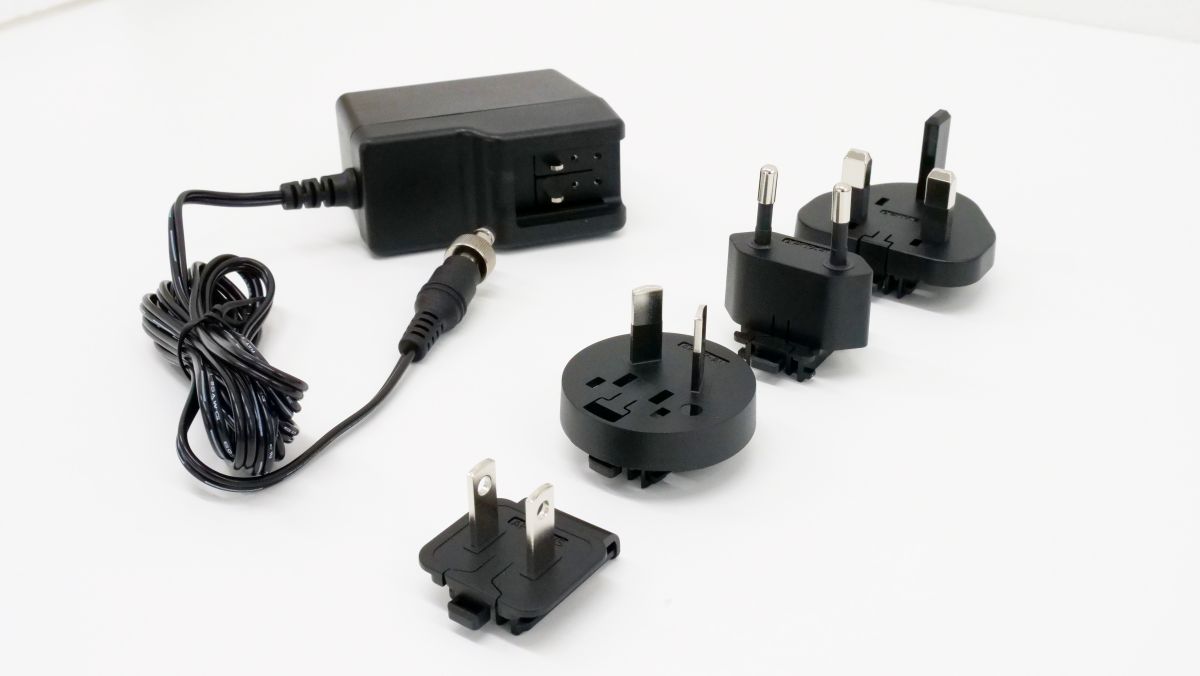
Various certification marks such as CE mark, FCC mark and KCC mark are written in the center. In addition, the power consumption is 30W. Since the power consumption is different from the lower model Atem Mini, the power adapter cannot be reused.
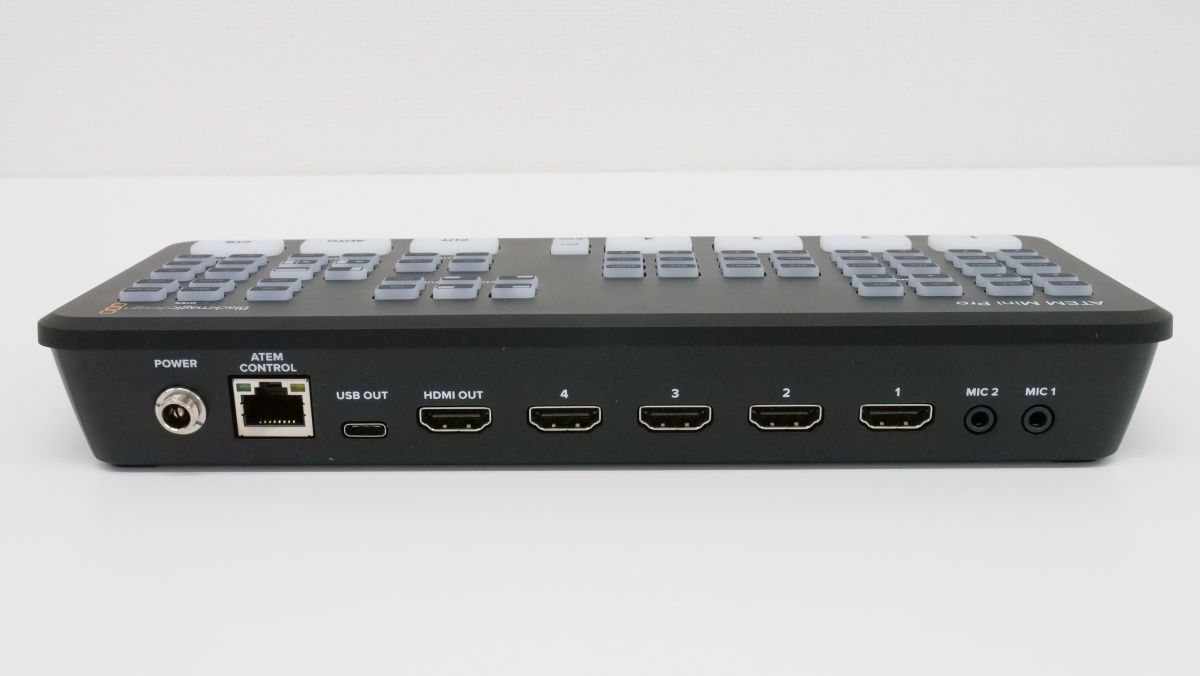
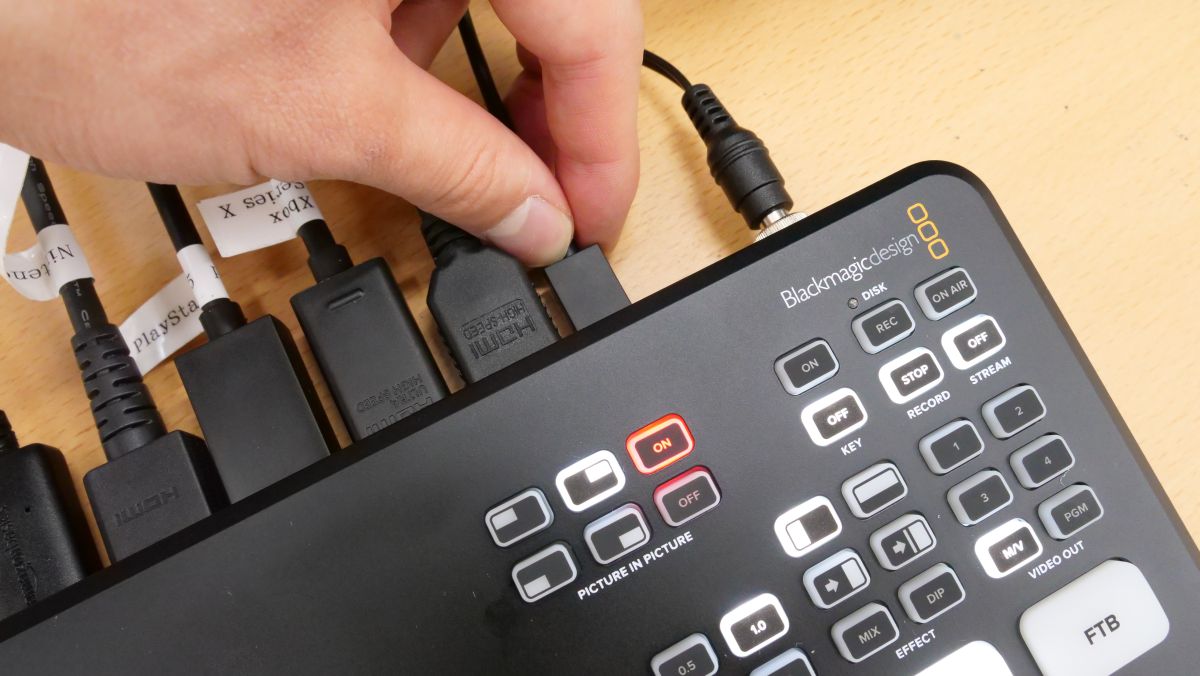
The back looks like this. From the left, it has a power connector, an Ethernet cable connector, a USB Type-C connector, an HDMI output connector, four HDMI input connectors, and two microphone input connectors.
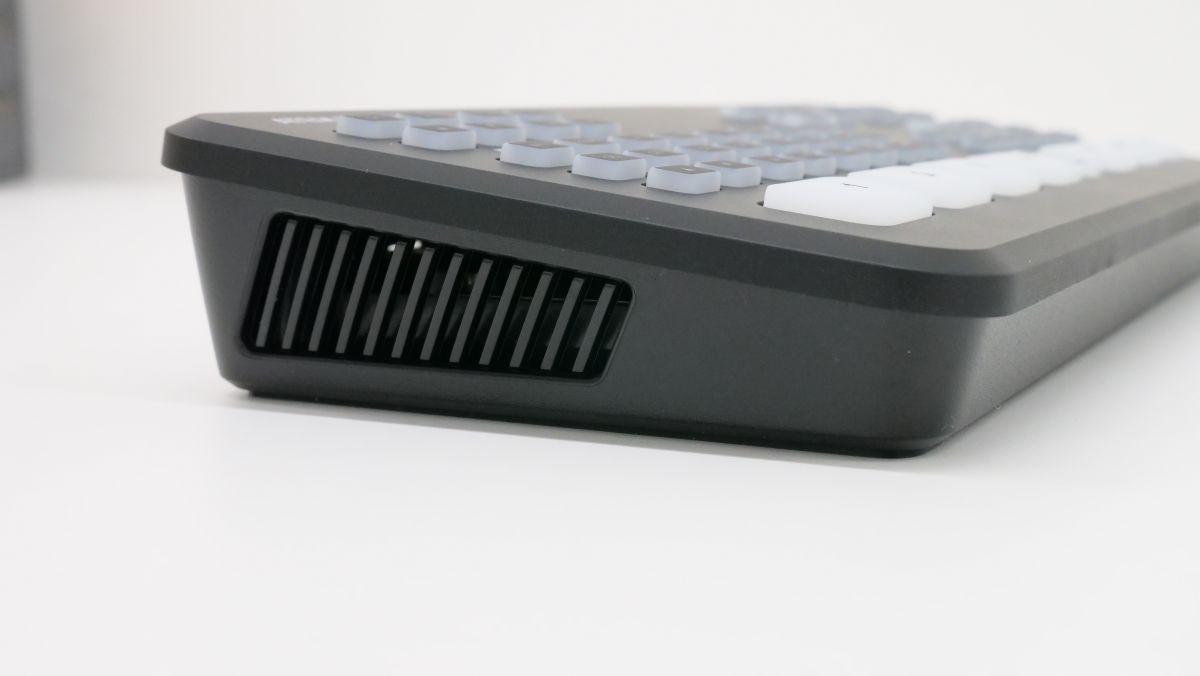
There is a slit for heat exhaust on the left side.
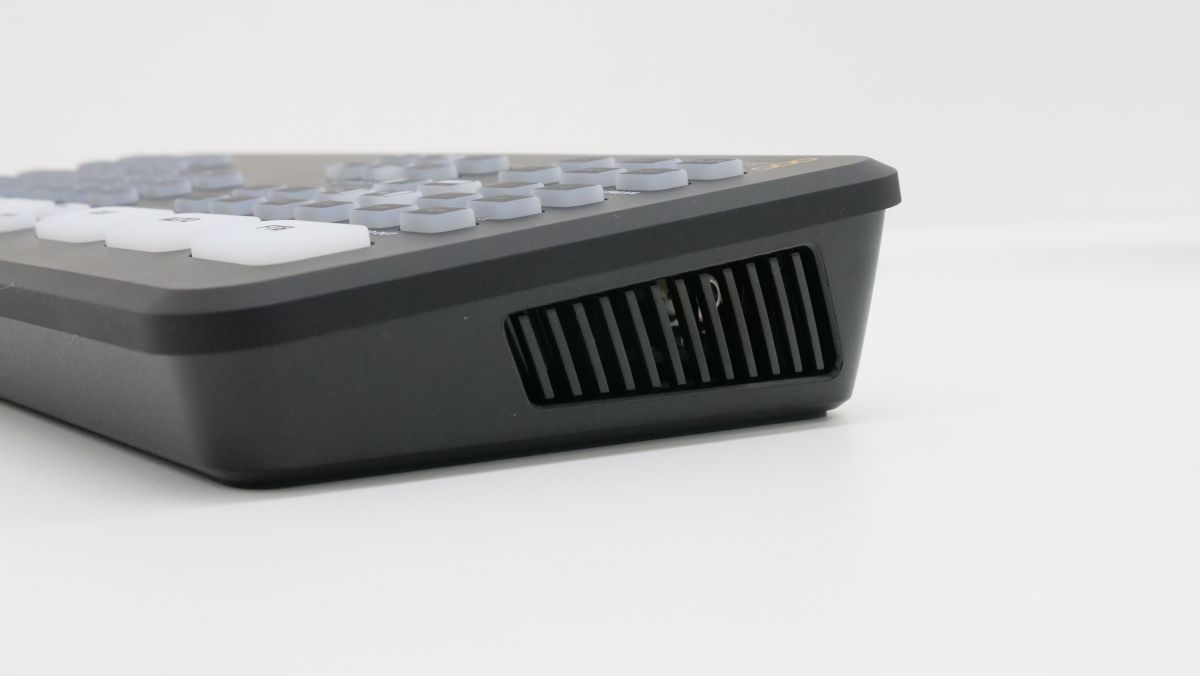
There was a slit on the right side as well.
The power adapter comes with four types of plugs that correspond to
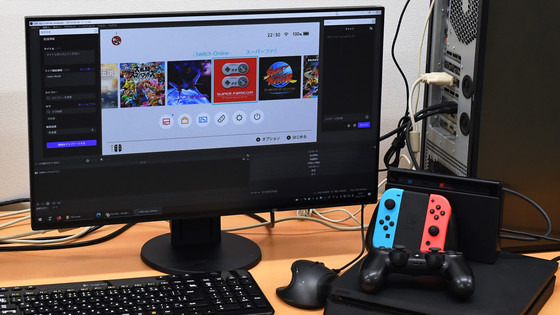
Let's actually use ATEM Mini Pro. This time, I connected a digital camera,
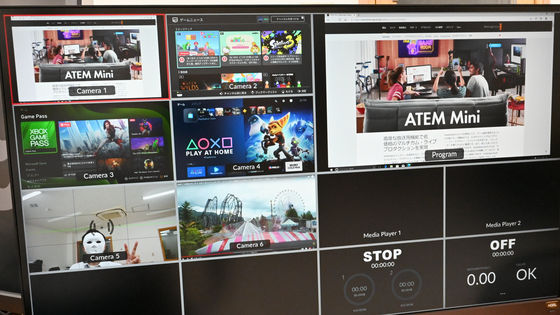
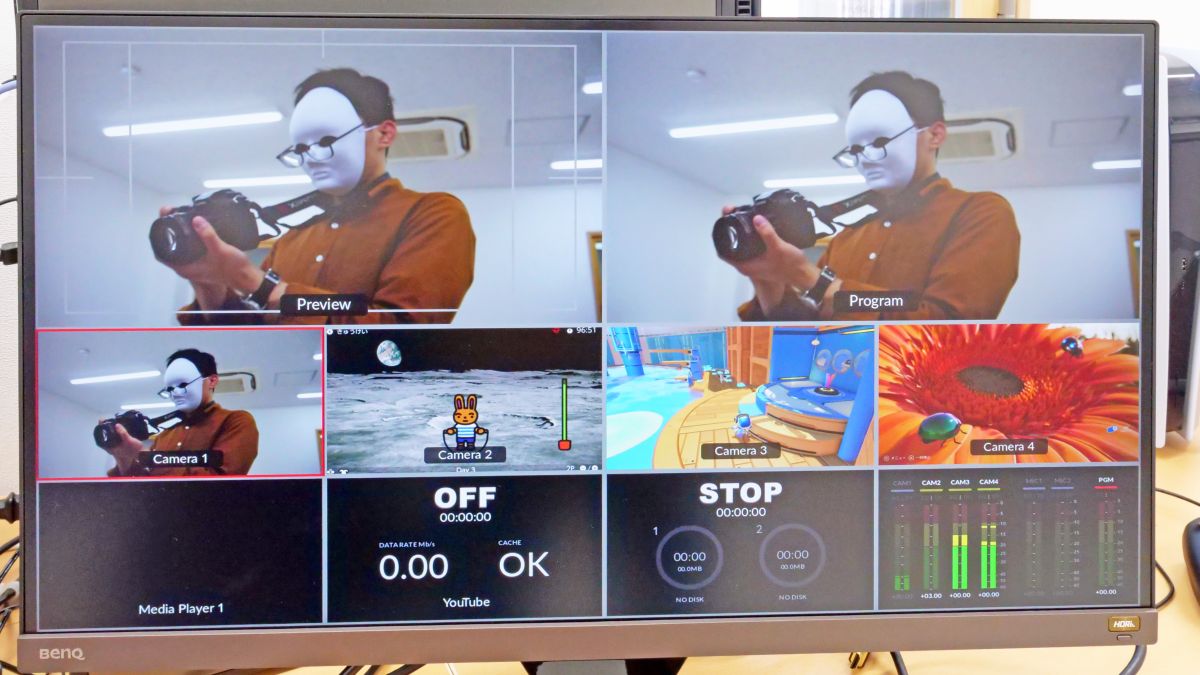
Looking a little away, it looks like this. You can see the compactness of ATEM Mini Pro by lining it up with a digital camera or monitor. What you see on the monitor on the right is a 'multi-view' that allows you to see at a glance the video and audio input to your ATEM Mini Pro.
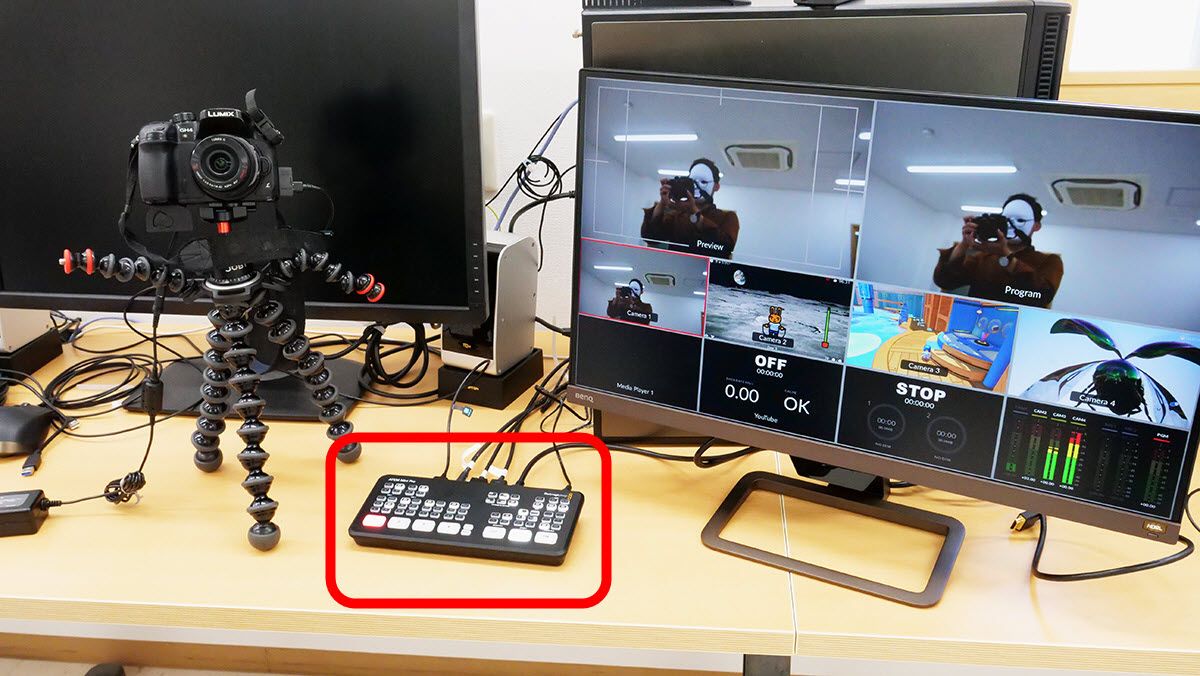
The preview of the output video and the video actually output are lined up in the upper row of the multi-view, and the video input to inputs 1 to 4 is lined up in order from the left in the middle row. From left to right, the space for displaying pre-registered images, the elapsed time for streaming distribution, the elapsed time for recording, and the audio mixer are displayed in the lower row.
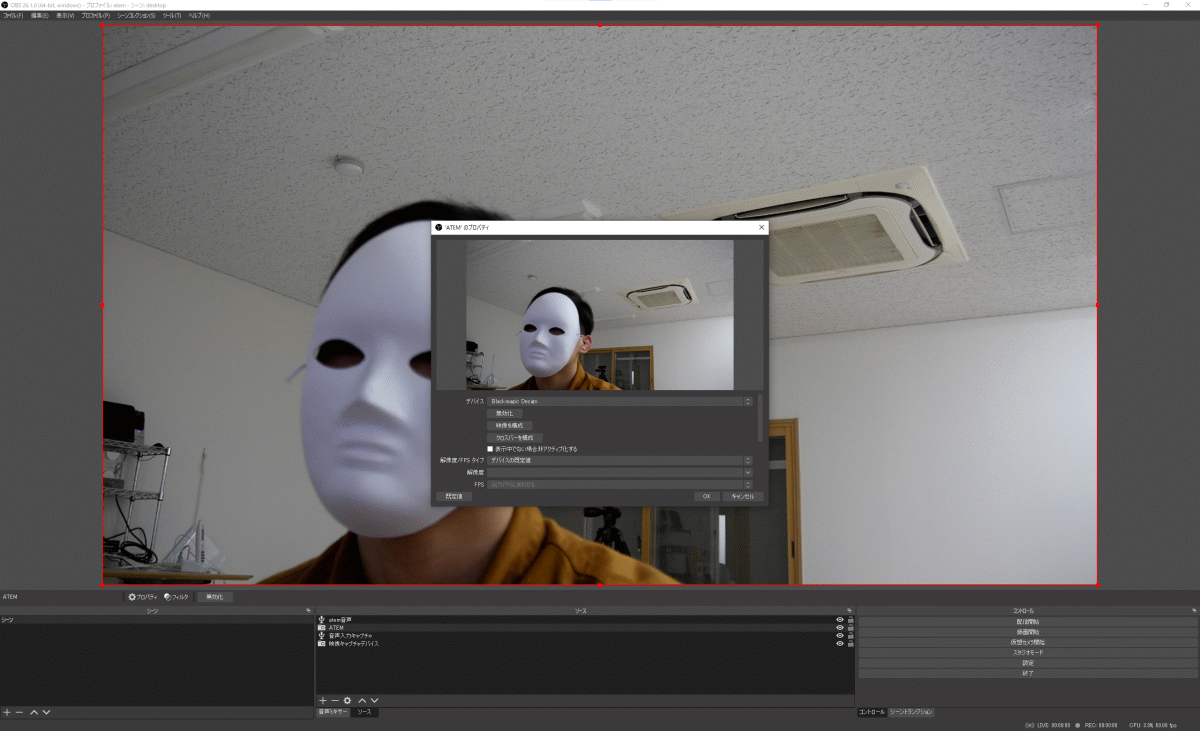
You can make ATEM Mini Pro be recognized as a webcam by connecting ATEM Mini Pro to your PC with a USB cable.
When I try to display the image actually recognized as a
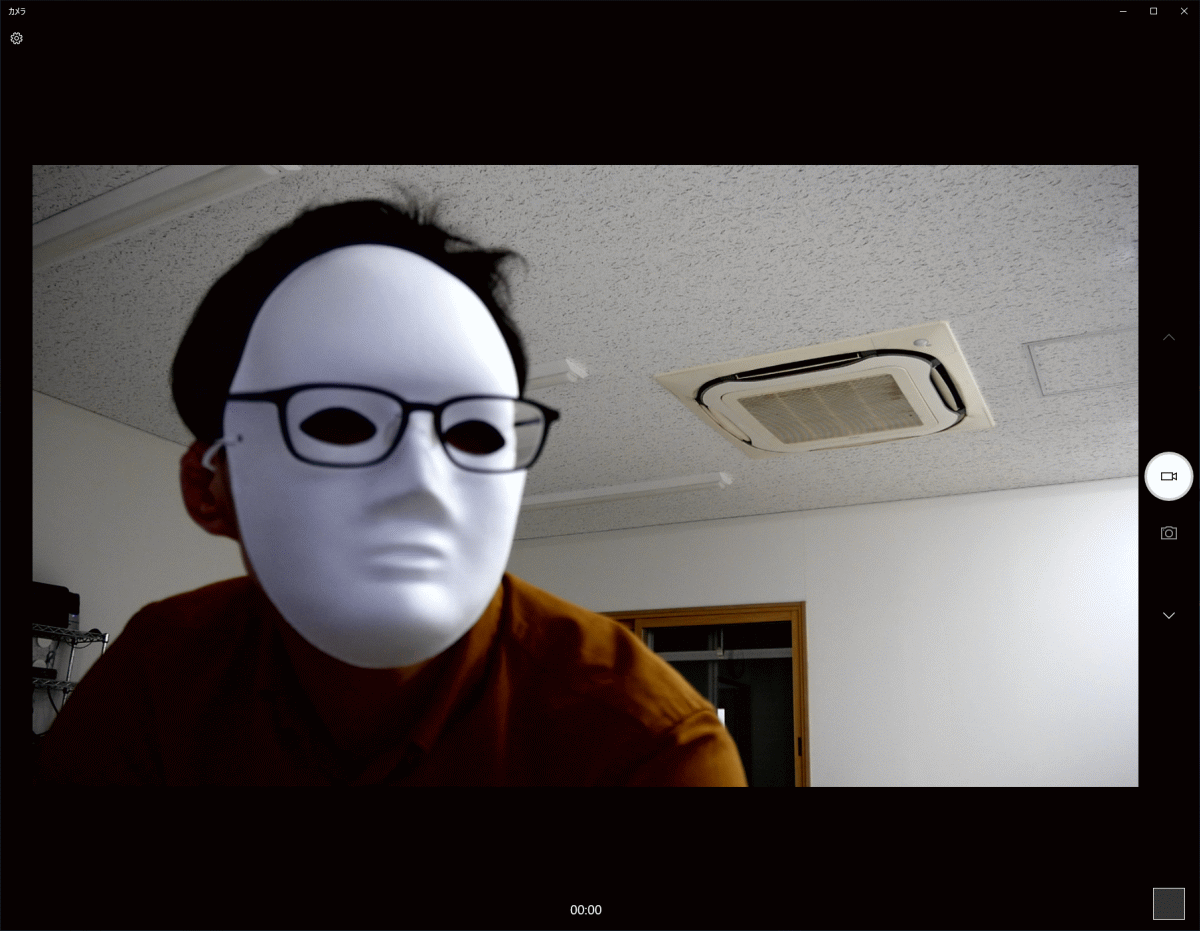
If you specify the video input to the PC as a webcam as an input source with a recording / distribution application such as
In the movie below, you can see how ATEM Mini Pro can be used to switch between images from three game consoles one after another.
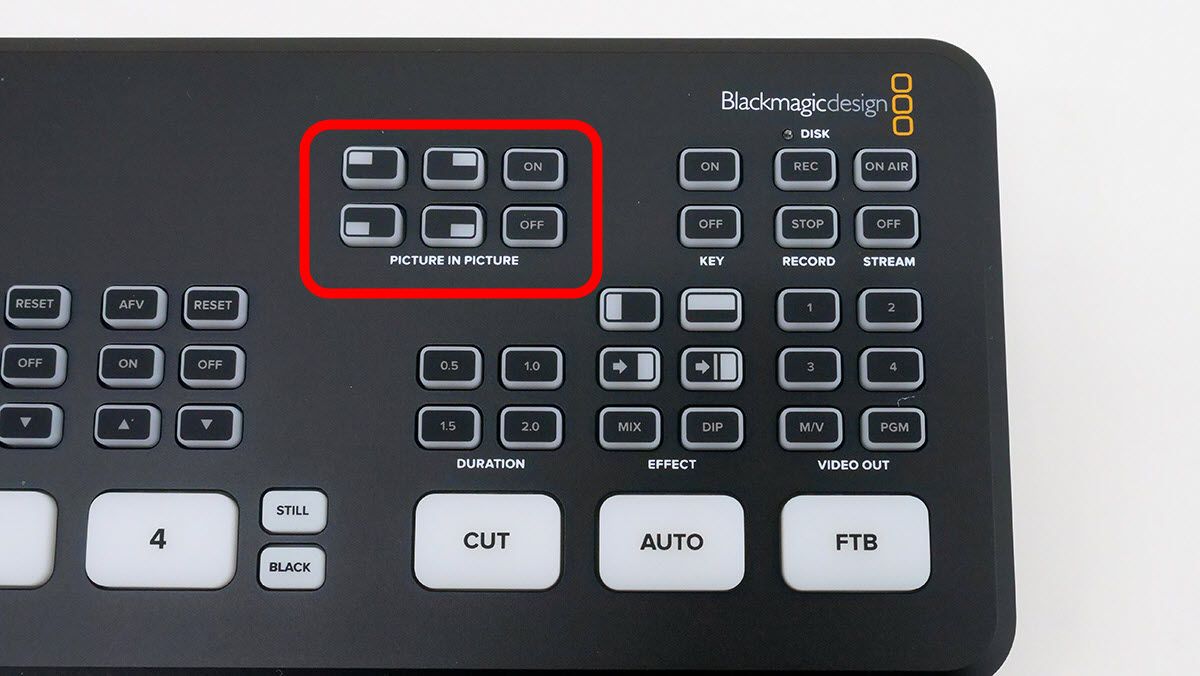
In addition, ATEM Mini Pro is equipped with a picture-in-picture function, and by pressing the button surrounded by the red frame, the image of input 1 is displayed small in any of the upper left, upper right, lower left, and lower right. You can.
You can see how you are using the picture-in-picture function in the following movie. ATEM Mini Pro alone can be used for full-fledged live broadcasts without the need for troublesome settings.
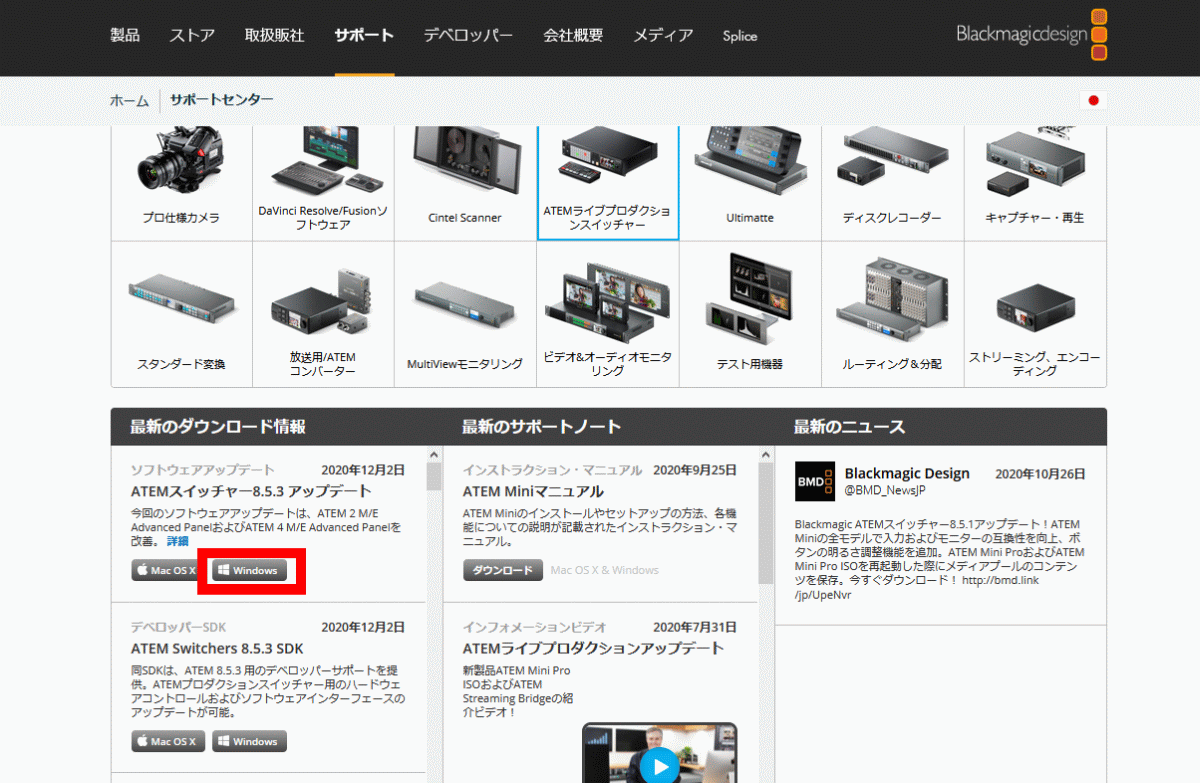
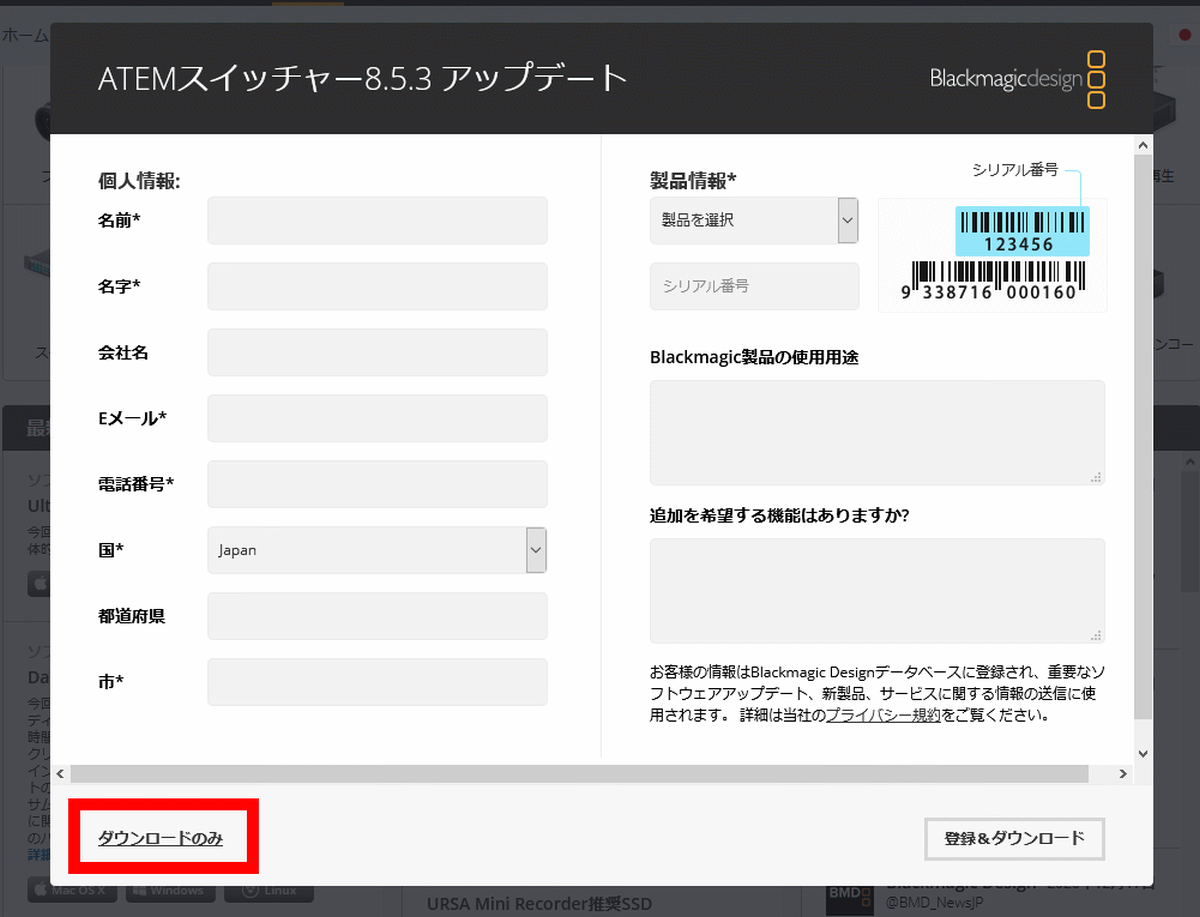
As mentioned above, ATEM Mini Pro can use various functions by itself, but you can fully utilize the functions of ATEM Mini Pro by installing 'Atem Software Control' on your PC. To install Atem Software Control, go to Blackmagic Design's ATEM Live Production Switcher support page and click on the 'Windows' button for 'ATEM Switcher' in the 'Latest Downloads' section at the bottom left. To do.
The personal information registration screen will be displayed, but if you only want to download the software, click 'Download only' at the bottom of the column.
The downloaded compressed file
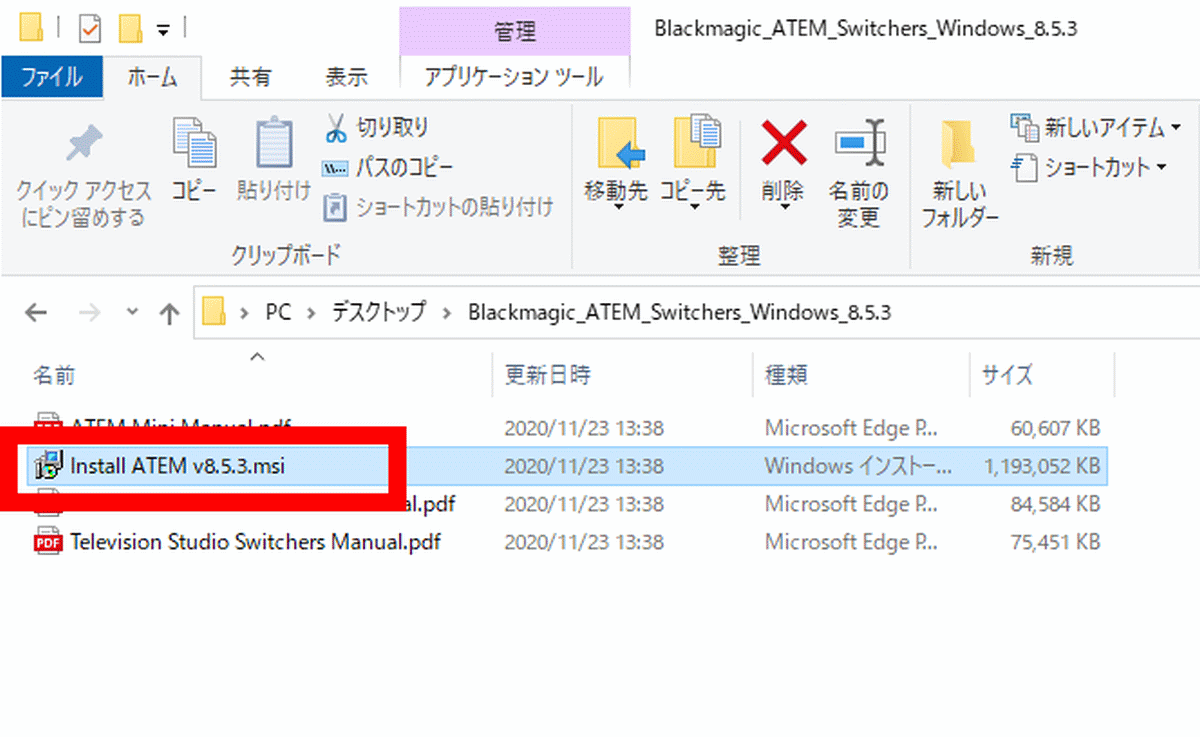
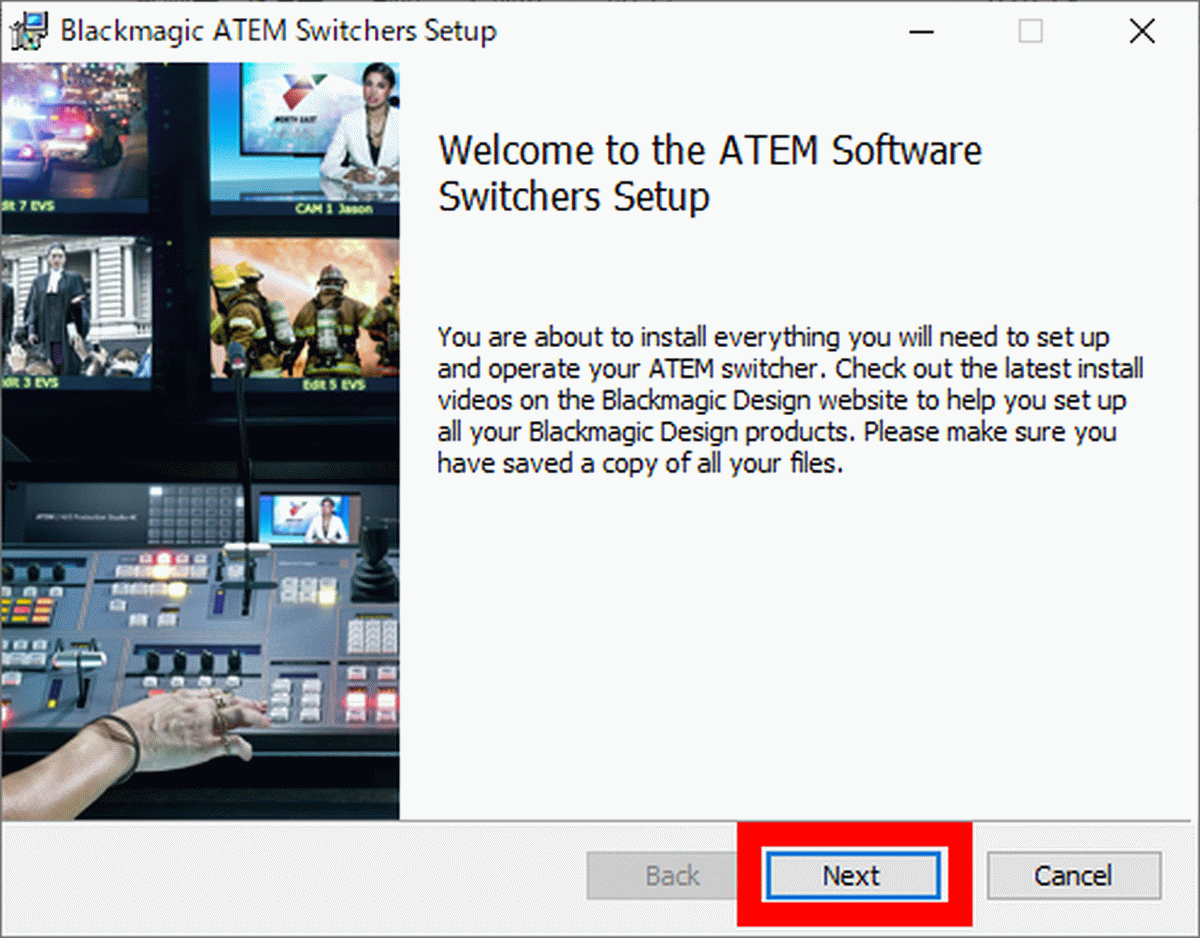
When the installer starts, click 'Next'.
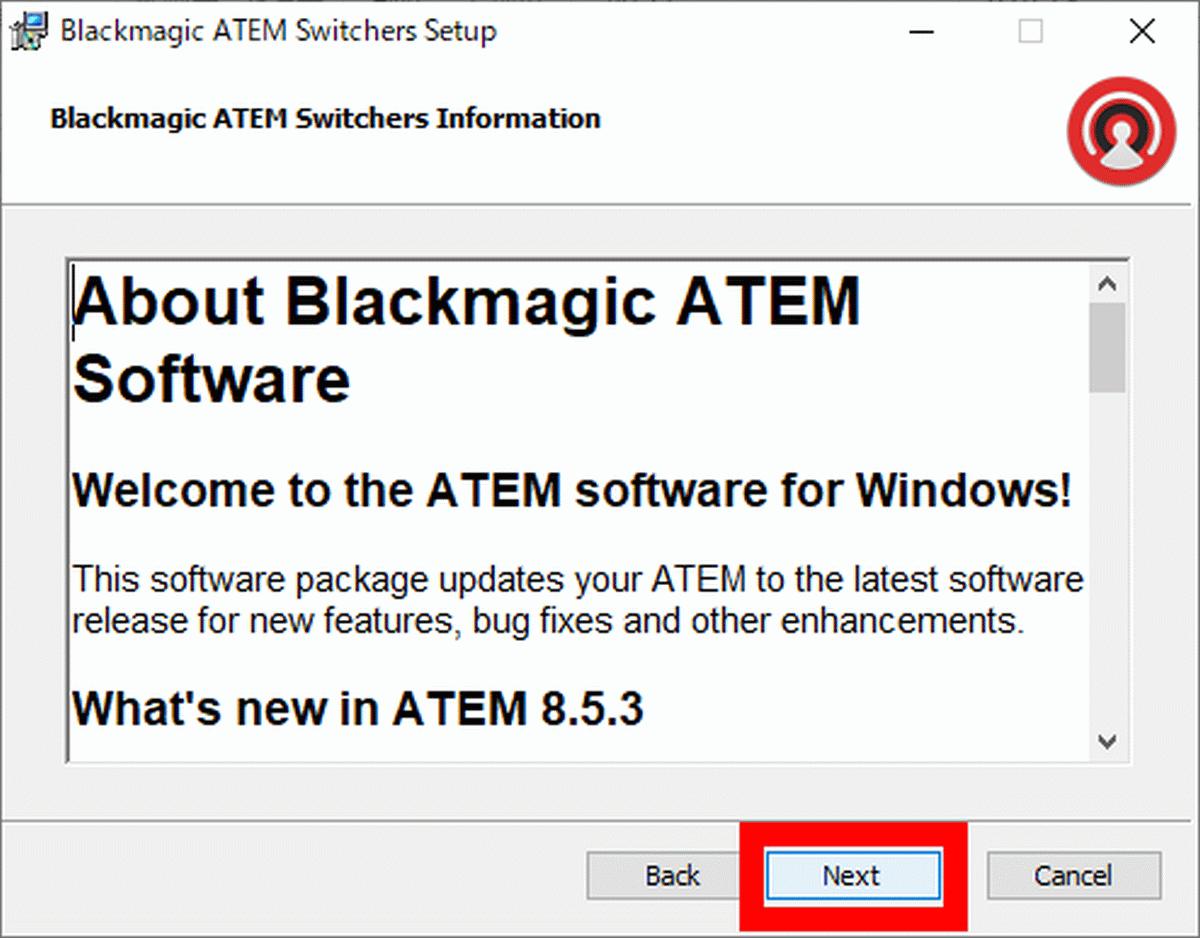
Information about the software will be displayed, so click 'Next'.
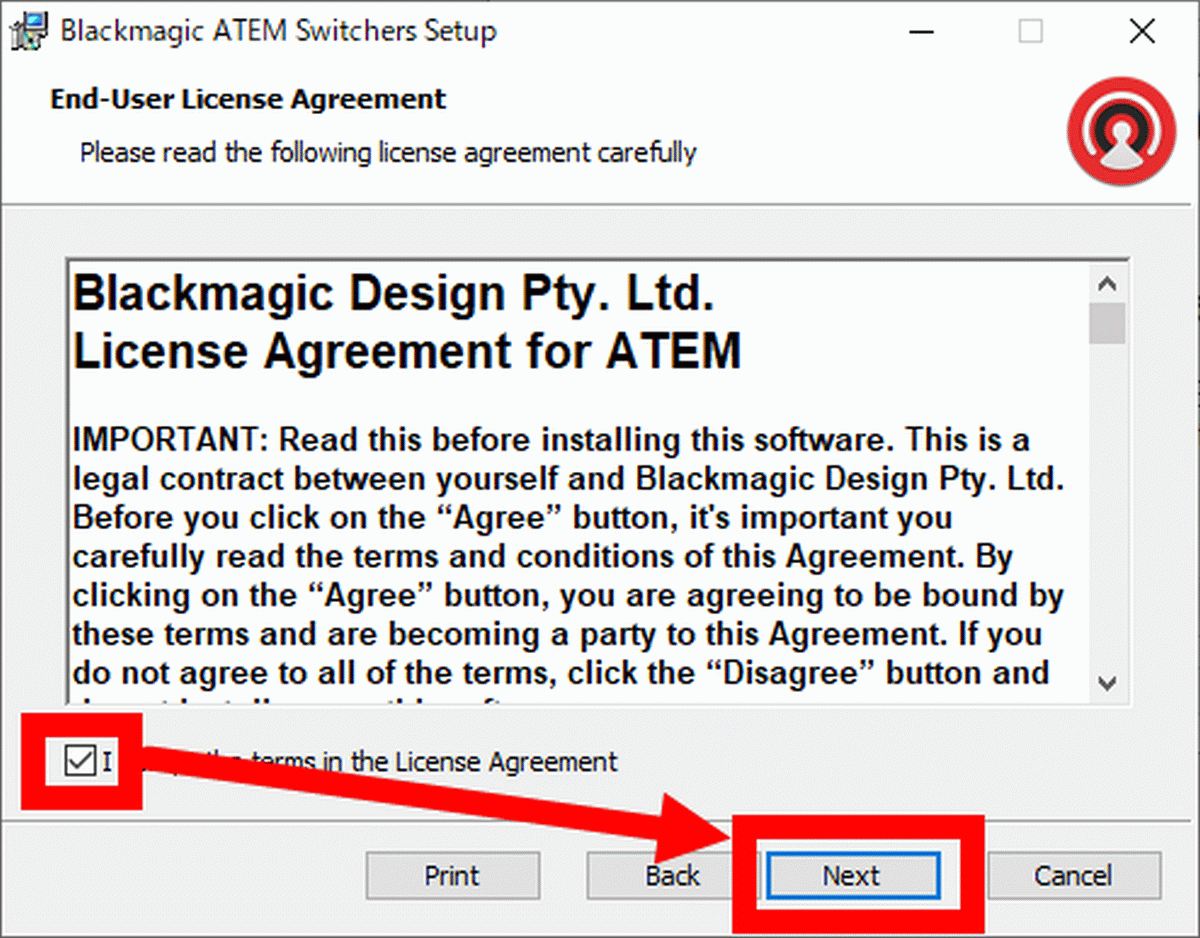
You will be asked to agree to the license terms, so check the check box and click 'Next'.
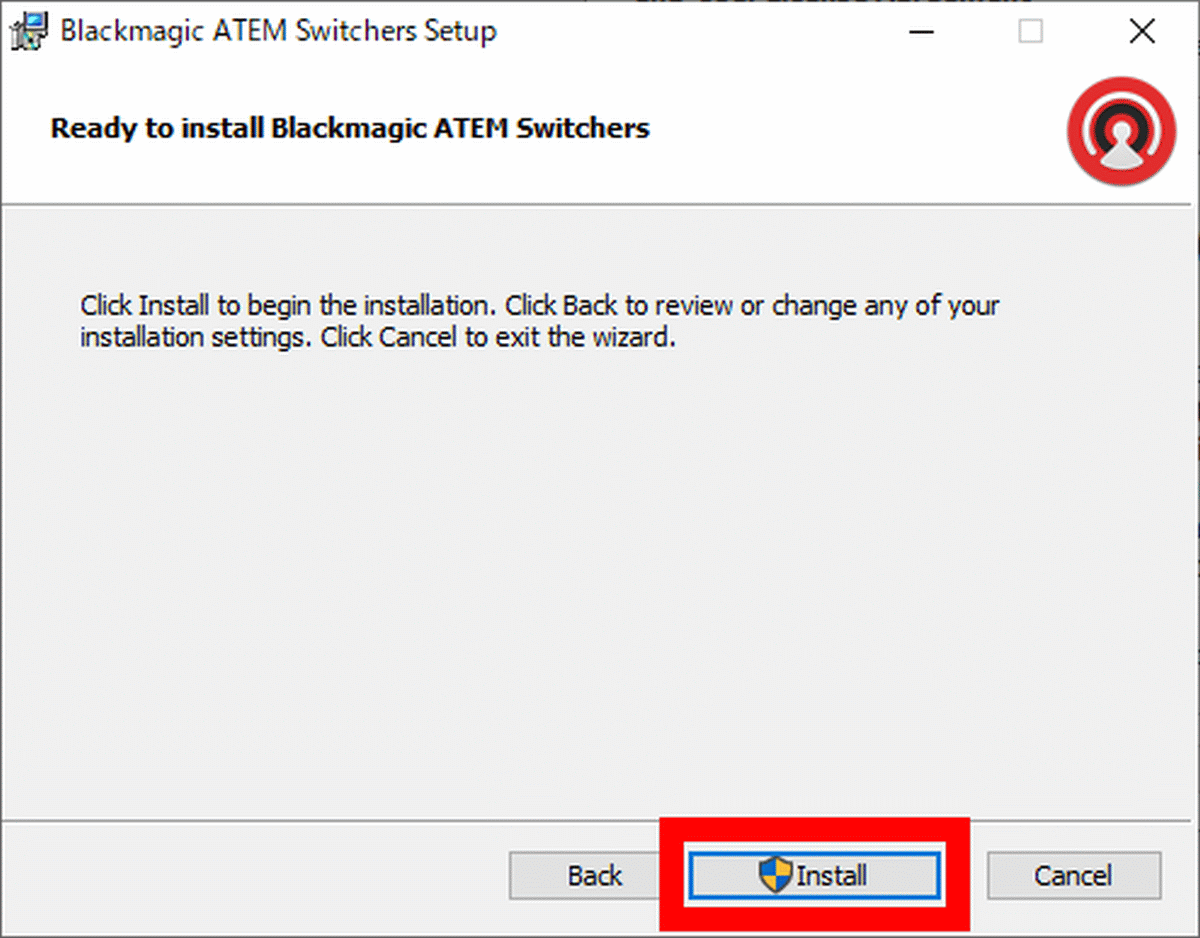
Click 'Install' to start the installation.
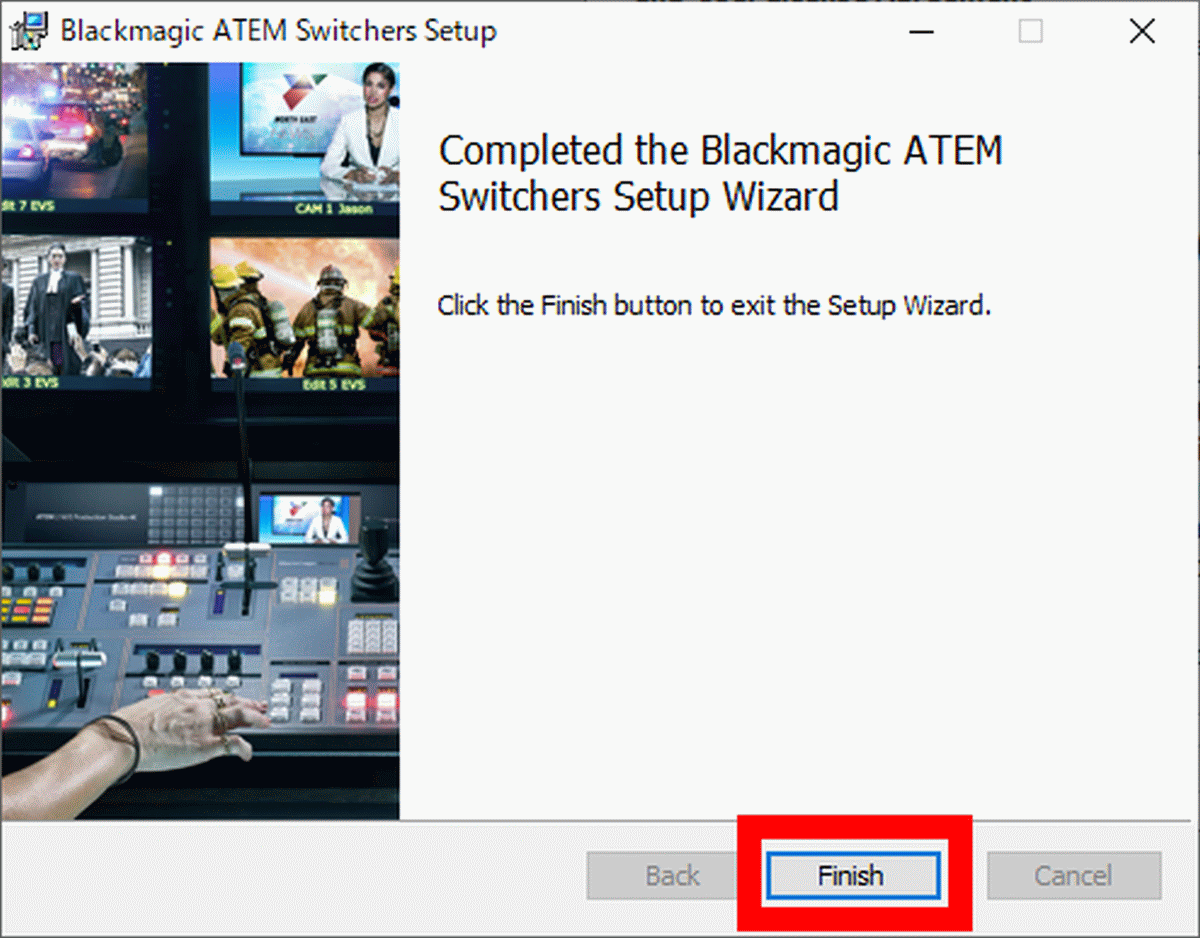
Click 'Finish' when the installation is complete.
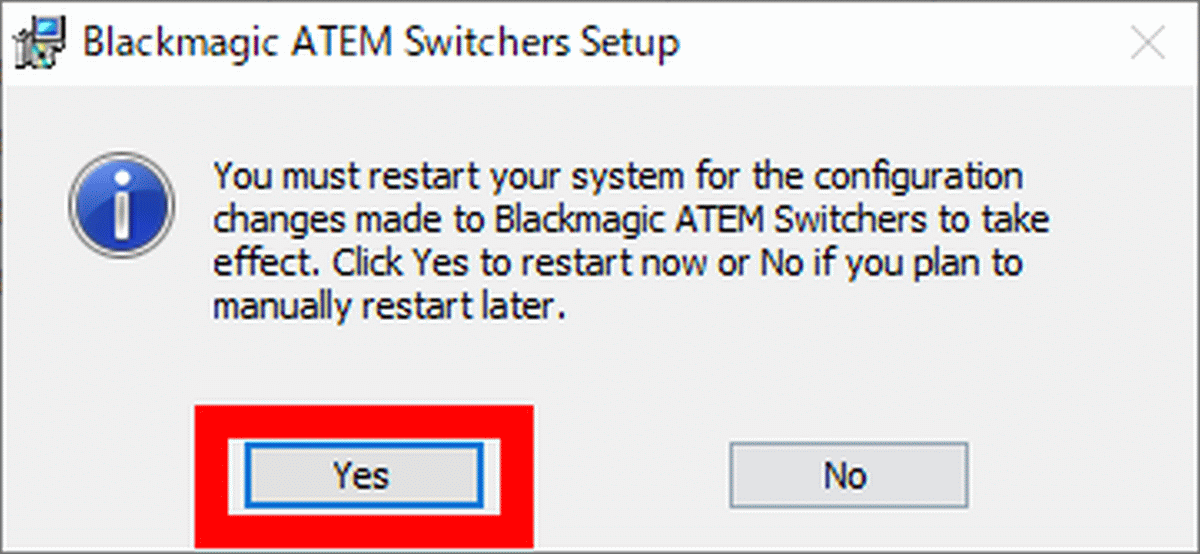
Then you will be asked to restart your PC, so click 'Yes' to restart your PC.
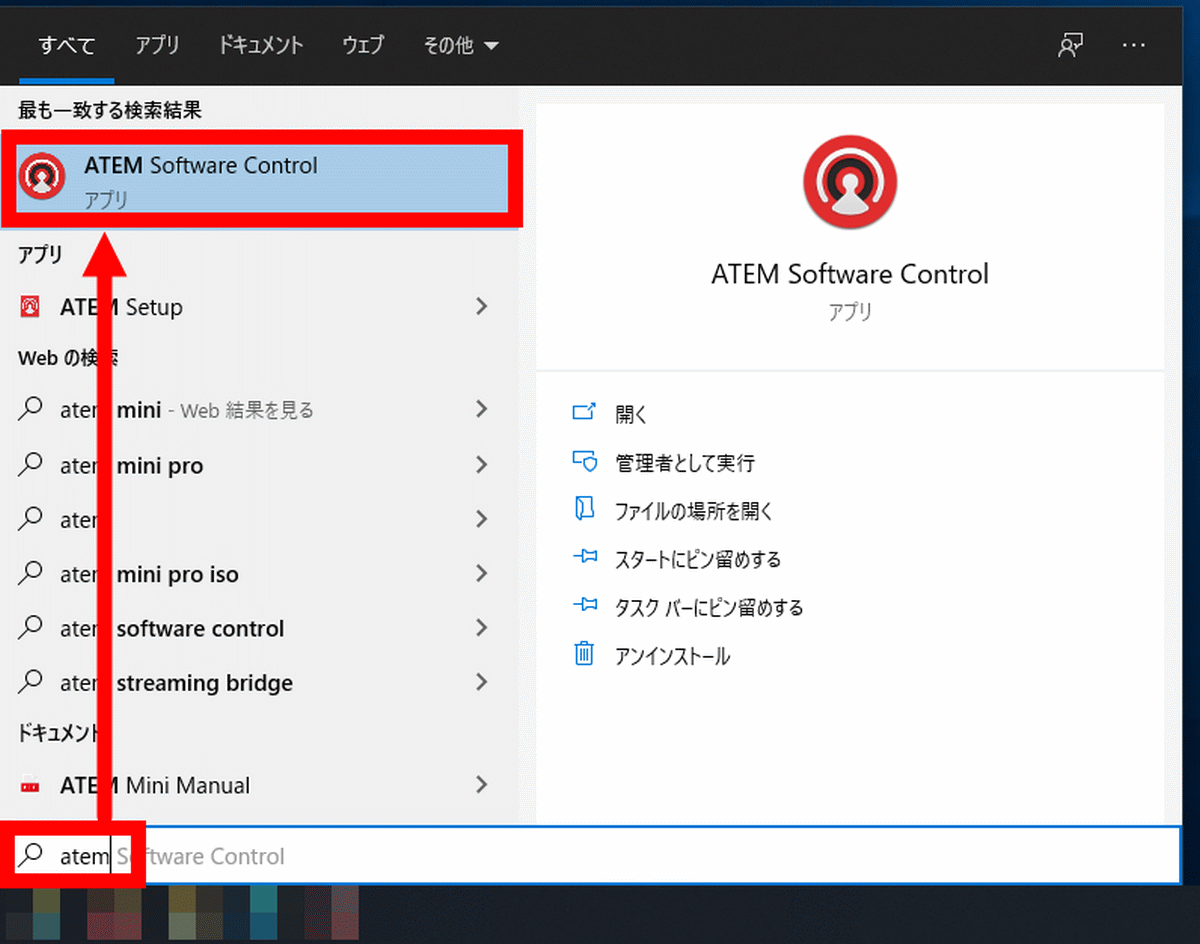
When the restart is complete, open the start menu and search for 'atem' to display 'ATEM Software Control'. Click it to start it.
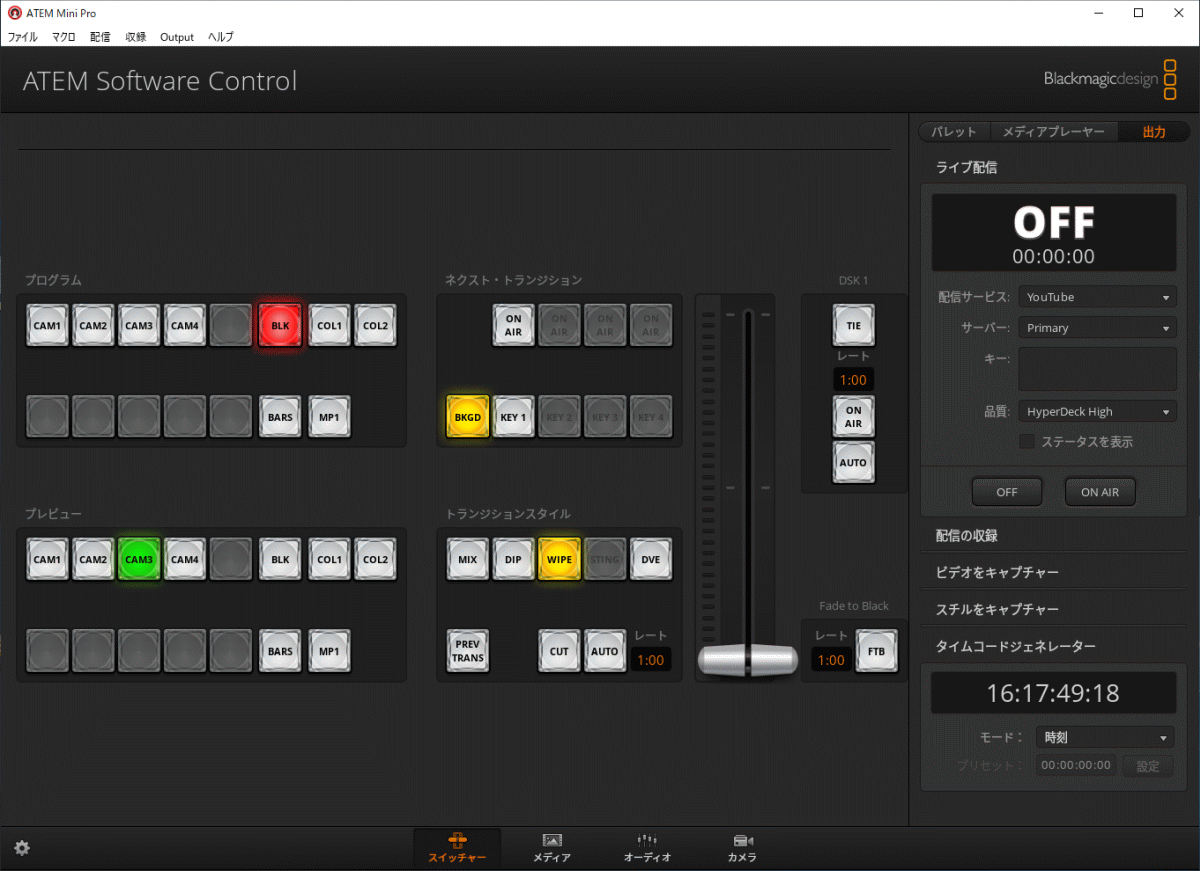
The ATEM Software Control screen is divided into four tabs: Switcher, Media, Audio, and Camera. The screen of the switcher tab looks like this. The buttons on the left correspond to the buttons on the ATEM Mini Pro itself, allowing you to operate your ATEM Mini Pro from the ATEM Software Control. In addition, a menu related to live distribution is arranged on the right side of the screen.
Click 'Media' at the bottom of the screen to display the Media tab. You can register images to ATEM Mini Pro by dragging and dropping the images saved on your PC onto this screen.

The registered image can be output by pressing the 'STILL' button on ATEM Mini Pro.

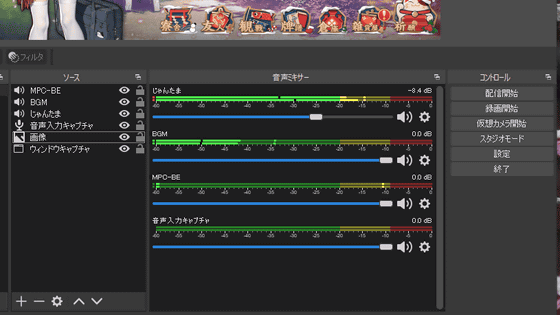
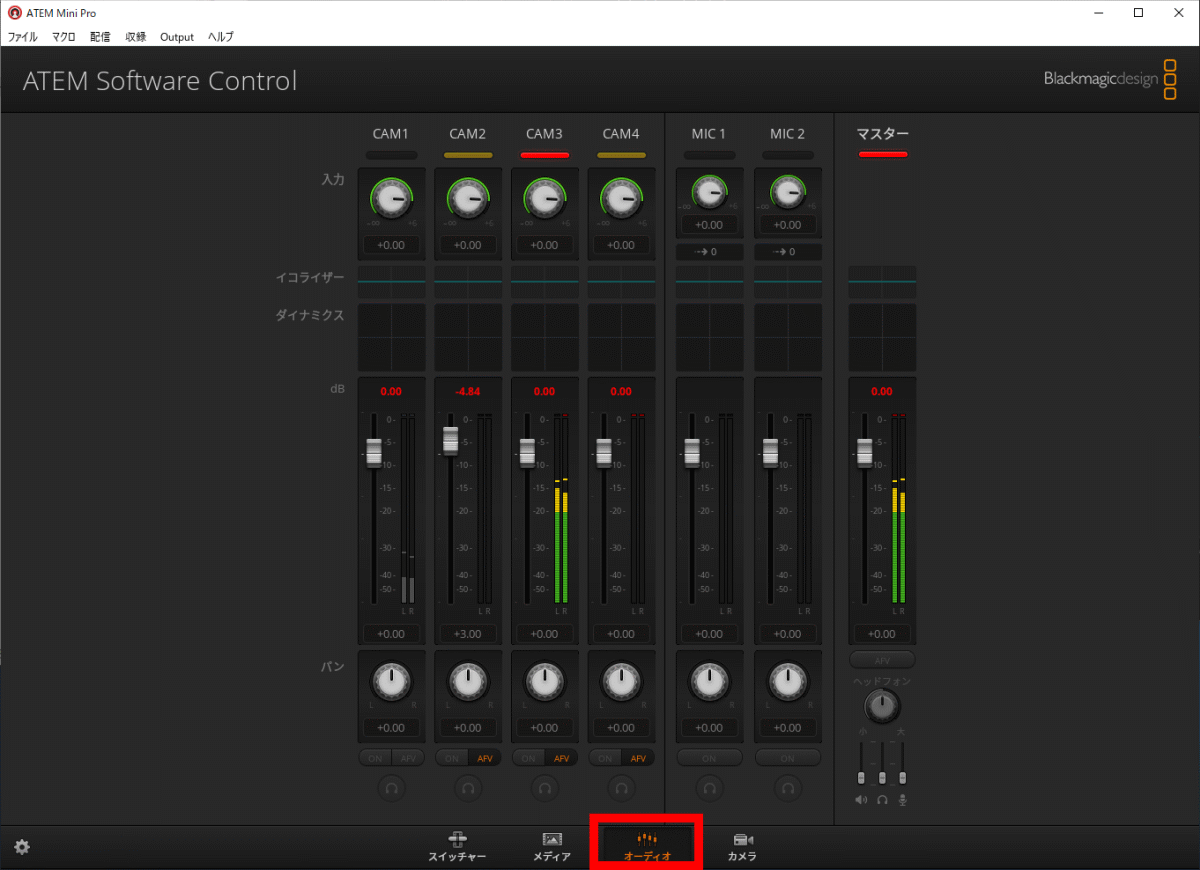
The audio tab looks like this. You can manage the volume of 4 video inputs and 2 microphone inputs on one screen. In addition, ATEM Software Control is compatible with
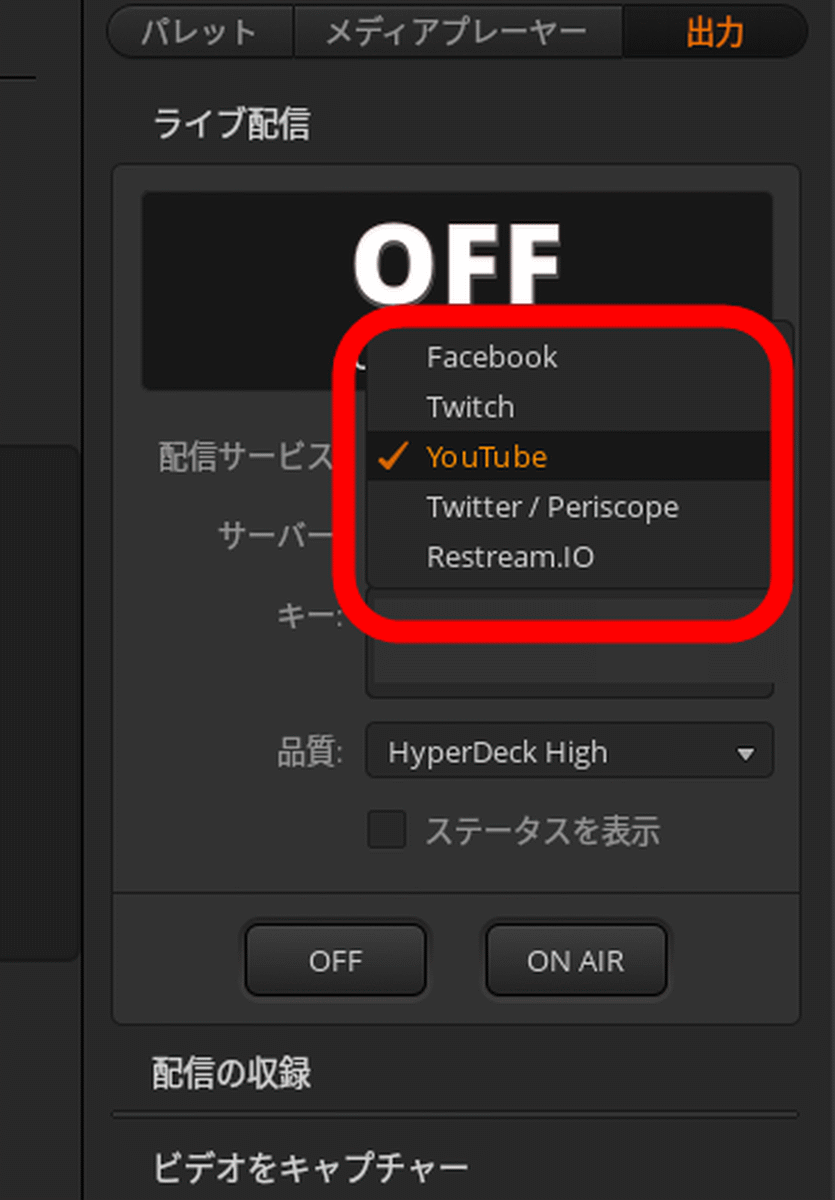
ATEM Mini Pro is equipped with a one-button stream distribution service that supports
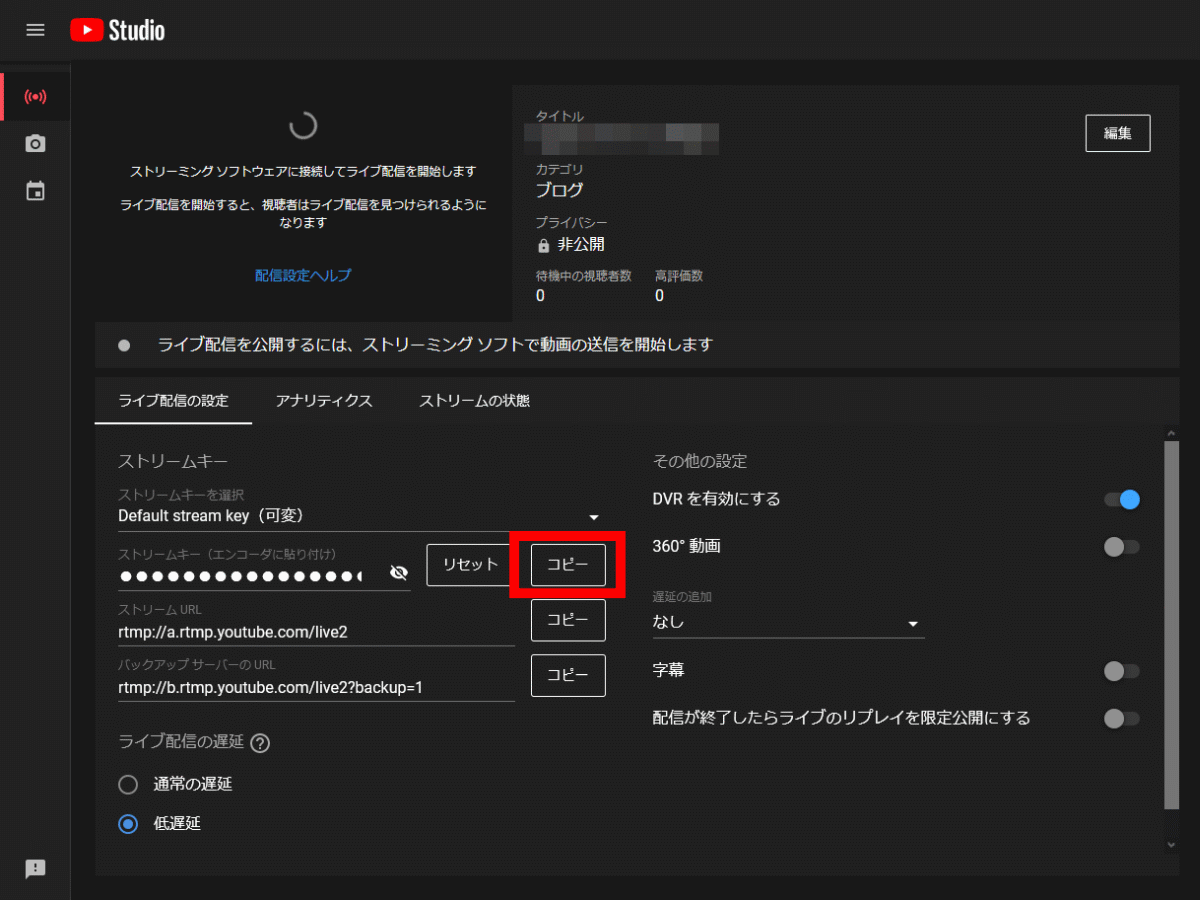
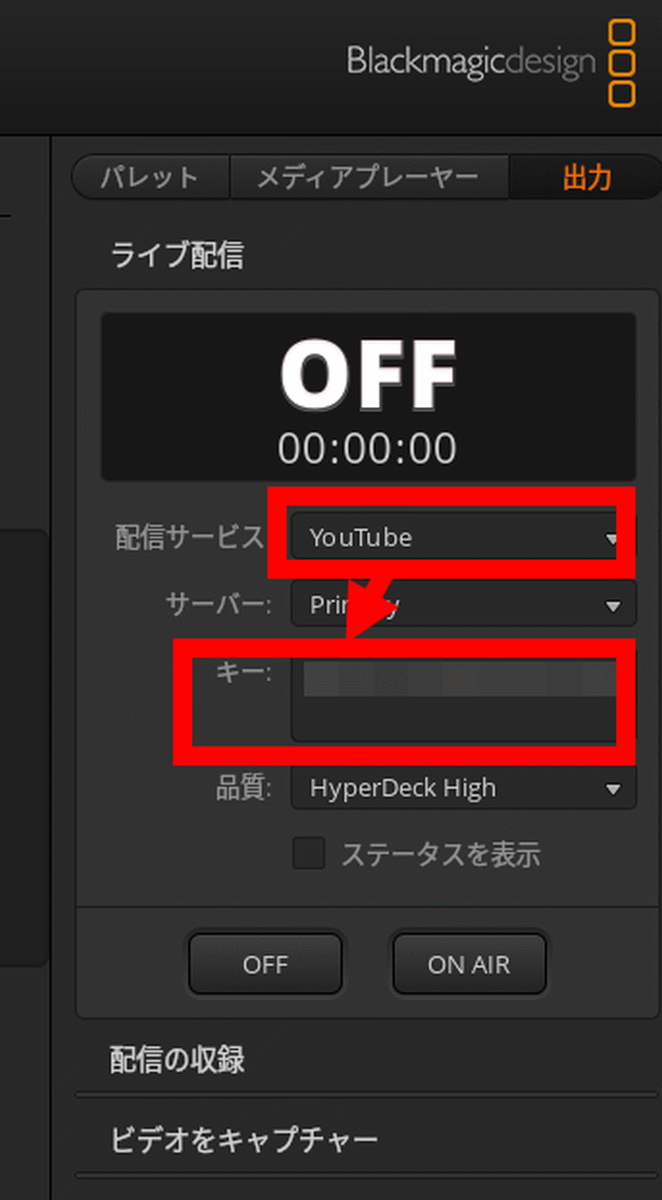
Next, select YouTube from 'Distribution Service' in the live distribution menu of ATEM Software Control, and paste the copied stream key into the area labeled 'Key'.
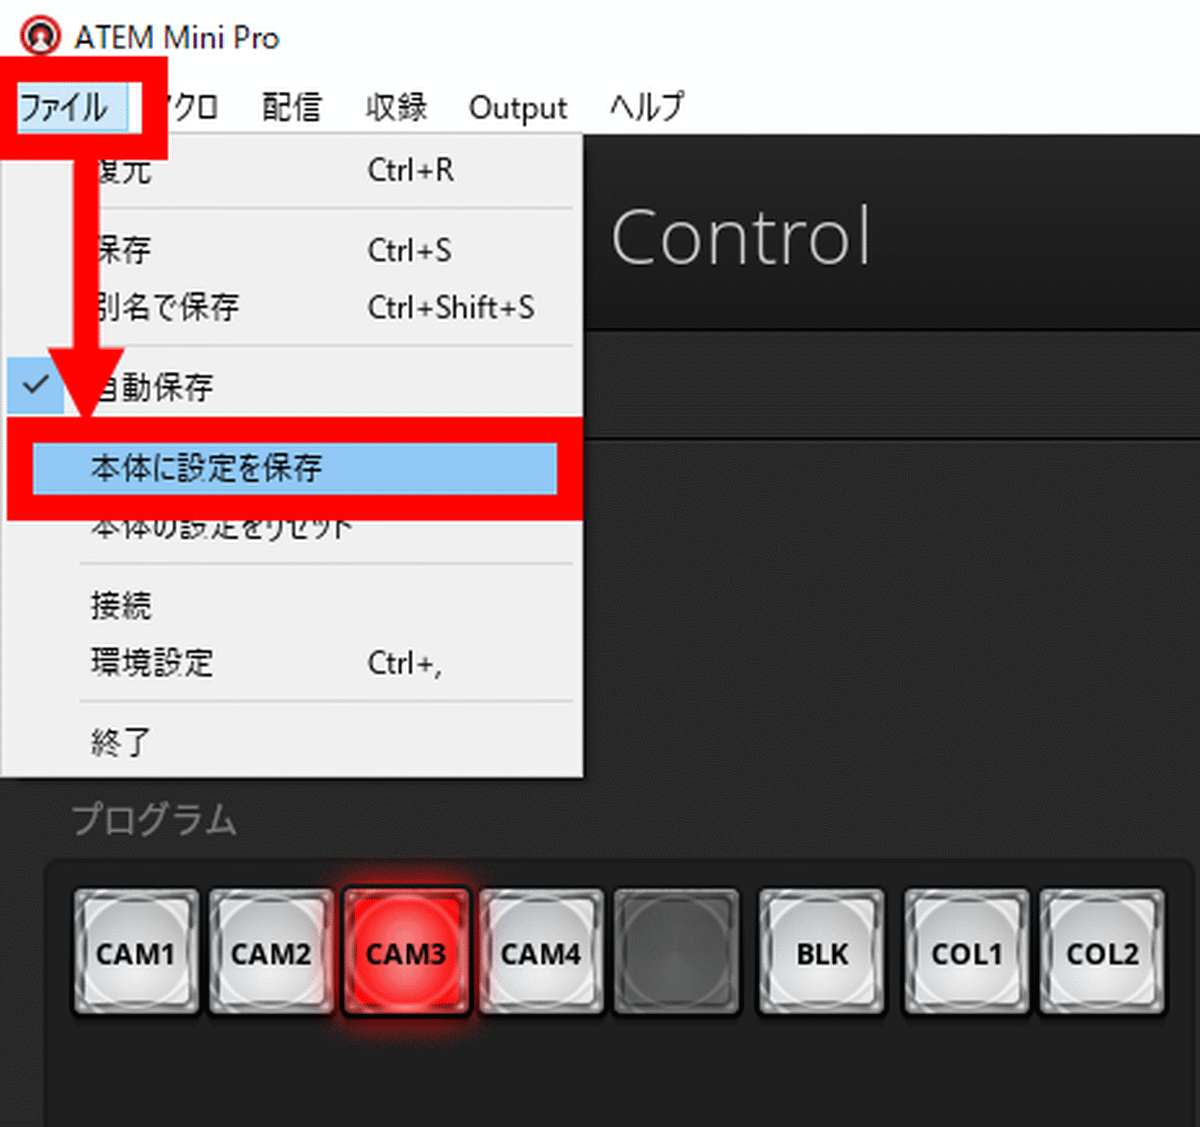
After pasting, click 'Save settings in main unit' from the 'File' menu. The stream key is now saved on your ATEM Mini Pro console.
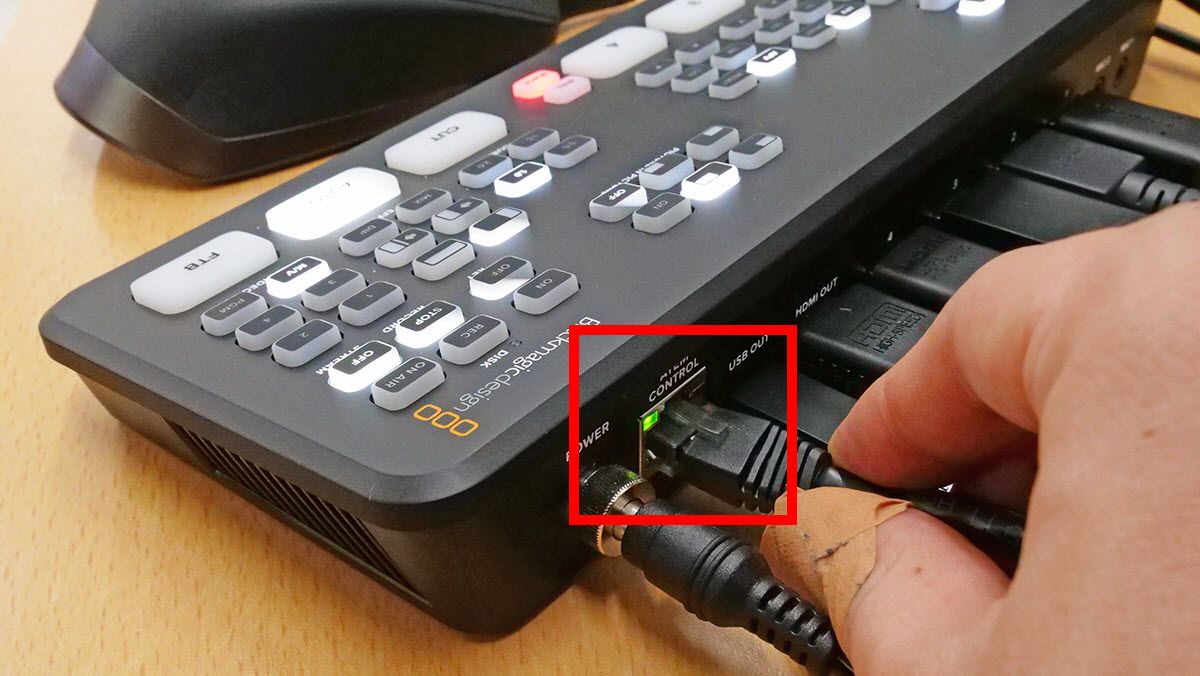
Once you've connected your Ethernet cable to your ATEM Mini Pro, you're ready to stream.
All you have to do is press the 'ON AIR' button on ATEM Mini Pro ...
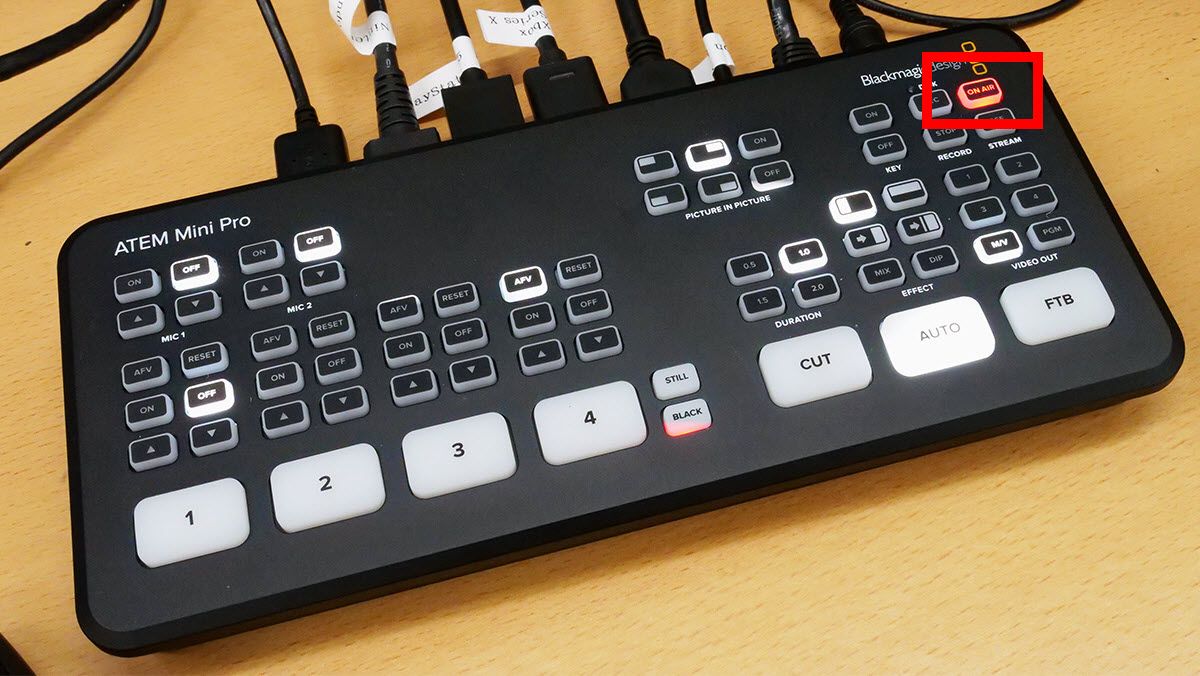
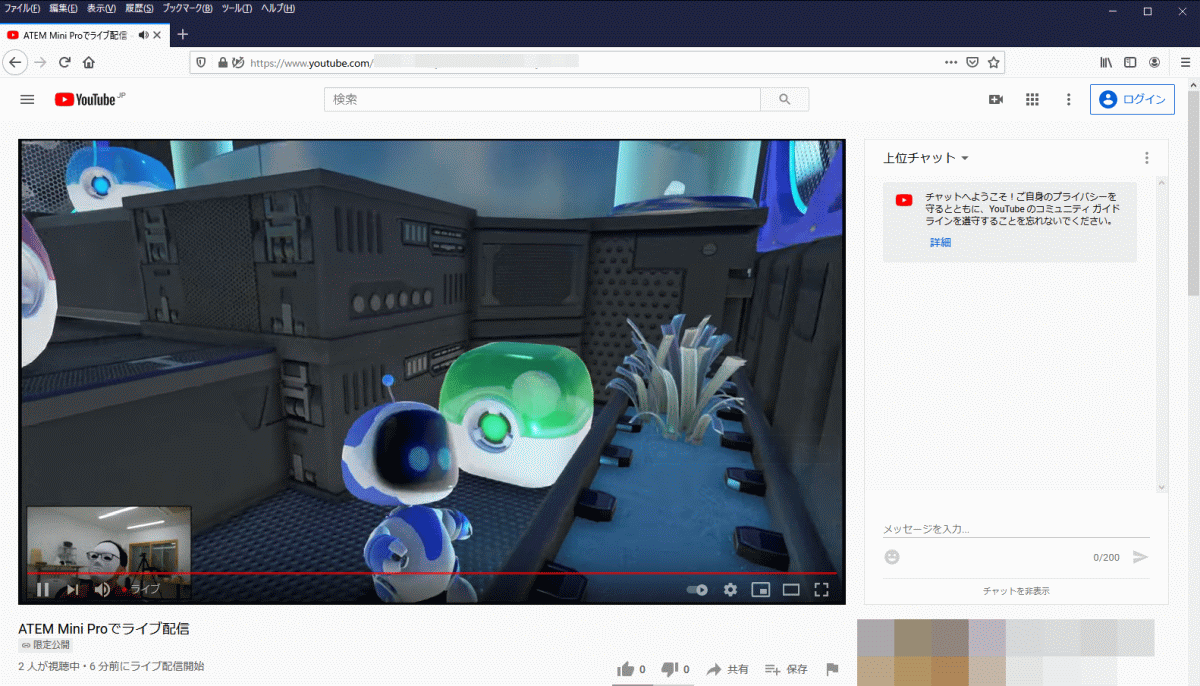
Streaming to YouTube will start. Stream settings are stored on ATEM Mini Pro so you can start streaming with ATEM Mini Pro even when you don't have a PC.
There are only five types of video distribution services that can be registered from ATEM Software Control: Facebook Live, Twitch, YouTube,
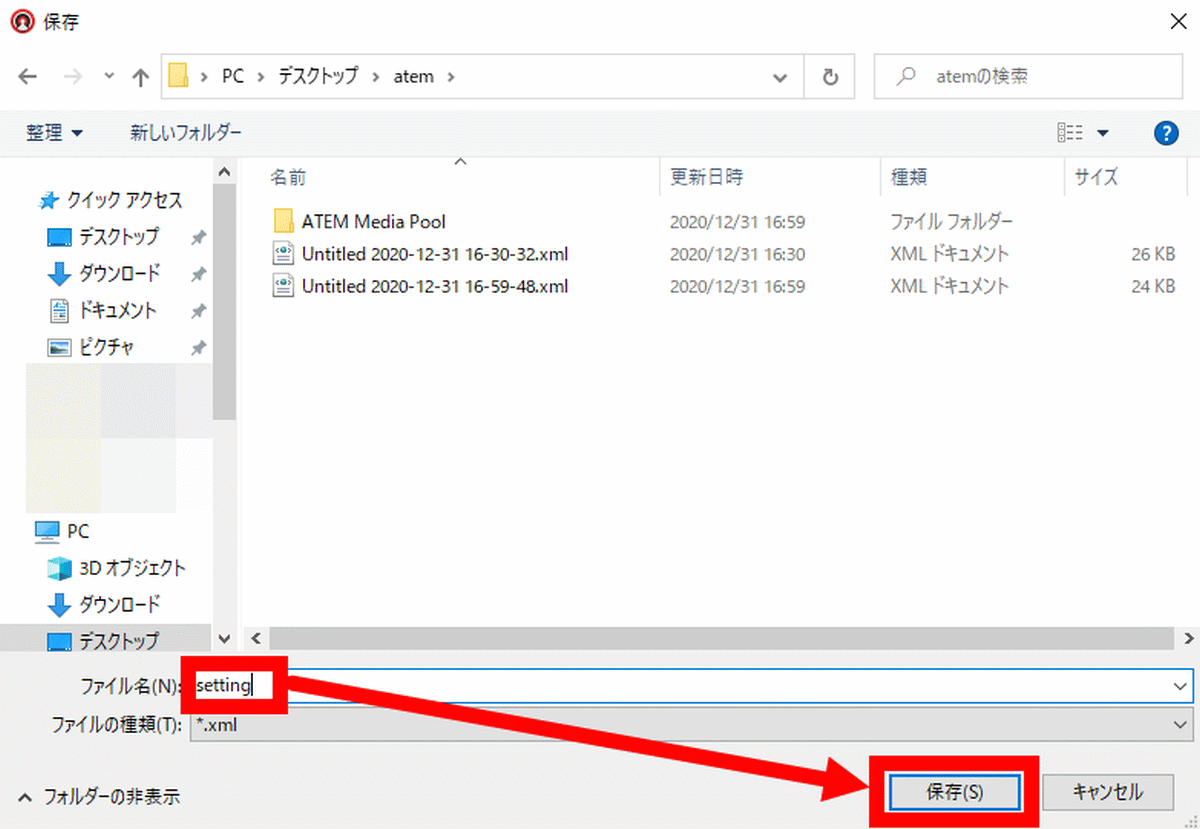
First, click 'Save As' in the 'File' menu to save the setting file to your PC.
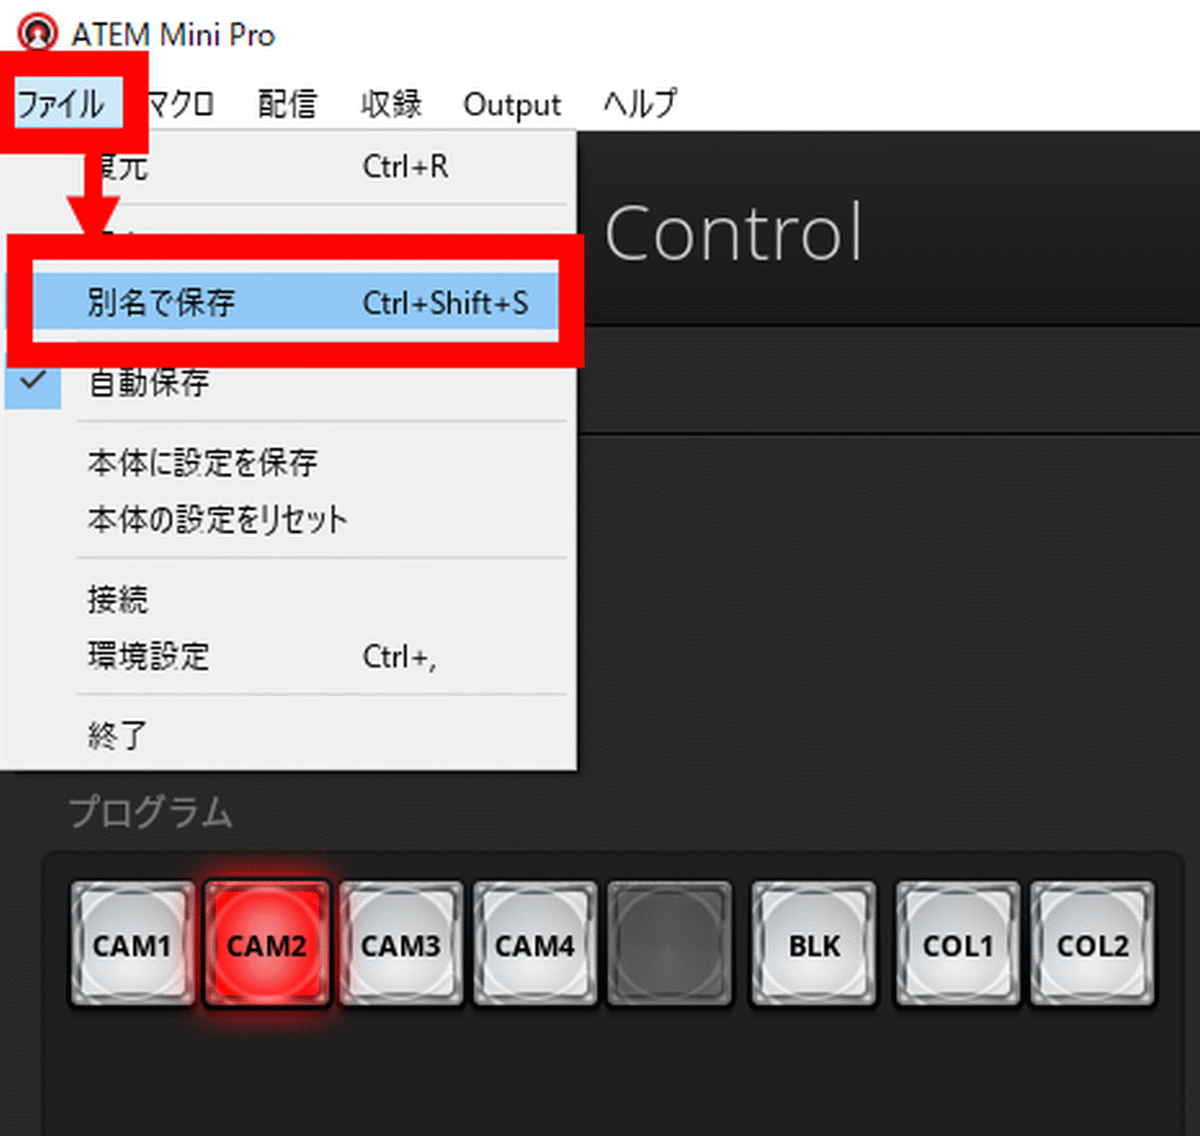
Then the save dialog is displayed, so click 'Save'.
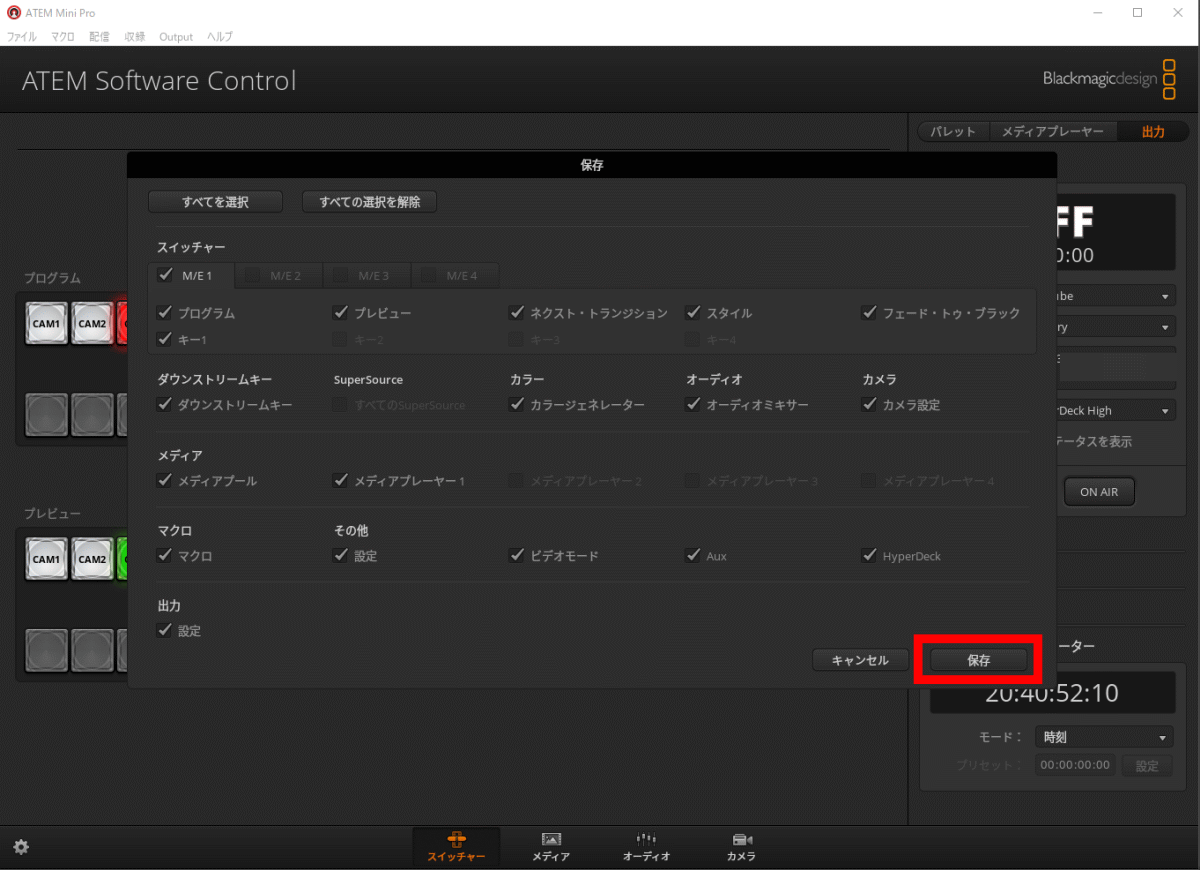
Click a descriptive name and click Save.
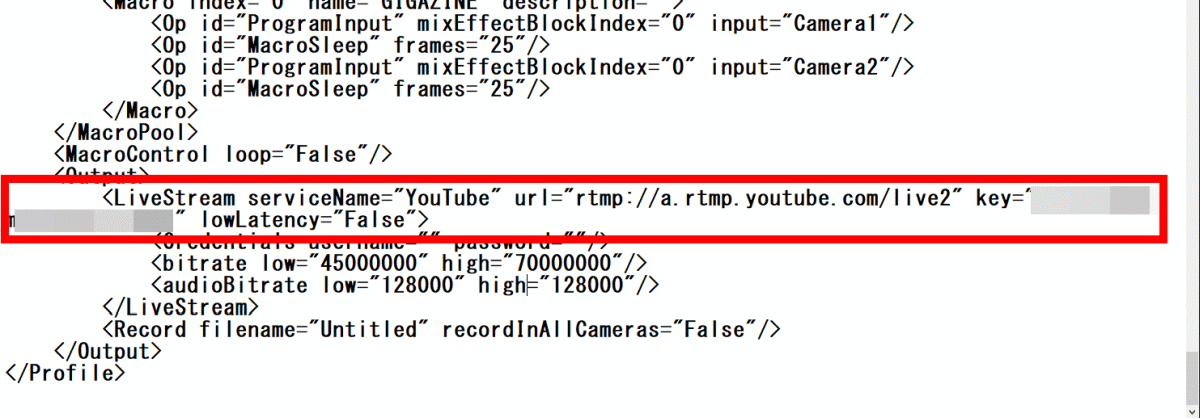
After opening the saved setting file with a text editor, enter the URL and stream key as appropriate in the part labeled 'LiveStream' and save it.
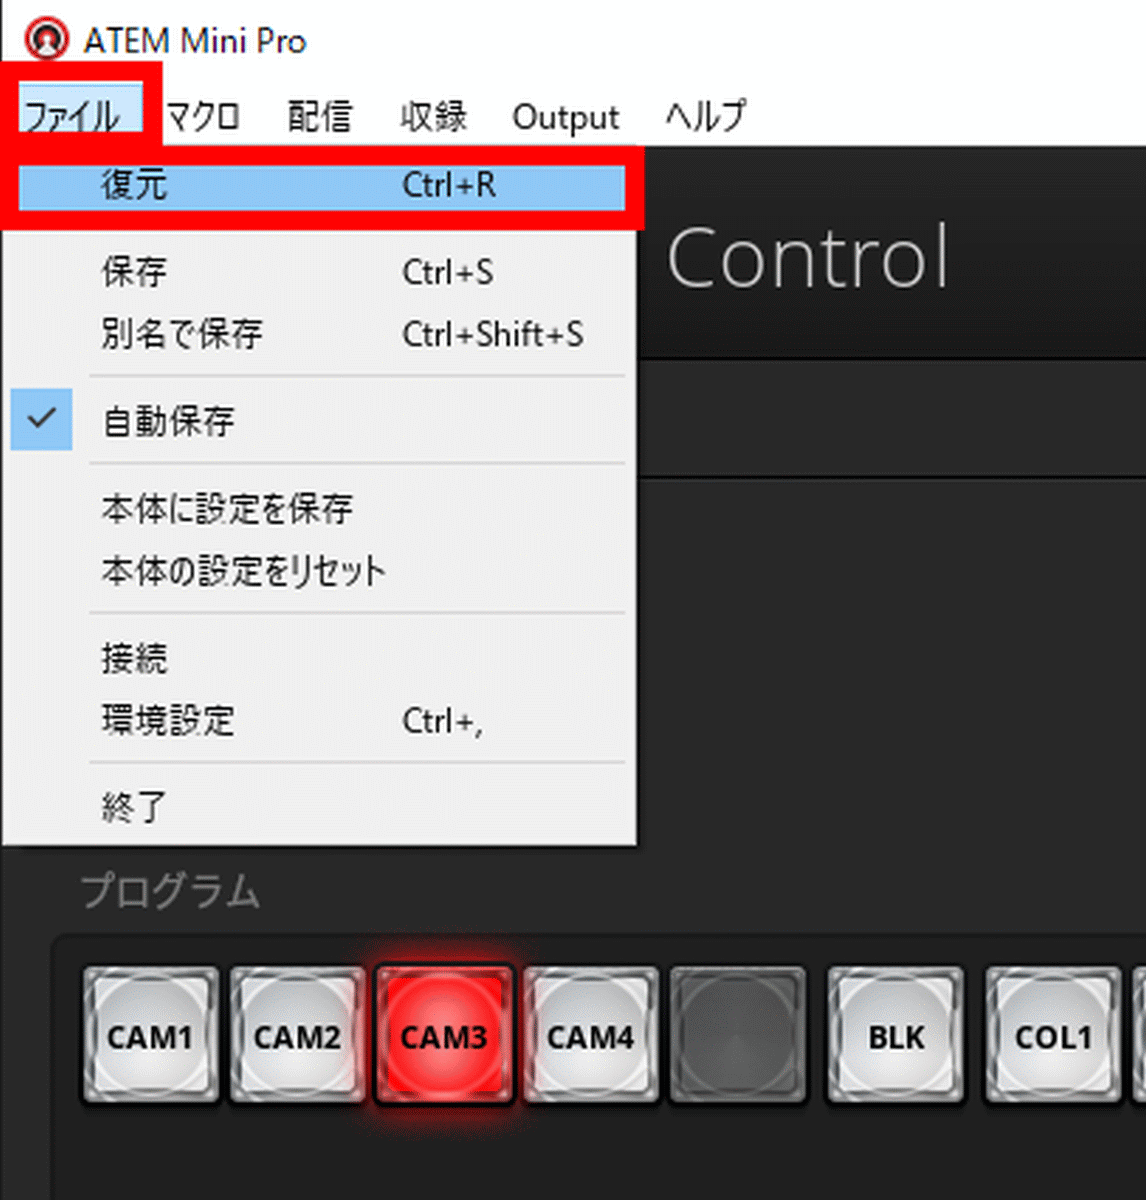
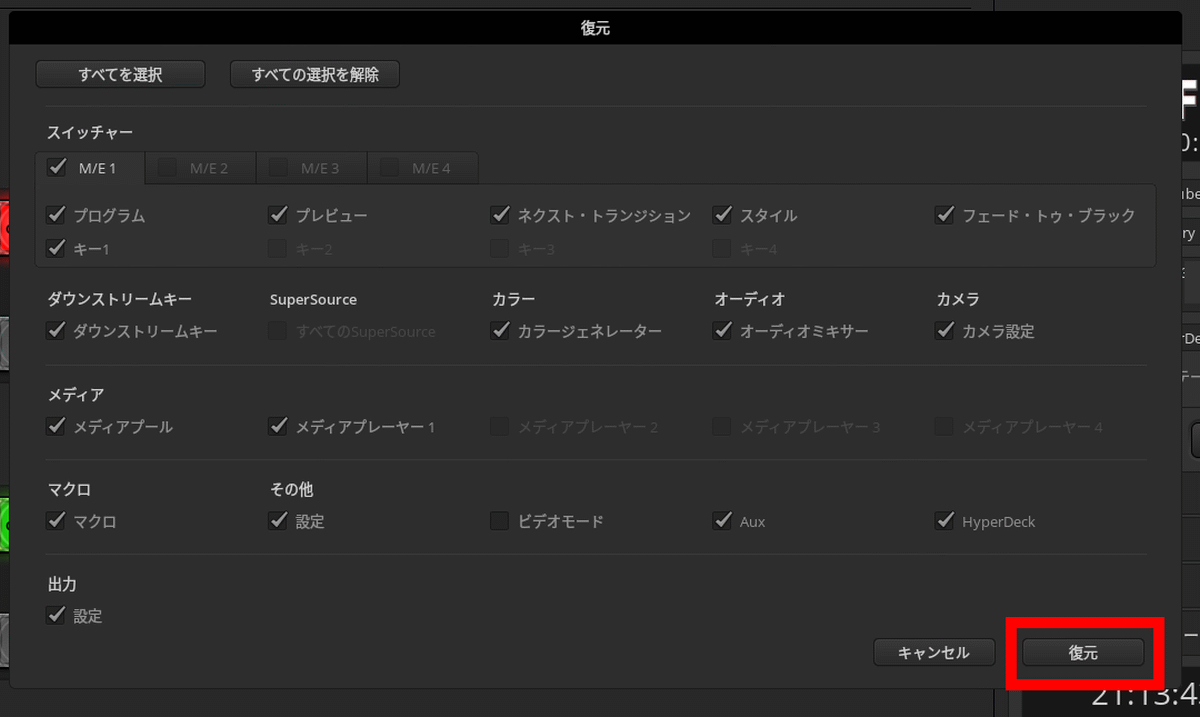
Click 'Restore' in the 'File' menu to load the edited configuration file into ATEM Software Control.
Select the edited configuration file and click 'Open'.
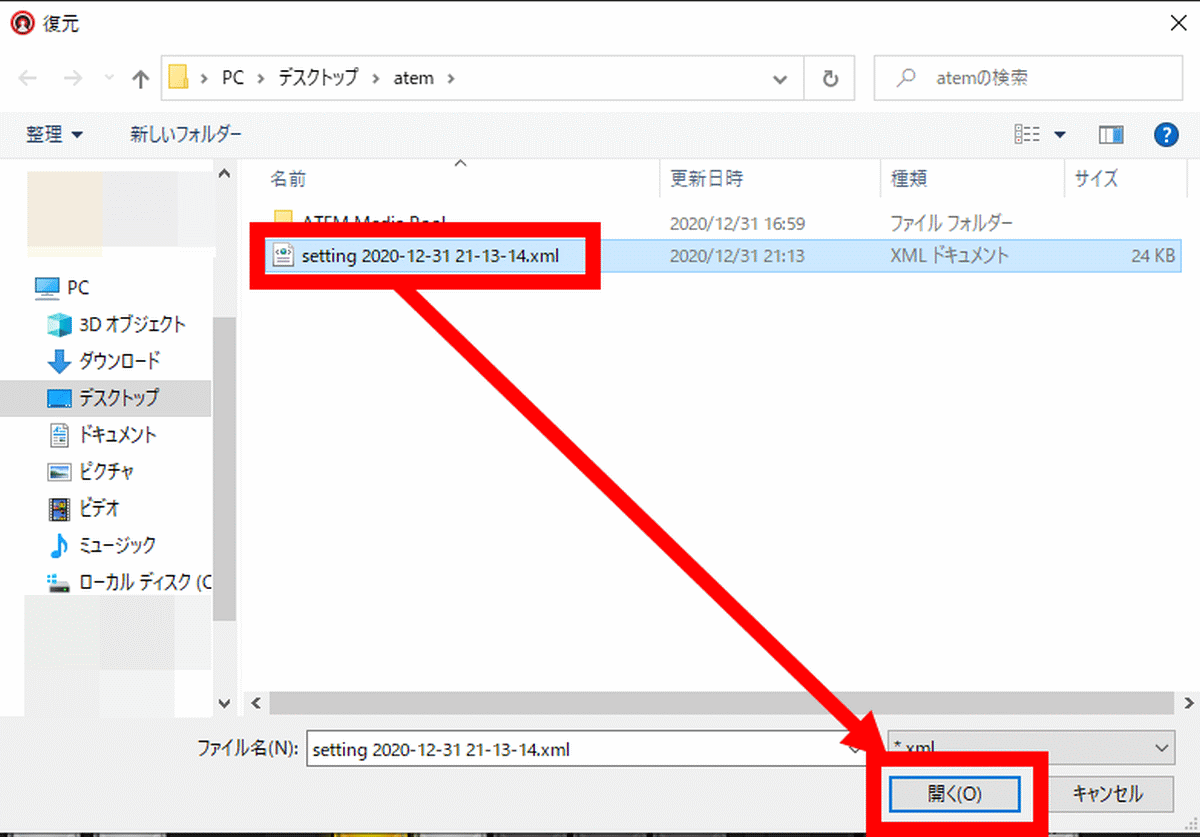
When the restore dialog is displayed, click 'Restore' to load the configuration file into ATEM Software Control.
After that, you can save the settings to ATEM Mini Pro and start streaming with one button.

ATEM Mini Pro allows you to use the picture-in-picture function and start streaming with simple operations. ATEM Software Control allows you to make detailed settings, so it is a recommended switcher for those who want to start video distribution and those who want to improve the quality of online meetings.
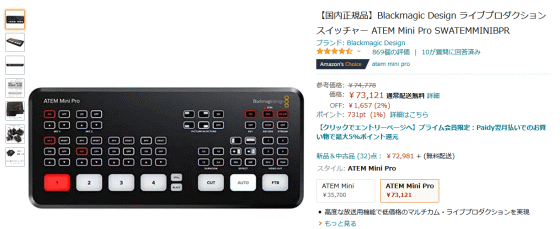
At the time of writing the article, ATEM Mini Pro is available on Amazon.co.jp for 73,121 yen.
Amazon | [Domestic Genuine] Blackmagic Design Live Production Switcher ATEM Mini Pro SWATEMMINIBPR | Blackmagic Design | PC / Peripheral Equipment Mail Order
Related Posts: