I tried using Sony's VDI CAM ZV-1 which can easily take Vlog images and product reviews
Sony has announced the VLOGCAM ZV-1, a digital camera that allows anyone to easily shoot video for video blogs. It is equipped with a 'background blur' function that can switch the background blur with one button, and a 'product review setting' function that automatically switches the focus of people and objects when reviewing the product, which is exactly the blog It has become a digital camera for people who send contents. This time, I was able to borrow the camera accessory ' shooting grip kit ' that makes it easy to take a selfie, so I actually tried using it.
VLOGCAM ZV-1/ZV-1G | Digital Camera VLOGCAM | Sony
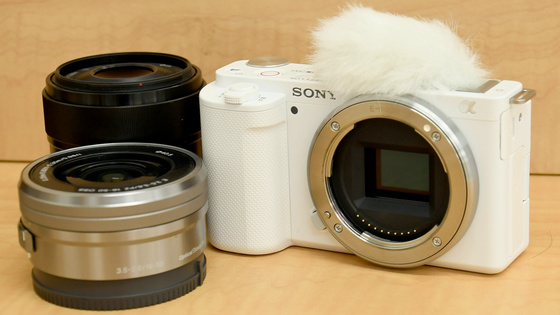
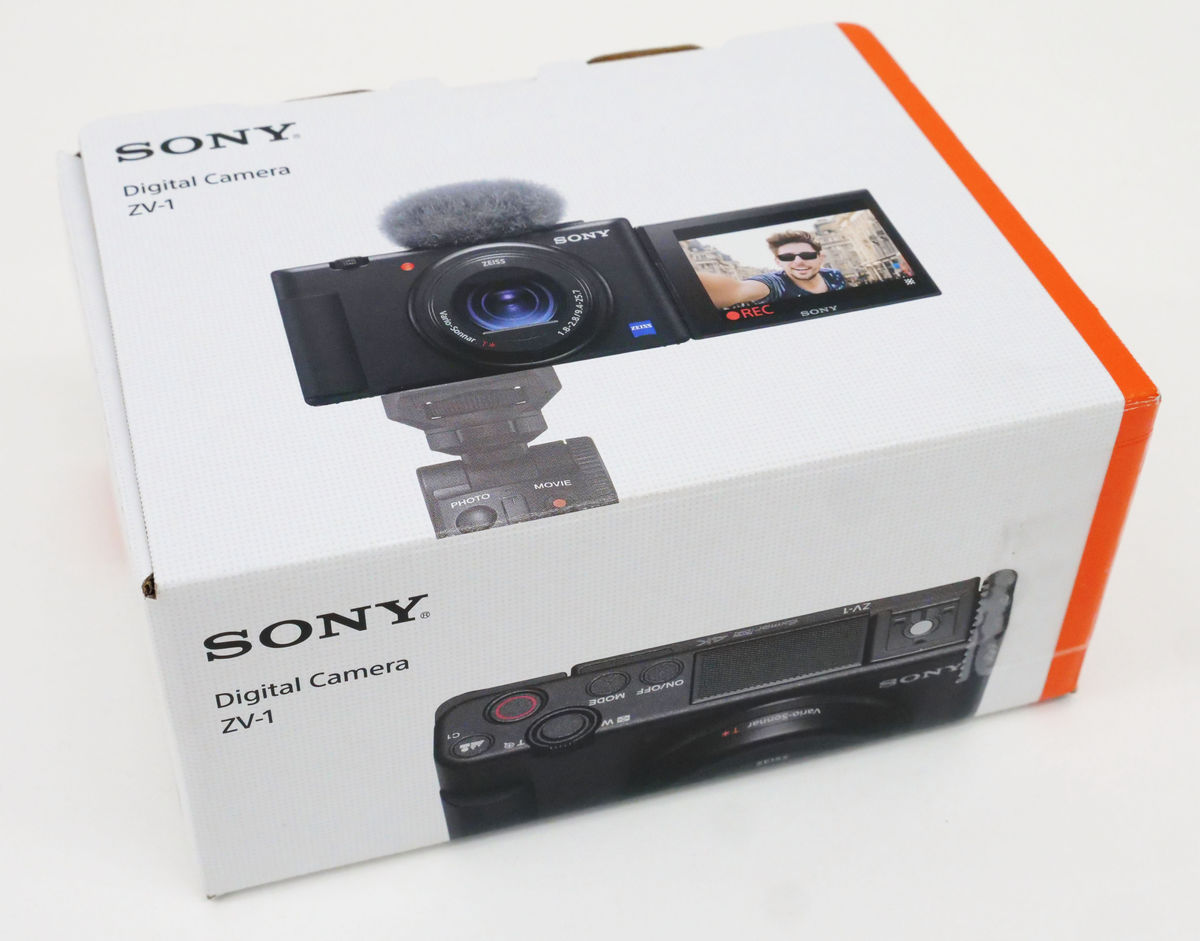
The VLOGCAM ZV-1 package looks something like this.
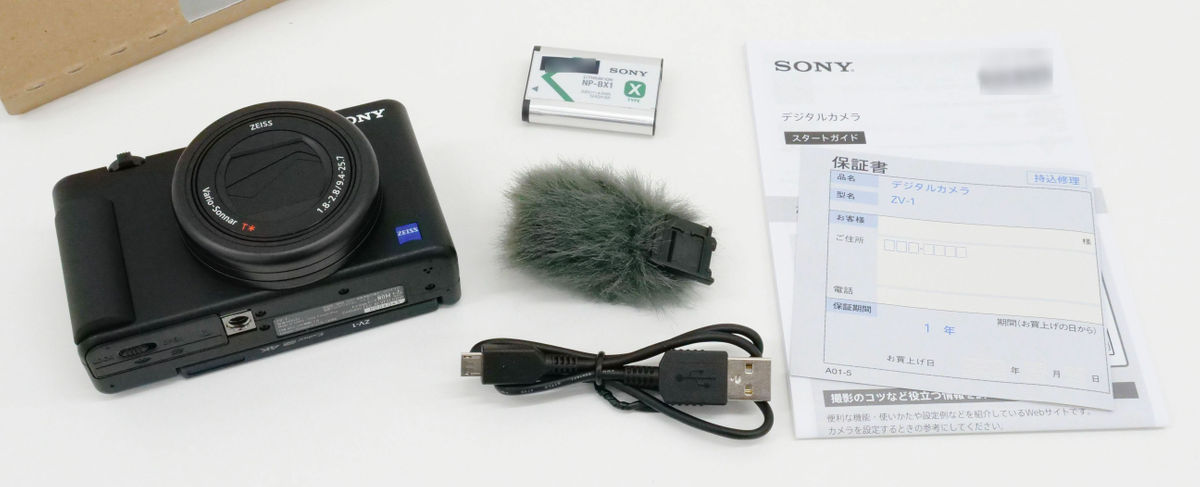
Inside was VLOGCAM ZV-1, battery pack, windscreen, Micro-USB cable, warranty card, start guide.
This is VLOGCAM ZV-1. The size is approximately 105.5mm x 60.0mm x 43.5mm, and the weight of the main unit only is 264g.
Seen from the front, it is slightly larger than a transportation IC card.
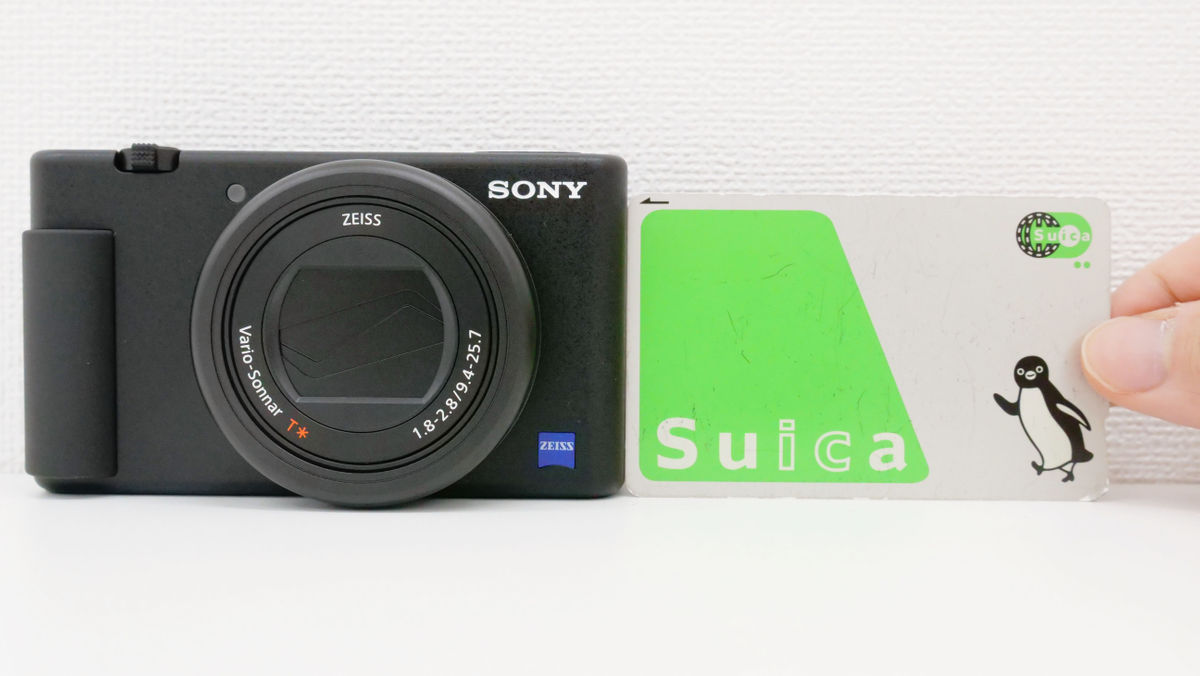
The thickness is about the short side of a transportation IC card.
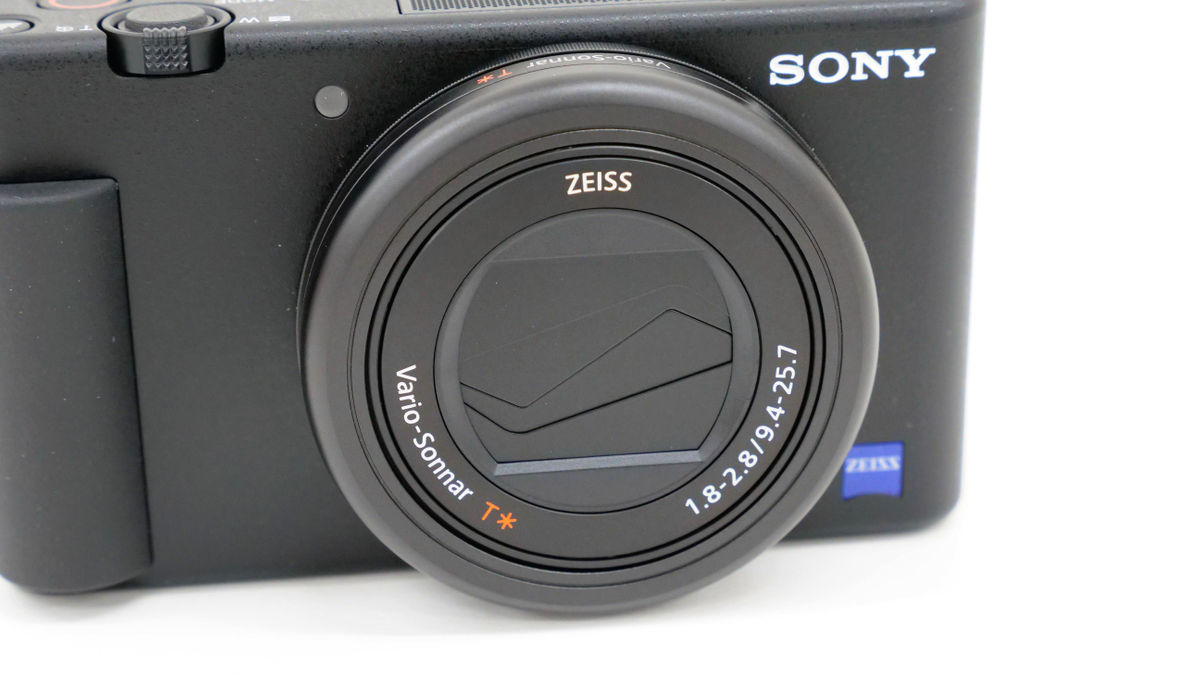
The front lens is stored when the power is off.
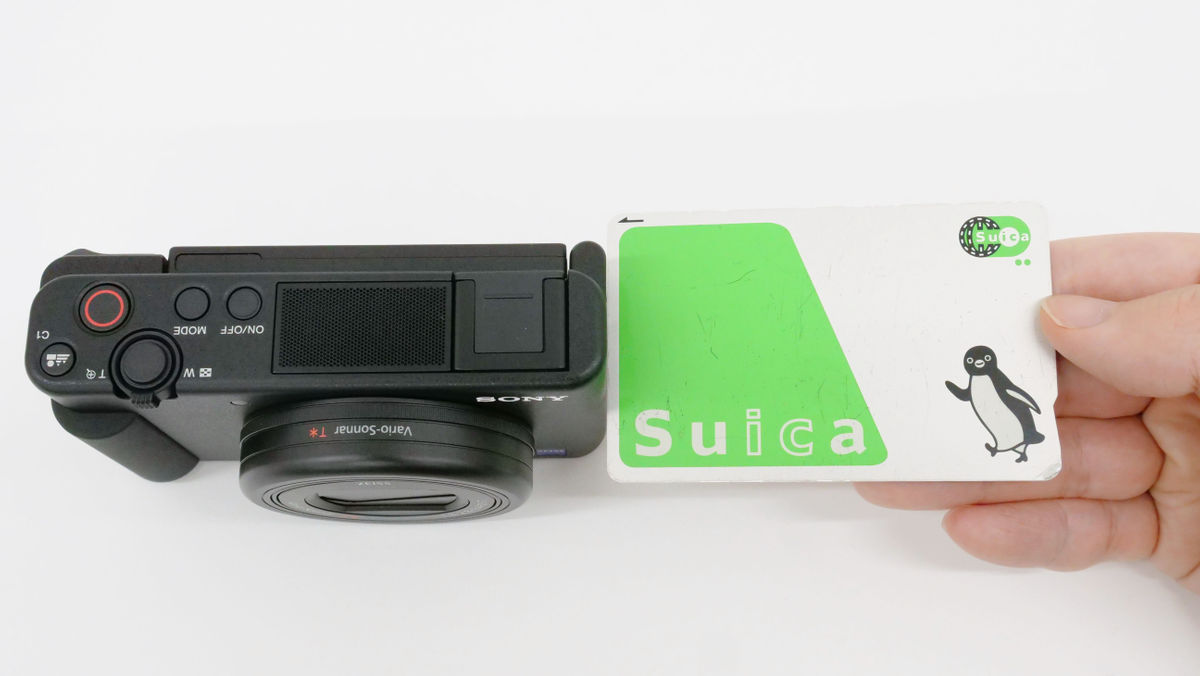
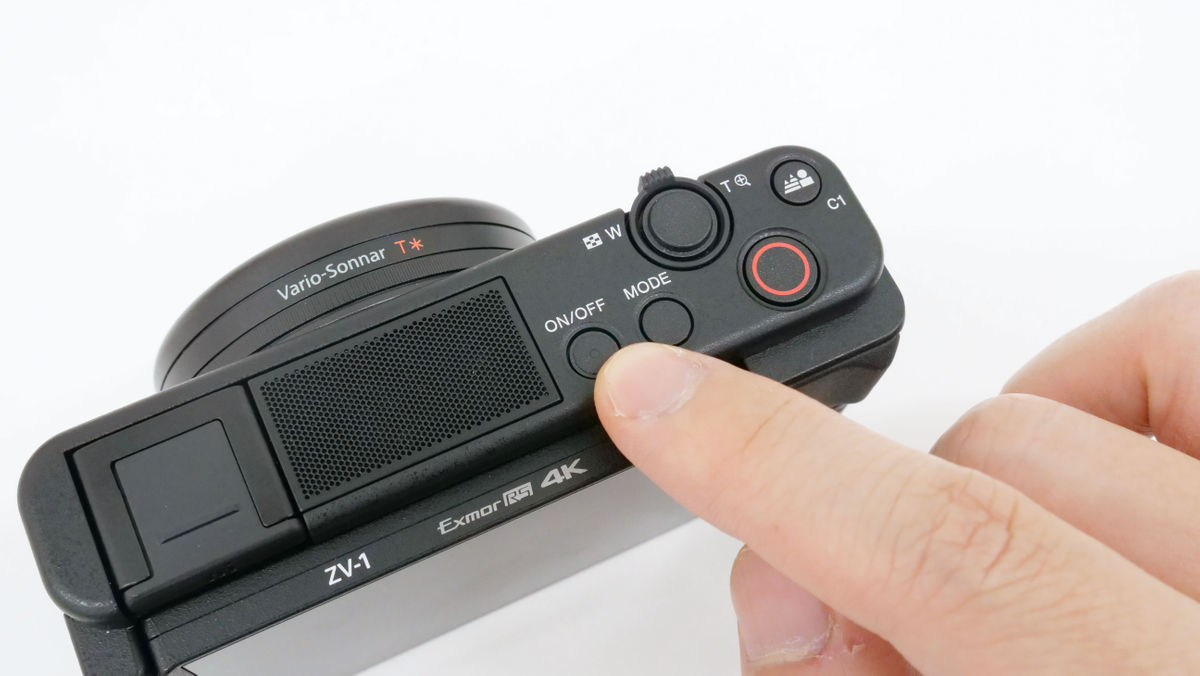
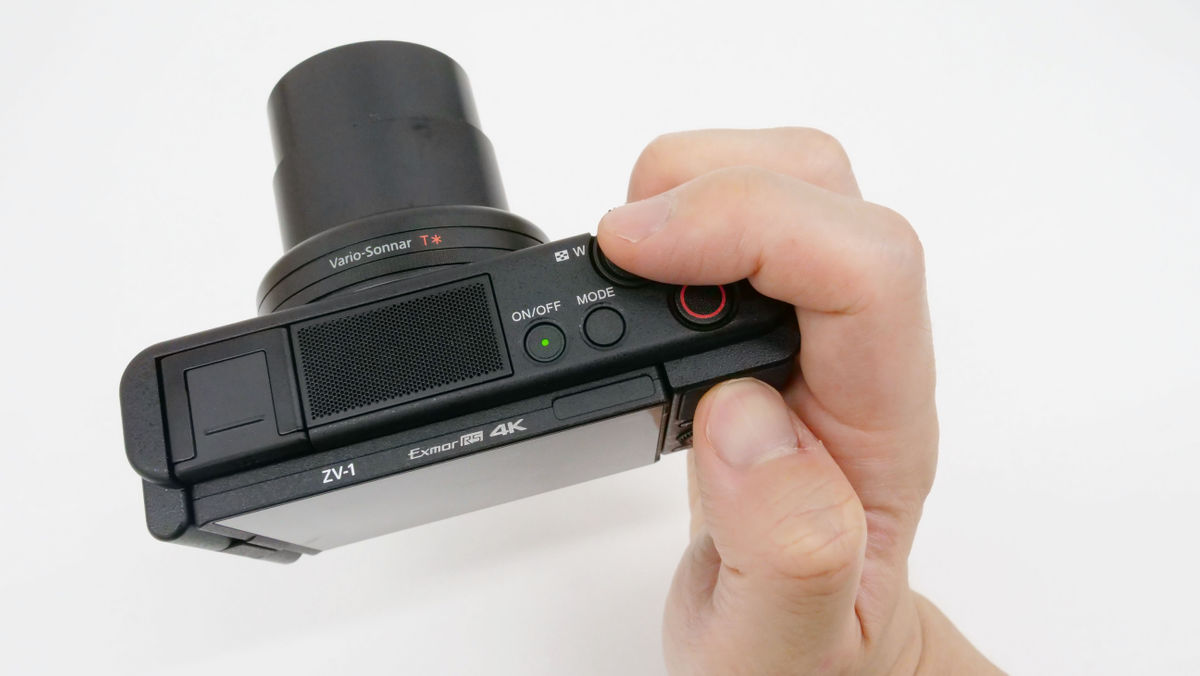
There is a microphone and power button, shutter button, recording button, etc. on the top.

3.0 type LCD monitor and operation buttons on the back.
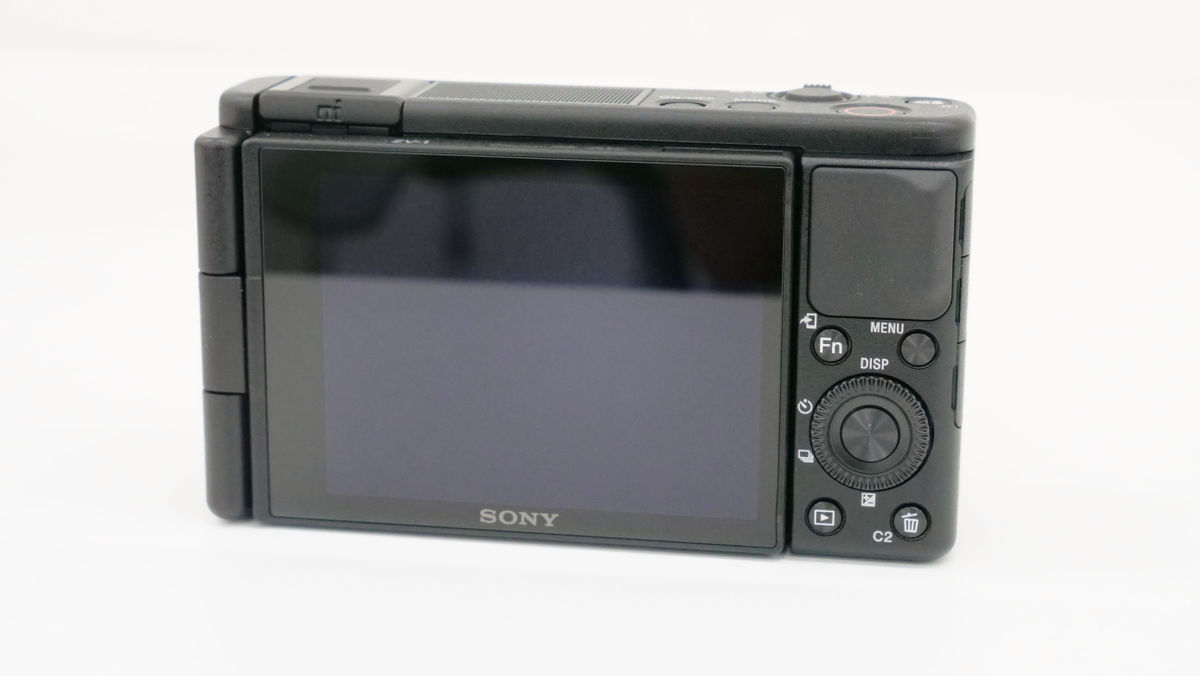
You can change shooting settings with the Fn button and general settings with the MENU button.
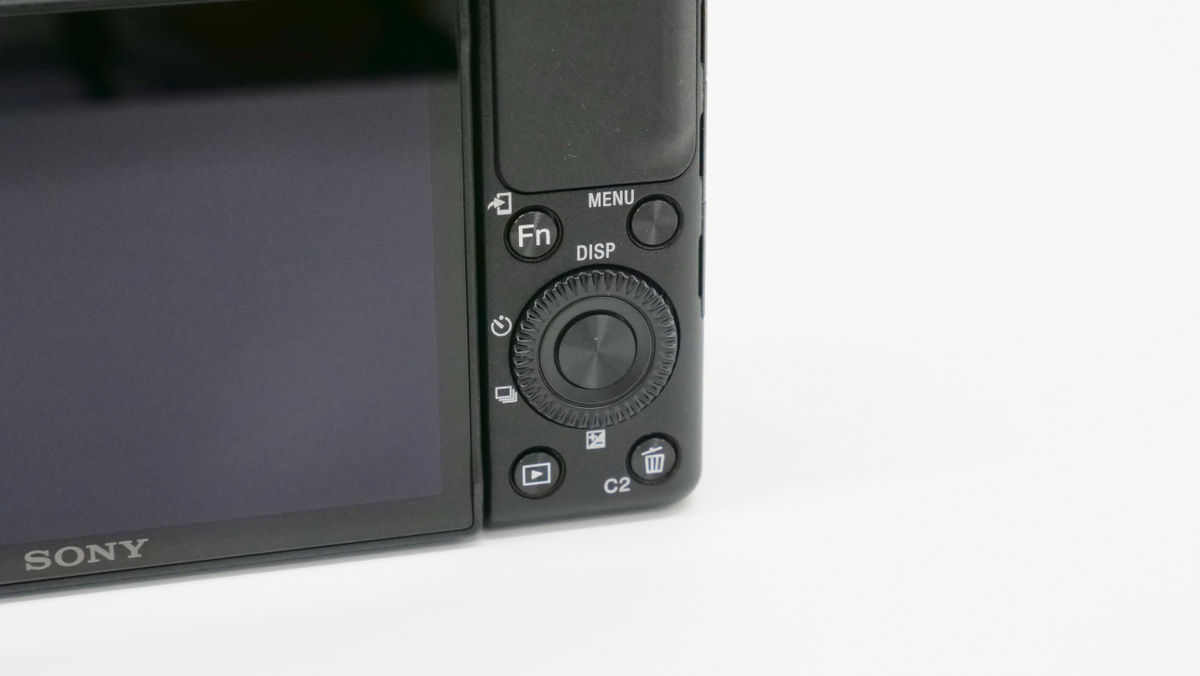
The monitor is a variangle type...

You can check the content that is also visible from the front side of the camera. The maximum open angle is about 176 degrees. In addition, the tilt angle in the horizontal direction can be adjusted up to about 270 degrees, which corresponds to high-angle and low-angle shooting.
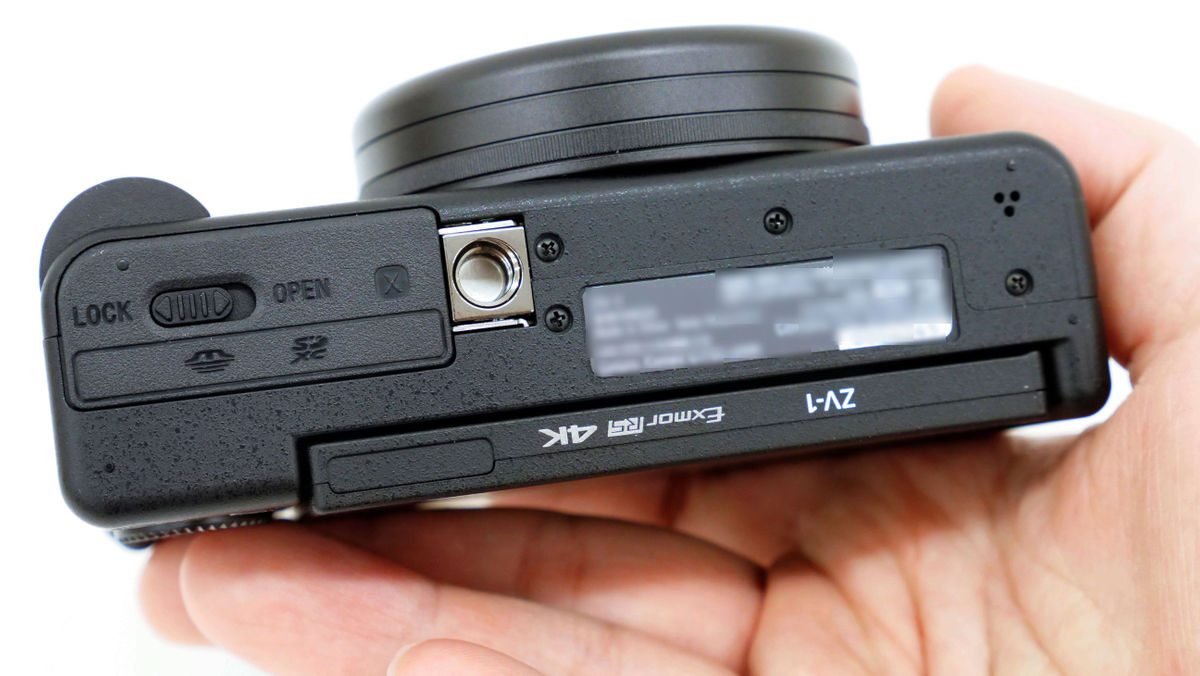
There is a battery slot on the bottom.
Let's actually use it. First of all, open the lock lever at the battery insertion port……
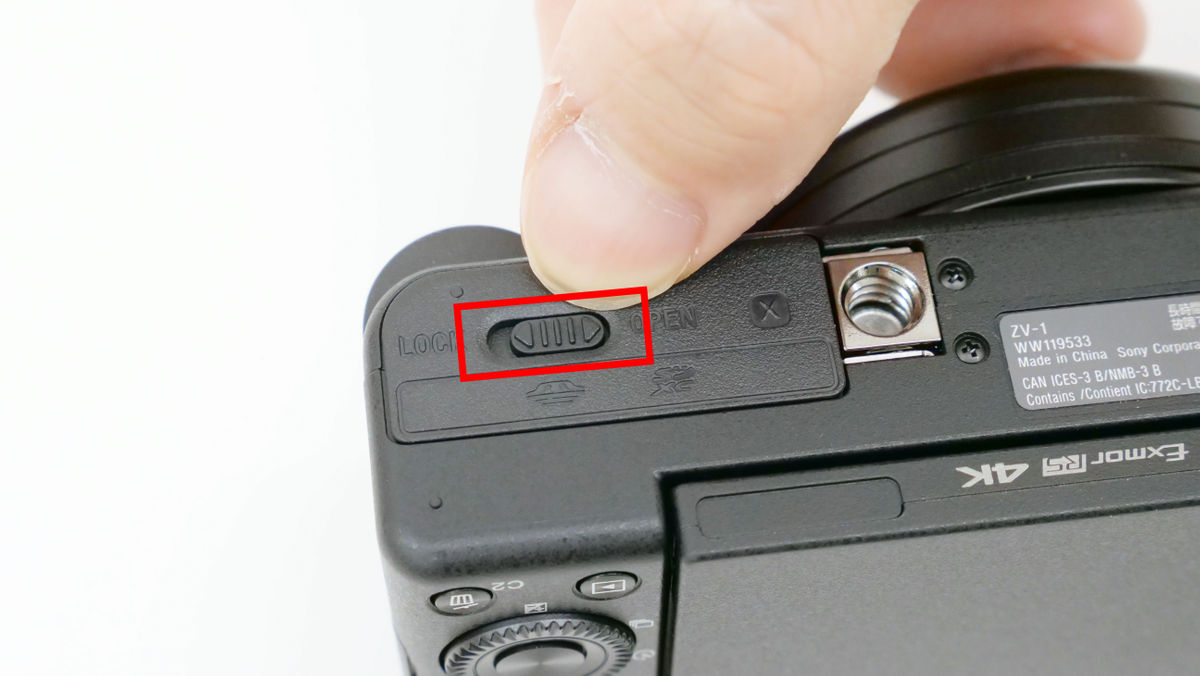
Open the lid.
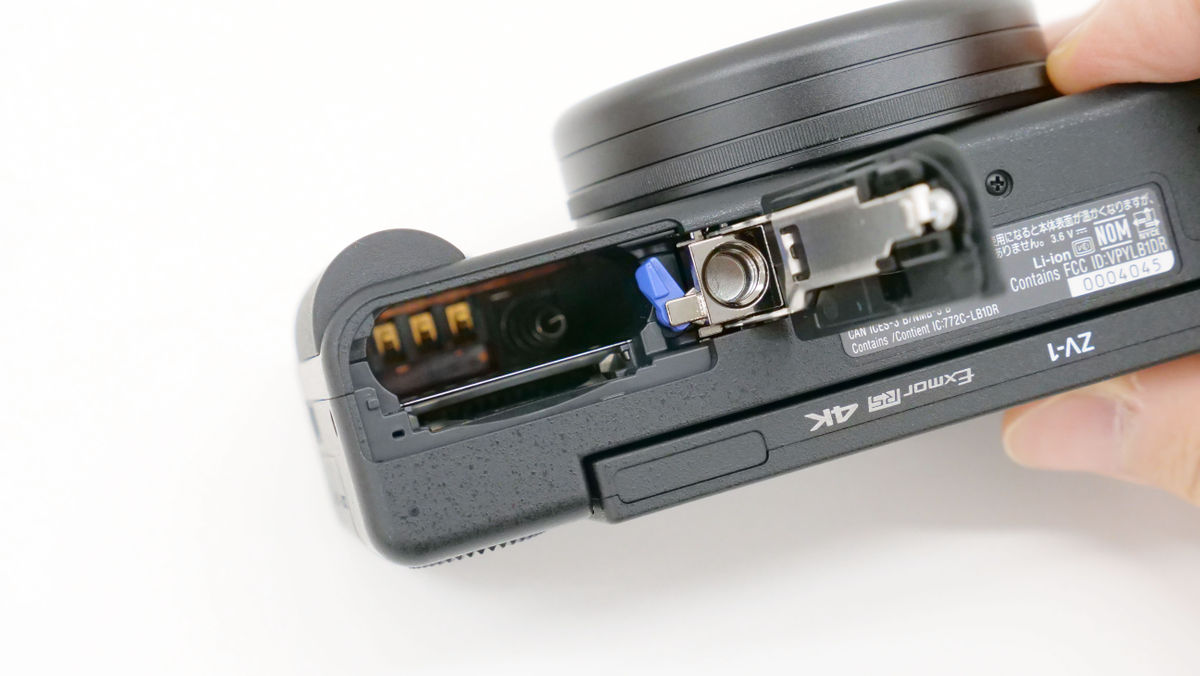
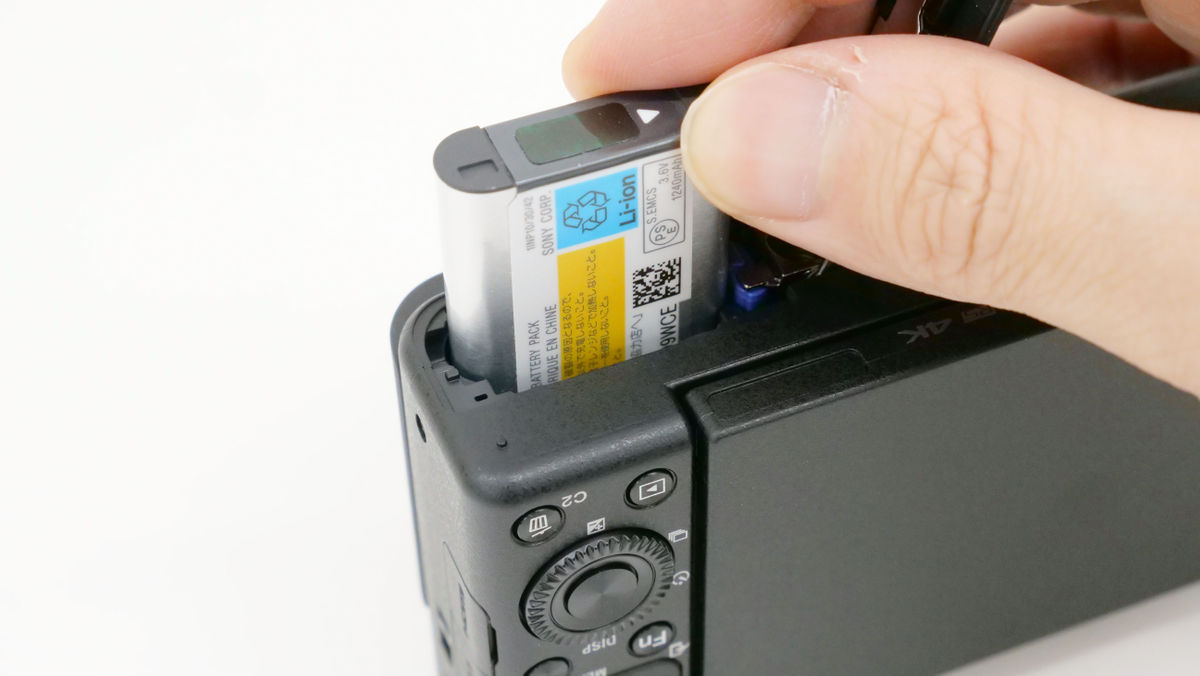
Insert the attached battery.
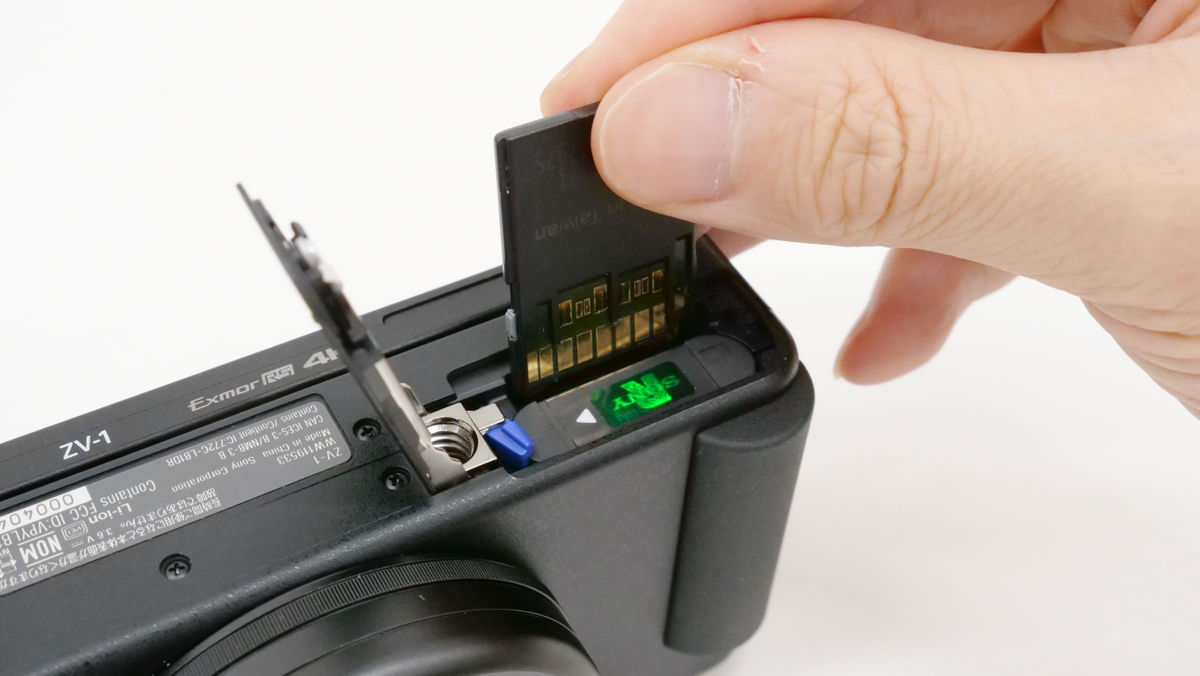
Insert an SD card or memory card right next to the battery. This time I used an SD card.
The weight of the VLOGCAM ZV-1 with the battery and SD card was 291g.

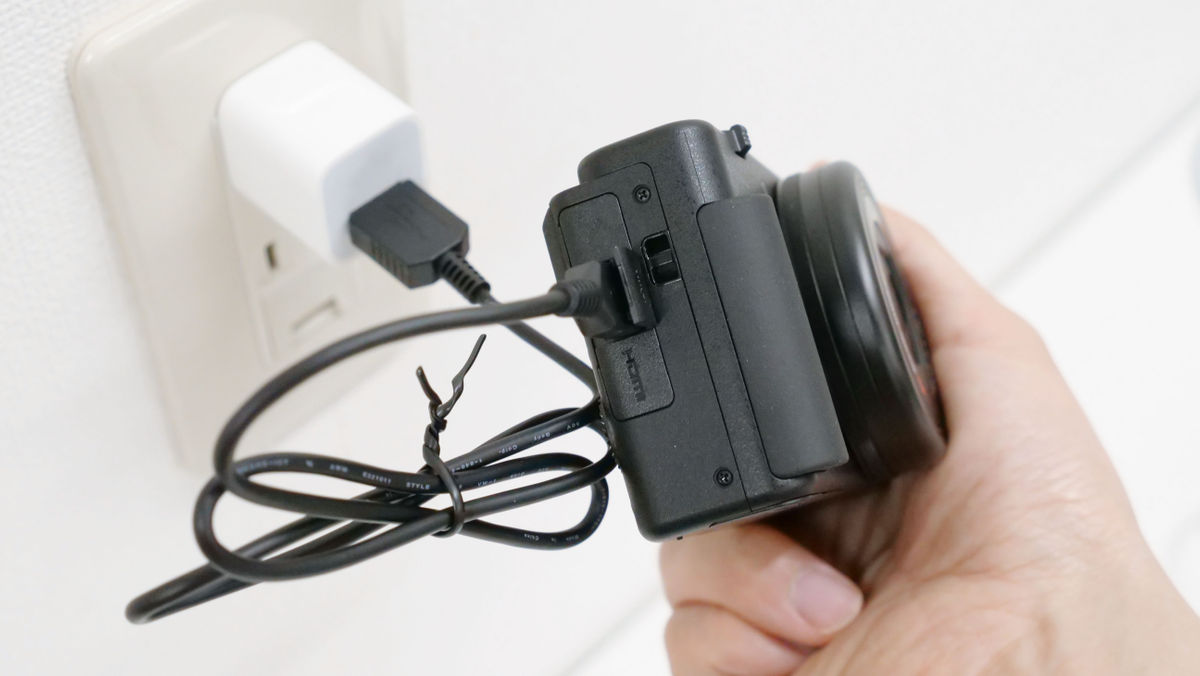
The battery is charged by connecting the included Micro-USB cable to the Micro-USB terminal on the side of the main unit.
Turn on the power button...
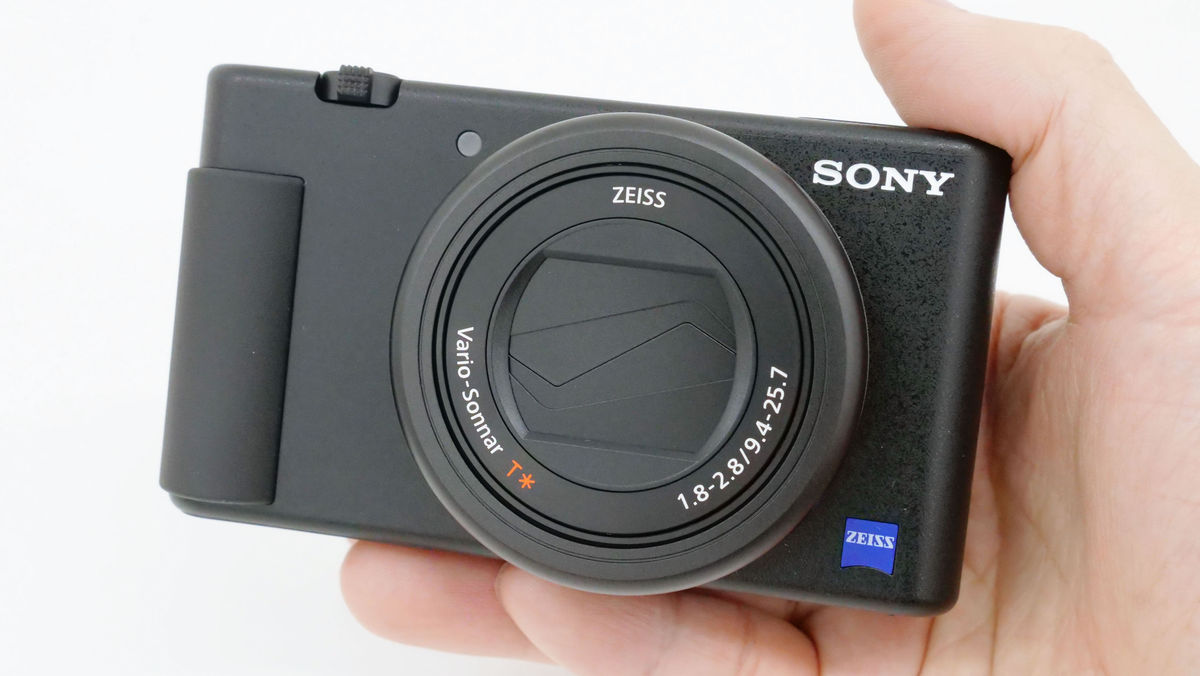
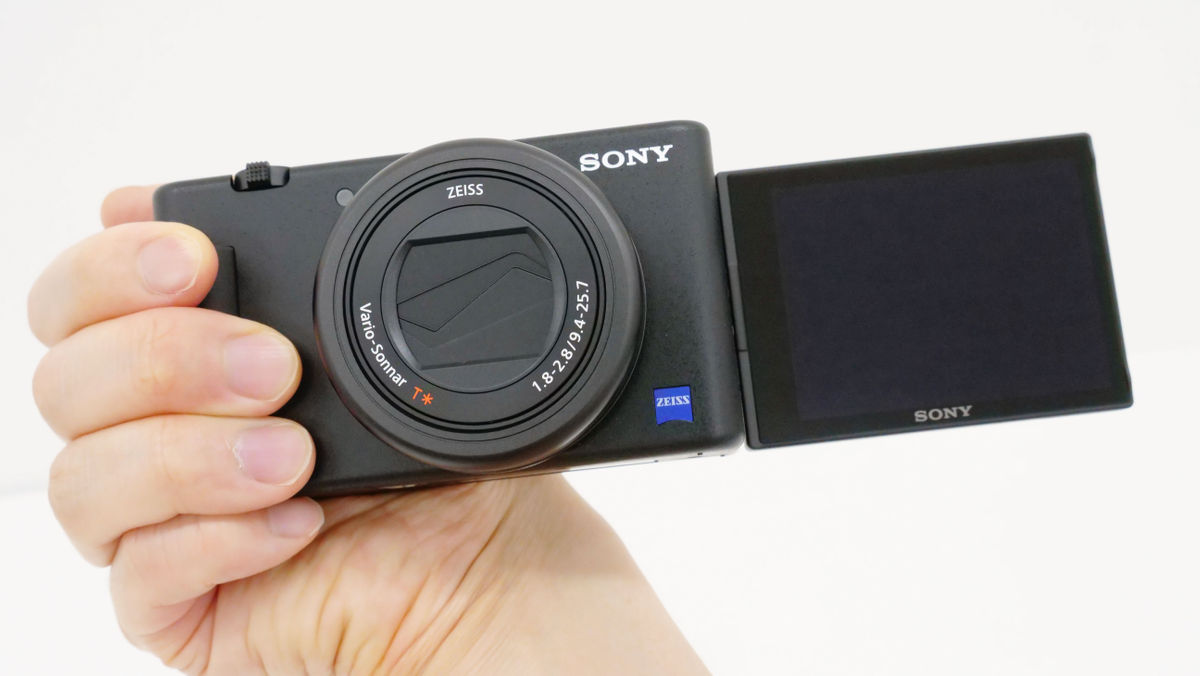
The lens part that was stored expanded with Guin.
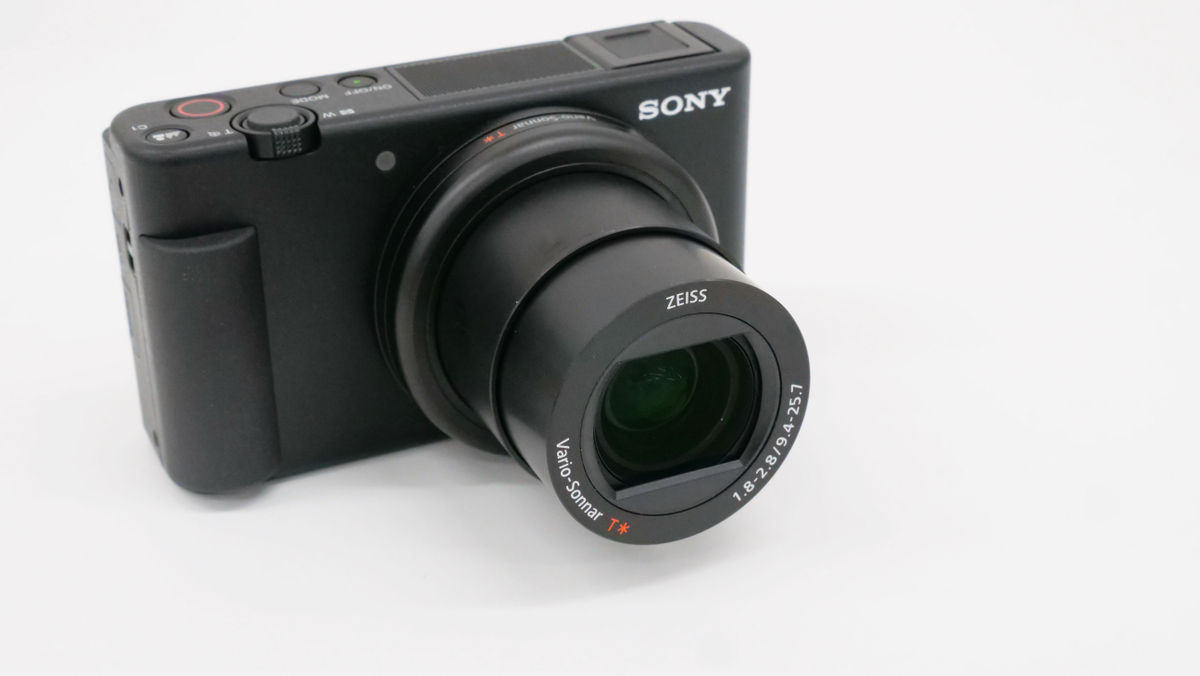
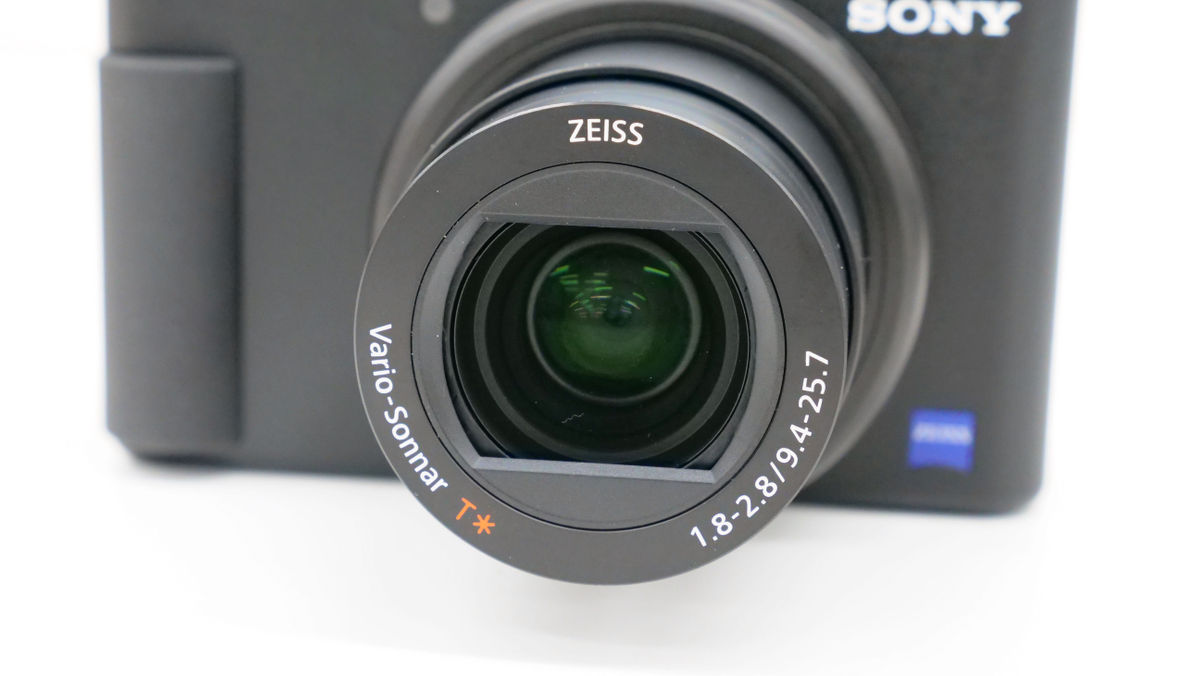
The lens is a ZEISS Vario-Zoner T* lens with an optical 2.7x zoom with an F value of F1.8-F2.8 and a focal length of 9.4mm-25.7mm.
Initial settings will be required when starting for the first time. First, set the living area and the current time. Select Run and press the center button on the control wheel.
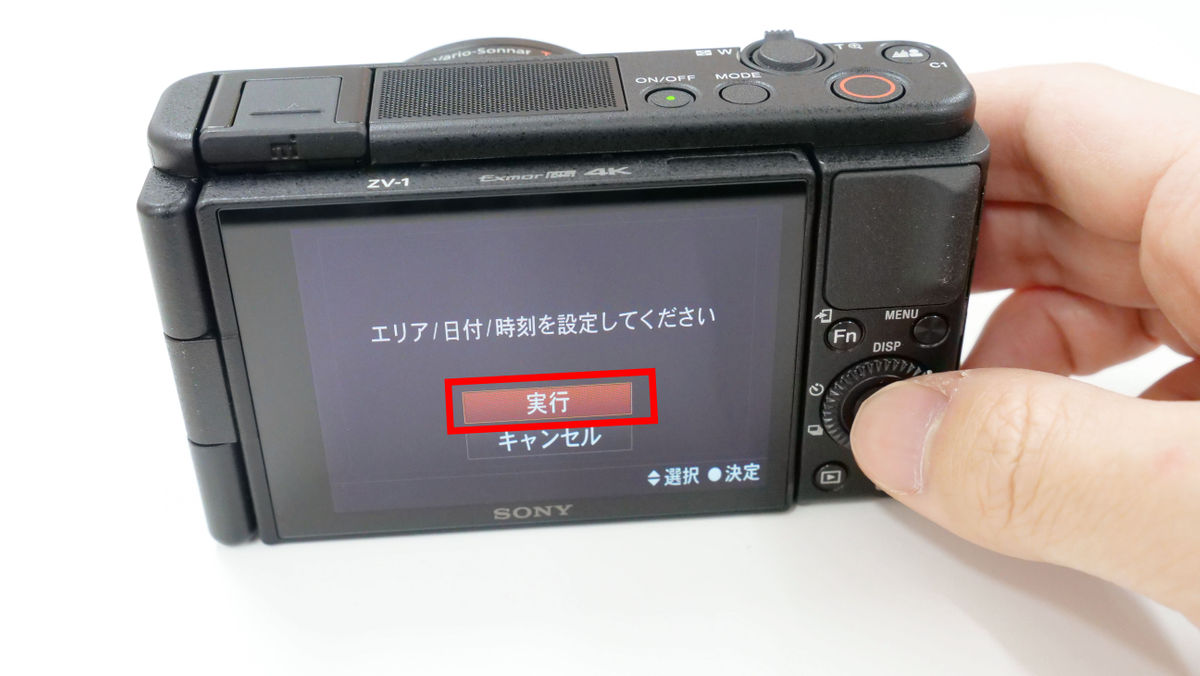
The living area can be changed with the left and right of the control wheel. This time, select 'Tokyo/Seoul'.
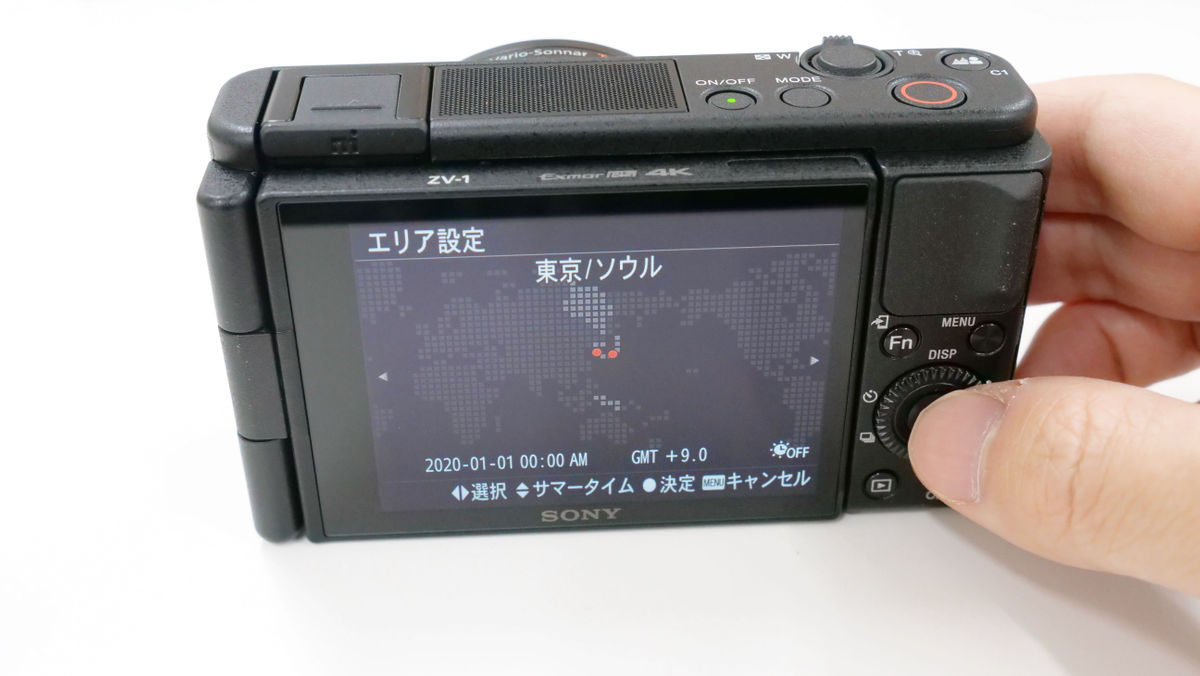
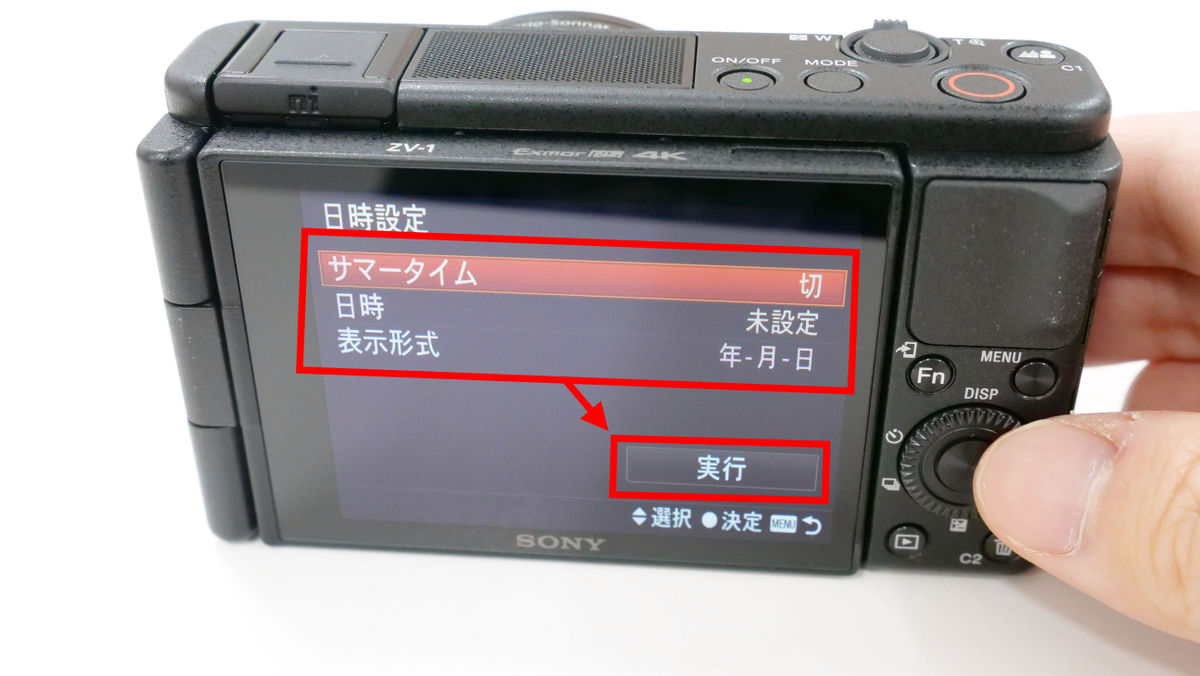
Select 'Execution' after setting the daylight saving time, date, date display format.
A commercial of Sony's image editing application called '
The VLOGCAM ZV-1 has a slightly protruding grip on the left side of the lens...
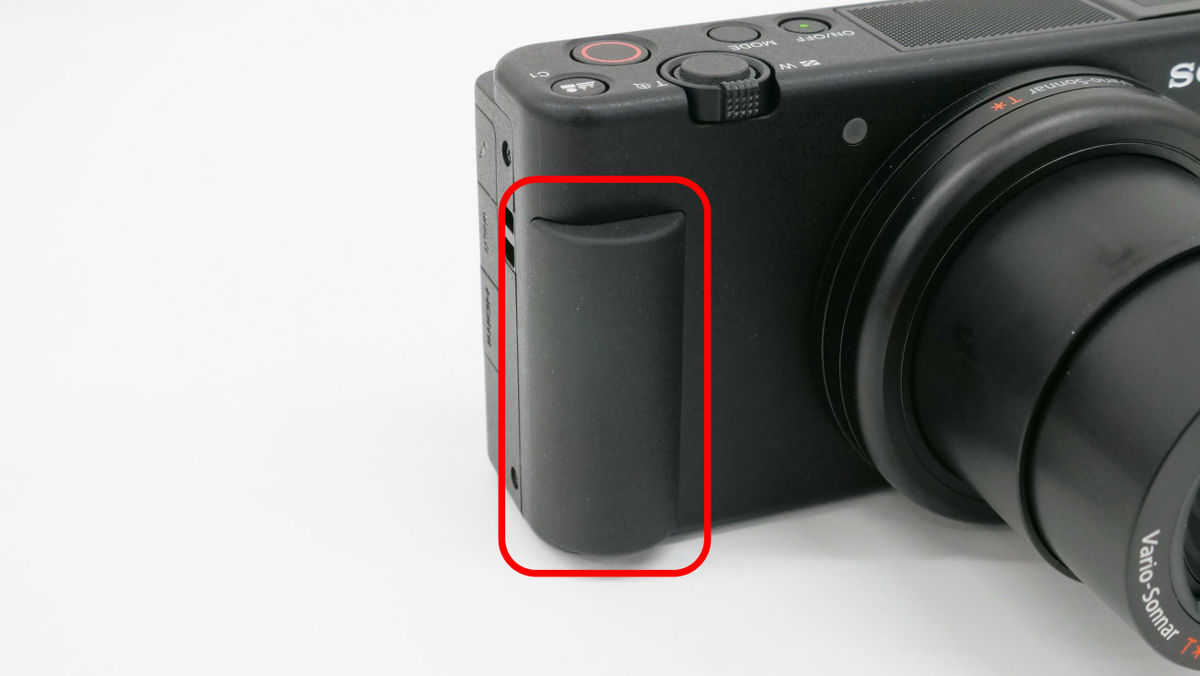
With this kind of design, it is easy to hold with one hand.
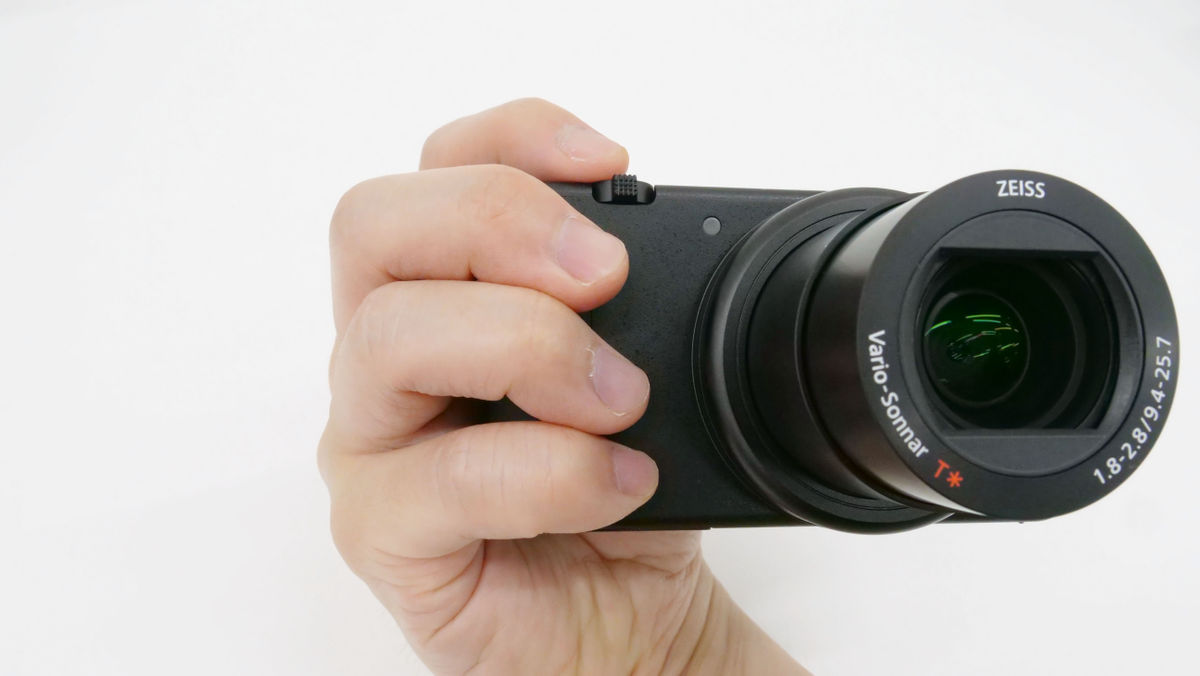
There is also a grip on the back side of the body where the right thumb is placed, and it is an image of 'holding it with your fingers' rather than 'holding it while letting the weight of the body escape to the grip'. Even if you hold it with one hand, you can press the shutter button and movie recording button with your index finger without any problem.
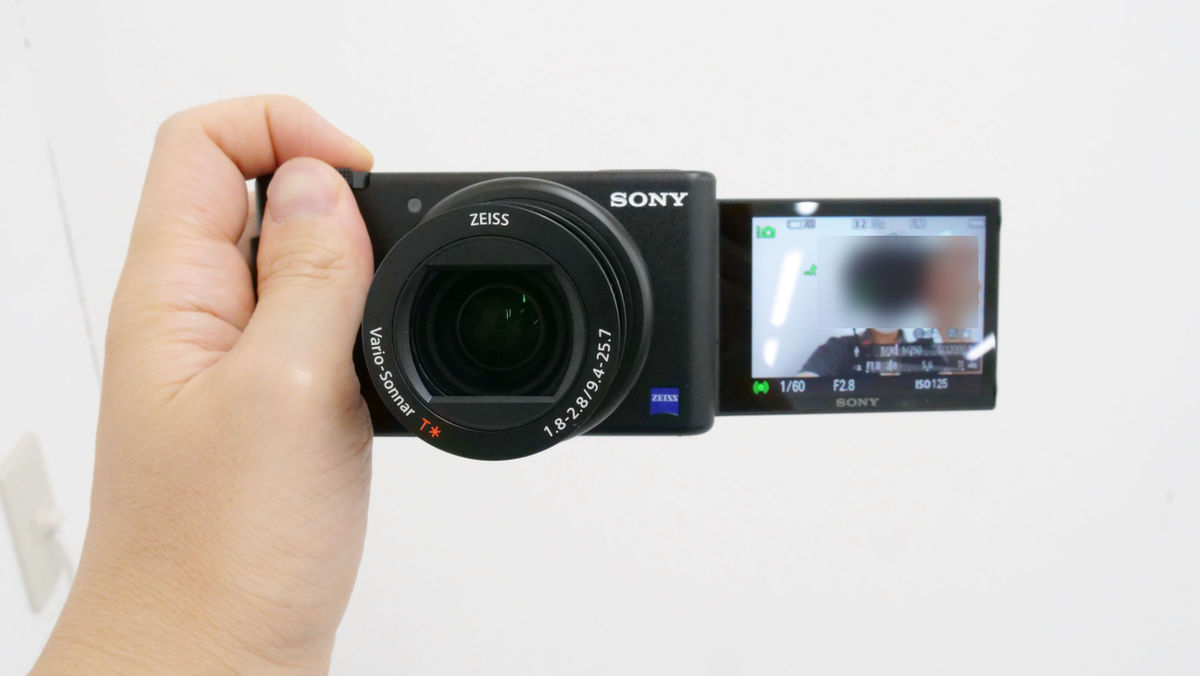
If you want to take a selfie, you can use the grip like this and hold it with your left hand, while checking the LCD monitor.
When you take a picture of yourself, it looks like this. The image is a simple reduction only, and we use 'Omakase Auto' that automatically determines the white balance, ISO sensitivity, exposure compensation, and ND filter by the camera itself. Originally, the mask and the wall are a little more white, but it seems that the camera that judged that 'the complexion cannot be so pure' corrected the color.
This is what
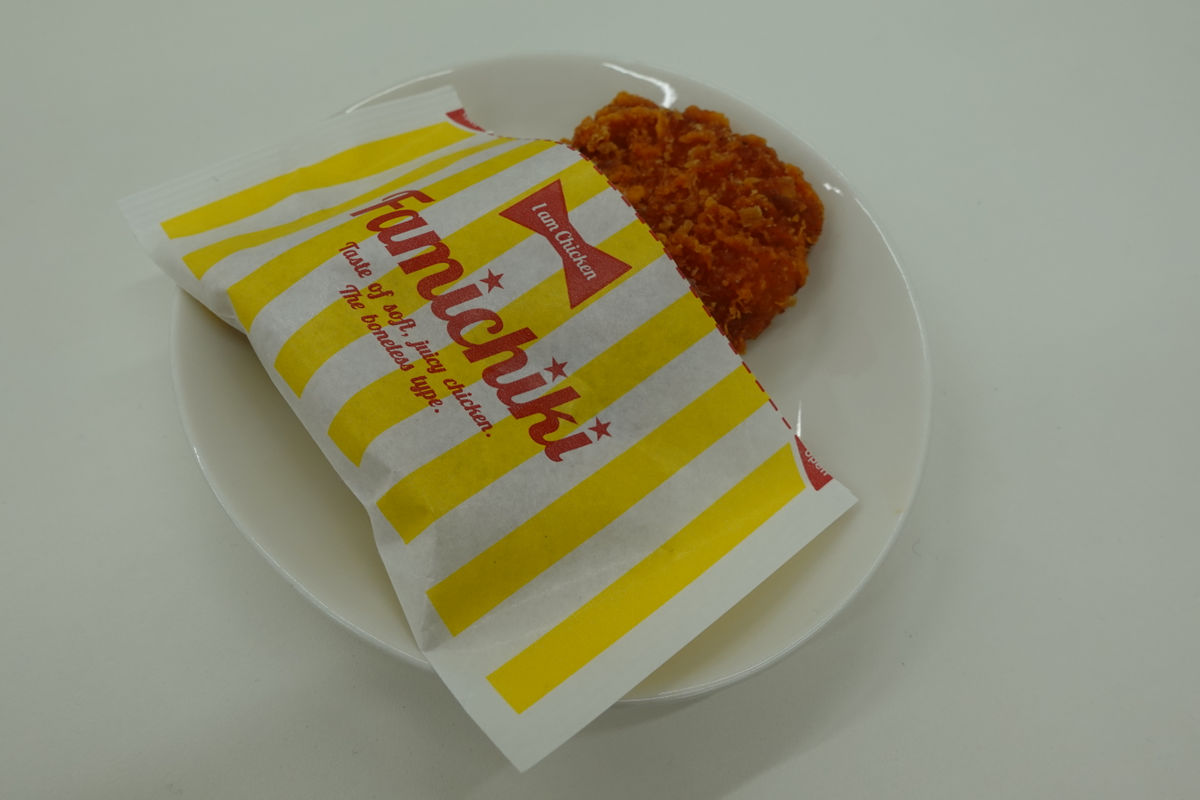
When I shot the same Fami Tiki with the
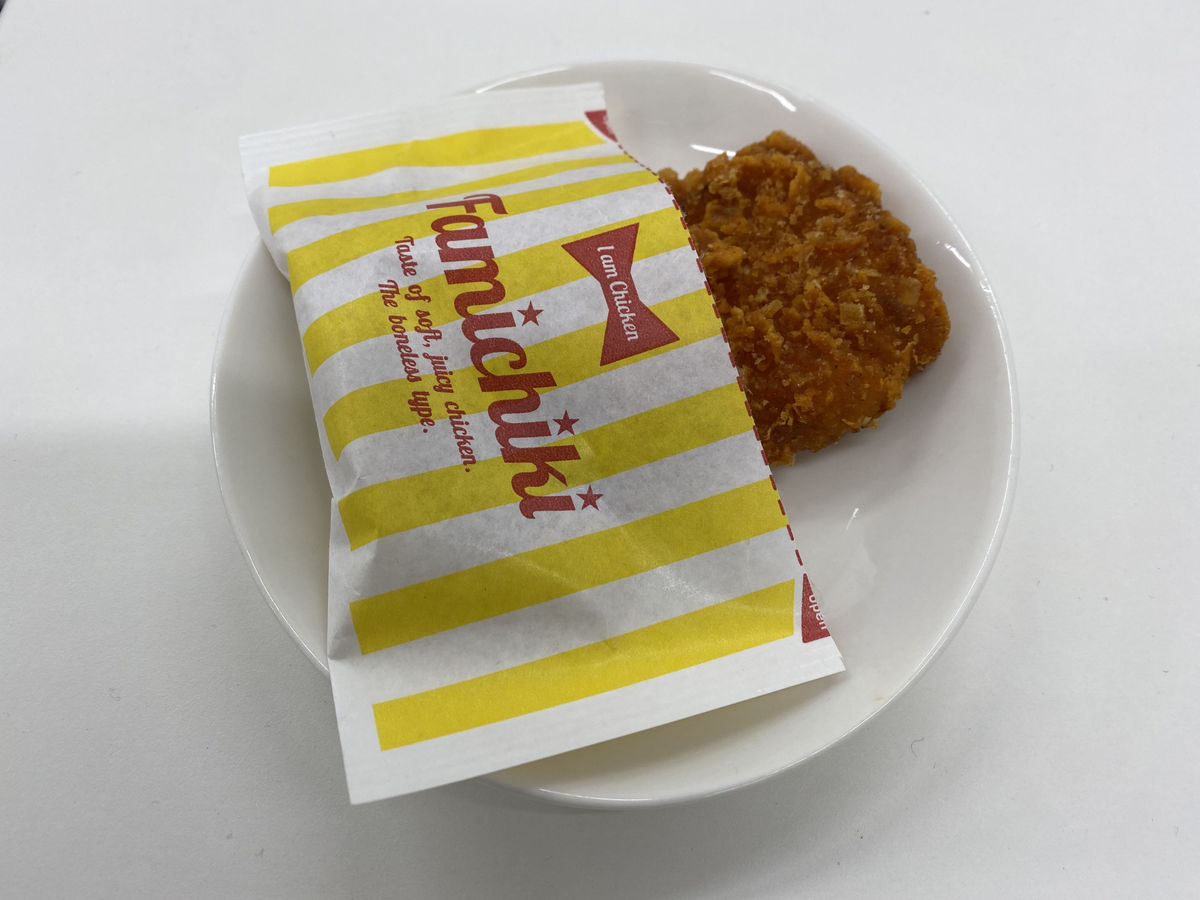
On the other hand, after adjusting only the white balance using Program Auto, I was able to take a beautiful picture of the Kentucky Fried Chicken '
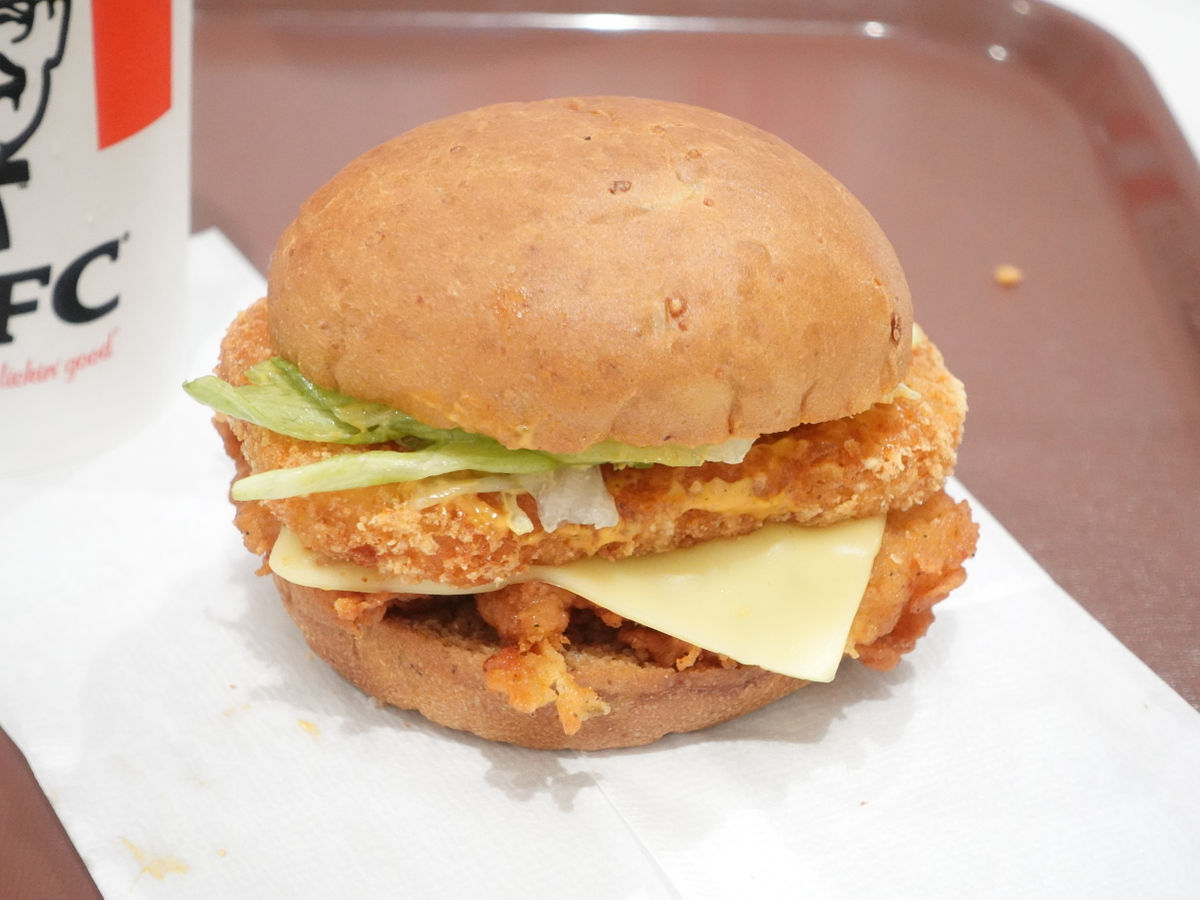
Below are the images taken under the same conditions using iPhone 11 Pro Max. After adjusting the white balance, you can see that the pictures taken with the VLOGCAM ZV-1 look pretty good.

Although it is such an 'auto-auto', you can take beautiful pictures outdoors.

All are unprocessed, but the colors are also vivid.
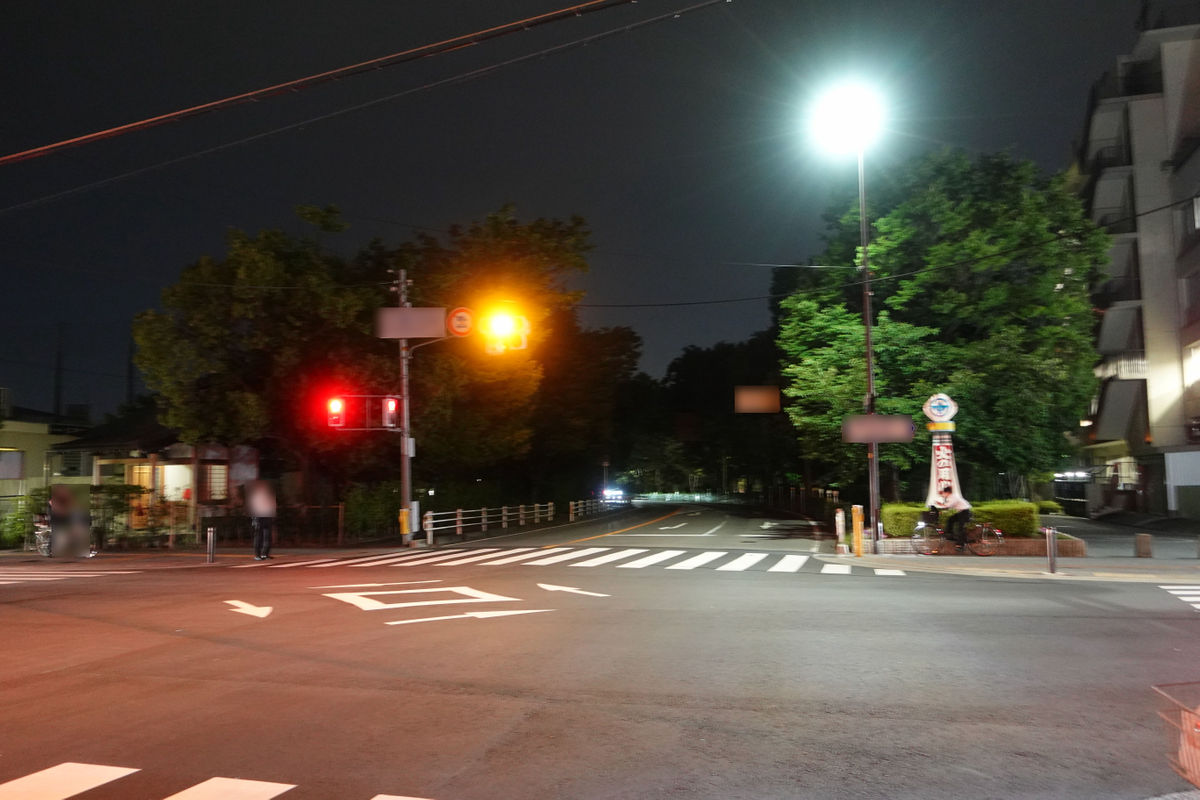
I took a picture of an intersection at night. The light source near the top right of the screen is a streetlight, not a signal, which is whitish to the eye.
In addition, VLOGCAM ZV-1 is equipped with a 'background blur' function that switches the F value with a single touch. The upper side is the photo taken with 'Background blur: Blurred' setting, where the maximum aperture value of F1.8 gives a good blur effect. Focus on the background with F5.6 fixed. The picture taken with 'Background blur: Clear' is on the lower side. If you compare it, you can see clearly that there is a difference in the way of blurring of '

Another feature is the whitening filter that makes your skin look white and beautiful. In the images below, the upper side is before using the whitening filter and the lower side is after using. By comparison, you can see that the skin has become slightly whiter. The above 'background blur' and 'whitening filter' can also be applied to movies.

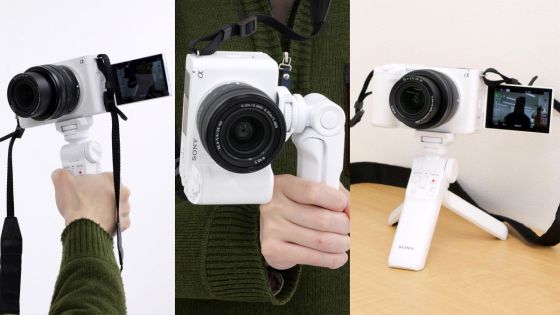
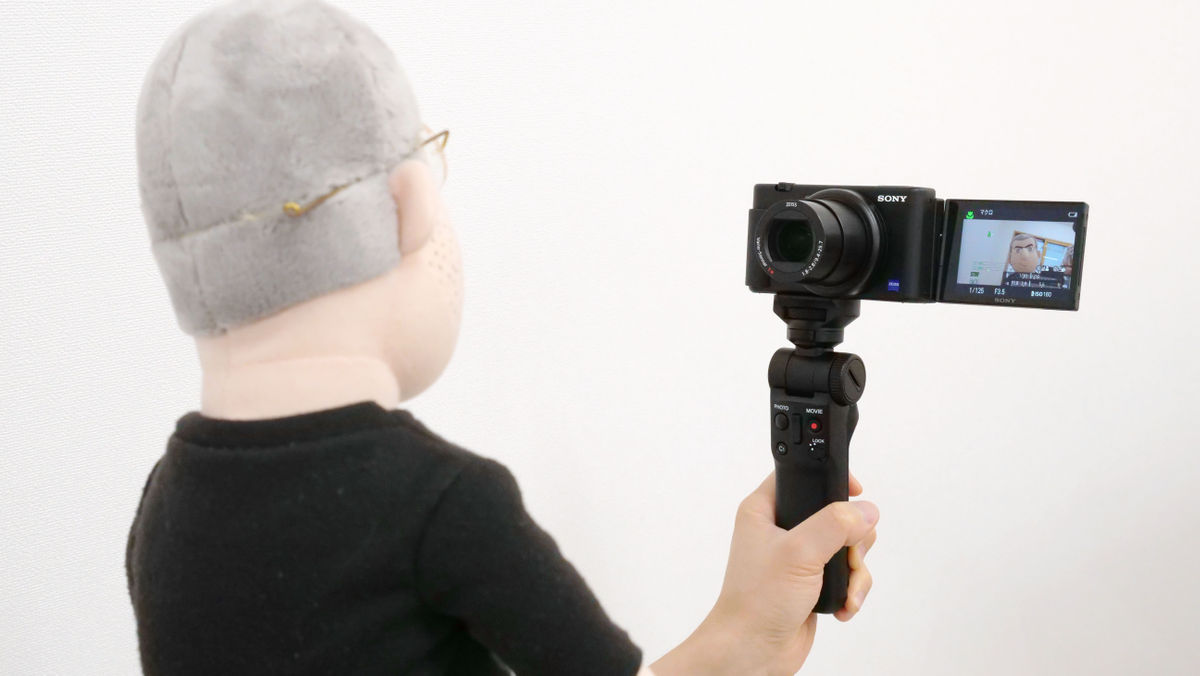
This time I will shoot a movie. This time, I will attach the accessory 'shooting grip kit' that improves the ease of holding and operation.
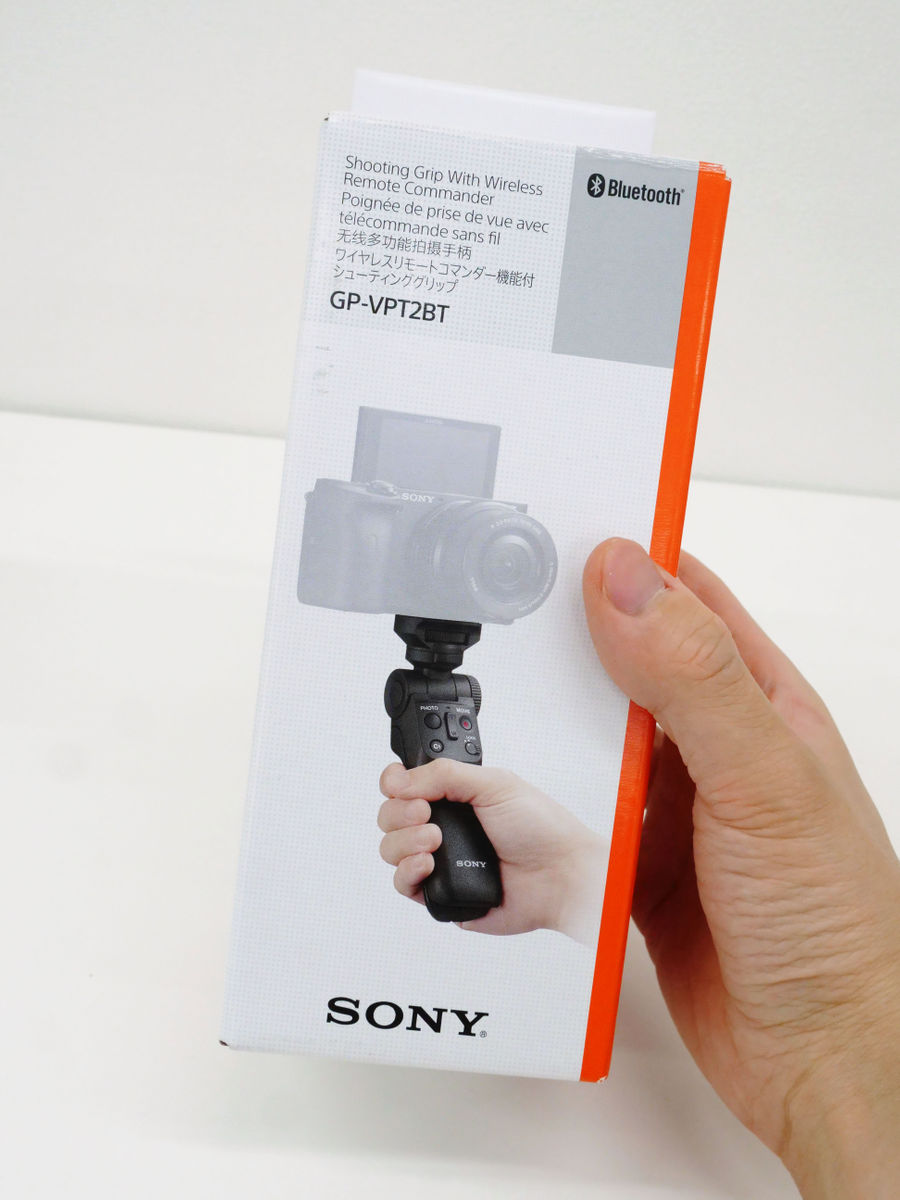
Inside the box is a shooting grip kit body, a lithium button battery, a carrying pouch, and a set of instructions.
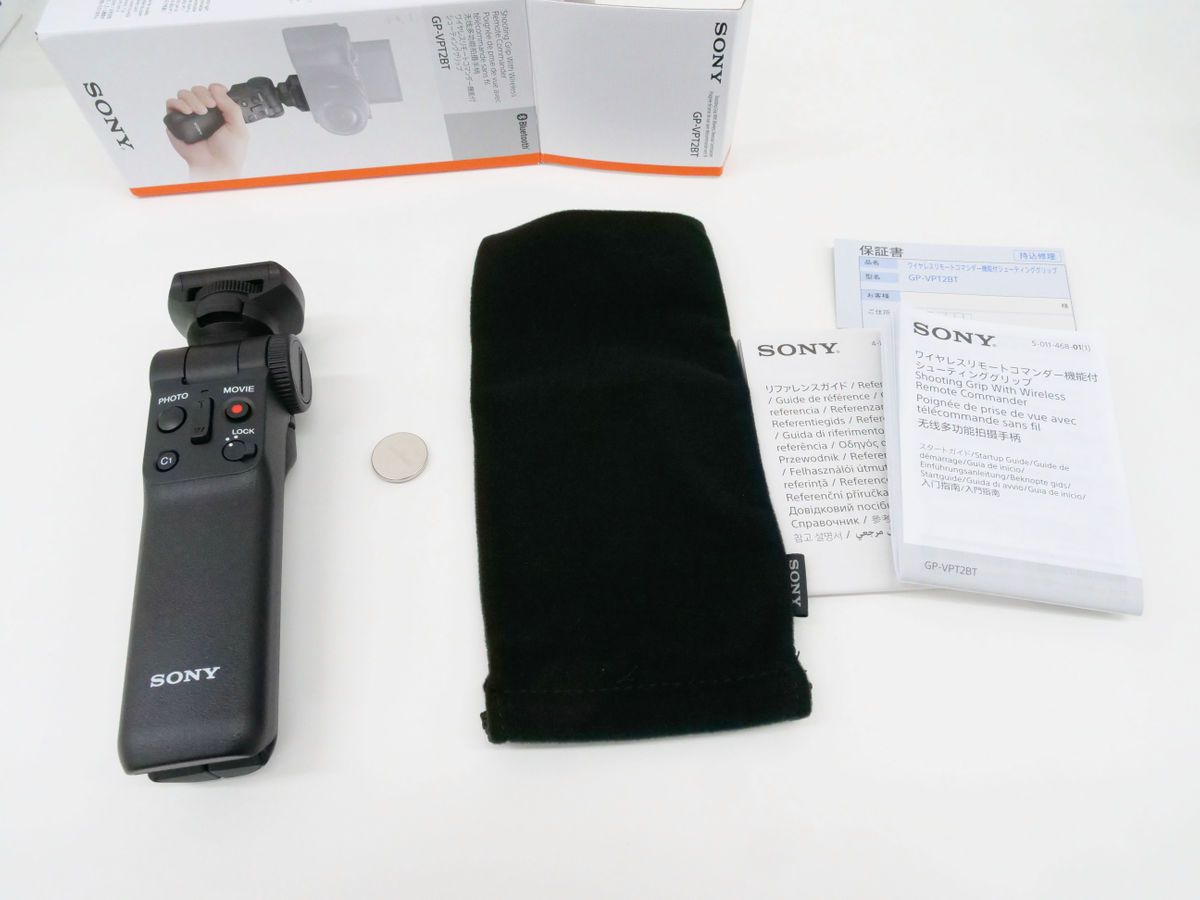
This is the shooting grip kit. It is an accessory that can be connected to the main unit and used like a tripod, but you can also operate some parts such as shutter button and shooting button with Bluetooth connection.

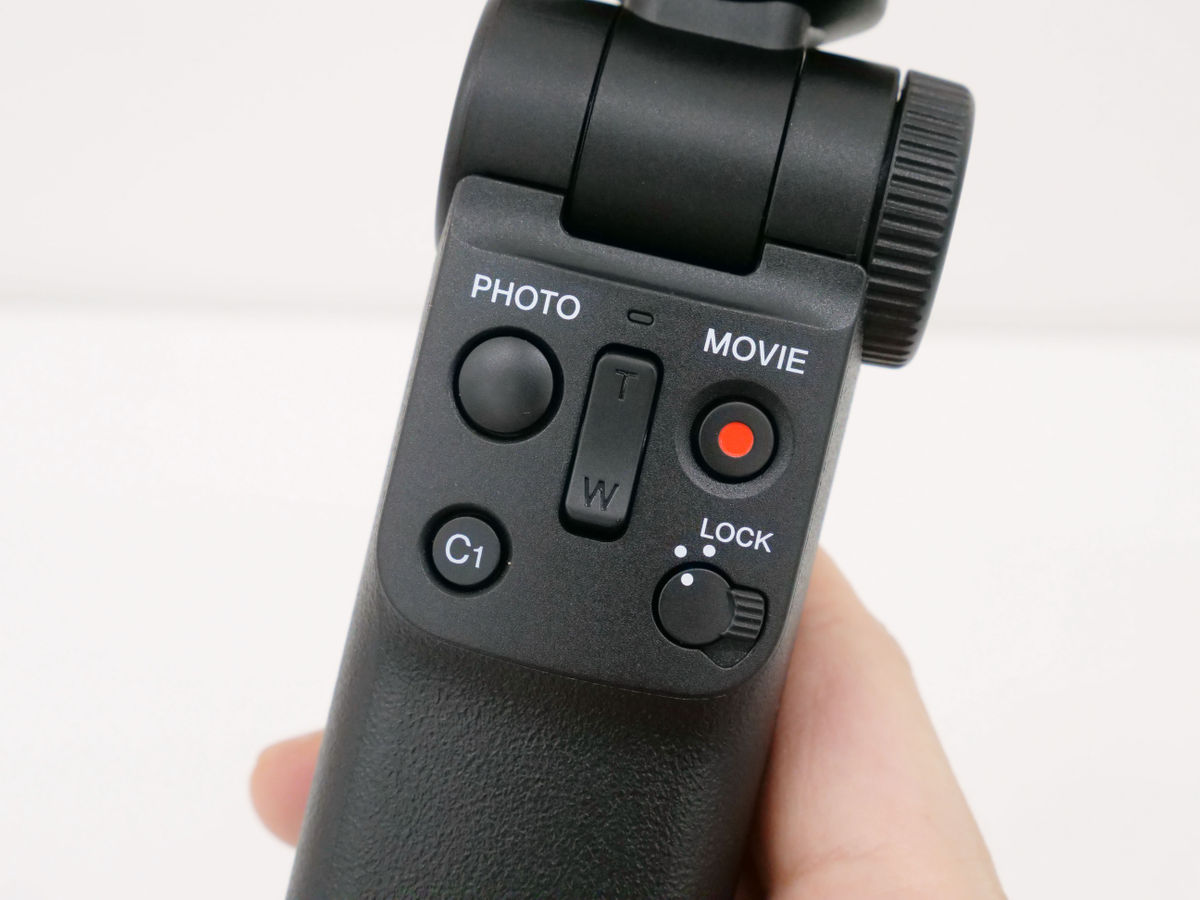
There are operation buttons on the front of the main unit.
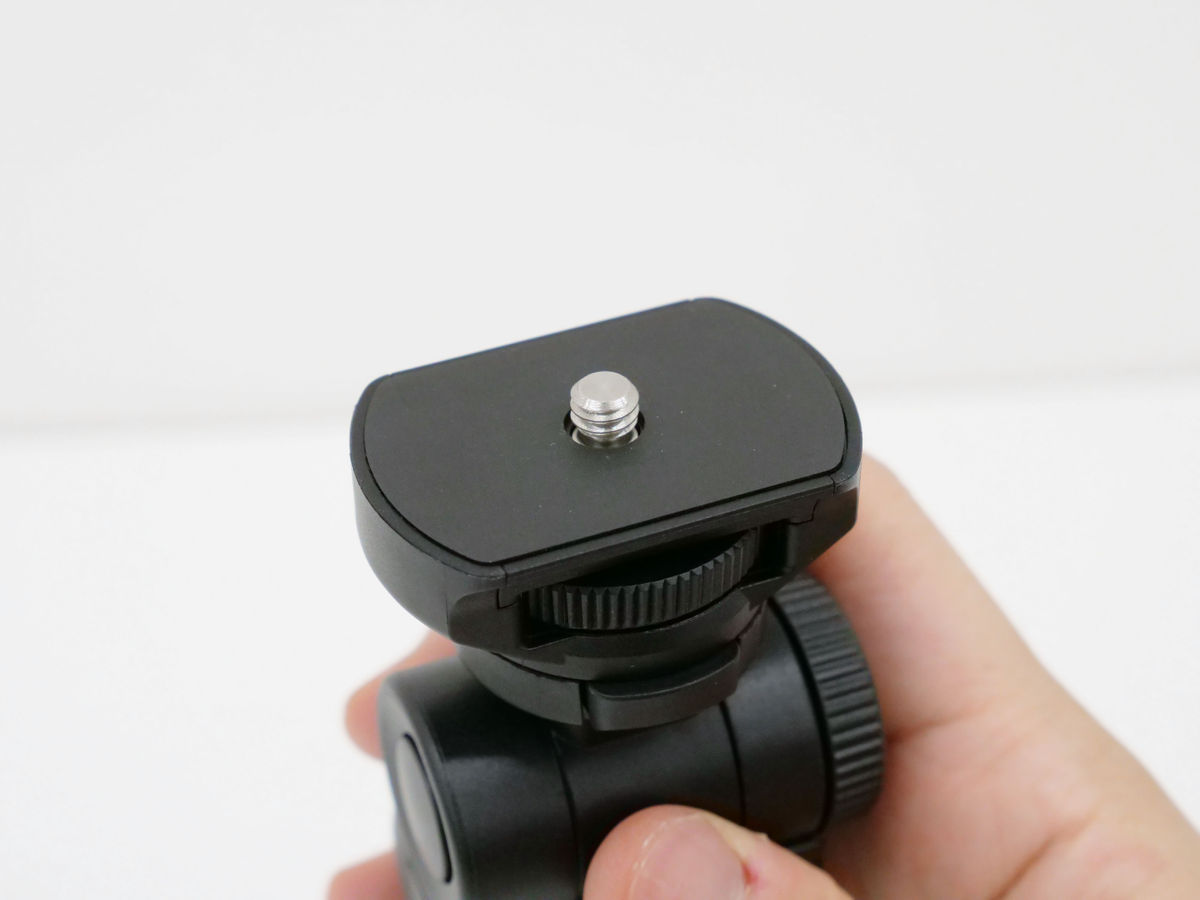
The upper part is a camera screw for connecting to the camera.
The legs open open and can stand on their own like a tripod.
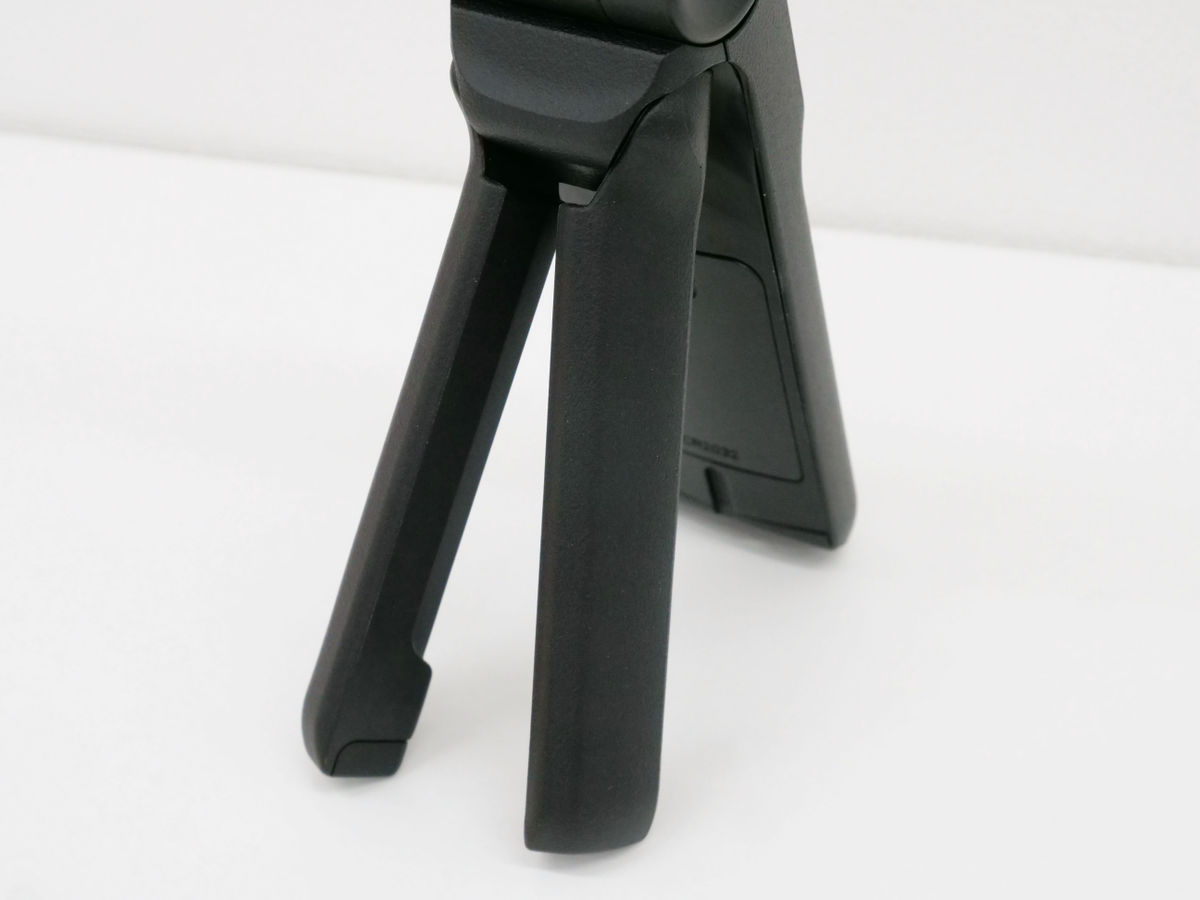
The range of motion is up to 90 degrees.
There is a battery slot on the back side of the bottom of the main unit.
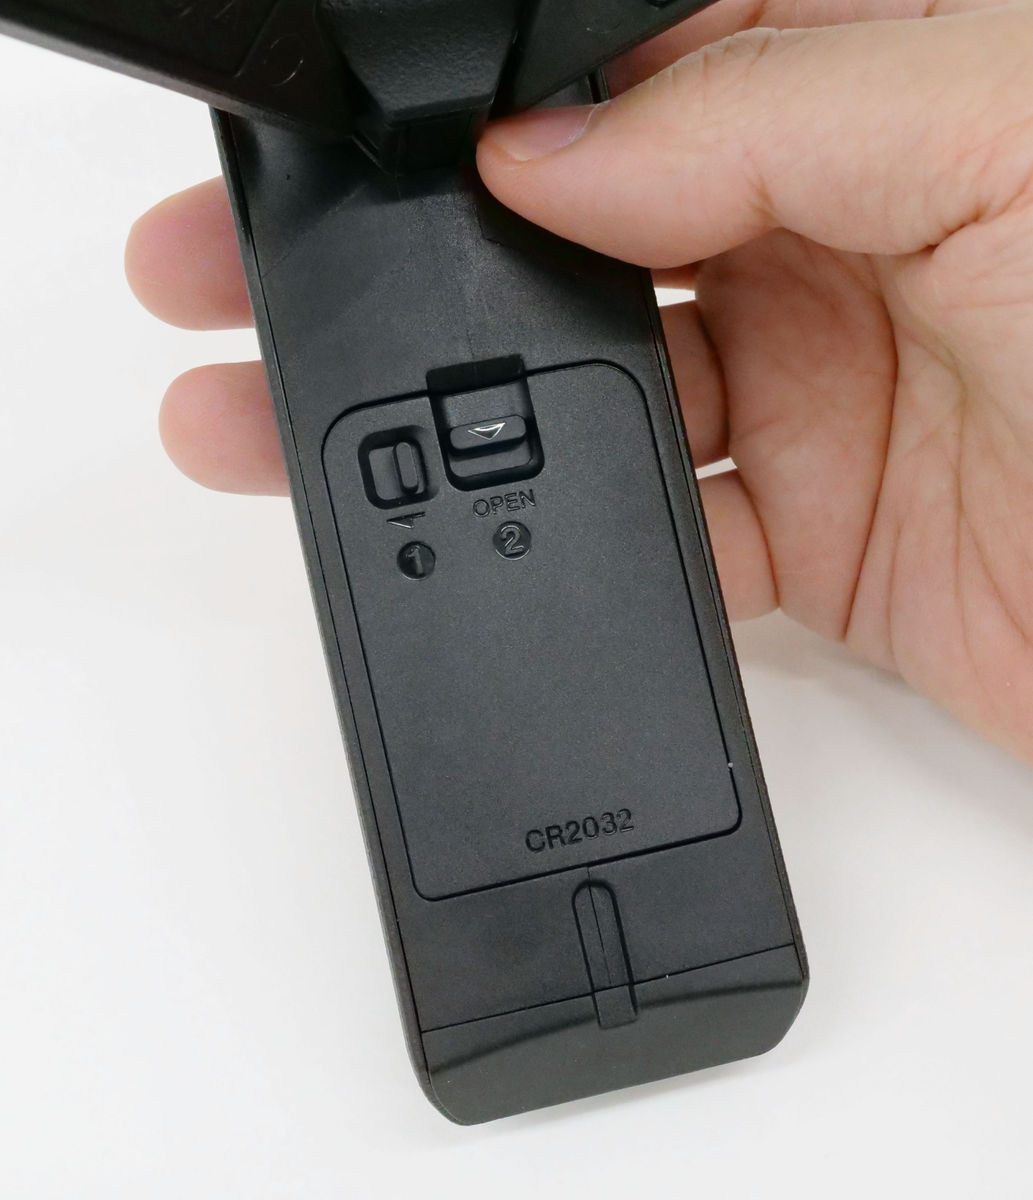
Let's use it. Remove the battery cover, insert the included lithium button battery, and close the cover.

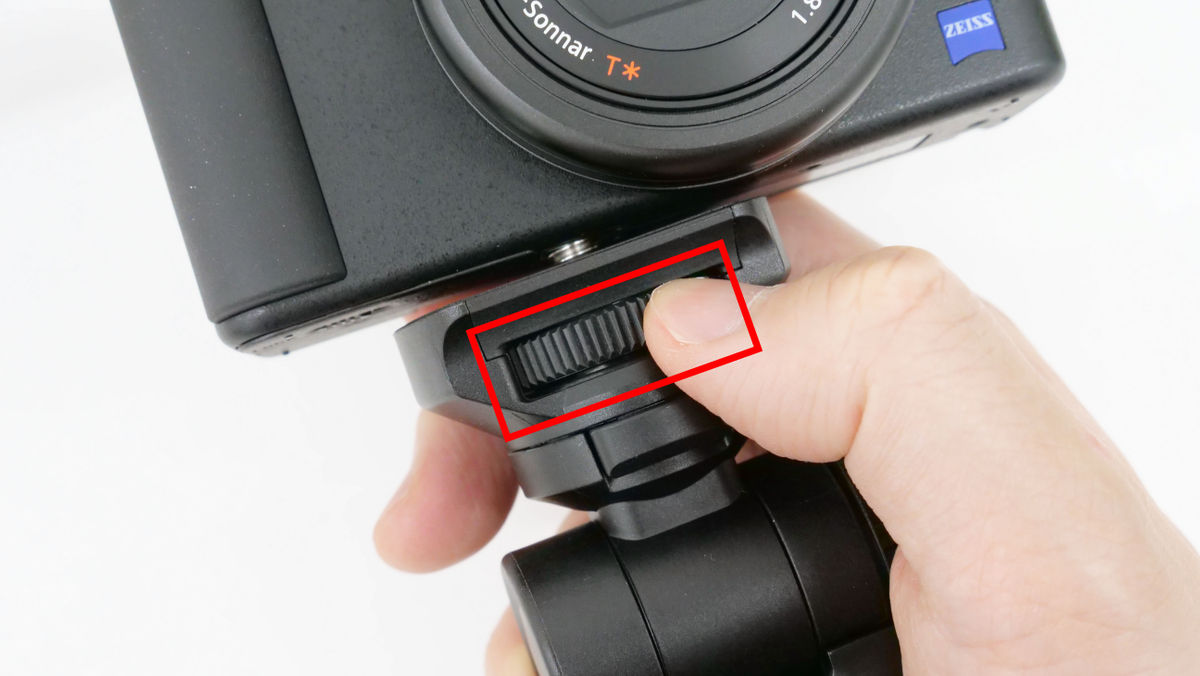
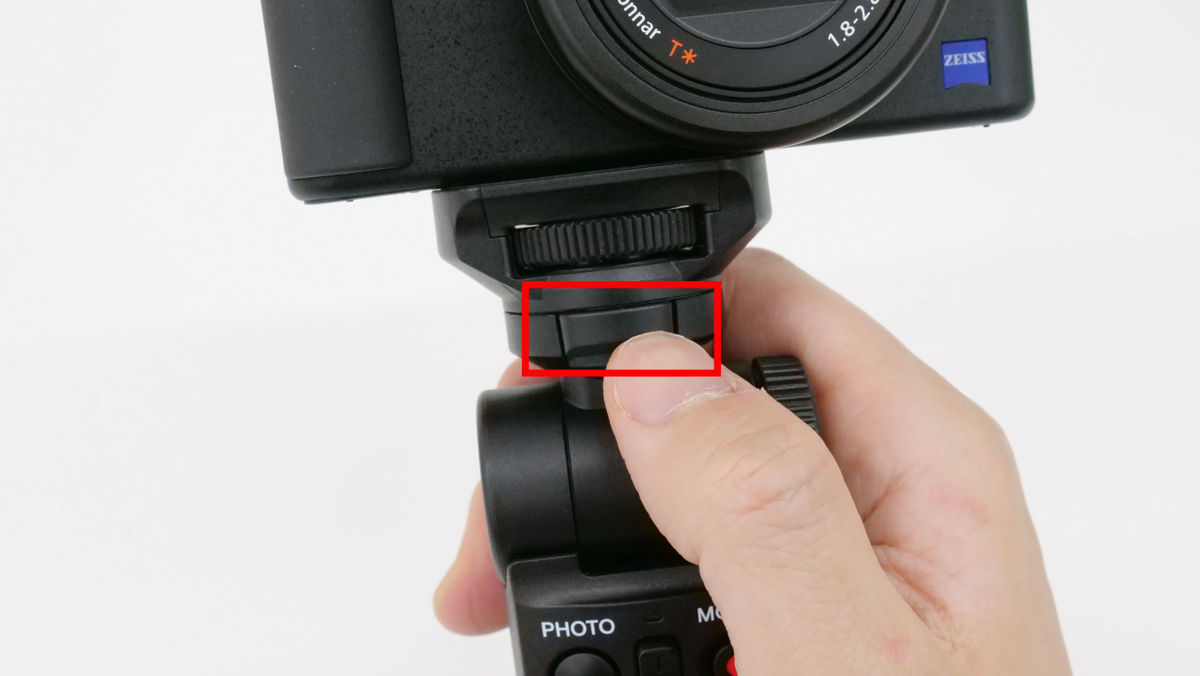
Connect the main body to the camera screw……
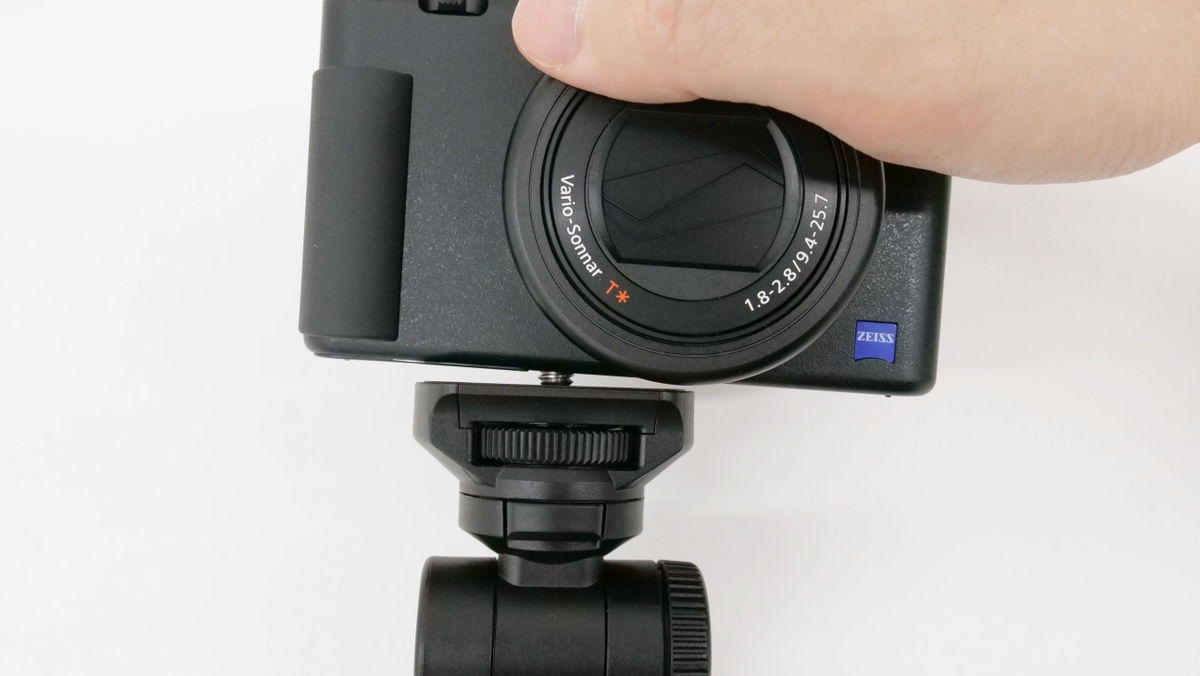
Turn the camera knob all the way around the red frame in the image, and the camera screw will tighten and the camera will be fixed.
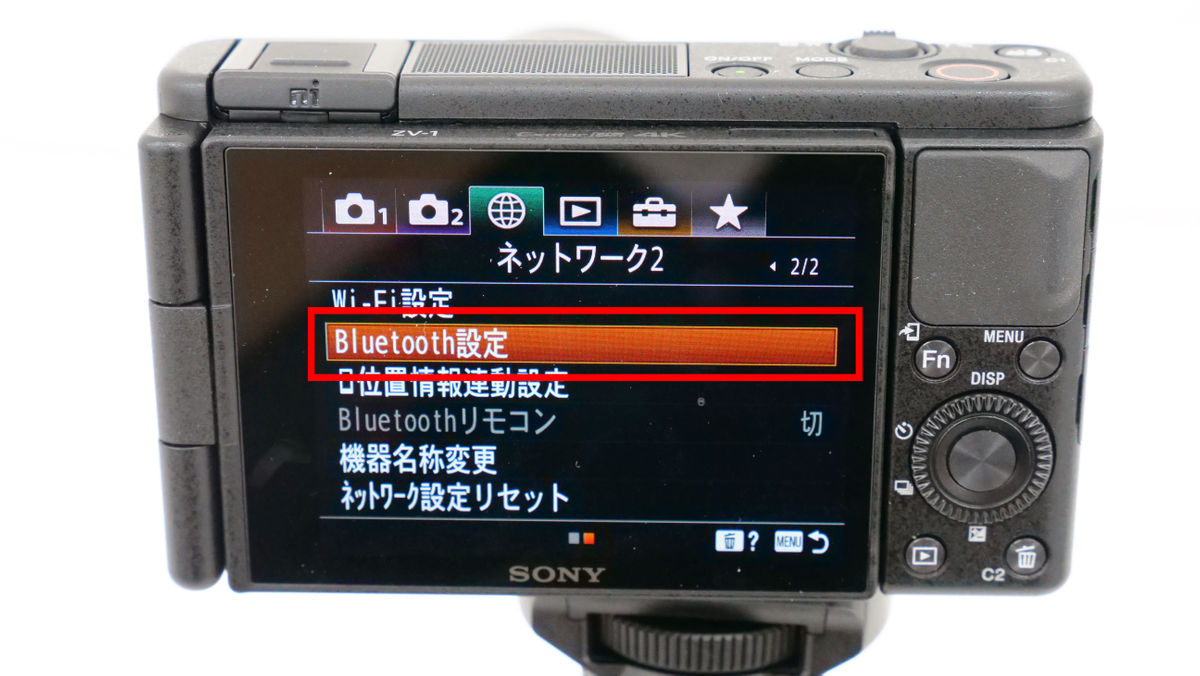
Next, connect the VLOGCAM ZV-1 and the shooting grip kit via Bluetooth. Press the MENU button on the VLOGCAM ZV-1 to open the setting screen and select 'Bluetooth setting' from 'Network 2'.
Select “Bluetooth function”……
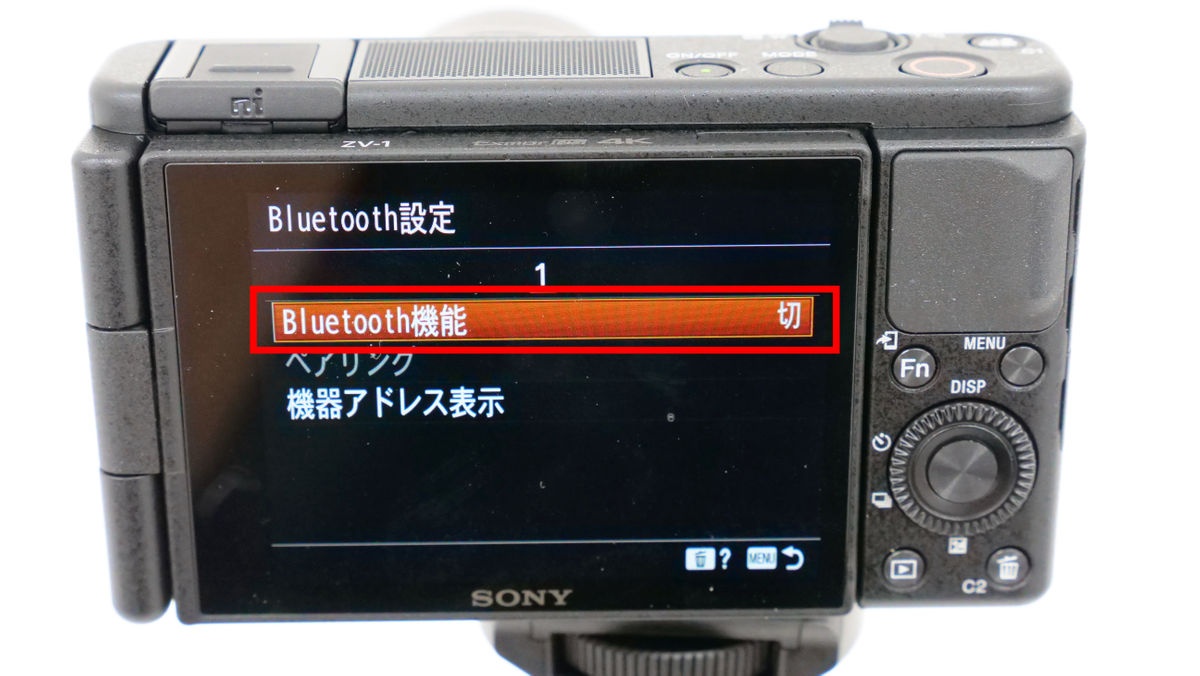
Select 'On'. The Bluetooth on the main unit is now on.

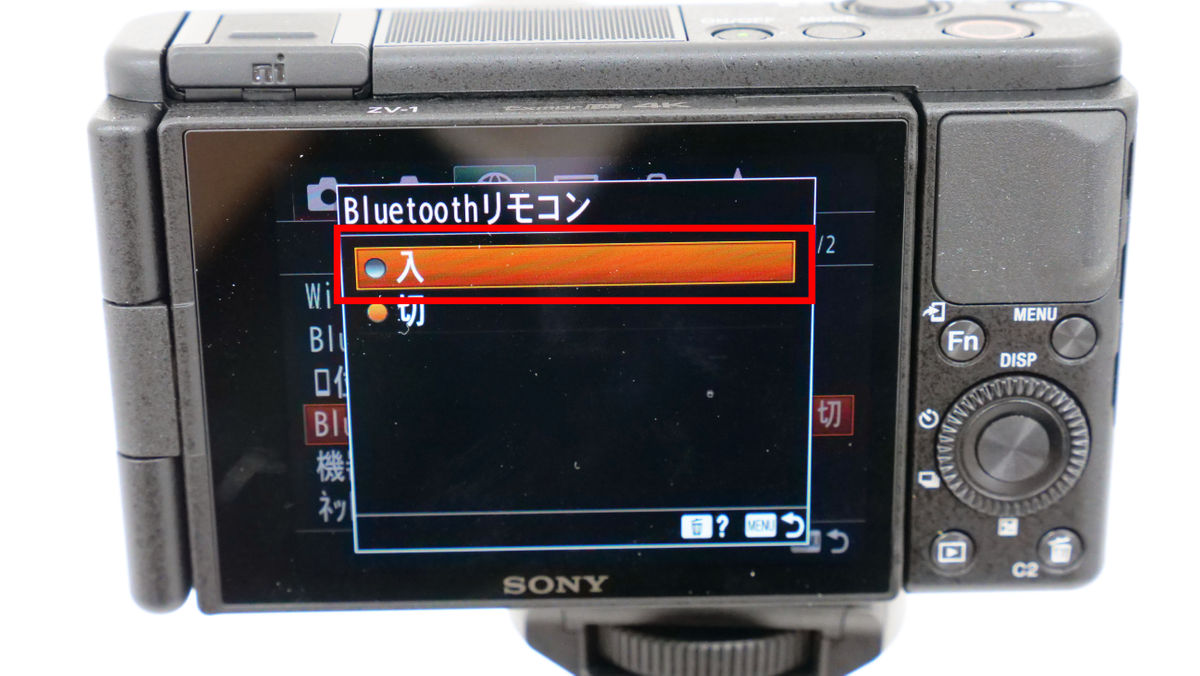
Next, pair with the shooting grip kit. Select 'Bluetooth remote control' from 'Network 2'.
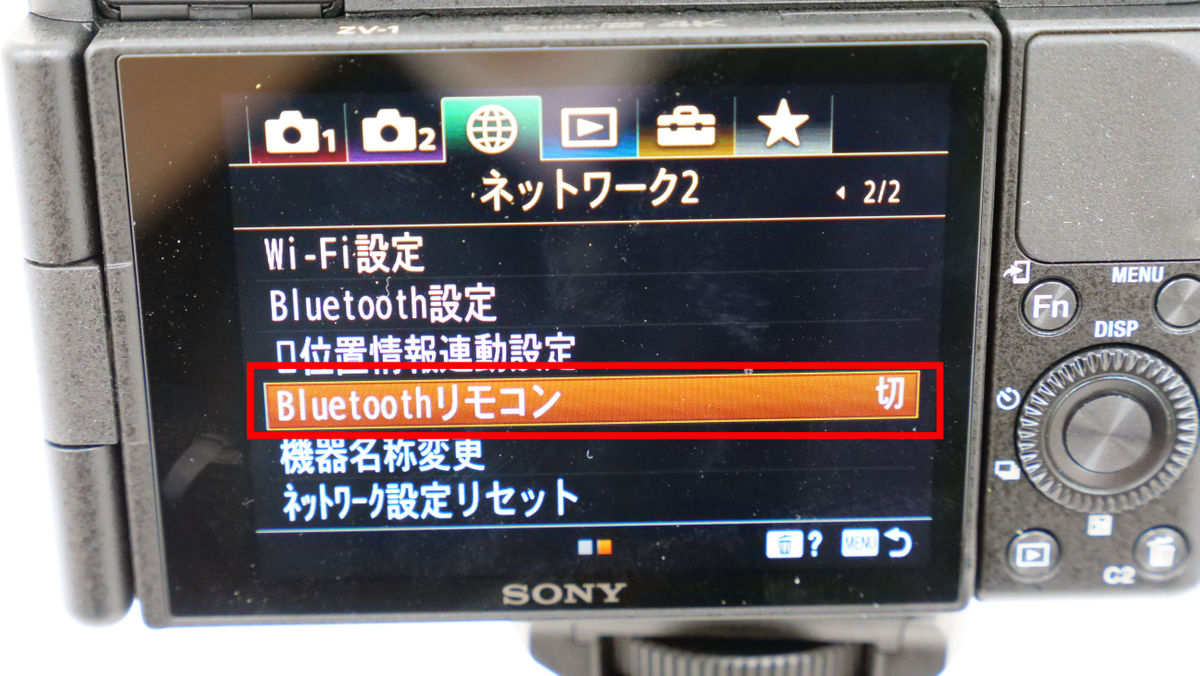
If you select “ON”……
The following message will appear prompting you to operate the connected device.
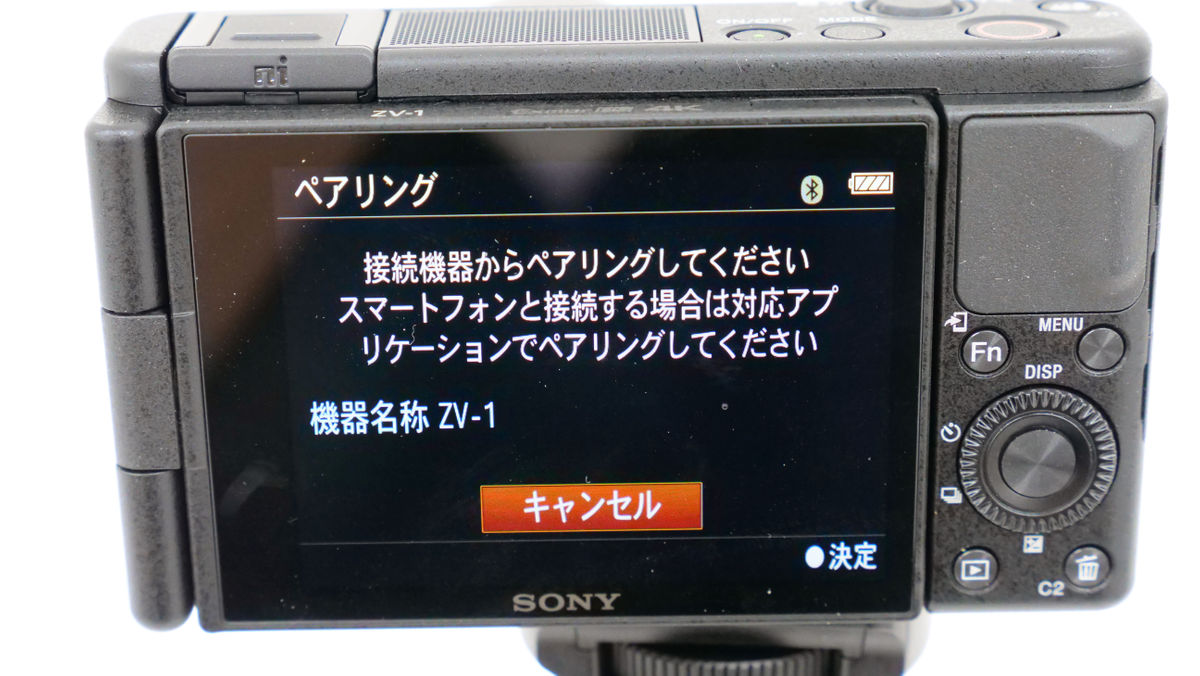
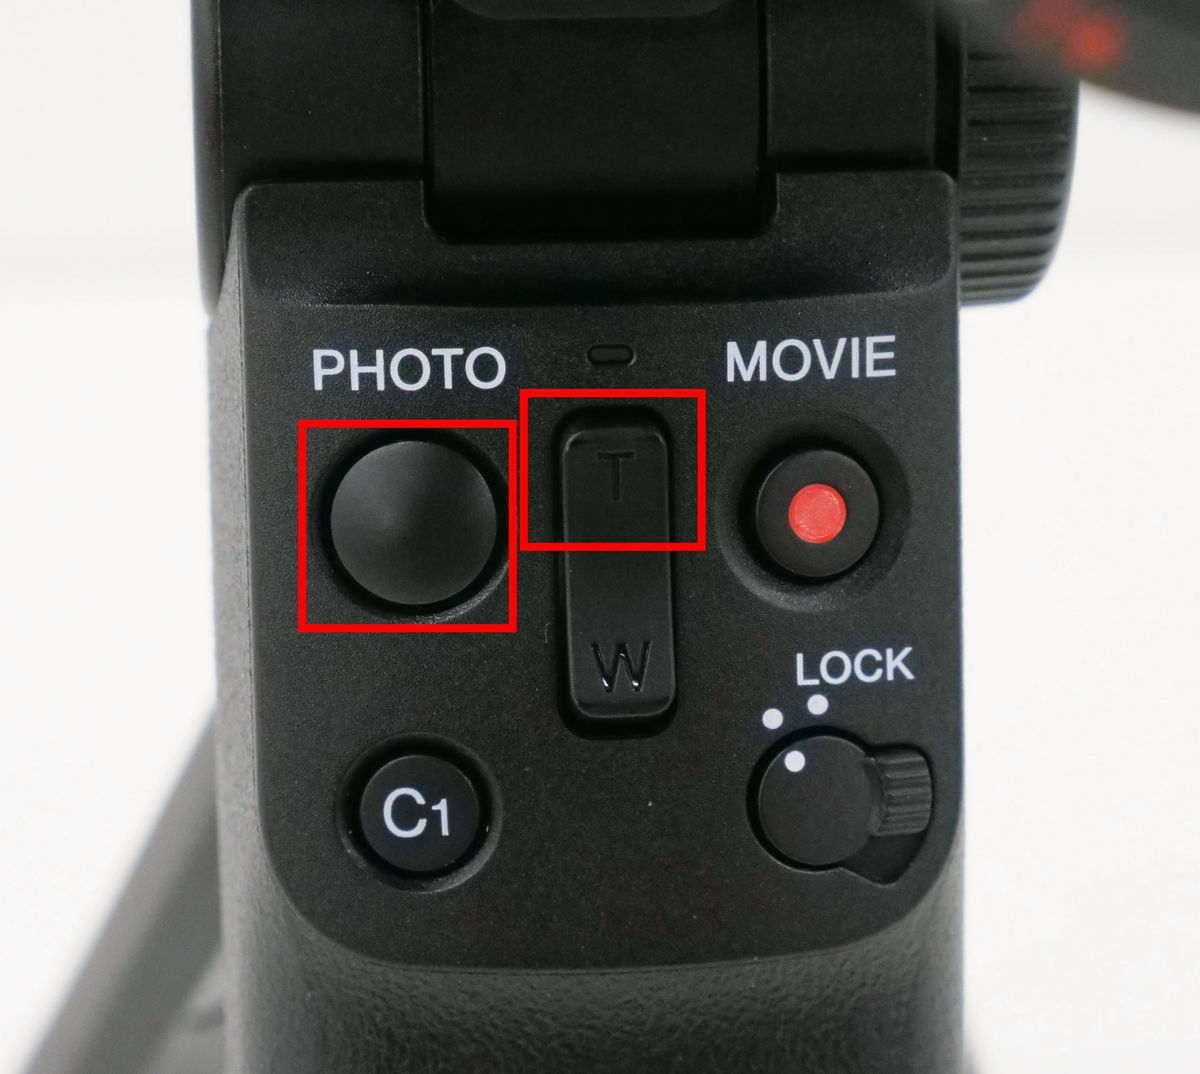
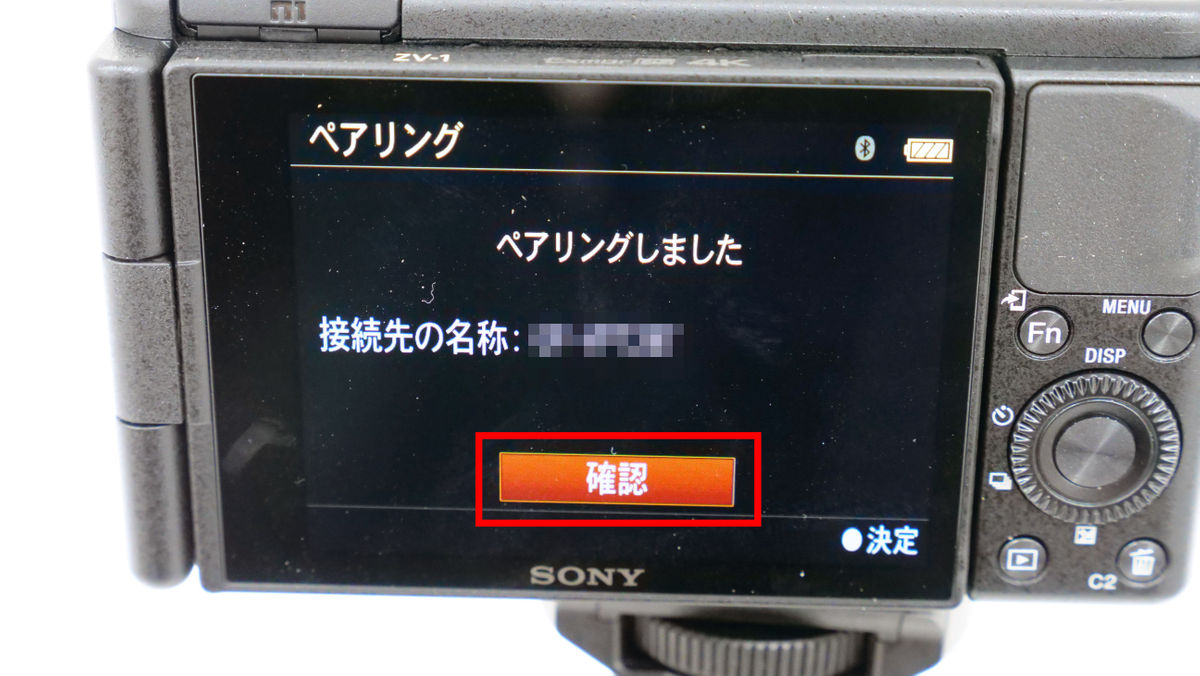
At this timing, simultaneously press and hold the PHOTO button and the upper button of the shooting grip kit for 7 seconds or longer.
Then VLOGCAM ZV-1 will display 'Are you sure you want to allow connection from this device?', so select 'Confirm'.
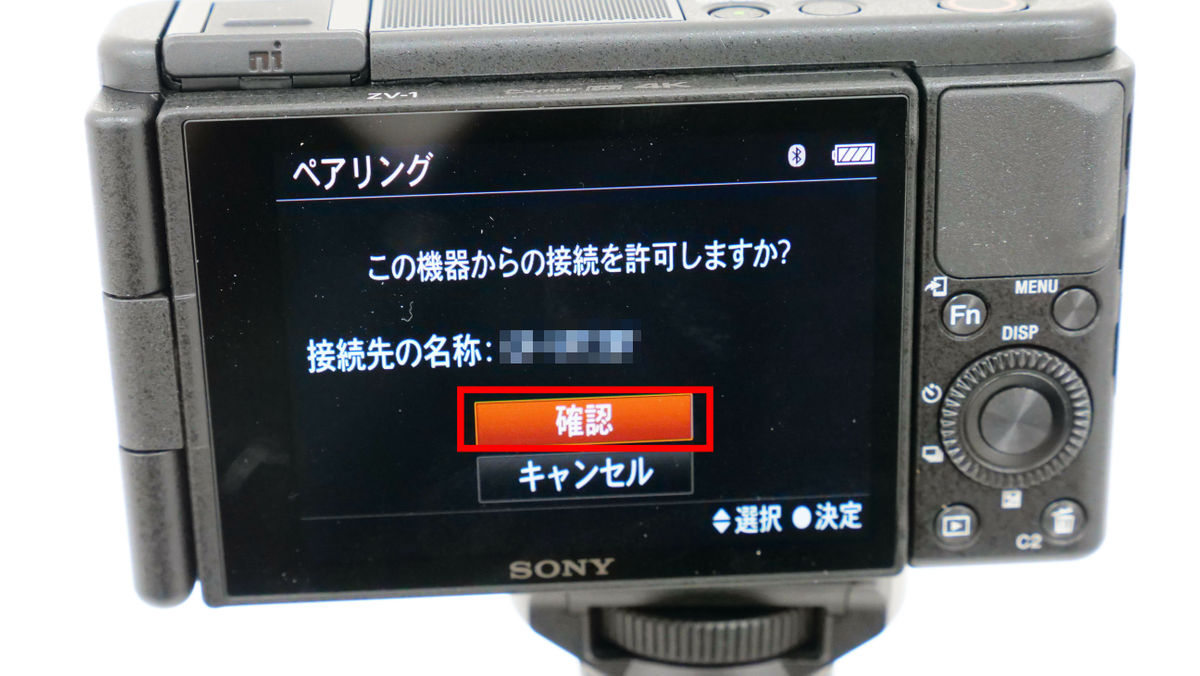
This completes pairing. Select 'Confirm' to complete the setting.
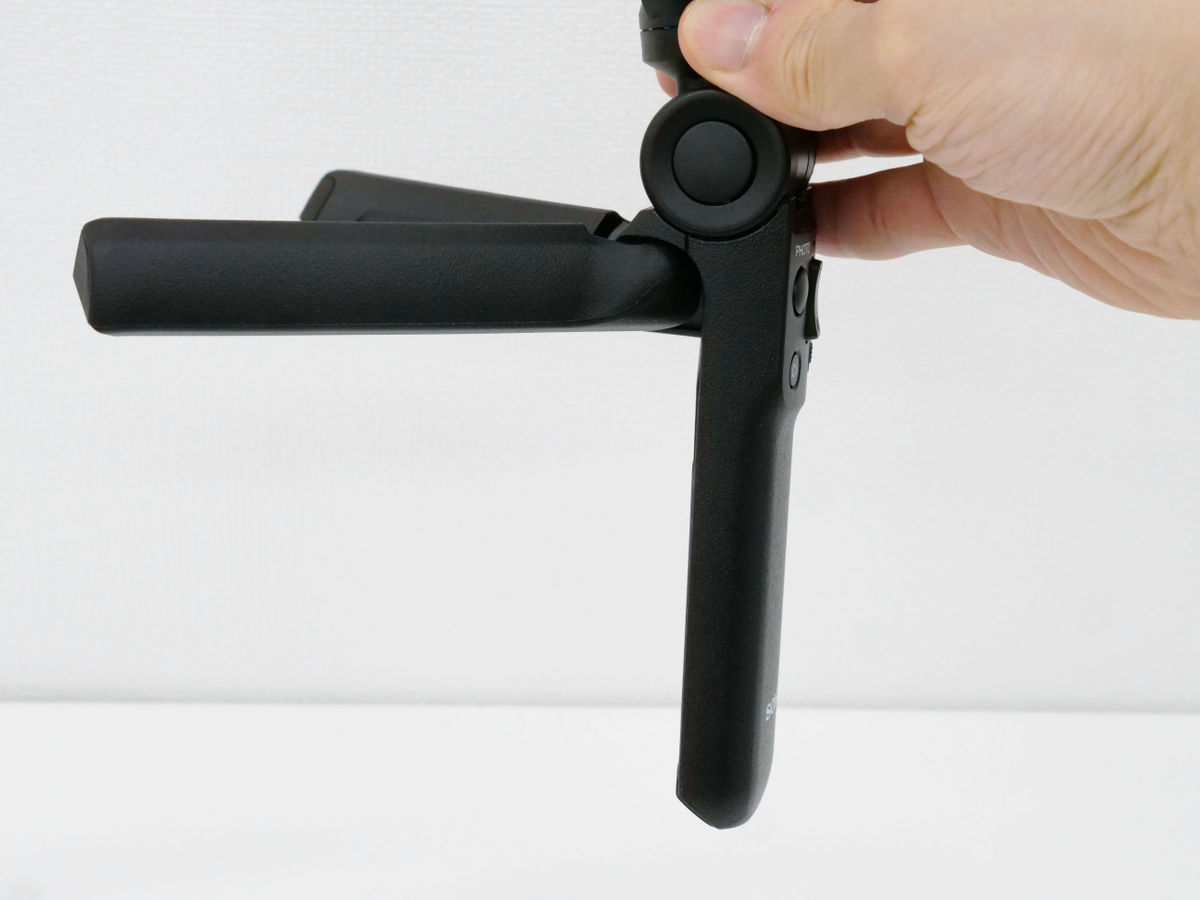
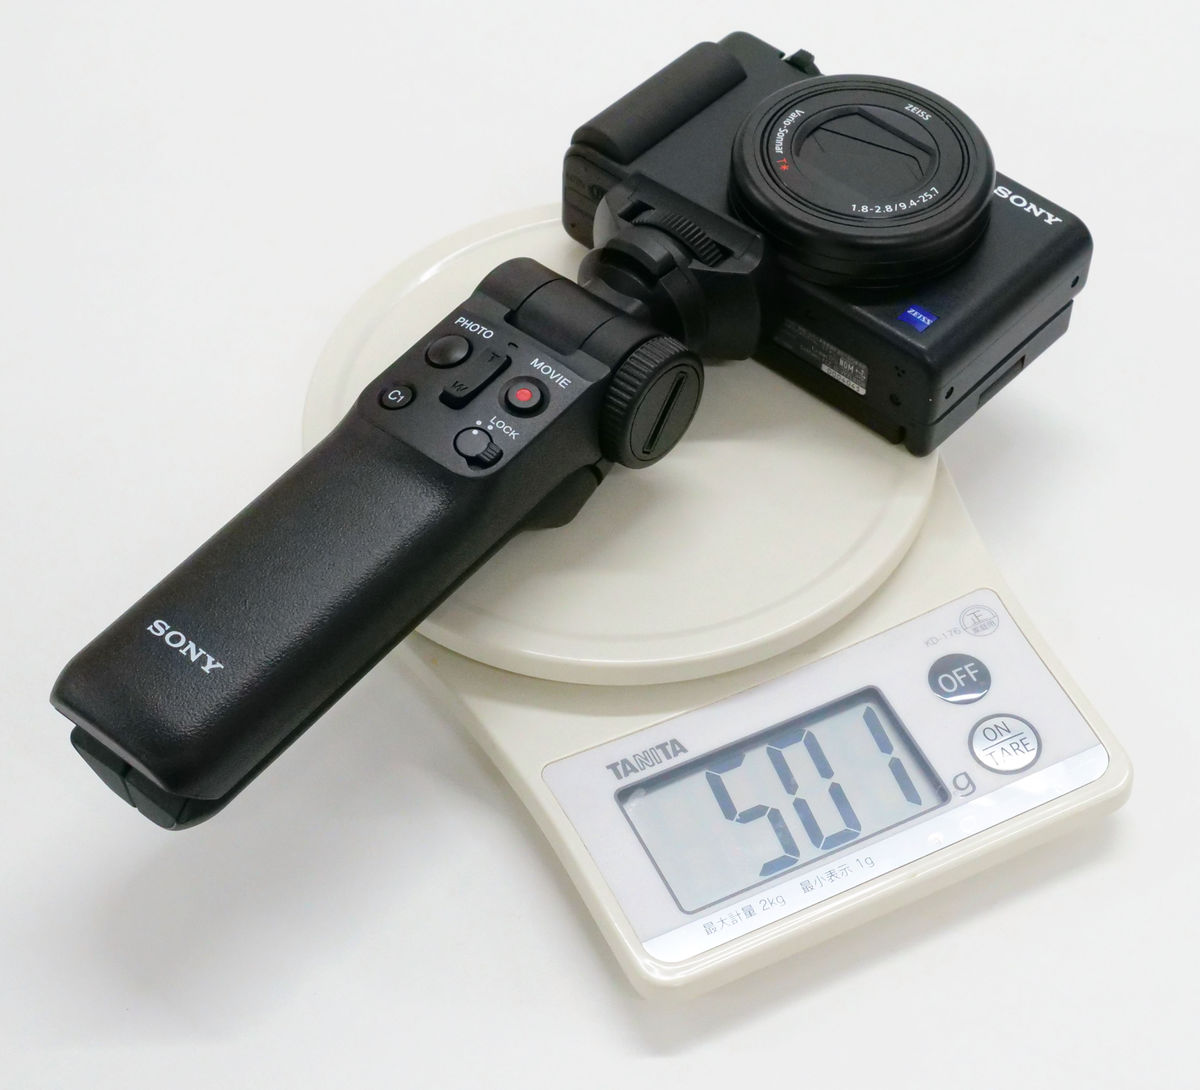
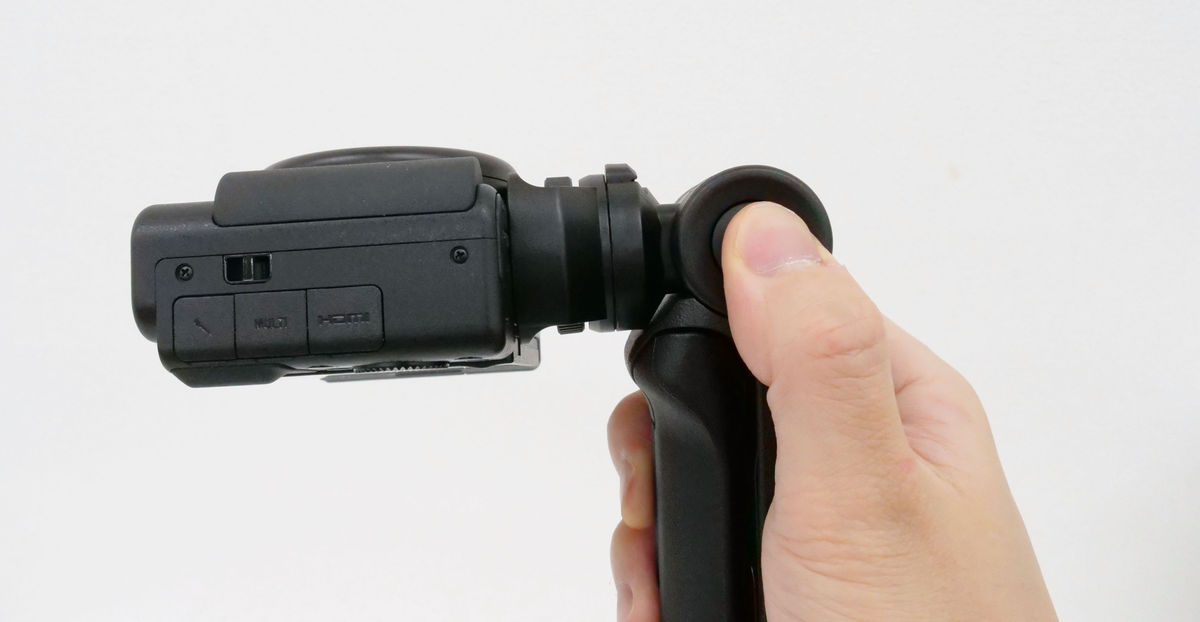
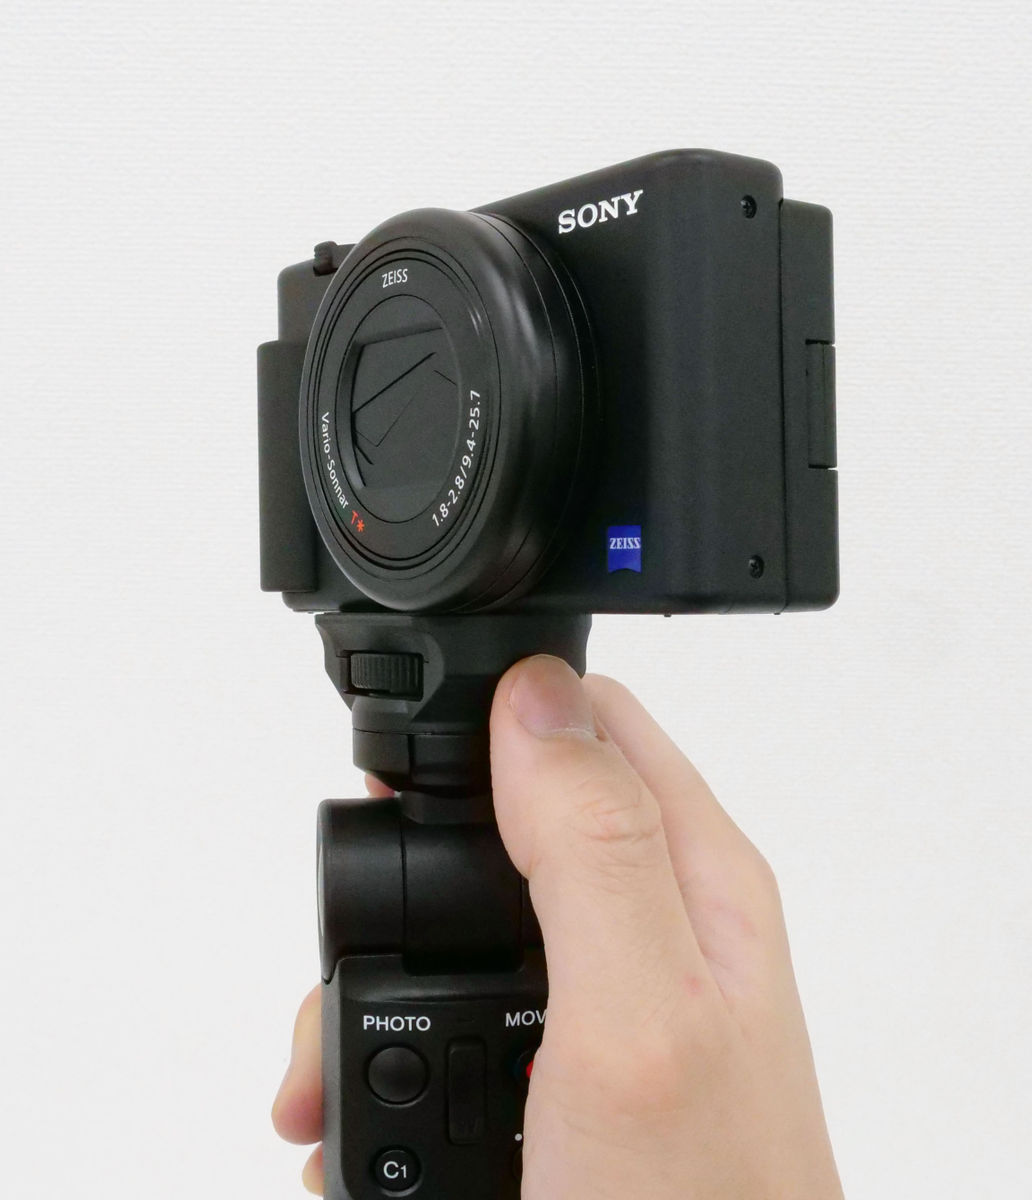
It actually looks like this when you hold it in your hand. Since it also becomes a tripod, it is thicker than the selfie stick and has a different usability. The shooting grip kit allows you to take photos, shoot movies, zoom in and out, and switch between 'blurred backgrounds'. These operations can be done with one touch. There is also a LOCK switch to prevent accidental operation.

The total weight of the fully equipped camera and grip is 501g. May be a little heavy to hold for a long time with one hand.
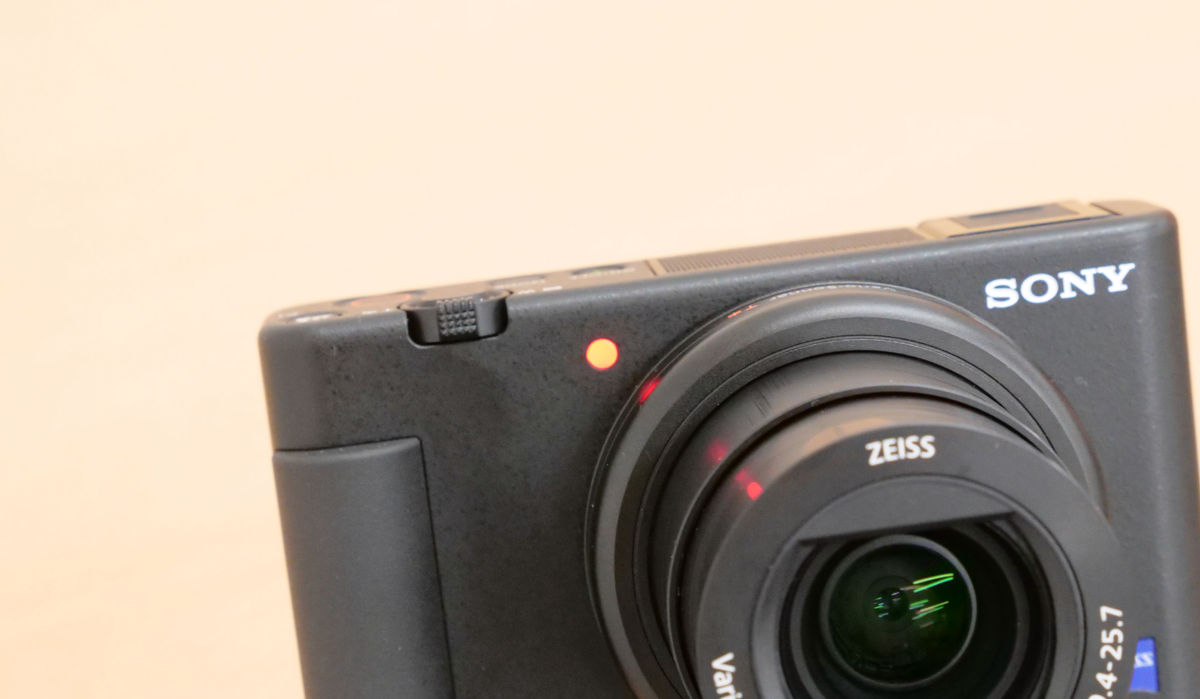
At the time of shooting, the light beside the lens turns red, so you can see at a glance from the front side that you are currently shooting.
You can also change the camera angle. If you push the angle adjustment button on the side of the main unit ...
You can lock the camera by tilting it vertically.
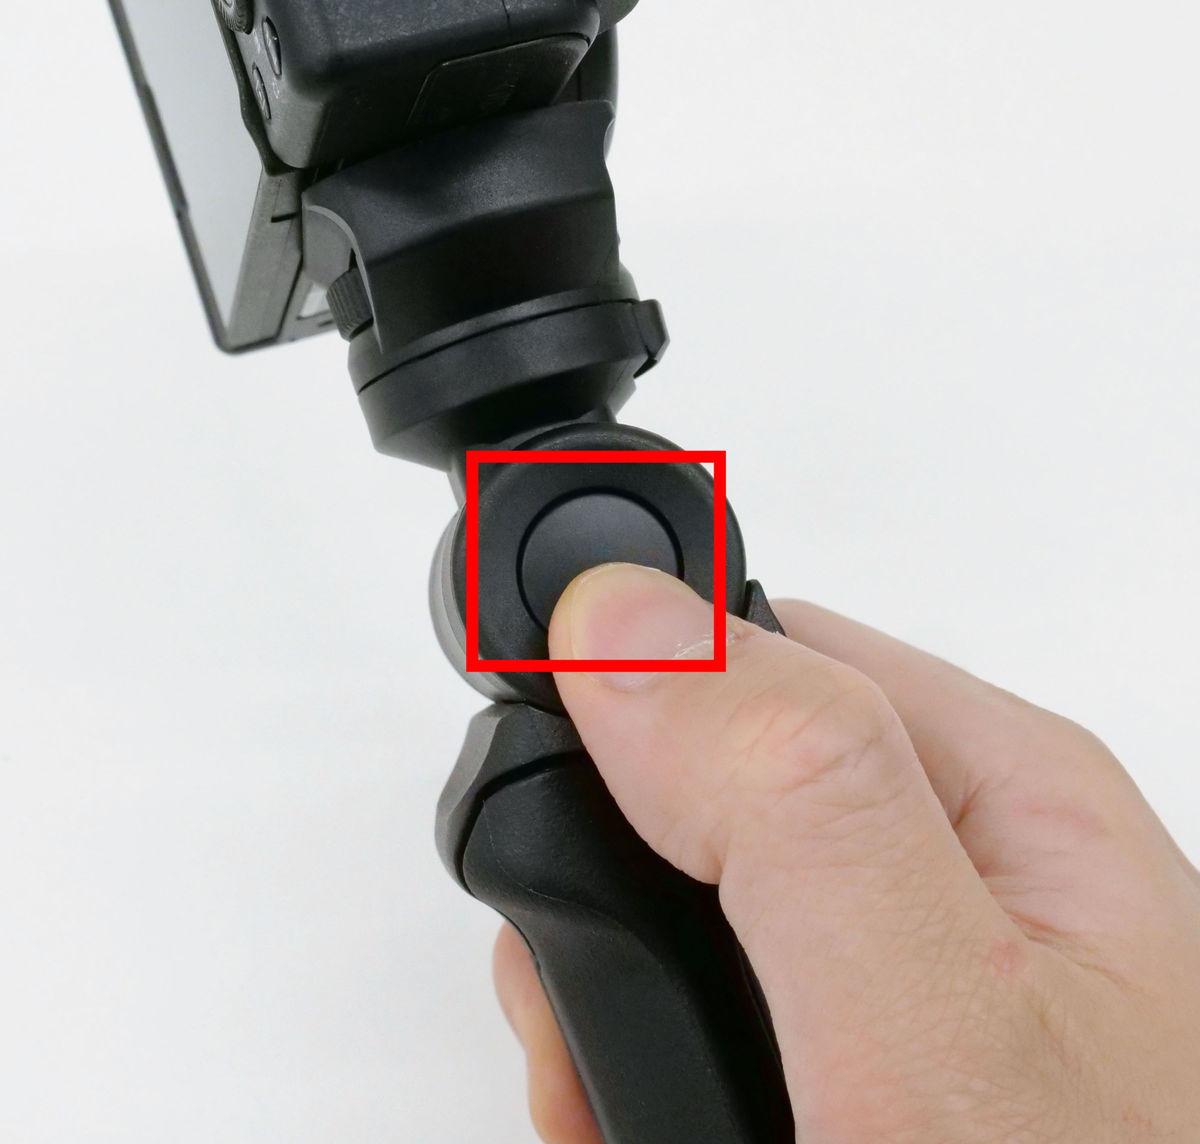
If you press the rotation button in the red frame below...
You can rotate the camera horizontally.
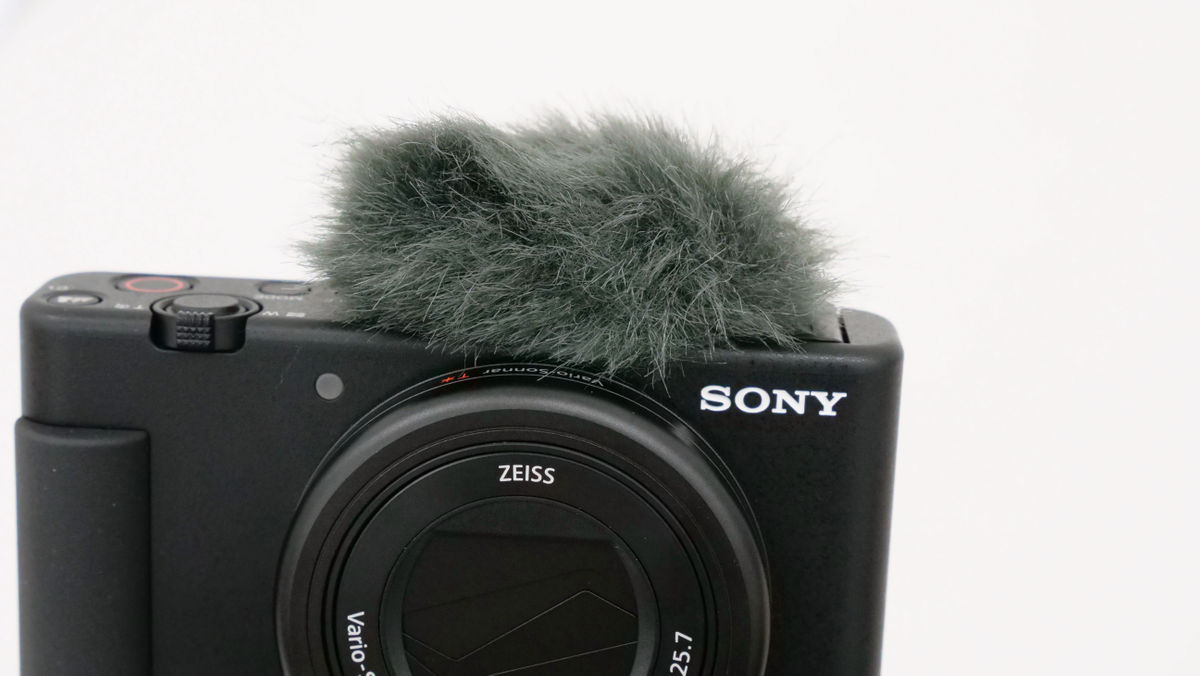
Also, when shooting in a windy environment, you can install a windscreen that makes it hard for wind noise to be heard.
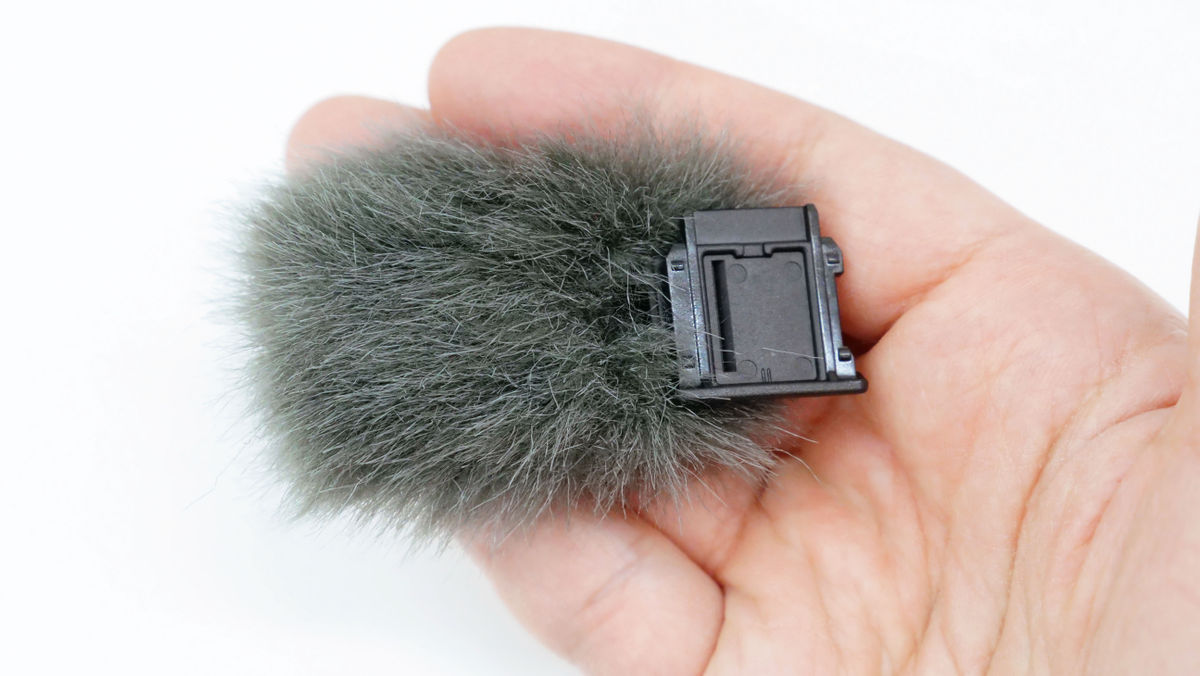
Remove the lid of the multi-interface shoe on the top of the main unit……

Install the windscreen.

In this state, it is possible to prevent wind noise from entering.
All the shooting was done with 'Omakase Auto'. It's hard to see when I'm swaying when I'm looking at the monitor while walking, but the shooting grip doesn't have a mechanism to stabilize the camera like a
Actually using ``VLOG CAM ZV-1'' outdoors-YouTube
Also, I will try using one of the features, 'Product Review Settings'. This function is to focus the camera well when reviewing a product. In the movie below, you can clearly see the difference between turning it on and turning it off.
I compared the product review comparison setting function of ``VLOG CAM ZV-1''-YouTube
If you bring something closer to the camera, 'This product is being reviewed this time,' the focus adjustment will not work if the product review setting is off.
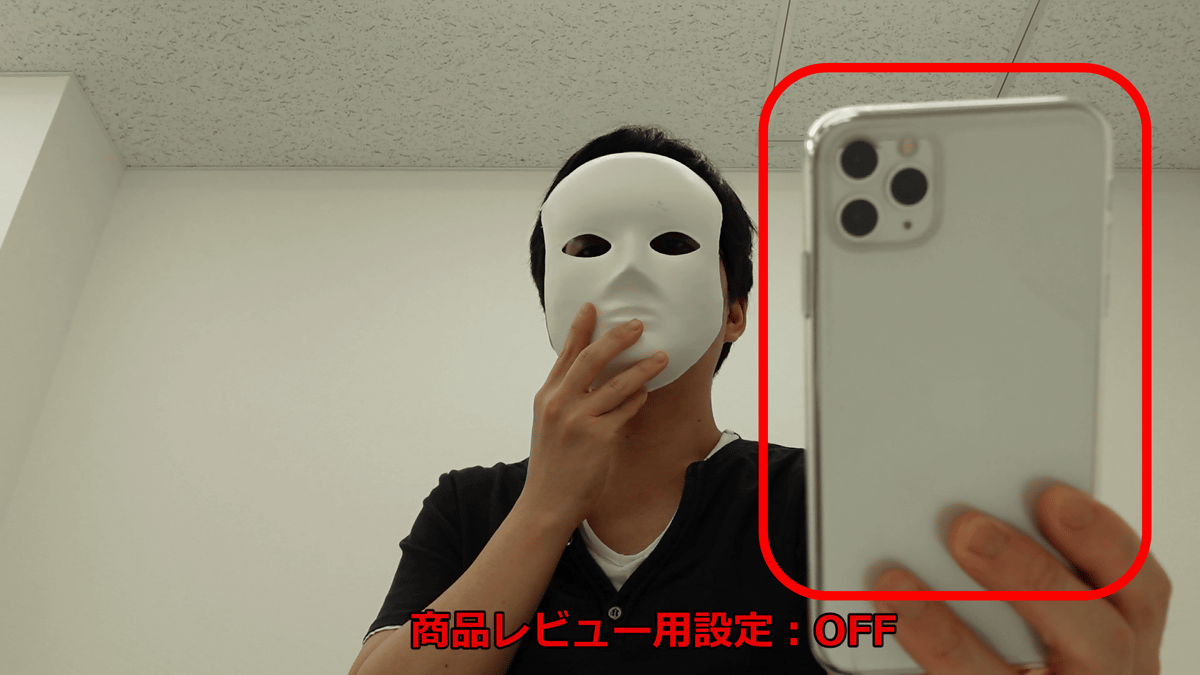
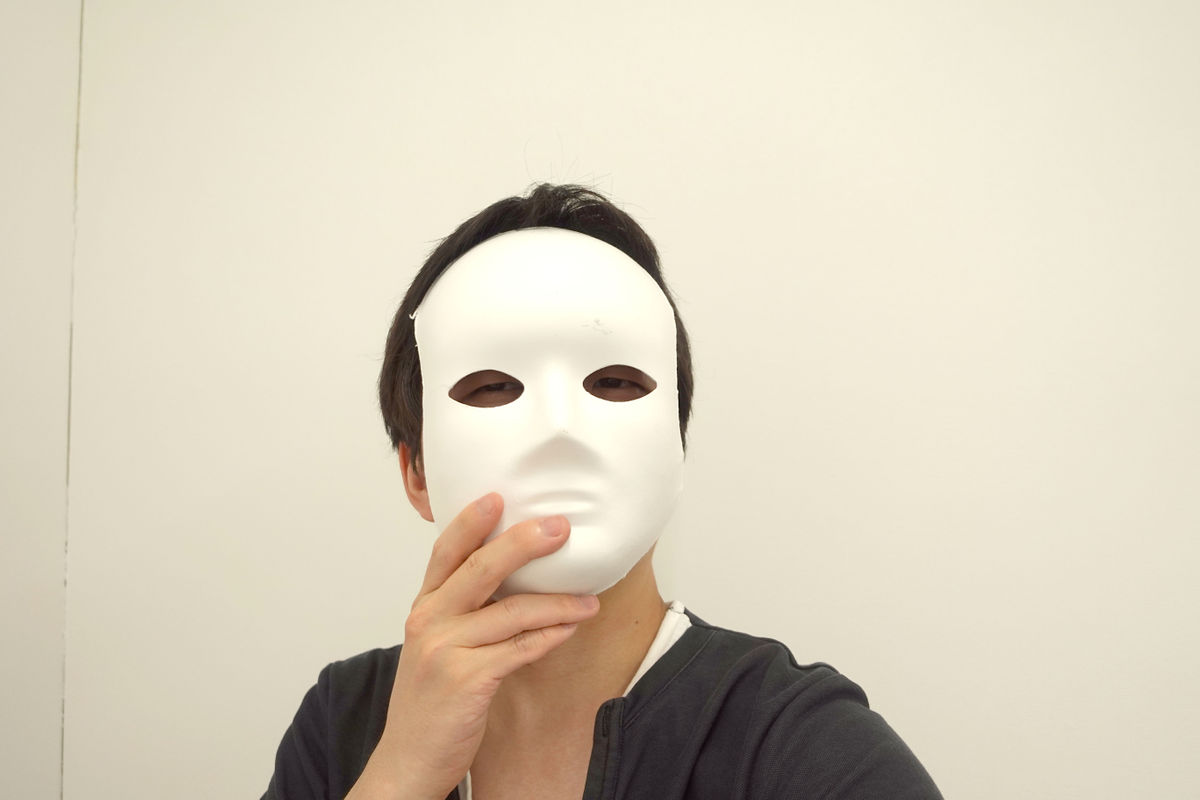
This is because VLOGCAM ZV-1 recognizes human eyes and keeps focusing on the face. Focusing technology by eye recognition is convenient, but in such situations, you pull your foot. Even if you cover your face with a mask, it will be recognized as a face as long as your eyes are visible.
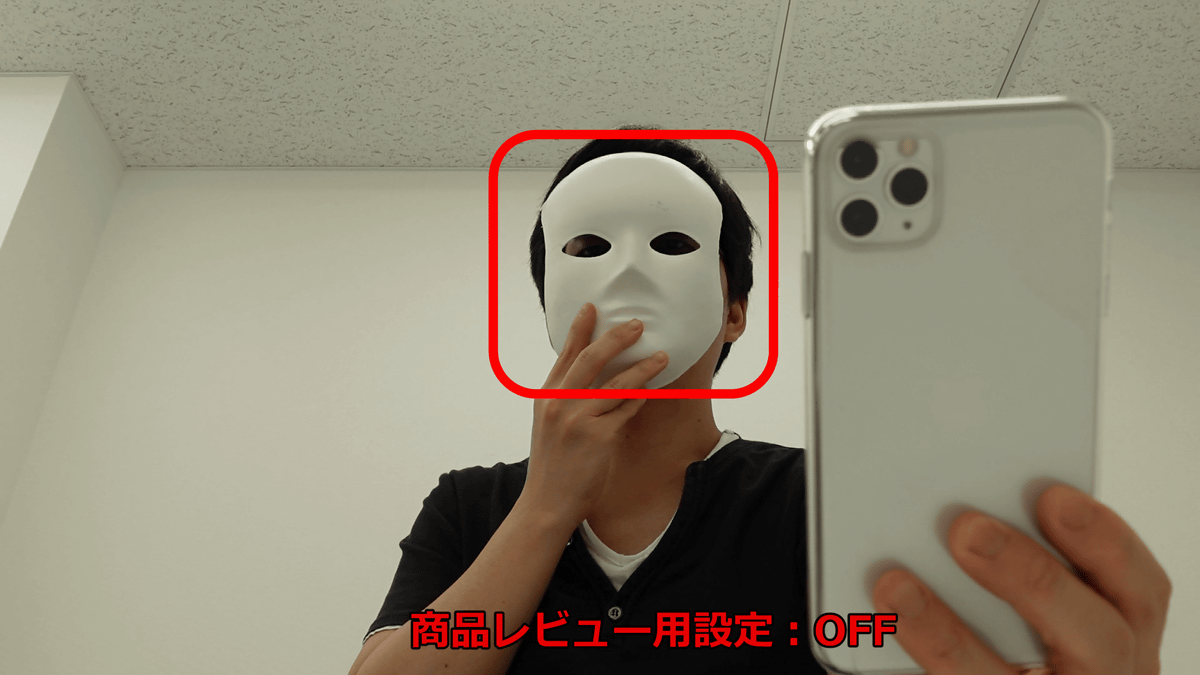
If you hide your eyes as shown below, the object will be more focused.

On the other hand, if the product review setting is turned on, the eye recognition function will be turned off, so you can focus on the object near the camera without hiding your face.

Demand for webcams is increasing due to new coronavirus infections, but around July 2020, dedicated software for connecting to a PC with USB and using it as a webcam will be announced.
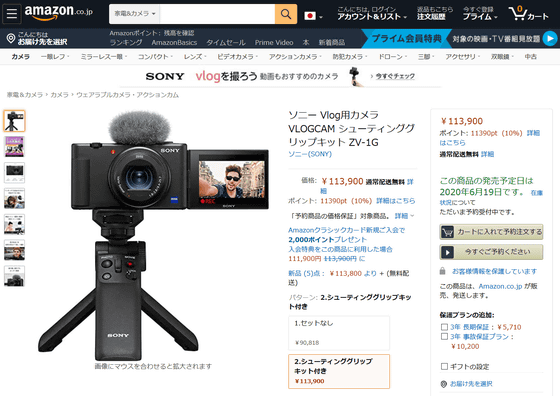
'VLOGCAM ZV-1' can be purchased from June 19, 2020. The price is open price, and the price of Amazon.co.jp only for the main body is 90,818 yen, and the set with the shooting grip kit is sold for 113,900 yen.
Related Posts: