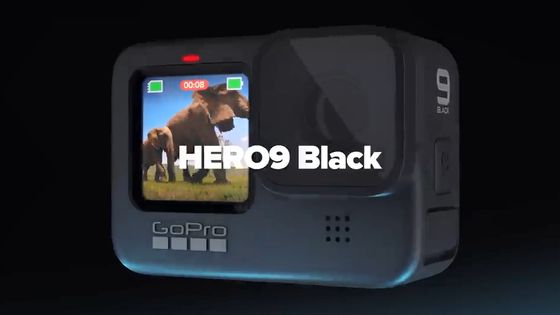
I tried using 'GoPro HERO9 Black' which has a color LCD on the front and an enhanced dedicated application
From the action camera GoPro, '
HERO9 Black 5K Video 20 MP Streaming Camera & Bundle | GoPro
https://gopro.com/ja/jp/shop/cameras/hero9-black/CHDHX-901-master.html
table of contents:
◆ Photo review
◆ I actually used it
◆ I tried to link with the GoPro application of the smartphone
◆ Since the lens can be attached and detached, I tried installing a new lens
◆ Photo review
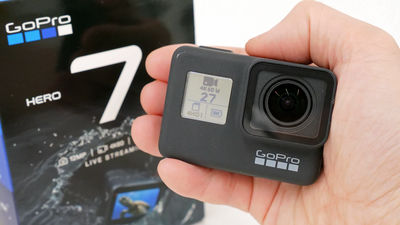
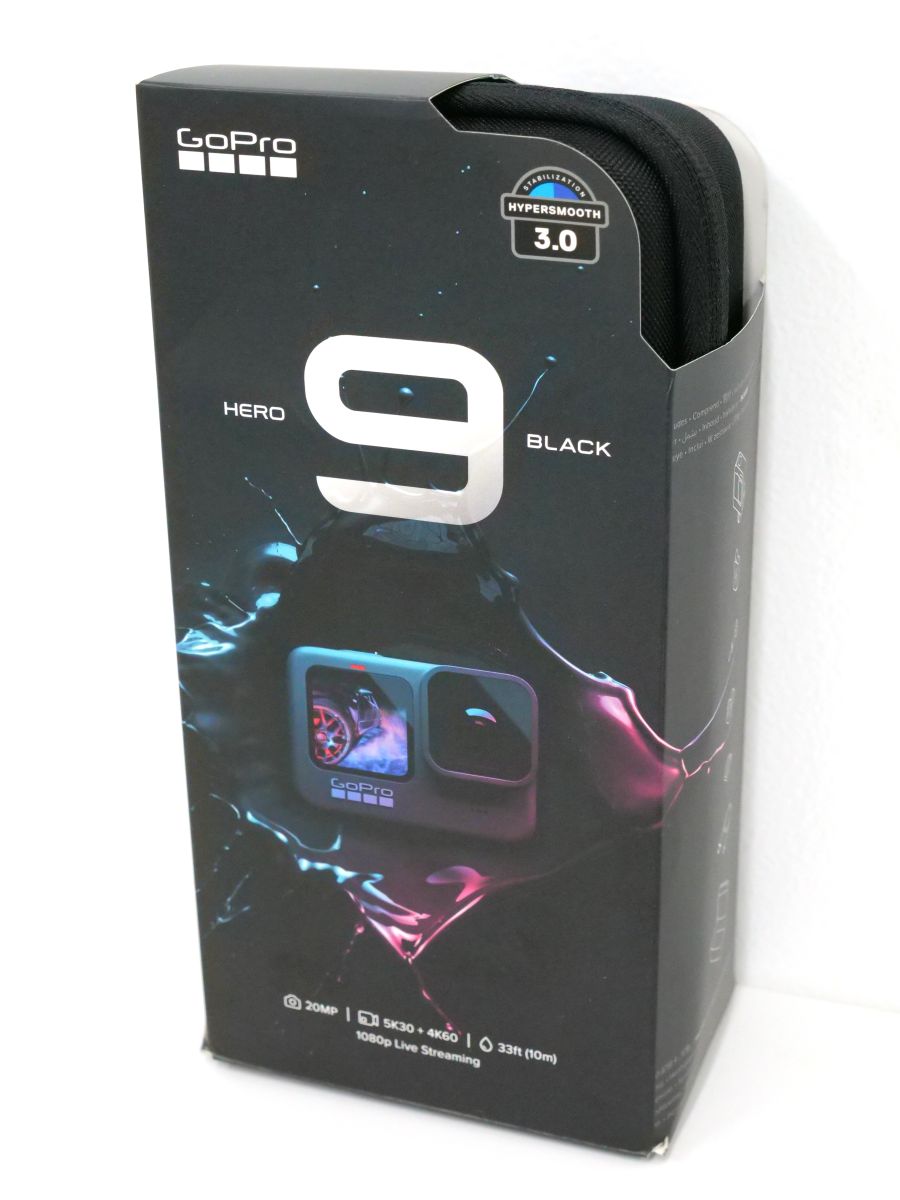
The package of 'GoPro HERO9 Black' looks like this.
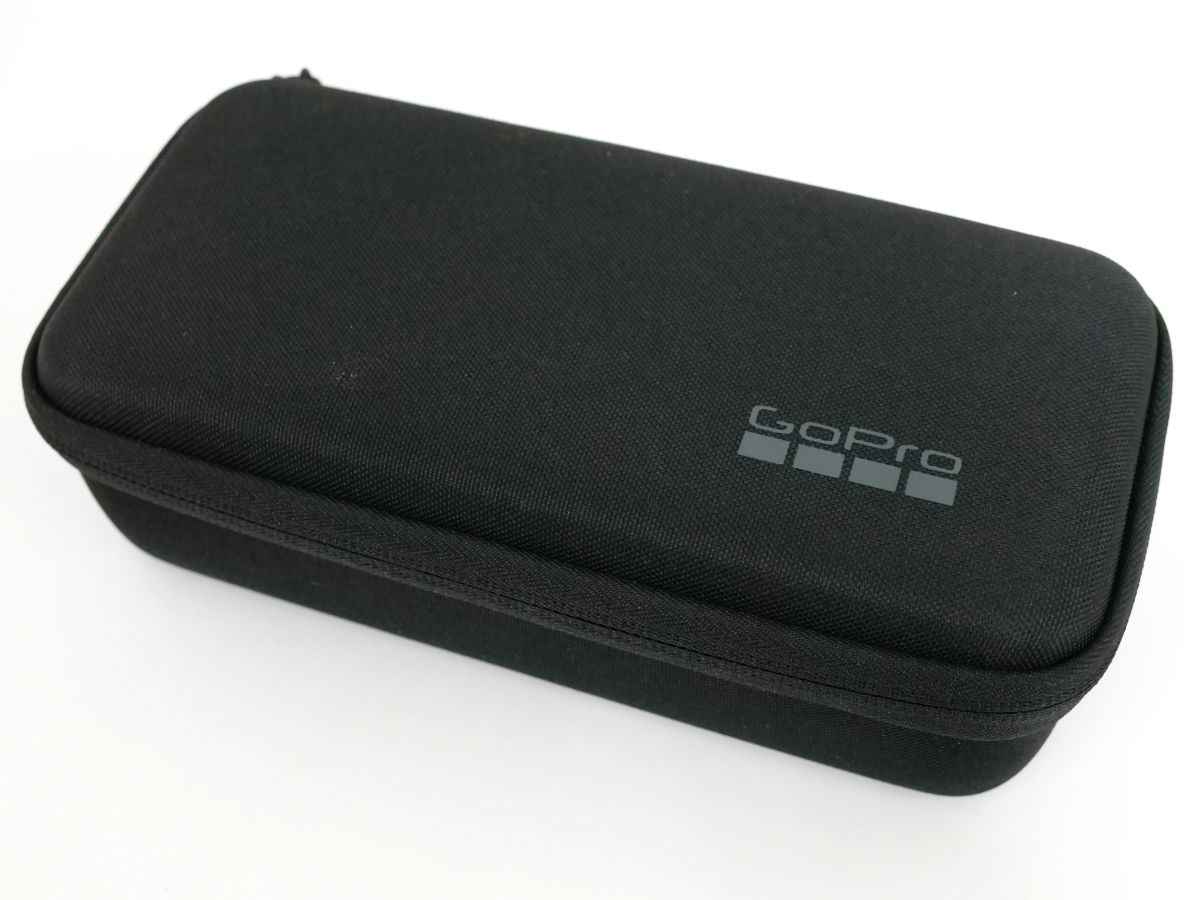
The set including the main body is in a
Opened.
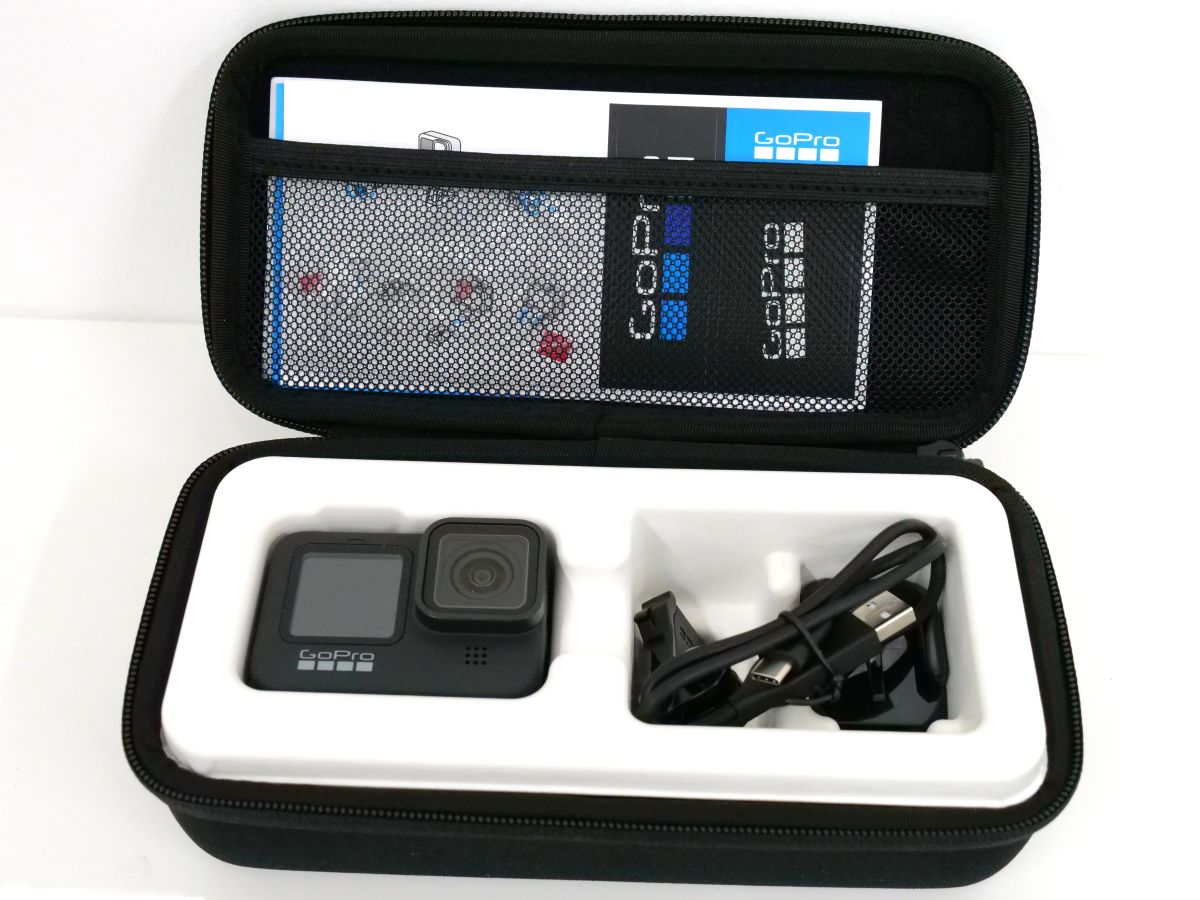
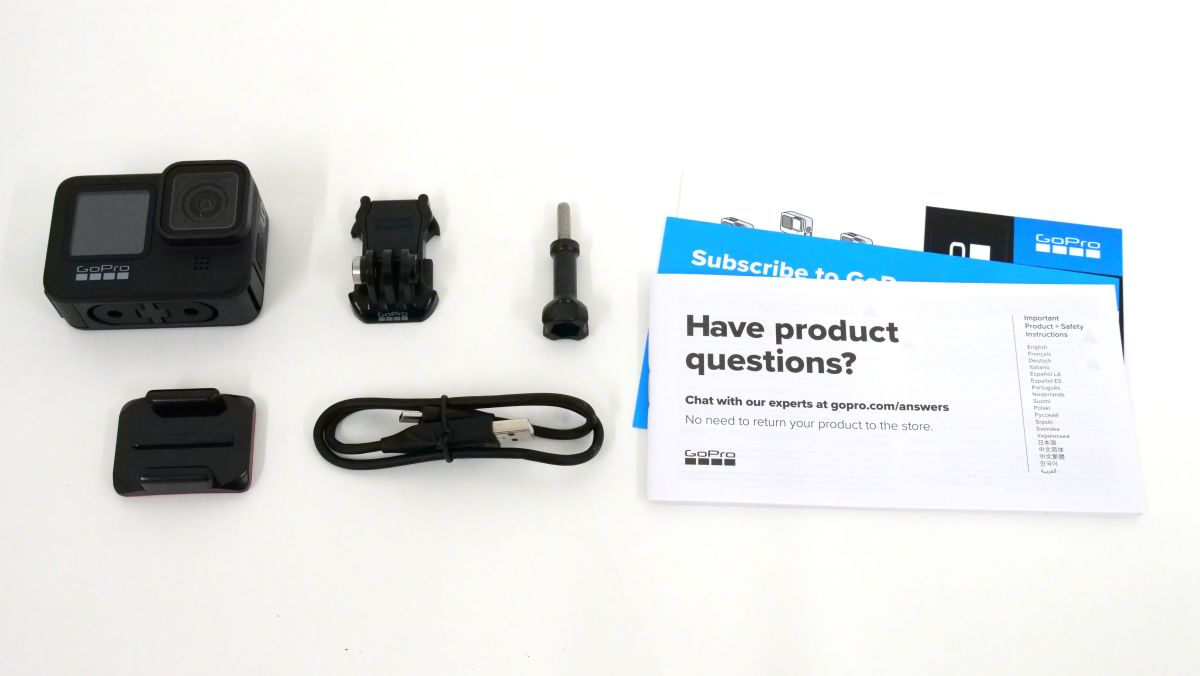
The contents are the GoPro HERO9 Black body, mounting buckle, thumb screw, adhesive base mount, USB Type-C cable, sticker, instruction manual, except for the body, it is almost the same as the previous model
The size of the main body is 71 x 55 x 33.6 mm. It was about one-third the size of the iPhone 11 Pro.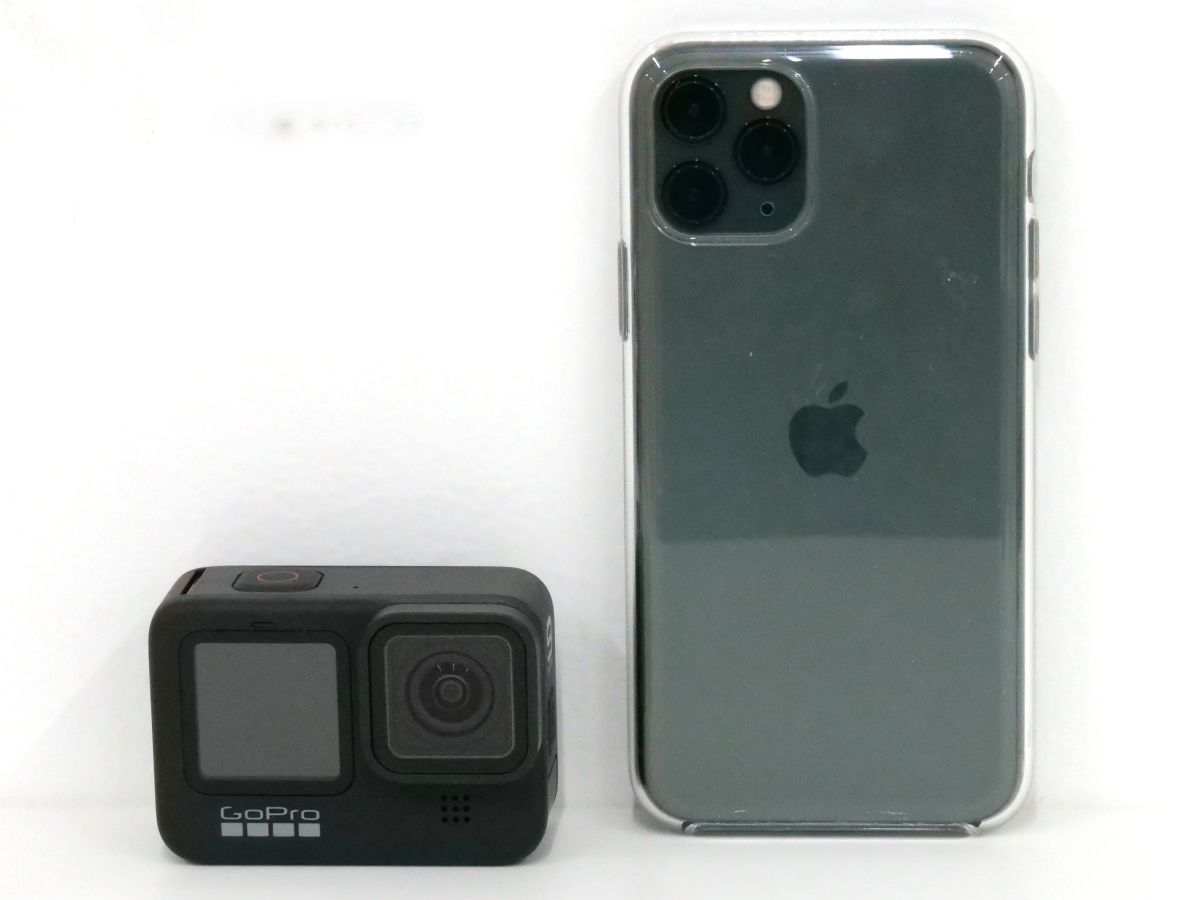
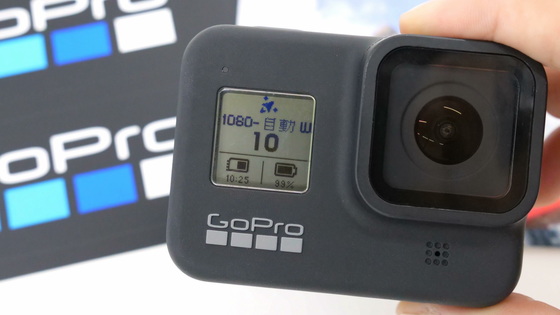
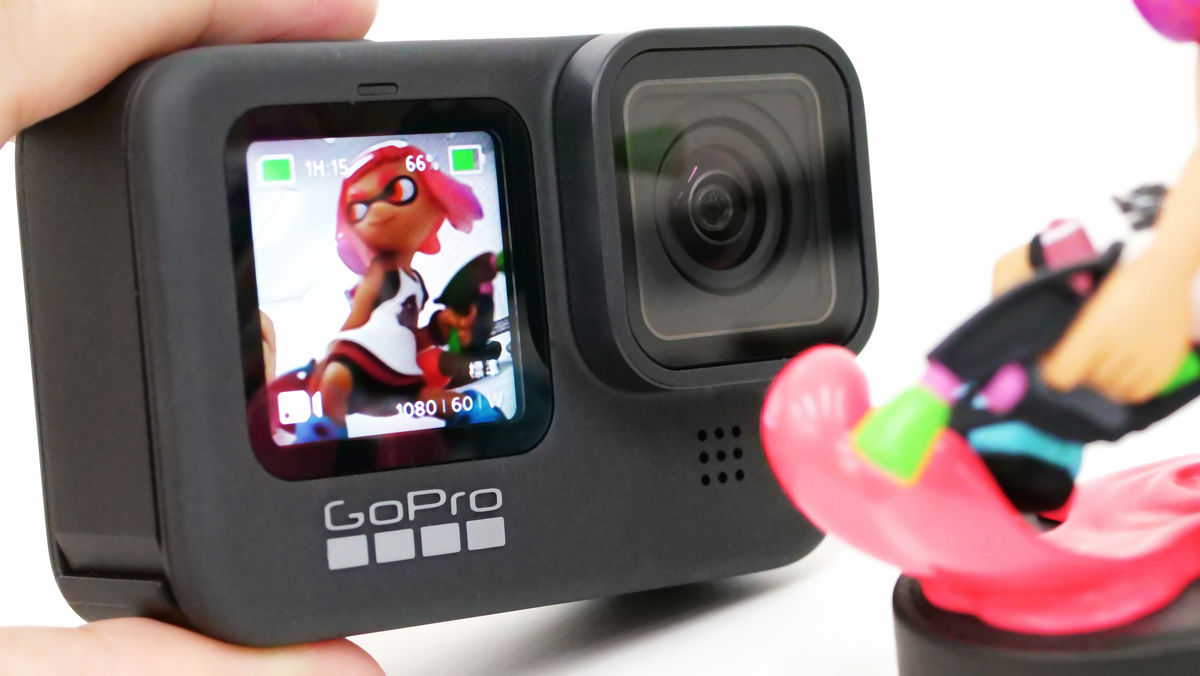
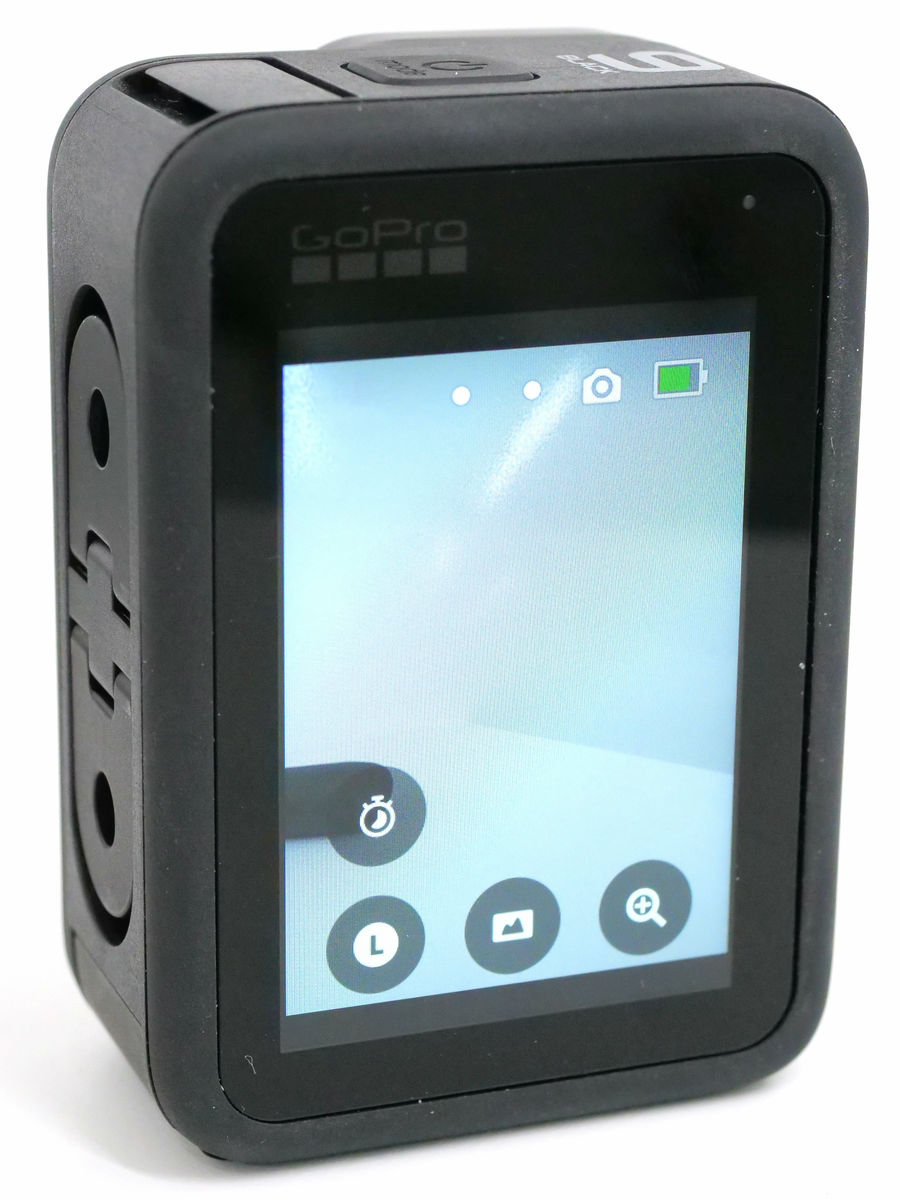
On the front is the lens and the color LCD display, which is a big difference from the previous model GoPro HERO8 Black.
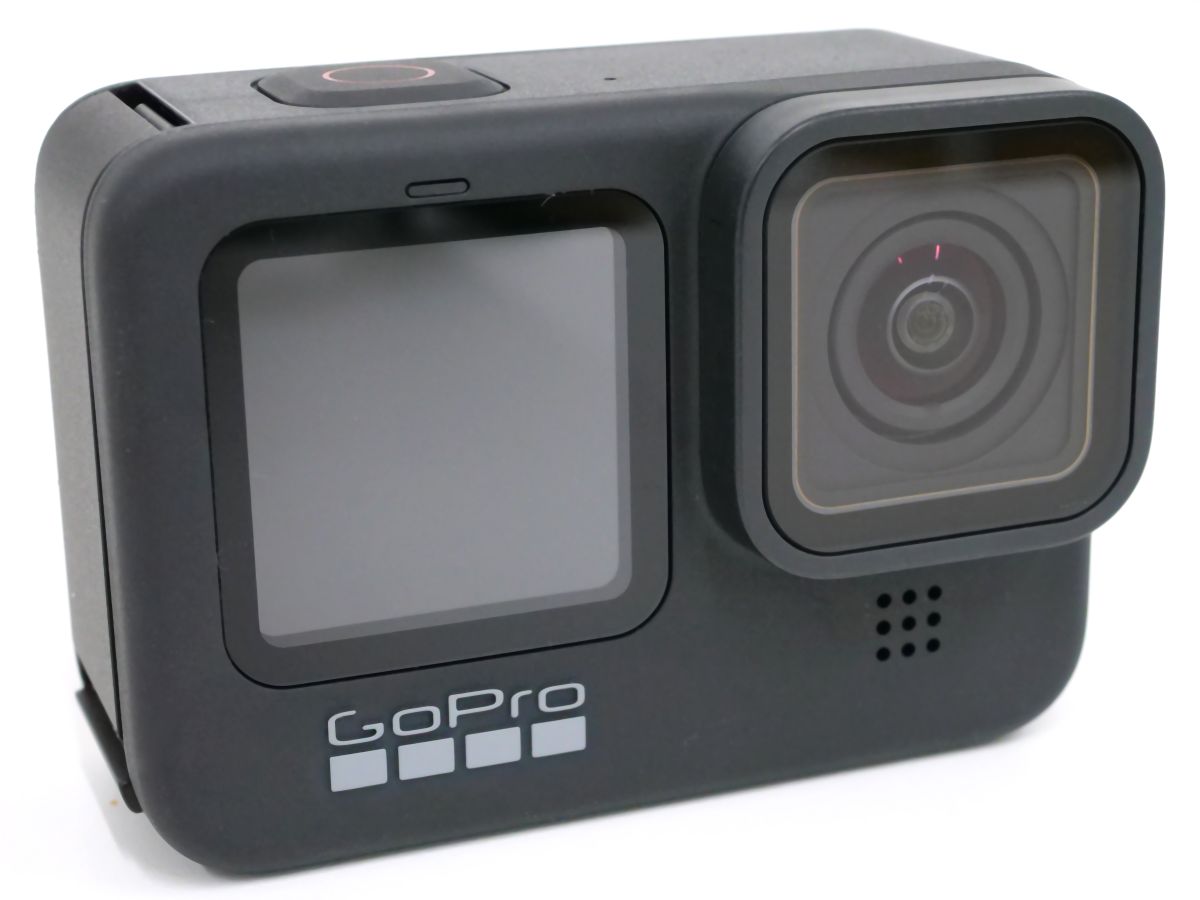
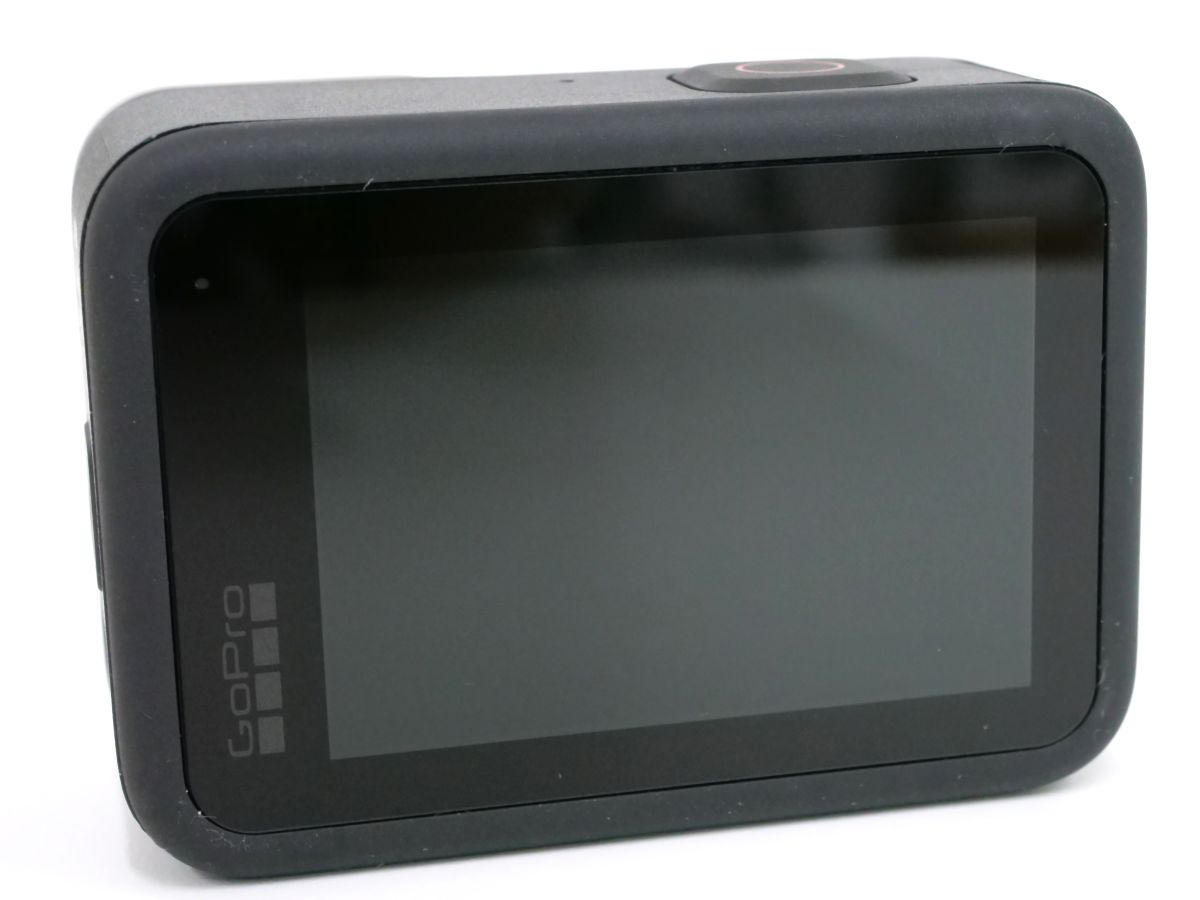
The back side is a touch panel liquid crystal.
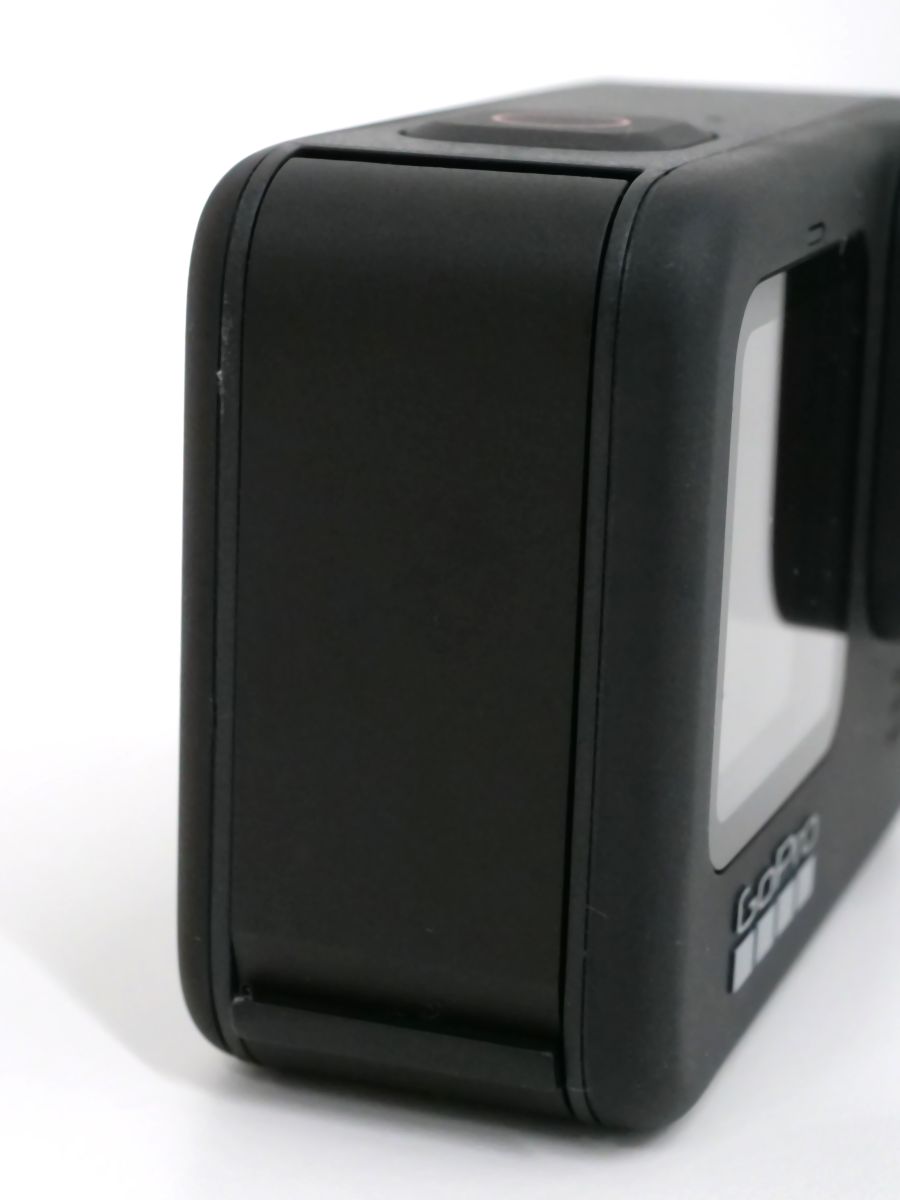
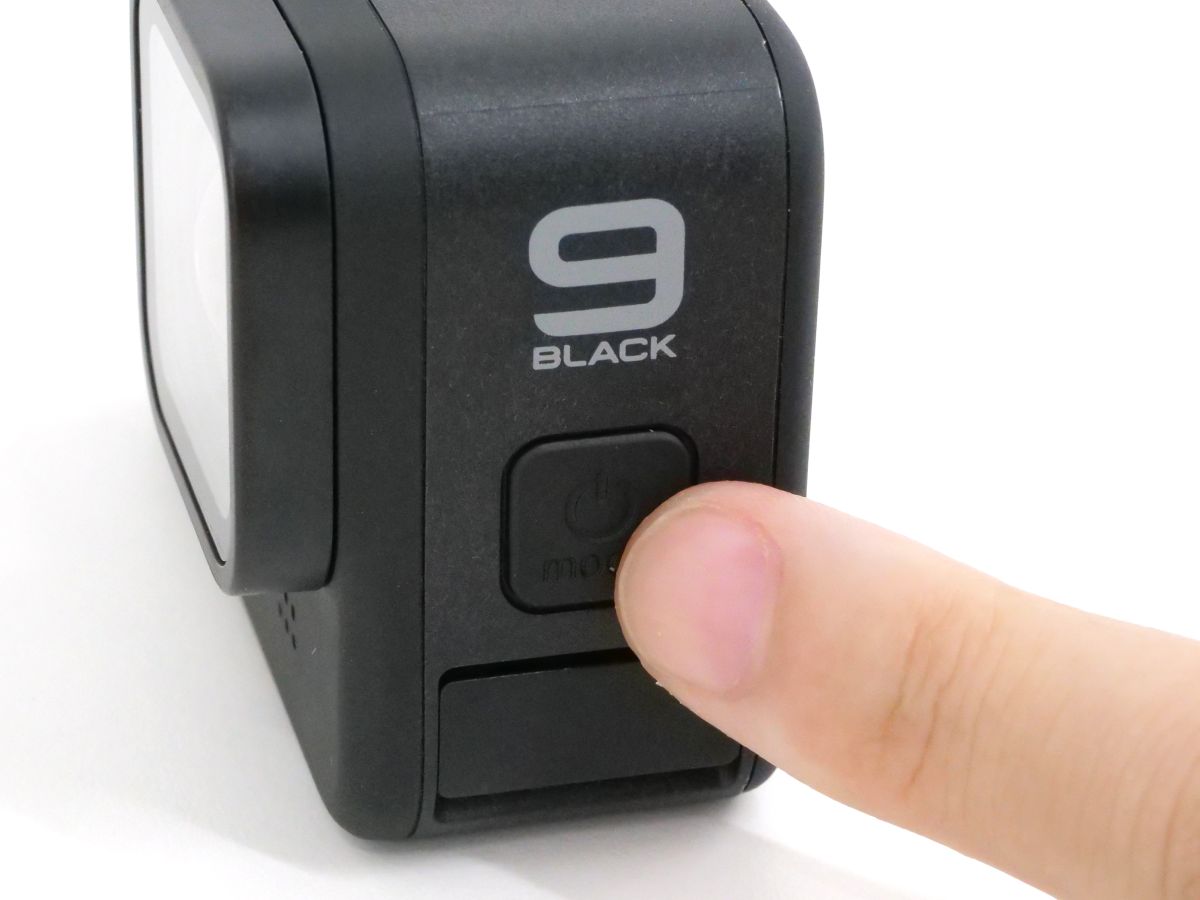
There is a shutter button on the top.

There was a built-in mount on the bottom for attaching to a mounting buckle.

When you pull out the built-in mount, it looks like this.

Battery door on the left side.
When you open the battery door, you'll find the battery and a USB Type-C port. The battery capacity has increased by 500mAh from the previous model GoPro HERO8 Black's 1220mAh to 1720mAh.

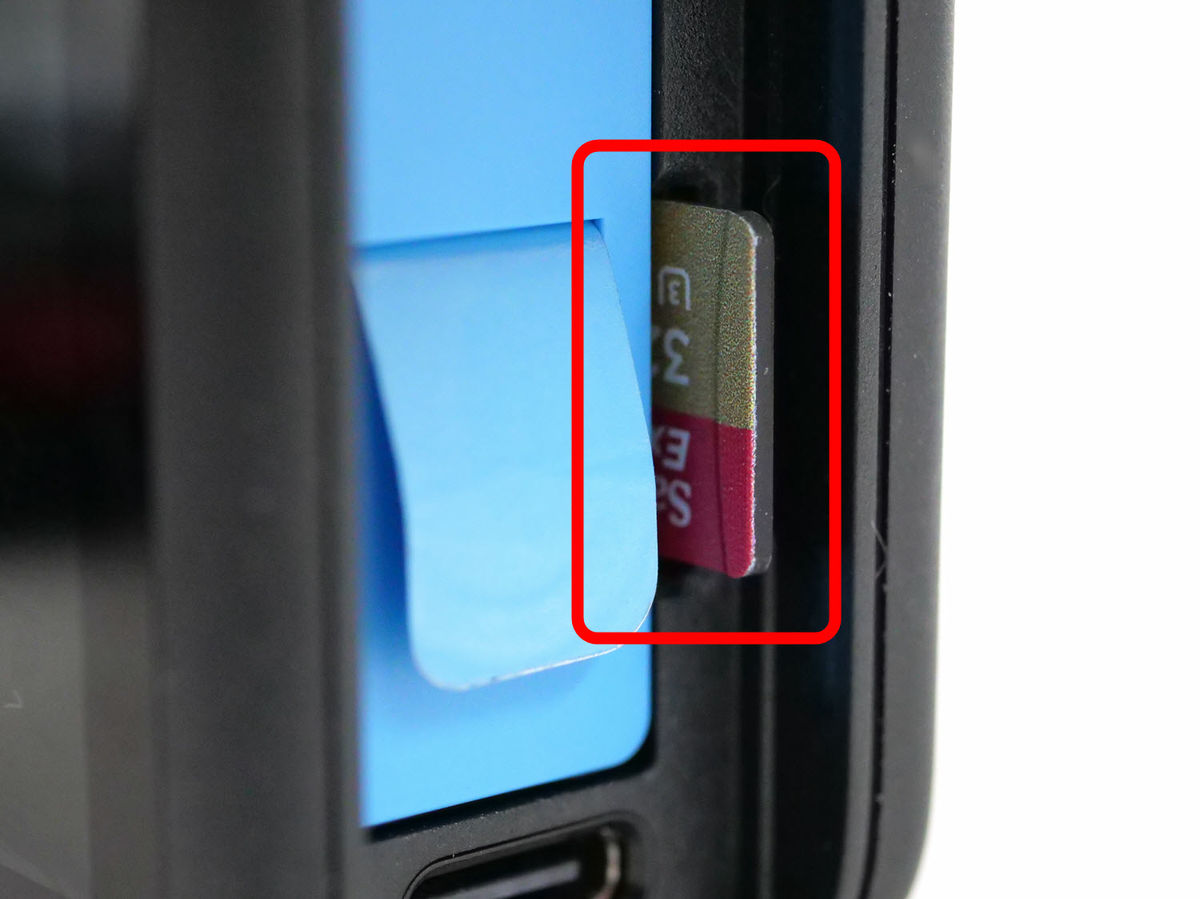
It's a little confusing, but it also has a microSD card slot.
Power button on the right side.

◆ I actually used it
Press and hold the power button to turn on the power.
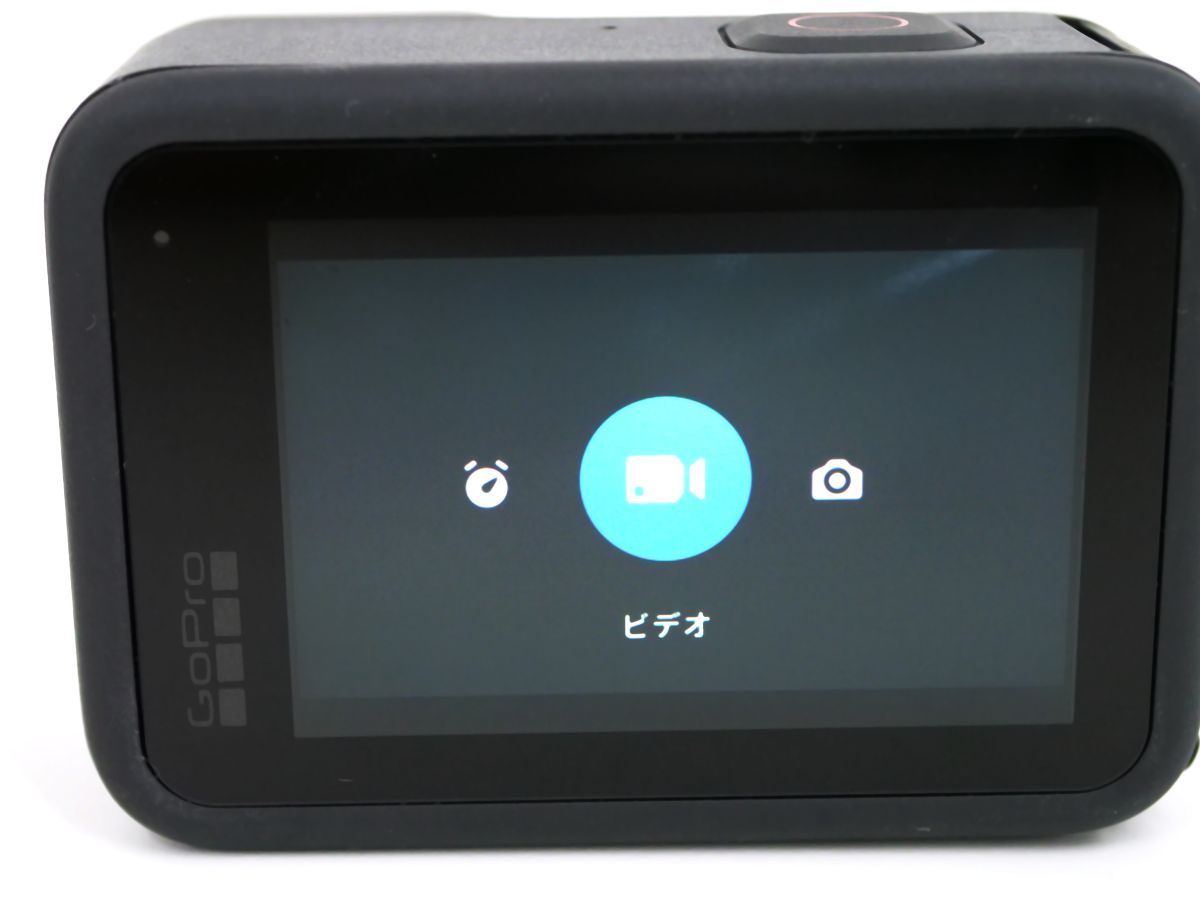
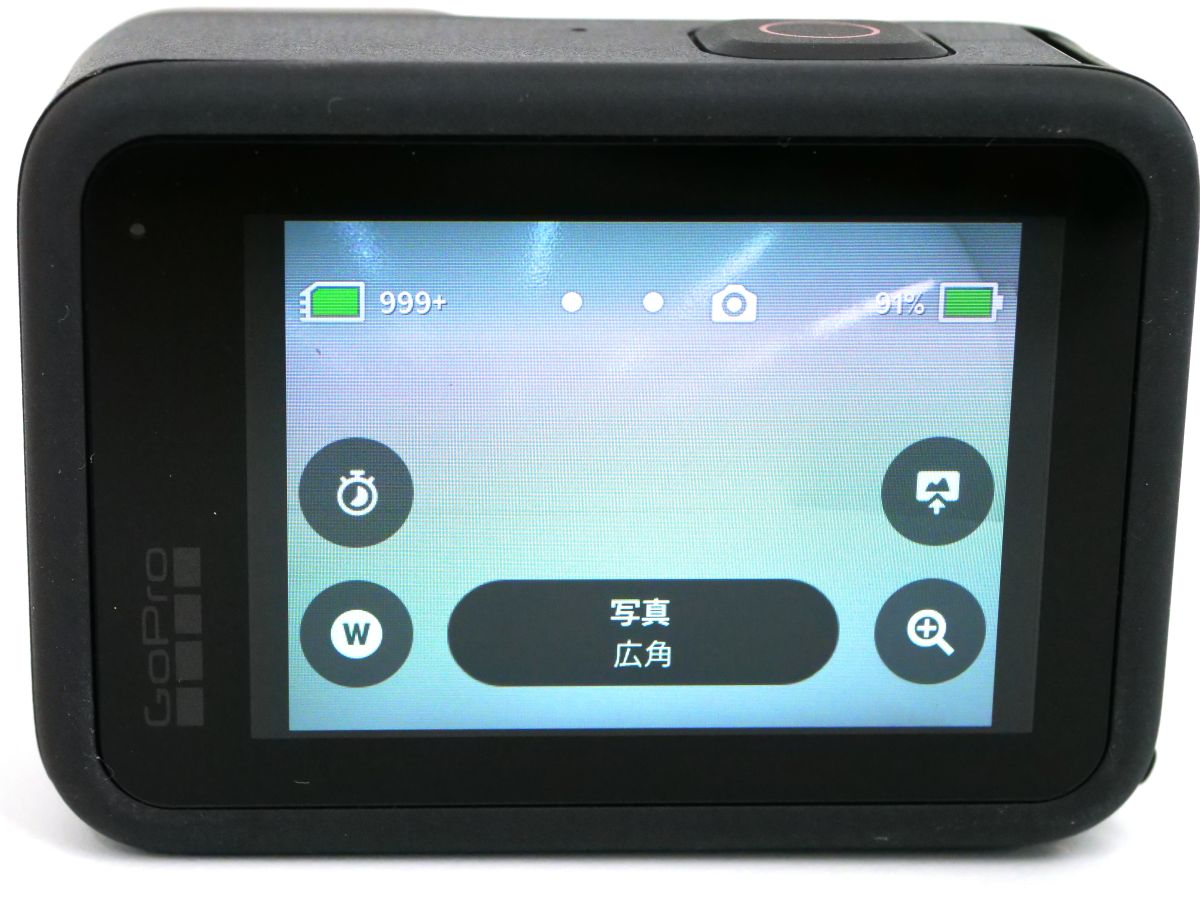
The touch panel LCD with the power turned on looks like the following.
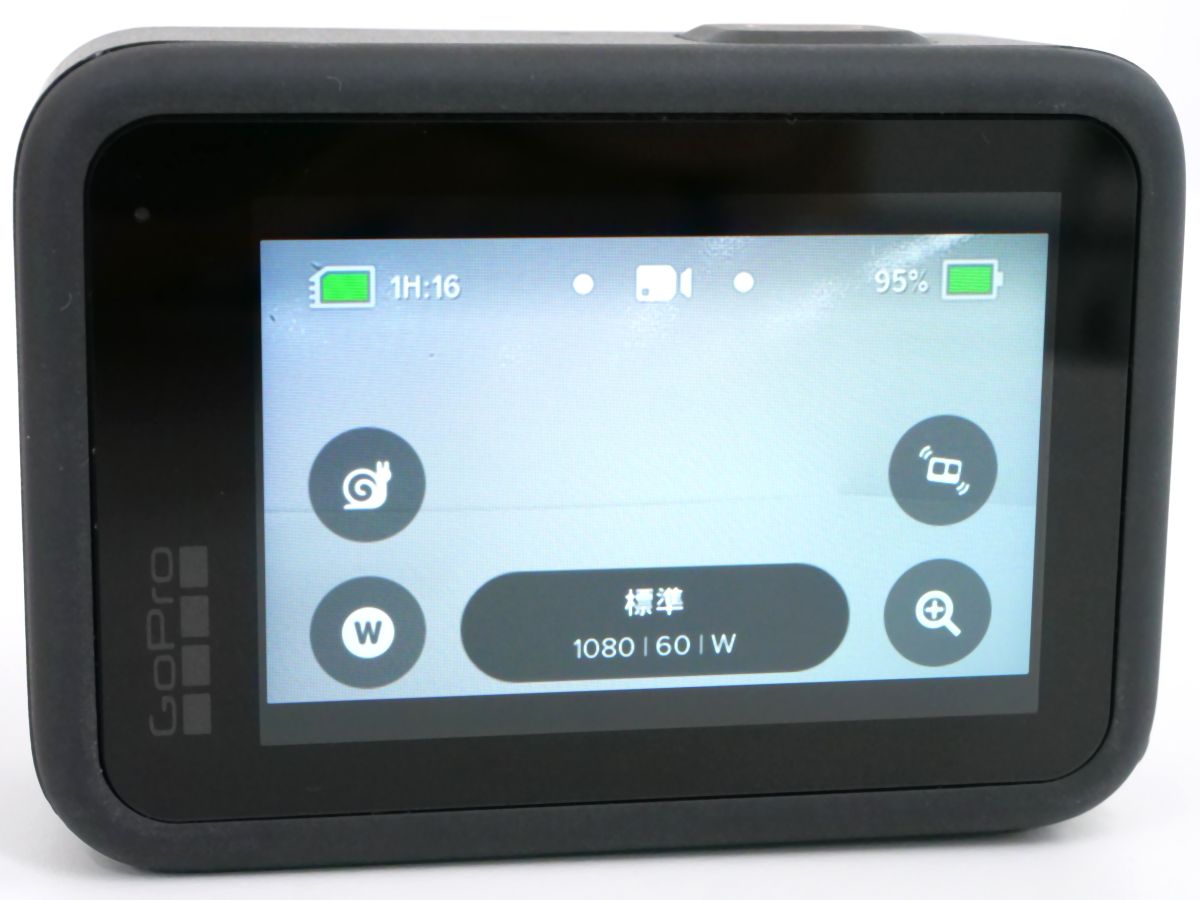
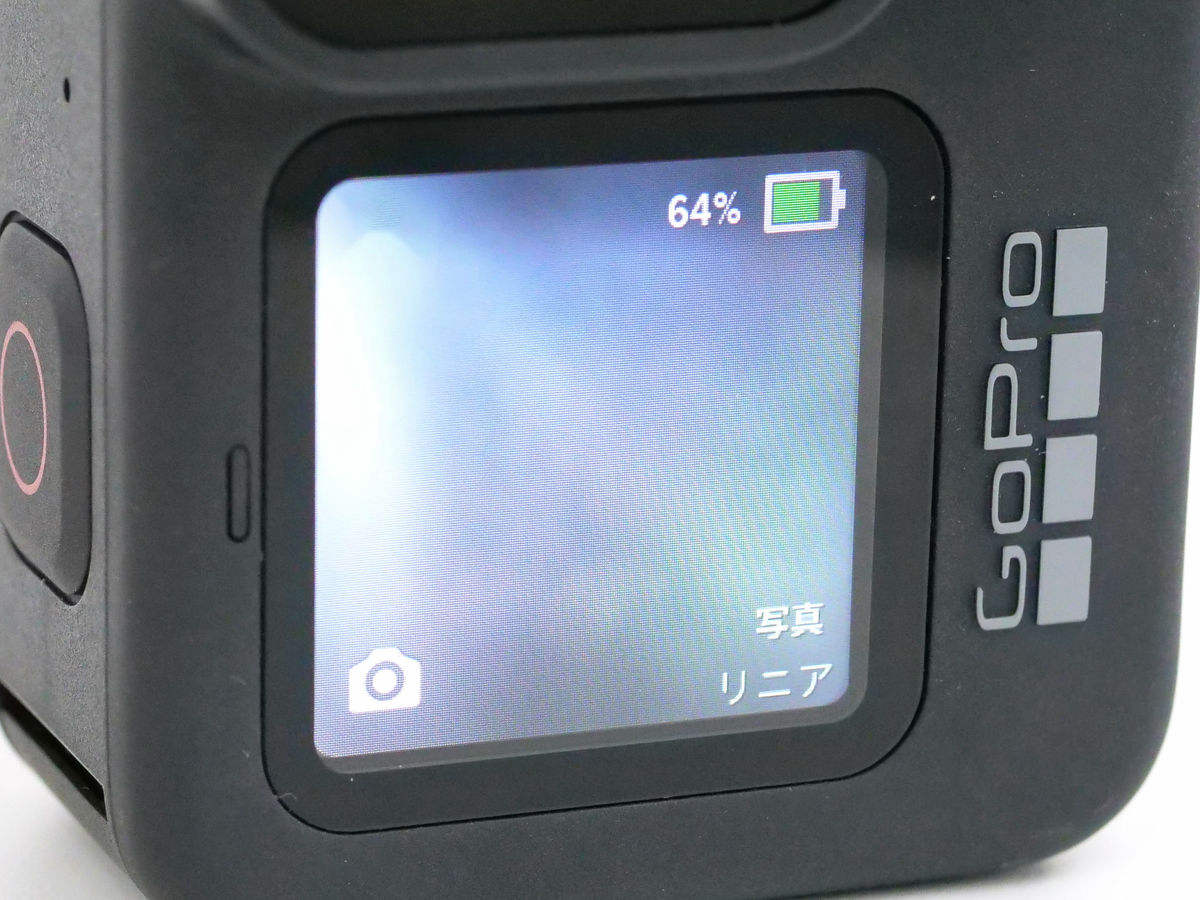
Also, when the power is turned on, the LCD on the front is always on.
With the new front monitor, you can take a selfie while checking yourself. The front LCD is always on, so you can seamlessly switch from normal shooting to selfies.
If you change the orientation of the GoPro HERO9 Black, the orientation of the LCD screen will change automatically ...
The direction of the liquid crystal on the front also changes automatically.
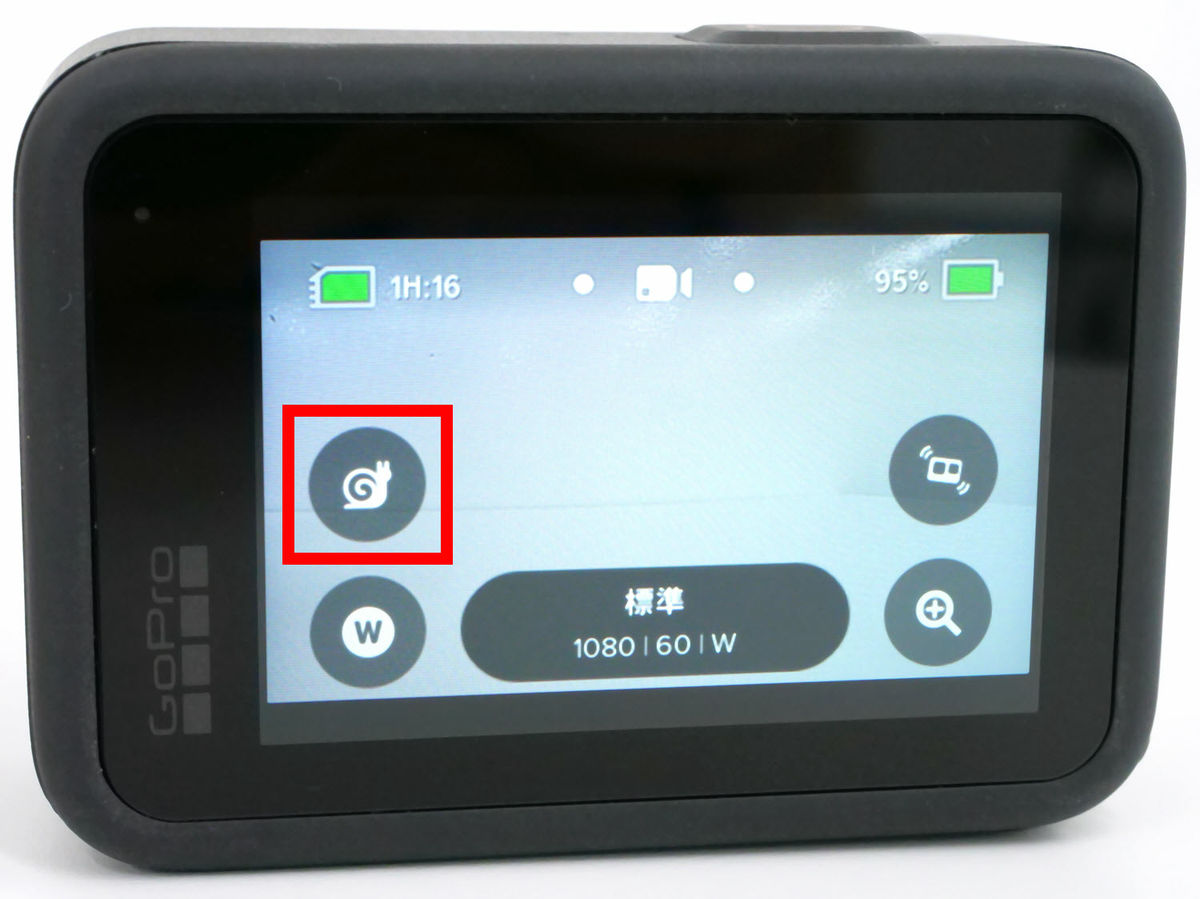
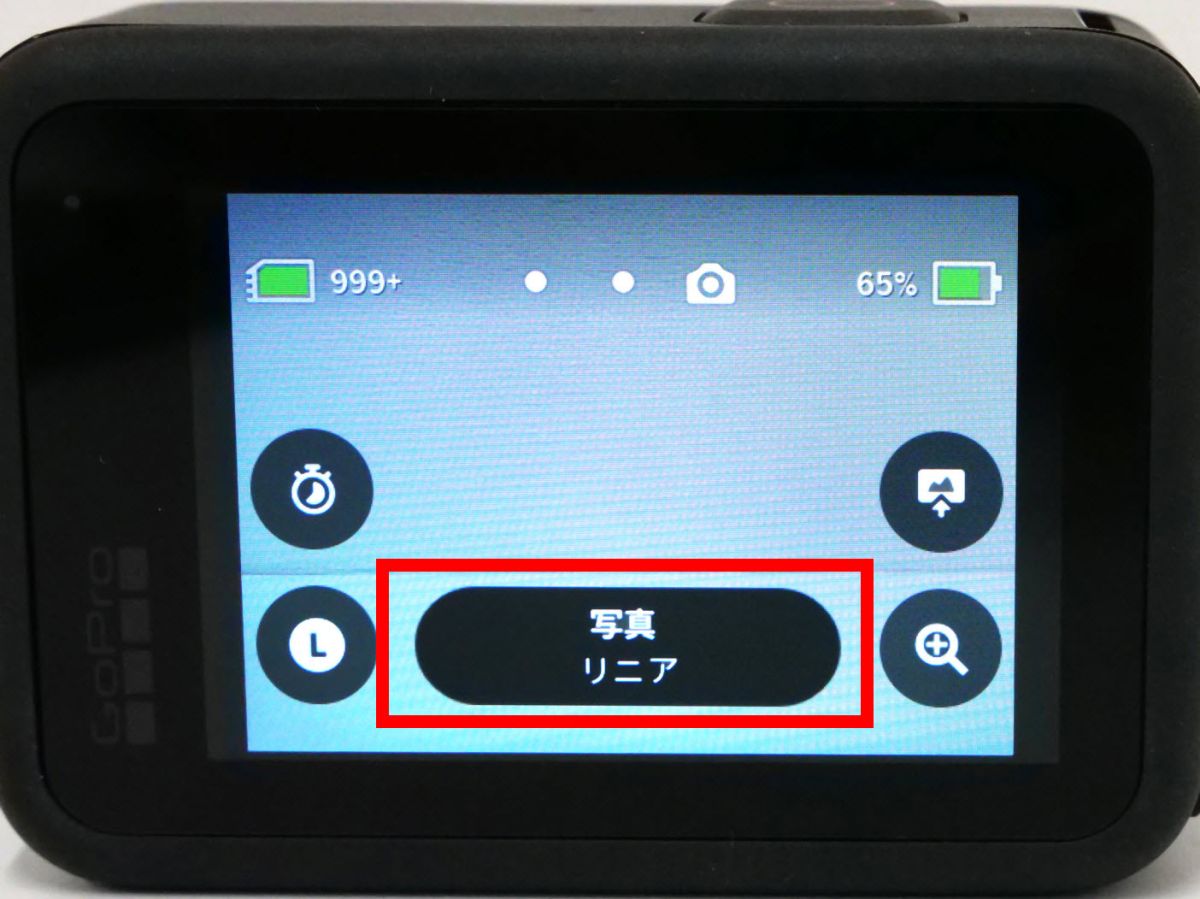
Shortcuts such as various shooting modes and settings are displayed on the touch panel LCD on the back. If you tap the snail icon, you can shoot a movie at 8x slower speed.
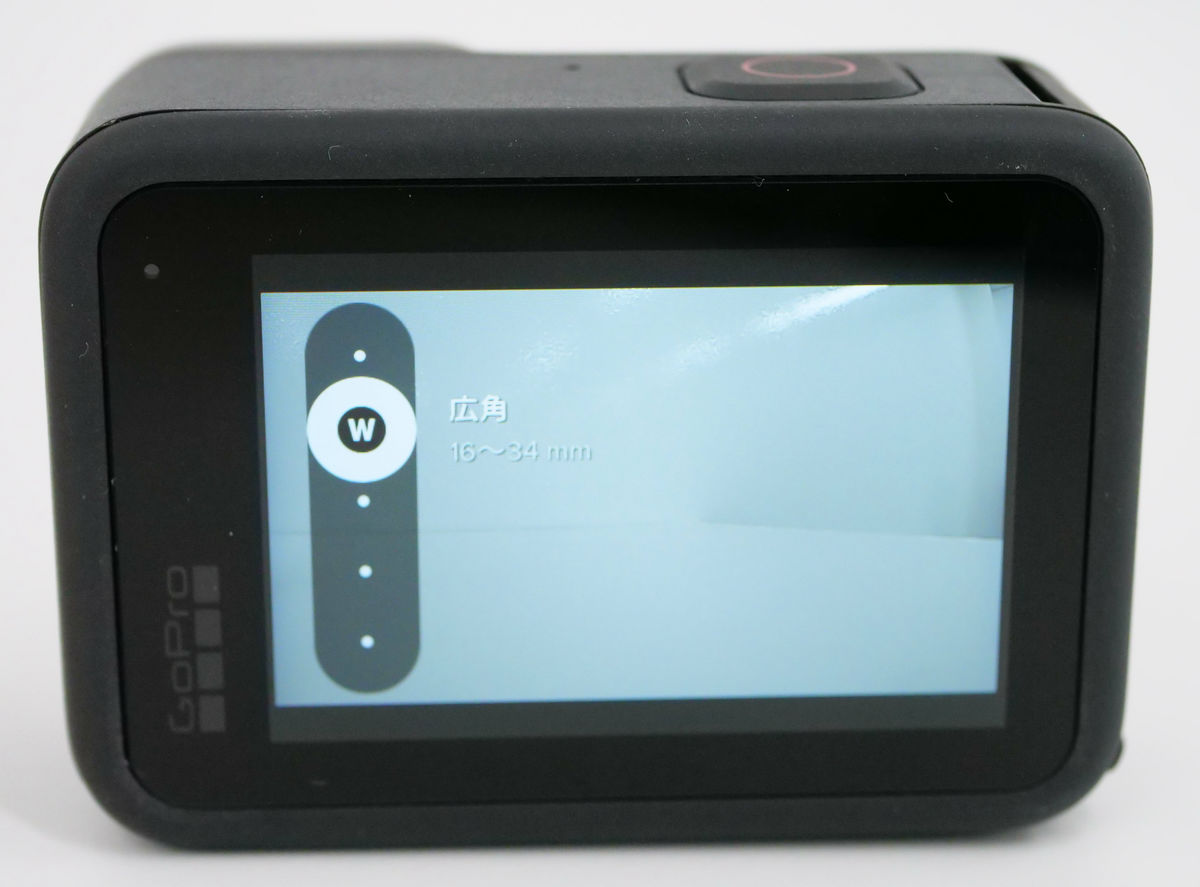
The alphabet icon at the bottom left is the camera lens setting. You can set the lens type and linear (fisheye disabled mode) on / off.
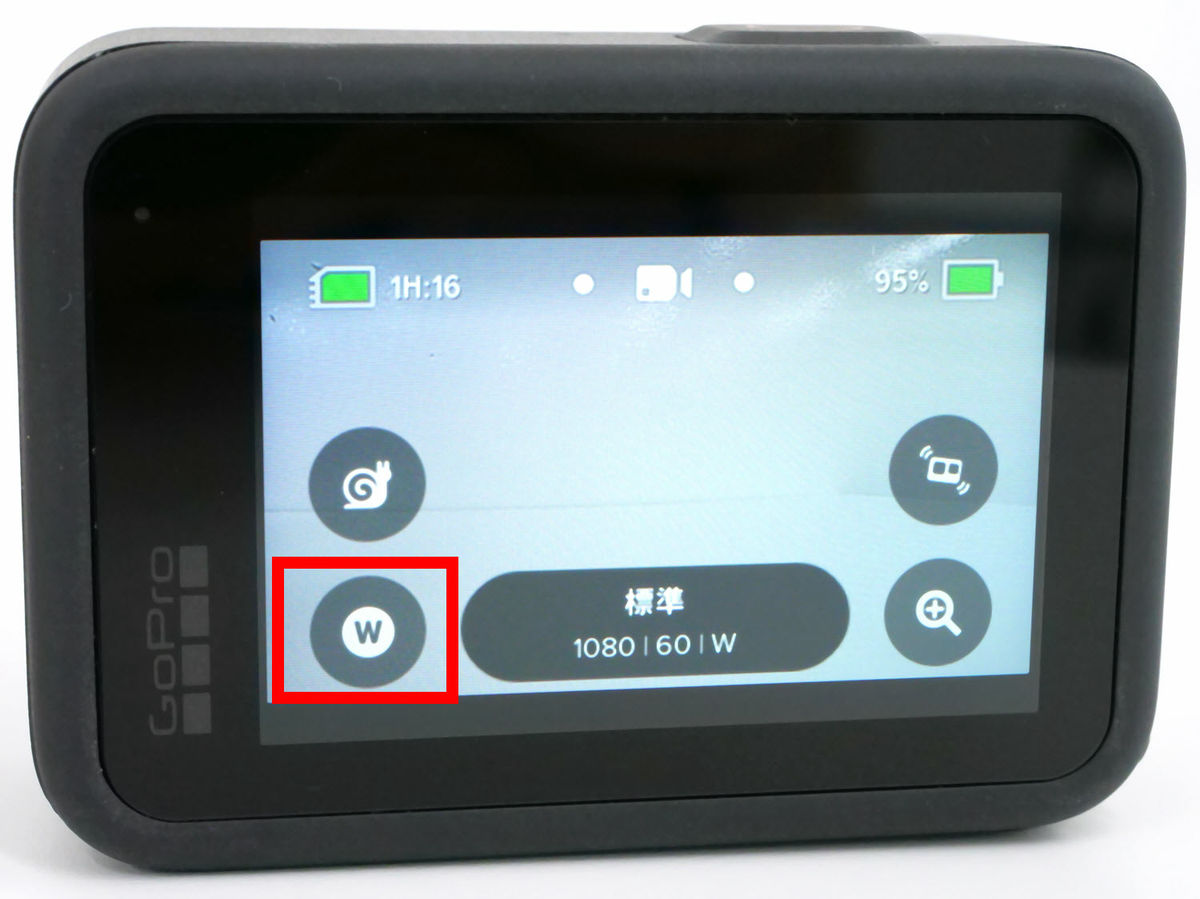
There are 5 types of lenses that can be set. SuperView with a focal length of 16mm is 'S', wide angle of 16-34mm is 'W', linear of 19-39mm is 'L', narrow angle of 27mm is 'N' ...
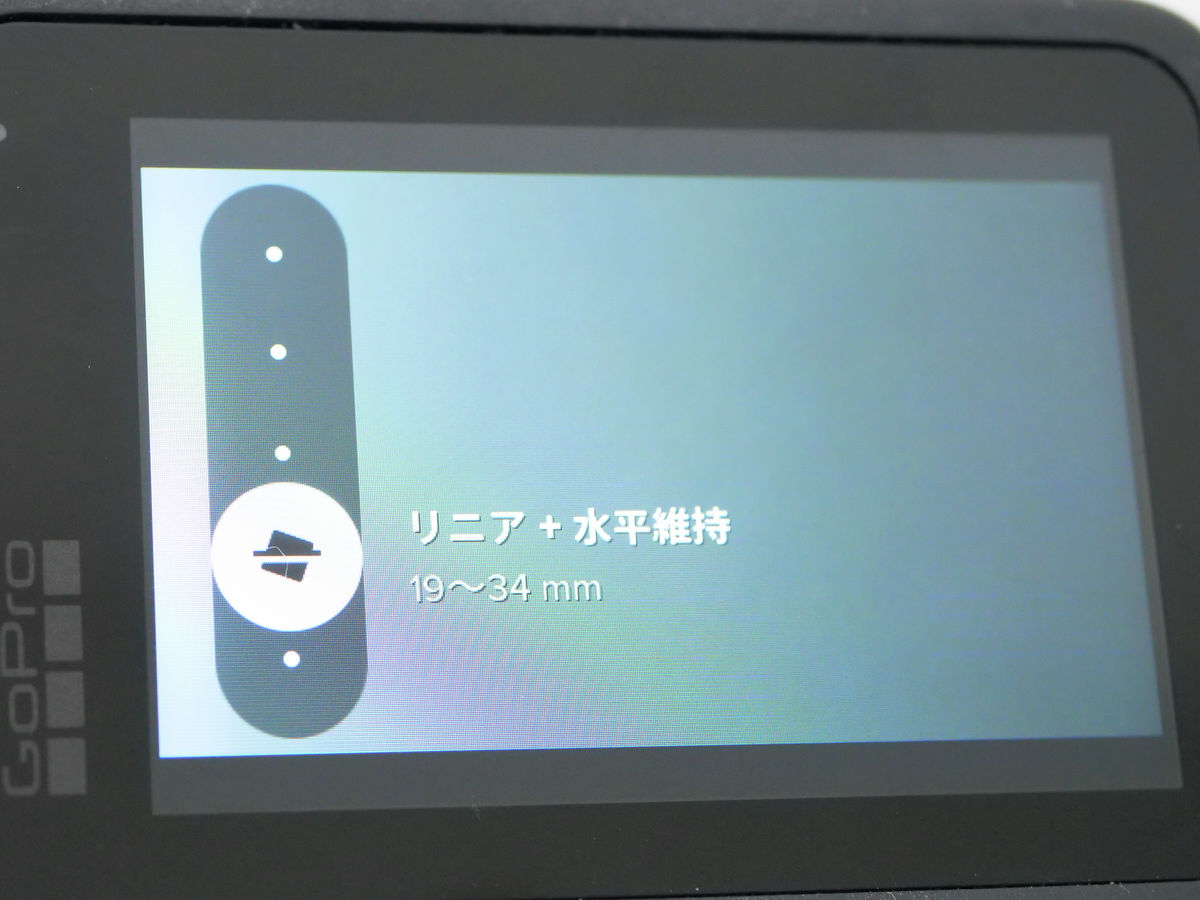
There is a linear + horizontal maintenance with a focal length of 19 to 34 mm.
Tap the red frame to turn on the blur correction function 'Hyper Smooth'. GoPro HERO9 Black is equipped with HyperSmooth 3.0, which evolved from the previous model HyperSmooth 2.0, and it is said that horizontal blur reduction is enhanced.
The following movie was actually shot with horizontal maintenance and HyperSmooth 3.0 turned on (left) and both turned off. Both have the camera fixed in the same position on the bike, but the angle was automatically leveled when leveling was turned on.
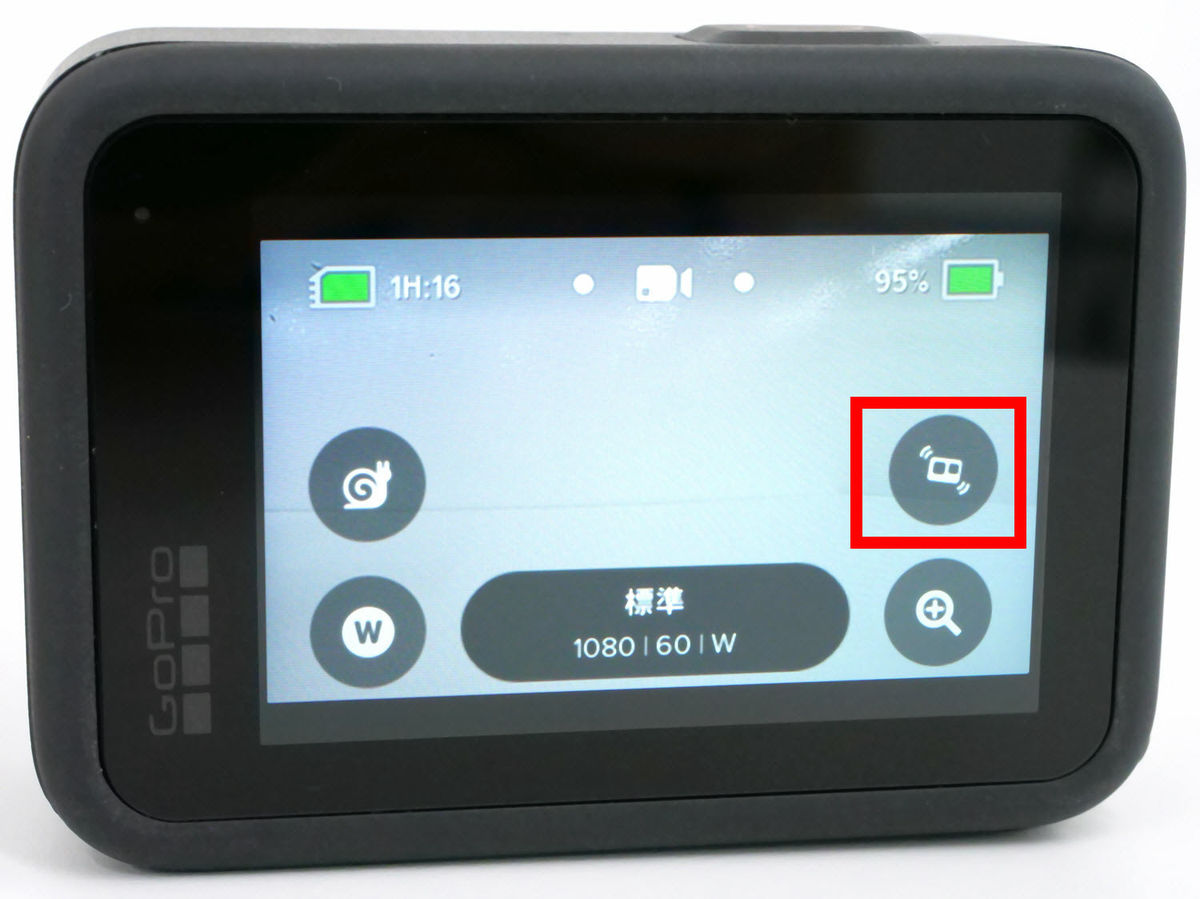
You can also switch functions by pressing and holding each icon. You can also add the new 'HindSight' added from the GoPro HERO9 Black.
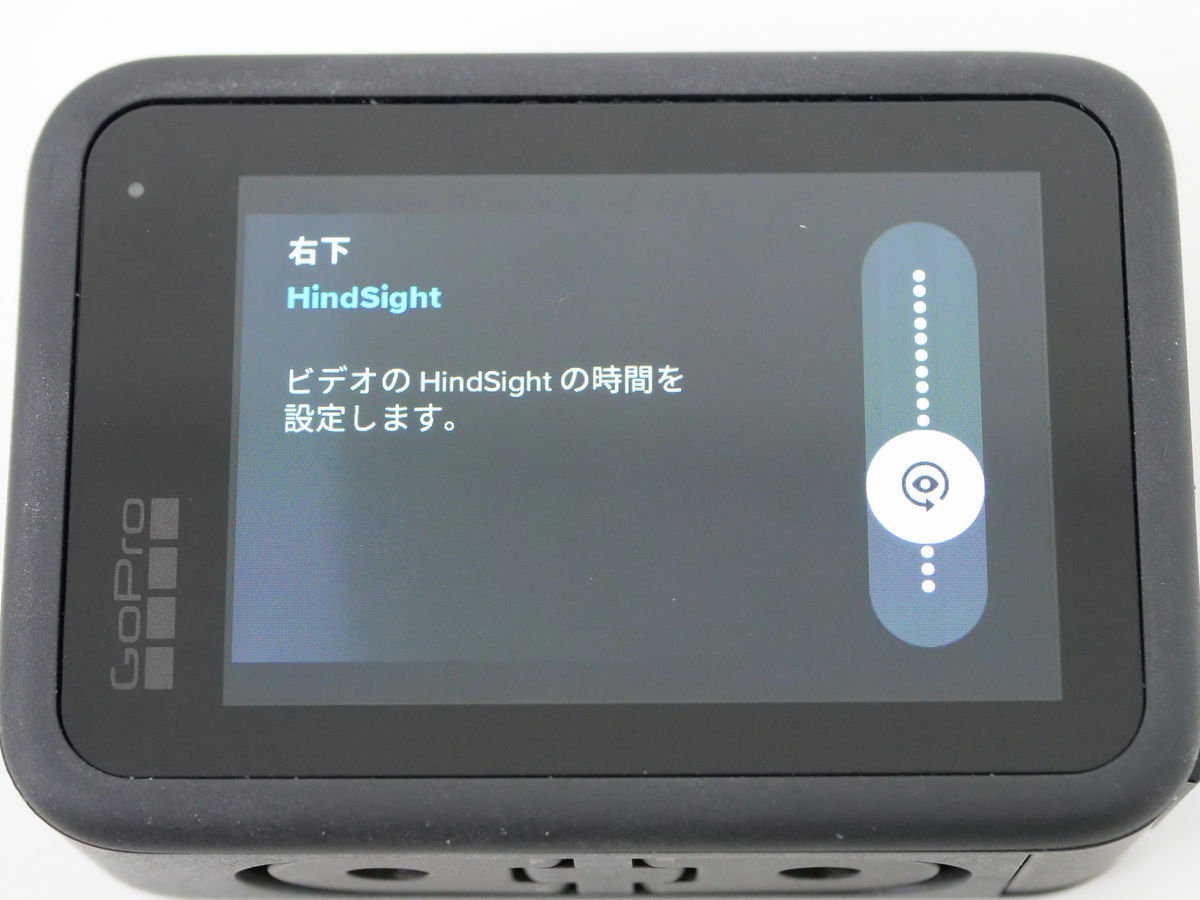
HindSight is a function that records the video before the start of recording for up to 30 seconds, so that you can shoot the decisive moment even if the timing of pressing the shutter button is delayed.
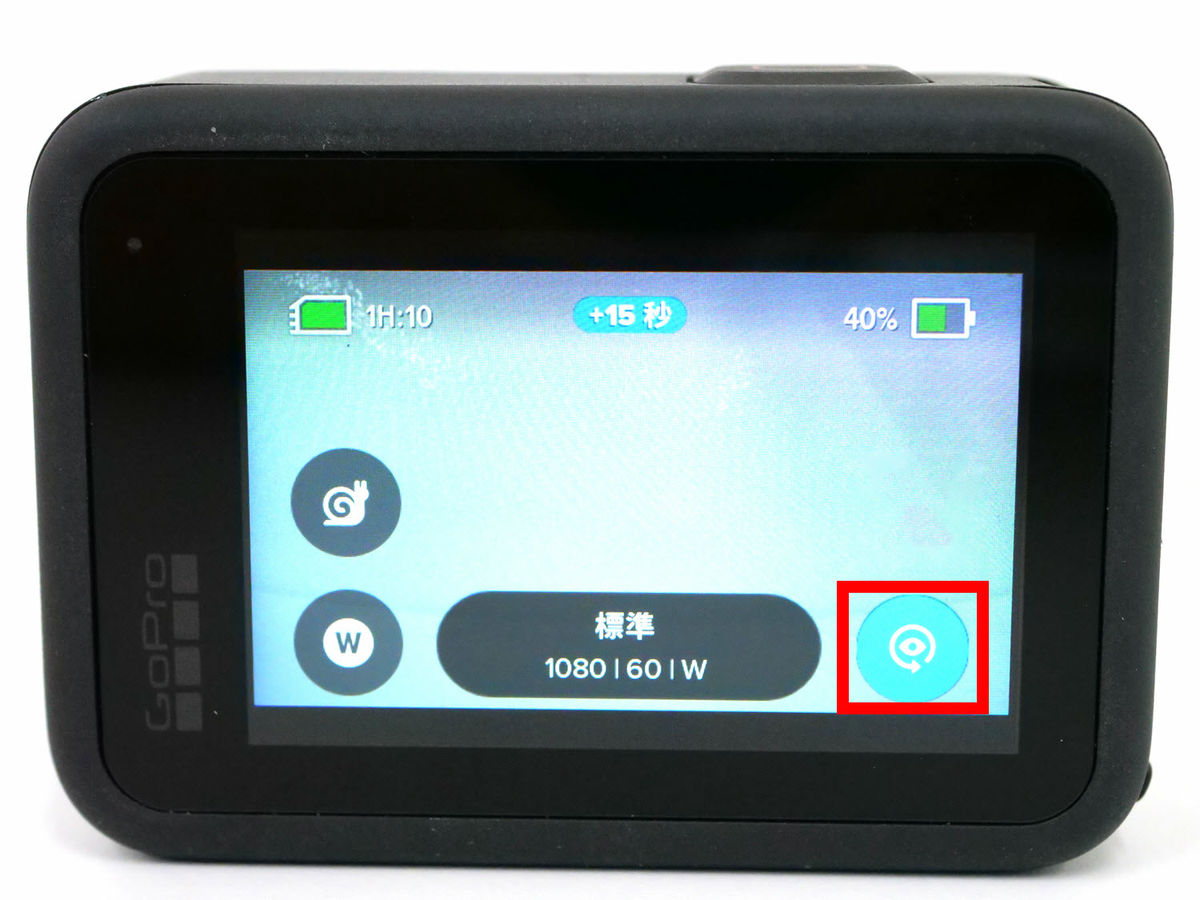
The timer function 'Schedule Capture' newly added in GoPro HERO9 Black can also be added.
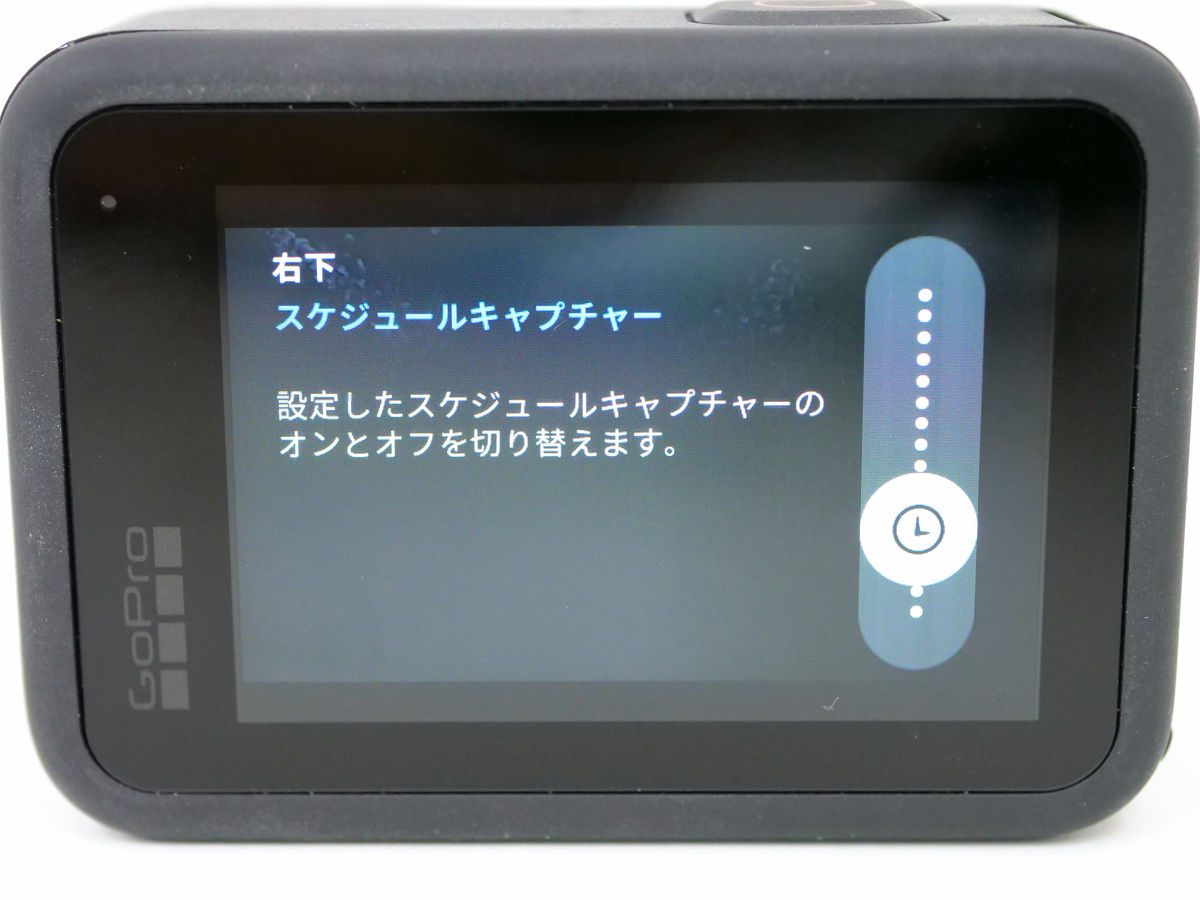
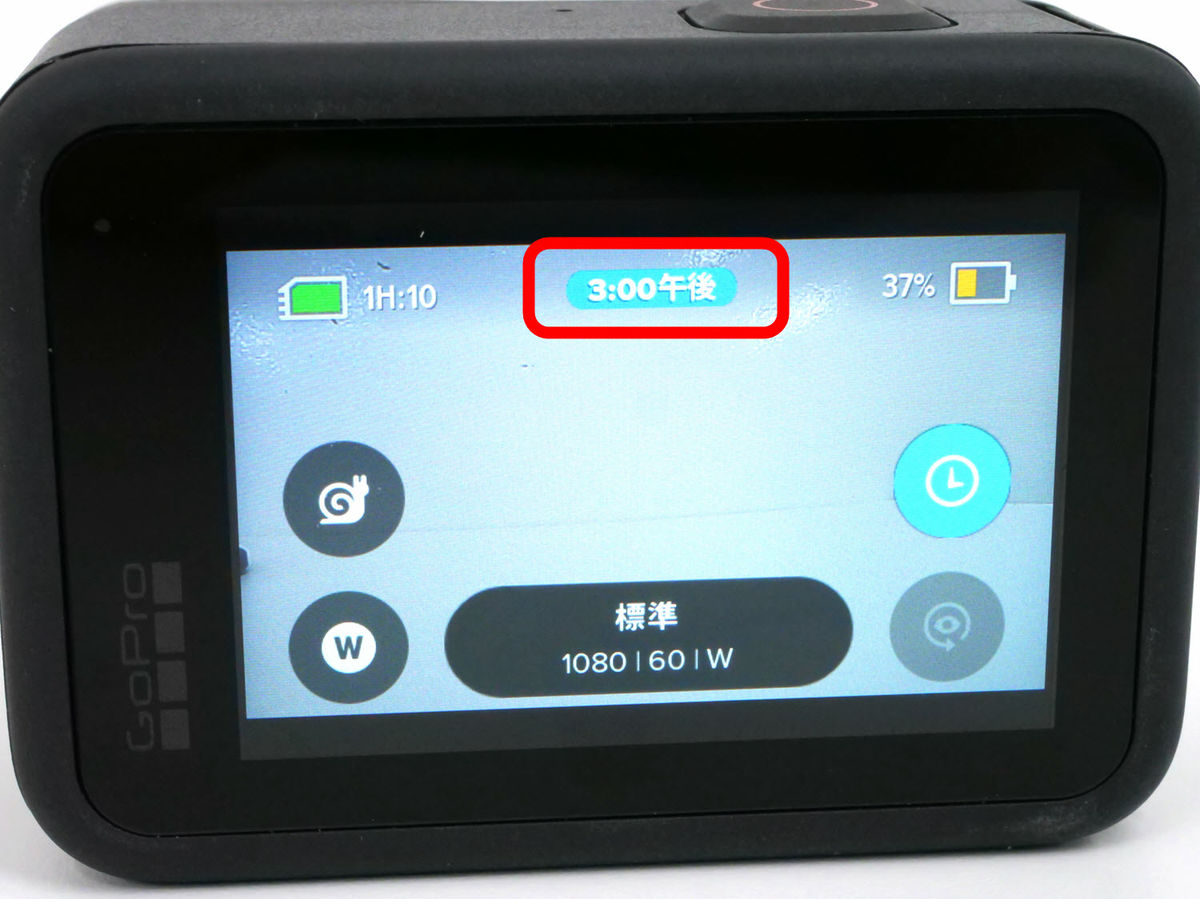
Schedule capture allows you to start shooting a movie at a specified time.

The reserved time is displayed at the top of the screen.
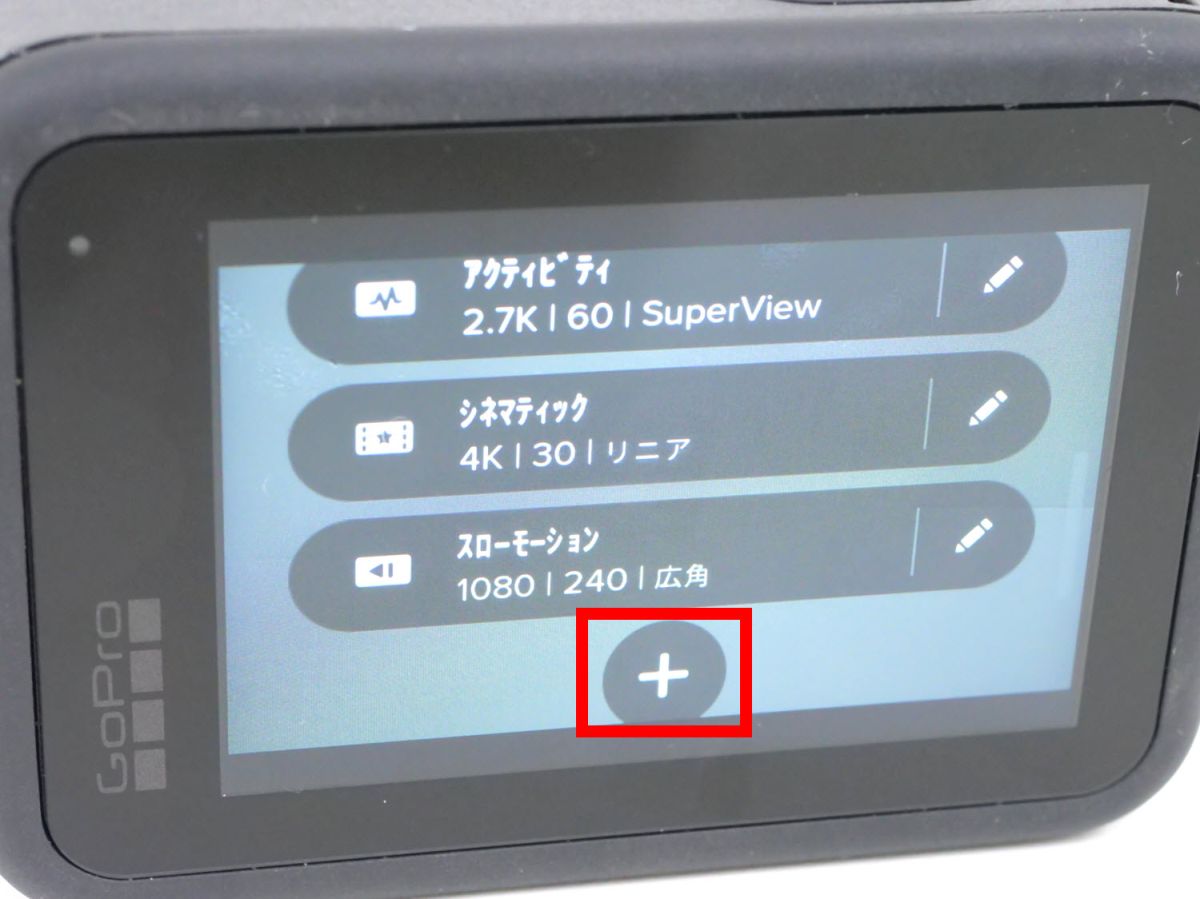
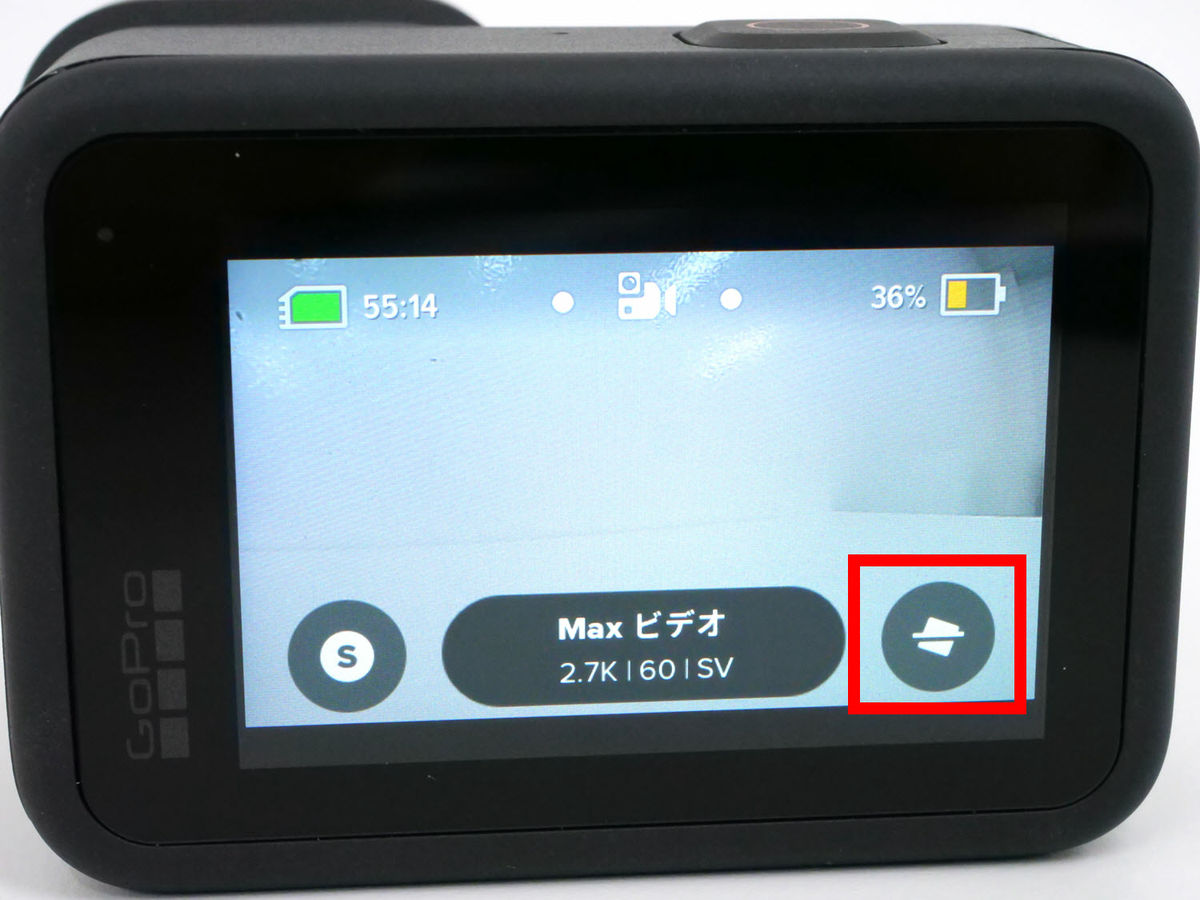
Also, if you tap the shooting settings at the bottom center of the screen ...
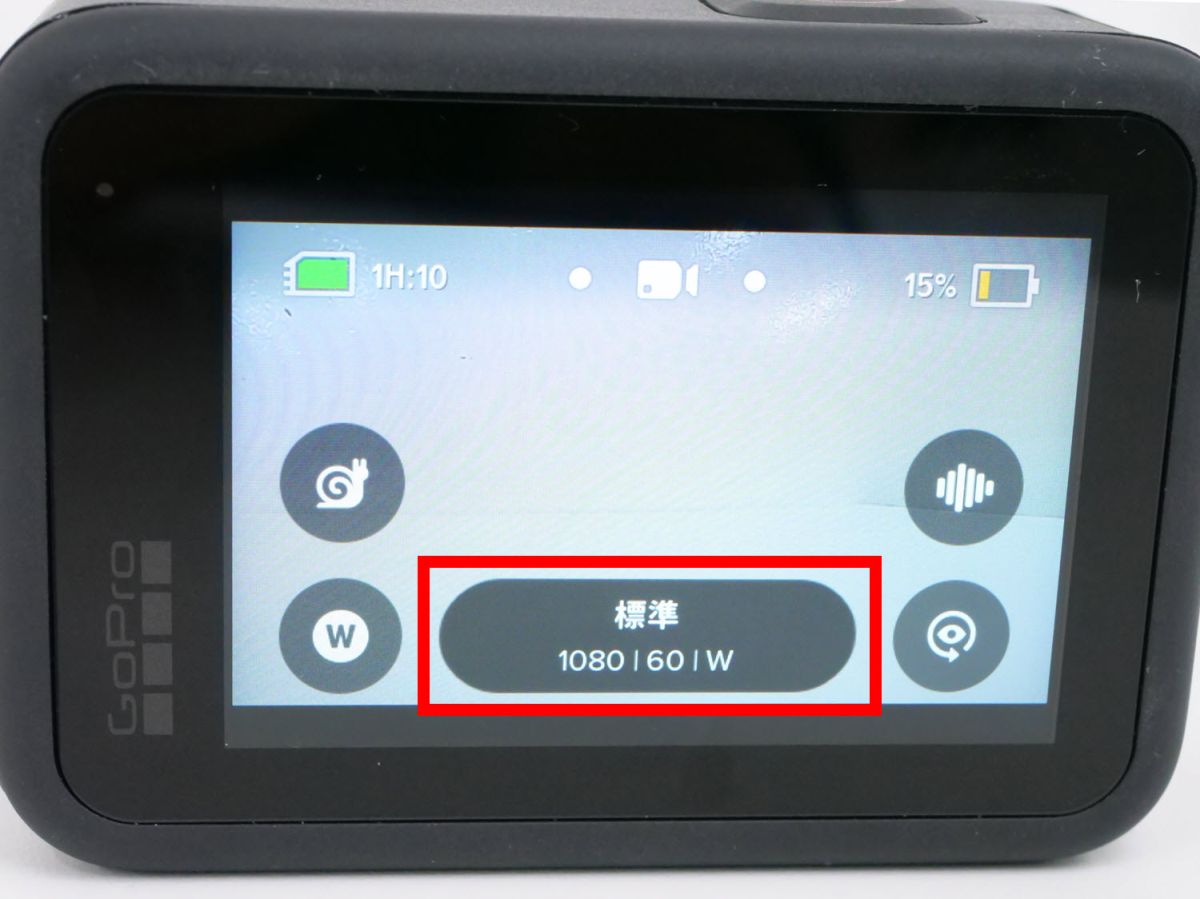
You can change shooting settings such as resolution and fps from the template with one tap. Some templates are provided by default, but you can also add your own settings by tapping '+'.
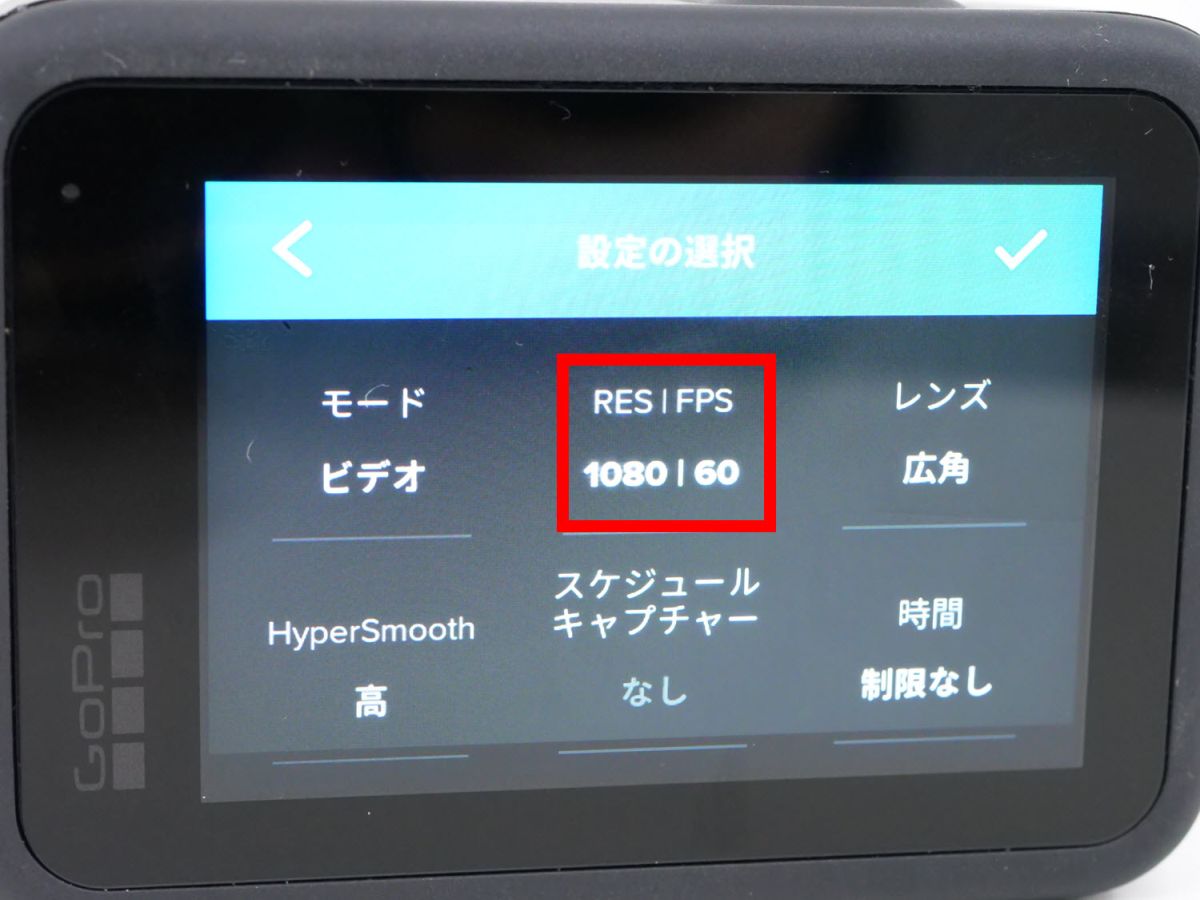
You can select the image quality by tapping 'RES | FPS'.
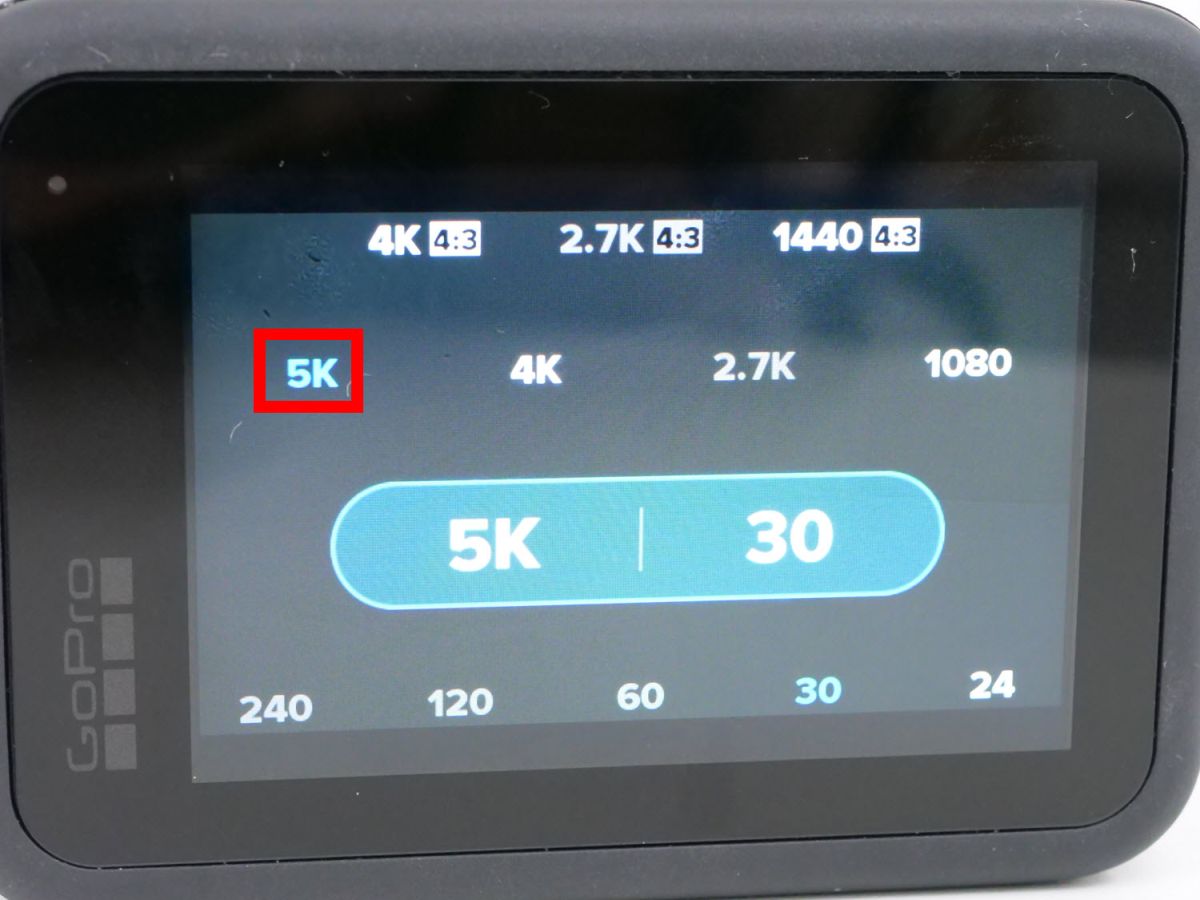
By tapping '5K', you can shoot a movie with 5K image quality newly supported by GoPro HERO9 Black. Note that if you set 5K image quality, the upper limit of FPS will be 30.
Swipe left or right on the screen to switch to time-lapse camcorder mode.
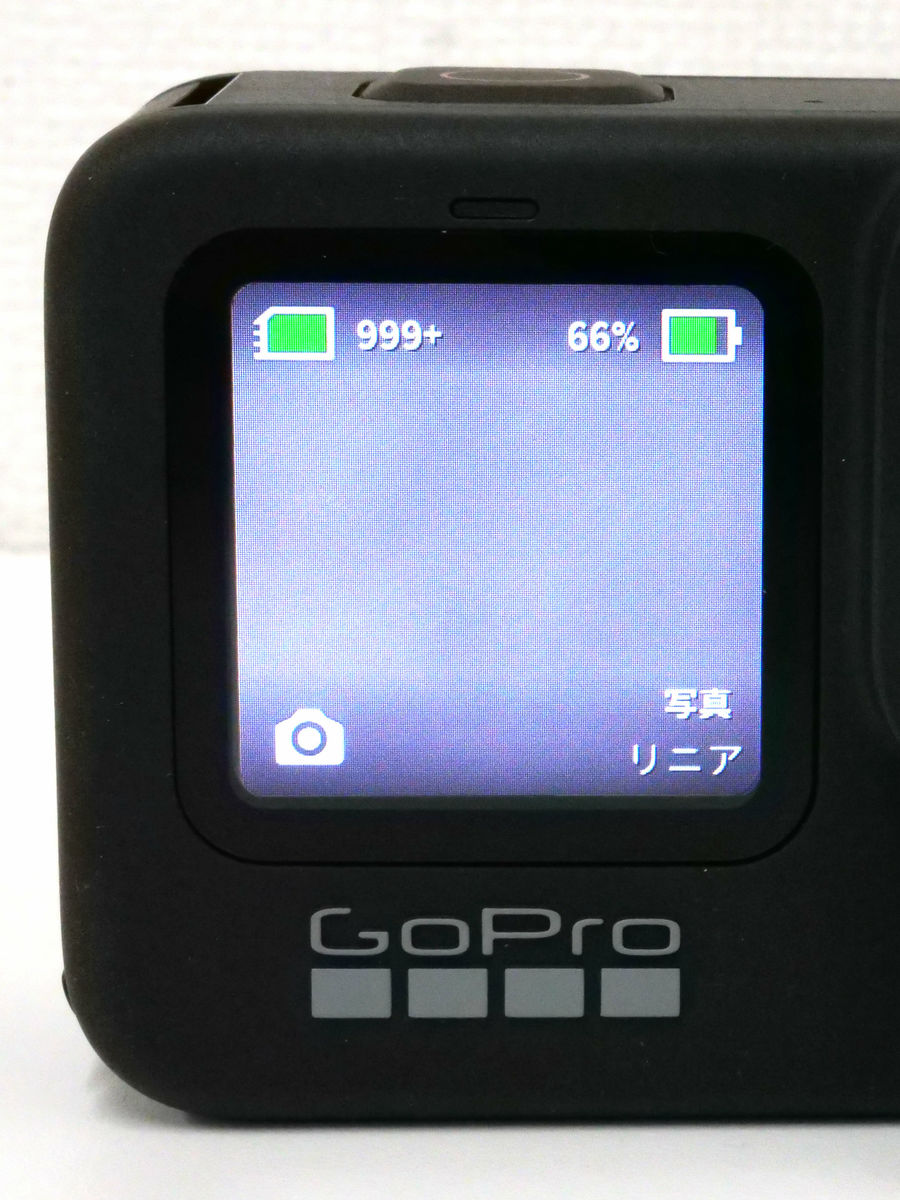
Below is the camera mode screen. In camera mode, the resolution of photography is powered up to 20 megapixels.
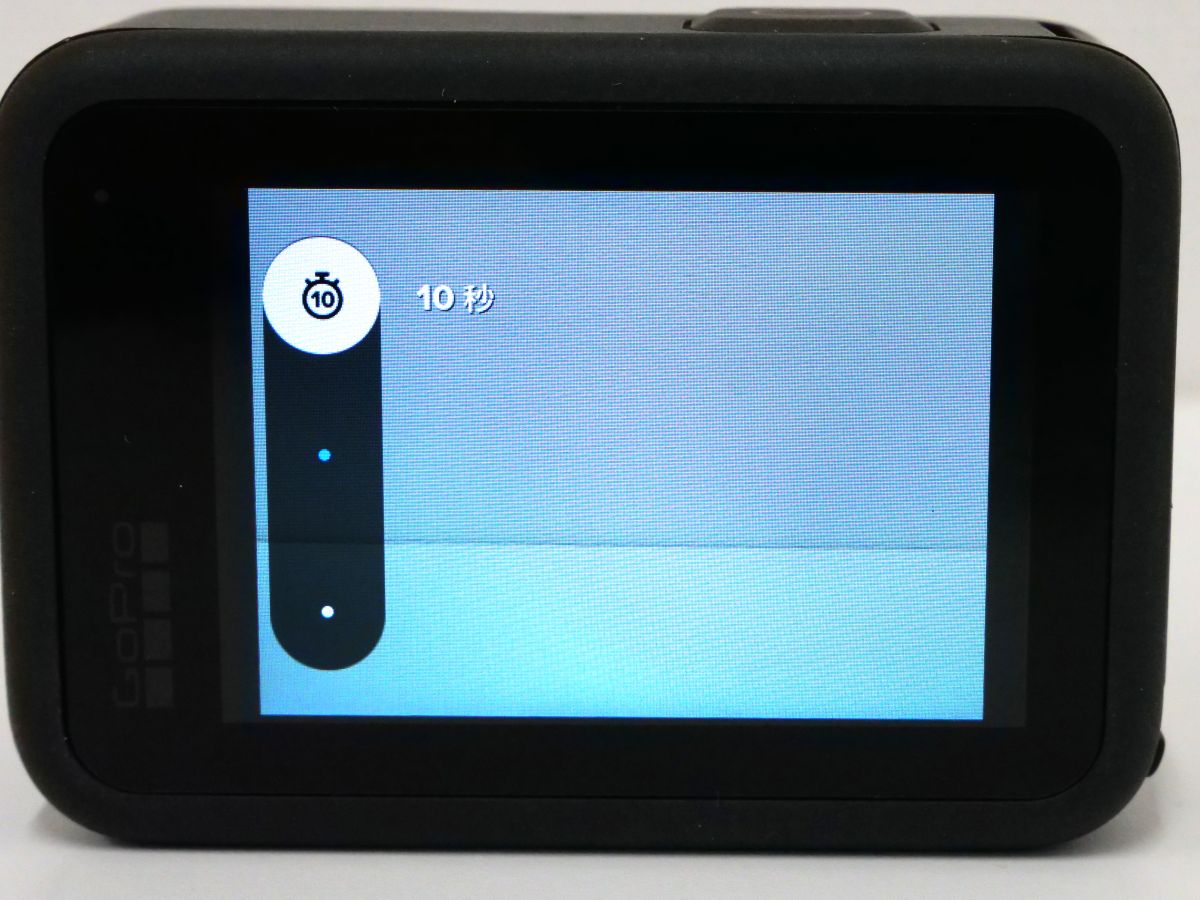
You can set the self-timer by tapping the mark like a stopwatch.

It can be set up to 10 seconds.
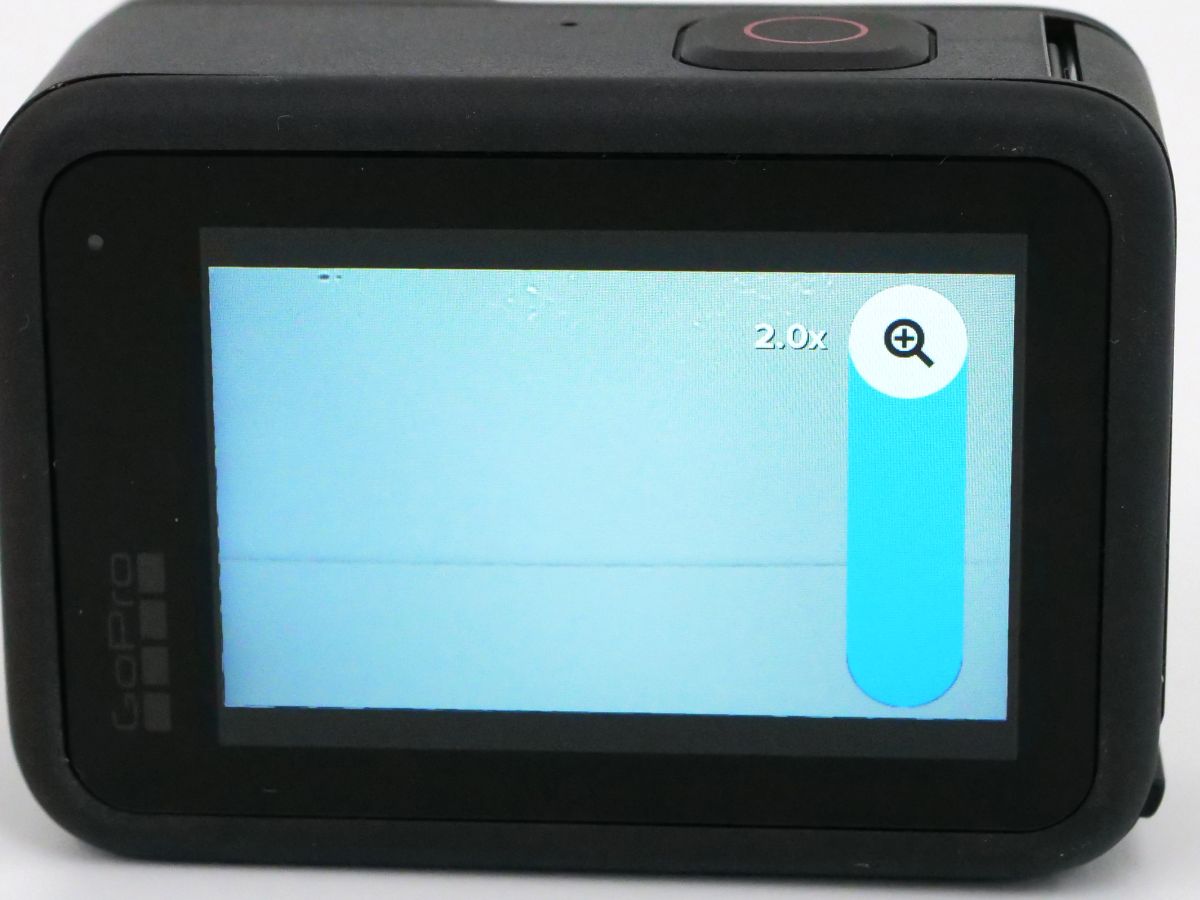
You can zoom by tapping the magnifying glass mark.
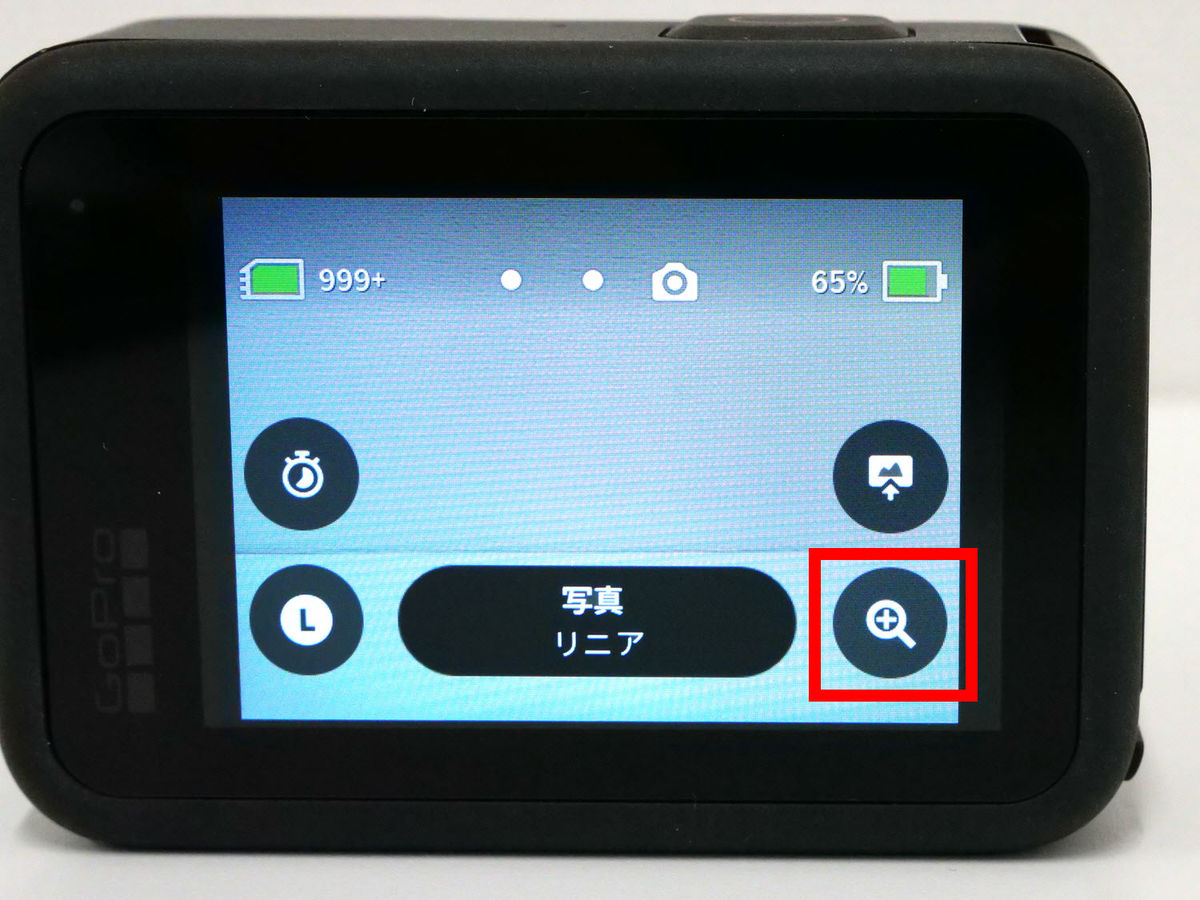
You can zoom up to 2x.
In camera mode, tap the bottom center ...
You can select 'Live Burst' which is newly added from GoPro HERO9 Black, and you will be able to record 1.5 seconds before and after taking a picture as a movie. In other words, you can create a still image and a short movie at the same time.

The following is the time-lapse mode screen. From GoPro Hero9 Black, the time-lapse function has also evolved to 'Time Warp 3.0'.

The mark like the speedometer at the bottom right is the 'speed lamp' icon. TimeWarp 3.0 is similar to TimeWarp 2.0 in that it can create timelapses up to 30x speed, except that you can switch between real time and half speed by tapping the 'speed ramp' while recording.

◆ I tried to link with the GoPro application of the smartphone
To integrate the app with your GoPro HERO9 Black, first swipe the screen from top to bottom.

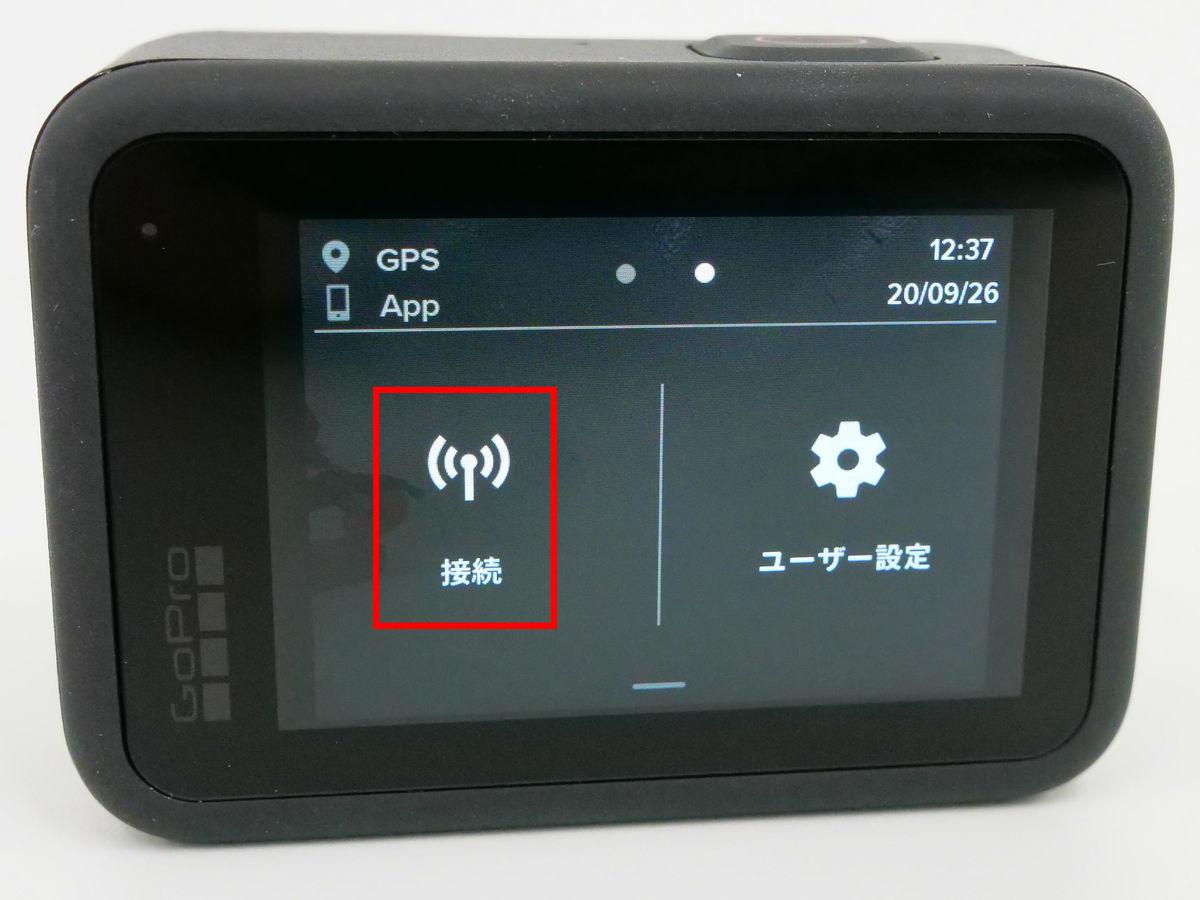
Then the following screen will be displayed, so swipe from left to right.

Tap 'Connect'.
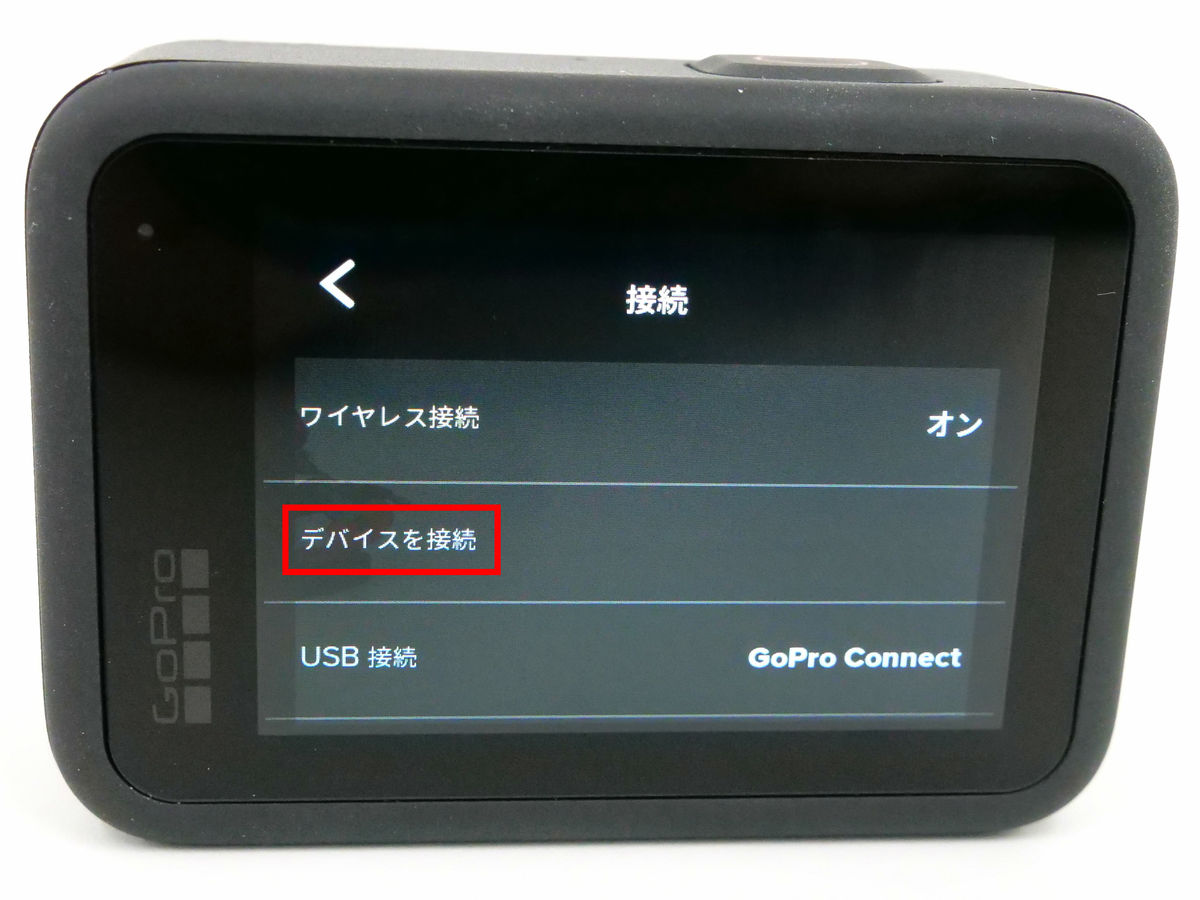
Tap 'Connect device'.
Tap 'GoPro App'.
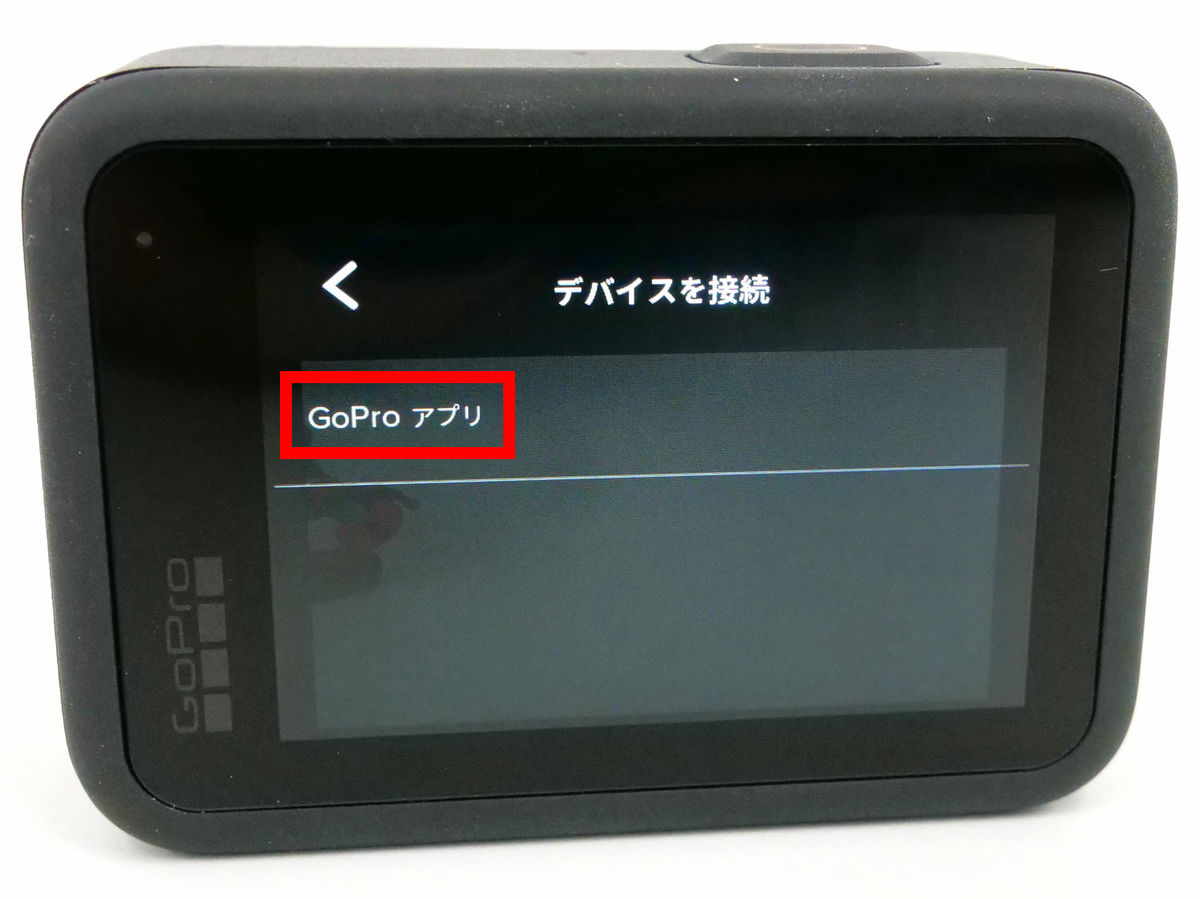
Set the smartphone with the following screen displayed.

The GoPro smartphone app is distributed on iOS and Android and can be downloaded from the URL below. This time I used the iOS version.
GoPro on the App Store
GoPro-Google Play app
https://play.google.com/store/apps/details?id=com.gopro.smarty
Tap 'Get' and tap 'Open' when the download is complete.
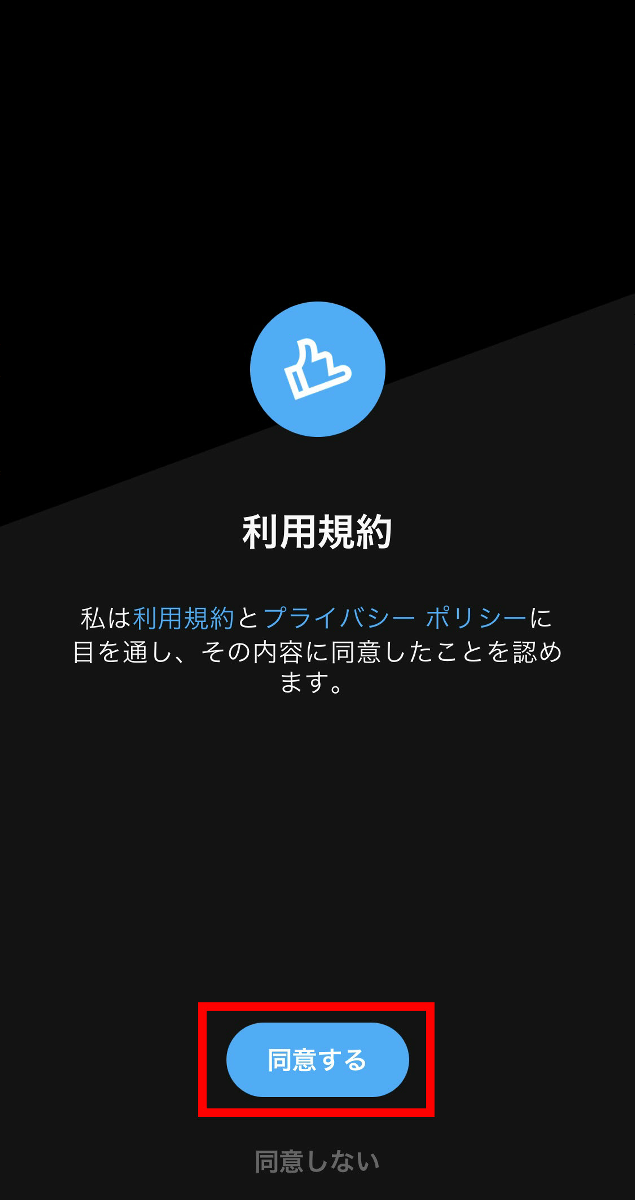
The app will open, so tap 'Agree'.
Tap Add Camera to connect the app to your GoPro HERO9 Black.
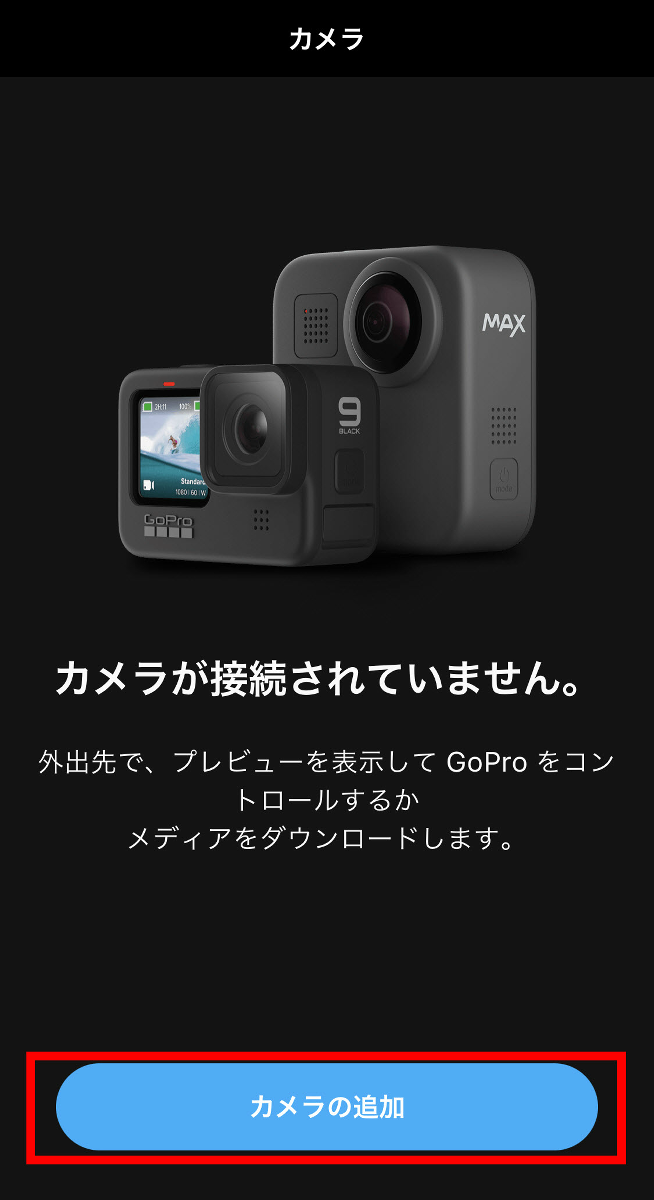
When the following screen is displayed, tap 'Connect camera'.
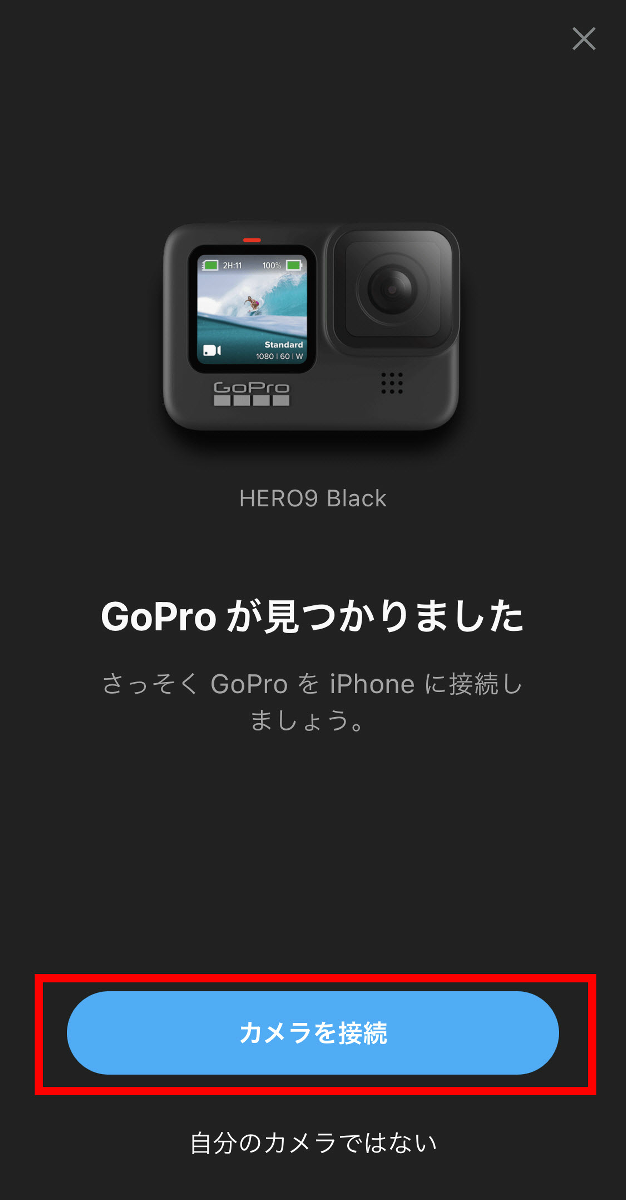
Tap 'Pairing'.
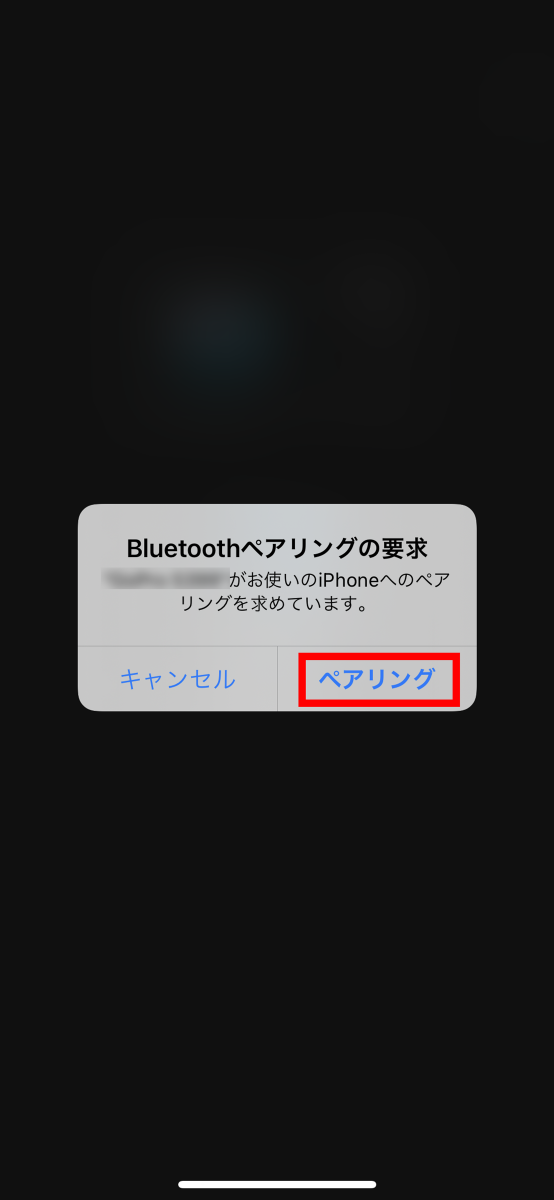
OK if 'Connected' is displayed

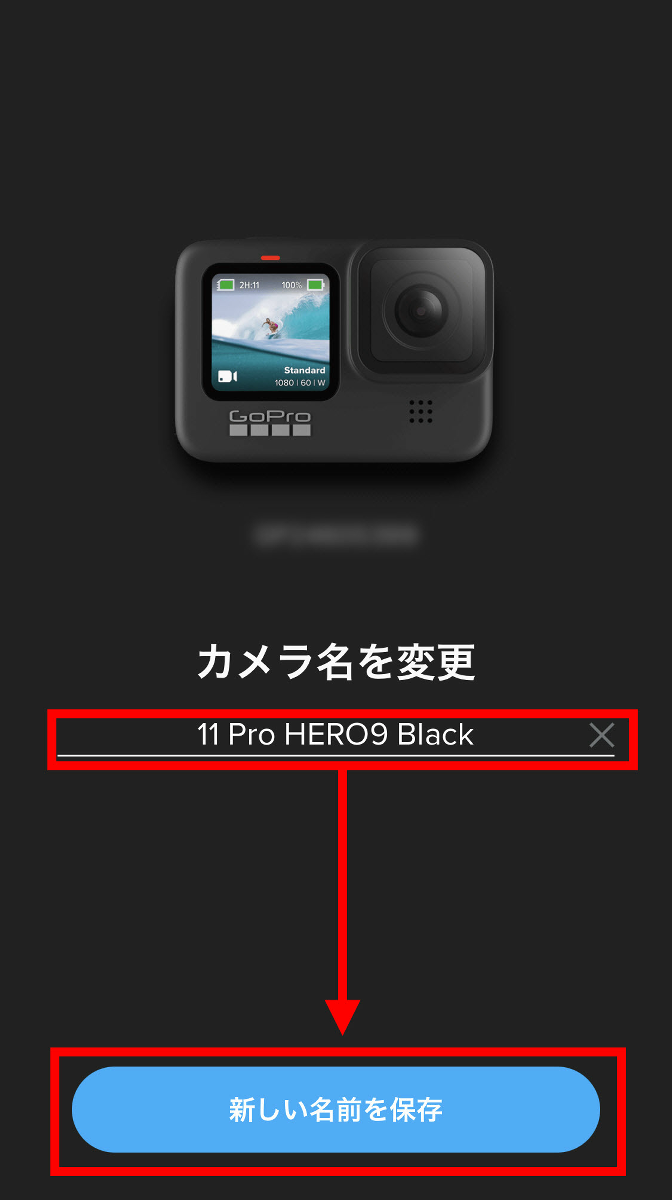
You can give the camera a name, so enter a name of your choice in the input field and tap 'Save New Name'.
Tap 'Start Now' to use the app.
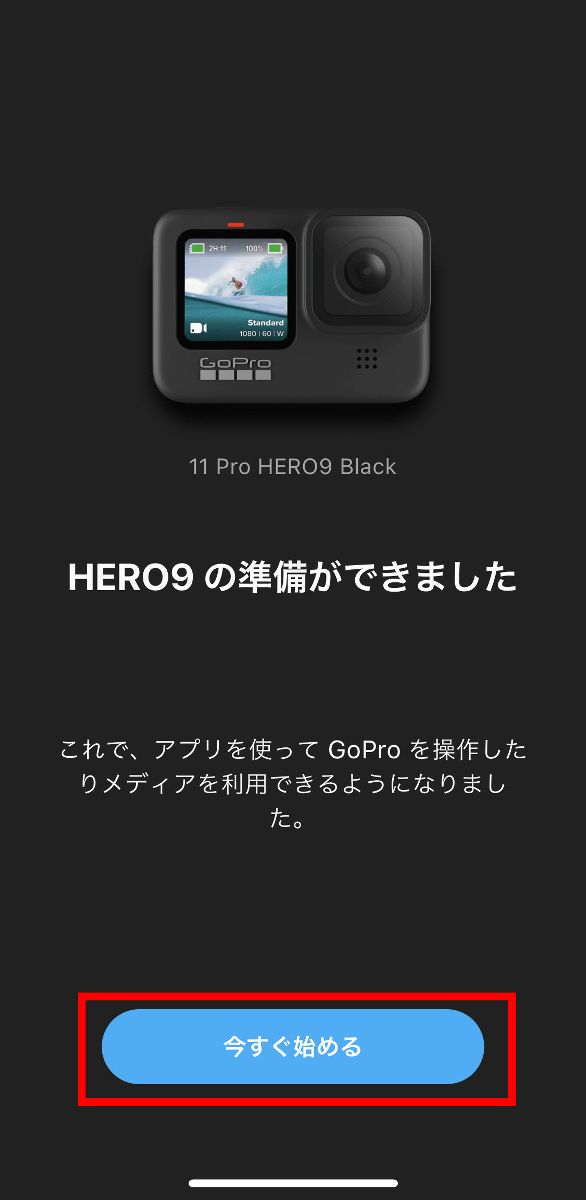
GoPro HERO9 Black can be remotely controlled from your smartphone. When you install the app for the first time, the following screen will be displayed, so tap 'Try' to open the remote control screen.

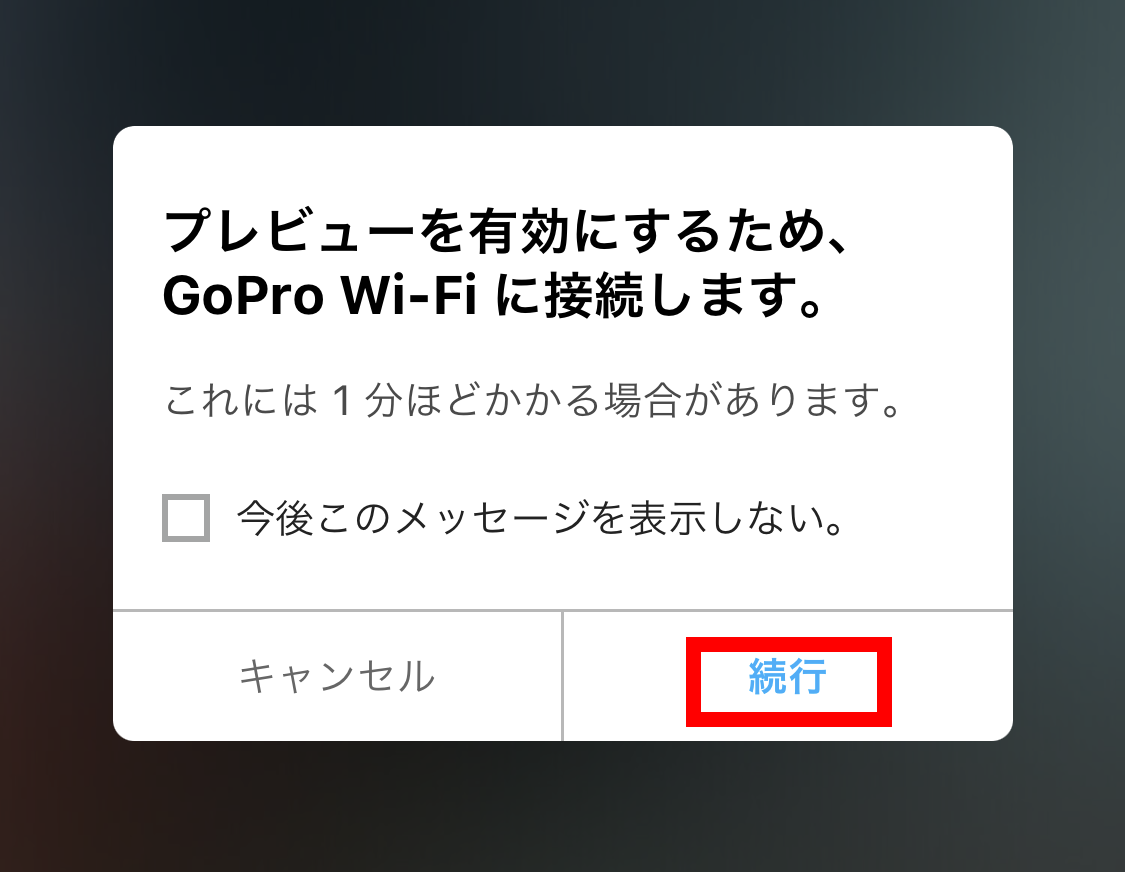
Tap 'Enable Preview' to sync your screen with GoPro HERO9 Black.
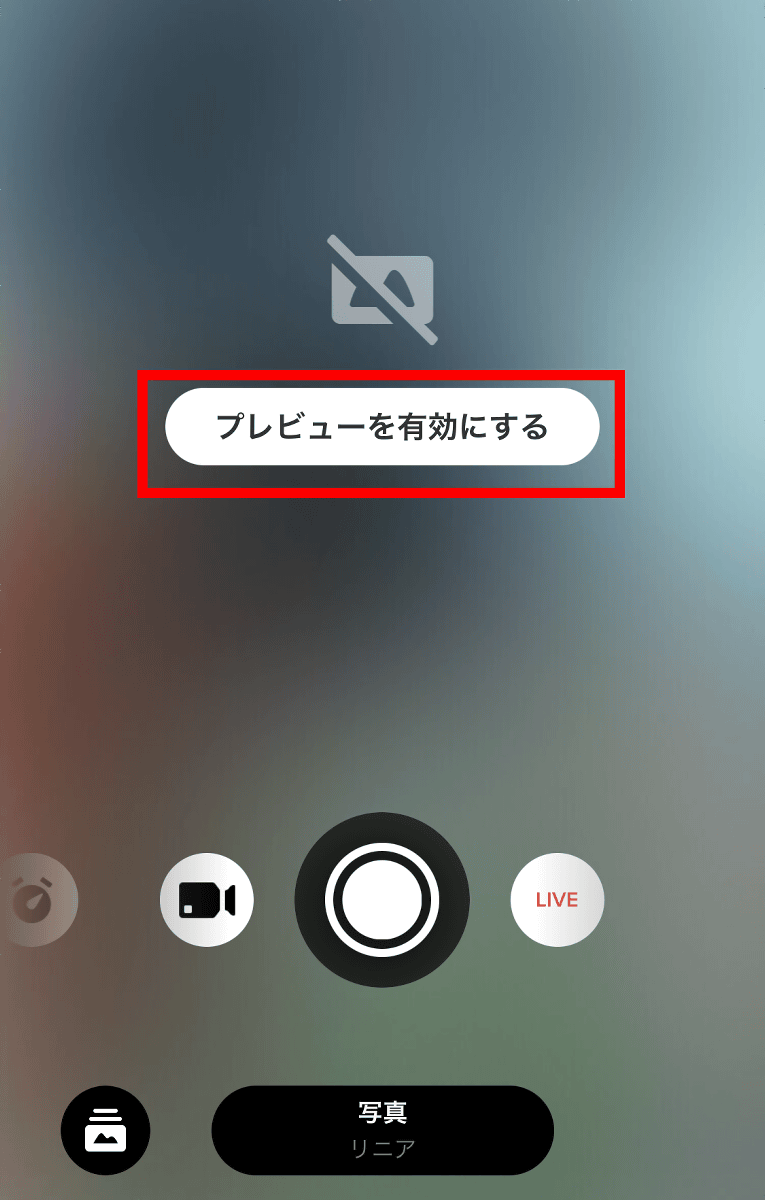
Tap 'Continue' to sync your screen with your GoPro HERO9 Black.
The following movie is actually operating GoPro HERO 9 from the application. Although there is a slight time lag, smooth operation is possible.
You can also set the upper limit of shooting time from your smartphone. Tap the shooting settings in the red frame ...
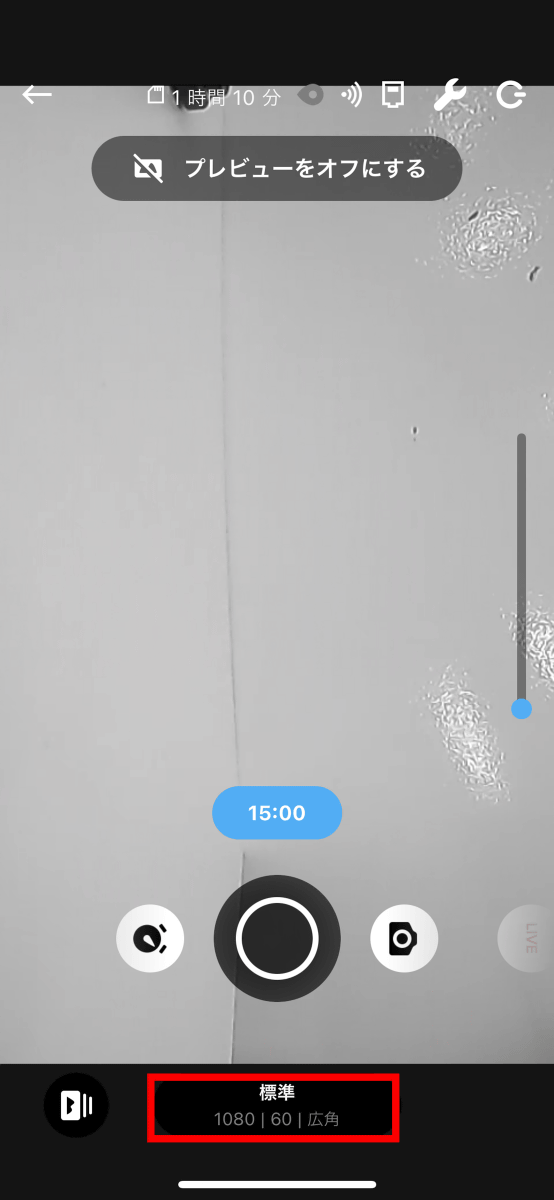
Tap the pen icon with the blue text.

The 'time' part is the upper limit of the movie shooting time, and the default is 'no upper limit'. You can change the maximum time by tapping.
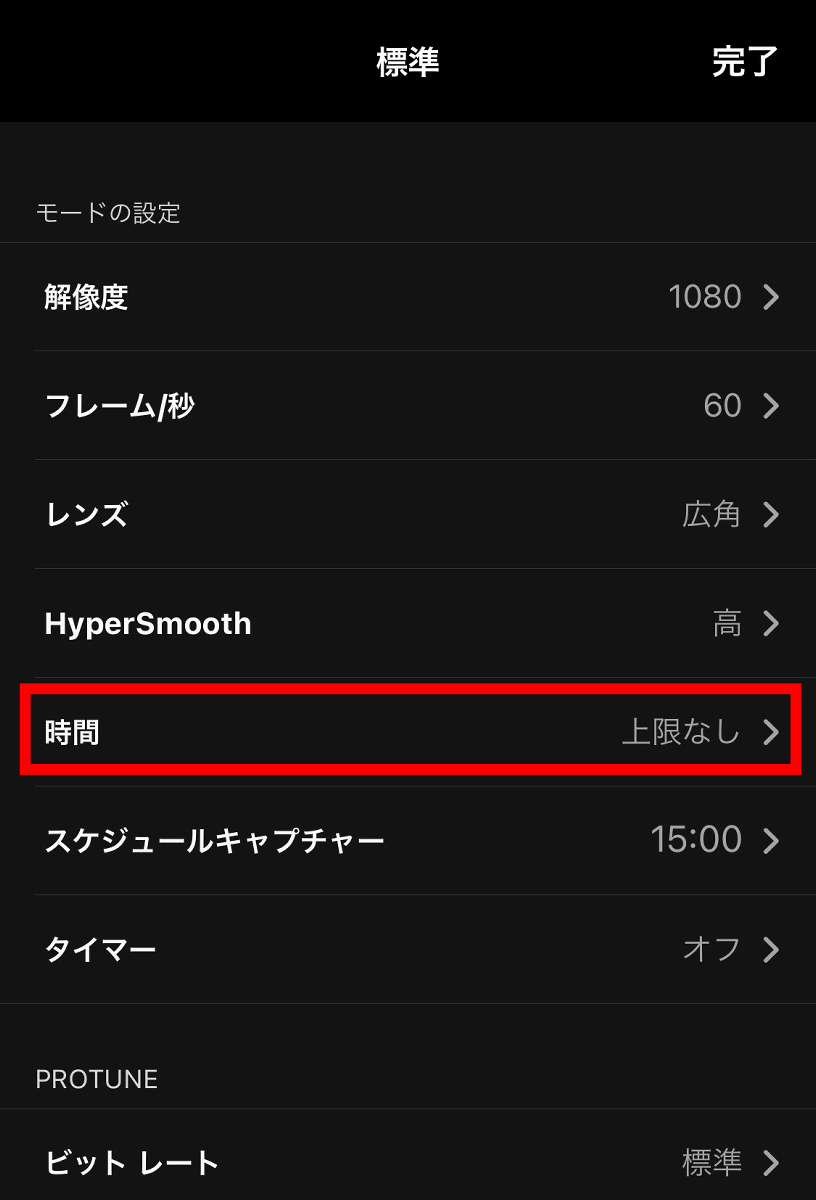
You can set the shooting time in the range of 15 seconds to 3 hours.

◆ Since the lens can be attached and detached, I tried installing a new lens
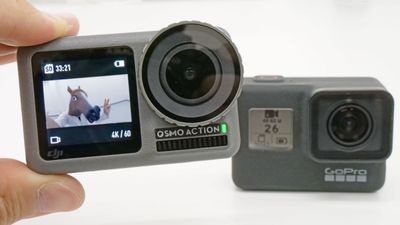
The GoPro HERO9 Black lens is removable, and you can also attach a dedicated lens such as the separately sold '
When you remove the lid of the Max lens modular, it looks like this.
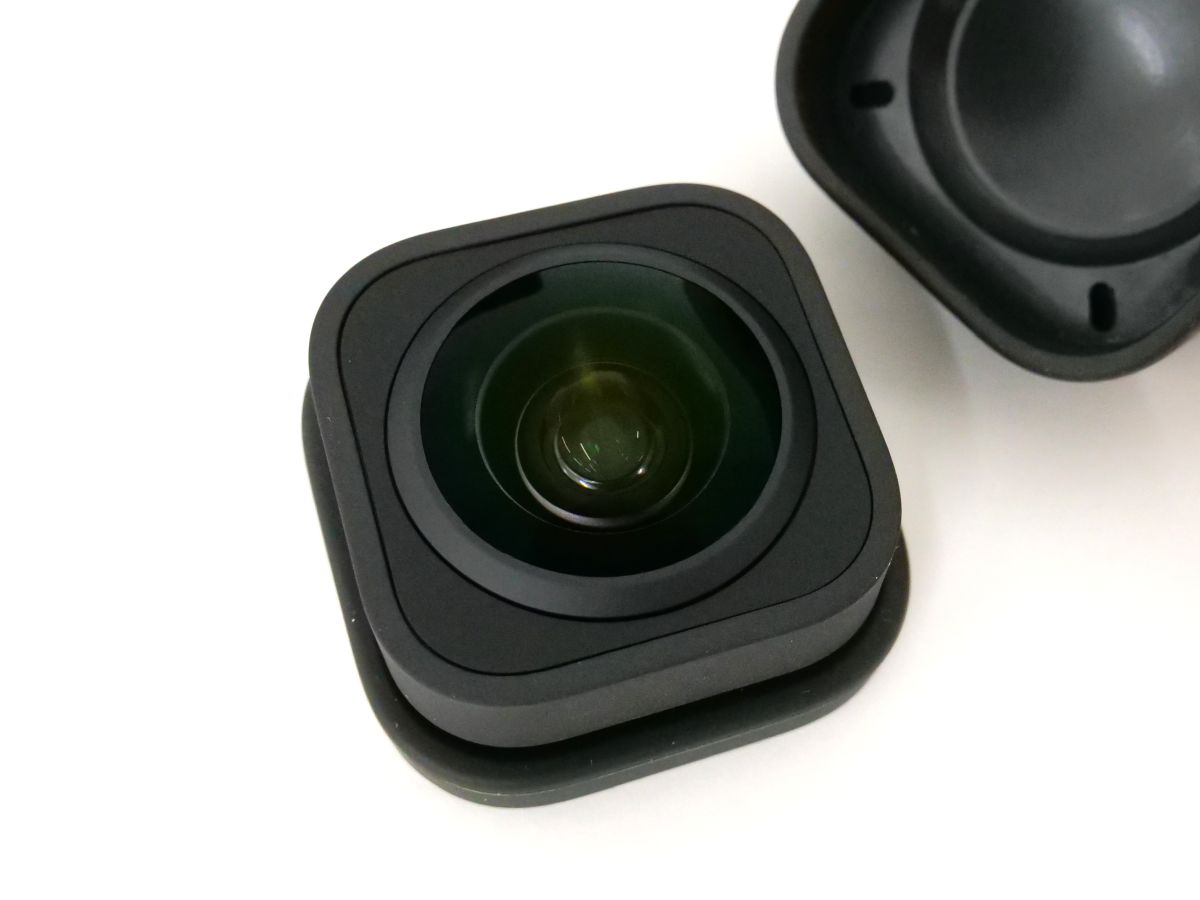
You can remove the GoPro HERO9 Black lens by pulling it around and turning it around.
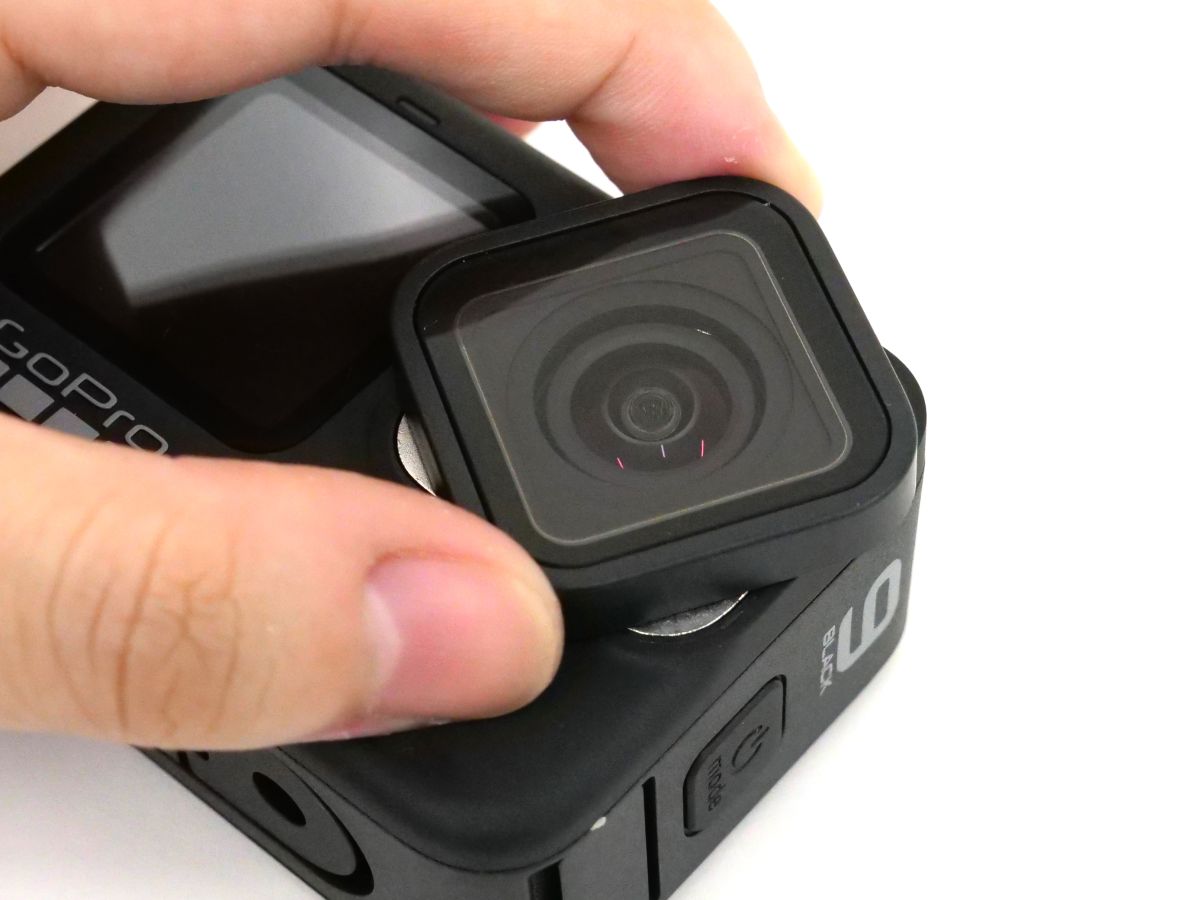
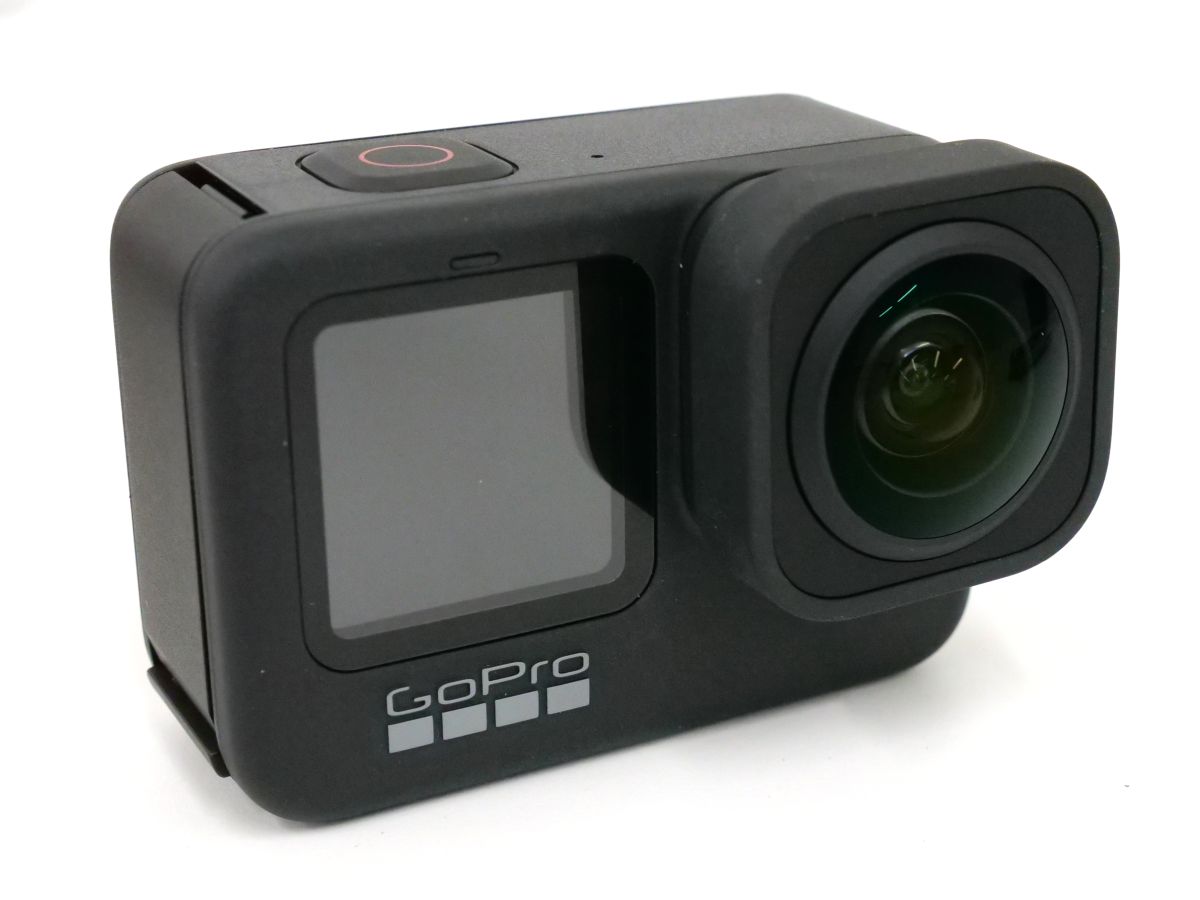
It looks like this when Max lens modular is attached.
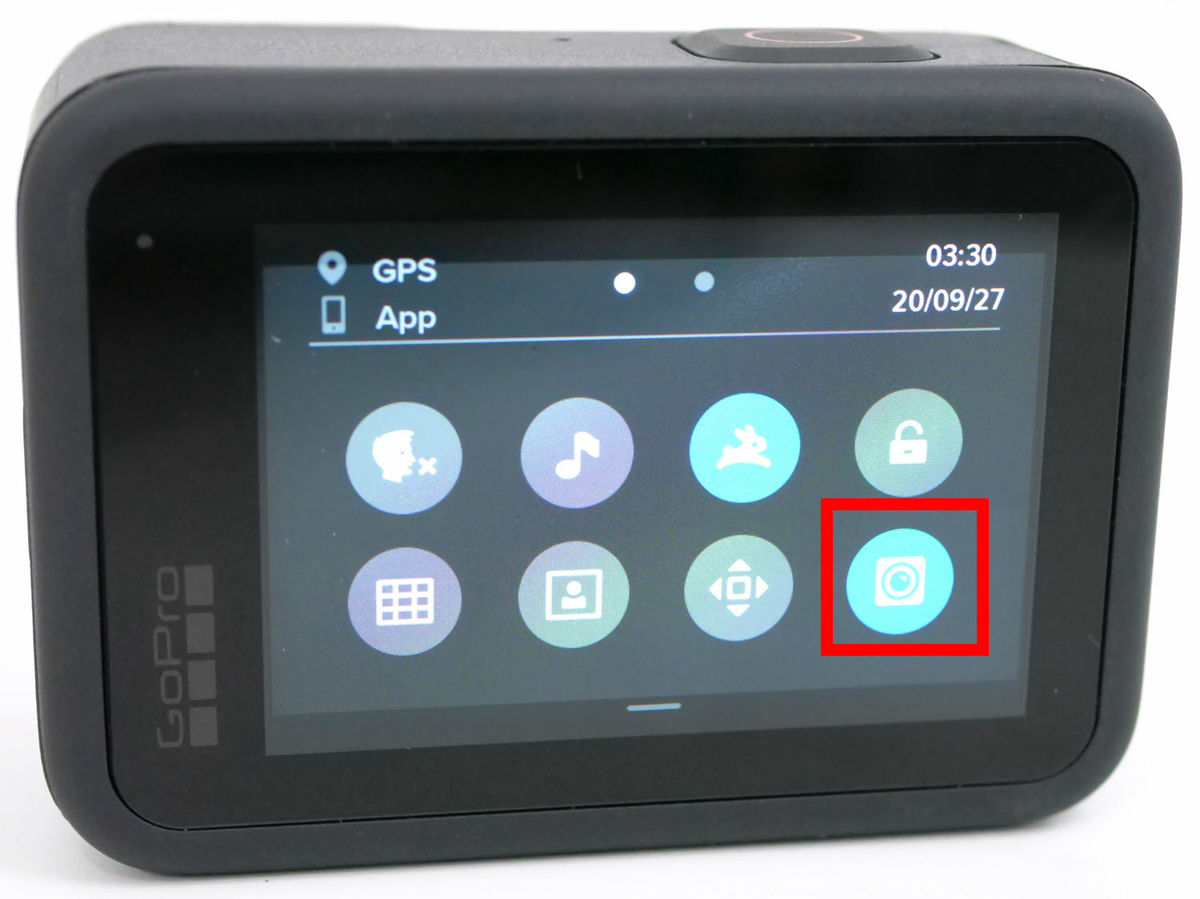
When Max Lens Modular is attached, you need to tap the lens icon at the bottom right of the screen below, which is displayed by swiping the screen from top to bottom, and turn on 'Max Lens Mode'.
Below are the photos actually taken with the ultra-wide-angle 'Max Super View' using the Max lens modular.
Below is a wide-angle photo taken with the default lens. There was a difference in the size of the margin from Max Super View.
The following is a picture taken with the default lens at a linear angle. You can see that the fisheye effect is gone. In terms of angle of view, the iPhones fill the screen, so you can see that you can shoot only a narrow range compared to Max Super View.
Also, if you tap the icon at the bottom right in Max lens mode, you can use the horizontal lock function that can be used only in Max lens mode.
The following movie was actually shot with the Max lens modular and the horizontal lock function turned on. The left side of the screen seems to be spinning around the GoPro HERO9 Black, and the right side is the movie actually shot. You can clearly see that the image is not turned sideways even if the camera is tilted or rotated once.
I tried using the horizontal lock function of Max lens modular with GoPro HERO9 Black with removable lens --YouTube
The price of 'GoPro HERO9 Black' is 54,000 yen on the official website . If you subscribe to a GoPro subscription for 500 yen per month, which includes unlimited cloud storage services at the time of purchase, you can purchase for 43,000 yen. At Amazon.co.jp, a set of battery and glasses holder was sold for 68,750 yen at the time of writing the article.
Amazon.co.jp: [GoPro Official Limited] GoPro HERO9 Black + Spare Battery + Official Store Limited Not For Sale Mega Holder (White) + Sticker [Domestic Genuine]: Camera

Related Posts: