Starting from scratch iOS application development "Let's install the created application on iPhone"
Preliminary knowledge Let's develop iOS app from scratch! This is "iOS application development starting from scratch". This time I will use the TableView which is perfect for displaying the list, and actually try launching the application on the iPhone. Once you paid 11,800 yen per year to move the application on iPhoneApple Developer ProgramIt was necessary to become a member of, but from 2015 it can be done free of charge.
The first article, "try making an application without writing the code" is from the following.
IOS application development starting from scratch "Application to switch screens with buttons" - GIGAZINE
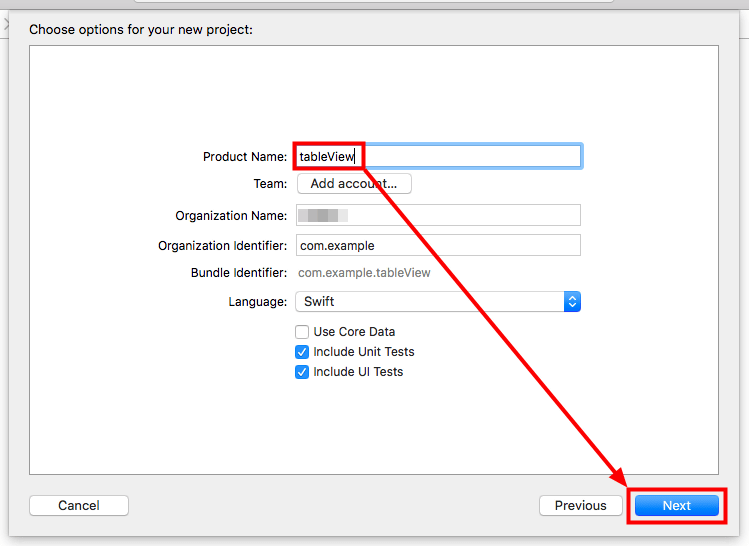
We will create new projects as we did last time. We named the "tableView" for the project.
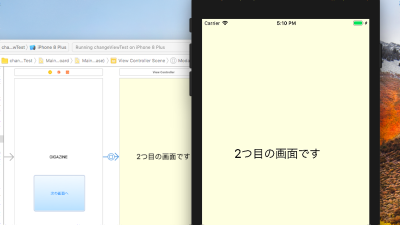
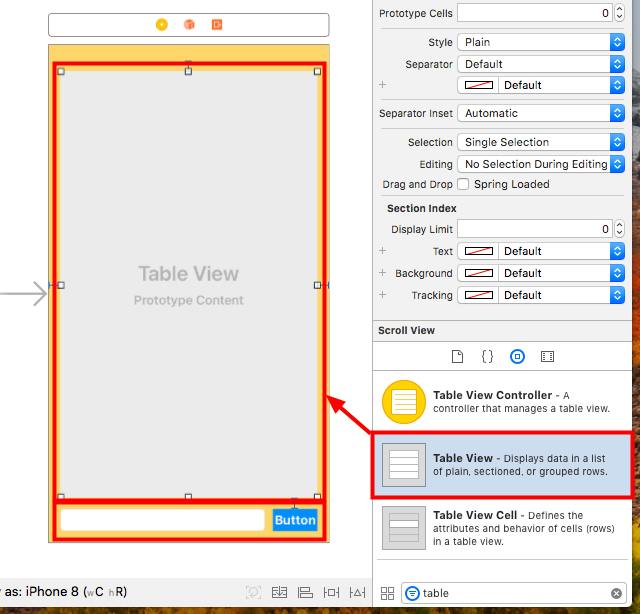
Open "Main.storyboard", place "Table View" from the bottom right on the screen by dragging and dropping, and use "Constraints" to determine the position and size. Place 'TextField' and 'Button' at the bottom. Also, for the sake of clarity, I changed the background color to orange. So far,The 3 rdYou can check with the articles up to.
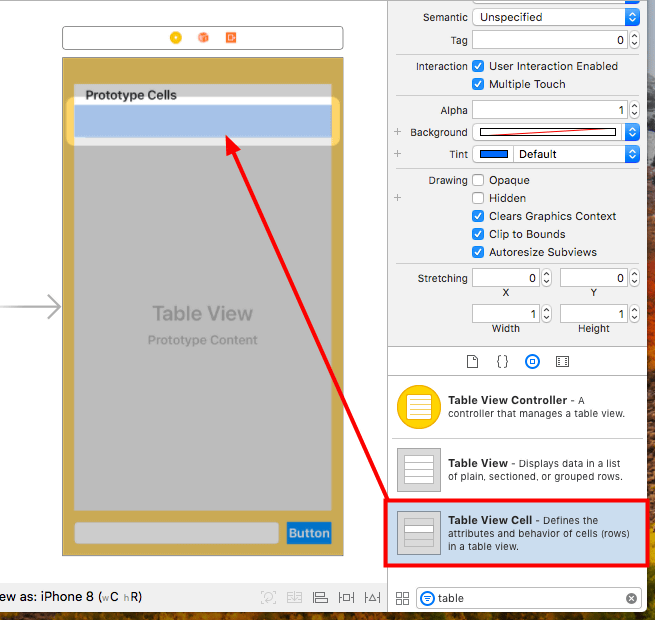
Next, drag & drop "Table View Cell" in the table view we placed earlier.
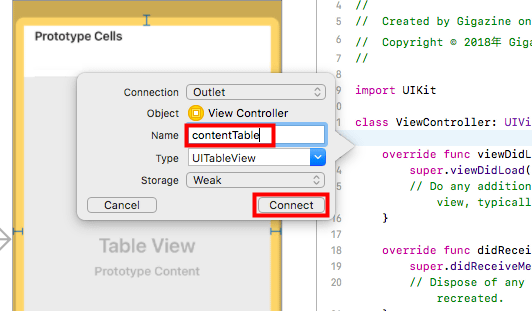
Then press "alt + command + enter" simultaneously to enter assistant editor mode and connect the table view to ViewController with "control + drag".

Anything is fine, but I clicked "Connect" by name "contentTable" this time.
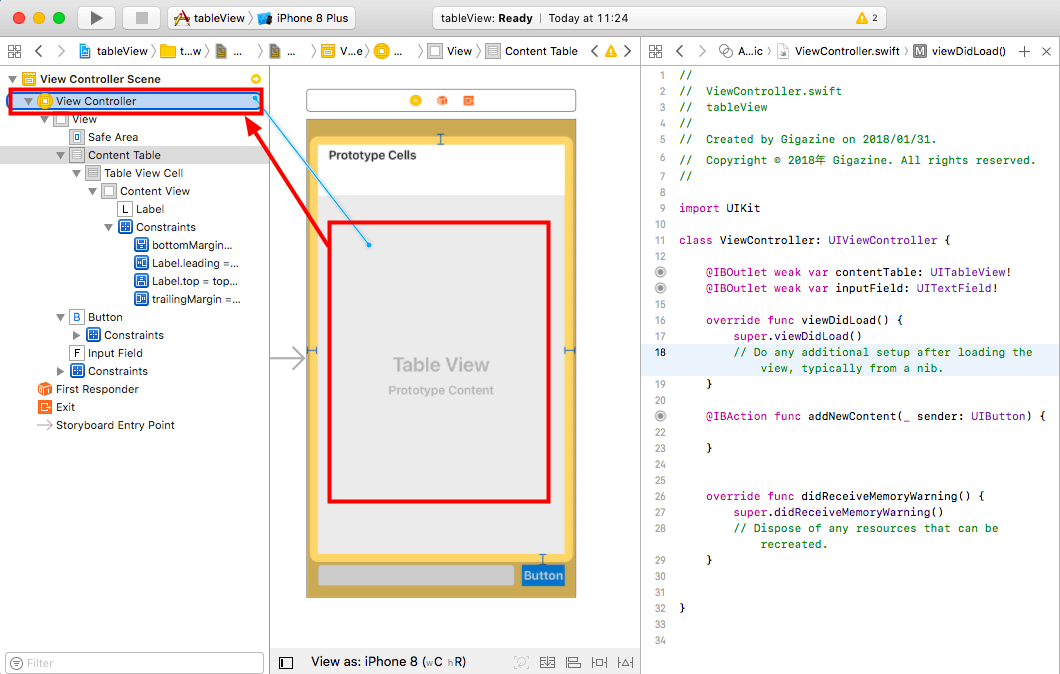
Also, connect the input fields and buttons arranged at the bottom to ViewController respectively. When connecting the button, select "Action" and check whether "@IBAction" is displayed in the code.

Control + click on the table view again, and now drag it to the "View Controller" on the left.
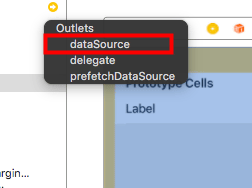
Select "dataSource" because you can ask the type of connection. This is the item of where to set the data to be displayed in the cell. Since we are connected to "View Controller" this time, we will set the data with "View Controller" which is a class corresponding to this screen.
Once again connect the table view and the left view controller with control + drag and select "delegate" this time. This sets the table view where to write the processing in case there is some action such as tapping a cell. Well, this has resulted in a total of three connections from the table view. In this way, in order to use the table view, it is basically necessary to make these three connections.

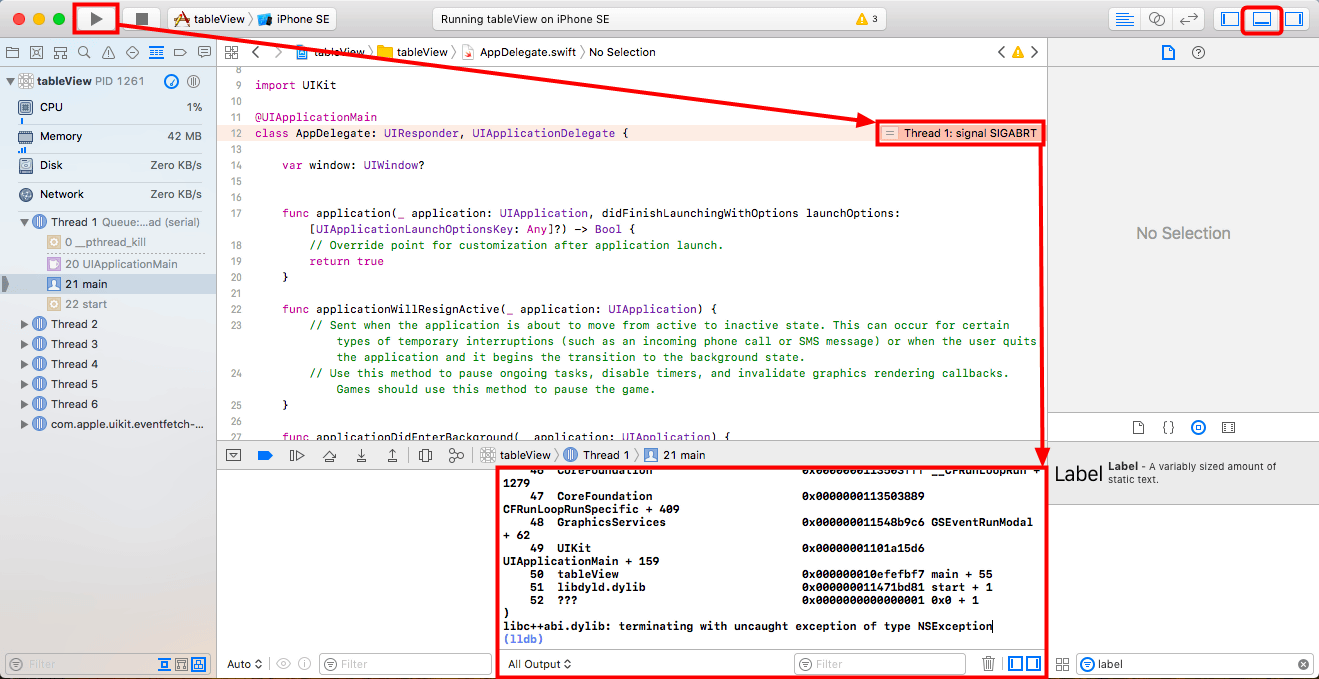
· "Signal SIGABRT"
I just connected the parts, but here I will click the play button and move the application. This will cause the application to stop with an error named "signal SIGABRT". Since this "signal SIGABRT" indication only has the meaning of the extent that the error occurred, it is necessary to see another place for why the error occurred. As it is shown in the image below, it is a log displayed when moving the application. If by any chance do not display please check if the mark on the upper right is blue.
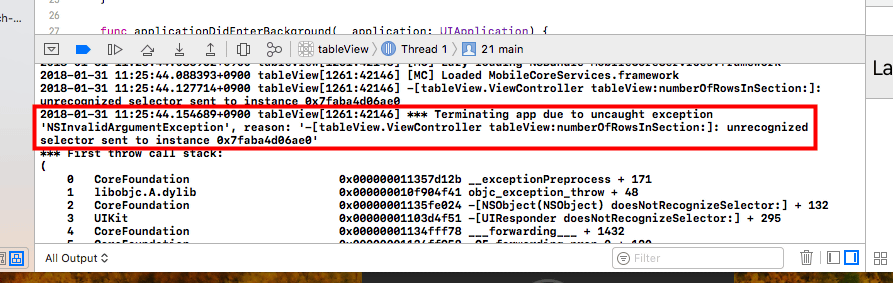
It is recorded what kind of error the application stopped in this log. As you go back a mystery string remaining in the log for a while, there is a part called "*** Terminating app due to ......", after which the reason is displayed. If you search Google for reasons why the application stopped, the string around this will be a big hint. Even if you search with 'signal SIGABRT' you probably will not find the information you want, so please be careful.
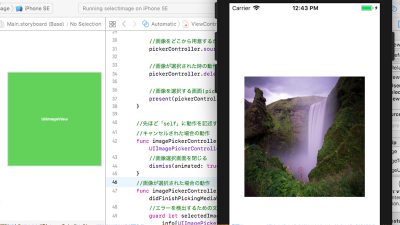
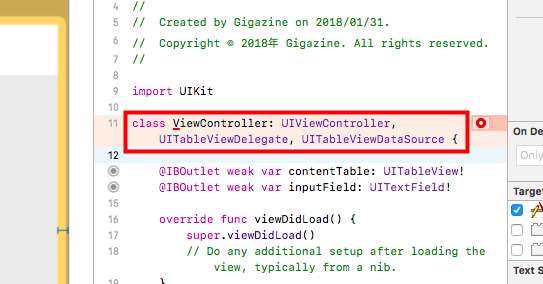
Well, I selected ViewController as the data source and delegate of the table view,Official documentAccording to the data source and the delegate class must always adopt the protocol "UITableViewDataSource" and "UITableViewDelegate".Last timeAs we did with "UIImagePickerControllerDelegate" and "UINavigationControllerDelegate" we will add it behind ViewController.
Then you will get an error like something. Click "Fix".
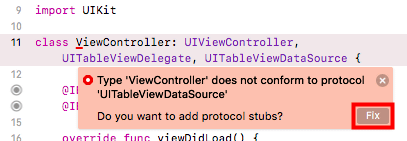
Then two functions were added. This is a required function for the class set for the data source, and it is a function that determines the number of cells displayed in the table view and a function that decides display of each cell.
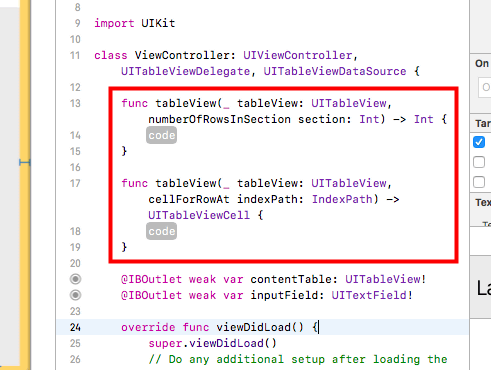
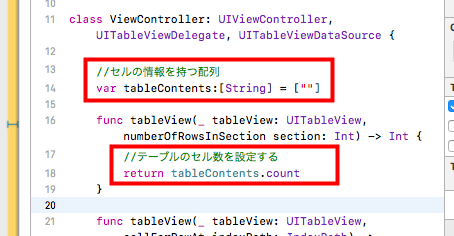
First, prepare an array "tableContents" to hold cell information. Then add "return tableContents.count" to the one that is "-> Int" indicating that the return value is an integer type out of the two functions added earlier. The number of cells in the table is now the same as the length of the array.
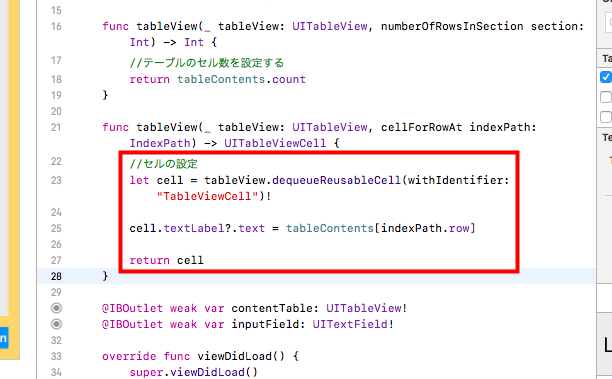
Next, set the cell display in the other cell.
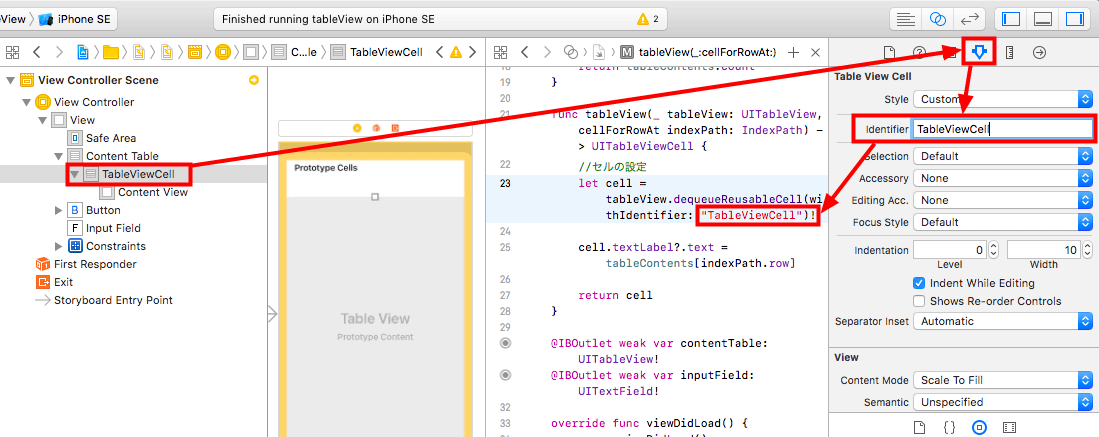
[code]let cell = tableView.dequeueReusableCell(withIdentifier:"TableViewCell")!
cell.textLabel? .text = tableContents [indexPath.row]
return cell [/ code]
This is the code that displays the character stored in the "corresponding to the position of the cell" location of the array "tableContents" in the cell.
Enter the exact same string as "" "TableViewCell" "in the above code in" Identifier "on the triangular mark" Attributes inspector "of the cell setting of the table view of the storyboard. Anything is okay if it is the same character string.
Next, I will set the action when pressing the button. First, add the character of the input field to the array storing the information to be displayed in the cell. Then put the input field back to the sky and finally reload the table.

· Move the application on the iPhone
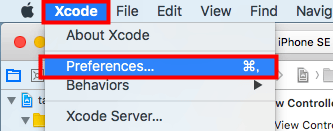
First you need to register Apple ID in Xcode. Click "Preferences ..." from "Xcode" in the menu.
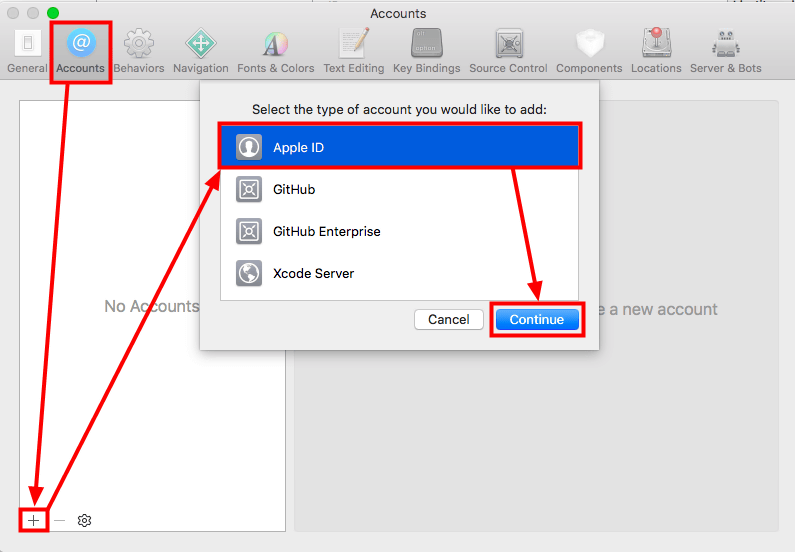
Click the "+" button at the bottom left of the "Accounts" tab, select "Apple ID" and click "Continue".
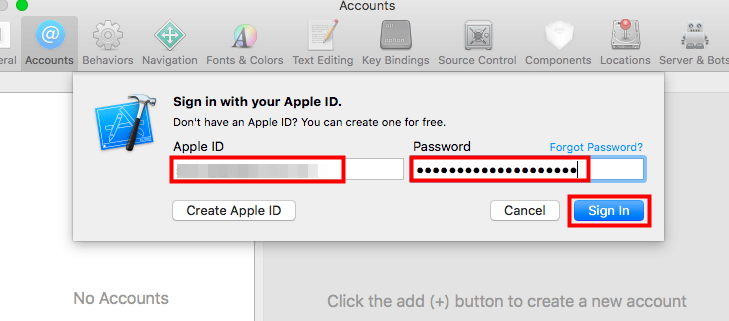
Enter your Apple ID and password and click "Sign In". This is the ID and password you are using to download the application on the App Store.
When the addition is successful, close the setting screen with the red button on the upper left.
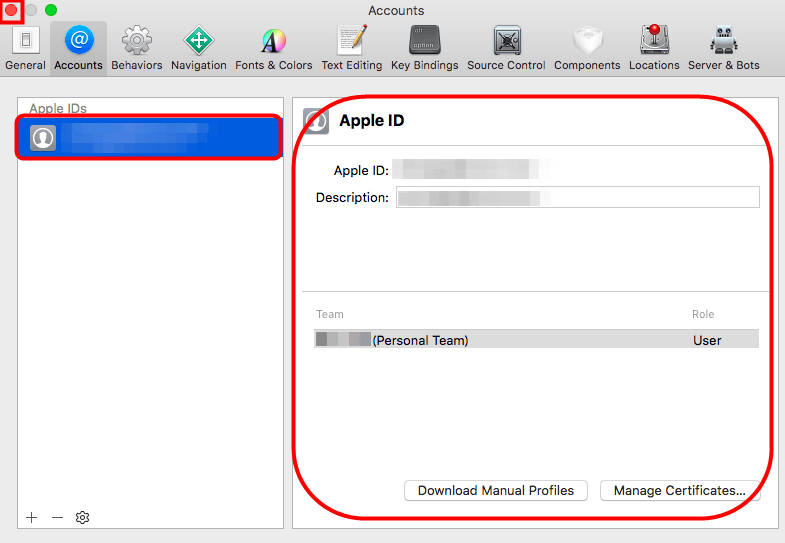
Select the project file from the left navigator and select the account you set earlier from the "Team" column. Then add a letter to the back so that the above "Bundle Identifier" is one thing in the world. An error will occur if you wear it with an application made by another person. And when you connect iPhone and Mac with USB to select the simulator, change to "iPhone" displayed and click the play button.

In the first time, an error similar to the screen below will appear and the application can not be started.
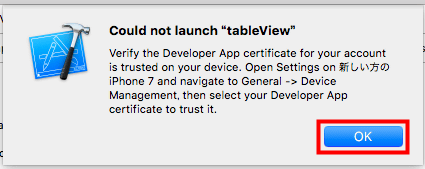
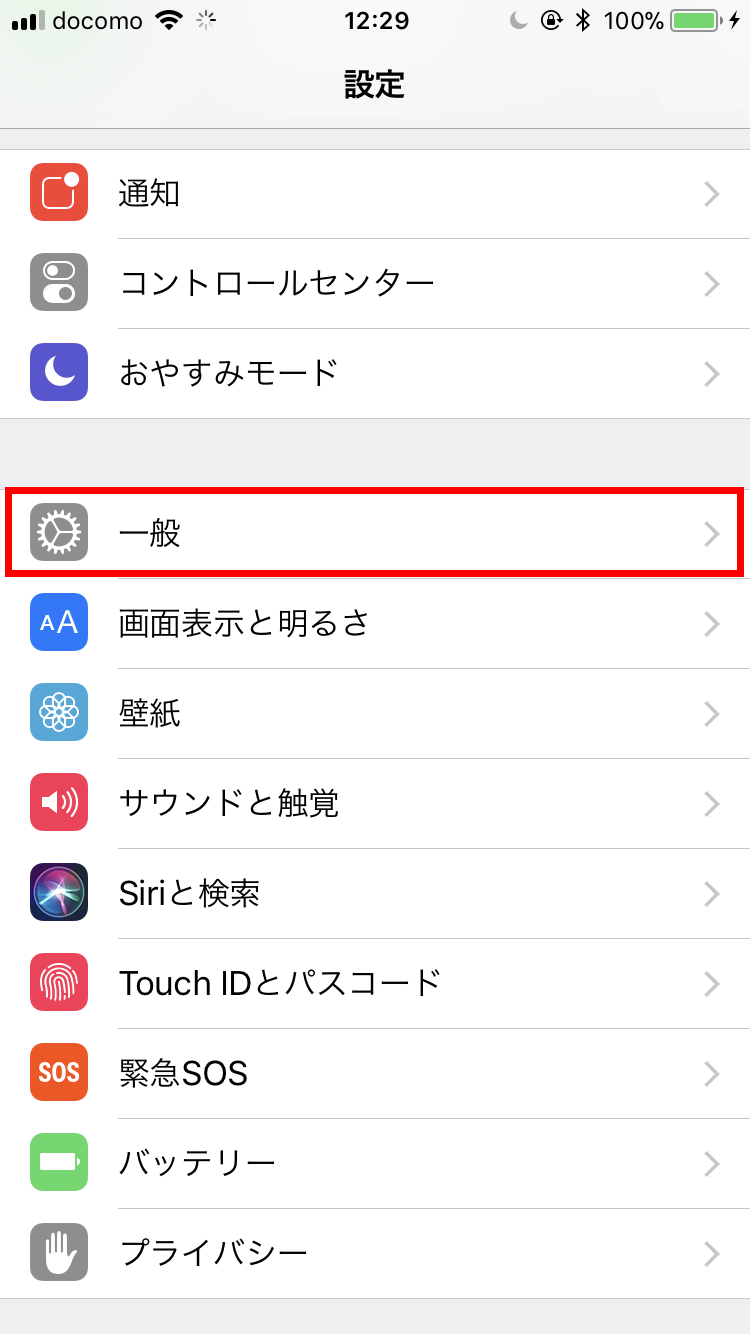
From the setting screen of iPhone, tap "General" ......
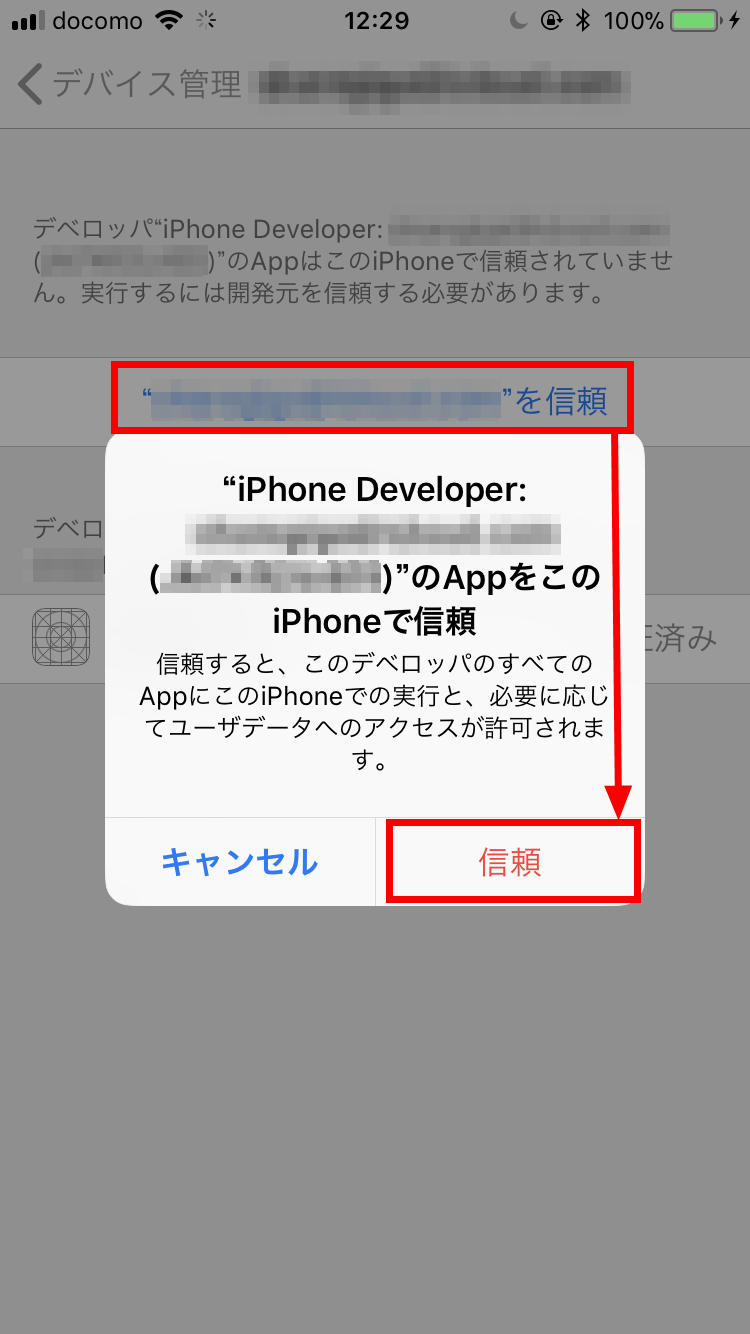
Tap "Device management" displayed on the lower side.
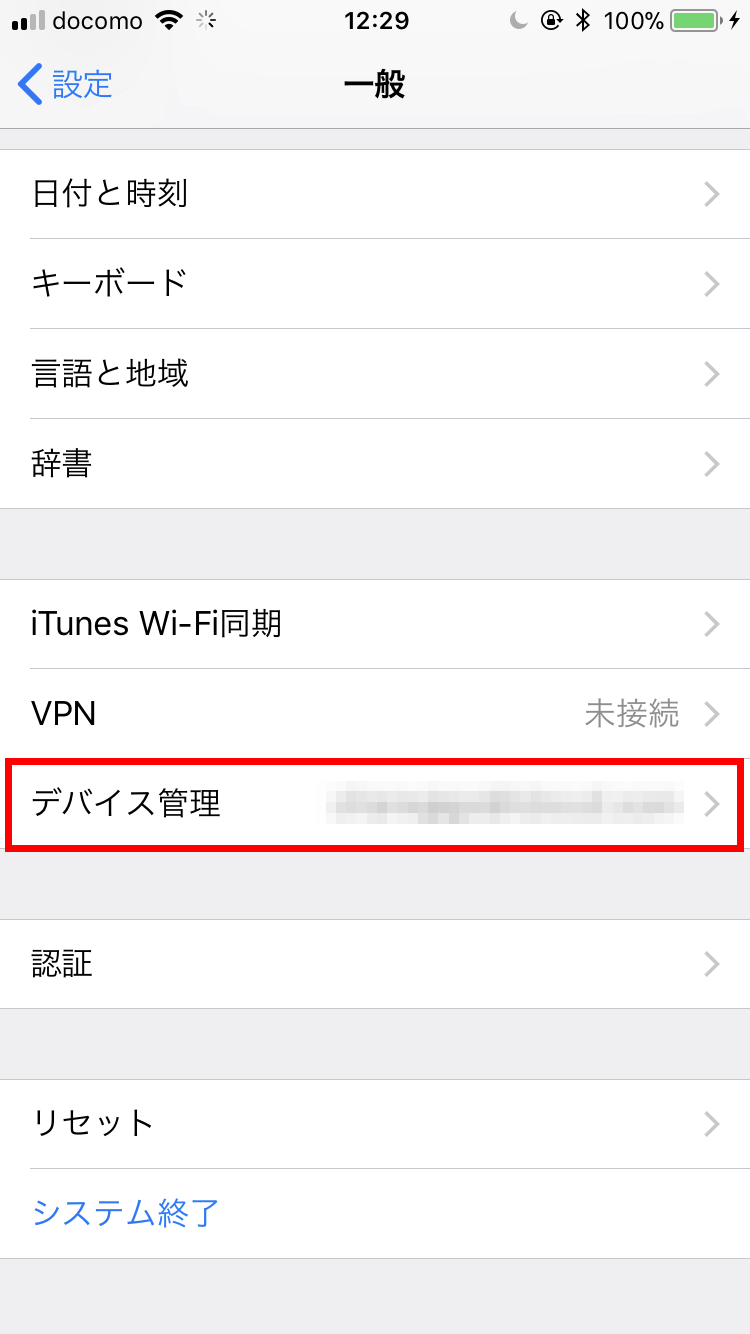
"Tap" "... ..." "When you tap a part, you tap" trust "again on the confirmation screen that is displayed.
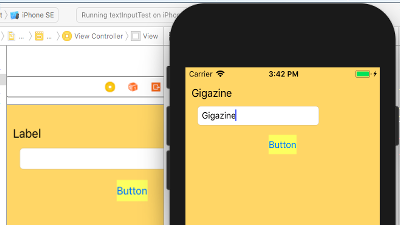
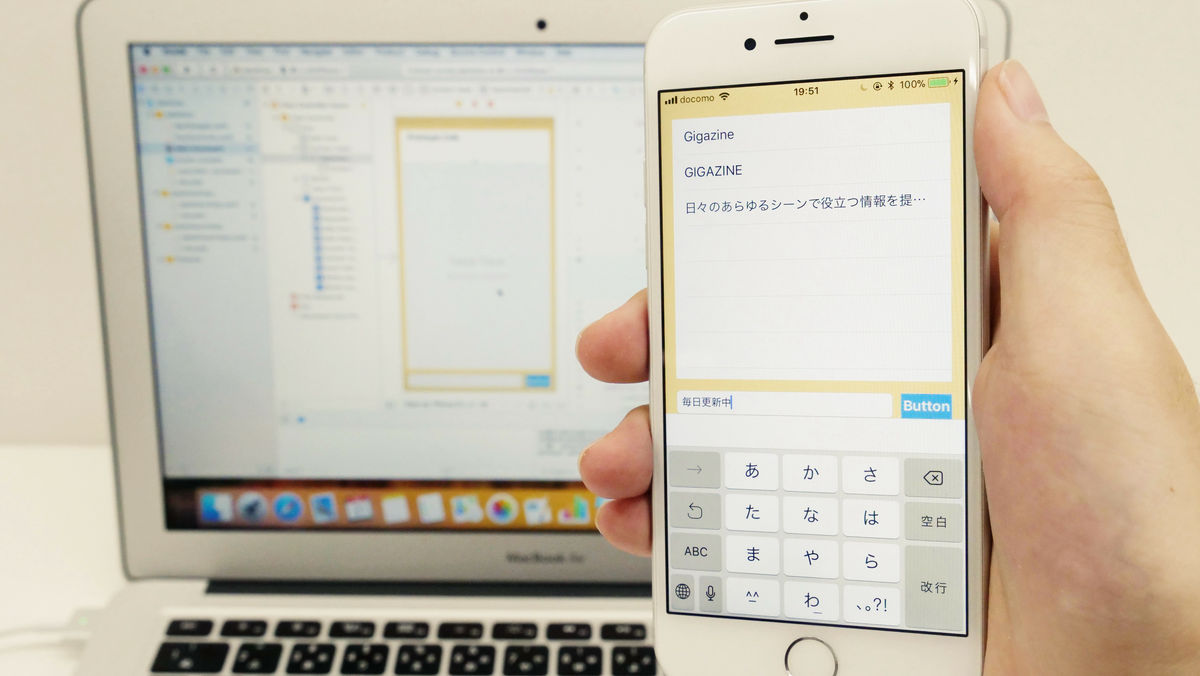
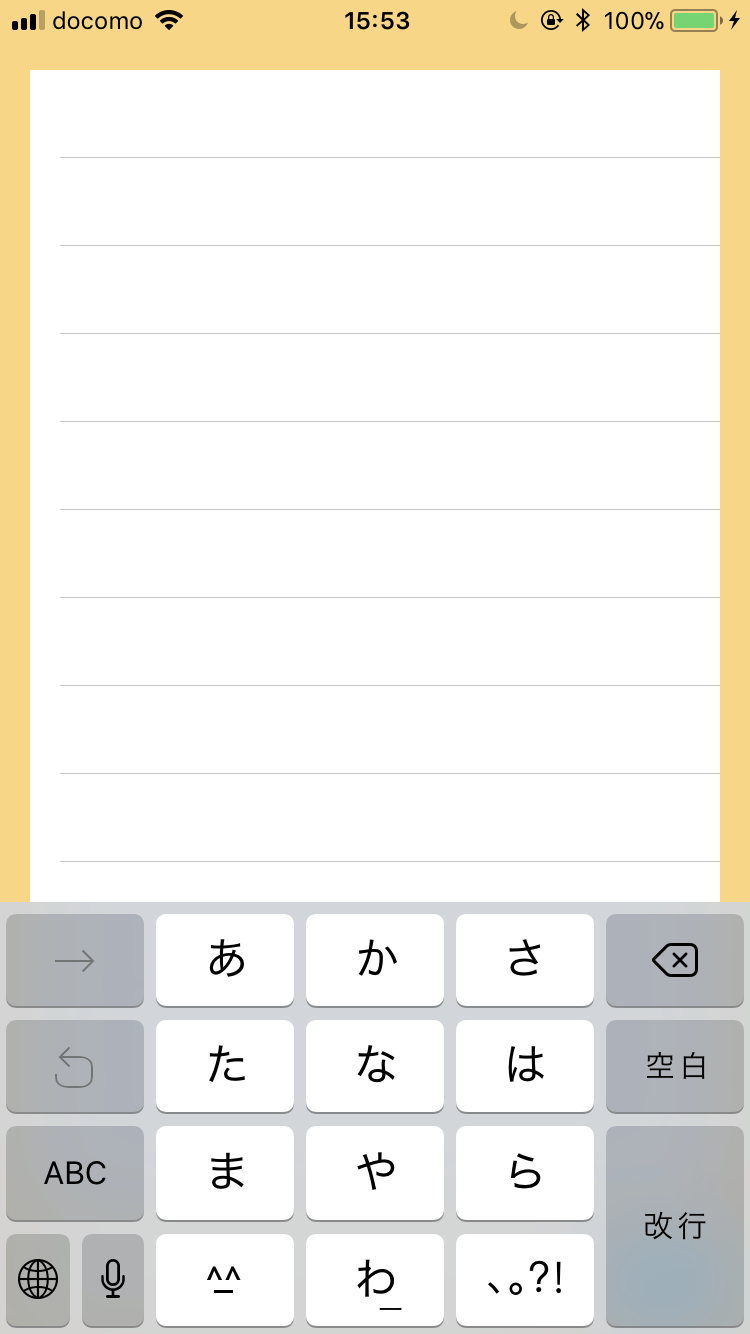
I tried launching the application again and succeeded in launching a splendid application. But the keyboard is disturbing and I can not push the button.
StackOverFlow"The distance between the input field and the bottom of the screen is set to the height of the keyboard when the height of the keyboard has changed" was listed. First in viewDidLoad ()
[code]NotificationCenter.default.addObserver(self,
selector: #selector (self.keyboardNotification (notification :)),
name: NSNotification.Name.UIKeyboardWillChangeFrame,
object: nil) [/ code]
And set it to call keyboardNotification () every time the height of the keyboard changes, then set it outside the viewDidLoad ()
[code]@objc func keyboardNotification(notification: NSNotification) {
if let userInfo = notification.userInfo {
let endFrame = (userInfo [UIKeyboardFrameEndUserInfoKey] as? NSValue) ?. cgRectValue
let endFrameY = endFrame.origin.y ?? 0
let duration: TimeInterval = (userInfo [UIKeyboardAnimationDurationUserInfoKey] as? NSNumber) ?. doubleValue ?? 0
let animationCurveRawNSN = userInfo [UIKeyboardAnimationCurveUserInfoKey] as? NSNumber
let animationCurveRaw = animationCurveRawNSN? .uintValue ?? UIViewAnimationOptions.curveEaseInOut.rawValue
let animationCurve: UIViewAnimationOptions = UIViewAnimationOptions (rawValue: animationCurveRaw)
if endFrameY> = UIScreen.main.bounds.size.height {
self.keyboardHeightLayoutConstraint? .constant = 0.0
} else {
self.keyboardHeightLayoutConstraint? .constant = endFrame? .size.height ?? 0.0
}
self.keyboardHeightLayoutConstraint2? .constant = self.keyboardHeightLayoutConstraint? .constant
UIView.animate (with Duration: duration,
delay: TimeInterval (0),
options: animationCurve,
animations: {self.view.layoutIfNeeded ()},
completion: nil)
}
} [/ code]
And "Enter the height of the keyboard and set the constraint appropriately". Then, the process of canceling the notification
[code]deinit {
NotificationCenter.default.removeObserver (self)
} [/ code]
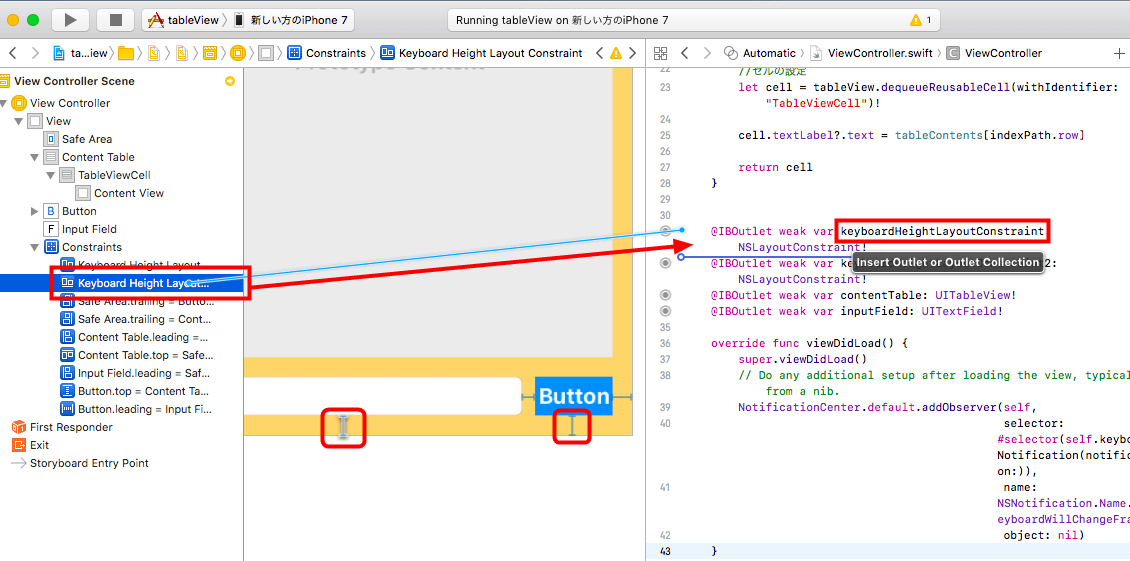
Finally write the input field and the constraint that sets the space below the button to the code with the name "keyboardHeightLayoutConstraint" and "keyboardHeightLayoutConstraint 2" respectively, you are ready.
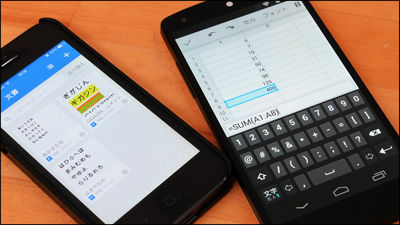
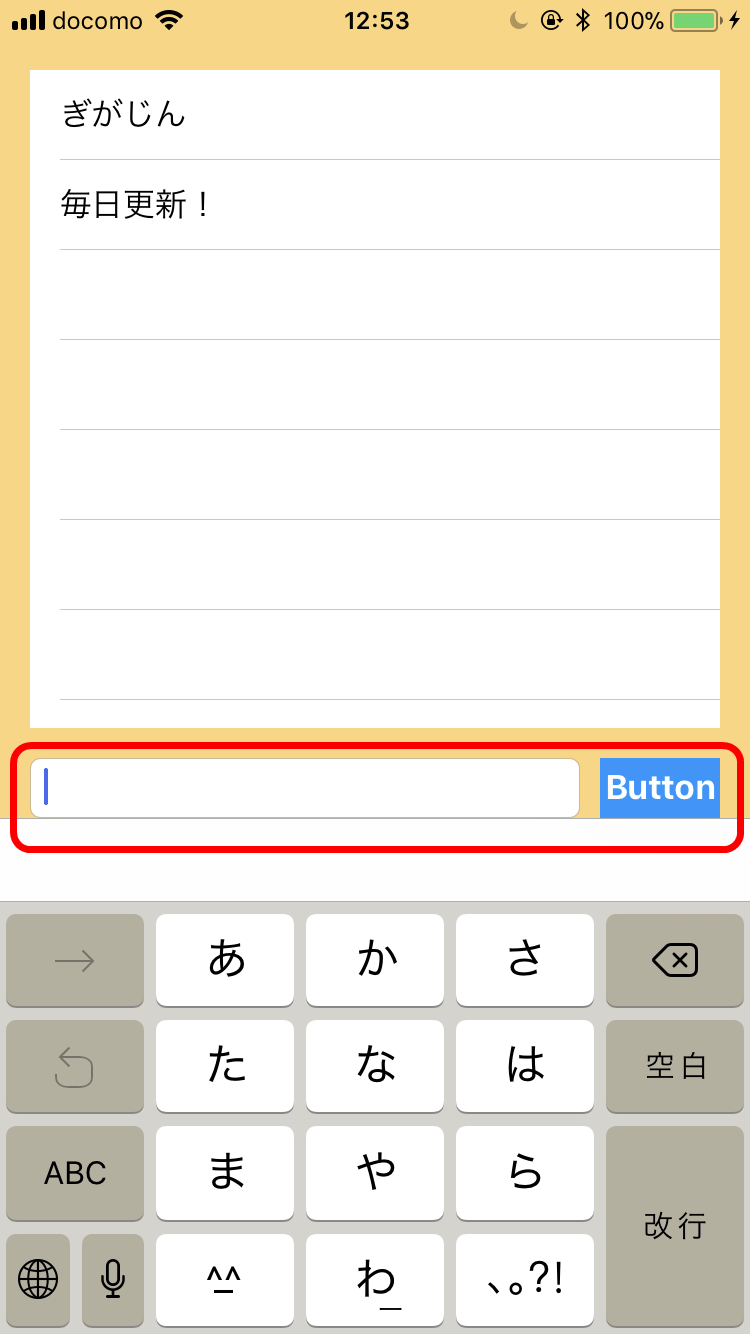
When I tried it again, the input field and button slid upwards according to the appearance of the keyboard this time.
Next time I will try using the library management tool "CocoaPods".
· Continued
Starting from scratch iOS application development "Let's develop efficiently with library" - GIGAZINE

Related Posts: