Starting from scratch iOS application development "Application to switch screens with buttons"
IOS in JapanEarn over 60% sharedoing. How is the application running on that iOS created? In this "iOS app development starting from scratch" series, intended for beginners never quite touched anything, we will explain how to make it in practice while creating an app. For the first time in the series, install "Xcode", a tool for application development, and create a simple application called "Switch the screen by pressing the button".
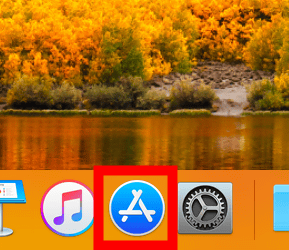
Be sure to use Apple's PC "MacIt is necessary. After starting Mac, click "App Store" from the dock below.
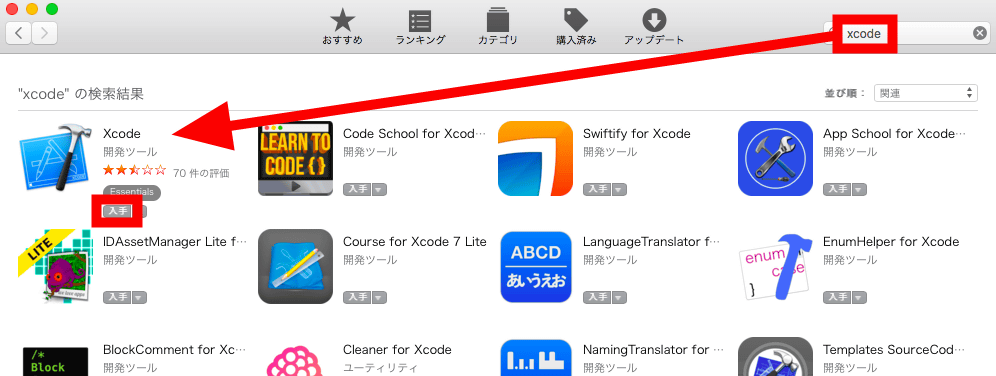
Enter "xcode" in the search field at the top left and "Enter Xcode" below when you press the enter key. Click "Obtain" button.
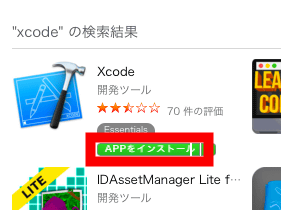
"Get" changes to "Install APP", so click "Install to APP" again.
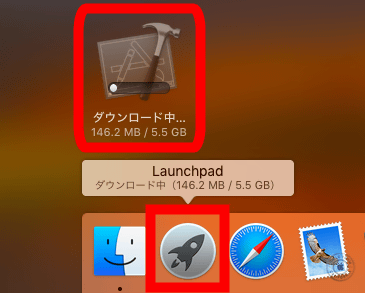
Although it seems there is not any change in the App Store, opening "Launchpad" from the dock below will be able to grasp the progress. There is a file capacity of 5.5 GB, it takes quite a long time, so wait patiently.
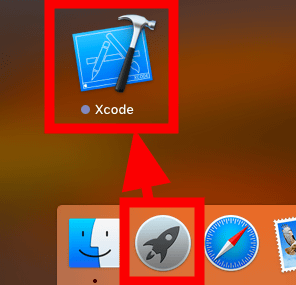
Downloading and installation is completed in about 3 hours. Click "Xcode" from "Launchpad" to start it.
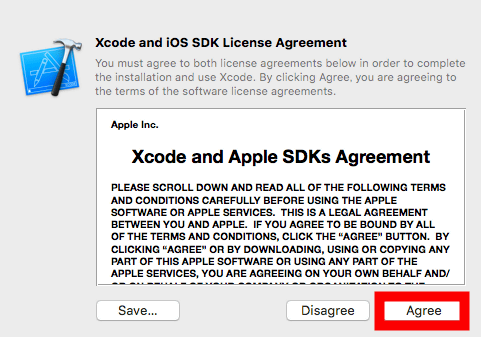
Since the license of Xcode is displayed, click "Agree" to approve it.
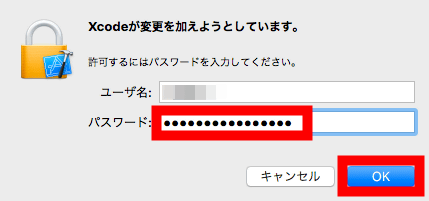
Enter the password you are using to log in to Mac and click "OK".
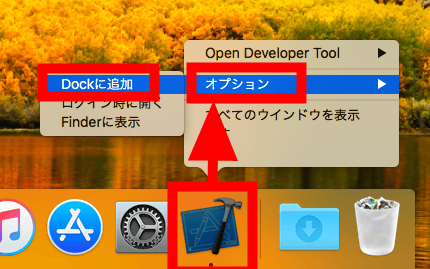
Xcode's initial setting will start automatically. Because it is kept waiting for a few minutes, right now, right click on the Xcode in the dock below and click "Add to Dock" from "Options" to make it easy to start up.
When Xcode starts up, select "Create a new Xcode project". Even if this screen does not appear, you can select "File" → "New" → "Project ..." from the menu bar above.

Make sure "Single View App" is selected and click "Next".

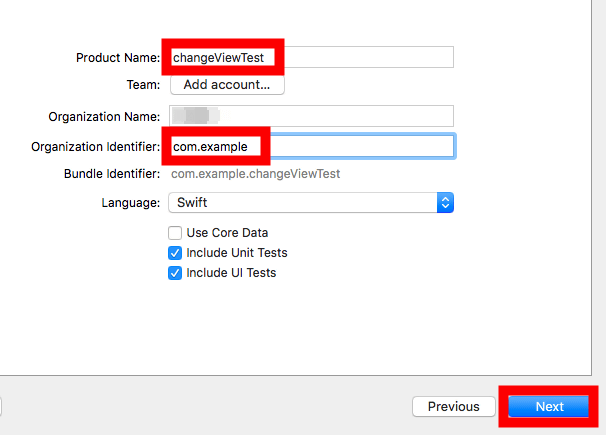
In the "Product Name" field, enter the name of the application to be created this time. Any name can be given, but this time I decided to make it "changeViewTest". Then enter "Organization Identifier". If you own some domain like "gigazine.net" or "google.co.jp" you will often put it in reverse order like "net.gigazine" or "jp.co.google" However, if you do not have a domain in particular, you can enter "com.example" like the image below. Leave the other settings as is and click "Next".
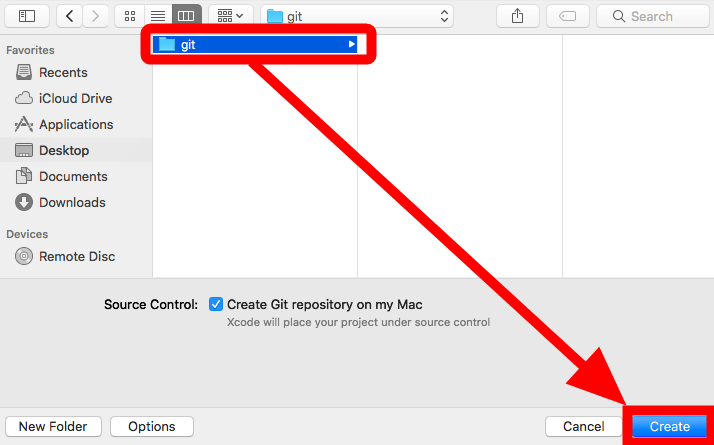
You will be asked in which folder to save the data. Where you can save it, Xcode will convert the data to "GitThis time, we will create a folder called "git" on the desktop and save the data in it.
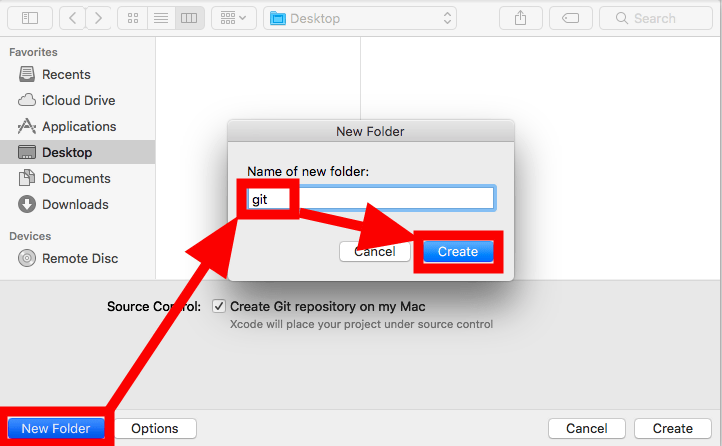
Confirm that the created "git" is selected and click "Create".
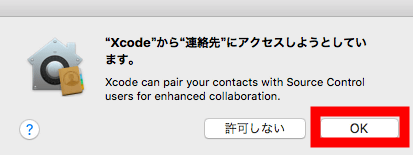
If you are asked for contact information, click "OK".
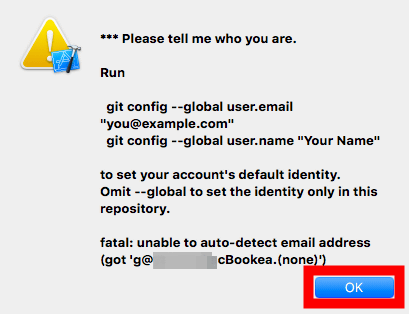
Since I did not enter any information on my contacts, I got an indication to git to set a mail address and name. Since the problem does not occur right now, I will let it through. Click "OK".
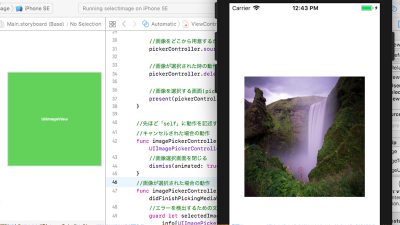
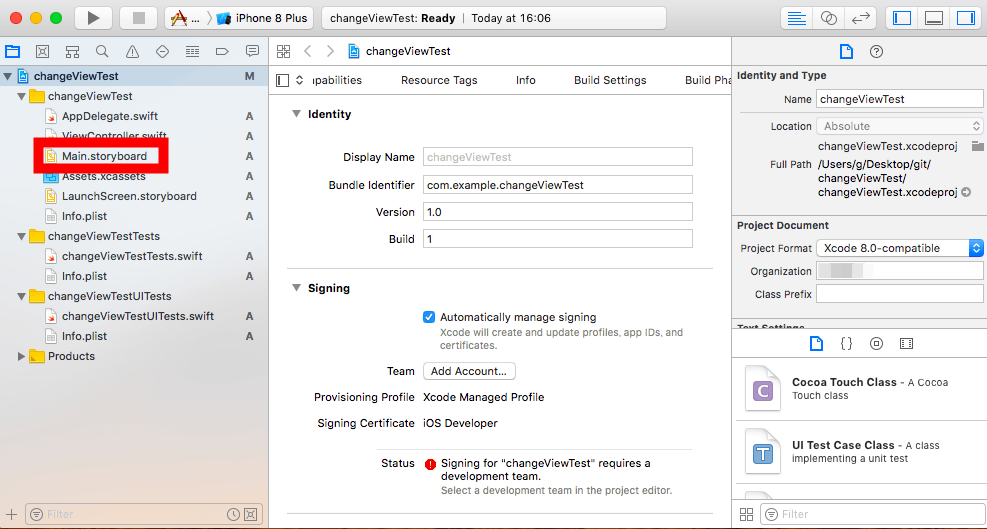
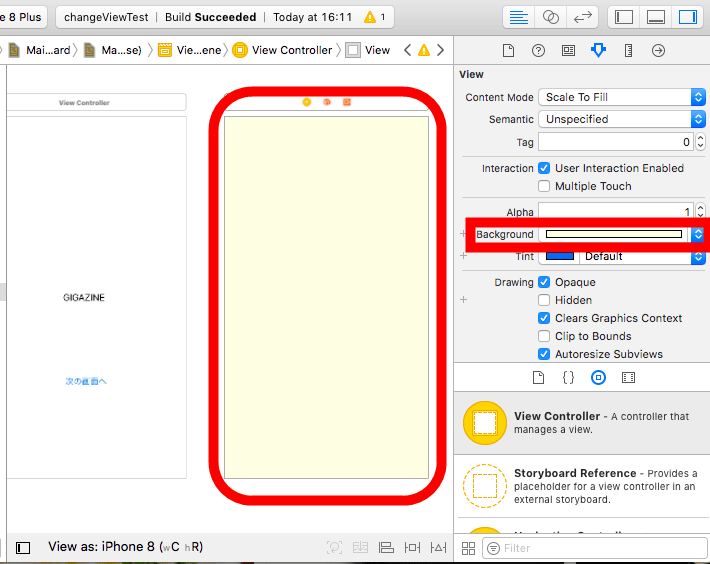
When the project is created, it looks like the image below. Click "Main.storyboard" from the left navigator.
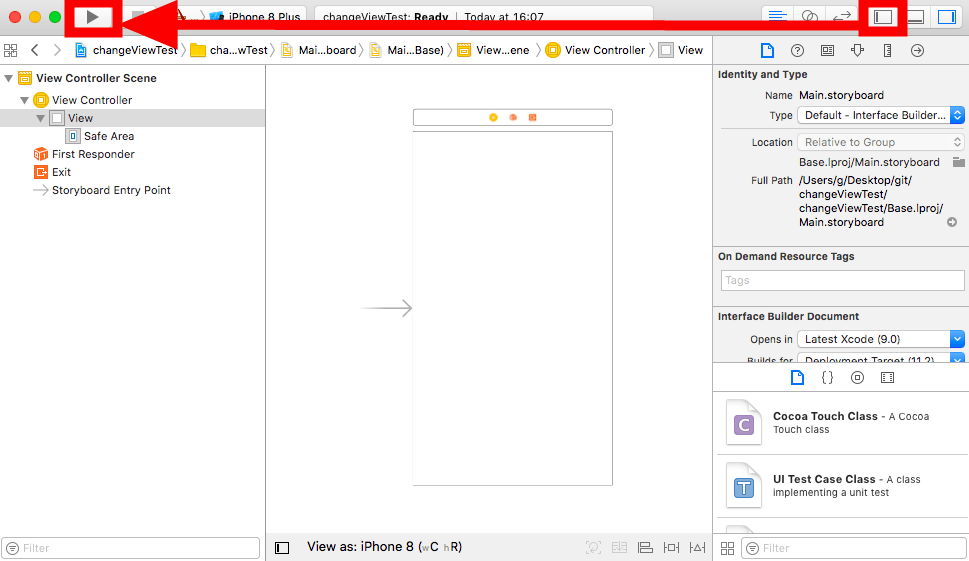
Since I will not use the navigator any more this time, I will close it with the button on the upper right. I have not set anything yet, but I will try to run it as it is. Click the playback mark button on the upper left.
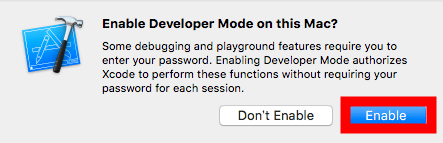
You will be asked if you want to turn on developer mode. Click "Enable" to turn it on.
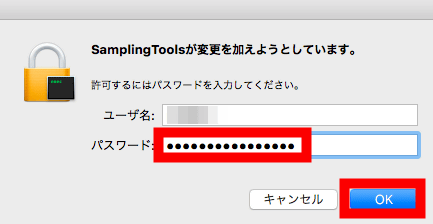
Since you need a password to turn on Developer mode, enter it and click "OK".
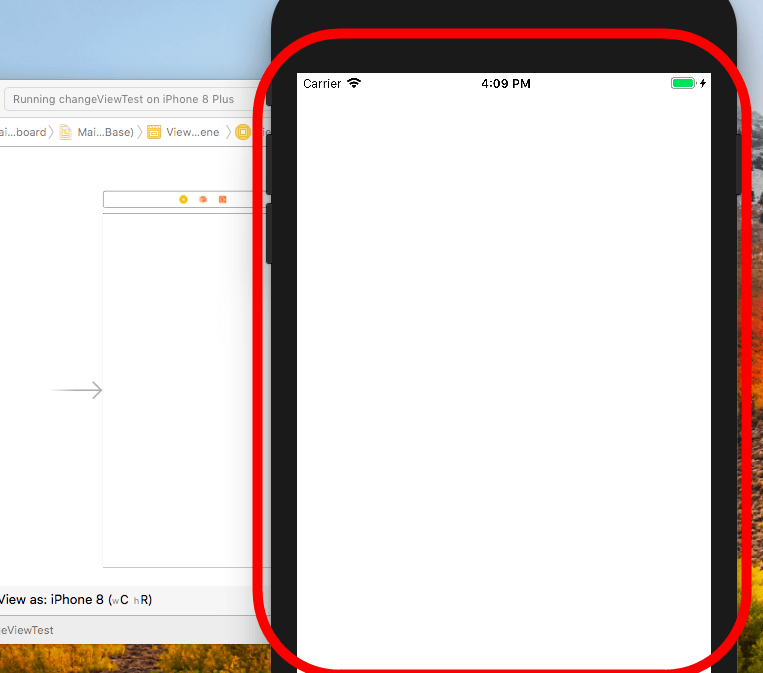
Then the simulator starts up. Since nothing has been set yet, a pure white screen was displayed.
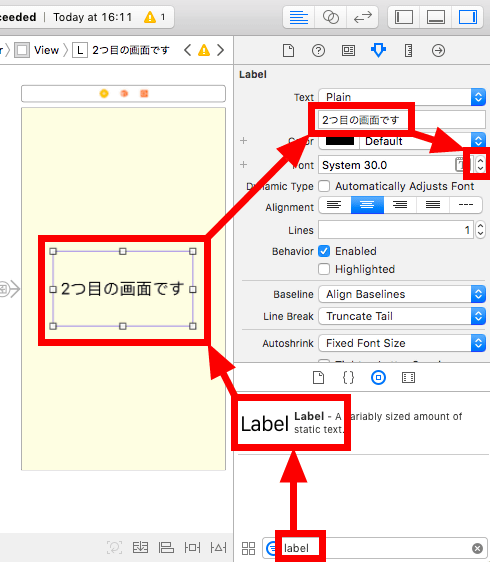
After confirming that the simulator starts properly, stop the application with the square button next to the execution button. Click the second circular mark from the right of the four aligned marks in the lower right part, then enter "label" in the lower filter. As soon as "Label" is displayed, place it on the screen by drag & amp; drop.

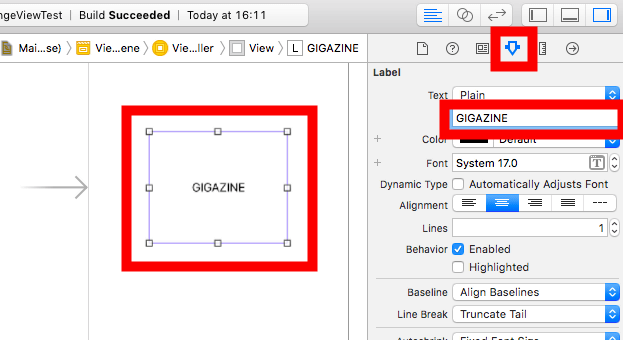
Drag the four corners of the placed "Label" to make it somewhat larger. Next, click the button of the triangle mark in the upper right, and enter the character you want to display in the second row of the "Text" menu below. This time I tried typing "GIGAZINE". Then the display on the left screen changed to "GIGAZINE".
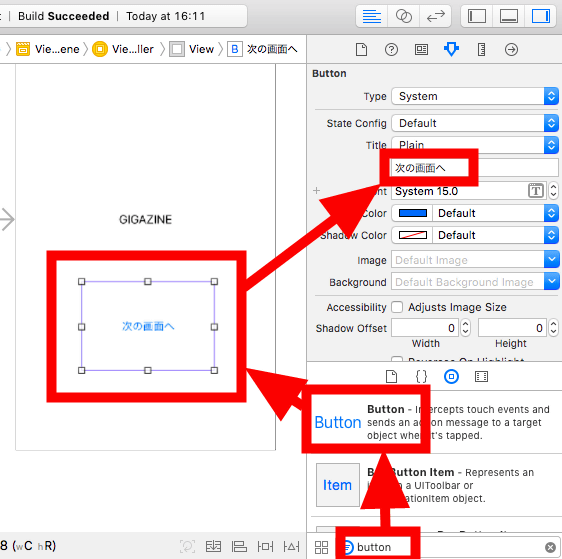
Then type "button" in the lower right filter and drag & drop the "Button" displayed above to the screen. Make it moderately large, and change the "Title" part in the right property to "to the next screen".
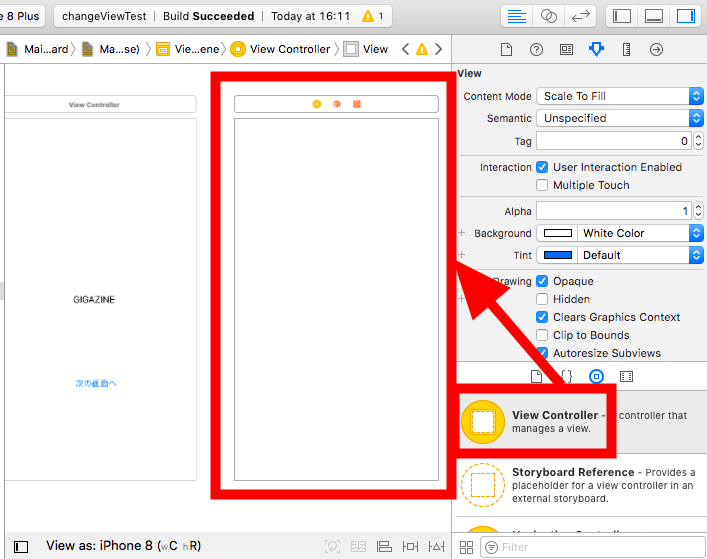
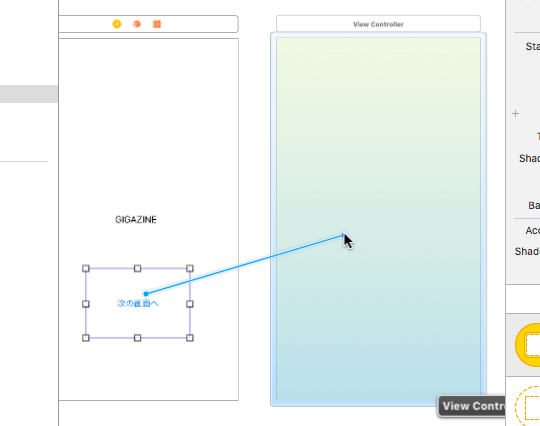
Prepare the screen to switch to. Drag & drop the "View Controller" in the lower right to the screen on the left, and a new screen will be displayed. If "View Controller" is not displayed in the lower right, please check whether the "button" you just entered remains in the lower right filter.
As for the new screen, try changing the setting from the menu of the triangle on the right. I changed "Background" to Gigazine-like color.
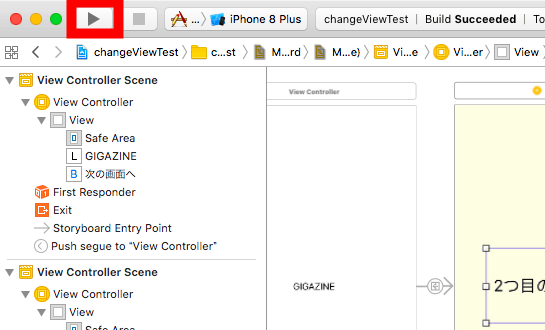
Next, make the setting "Switch the screen when you press the button". Hold down "control" next to the "A" key and click the button labeled "To next screen" and drag it to the right screen without releasing "control" as it is.
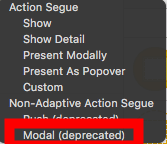
When you release the button with dragging, a menu like the image below will appear. I choose a method to switch the screen, but this time I click "Modal" at the bottom.
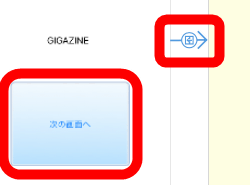
An arrow was displayed between the screen and the screen. When you click the arrow, the button labeled "To next screen" is highlighted in blue and you can see that it is associated with this button.
Drag and drop the displayed "Label" into the second screen by entering "label" in the filter on the lower right, change the size and then change the character to be displayed from "Text" on the right to "2 It is the first screen ", and the size was adjusted with the up and down arrows at the lower right of the text.
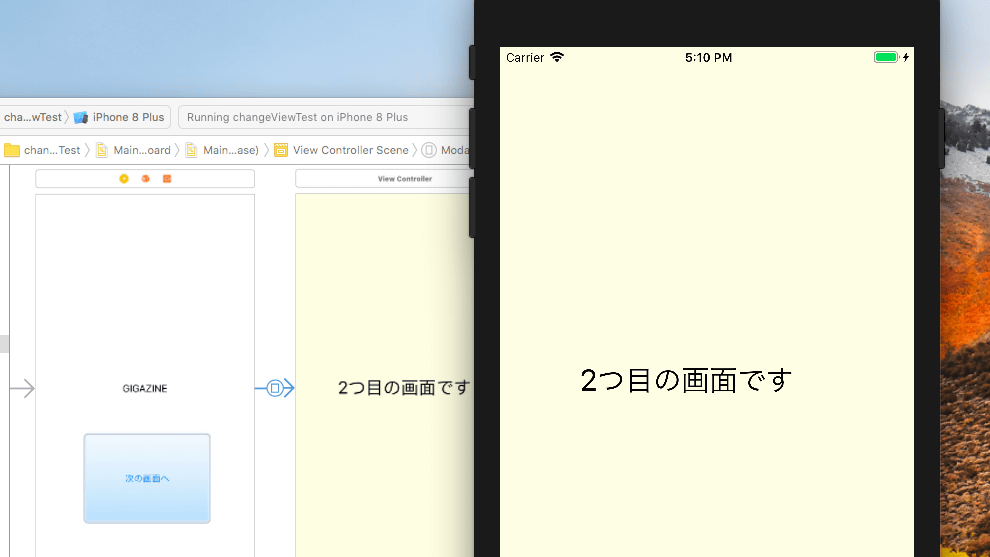
This time it is completed. Click the play button in the upper left corner of Xcode to execute.
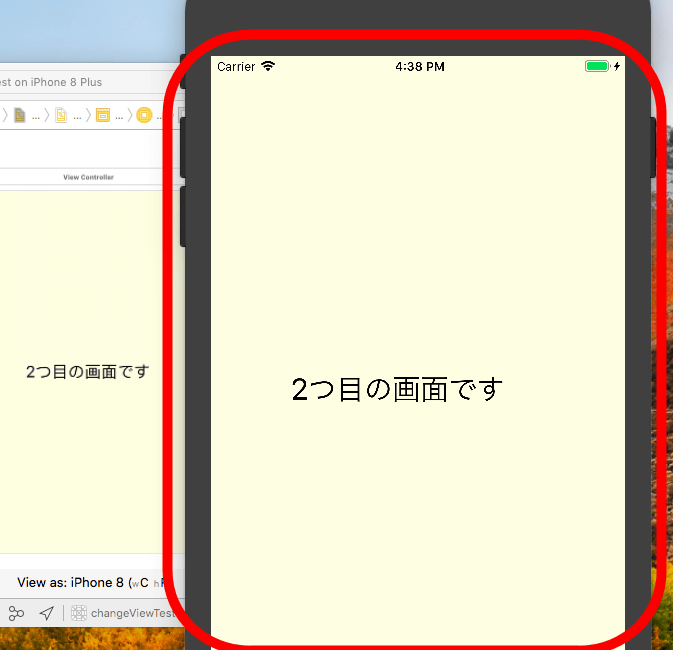
"GIGAZINE" "To the next screen" was displayed on the simulator. If you click "Go to next screen" here ...

The screen switched, "It is the second screen" was displayed.
As you can see, the iOS application can be developed quite intuitively, so you can move the screen accordingly as you start from zero knowledge. Next time using the code I will try to create an application saying "Press the button changes the display on the screen."
· Continued
Starting from scratch iOS application development "Let's operate the screen with code" - GIGAZINE
Related Posts: