Anker's first high-performance car drive recorder "Roav DashCam C2" review famous for mobile battery
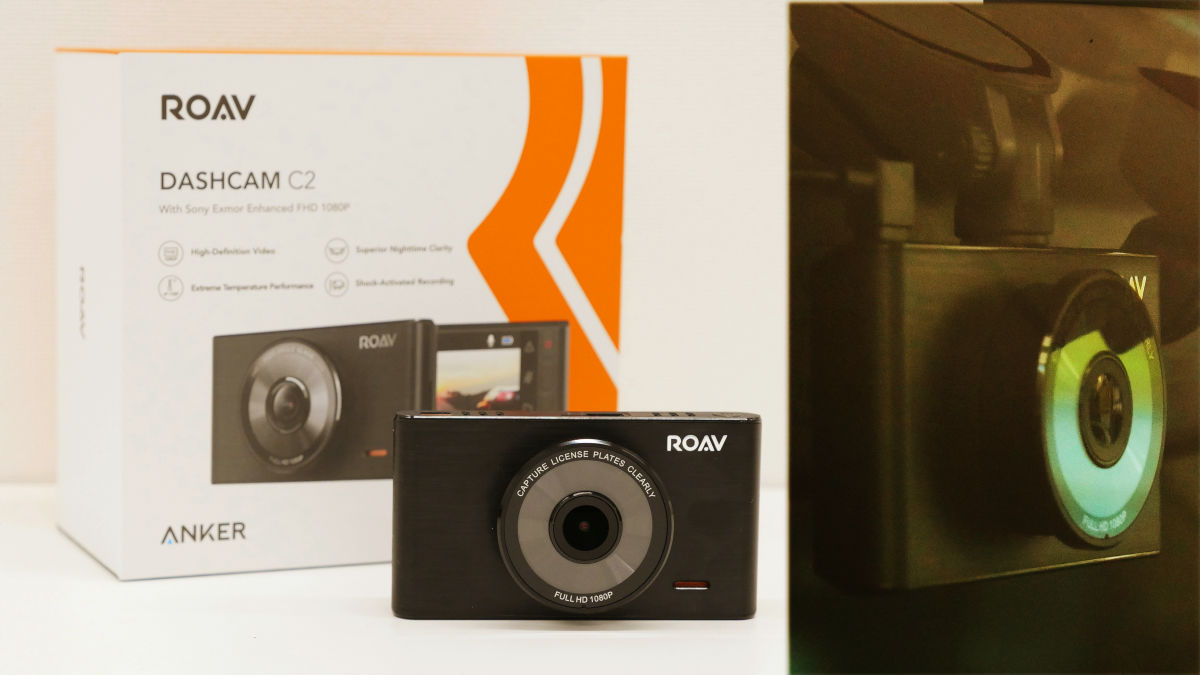
First mobile car recorder from Anker, a famous mobile batteryAnker Roav DashCam C2(DashCam) appeared on Wednesday, December 20, 2017. With a Sony made CMOS image sensor and a high-performance chipset, the lens with a horizontal wide angle of 145 degrees captures the entirety on a four-lane road and can record with full HD high definition both day and night. During parking, a function "parking monitor" that starts recording automatically when vibration such as accident and caravan is occurred is carried. I've decided to try out various ways to see how much it is really good.
Anker | Press Release 【Anker】 Released the first high-performance drive recorder "Anker Roav DashCam C2"
In order to test DashCam 's abilities at once, I tried running around various places and seeing what kind of images could be contained. The picture taken while driving at night is like this.
Equipped with Anker's first drive recorder Roav DashCam C2 and tried to record in front of the Osaka World Exposition Park in the middle of the night - YouTube
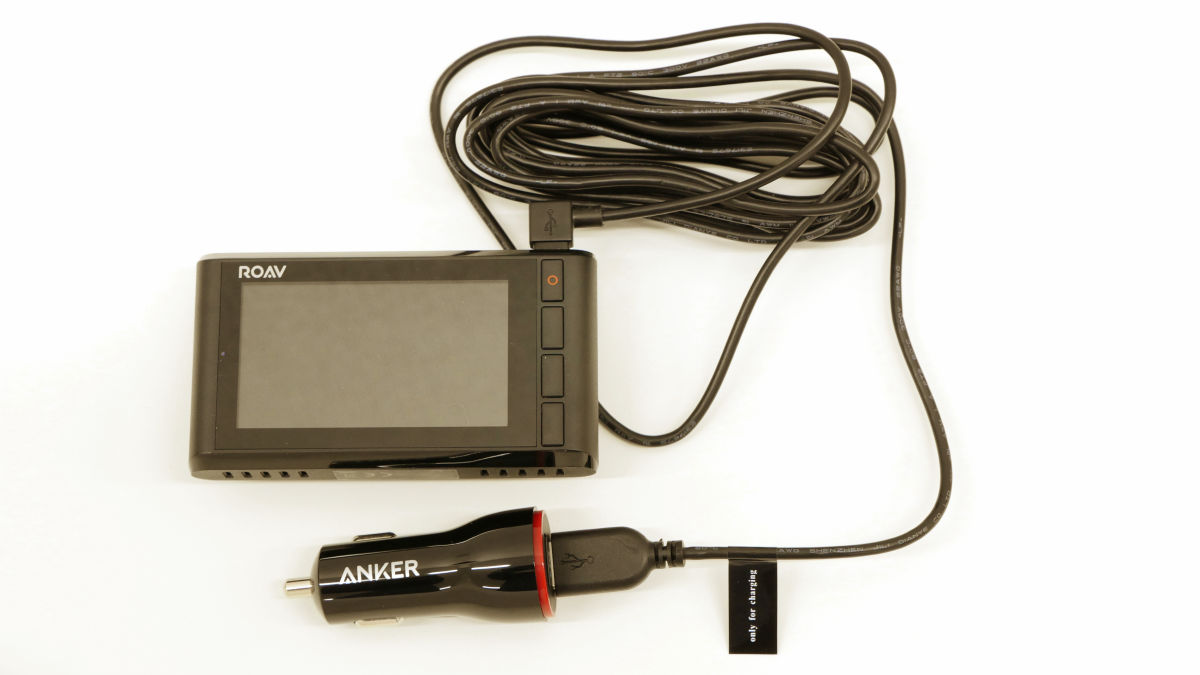
◆ Package opening · Contents are like this
Anker's Roav DashCam C2 has arrived at the editorial department.

The product package looks something like this. Speaking of Anker there is an image of white and light blue package, Roav DashCam C2 is a package of white and orange.
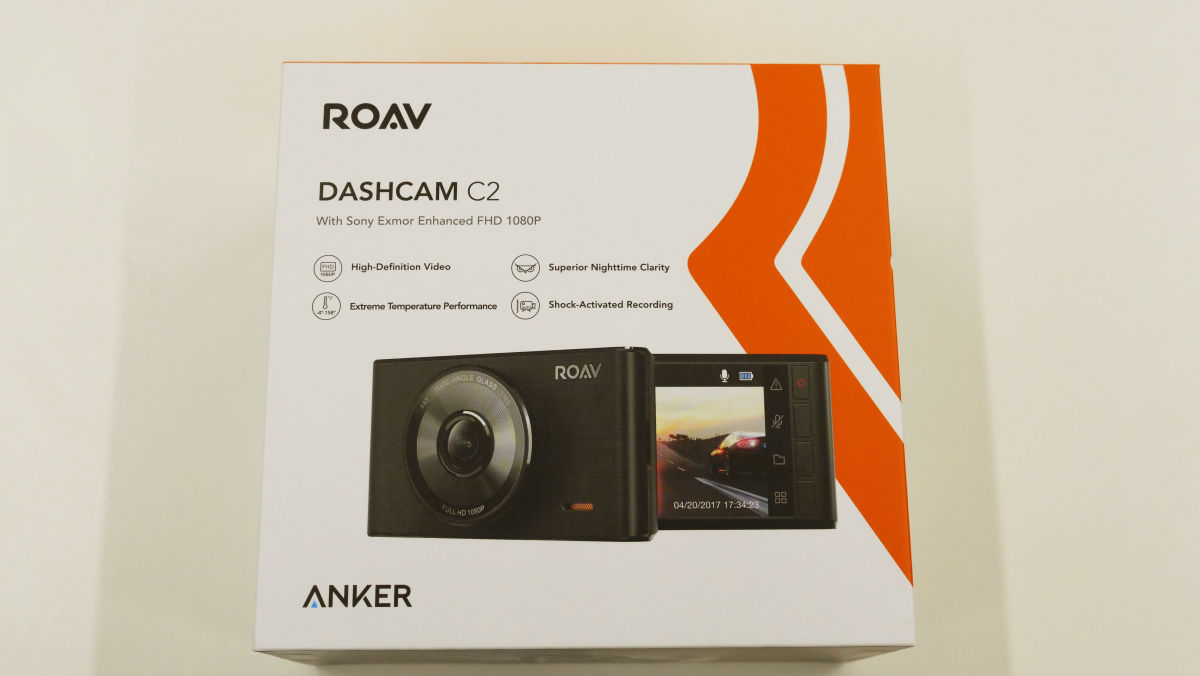
At the top of the package there was a description of the function "Shooting in full high-vision image quality" "Clear even at night" "Wide adaptation to heat and cold," "Record automatically when a shock is detected".

The box is divided into upper and lower vanity box type. When opened, the 2 port USB carcare to be inserted in the main body and cigar socket appeared. Sponge is affixed to the back of the lid and it is safe because there is no scratch on the main body.

Taking the main body, an instruction manual, support contact point appeared
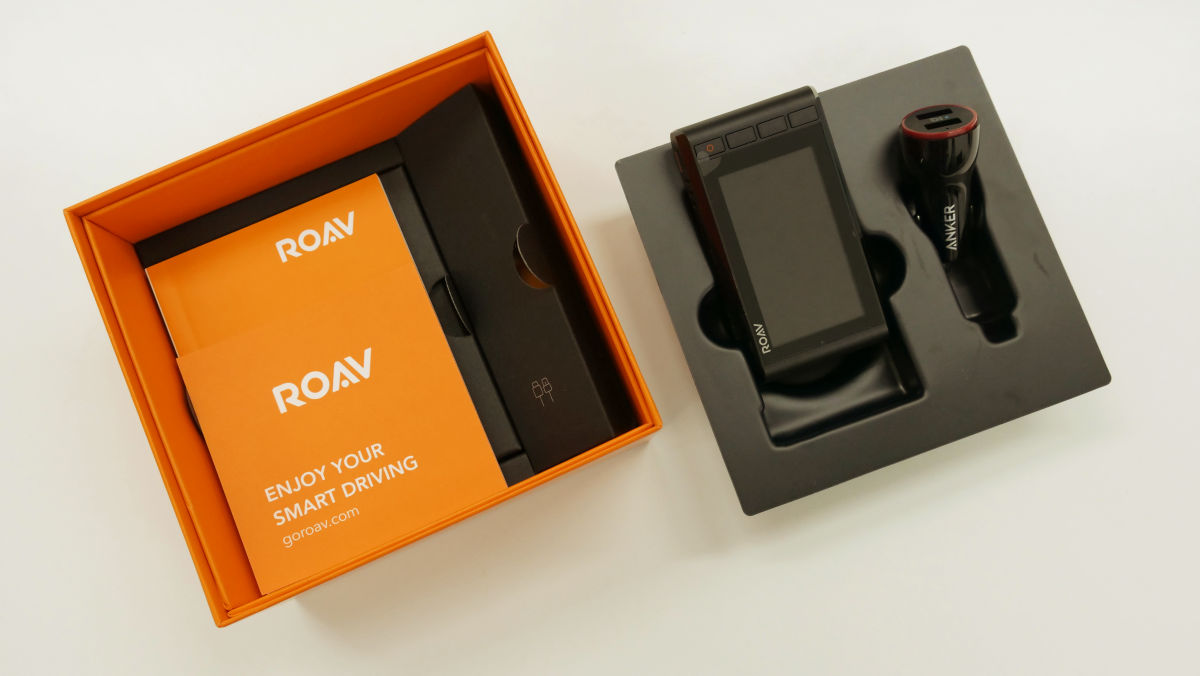
Below the instruction manual there is a suction cup for mounting the main unit and a 3M sticker mount, you can choose the mounting method of the main unit

At the bottom of the box left, there was a Micro - USB cable and an orange adjustment bar. The length of the Micro-USB cable is about 3 meters 47 centimeters.

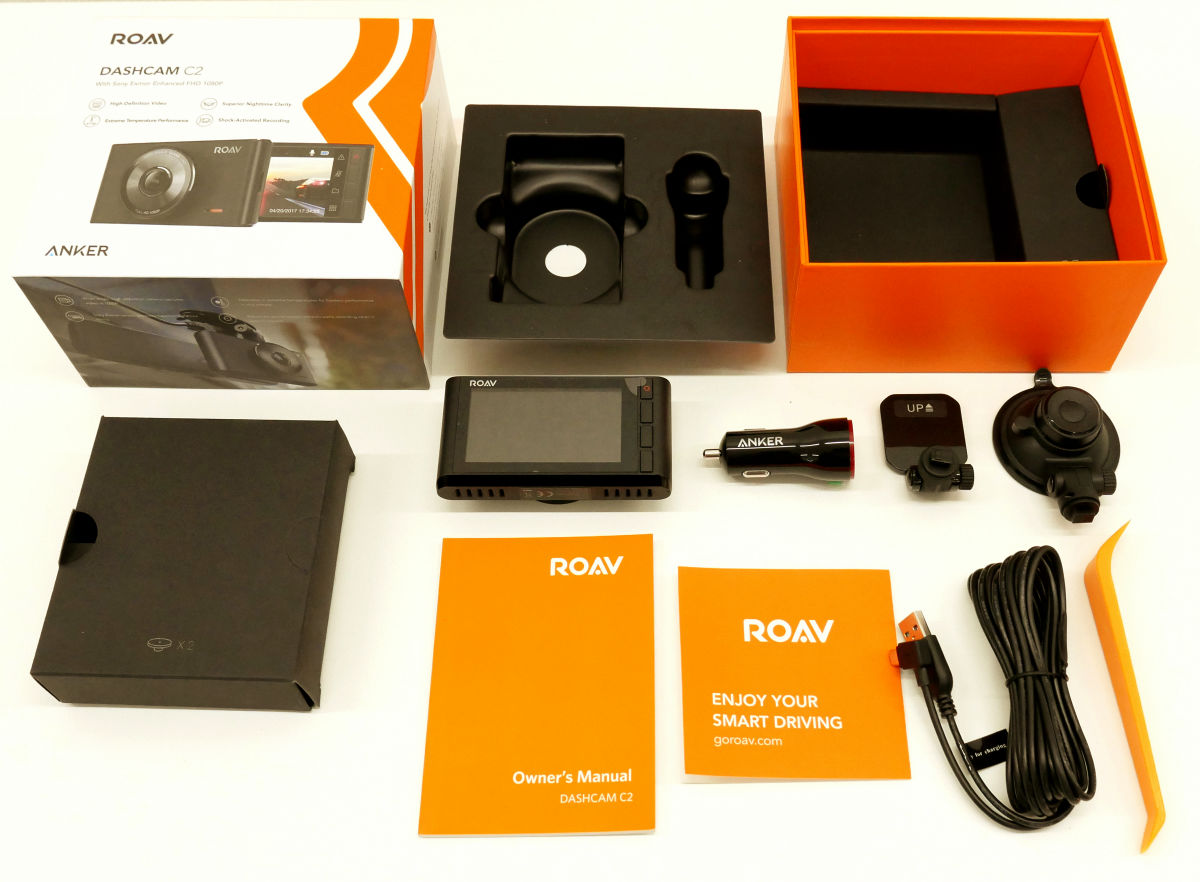
Try out all the contents and it looks like this.
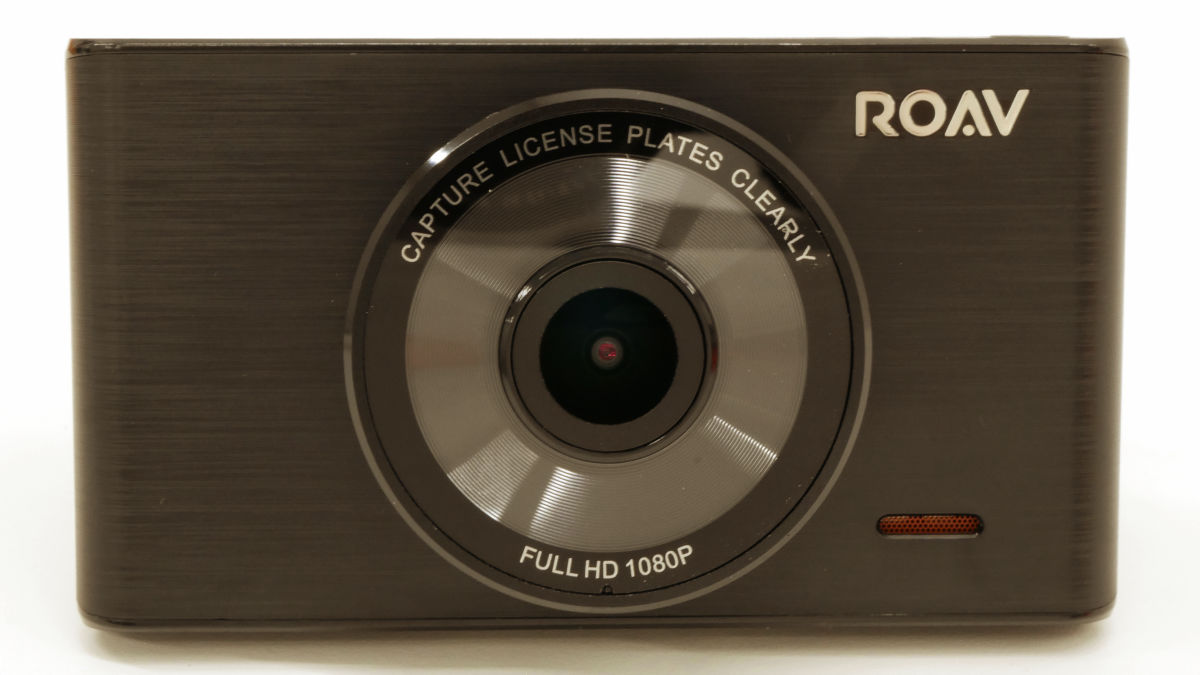
The body of DashCam. It looks like a compact digital camera with palm size. Since the battery itself is also built in the body itself, you can record for 30 seconds 15 times with the function "parking monitor" that starts to record automatically when feeling vibration when fully charged.

The size is long side 90 mm, short side 55 mm, thickness 30 mm. Compared with iPhone 6 with a height of 138.1 mm and a width of 67.0 mm, it looks like this.

There is a speaker in the lower right on the lens side of DashCam.
On the liquid crystal side, four switches are arranged vertically on the right side. Mainly operate this DashCam with this switch.

The top surface has a power switch, a groove to mount the mount from the left, an exhaust port beside the groove, and a Micro-USB charging port on the right side.

There is a slot of Micro-USB card on the left side, and insert the metal terminal toward the screen side. Be careful not to make a mistake in orientation. Recorded video will be MP4 format movie compressed with H.264. Recorded image quality is full HD quality with display resolution 1920 x 1080. The frame rate is 30 fps. With full HD picture quality, movie recording time is 320 minutes with 32GB, 640 minutes by 64GB, and 1280 minutes by 128GB.

Two mounts, one for each type, are installed for mounting. 3M sticker mount with suction cup type on the left and adhesive material type on the right

Adsorption surface / adhesive surface on the back side is like this.

When installing, slide the convex part at the tip of the mount into the groove of the main body and insert it.


Attaching the suction cup type to the main body looks like this.

The angle can be finely adjusted for the mount.

After fixing the angle, fasten the dial.

The 2 port USB car charger to be inserted in the cigar socket has the Anker logo printed ......

There are two USB ports. Anker's proprietary standard for changing voltage according to connected equipmentPowerIQBecause I have a logo, while using one side for a drive recorder, the other port is likely to be used for charging mobile devices.

Connect the 2 port USB car charger to the main unit using the attached Micro - USB cable.

When connecting the main body and the 2 port USB car charger with Micro - USB cable, it is like this.
Installation work
First, lightly wipe the windshield to which Roav DashCam C2 is attached and dry it.

Gently wipe the suction cup and keep it clean.

Next attach the suction cup mount to the main body and paste it on the windshield. Pettari.

Squeeze the knob on the suction cup mount clockwise. The body was fixed to the windshield with this.

Insert the Micro - USB cable into the main unit.

Expand the gap of the dashboard with adjustment bars and push the Micro - USB cable in.


Also the side.

Insert Micro-USB cable into 2 port USB karaoke ......

Insert in cigar socket.

Finally, adjust the angle of the main unit and complete installation.

I installed DashCam and looked like this from the outside.

Turn the key and pass electricity through the cigar socket, DashCam will start up at the same time.

The logo of "ROAV" was displayed on the liquid crystal screen after starting up.

"Let's get you set up!" Will be displayed and start setup. Check mark Press the right switch.

The operation method of DashCam corresponds to the switch next to the icons on the right side of the screen. For example, the checkmark at the bottom of the screen corresponds to the switch at the bottom. Press switch to proceed with setup.

It became the setting of the clock and the date.

In the operation of DashCam, "four icons in the vertical direction" on the right side of the screen and "four switches arranged in the vertical direction" on the right side of the main unit are shown respectively. The top "checkmark" is the top switch, the secondary "+" is the 2nd switch, the 3rd "-" is the 3rd switch, the 4th "→" is 4 The second switch is shown. "Check mark" completes the setting "+" advances the setting time, "-" returns the setting time, "→" moves to the next date and time unit setting. Once you have set all the times, you can change the display of the year, month and day. In this example, I changed from the display of "MM / DD / YYYY (month / date / AD)" in the initial state to "YYYY / MM / DD (AD calendar month / date)" which is familiar. When you finish setting the watch and date, close the clock setting with the top switch.

Next is the language setting. Select "Japanese" and press the bottom switch to decide.

Set the sensitivity "G sensor sensitivity" to automatically detect the vibration while parking. This time is set as it is with the default "medium".

Next, when the G sensor senses during parking, it sets "parking collision detection" which automatically records in countermeasures against collision and on-board vandalism. This time it is set to the default "off". Main setting is completed.

When you finish the setting, the left LED lamp turns red and you are prompted to format the microSD card. Select "OK" and press the bottom switch to make the decision.

Again, since the message to delete all data is reconfirmed, select "OK" and press the bottom switch to decide.

During formatting, the screen gets dark.

When formatting is completed, DashCam starts recording in "Loop mode", power is supplied, and recording continues. While recording, the LED lamp on the left of the LCD screen lighted up in blue.

When you press the top switch on which red "◯" is printed, recording starts for 30 seconds as "emergency recording mode" with guard taken separately from "loop mode".

When one of the other three buttons is pressed, an icon appears.

You can toggle recording on and off by pressing the second button from the top, right of the second "microphone" icon. For this time, set the microphone off.

The third "folder" icon from the top right, when you press the third button from the top you can play and delete the recorded movie.

To change the setting, press the right switch of the icon close to the shape of the fourth "field" from the top.

The setting can be changed by the same operation method as the clock setting, and the logo and date display is hidden in the item of "watermark display" this time.

◆ Actual shot image looks something like this
It is strong against backlighting, even if you run in the daytime you can check the license plate of the front car.
We equipped with Anker's first drive recorder Roav DashCam C2 and tried to record in front of Osaka World Expo Park in backlight - YouTube
Because the lens adopts a wide angle lens with a field angle of 145 degrees, it can capture up to four lanes including sidewalks on one side three lane roads.
We equipped with Anker's first drive recorder Roav DashCam C2 and tried to record in front of Osaka World Expo Park Mall with 3 lanes in the daytime - YouTube
When wearing it actually running, you can record a wide field of view with high image quality even at night.
Equipped with Anker's first drive recorder, Roav DashCam C2, recorded in front of Osaka World Expo Park Mall with 3 lanes at midnight - YouTube
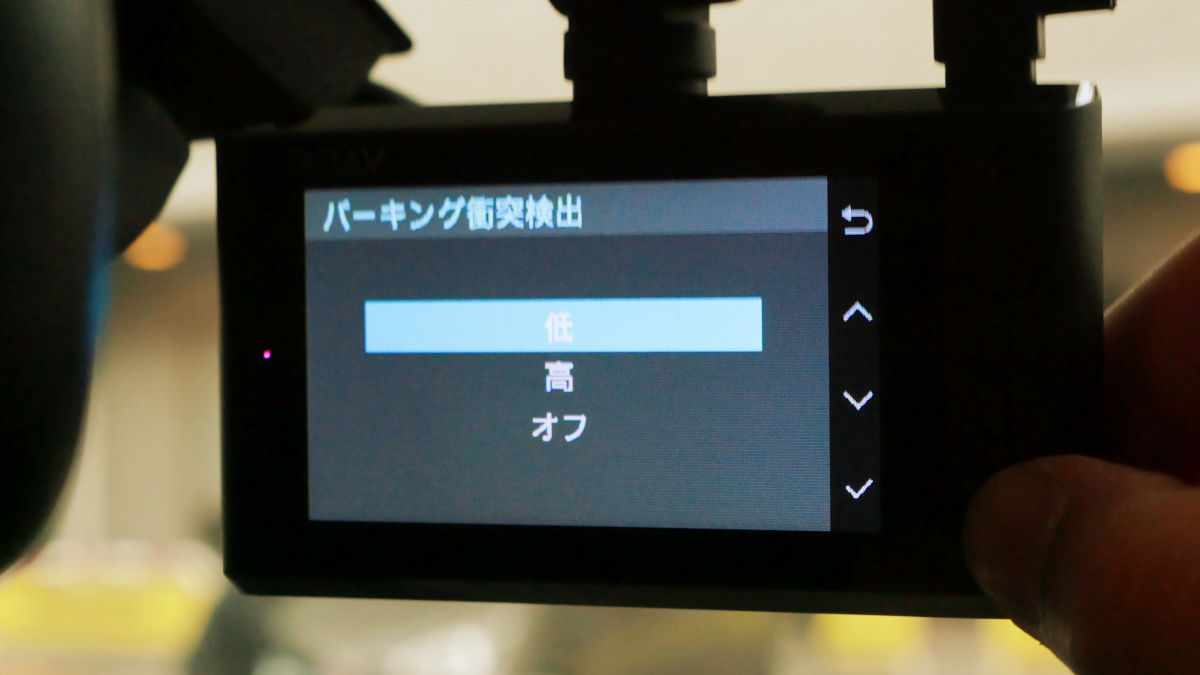
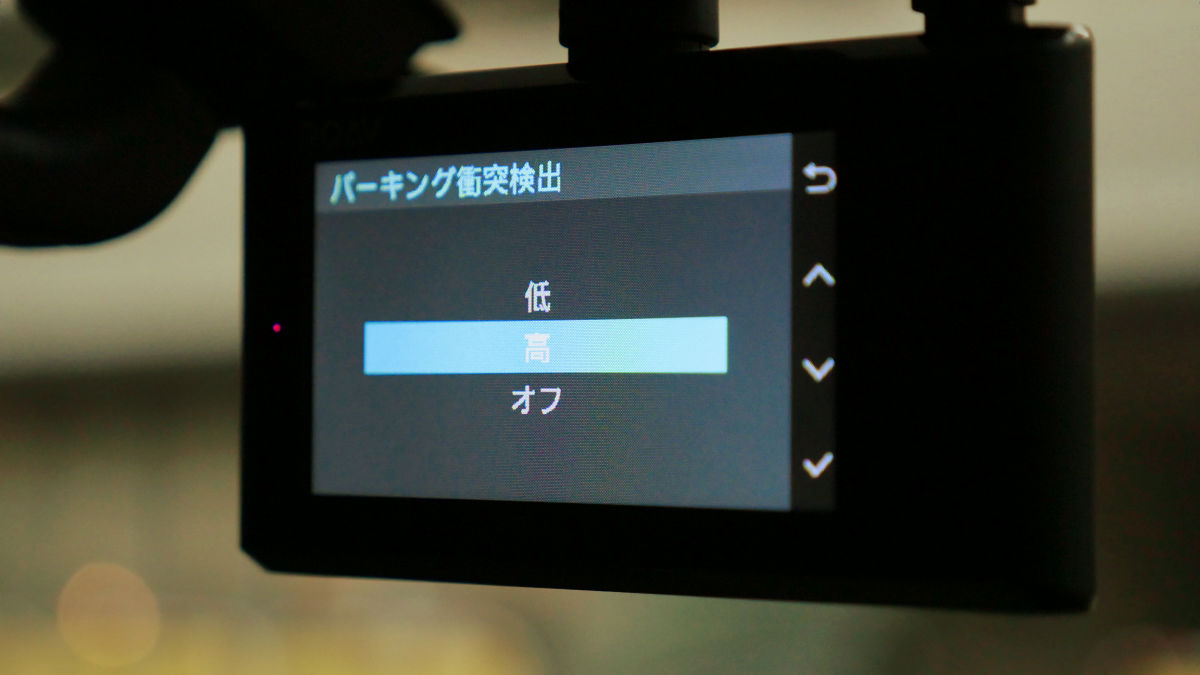
◆ Sensing and recording vibrations such as parking accidents and car vandalism
Select "parking collision detection" from the setting and press the bottom switch.

Select "Low" or "High" for "parking collision detection" and press the bottom switch.
Turn on "parking collision detection". Next, when you pull out the Micro-USB cable or turn the key to stop supplying electricity to the cigar socket, recording in "Loop mode" stops ...

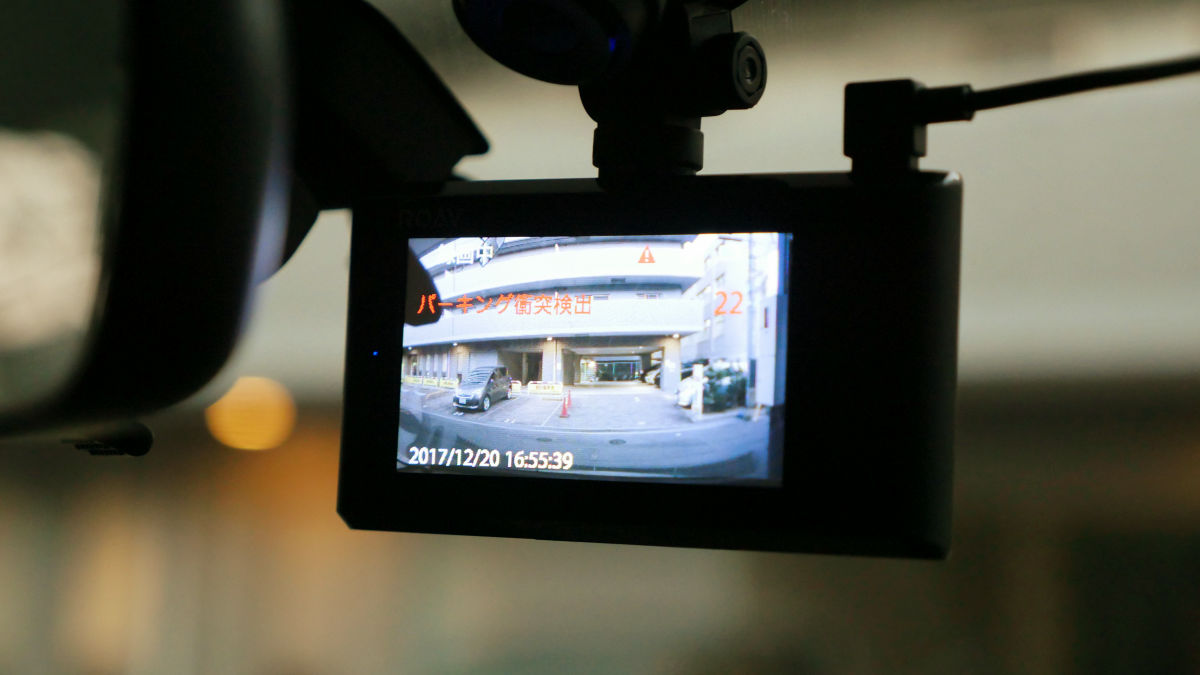
It will be displayed on the LCD screen "Go into parking monitor". When this state is reached, the G sensor senses vibrations such as accidents and car vandalism while parking, using the battery of the main unit, "parking monitor" of automatic recording mode is turned on. It can record 15 times for 30 seconds with the main body fully charged.

· I tried to see how sensitive the G sensor is
I experimented lightly how sensitive "parking monitor" is. Even if one adult man rocks from the side from the outside of the car. It did not work automatically.

Open the door to 45 degrees to reproduce a light collision, and tighten it somewhat violently ......

"Parking collision detection" is displayed and recorded automatically.

Next, I tried to increase the sensitivity Set "parking collision detection" to "high".
I opened the door of the car about 30 degrees and tried to shorten the distance that I could use momentum with the same amount of force as before.

G sensor became more sensitive than "low", "parking collision detected" is displayed and recorded automatically.
If "parking collision detection" is set to "low" instead of "doing the recording just by closing the door", if you do not close the door with a moderate power, "parking monitor" will not work , It is not problematic for everyday use, and when you want to lower the sensitivity further, you can lower the "G sensor sensitivity" of the setting. Anker's DashCam was a drive recorder that can use HD picture quality recording, viewing angle of 145 degrees, day / night shooting, backlight correspondence, automatic parking recording function without problems. Anker's Roav DashCam C2Amazon.co.jpIt is on sale for 9999 yen including tax.
Amazon | Anker Roav DashCam C2 (high-performance drive recorder) 【High-definition at night / full HD recording / wide-angle shooting of 4 lanes / LED signal compatible / G sensor / parking monitor / 3 inch liquid crystal display / 2 port car charger attached (WiFi And application not compatible) | Drive recorder body | Car & motorcycle mail order
Related Posts: