"PTV 2000" capable of full HD output on the notebook PC screen with wireless LAN without jamming cables
When using a notebook PC at home or office, it is not unusual to think that "if the screen is larger ...", it is troublesome to connect the cable to the display every time. Also, if you use a large screen while operating a laptop from a remote location such as a sofa, you will have to prepare three meters or five meters of cable, so it is also awkward to make handling inconvenient .
In such a case it seems to be convenient to connect a notebook PC and display wirelessly "PTV 2000(Around 8550 yen including tax) ".

You can see the situation until you actually connect to the display and start browsing the full HD movie of "YouTube".
I tried wireless LAN full HD transfer of "PTV 2000" - YouTube
Intel advocates "WiDi (Wireless Display)If the product is compatible withScreen output is possible without attaching an external transmitter to the PC. LCD TV and "PTV 2000The setup is completed by simply connecting with HDMI, and the screen of laptop PC can display what comes out via wireless LAN. Since the specifications of the notebook PC required are fairly severe, those who are considering purchasing should check the following conditions firmly.

Also, NETGEAR officially announcedList of compatible PCsThere is also so, if you also check it is more secure.
Those with the following seals are officially compatible with WiDi, so choosing the one stuck to this is the most reliable.

From Buffalo, "PC-TV 1 / HD(Direct sales price 10, 1800 yen) "From IO data,"WDA-X1(Direct sales price 10, 1,800 yen) "such as WiDi compatible products are out, but both are equipped with digital audio output etc. As price rises, this time focusing on cost performance"PTV 2000(About 8550 yen including tax) "I purchased.
◆ Actual machine review
The package looks something like this. It is Uri that big screen TV becomes wireless display.

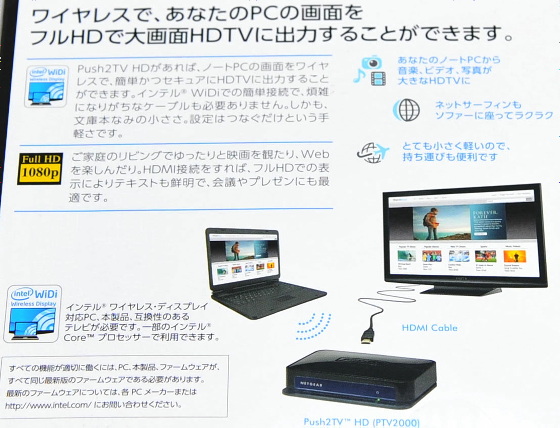
On the back of the box you can appreciate that you can connect with full HD and you can sit on the sofa and surf the web.
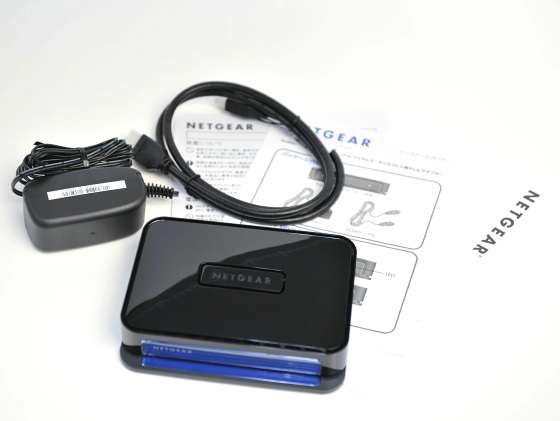
The contents are the main body, power supply, HDMI, instruction manual etc.
The main body size is 138 (W) x 106 (D) x 32 (H) mm, the weight is 180 g and compact size regardless of installation location.
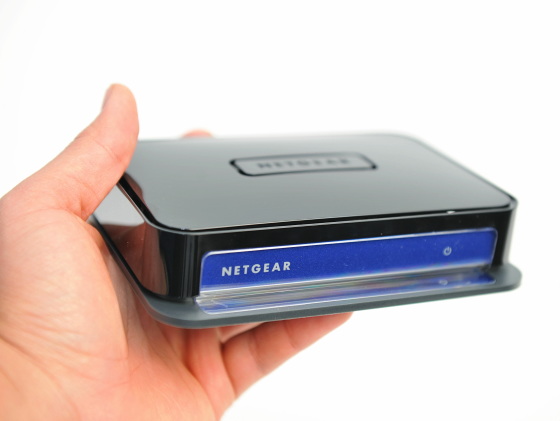
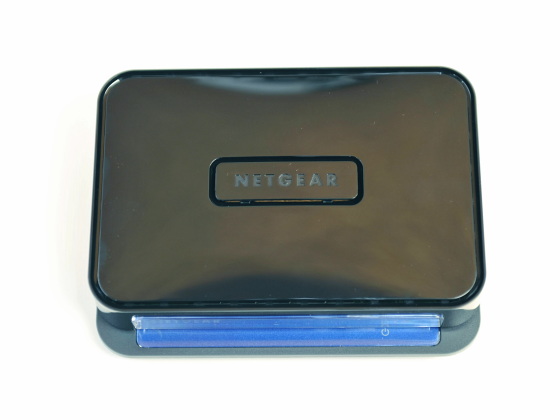
Viewed from the top. It seems that there is no discomfort even if it is aside as an audio set because it is chic color.
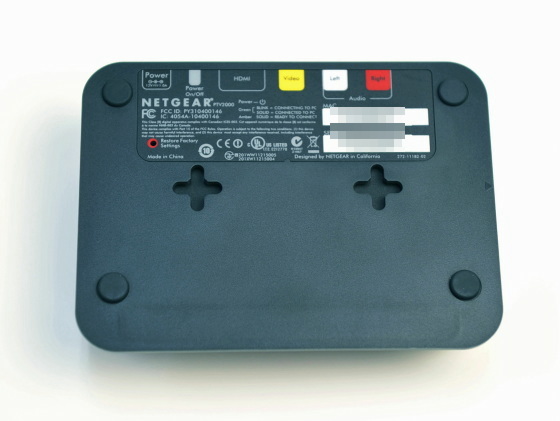
It is the bottom. There is a hole that can be hung on the wall by hooking on the screw.
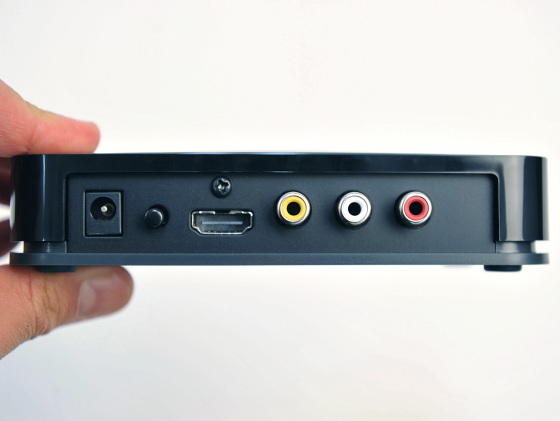
The back side looks like this. From the left of the photo, it is power supply, reset button, HDMI, composite video terminal.
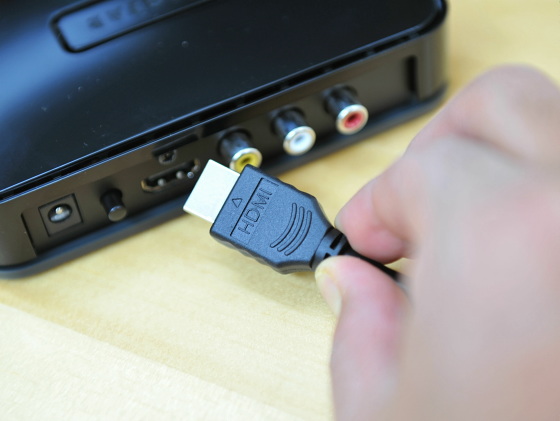
Connection with the TV is done with HDMI. It is better not to use the Composite terminal if it is not so much because the resolution drops extremely.
◆ Initial setting
In this test, notebook PC "Let's Note CF-S10", The television set"BRAVIA KDL-32 EX 710"Was used.
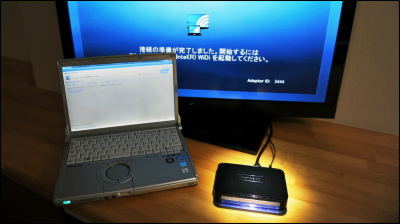
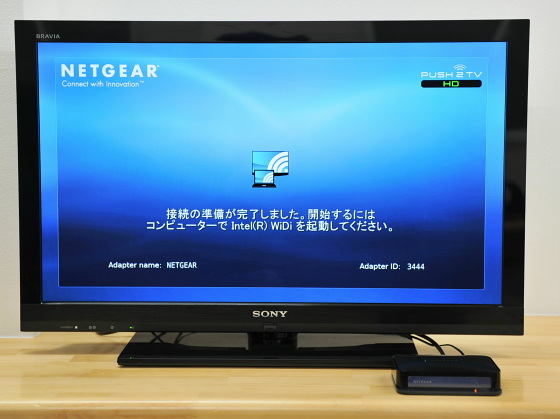
When turning on the power, you will be prompted to start WiDi on the PC side.
◆ Pattern 1: When WiDi software is installed from the beginning
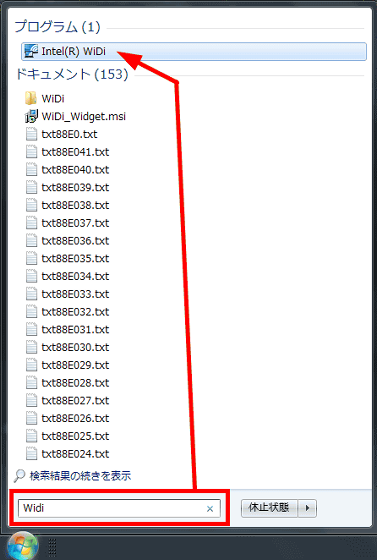
Search for "WiDi" from the Windows 7 start menu and start the software.
◆ Pattern 2: When WiDi software is not installed
If WiDi software can not be found even by searching like "Pattern 1" above, you need to set it yourself. The following operations are allYou must log on to the account of the administrator userPlease be careful.
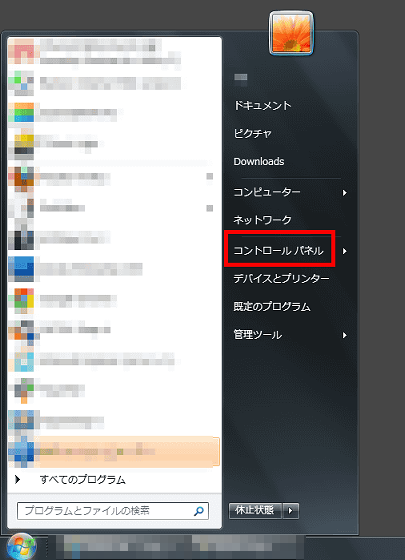
Press "Windows key" and click the control panel in the displayed menu.
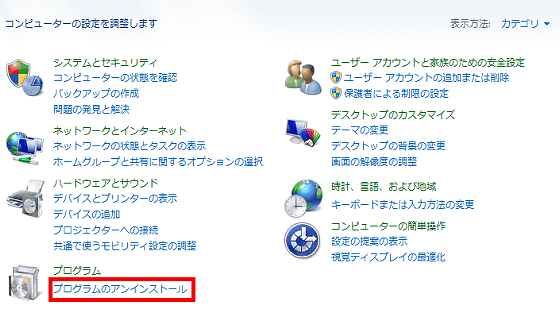
Select "Uninstall a program".
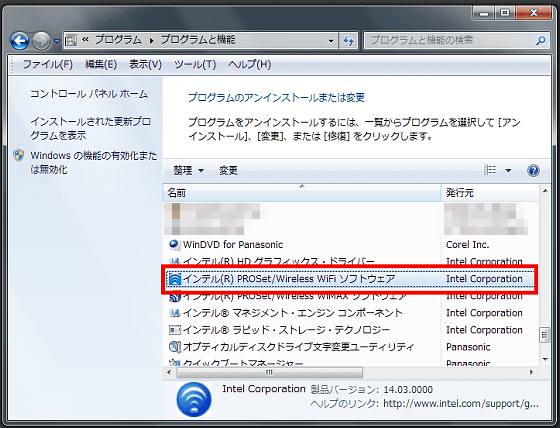
Select "Intel PROSet / Wireless WiFi Software" and make changes.
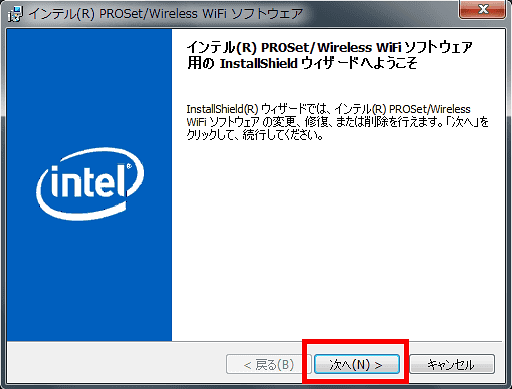
The setup wizard will start, so click "Next".
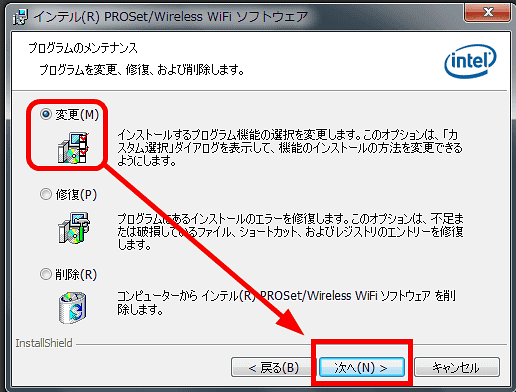
After confirming that "Change" is checked, click "Next".
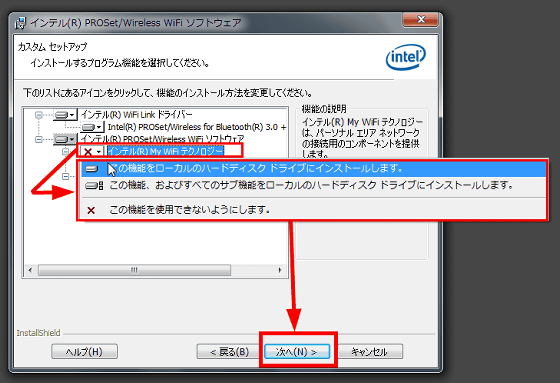
Click the red "X" displayed on the left side of "Intel My WiFi Technology", change to "Install this function and all sub functions to local hard drive" and click Next.
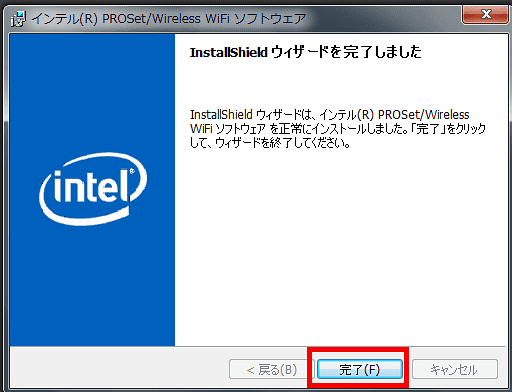
Click "Finish" to restart Windows.
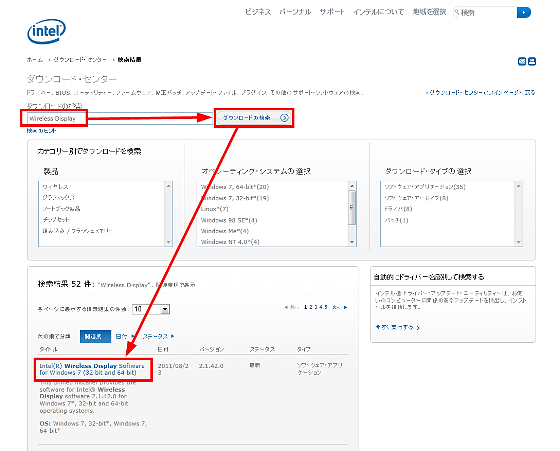
next"Intel Download CenterGo to "Wireless Display" and click "Search for download". Select "Intel Wireless Display Software for Windows 7 (32 bit and 64 bit)" displayed at the top.
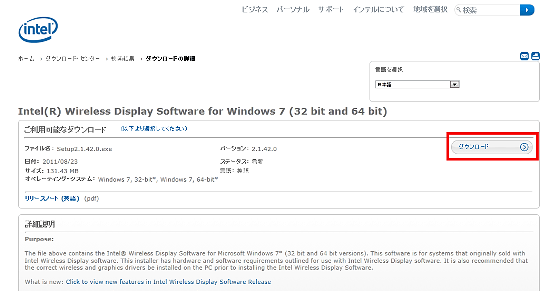
As the confirmation screen is displayed, click "Download".
If you check "I agree with the terms of the license agreement", the download will start.
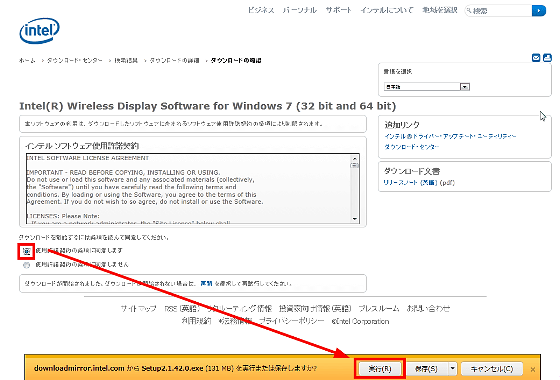
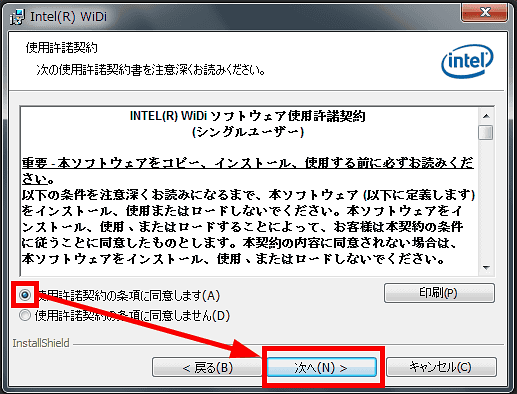
When you select Execute, the installer will start, so select "Next".
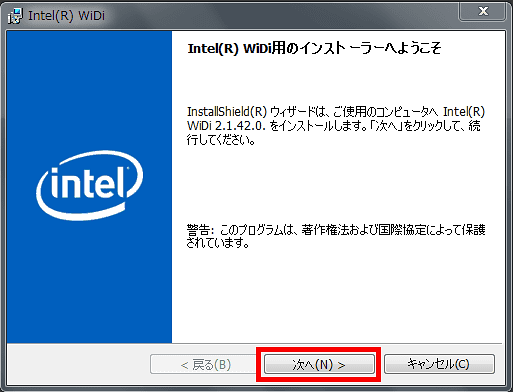
Please check "I agree with the terms of the license agreement" and click "Next".
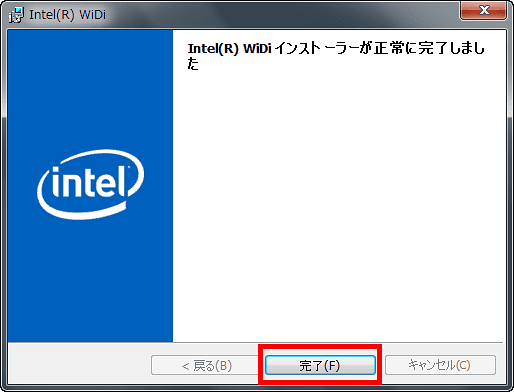
Click Finish
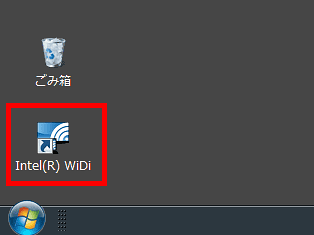
Since the "Intel WiDi" icon is displayed on the desktop, click it to start up.
◆ Initial setting common to patterns 1 and 2
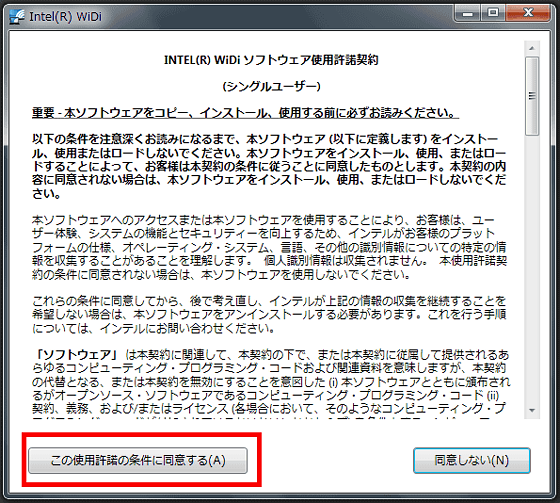
Click "I agree to this license agreement".
Since "LiVing Room" is selected, select "CONNECT" as it is.
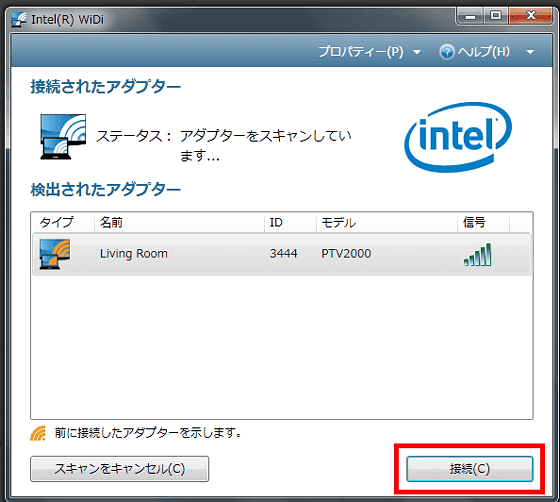
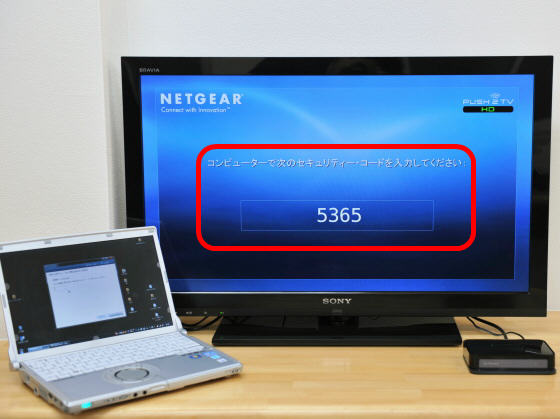
When the connection is established, an authentication code is displayed on the TV screen.
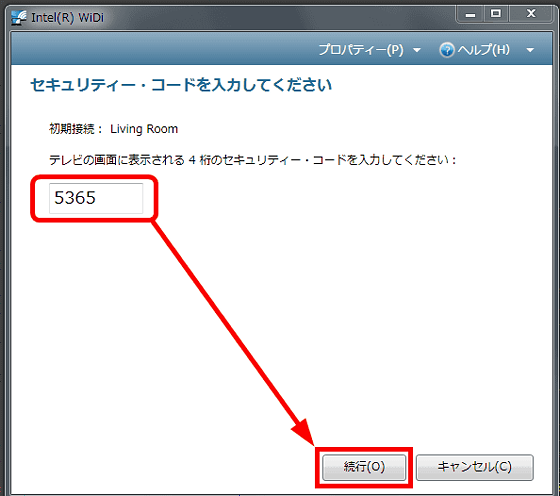
Enter the authentication code displayed on the screen into the notebook PC and click "Continue".
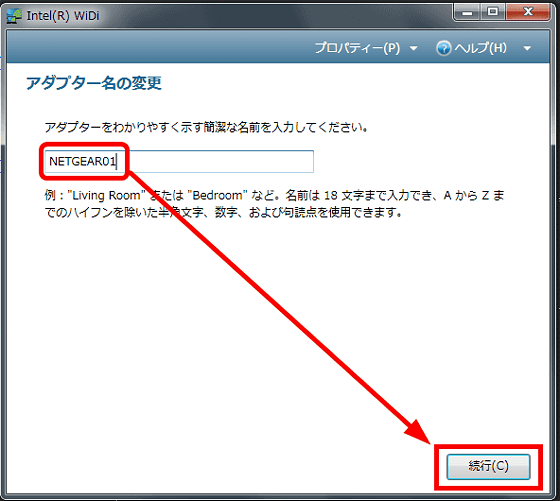
Enter a name of your choice as you can assign a name to the adapter and "continue".
Click "Finish".
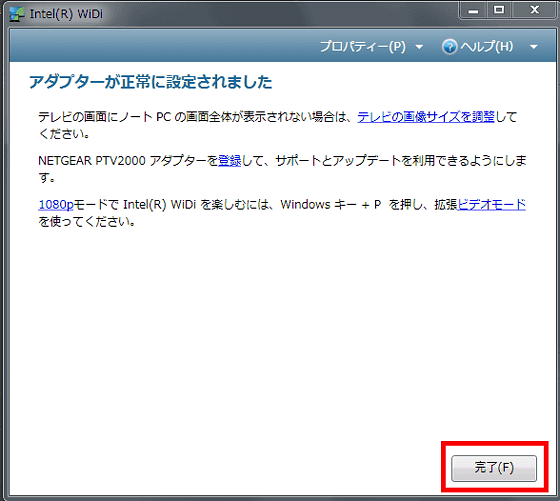
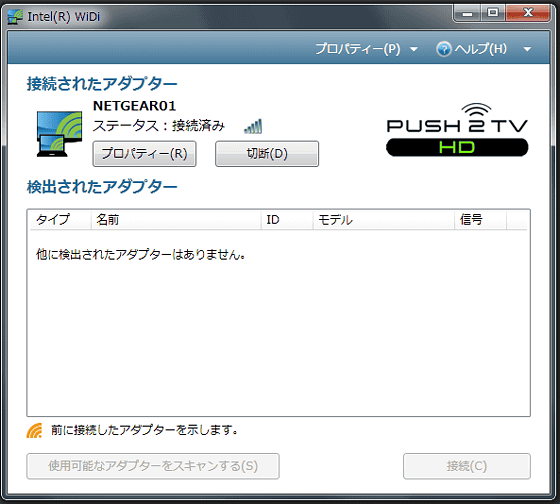
When all the connections are completed normally, the window like this will appear.
◆ Operation Review
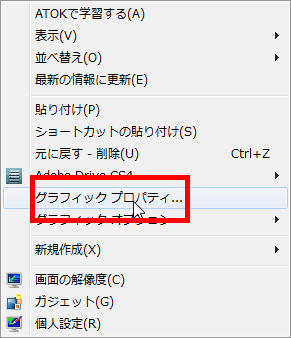
If you want to select a clone display etc, right click on the desktop's place where it is nothing, display a menu and select "Graphic Properties".
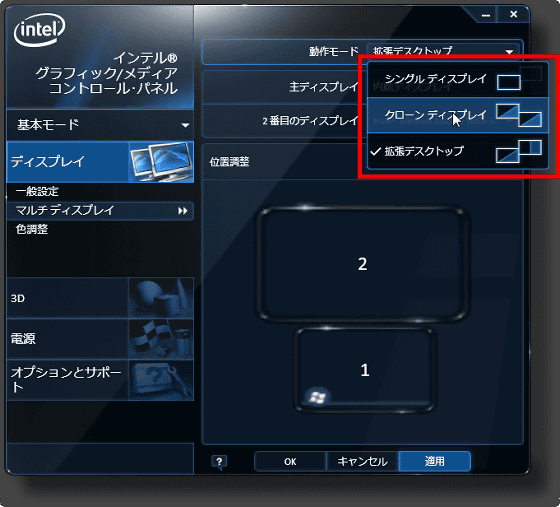
Select "clone display" to display the same screen as your PC on the TV screen, "single display" to display only on the TV screen. If you display different screens on TV and PC, choose Extended Desktop.
The display on the dual display looks like this.
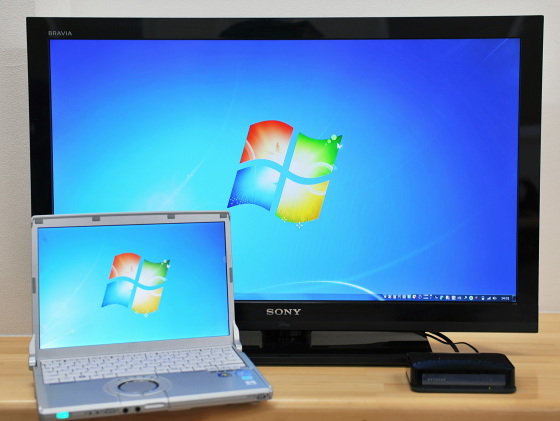
Sitting on a chair and relaxing, watch a movie on a big screen. You can also use it like searching on your PC. The movement of the cursor etc. displayed on the TV screen can be felt slightly delayed, but it is not problem level unless it is an application such as playing a game.
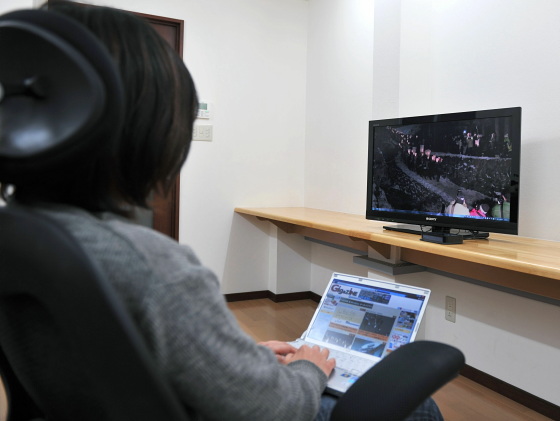
Since it is convenient to be able to connect to a large screen smoothly without sacrificing the lightweightness and compactness of the notebook PC at any cost, please consider the purchase of a favorite person who wants to stick to the screen size while leaving mobility.
In addition, when trying with the combination of "Let's Note CF-S10" and Eizo's "FlexScan color LCD monitor · M170 / M190", when connecting from the "HDMI output of" PTV 200 "to the HDMI input of the display, full HD I could not get the resolution of DVI and I got a full HD resolution when I entered it with DVI. It may be derived from individual machines, but when using the set with a liquid crystal display rather than a television set, "When the situation is not enough resolution" happens when switching to DVI connection is improved maybe.
Related Posts:
