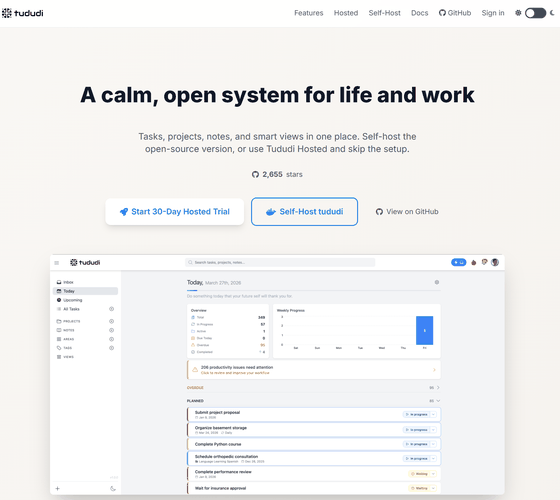
Tududi is a free, open-source application that allows you to efficiently categorize and track your work, from personal task management to large-scale project management and detailed note-taking.
Task management apps are convenient, but free versions often have limited functionality, and paid plans require monthly fees. Furthermore, many people are uneasy about storing work and personal information on external cloud services. That's why Tududi , an open-source task management tool, has been released that is free, has no feature limitations, and allows for self-hosted operation.
tududi - Organize Life and Work, Self-Hosted or Hosted
chrisvel/tududi: A calm, open system for organizing life and work. Tasks, projects, notes, areas, and smart workflows - self-hosted or hosted.
◆ Task registration process
Grouping tasks is useful when managing various types of tasks, such as company tasks, daily tasks, and travel preparations. Tududi allows you to create groups using its area function.
This time, as an example, let's register the everyday task of taking out the trash. Click the '+' icon under 'Area' in the menu on the left.
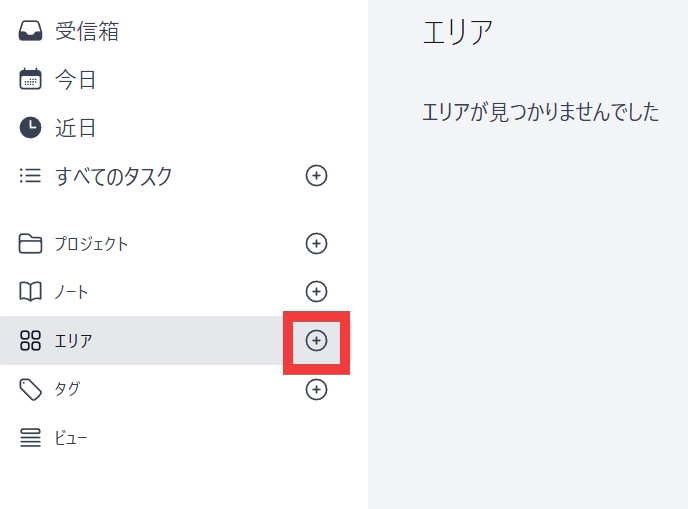
A form will appear. Enter an area name of your choice, such as 'Private,' in the 'Enter area name' field, enter a description in the 'Enter area description' field, and click 'Create Area.'

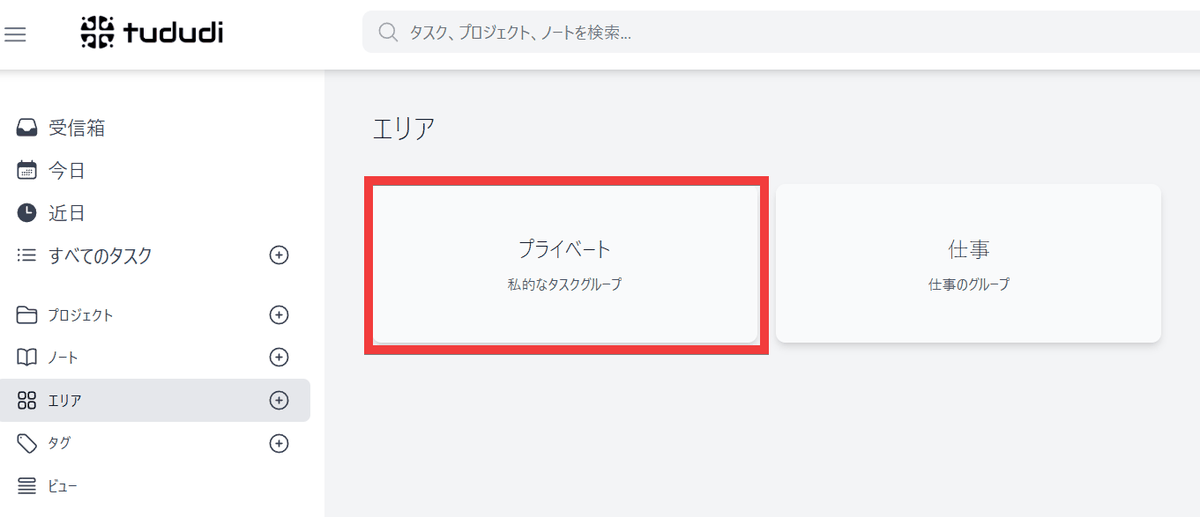
A new area will be created. Click 'Private'.
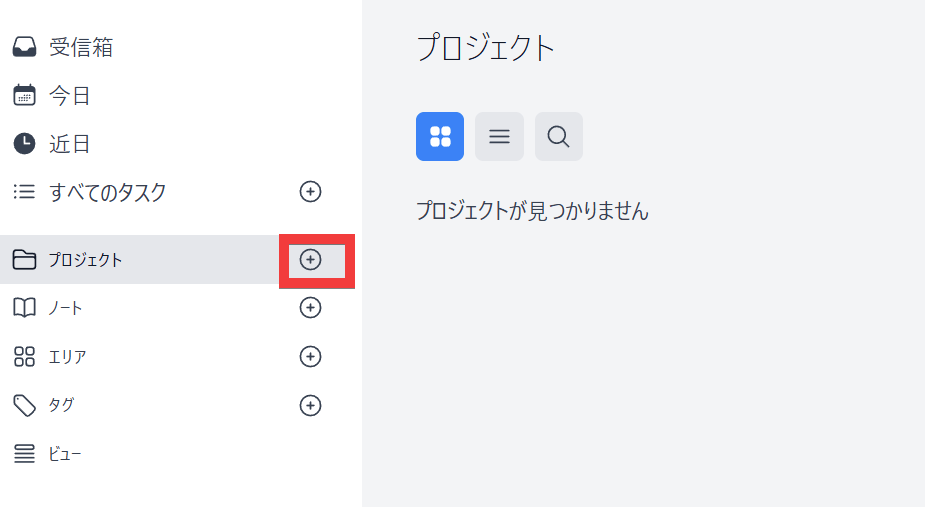
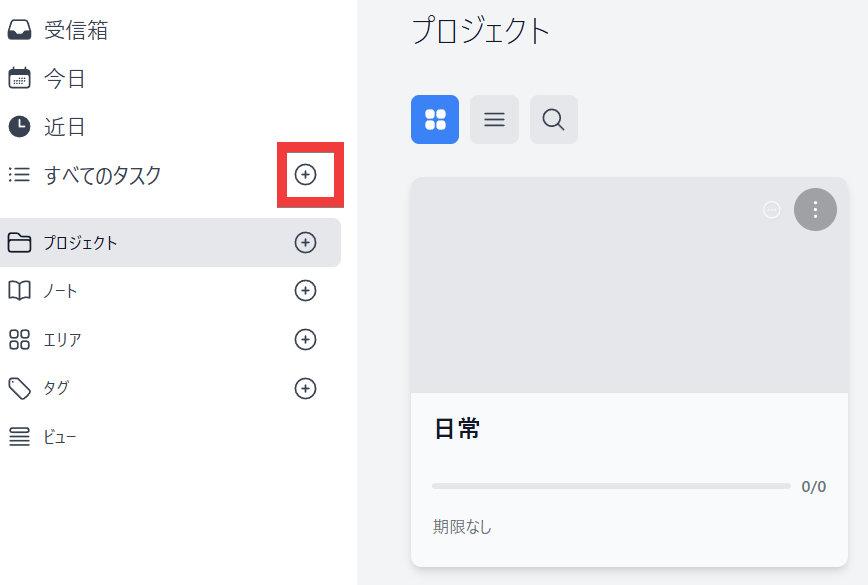
A list of empty projects will be displayed, so click the '+' icon in the 'Projects' menu.
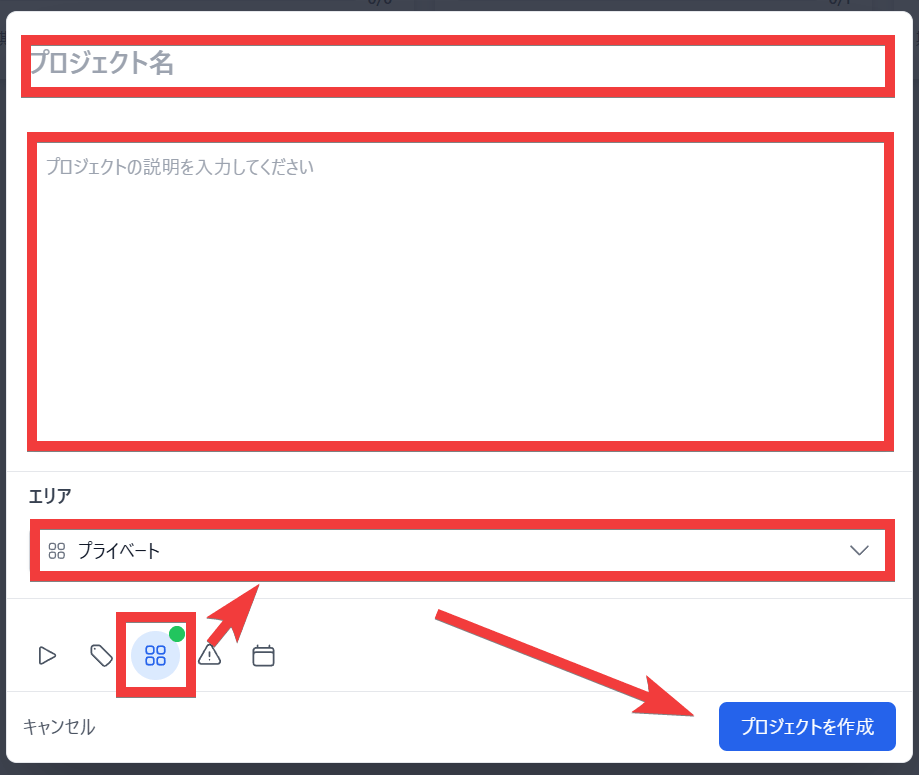
A form will appear. Enter a project name of your choice, such as 'Daily Life,' in the 'Project Name' field, enter a description in the 'Please enter a project description' field, click the 'Area' icon, select 'Private,' and finally click 'Create Project.'
Once a new project is created, click the '+' icon under 'All Tasks' in the left-hand menu.
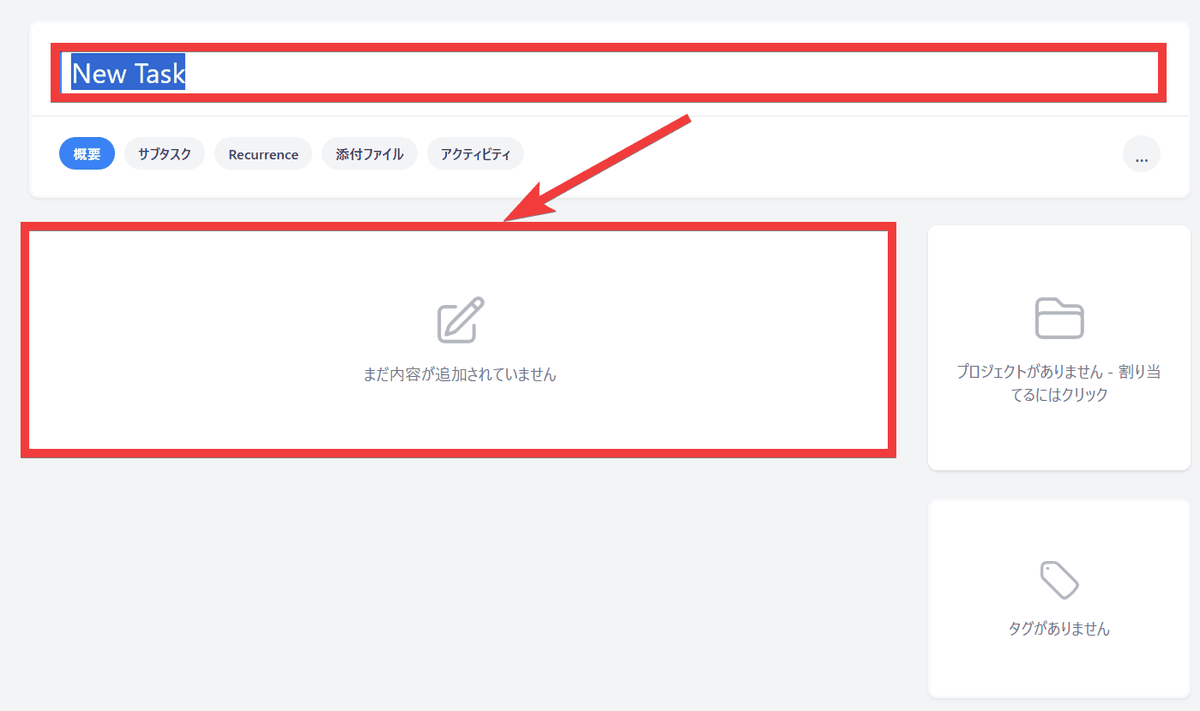
The task registration screen will appear, so enter a task name such as 'Take out the trash' in 'New Task' and click anywhere in the content field below.
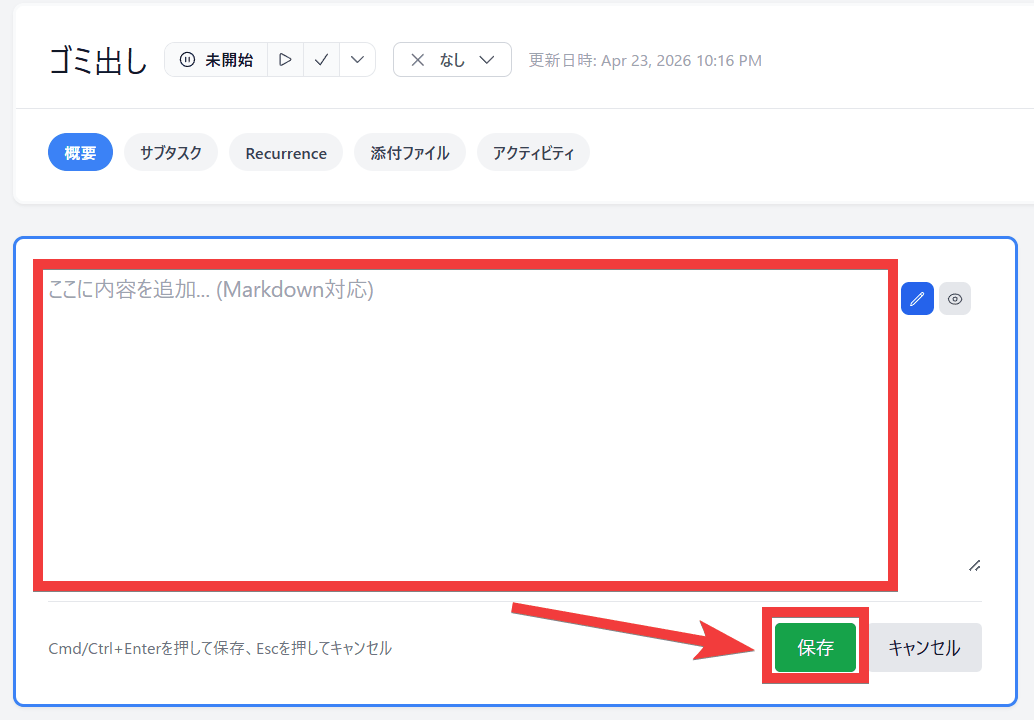
Enter the task details in the content field and click 'Save'.
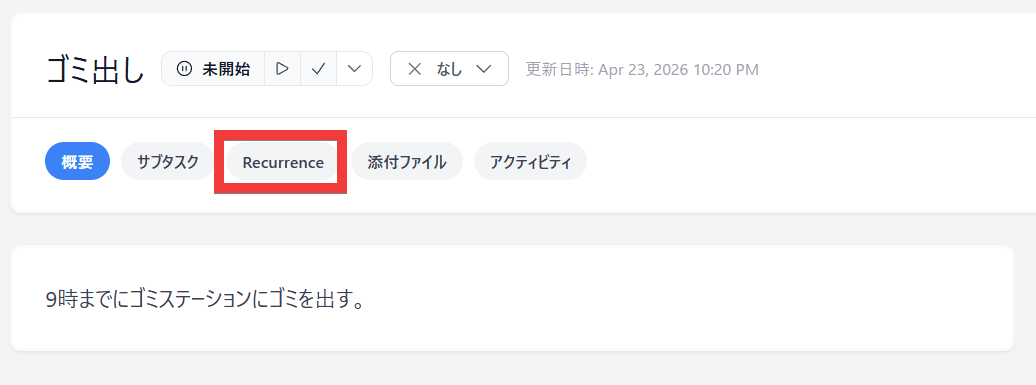
To set up recurrence, click 'Recurrence'.
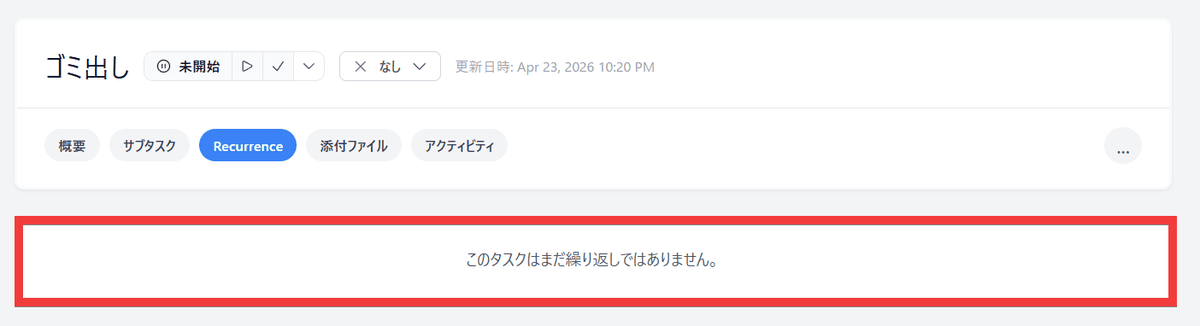
Click anywhere in the field that says 'This task is not yet a repeat.'
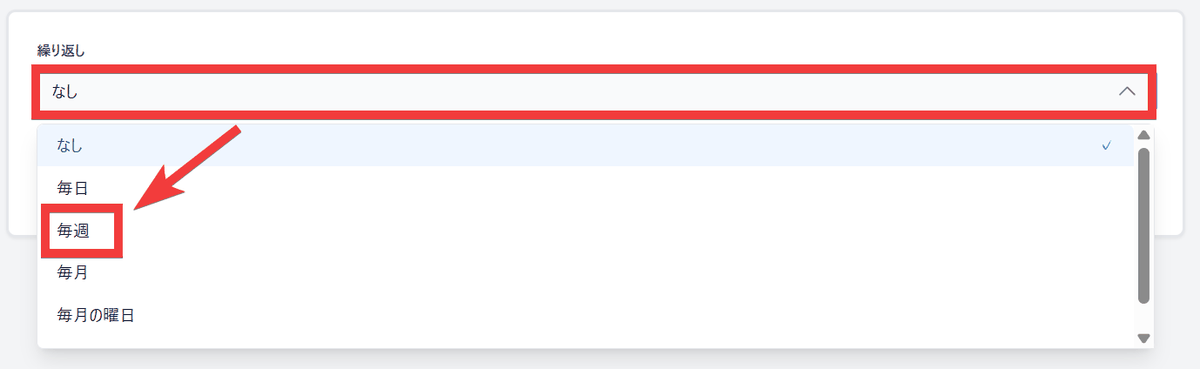
A dropdown menu will appear, so select 'Weekly'.
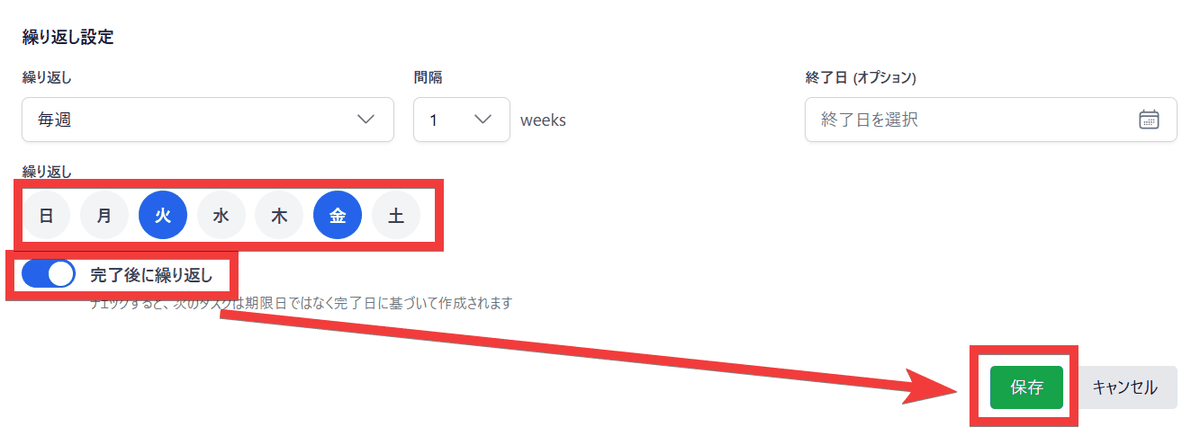
Select the day of the week and turn on the 'Repeat after completion' toggle, then click 'Save'.
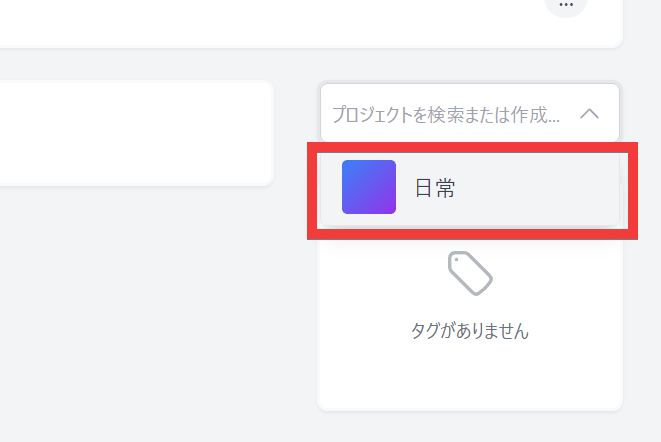
Click 'Overview,' then click anywhere in the Project section.
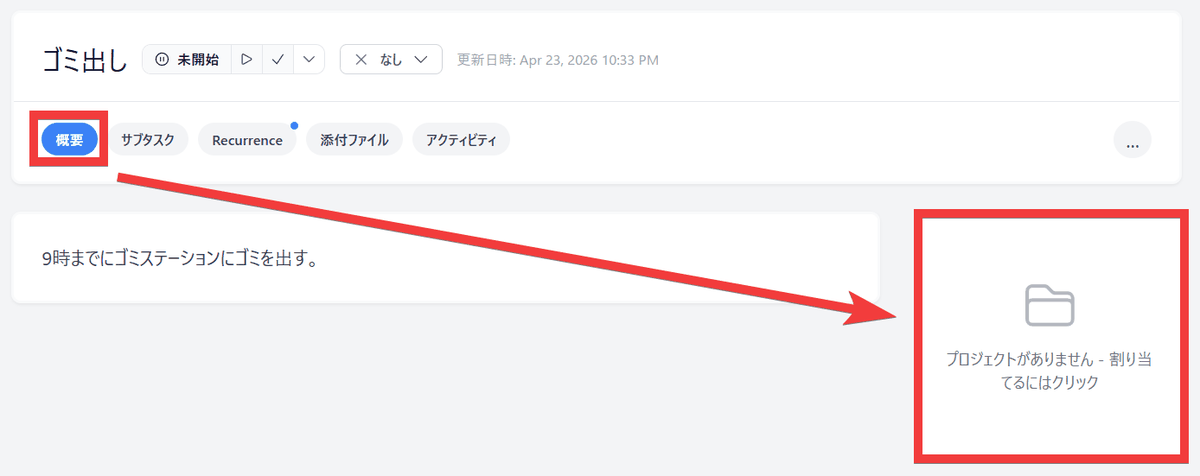
A project selection menu will appear, so select any project, such as 'Daily Life'.
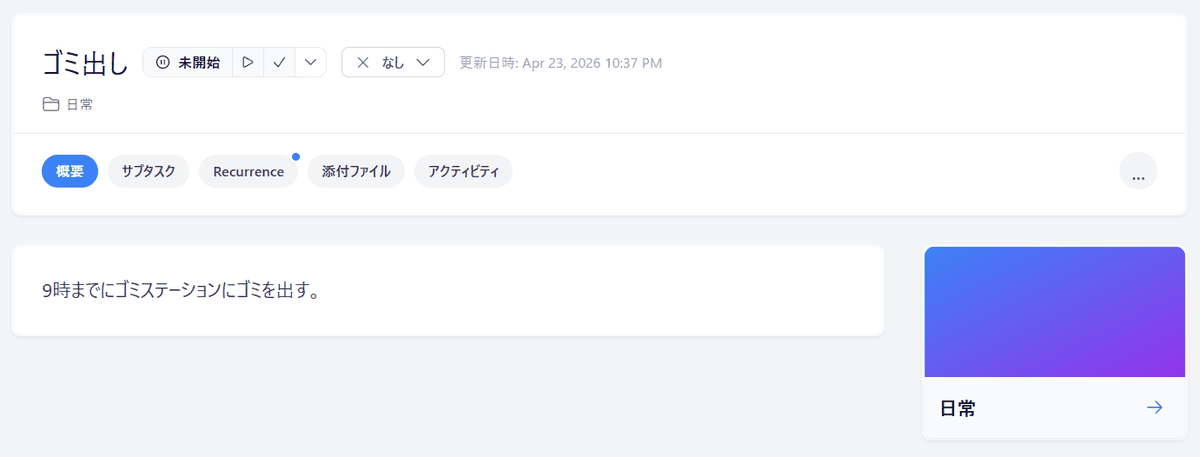
This completes the basic registration process.
◆ Flexible repetition settings
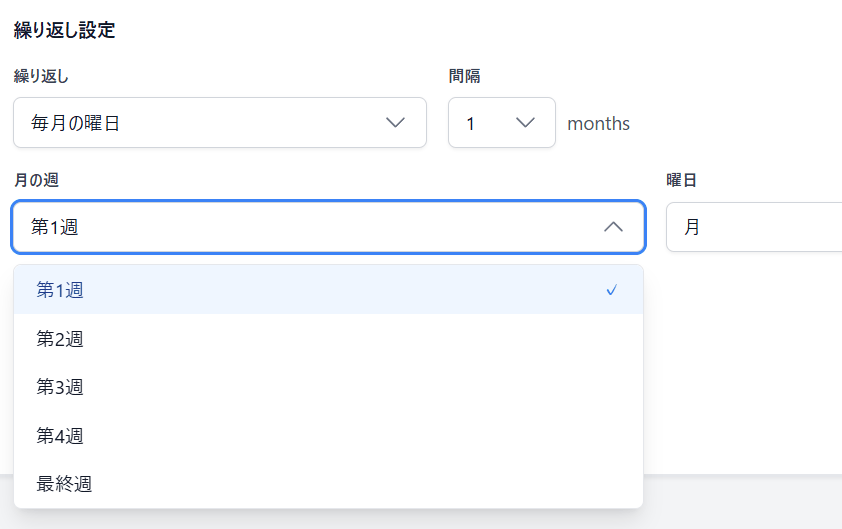
The recurring settings allow you to choose from multiple patterns, such as 'daily,' 'weekly,' 'monthly,' 'day of the week each month,' and 'last day of the month.'
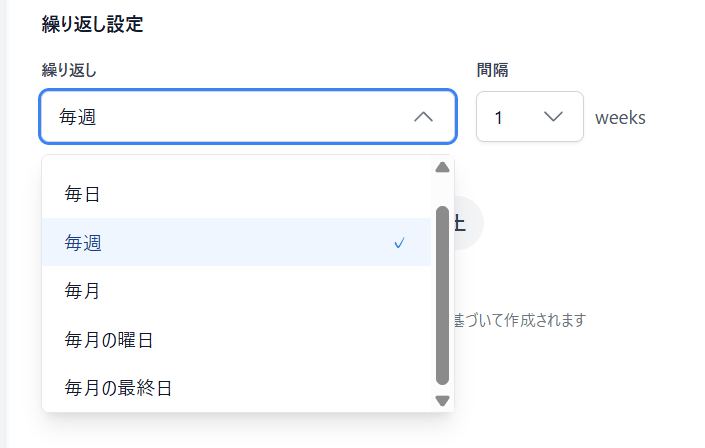
Under 'Days of the week each month,' you can specify details such as 'which day of the week in which week' or 'which day of the last week.'
◆ Displaying a list of tasks
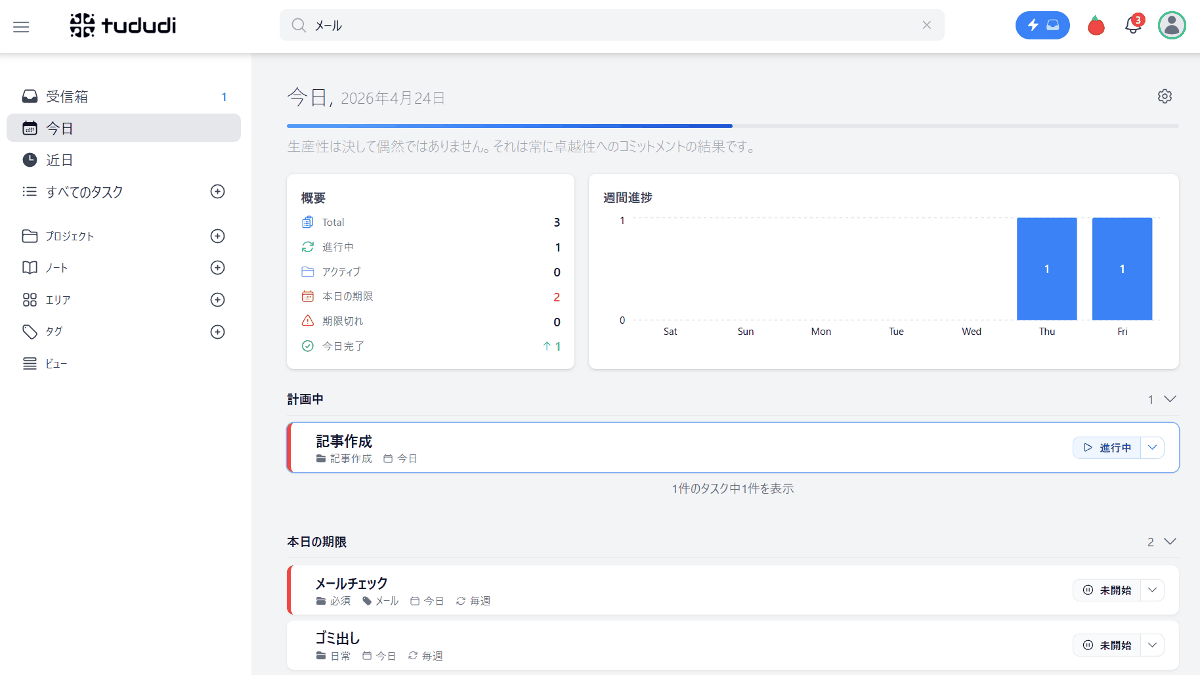
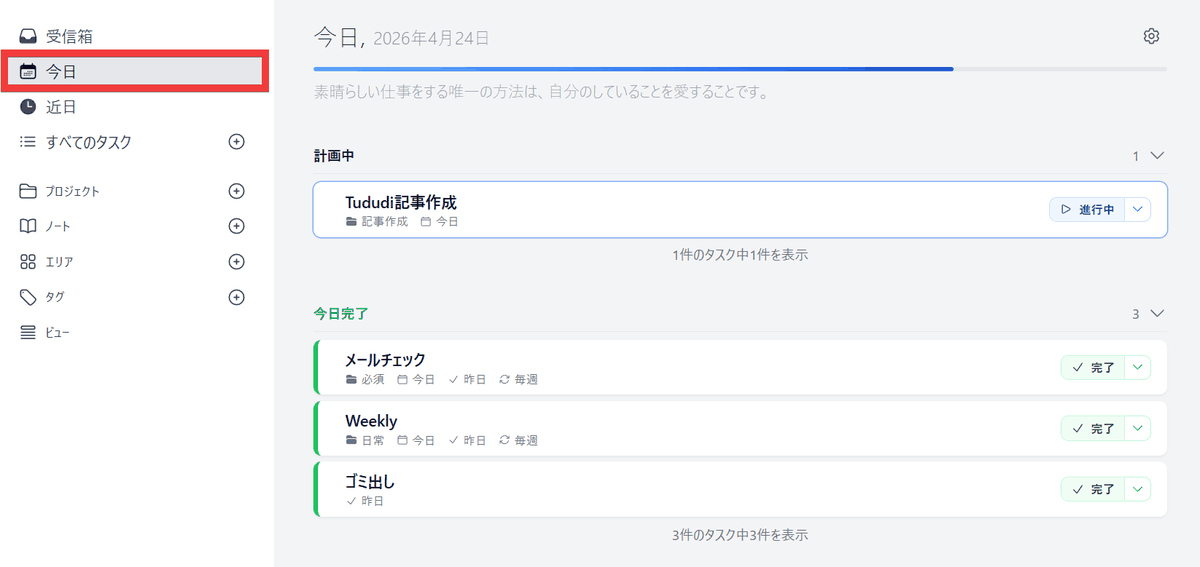
Clicking 'Today' in the left menu will display a list of today's tasks, categorized by status such as 'In Progress' and 'Completed.'
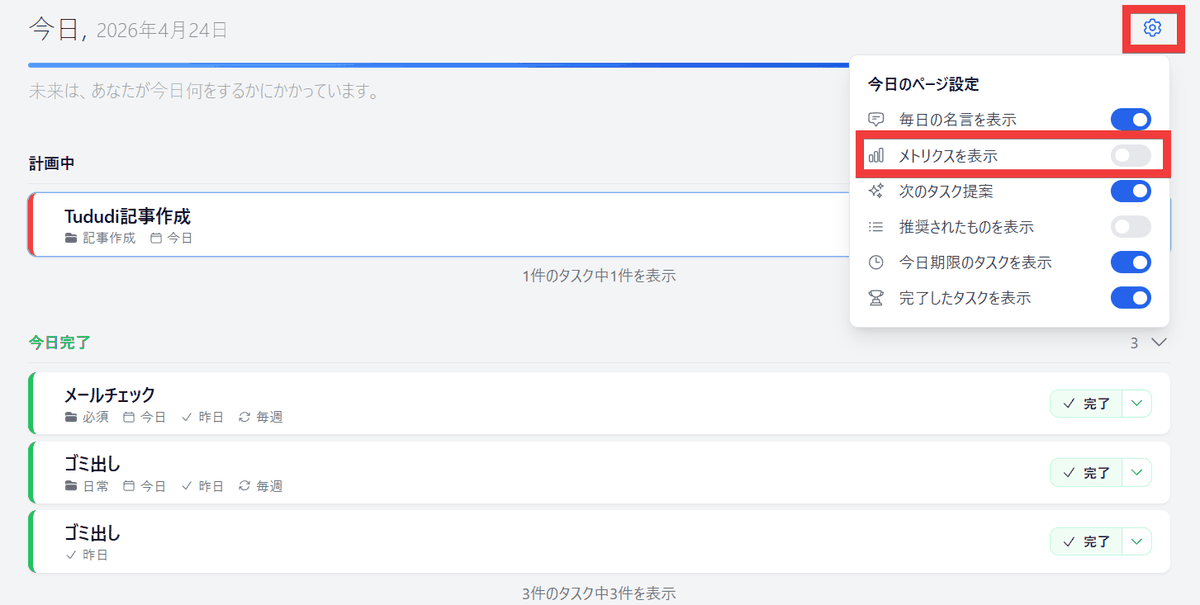
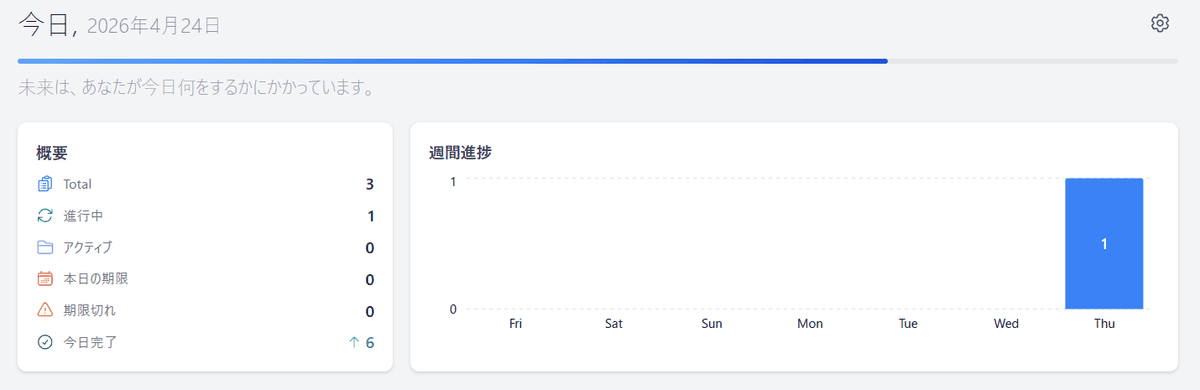
Clicking the gear icon in the upper right corner of today's task view allows you to customize the display, and turning on the 'Metrics' toggle will...
Task statistics will be displayed.
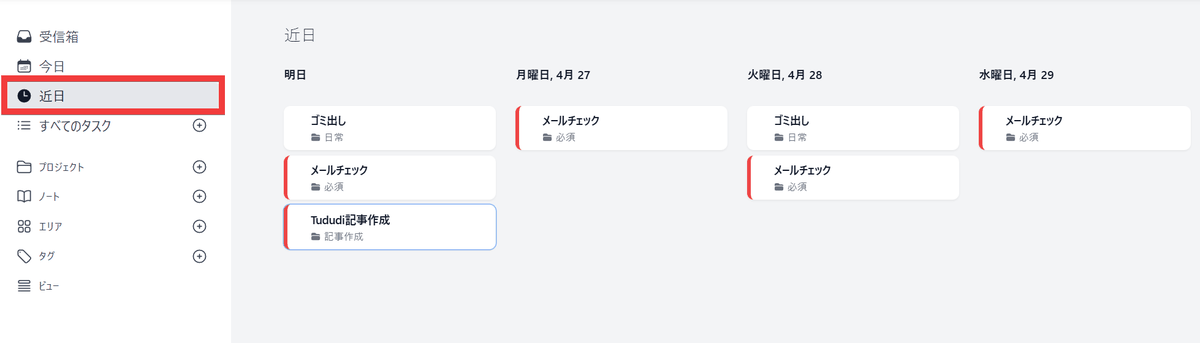
Clicking 'Upcoming' in the left menu will display a list of upcoming tasks, preventing you from panicking when a task suddenly appears on the day itself.
◆ Registering a memo
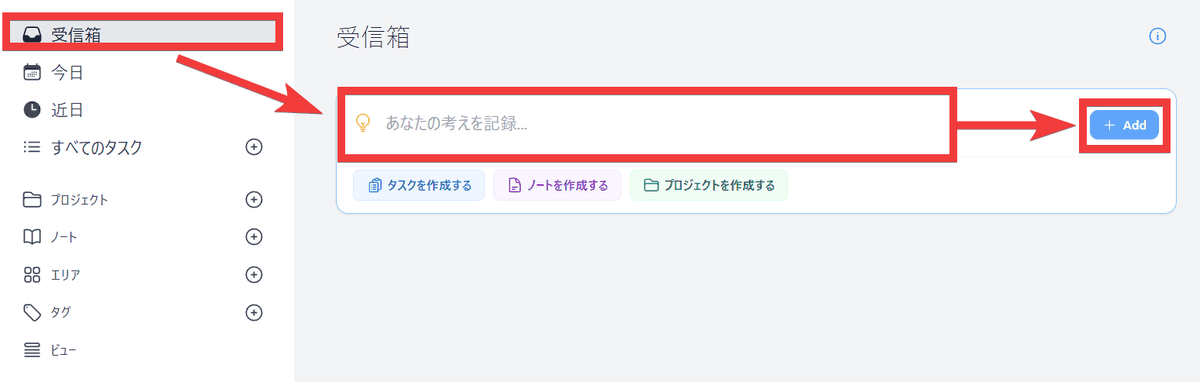
You can quickly jot down any ideas that come to mind. Click 'Inbox' from the left menu, enter your notes in the 'Record Your Thoughts' form, and then click 'Add'.
A new memo will be created.
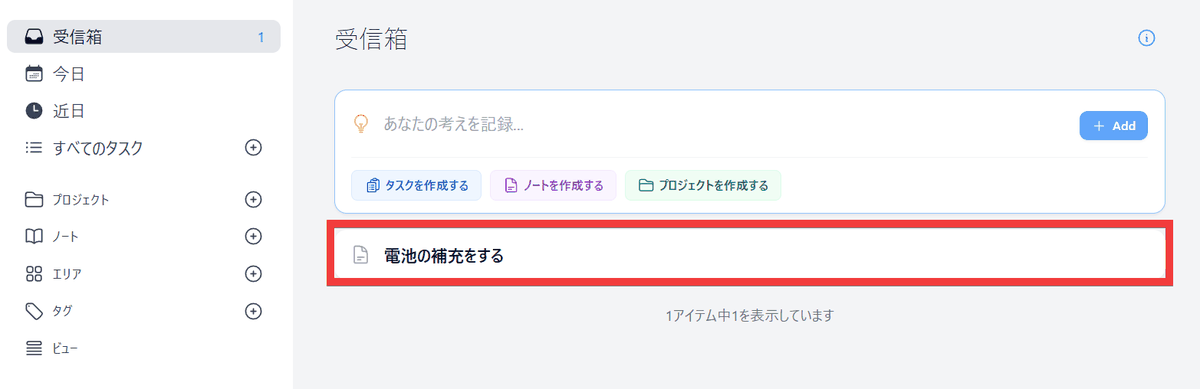
Notes can be organized later as 'tasks,' 'notes,' or 'create as a new project.'

◆Other features
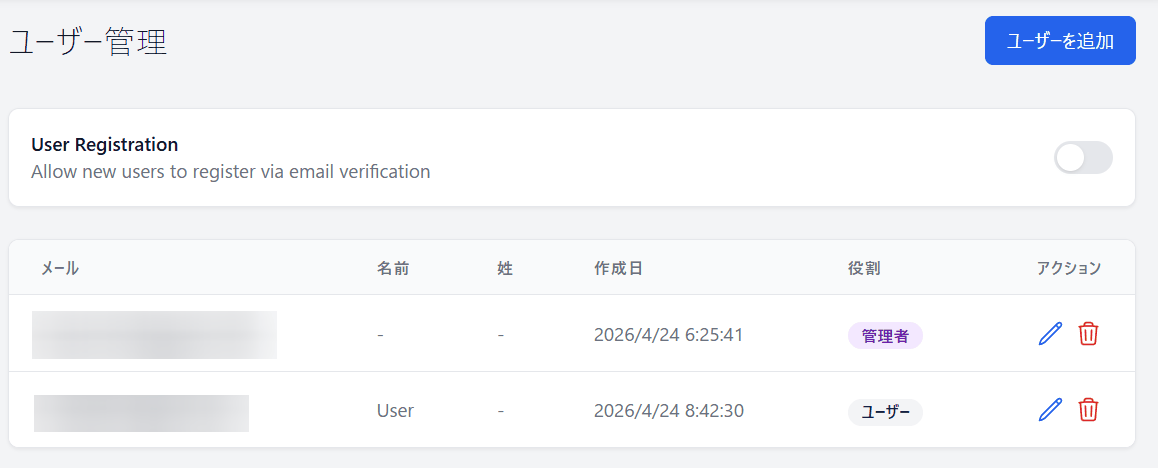
• Multiple user registration
Each user can manage their own tasks.
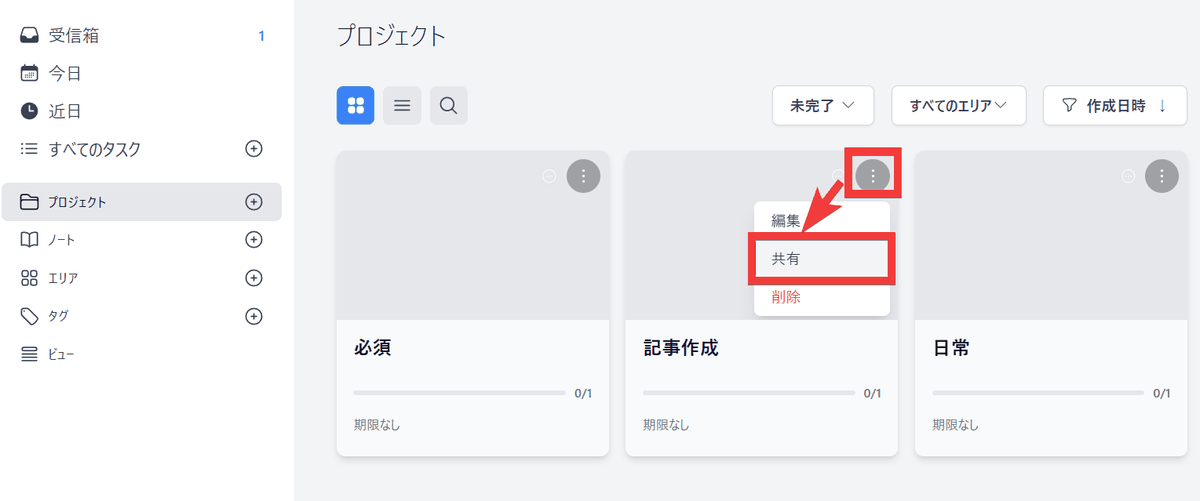
- Sharing the project
Projects can be shared with others, and permissions such as adding, editing, and deleting can be assigned to each user.
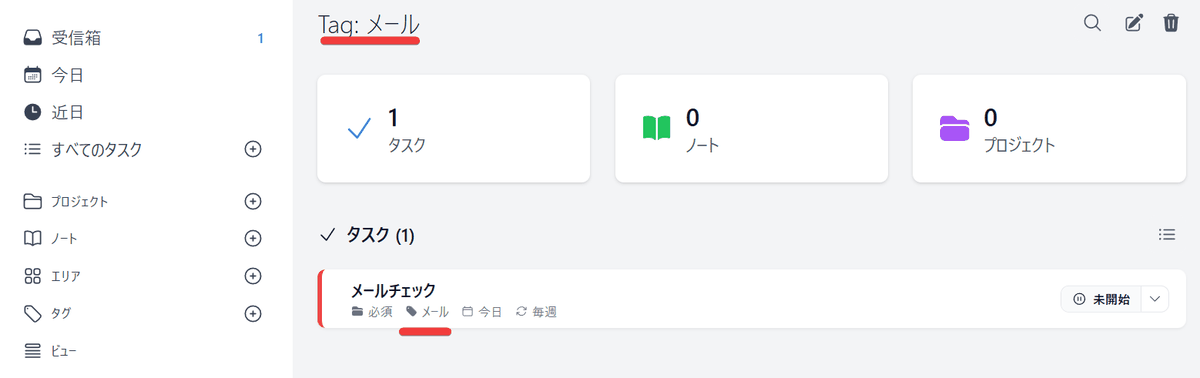
- Adding tags
You can add tags to tasks and notes.
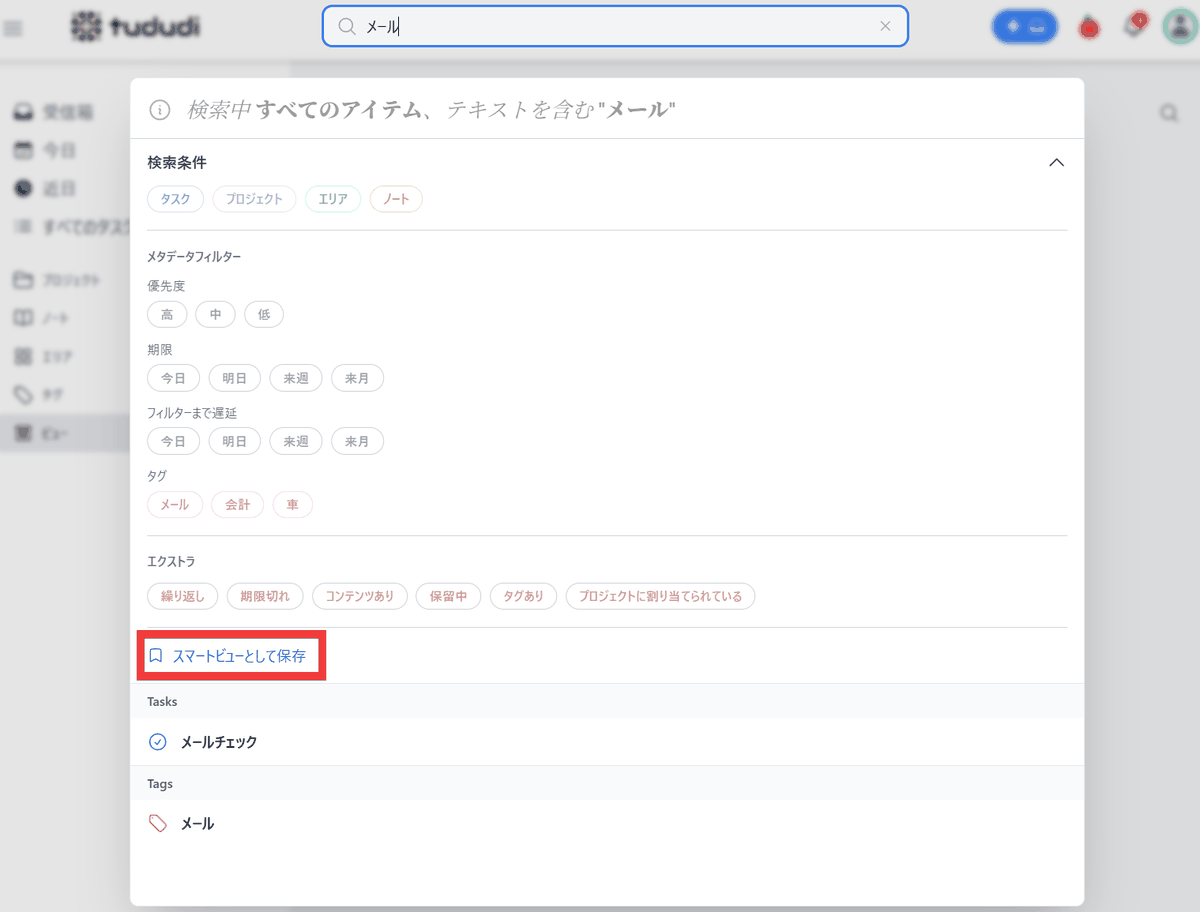
• Advanced search and smart view
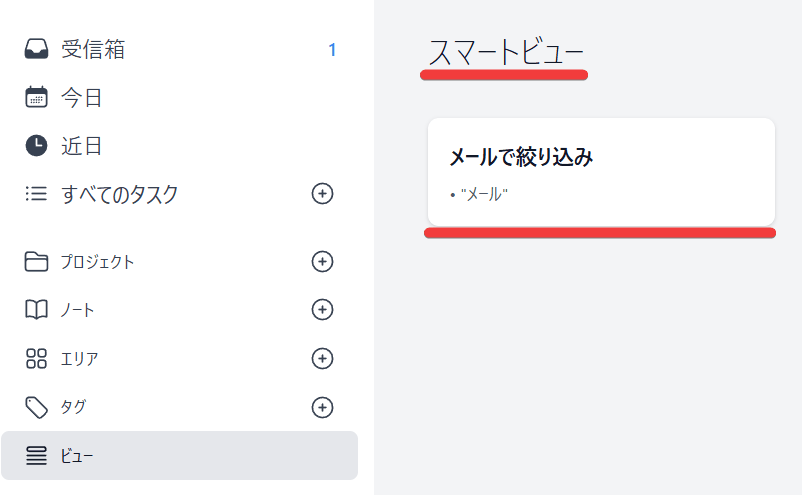
You can narrow down your items by applying various filters. Clicking 'Save as Smart View' will save those criteria as a smart view.
Clicking 'Views' in the left-hand menu will display a list of your saved smart views.
◆How to set up Tududi
This time, we will build the environment using
 services:
 tududi:
 image: chrisvel/tududi:latest
 container_name: tududi
 restart: unless-stopped
 ports:
 - '3002:3002'
 environment:
 TUDUDI_USER_EMAIL: [Any email address]
 TUDUDI_USER_PASSWORD: [Any password]
 TUDUDI_SESSION_SECRET: [Value generated by openssl rand -hex 64]
 volume:
 - ./tududi_db:/app/backend/db
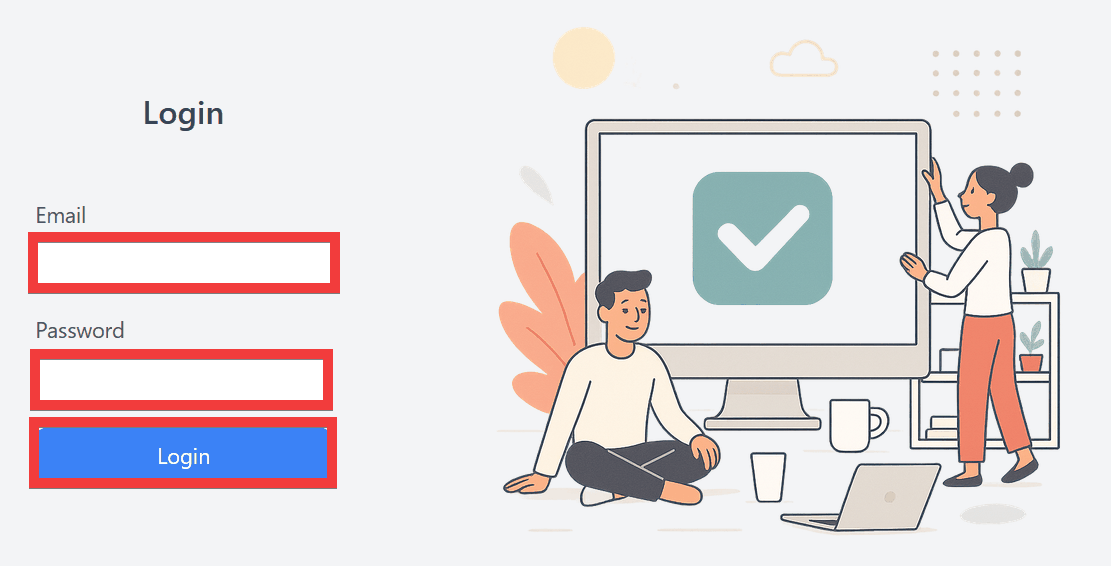
When you access 'http://localhost:3002/' in your browser, a login screen will appear. Enter your email address in 'Email' and your password in 'Password,' then click 'Login.'
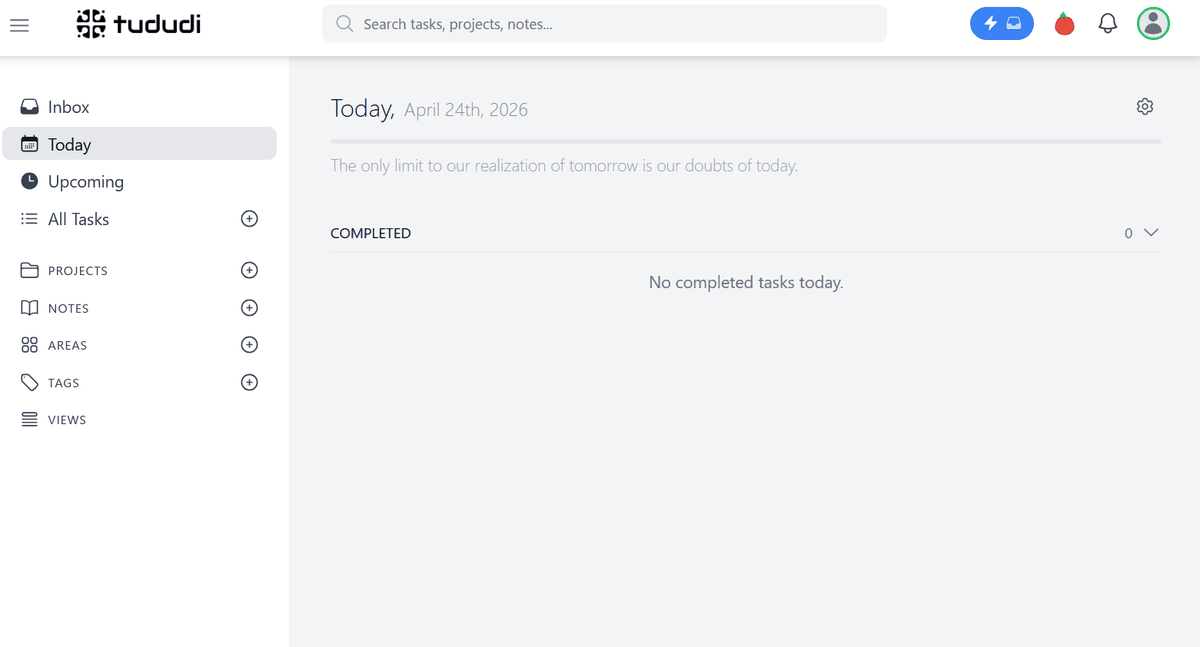
The dashboard will be displayed.
Tududi allows you to manage tasks and notes in one tool, supports hierarchical organization using areas and projects, and offers flexible recurring settings, making it useful for managing work and personal tasks.
Related Posts: