Review of 'DoNotNotify,' a free Android app that filters and blocks unwanted smartphone notifications.
While smartphone app notification features are convenient and useful, there are many situations where you feel 'I don't need this notification,' yet most apps don't allow for detailed notification on/off settings. DoNotNotify is an Android app that allows you to finely configure notification permissions and denials from outside the app.
anujja/DoNotNotify: DoNotNotify app
◆Features
According to the official GitHub repository, DoNotNotify has the following features:
- Notification blocking : Use Android's NotificationListenerService to block notifications in real time.
• Flexible rules : Deny list (block matching notifications) • Allow list (allow only matching notifications)
- Pattern matching : Use simple partial matching or regular expression patterns to match the notification title and body.
• Time-based rules : Rules can be scheduled to be effective only during specific time periods.
• Preset rules : Over 40 pre-configured rules are available for popular apps such as e-commerce promotions and social media.
• Automatic installation rules : When you install a compatible app, the relevant pre-configured rules are automatically added.
• Notification history : You can customize the retention period and view all received notifications.
• Block history : Allows you to track which notifications were blocked by which rules.
- Import/Export : Rules can be backed up and restored as JSON files.
• Completely offline : No network access required, no data collection.
◆Installation
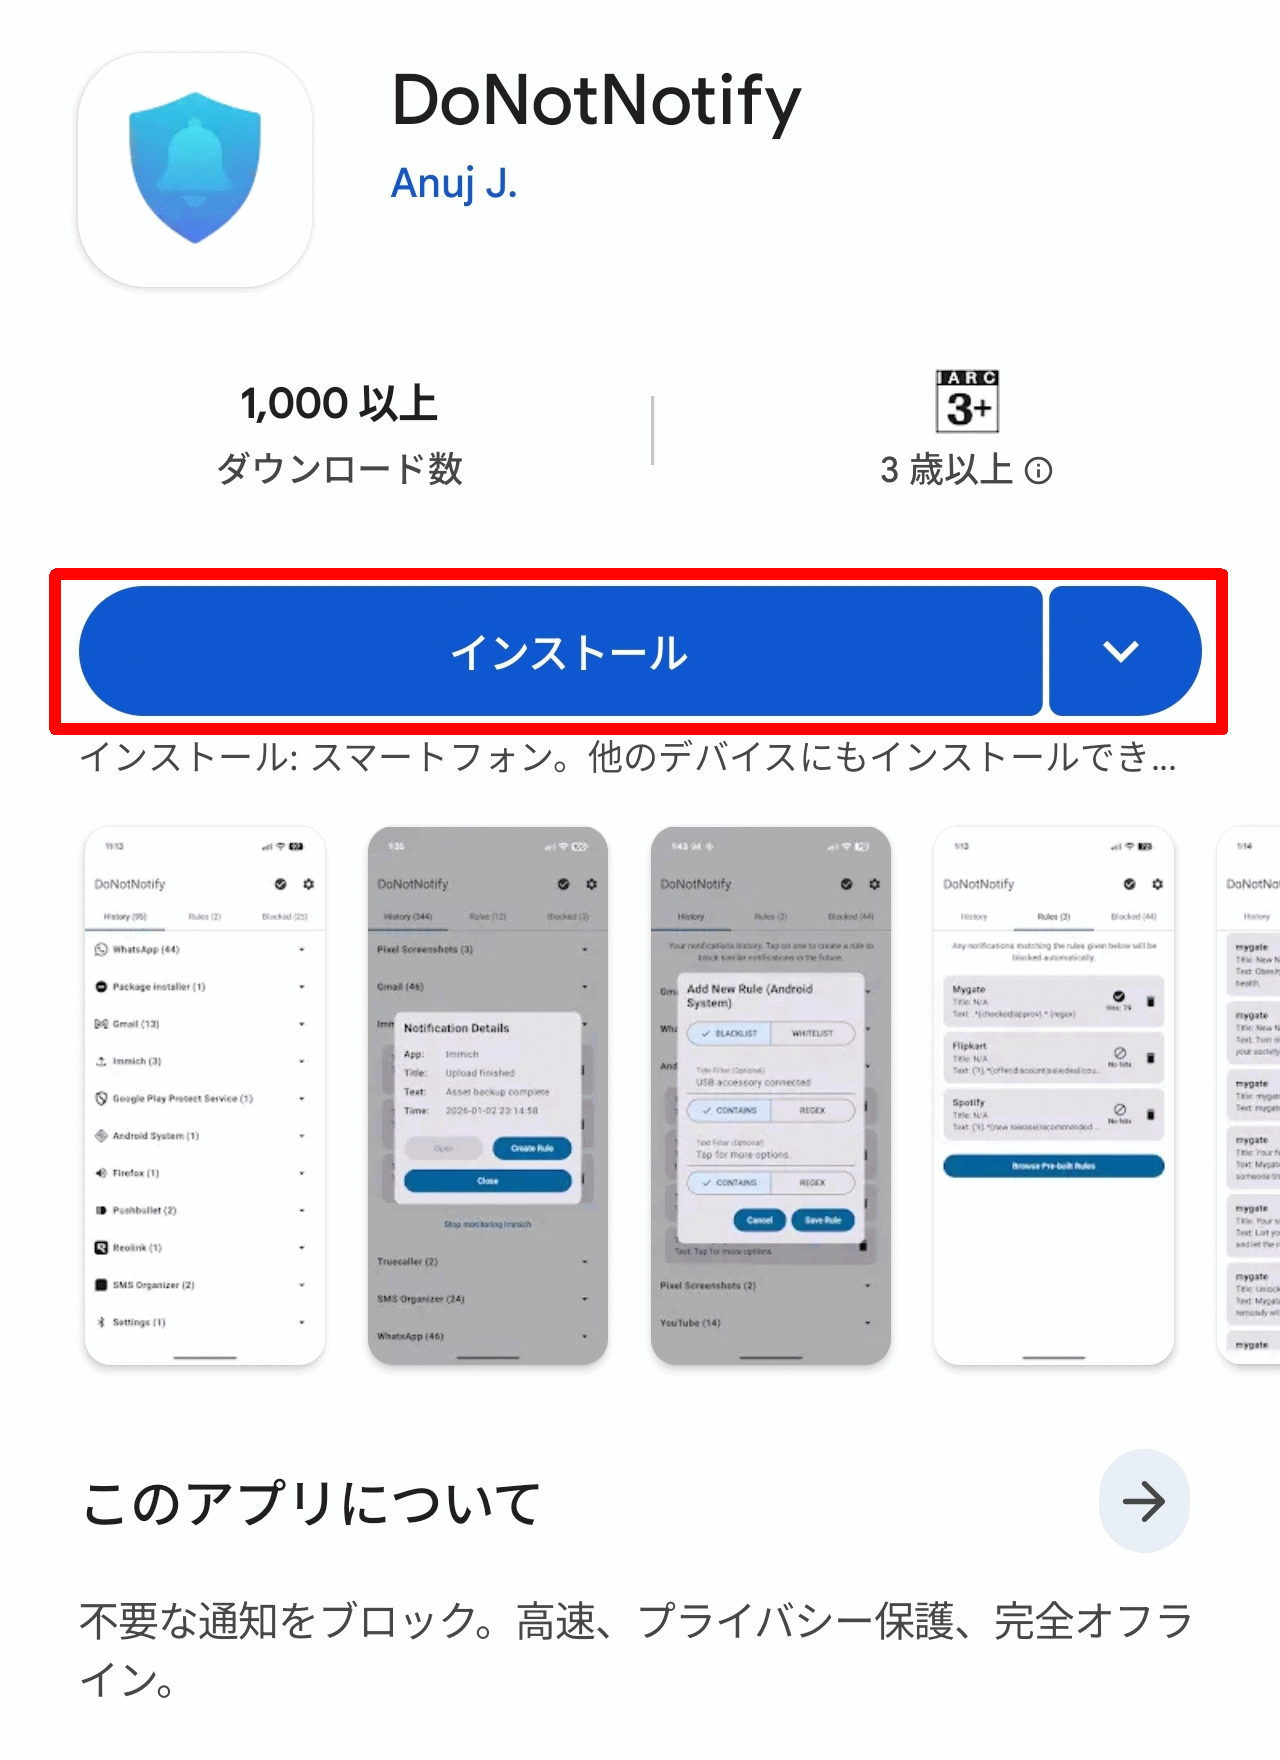
Although there is no specific explanation on the official GitHub page, DoNotNotify can be installed from the Google Play Store.
DoNotNotify - App on Google Play
https://play.google.com/store/apps/details?id=com.donotnotify.donotnotify&hl=ja
Open the DoNotNotify page on Google Play and tap the 'Install' button.
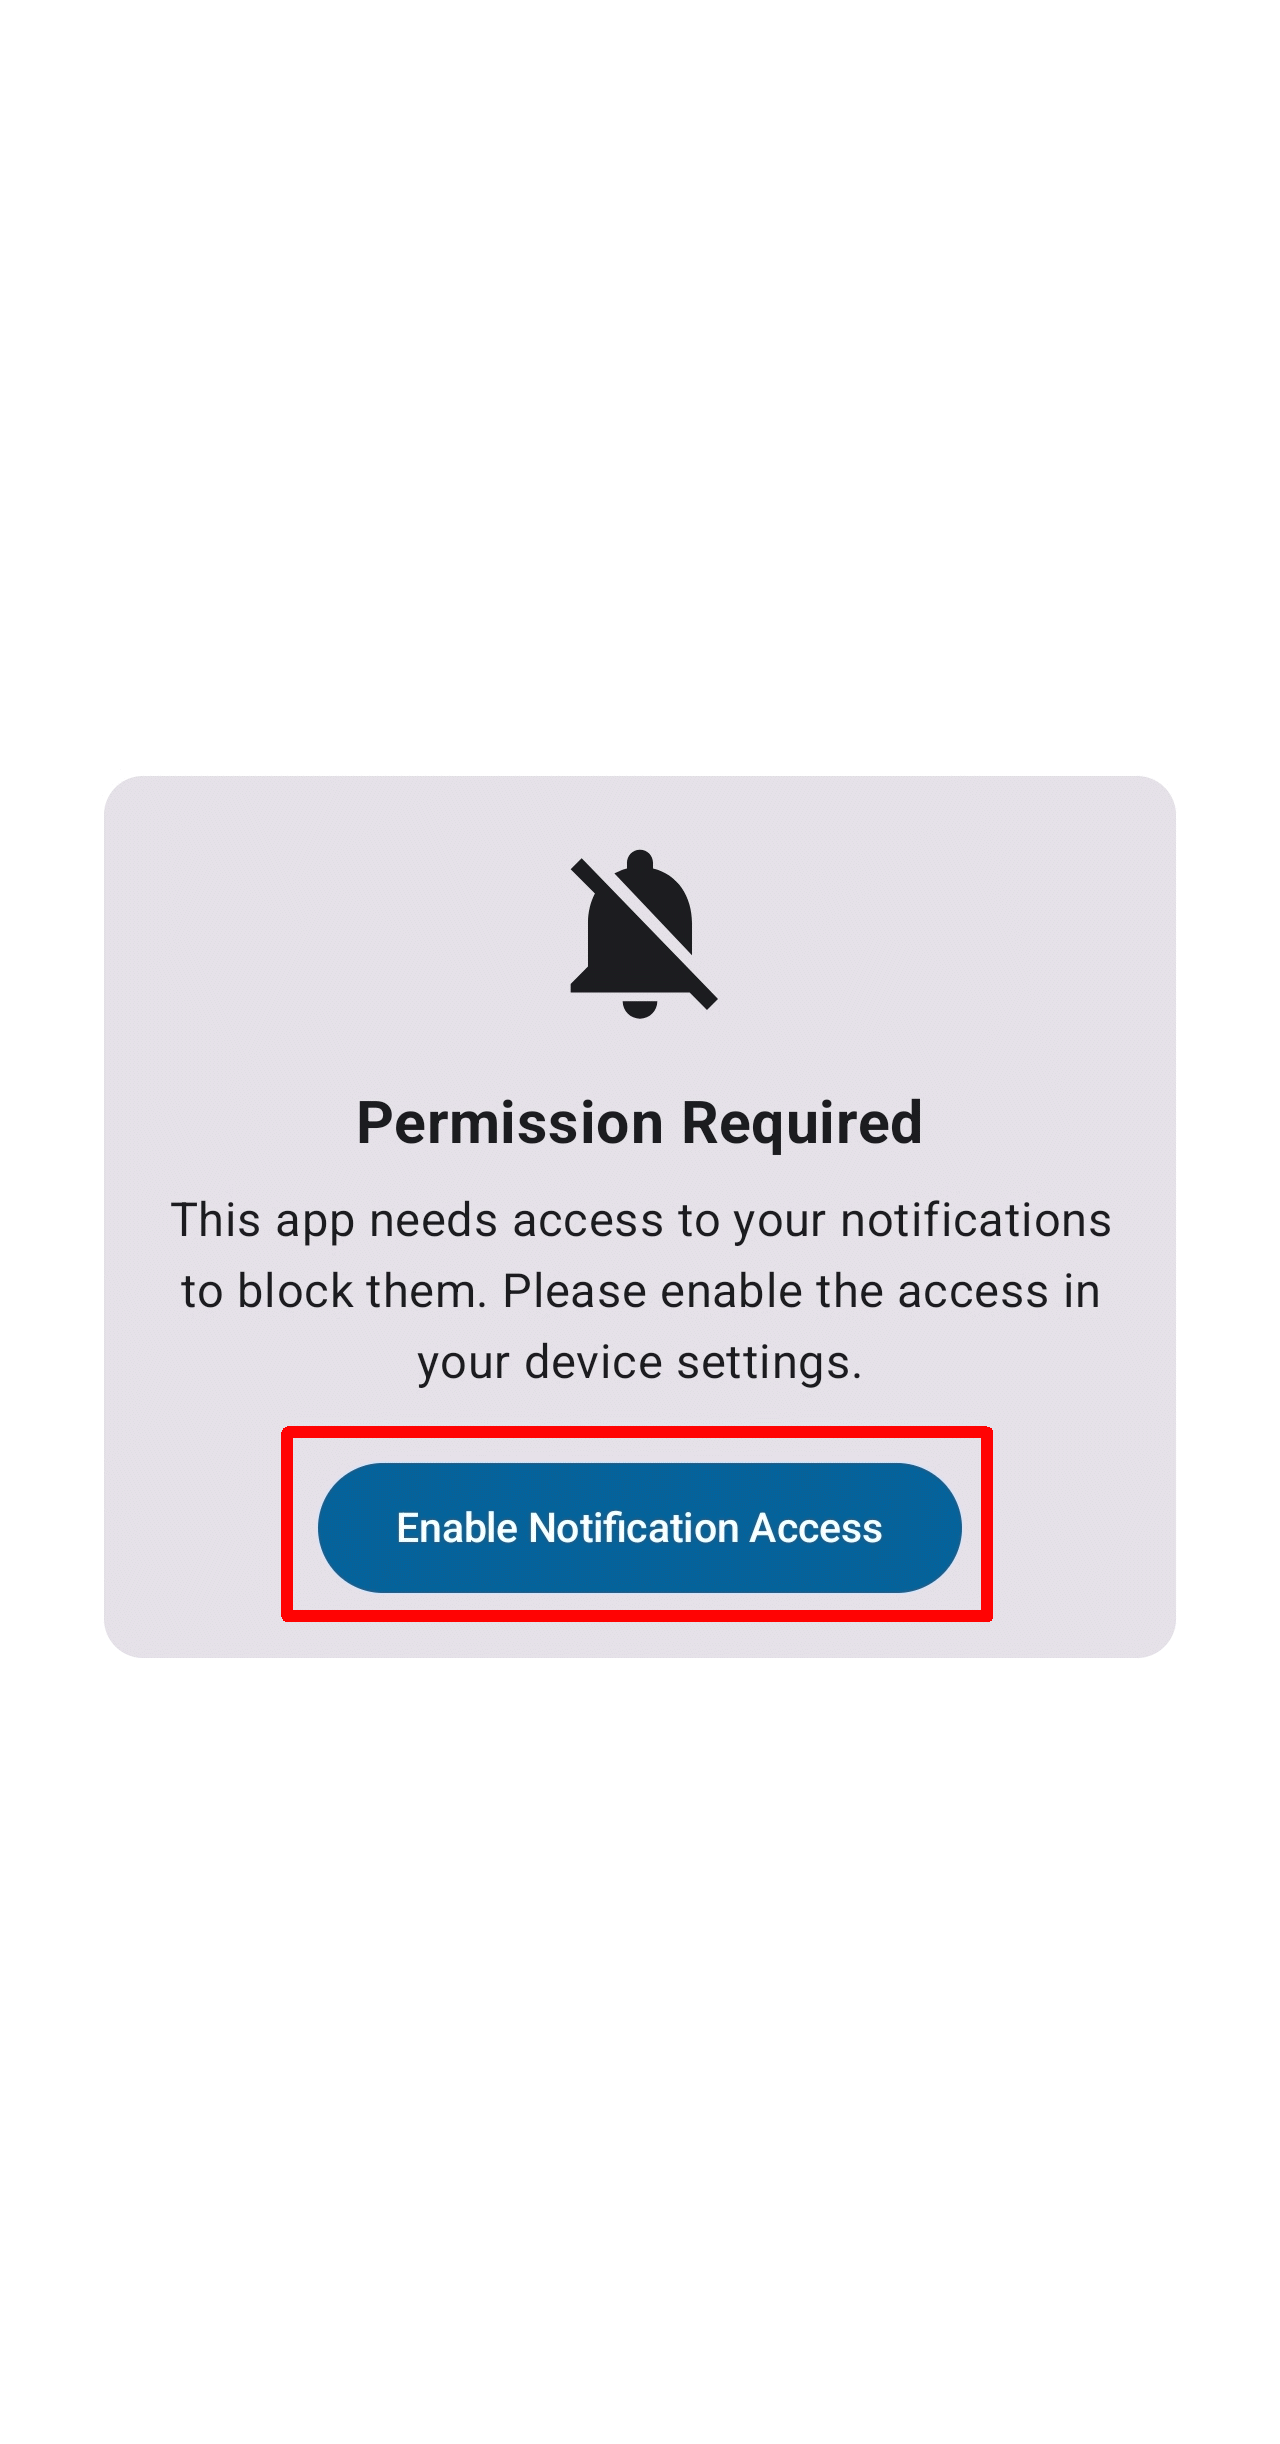
Once the installation is complete, an 'Open' button will appear; tap it.

Immediately after installation, since permissions haven't been set, a screen saying 'Permission Required' will appear, so tap 'Enable Notification Access'.
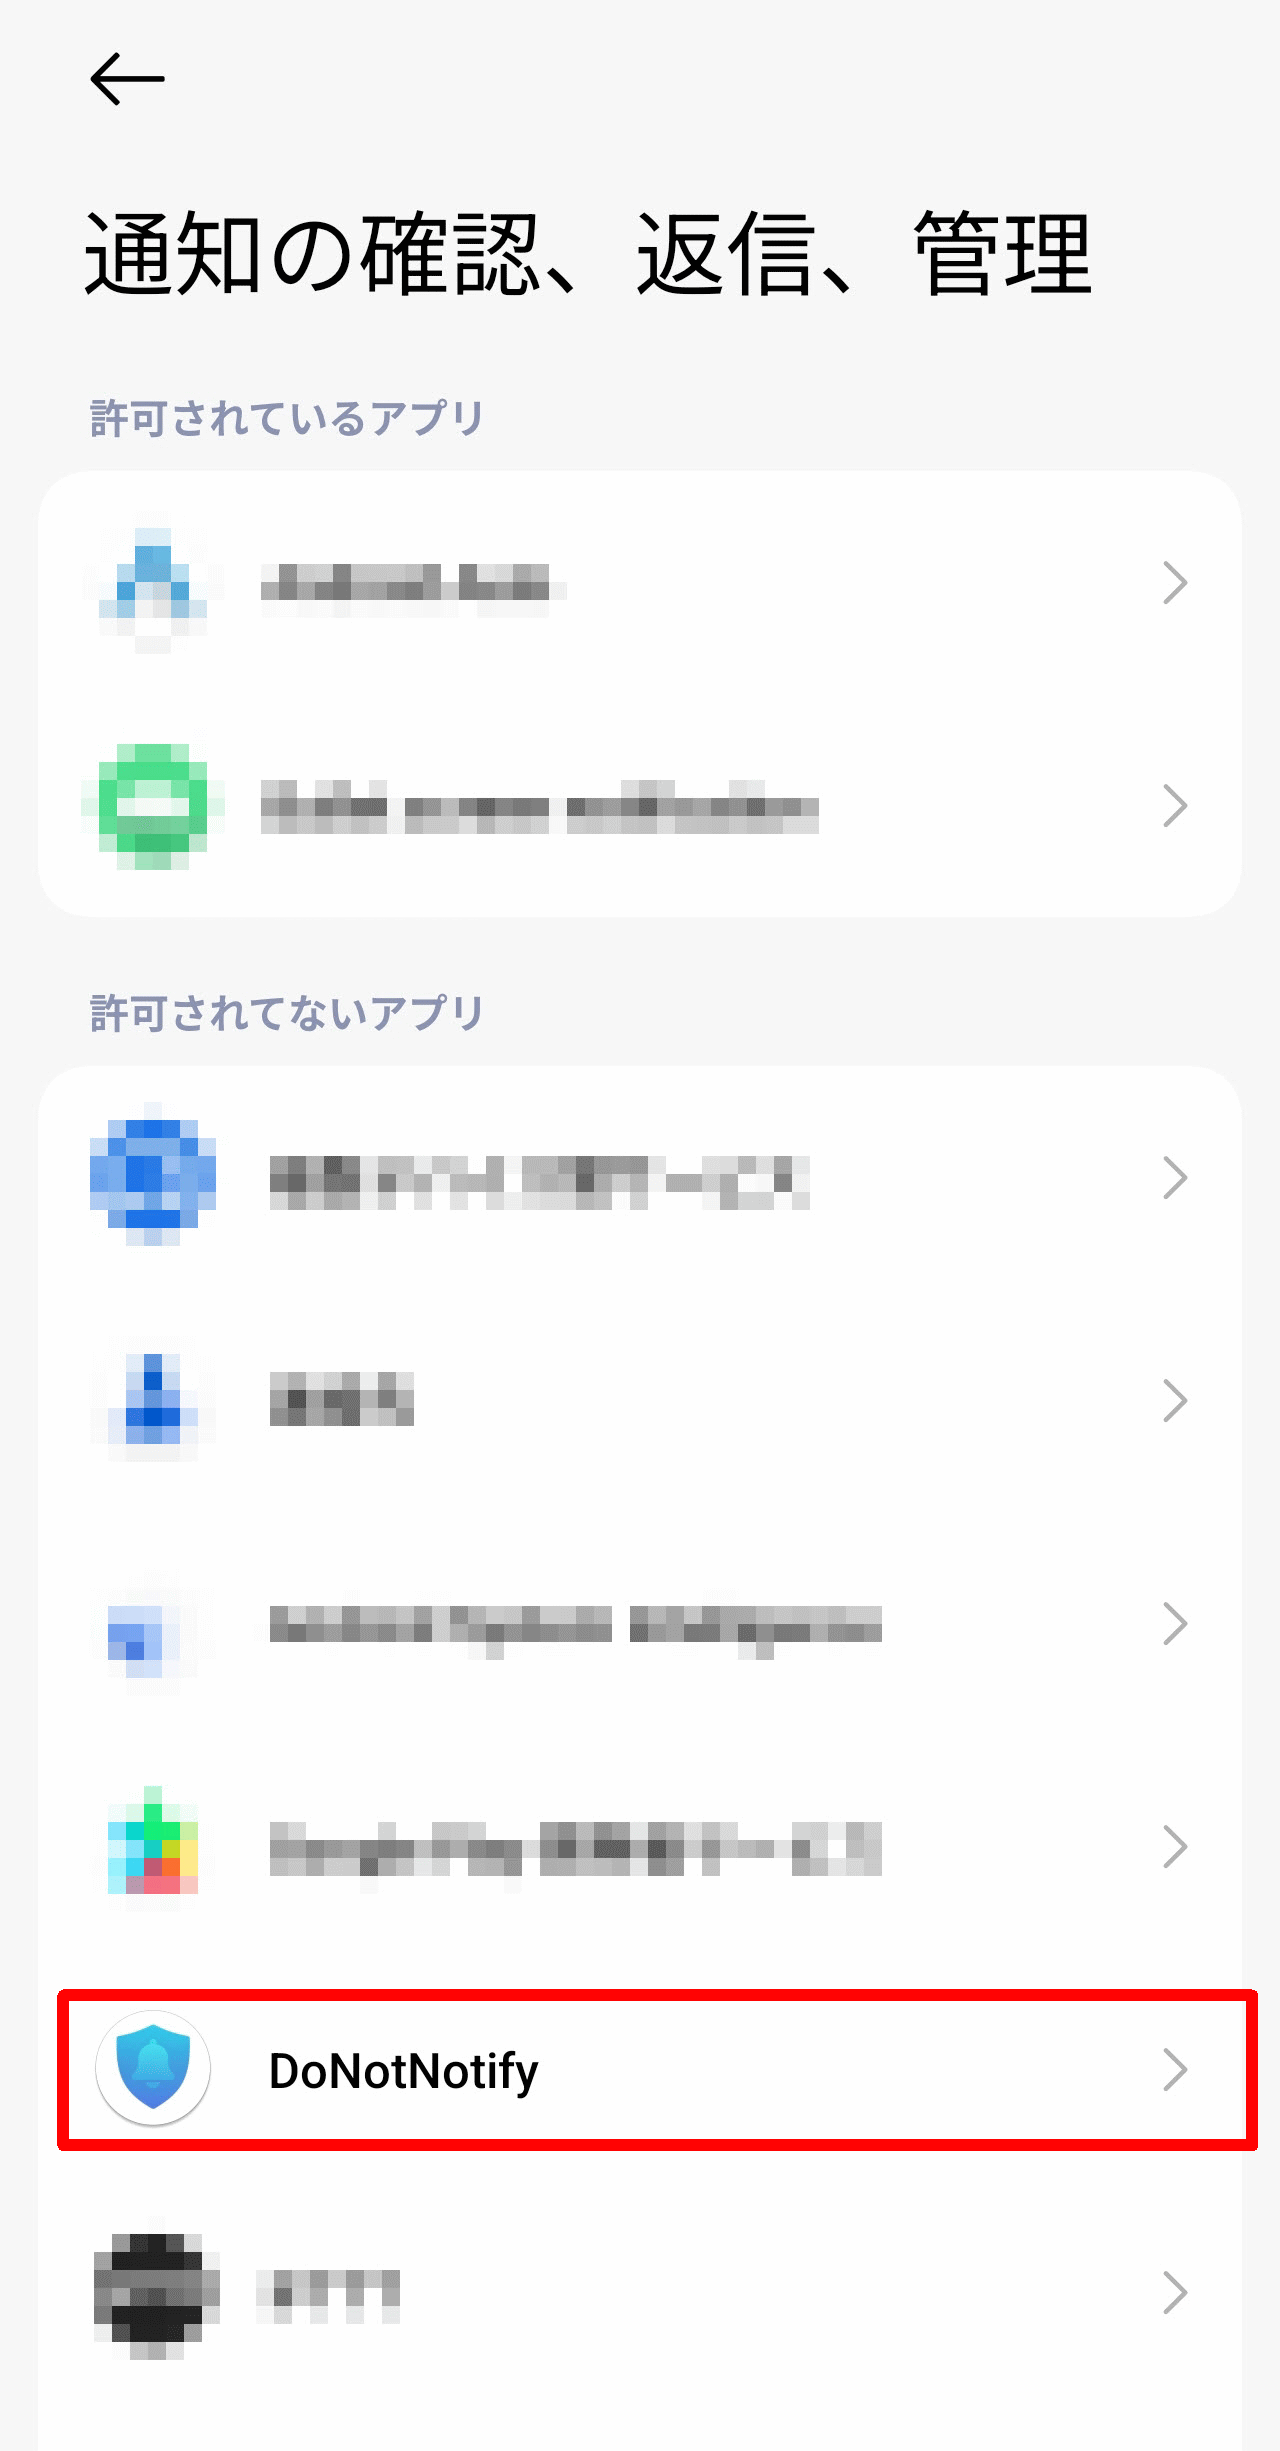
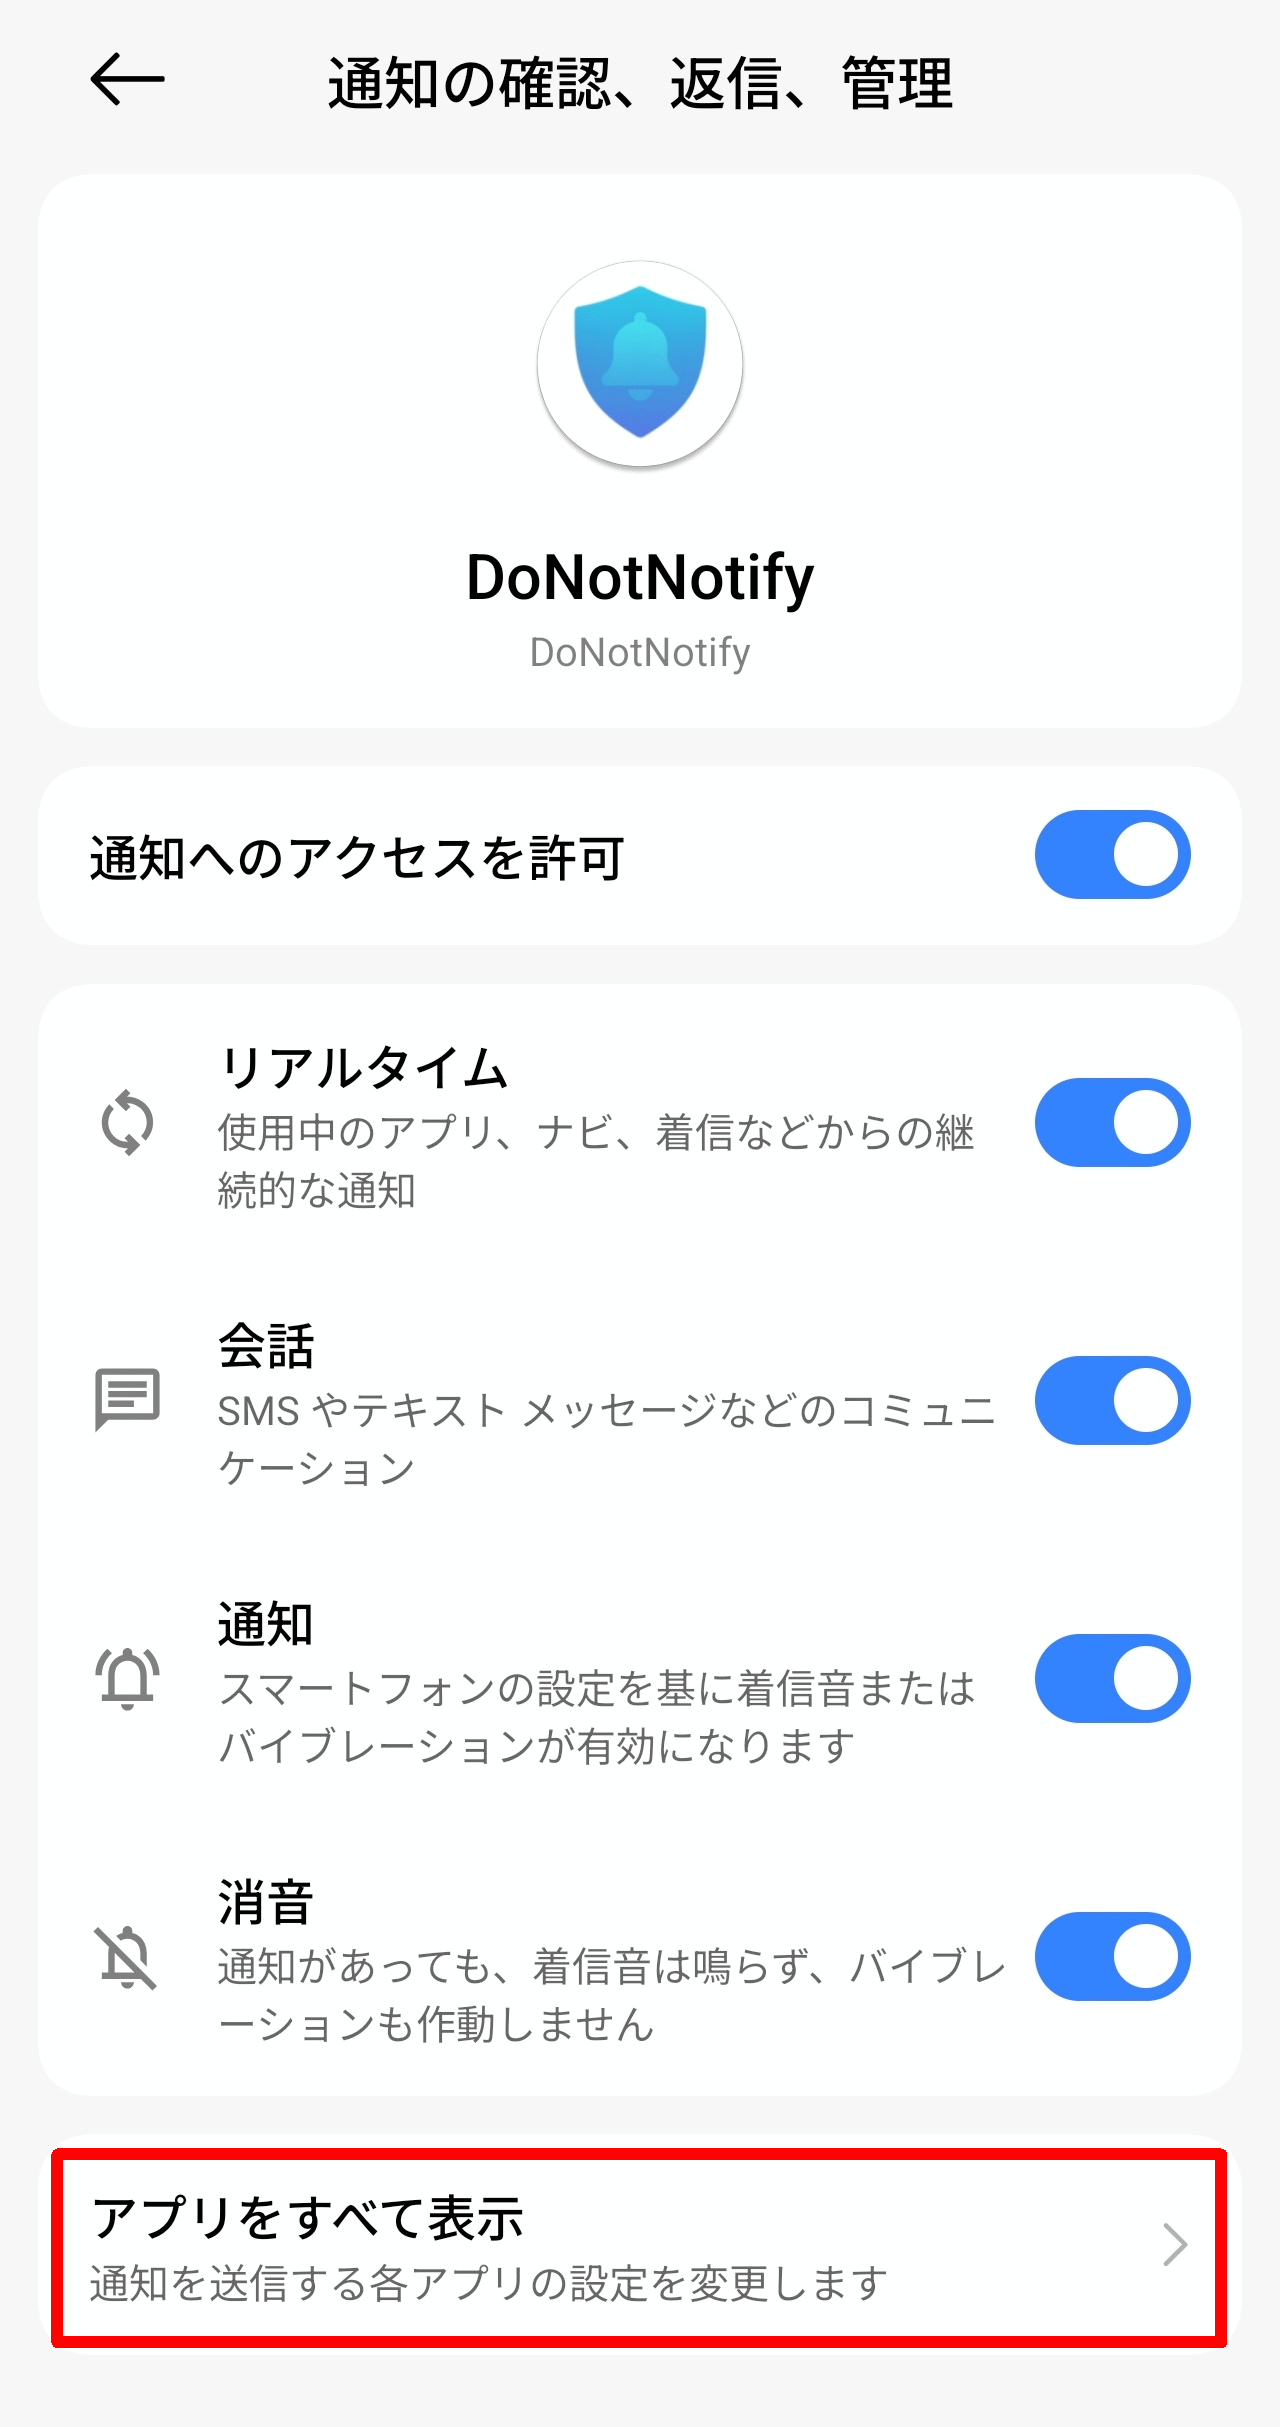
The 'Check, reply to, and manage notifications' screen will appear, so tap 'DoNotNotify'.
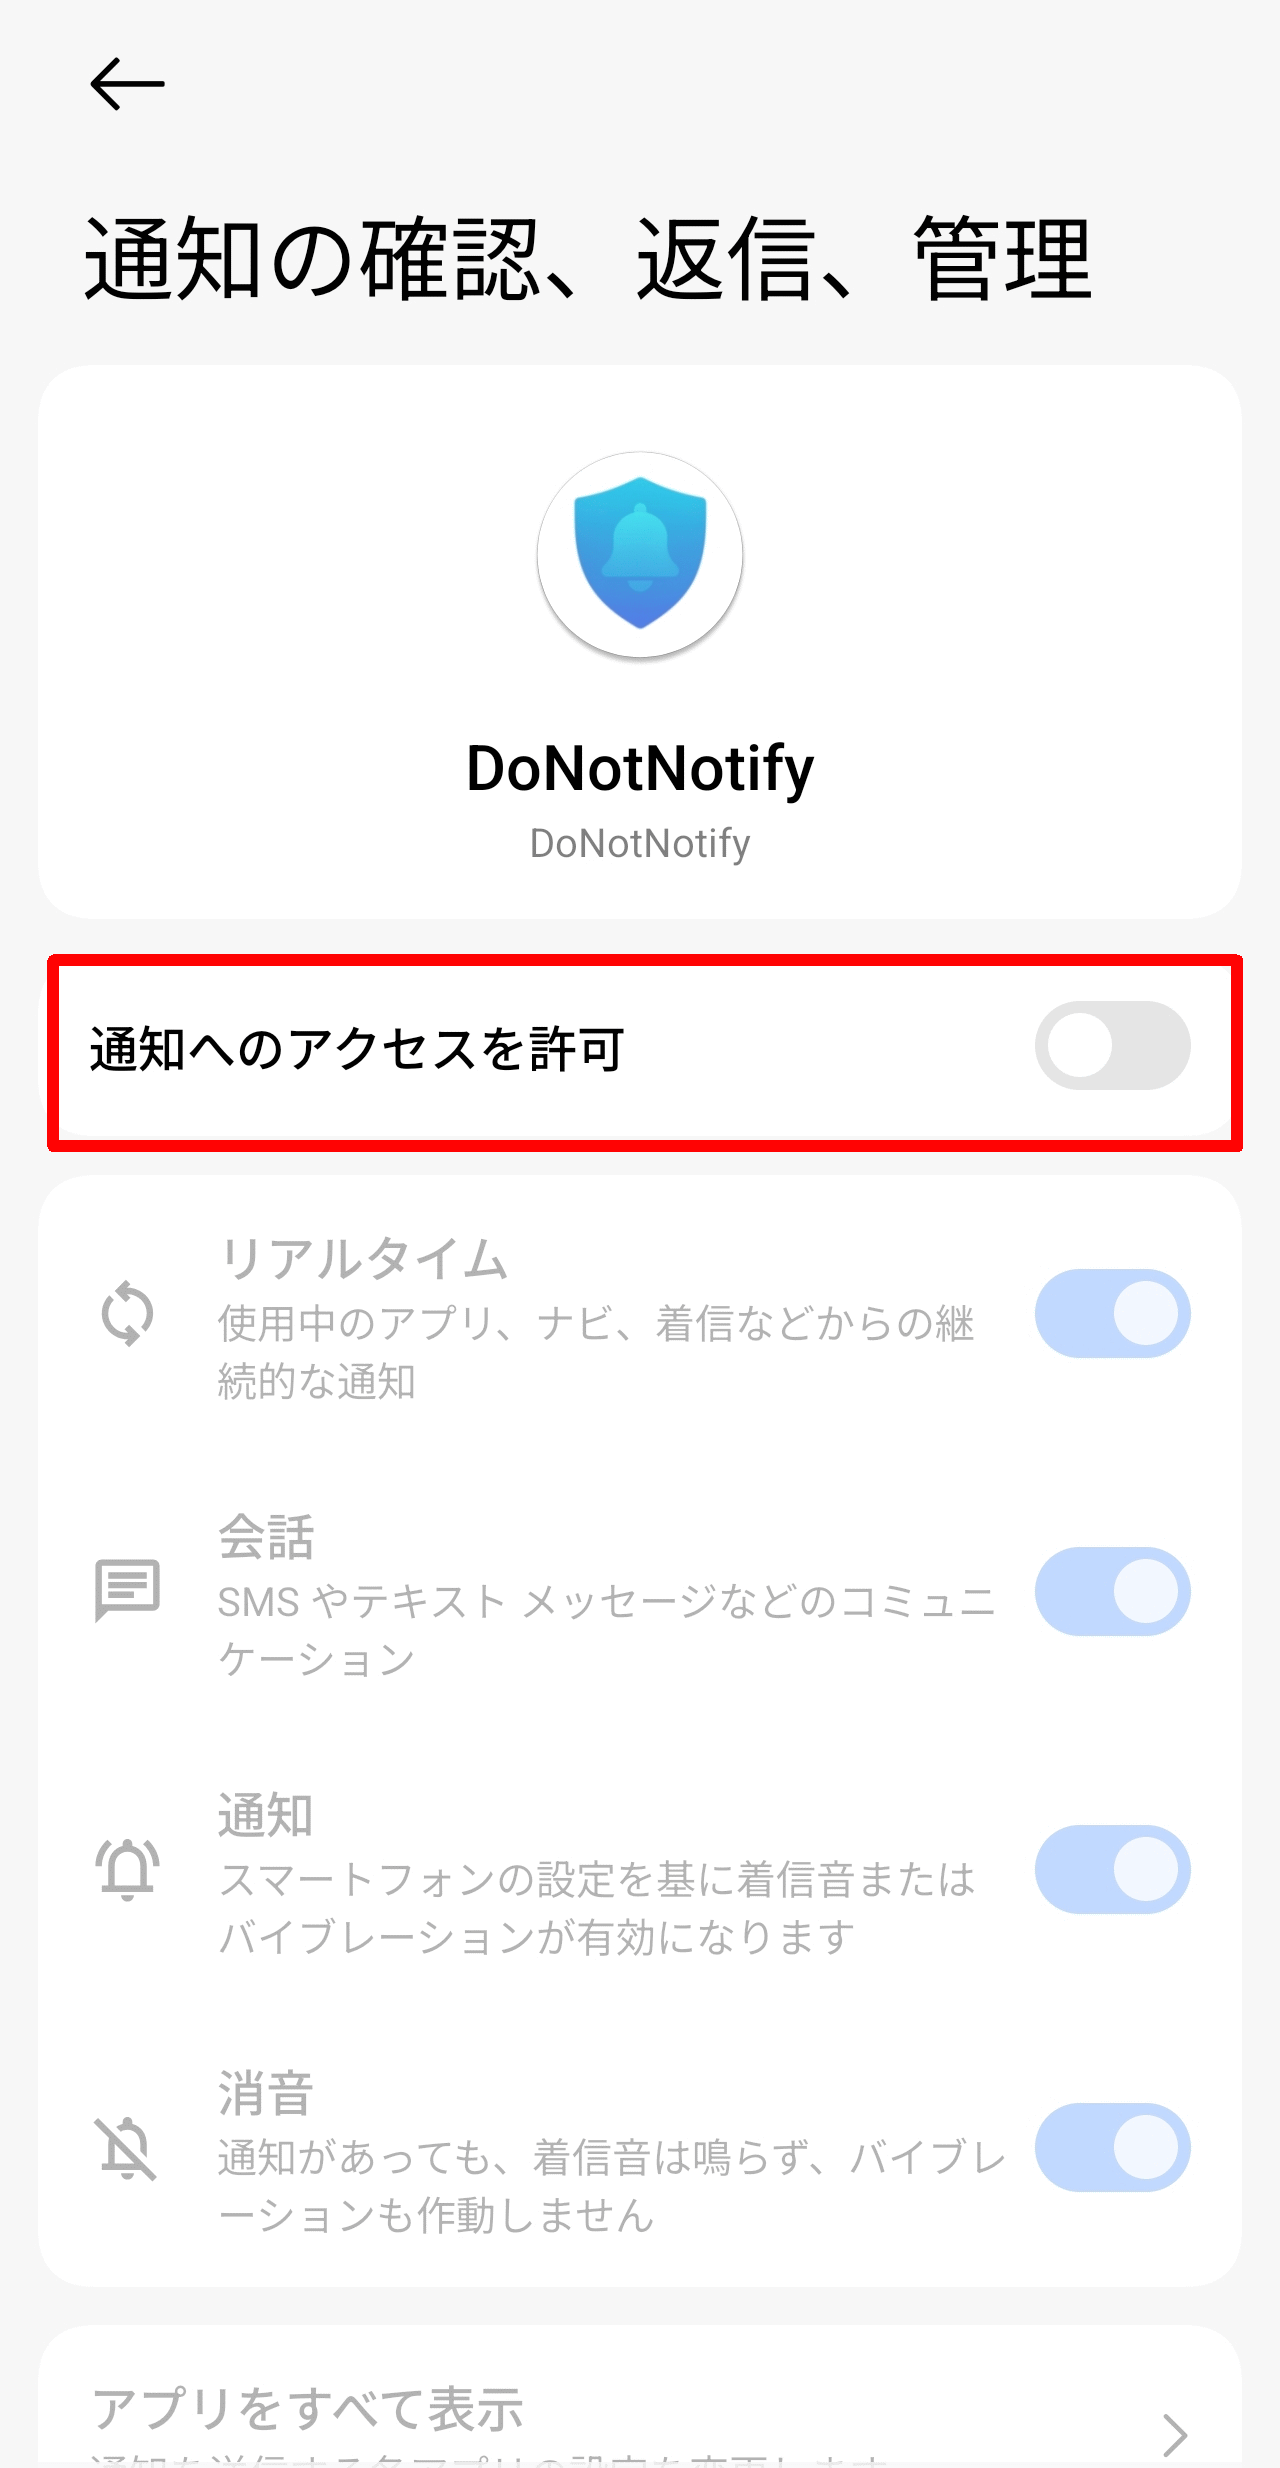
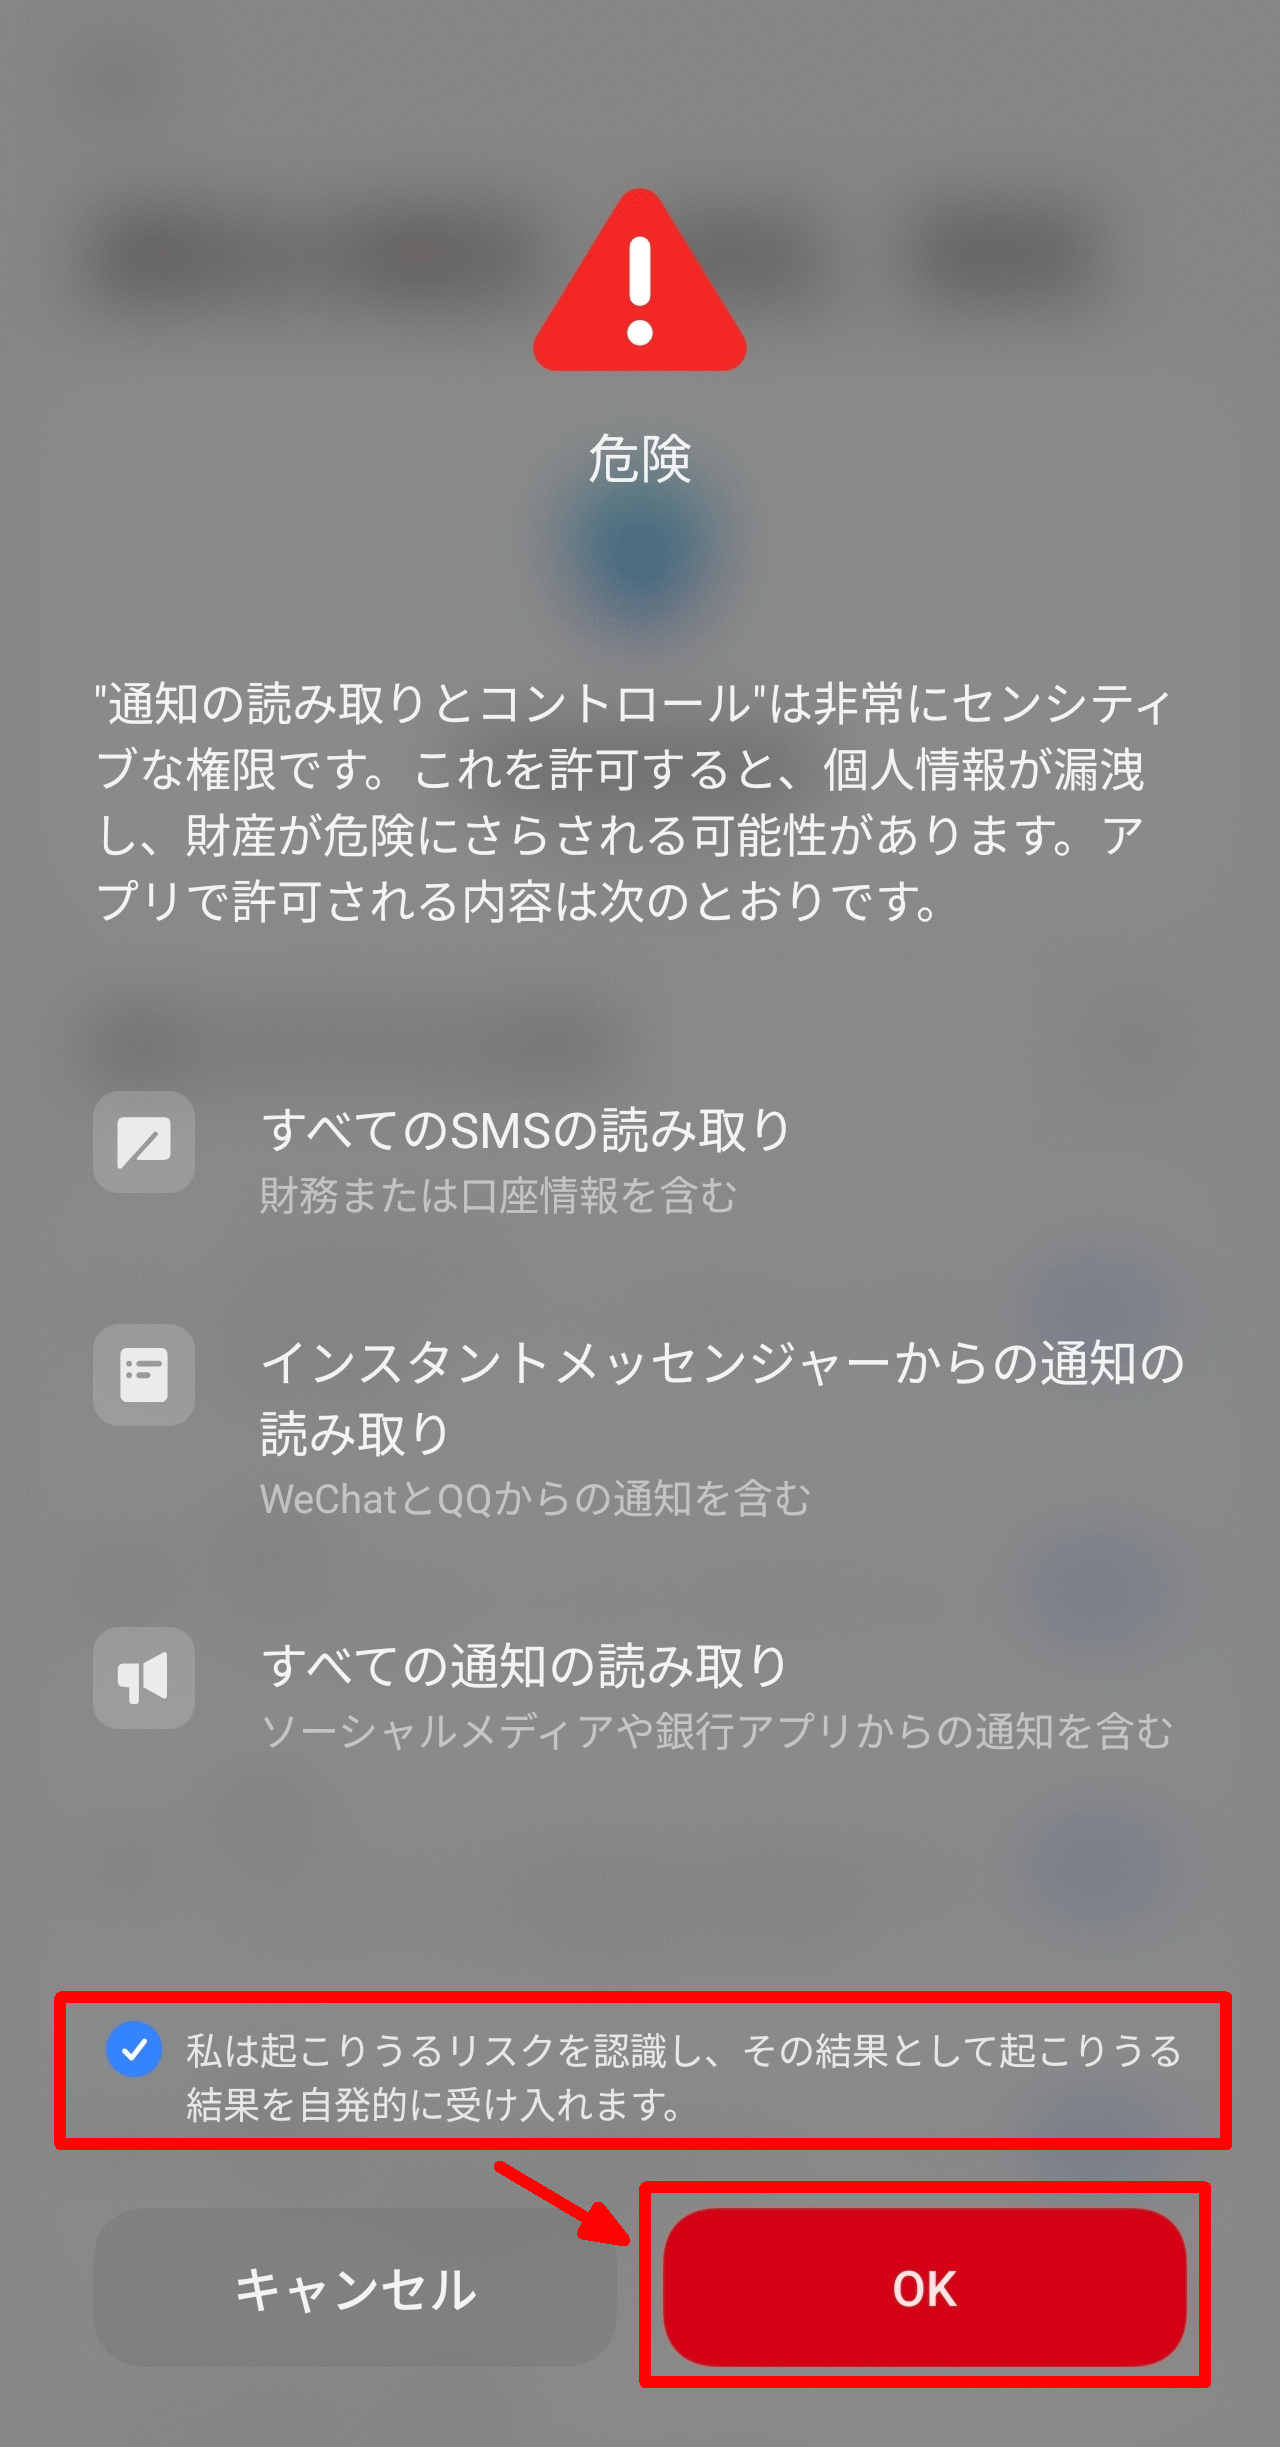
Tap 'Allow access to notifications'.
A warning screen will then appear saying 'Danger.' This is because enabling notifications could potentially lead to sensitive notifications being read depending on the situation. Check the box that says 'I acknowledge the risks and accept the consequences,' and then tap 'OK.'
Return to the 'Check, reply to, and manage notifications' screen and tap 'Show all apps'.
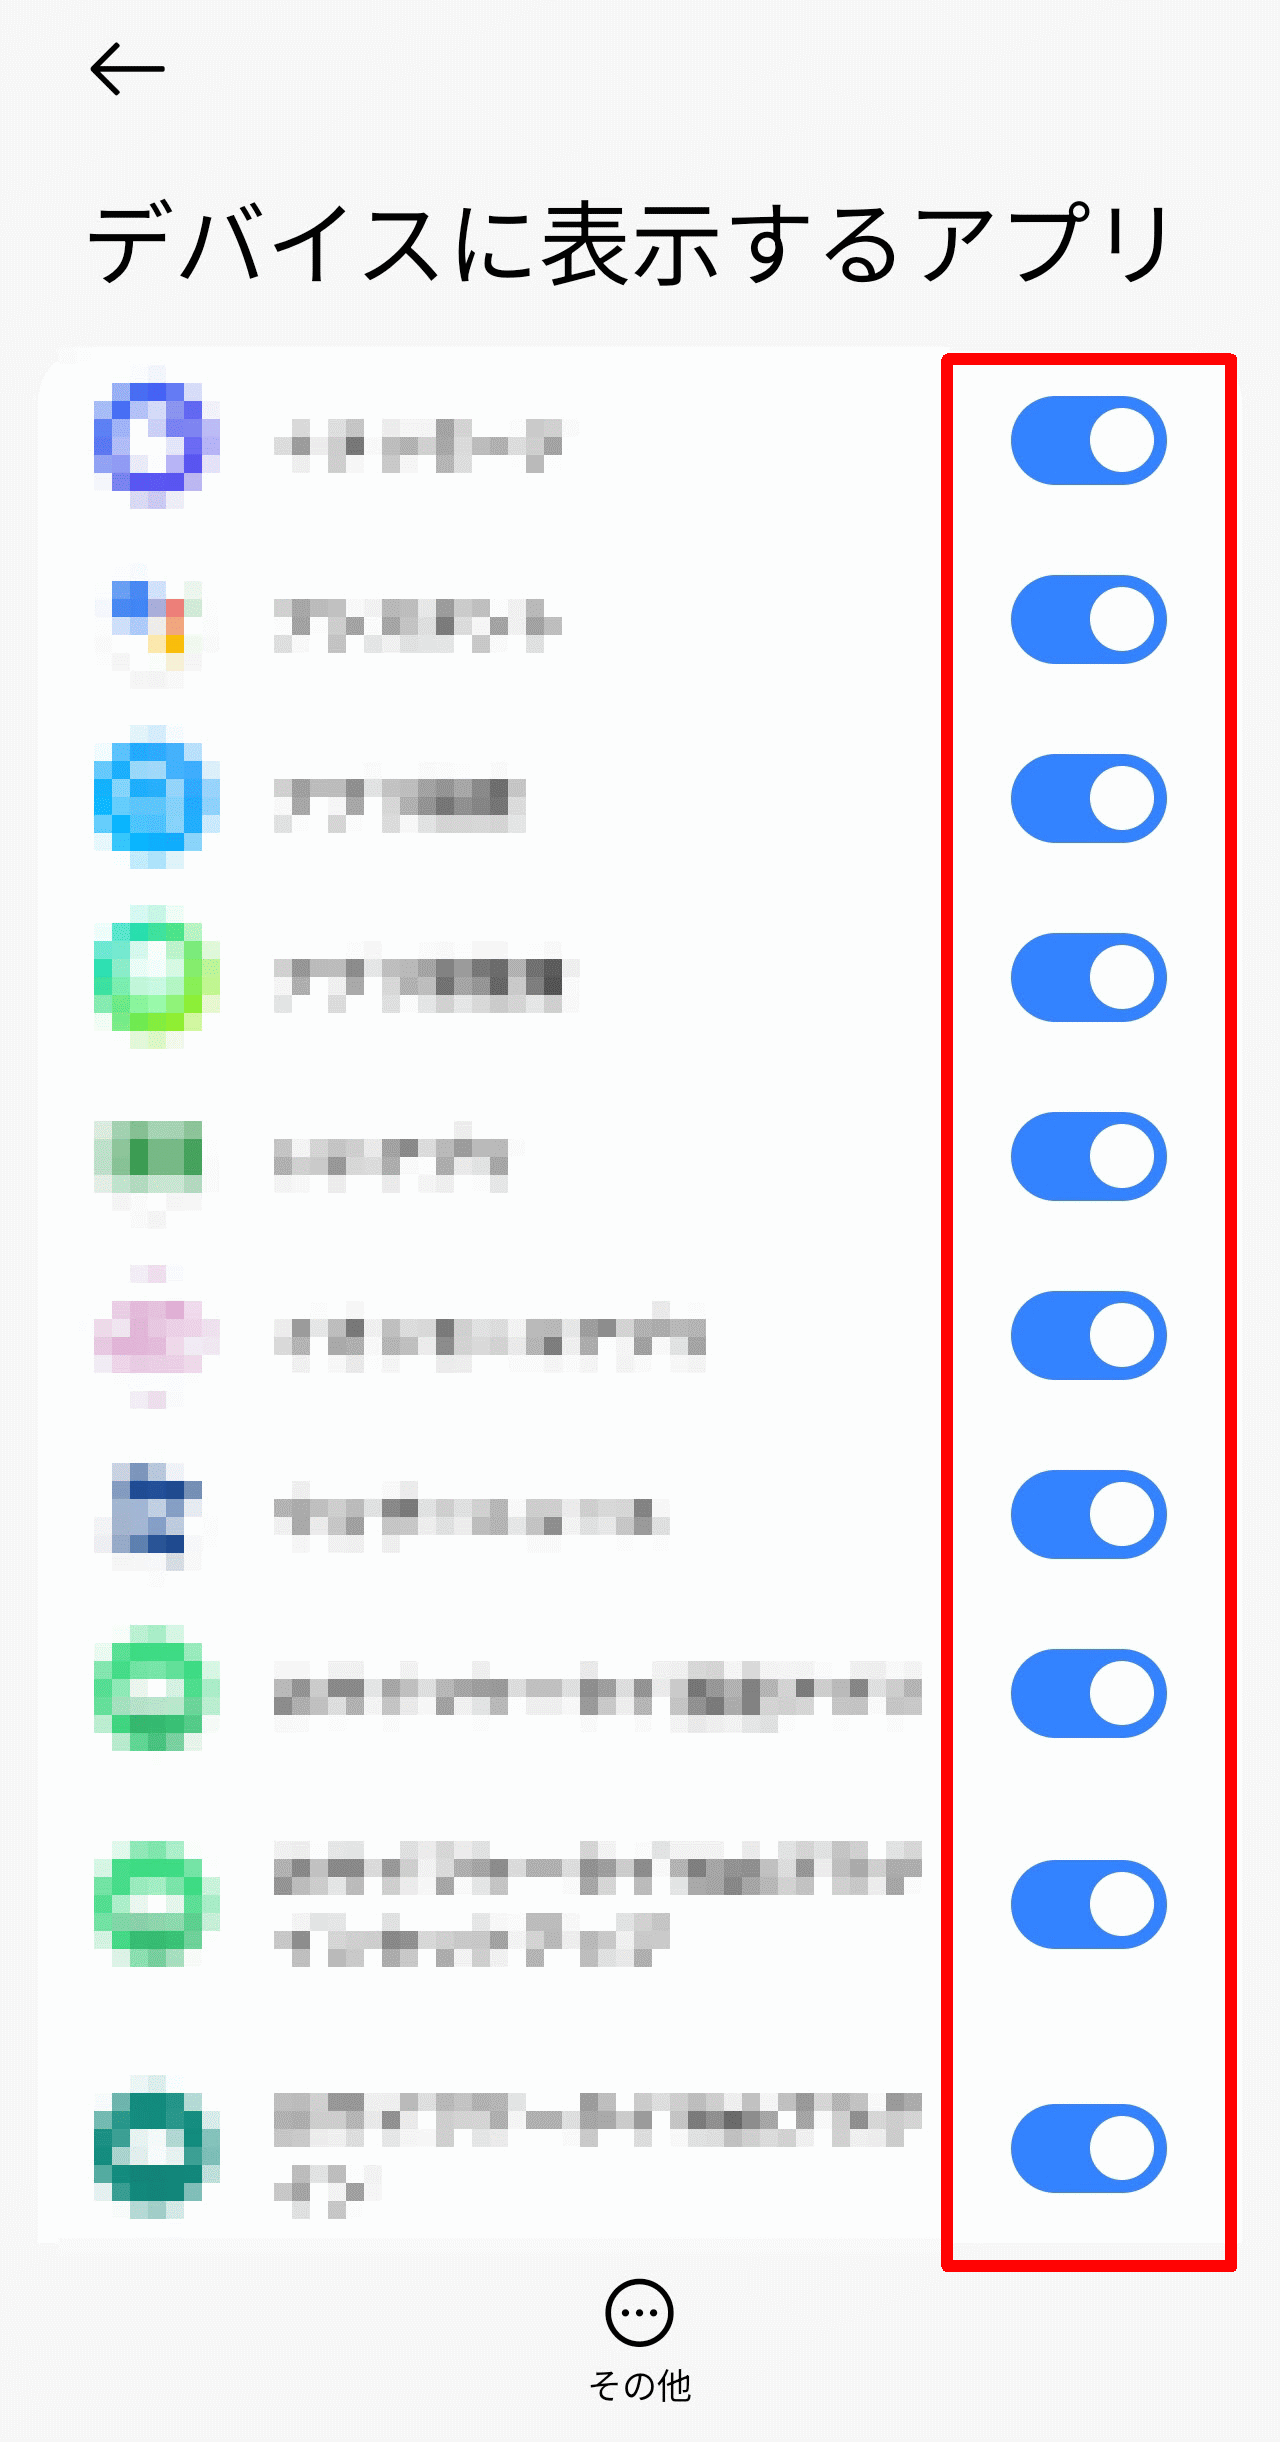
On the 'Apps to show on your device' screen, remove any apps that might send sensitive notifications.
◆ Activation
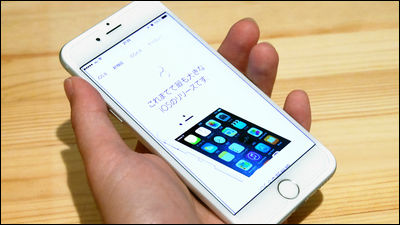
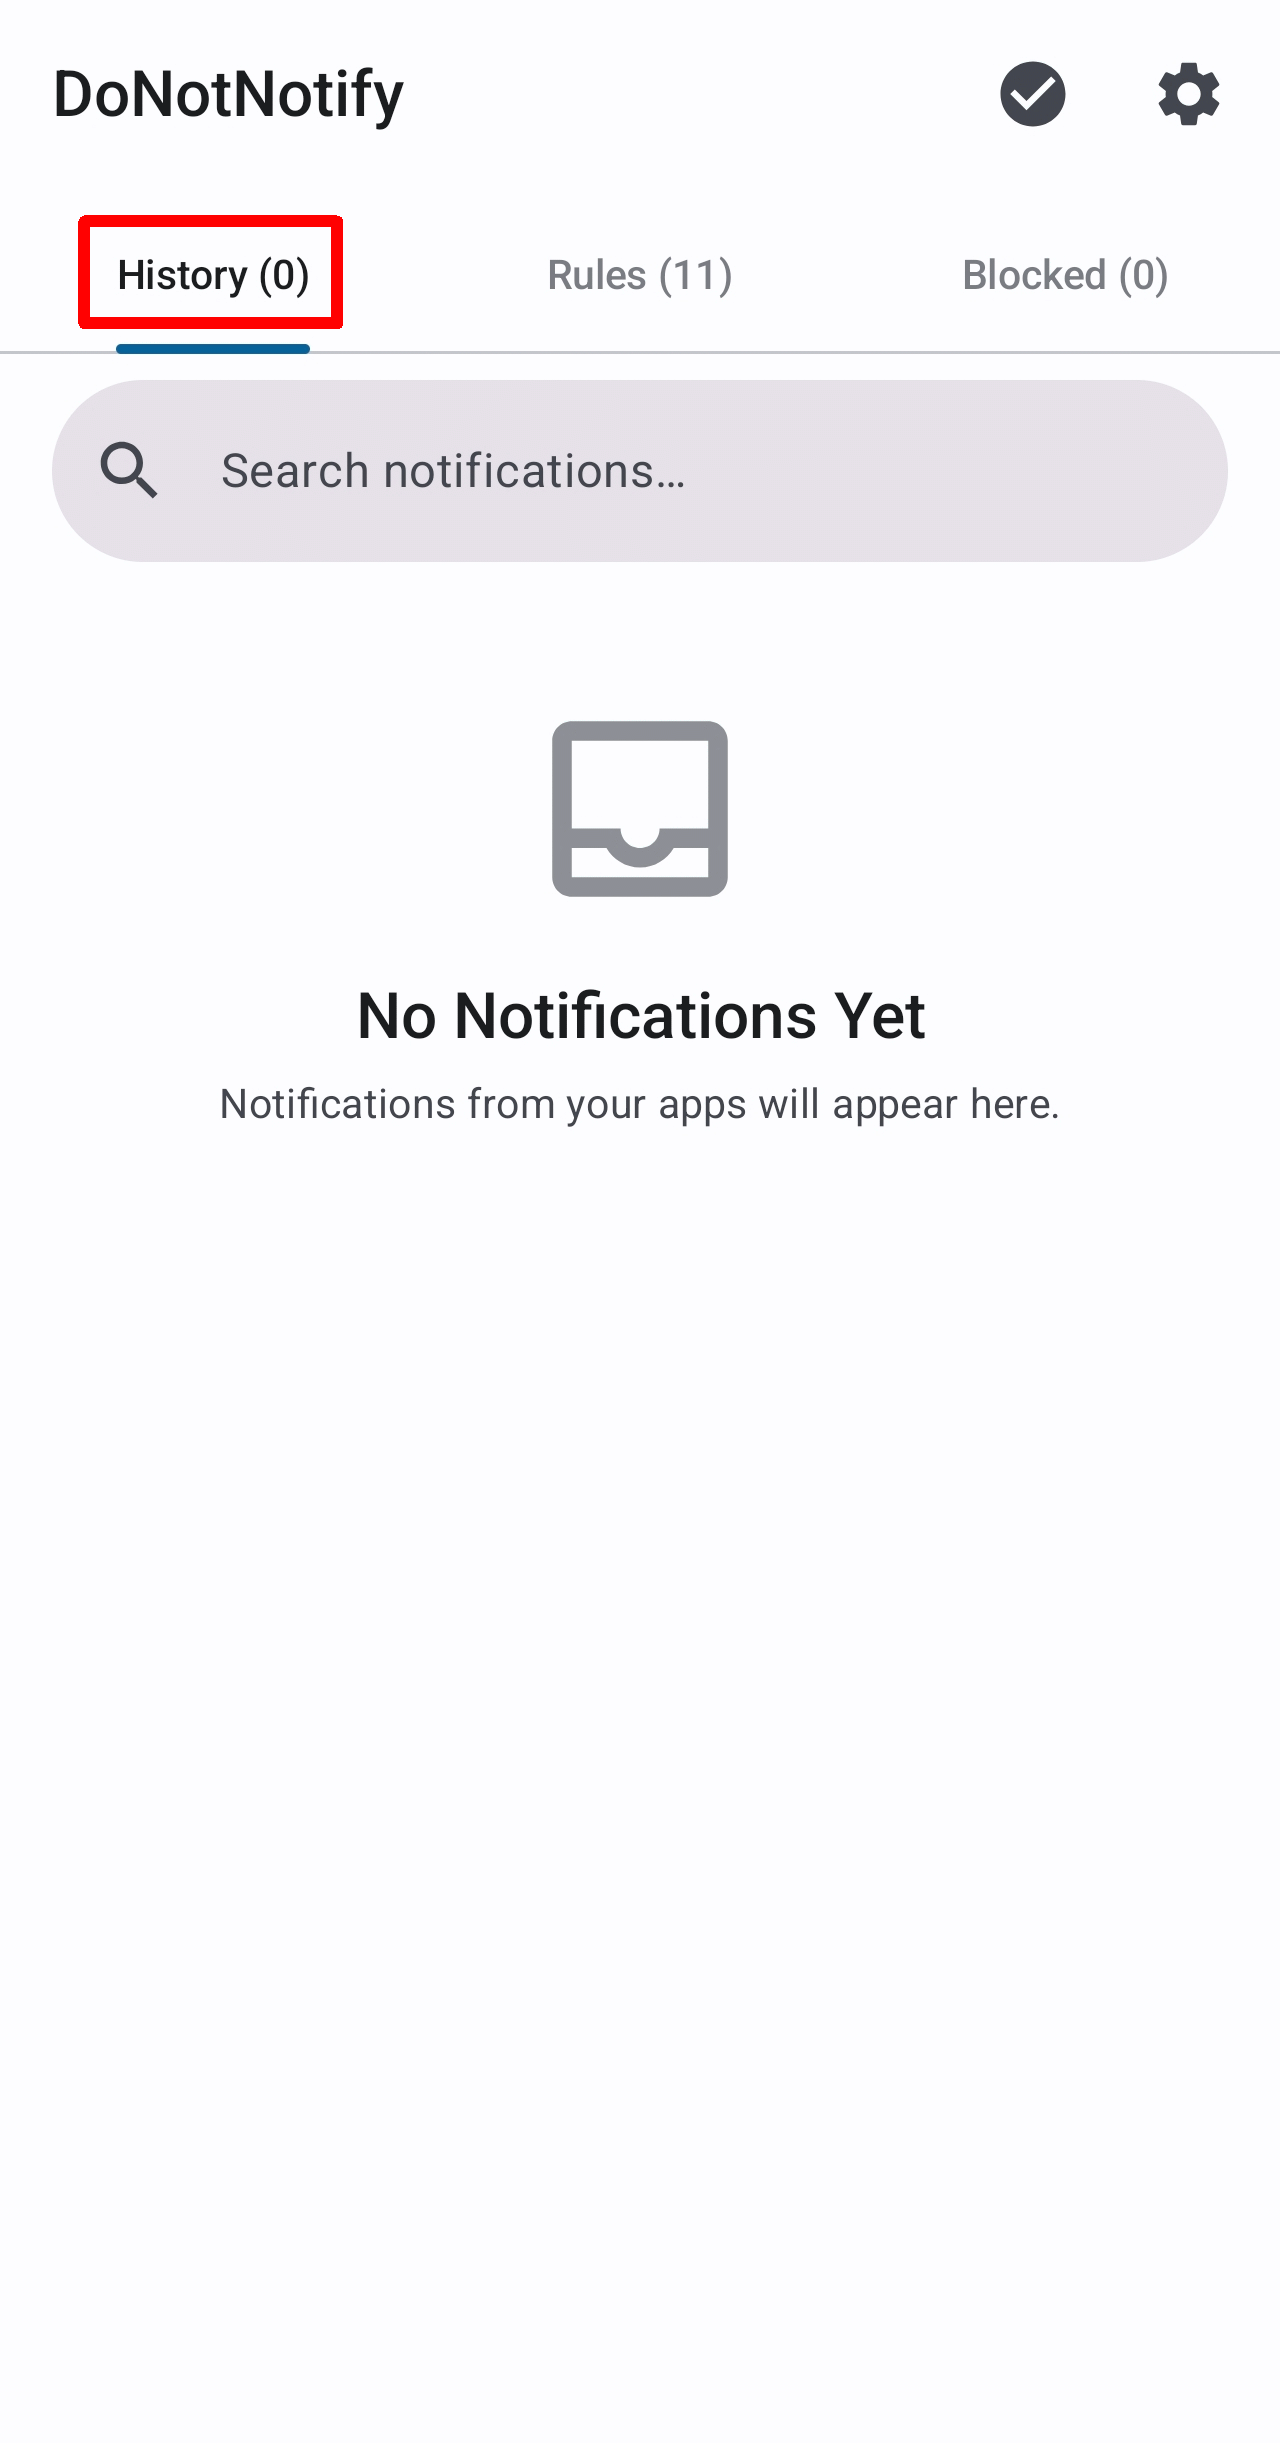
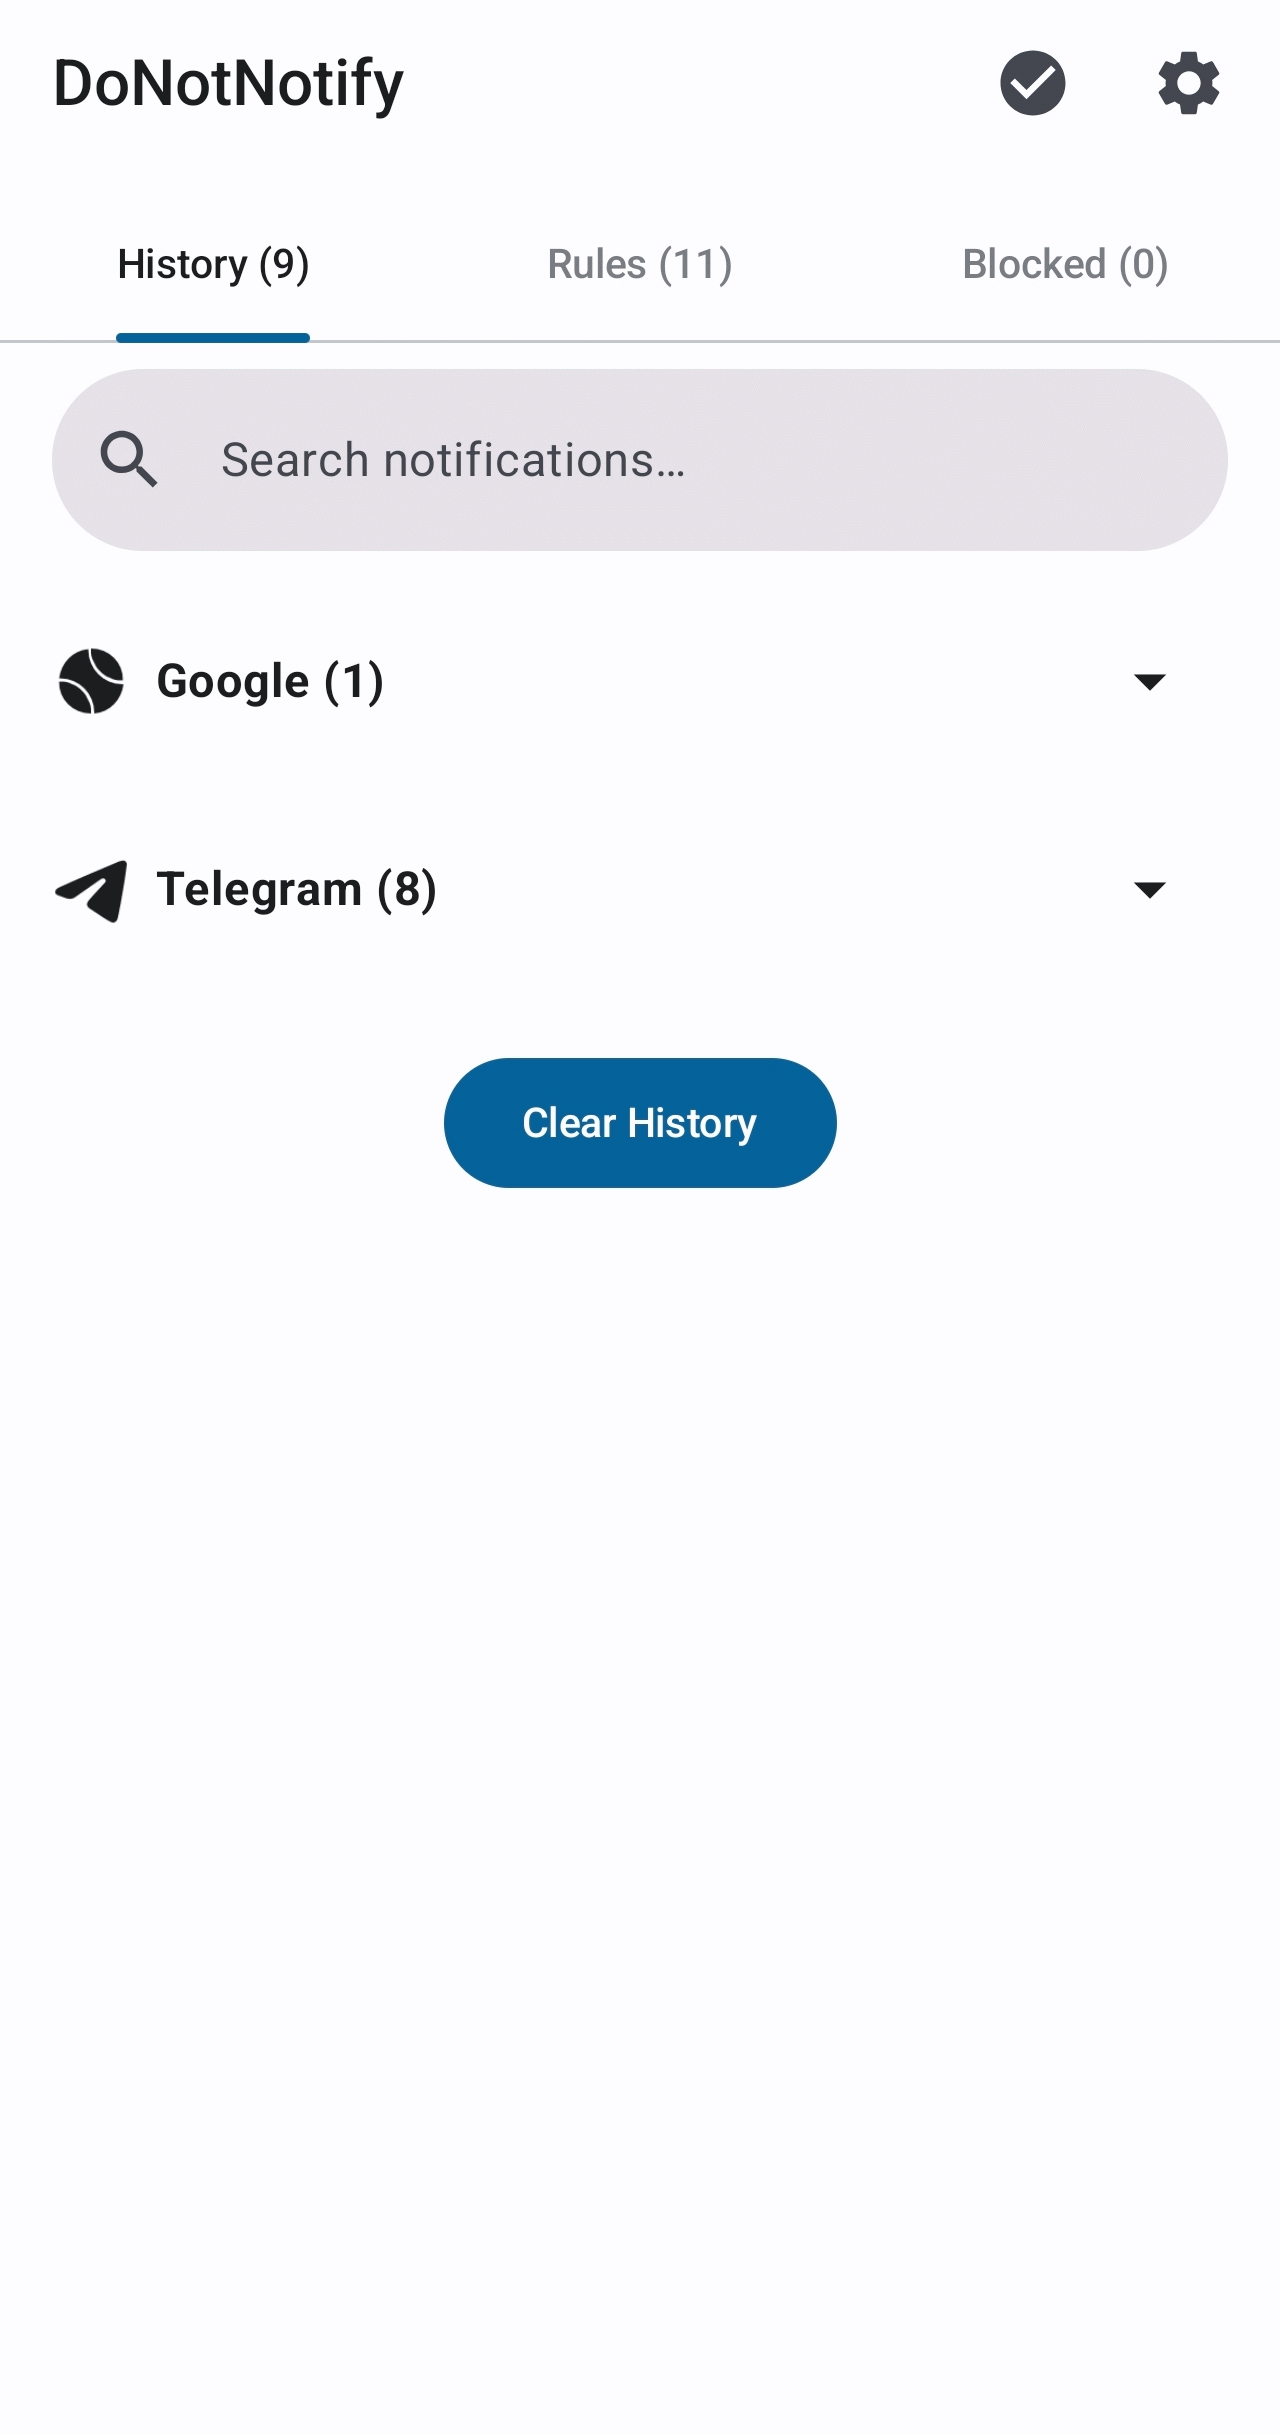
The following is what it looks like immediately after installation. It's the same state as if you had selected 'History' from the three tabs at the top.
After some time had passed, it appeared to have picked up several notifications.
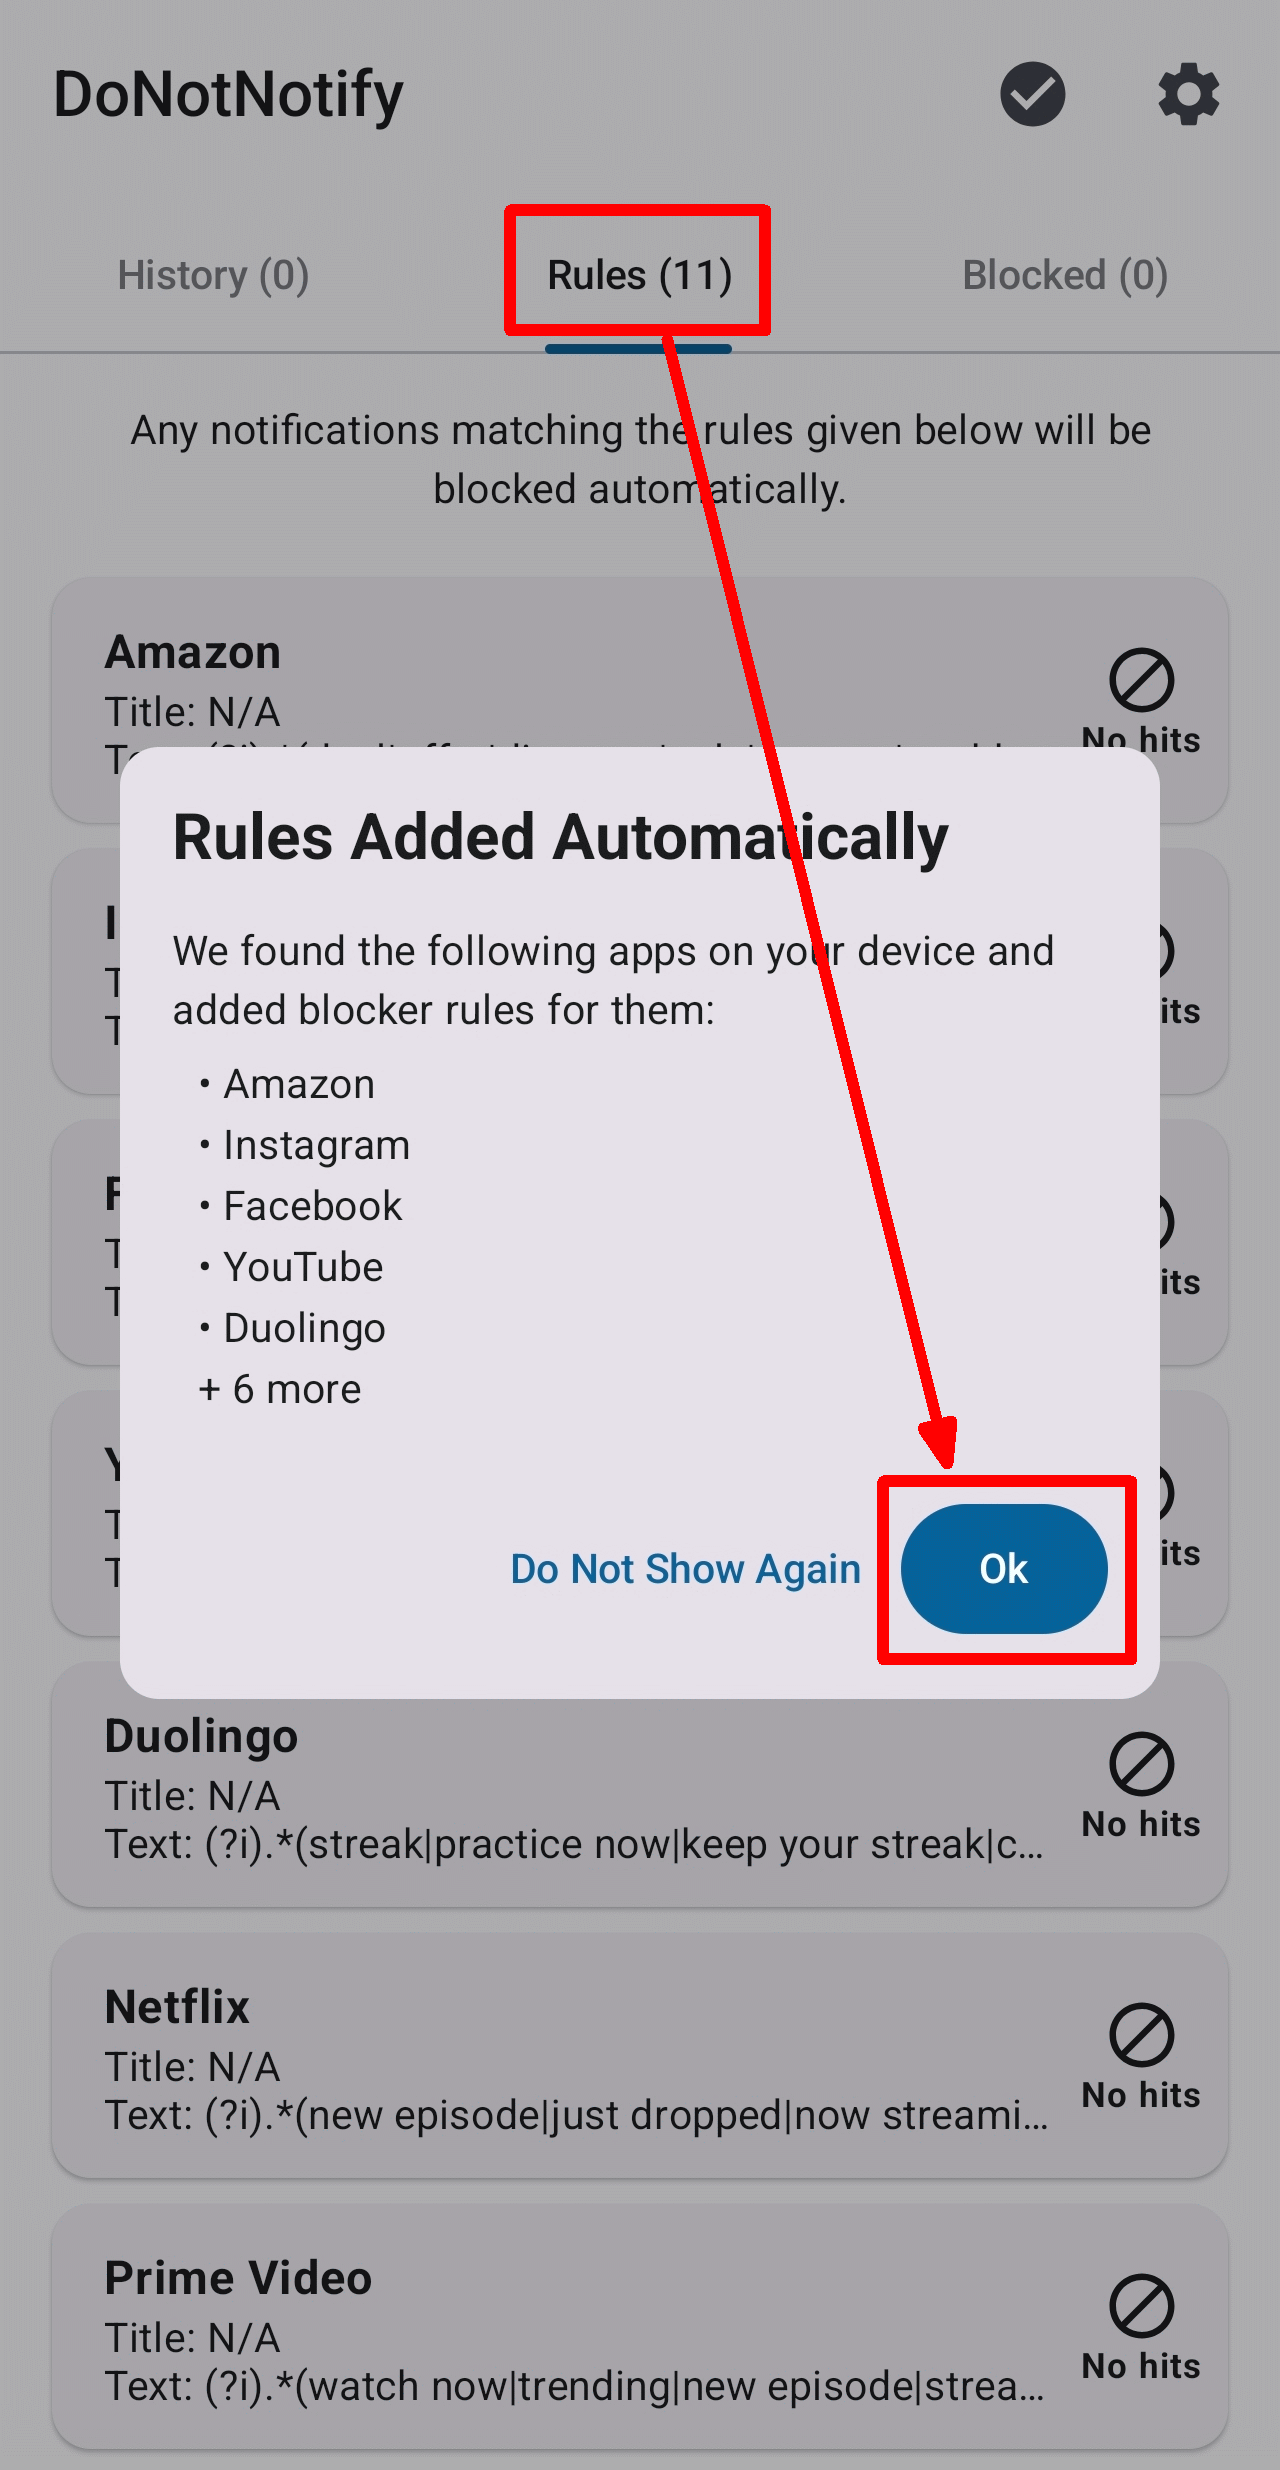
Select 'Rules' from the three tabs at the top. The first time you view it, a 'Rules Added Automatically' pop-up will appear, indicating that it will install the preset rules corresponding to the apps installed on your smartphone. Tap 'OK'.
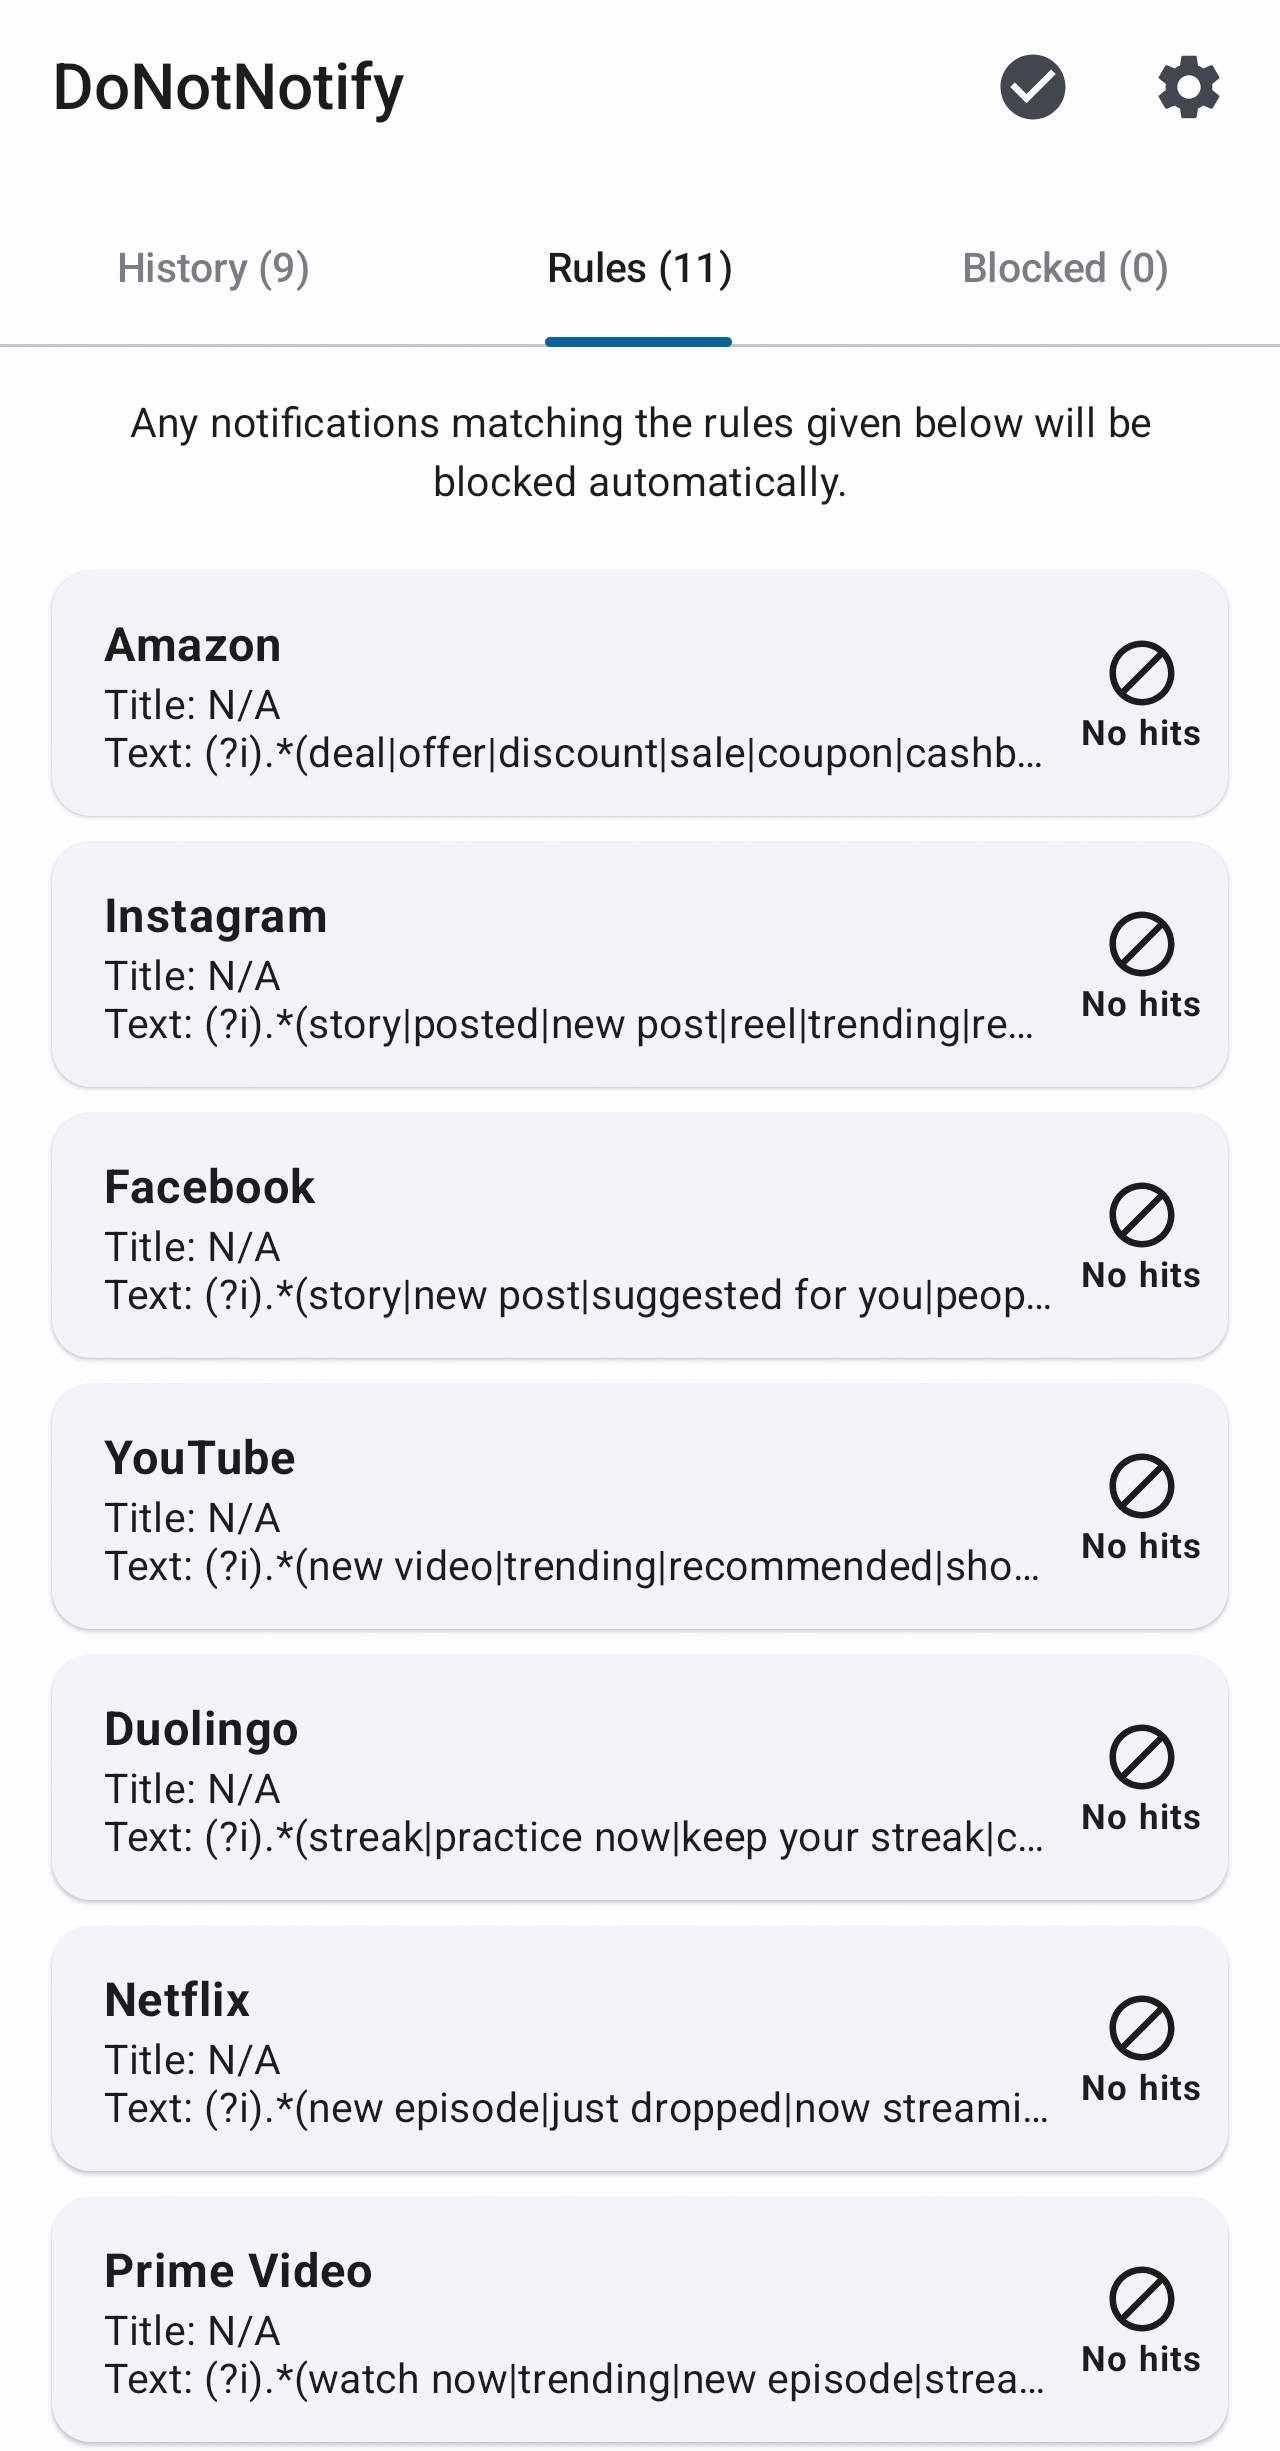
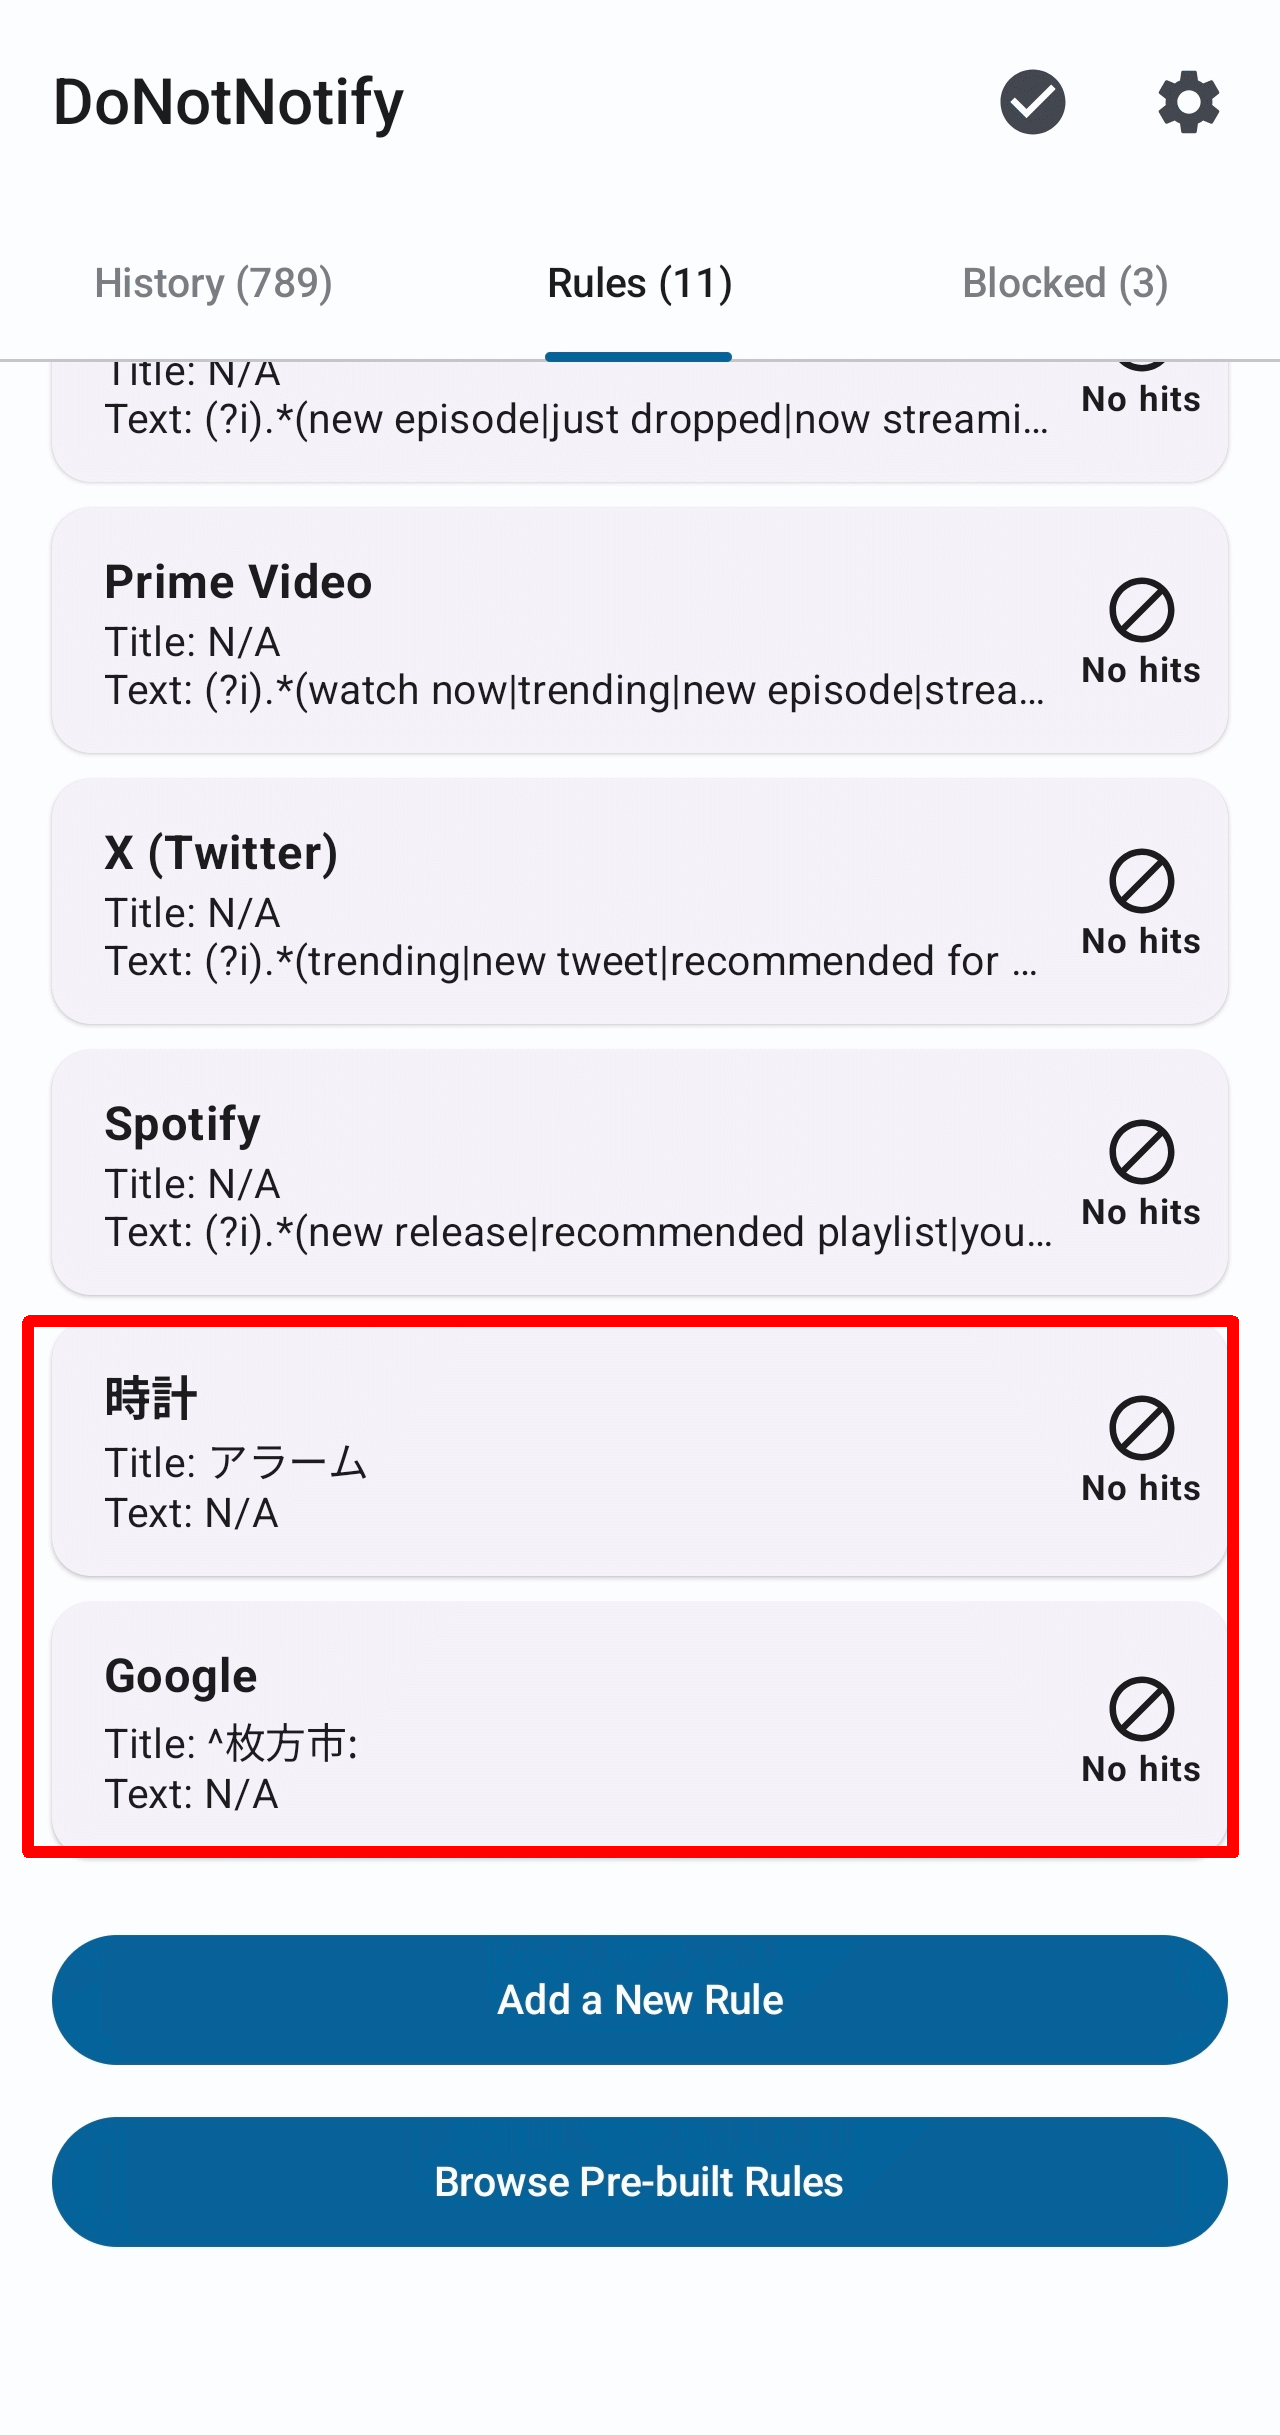
The Rules tab displays a list of installed rules.
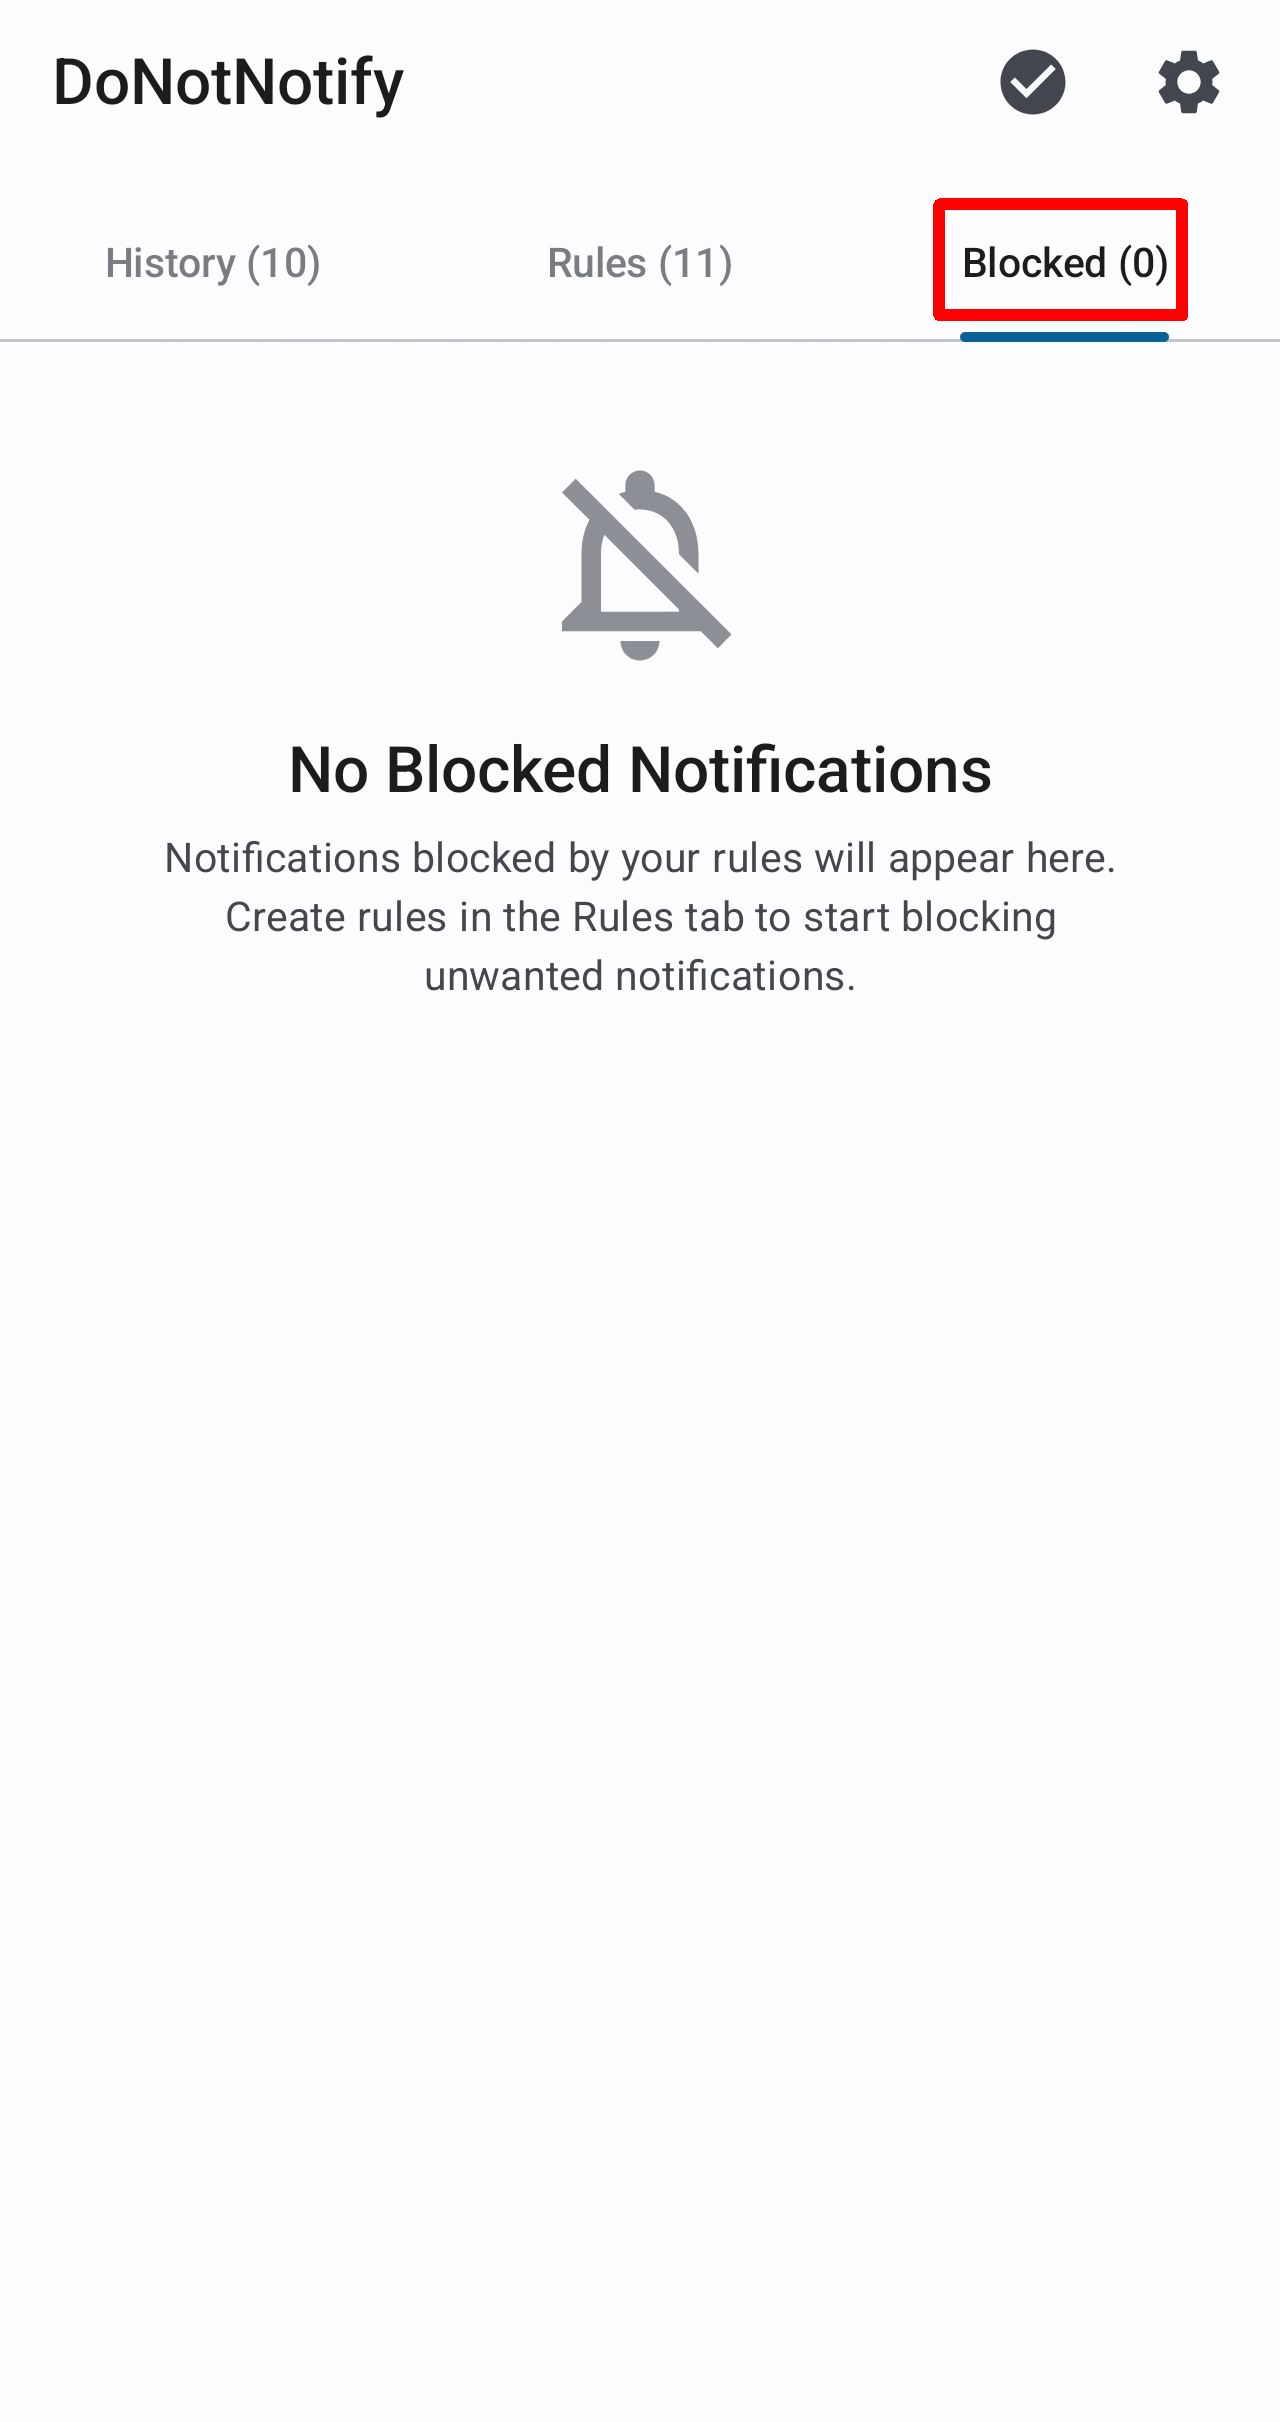
Selecting 'Blocked' from the three tabs at the top will display a list of blocked notifications. The image below shows the state immediately after installation, so there are no blocked notifications yet.
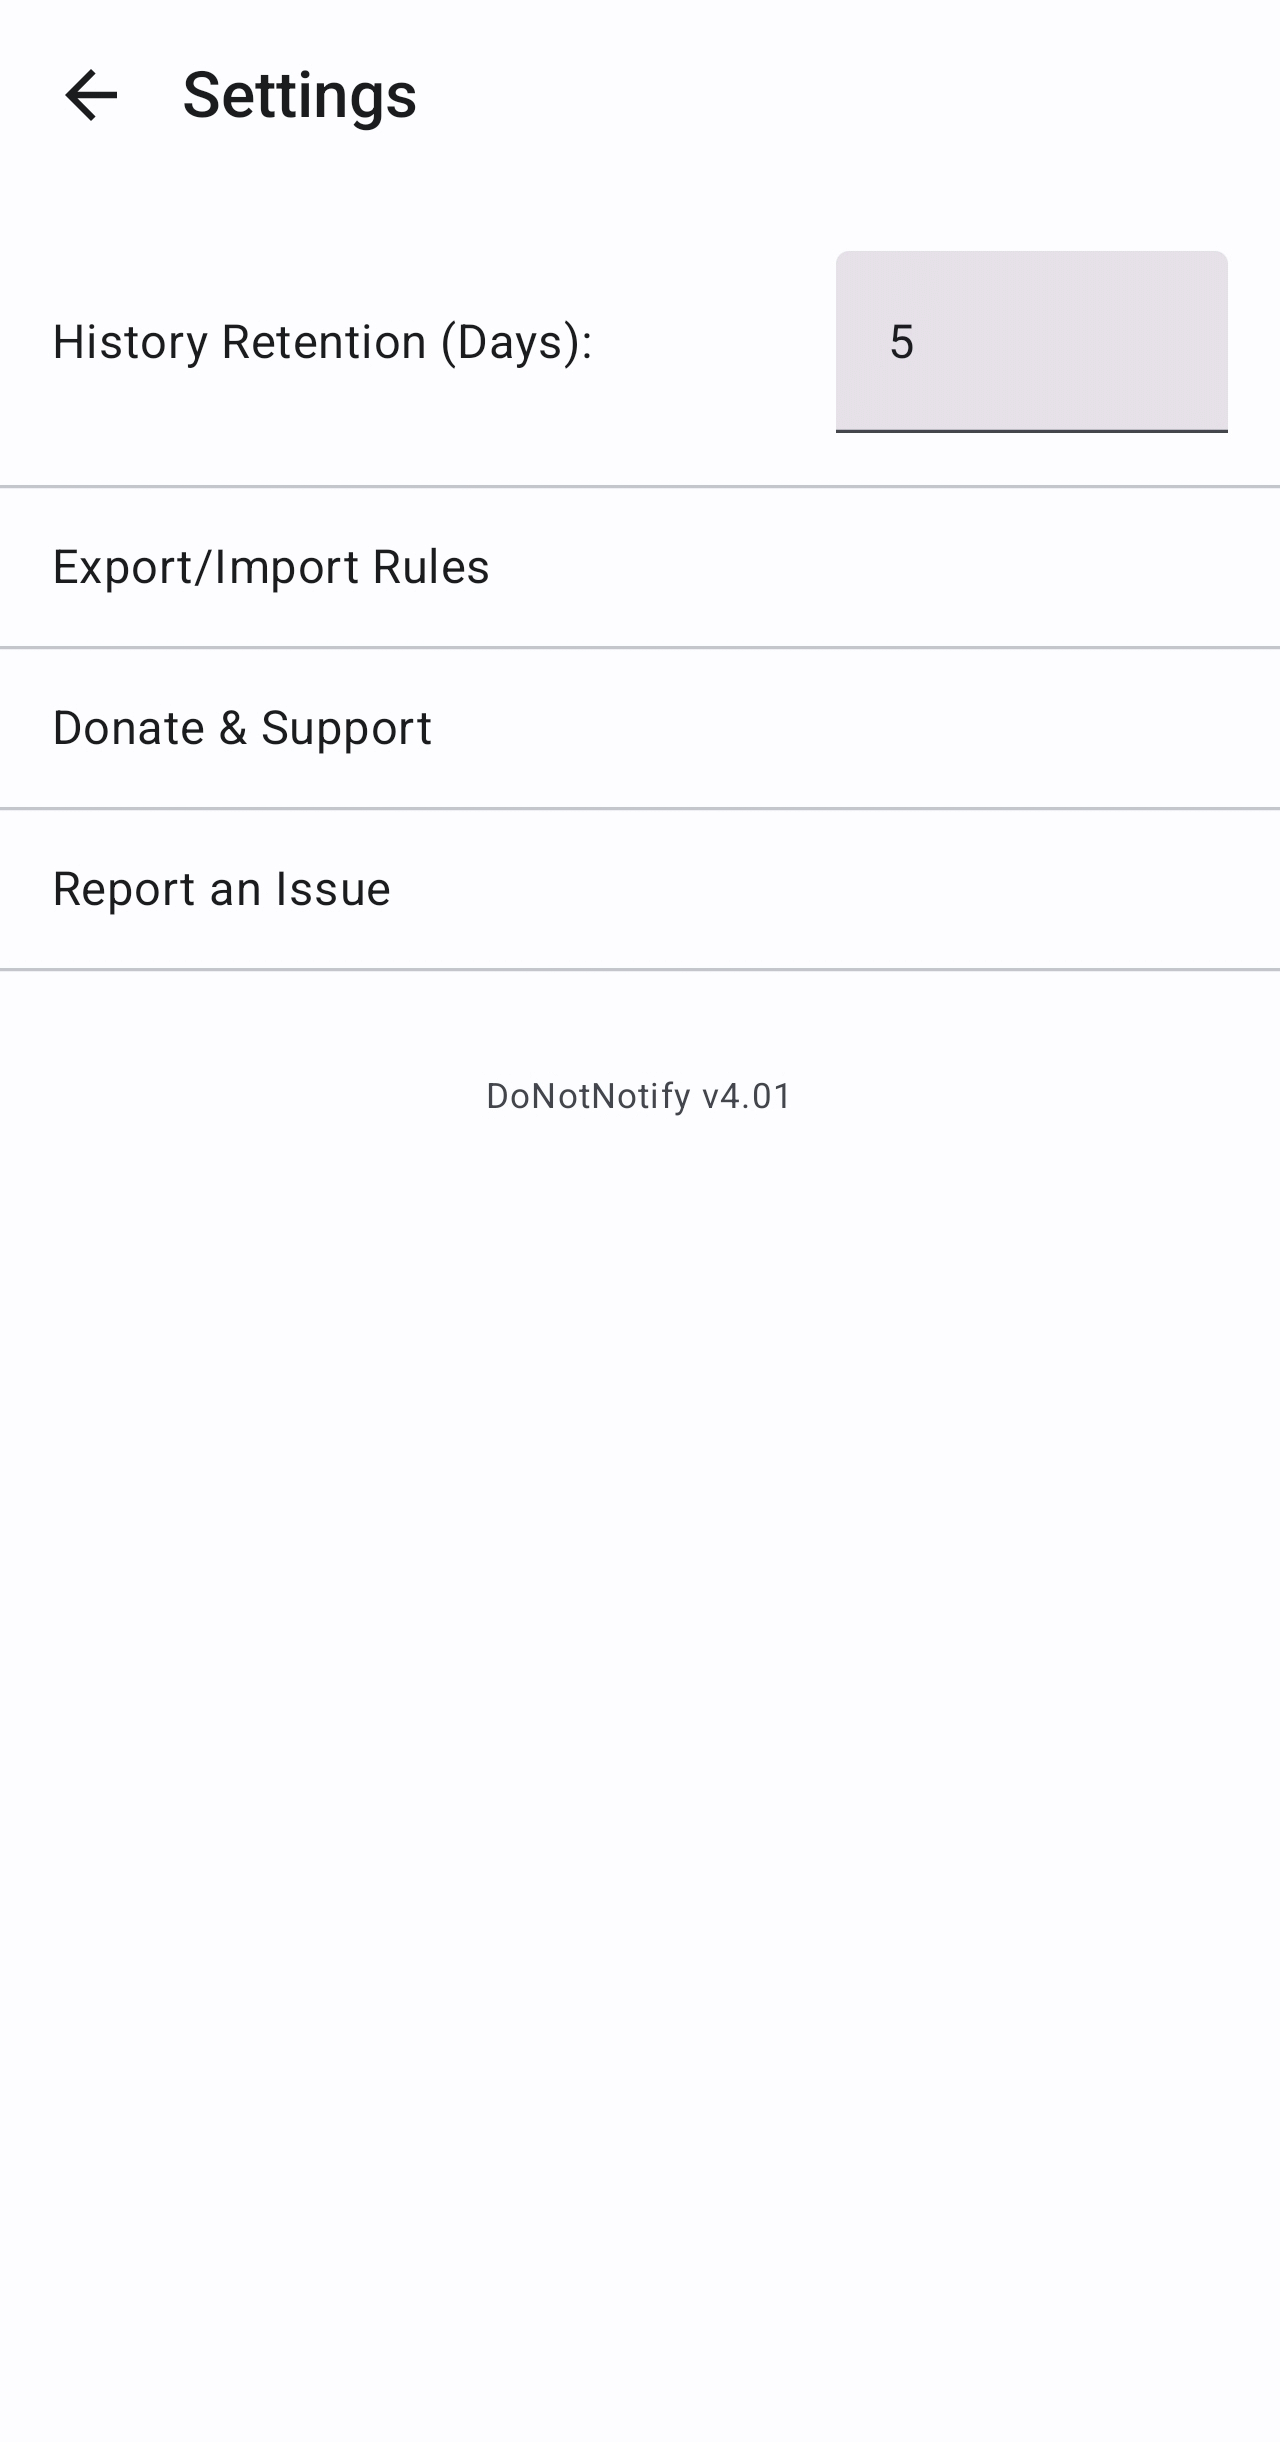
Tapping the gear icon in the upper right corner of the screen will take you to the 'Settings' screen.
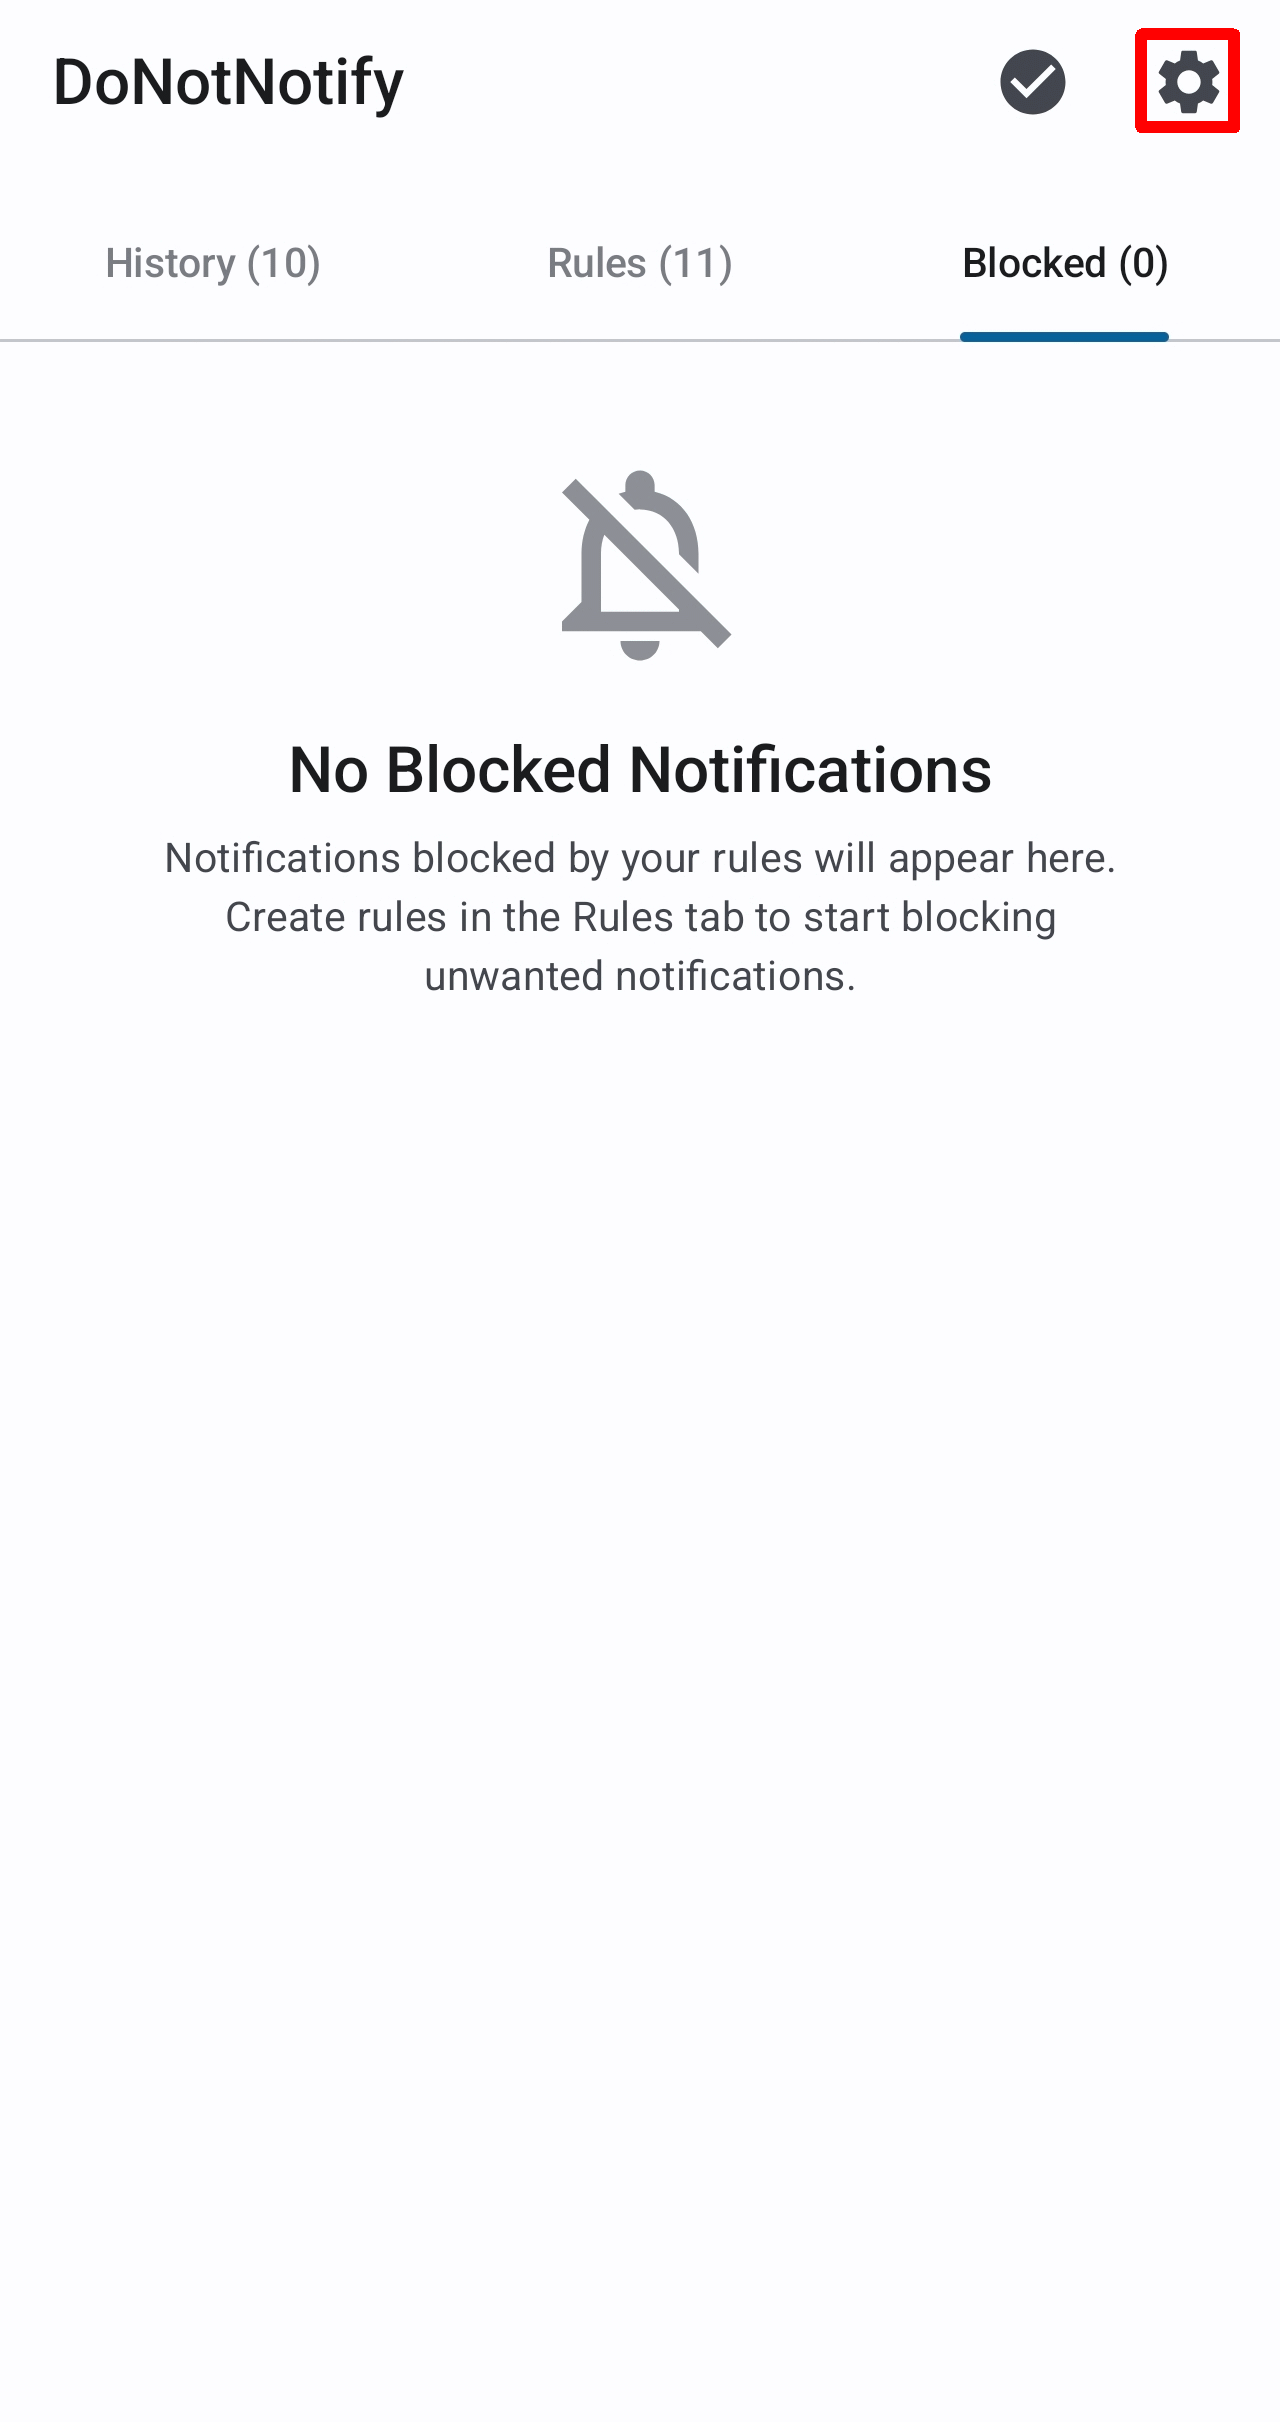
The 'Settings' screen contains the following items:
• History retention period (specify number of days)
- Export and import rules
Donations and support
• Reporting of problems
◆ Rule registration
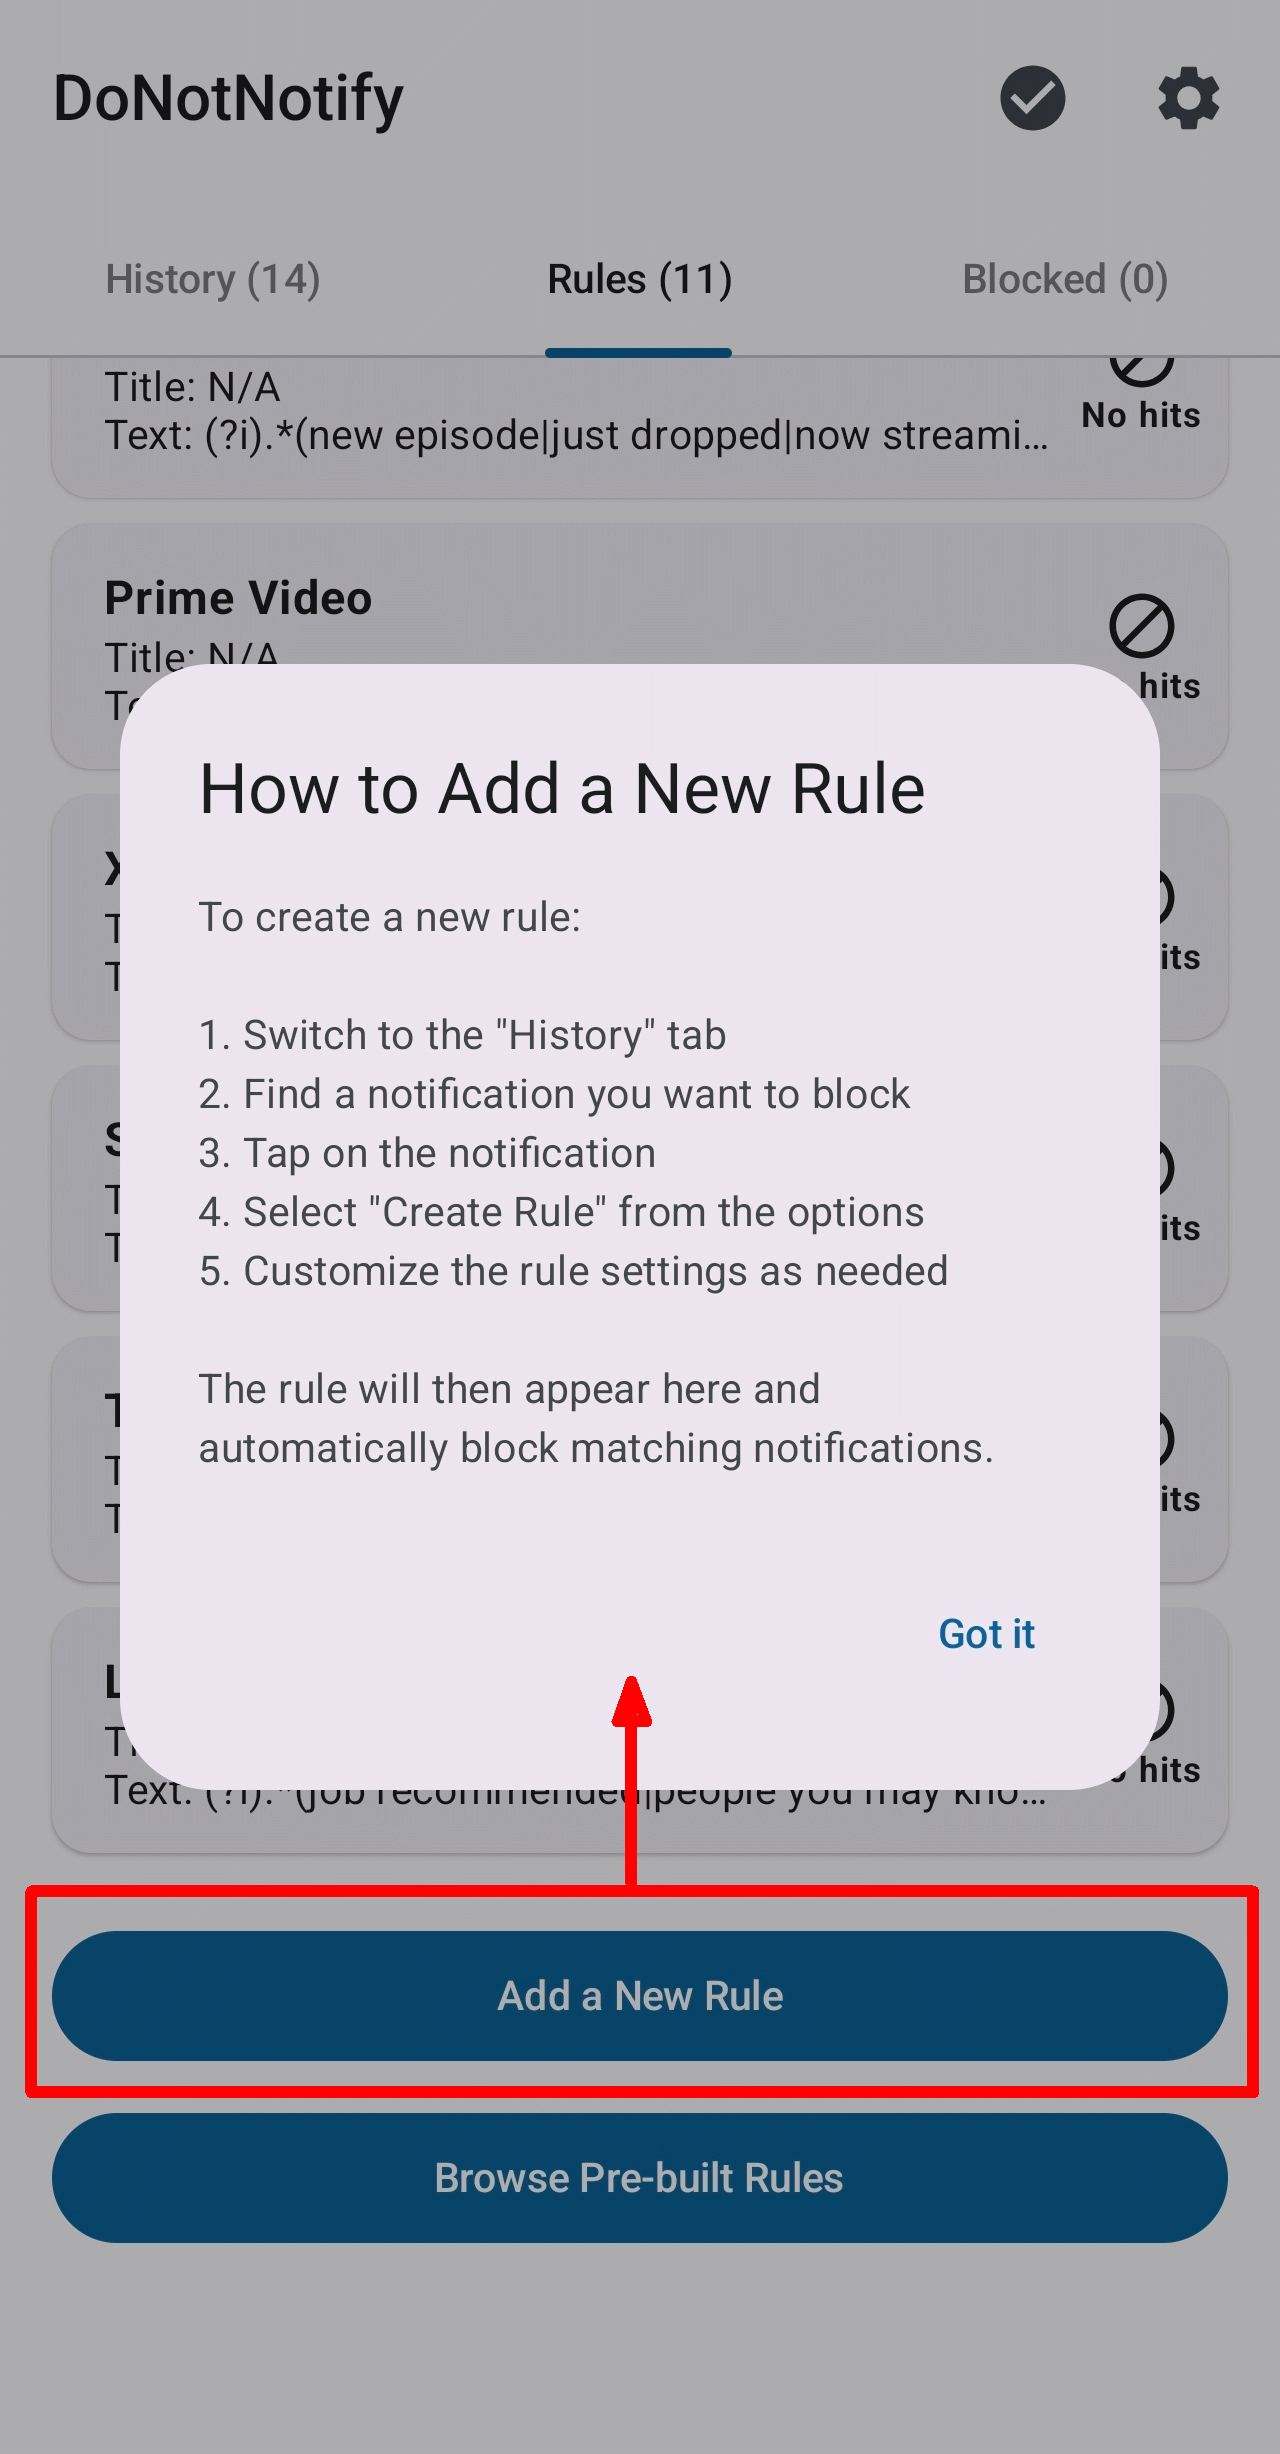
When I tapped the 'Add a New Rule' button at the bottom of the 'Rules' tab, a 'How to Add a New Rule' pop-up appeared. It said that I needed to add a new rule in the 'History' tab.
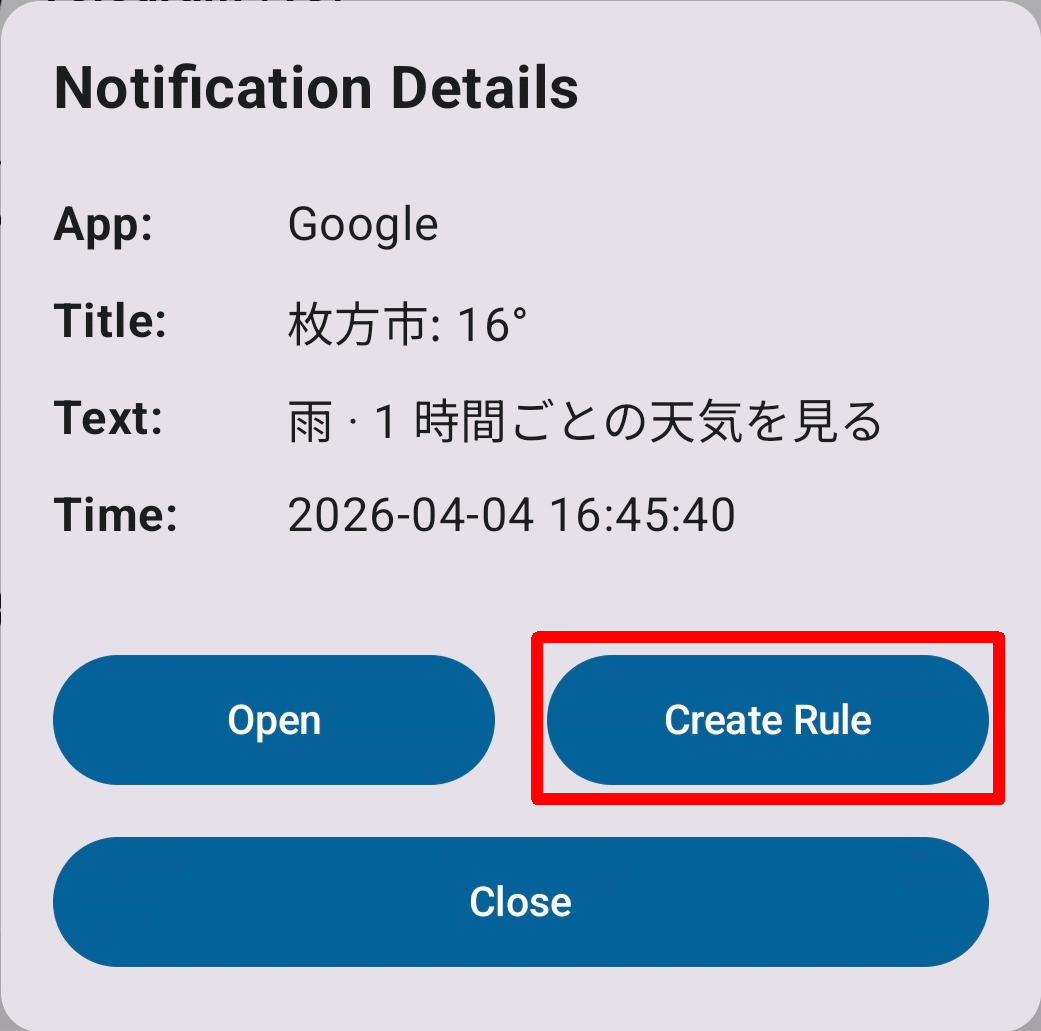
In the notification history under 'History,' there was a weather notification that was for nearby areas but not very helpful, so I'll try turning it off.
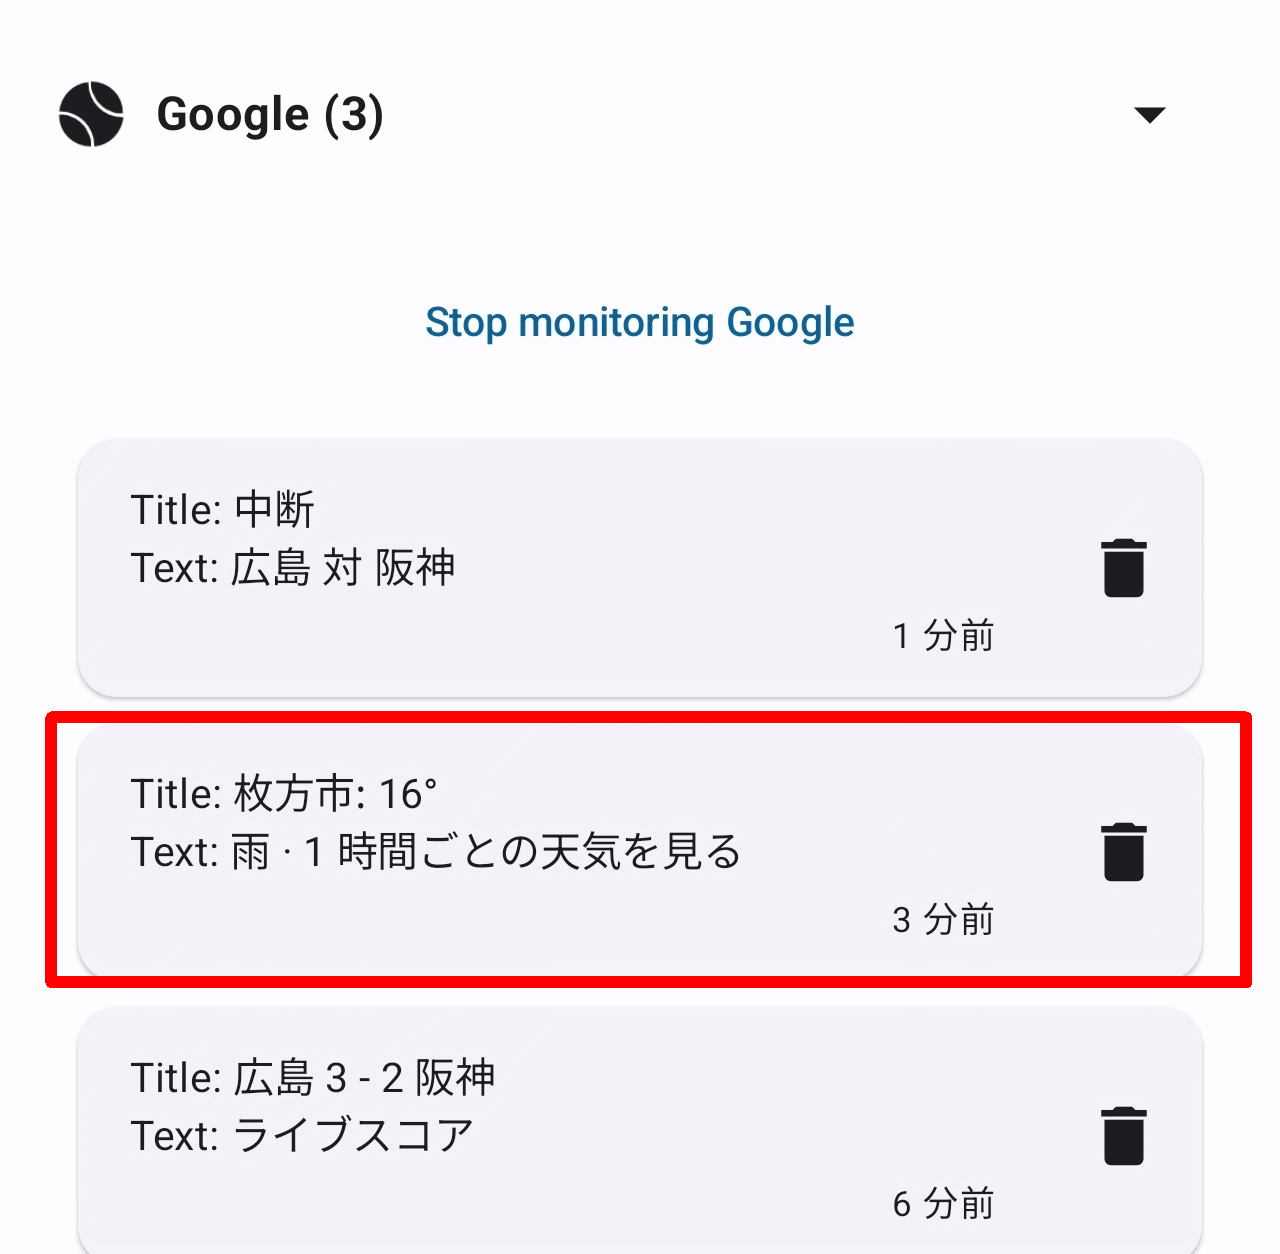
When you tap the notification in question, a 'Notification Details' pop-up will appear, so tap the 'Create Rule' button.
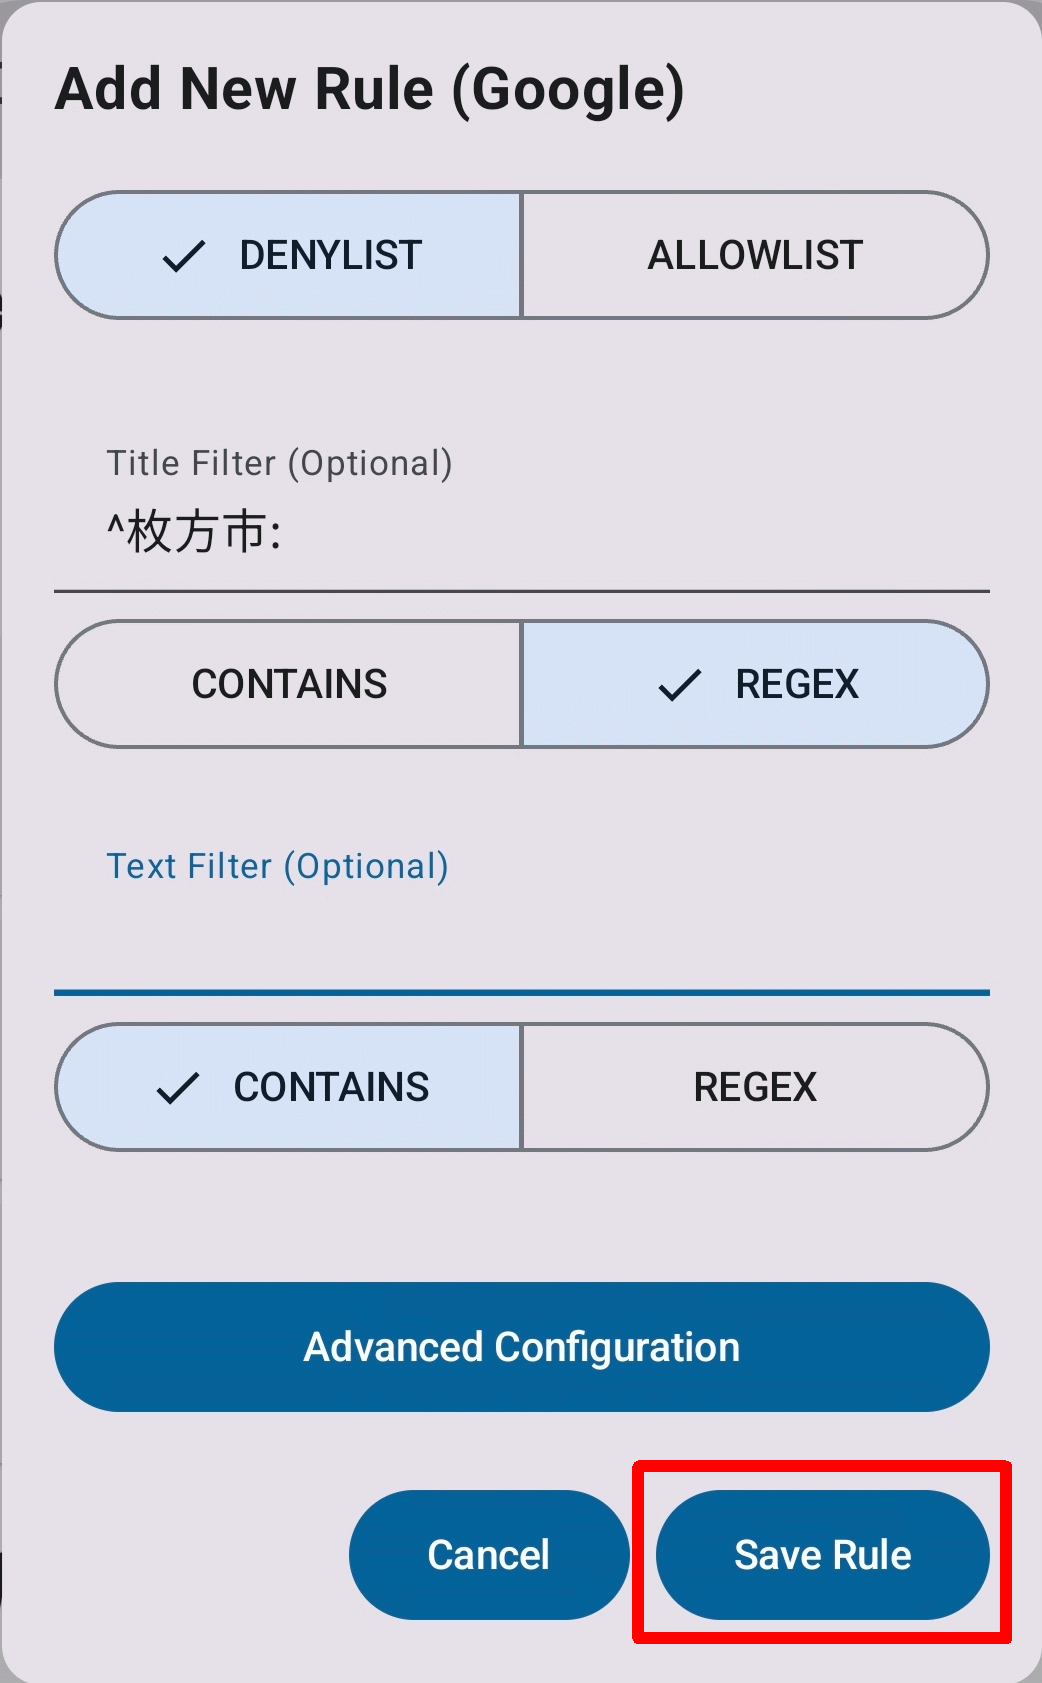
A 'Add a New Rule' pop-up will appear, so you can set up the rule.
• DENYLIST/ALLOWLIST : A list of those who are denied or allowed.
• Title Filter : The title string to filter (you can choose between plain text or regular expression).
• Text Filter : The notification string to filter (you can choose between plain text or regular expression).
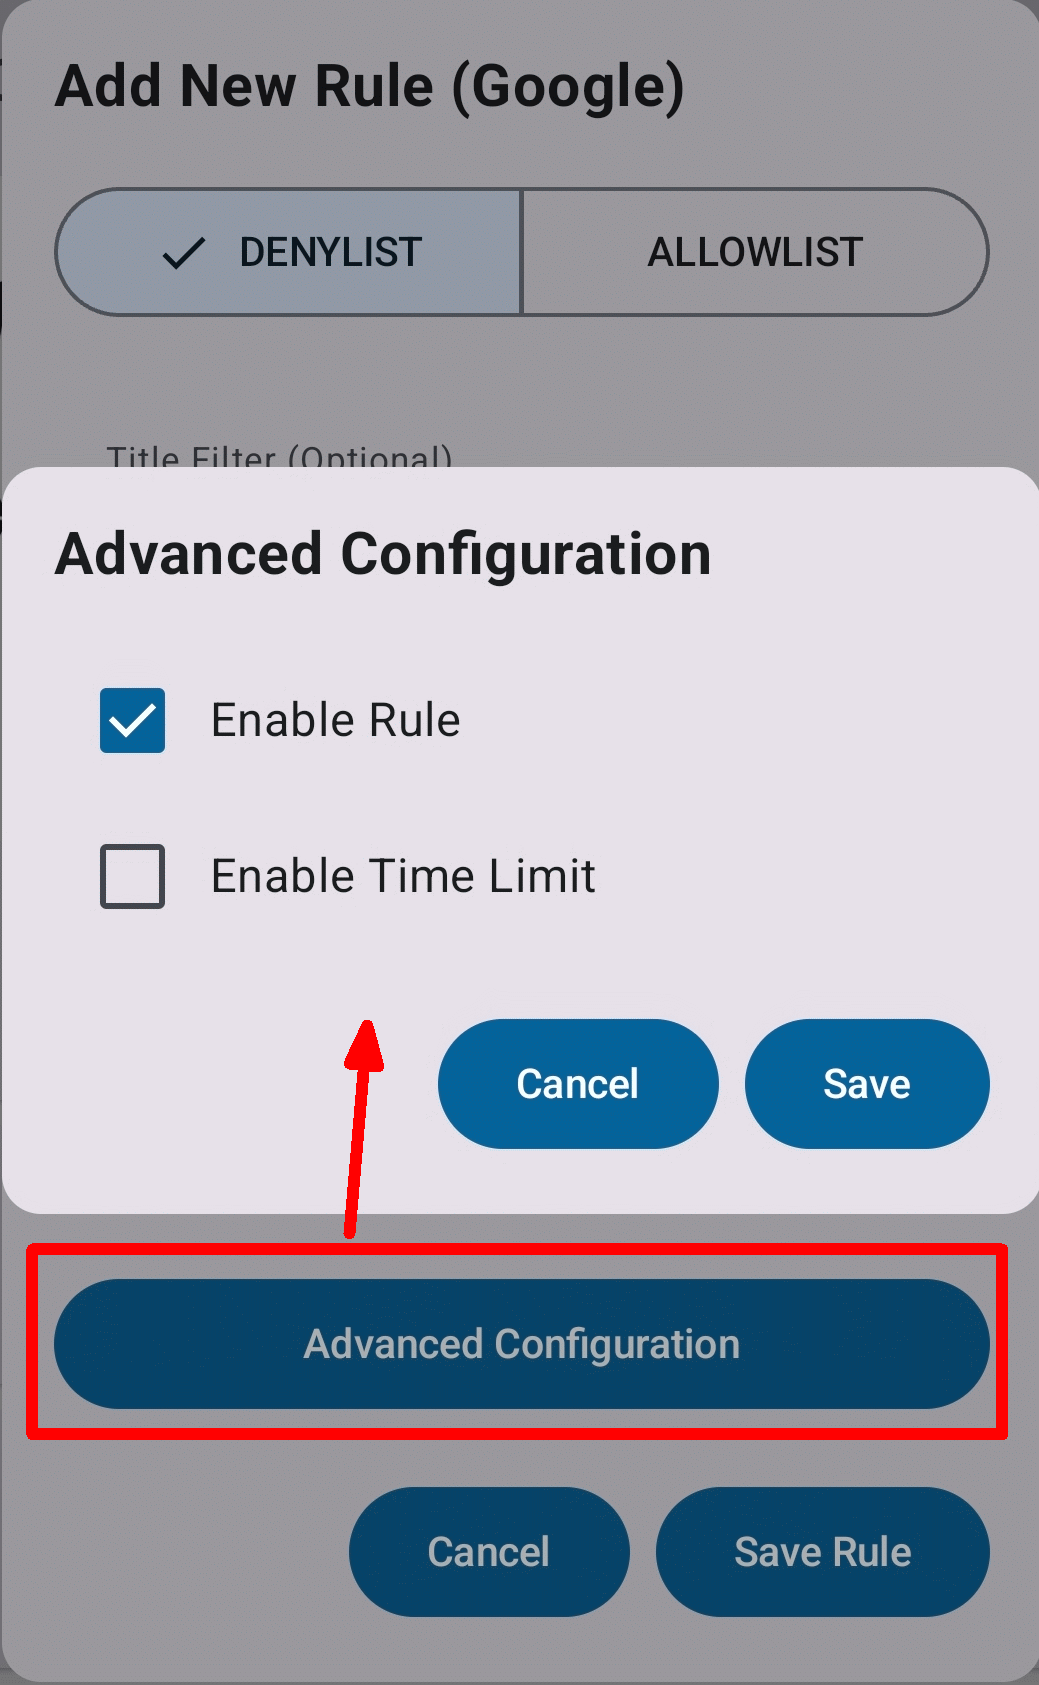
Tapping 'Advanced Configuration' will display a pop-up window where you can configure the following further settings:
• Eligible Rule: Whether to enable the rule or not.
• Enable Tile Limit: Whether to set an expiration date for the rule.
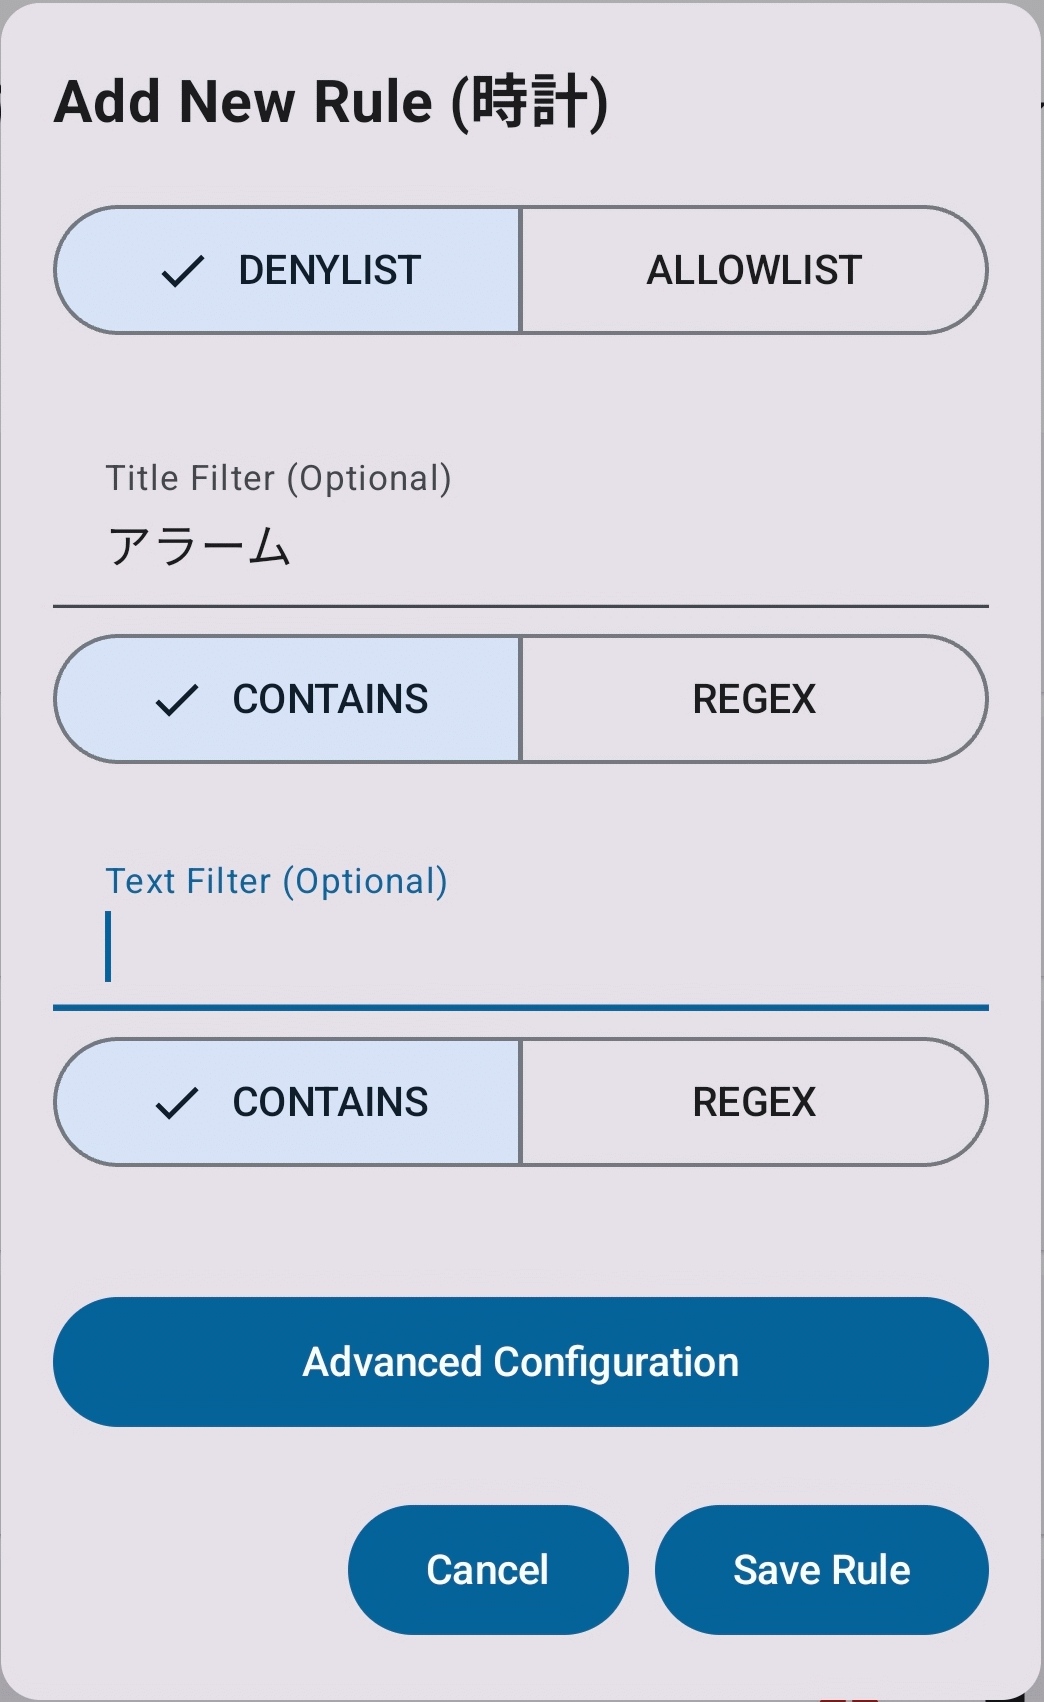
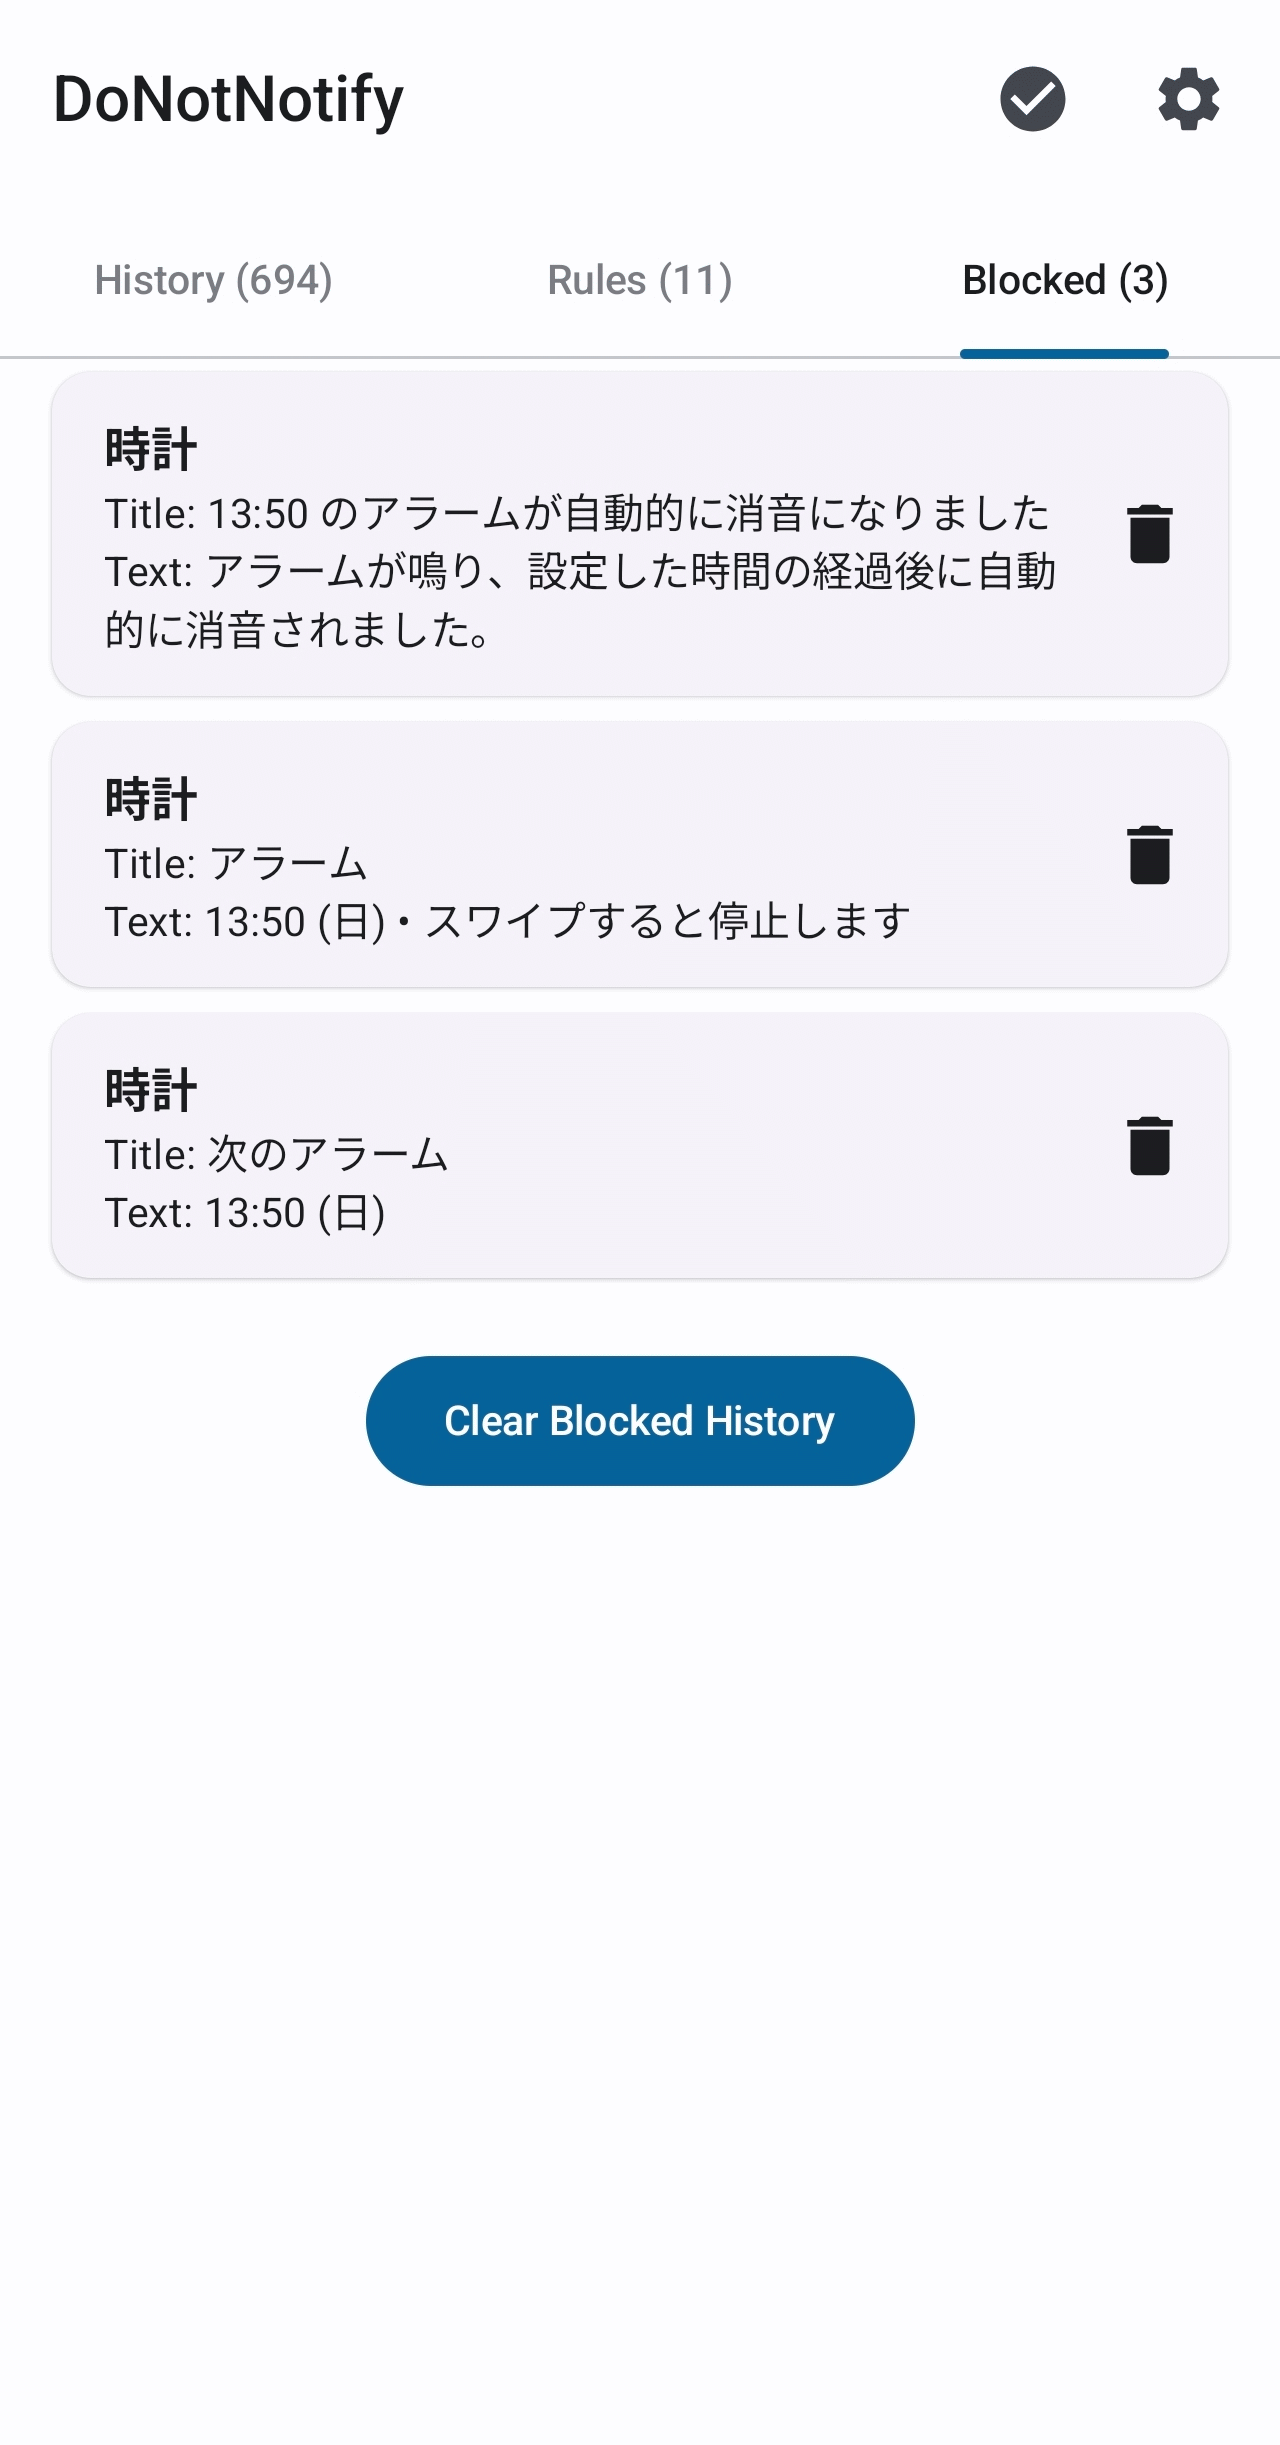
I also don't need notifications from the 'clock' app, so I'll add it to my blocked list.
When I checked 'Rules,' the added rule was displayed in the list.
After leaving it for a while and checking 'Blocked,' I found a list of notifications that had been blocked by the rule I had added.
After checking how the rules are applied in various ways, I noticed the following two points:
Filtering using regular expressions can be difficult and may require trial and error.
- Preset rules often cannot be used because the notifications are localized into Japanese.
◆Summary
DoNotNotify often requires some trial and error during the rule setup phase, but if you're overwhelmed by too many unnecessary notifications, it's definitely worth trying.
Related Posts: