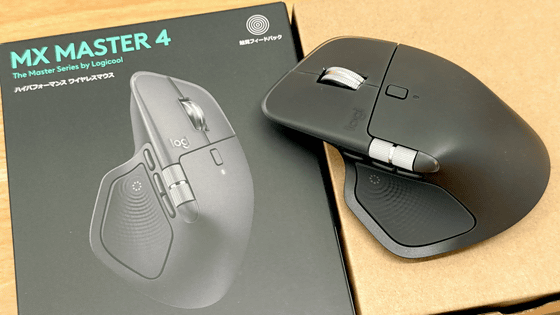
'MX Master 4' setup and usage review: a mouse that has evolved significantly from the previous model with haptic feedback and Actions Ring, but can be used like a left-handed device
Logitech's high-end MX series mouse, the MX Master 4 , will be released on Thursday, October 30, 2025. The MX Master 4 represents a significant evolution not only in hardware but also in software from previous models. It features haptic feedback, which conveys actions through vibrations, and a new Actions Ring feature that allows you to select and execute shortcut actions on the screen, greatly expanding its usability. I was able to get a sneak peek at the MX Master 4, so I set it up and used it while checking out the new features.
MX Master 4 Wireless Mouse | Logitech
·table of contents
◆Set up MX Master with 'Logi Options+'
◆Check out the feel and usability of the MX Master 4
◆Setting up the new feature 'Actions Ring' from MX Master 4
◆ Set the Actions Ring for each application, some support haptic feedback
◆ Impressions
You can see the appearance of the MX Master 4 and a comparison with the previous model by reading the article below.
Logitech's top-of-the-line wireless mouse 'MX Master 4' quick photo review, both software and hardware have evolved significantly from the previous model - GIGAZINE
◆Set up MX Master with 'Logi Options+'
The MX Master 4 is set up using ' Logi Options+ ', just like the previous model, the MX Master 3s. Wireless connections can be made via Bluetooth or Logitech's proprietary connection standard, Logi Bolt. Instructions for installing Logi Options+ are summarized in the article below.
Logitech's wireless mechanical keyboard 'MX Mechanical' with a pleasant rattling sound and a firm touch and the highly functional wireless mouse 'MX Master 3S' review - GIGAZINE
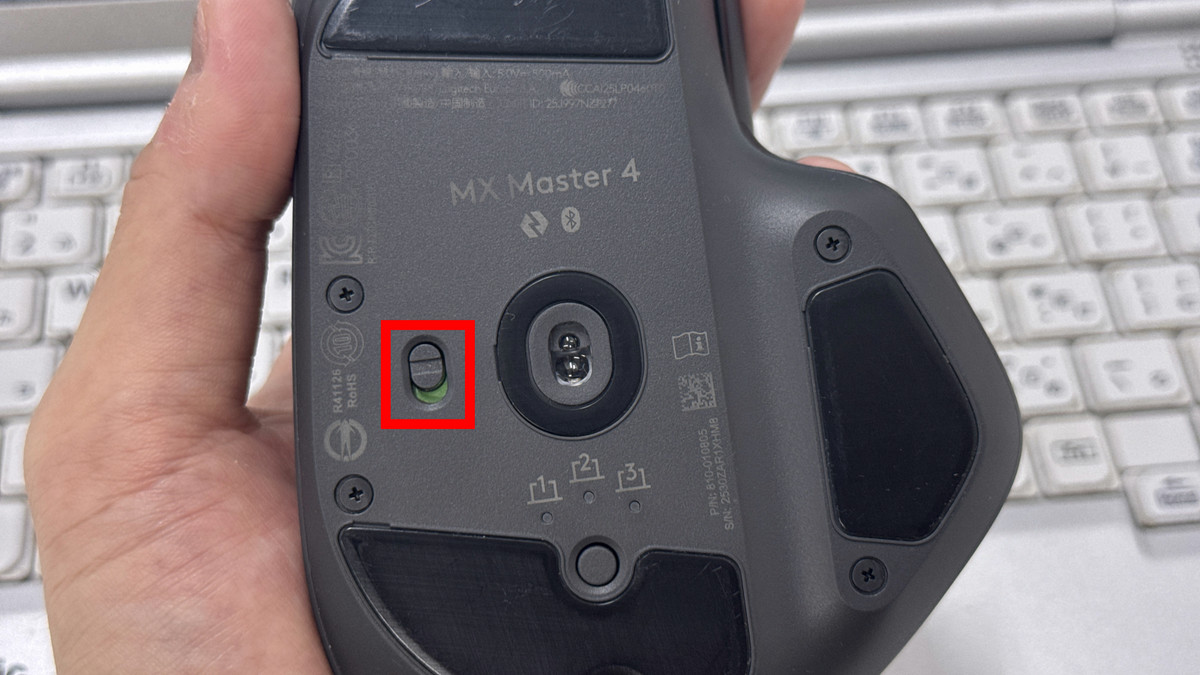
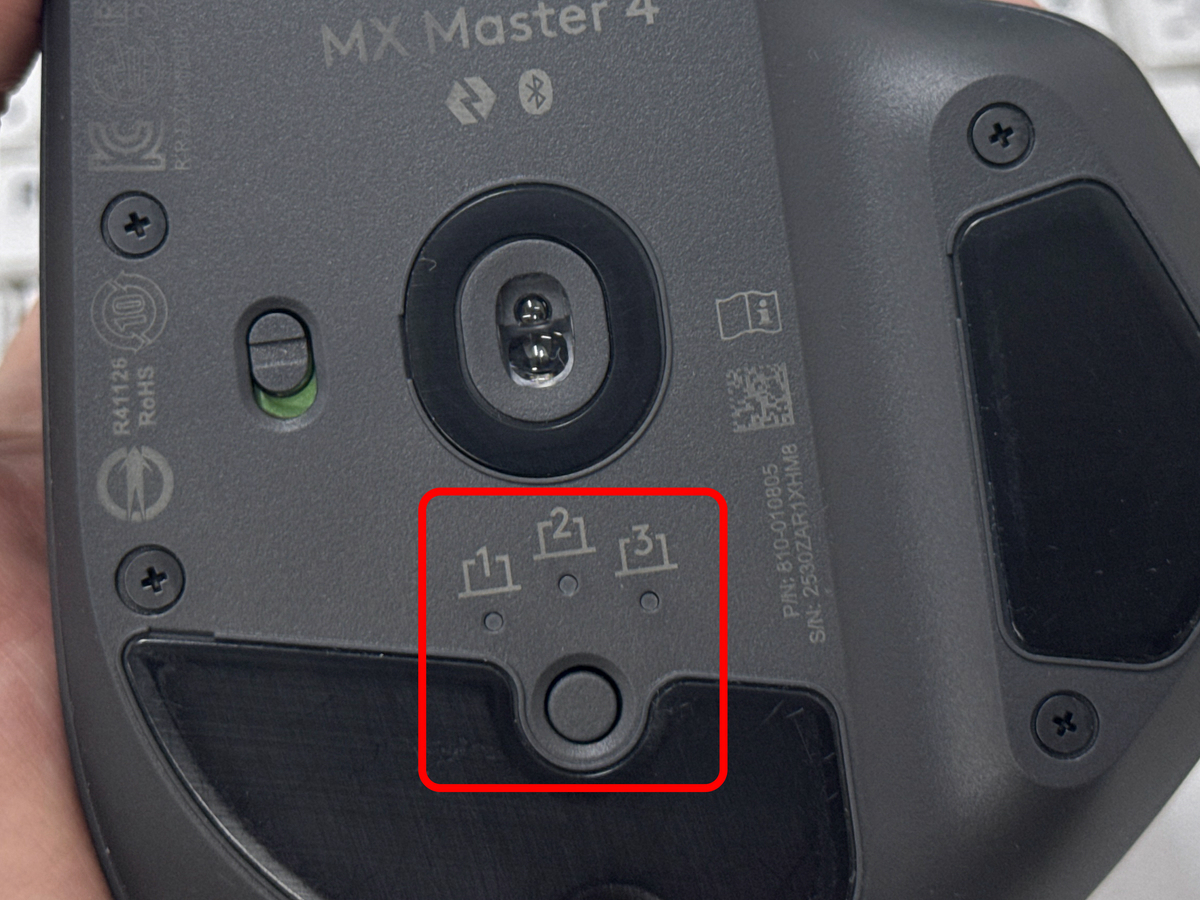
To power the MX Master 4, simply flip the slide switch on the bottom. The battery life is officially rated at up to 70 days, and there's a 'battery saving mode' that turns off haptic feedback (described below) to extend battery life.
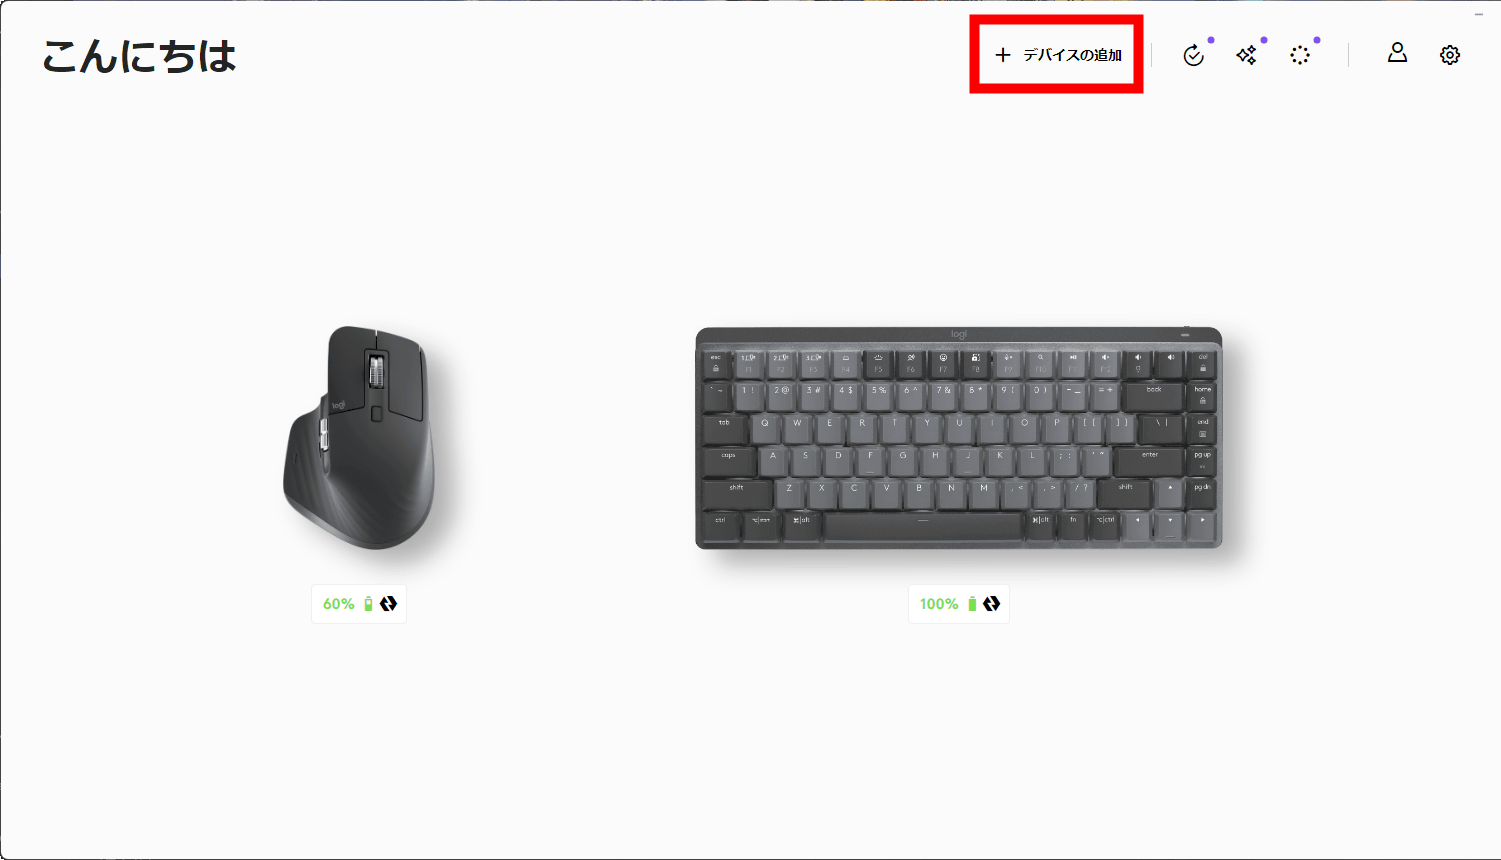
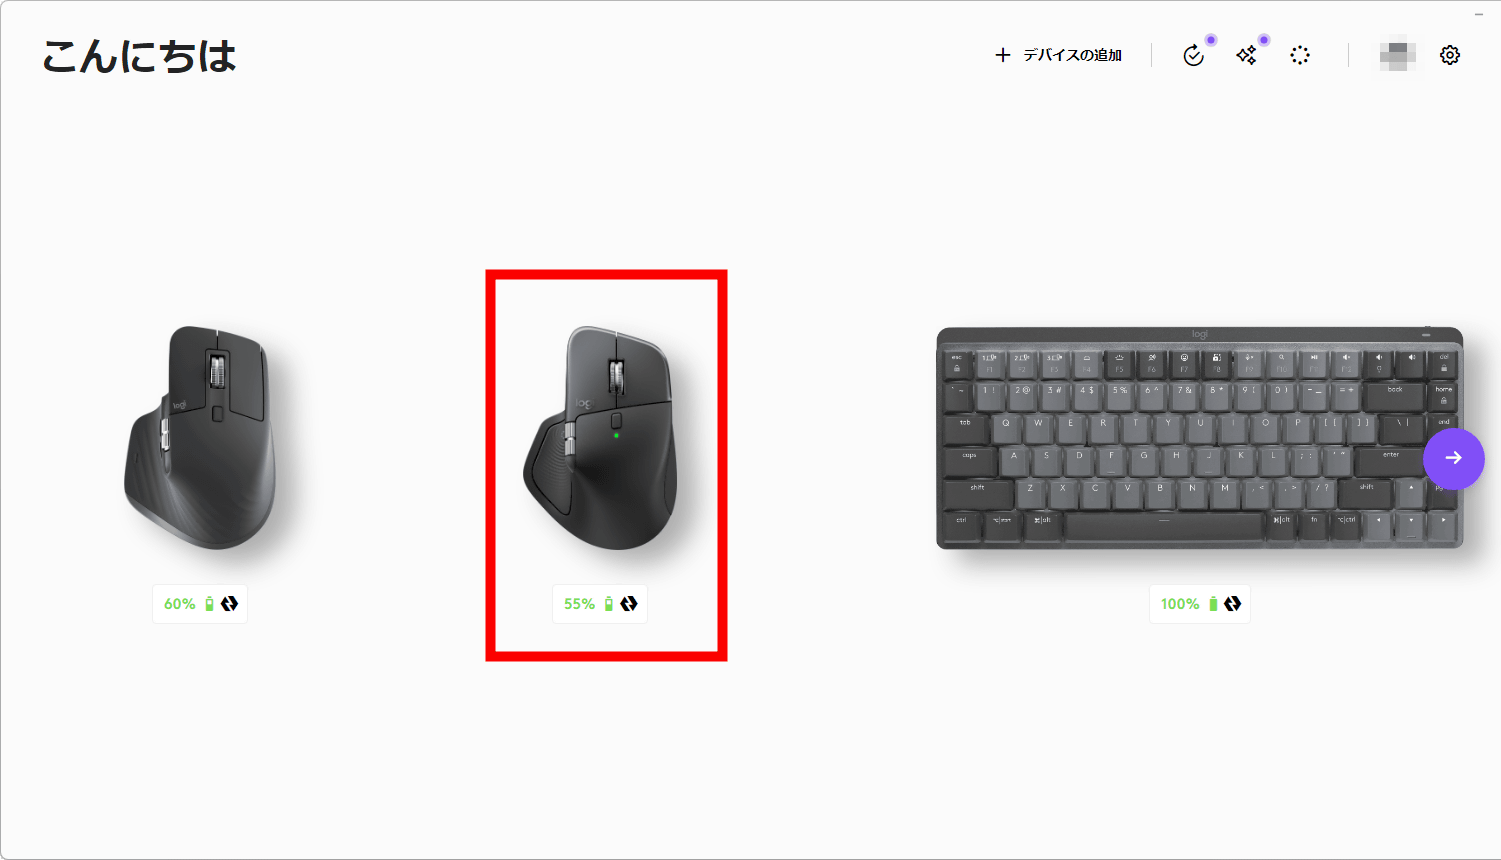
Connect the MX Master 4 to a PC with Logi Options+ installed. Click '+ Add device' in Logi Options+.
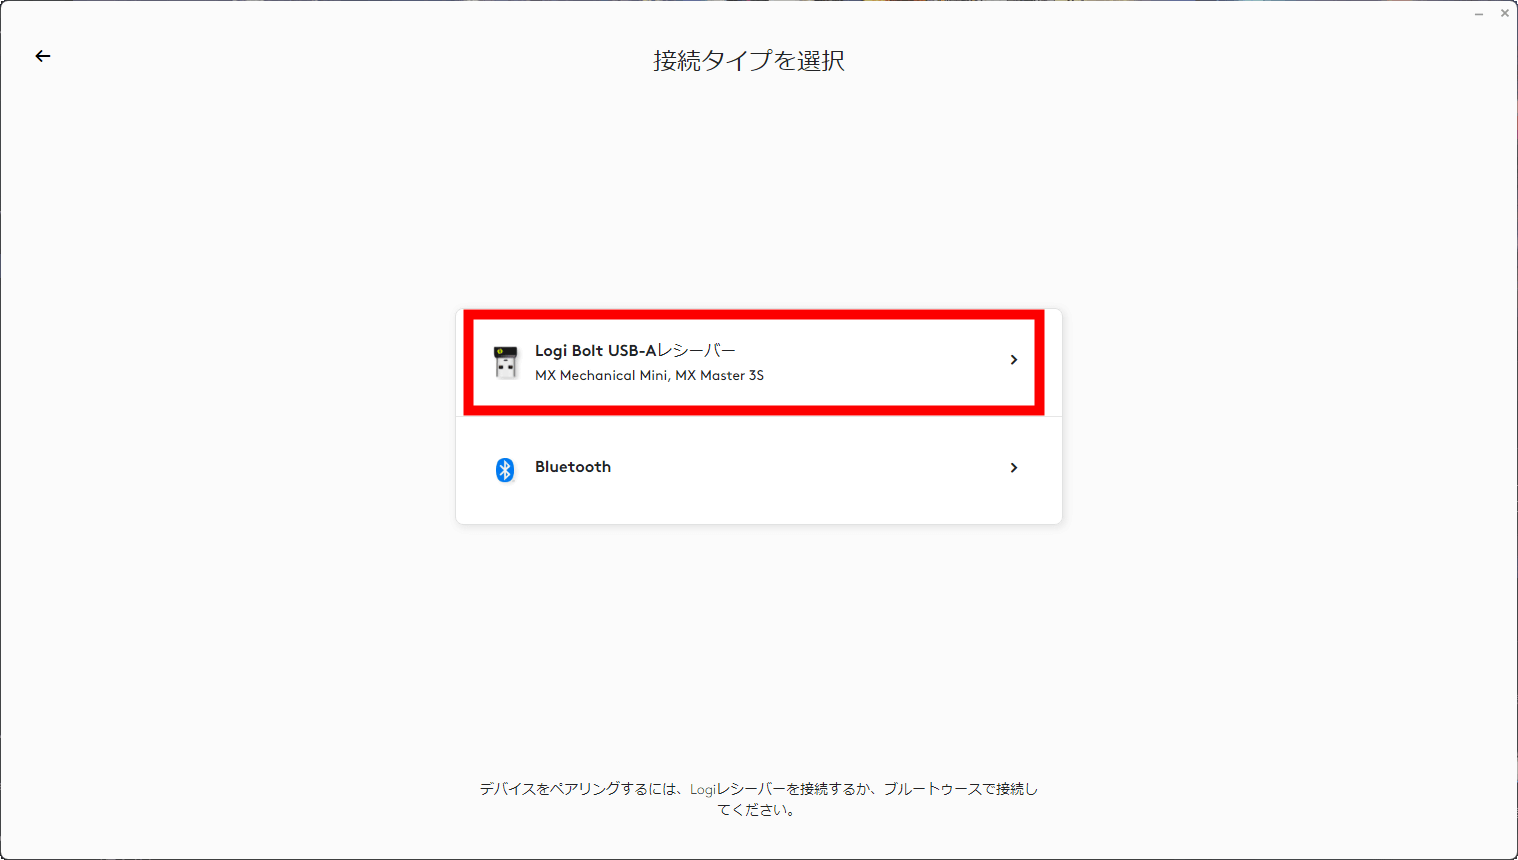
This time, I connected the Logi Bolt receiver to my PC to connect using the low latency Logi Bolt. Select the Logi Bolt receiver.
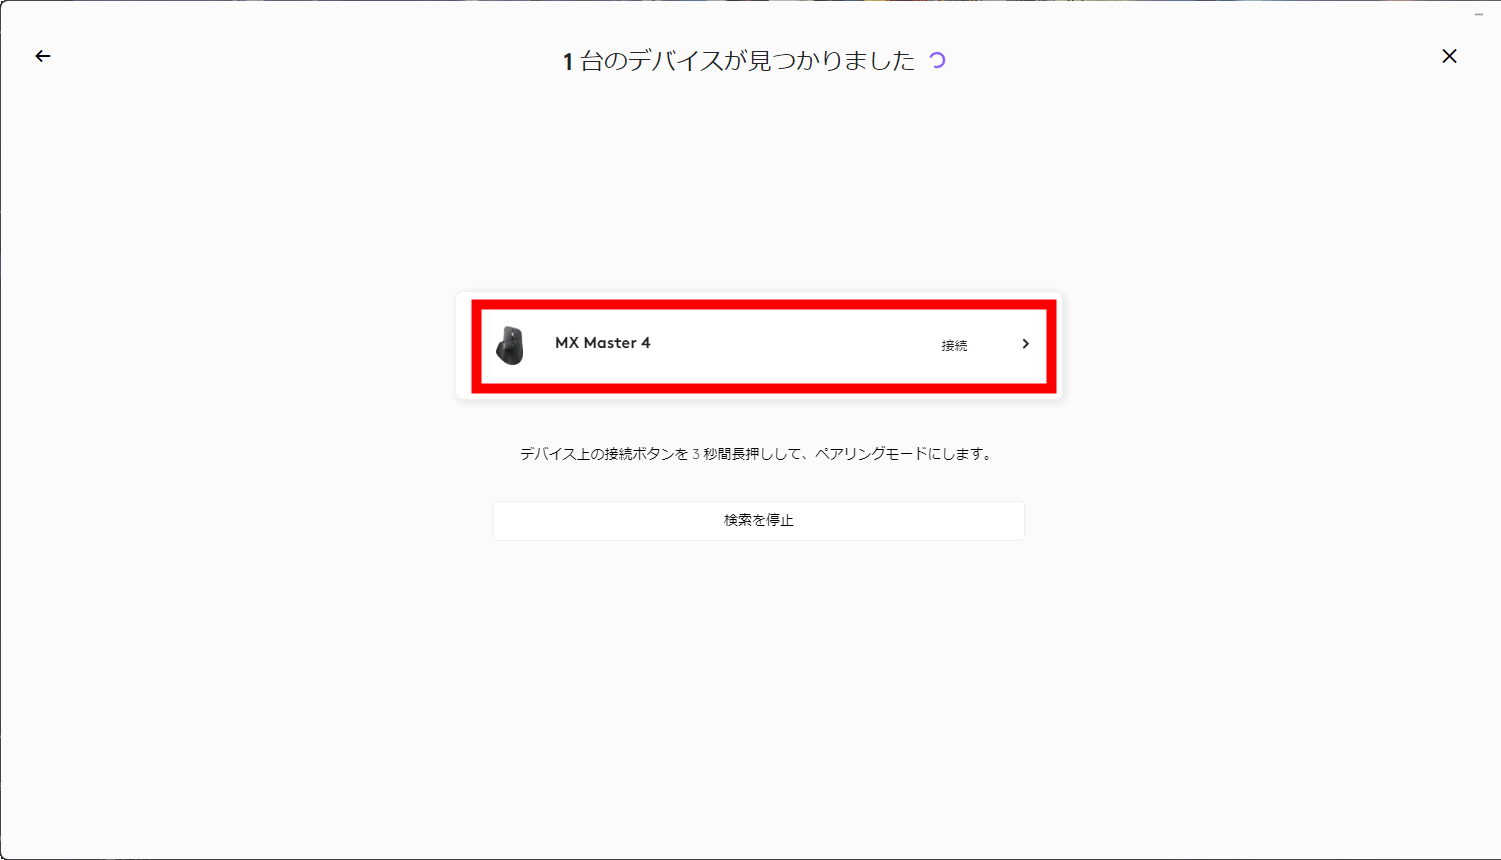
'MX Master 4' will appear, so click on it.
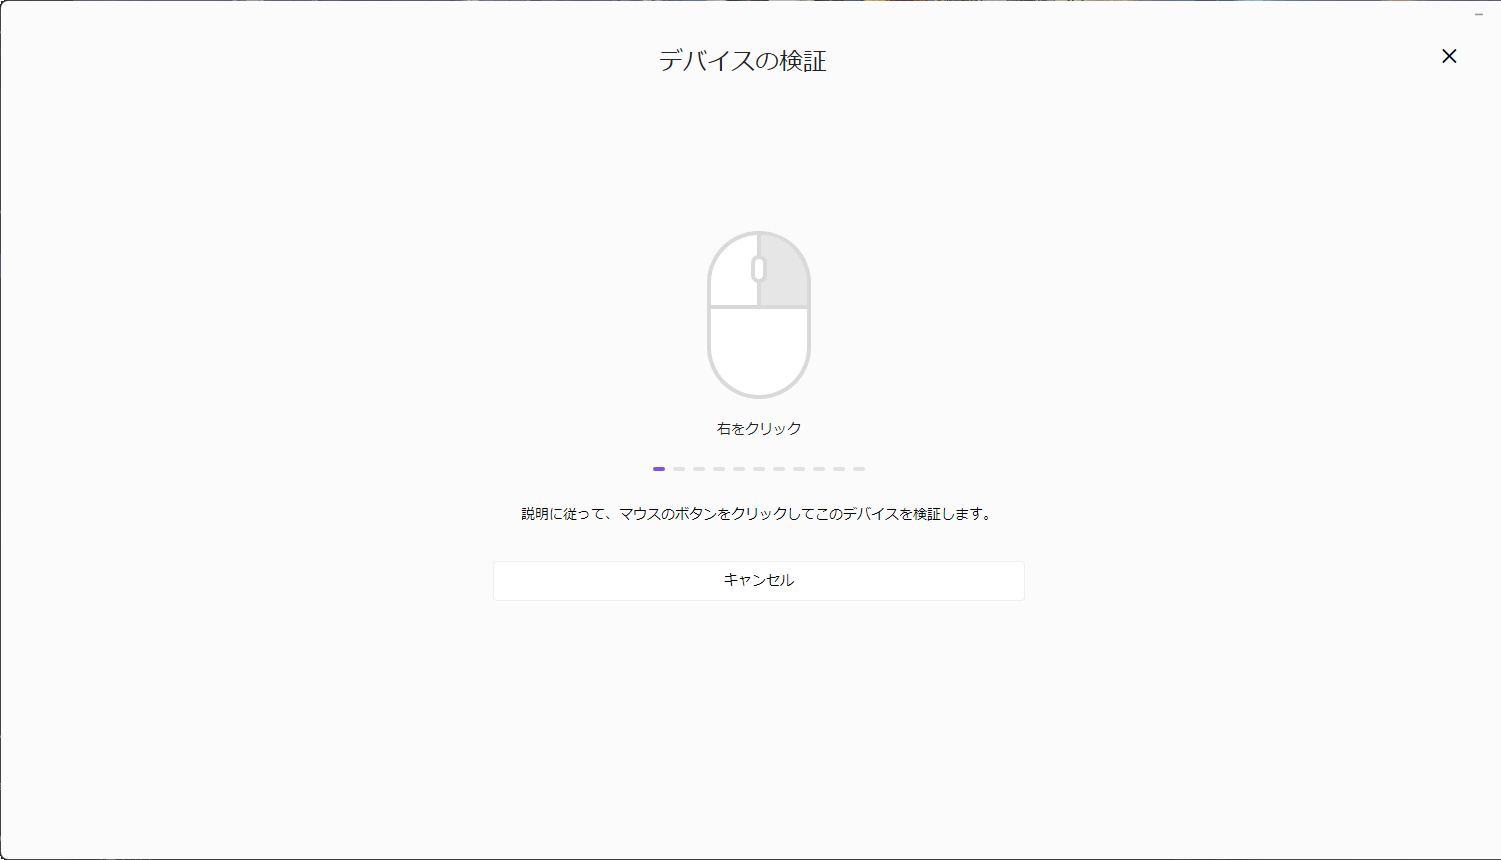
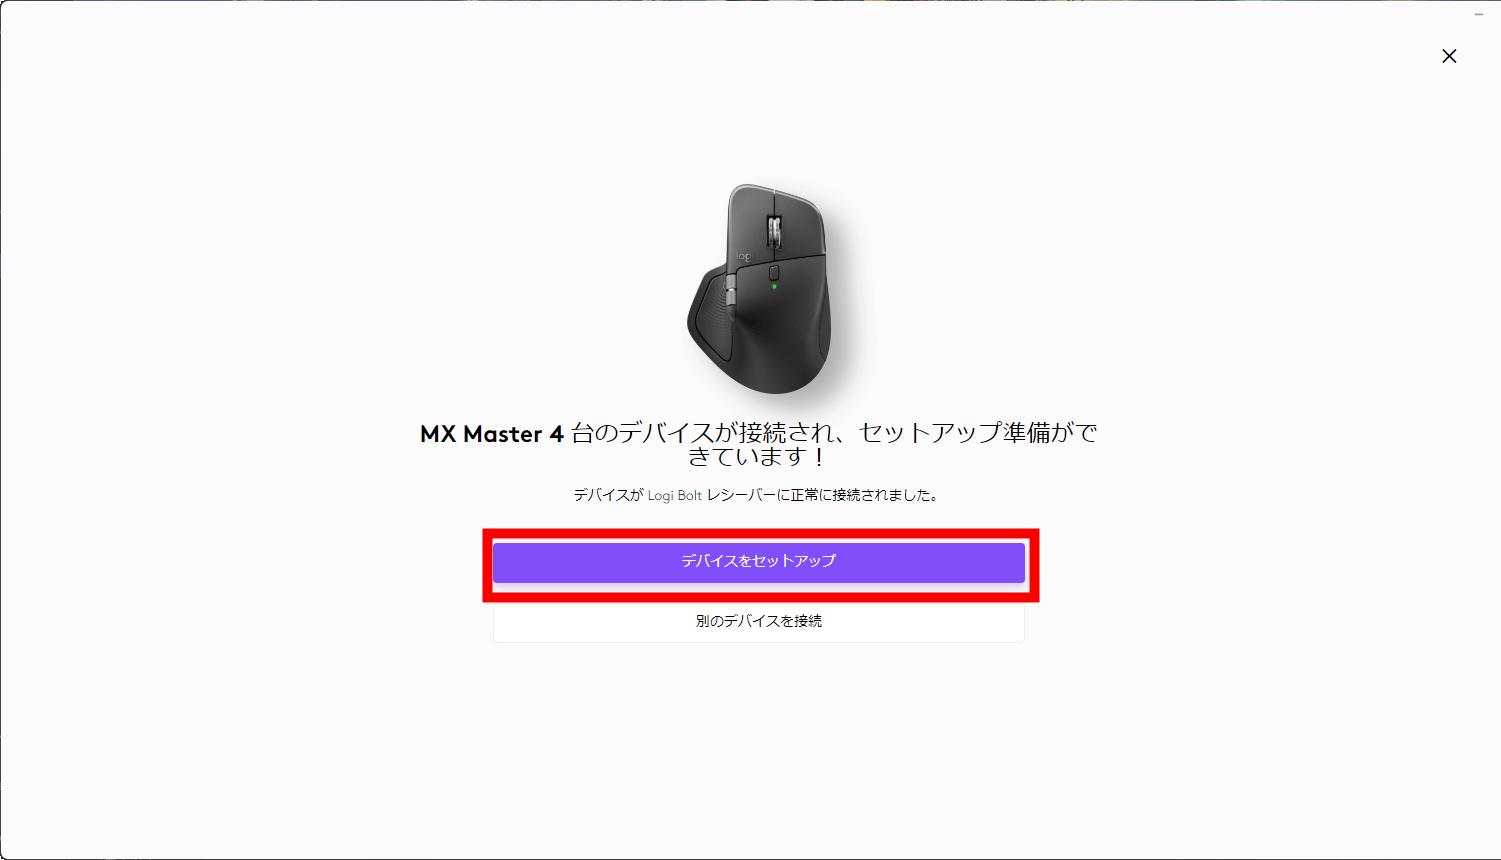
The device verification will begin. Just click the mouse as shown.
Once the device has been verified, the setup of the MX Master 4 is complete. Click 'Set up device.'
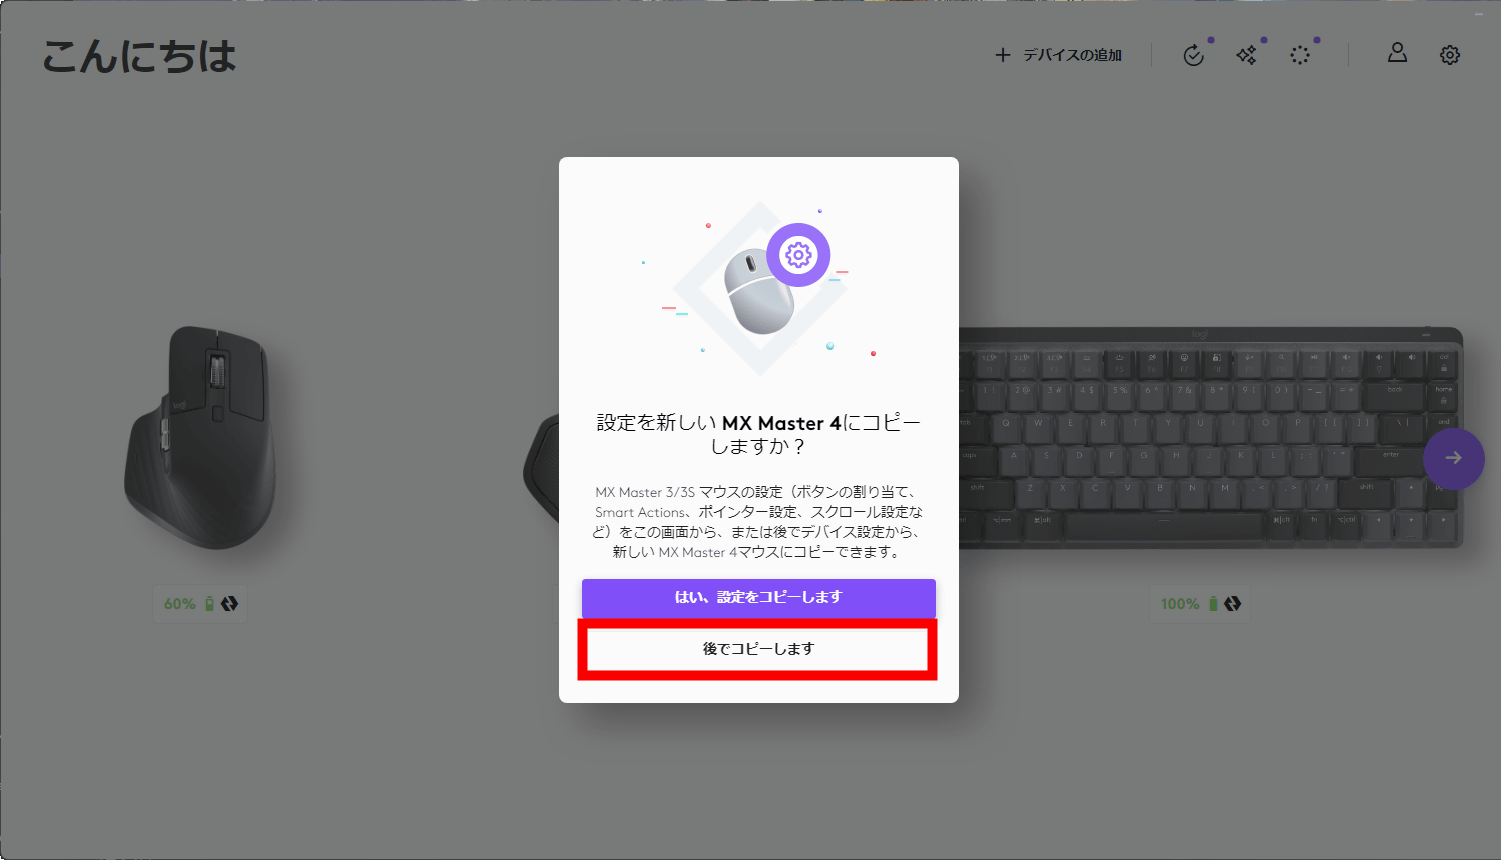
The previous model, the MX Master 3s, was already connected to the PC I connected this time. I could have just carried over the settings, but since I wanted to set it up from scratch this time, I selected 'Copy later.'
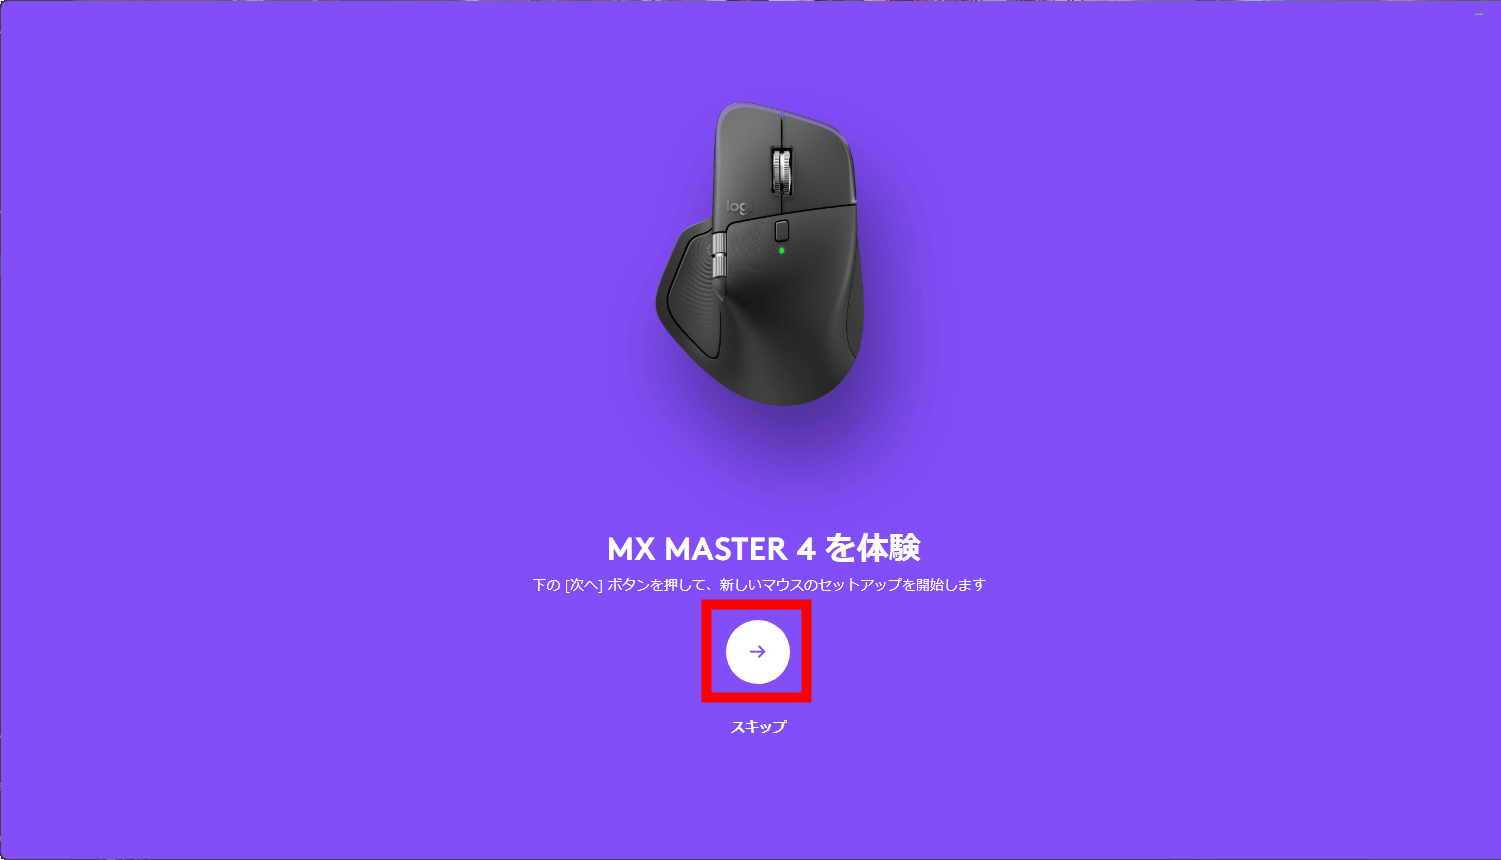
When setting up the MX Master 4, you'll be presented with a general guide to how to use it. Click the arrows to move through the pages.
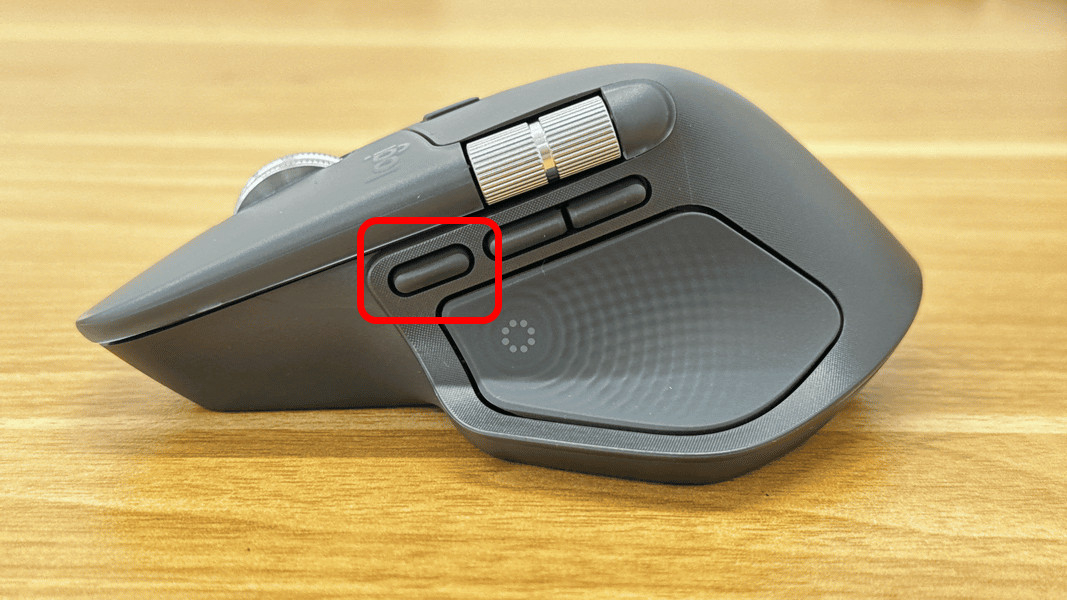
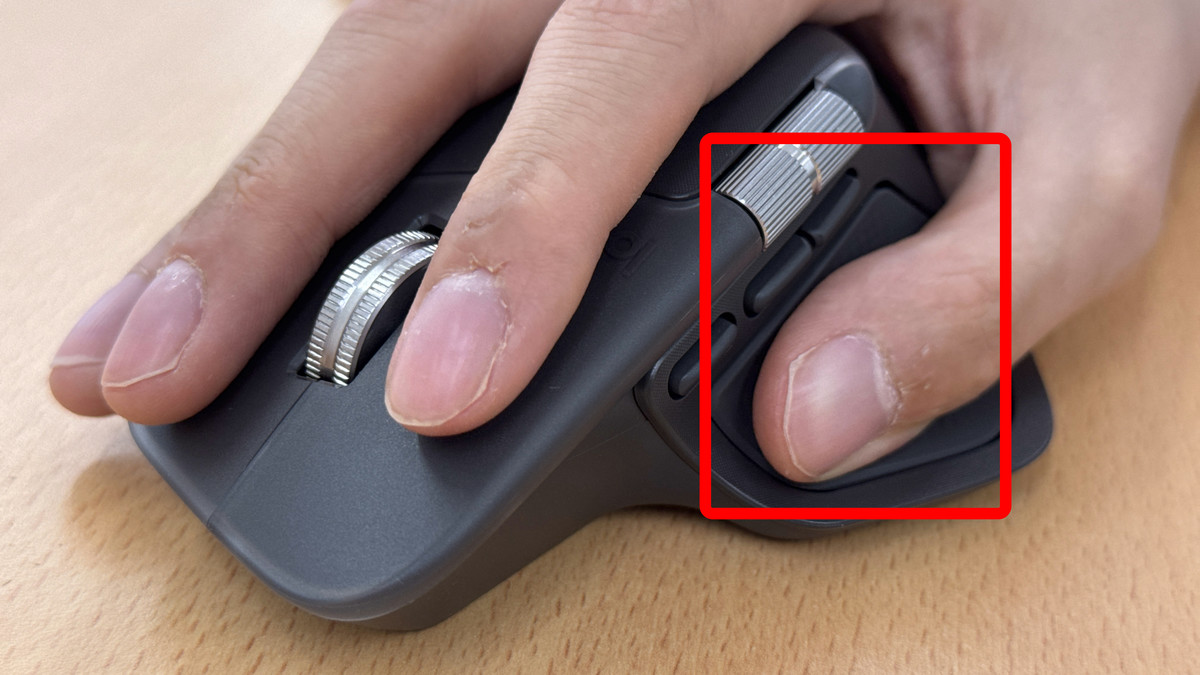
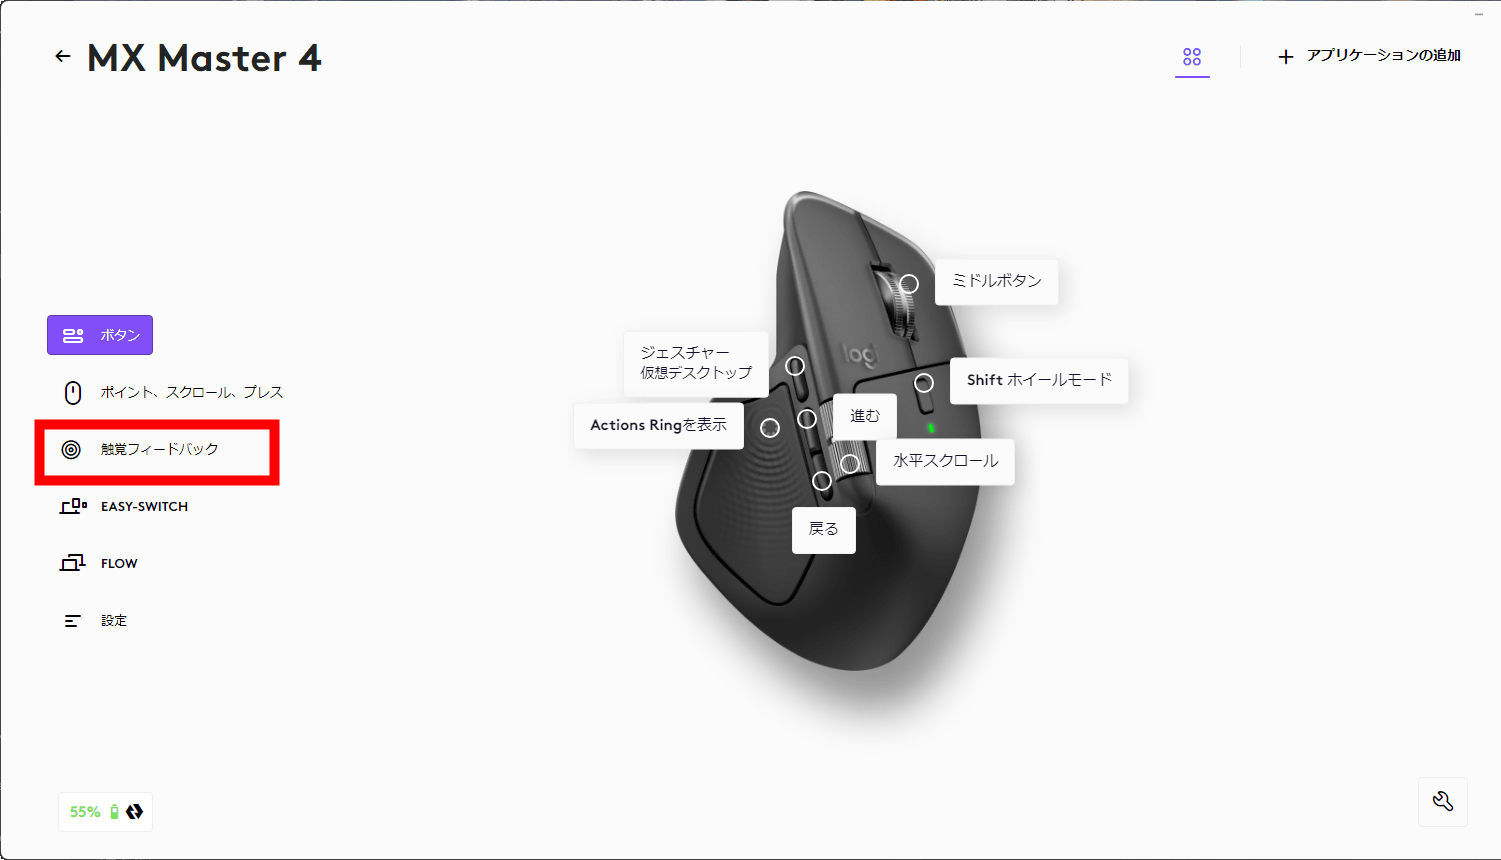
On the MX Master series, you could open virtual desktops or perform specific gesture actions by clicking the gesture button on the left side of the mouse and performing a gesture. Gesture actions and virtual desktops are still available on the MX Master 4, but the button has been moved to the side of the mouse.
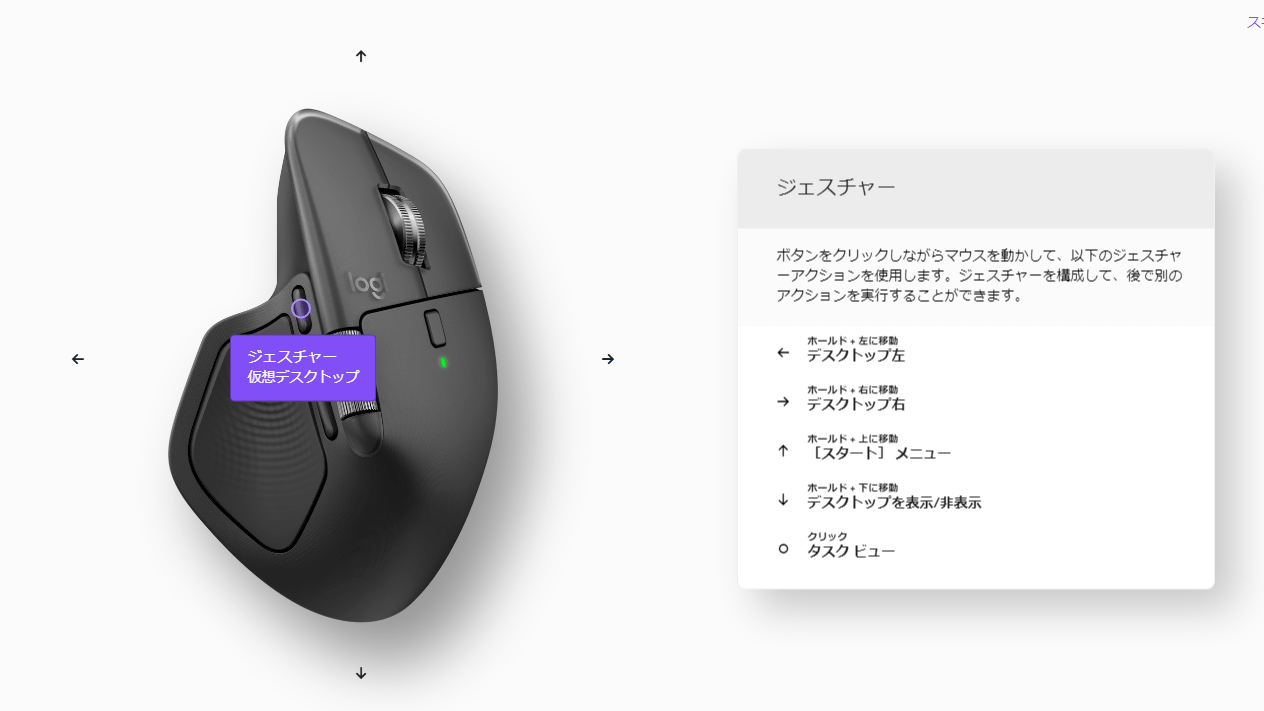
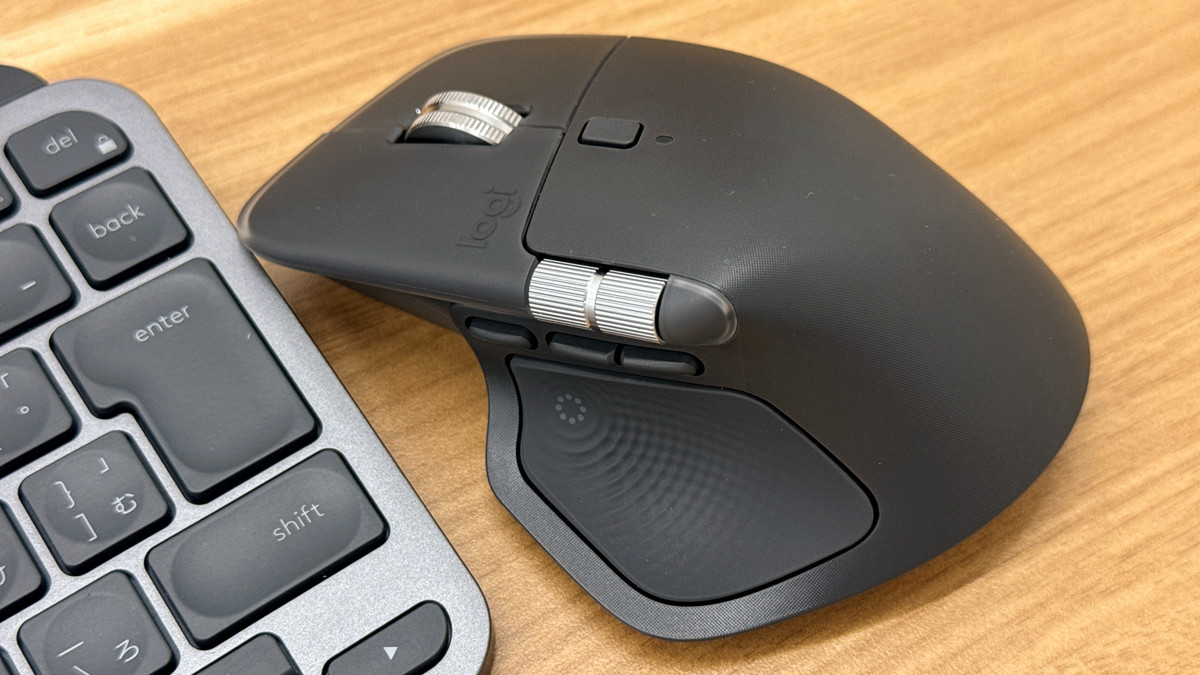
On the actual device, the gesture button is located in the red box below, and there are two side buttons to the right of it.
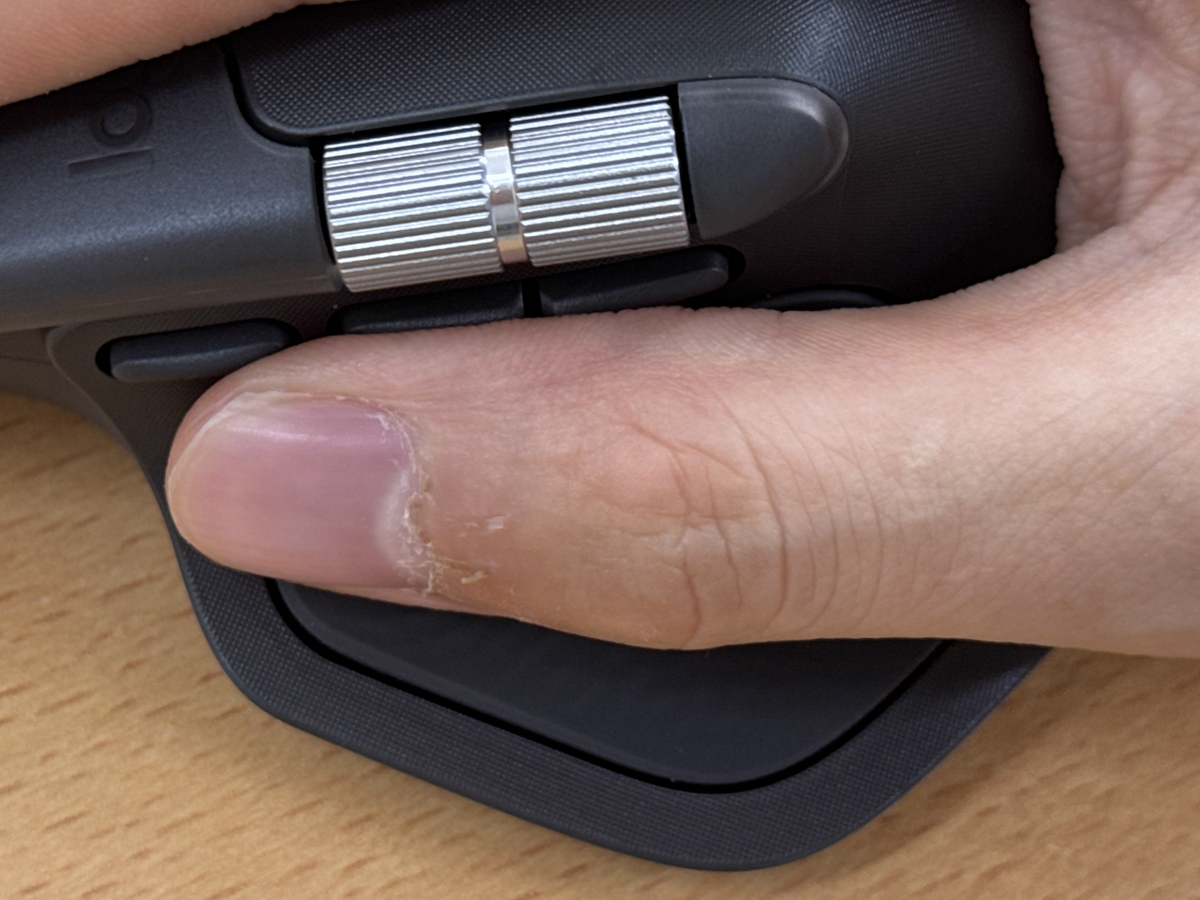
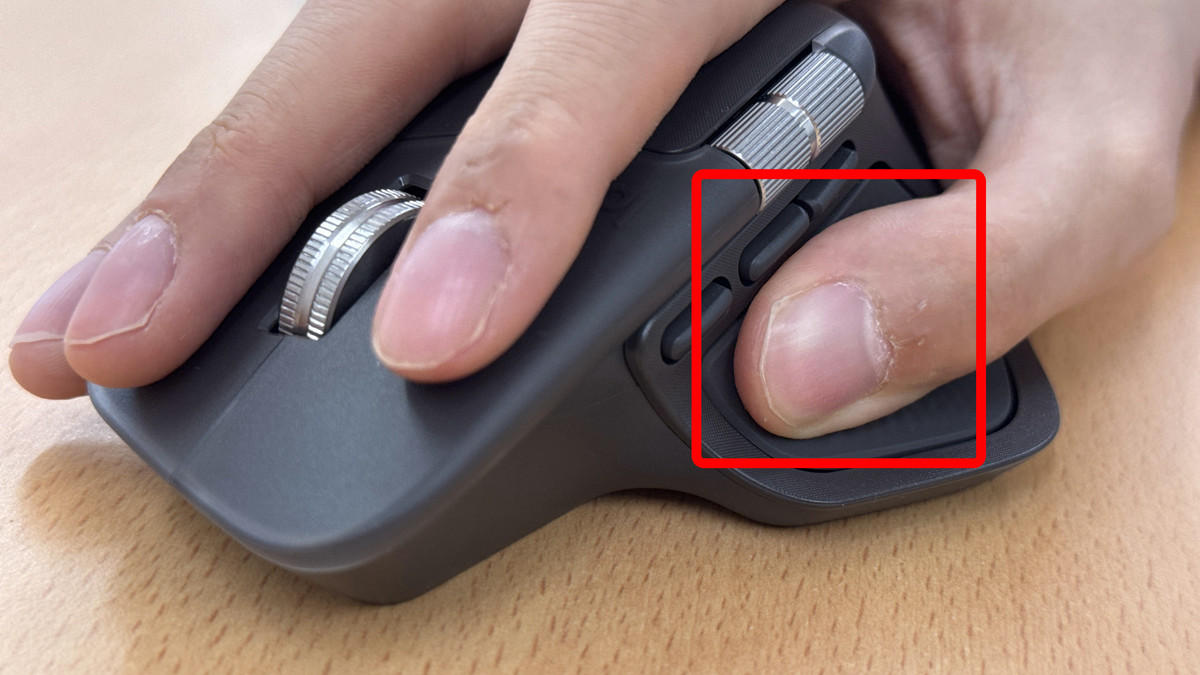
Another new feature added to the MX Master 4 is haptic feedback. When using the Actions Ring (described below) or certain software that supports plug-ins, you'll feel a vibration in your thumb.

By the way, the tactile sensor panel that gives tactile feedback on the MX Master 4 is located in the thumb area below. This is where the gesture button was located on the previous model. As the name suggests, it provides 'tactile feedback,' and the vibrations are quite subtle.
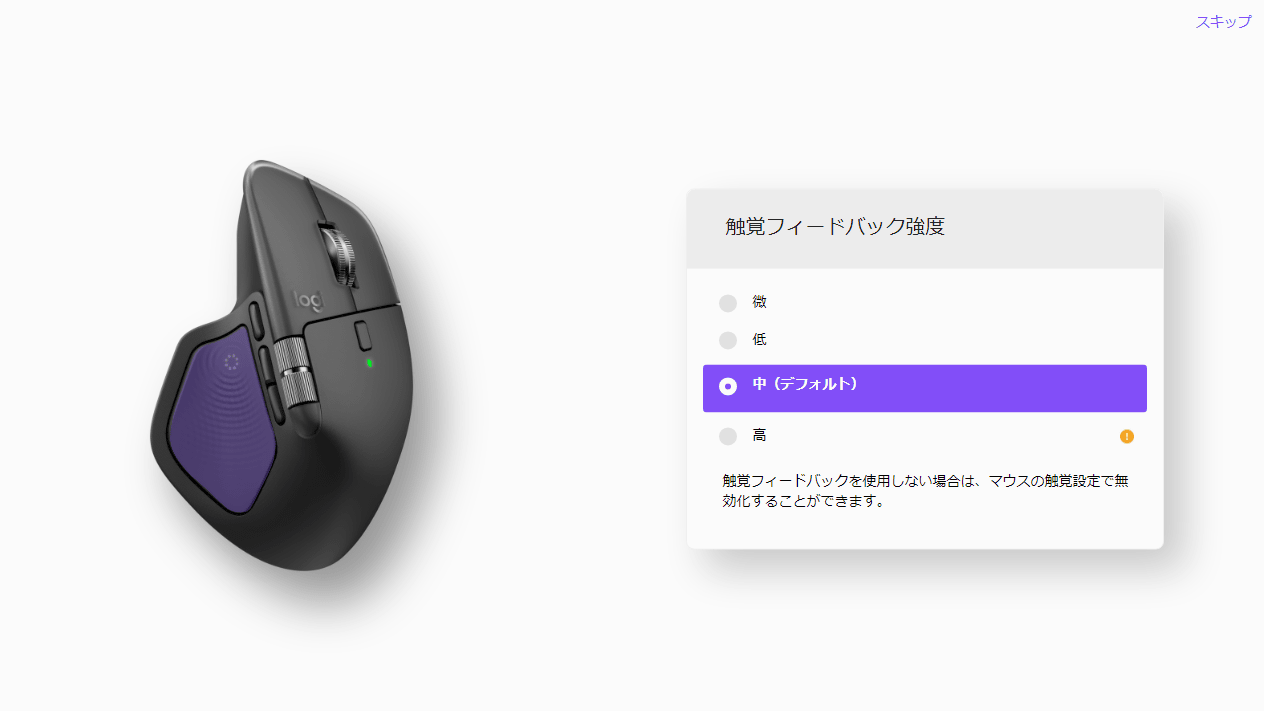
The strength of the haptic feedback can be adjusted in four levels.
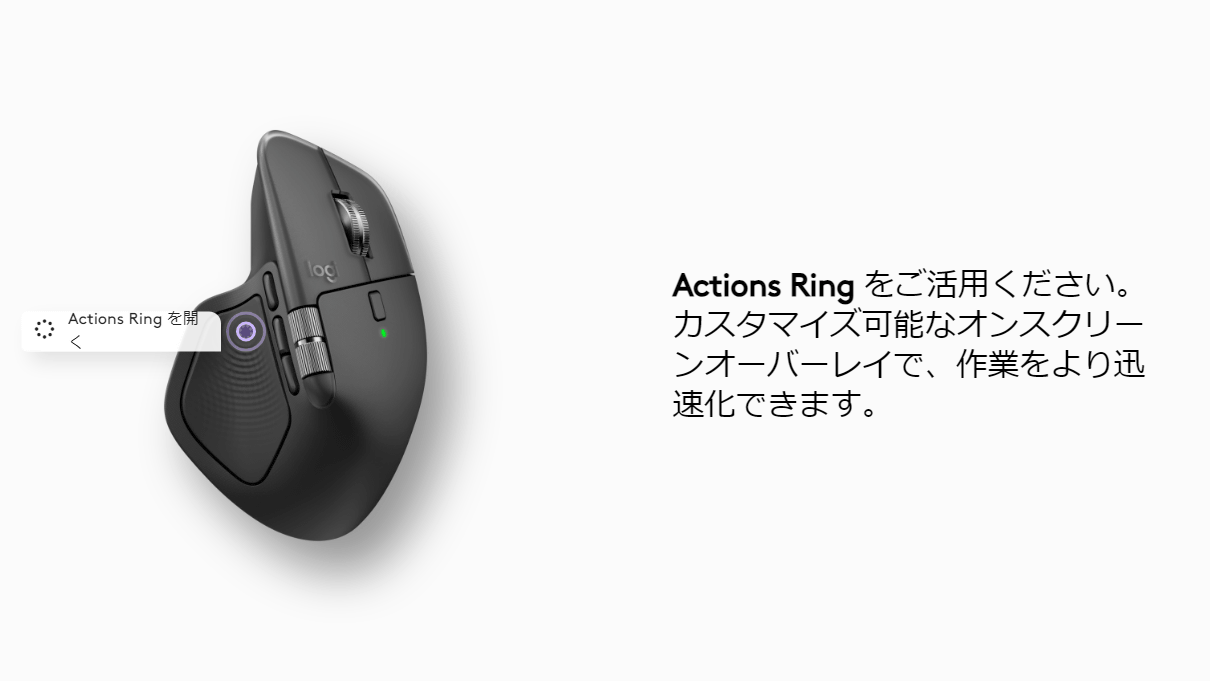
The Actions Ring is an on-screen shortcut overlay that lets you launch apps, navigate, access files, and more with just your mouse. Click the arrow to complete the tutorial.
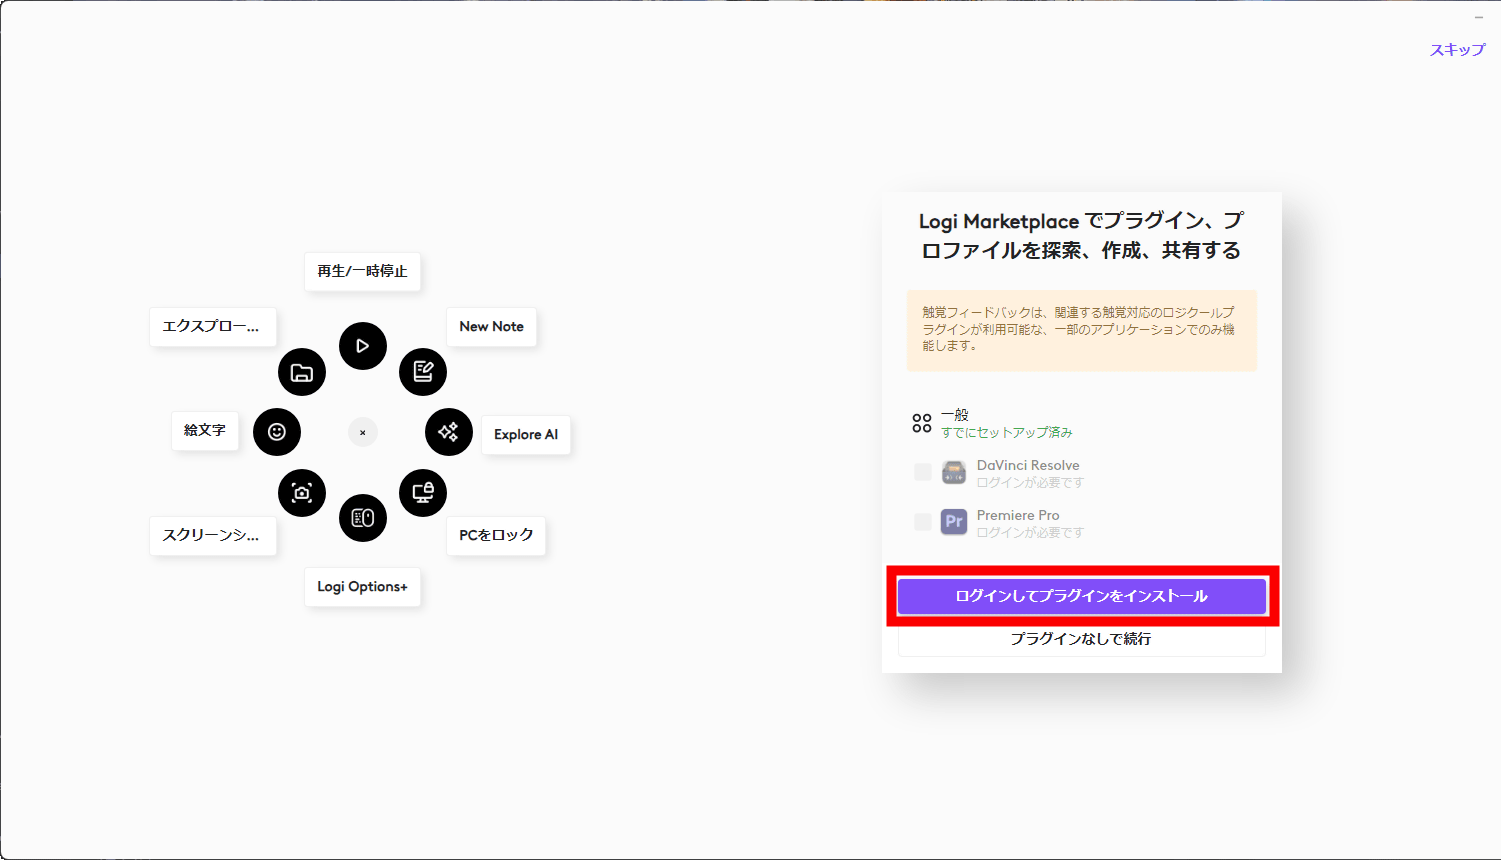
You can customize the Actions Ring yourself and set it for each application. Some applications are already shared on Logitech's plug-in distribution platform, Logi Marketplace, and can be installed along with the applications installed on your PC. In this case, I was able to install the Actions Ring for Davinci Resolve and Adobe Premiere Pro, so I clicked 'Log in and install plugins.' Note that you will need to register
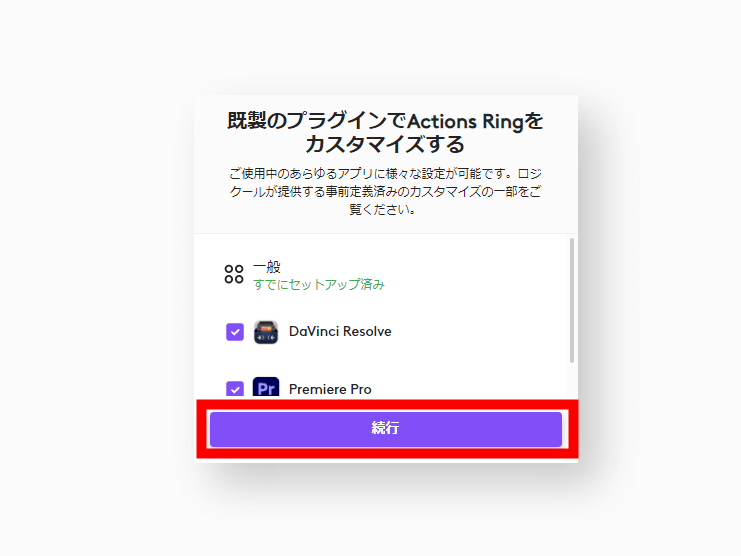
Click 'Continue'.
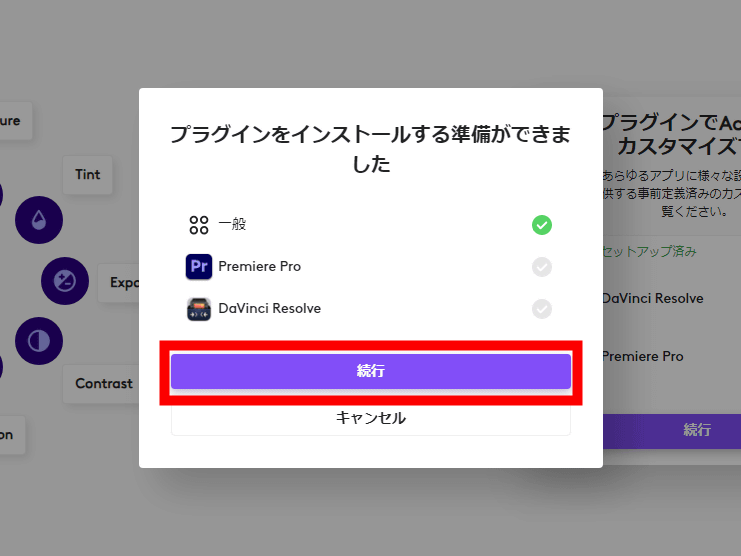
It says you're ready to install, so click 'Continue.'
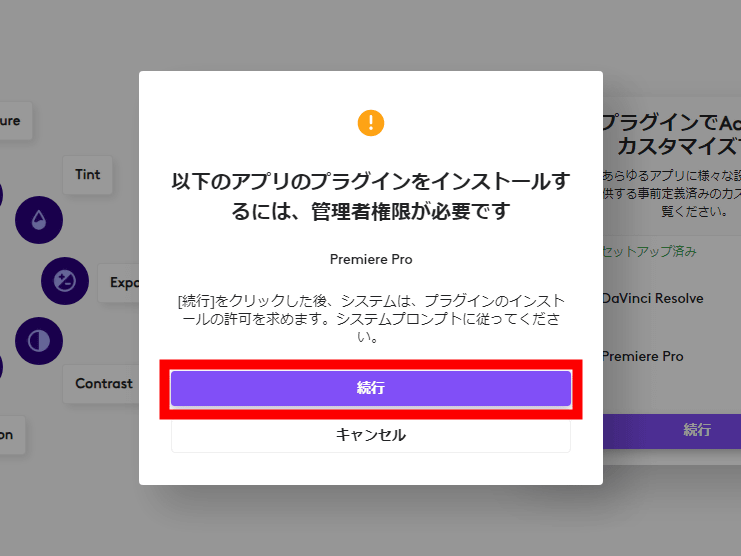
Some applications, such as Premiere Pro, require administrator privileges. Click 'Continue.'
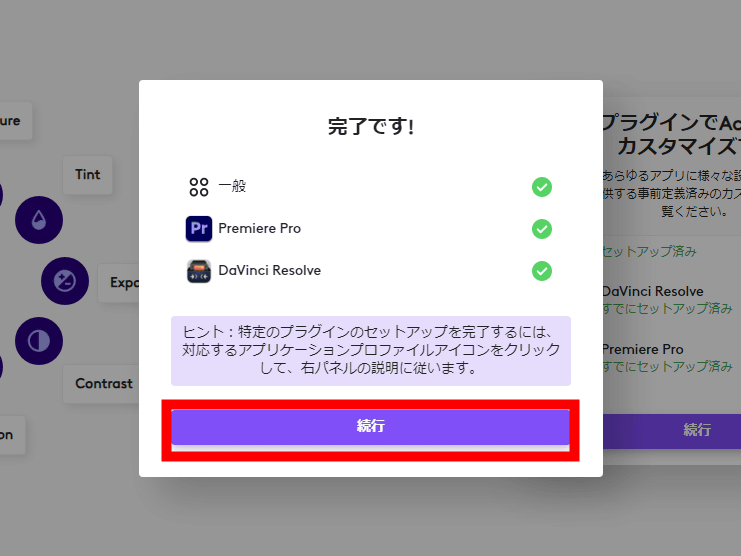
Once the installation is complete, click 'Continue.'
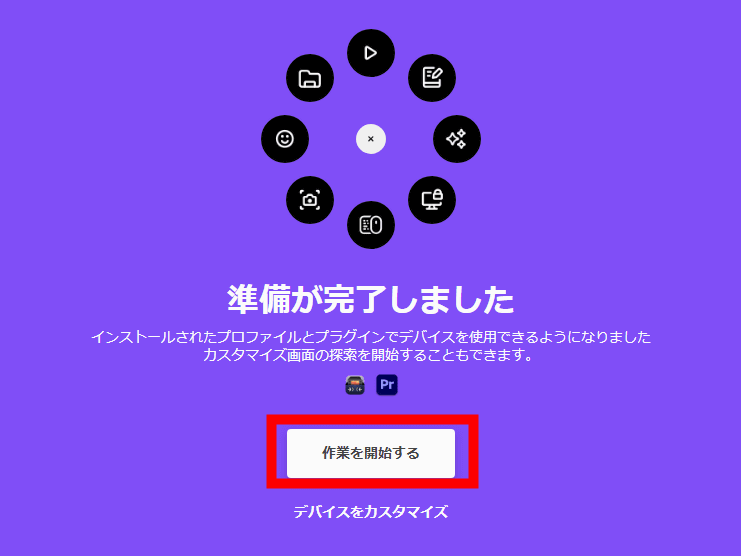
The setup is now complete. Click 'Get started.'
◆Check out the feel and usability of the MX Master 4
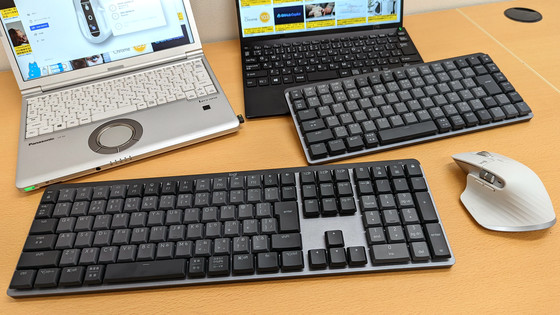
Below is a comparison of
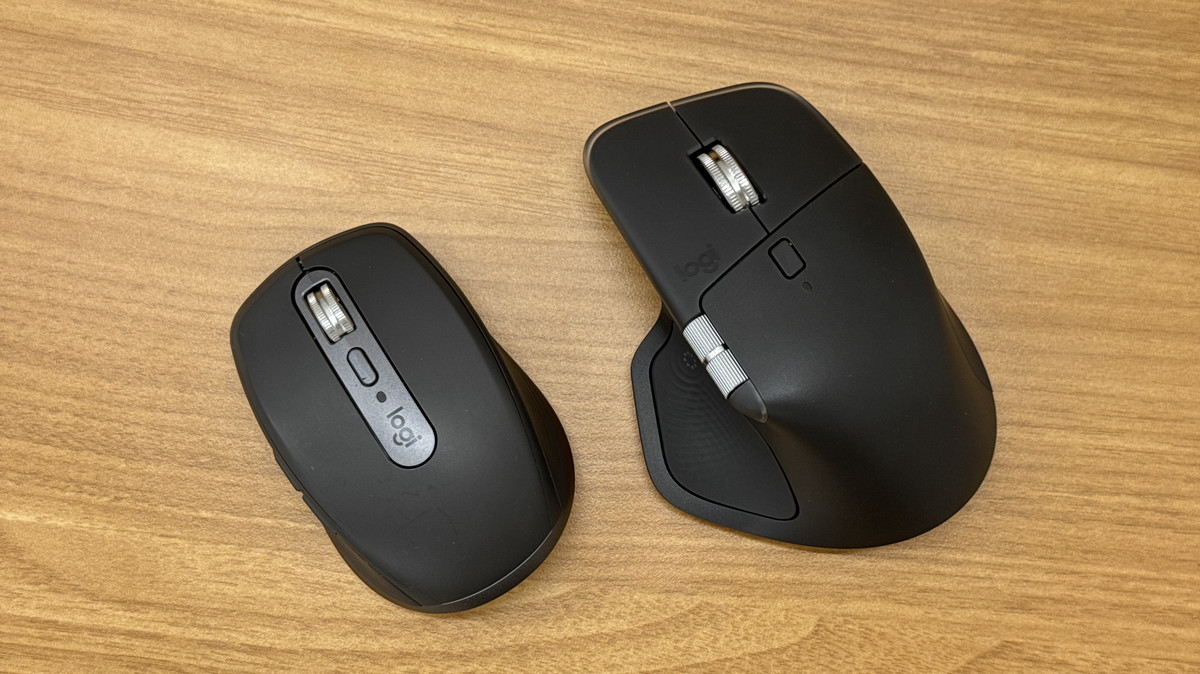
Because of its size, the MX Anywhere 3 is held like a mouse with your fingers.

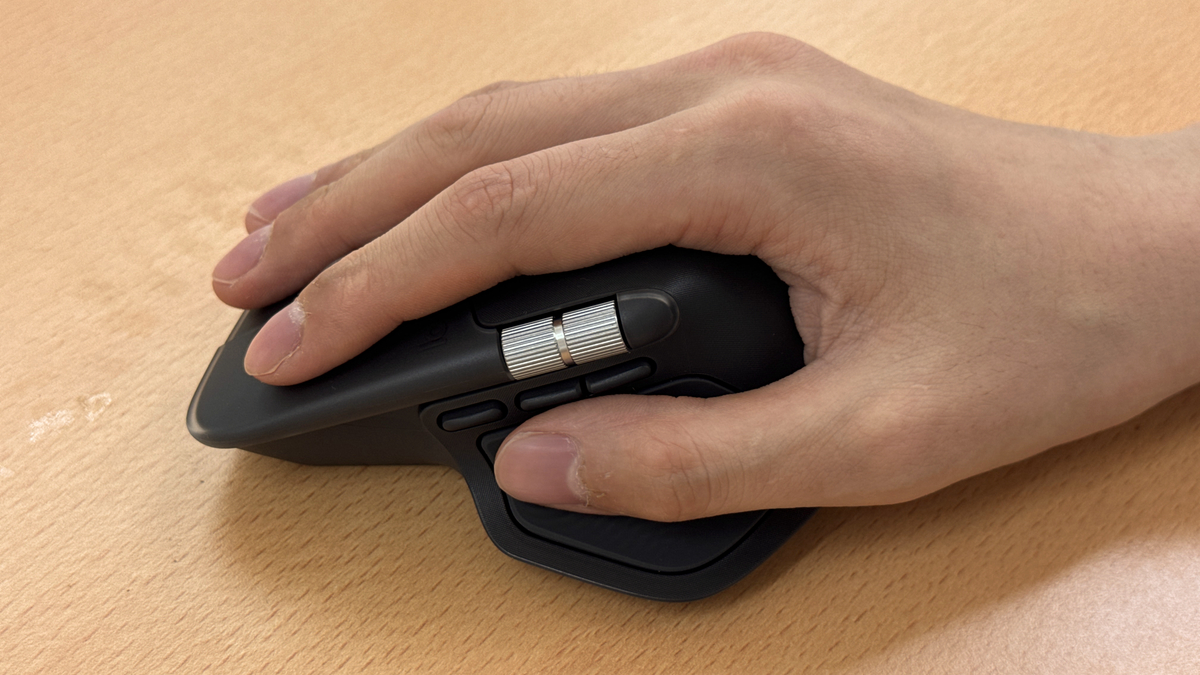
In contrast, the MX Master 4 is held firmly in the palm of your hand and moves around your wrist, which is placed on the desk. If you use the mouse with the weight of your hand, the MX Master 4 may be more comfortable.
When we asked an editorial staff member who always uses the original MX Master to try it out, he said that the back of the mouse is slightly more inclined, giving the mouse a firmer feel in the palm of your hand. The MX Master 4 uses a plastic material instead of silicone in the area that touches the palm, which tends to sweat. It feels a little smoother than previous models, but it's not difficult to hold. It also seems less susceptible to hydrolysis.
Although the MX Master 4 has a larger sole area than the previous model, when you actually move it, there is no particular feeling of catching, and it can be operated smoothly.

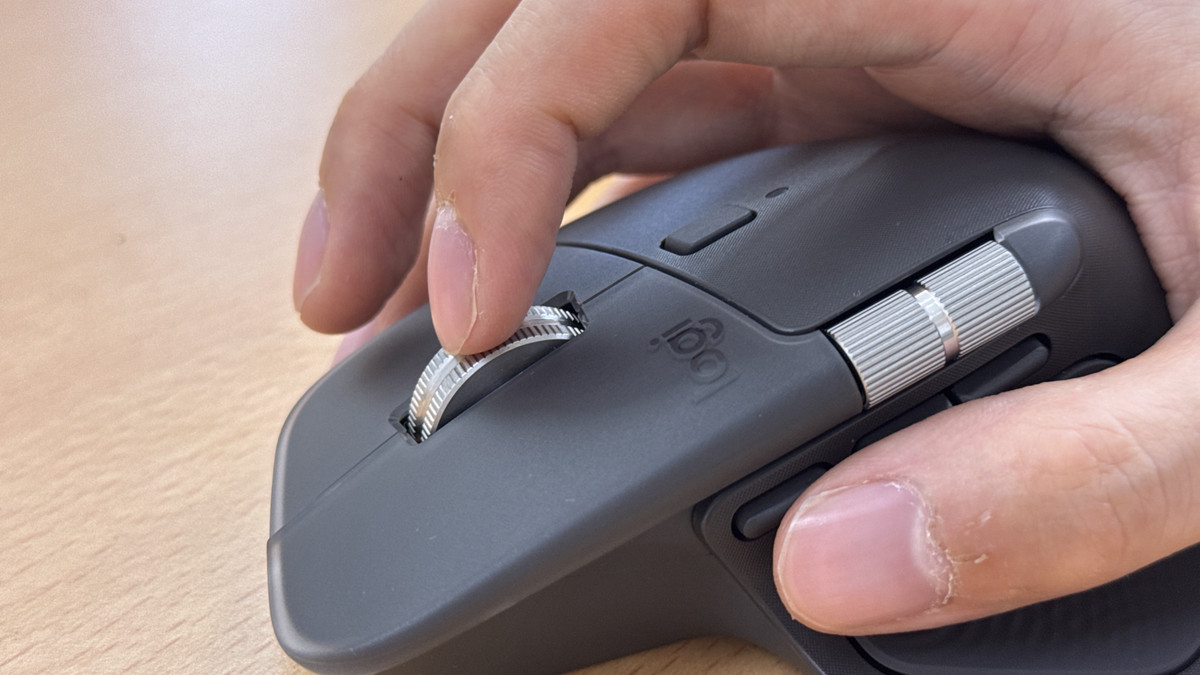
The mouse click is noticeably quieter than the previous model. The click also feels softer. However, one editorial staff member using the original MX Master commented, 'It's noticeably quieter, but it still doesn't feel right without that solid click and sound.' Also, the left click button has been extended slightly forward compared to the previous model, so it feels like your index finger can rest more naturally on it.
Below is a movie comparing the click sound with the previous model MX Master 3s.
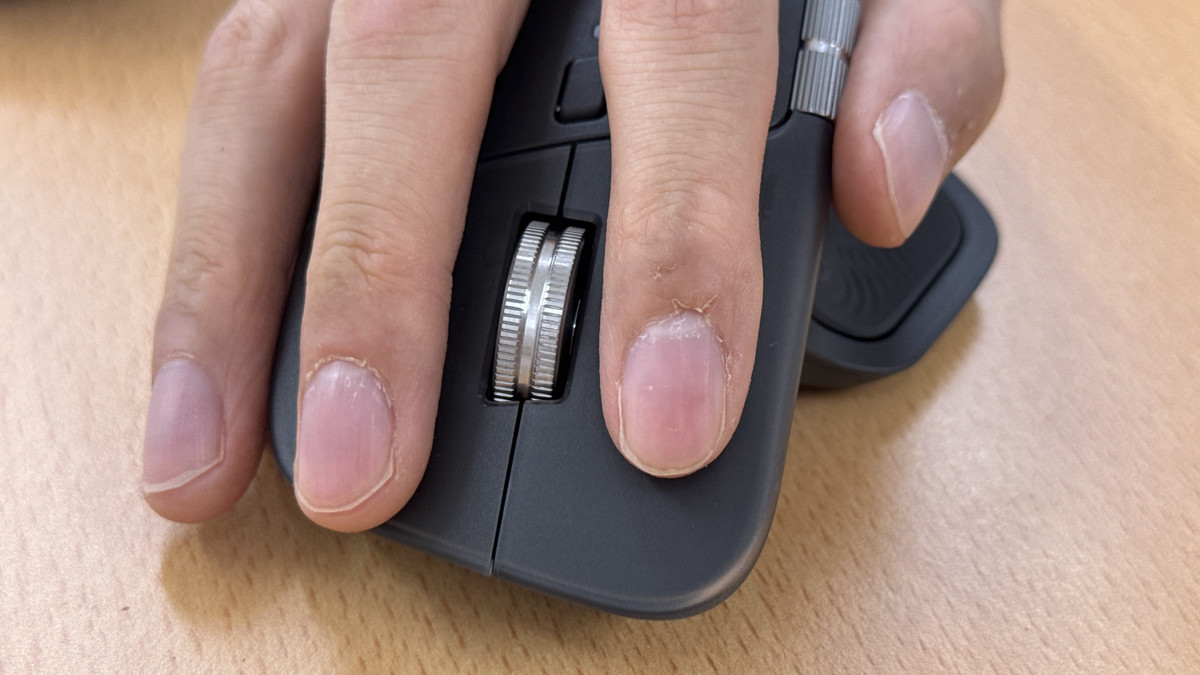
The center wheel was also smooth and easy to operate.
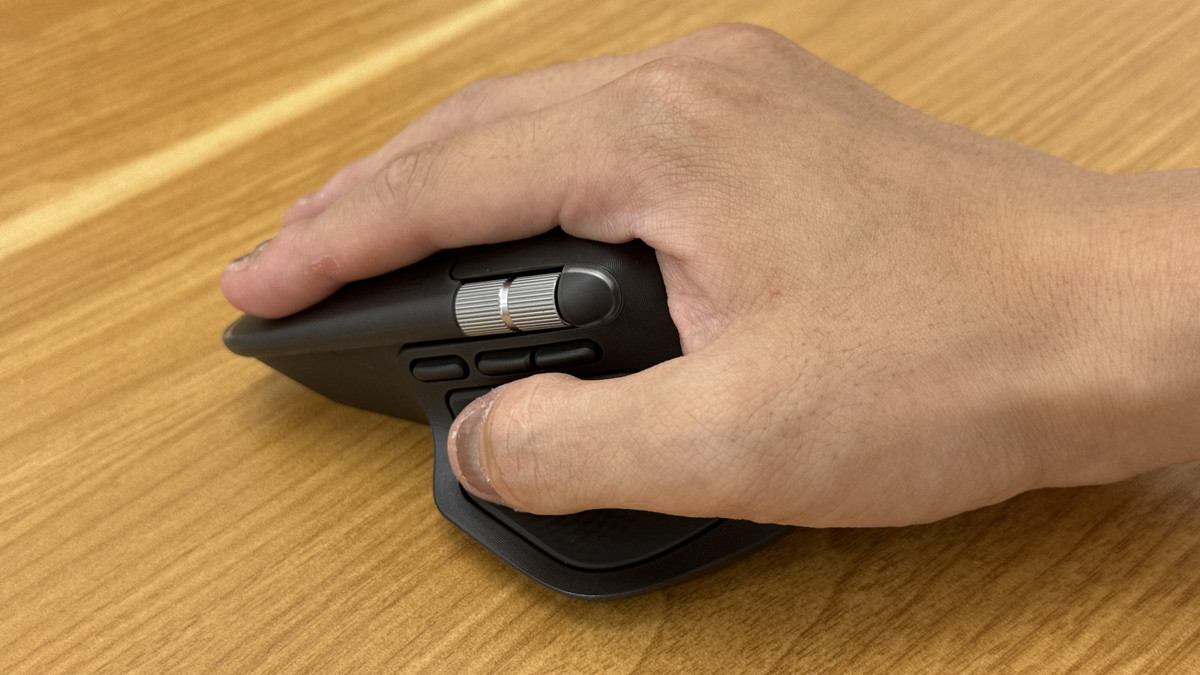
Unlike the previous model, the thumb wheel is designed to protrude from the side, making it easier to operate.
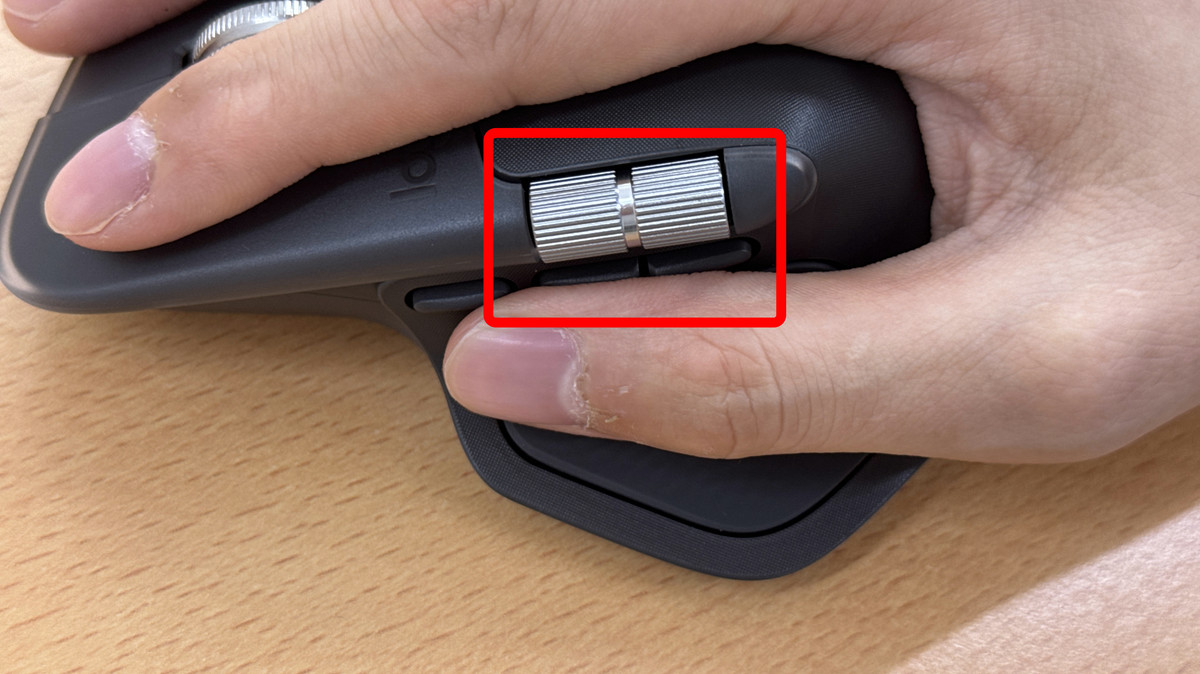
Previous models had a gesture button where your thumb would rest, but the MX Master 4 has been replaced with a tactile sensor panel, moving the gesture button to the left side of the mouse, below the thumb wheel. This means the number of buttons operated with your thumb has gone from two to three. On previous models, you had to press two side buttons separately with the tip and pad of your thumb, but with the MX Master 4, you either have to press both the gesture button and the two side buttons separately with the tip of your thumb, or you have to remove the gesture button from the home position and always place your finger on the side button to press them separately. The operation feel is slightly different, so it may feel a little strange for those who have used the previous MX Master series.
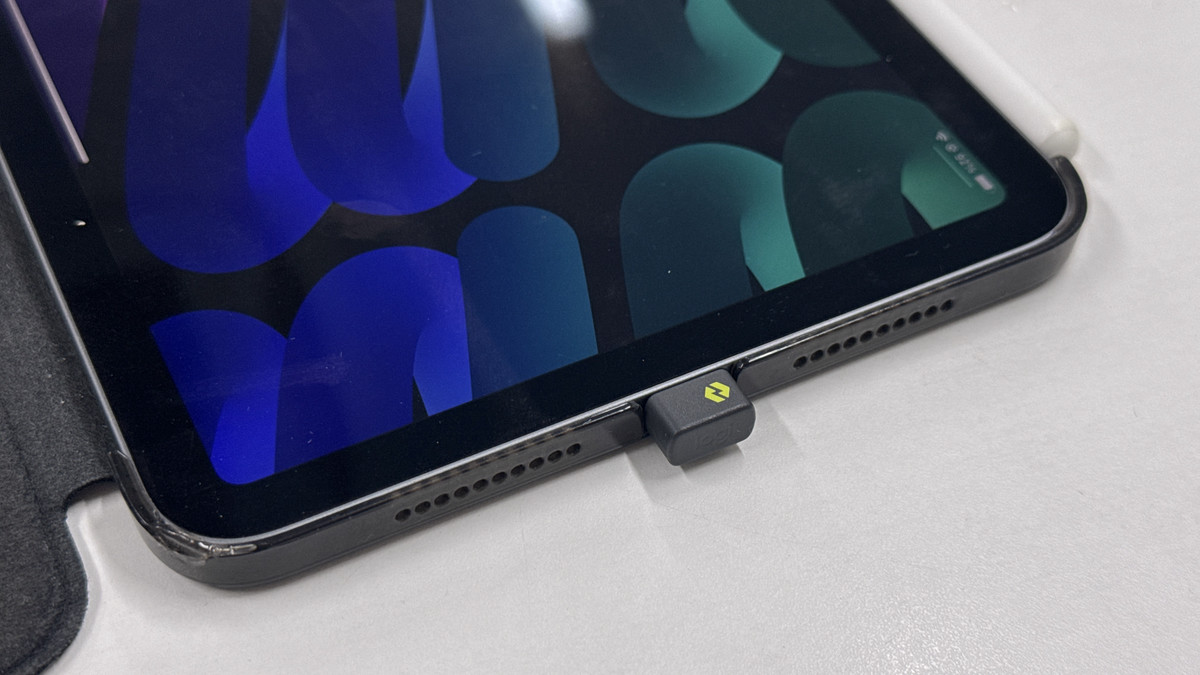
In addition, the Logi Bolt receiver included with the MX Master 4 is now USB-C compatible, meaning you can now connect devices such as the MX Master 4 to devices that only have a USB-C port, such as an iPad or laptop, via Logi Bolt.
◆Setting up the new feature 'Actions Ring' from MX Master 4
The biggest improvement in the MX Master 4 is its support for the Actions Ring. The Actions Ring is a visual representation of Logitech's macro registration function,
To use the Actions Ring, simply press the tactile sensor panel. While the gesture buttons on the previous model required you to press them from top to bottom with your thumb, the new tactile sensor panel responds from the sides to the bottom of the mouse, so you can press it from the top or from the side as if you were gripping the mouse.
Here's how to actually use Actions Ring: By clicking the ring-shaped icon that appears on the screen, you can launch a browser, launch Explorer, or perform a series of tasks, such as 'launching a browser and having ChatGPT think about the message text for the keywords you're copying.'
When you use the cursor to move the Actions Ring that appears on this screen, the tactile sensor panel of the mouse vibrates each time you select an action. When you actually touch it, it feels more like a bouncy sensation than a strong vibration. This tactile feedback has a variety of patterns, and you can customize it yourself.
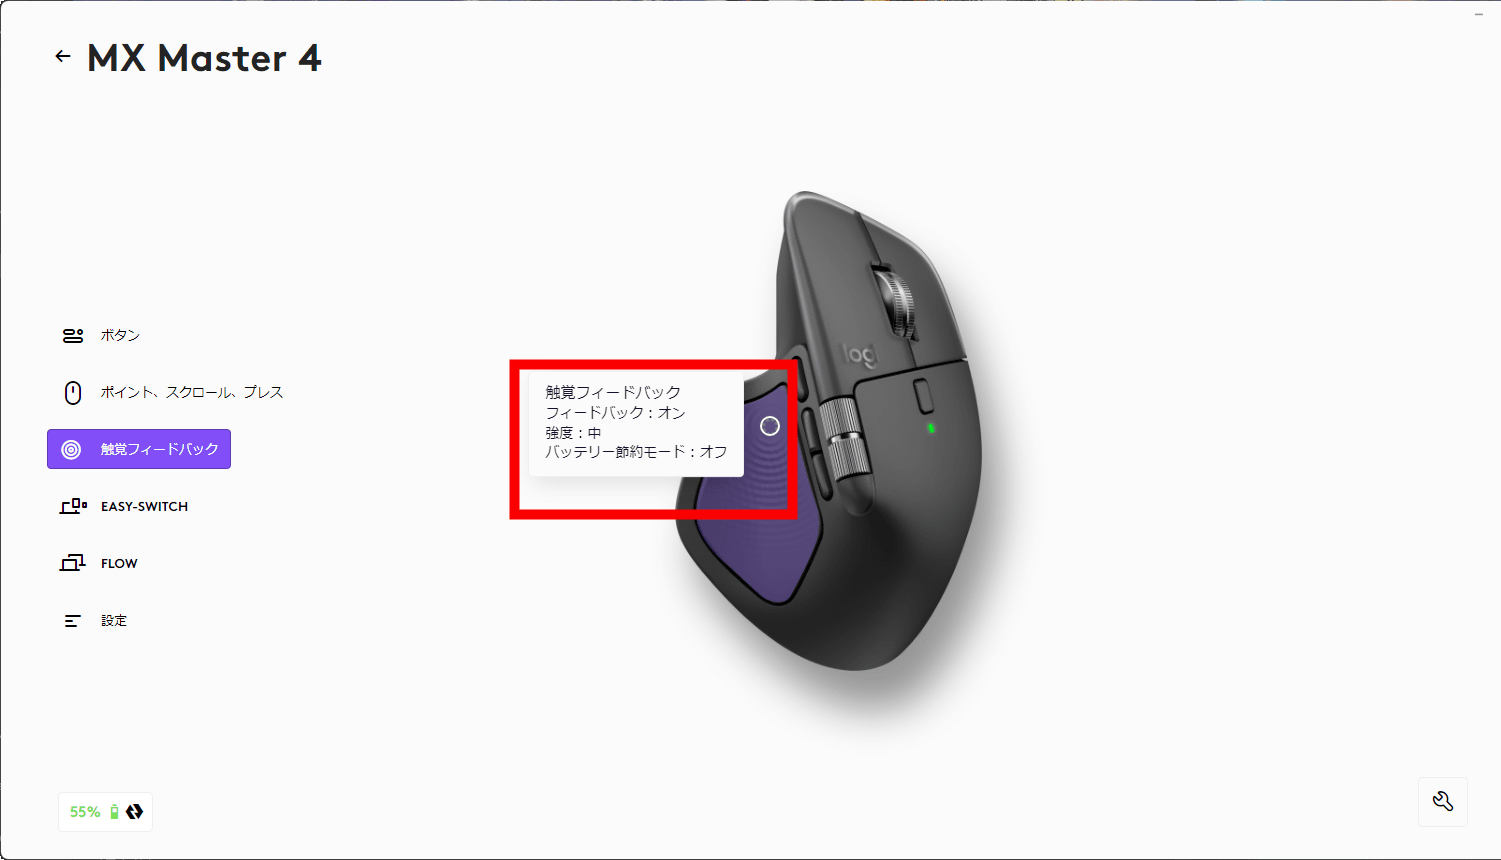
The Actions Ring can be customized in Logi Options+. From the Logi Options+ screen, select MX Master 4.
Select Haptic Feedback.
Click on the tactile sensor panel of the MX Master 4.
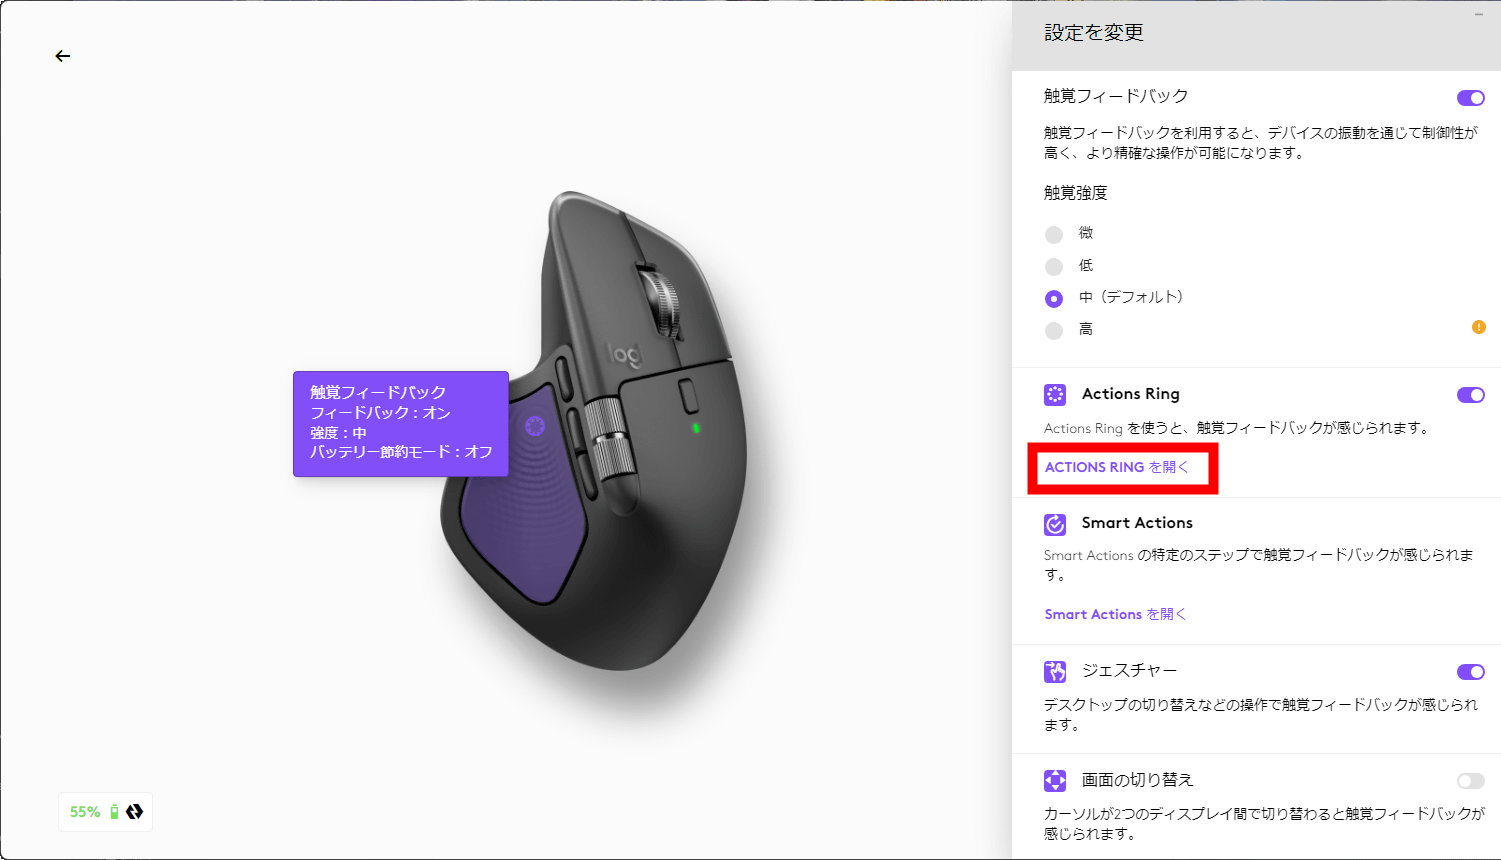
Click 'Open Actions Ring' under 'Actions Ring.'
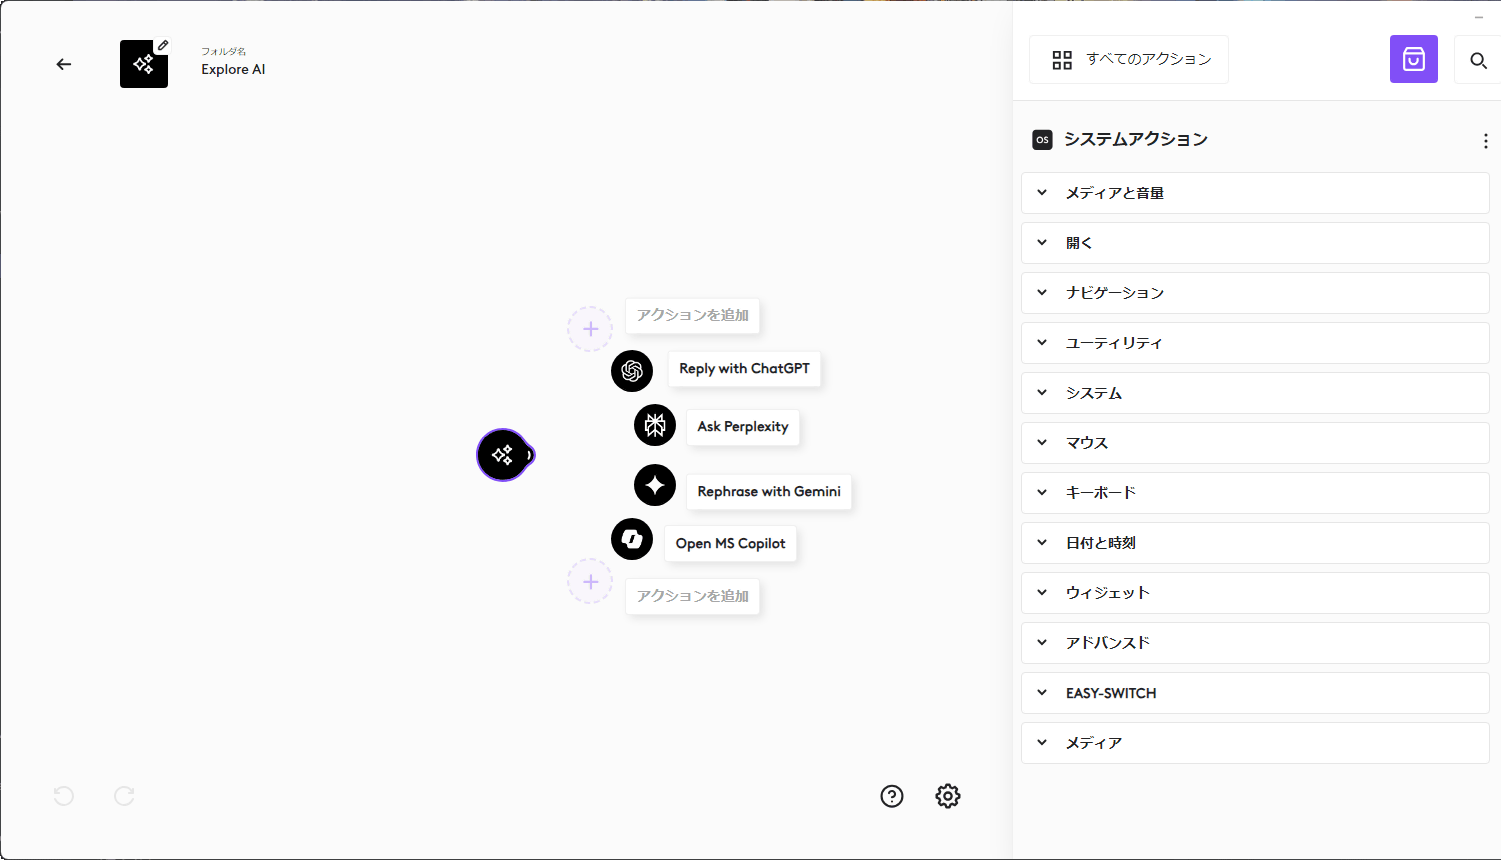
This is the Actions Ring, which has eight different actions. For example, click 'Explore AI' on the right.
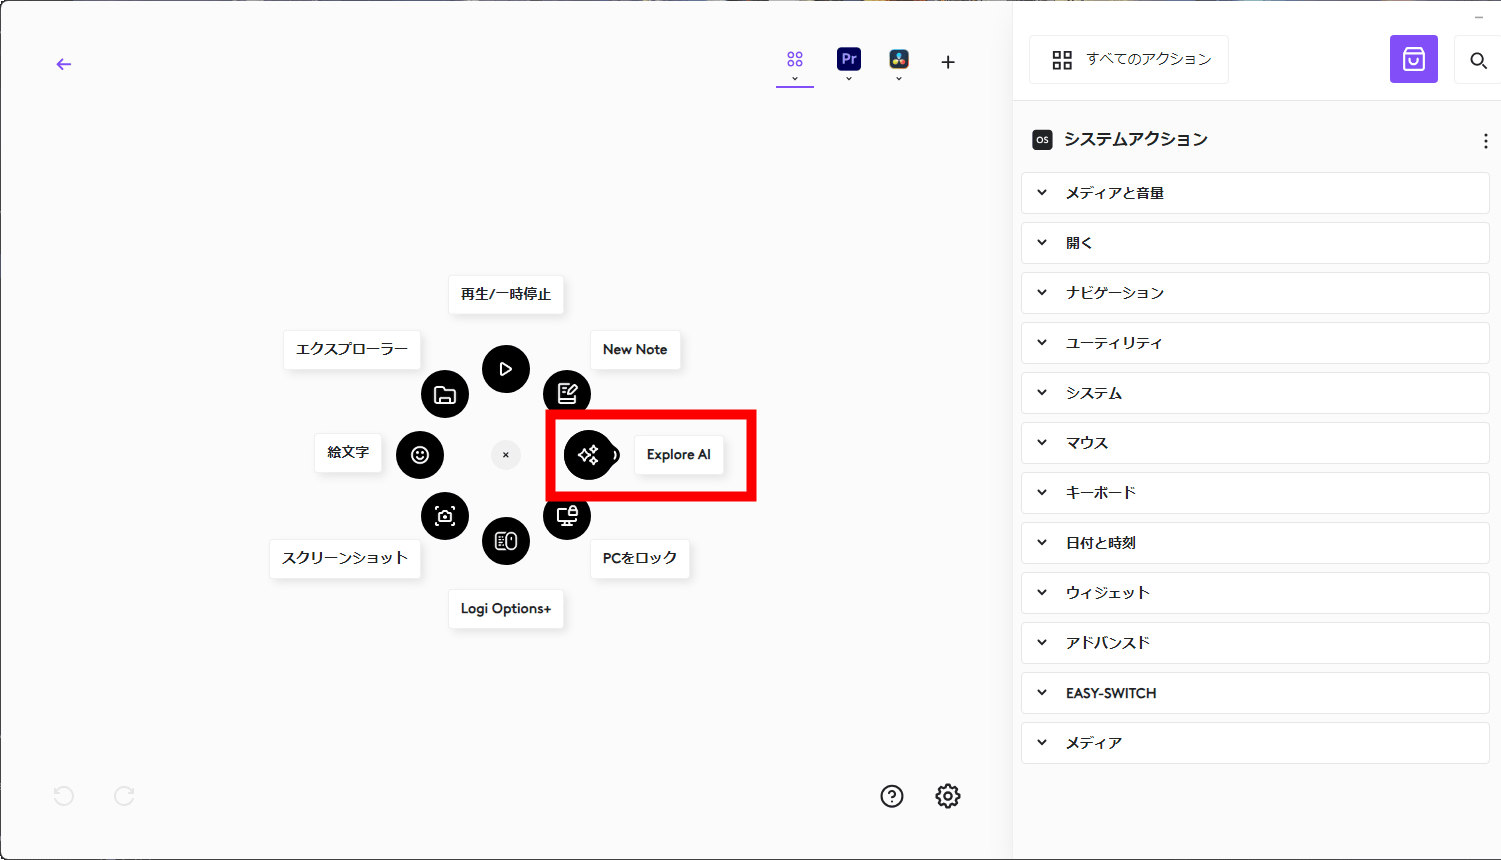
This 'Explore AI' is a folder that expands when clicked, allowing you to select four actions: 'Reply with ChatGPT,' 'Ask Perplexity,' 'Rephrase with Gemini,' and 'Open MS Copilot.' Up to nine actions can be set in a folder. The Actions Ring can determine actions in eight directions, so a total of 72 actions can be registered.
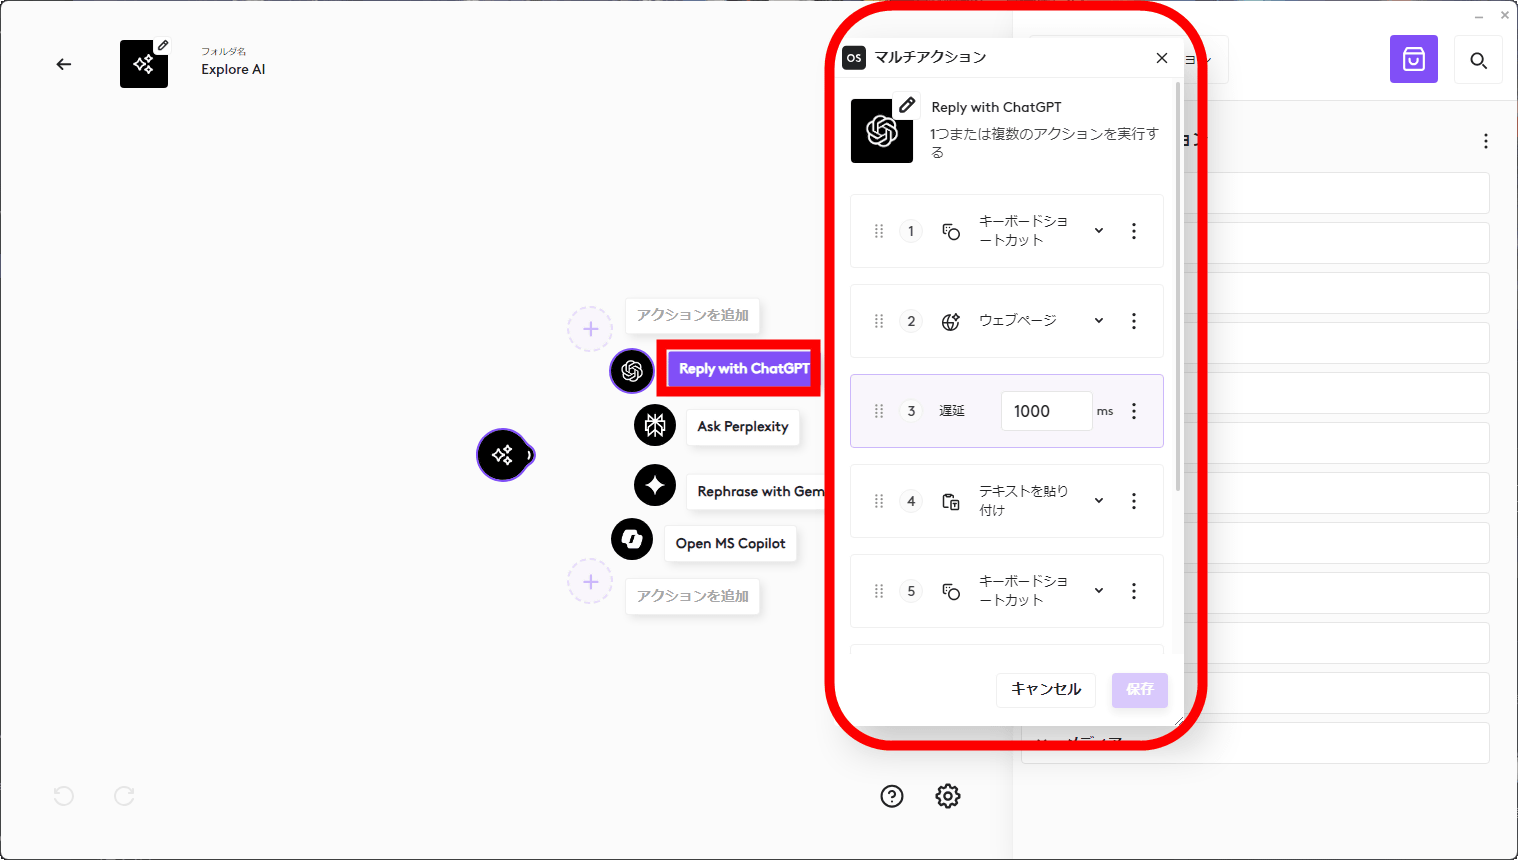
'Reply with ChatGPT' is a multi-action feature, and the entire process of launching ChatGPT, pasting text, and sending is built as a macro, as shown below.
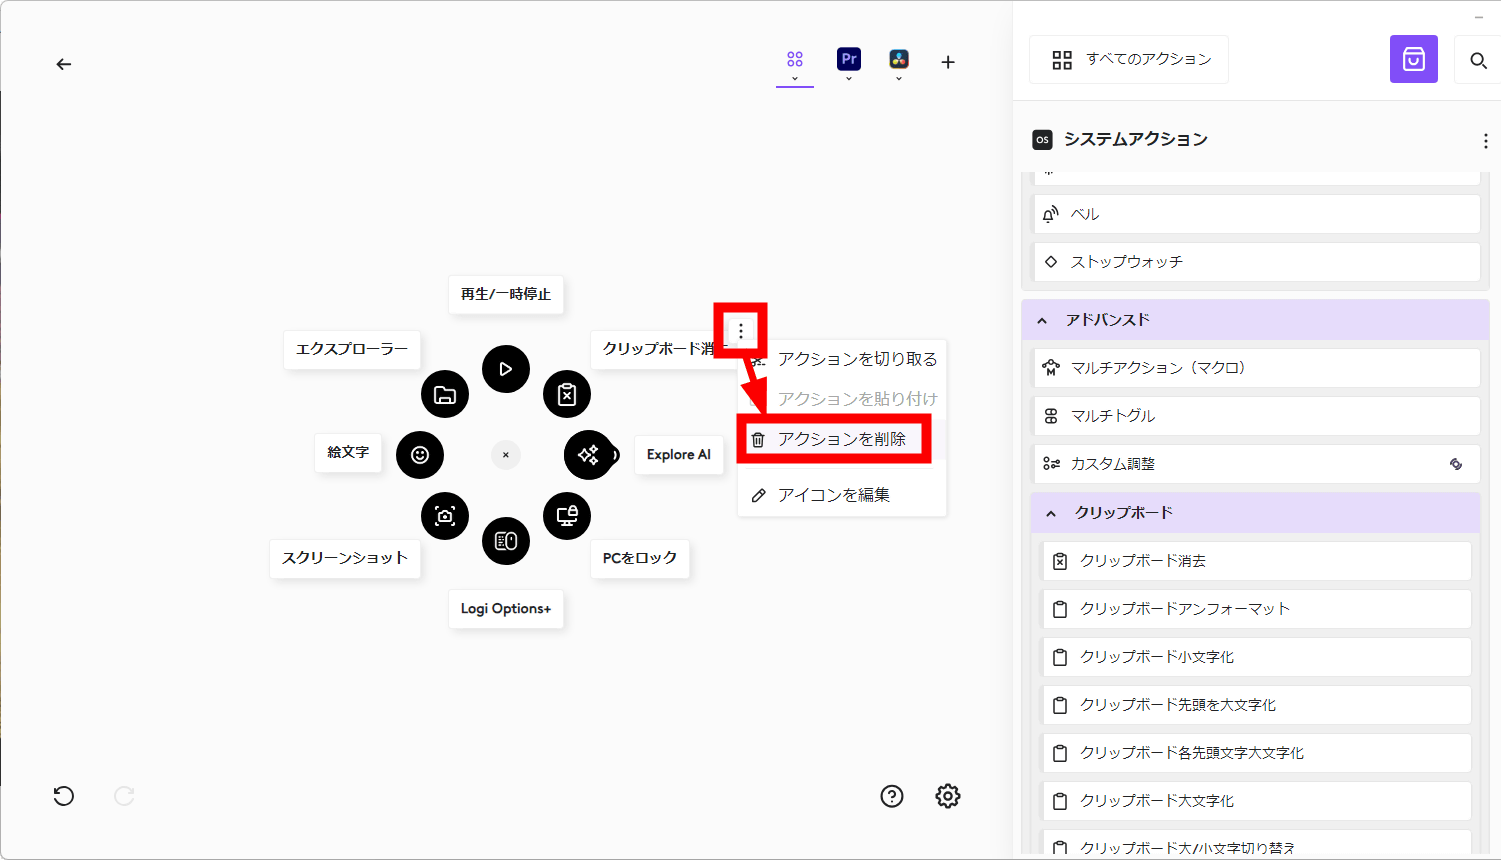
You can customize the actions to your liking, and you can remove any action by clicking the kebab icon and selecting 'Remove Action.'
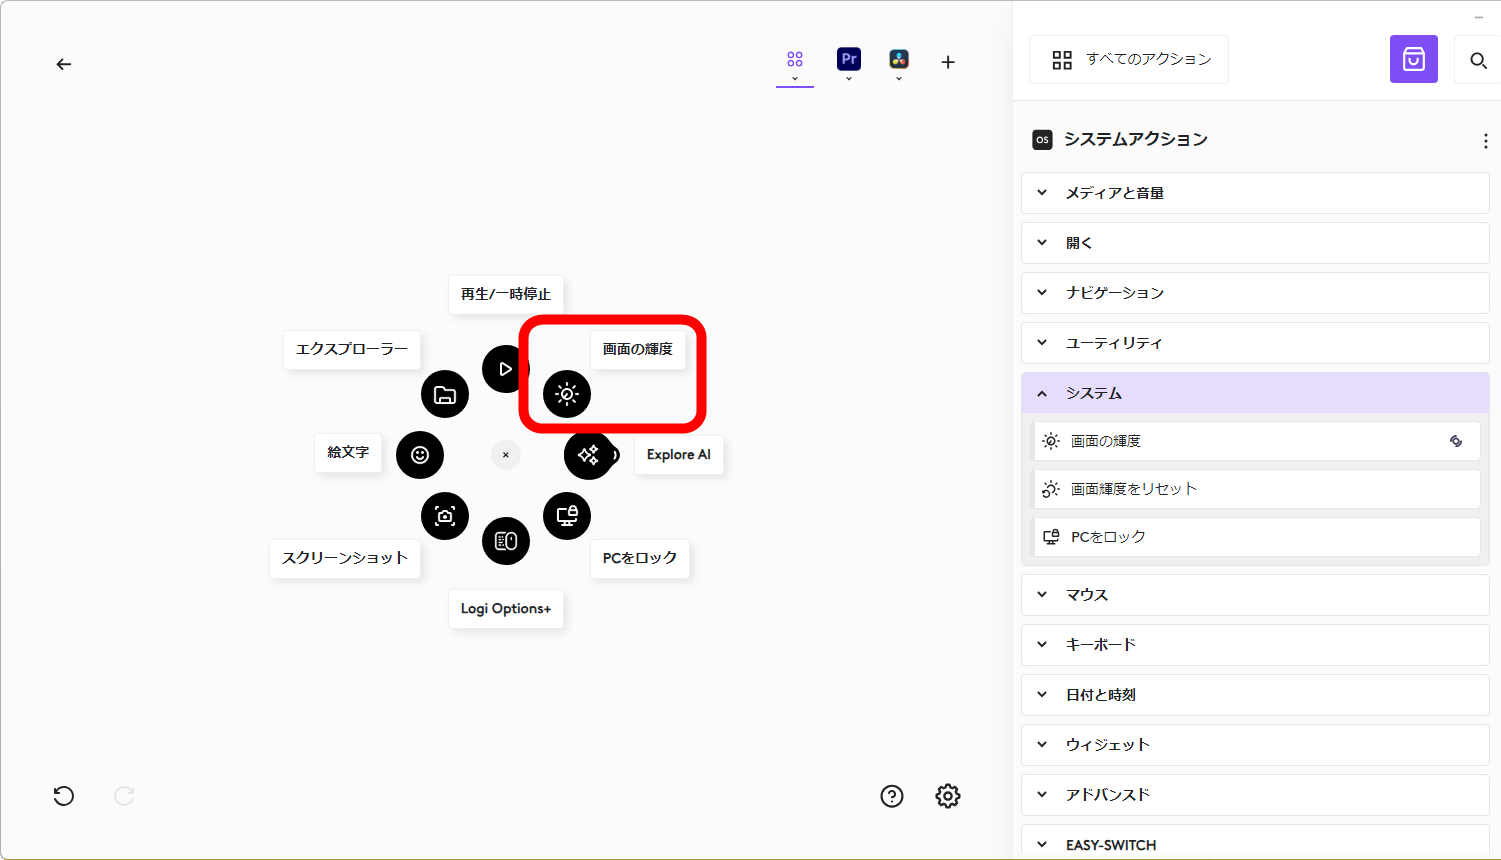
This time, we'll register the 'Screen Brightness' adjustment in the Actions Ring. Click 'Add Action' in the empty space and select 'Screen Brightness' from the system actions on the right side of the screen.
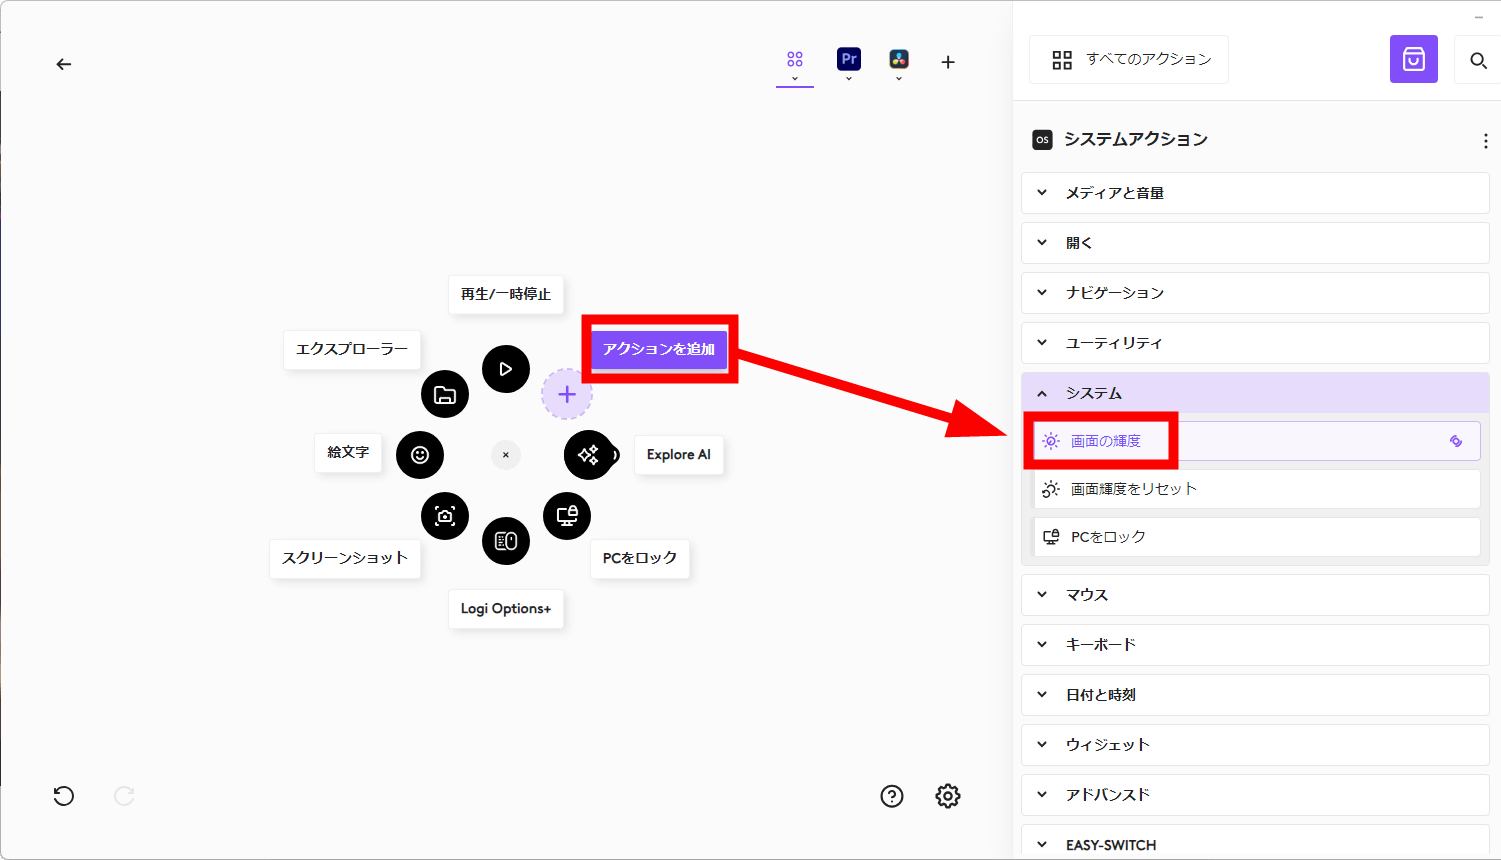
Then, I was able to set the 'screen brightness' like this.
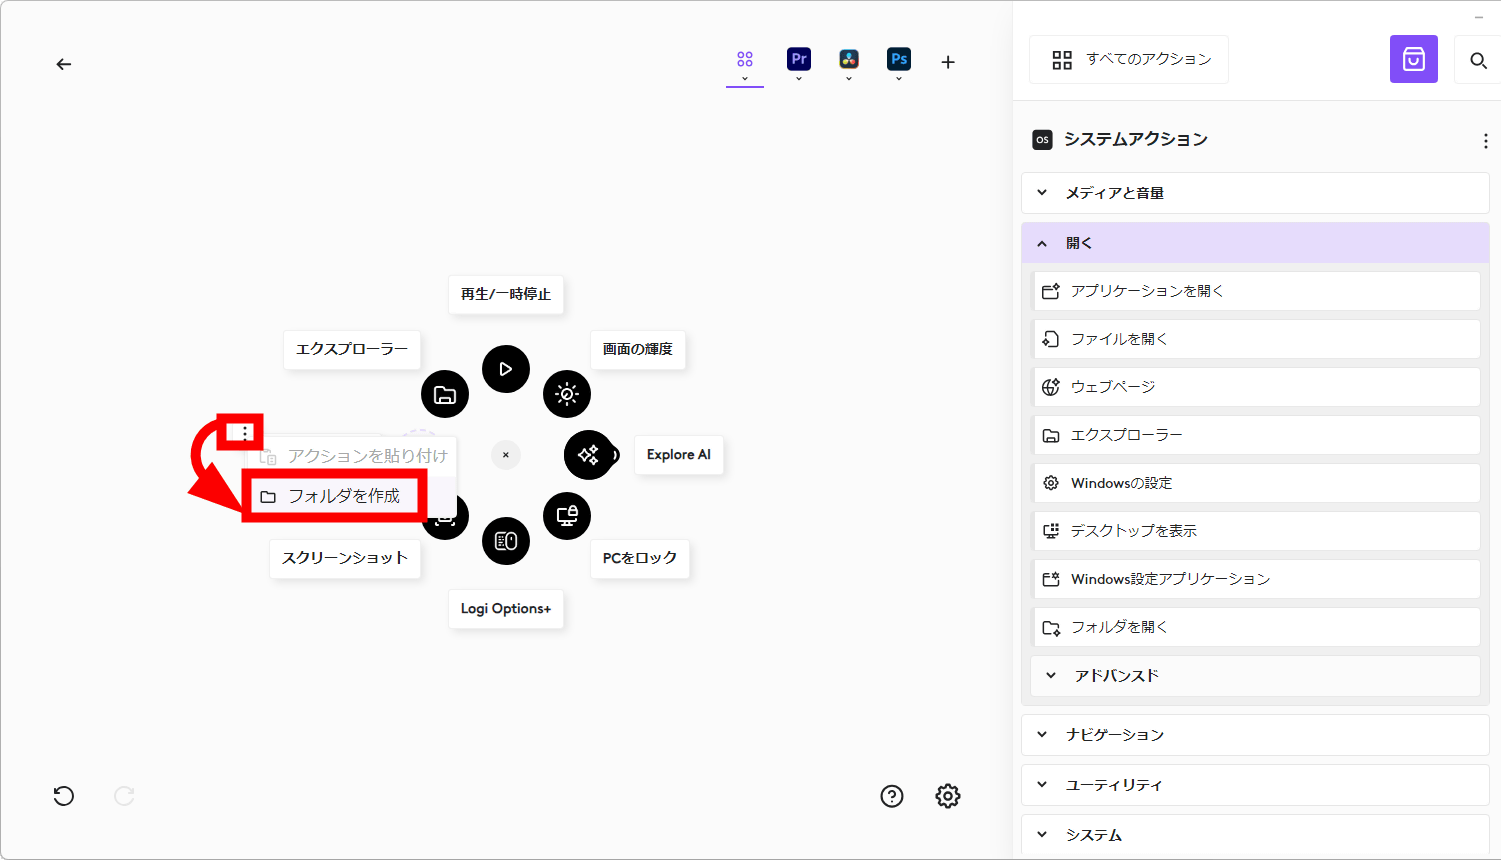
To create a folder, click the kebab icon in the empty space and select 'Create Folder.'
Drag 'Open Application' to 'Add Action'.
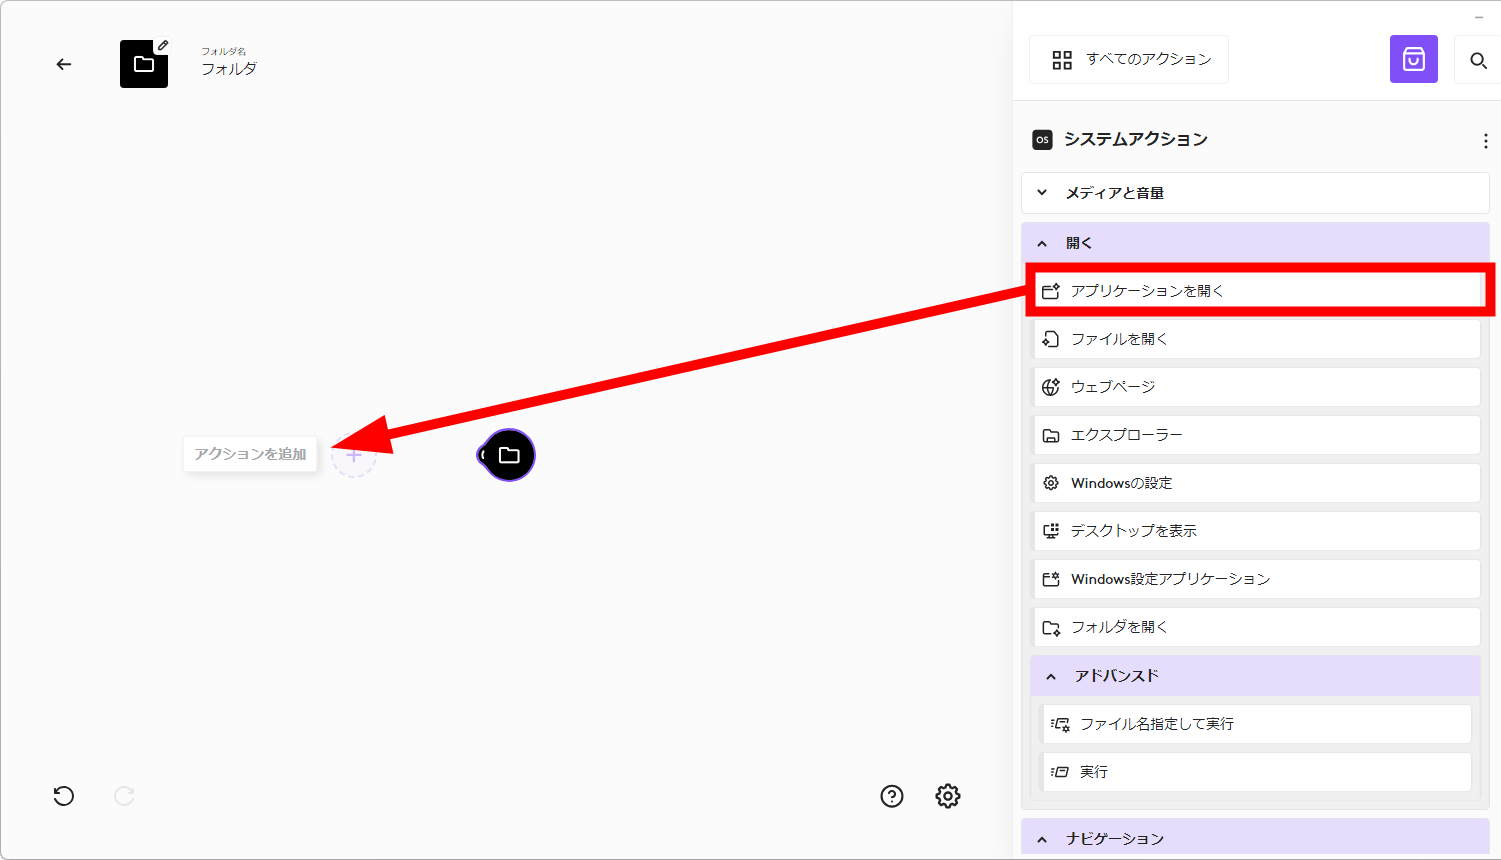
Select the application you want to open from the drop-down menu, change the name at the top, and click 'Save.'

I have registered the applications I use most often in a folder.
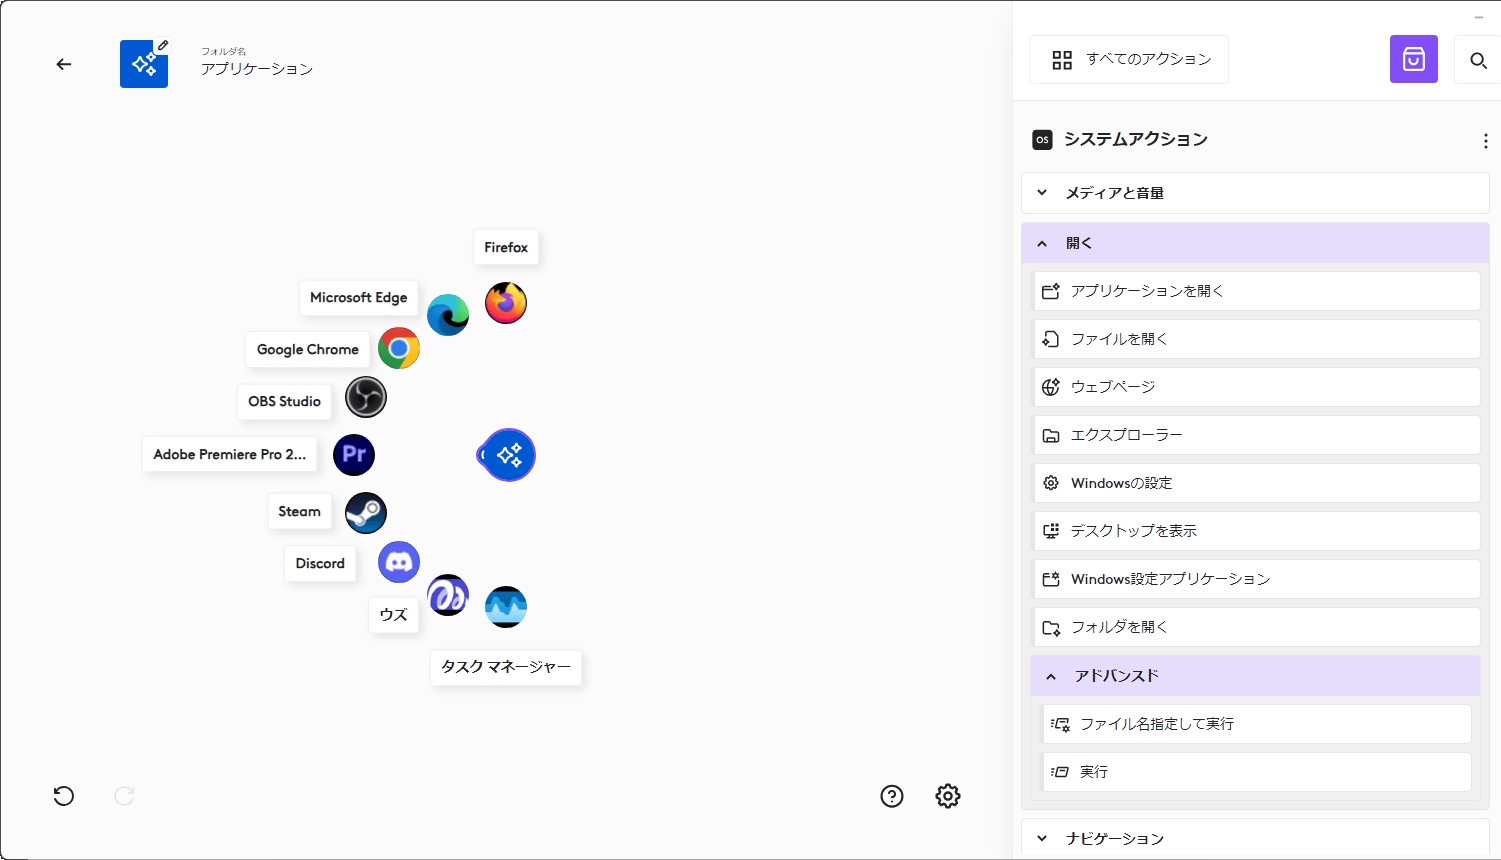
And here's what it looks like when you open it on the screen: It's incredibly convenient to be able to quickly launch your usual applications directly from anywhere on the screen, without having to move the mouse cursor to find a shortcut or open File Explorer or the Start menu.

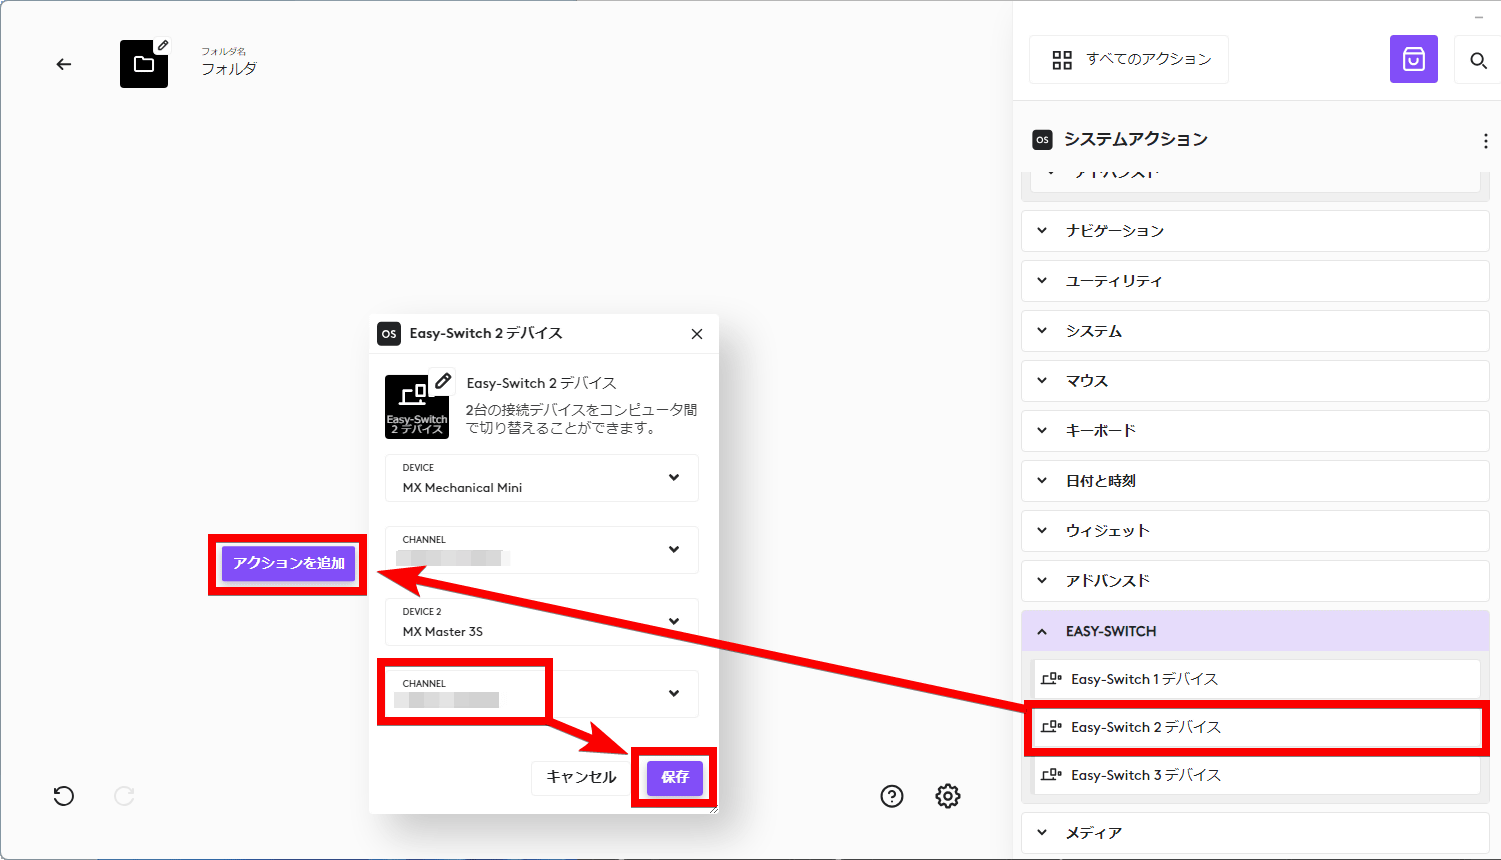
One editorial staff member using the MX Master series was particularly pleased to find that Easy-Switch can be selected from the Actions Ring. Up to three devices can be registered to MX series devices, and the 'Easy-Switch' function allows you to switch connected devices from the device side by pressing a button on the device. Mice such as the Mx Master have the Easy-Switch button on the bottom, so you need to flip them over every time you want to switch.
However, you can also register Easy-Switch as an action in Actions Ring. This means that when you want to switch devices, you don't have to flip the mouse over and press the Easy-Switch button; you can just switch using Actions Ring. This makes the experience more seamless than before. However, while you can switch from a PC with Logi Options+ installed to a device like an iPad or smartphone using Actions Ring, you still need to press the button on the back to switch from an iPad or smartphone without Logi Options+ to a PC.
◆ Set the Actions Ring for each application, some support haptic feedback
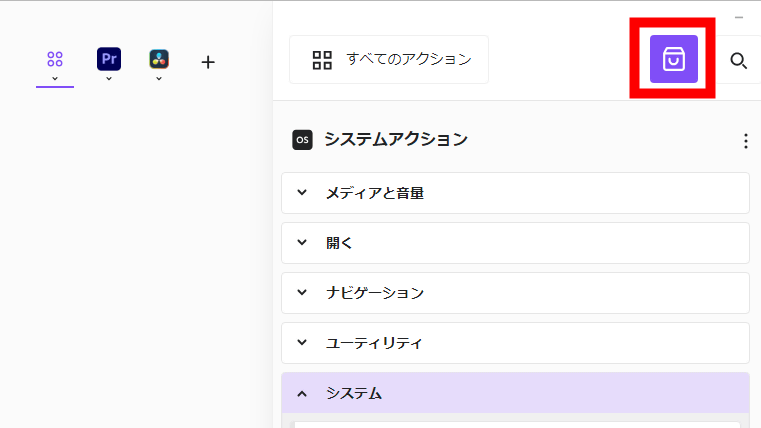
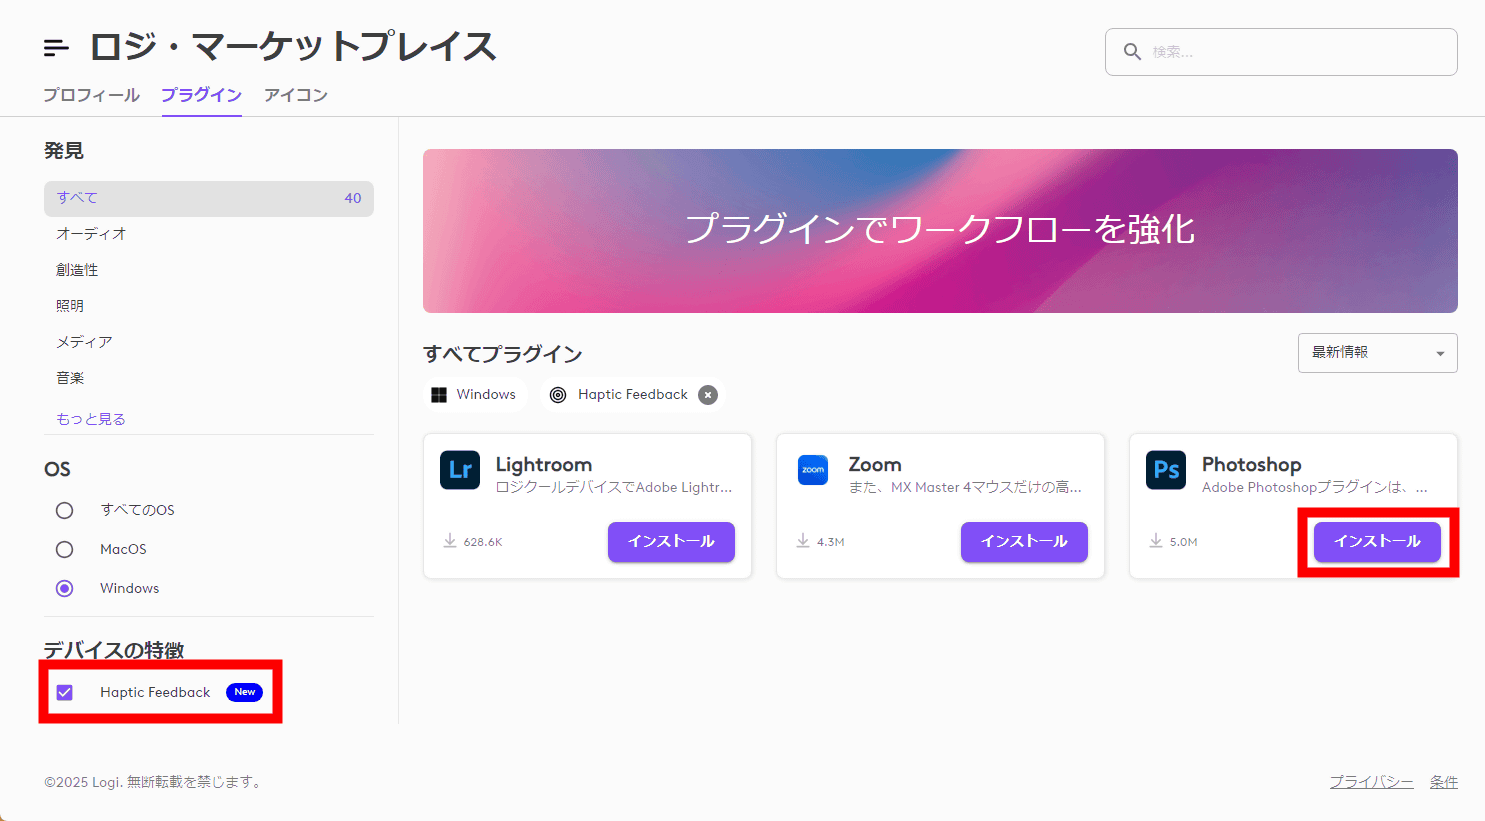
Actions Ring can be set individually for each application. Actions Ring for some applications is also distributed on Logitech's official distribution platform, Logitech Marketplace. From the Actions Ring setting screen in Logi Options+, click the paper bag icon in the upper right corner.
The Logi Marketplace offers a variety of plugins, including:
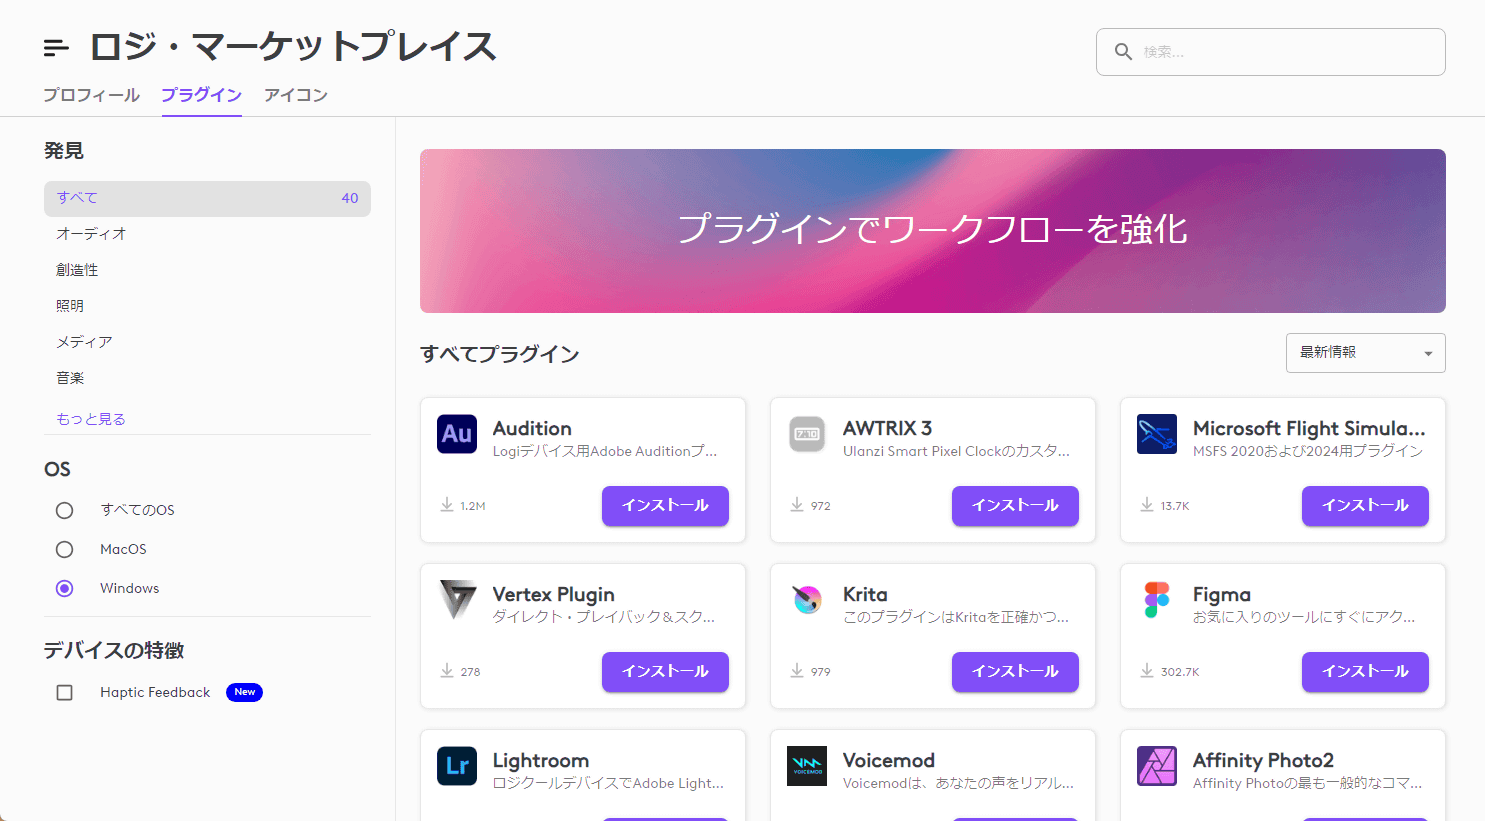
Checking 'Haptic Feedback' in the left column gives you access to a plugin that allows you to link haptic feedback to app actions. At the time of writing, three applications support haptic feedback plugins: Lightroom, Zoom, and Photoshop. To install the Photoshop plugin, click 'Install' for Photoshop.
Once the installation is complete, click 'Continue.'

Once you install the plugin, you'll see a dedicated Actions Ring for Photoshop. Of course, this Actions Ring for Photoshop can also be customized.
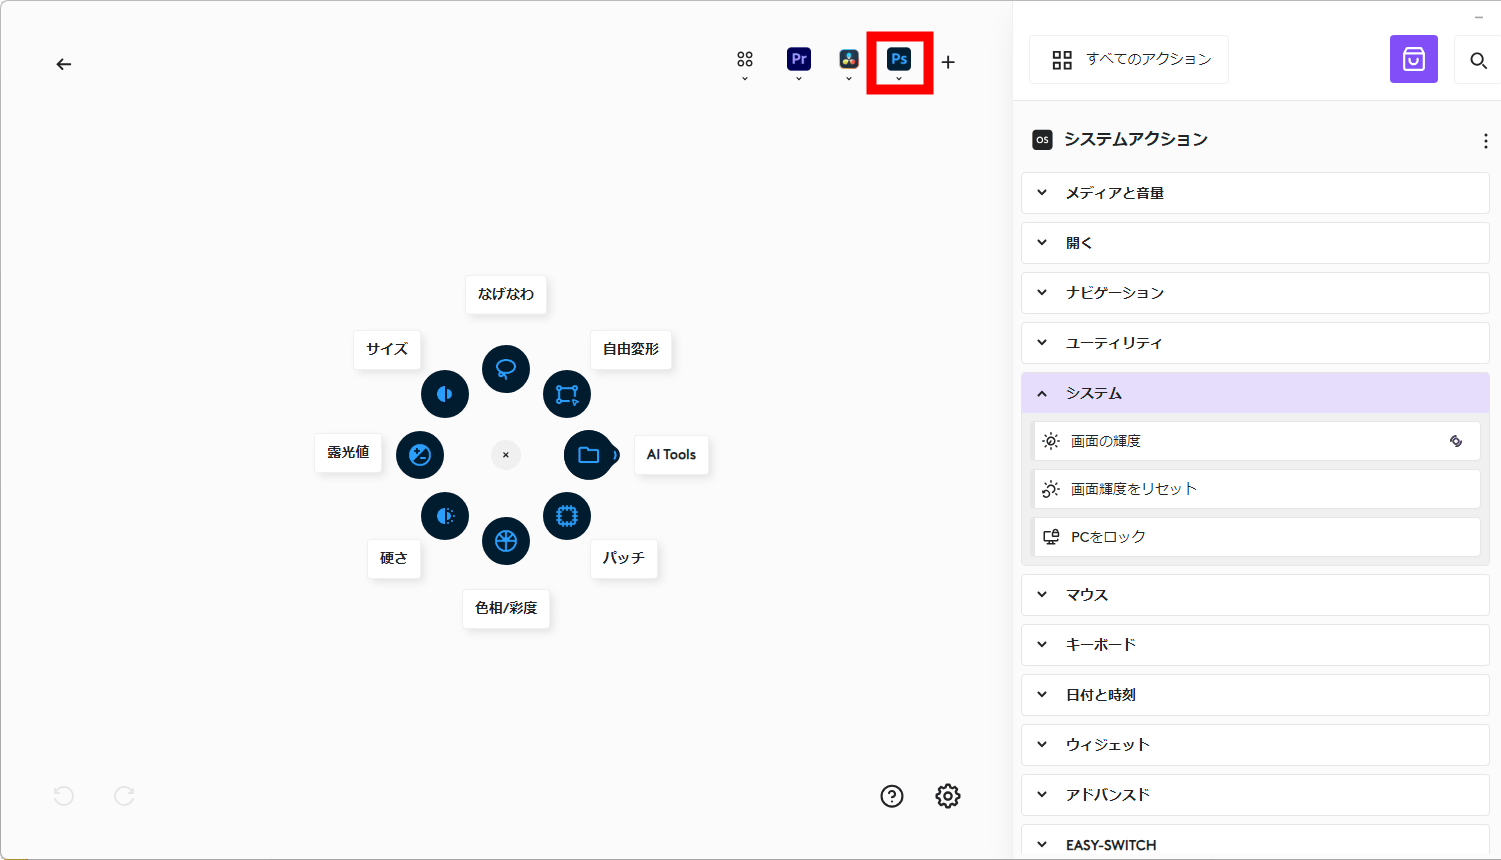
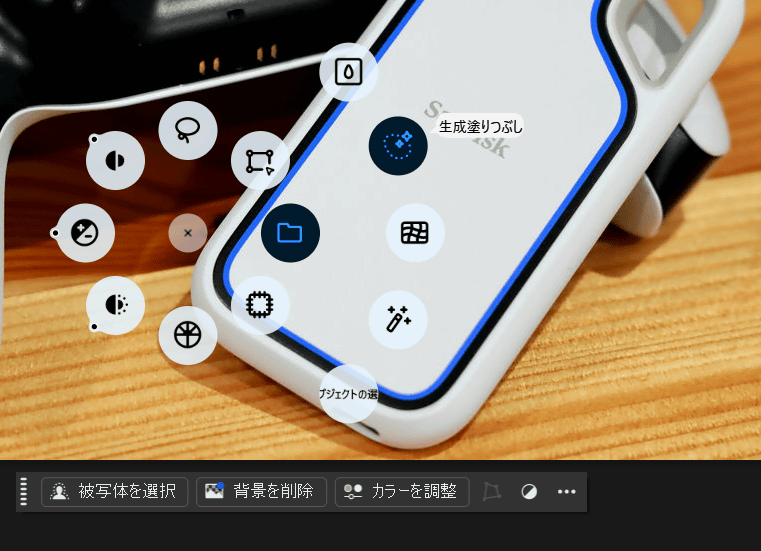
When you call Actions Ring while Photoshop is running and active, it automatically switches to the Actions Ring for Photoshop. You can register various items as actions, and intuitively switch tools and change parameters with the cursor, so it can be used like a left-hand device.
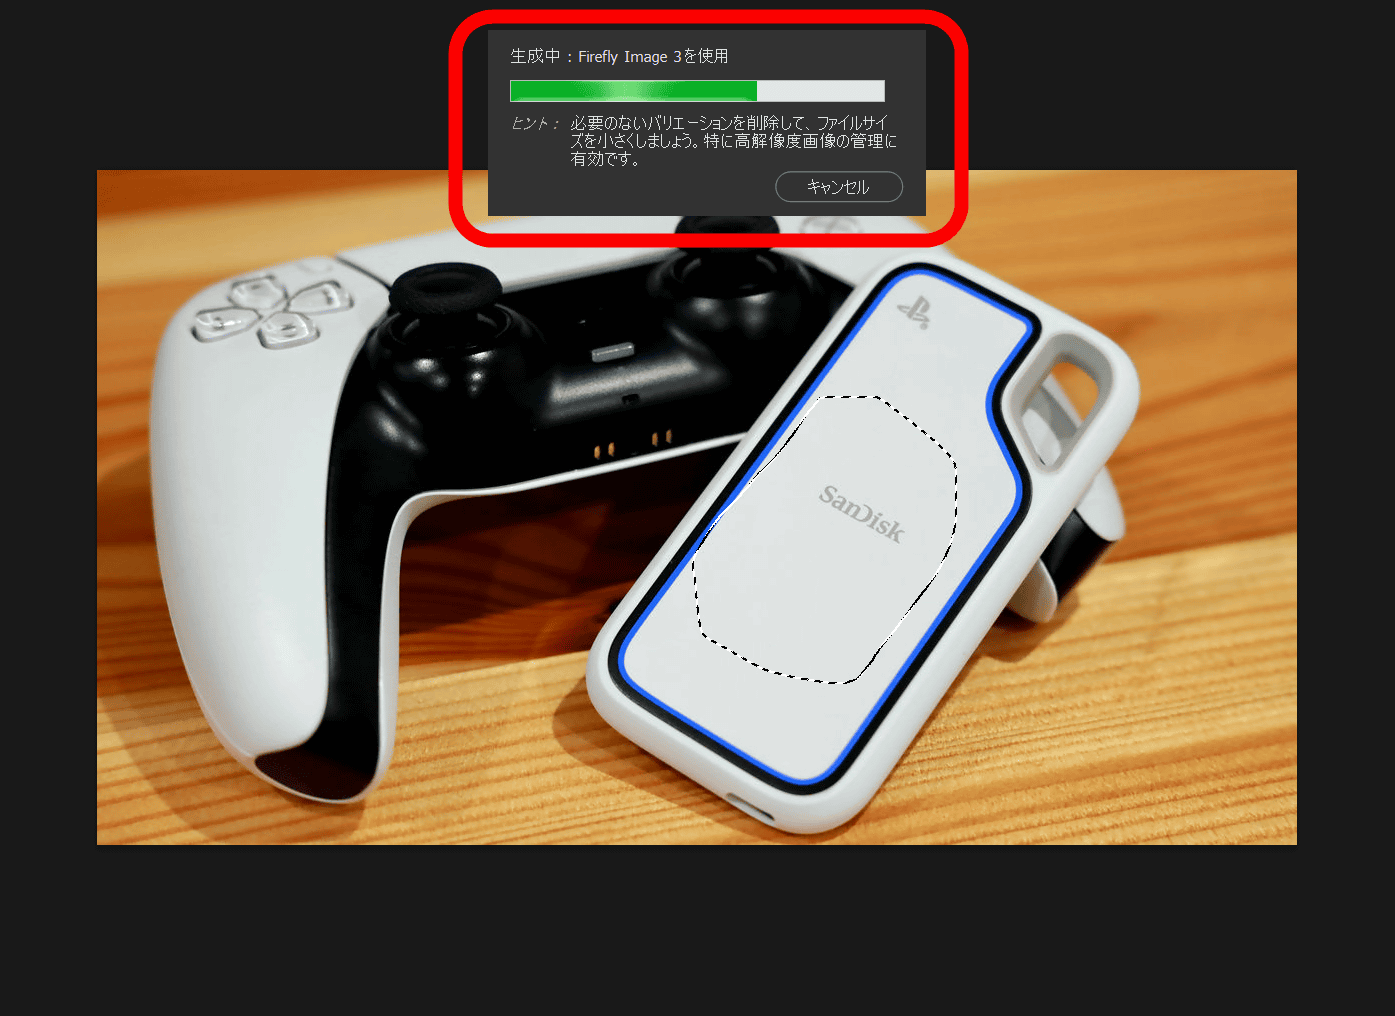
Another key point is that if the plugin supports haptic feedback, you can know the operation of the app through the haptic feedback support. For example, when performing a process that takes some time, such as image generation using FireFly, the haptic sensor panel will vibrate when the process is complete. This is very convenient because you can know in real time when the process is complete while working on other tasks.
◆ Impressions
After actually using the MX Master 4, I felt it was a legitimate evolution of the MX Master series and was highly refined. While the overall design is consistent with the MX Master series, the finer details have been significantly improved, and I got the impression that the areas of comfort and operability that I had previously been dissatisfied with have been resolved. In particular, after using the previous model for three years, I was dissatisfied with the silicon, which deteriorates due to hydrolysis, and the operability of the thumb wheel, but these areas have been improved in the MX Master 4.
The Actions Ring, which allows you to access shortcuts anywhere on the screen, is extremely convenient. Even if you use multiple browsers and apps for different purposes, or organize your data into folders, you can pre-select frequently used applications and folders to avoid having to search for them. Up to 72 actions can be registered, allowing for far more tasks than previous Smart Actions. Once you get used to it, holding the MX Master 4 in your right hand can significantly improve the efficiency of your PC tasks, just like using a left-hand device. When I first started using the haptic feedback, I was shocked to see a mouse vibrating. However, the visual and tactile feedback improves the accuracy of Actions Ring's operations, so I quickly got used to it and realized how useful it is. If you experience any discomfort, we recommend lowering the haptic feedback vibration setting.
The MX Master 4 will be released on Thursday, October 30, 2025, with a one-year free warranty for 19,900 yen (tax included) and a two-year free warranty for 21,890 yen (tax included). Pre-orders are available at the Logitech official online store.
Computer Mice - Wireless, Bluetooth, Wired | Logitech
https://www.logicool.co.jp/ja-jp/shop/c/mice
The MX Master 4 is also available on Amazon.co.jp and can be pre-ordered from the link below. It comes with a one-year warranty and costs 19,900 yen.
Amazon.co.jp: [Amazon.co.jp Exclusive] Logitech MX MASTER 4 Advanced Wireless Mouse with Haptic Feedback, Quiet Operation, MX2400GRd, Logi Bolt, Bluetooth, Non-Unifying, 8000dpi, High-Speed Scroll Wheel, USB-C Rechargeable, Wireless, MX2400 Graphite, Official Japanese Product. *Amazon.co.jp Exclusive Wallpaper Download Included: Computers & Peripherals

Related Posts: