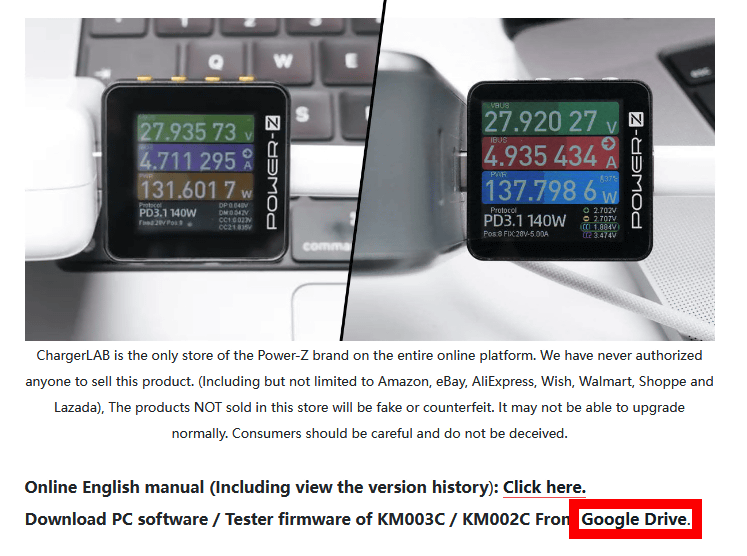
Review of the USB PD3.1 compatible USB tester 'Power-Z KM003C' that allows you to view measurement results on a PC application, and even though it can be purchased for around 10,000 yen, you can check a huge amount of information such as 'device power supply status', 'USP PD communication content', and 'fast charging compatible standards' and you can save and compare the measurement results, which is very convenient
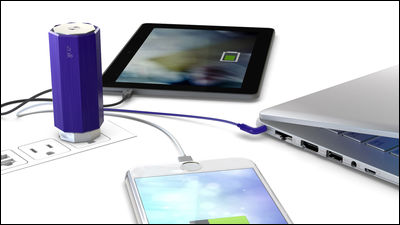
The editorial department of GIGAZINE reviews a variety of devices such as smartphones, PCs, and USB adapters, and USB testers that can check the USB power supply status and compatible standards of the device are very useful. However, the USB tester at the editorial department does not have an image output function of the measurement results, so it was necessary to take a picture of the small screen directly with a camera to show the measurement results. 'I want to output and save the measurement results on the PC screen. If possible, I would also like a function to display the progress of the power supply status in a graph and a function to compare it with past measurement results,' I thought, and while searching for it, I discovered the multifunctional and relatively inexpensive USB tester ' Power-Z KM003C '. When I actually bought and used the Power-Z KM003C, I found it to be a very highly functional and useful device, so I summarized how to use the main functions.
Introducing the Brand New POWER-Z KM003C - Chargerlab
·table of contents
◆1: Check the appearance of Power-Z KM003C
◆2: Check the power supply status with the Power-Z KM003C unit
◆3: Install the PC app
◆4: Check the power supply status with the app
◆5: Store the measurement results in a database and compare them with past results
◆6: Check the USB PD communication content with the app
◆7: Check the compatible fast charging standards for the Power-Z KM003C unit
◆8: Check the eMarker information on the Power-Z KM003C unit
◆9: Check the information of Apple USB adapter on Power-Z KM003C
◆1: Check the appearance of Power-Z KM003C
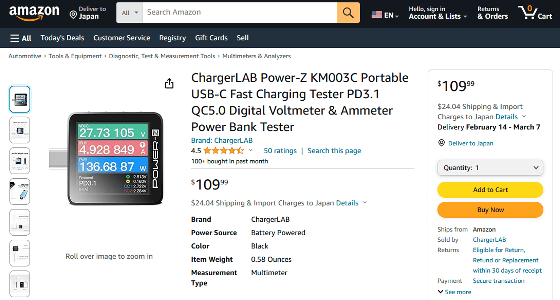
The Power-Z KM003C can be purchased from Japanese online shops, but this time I purchased it from Amazon.com, which was linked from the official website. The price is $109.99 (about 16,300 yen). It will be a little more expensive if you include shipping costs.
Amazon.com: ChargerLAB Power-Z KM003C Portable USB-C Fast Charging Tester PD3.1 QC5.0 Digital Voltmeter & Ammeter Power Bank Tester : Automotive
The Power-Z KM003C arrived a few days after I ordered it.
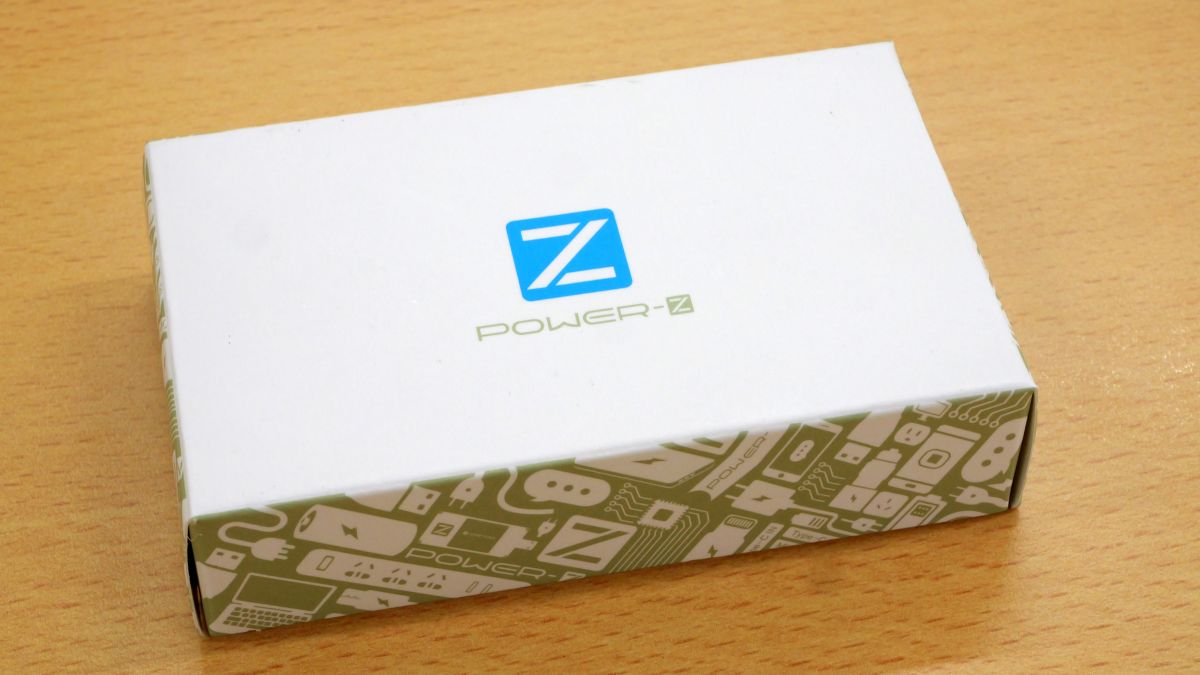
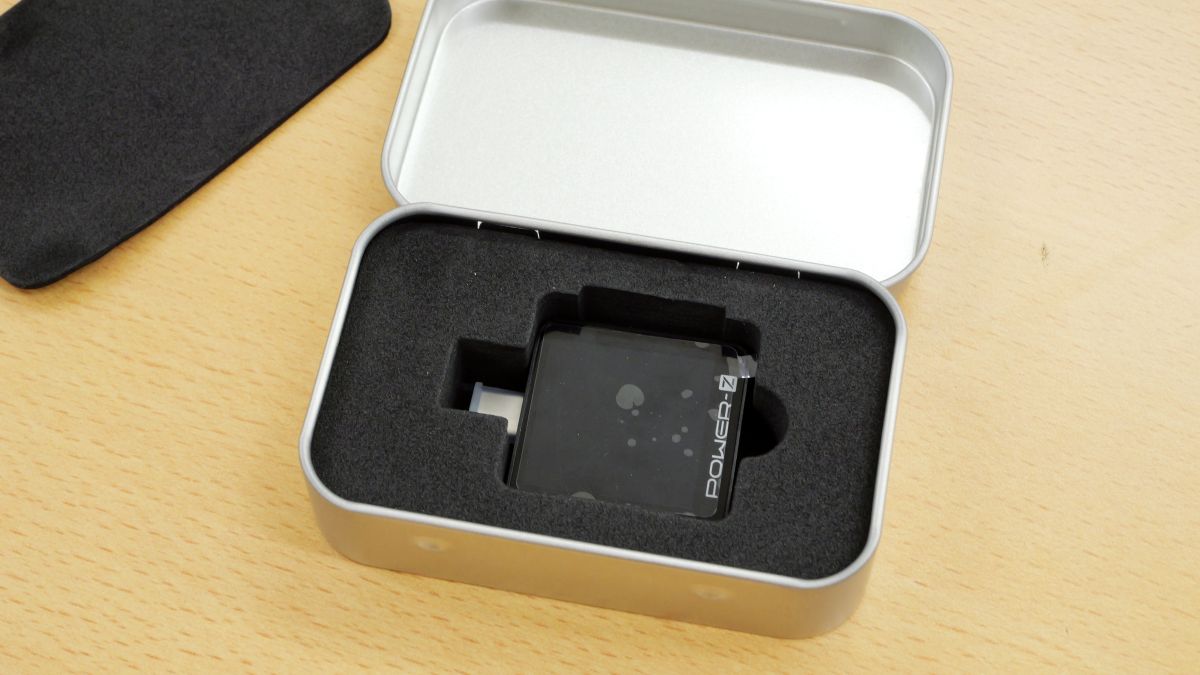
Inside the package was a silver case and a piece of paper with a QR code that allowed users to access the official social media accounts.

Opening the silver case revealed the Power-Z KM003C.
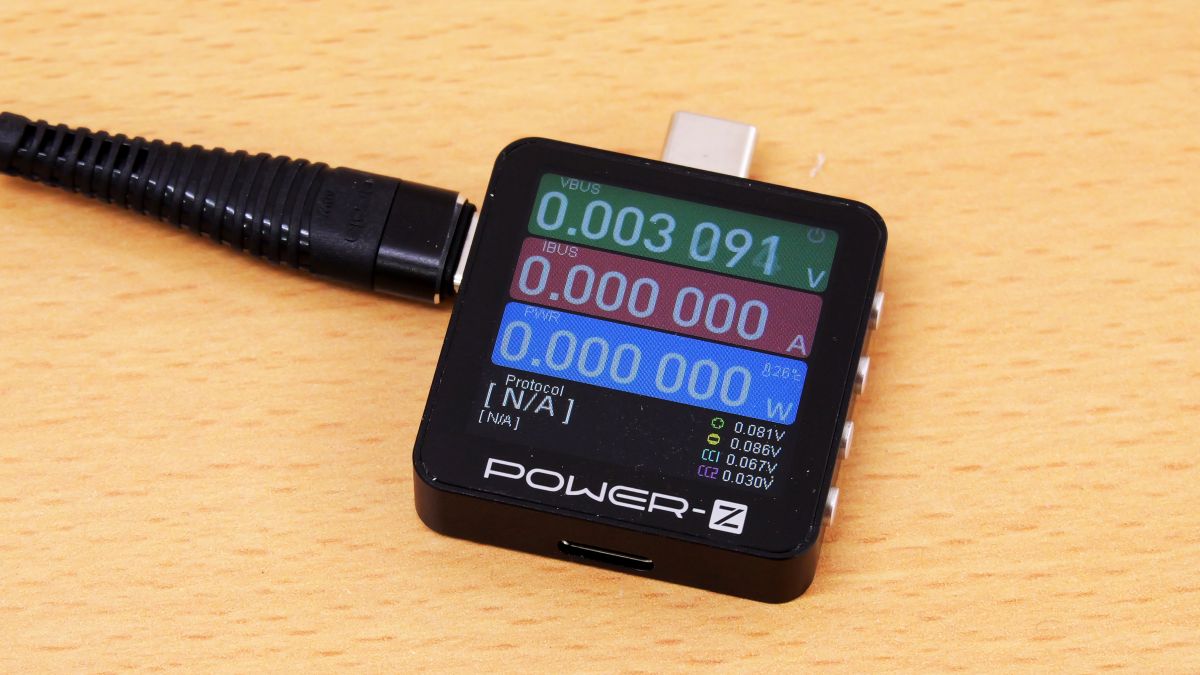
The Power-Z KM003C looks like this: It has a square display on the front.
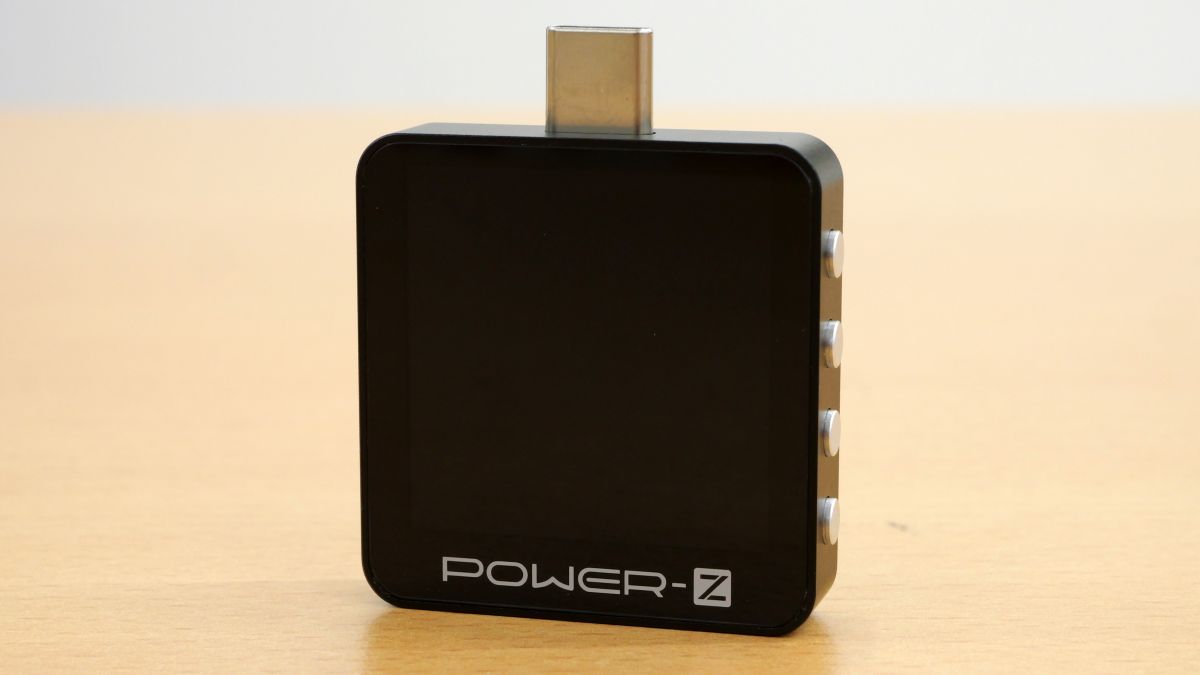
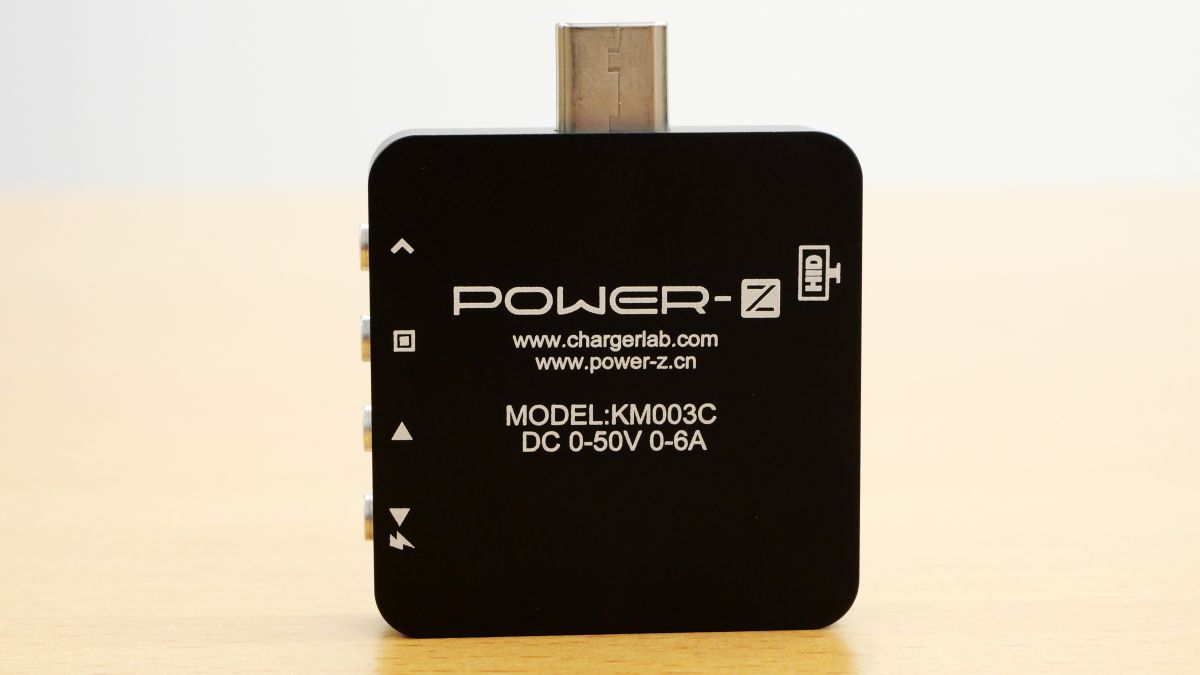
The official website URL and model name are written on the back.
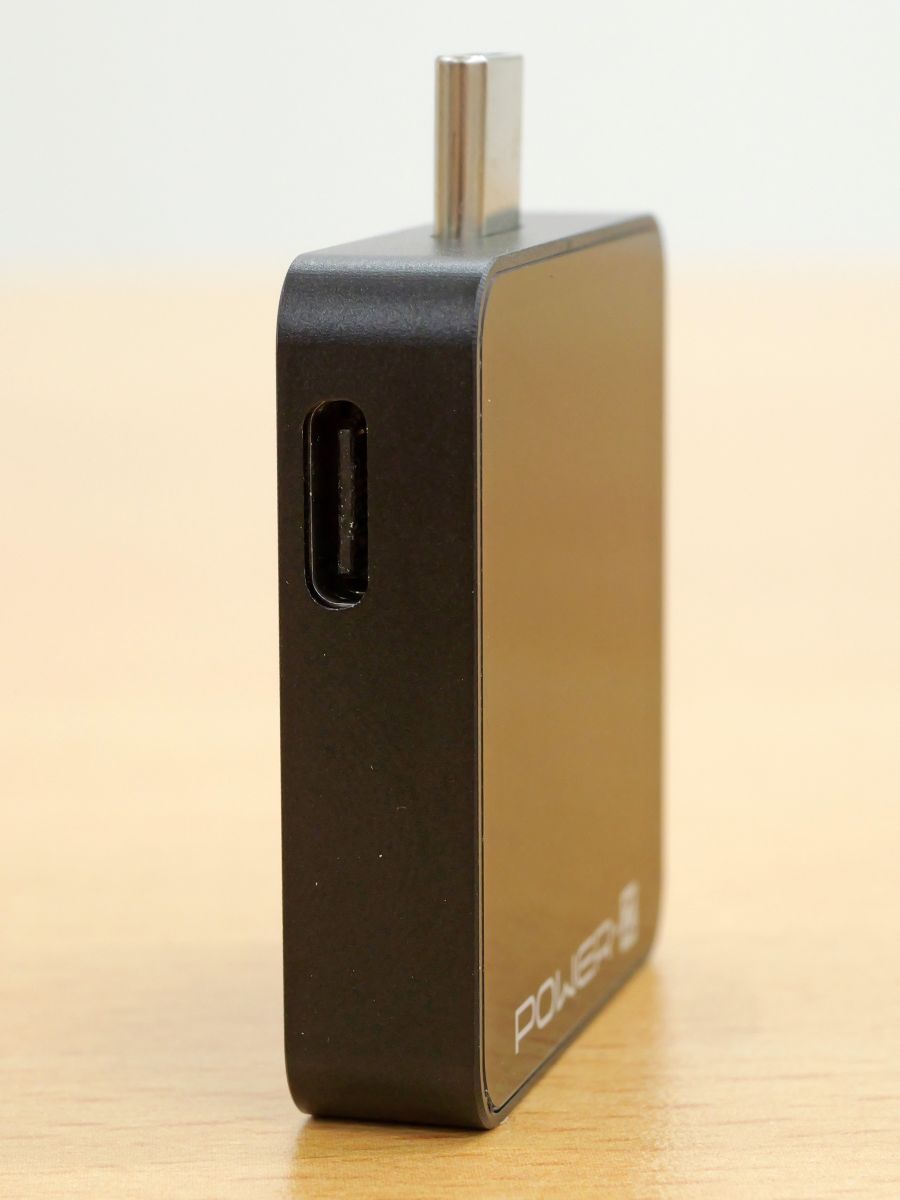
The left side is equipped with a USB Type-C port for auxiliary power input.
There are four buttons on the right side. From top to bottom, their functions are 'Cancel,' 'Confirm,' 'Next,' and 'Previous.'
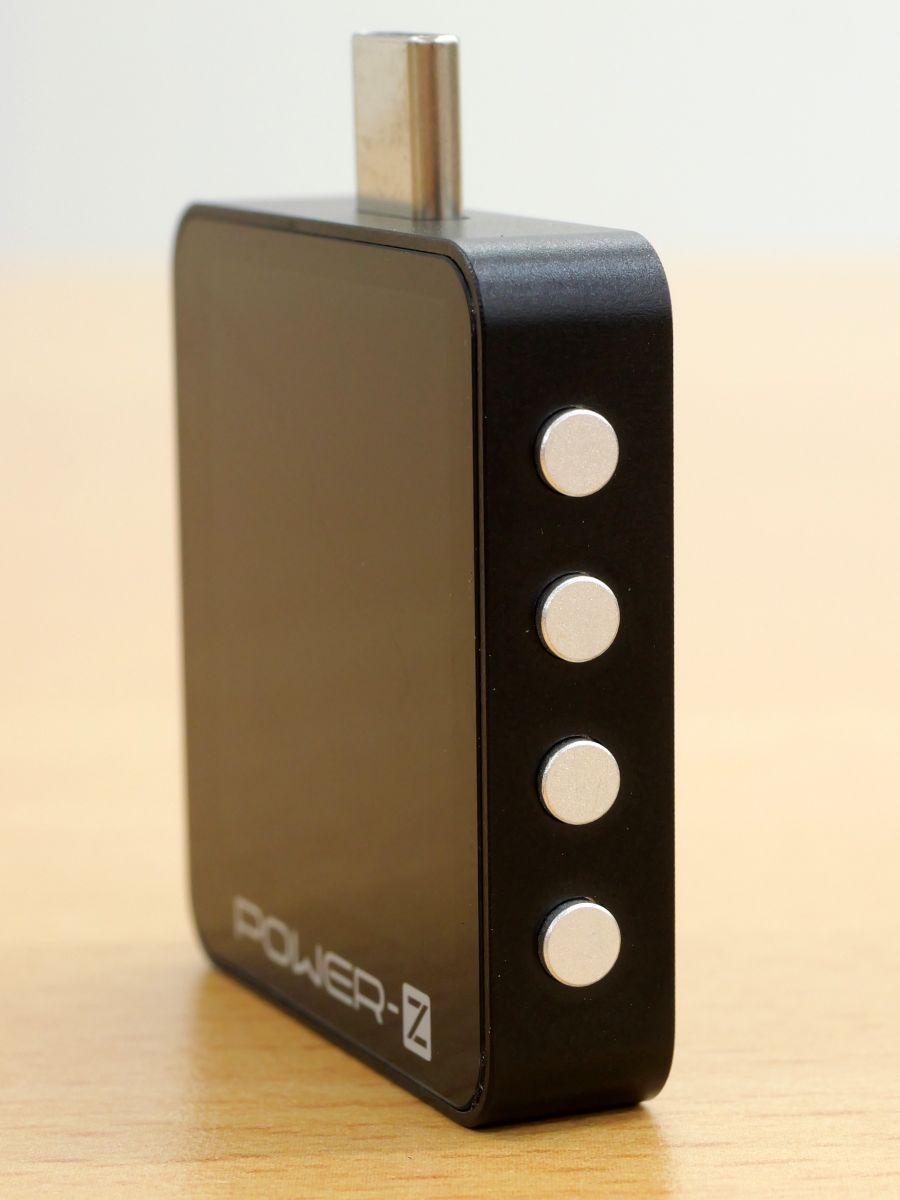
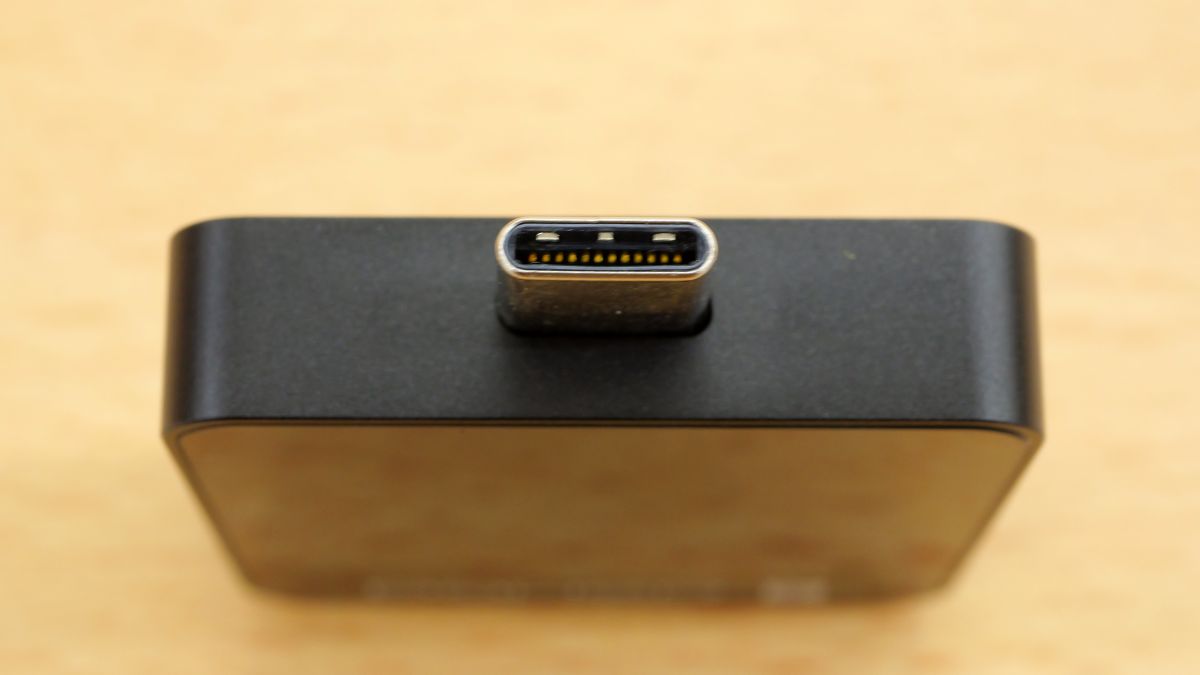
There is a USB Type-C male terminal on the top.
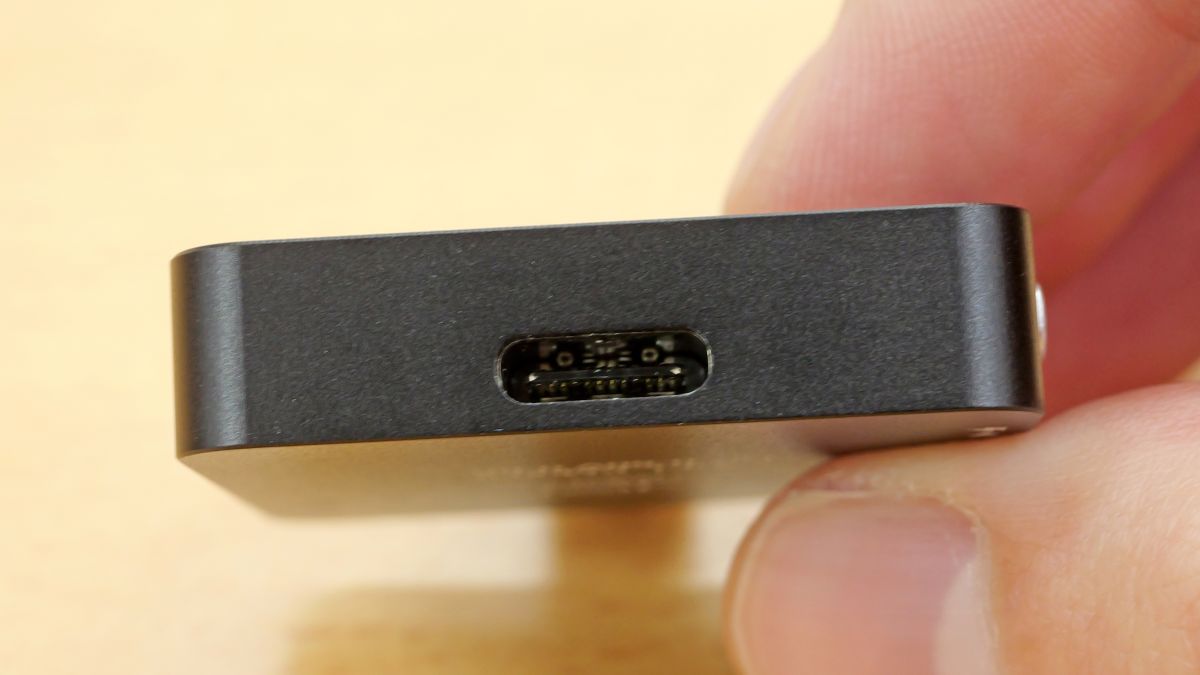
There is a USB Type-C female terminal on the bottom.
◆2: Check the power supply status with the Power-Z KM003C main unit
The Power-Z KM003C can output measurement results to two places: the display on the main unit and the PC app. First, try checking the power supply status of devices such as smartphones on the display on the main unit.
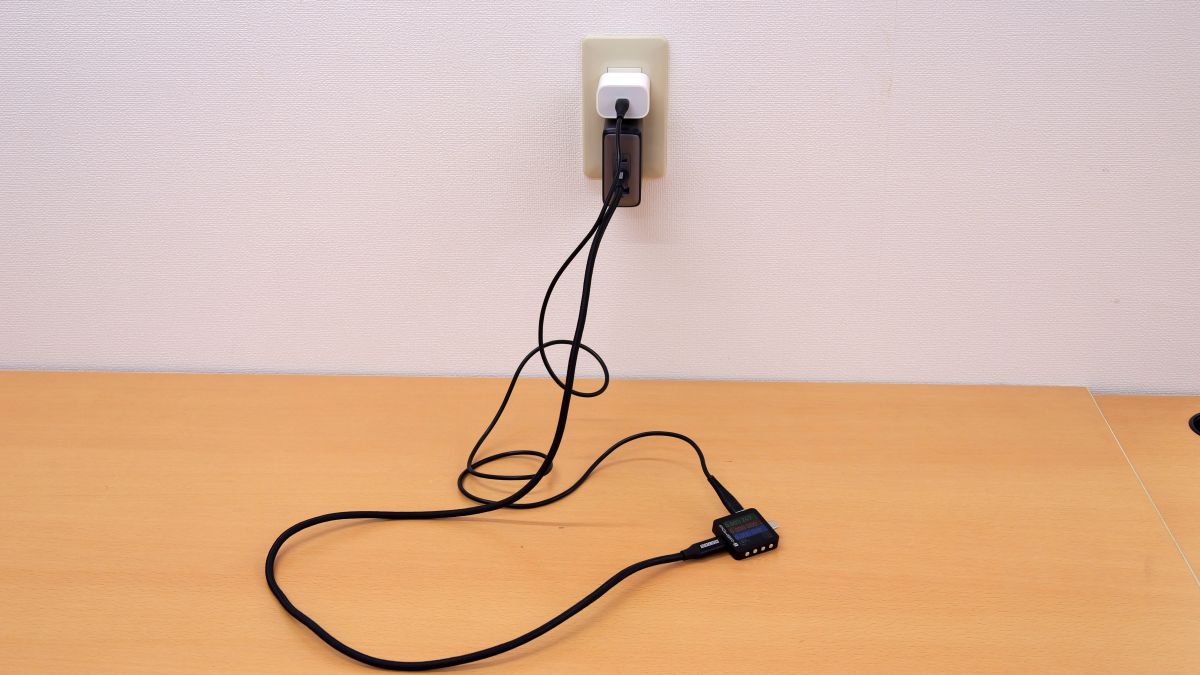
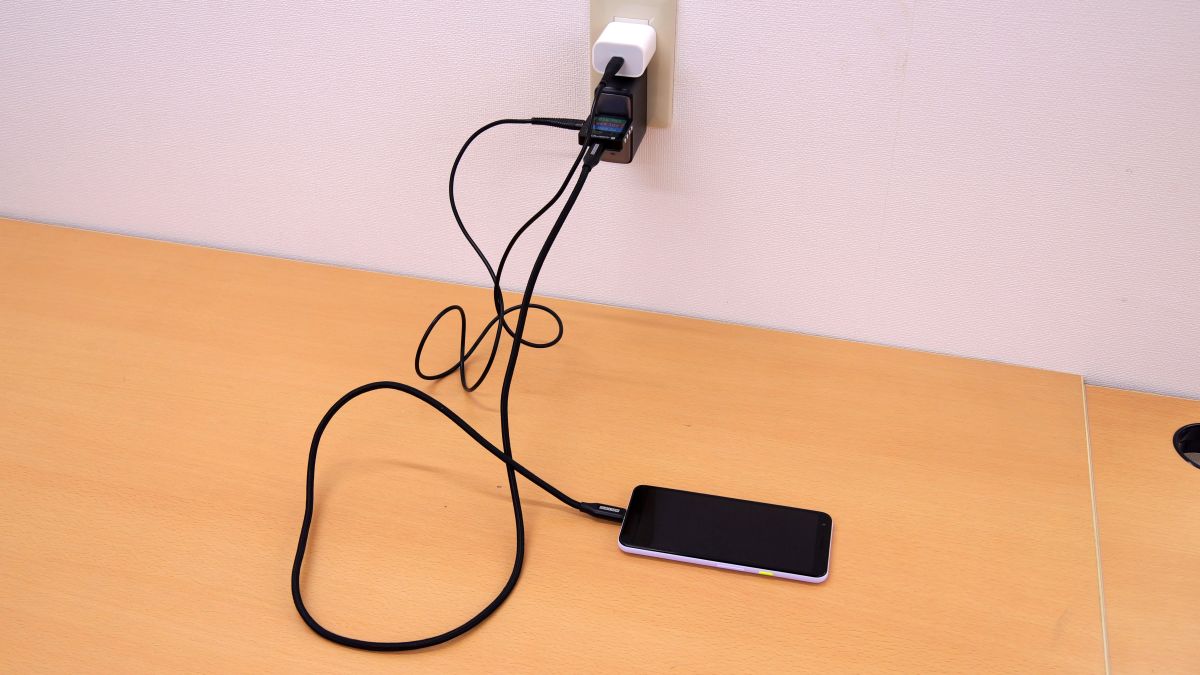
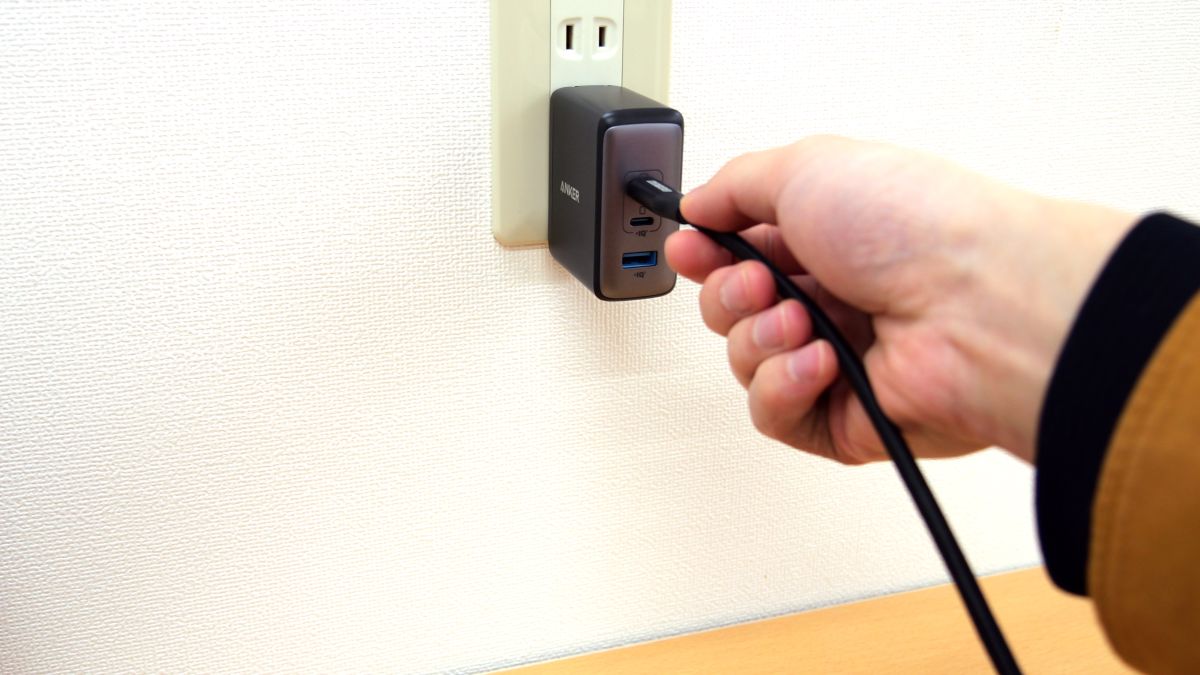
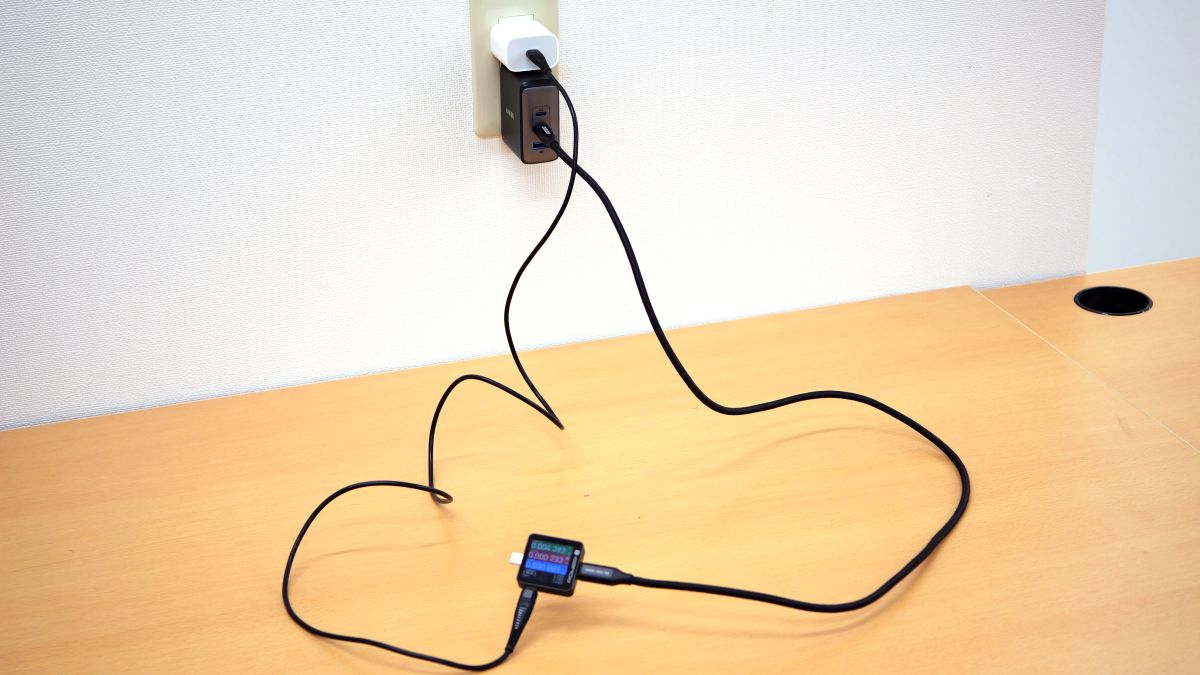
First, to supply power to the Power-Z KM003C unit, insert the USB Type-C cable into the side of the unit and connect it to a USB adapter.
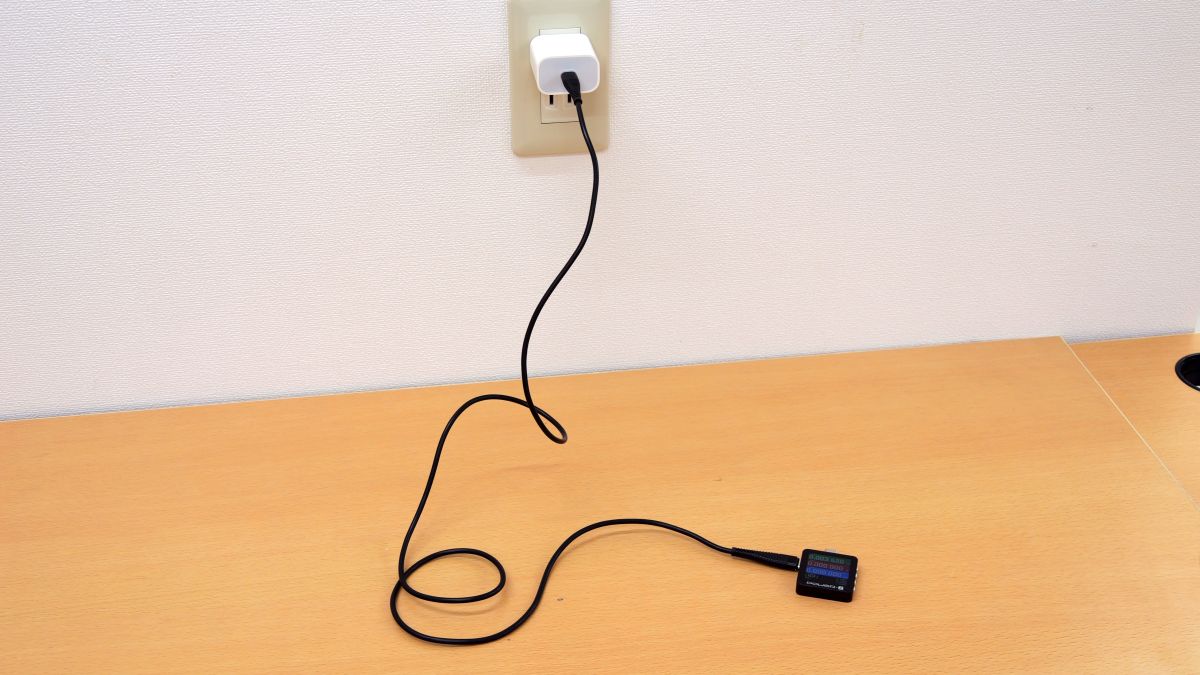
The Power-Z KM003C display will then light up and show the voltage, current, and power being output by the power supply.
Next, prepare a USB adapter to power your smartphone and connect the USB Type-C cable to the female terminal of the Power-Z KM003C instead of the smartphone.
Finally, connect the male terminal of the Power-Z KM003C to your smartphone and you're ready to go.
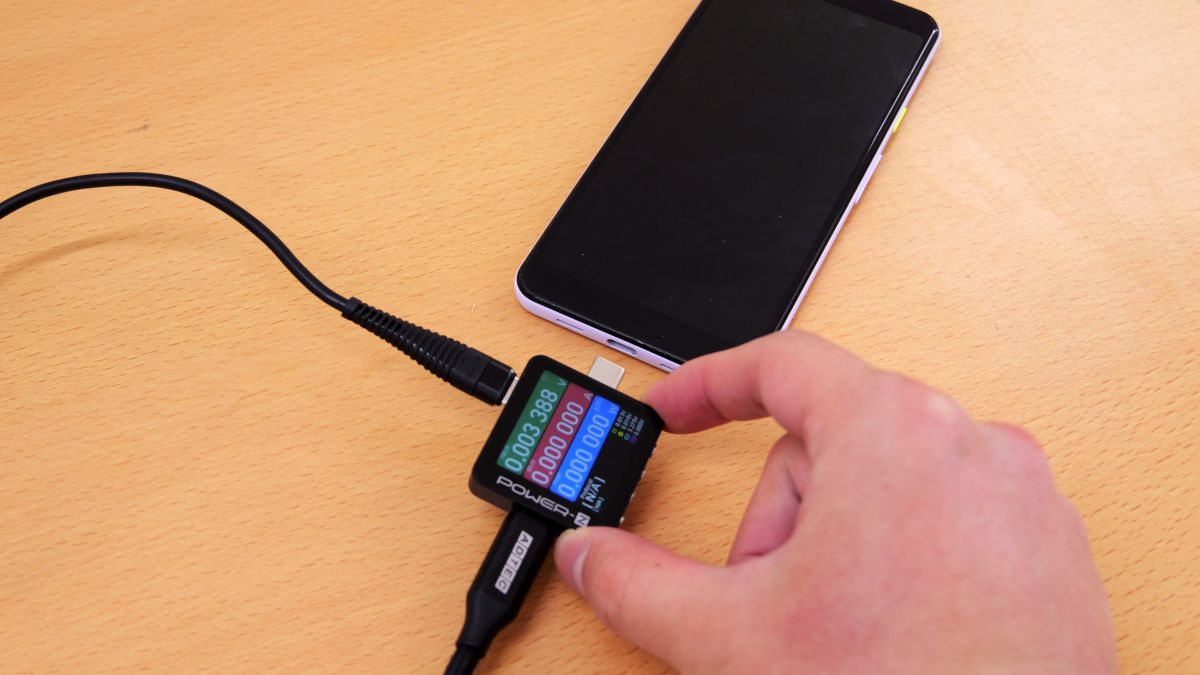
You can now check the voltage, current, and power being output from the USB adapter to your smartphone.
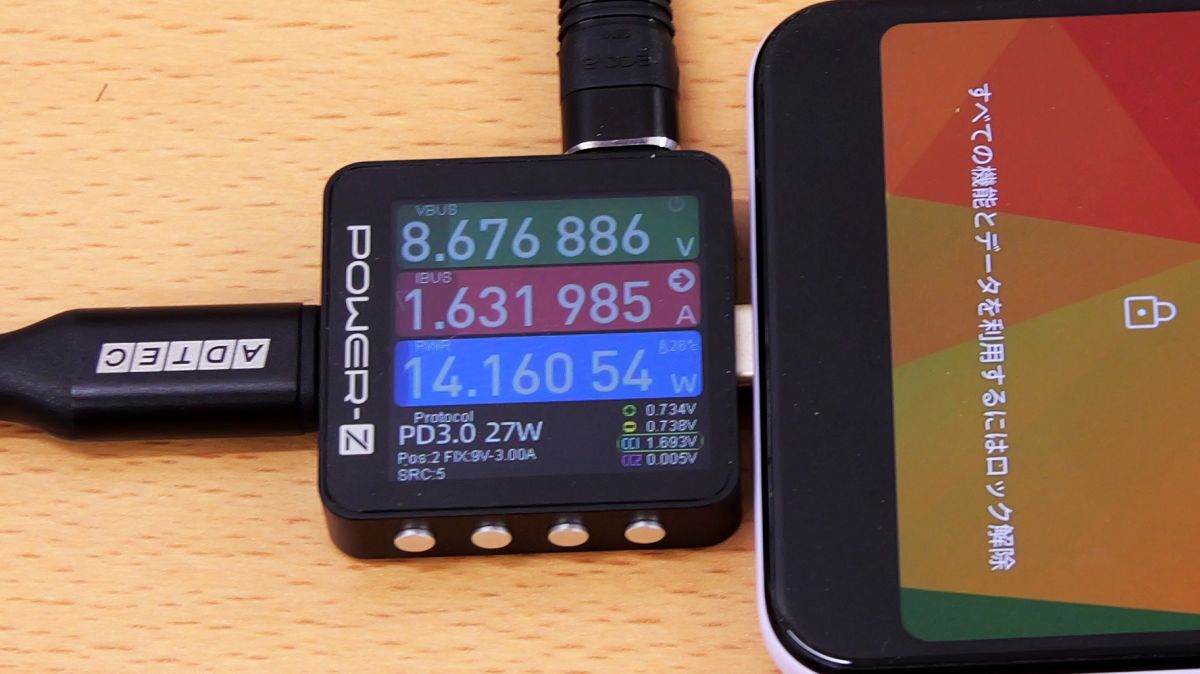
By the way, you can check the output status not only by connecting the female terminal of the Power-Z KM003C to a USB adapter and connecting the male terminal to the output device, but also by connecting the male terminal of the Power-Z KM003C to a USB adapter and connecting the female terminal to the output device.
◆3: Install the PC app
By installing the 'Mtools' app on your PC, you can check the output status of the Power-Z KM003C. To install Mtools, first access the following link.
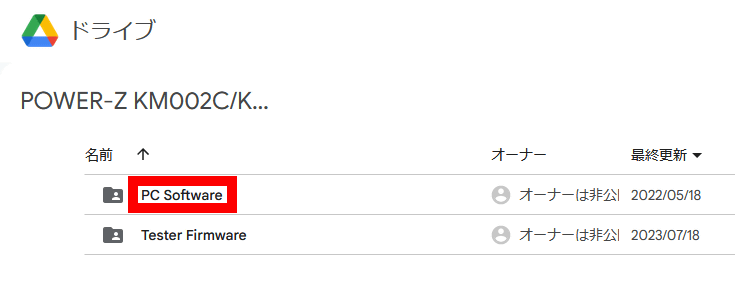
KM003C/KM002C Technical Support - Chargerlab
Find the link to Google Drive and click on it.
Once you access Google Drive, double-click 'PC Software.'
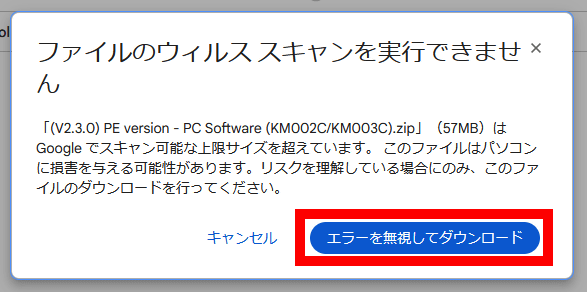
A ZIP file named '(V2.3.0) PE version - PC Software (KM002C/KM003C).zip' will be saved, so click 'Download' to download it.
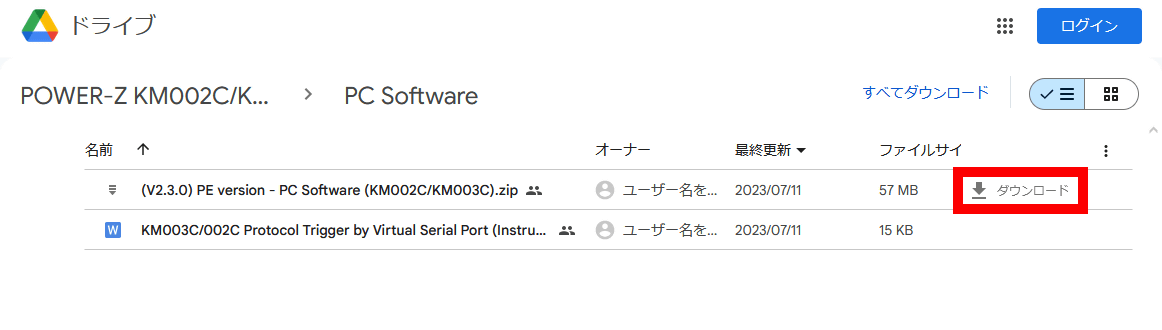
If you see a warning that the file is too large to scan for viruses, click 'Ignore errors and download.'
Extract the downloaded ZIP file using standard Windows functions or a compatible app such as '

Run 'Mtools.exe' stored in the extracted file.
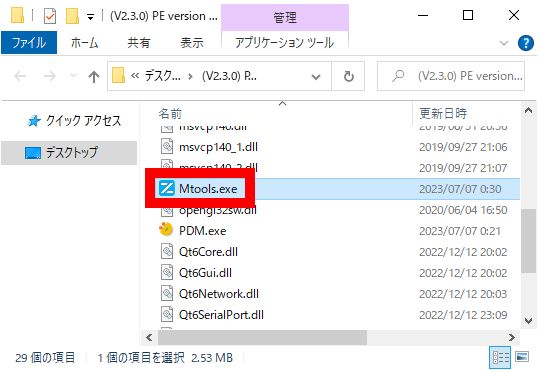
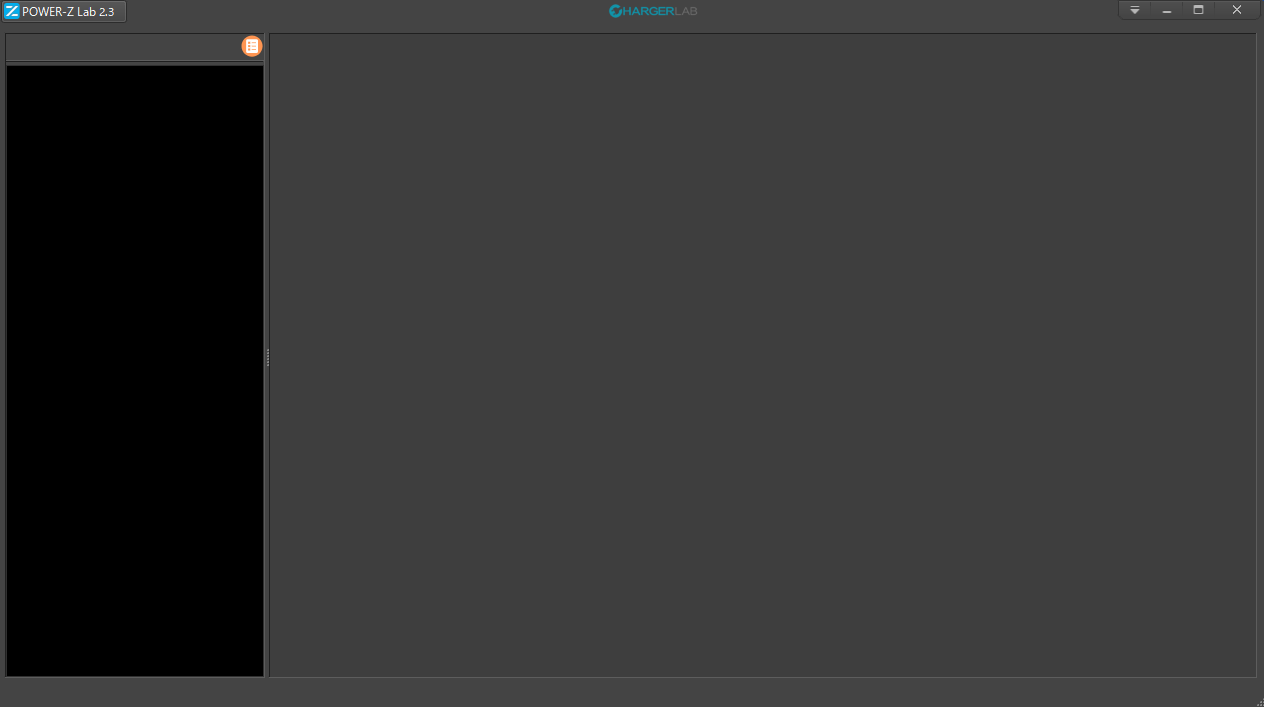
This will start Mtools.
◆4: Check the power supply status with the app
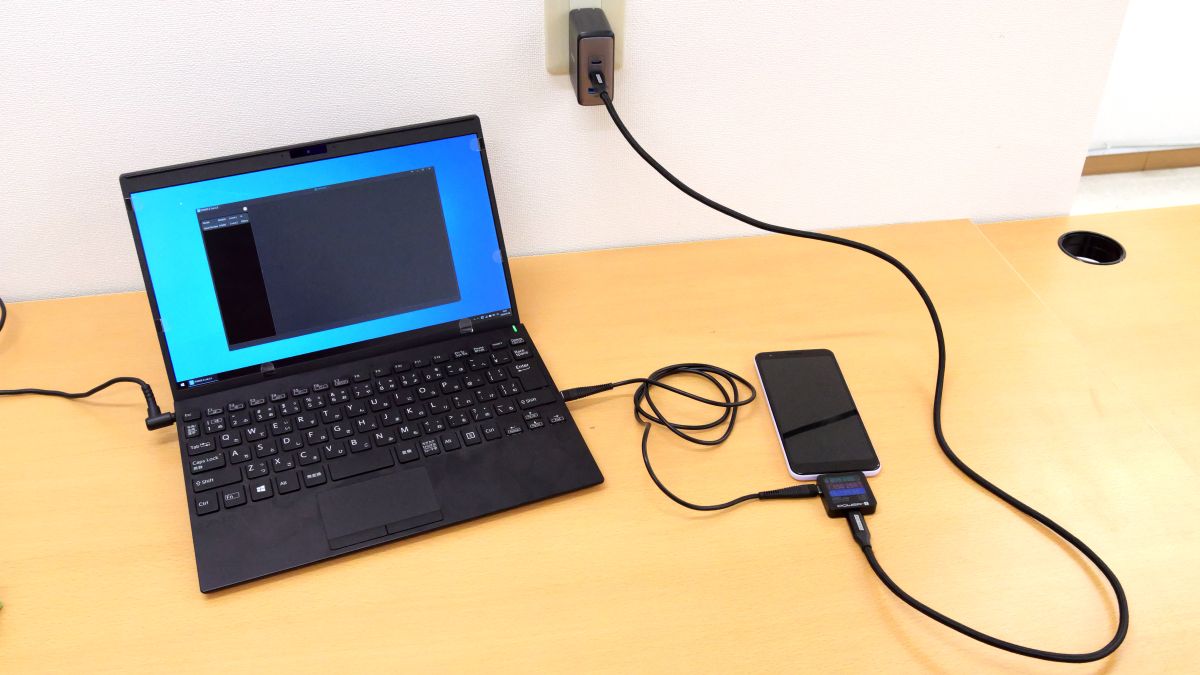
To check the measurement results of the Power-Z KM003C on a PC, first start Mtools on the PC, then connect the PC and the auxiliary power port of the Power-Z KM003C with a USB cable, and connect the device you want to measure to the male and female terminals.
The serial number of Power-Z KM003C and other information will be displayed on the left side of the Mtools screen, so double-click it.

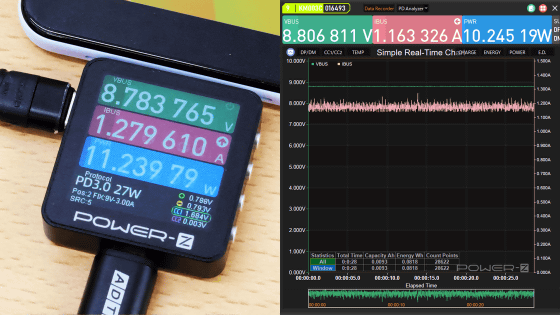
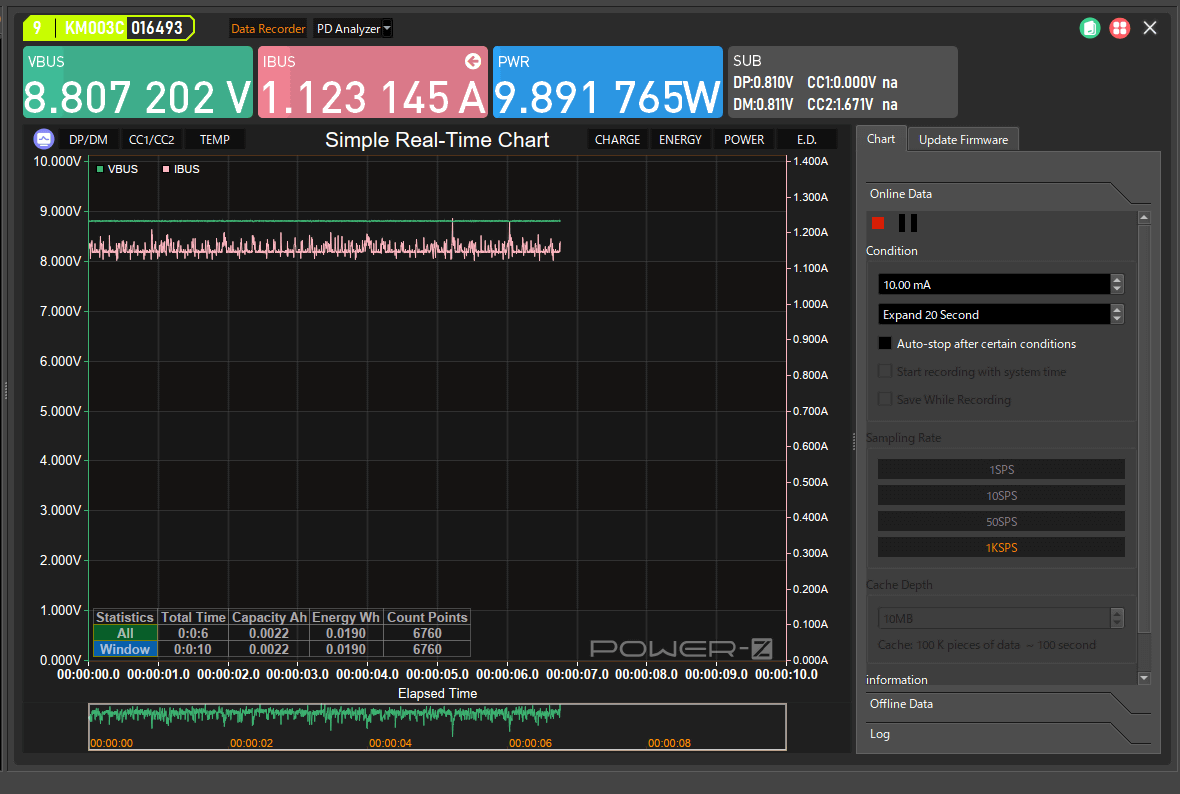
Then, the voltage, current, and power were displayed at the top of the screen as shown below.
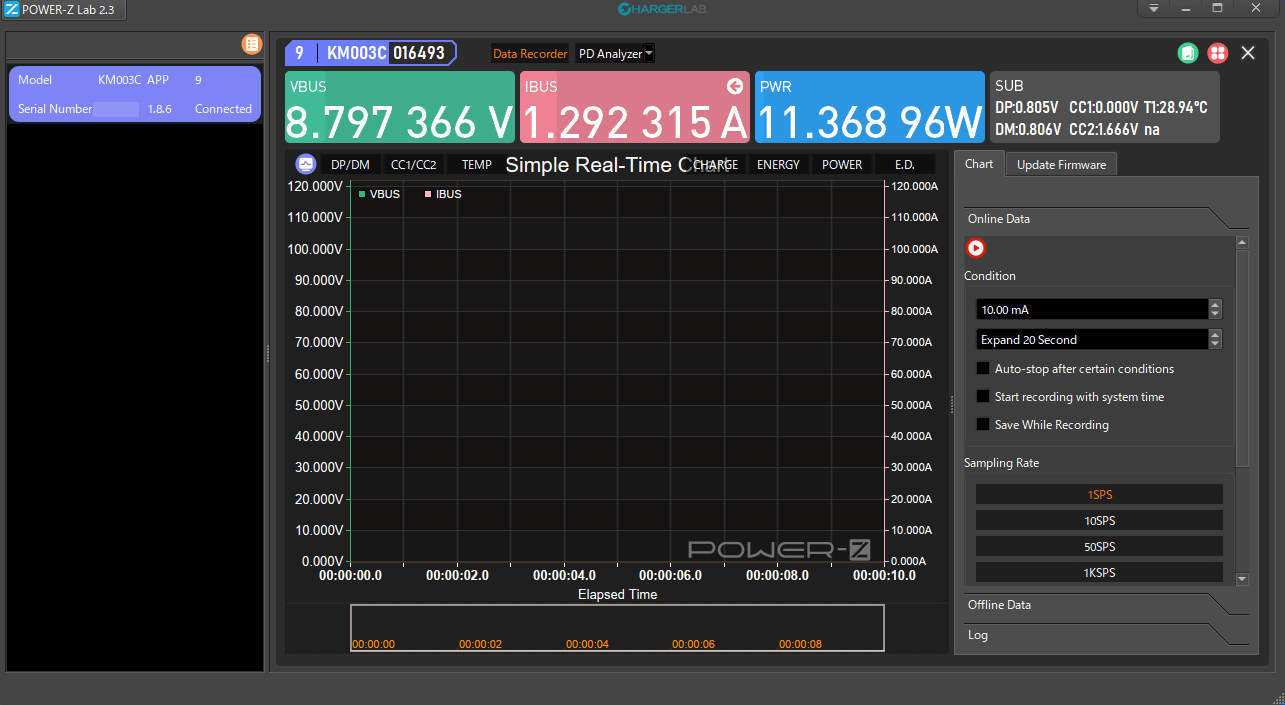
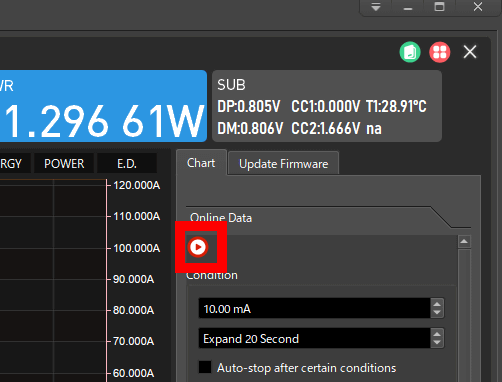
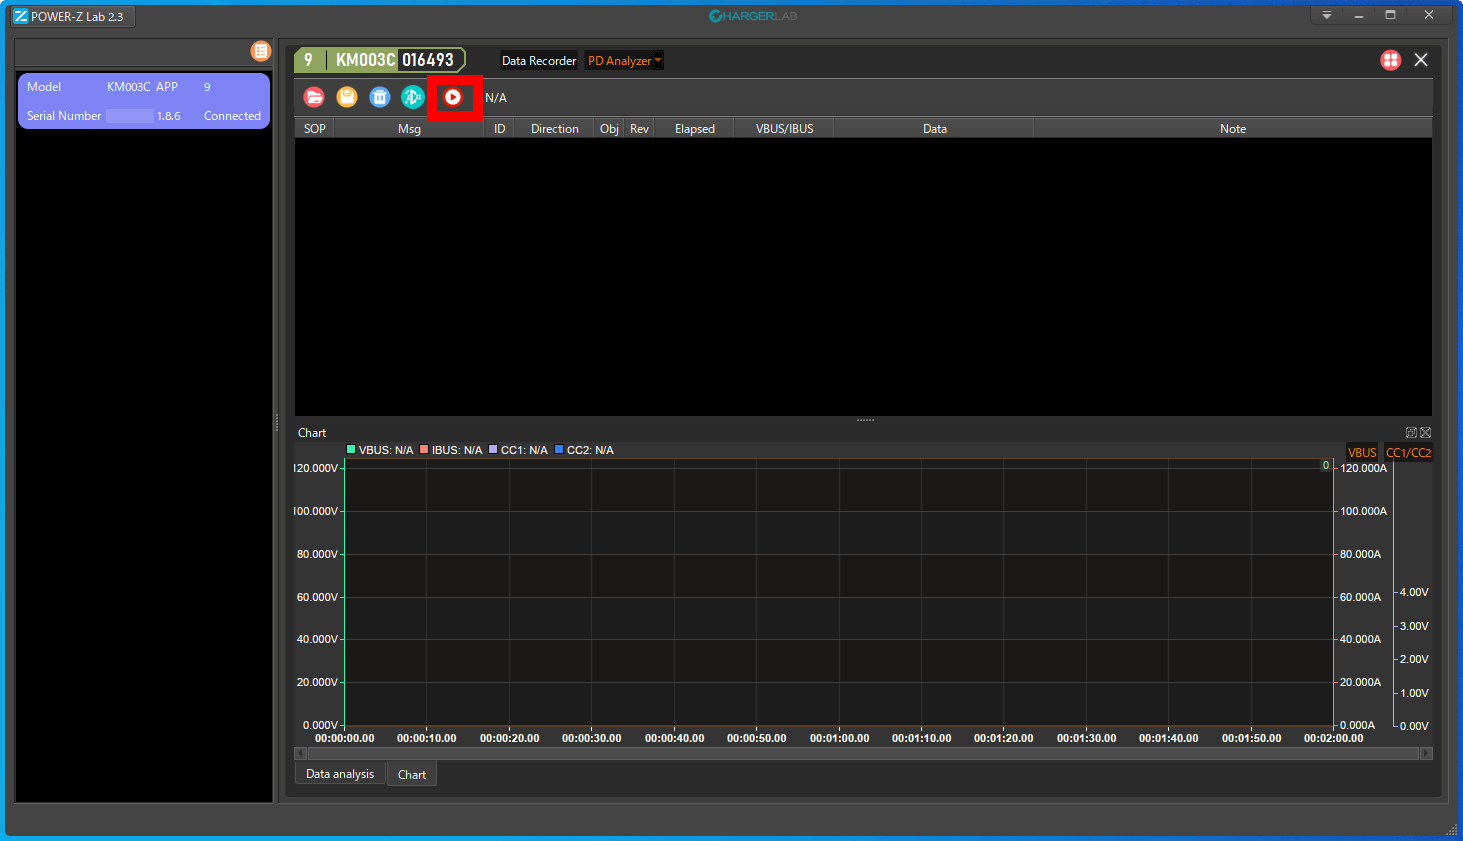
To view the measurement results in graphical form, click the play button on the right side of the screen.
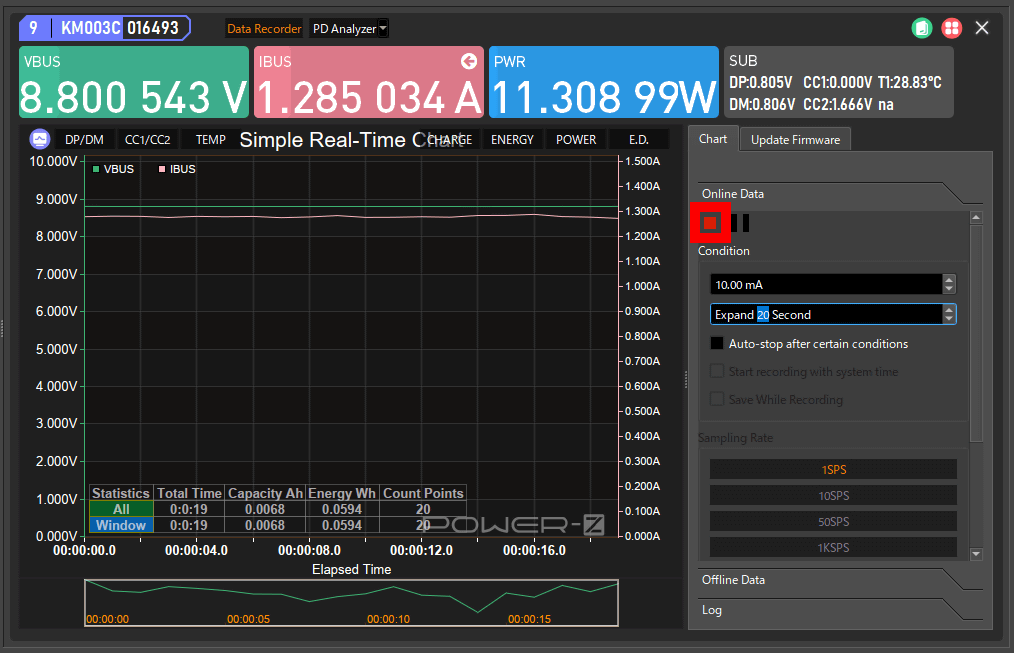
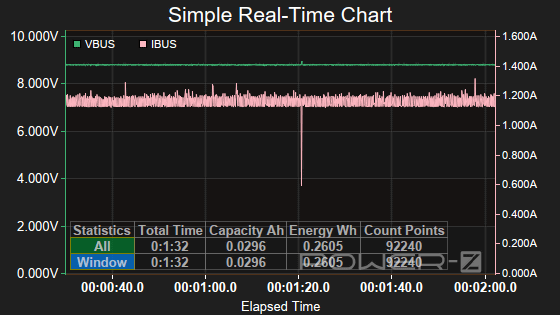
A graph will then be drawn. The horizontal axis of the graph is the elapsed time from the start of drawing, and the vertical axis shows the voltage and current, with the green line showing the voltage and the pink line showing the current. To stop drawing the graph, click the stop button.
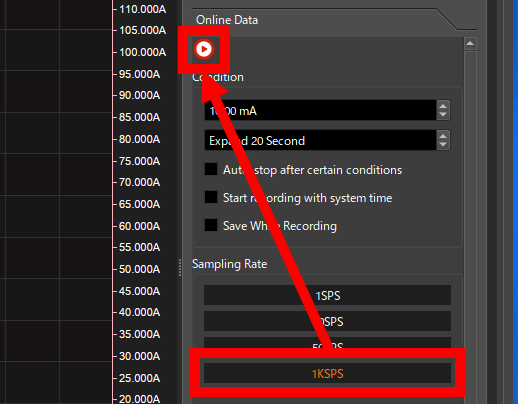
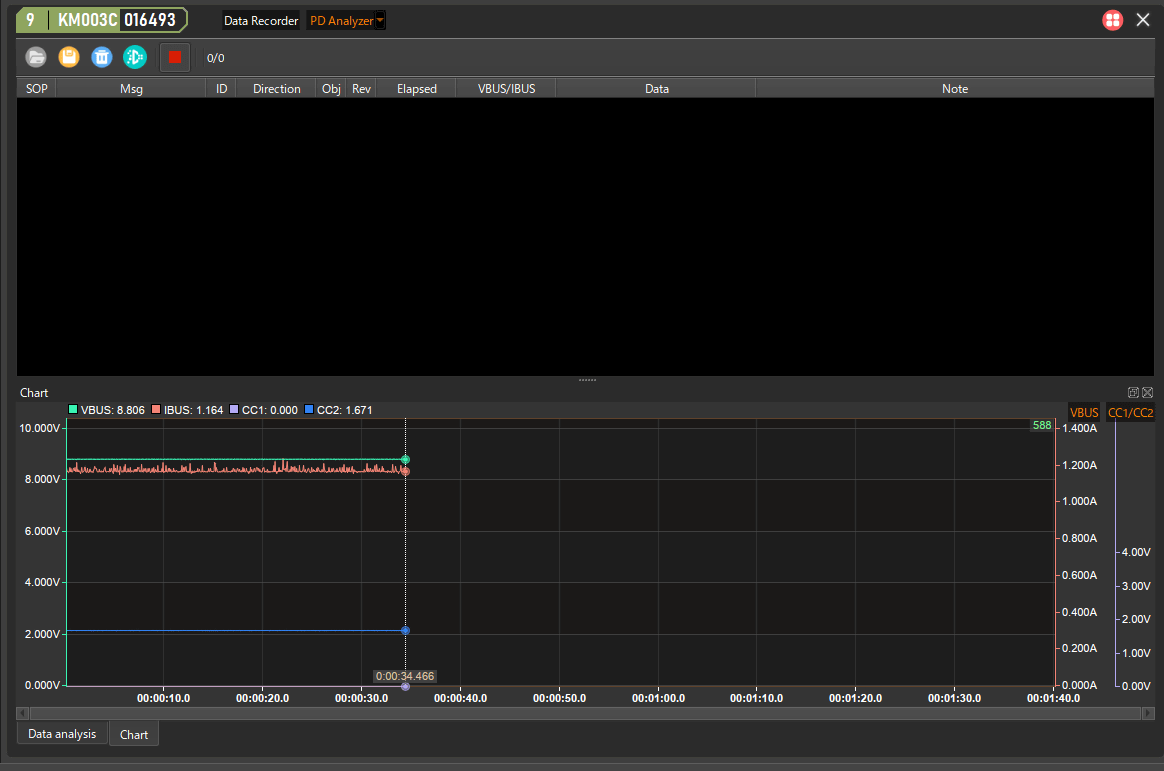
By default, the measurement results are plotted once per second. The drawing frequency can be changed from 'Sampling Rate'. For example, if you select '1KSPS', you can plot 1000 times per second. To test it out, I clicked '1KSPS' and then clicked the play button.
A graph plotted 1000 times per second looks like this. You can see the detailed changes in voltage and current.
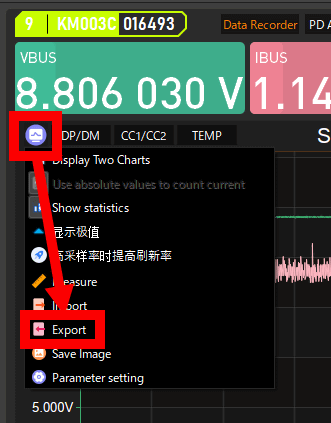
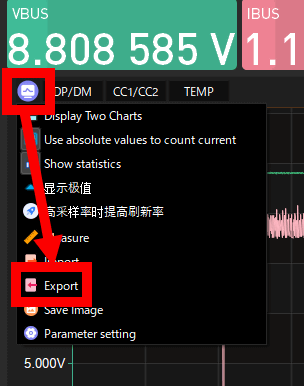
If you want to save the graph as an image file, click the blue button on the left side of the screen and then click 'Export.'
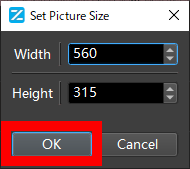
Specify the resolution of the output image and click 'OK'.
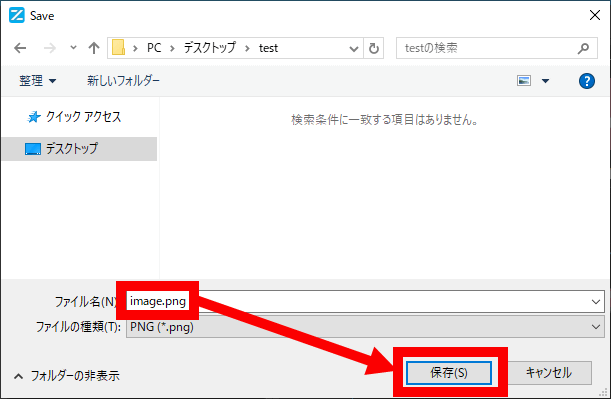
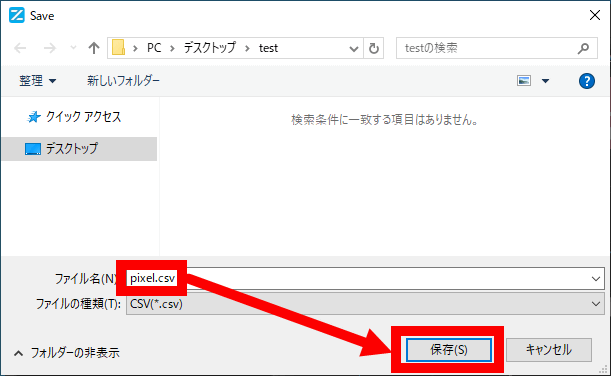
Specify the save destination and file name and click 'Save'. You can choose the save format from 'JPEG', 'PNG', 'GIF', 'BMP', 'SVG', and 'PDF'.
The saved images are below.
◆5: Store the measurement results in a database and compare them with past results
Mtools also has a function to database the measurement results and display multiple results side by side. To save the measurement results, click the blue button and then click 'Export'.
Specify the save destination and name and click 'Save'. Data can be saved in CSV or DB format.
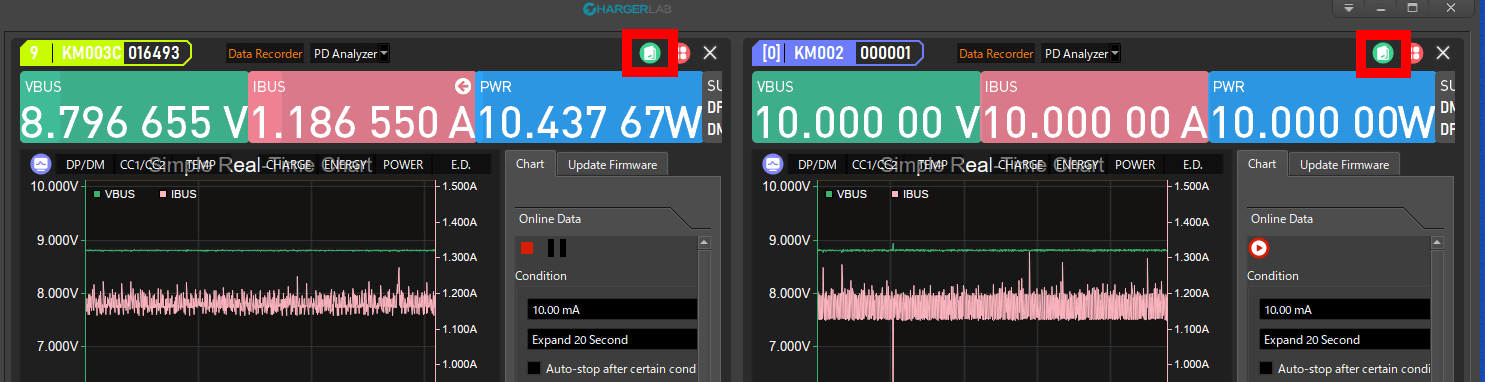
To display the measurement results side by side, click the orange button on the left side of the screen and then click 'Create Simulator'.
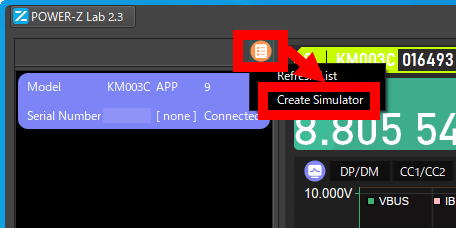
An empty device information will then be displayed, so double-click it.
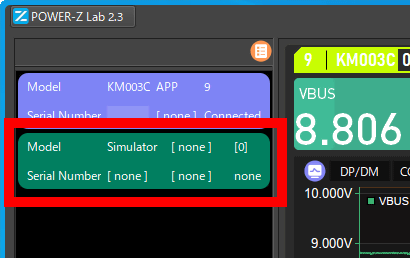
When you double-click, a new measurement result display screen will appear to the right of the current measurement result display screen. At the time of writing, up to four measurement result display screens can be arranged. If you try to create a fifth screen, the app will be forcibly terminated.
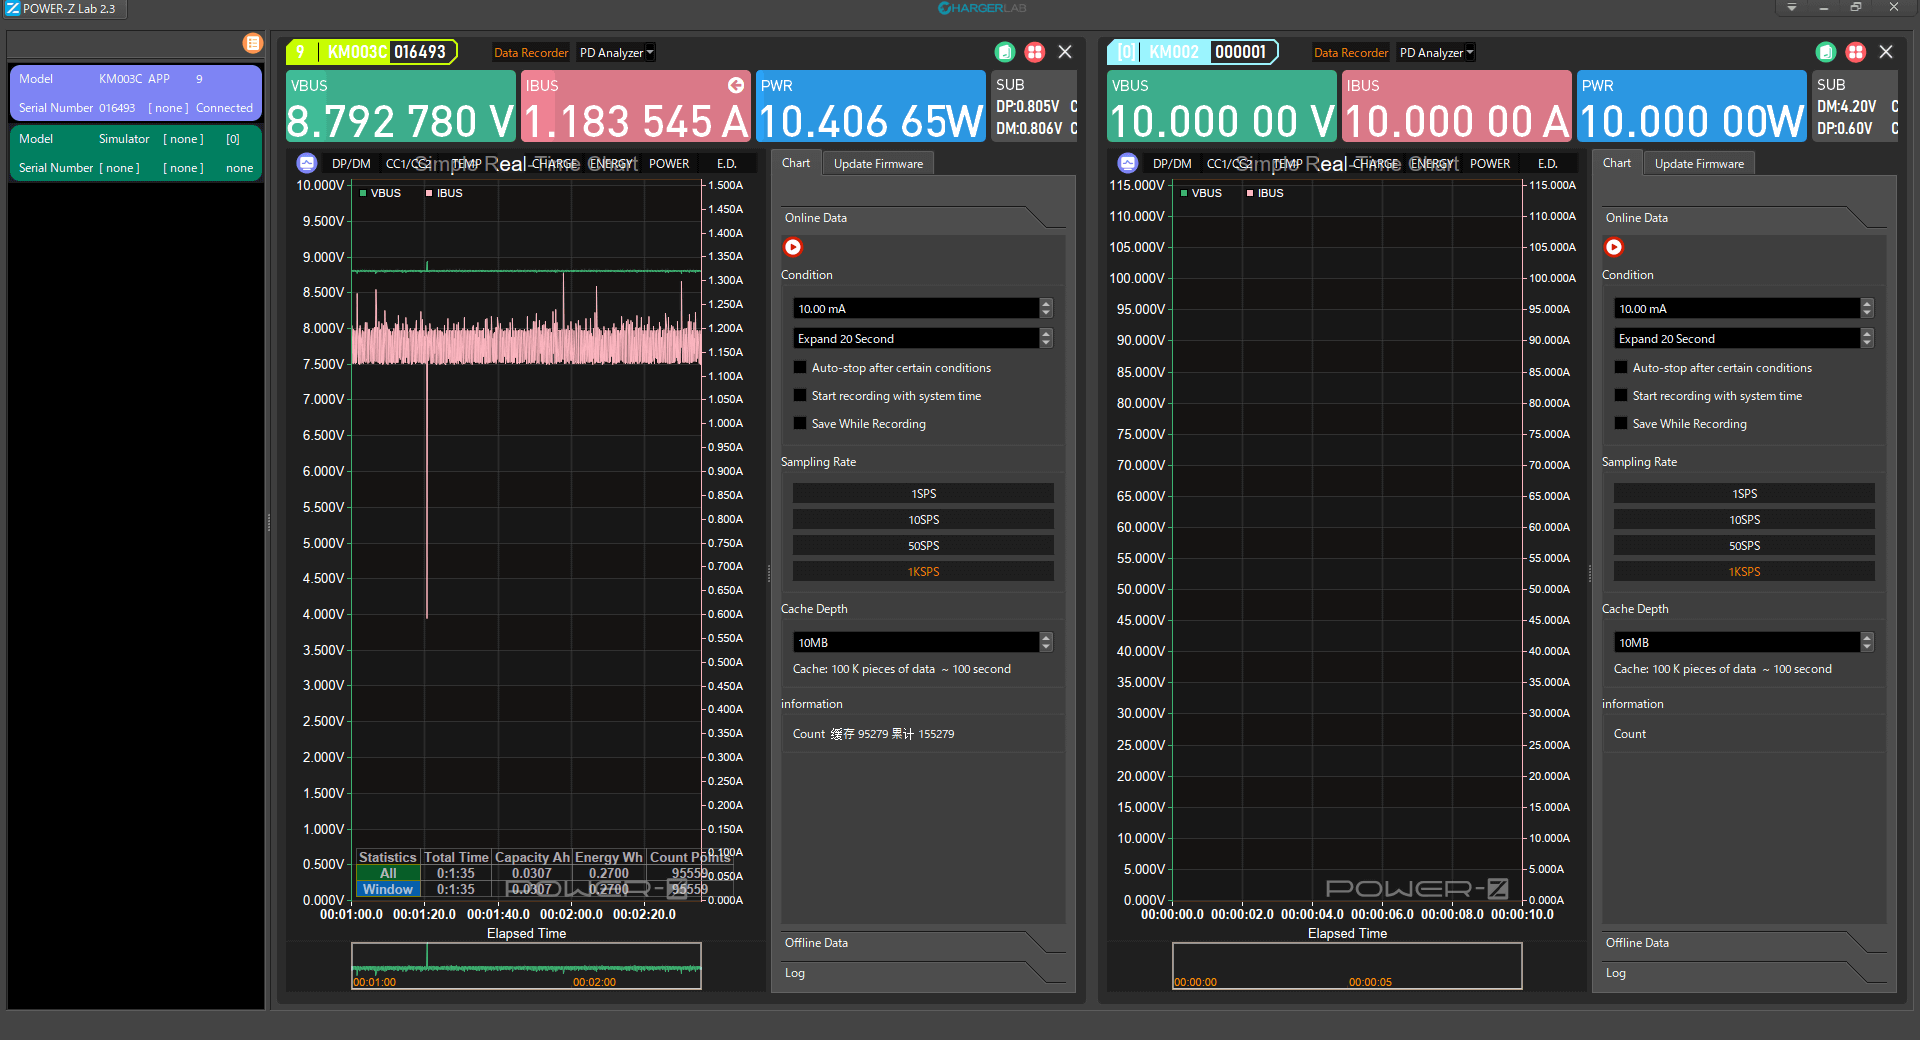
Next, load the exported data into the newly created measurement result display screen. First, click the blue button and then click 'Import'.
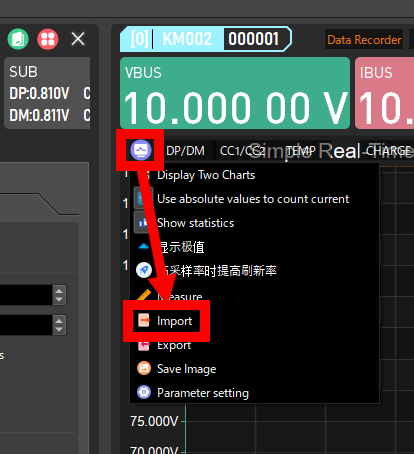
Select the data you want to load and click 'Open.'
Now you can compare multiple data sets. You can now compare real-time measurements with saved data, or save data with other saved data.
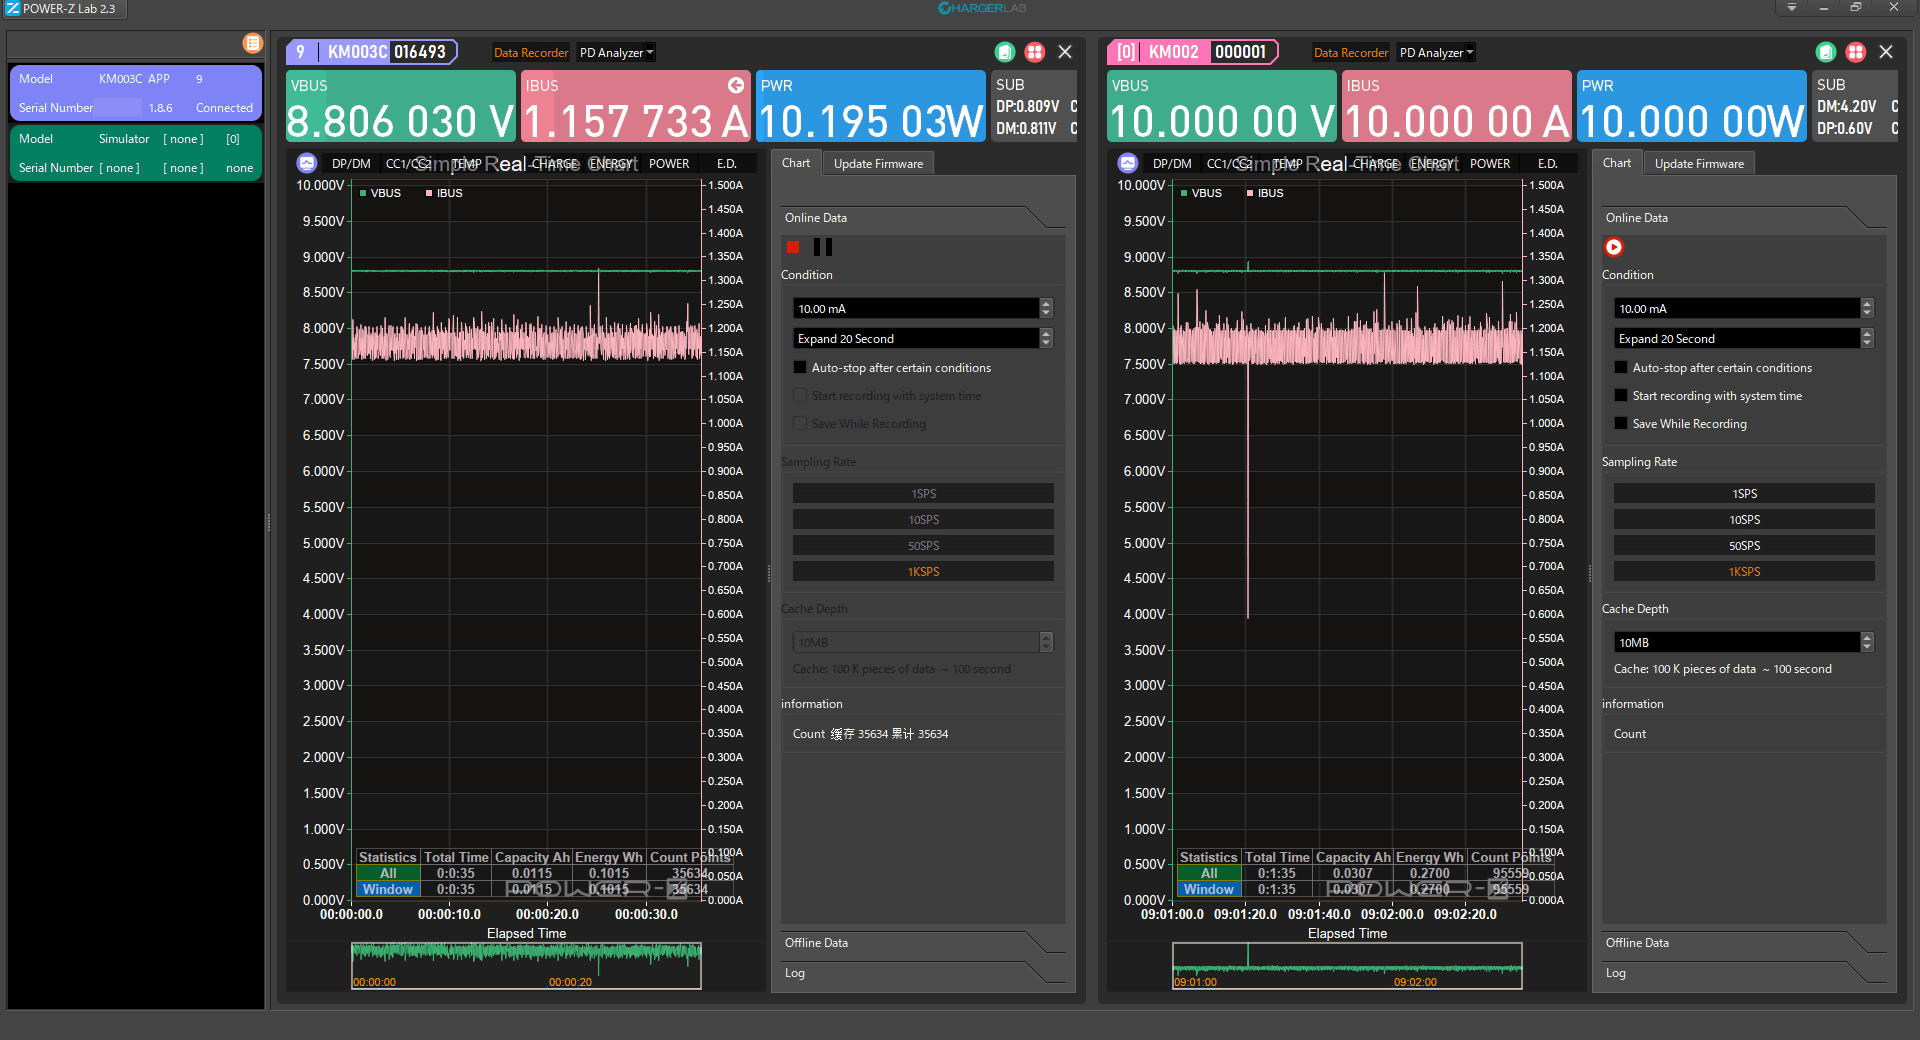
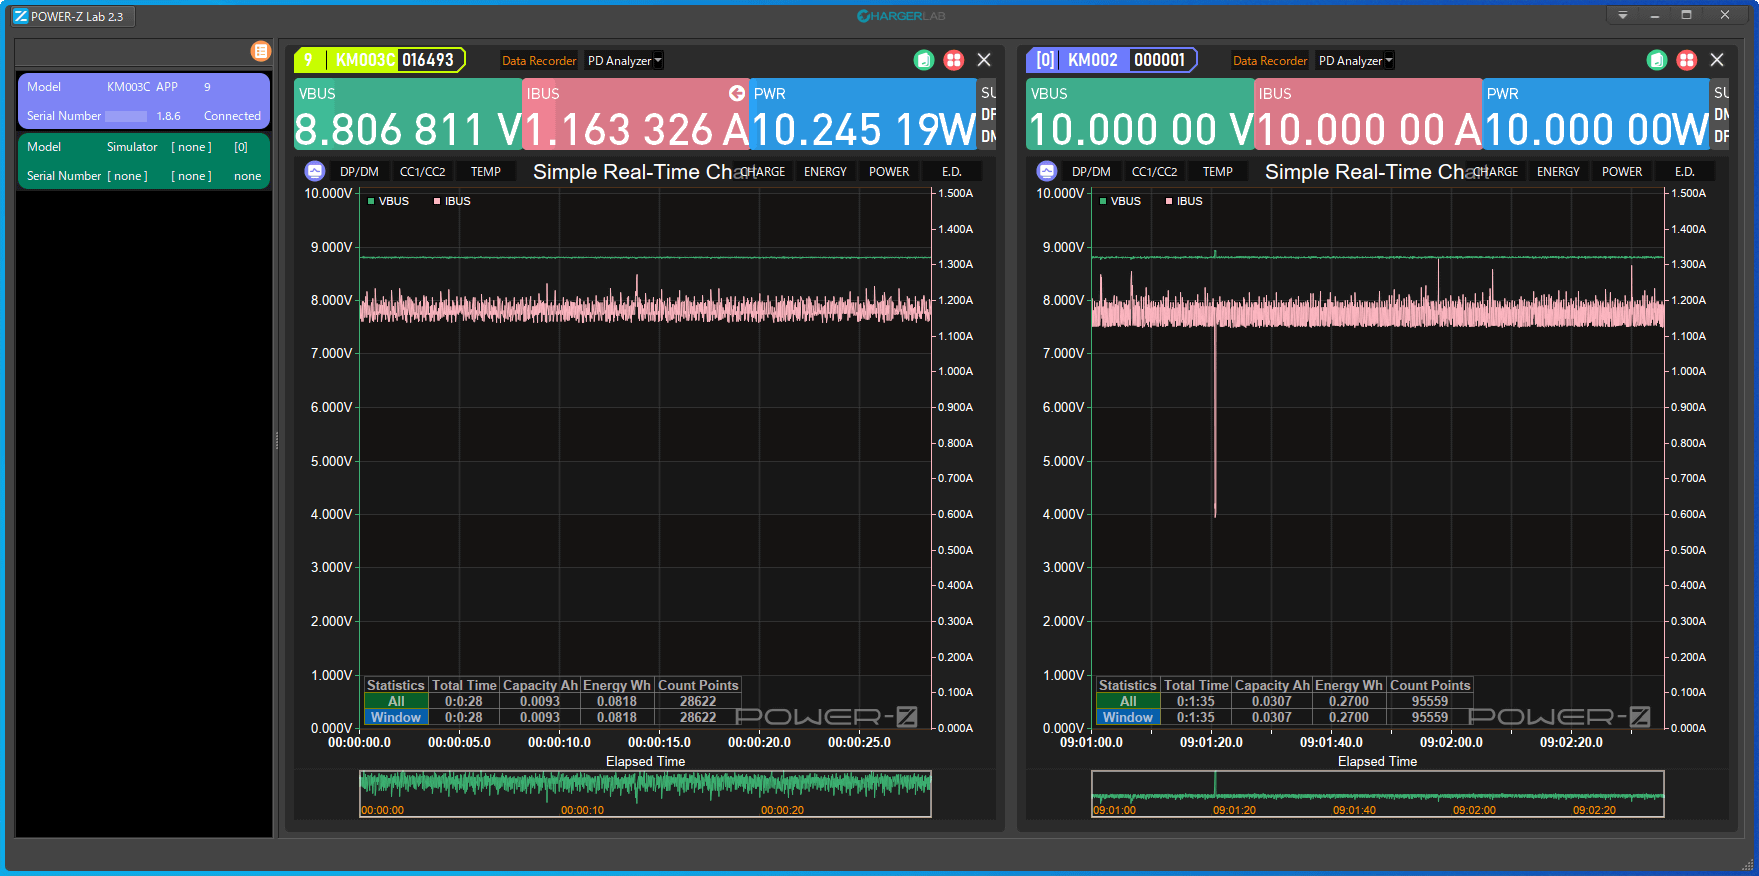
In the standard state, the sidebar gets in the way and takes up too much space in which to display the graph, so click the button in the red frame to hide the sidebar.
This will allow you to see a larger version of the graph.
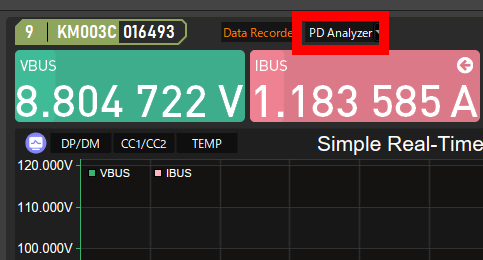
◆6: Check the USB PD communication content with the app
By combining Power-Z KM003C and Mtools, you can check the USB PD communication contents from a PC. First, wire the device in the same way as checking the output status.
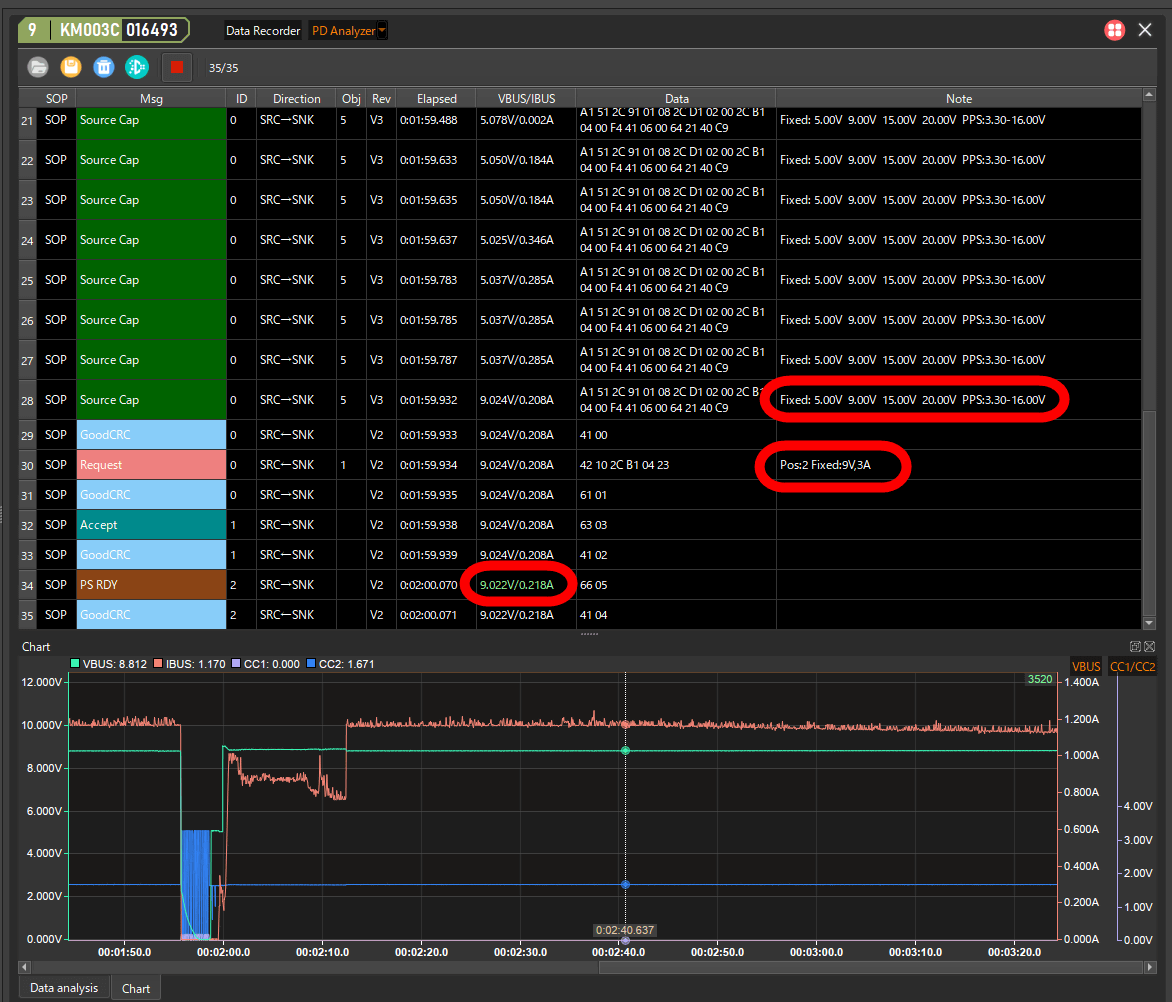
Next, click 'PD Analyzer' at the top of the screen.
Click the play button.
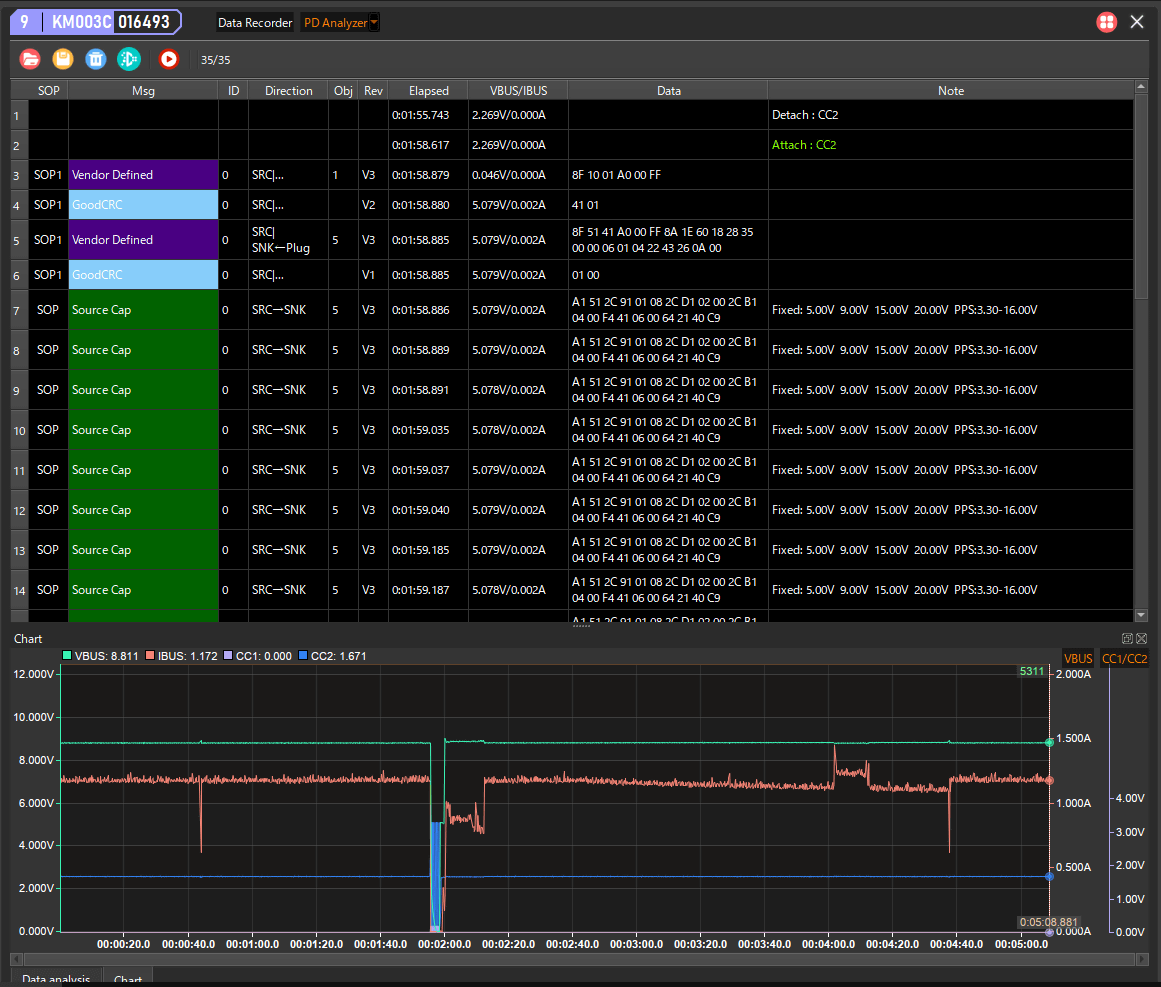
The USB PD communication content will then be displayed at the top of the screen, and the voltage and current levels will be displayed at the bottom of the screen.
To perform USB PD communication, unplug the USB cable and then reinsert it.
Then, the contents of the communication were displayed at the top of the screen. By checking the contents of the communication, you can check what output the USB adapter is proposing, the type of output requested by the device, the actual output status, etc.
The contents of USB PD communications can also be made into a database. To make a database, click the yellow save button at the top of the screen.
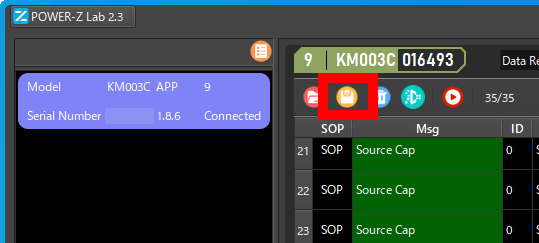
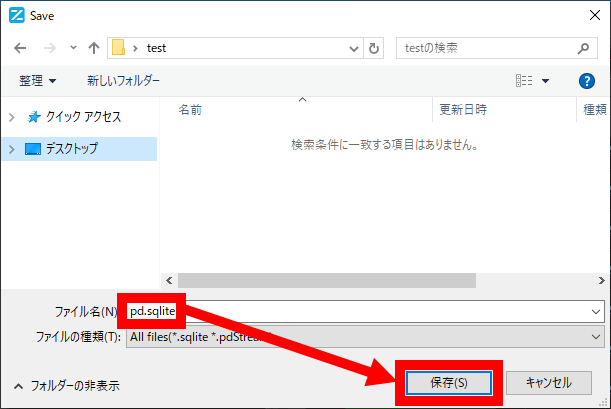
Specify the save destination and file name and then click 'Save'. The USB PD communication contents can be saved in either SQLite format or pdStream format.
Click the red file open button to load the saved data.
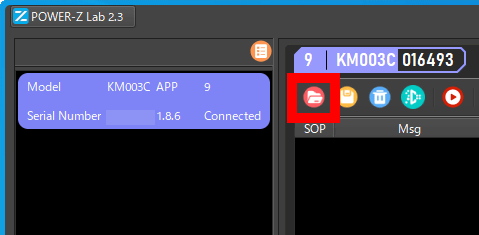
Select the file you want to load and click 'Open.'
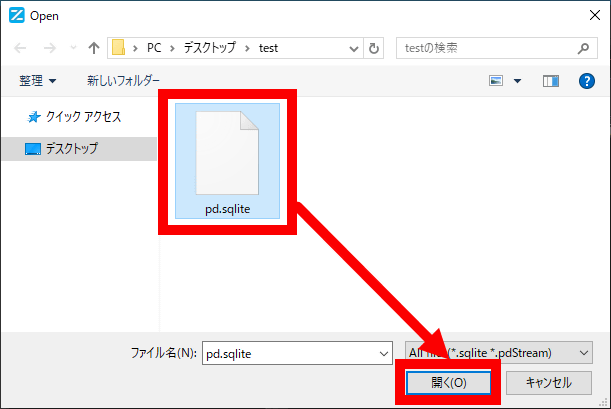
This allows you to review past communications.
◆7: Check the compatible standards for fast charging with the Power-Z KM003C unit
The Power-Z KM003C also has a function to check the fast charging standard supported by the USB adapter. To check the support status of the fast charging standard, first connect the auxiliary power supply to the Power-Z KM003C, then connect the USB adapter and the Power-Z KM003C.
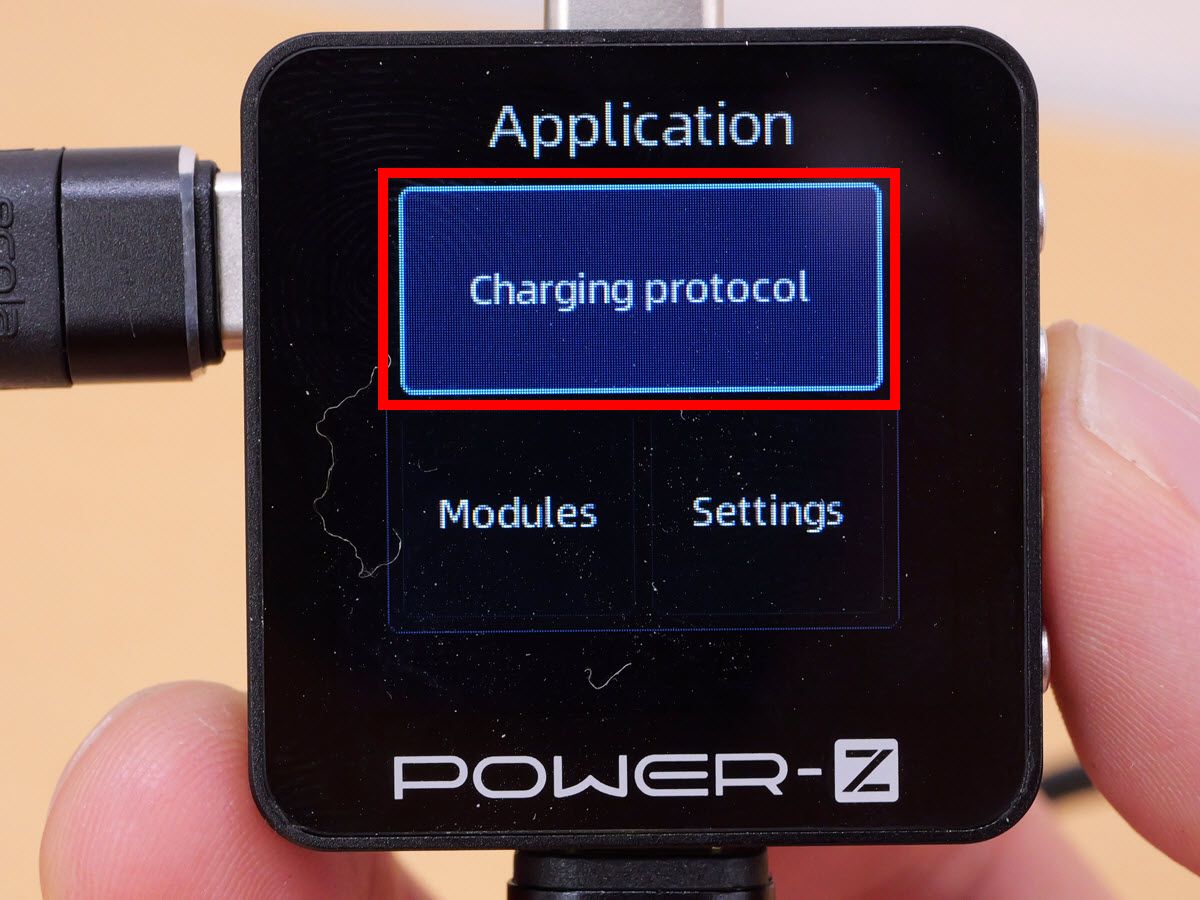
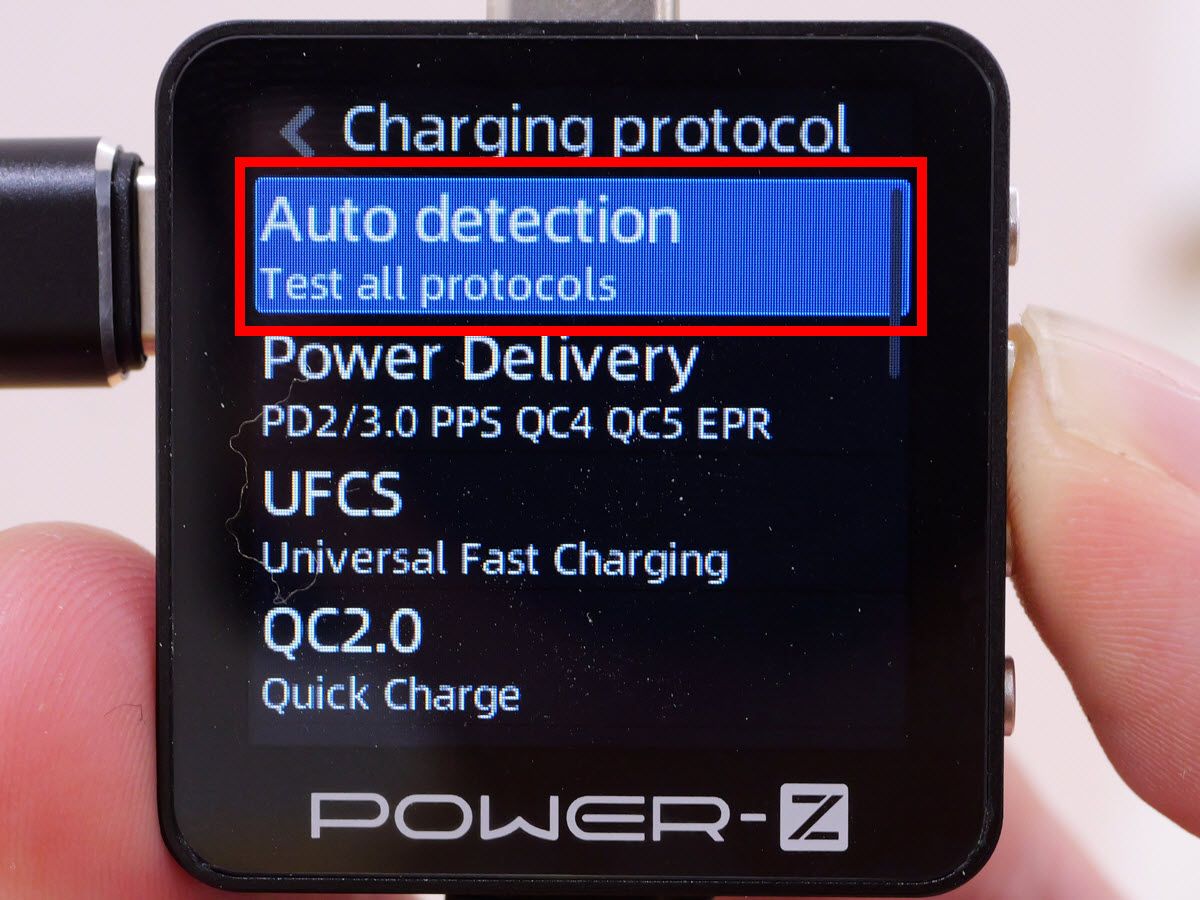
Press the 'Next' and 'Back' buttons on the right side to display the 'Application' screen and select 'Charging protocol'.
Select 'Be ready!'
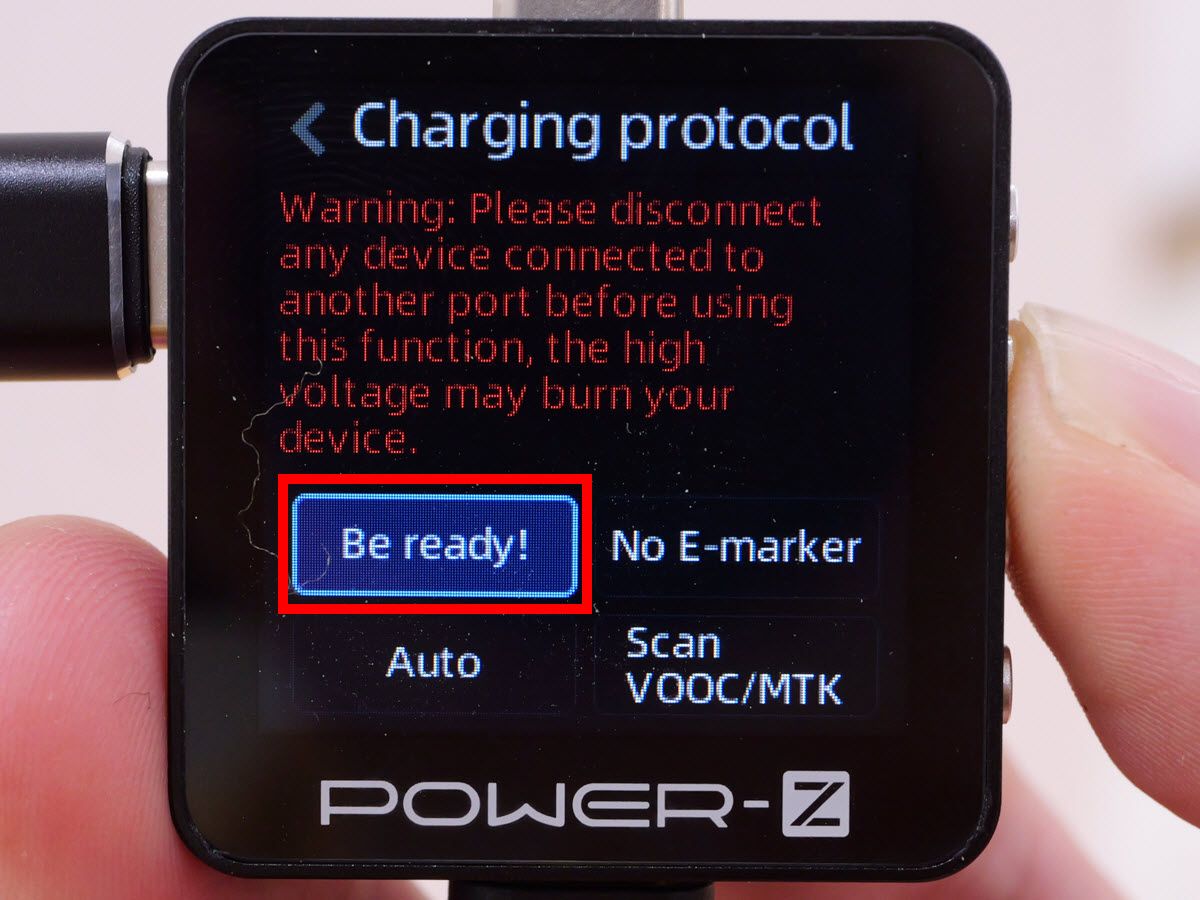
Select 'Auto detection'.
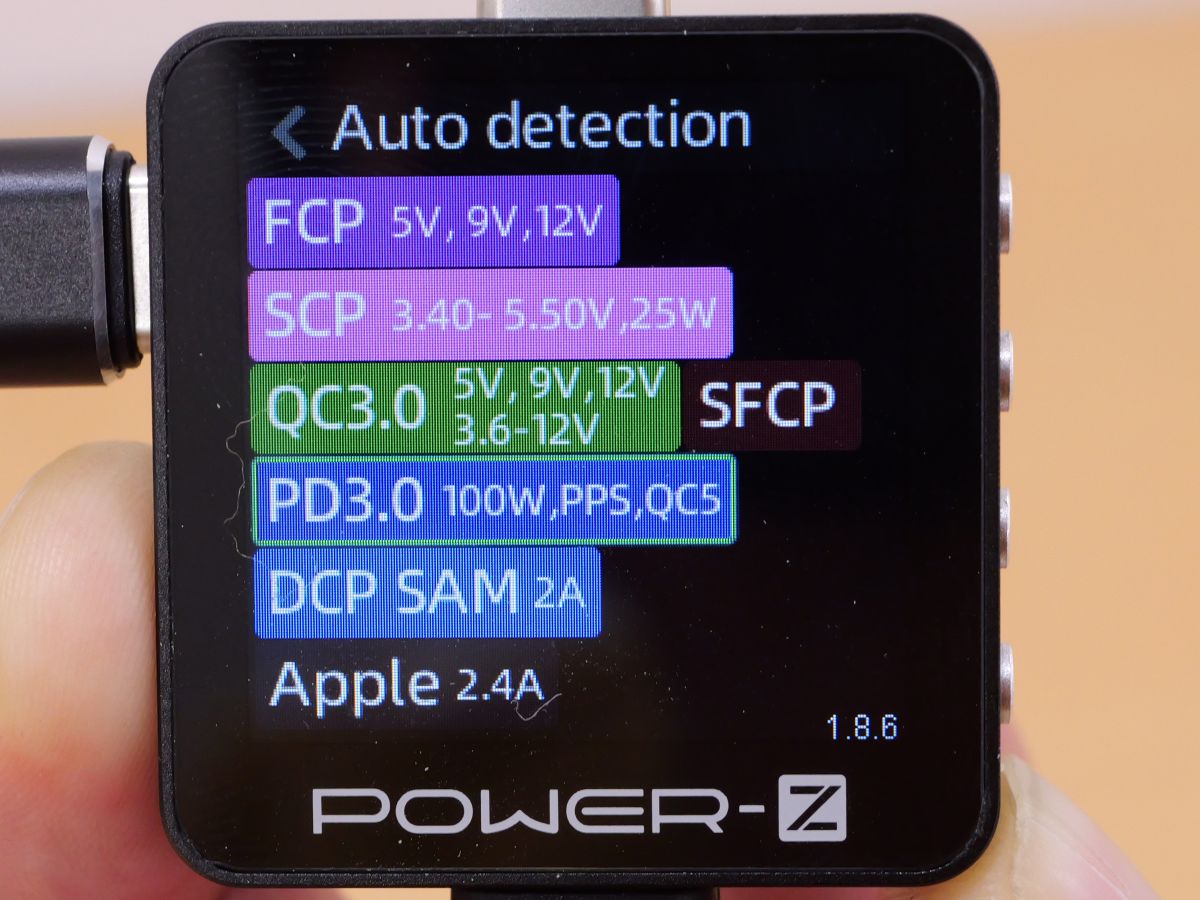
Please wait a while as the analysis of compatible standards will begin.

After a while, the USB adapter's supported standards will be displayed as shown below.
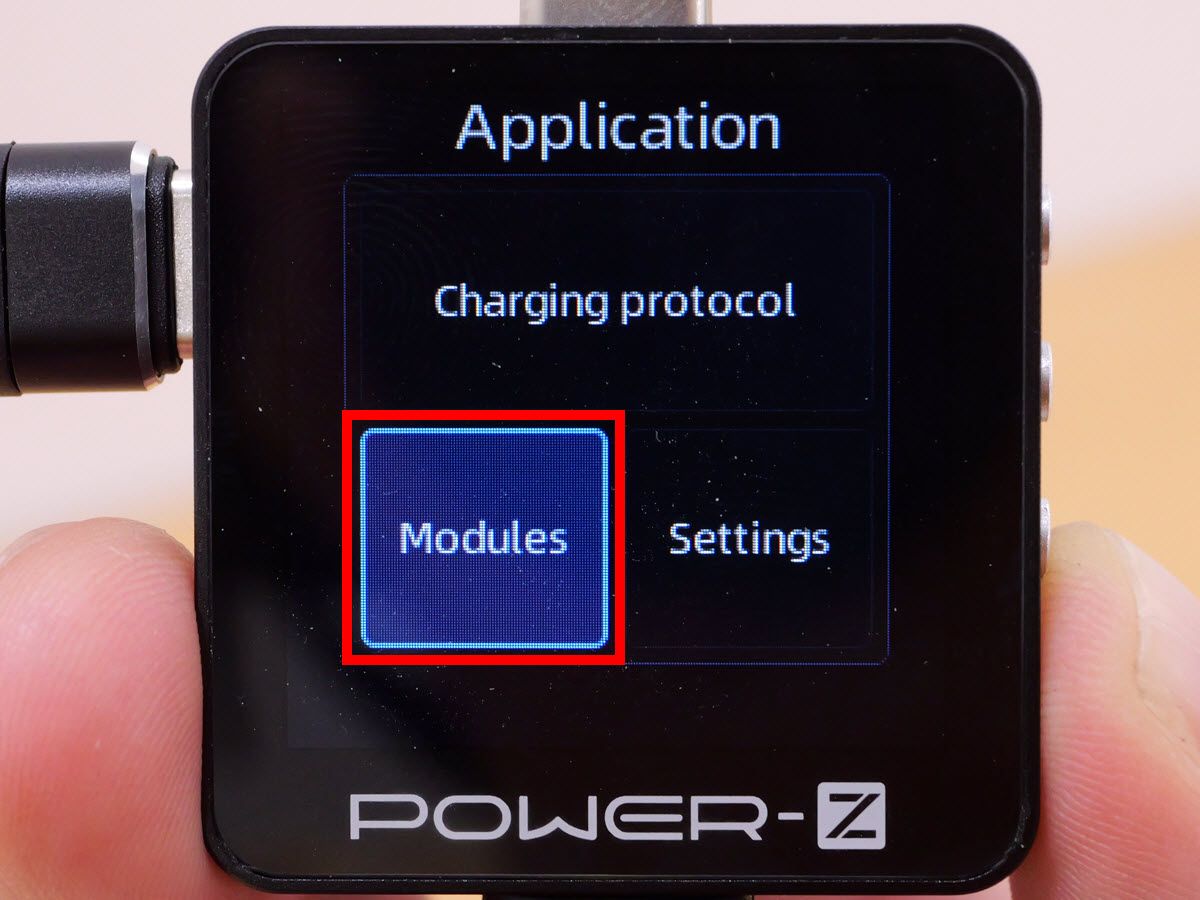
◆8: Check the eMarker information on the Power-Z KM003C unit
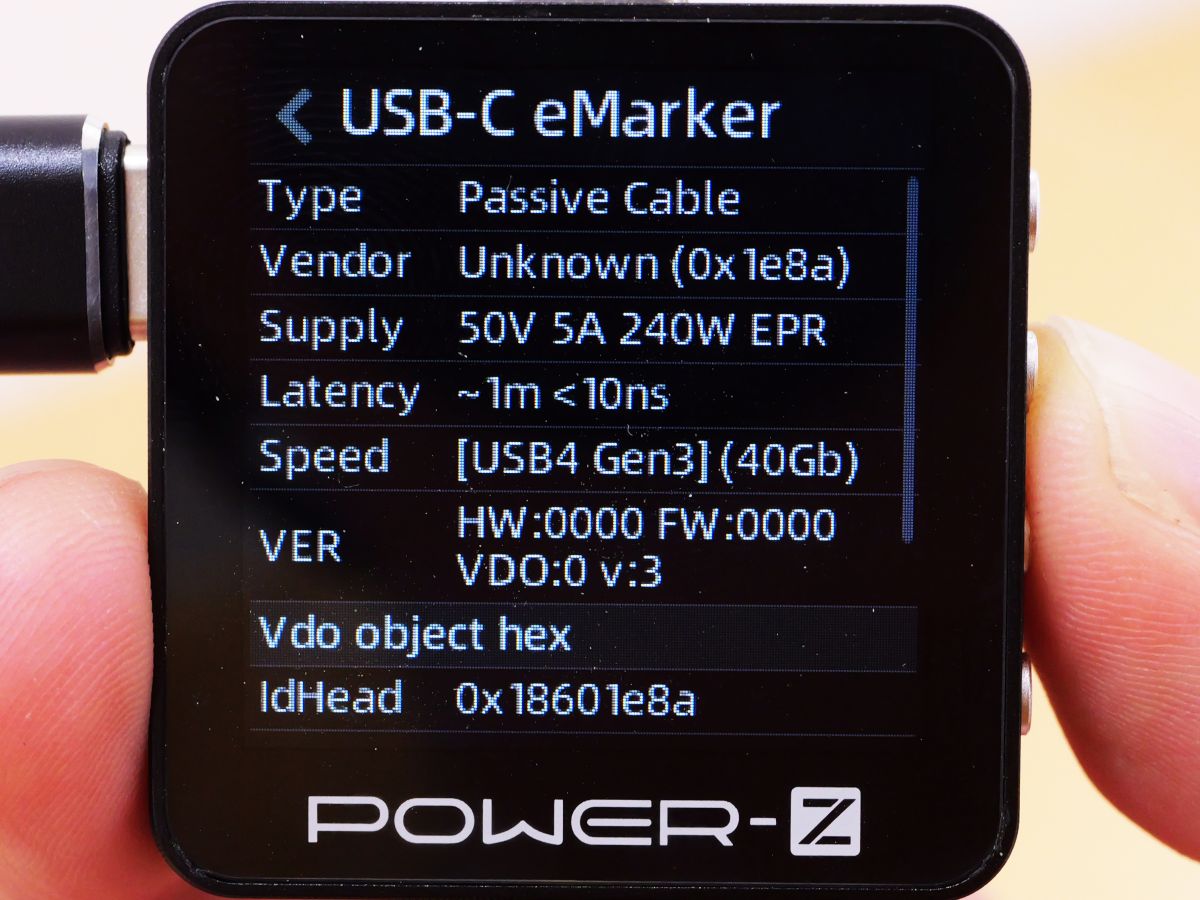
Some USB Type-C cables have an IC chip called 'eMarker' that records cable information. You can check the eMarker information by using the Power-Z KM003C.
To check the eMarker information, connect an auxiliary power supply to the Power-Z KM003C and connect the USB cable you want to check the information for to the female terminal of the Power-Z KM003C.
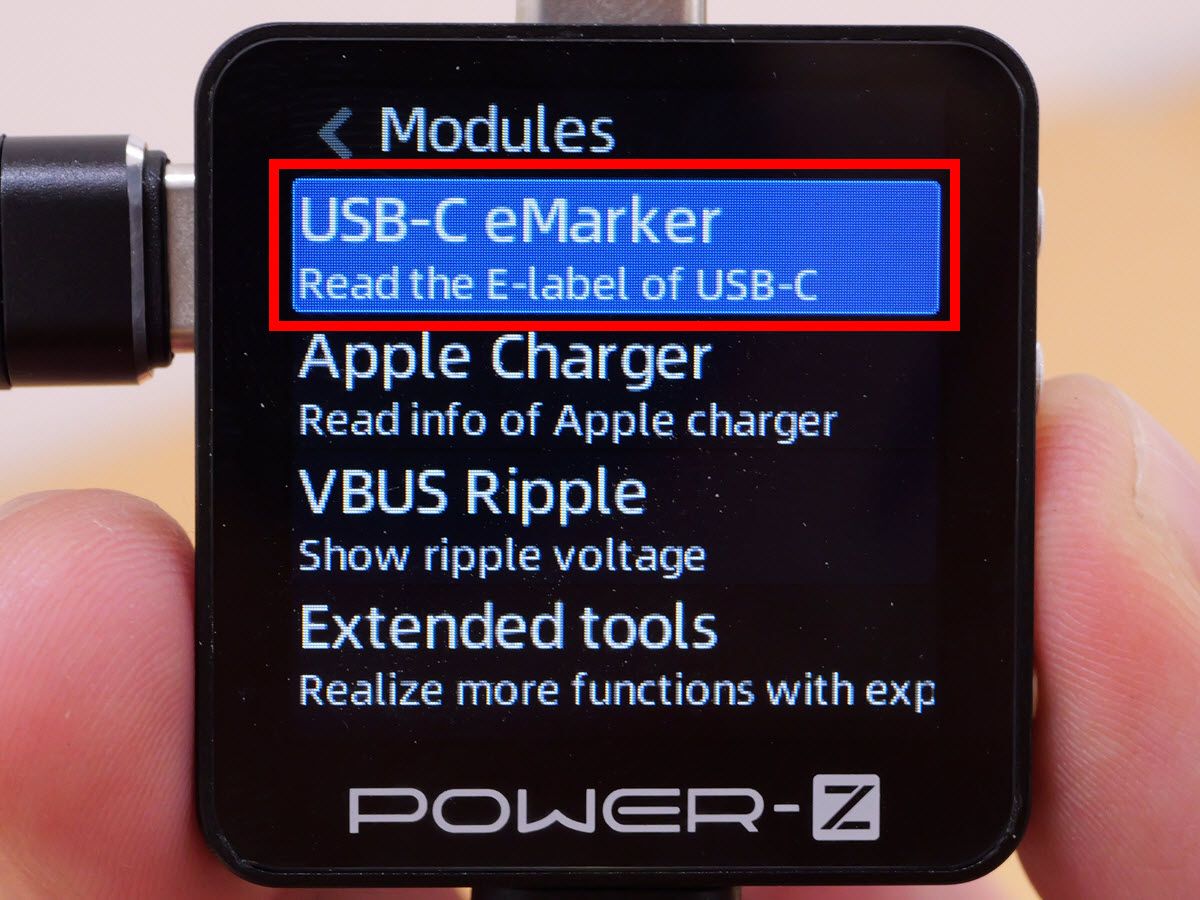
Select “Modules” from “Application”.
Select “USB-C eMarker”.
The eMarker information will then be displayed, allowing you to check the maximum power that can be supplied and the standards that are supported.
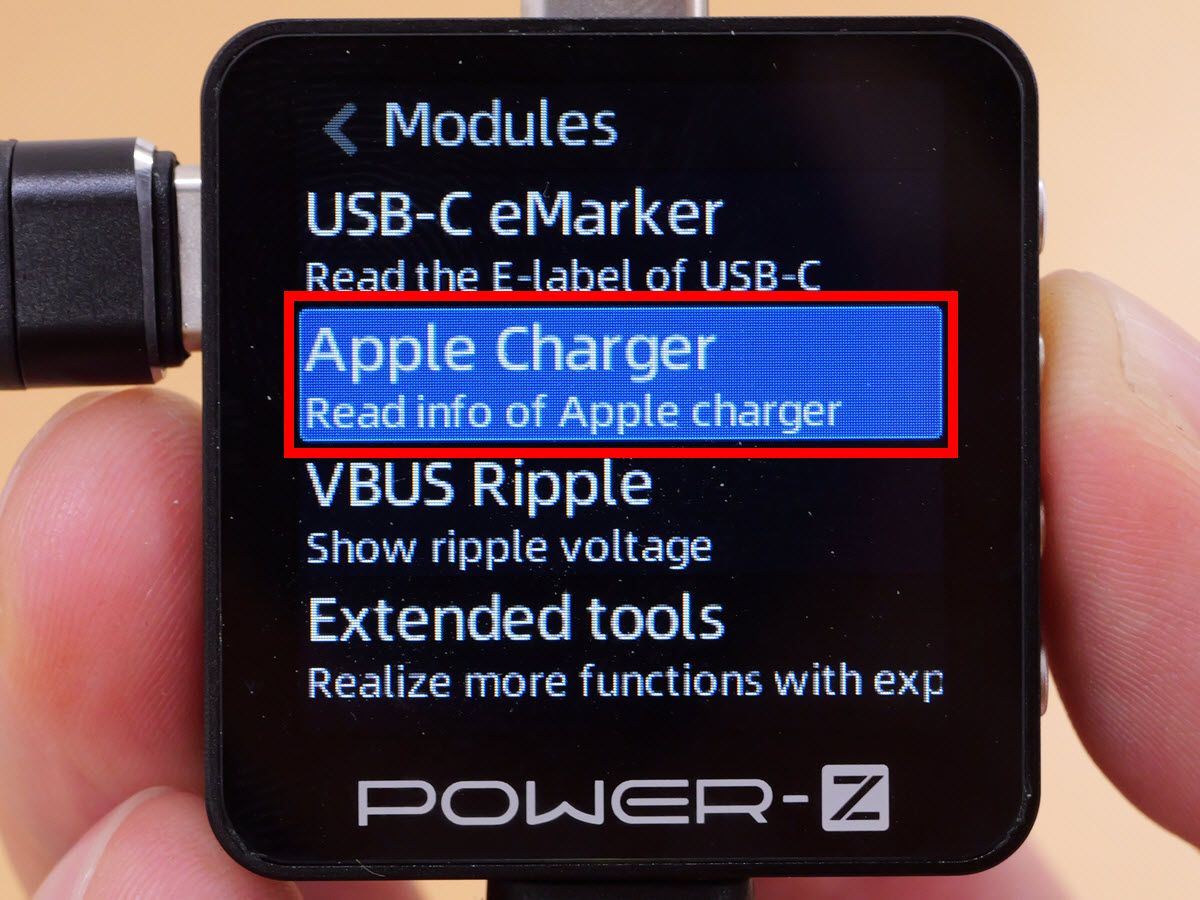
◆9: Check the information of Apple USB adapter on Power-Z KM003C
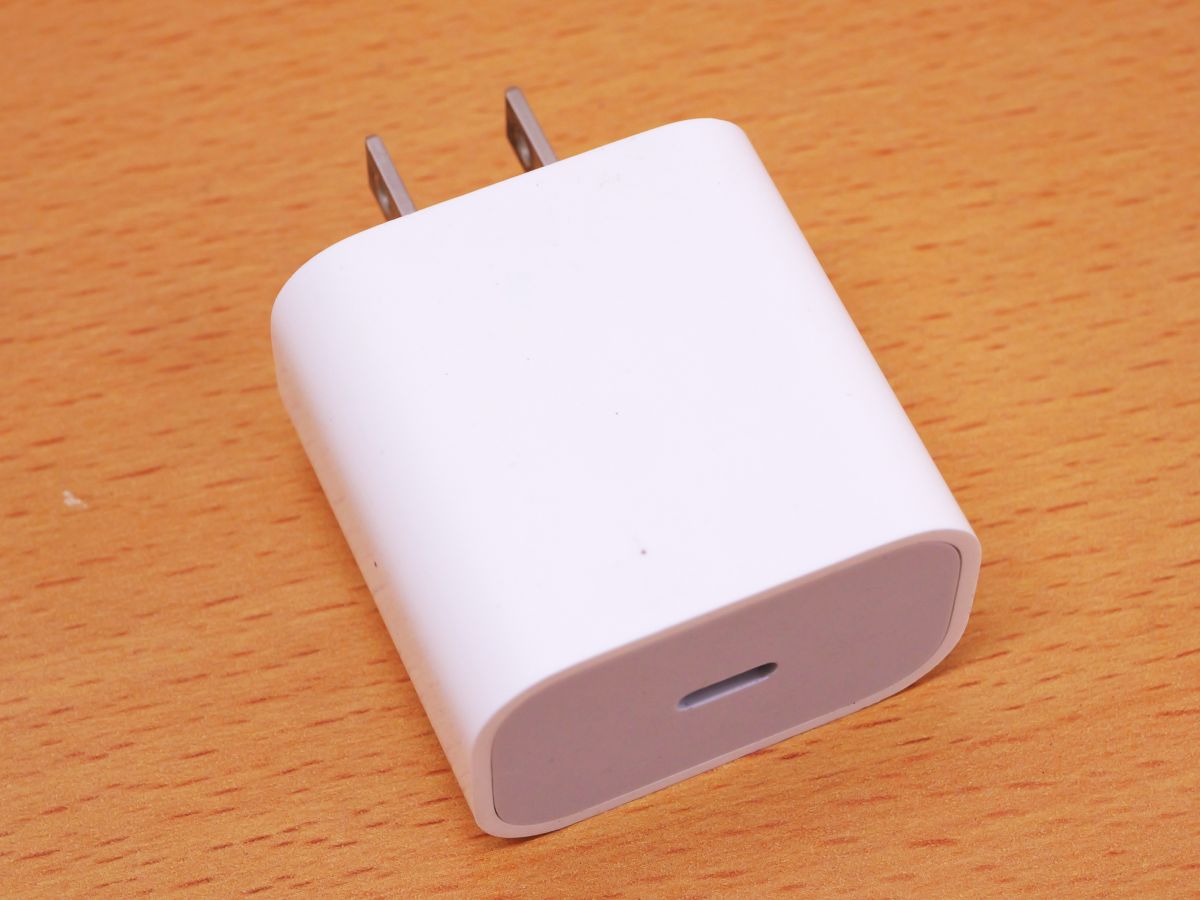
Using the Power-Z KM003C, you can also check information about Apple USB adapters. This time, we will check the information about the following USB adapters.
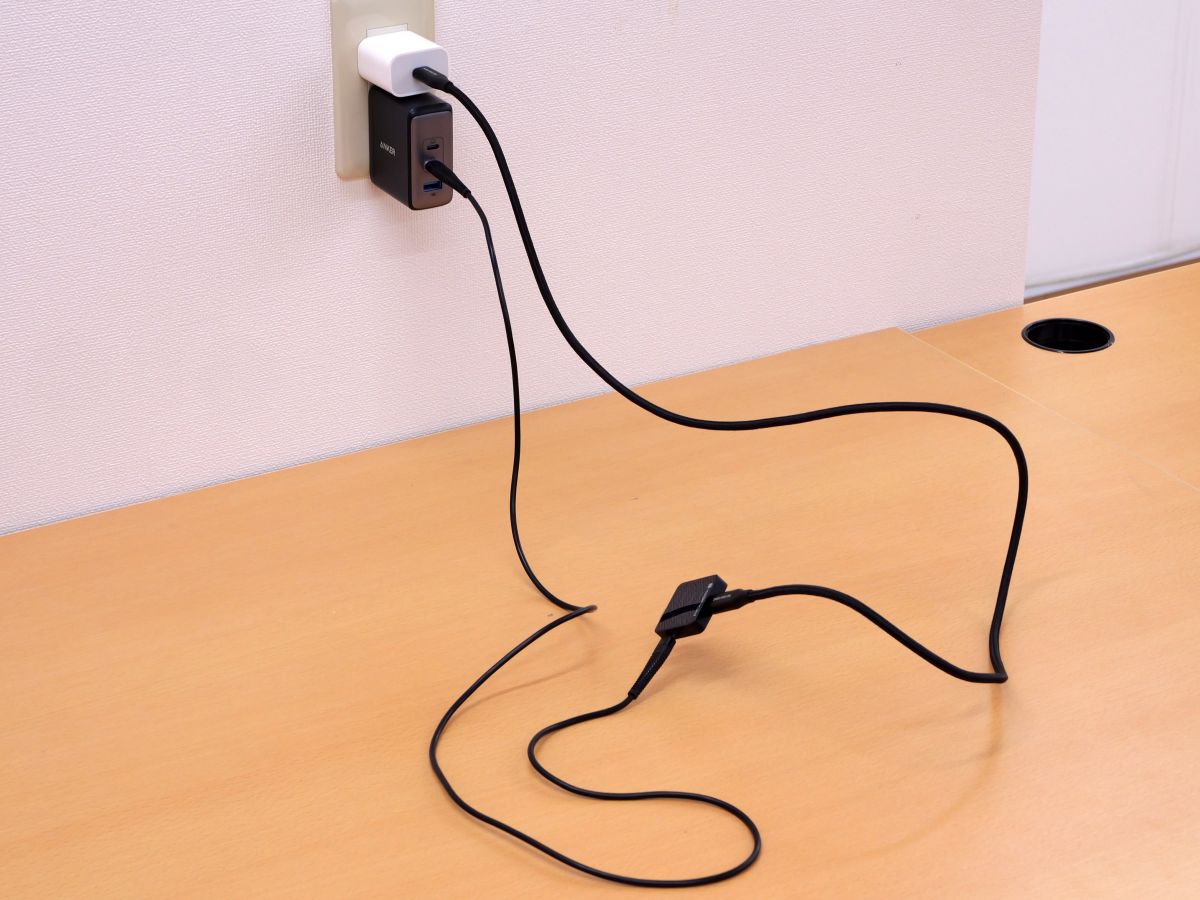
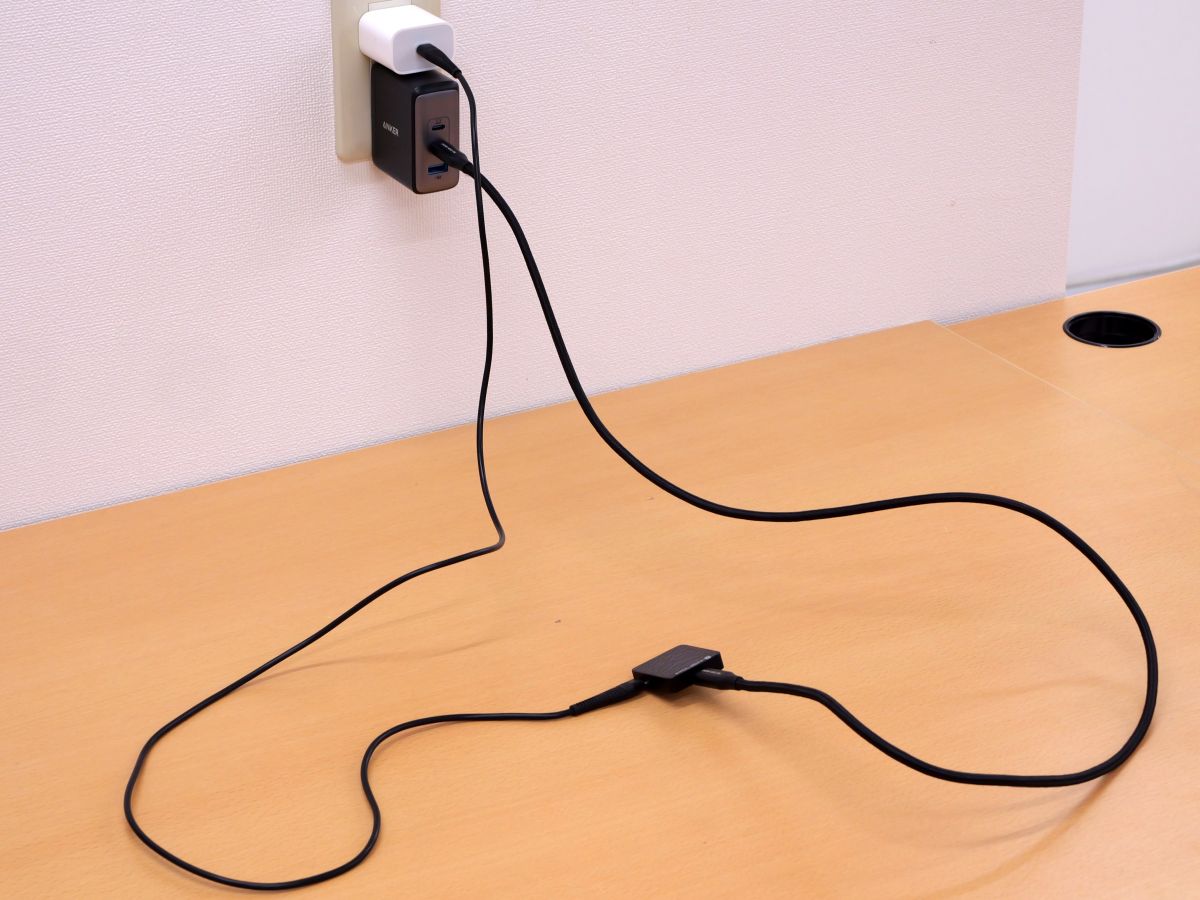
First, connect the Power-Z KM003C to an auxiliary power source, then connect the USB adapter to the Power-Z KM003C.
Select 'Apple Charger' under 'Modules.'
The product name and serial number of the USB adapter will then be displayed.

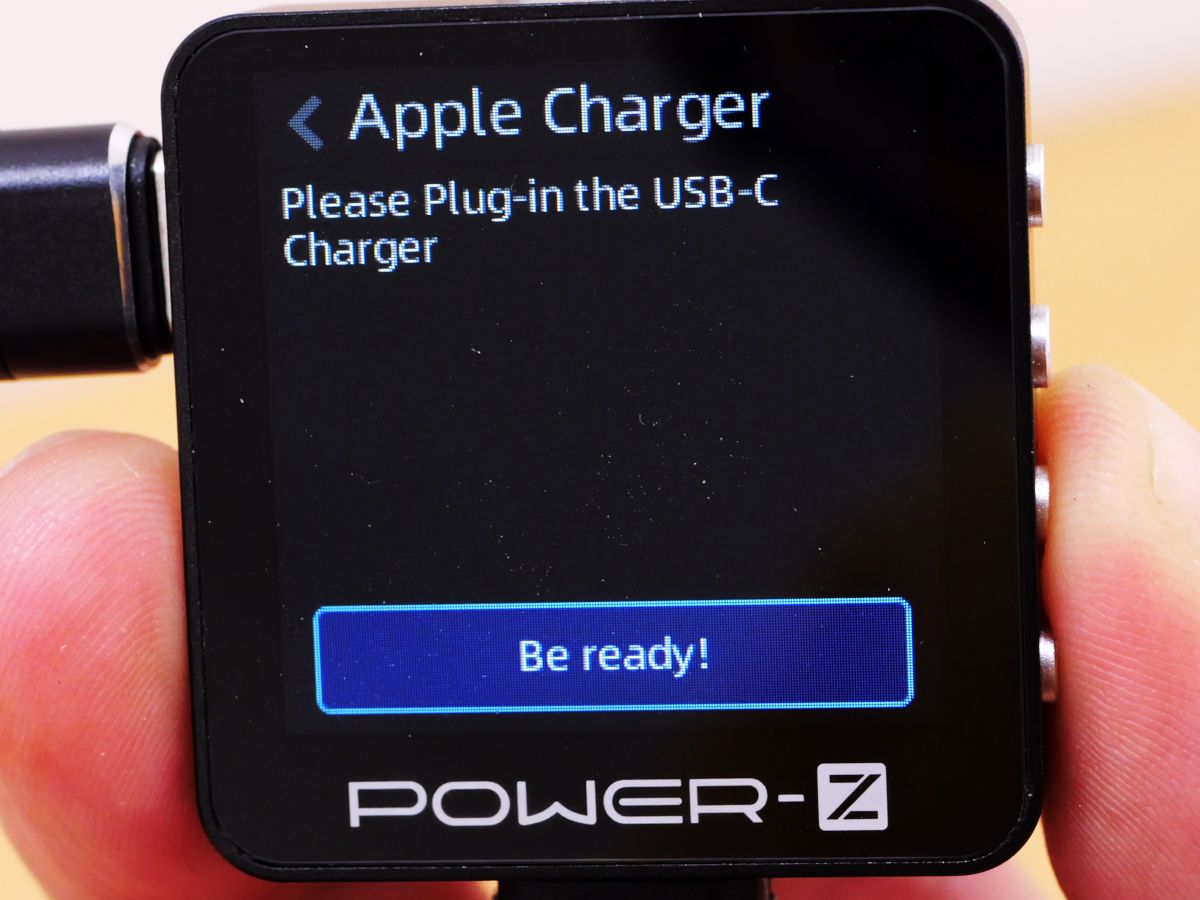
To see what the results would be like if I used a USB adapter other than the Apple one, I connected an Anker USB adapter and tried using the Apple Charger.
Then, a notification was displayed saying 'Please connect a USB-C charger.' This function can also be used to distinguish counterfeit Apple USB adapters.
At the time of writing, the Power-Z KM003C is available on Amazon.com for $109.99 (approximately 16,300 yen) excluding shipping.
Amazon.com: ChargerLAB Power-Z KM003C Portable USB-C Fast Charging Tester PD3.1 QC5.0 Digital Voltmeter & Ammeter Power Bank Tester : Automotive
Continued
I tried to update the firmware of the USB tester 'Power-Z KM003C' that can check the communication content of the USB port and the compatible standard for fast charging - GIGAZINE
Related Posts: