I tried using ``WireHub'', a service that manages configuration files for WireGuard, a simple and fast VPN that can be used for free.

' WireHub ' is a configuration file management service for '
Social Networking / WireHub
https://www.wirehub.org/
Access the WireHub page and click 'Join the Beta!'
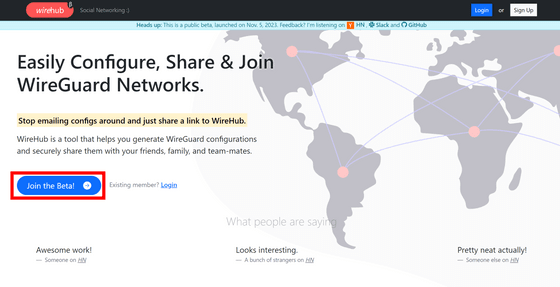
You can log in with your GitHub or GitLab account. This time, click 'Sign Up with GitHub'.
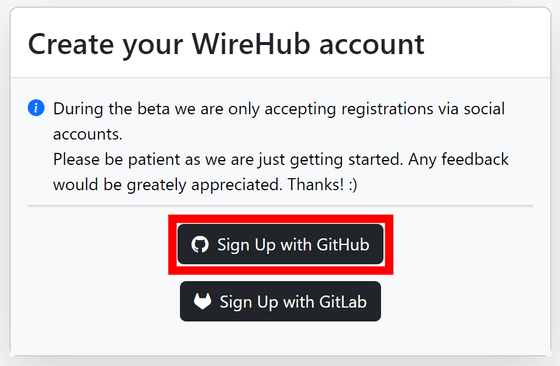
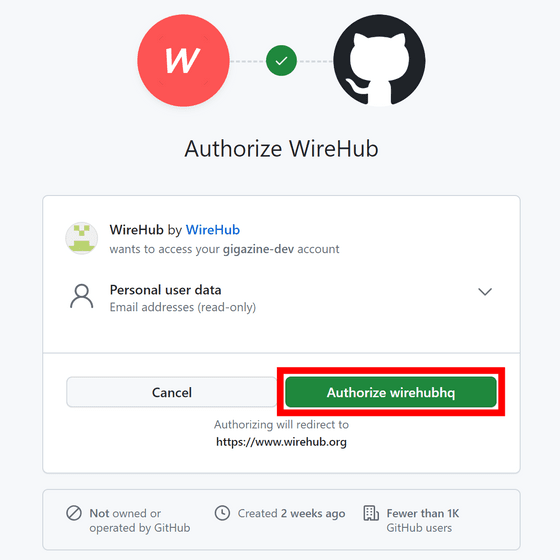
Click 'Authorize wirehubhq'.
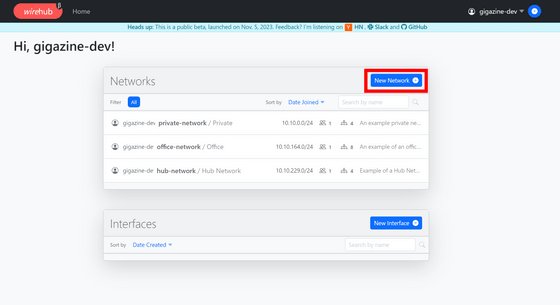
This is what it looks like when you successfully log in. Three networks have already been formed as samples, but this time we will create a new network by clicking 'New Network'.
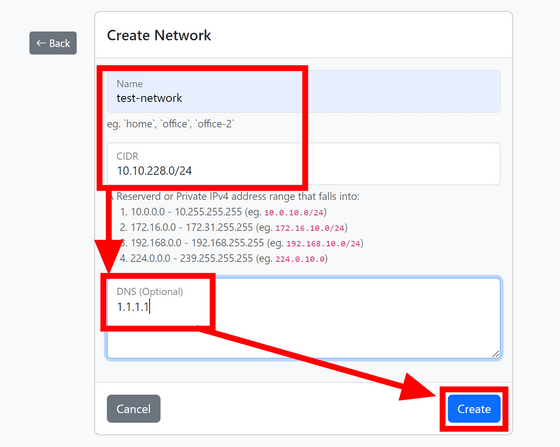
Enter the network name and CIDR assigned to that network. This time, I set the DNS to ' 1.1.1.1 ' and clicked 'Create'.
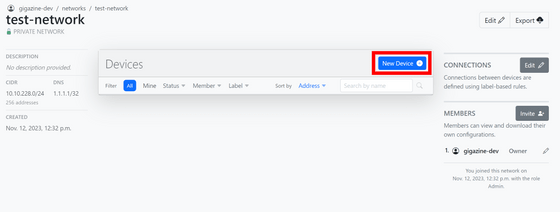
Now that you have created the network, click 'New Device' to add a device to the network.
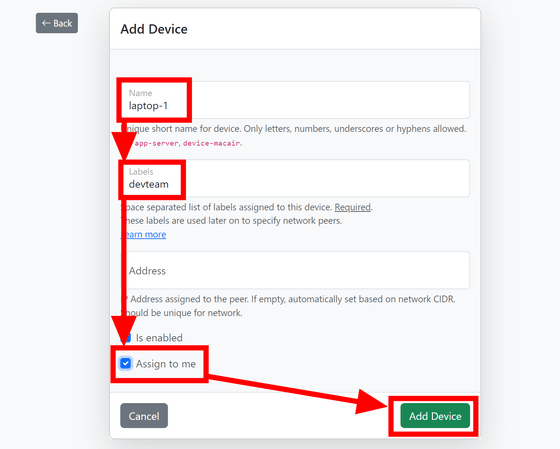
Enter a name and label for your device. The device to be added this time is your own device, so check 'Assign to me' and click 'Add Device'.
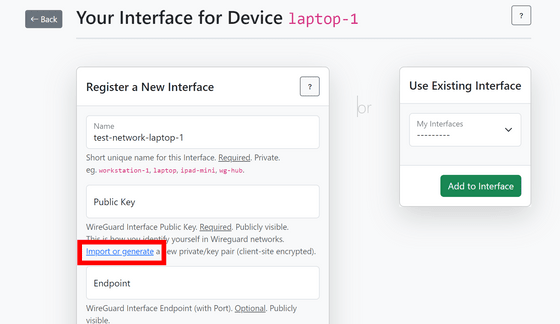
Enter the public key used for WireGuard communication. If you have already created a private key/public key, just enter the public key. This time we will create it on WireHub, so click on 'Import or generate'.
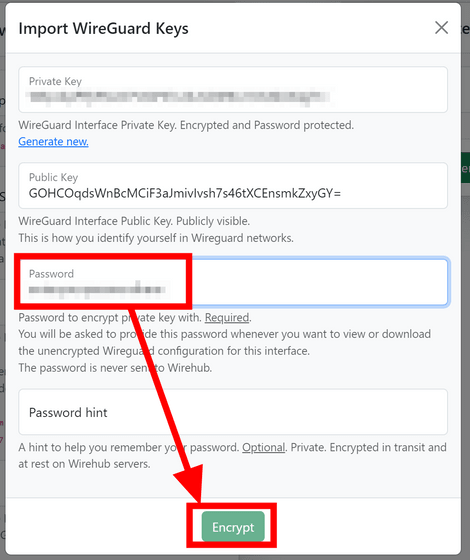
A public key and private key will be automatically created. Enter the password used to save the private key and click 'Encrypt'.
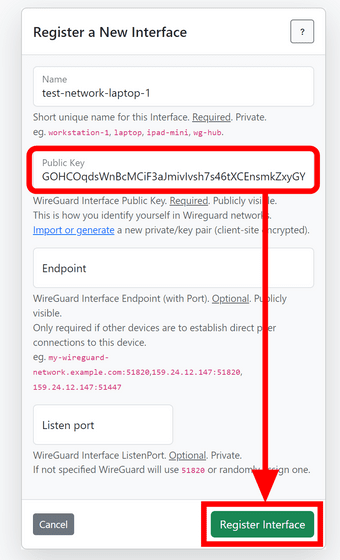
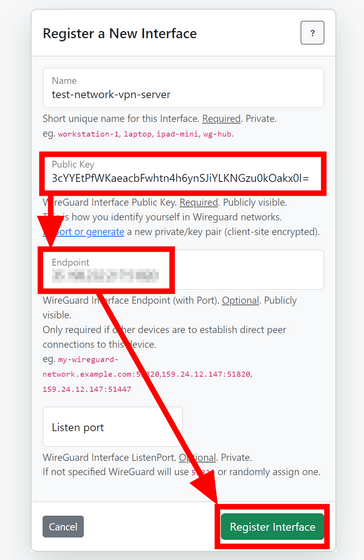
Confirm that the public key has been entered and click 'Register Interface'.
The first device has now been registered. Next, we will register the server side device, so click 'New Device' again.

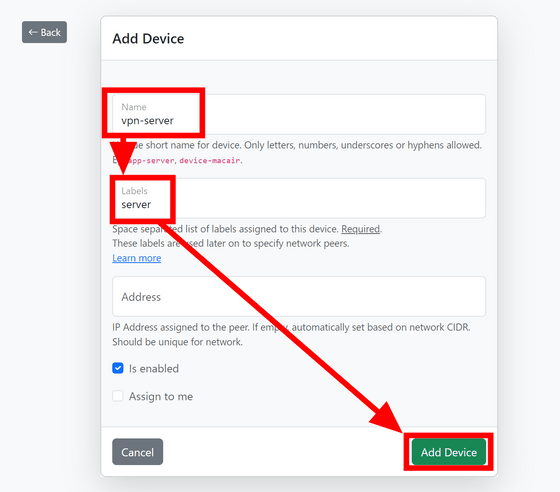
Enter the name and label and click 'Add Device'.
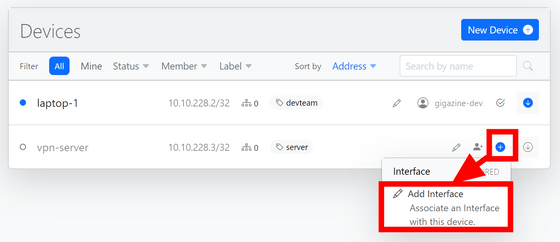
The server will be displayed in the device list, so click 'Add Interface' from the blue plus mark button to register the server.
This time we will use Debian as the server. Install WireGuard with the command below.
[code]apt install wireguard[/code]
Then, create a public key and private key using the following command.
[code]wg genkey | tee privatekey | wg pubkey > publickey[/code]
Copy the public key you created.

Enter the public key on the registration screen of the WireHub interface, and enter the server address and listening port information in the Endpoint field. Then click 'Register Interface'.
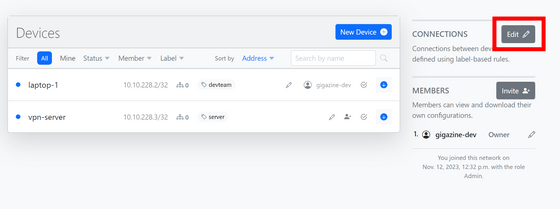
Now that the device has been registered, configure the connection settings. Click 'Edit' next to 'CONNECTIONS'.
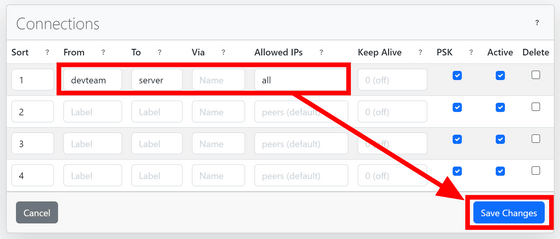
Connections are managed based on labels. This time, I set it so that 'devteam' can connect to 'server'. In addition to directly entering IP addresses and CIDRs, the Allowed IPs field also supports keywords, including 'peers' which specifies only connected peers and 'network' which specifies the entire CIDR of the network, as well as all communications. 'all' can be entered.
When the settings are complete, open the settings file with the arrow mark at the right end of the device field and click 'Download' to download it.
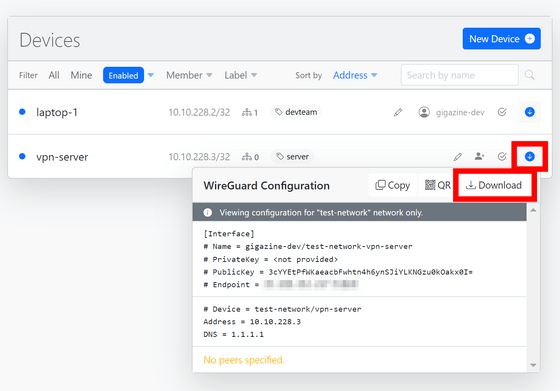
On the server side, save this configuration file in '/etc/wireguard/wg0.conf'. Since resolvconf is required for loading, first install it using the command below.
[code]sudo apt install resolvconf -y[/code]
All you have to do is start WireGuard with the 'wg-quick up wg0' command. You can check whether it has started by using the 'wg show wg0' command.

Next, download the client-side configuration file.
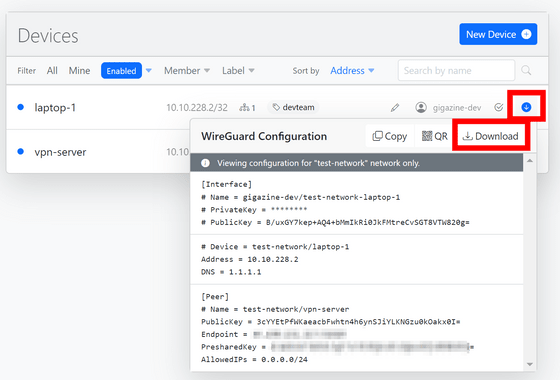
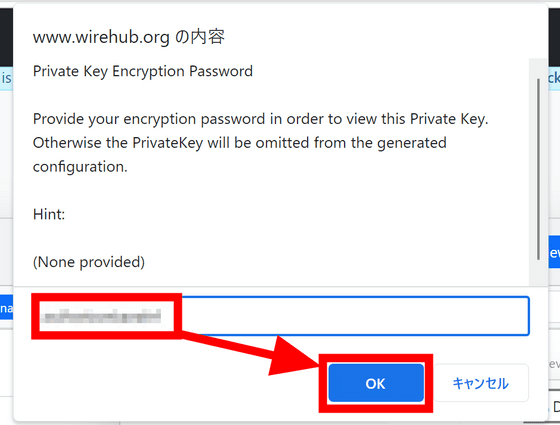
If you created a private key on WireHub, you will need to enter the password when downloading. Once you have entered the information, click 'OK'.
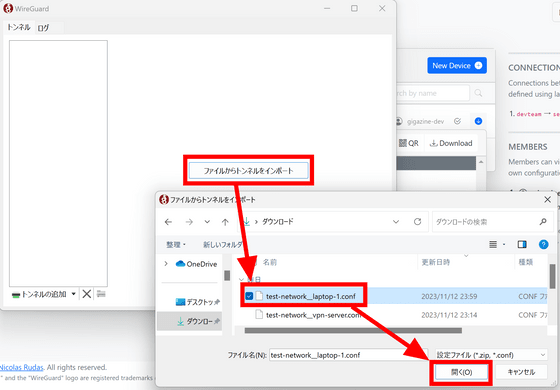
Start WireGuard and click 'Import tunnel from file'. Select the downloaded file and click Open.
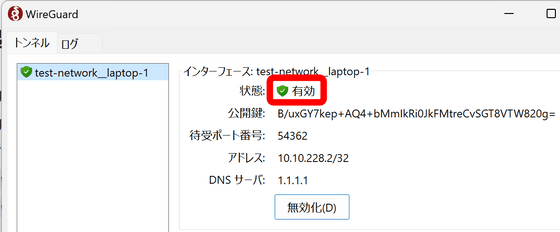
Once the settings are loaded, click 'Enable'.
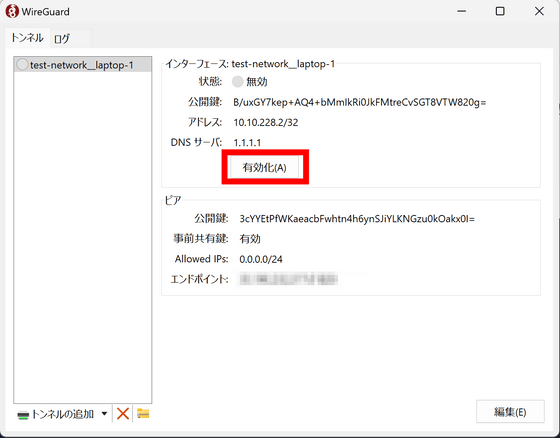
WireGuard connection is now complete.
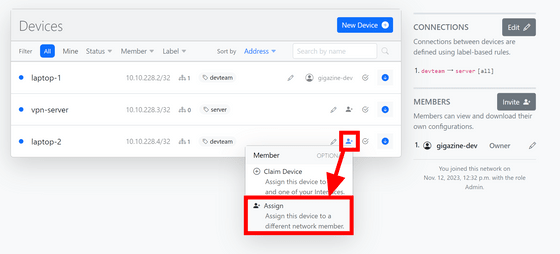
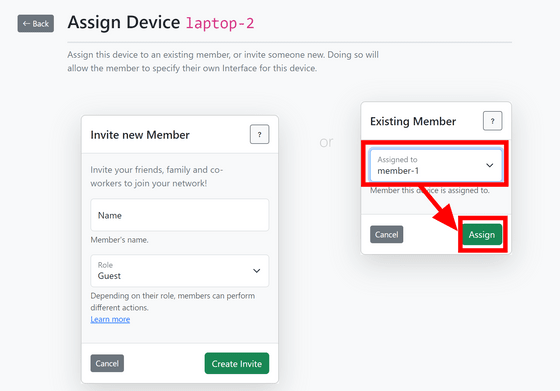
WireHub also has the ability to share connection information with team members. Create a new device called 'laptop-2' and click 'Assign' from the member mark.
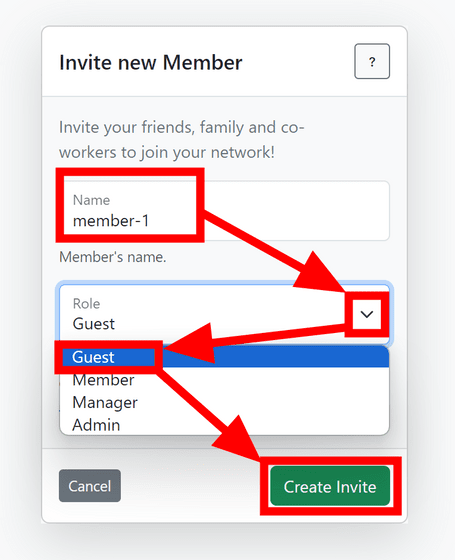
Select a name and role and click 'Create Invite'. Among the roles, 'Guest' can be used without creating an account, but 'Member', 'Manager', and 'Admin' require creating a WireHub account. This time I selected 'Guest'.
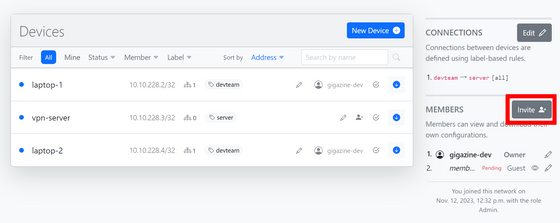
You will be suddenly returned to the device list screen, but click 'Invite' under 'MEMBERS' in the menu on the right.
A member invitation link is added at the bottom, so copy it and send it to the person you want to share it with.
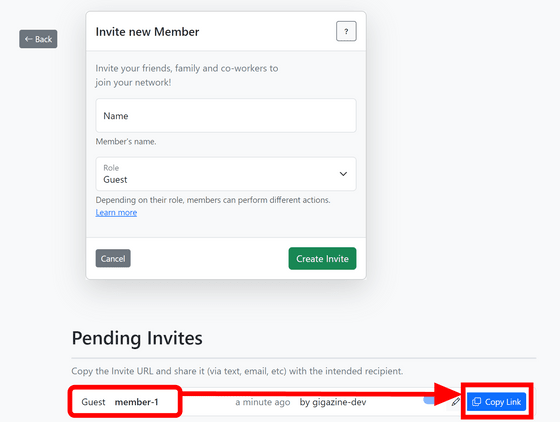
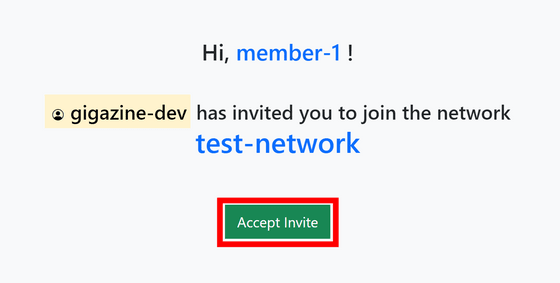
When the recipient accesses the URL, the screen shown below will appear, so click 'Accept Invite'.
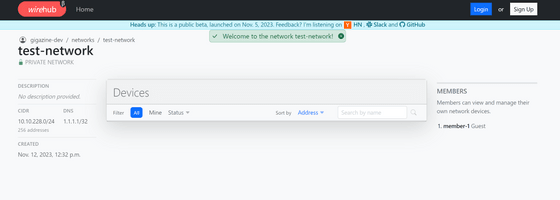
Guest members can only see connection information for devices assigned to them... which is supposed to be the case, but nothing is displayed.
For some reason, the assignment of laptop-2 had changed, so click 'Assign' from the member icon again.
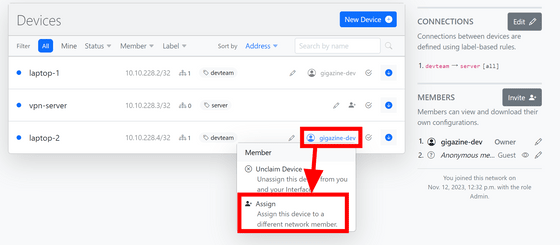
Select the member you want to assign in the 'Existing Member' field on the right and click 'Assign'.
When I reloaded the Guest member's screen, only the successfully assigned devices were displayed. After that, just download the connection information as before and load it into WireGuard.

Related Posts:
in Software, Review, Web Application, Posted by log1d_ts


