I have summarized the steps to install an OS on 'Raspberry Pi 5' so that it can be used as an ultra-compact desktop PC in an easy-to-understand manner even for beginners.
Raspberry Pi Documentation - Getting started
https://www.raspberrypi.com/documentation/computers/getting-started.html
·table of contents
◆1: Preface (about technical aptitude)
◆2: Install Raspberry Pi Imager on another PC
◆3: Create installation media using Raspberry Pi Imager
◆4: Boot Raspberry Pi 5 and install Raspberry Pi OS
◆5: Japaneseize the Raspberry Pi OS
◆1: Preface (about technical aptitude)
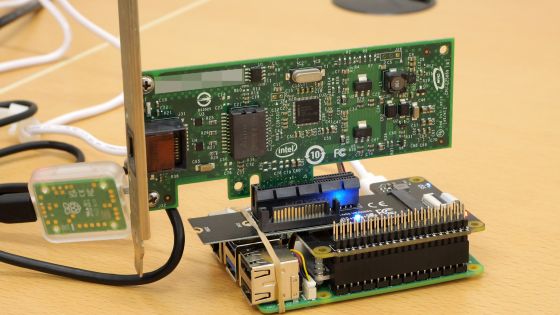
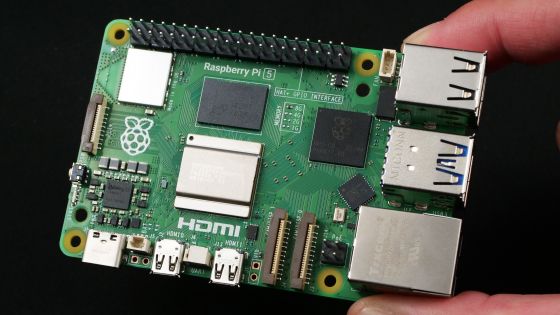
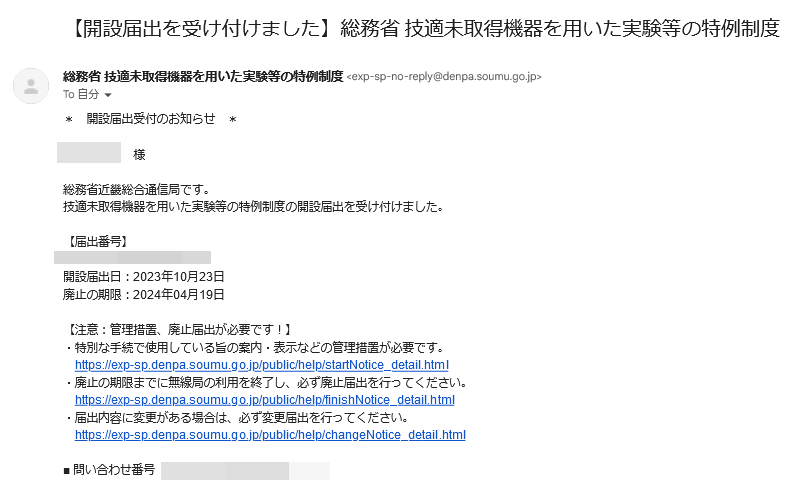
The Raspberry Pi 5 used this time was sent directly to the GIGAZINE editorial department from the Raspberry Pi Foundation and has not received technical standards compliance certification. Therefore, we have submitted a notification for the ` `special system for experiments, etc. using equipment that has not obtained technical compliance .'' In addition, in Japan, Raspberry Pi 5 is scheduled to be released after the technical compliance application by the agency, so general users do not need to worry about technical compliance.
◆2: Install Raspberry Pi Imager on another PC
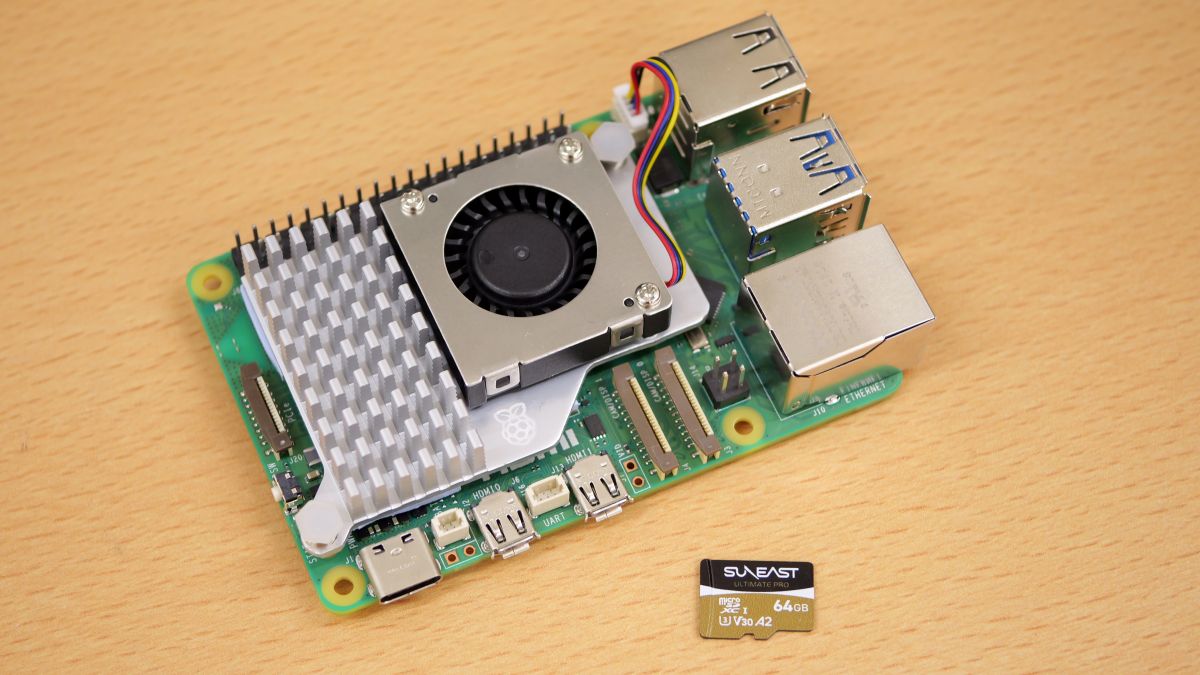
To use Raspberry Pi 5, you first need to install an OS. There are various ways to install an OS, but this time we will use ``Raspberry Pi Imager'' to write the installation image to a microSD card. Please note that to install the OS using this procedure, you will need a microSD card with a capacity of 16GB or more. Also, since the microSD card used for installation will serve as the main storage, we recommend preparing a microSD card with as large a capacity as possible. If you follow the instructions, all data on the microSD card will be deleted, so be careful not to use a microSD card with important data saved on it .
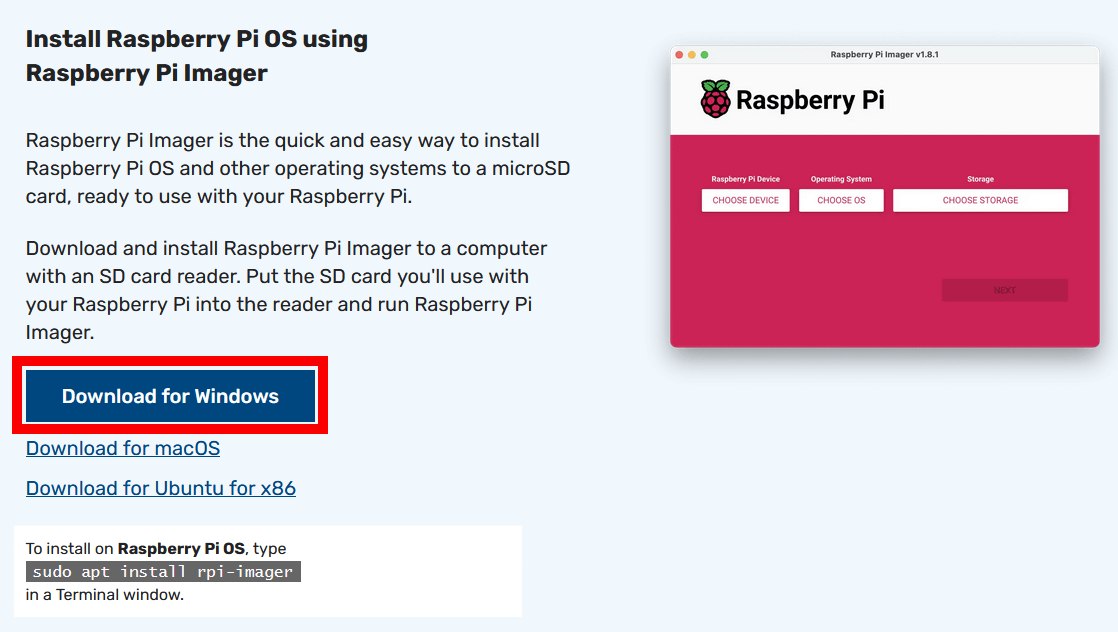
First, click the link below to access the download page to install Raspberry Pi Imager.
Raspberry Pi OS – Raspberry Pi
Then click 'Download for Windows' to download the installer.
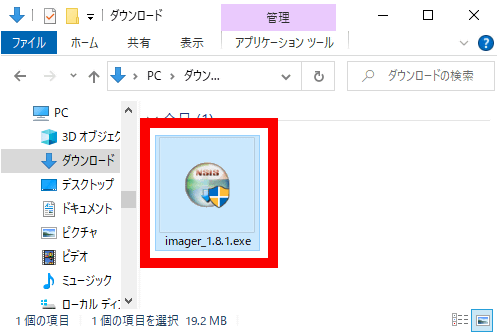
Once the installer has finished downloading, double-click to launch it.
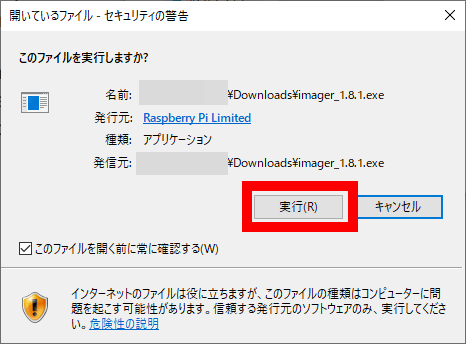
If the following warning appears, click 'Run'.
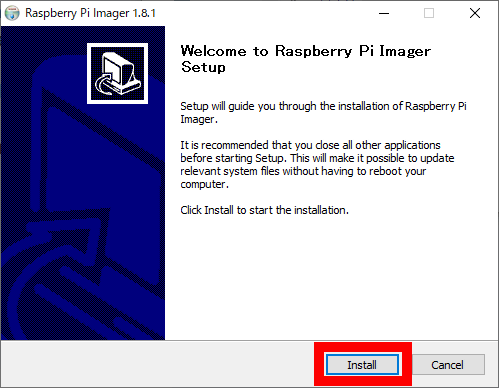
Click 'Install'.
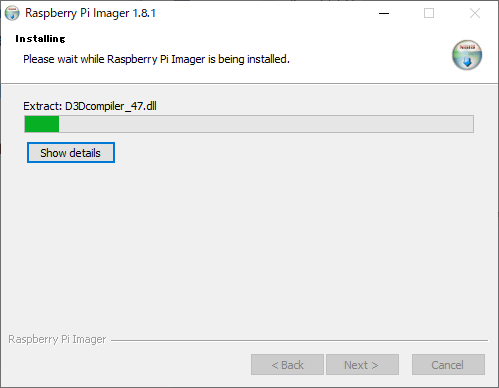
Wait for a while until the installation is complete.
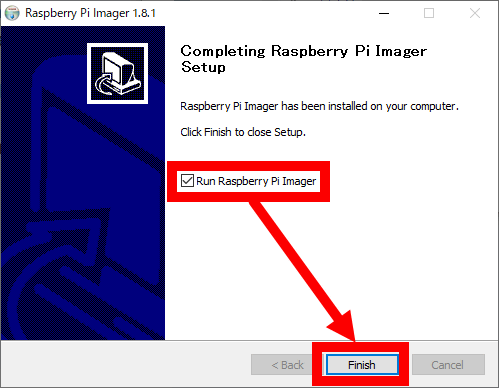
When installation is complete, check 'Run Raspberry Pi Imager' and click 'Finish'.
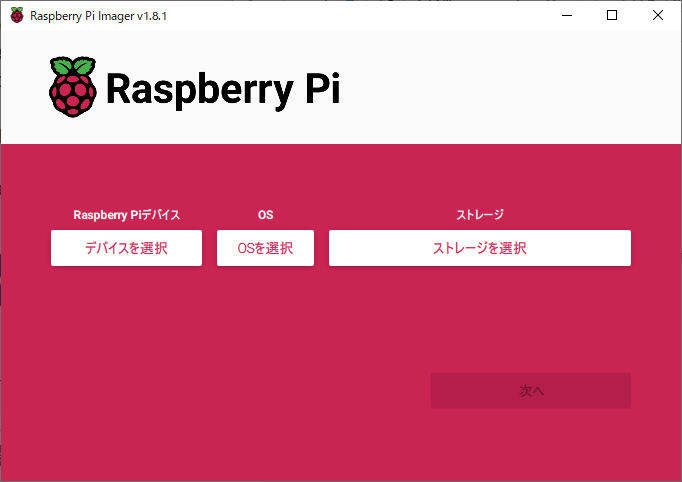
Once Raspberry Pi Imager starts, preparations are complete.
◆3: Create installation media using Raspberry Pi Imager
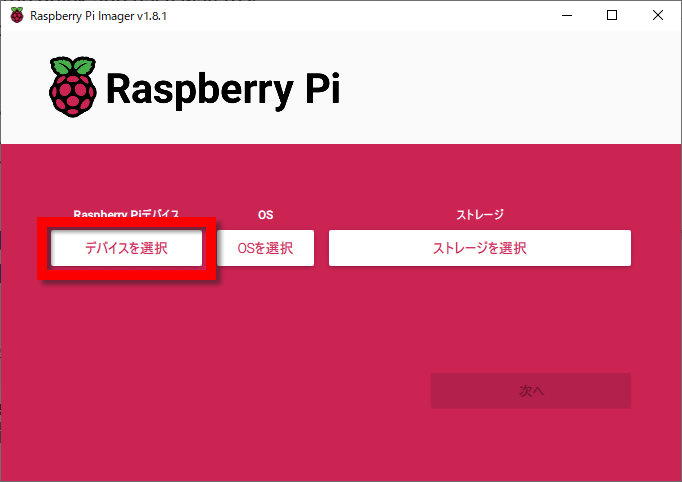
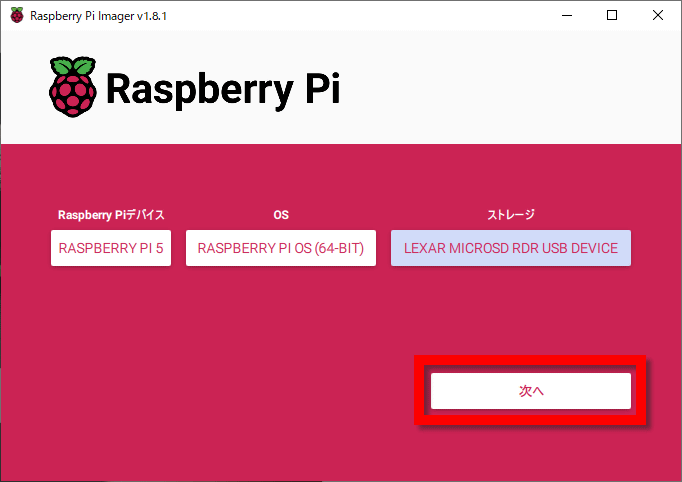
After starting Raspberry Pi Imager, insert the microSD card into your PC and click 'Select Device'.
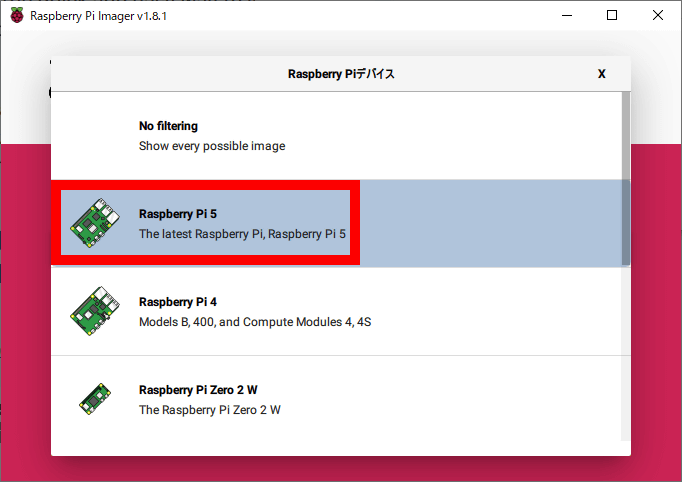
Click 'Raspberry Pi 5'.
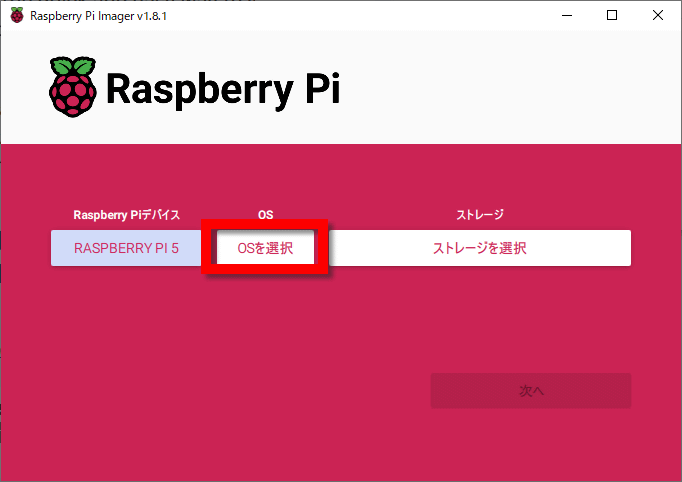
Click 'Select OS'.
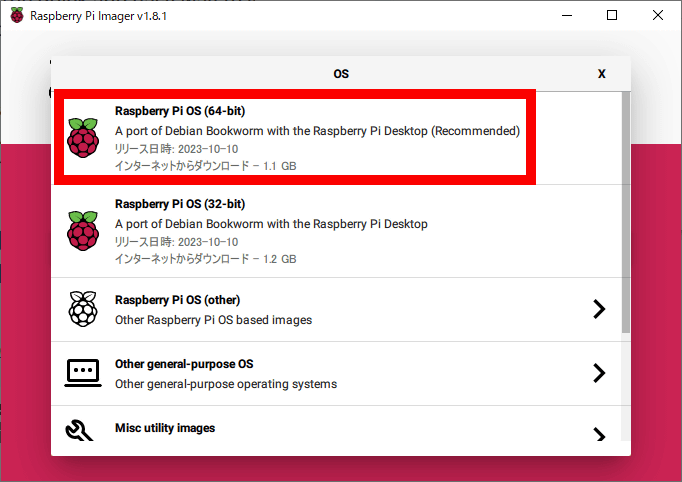
Click 'Raspberry Pi OS (64-bit)'.
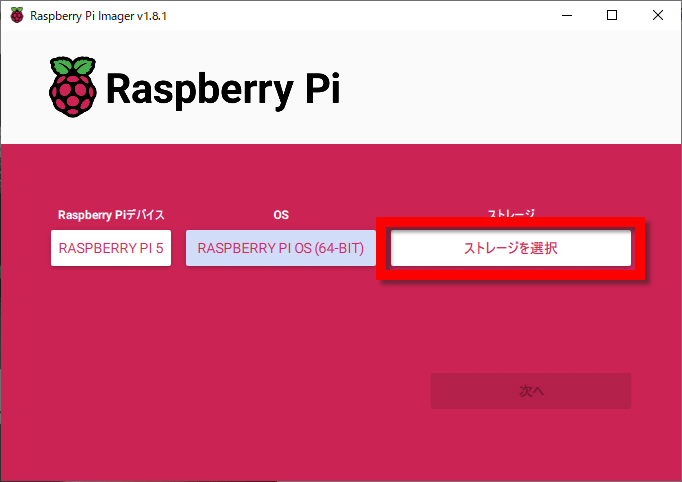
Click 'Select storage'.
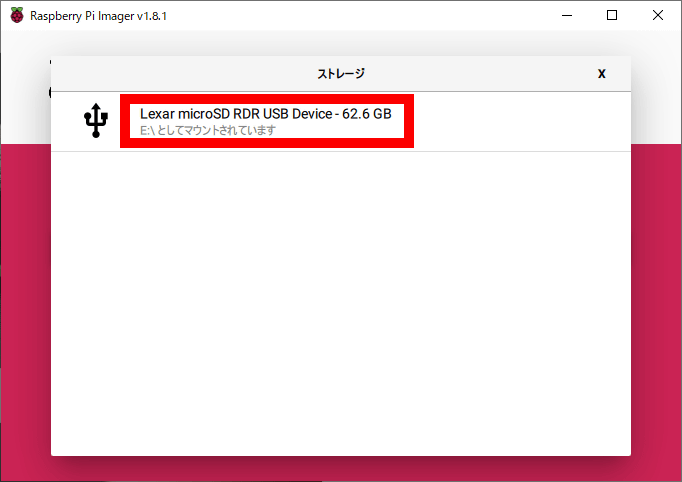
Select the inserted microSD card.
Click 'Next'.
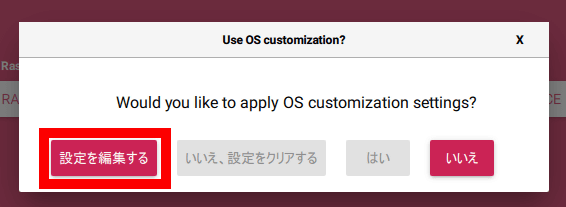
Click 'Edit settings'.
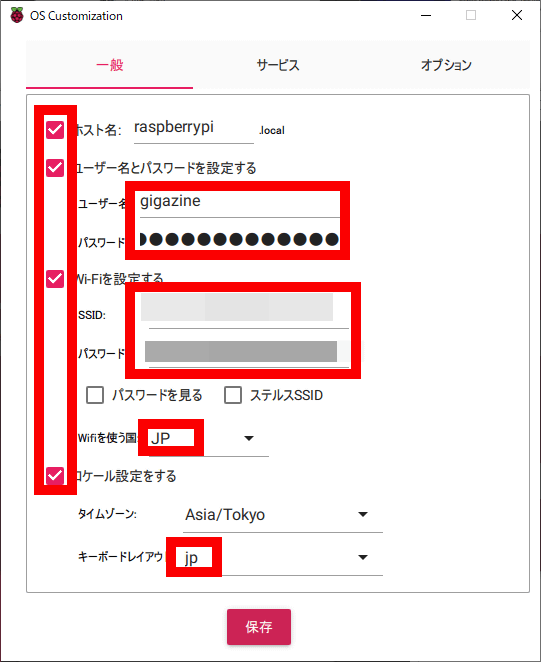
Check the four check boxes and set 'Username', 'Password', 'Wi-Fi SSID', 'Wi-Fi Password', 'Country to use Wi-Fi', and 'Keyboard Layout'. If you live in Japan and use a Japanese keyboard, select 'JP' for 'Country that uses Wi-Fi' and 'jp' for 'Keyboard layout'. Please note that random character strings may have been entered in advance for 'Password' and 'Wi-Fi Password', so please delete them before entering the password you want to set or the correct password.
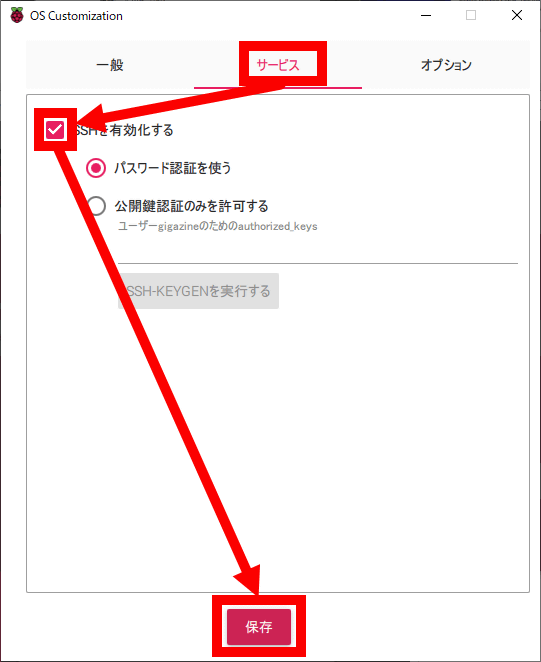
Next, click 'Services', check 'Enable SSH', and click 'Save'. Enabling SSH is convenient because it allows you to operate the Raspberry Pi from another PC, but this setting can be changed after installation, so there is no need to enable it.
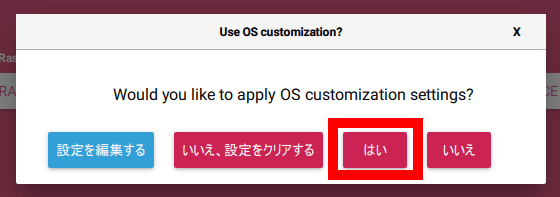
Click 'Yes' when asked if you want to apply the settings.
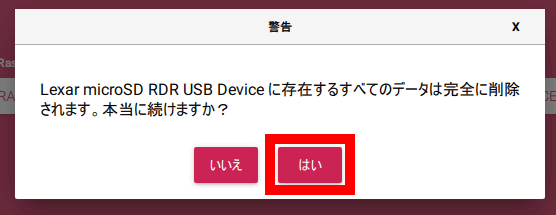
If a warning that the data on the microSD card will be deleted is displayed, click 'Yes'.
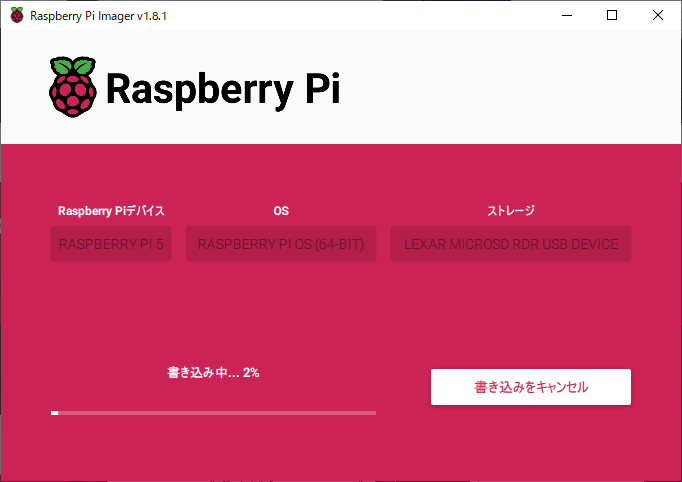
Wait for a while until writing is completed.
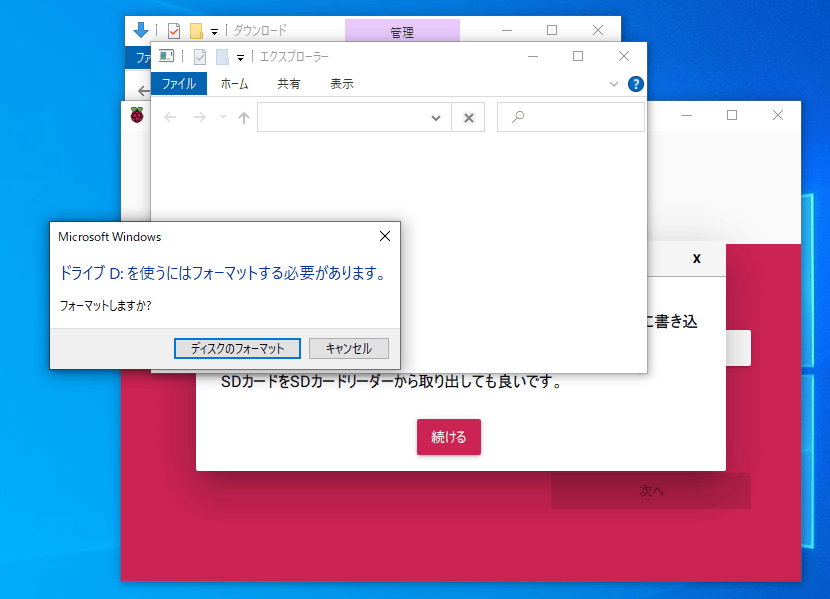
When writing is complete, a warning may appear saying 'You must format the drive to use it,' but click 'Cancel'. Please note that if you format by mistake, you will need to rewrite the installation image.
◆4: Boot Raspberry Pi 5 and install Raspberry Pi OS
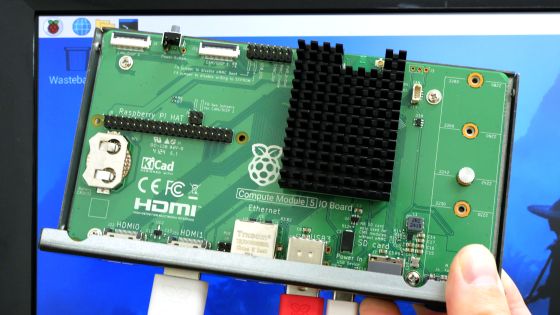
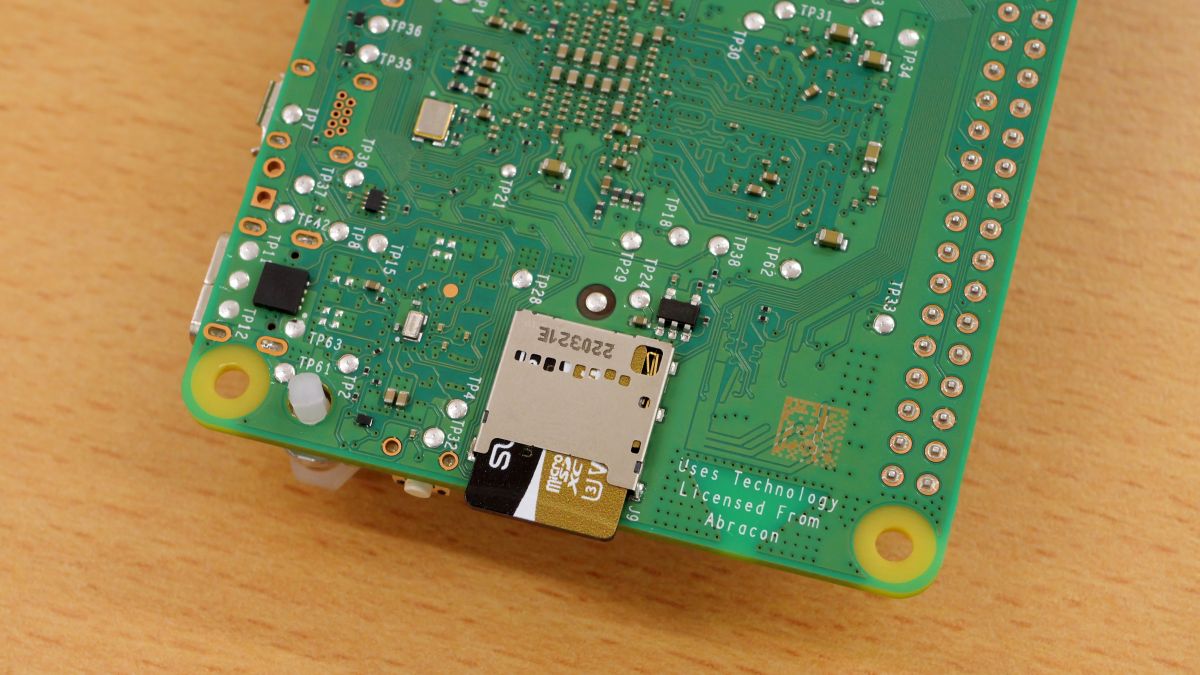
Insert the microSD card with the installation image written into the microSD card slot of Raspberry Pi 5.
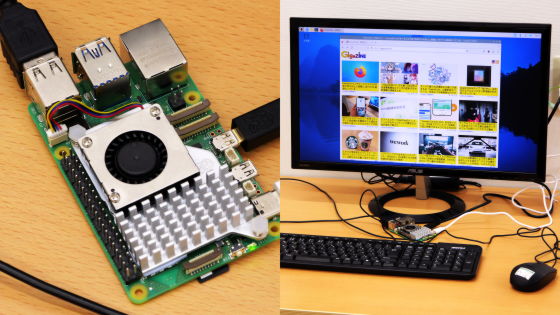
Next, prepare an ``HDMI cable'', ``power adapter'', ``mouse'', and ``keyboard'' to start Raspberry Pi 5 and display and operate the screen. Please note that the Raspberry Pi 5's HDMI port is micro HDMI, so please prepare a cable that matches the port.
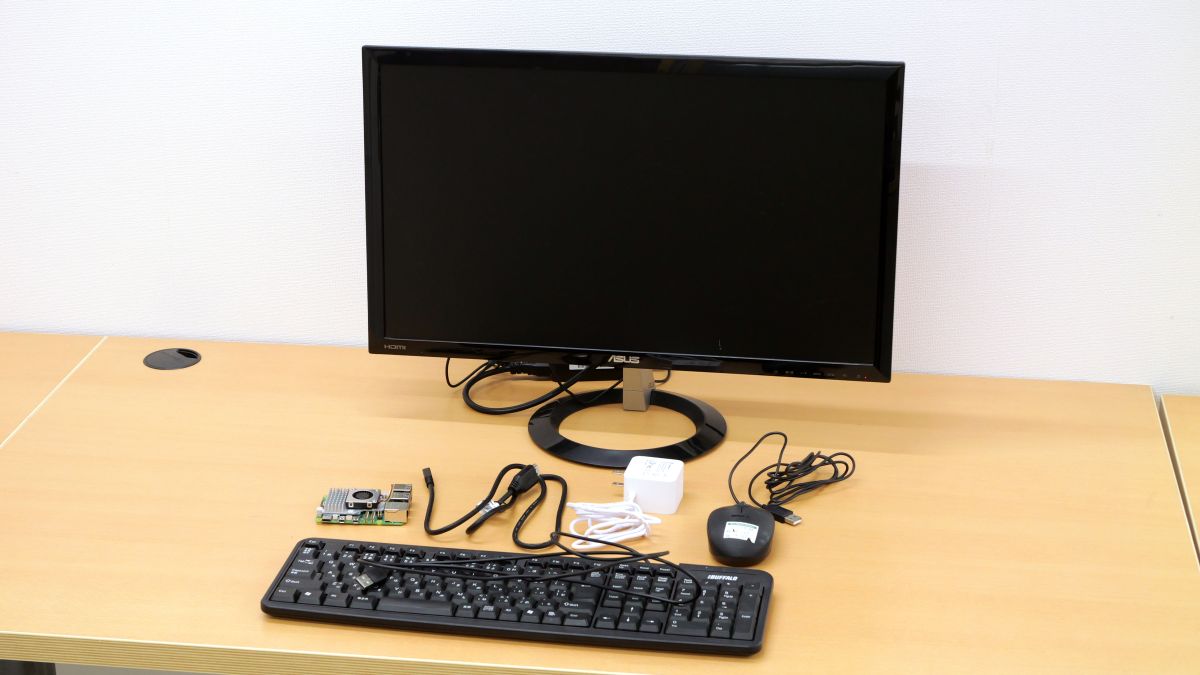
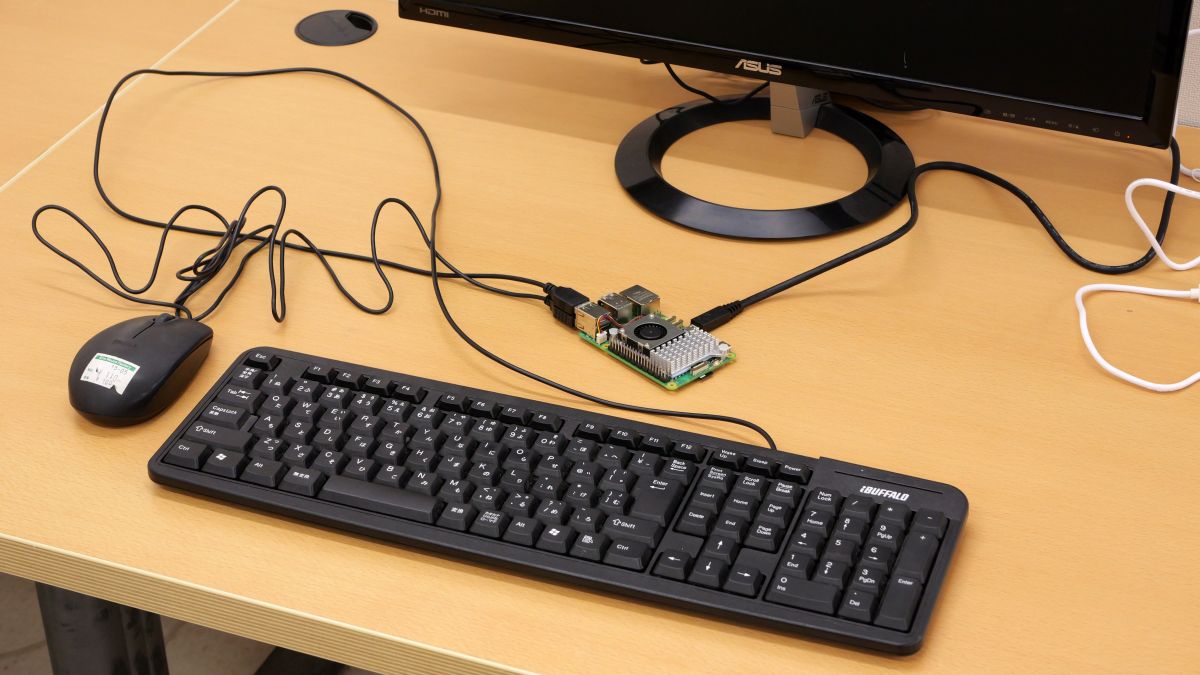
First, connect a monitor, mouse, and keyboard to Raspberry Pi 5.
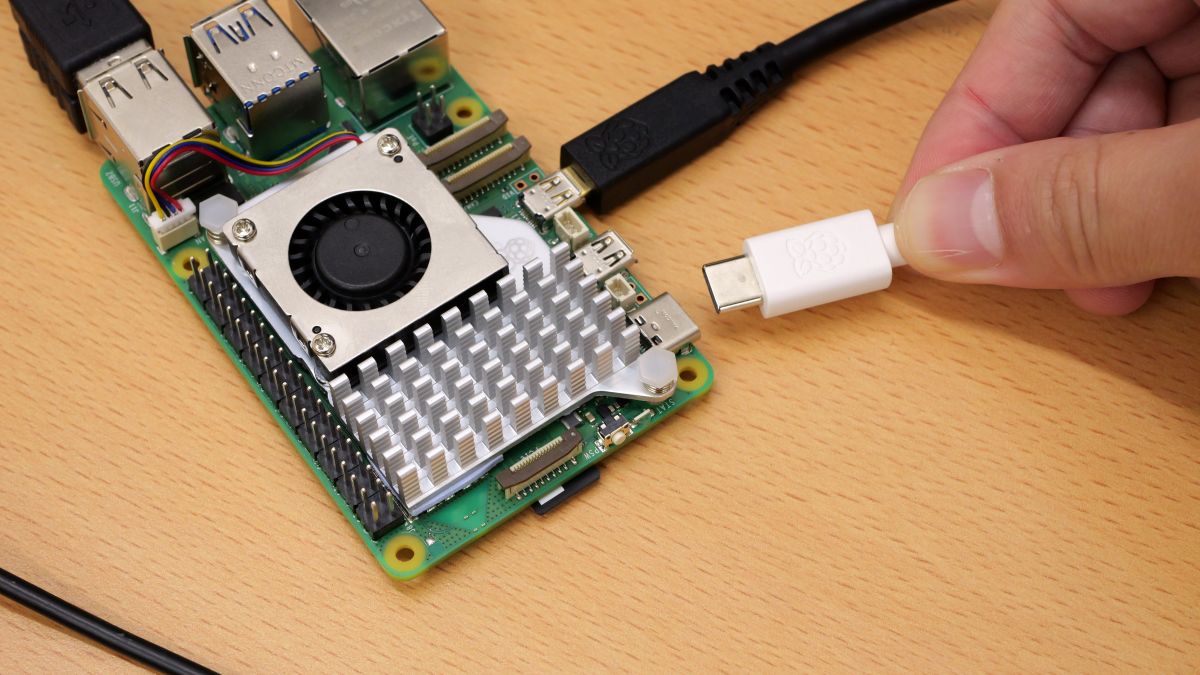
Next, connect the power supply and the Raspberry Pi 5 will turn on.
When the power is turned on, the OS installation will start automatically, so wait for a while. It will restart several times during the process, but there is no problem.
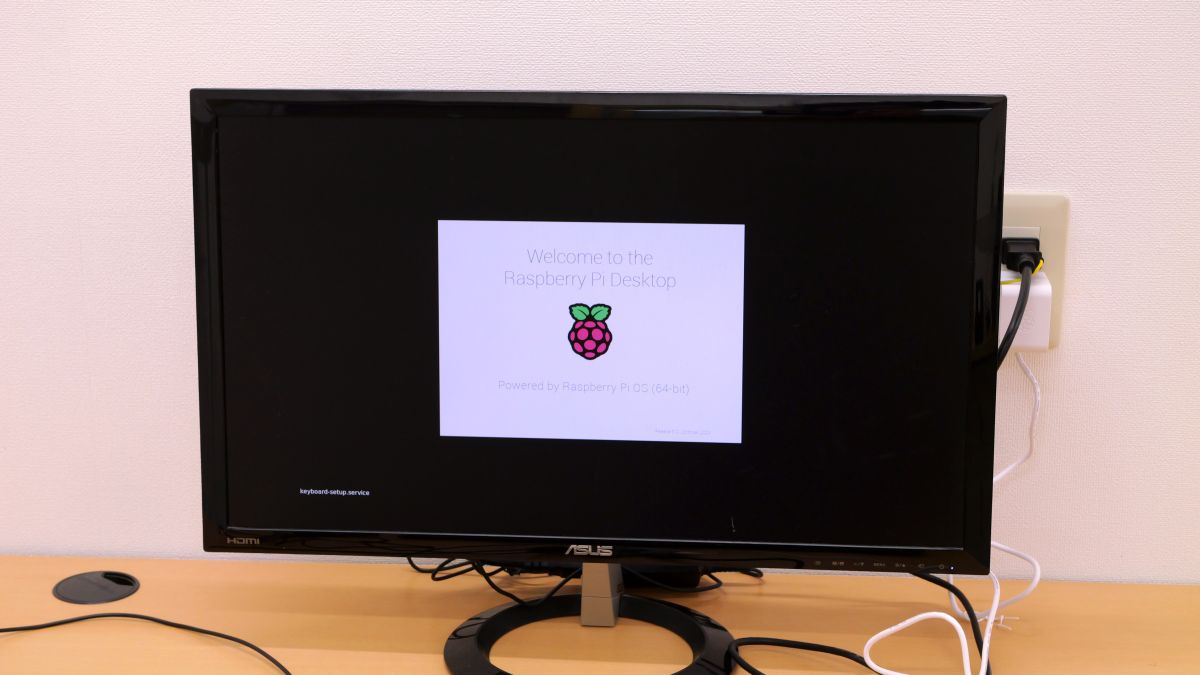
When the desktop screen is displayed, the Raspberry Pi OS installation is complete.

◆5: Japaneseize the Raspberry Pi OS
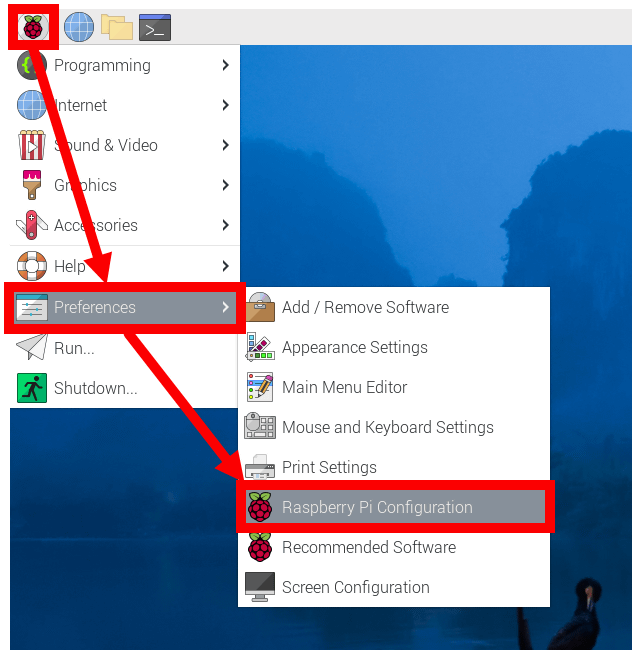
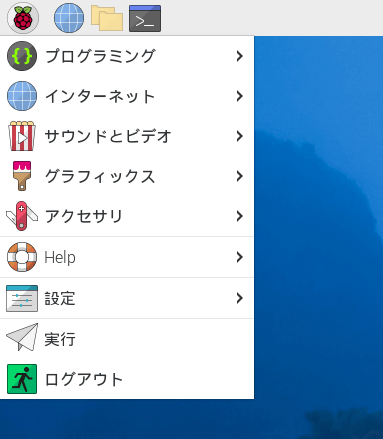
The Raspberry Pi OS's language is initially set to English, so switch it to Japanese. First, click the Raspberry Pi logo at the top left of the screen, click 'Preferences', and then click 'Raspberry Pi Configuration'.
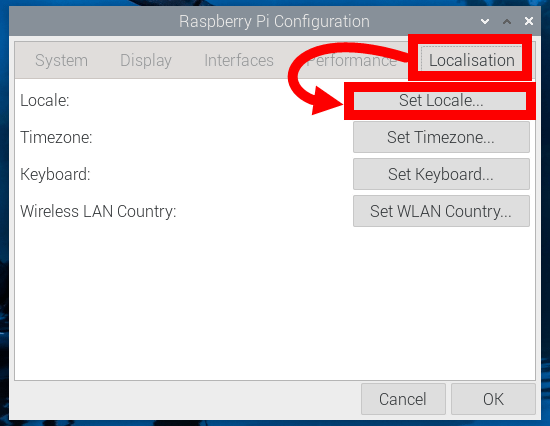
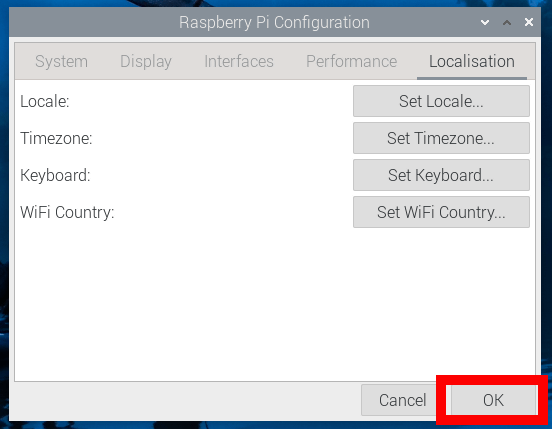
When the setting screen is displayed, click 'Localization' and then 'Set Locale'.
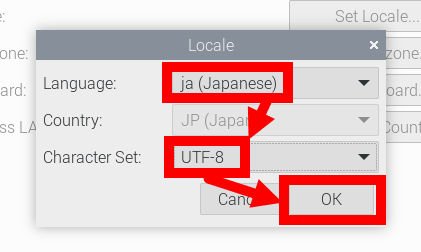
Switch 'Language' to 'ja (Japanese)' and 'Character Set' to 'UTF-8' and click 'OK'.
Click 'OK' at the bottom right of the settings screen.
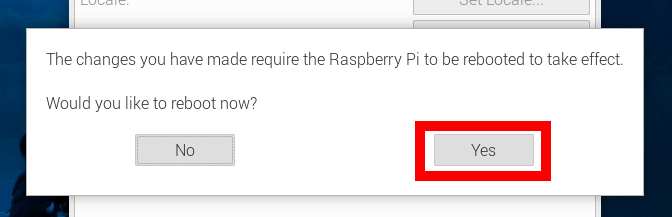
You will be asked if you want to restart, so click 'Yes'.
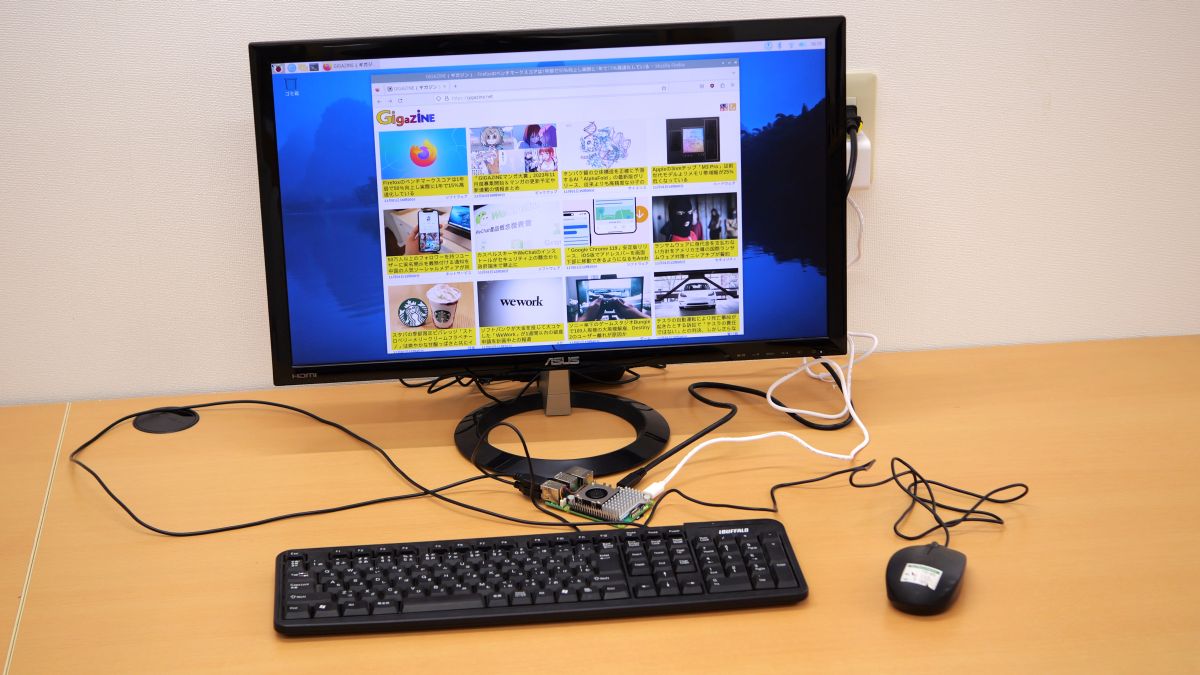
Then, the Raspberry Pi OS will start up in Japanese language.
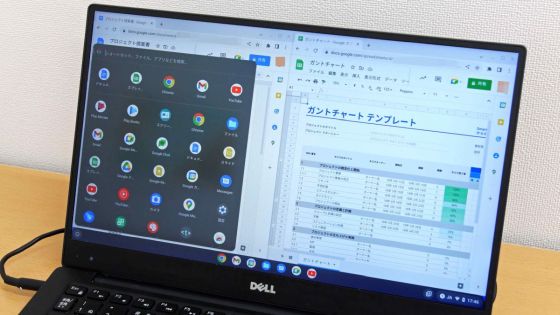
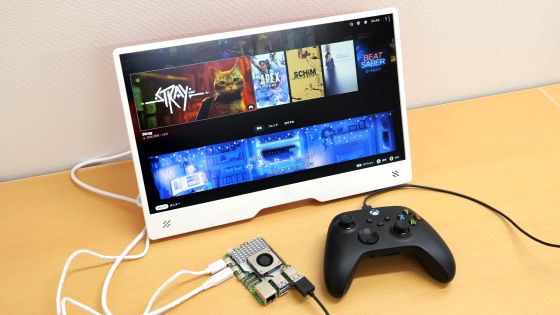
Now you can use Raspberry Pi 5 as a small desktop PC. If you find yourself in a situation where you want to do something but don't know how, you can find useful information by searching the web using search terms such as 'Raspberry Pi ○○' or 'Linux ○○,' so please try using it for various purposes.
◆Forum now open
GIGAZINE's official Discord server has a forum related to Raspberry Pi 5. Anyone can write from the link below, so please write something like 'I'm curious about ○○'.
• Discord | 'Raspberry Pi 5 has arrived at the GIGAZINE editorial department, so I'm going to review it, but what do you want to know? ' | GIGAZINE
https://discord.com/channels/1037961069903216680/1166304963497041981

Related Posts: