Analyzing why MagSafe installed on the back of iPhone sticks to each other using magnetic modeling
The iPhone series starting with the iPhone 12 and iPhone 12 Pro is equipped with MagSafe on the back, allowing wireless charging. MagSafe has a built-in magnet, and when you bring the MagSafe charger close to it, it sticks to the appropriate position, but engineer Kavi explains how this 'experience' is created. analyzed using magnetic modeling.
Magnetically Modeling MagSafe – kavi’s blog
You can check the operation when the MagSafe charger sticks by watching the movie below.
Magnetically Modeling Magsafe - Intro Video (Link in Description) - YouTube
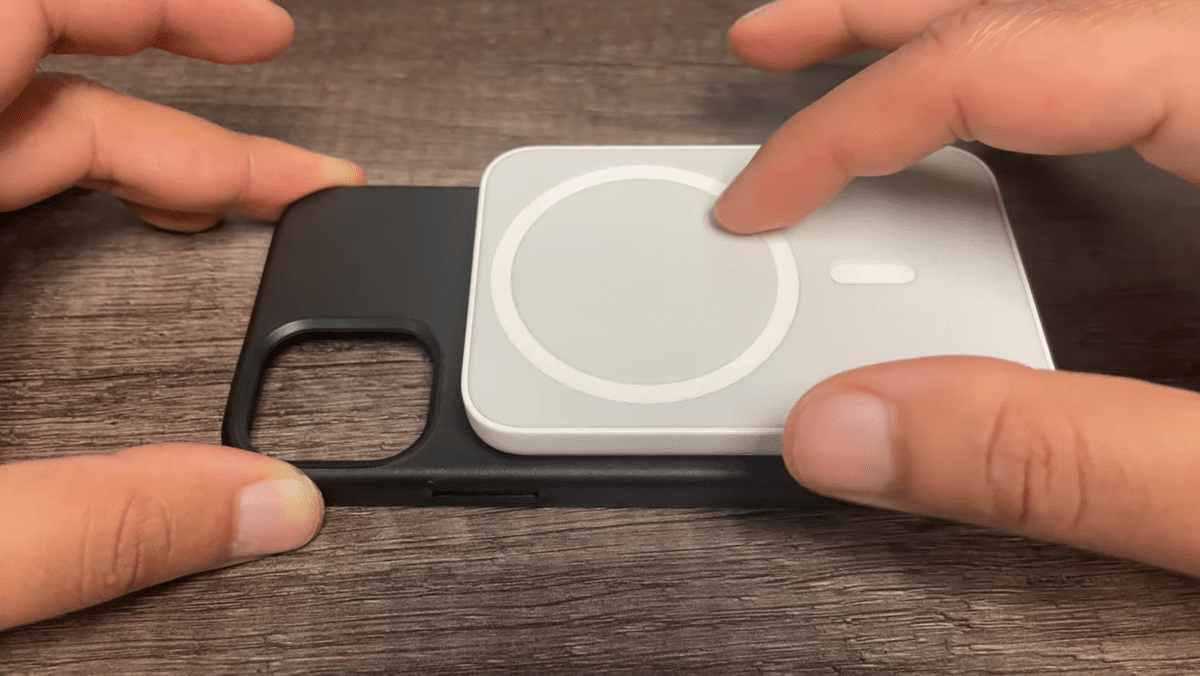
Kavi slowly brings the MagSafe compatible accessory closer.
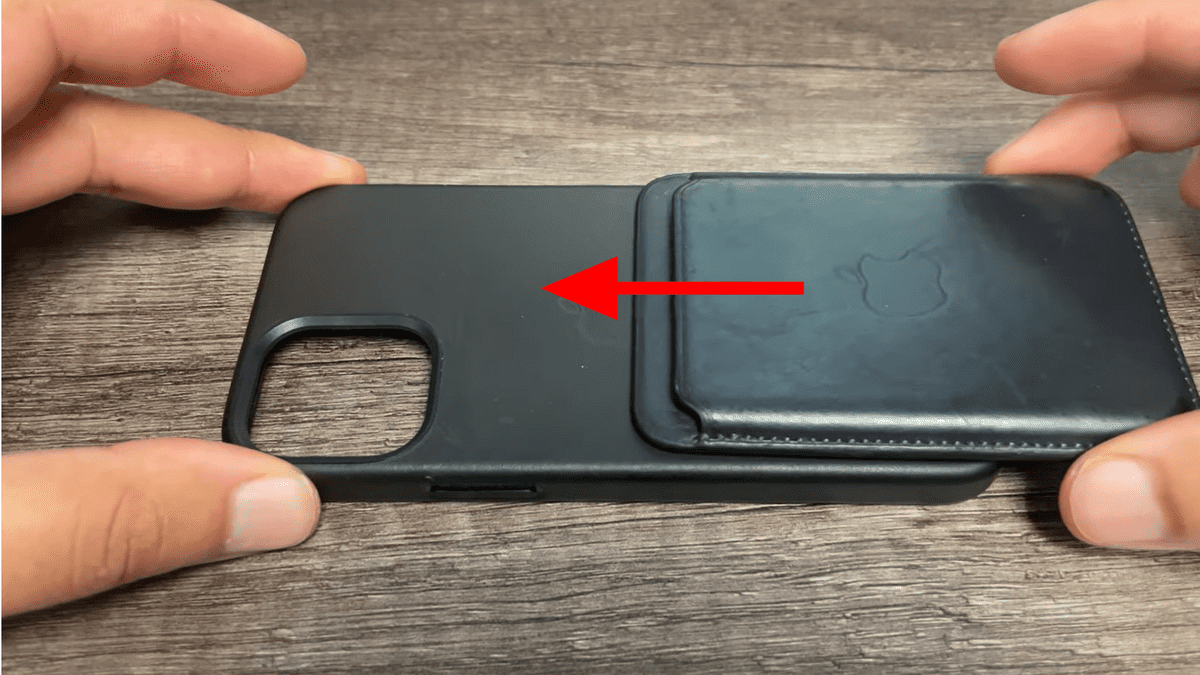
When I got close enough, I heard a 'click' sound and the accessory jumped into place.

It works exactly the same no matter the direction.

MagSafe uses a circular magnet, so it works the same way regardless of orientation.
Mr. Kavi wanted to know the principle behind the operation of ``automatically sticking to the appropriate position'' as mentioned above, so he decided to perform magnetic modeling and analysis using Magpylib . First of all, he investigated Apple's accessory design guidelines (R21, p148) (PDF file) and created a model as shown below using Google Colab. 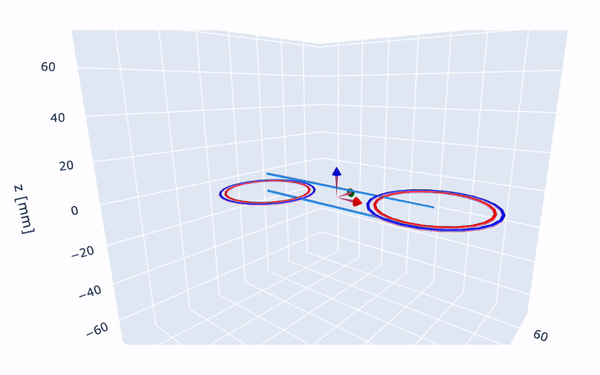
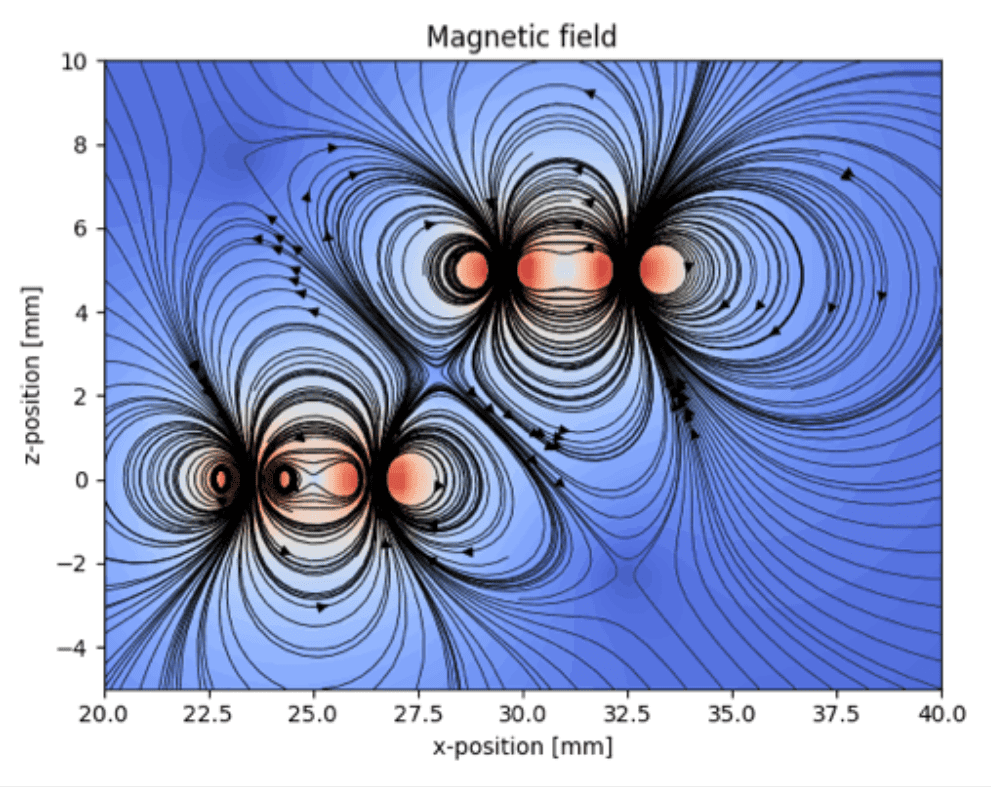
The state of the magnetic field when they are attached is like this. In order to take a closer look, we will enlarge the red frame.
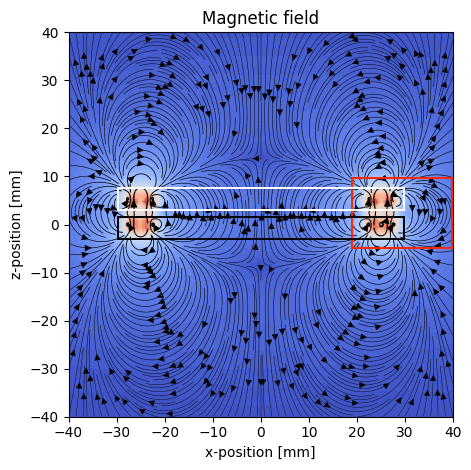
When two parts are attached, many magnetic lines of force connect them.

As you move the parts horizontally, the lines of magnetic force will separate from the center.

After moving about 6mm, the magnetic field lines split.
With this visualization in place, Kavi then tried to calculate the force on the magnet. However, since Magpylib did not have a function to calculate force, it was necessary to calculate it on your own instead. The force 'F' applied between two magnets can be expressed as follows using the inner product and slope of
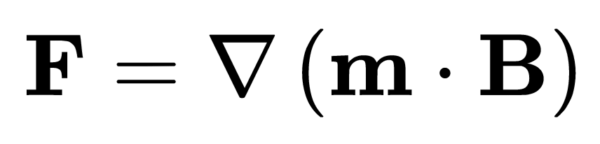
Since the above formula was too complicated, Mr. Kavi replaced the magnet model with a 2D model and reduced the magnet dimensions to points so that it could be calculated using the following formula.

In this way, Mr. Kavi succeeded in visualizing the force applied to the entire MagSafe. The red line in the figure below represents the force applied to MagSafe, and the black line represents the force applied to each dipole . The green line indicates the direction of torque. You can see that when the MagSafe charger is close enough to the level of a few millimeters, a large red arrow appears in the direction of sticking. 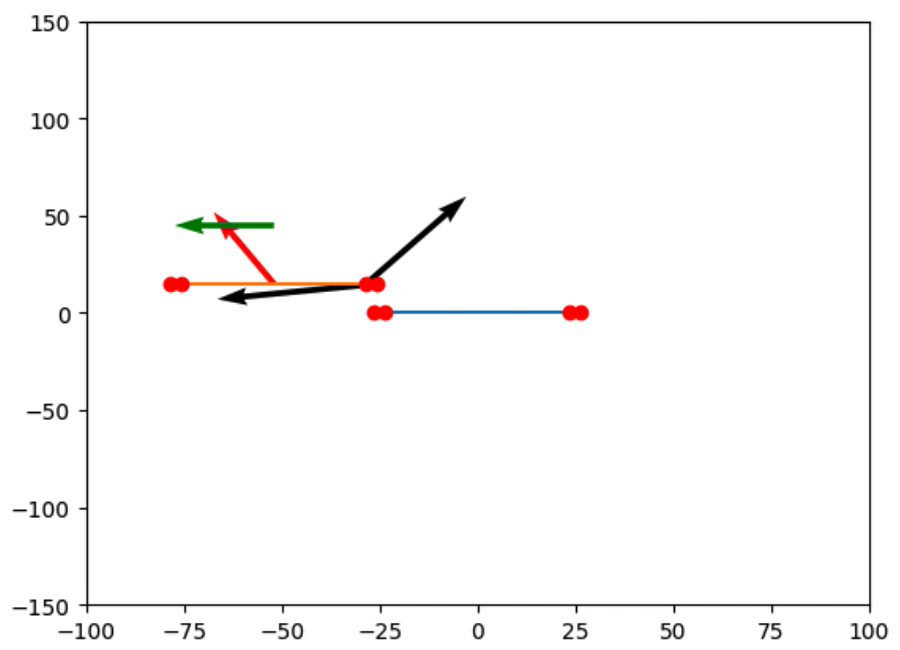
Mr. Kavi searched to see if he could create a more interactive model, and he succeeded in developing an app like the one shown below using p5.js. This app is hosted on GitHub , so if you want to experience the power of MagSafe, check it out. 
Related Posts: