Review of 'HTC VIVE Pro 2' VR headset for high end with 5K resolution & high refresh rate & viewing angle 120 degrees
From HTC's VR device brand 'VIVE', the high-end VR device ' VIVE Pro 2 ' appeared on June 30, 2021. I realized 5K resolution of 2448 x 2448 pixels for one eye and 4896 x 2448 pixels for both eyes, and I got the opportunity to experience VIVE Pro 2 with a viewing angle of 120 degrees and a frame rate of up to 120 Hz, so I actually connected it to a PC and played various games. I tried to play.
Overview of VIVE Pro 2 | VIVE Japan
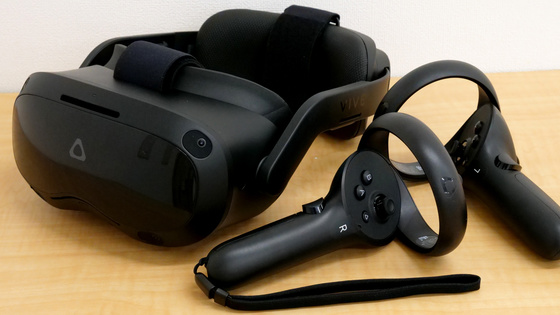
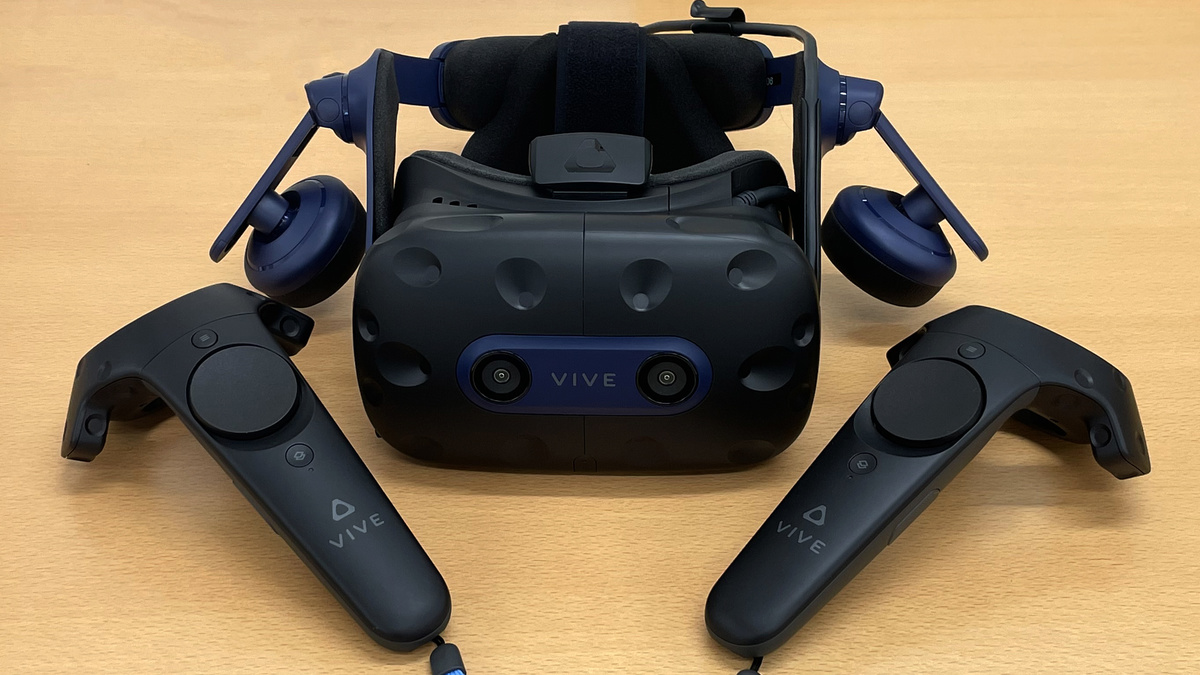
VIVE Pro 2 and controller (1.0) and base station (1.0)
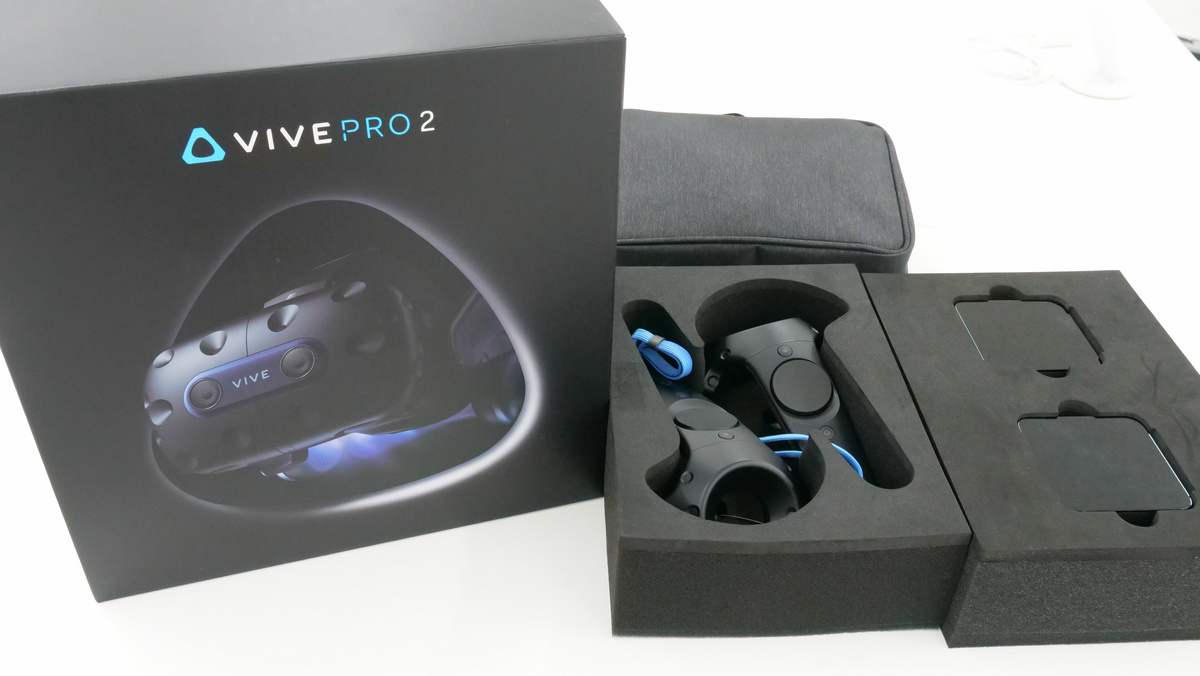
When I take out the VIVE Pro 2 main unit at once, it looks like this. The length of the cable is about 5m.
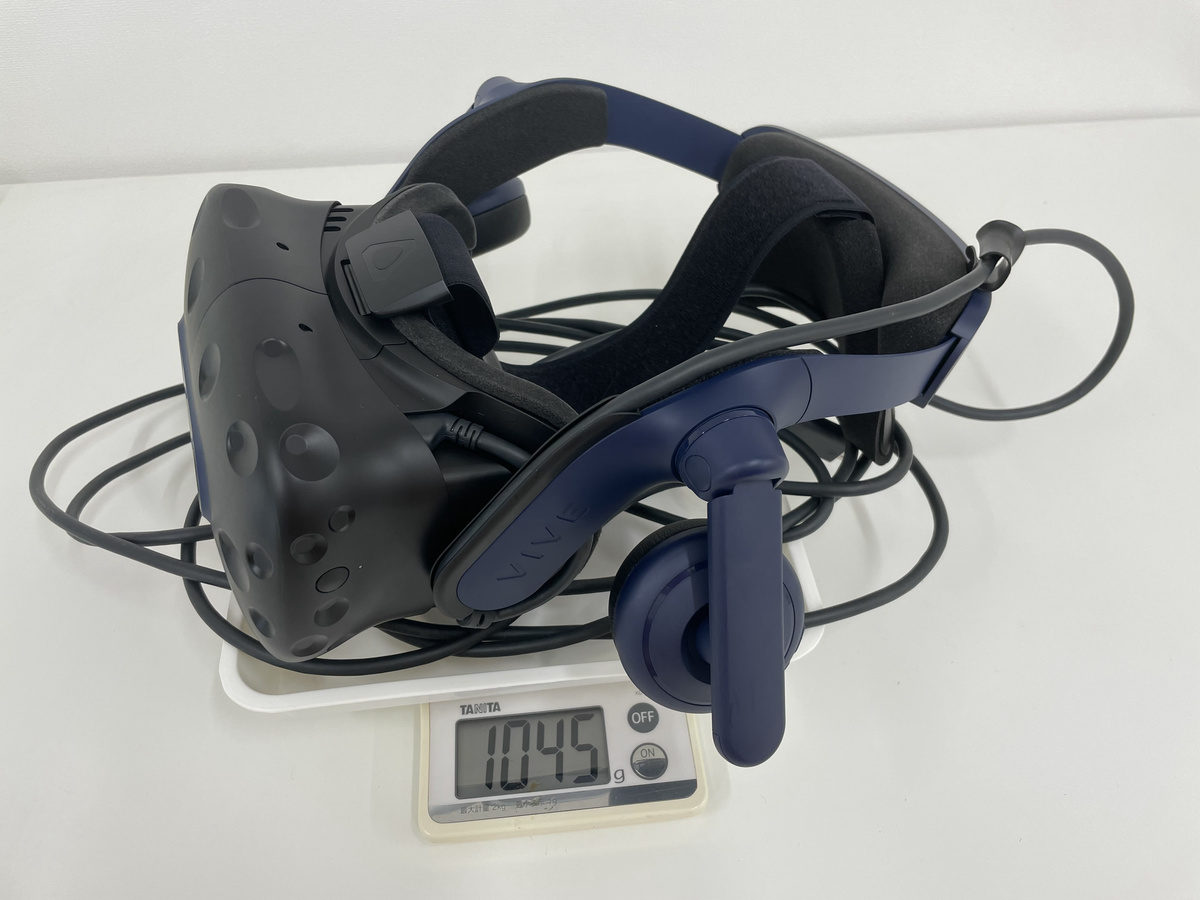
Including the cable, the VIVE Pro 2 weighs 1045g in actual measurement. The 5m cable hangs on the floor when in use, so it's actually lighter.
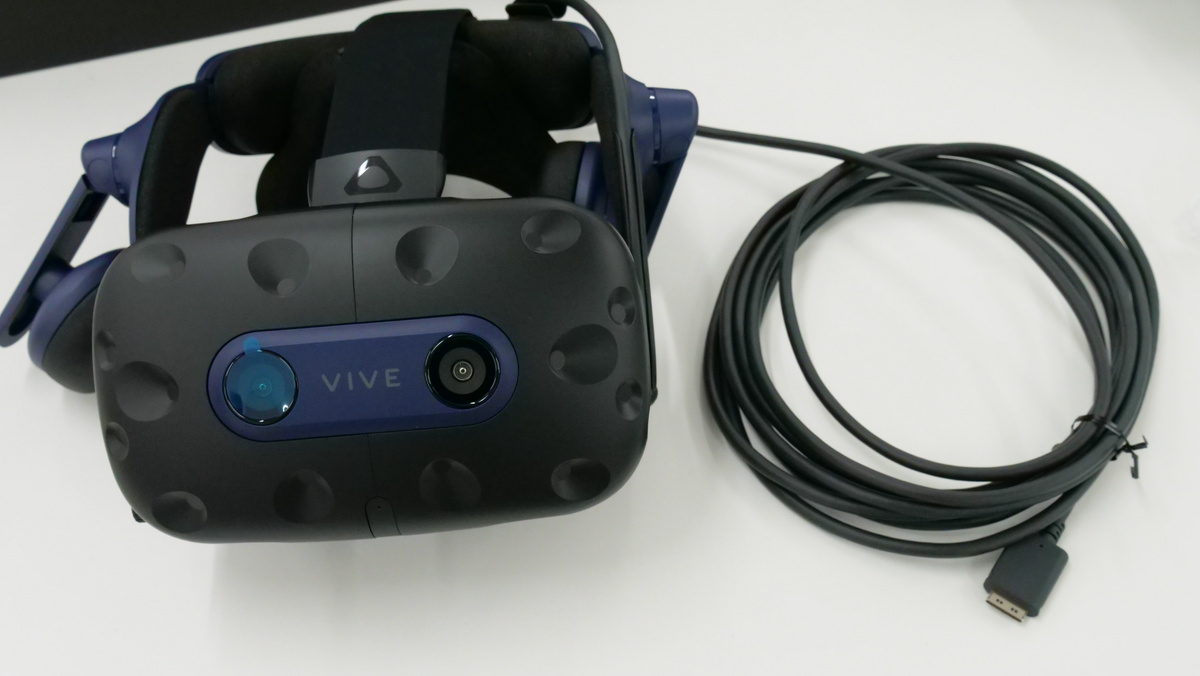
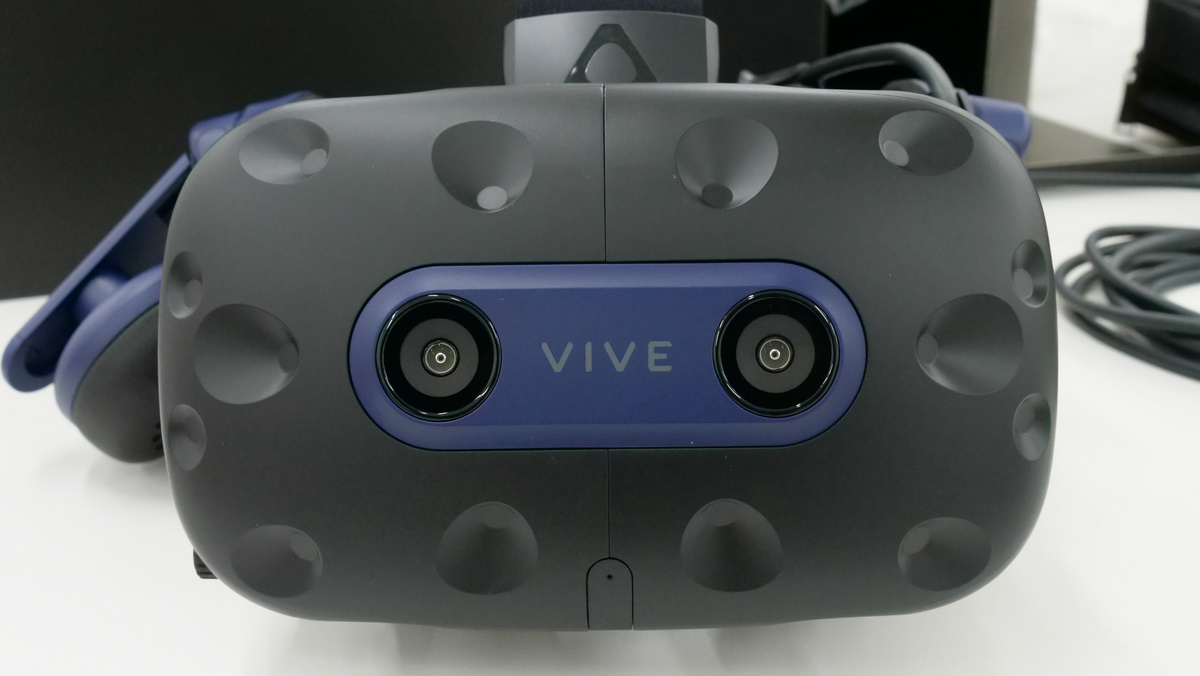
There was a dual camera for tracking on the front part.
The left side
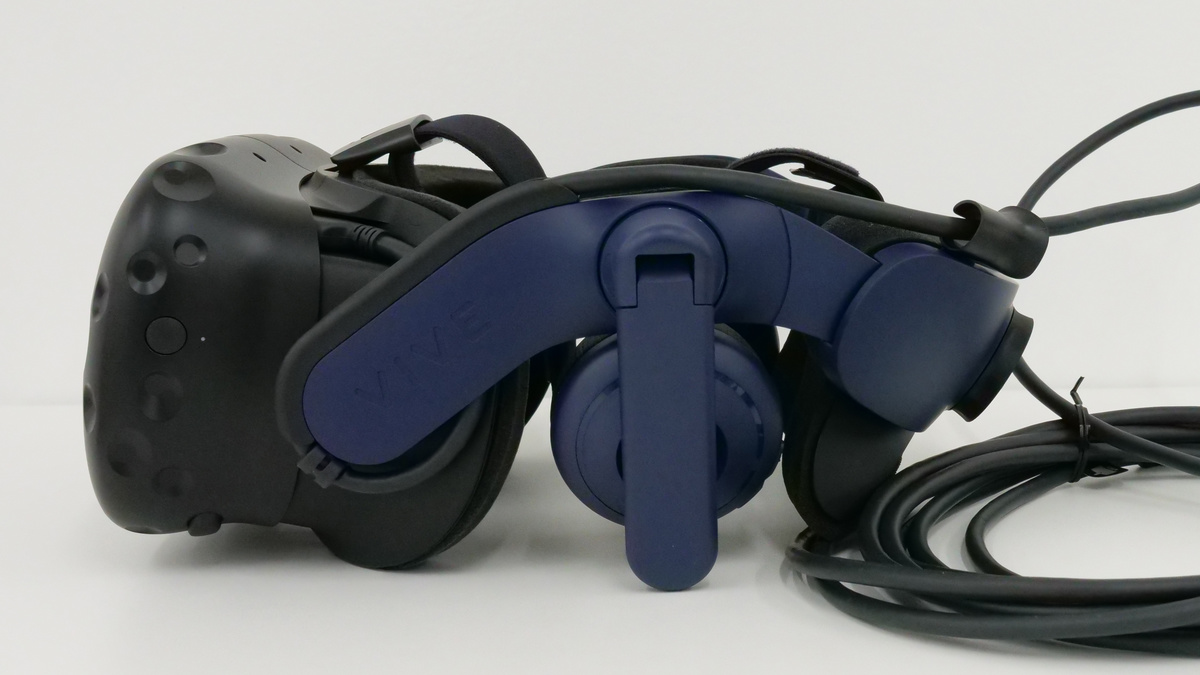
right side

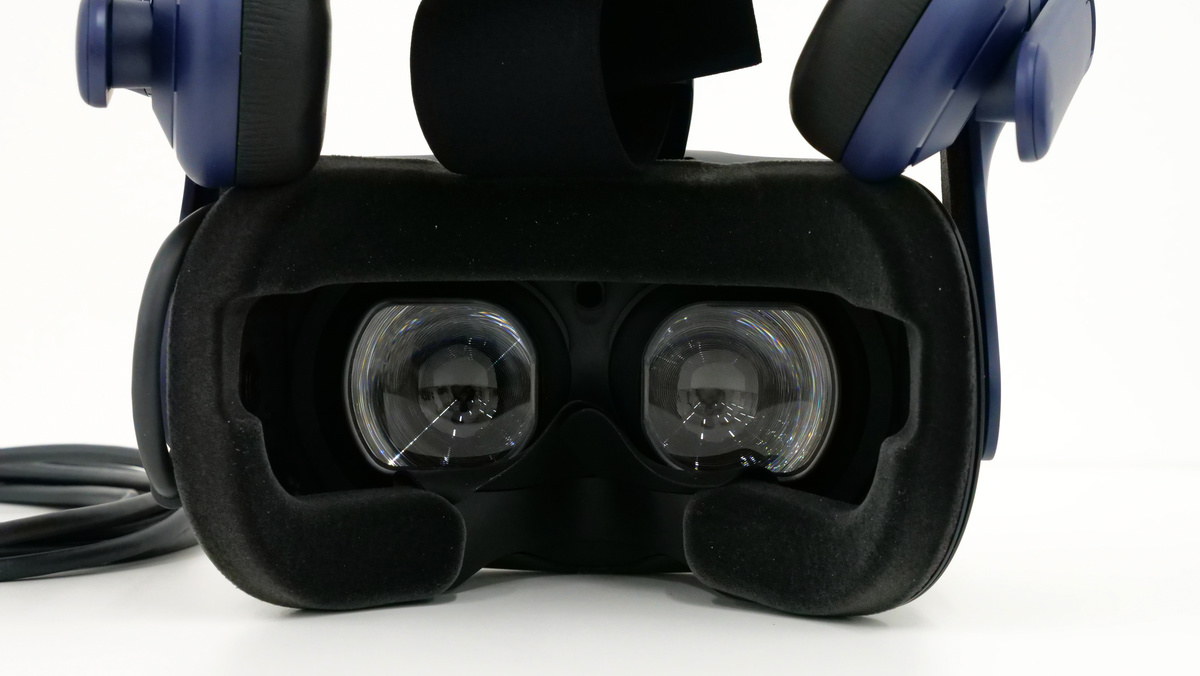
The goggles part looks like this. The face pad is a cushion and is fixed with Velcro.
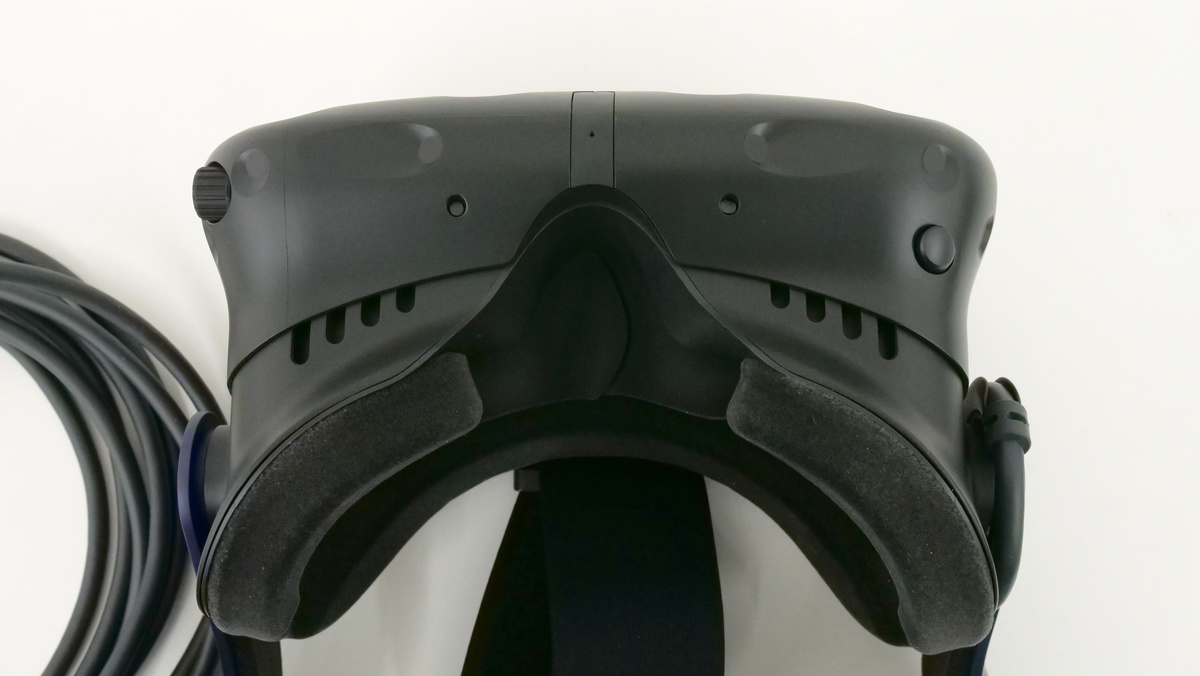
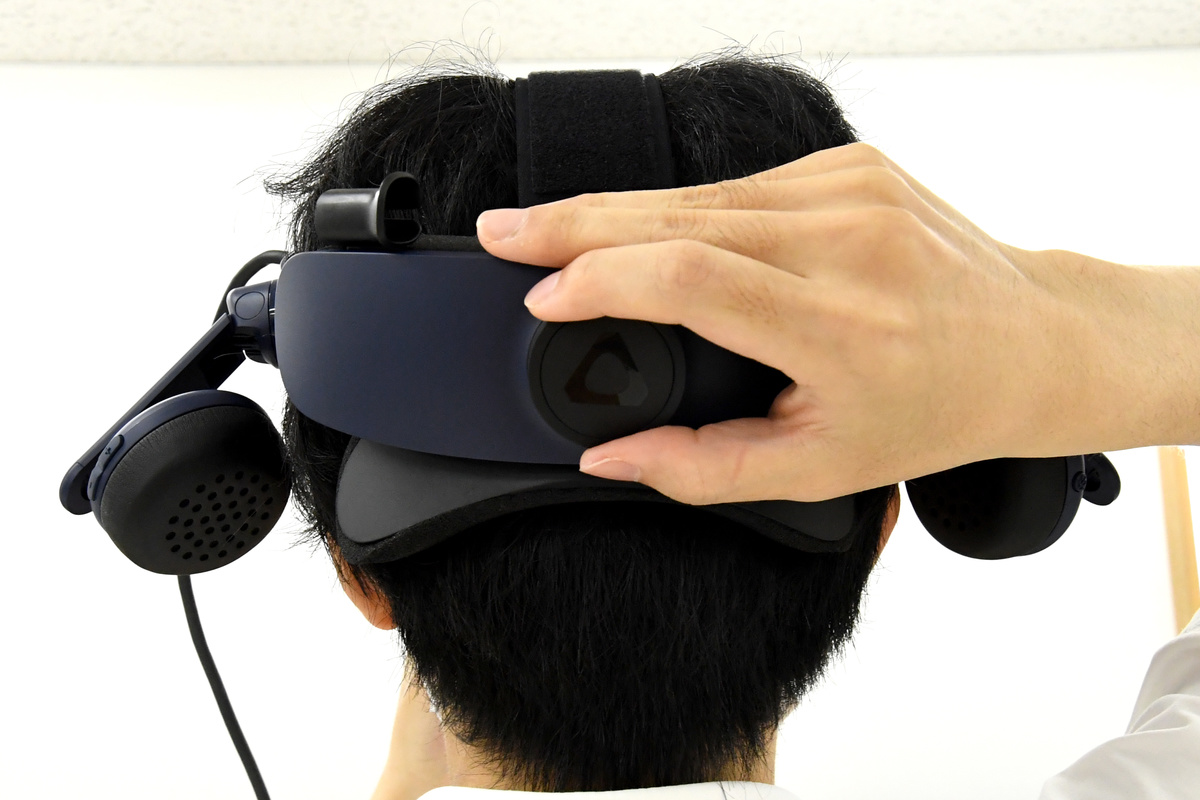
The headband looks like this, you can squeeze the length of the headband by squeezing the dial engraved with the VIVE logo, and you can firmly fix the headset. There are two movable over-ear type speakers on the left and right. The left speaker has a volume control button and the right speaker has a mute button.

A view of the goggles from below. There is a silicone nose pad on the nose to prevent light from entering the field of vision. The dial on the left facing the goggles is for adjusting the interpupillary distance (IPD), and the button on the right is for adjusting the depth of the display.
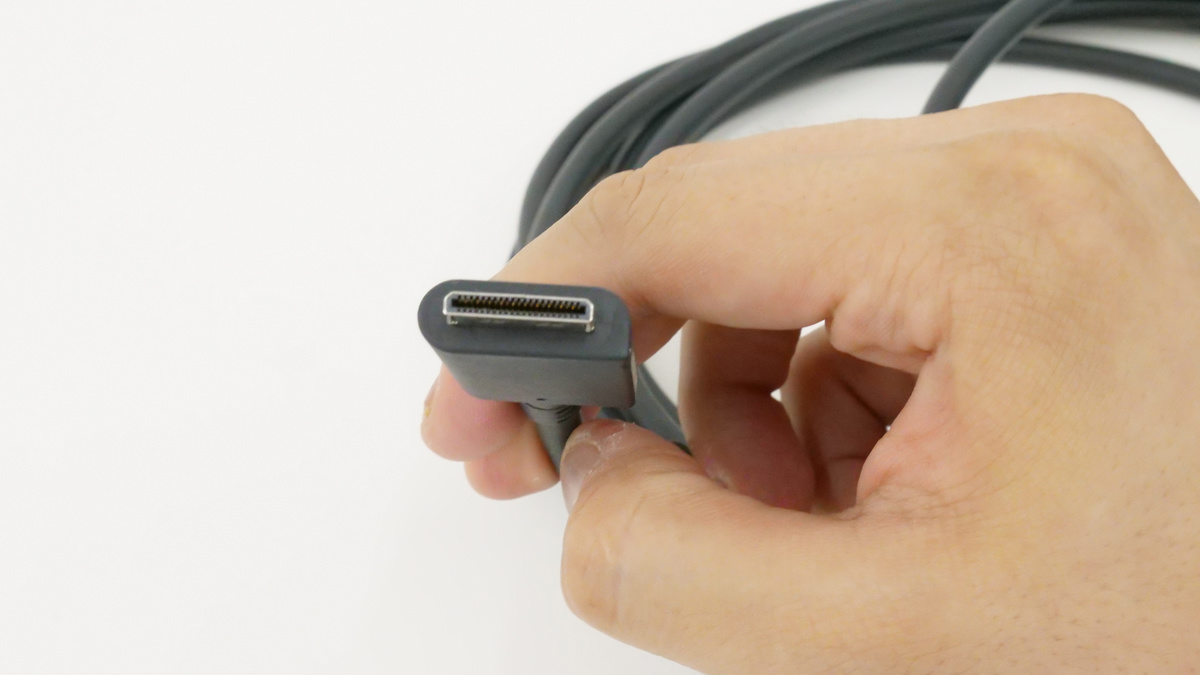
The cable terminal looks like this.
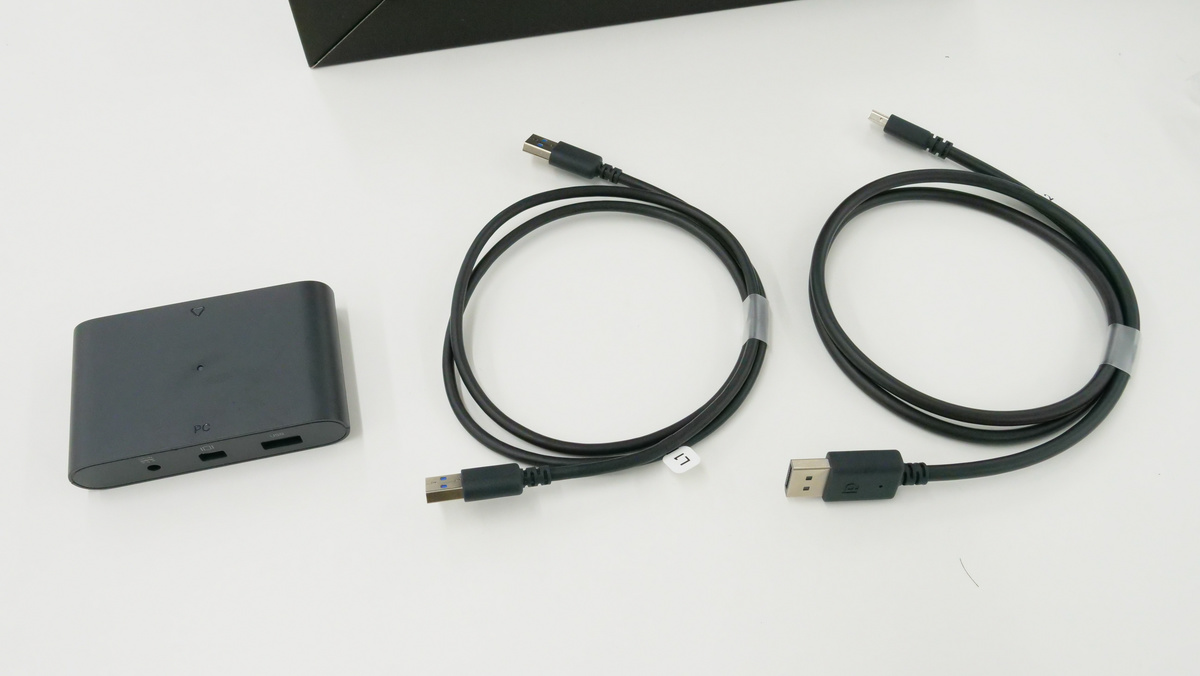
Next, a link box for connecting the headset to the PC, a DisplayPort cable, and a USB Type-A cable.
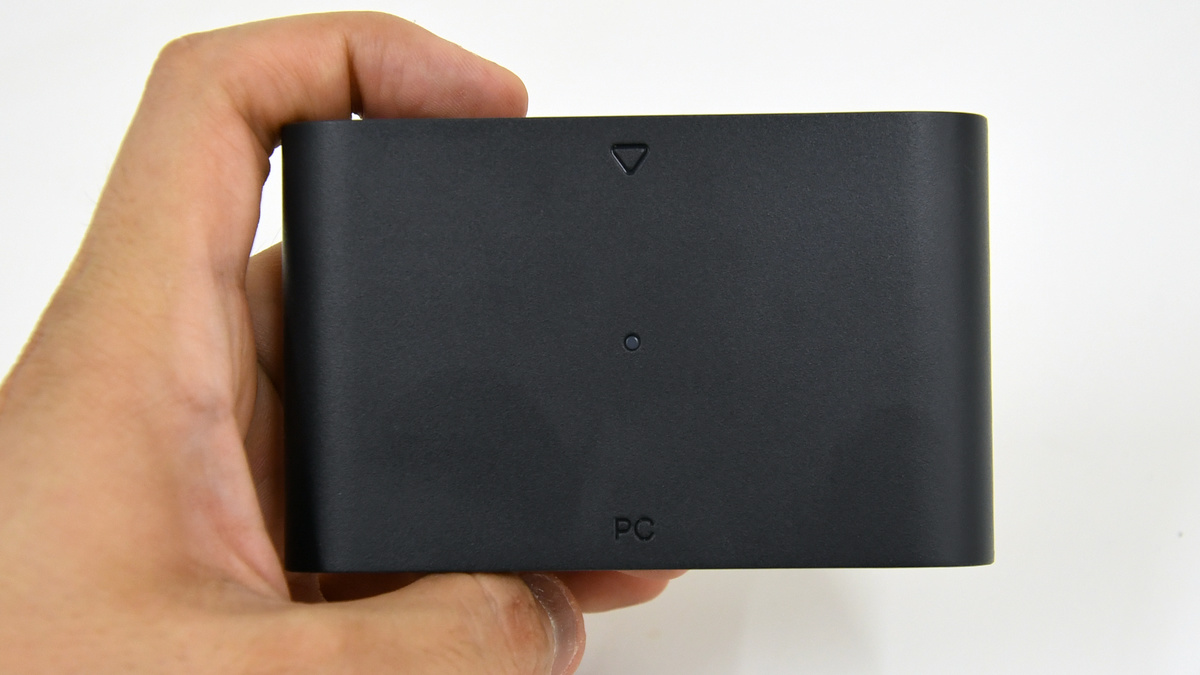
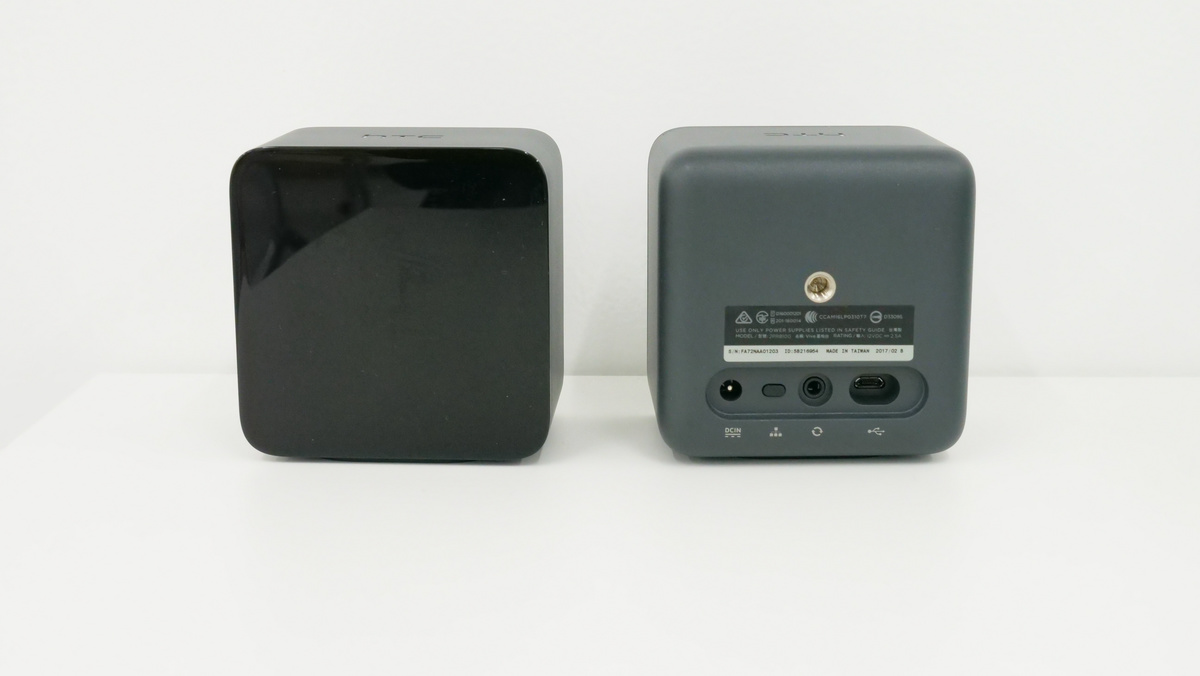
The link box looks like this. There is an indicator in the center.
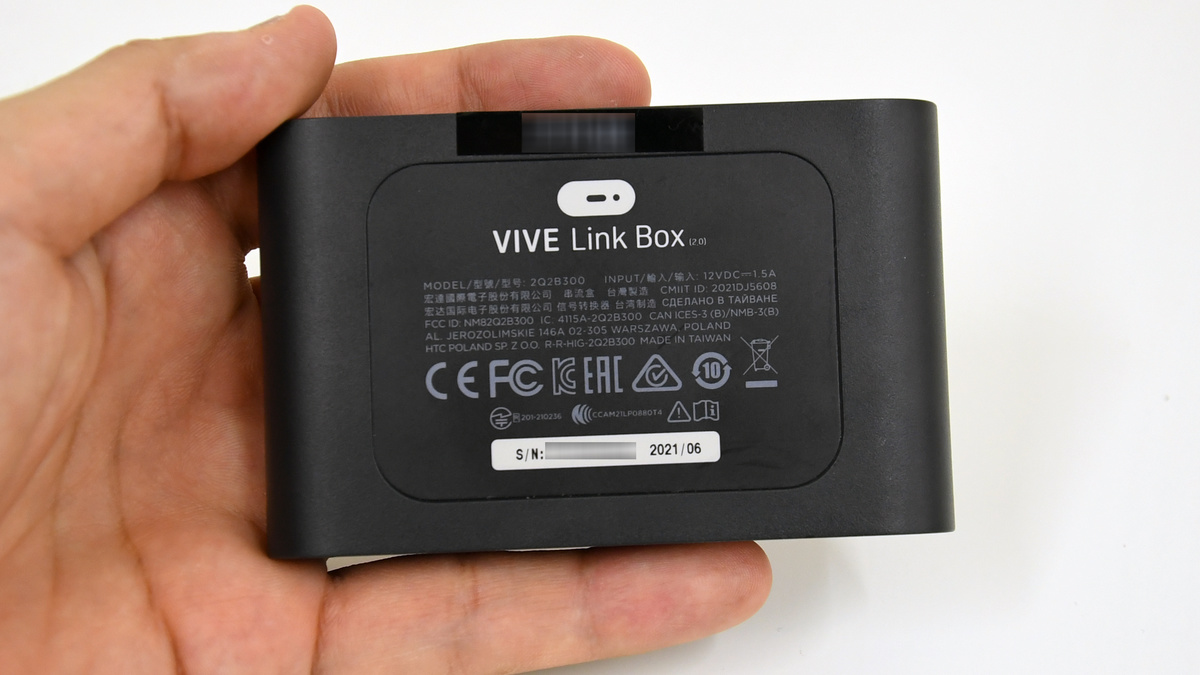
There was a technical suitability mark and a serial number on the back.
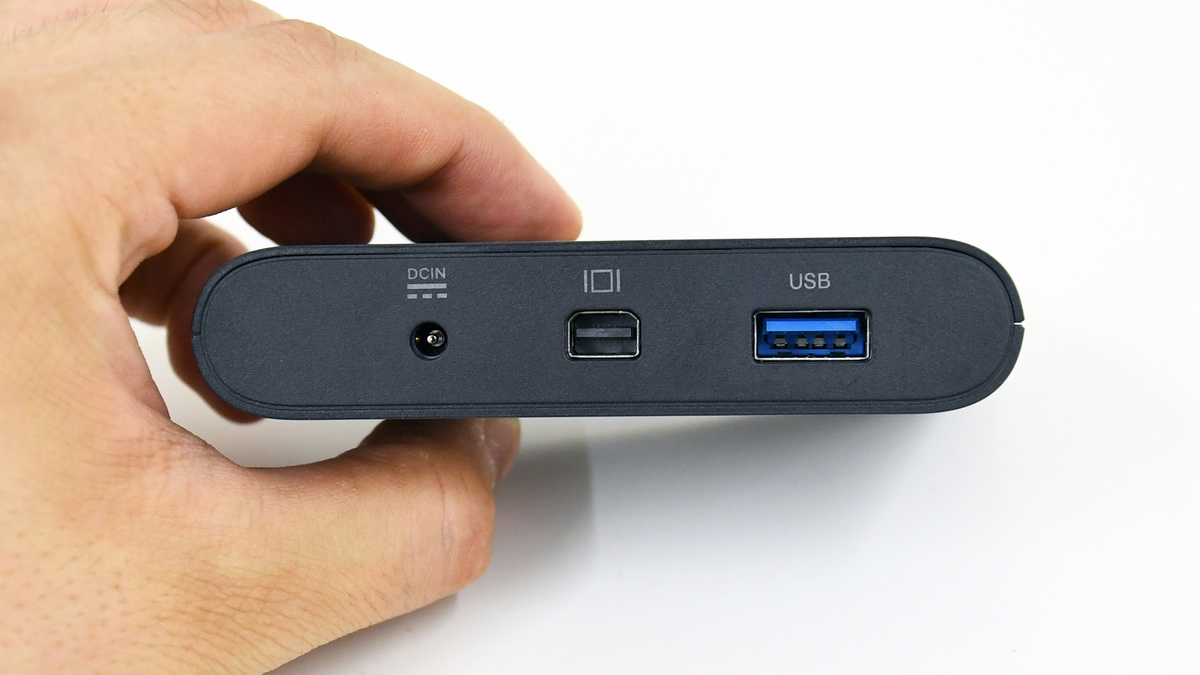
On the PC side, there is a power port, a port for connecting a DisplayPort cable, and a USB Type-A port that supports USB 3.2.
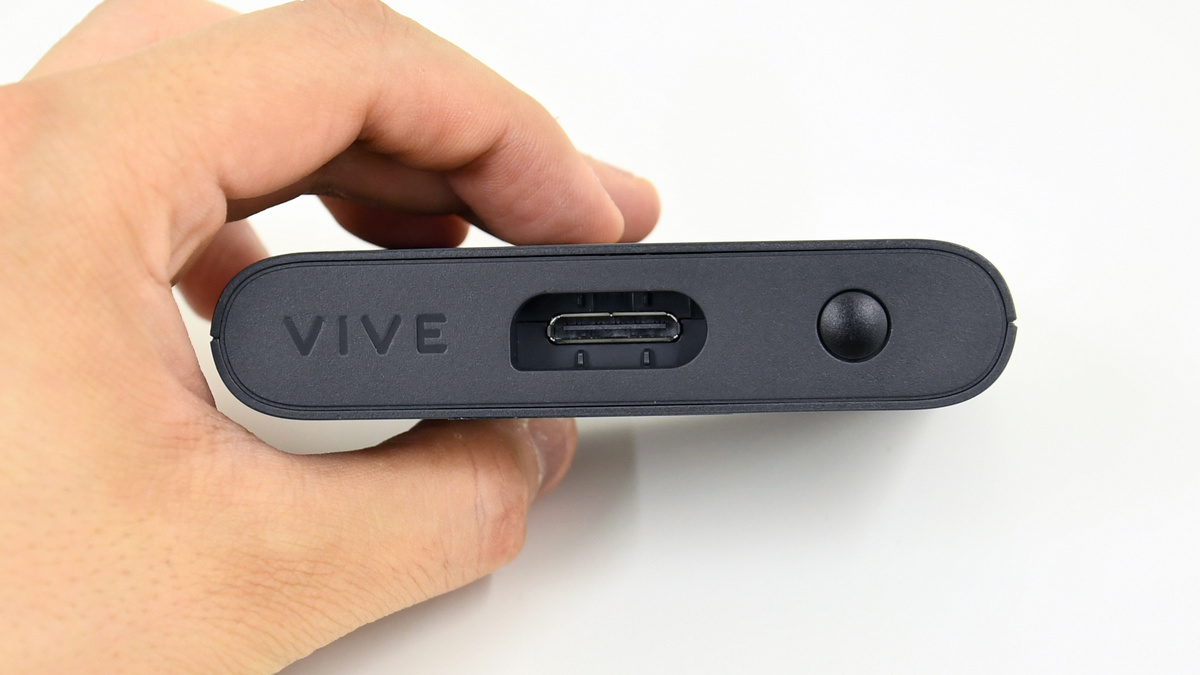
On the VIVE side, there is a headset cable connection port and a power button.
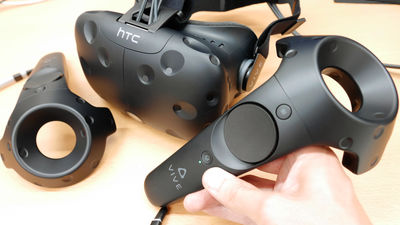
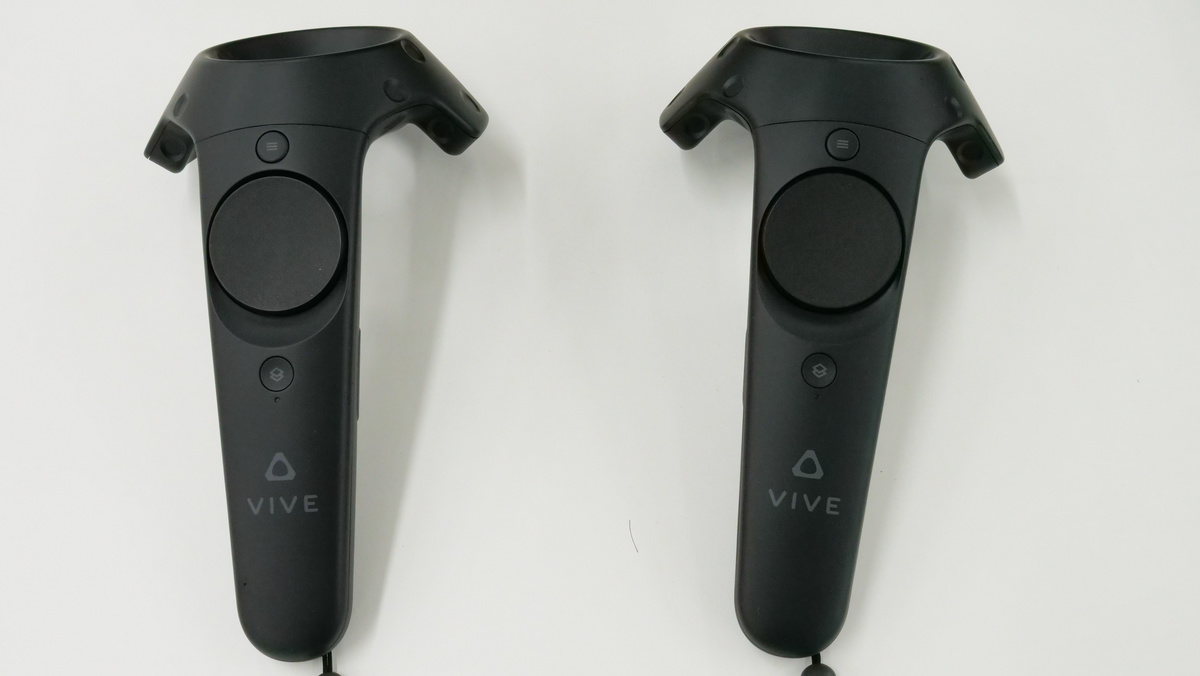
And the controller. This time I will use 1.0 used in the original
Two pairs of base stations. For the base station, I used 1.0 used in the first HTC Vive this time.
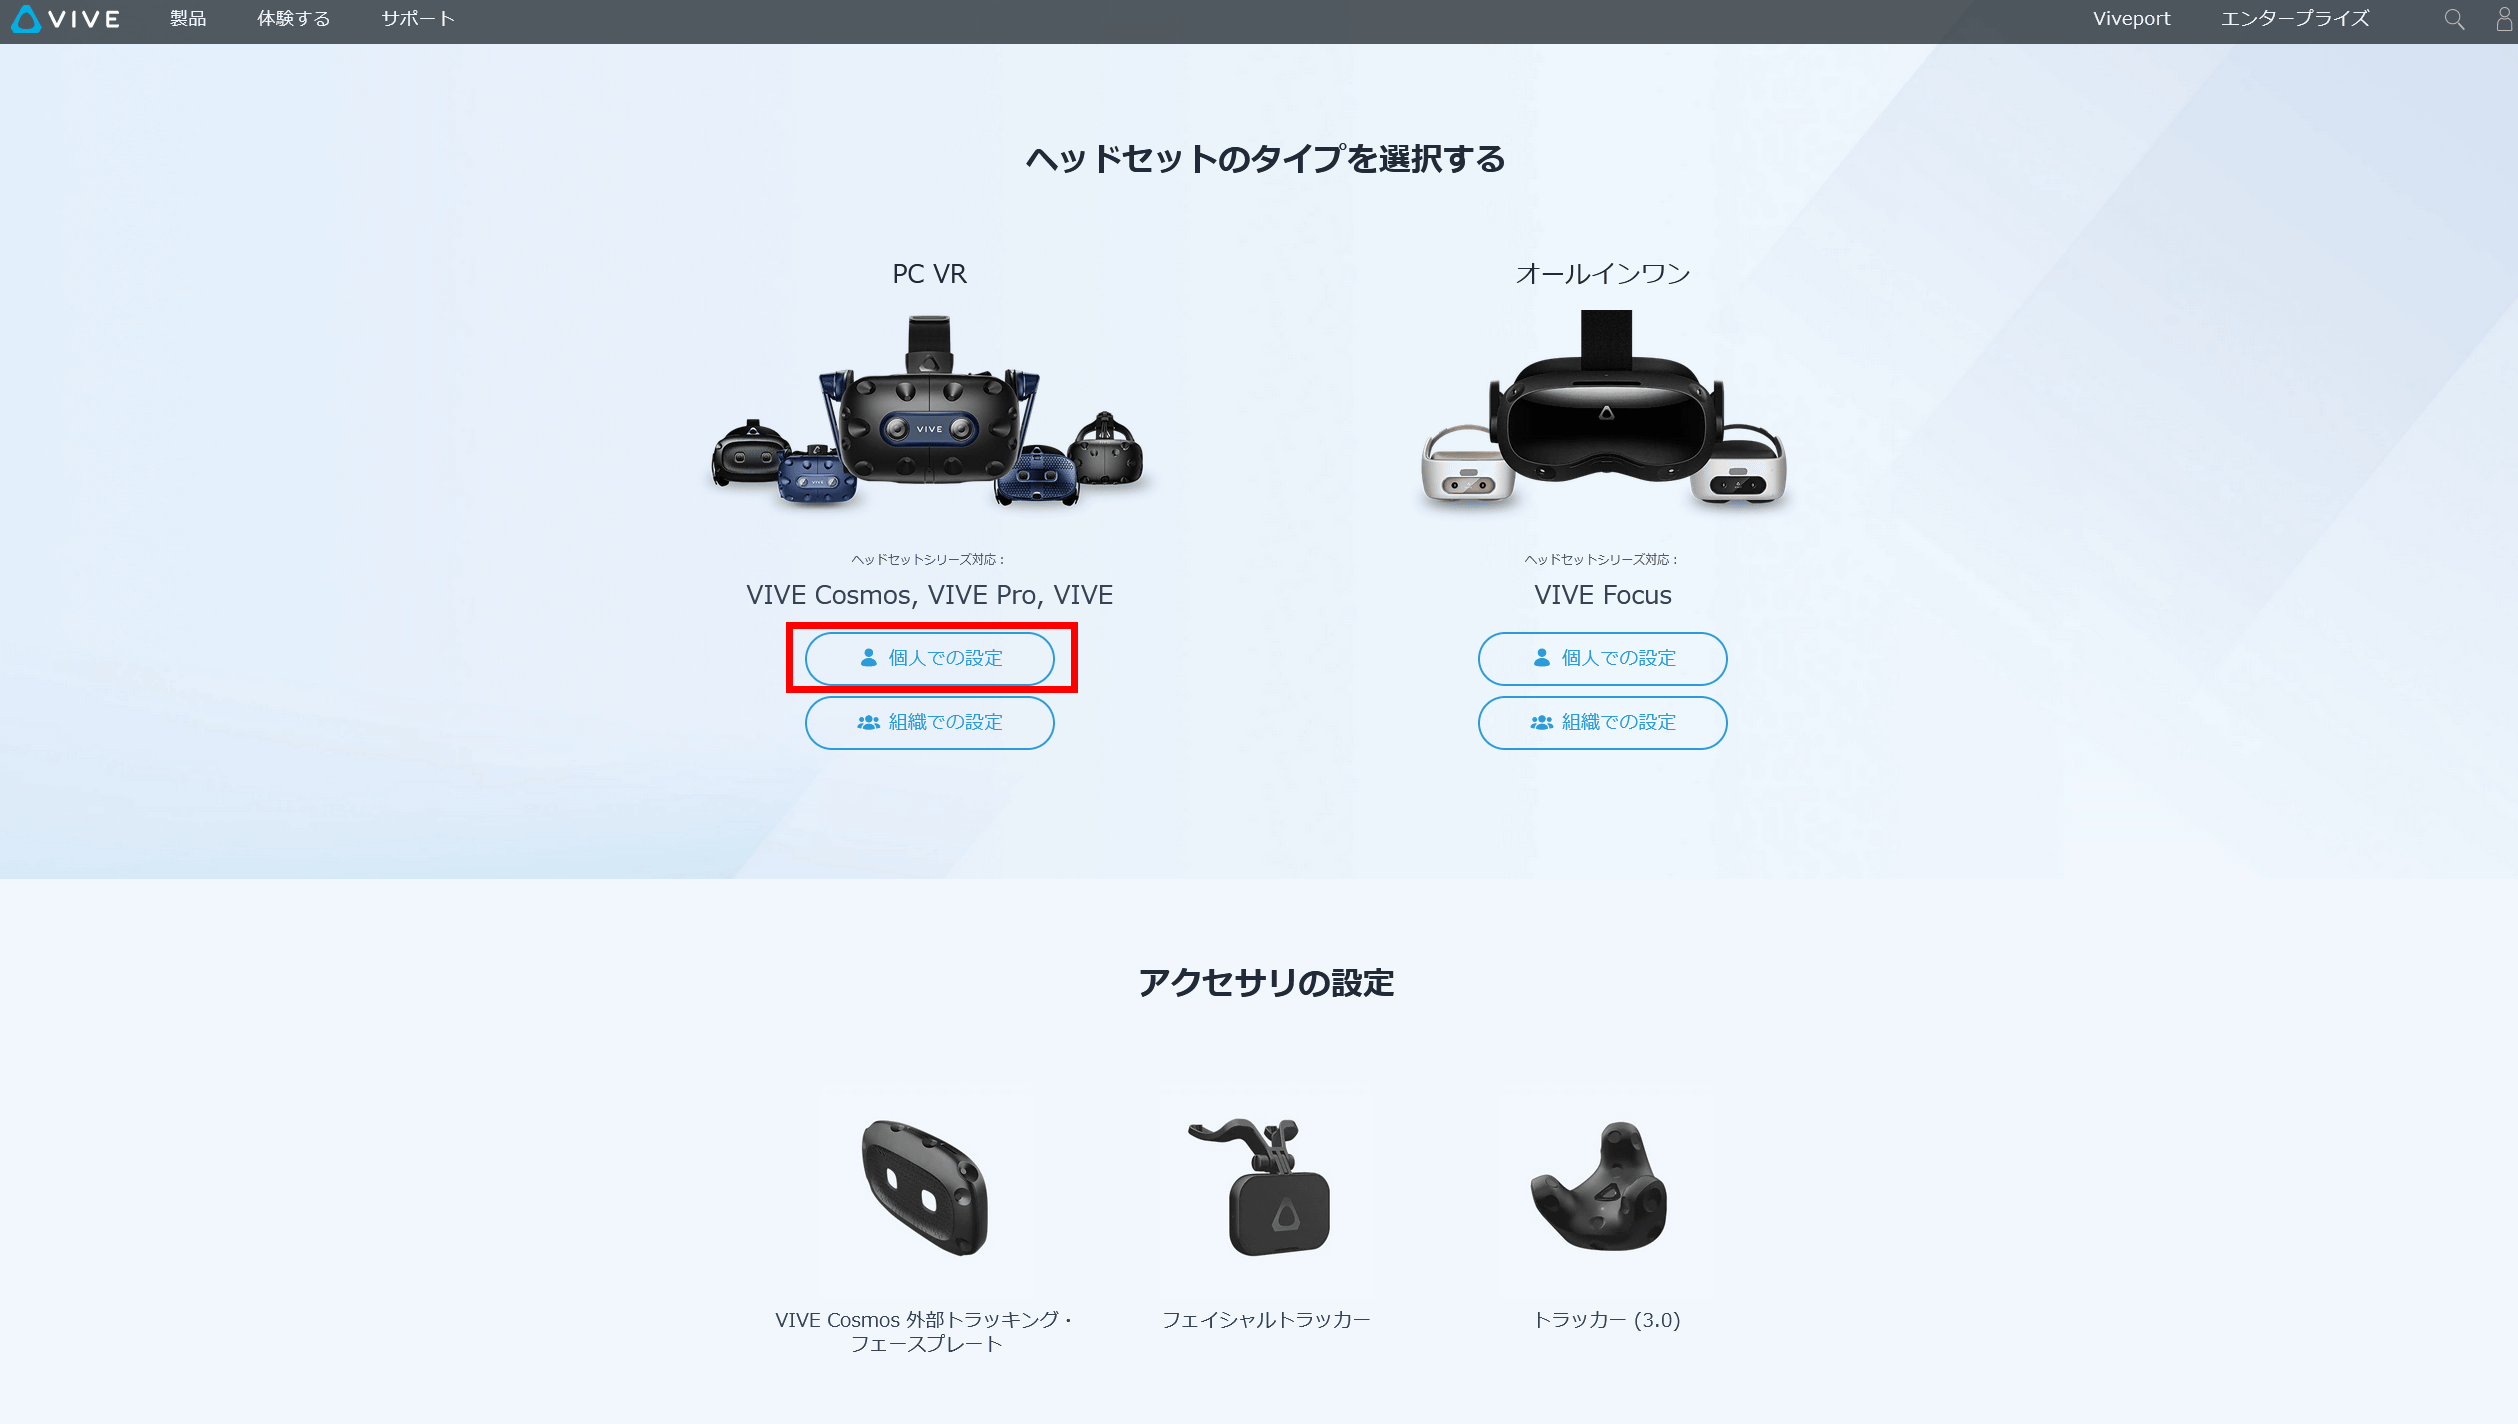
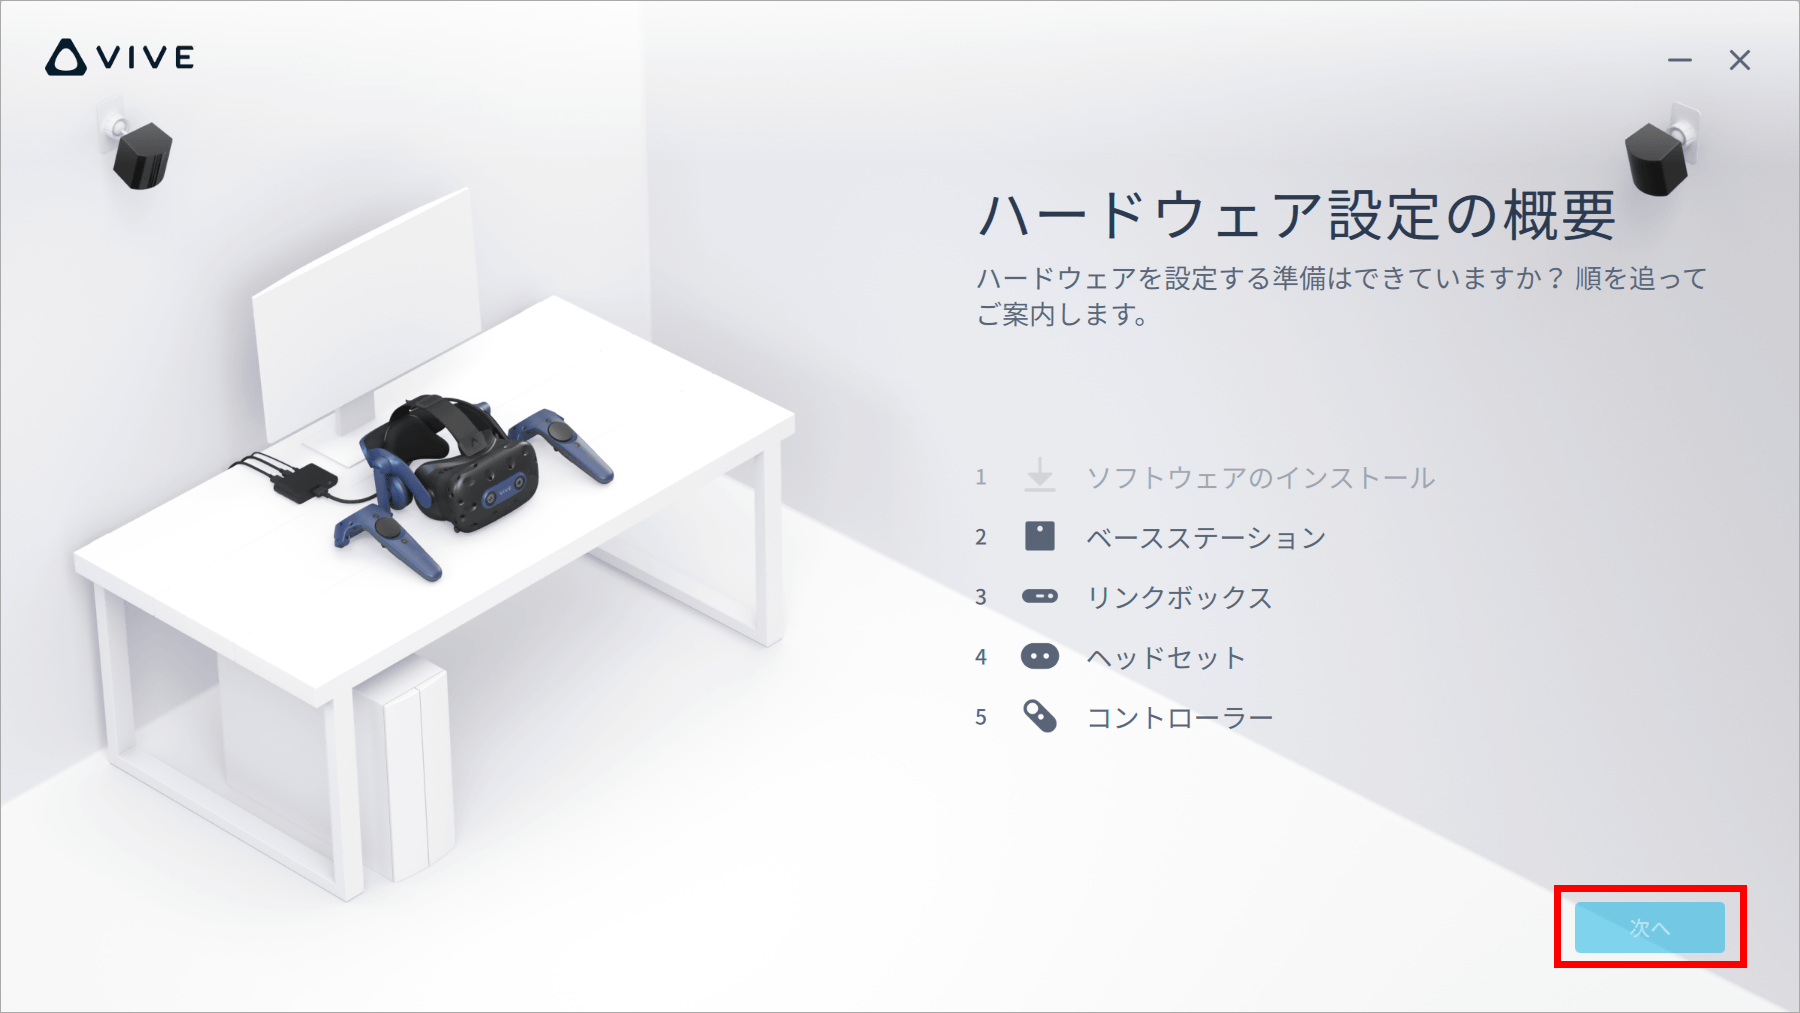
Set up immediately. First, get the VIVE setup program from the following page.
Set VIVE | VIVE Japan
Click 'Personal settings' of 'VIVE Cosmos, VIVE Pro, VIVE'.
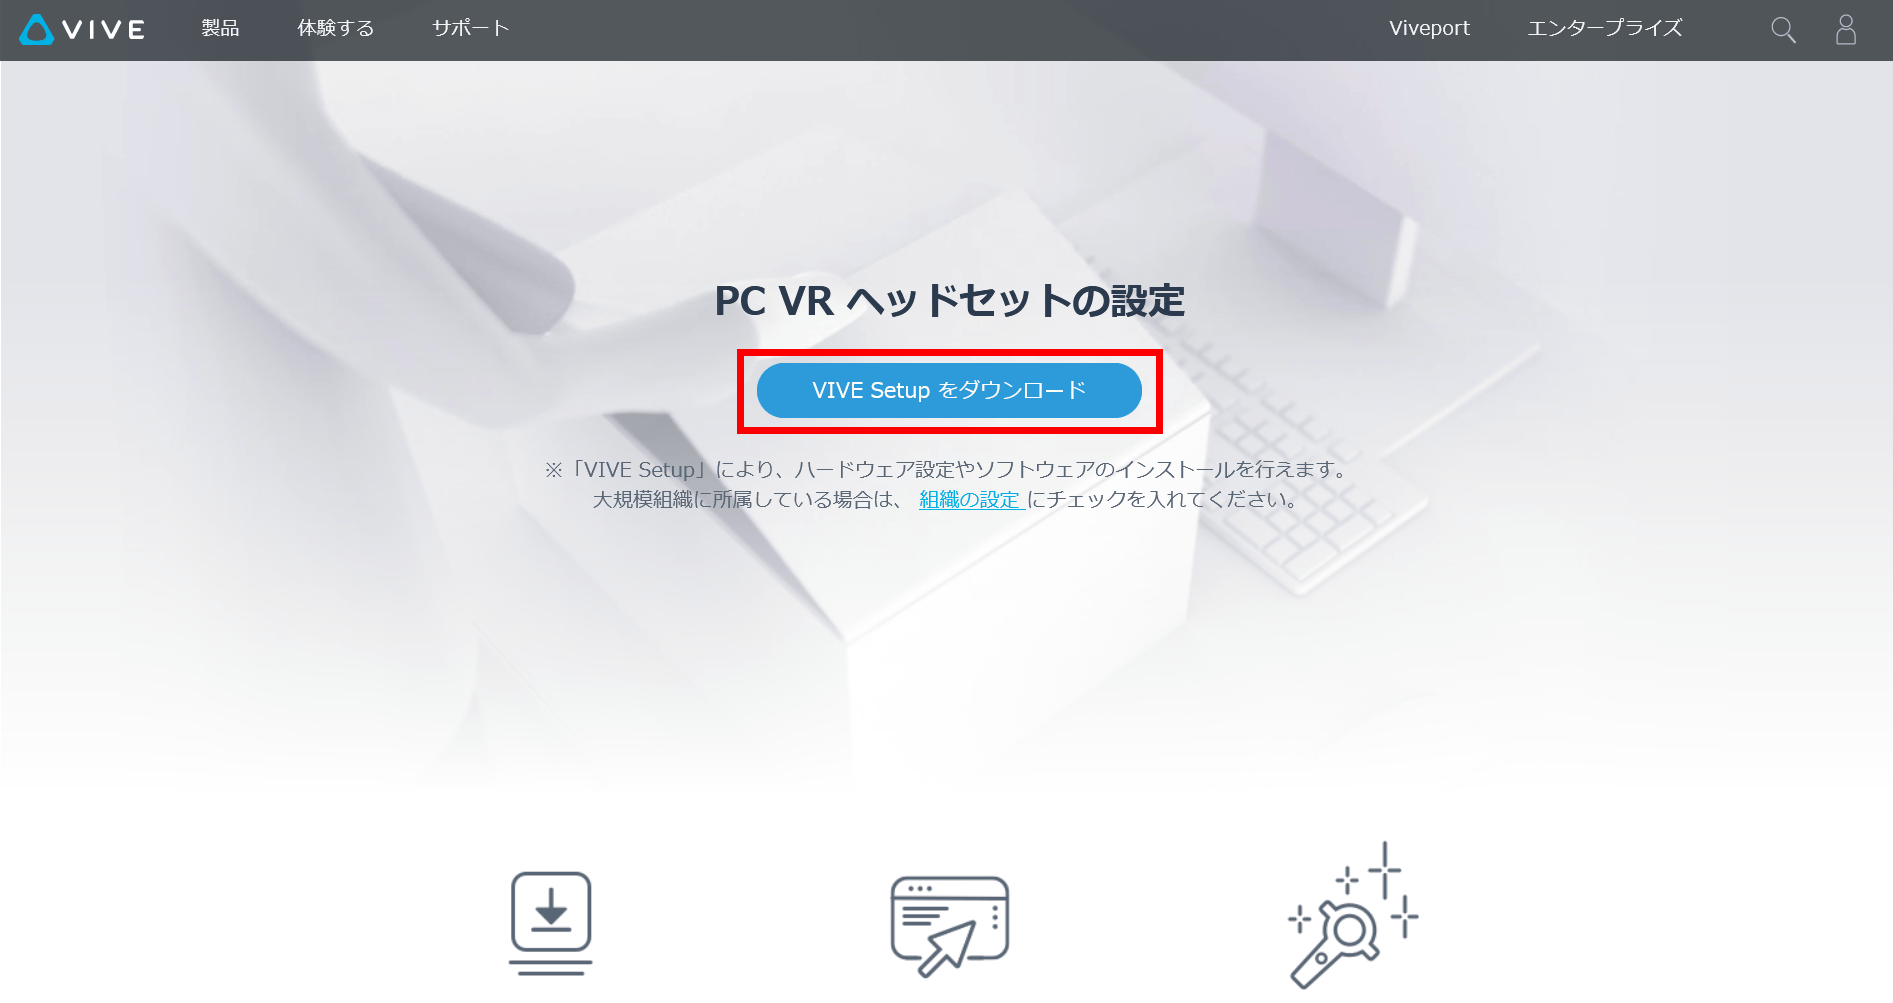
Click 'Download VIVE Setup' to download 'ViveSetup.exe'. The capacity is about 6.2MB.
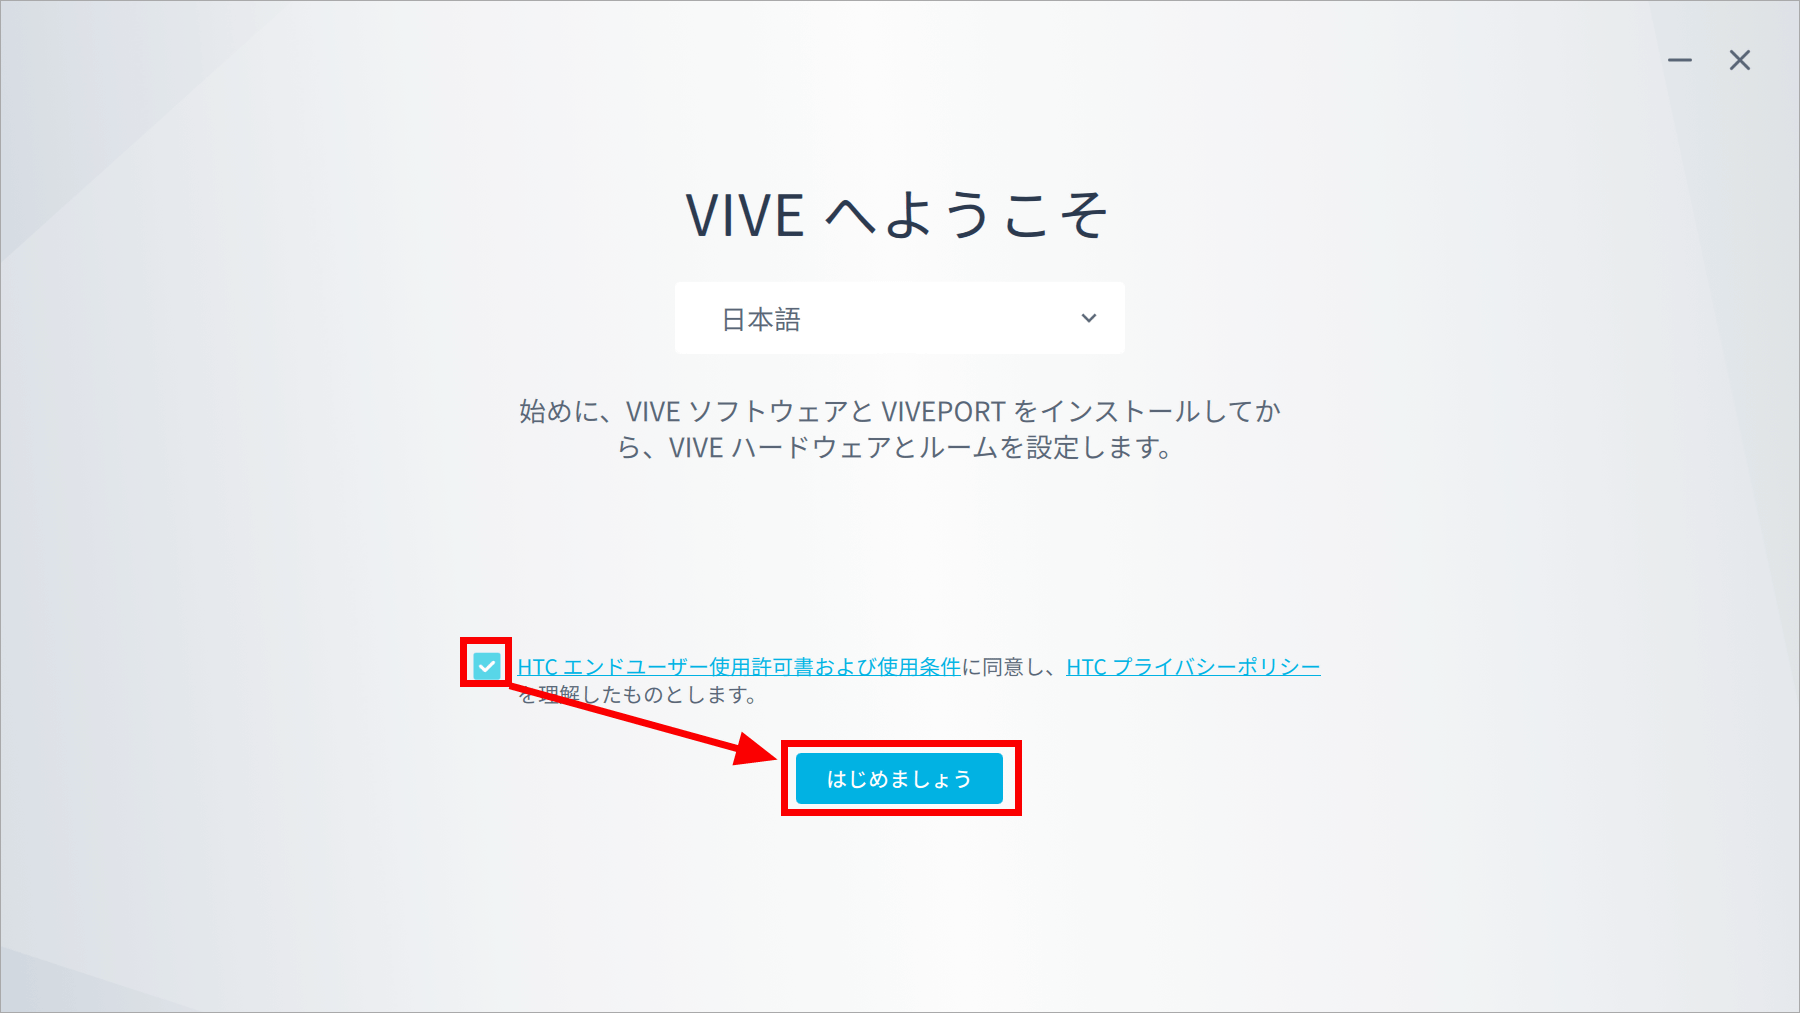
Launch ViveSetup.exe. Check to agree to the HTC End User License and Terms of Use and Privacy Policy and click 'Get Started'.
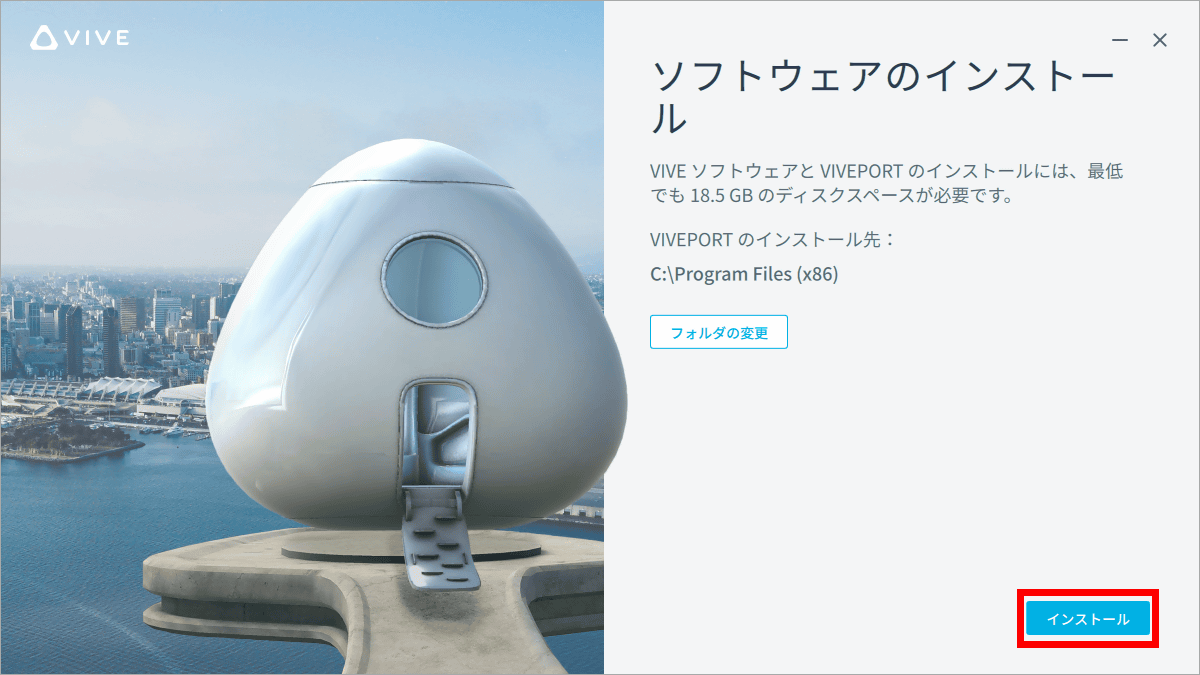
To install the VIVE software and the VIVE app store 'VIVE PORT', you need at least 18.5GB of free space on the storage. Click 'Install'.
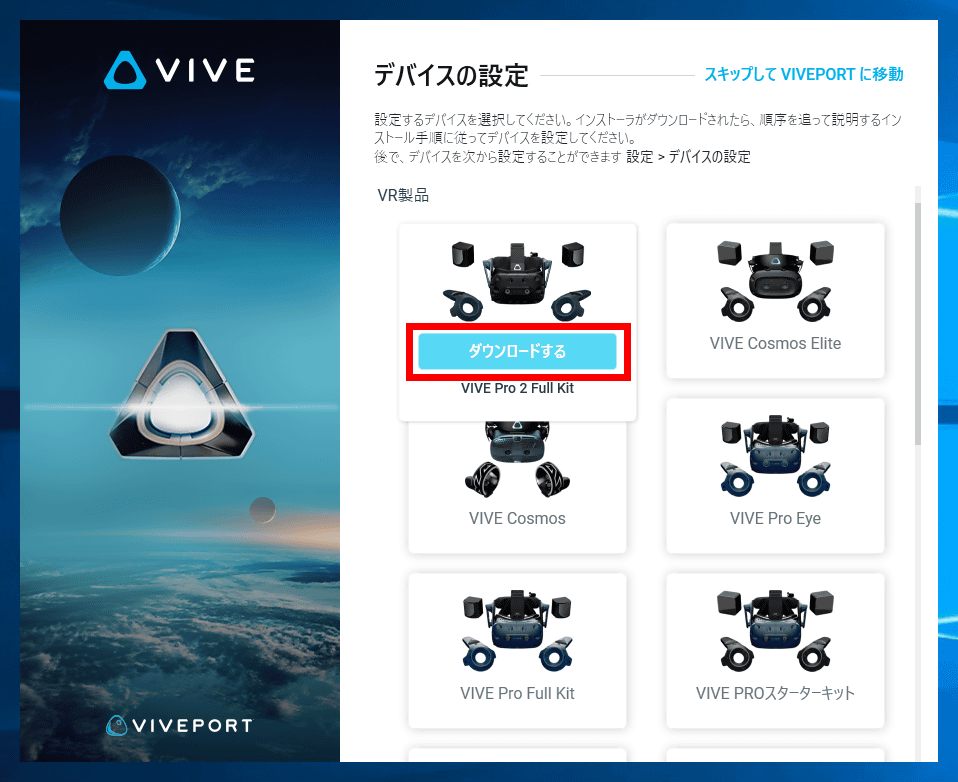
The screen will change to the 'Device Settings' screen, so select 'Download' from the 'VIVE Pro 2 Full Kit'.
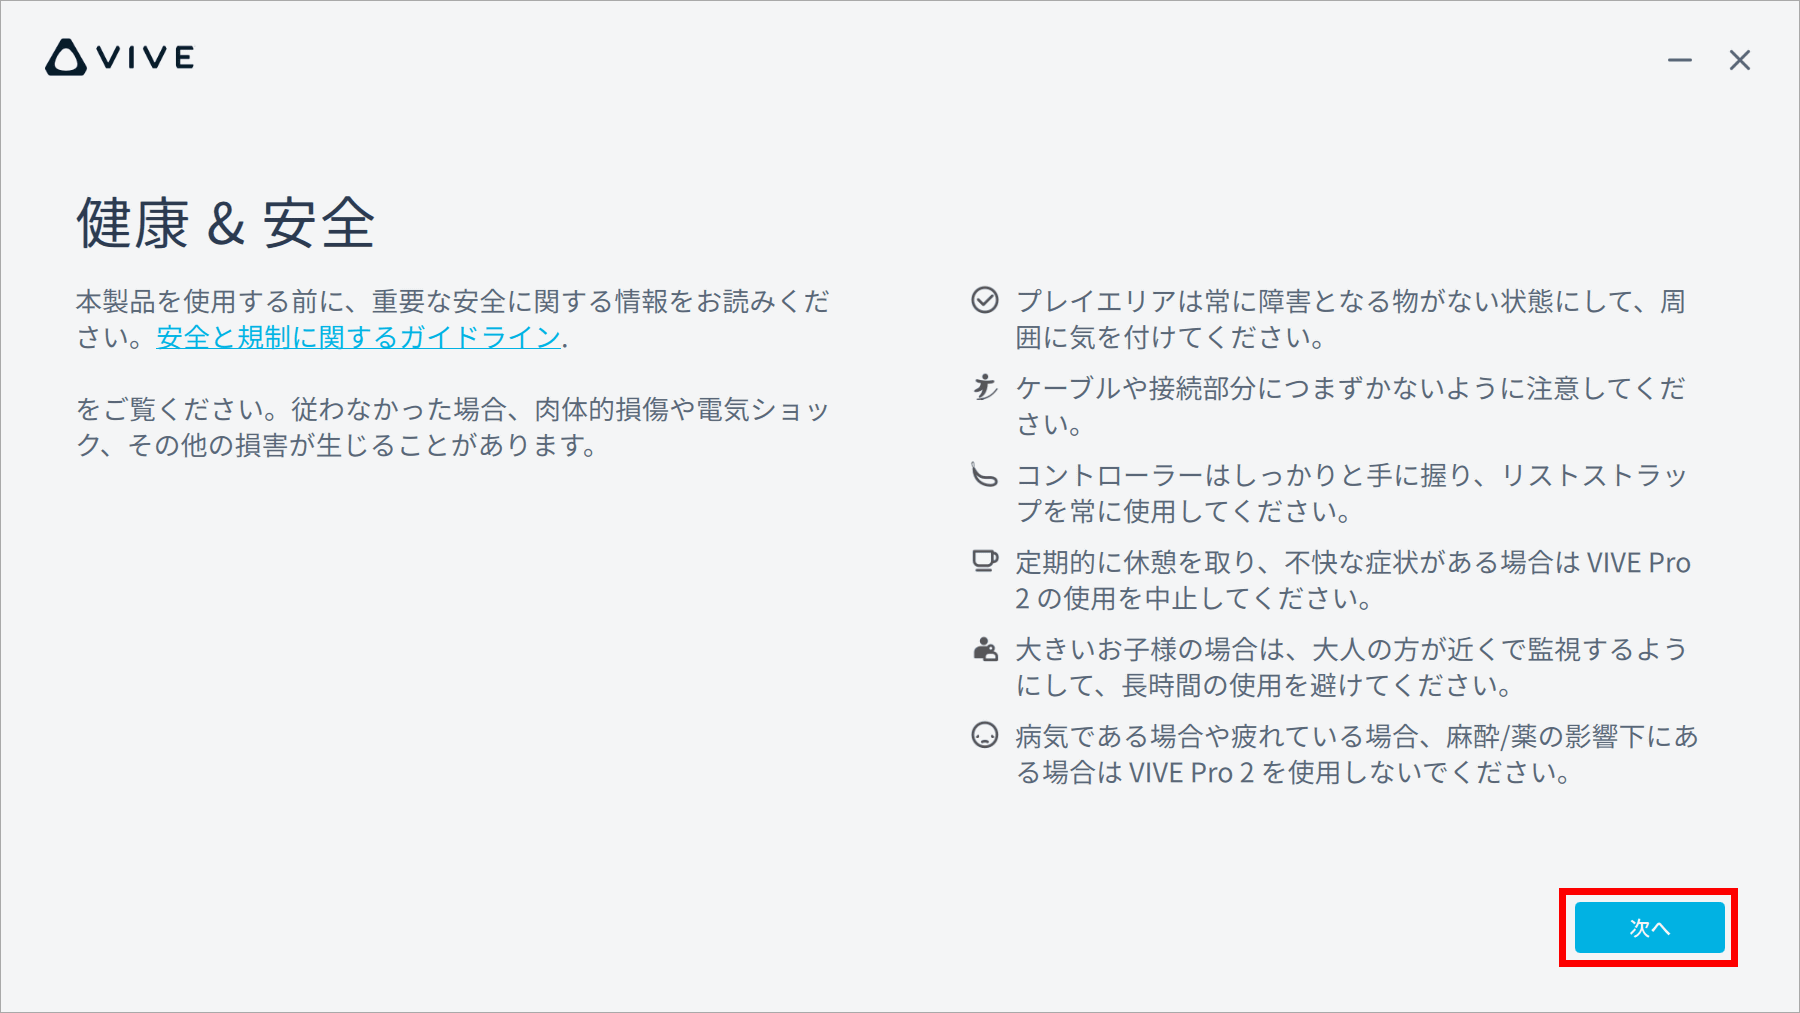
Click 'Next'.
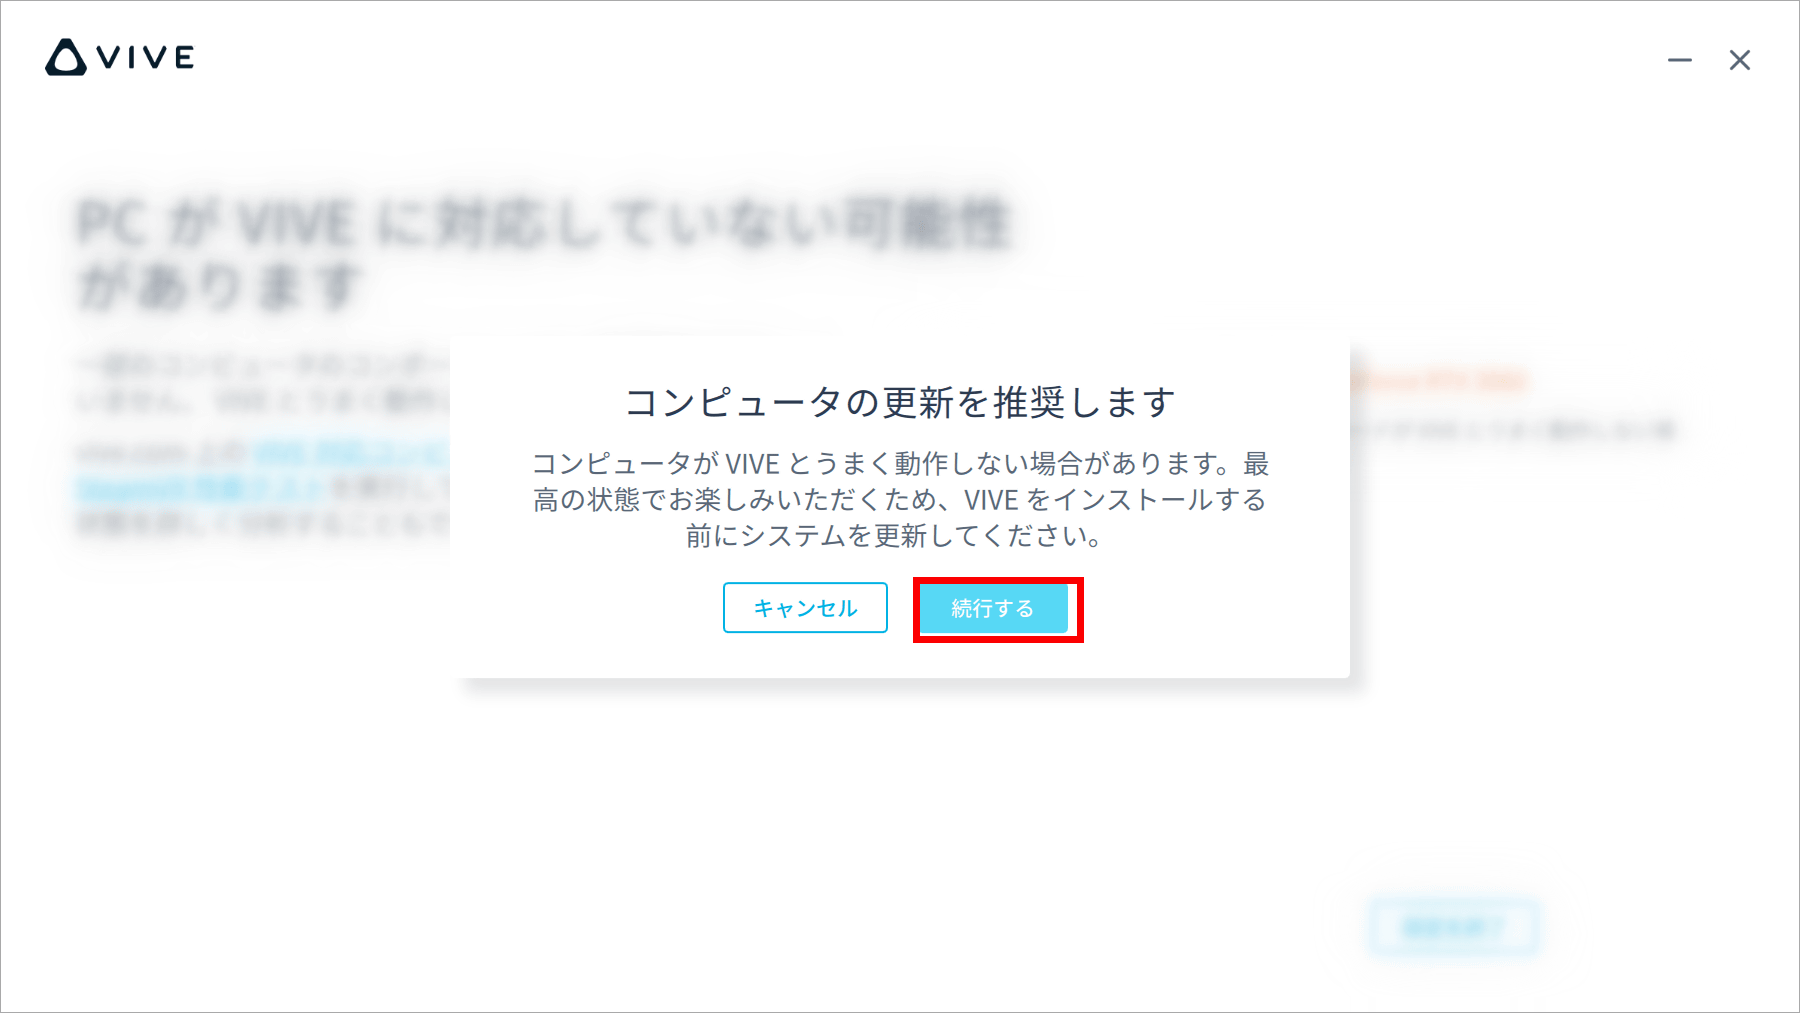
VIVE Pro 2 supports 5K resolution, but you can only experience VR at 5K resolution if your GPU is RTX 20 or higher. This time I connect to a PC with NVIDIA GeForce RTX 3060, but a warning was displayed due to a driver problem. Ignore this time and click 'Next'.

Click 'Continue'.
The installation will start.
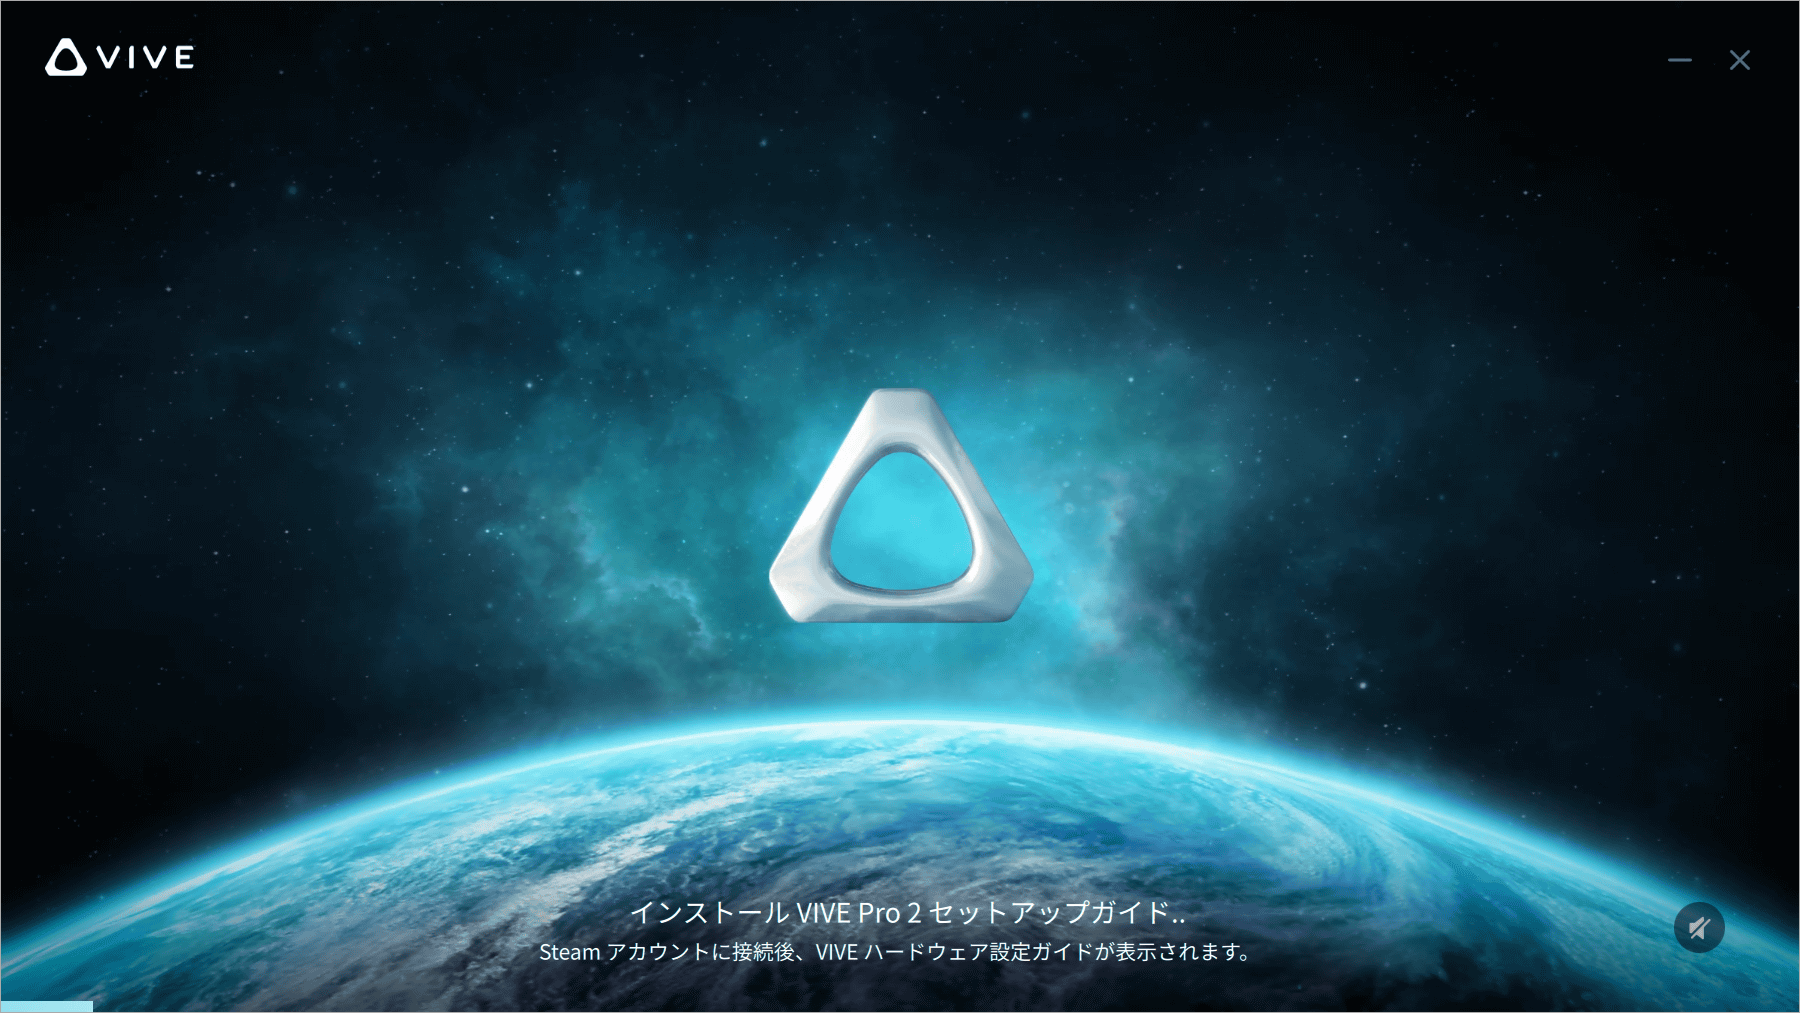
After the installation is complete, the VIVE Pro 2 setup will begin. Click 'Next'.
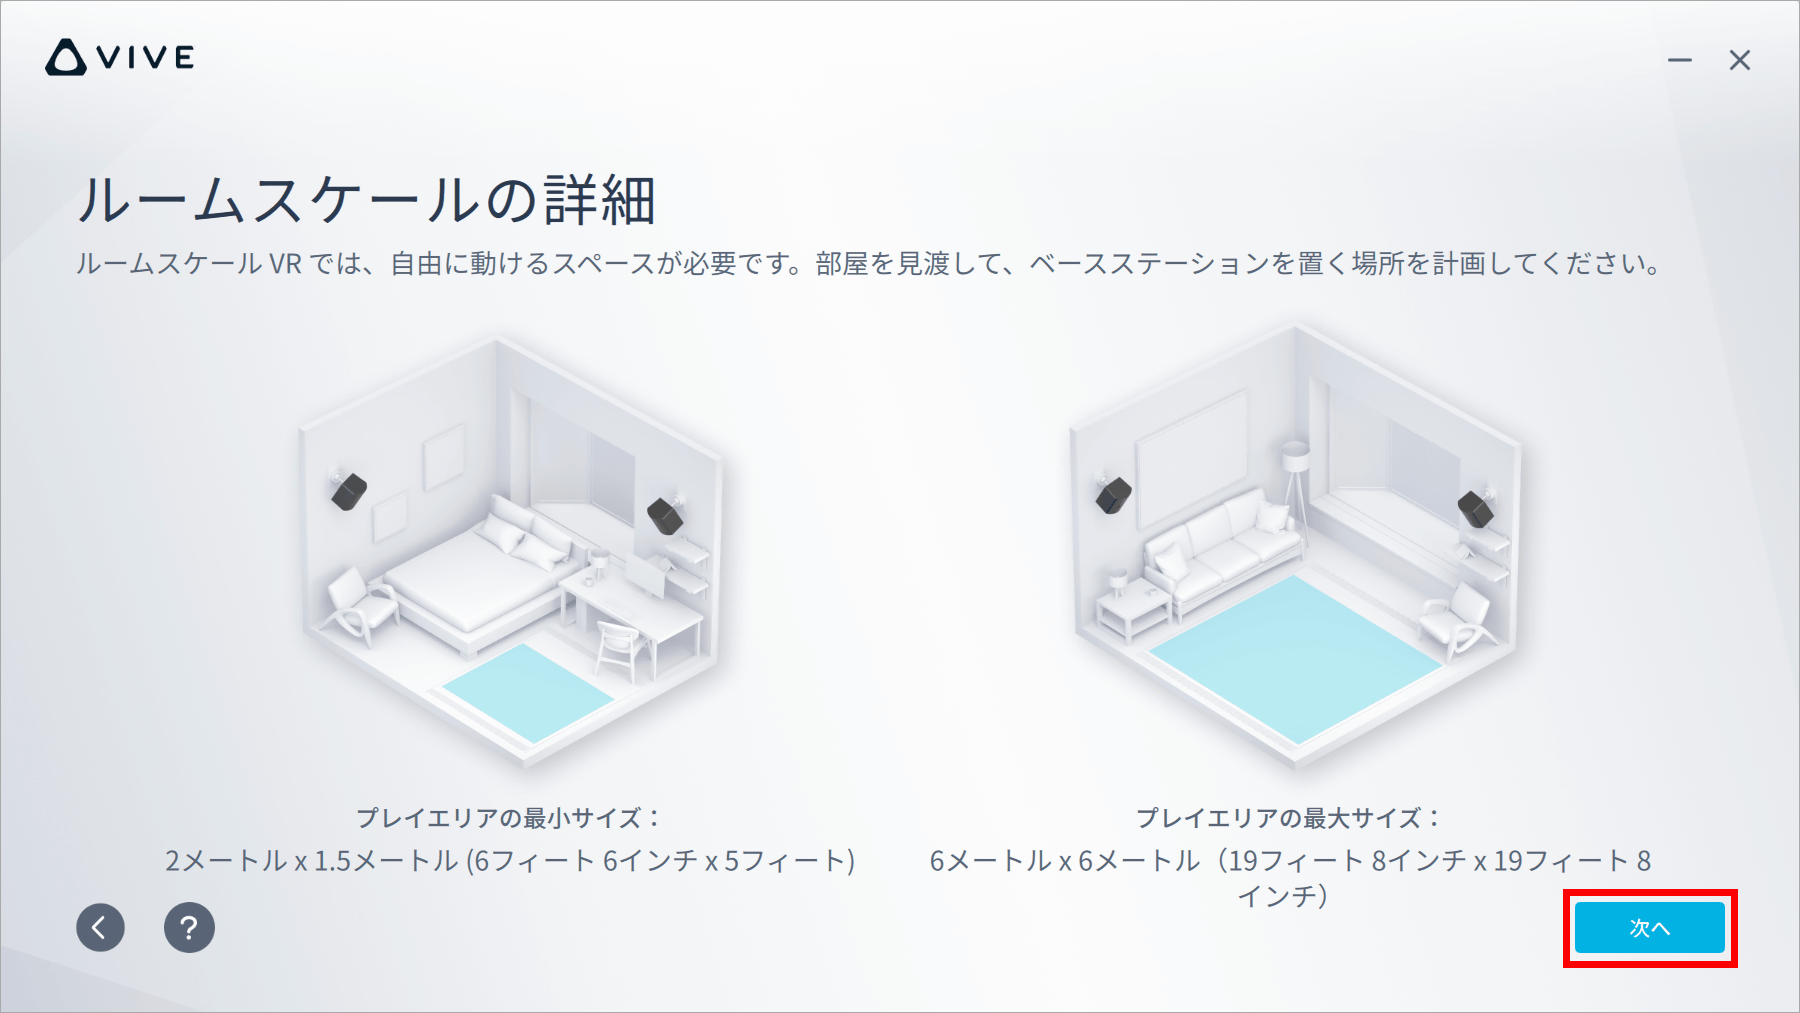
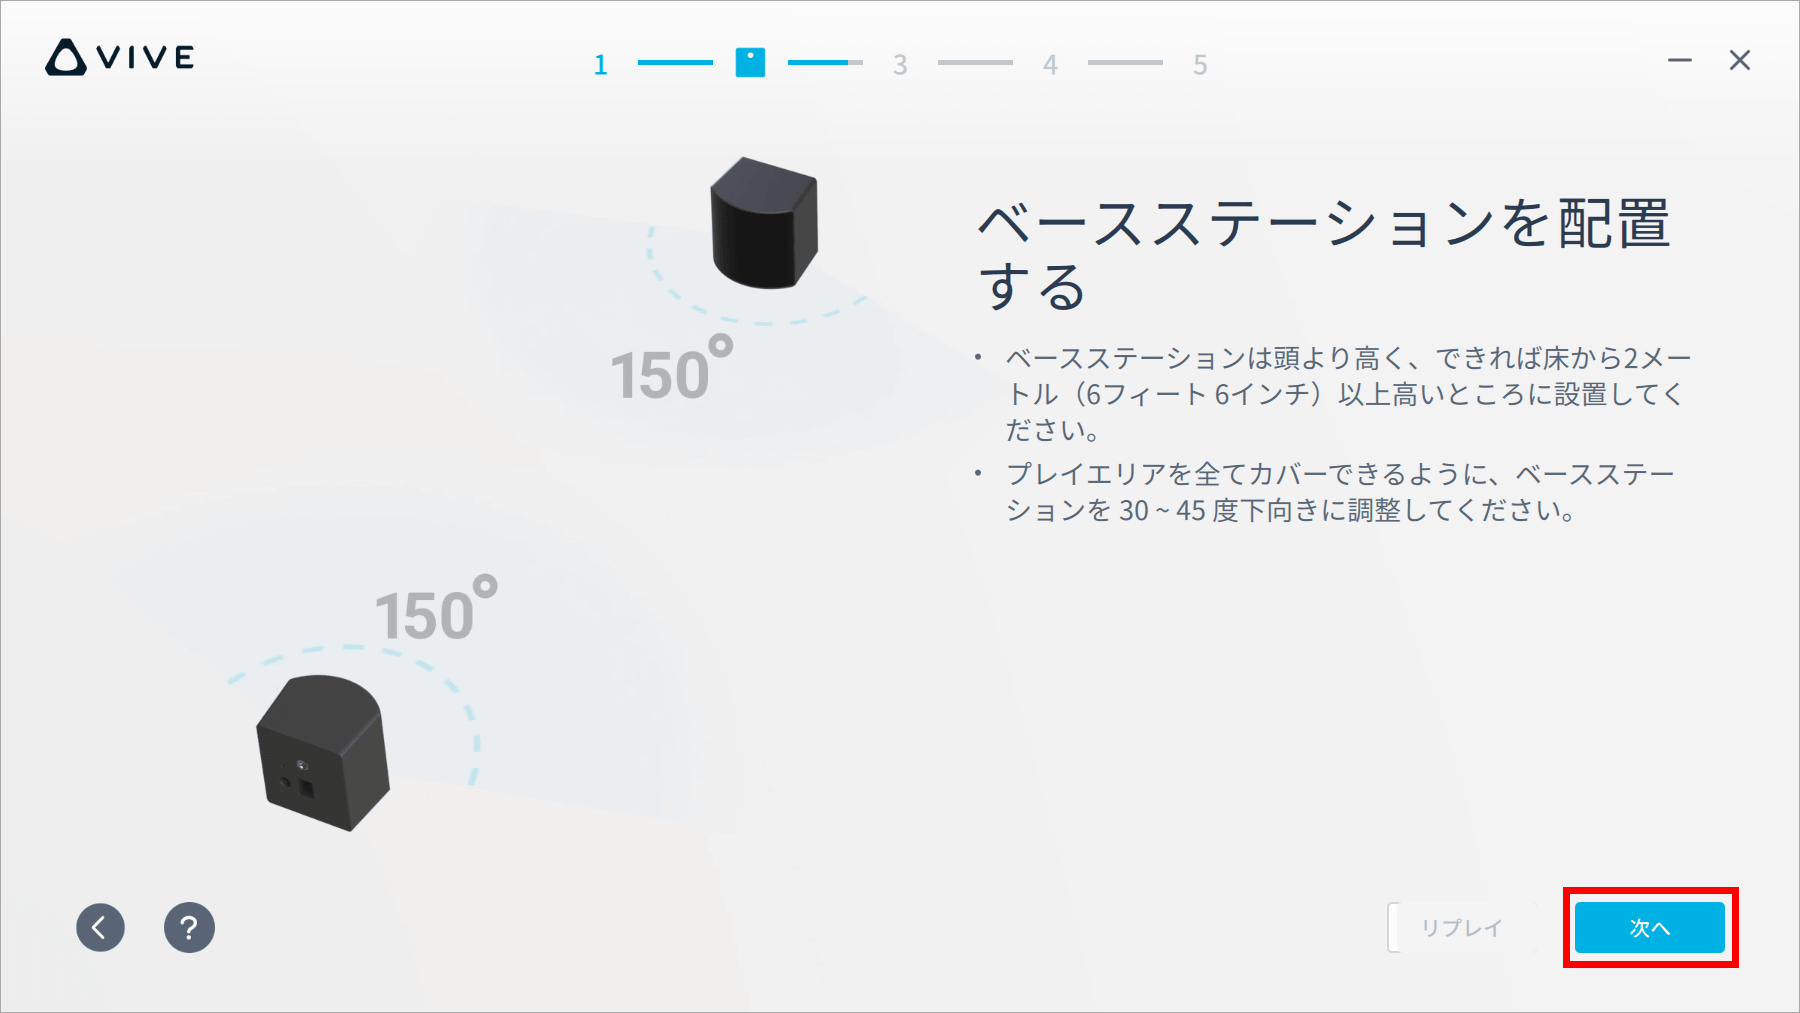
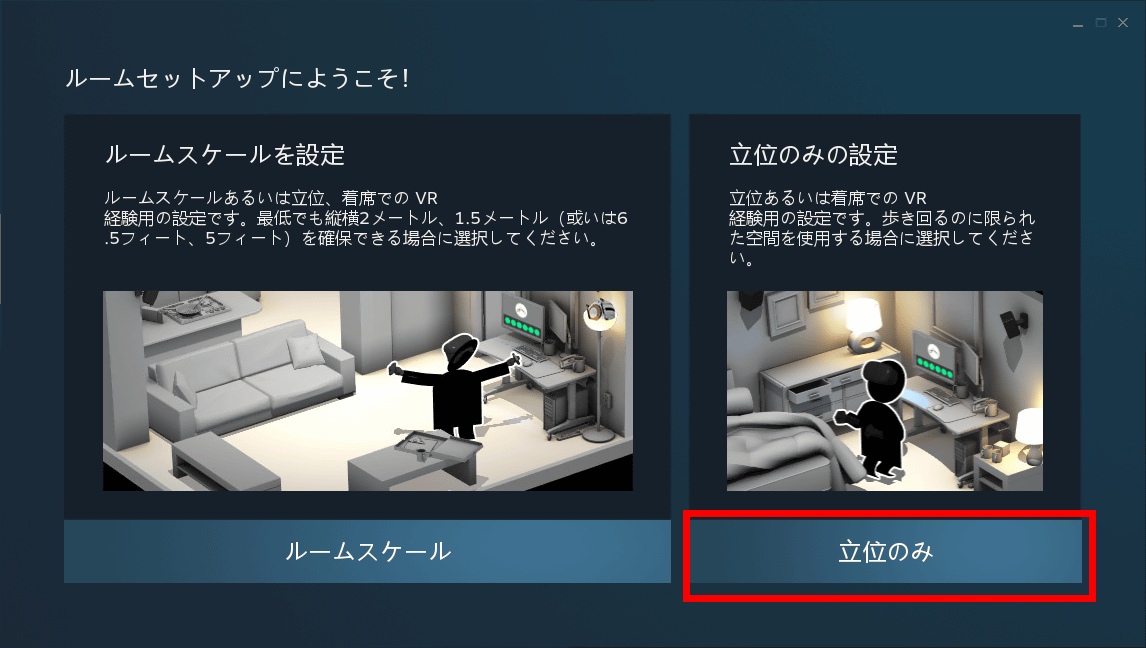
From here, just click 'Next' while proceeding with the setup as instructed. In order to experience VR with VIVE Pro 2, a space of at least 2m x 1.5m is required. After cleaning up the room and securing space, set the room scale.
A total of 3 outlets are required for the link box and 2 base stations. Depending on the situation, you may need to provide extension cords and equipment for mounting the base station.

First, set up the base station.
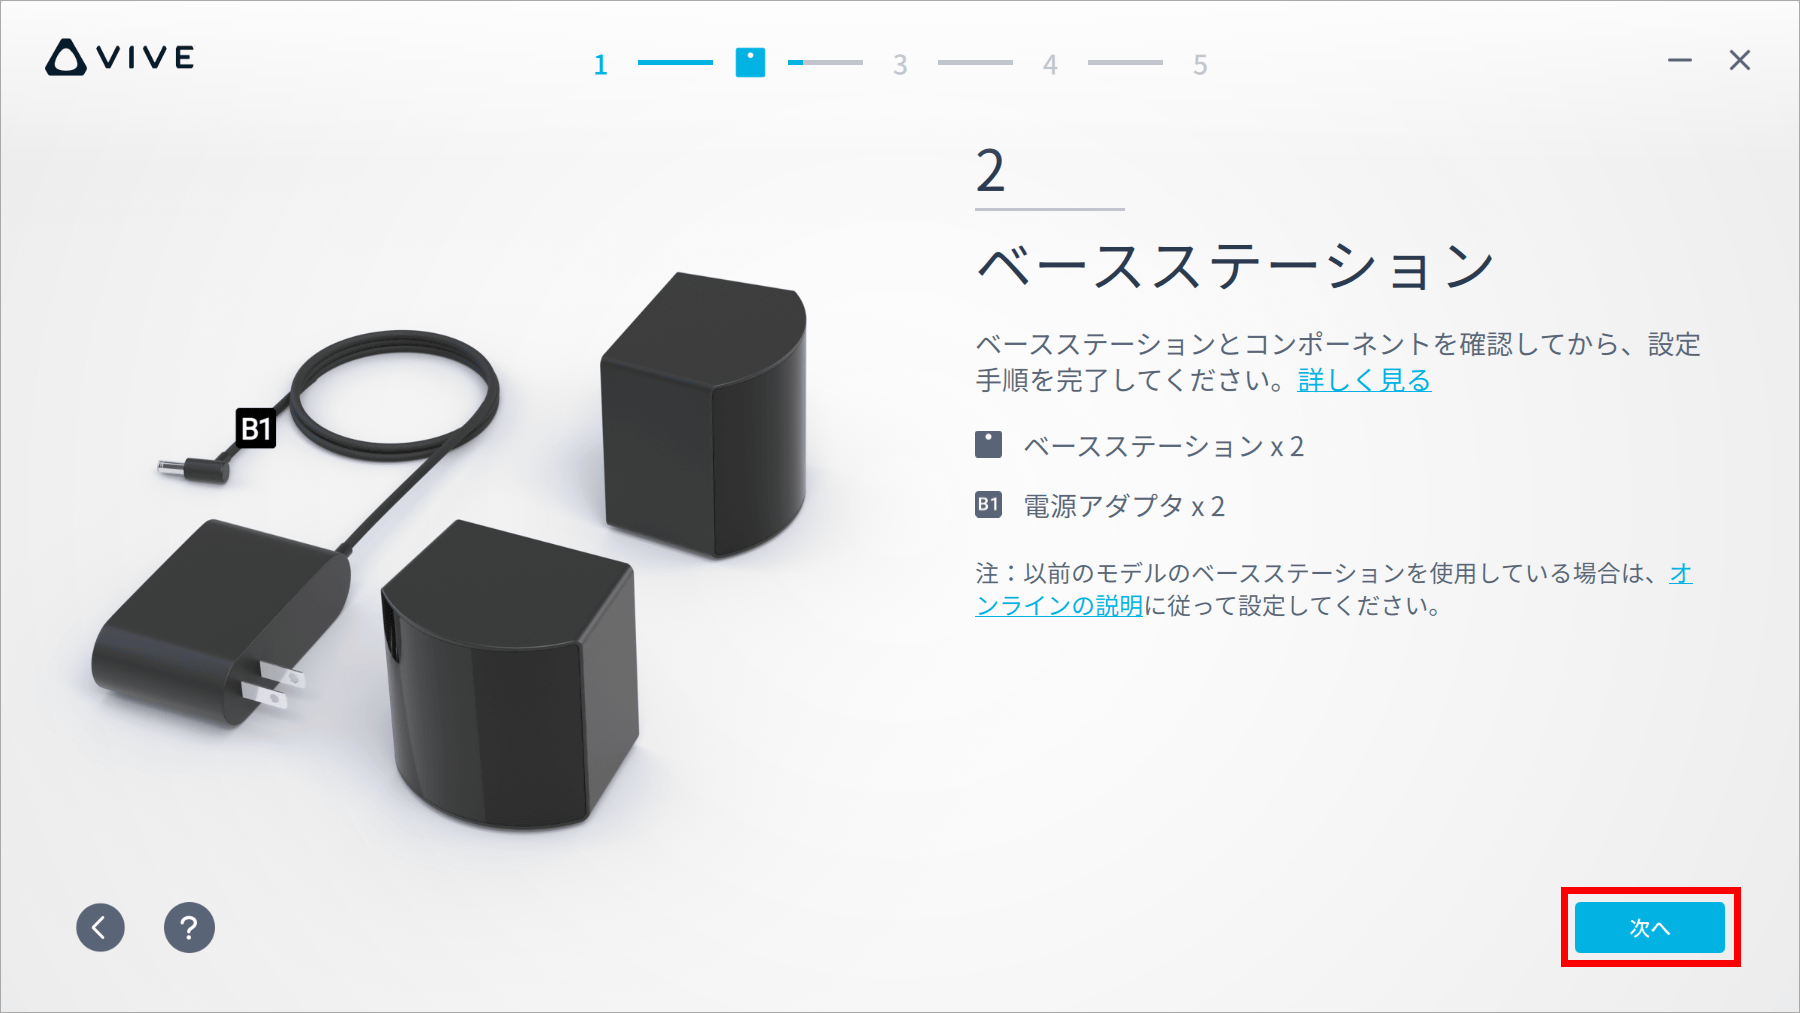
I just connected the power cable to the base station.

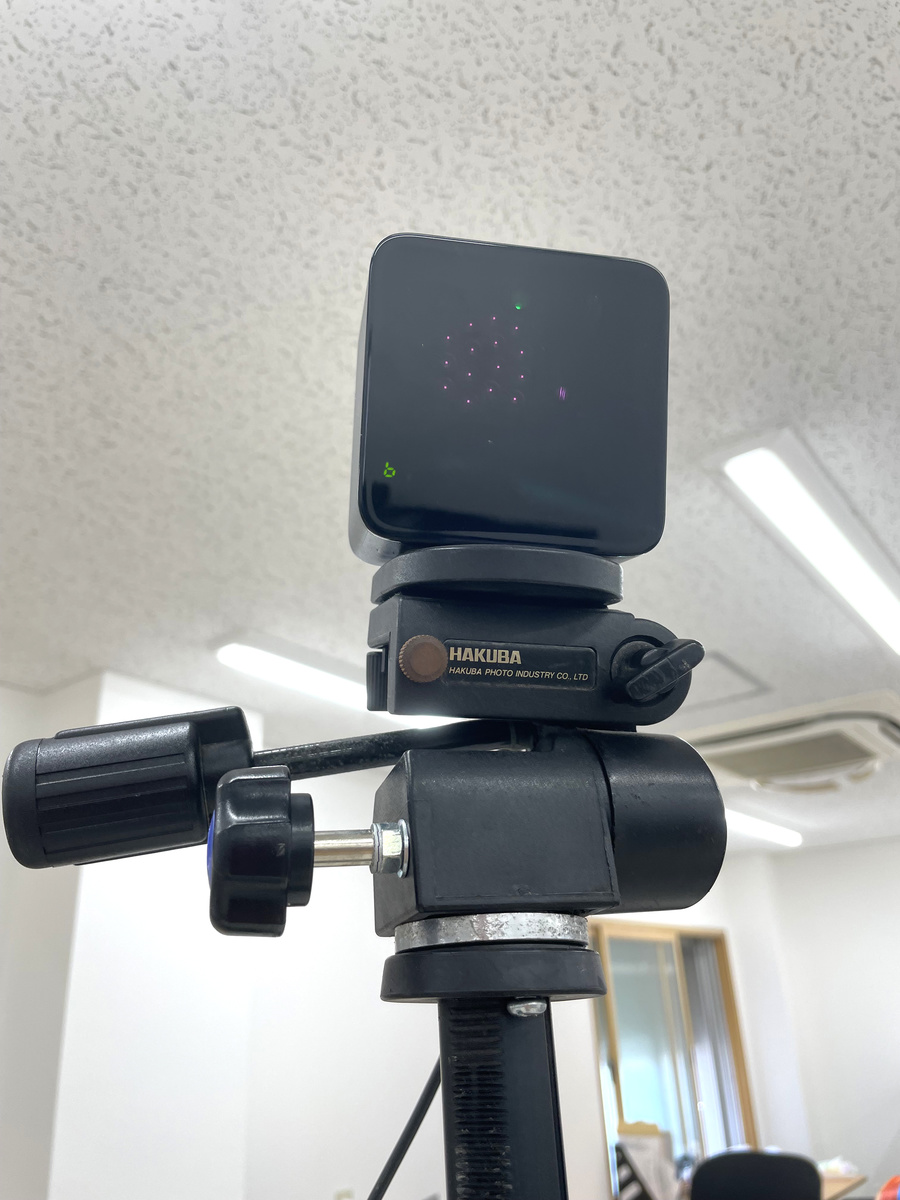
The base station has a quarter-inch screw hole that allows it to be attached not only to specialized equipment but also to common camera tripods.
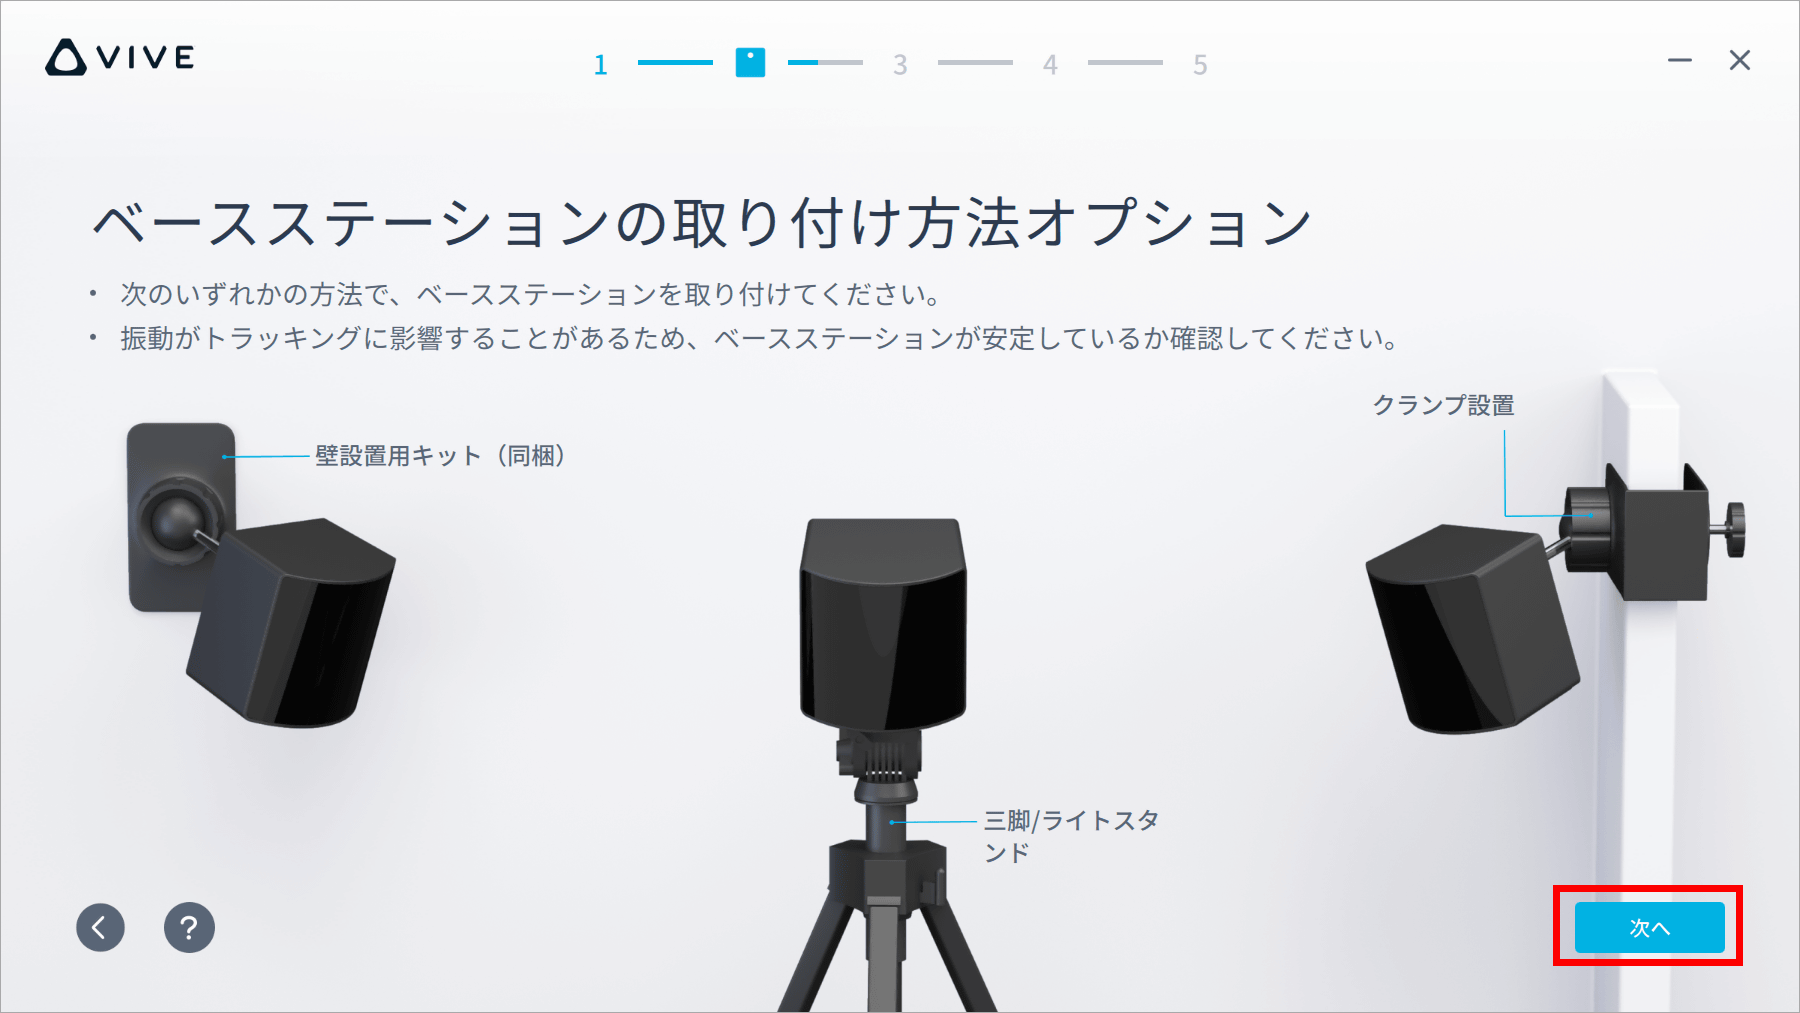
The base station should be above your head and, if possible, at least 2 meters above your head. You also need to place the two base stations diagonally across the expected room scale.
After installing, turn on the power.

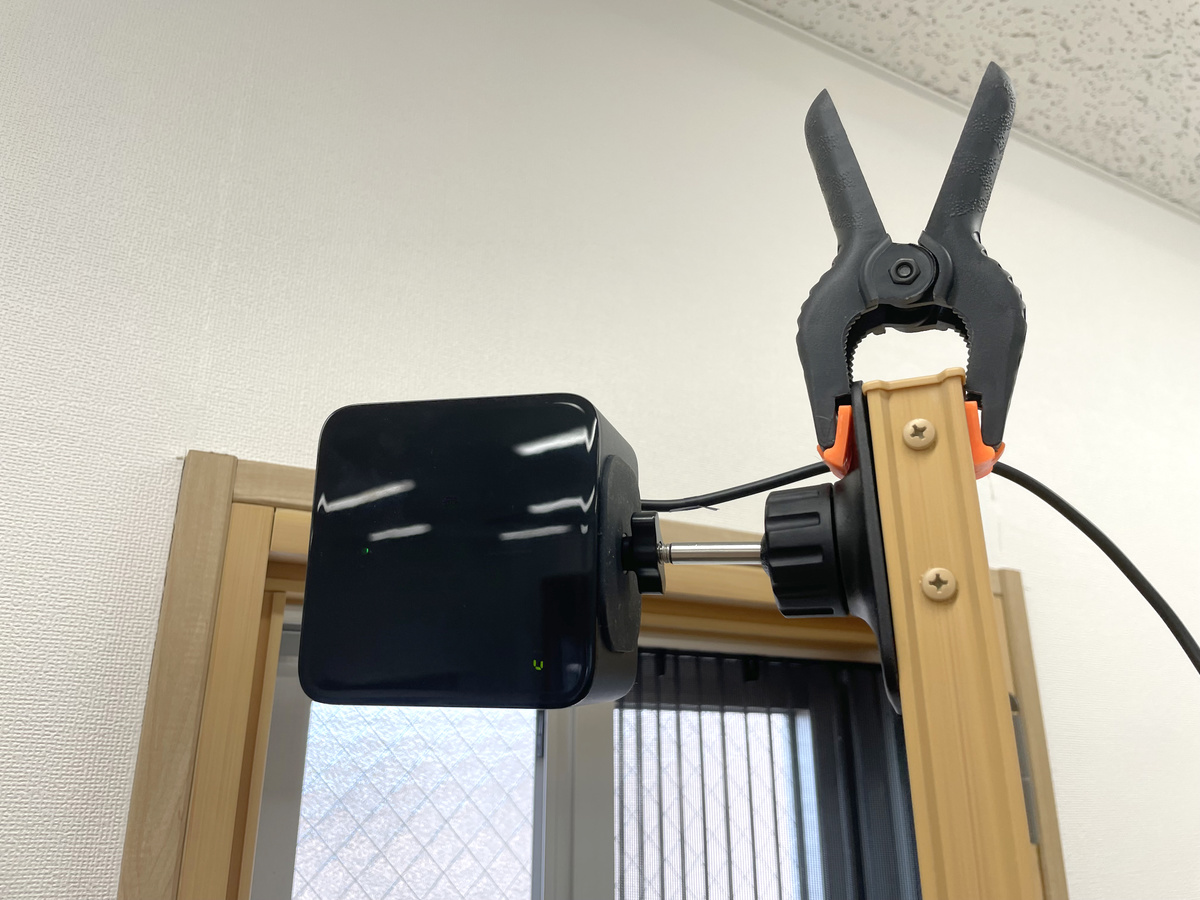
That's why one of the base stations is fixed to the window frame with a clip and a special mount ...
The other one was attached to a camera tripod.
Next, set the link box. Connect various cables and power cables.
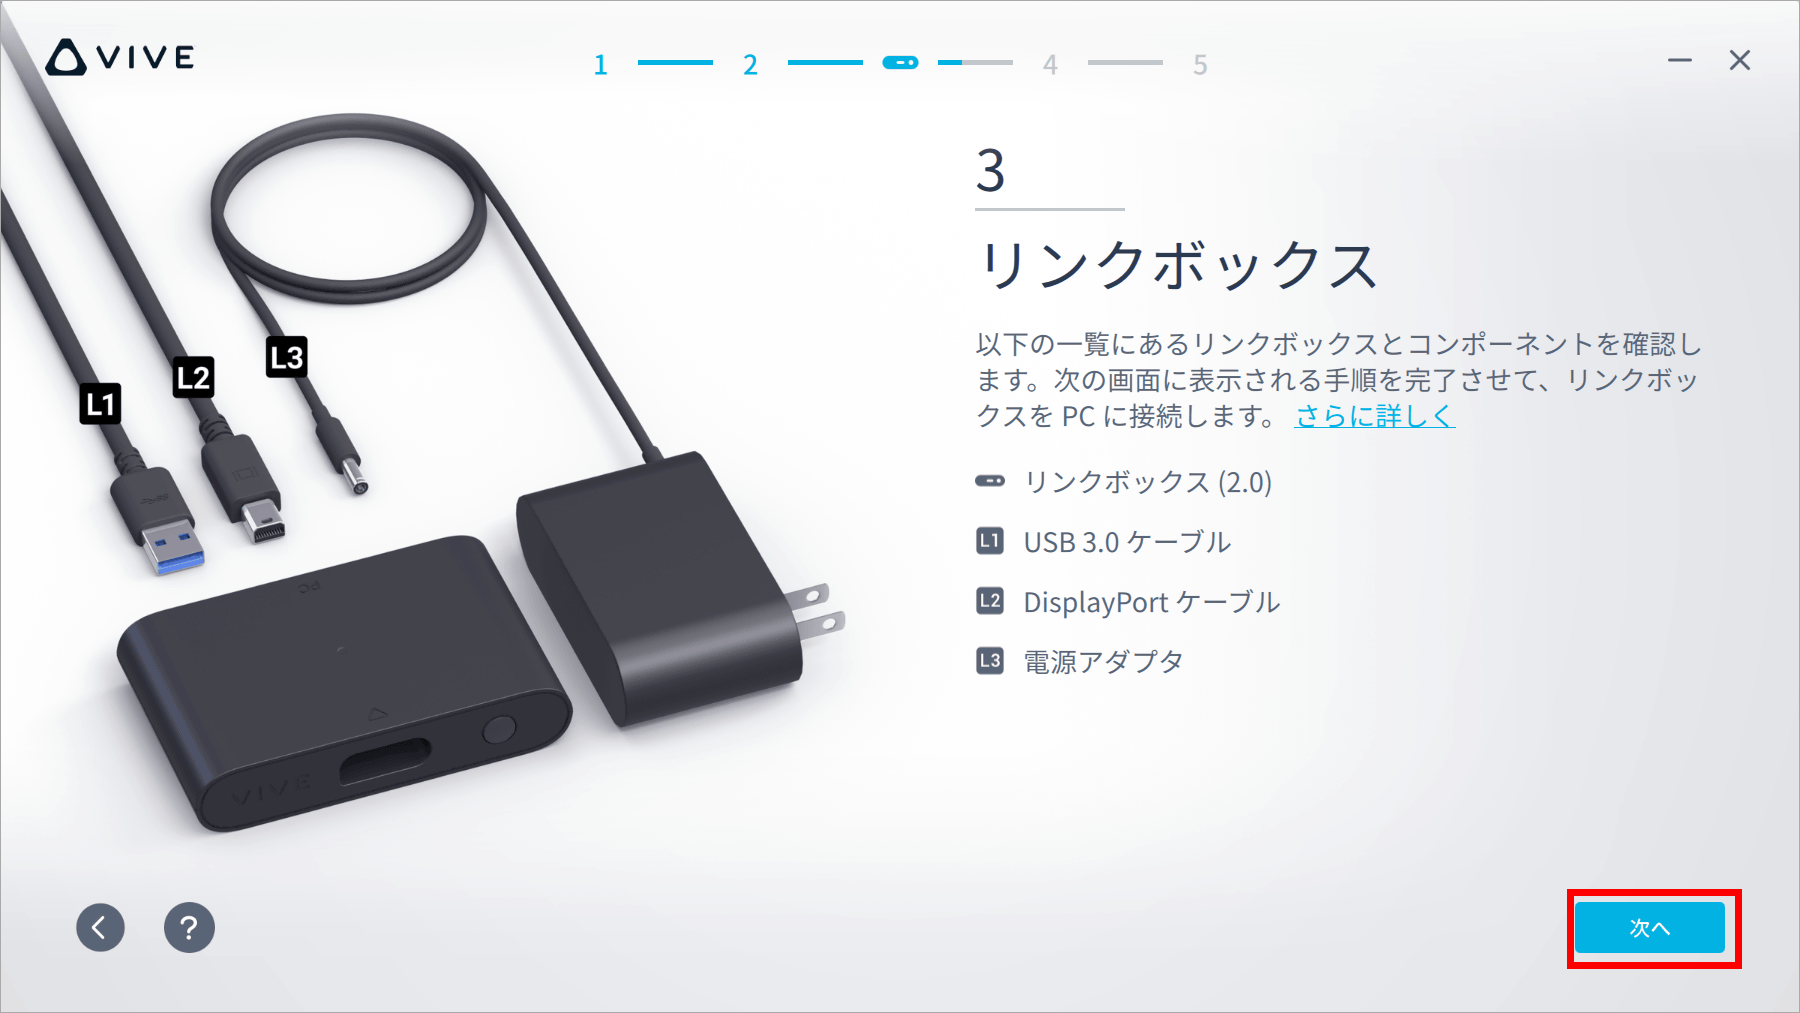
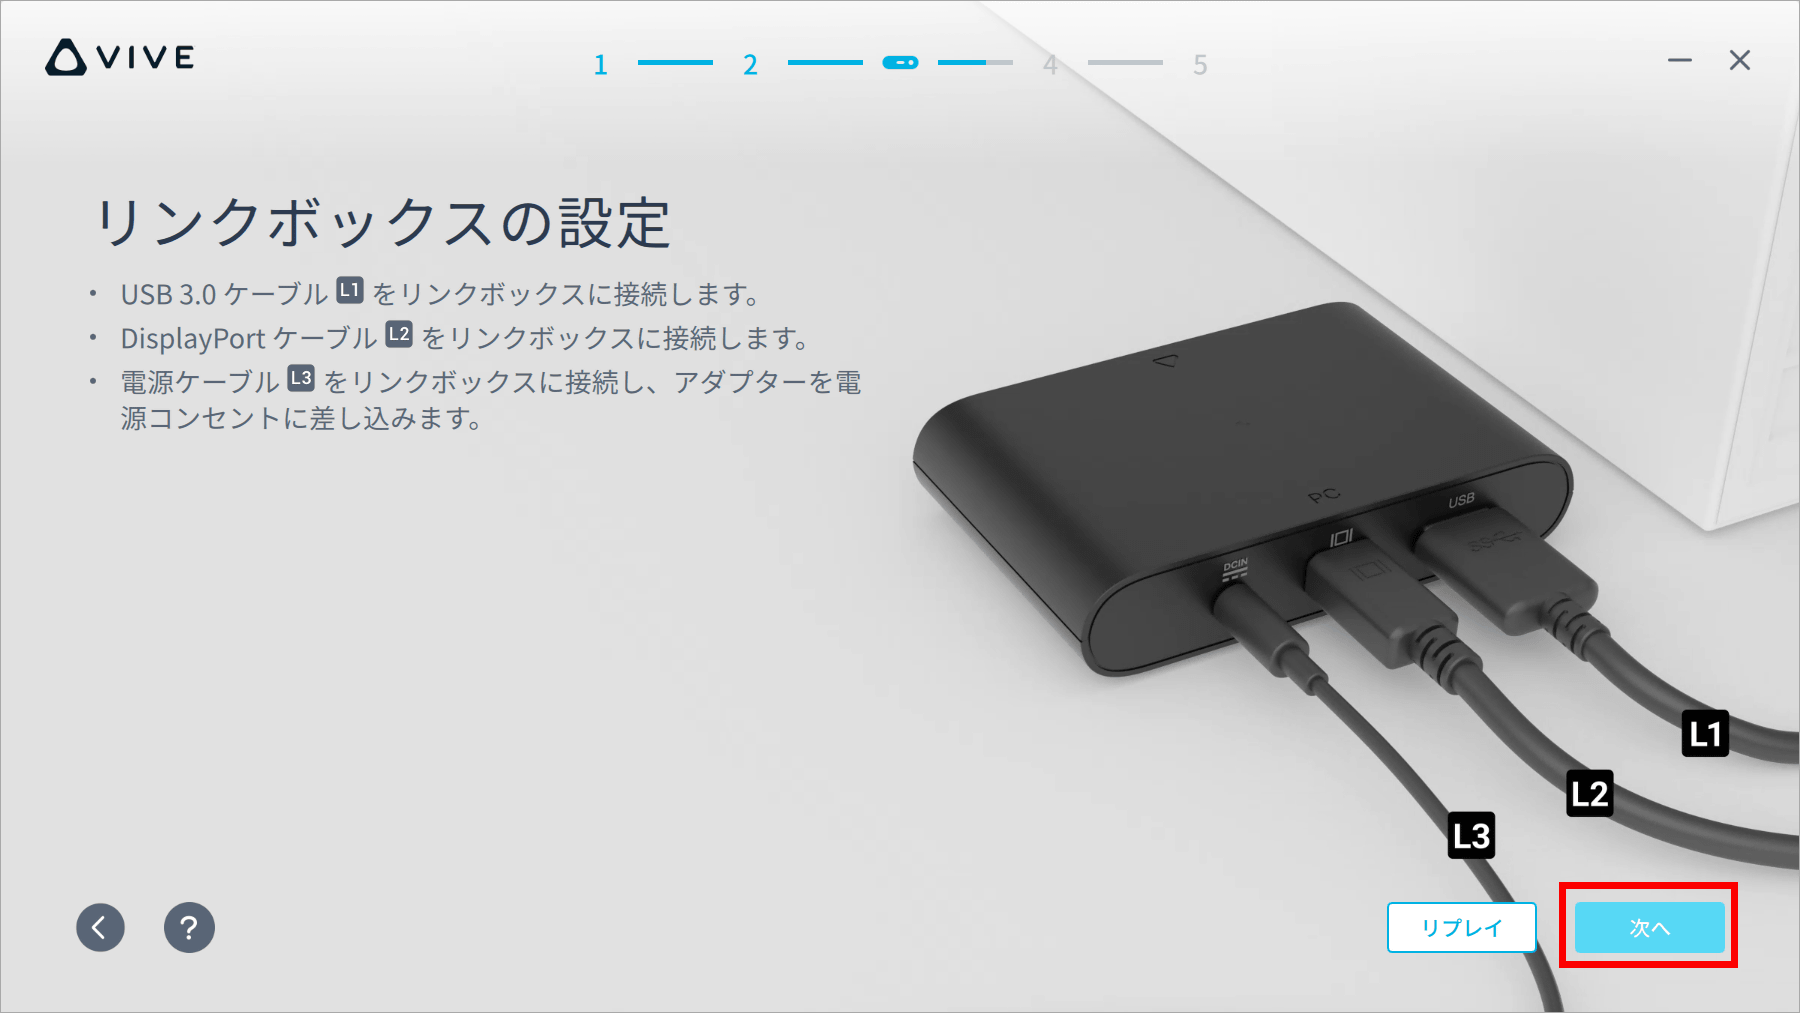
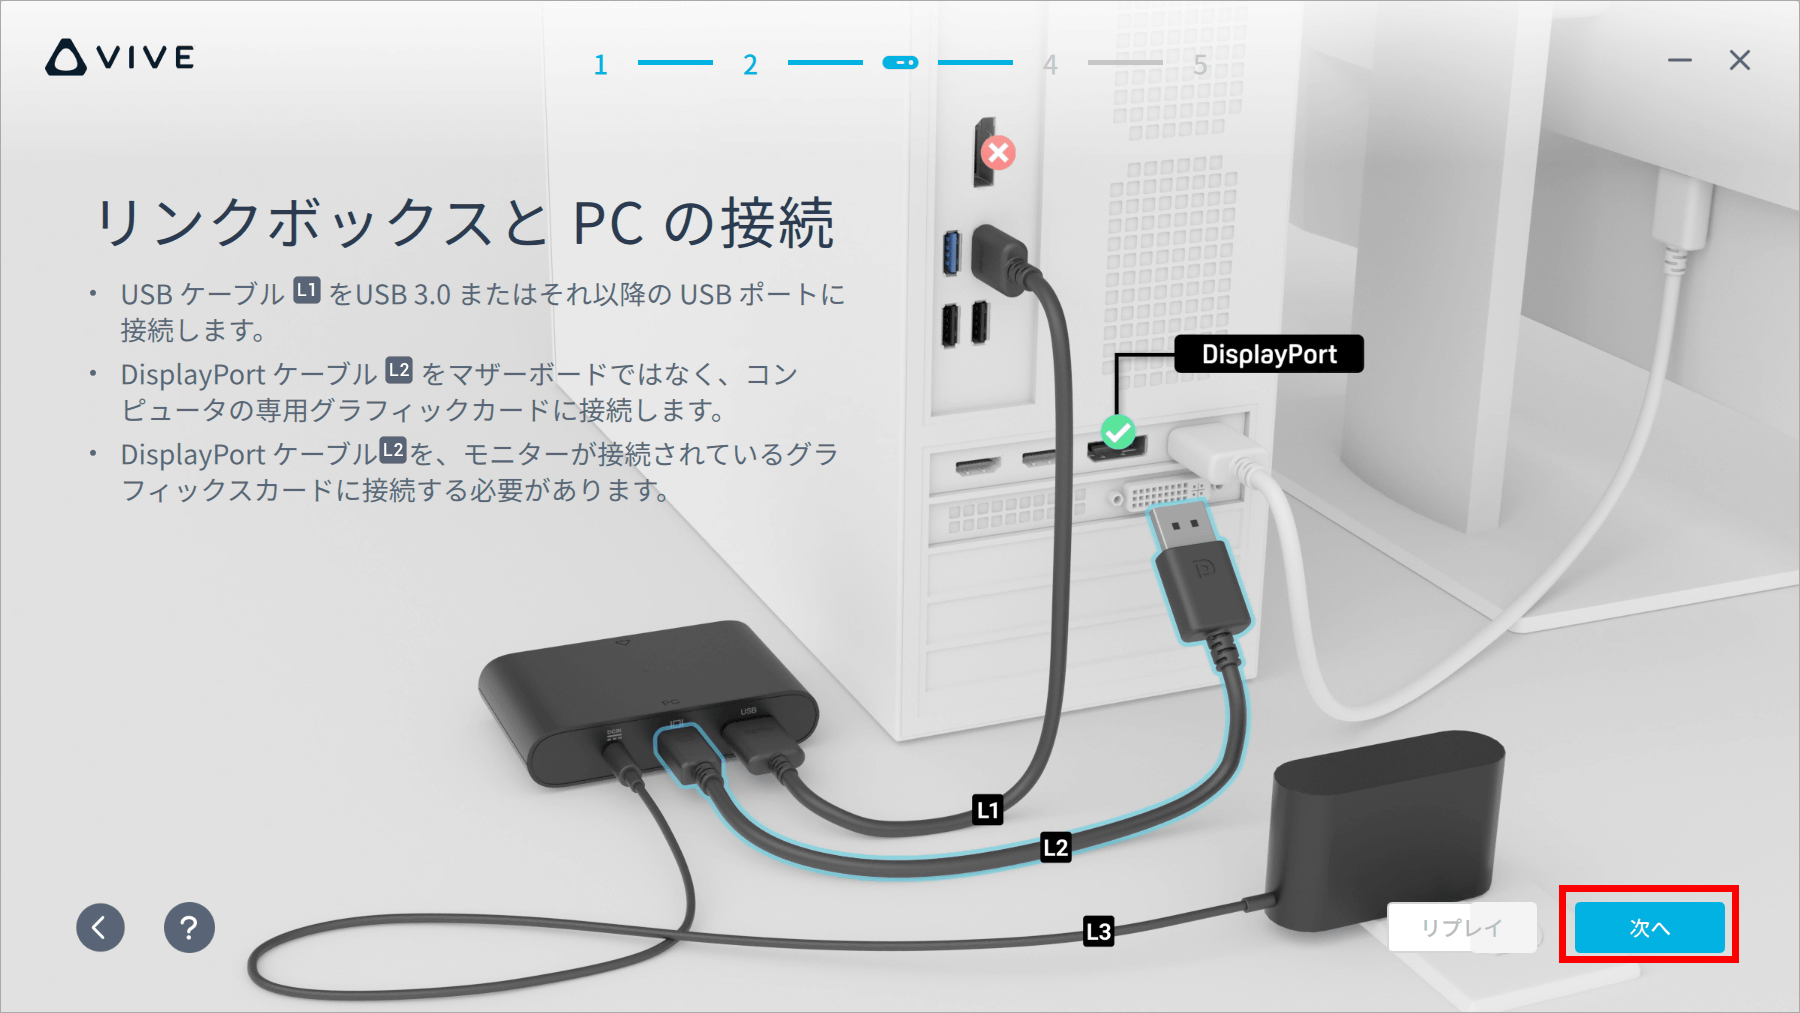
First connect the link box to your PC.
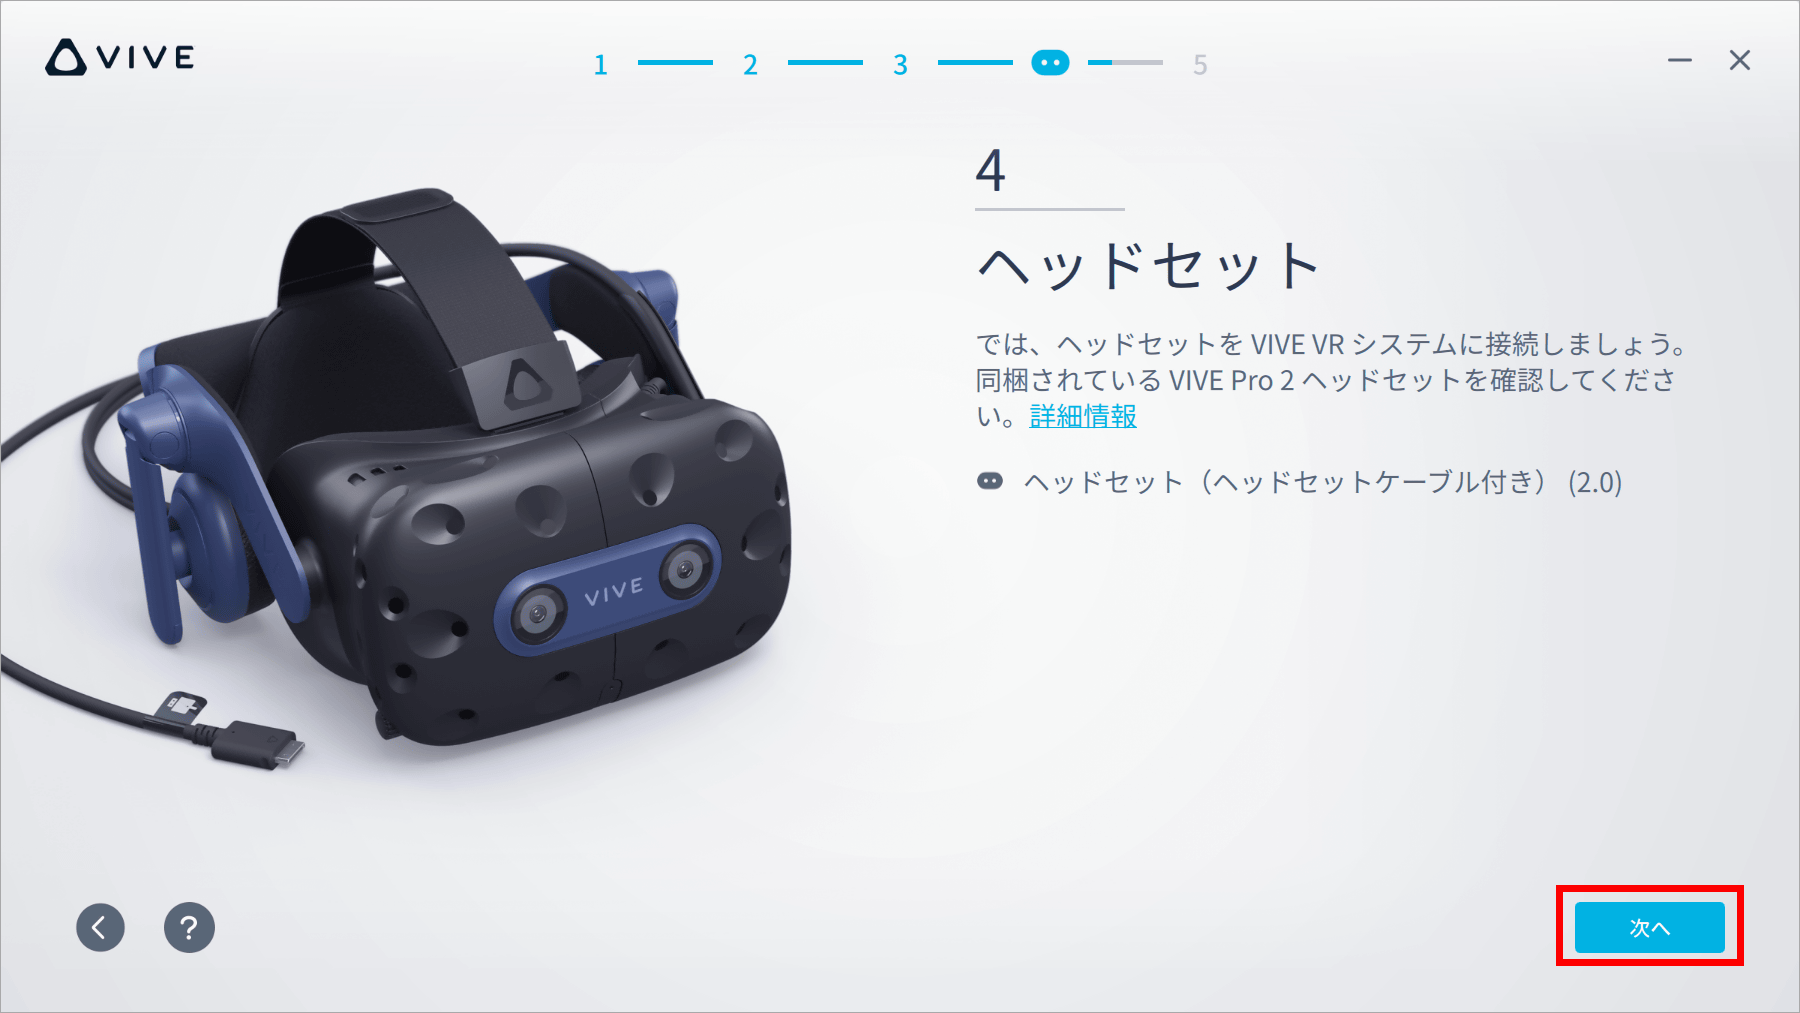
Get your headset ready.
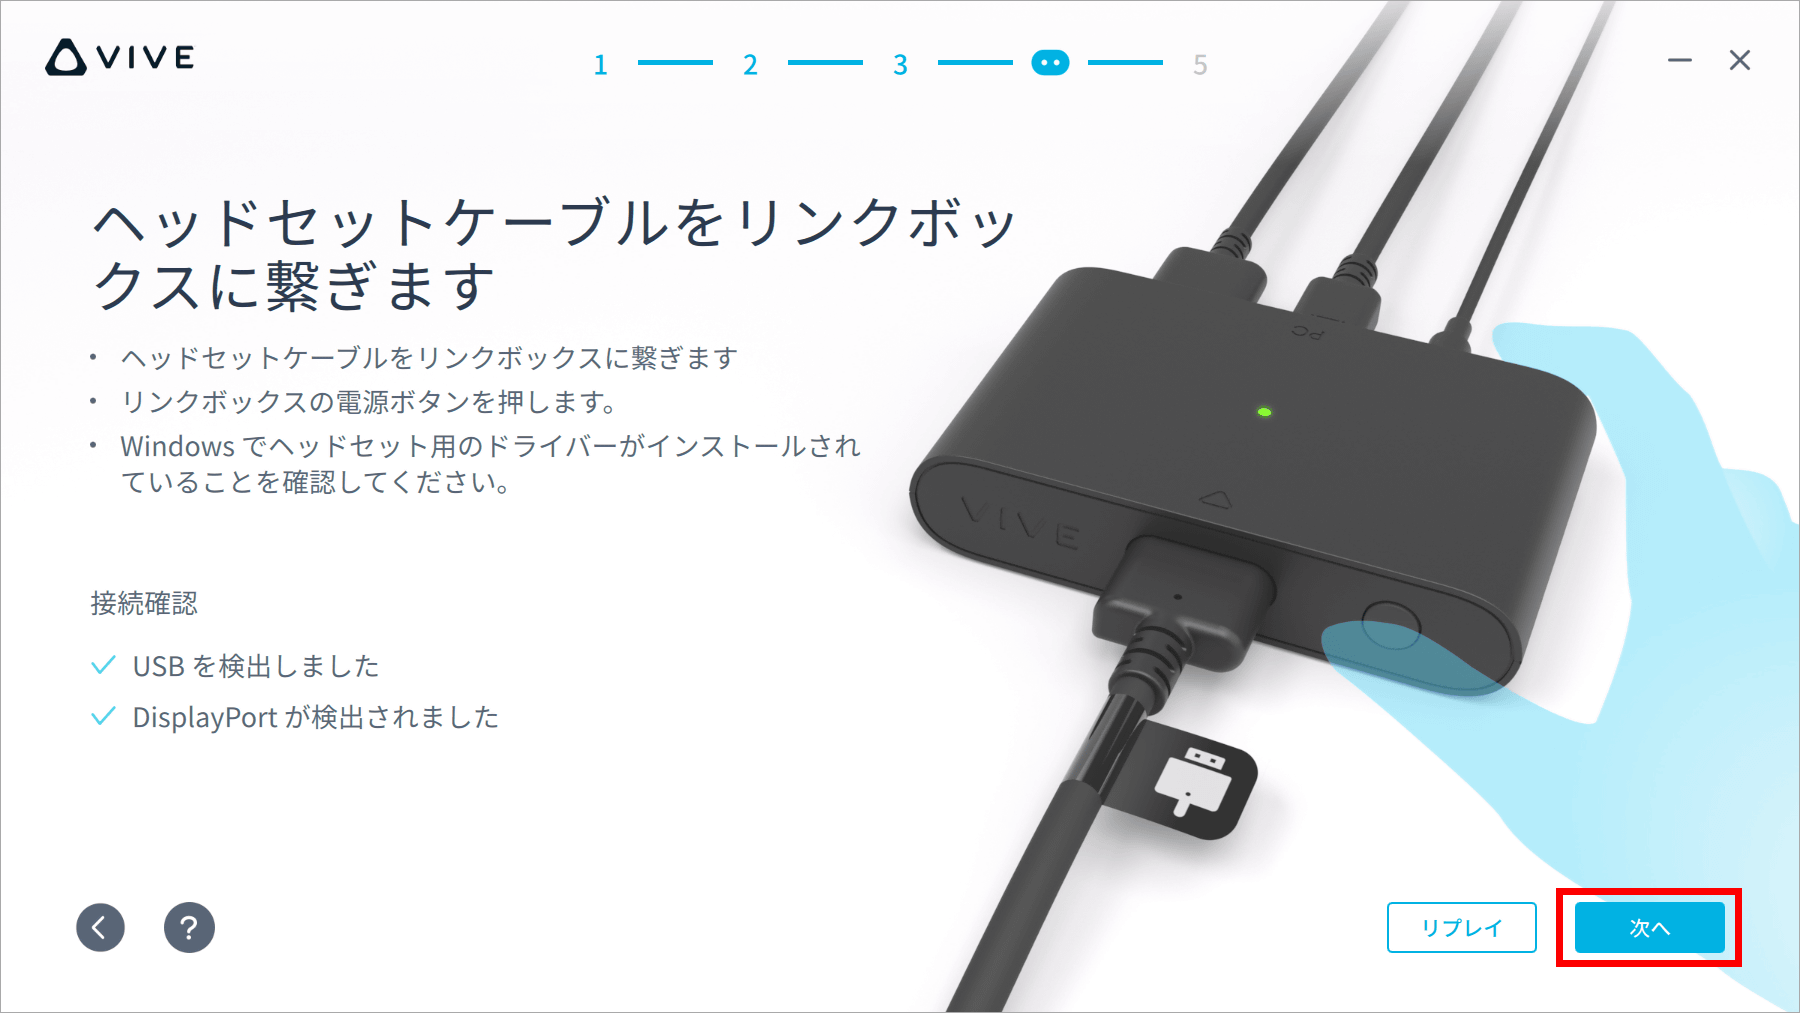
Connect the headset cable to the link box. When you turn on the power, the connection between USB and DisplayPort will be checked.
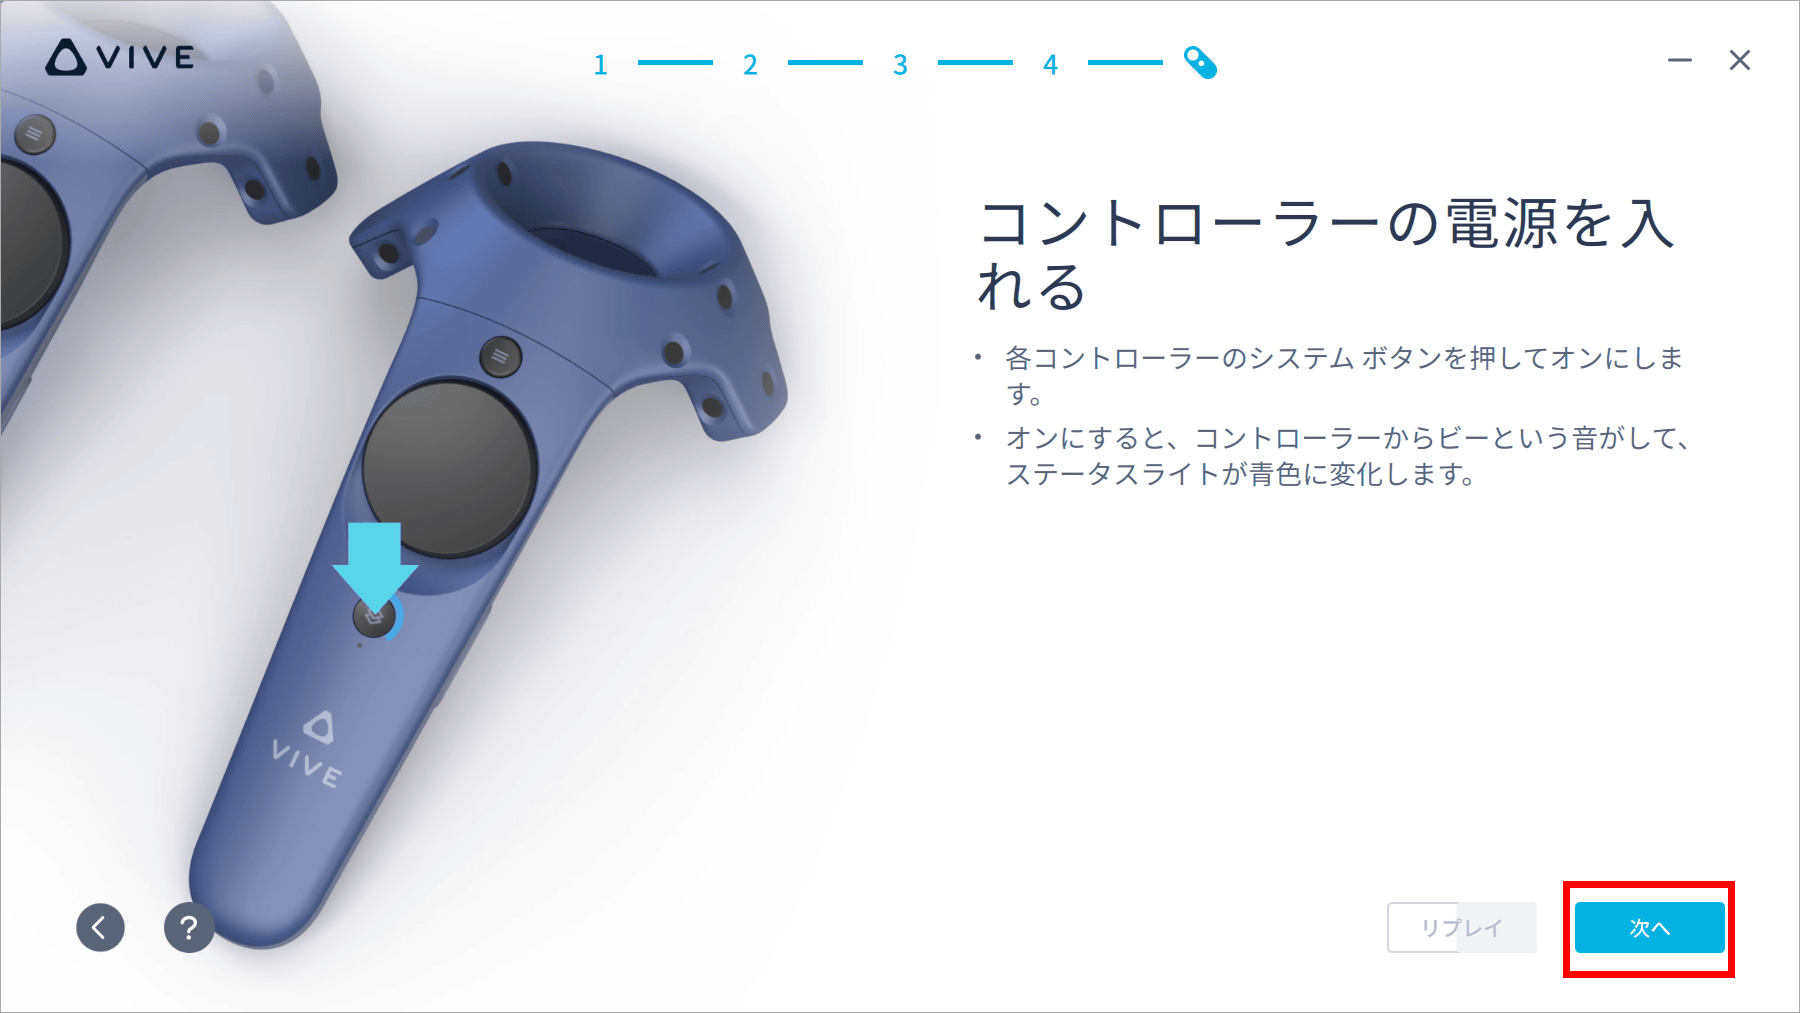
Next, prepare the controller.

Turn on the controller.
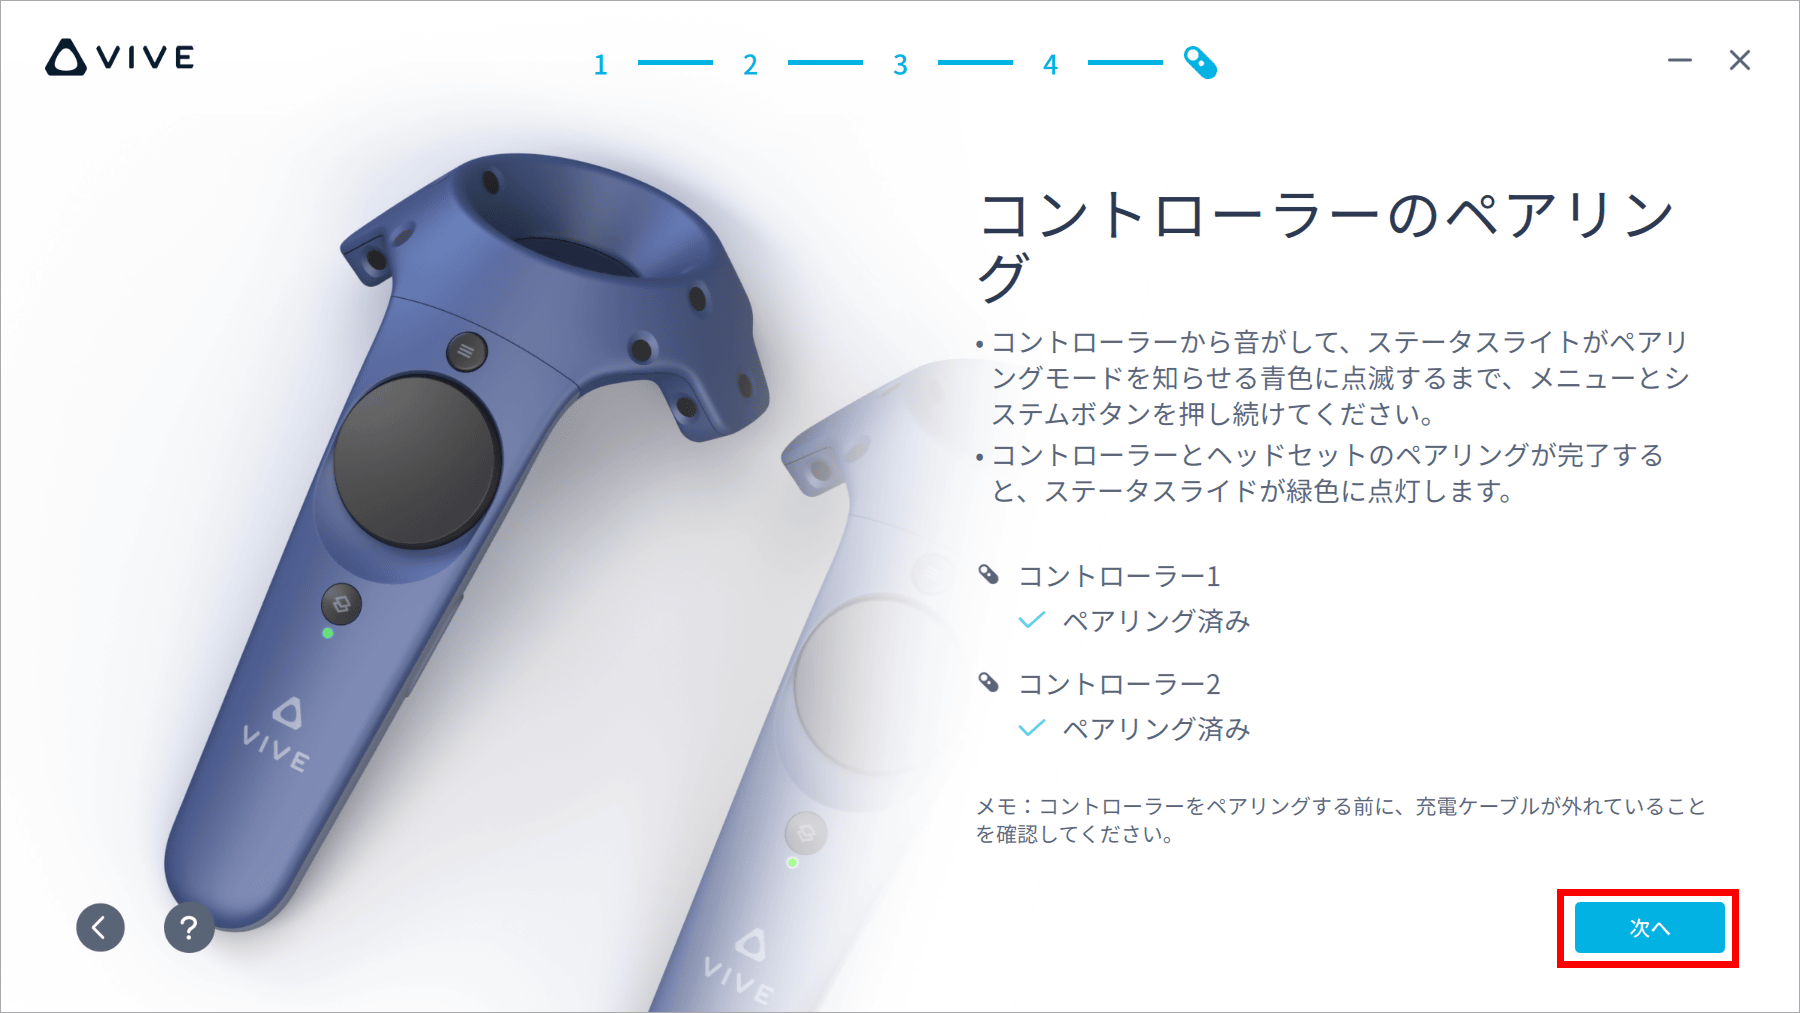
Pair the two controllers. After successful pairing, the controller status light will turn green.
Finally, perform 'room setup'.
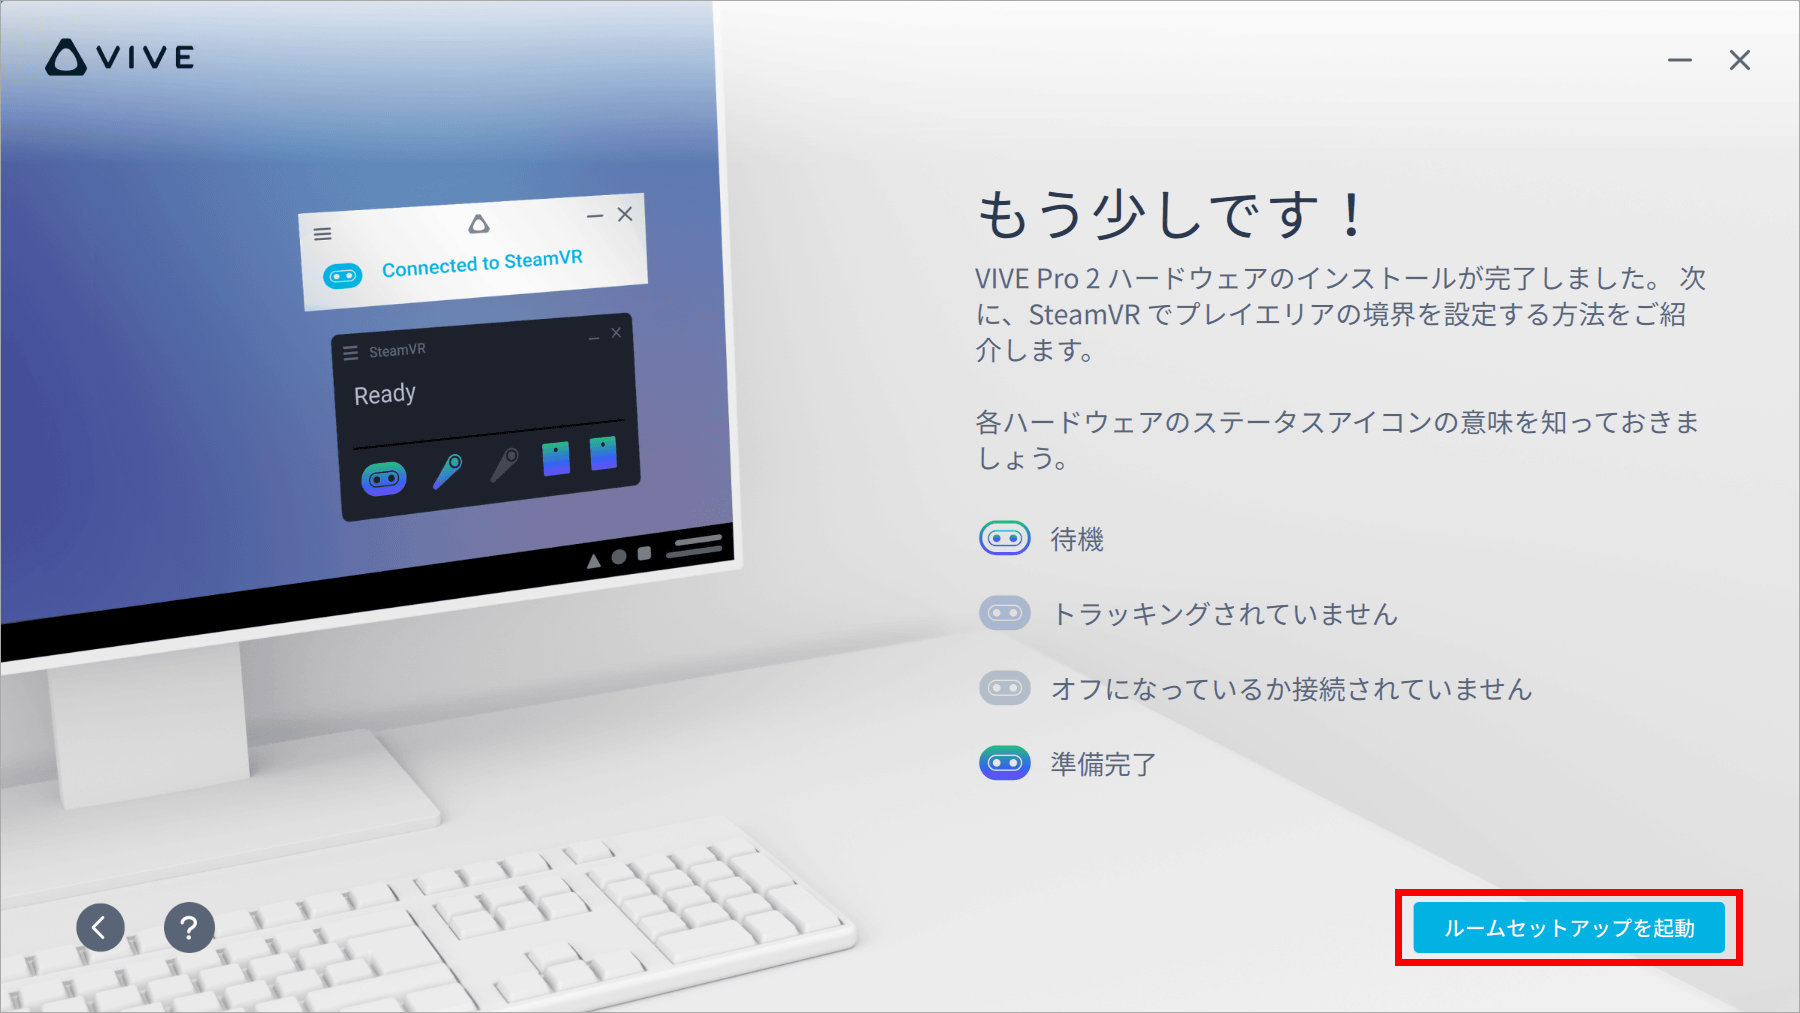
If you have already installed Steam here,
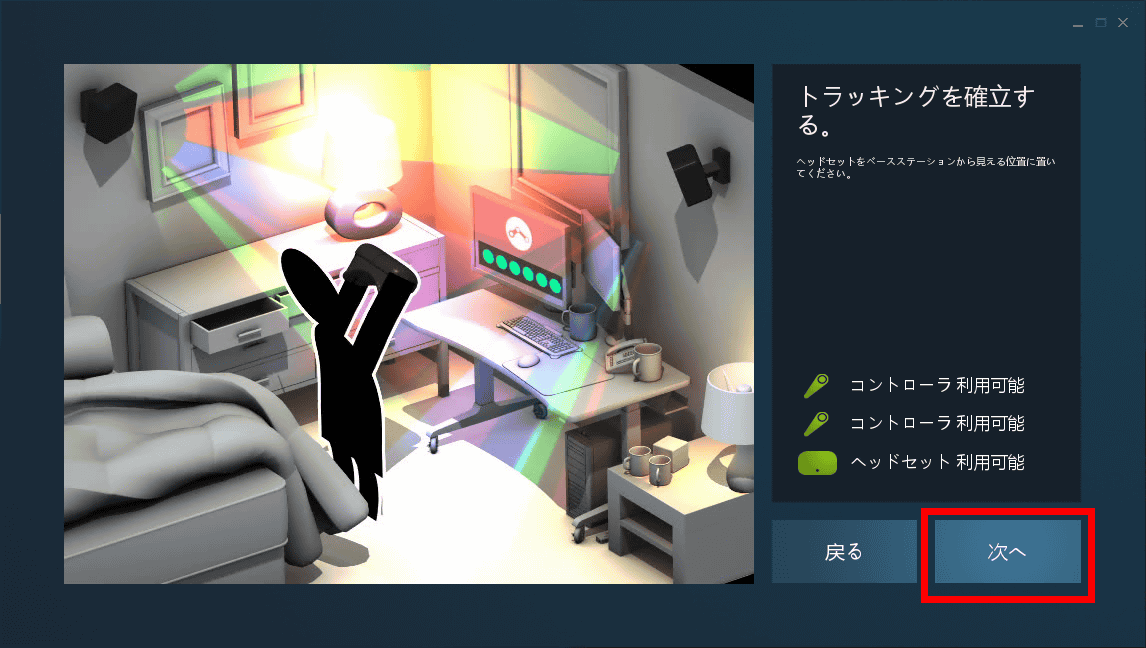
To establish tracking, hold the headset between the two base stations and click Next.
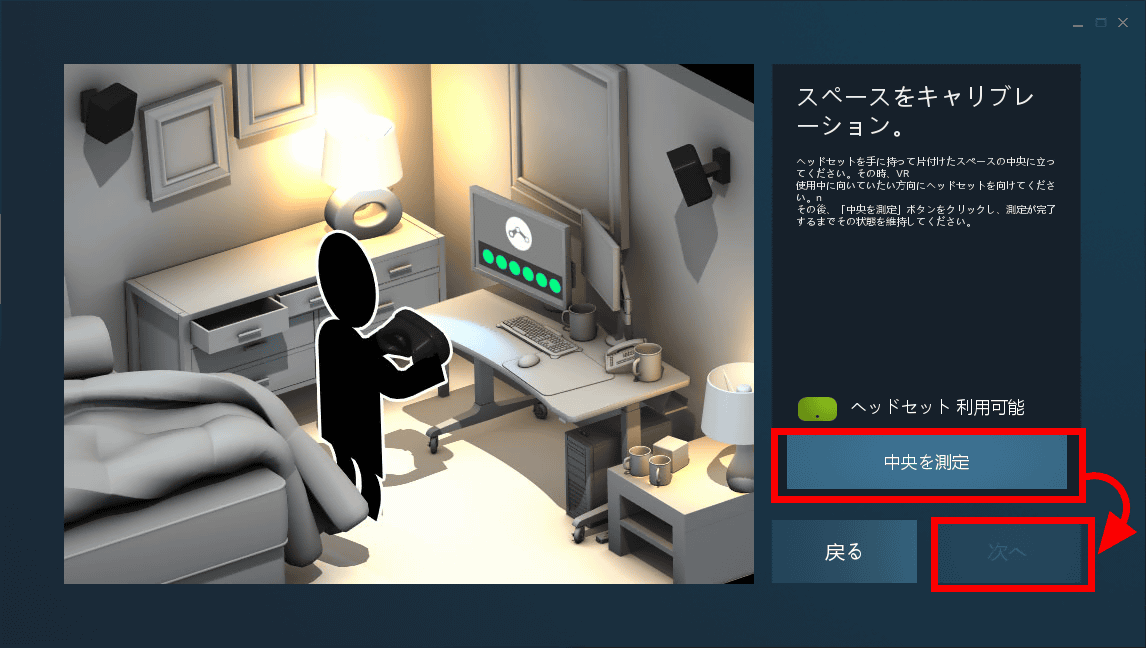
To set the front direction of the headset and the center of the space, stand at the point you want to set in the center, point the headset in the direction you want to face, press 'Measure center', and then click 'Next'.
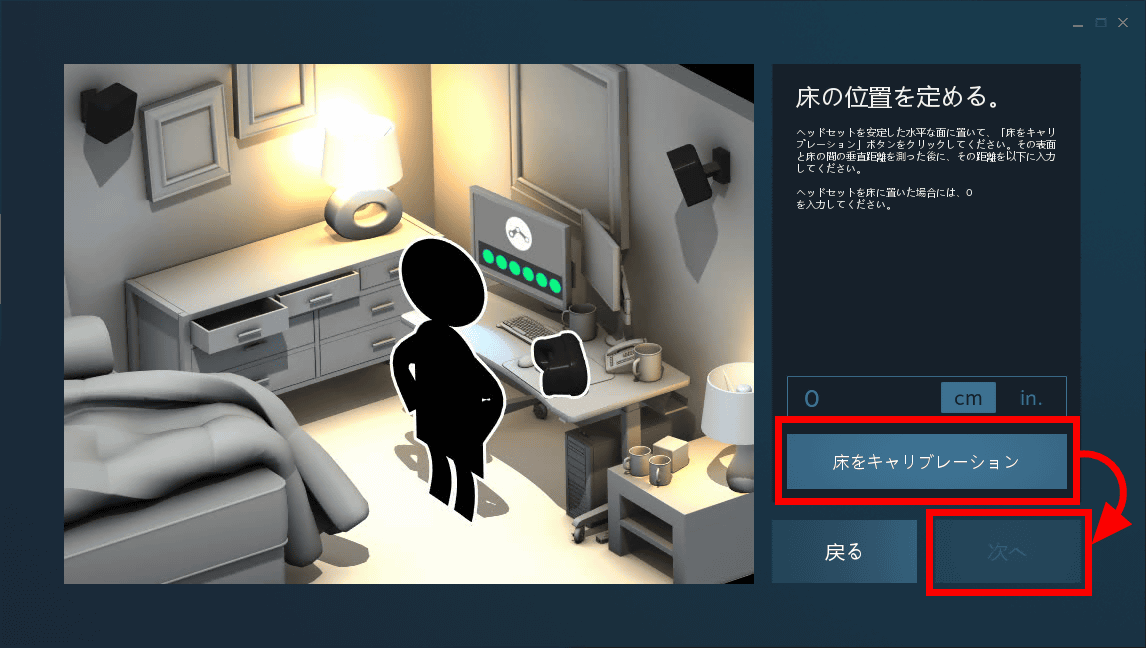
Determine the height of the floor. Place the headset on the floor, click Calibrate Floor, and then click Next. This completes all settings.
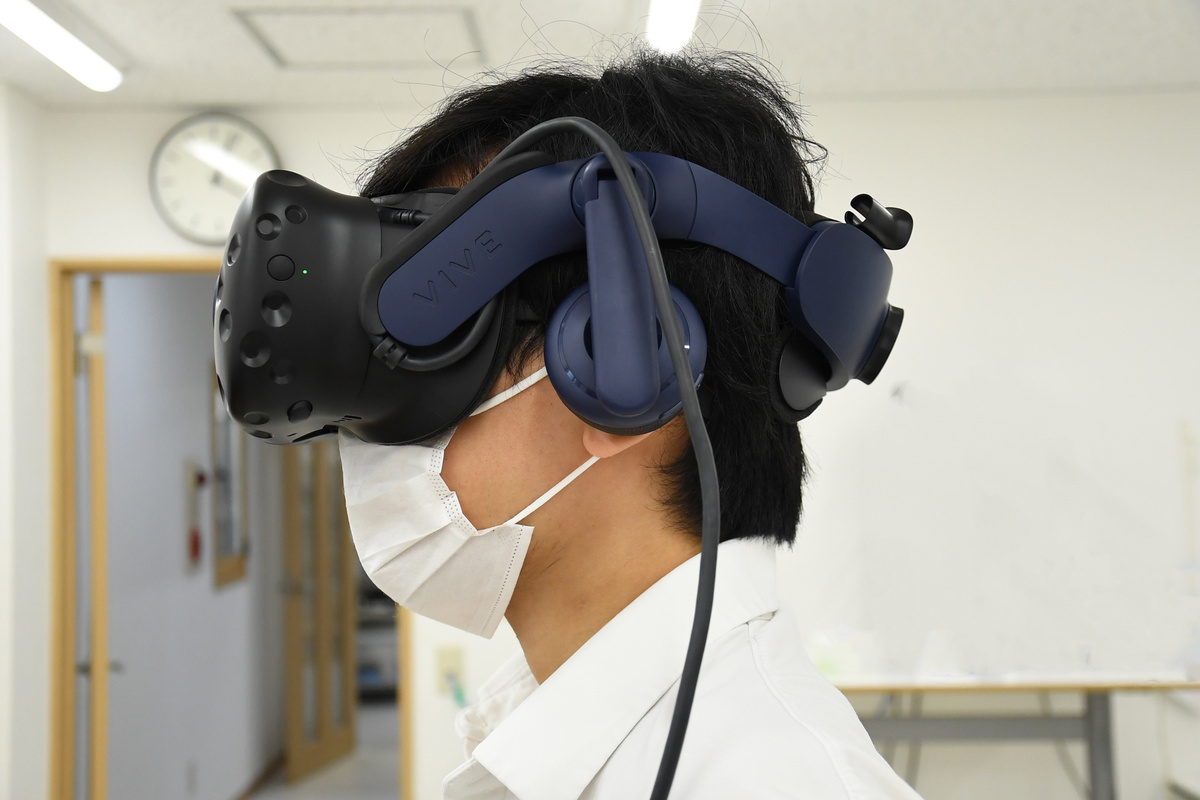
Lift the headset headband and place the goggles on your face to find the focus.
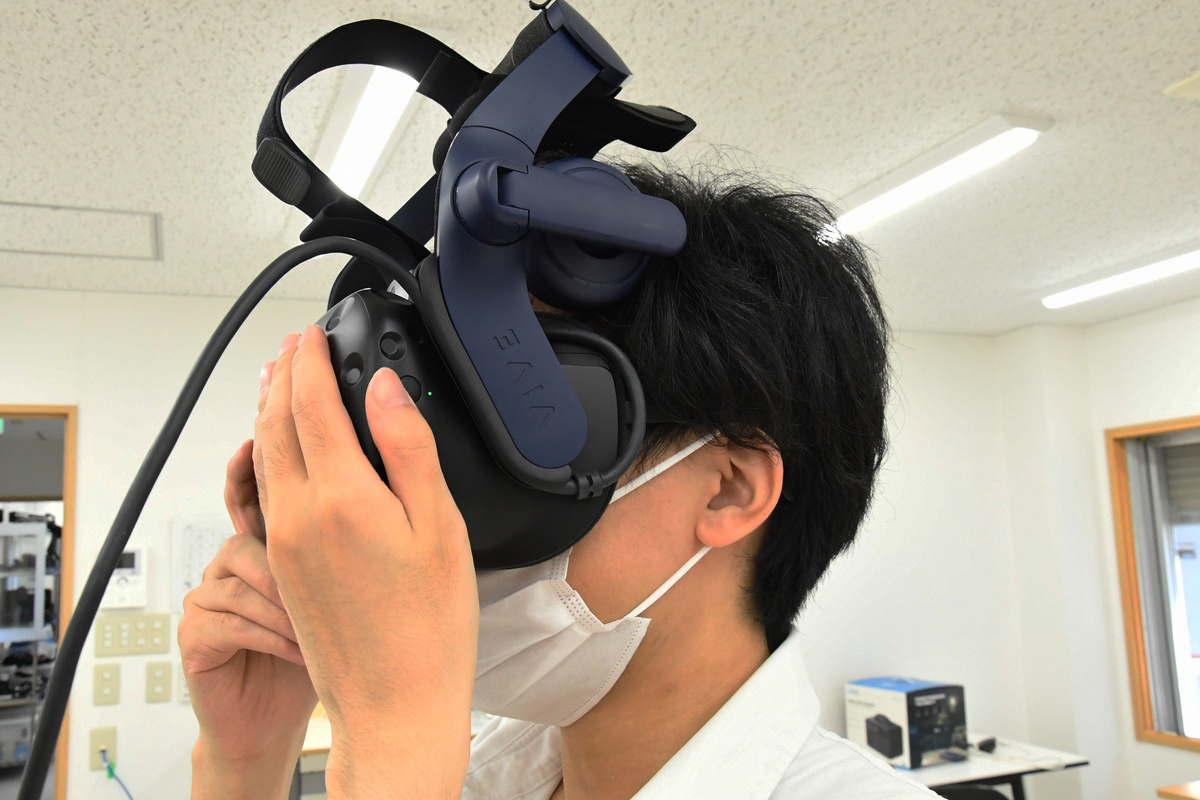
When you find a position that is in focus, just lower the headband ...

Turn the dial to fix it firmly.
Lower the speaker and place it on your ear.

This completes the installation.
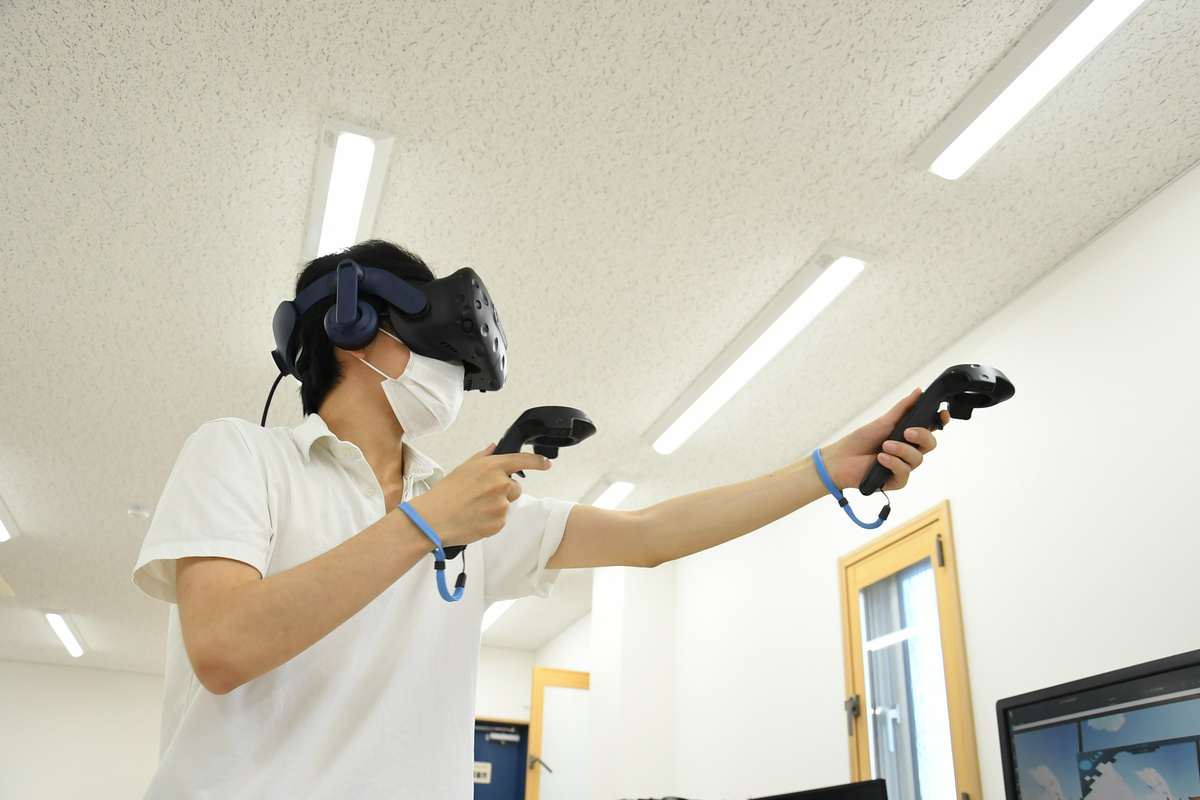
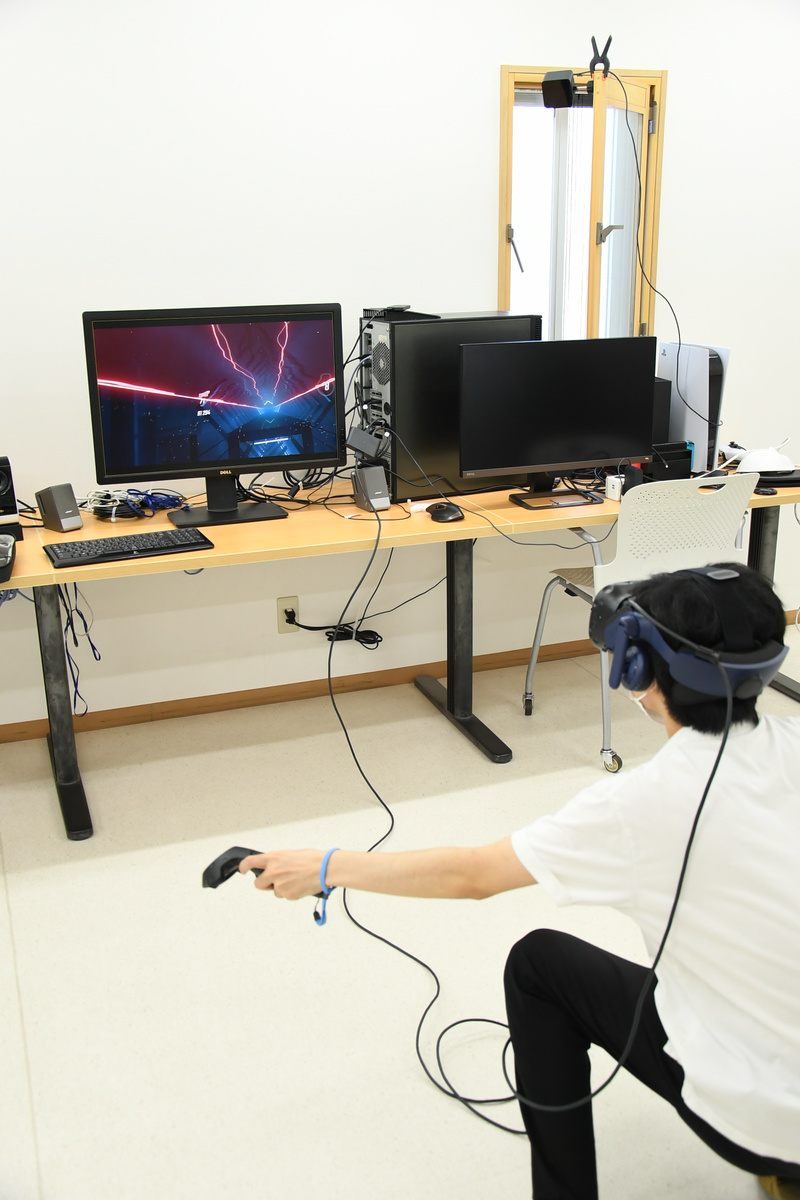
PC-connected VIVE Pro 2 can launch VR content directly with VIVEPORT, but it is possible to play various VR games and experience VR content with SteamVR of the game distribution platform Steam. The following is the place where I actually walked around the home of SteamVR with VIVE Pro 2. With 5K resolution and 90Hz, the world can be seen quite beautifully in the headset, and the viewing angle of 120 degrees gives the feeling that the space surrounds the field of view.
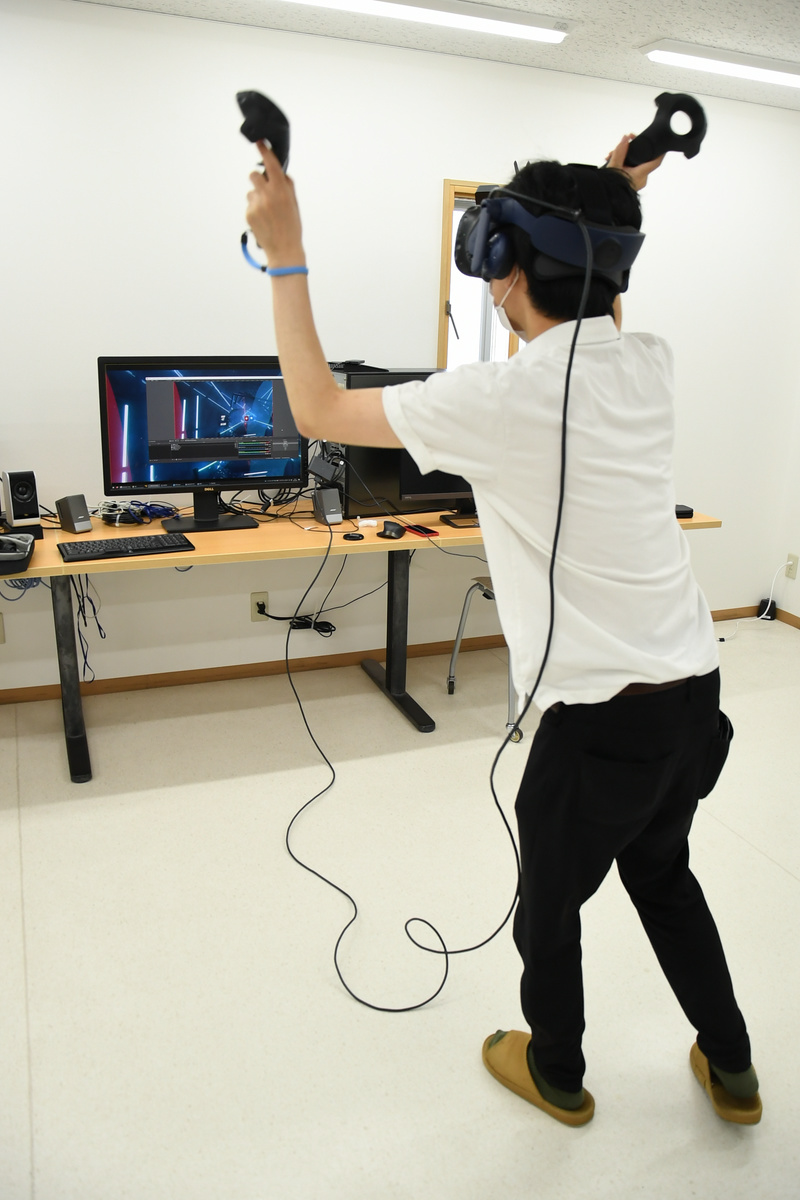
In addition, I played the VR game 'The Lab ', which is distributed free of charge by Valve, which provides Steam. The Lab has multiple contents, but the hottest one is 'Longbow', a defense-type game that shoots enemy soldiers with a bow. The following movie is where I actually played Longbow.
Hit the bow in the VR space of 'The Lab' with VIVE Pro 2-YouTube
Holding a bow with his left hand and pulling a string with his right hand. Since VIVE Pro 2 can grasp the position of the headset and controller at the base station, it is characterized by high recognition accuracy of the direction of the headset and the position of the controller. Also, even on a screen with violent movement, motion blur is reduced and the display resolution is high, so the screen door effect that the mesh pattern can be seen was hardly felt. The action of really pulling the bow and shooting the arrow at the opponent leads to the operation of shooting the bow and arrow as it is, and you can enjoy the experience unique to VR.
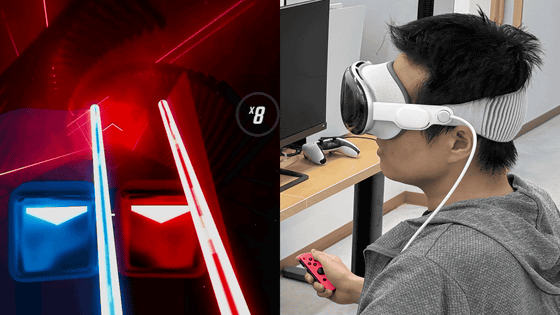
Next, I played the
Playing 'Beat Saber' on VIVE Pro 2-YouTube
Since VIVE Pro 2 can experience a high frame rate of 90Hz to 120Hz, the movement of the image is smooth overall.
Since the base station recognizes the position of the headset firmly, it can respond to large movements such as crouching and leaning without delay. However, there are pros and cons that you have to drag a 5m cable for the convenience of connecting to a PC. Although it can not be helped, when experiencing a stand-alone VR headset such as VIVE Focus 3 or Oculus Quest 2, when playing a VR game that moves a lot, the cable is inevitably anxious and movement is restricted. I found it a little annoying.
And the following movie is where I played 'VR Kanojo ' where you can experience interacting with girls in VR. With higher resolution and wider viewing angle, I got the impression that the 'feeling of being in a room' became more realistic. In addition, the quality of the sound quality of the speaker has also improved, so it can be said that the immersive feeling is greatly improved compared to the conventional VR headset. Furthermore, if you raise the performance to 'quality' and 'high quality', the image quality will be much better, but probably because the power of the PC is full, it has become jarring.
When you play 'VR Kanojo' on VIVE Pro 2, you can feel the size and texture of the room realistically-YouTube
Unlike the stand-alone VR device, VIVE Pro 2 is characterized by being able to play VR content provided on a PC and introducing mods created by volunteers. You can also access apps and content that are distributed outside the official platform. However, it should be noted that PC specifications above a certain level are required to demonstrate 5K resolution, and there are very few contents that can fully enjoy 5K resolution at the time of article creation. Still, it is fascinating to be able to experience cutting-edge VR content.
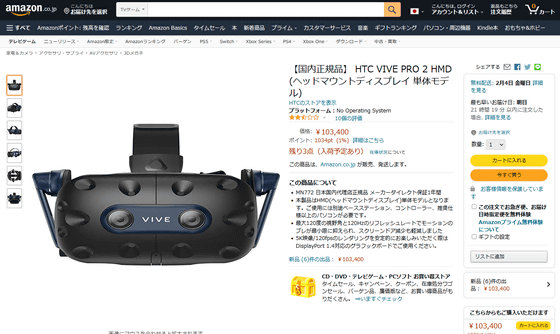
The list price of VIVE Pro 2 is 103,400 yen including tax for the headset only. You can also order at Amazon.co.jp. Furthermore, in August 2021, a full kit that includes a controller and a base station will be released.
Amazon | [Domestic Genuine] HTC VIVE PRO 2 HMD (Head Mounted Display Single Model) | Game
Related Posts: