I tried using the camera application 'Microsoft Pix' equipped with silent shooting and document scanner function for free

Microsoft Pix camera
https://www.microsoft.com/en-us/microsoftpix
'Microsoft Pix Camera' on the App Store
https://apps.apple.com/jp/app/id1127910488
First, search for Microsoft Pix in the App Store to install Microsoft Pix on your iPhone. Since I have installed it once this time, tap the button in the red frame to install it again.

When the installation is complete, tap Open to launch Microsoft Pix.

When you start Microsoft Pix, the tutorial will be displayed. Tap 'Next' to continue reading.
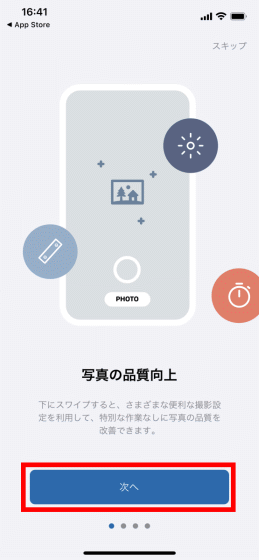
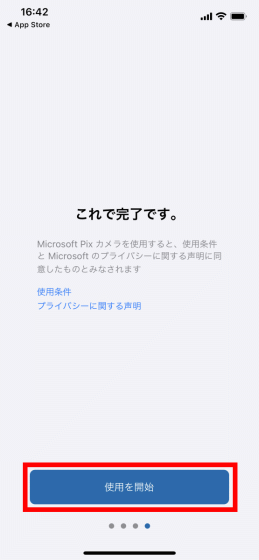
After reading to the end, read the terms of use and privacy statement carefully and tap 'Get Started'.
You will be asked for permission to use the camera, so tap 'OK'.
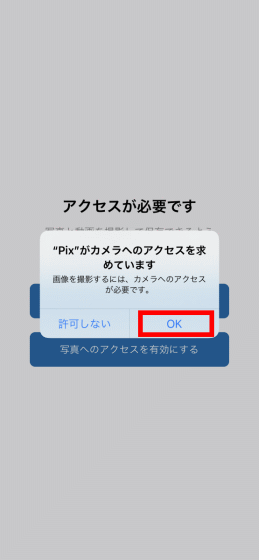
You will be asked to access the photos you have taken, so tap 'Allow access to all photos' to start using Microsoft Pix.

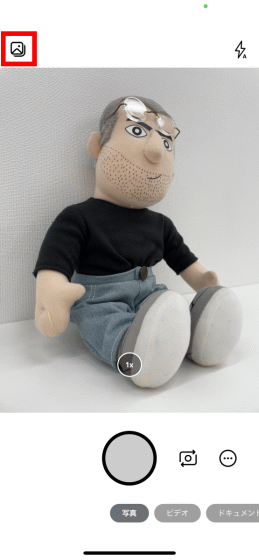
The shooting screen of Microsoft Pix looks like this. At the top of the screen, there is a button to check the pictures taken and a button to switch the flash on / off, and at the bottom of the screen, there are a shutter button, a camera switching button, and a shooting setting button. Swipe up on the monitor in the center or tap the shooting settings button to make detailed shooting settings.

The setting items related to shooting are like this. There are buttons that allow you to switch the flash on and off, take a self-timer shot, change the aspect ratio, and change the exposure. Swipe further to the left ...

A button to display the grid lines on the screen and a button to display the electronic level will appear.

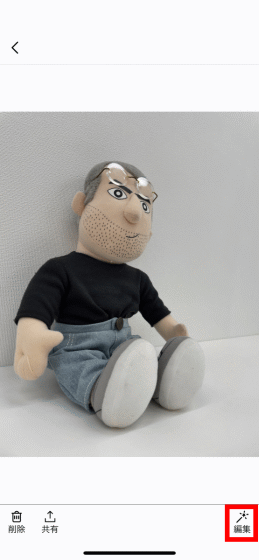
When you tap the shutter button to take a picture, the picture taken will be displayed at the bottom left of the screen. When you tap this ...
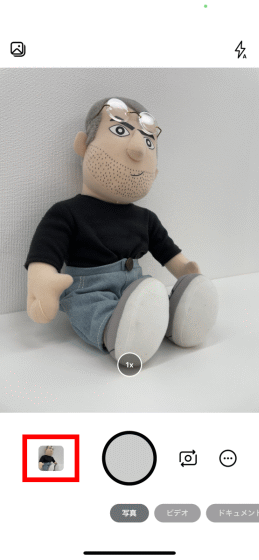
It is possible to check the photos taken. From this screen, you can delete, share, and edit photos. This time, tap 'Edit' at the bottom right to edit the photo you took.
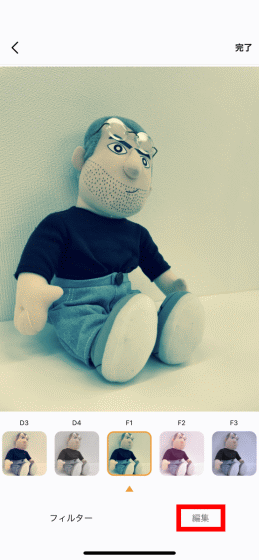
On the edit screen, you can select various filters and easily edit the photo with a nice atmosphere. You can also make detailed edits by tapping 'Edit' at the bottom right.
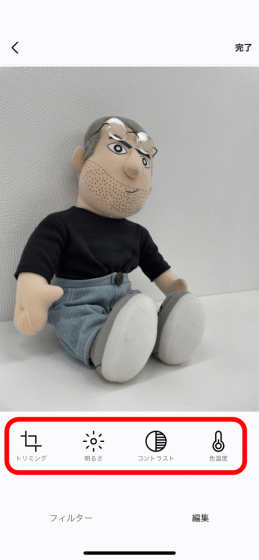
When you tap 'Edit', it looks like this. From the left, buttons for trimming, adjusting brightness, adjusting contrast, and adjusting color temperature are displayed. Furthermore, if you swipe the part where each button is arranged to the left ...
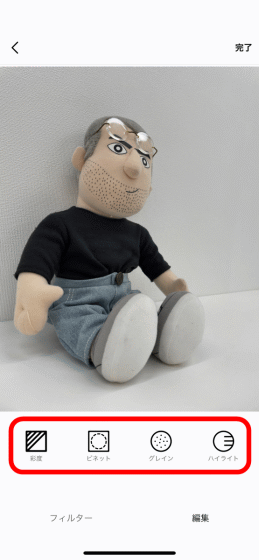
'Vignette' that adjusts the brightness of the surroundings, 'Grain' that reproduces the graininess like a film, and a highlight adjustment button are displayed.
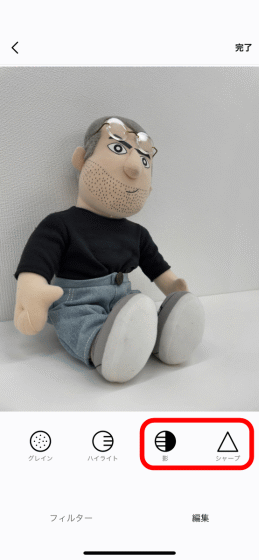
In addition, you can also adjust the brightness of shadows and the sharpness. Microsoft Pix has a total of 10 editing items, so you can fine-tune your photos to get the look you want.
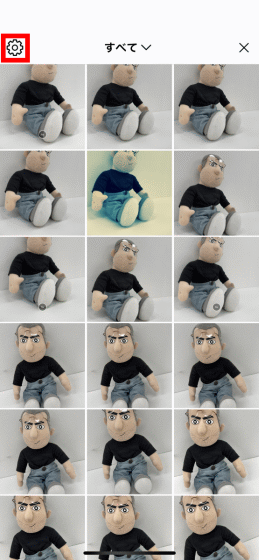
Microsoft Pix can turn the shutter sound on and off. By default, the shutter sound is set to sound, so I will switch the shutter sound off. First, tap the upper left button.
Then, a list of taken pictures will be displayed, so tap the gear icon on the upper left to open the setting screen.
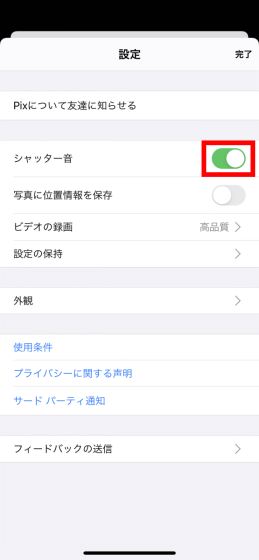
If you check the item labeled 'Shutter sound' on the setting screen, the on / off switch button is in the green 'on' state. In this state, the shutter sound will be heard, so tap the on / off switch button to switch it to 'off'.
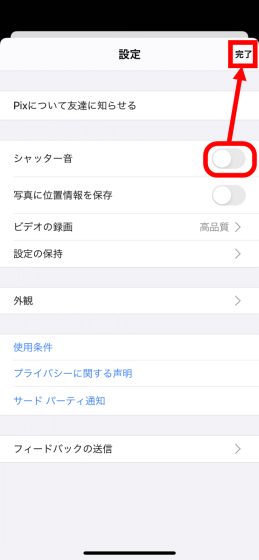
After confirming that it is in the gray 'off' state, tap 'Done' in the upper right to close the setting screen.
You can see how to actually take a picture without making a shutter sound in the following movie. Since you can take pictures quietly without making a shutter sound, you can take pictures of food without making a sound in a quiet cafe, or you can take pictures of your baby's sleeping face quietly.
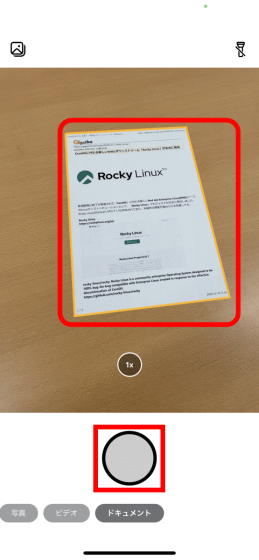
Microsoft Pix also has a document scan function that automatically cuts out paper materials, whiteboards, business cards, etc. into appropriate shapes and shoots them. To use the document scan function, first tap the button labeled 'Document' at the bottom of the shooting screen.
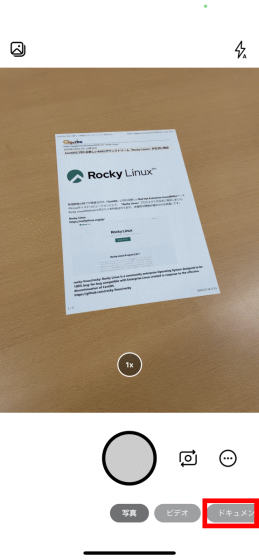
Then, the scanned target is automatically detected and surrounded by an orange border. If you tap the shutter button in this state ...
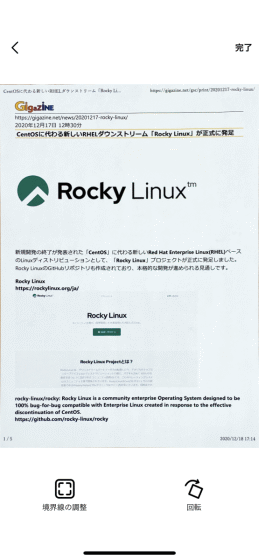
Like this, it automatically cuts out only the area of the paper and shoots it. Since there is no need to finely adjust the position of the camera, it is possible to save materials quickly.
Related Posts:
in Software, Smartphone, Review, Posted by log1o_hf


