'Passbolt' that allows you to host password management for multiple people on your own server for free, open source data import of 1Password and KeePass is also possible
Software that manages passwords includes
Passbolt | Open source password manager for teams
https://www.passbolt.com/
Passbolt · GitHub
https://github.com/passbolt
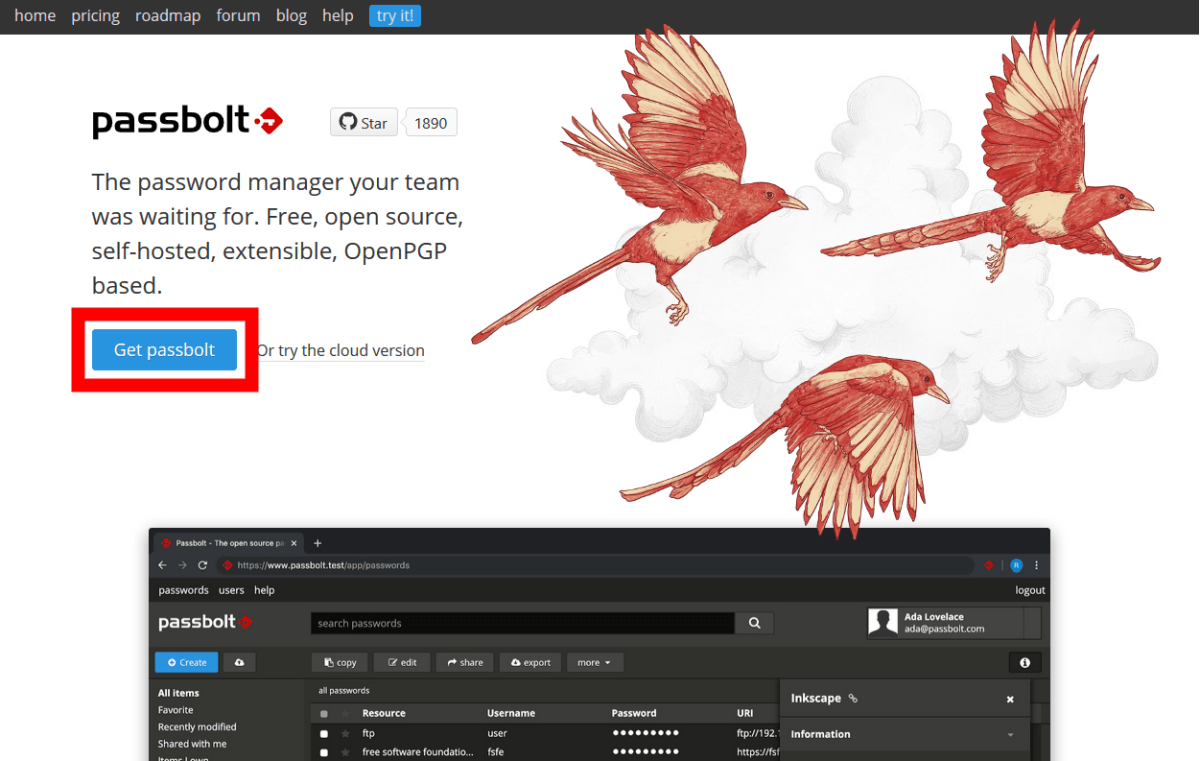
First, access the top page to download Passbolt. Click 'Get pass bolt'.
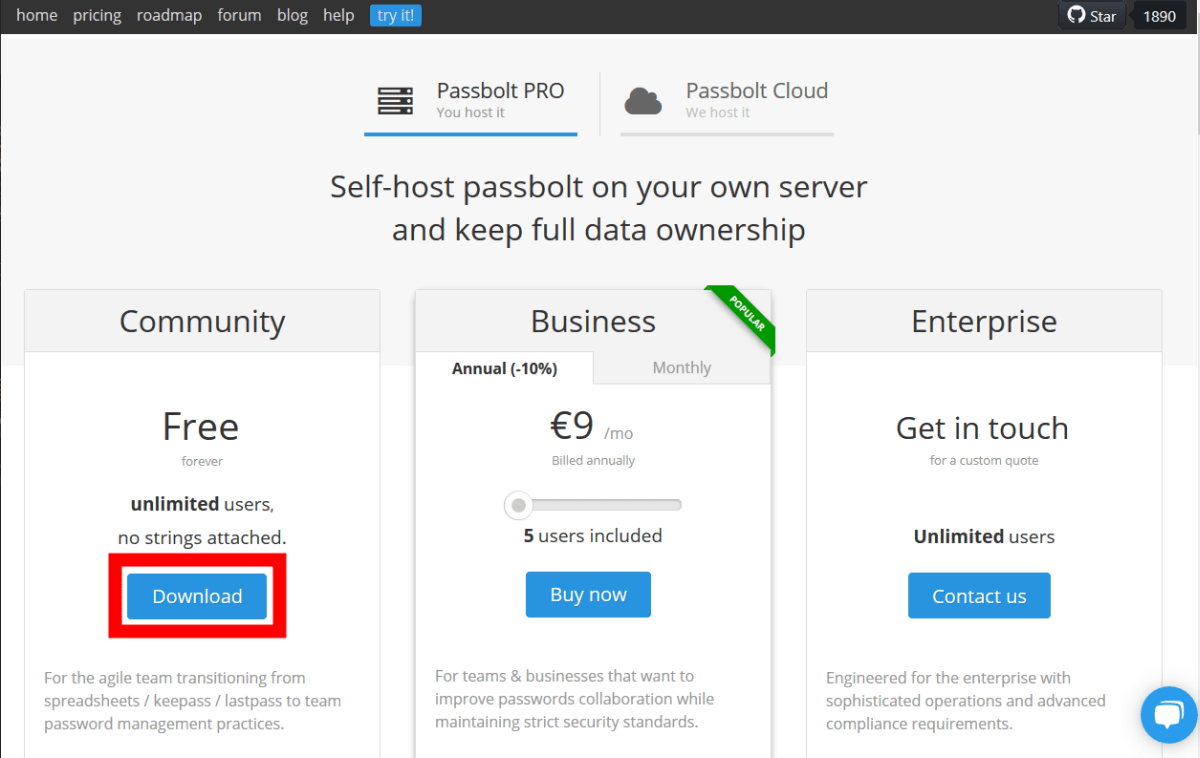
Passbolt has 'Passbolt PRO' which prepares and hosts a server by itself and 'Passbolt Cloud' which is a cloud version, but this time, I will try the free version of 'Passbolt PRO'. Click 'Download' to proceed.
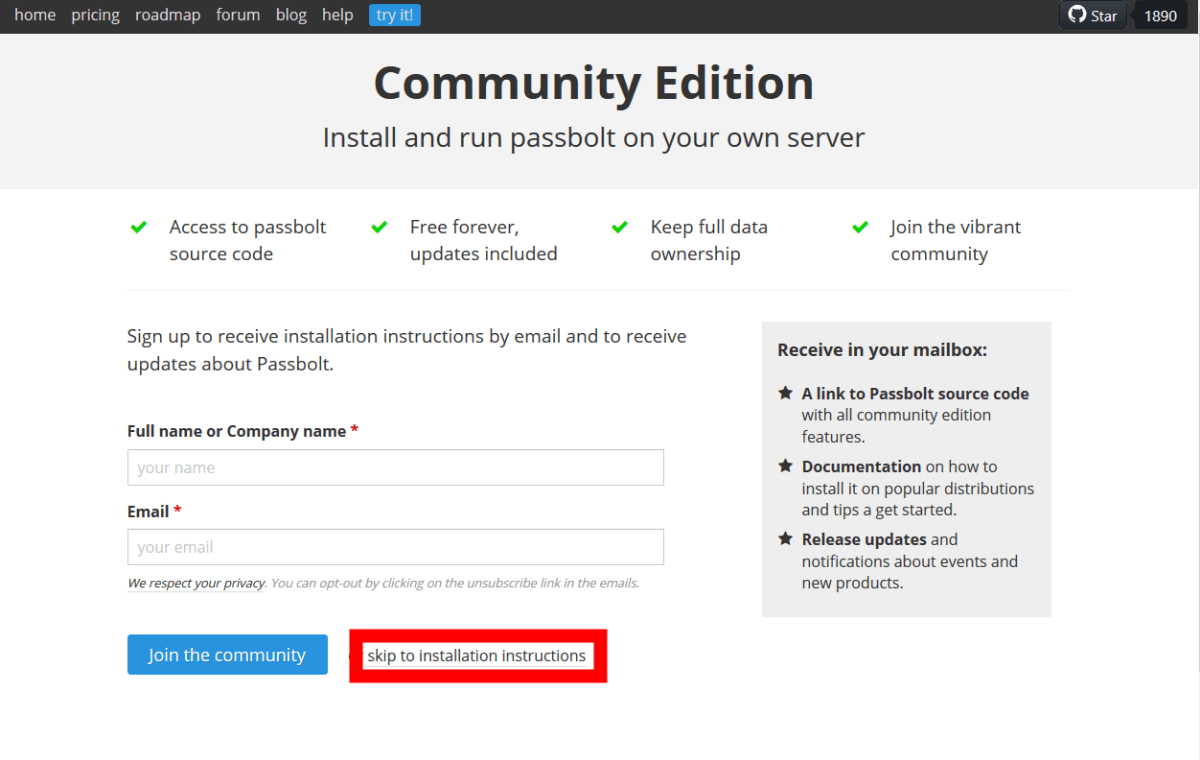
You will be asked to enter your name and email address, but you can install it without entering it, so click the red frame part.
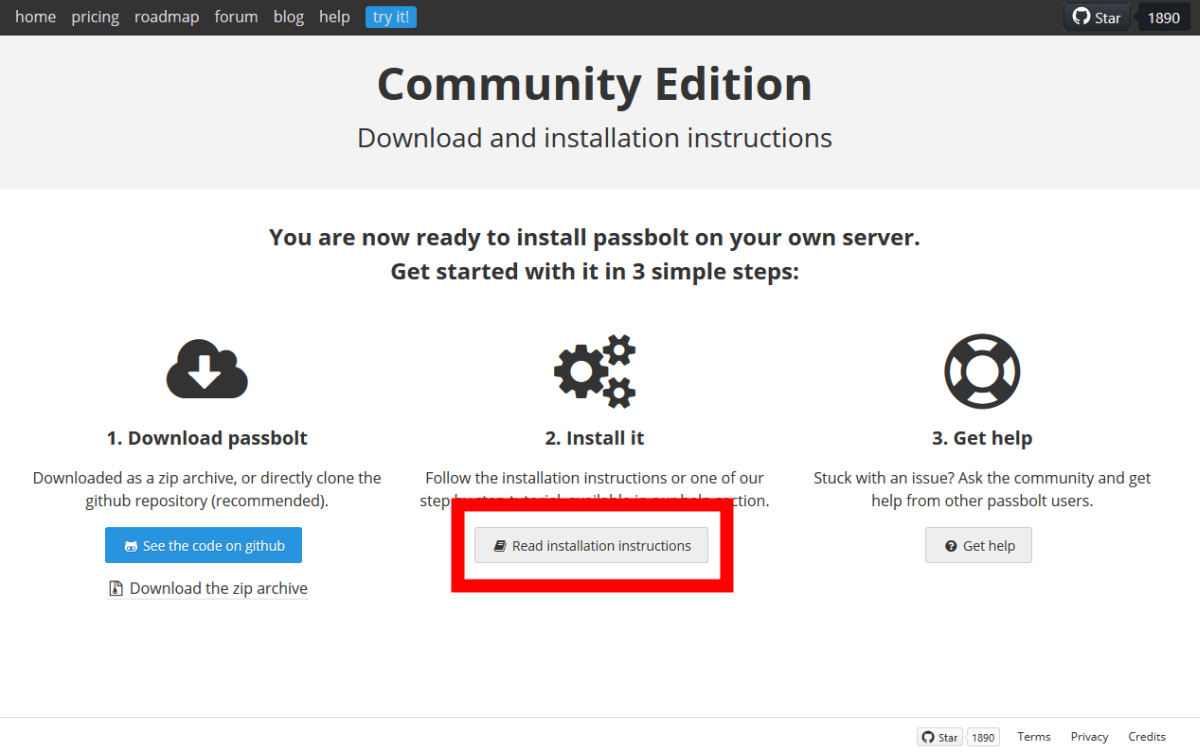
Click 'Read installation instructions'.
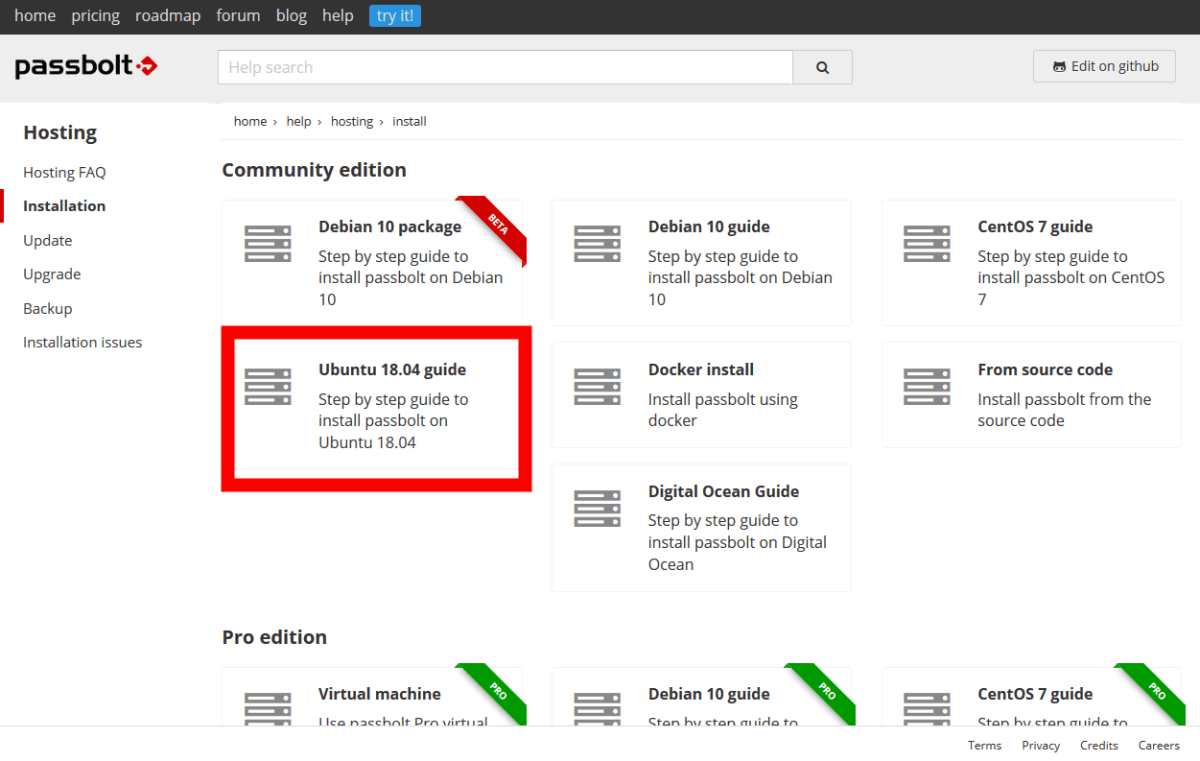
This time I will install Passbolt on Ubuntu 18.04, so click 'Ubuntu 18.04 guide'.
The explanation screen of the command to install is displayed.
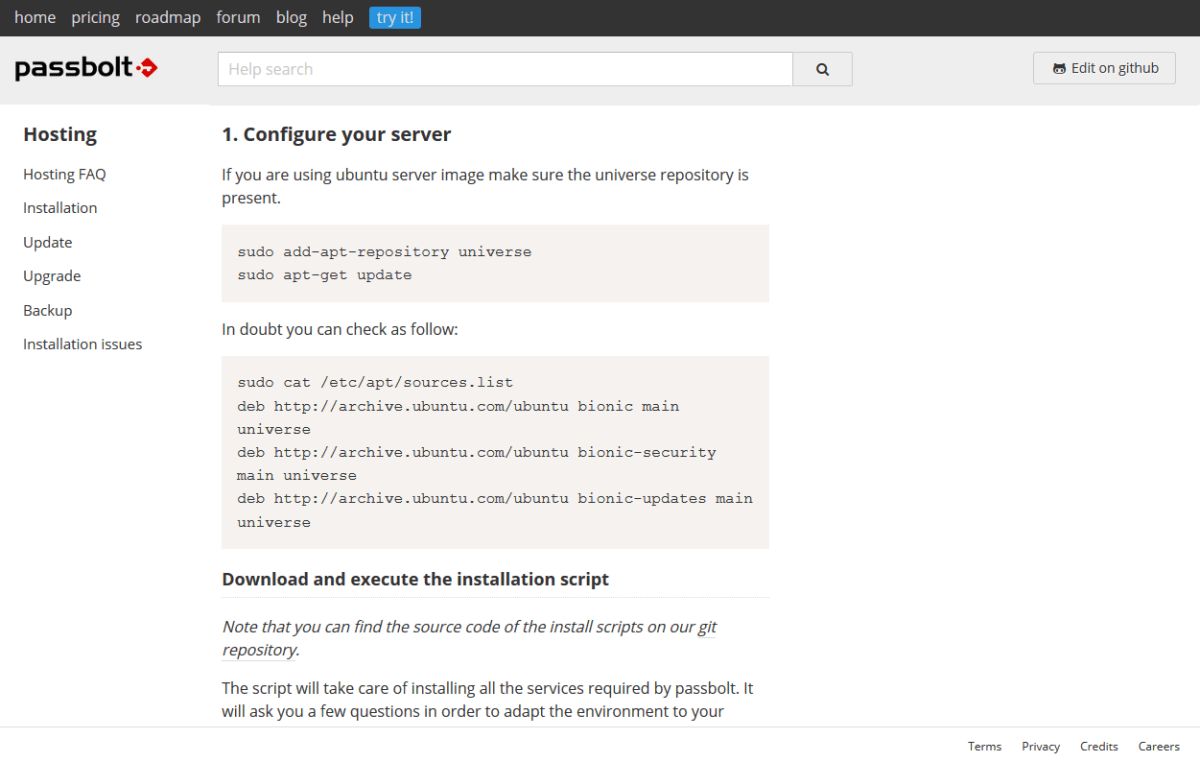
You can run the script to install Passbolt by running the following command.
[code]wget -O passbolt-ce-installer-ubuntu-18.04.tar.gz https://www.passbolt.com/ce/download/installers/ubuntu/latest
wget -O passbolt-installer-checksum https://www.passbolt.com/ce/download/installers/ubuntu/latest-checksum
sha512sum -c passbolt-installer-checksum
tar -xzf passbolt-ce-installer-ubuntu-18.04.tar.gz
sudo ./passbolt_ce_ubuntu_installer.sh[/code]
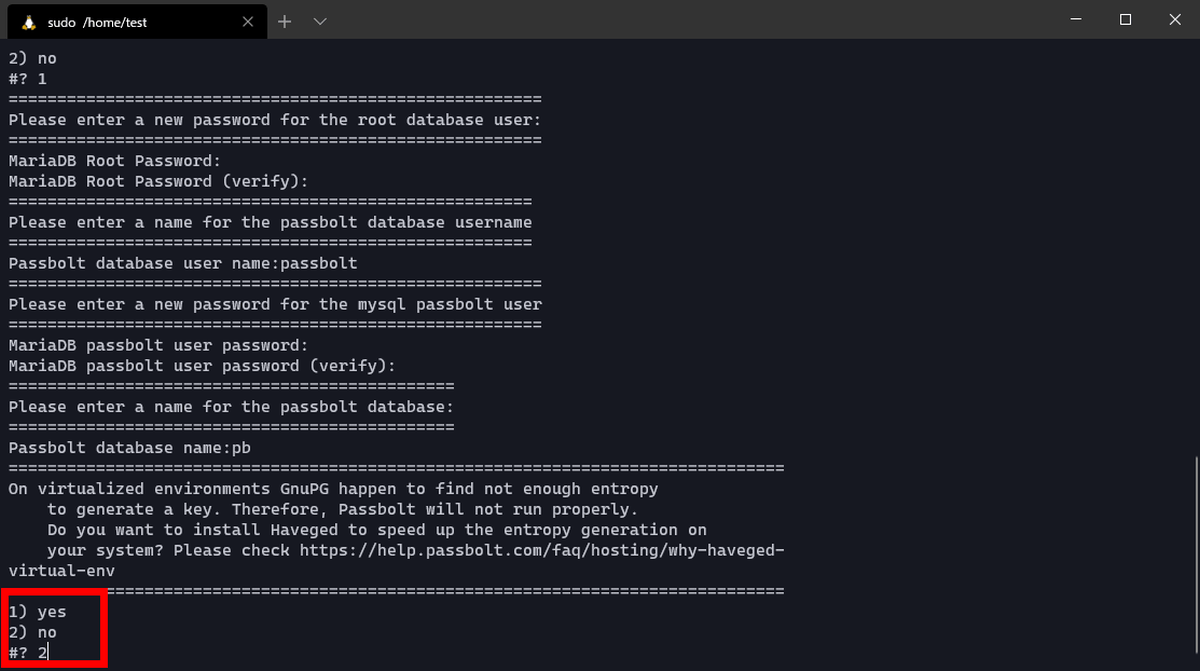
When you run the script, you will be asked if you want to install MariaDB. This time, select 'yes'.

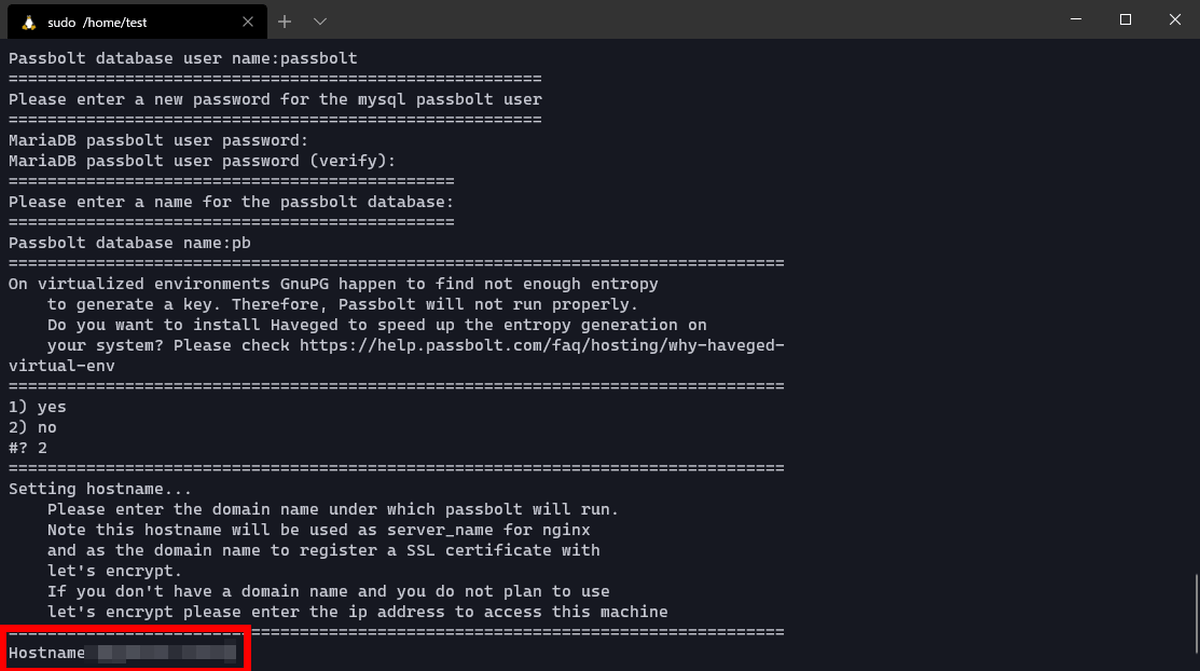
Set the password for the MariaDB root user, the user name and password of the user who will use the Passbolt database, and the Passbolt database name.

Since entropy is insufficient when generating keys with GnuPG in a virtual environment, generated random numbers by Haveged. Since the installation destination this time is an actual machine, select 'no'.
You will be prompted to enter the domain name or IP address, so enter the domain name.
Finally, set SSL. There are 3 ways to use the certificate you prepared yourself, to issue the certificate with Let's Encrypt, and to not use SSL. This time, Passbolt was set without SSL. This completes the scripted installation.

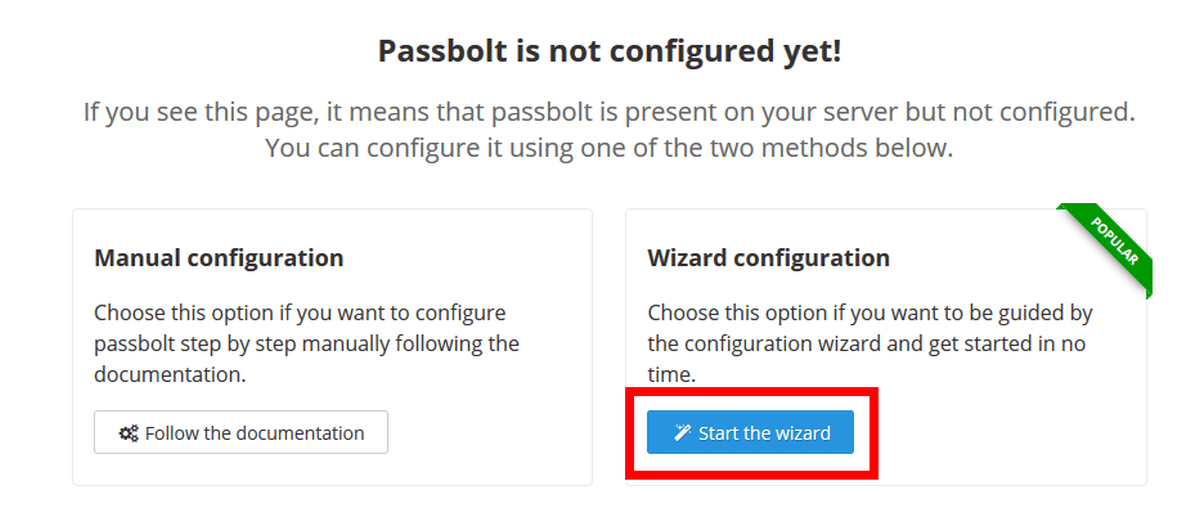
After the installation is complete, access the domain you set earlier from your browser. Click 'Start the wizard' to continue setting from the browser.
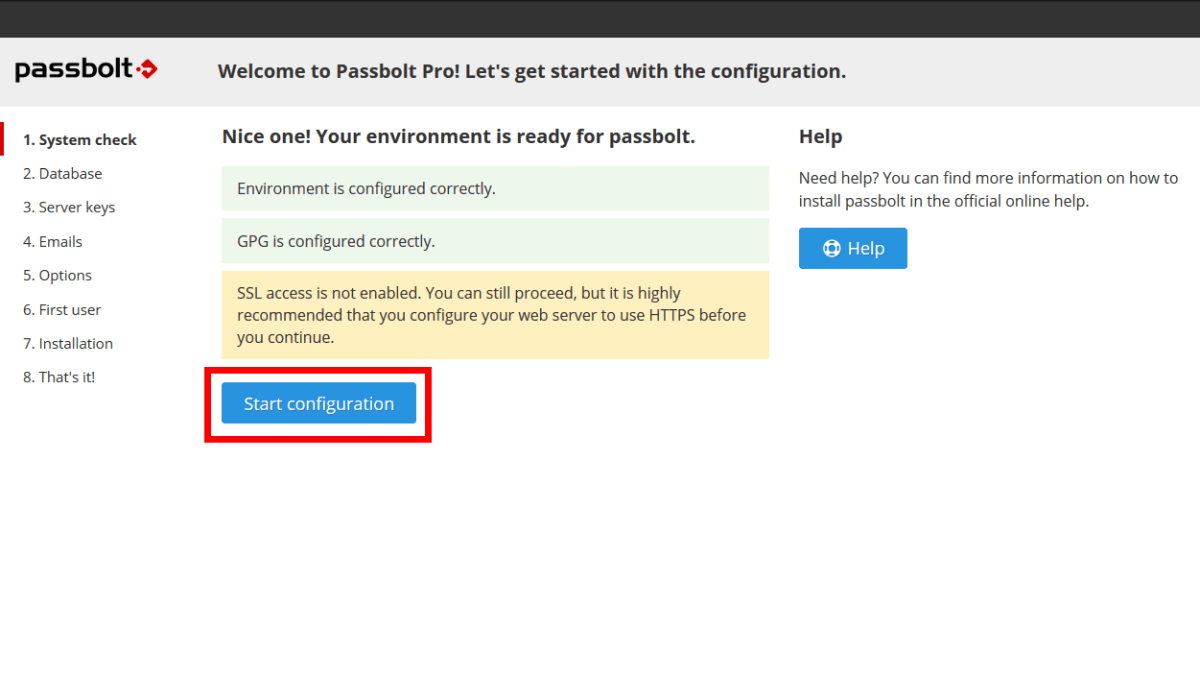
Click 'Start configuration'.
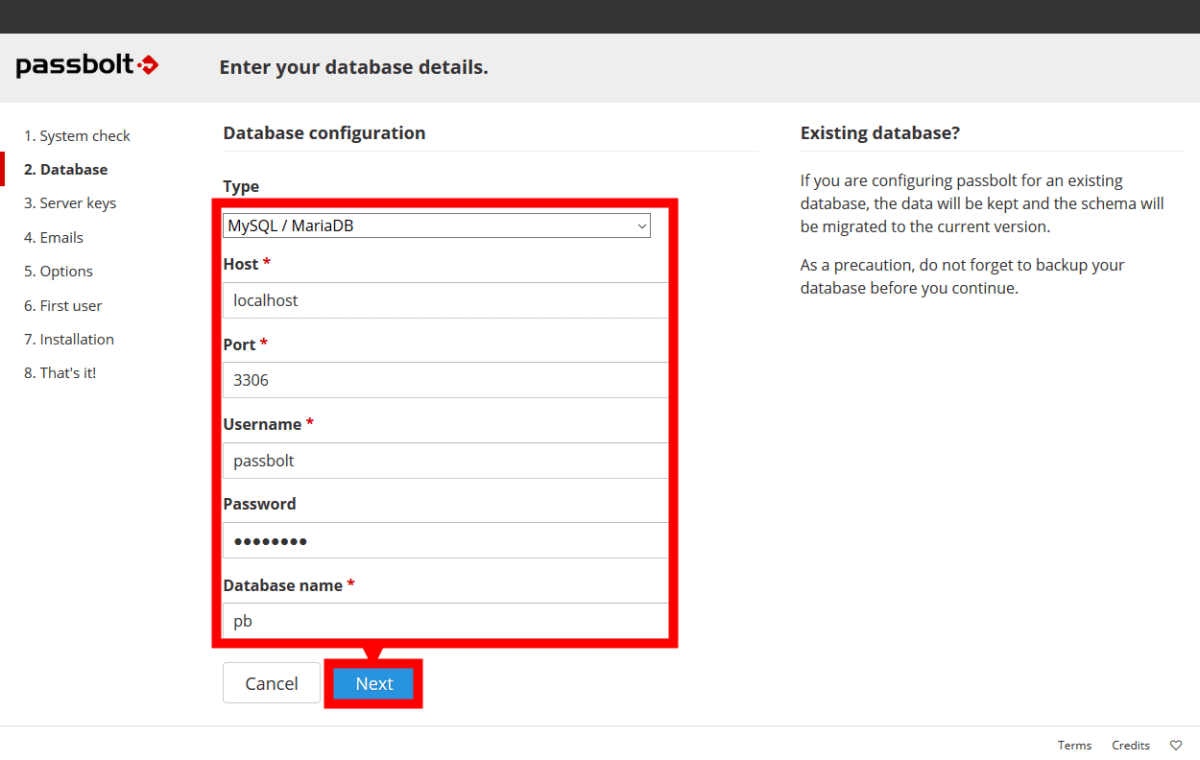
If you installed MariaDB together when you installed Passbolt, you can enter the database name set during installation here. Click 'Next' when you are done.
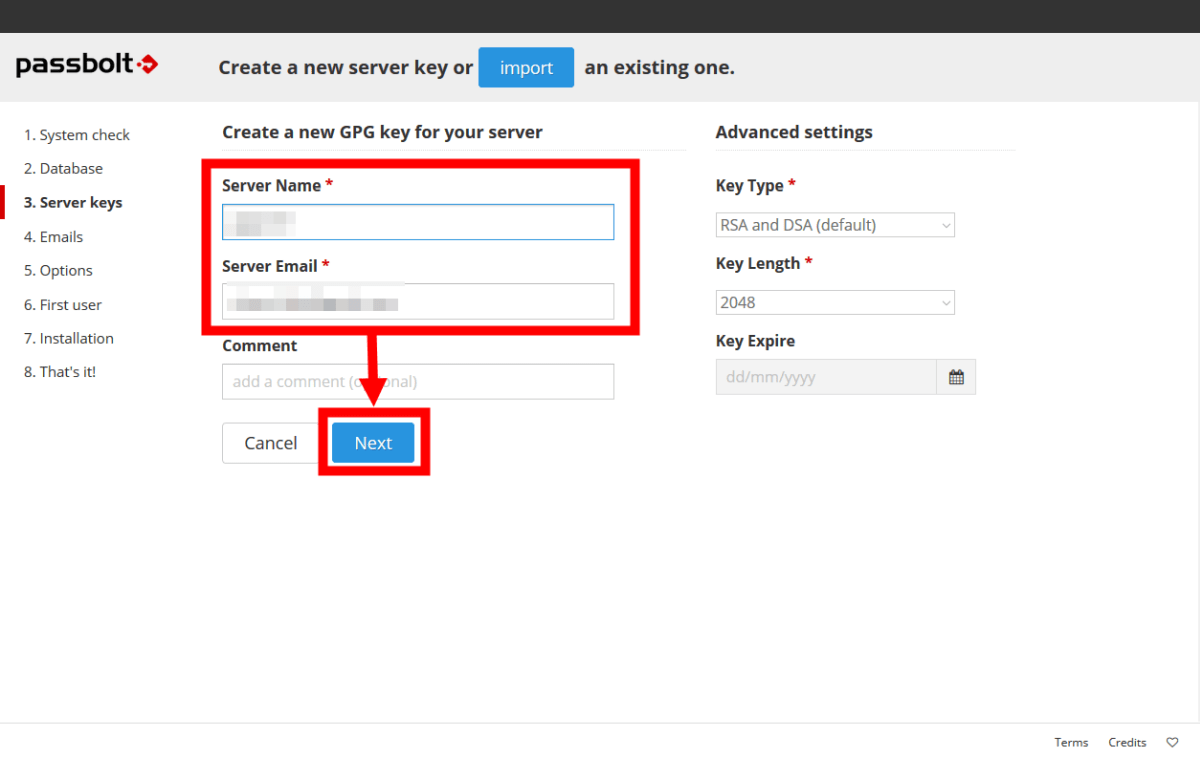
Enter the server name and email address to generate the GnuPG server key and click 'Next'.
Then specify the SMTP server. It does not matter whether the SMTP server runs on the server where Passbolt is installed or another server.
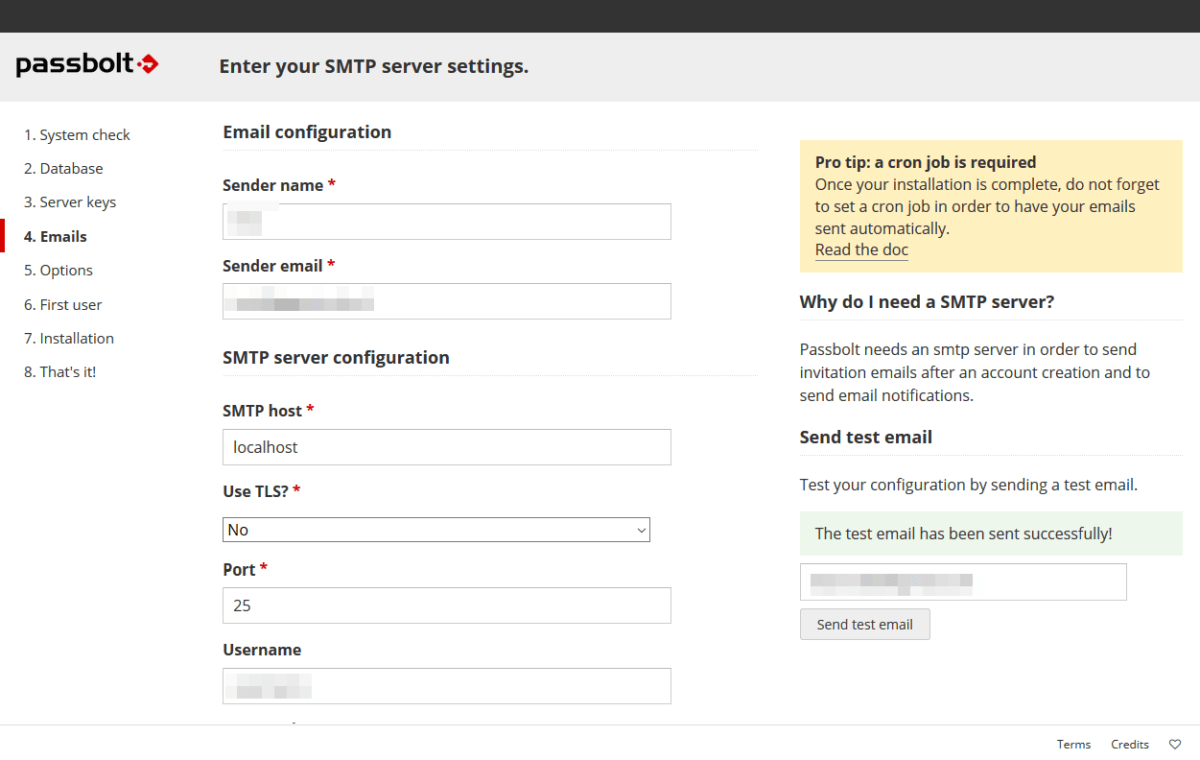
Enter the host on which the SMTP server is running, user name, etc., and click 'Next'.

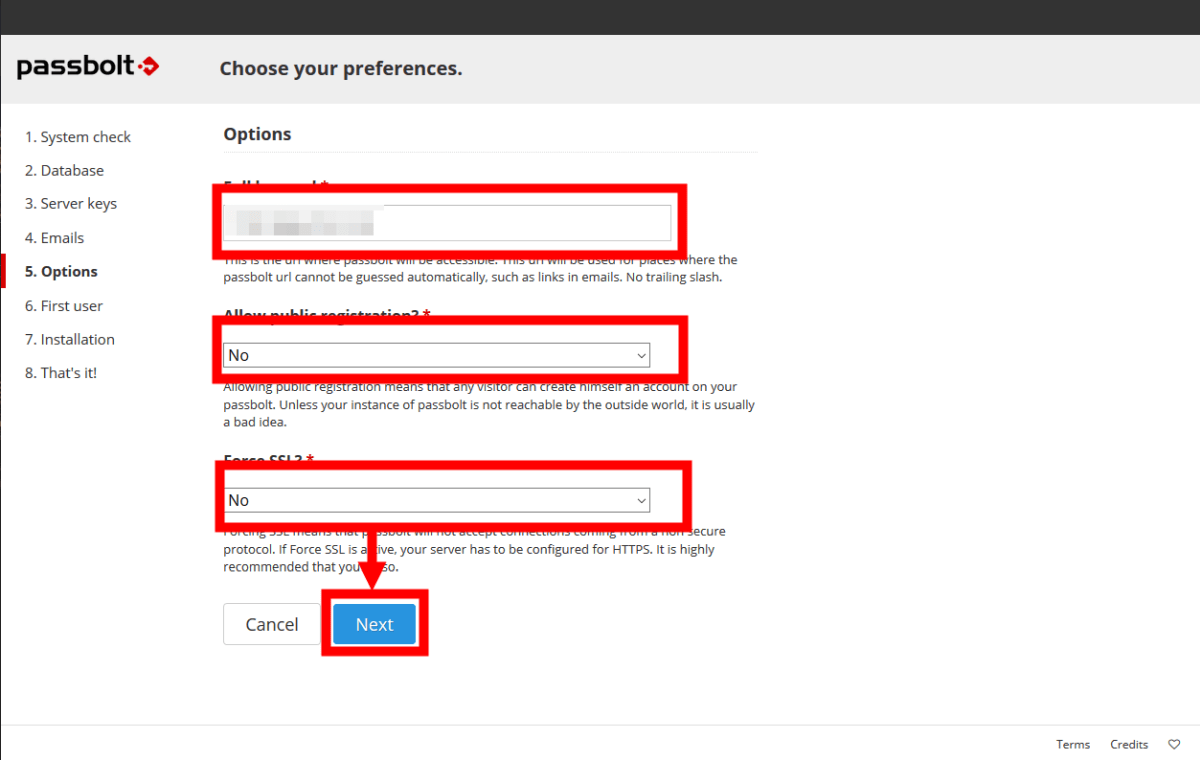
Click 'Next' after setting the base URL when accessing Passbolt, 'Allow public registration?' to set whether anyone can register Passbolt user, 'Force SSL?' to force the use of SSL ..
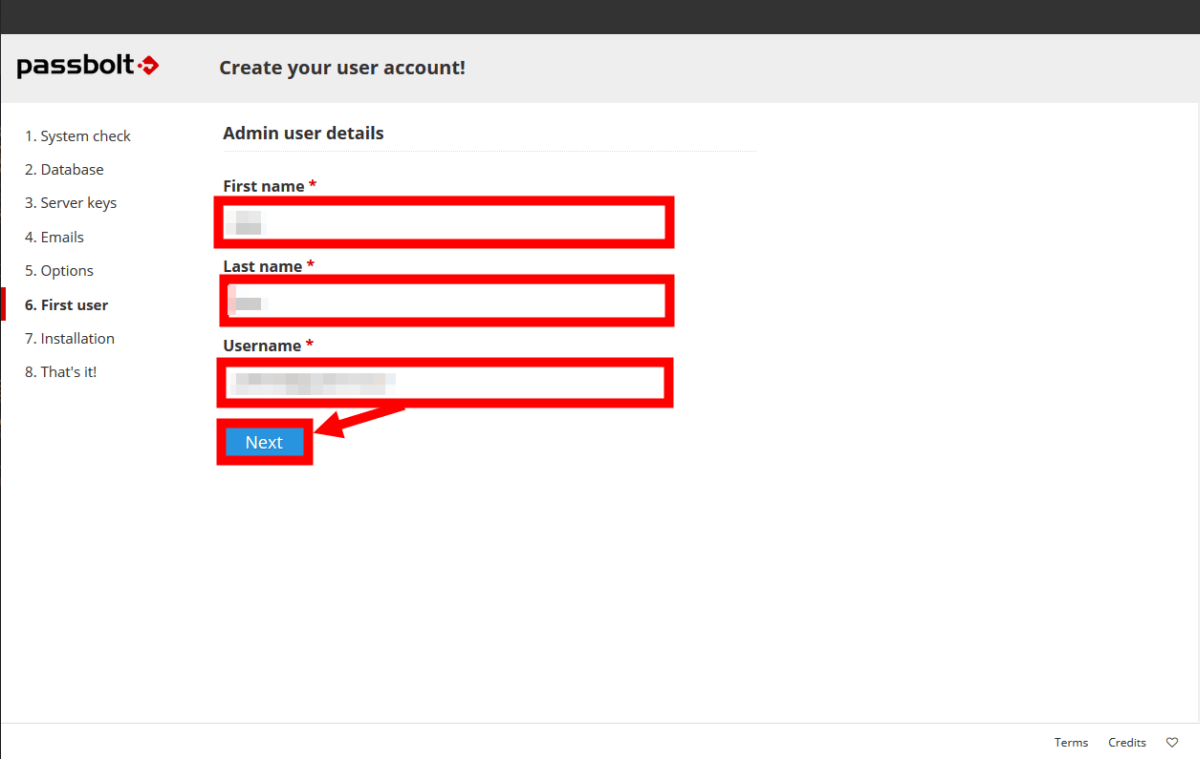
Finally, set the administrator account. Enter your name and user name in email address format and click Next.
The installation has started.

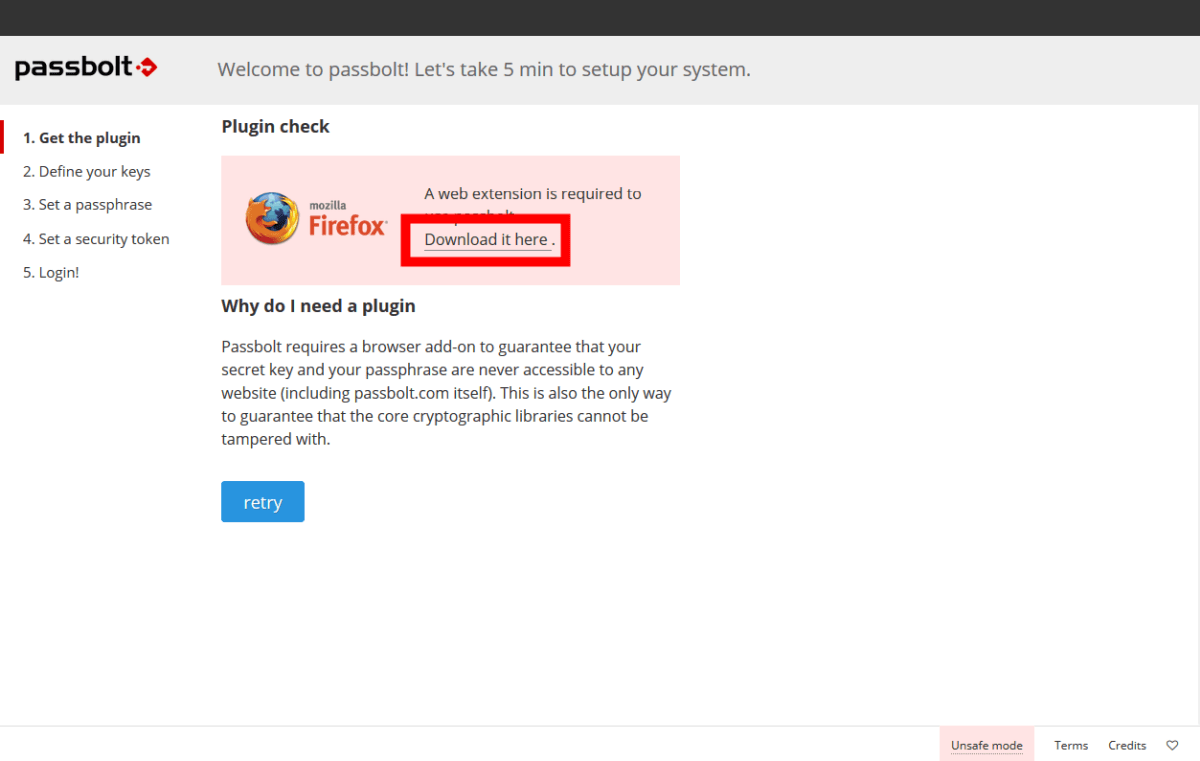
When the installation is complete, it will be checked if the plugin is installed. Click 'Download it here' to install the plugin. There are plugins for Firefox and Chrome.
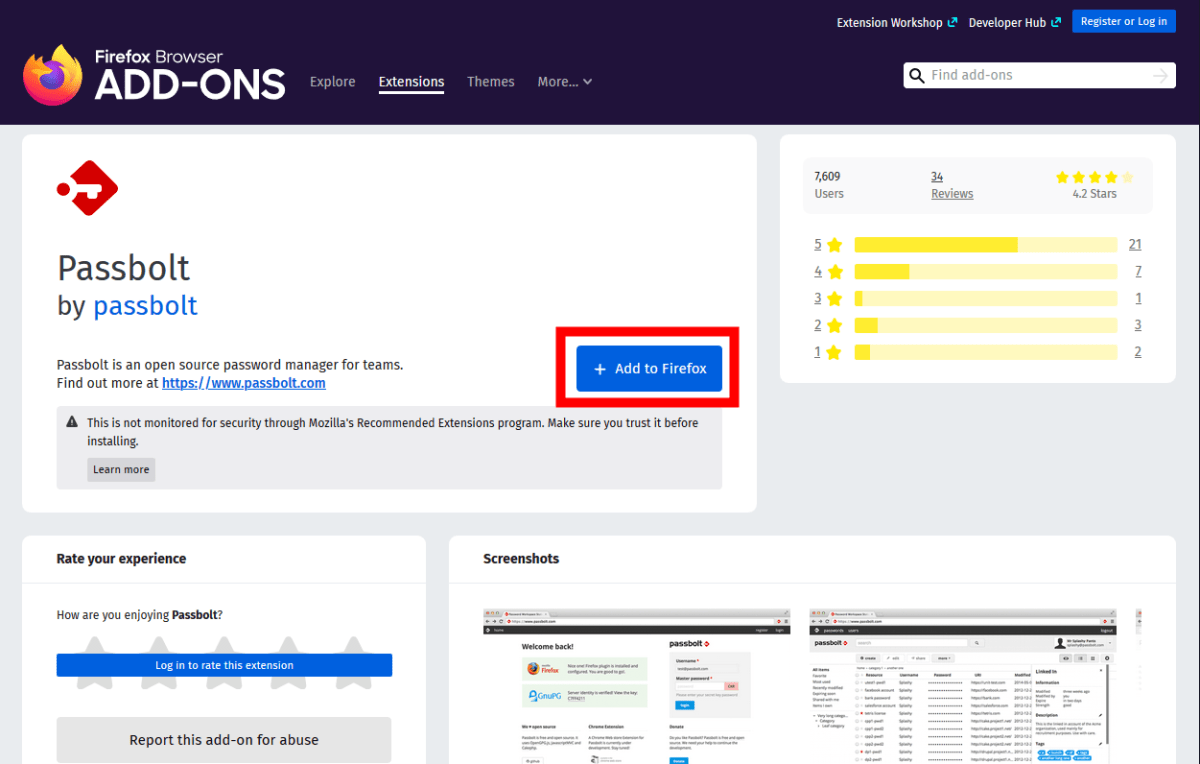
Since I was using Firefox this time, the screen to install the Firefox add-on was displayed. Click Add to Firefox to install the plugin.
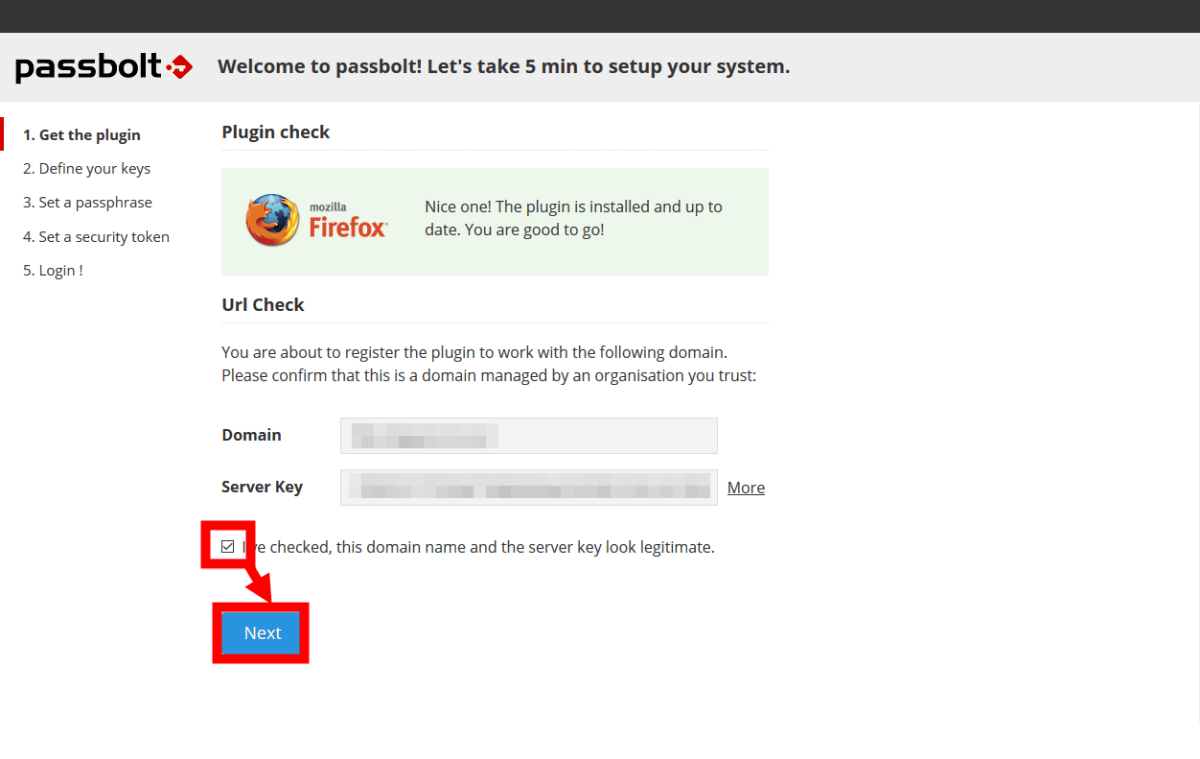
After installing the plugin, go back to the Passbolt page and click 'retry'...

Passed the plugin check. The URL and server key to be set in the plug-in are automatically entered, so check the check box and click 'Next'.
Click 'Next'.

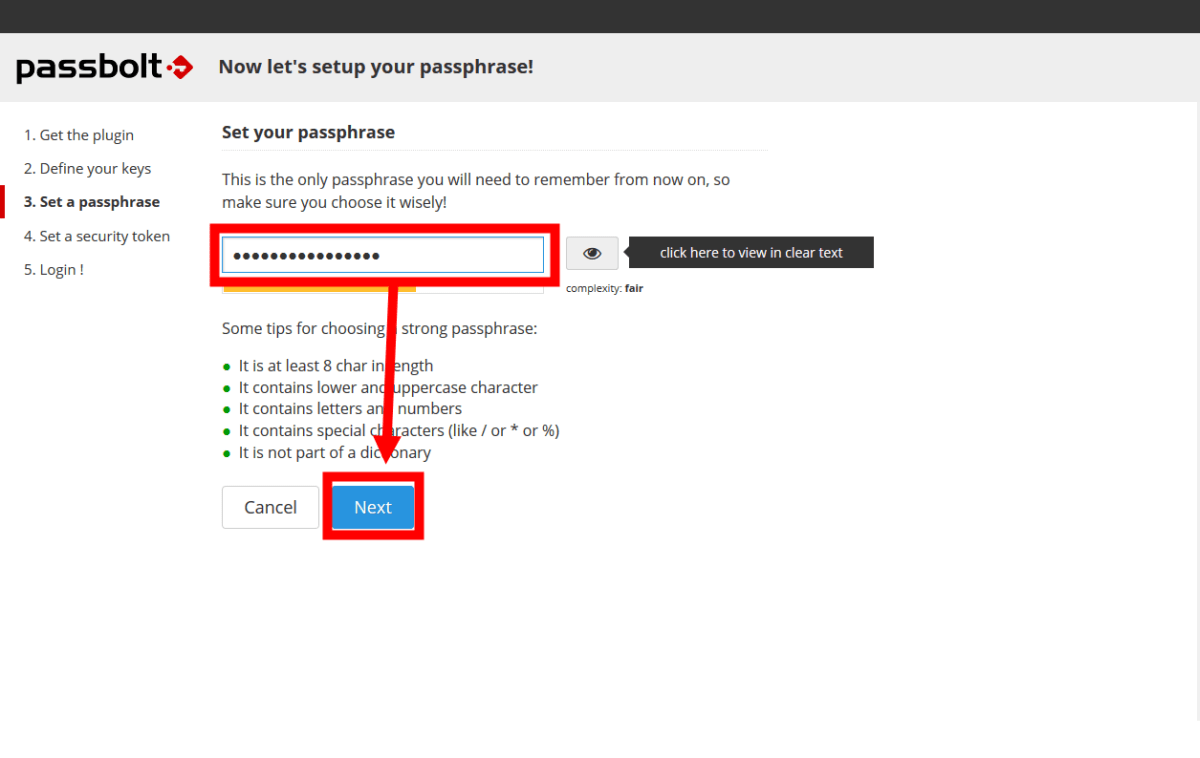
Then enter your passphrase. A minimum of 8 characters is required, but there are also recommended requirements, such as including uppercase and lowercase letters and symbols. '
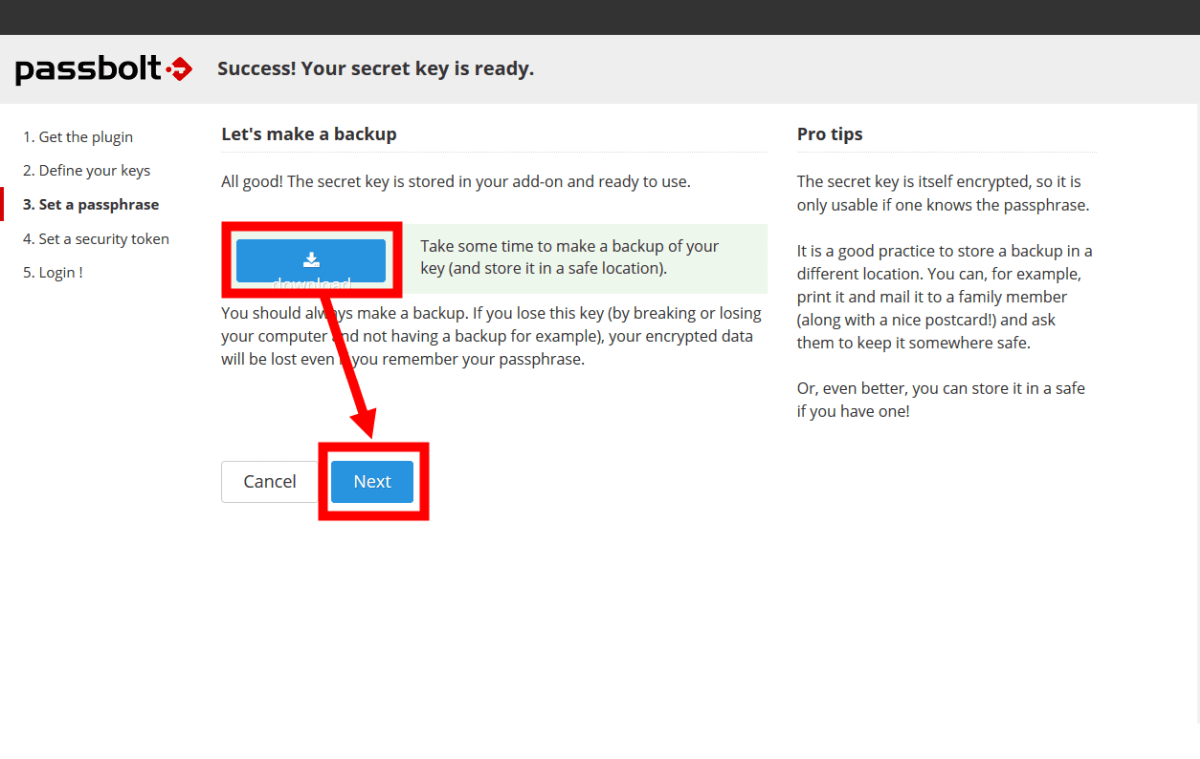
Move to the screen where you can back up the private key. Click the blue button to download your private key and click Next.
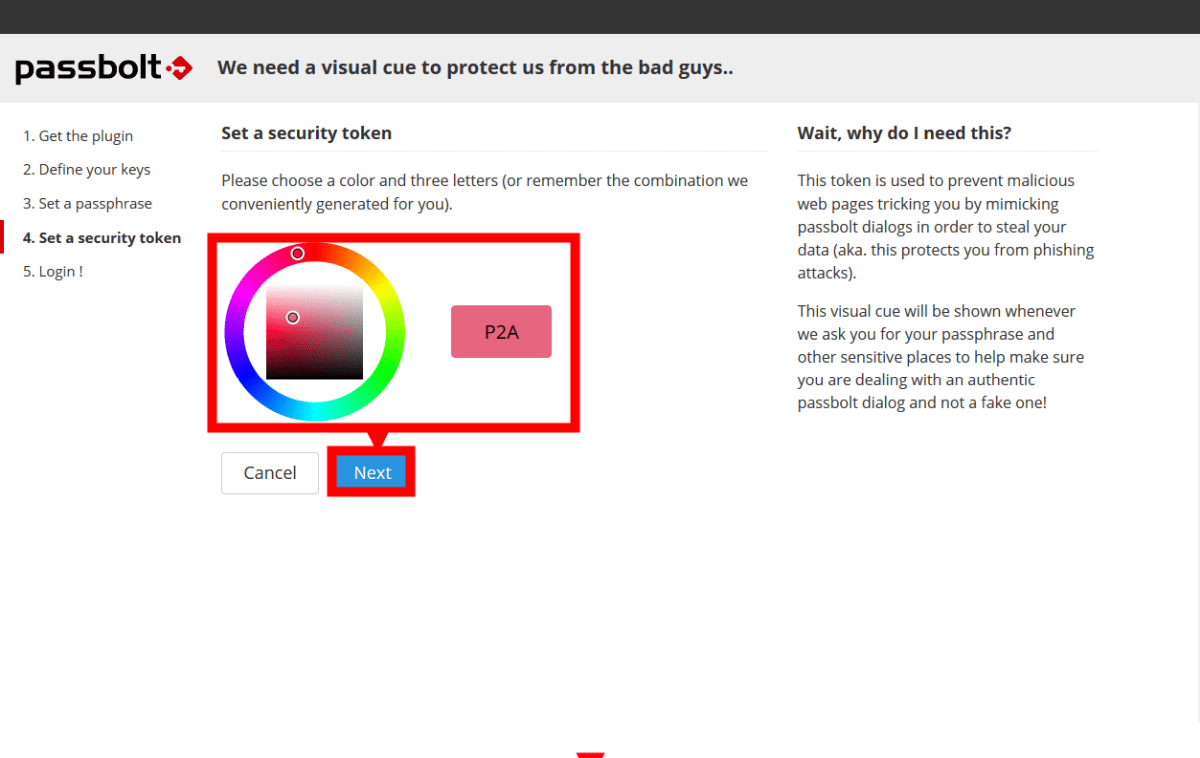
To prevent malicious websites from spoofing Passbolt and stealing information, set a security token that combines colors and strings. Select a color from the color palette, enter the character string, and click 'Next'.
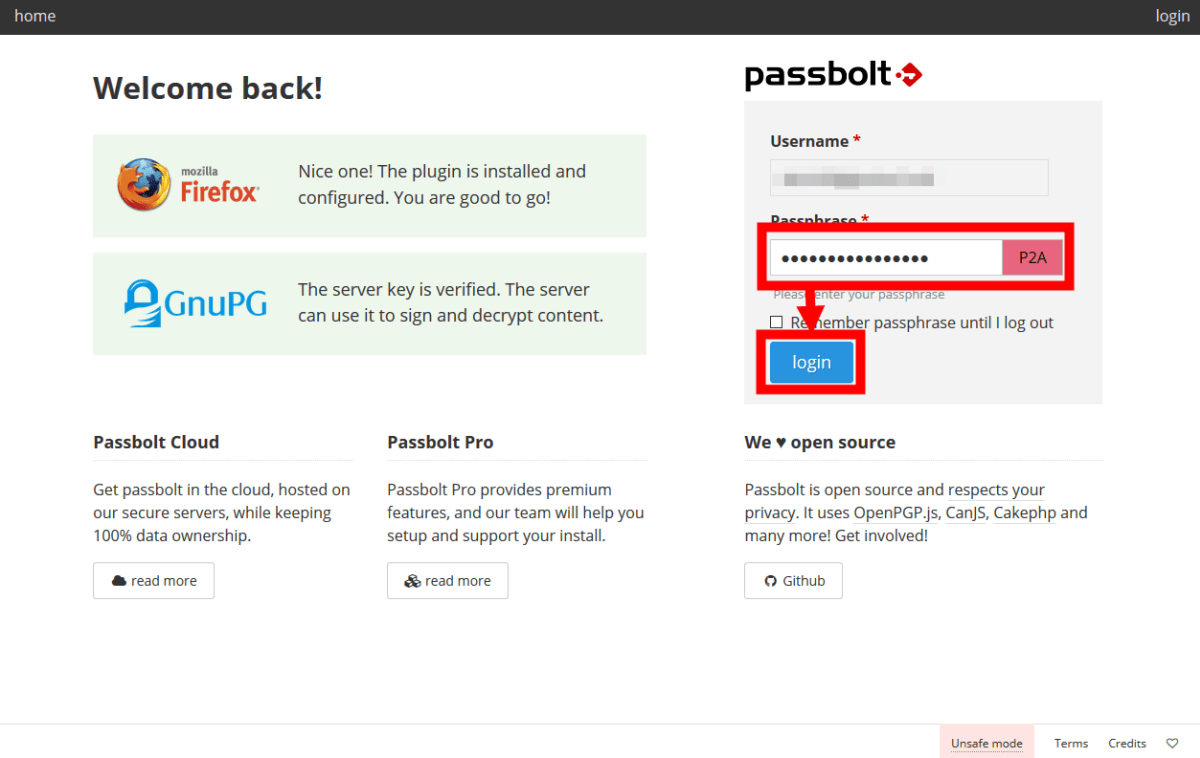
When the login screen is displayed, enter the passphrase, confirm that the security token is correct, and click 'login'.
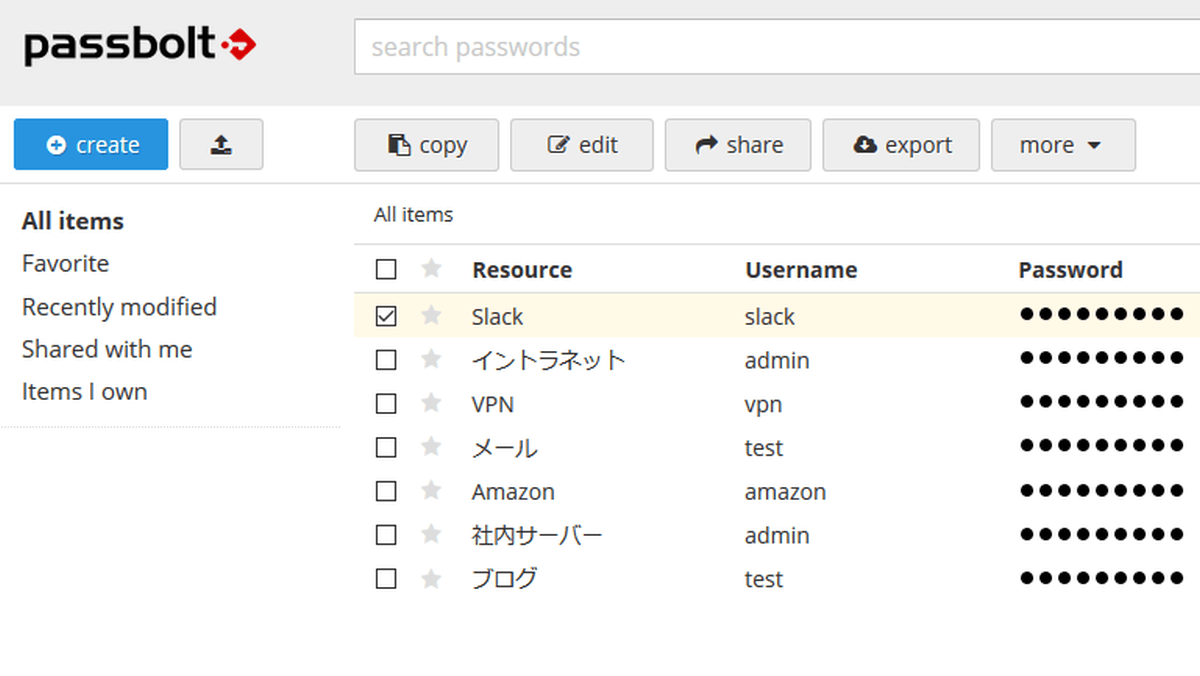
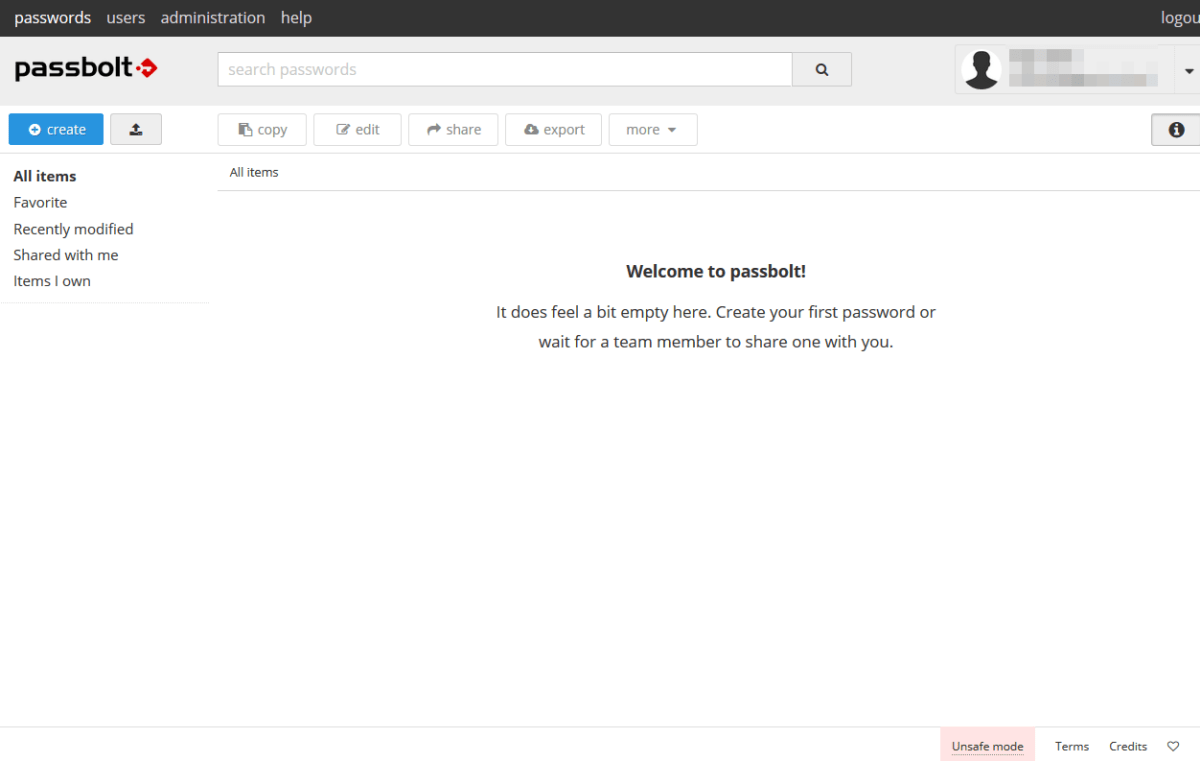
The Passbolt top screen is displayed. The installation method up to this point has been quite complicated because it only handles passwords.
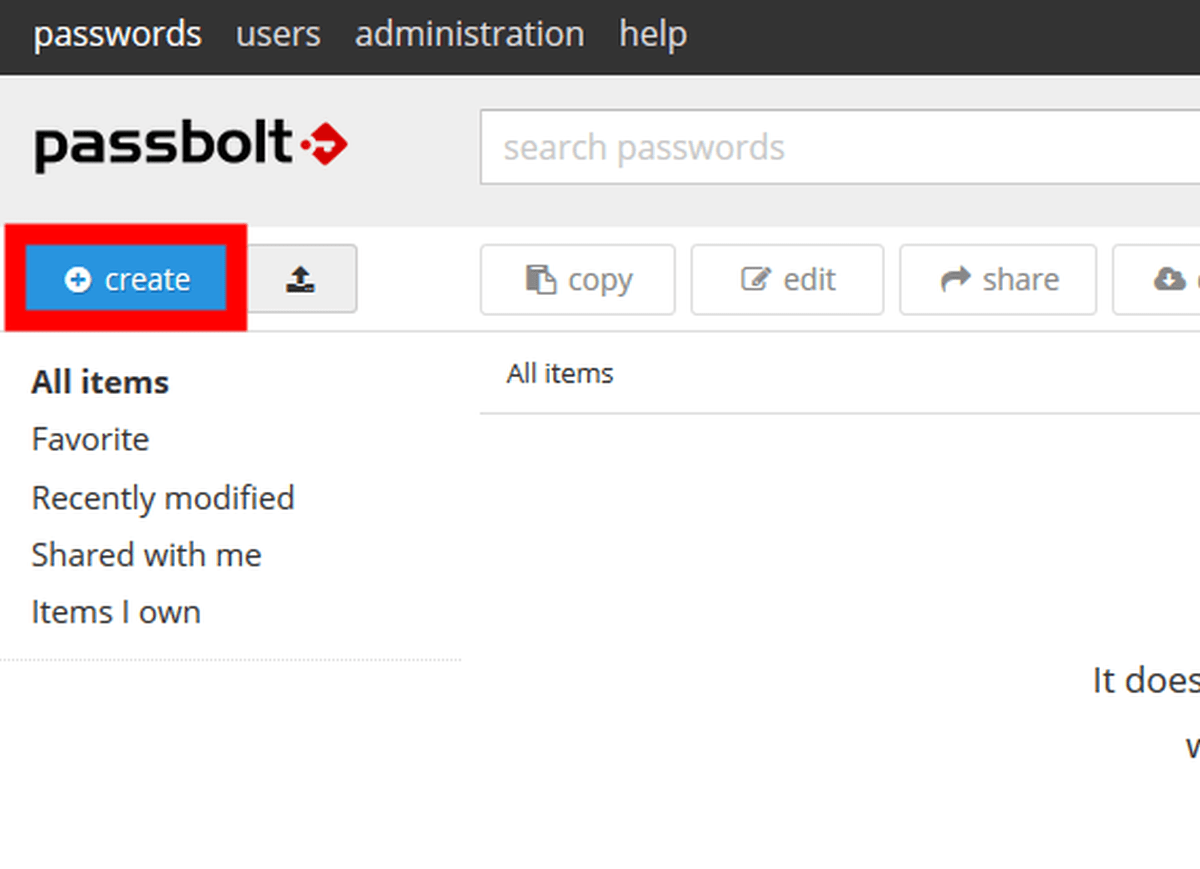
Click 'create' to register the password.
You can register the management name and URL of the registered password, user name, password, etc. Also here, the security token is displayed, so you can check whether Passbolt has been replaced with a fake website.
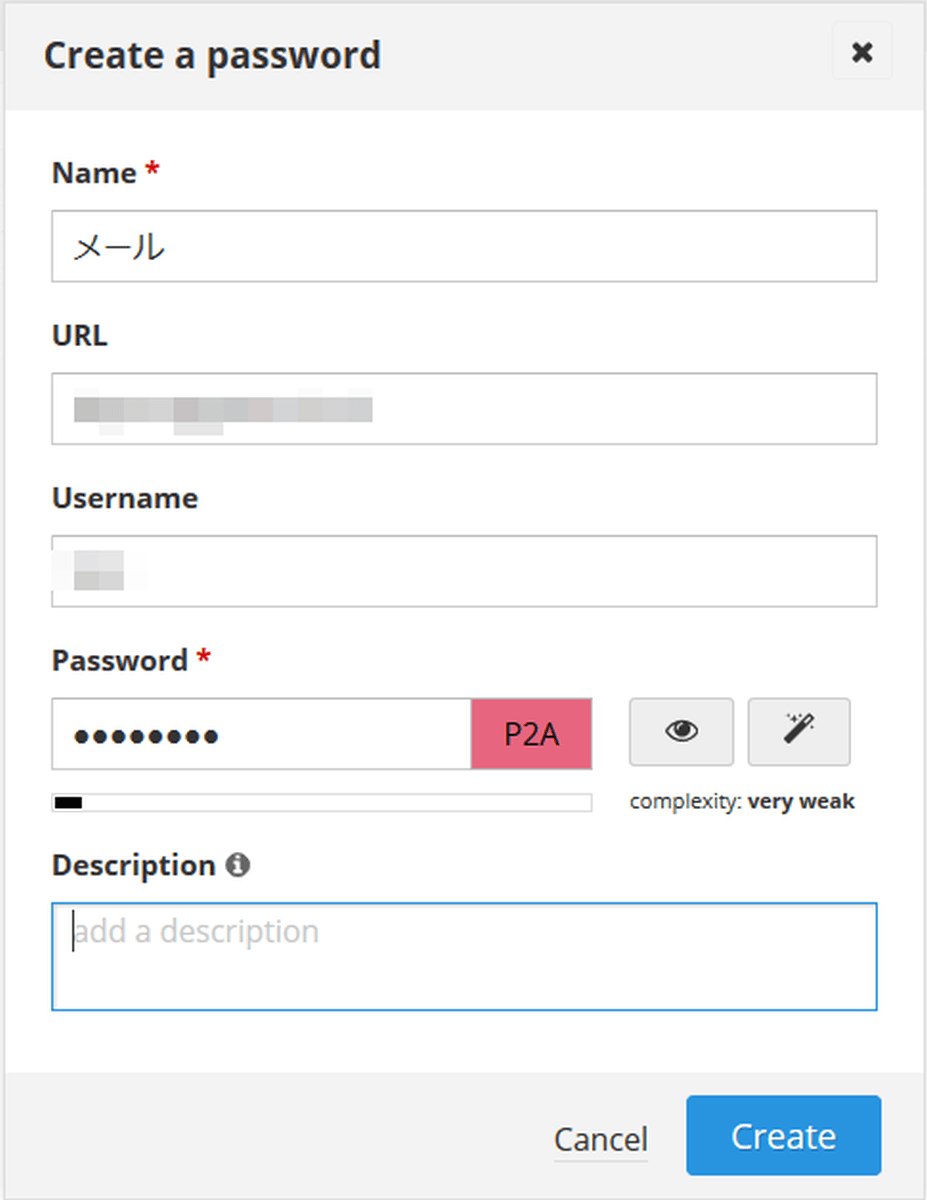
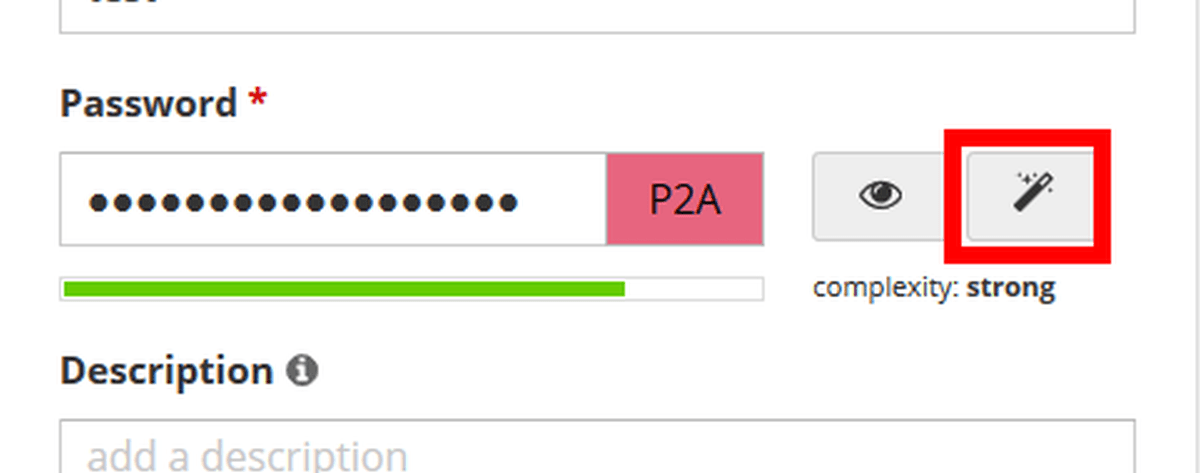
Click the button in the red frame to automatically generate a strong password.
The eye-designed button allows you to confirm the entered password.

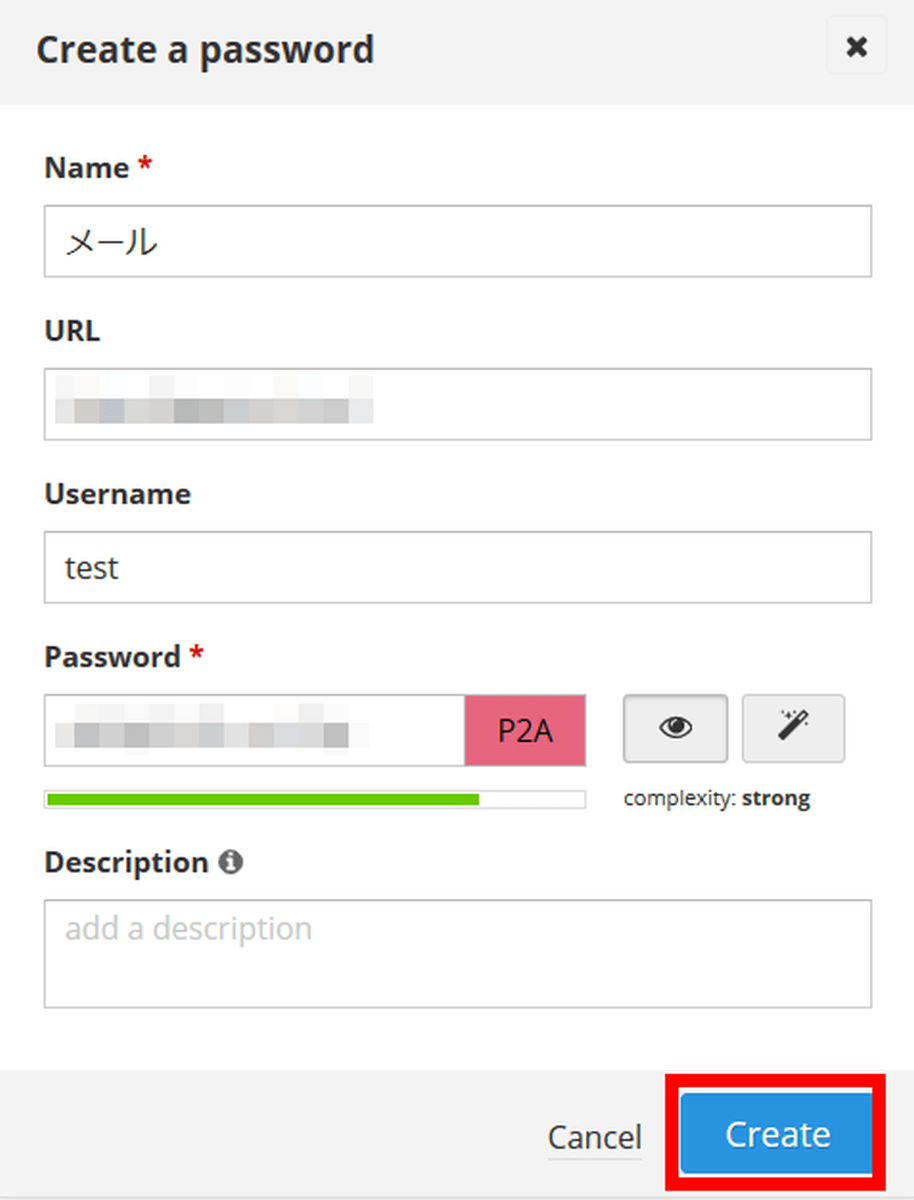
Click “Create” when the input is complete.
Enter your passphrase and click OK.

The password has been registered.
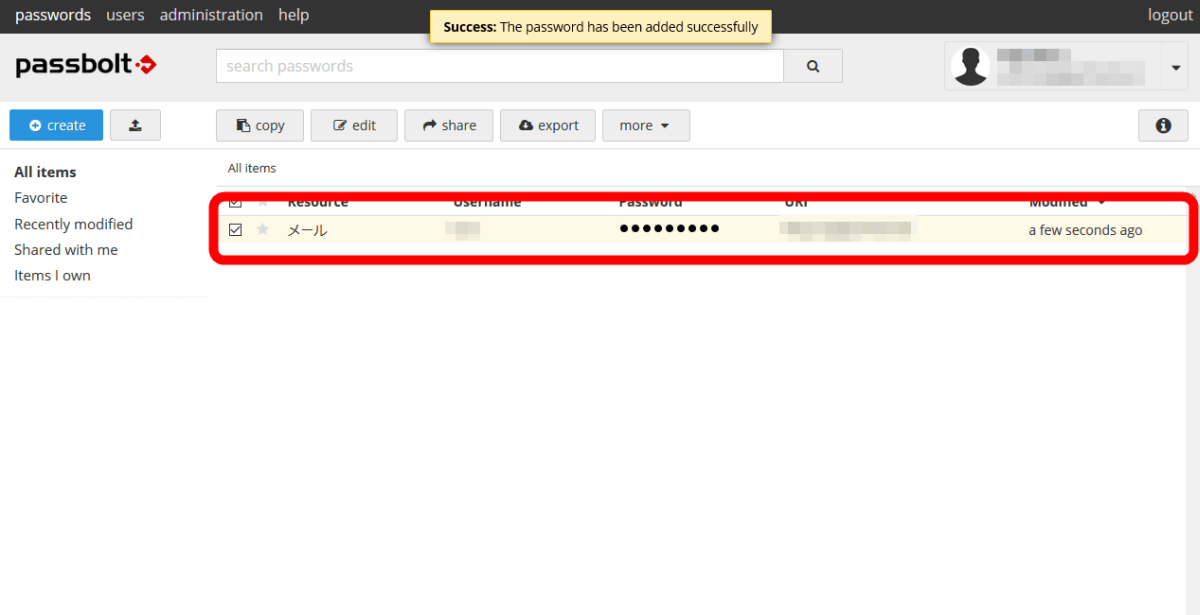
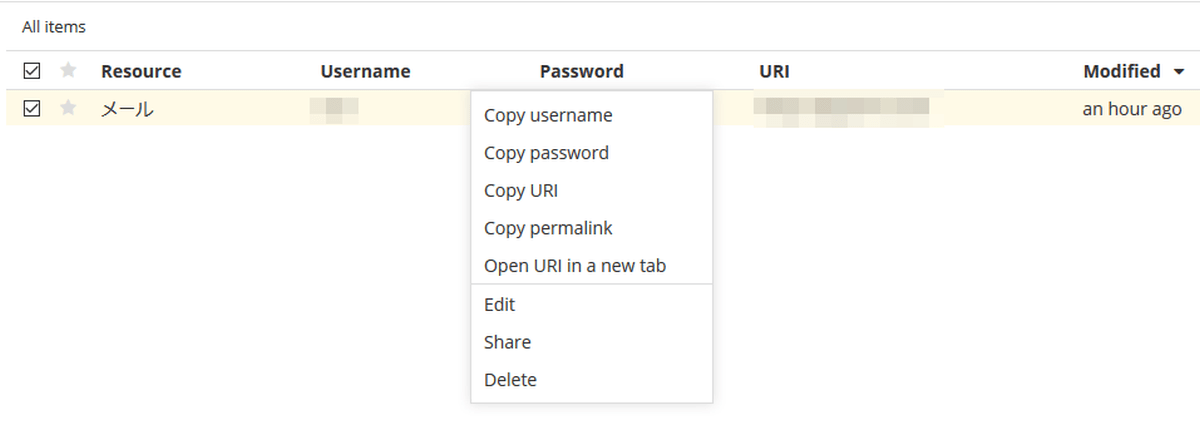
By right-clicking on the registered item, you can copy the user name, password and URI.
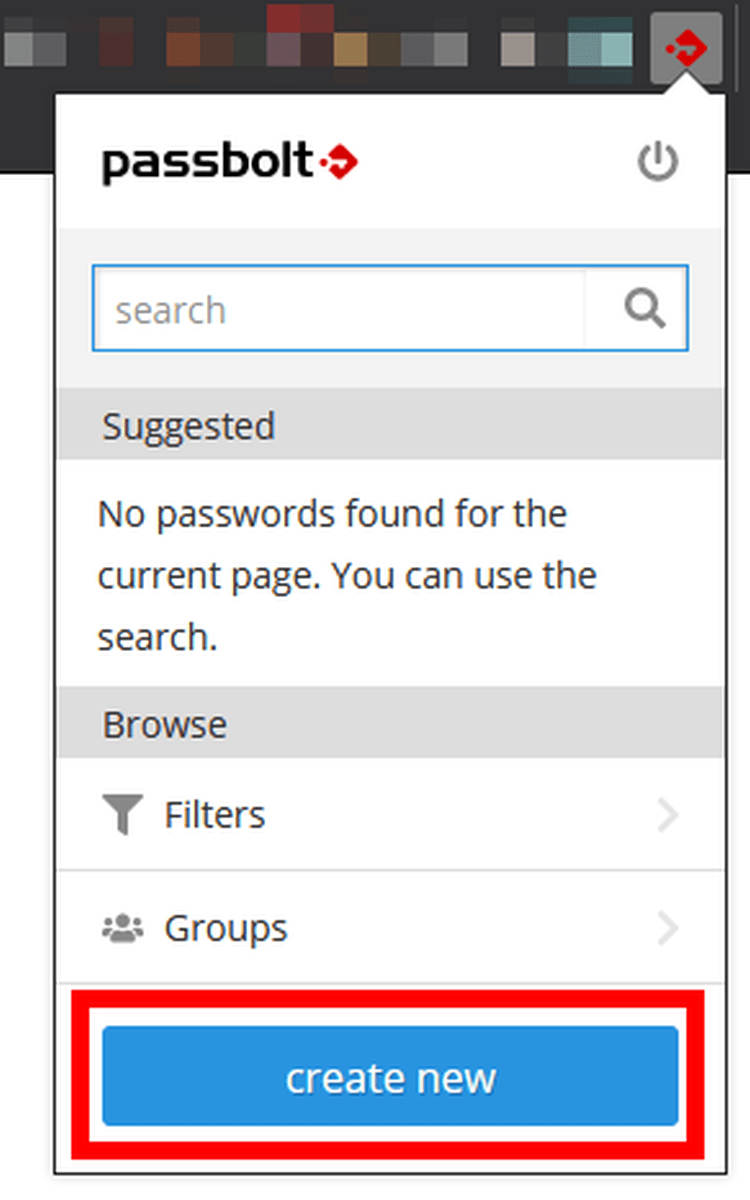
Also, if you use the plugin installed in your browser, you can also register the password of the website you are opening via the plugin. Click the Passbolt plugin icon and click 'create new'.
The name and URL of the website you are opening are automatically entered, so enter the user name and password you want to register and click 'Save'.

Enter your passphrase and click 'Submit'. This completes password registration via the add-in.

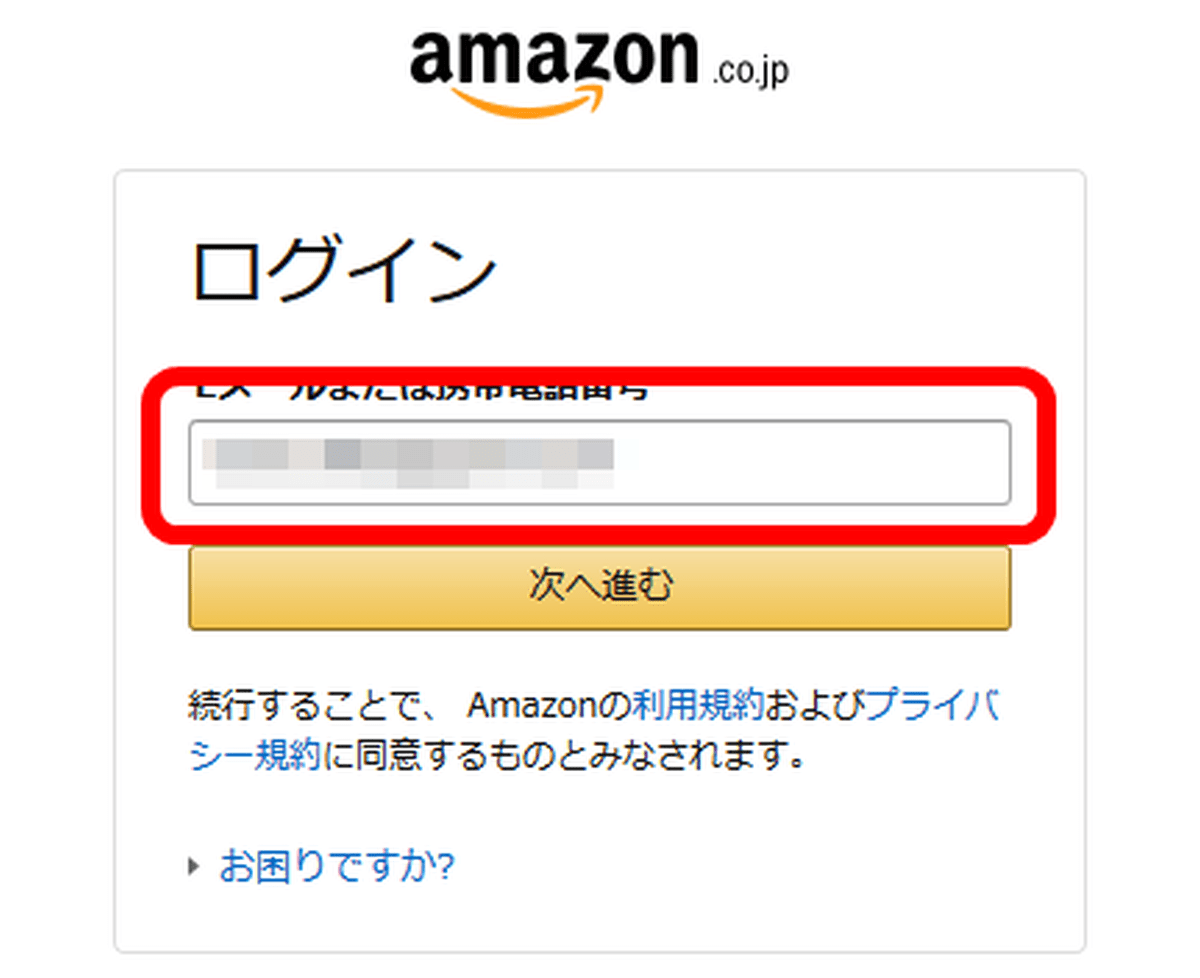
The password registered in Passbolt can be automatically completed on the website. Clicking on the icon will suggest a password for the website, so click on it.
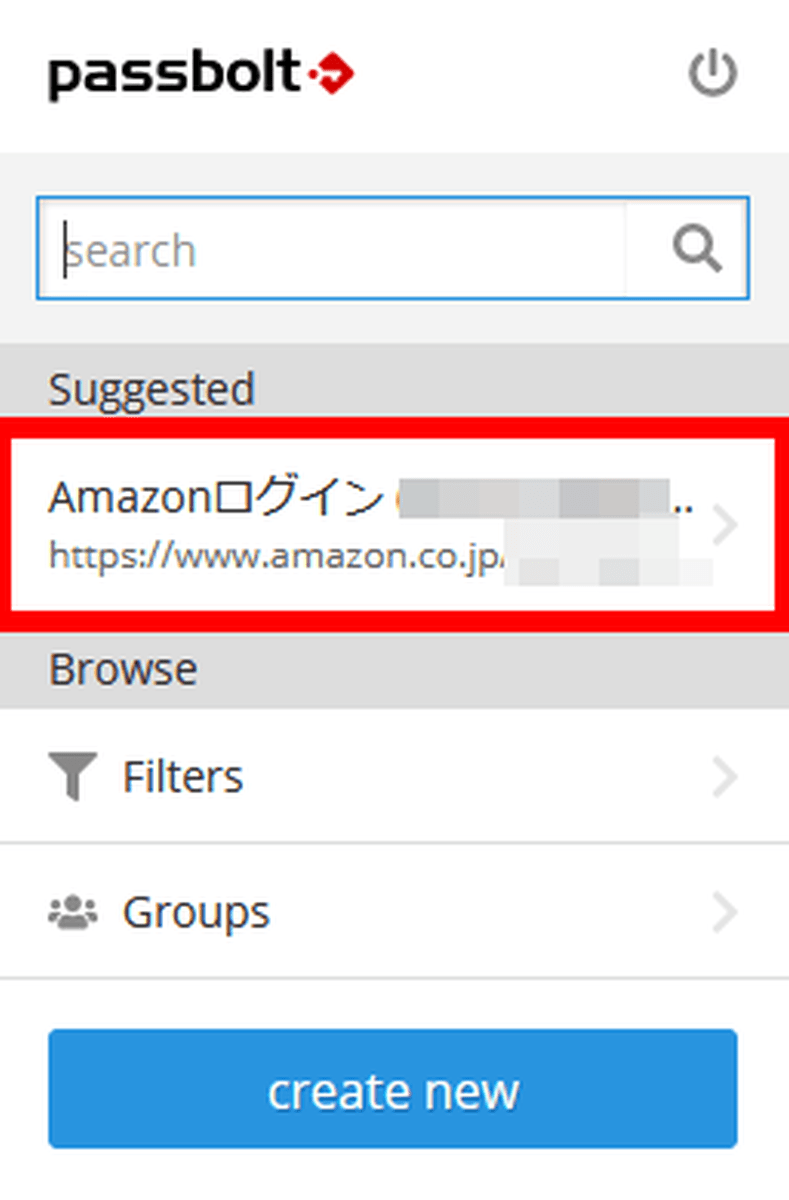
Click 'use on this page'...
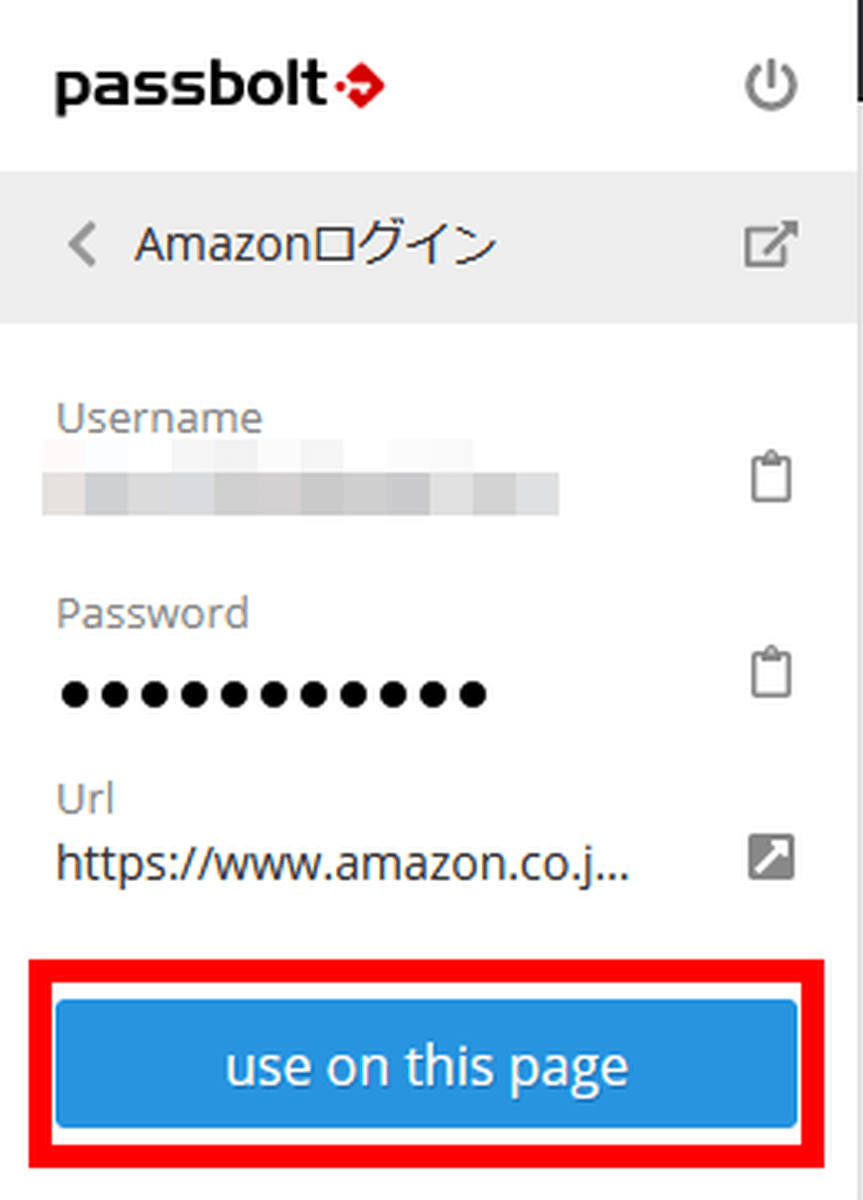
The user name and password will be auto-completed.
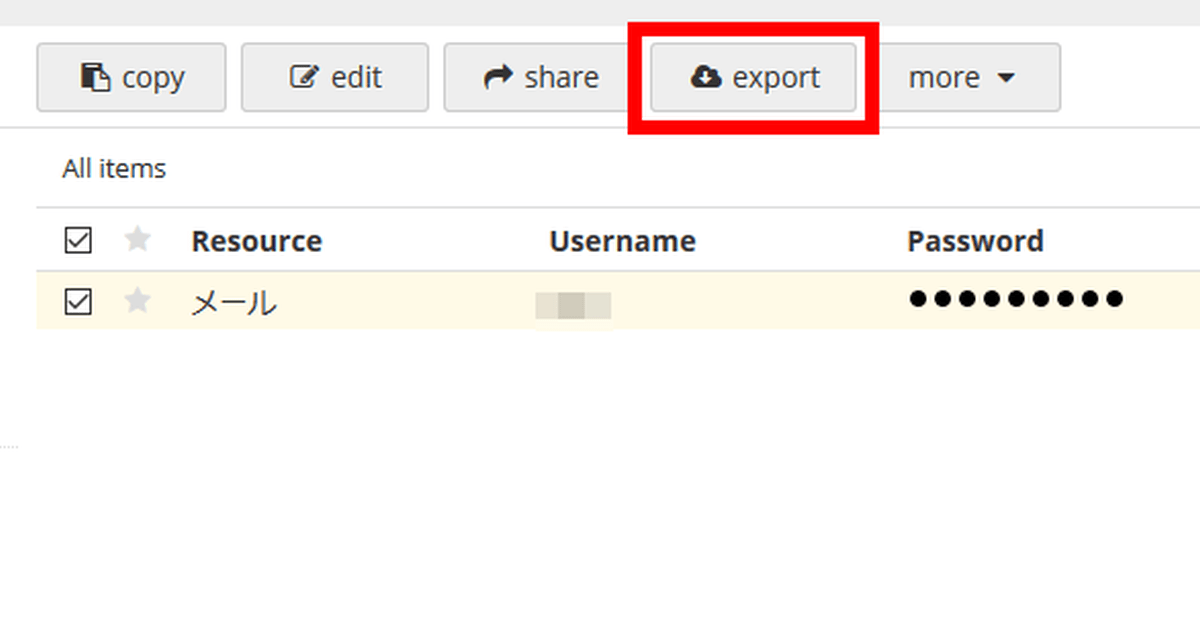
You can also output the password list in case of moving to another service or preparing for Passbolt database corruption. Click the 'export' button at the top of the list...
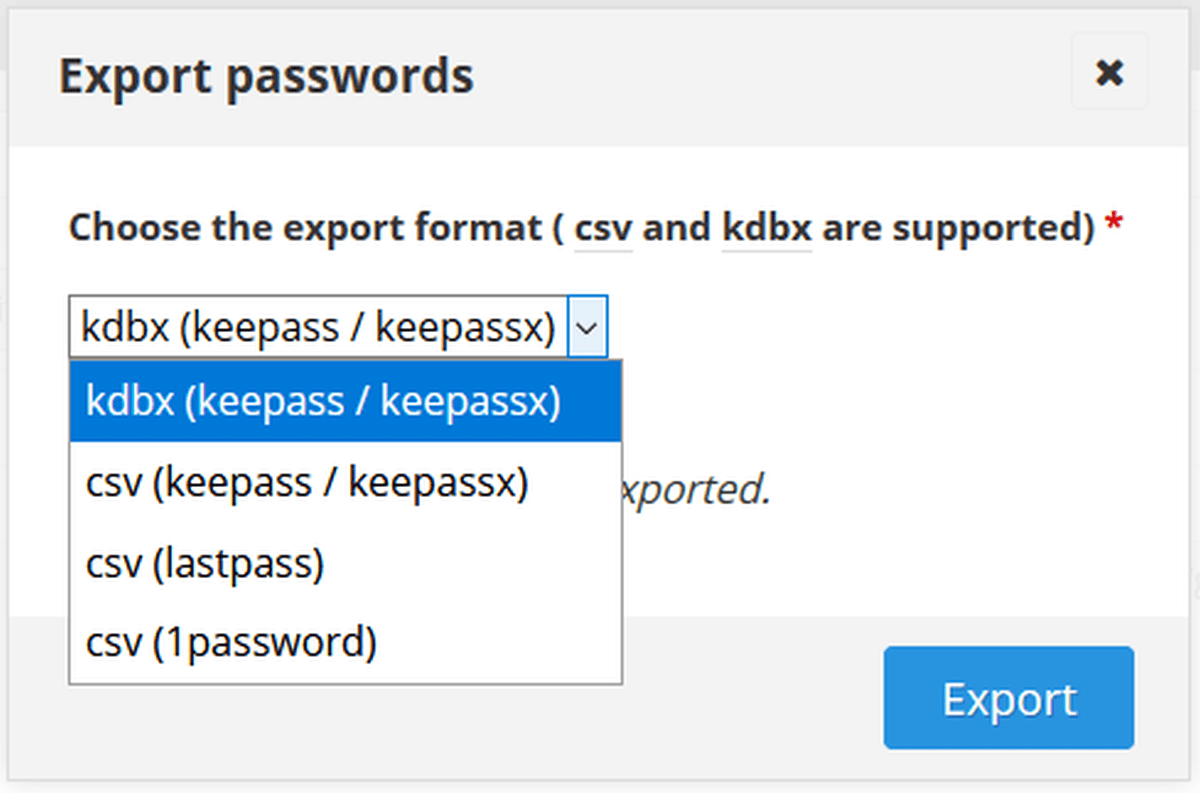
You can output the password. The output formats are kdbx and csv for KeePass, csv for LastPass, and csv file for 1Password.
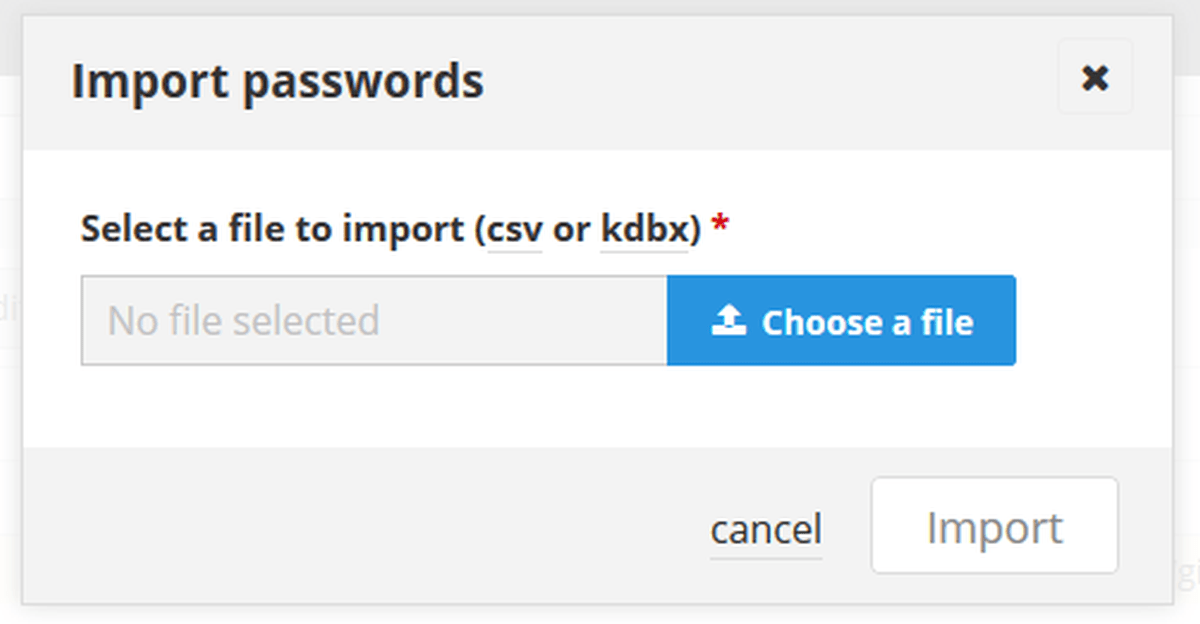
You can also read the password from the file by clicking the button in the red frame.

The file format that can be input is the same as the file format that can be output. You can easily switch from each service.
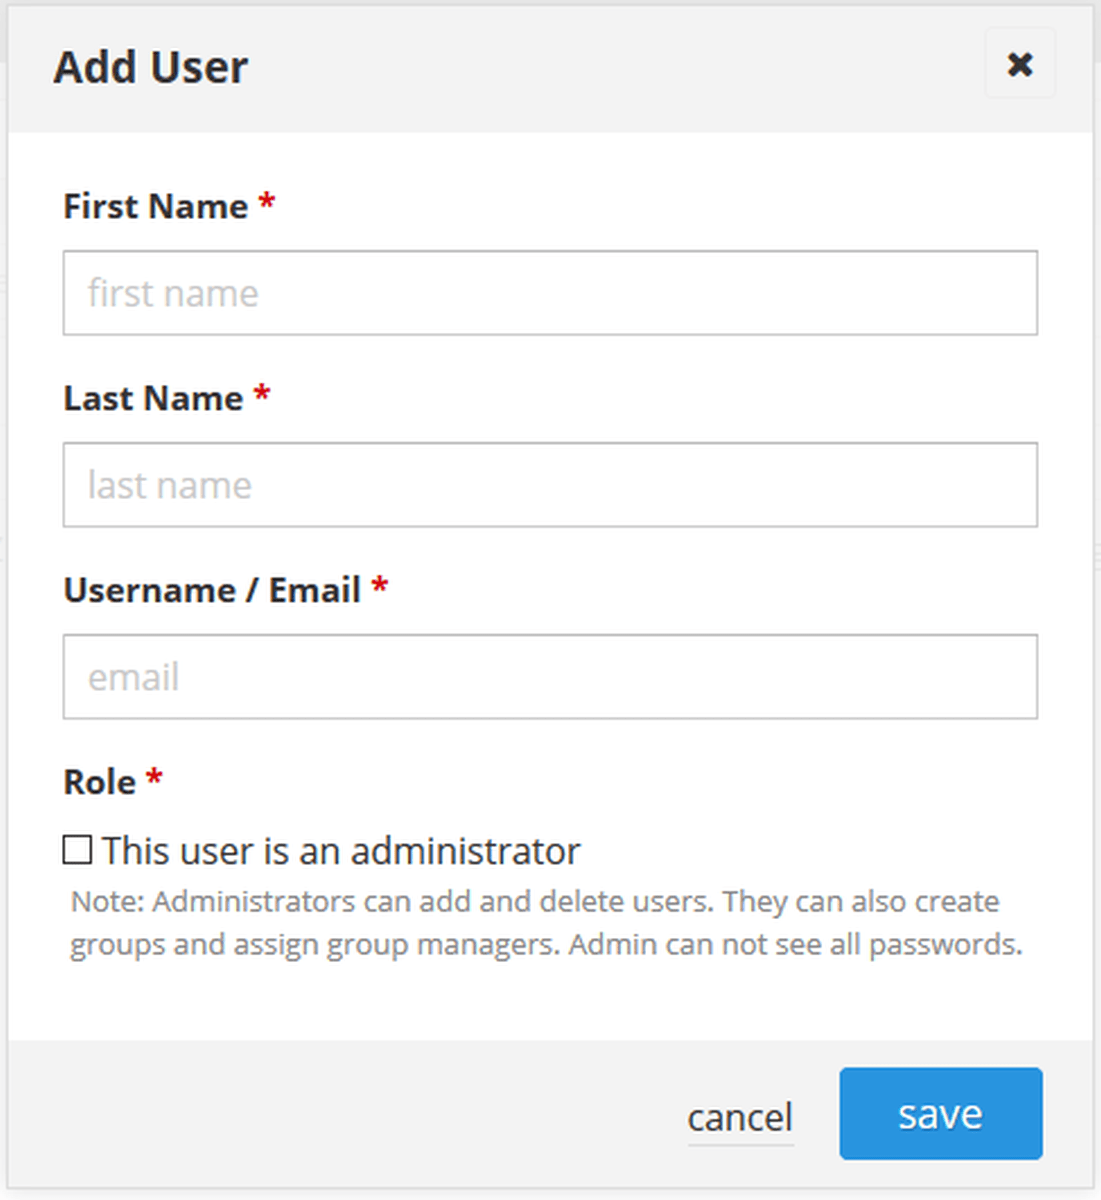
Passbolt users are managed from 'users' at the top. Click 'create' to create a user.
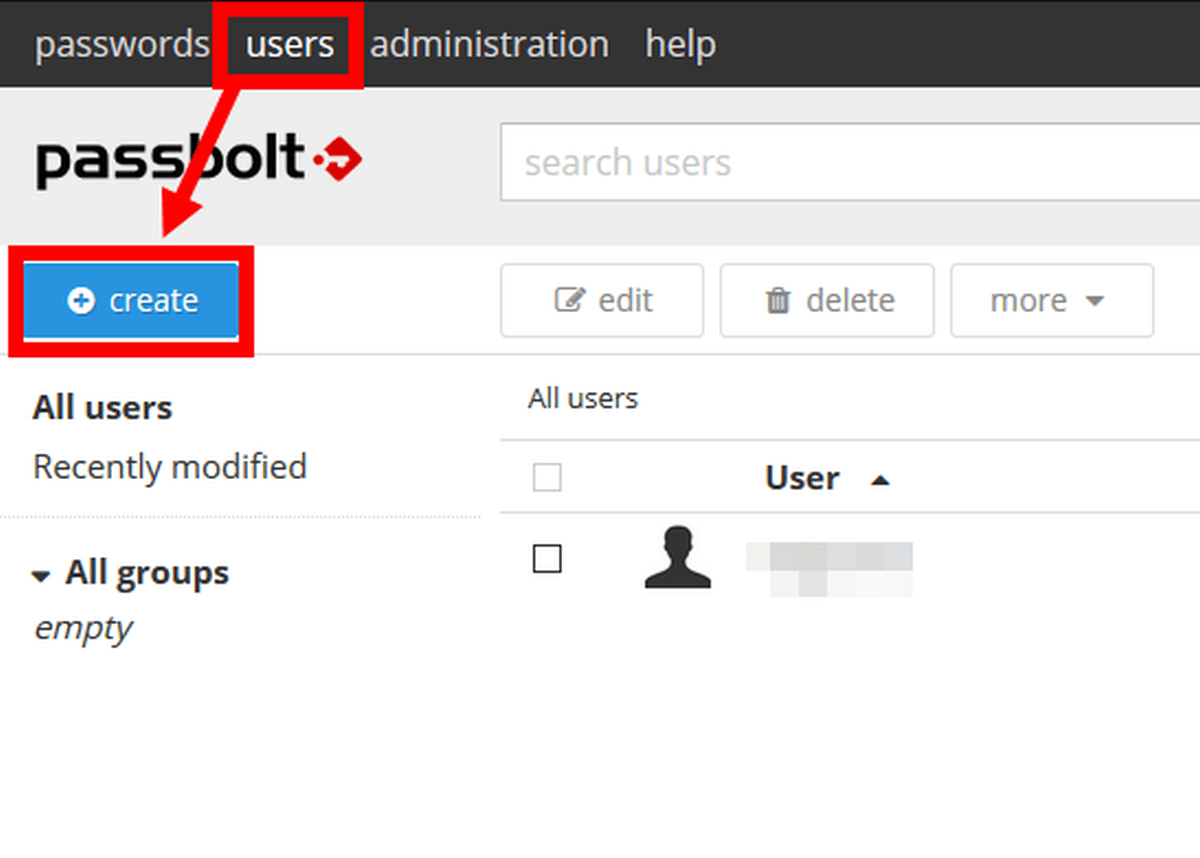
You can create users just as you created an administrator account during installation.
In addition, a business plan of 10 euros (about 1250 yen) per month can be used by up to 5 people and can use functions such as audit function and LDAP linkage function.
Related Posts:


in Software, Web Service, Security, Web Application, Posted by darkhorse_log