Starting from scratch iOS application development "Let's operate the screen using code"
Preliminary knowledge Let's develop iOS app from scratch! This is "iOS application development starting from scratch". In this time I will write a program using the language "Swift" and try to manipulate the screen from the program. Please note that this article is made with reference to official commentary articles.
Start Developing iOS Apps (Swift): Jump Right In
https://developer.apple.com/library/content/referencelibrary/GettingStarted/DevelopiOSAppsSwift/
It was the first one.Last timeRealized the screen transition only by setting the storyboard.
IOS application development starting from scratch "Application to switch screens with buttons" - GIGAZINE
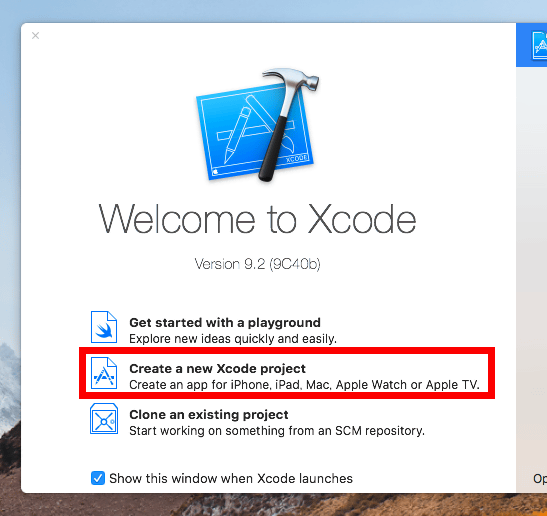
First, start Xcode and click "Create a new Xcode project" to create a new project.
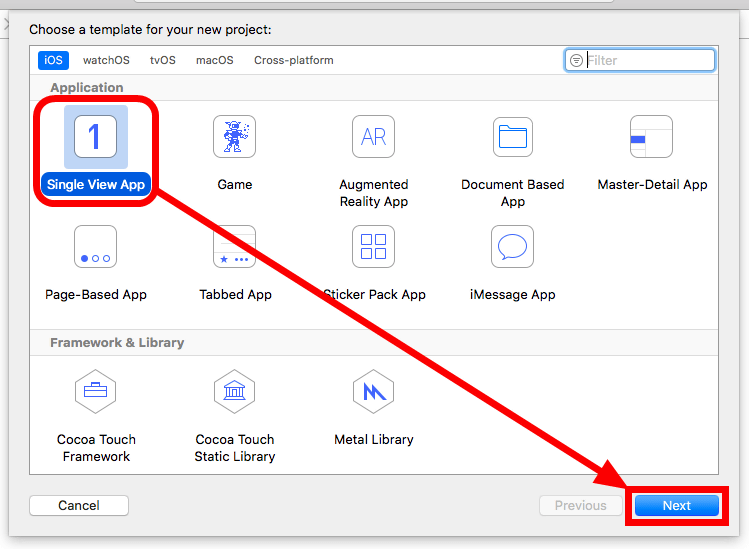
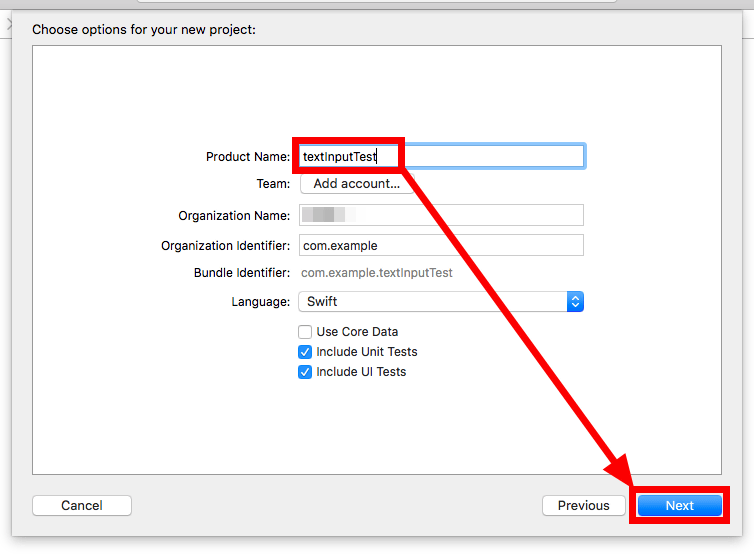
Confirm that "Single View App" is selected and click "Next".
Anything is OK for Product Name, but this time I'll keep it as "textinputTest". In the other columns1stSince the information you entered remains, just click "Next".
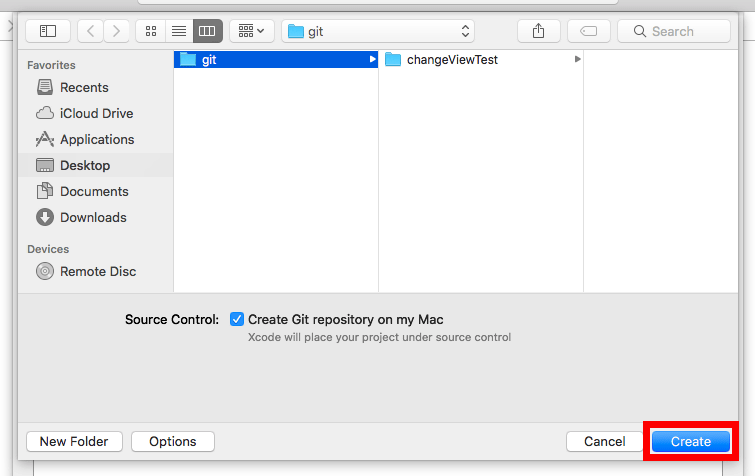
Select the save destination of the project and click "Create".
The project has been created. Here, when looking at the navigator on the left side of the screen, there are three displayed from the top: "AppDelegate.swift" "ViewController.swift" "Main.storyboard". I will briefly explain these three points.
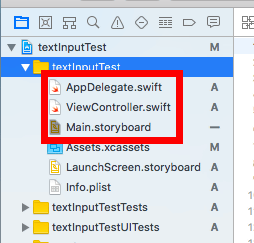
First of all, the file "Main.storyboard" at the bottom is a file in the form of "Storyboard" responsible for the layout of the screen, and it was also used in the previous screen transition application. Used when placing parts on the screen such as buttons and labels.
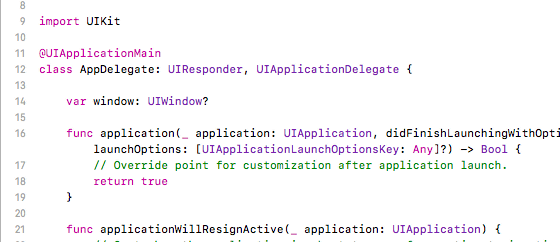
"AppDelegate.swift" is a file for setting the operation of the application itself. For example, "AppDelegate.swift" reads the setting of "~~ first when the application starts up" or "When the application is pressed on the background, Save the data of ~~ when migrating to "You can do settings such as. Perhaps novice never touches this file, so please leave it in the corner of your head, "there are such things".
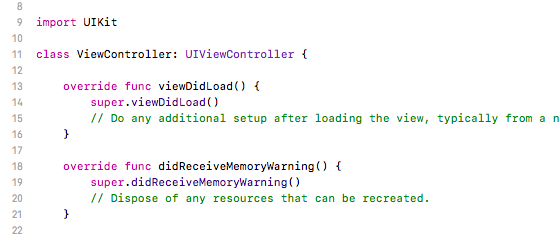
"ViewController.swift" is a file to set the screen display. If one screen on the storyboard and one ViewController are set, for example when creating a menu screen with a storyboard, if you create "menuViewController.swift" to set its behavior or create a game screen "gameViewController I will make .swift. Detailed methodWanabe's blogPlease refer to and etc.
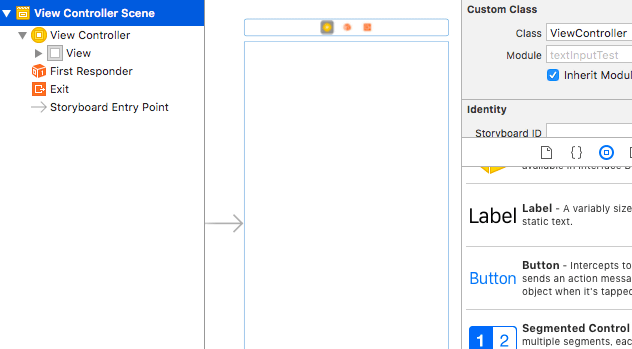
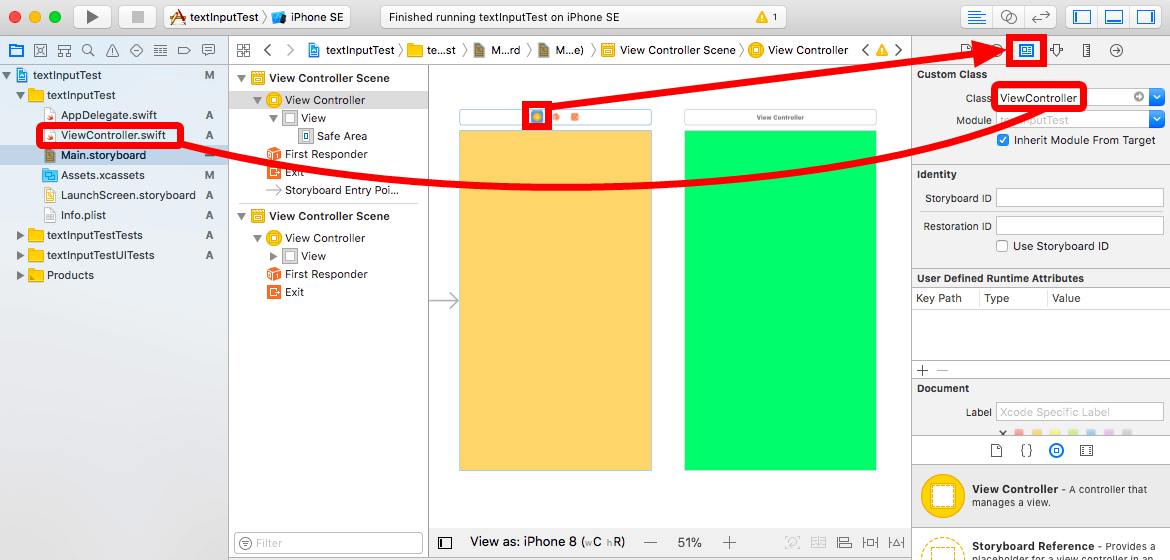
To check the ViewController associated with the screen, click the yellow circle "View Controller" in the upper left of the screen, open "Identity inspector" from the square button on the upper right, and click on the "Class" at the top I will look at the column. For example, in the image below, the column column is "ViewController", which means that it corresponds to "ViewController.swift" in the navigator on the left side of Xcode. Since "ViewController.swift" is tied to the orange screen, basically it is not possible to manipulate the green screen. If you want to manipulate the green screen, you need to prepare and tie another swift file as described above.
· Relationship between Class and swift file
In the above explanation, Class and swift files are not separated, and these two items are described as if they are one body. This is because it follows the rule "write code for only one class in one swift file, make the class name and swift file name the same". I do not recommend it, but in reality it is also possible to write multiple classes in one swift file. To be precise, it is a class created inheriting the class called UIViewController which is linked with orange and green screens. In order to make it easy to understand that it is a class connected to the screen, name it "Nantoka ViewController" It is.
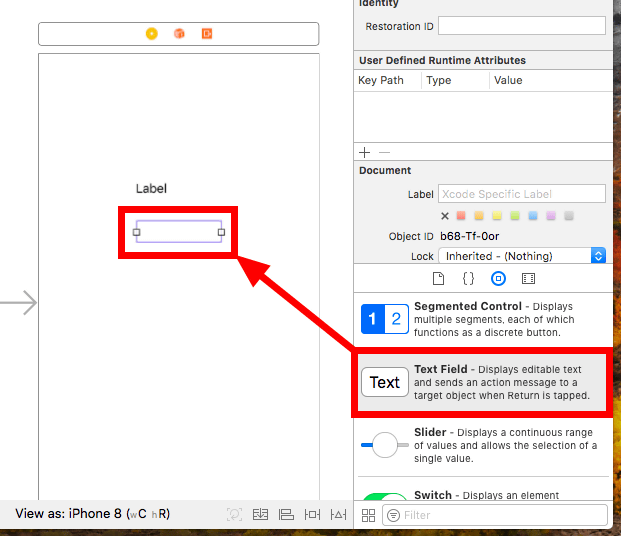
Since the screen is going to create one application this time, I edit "ViewController.swift" corresponding to this screen, but first place the UI such as labels and input fields with the storyboard. Drag the parts labeled "Label" from the bottom right and place it on the screen of the storyboard.

Place "Text Field" as input field together.
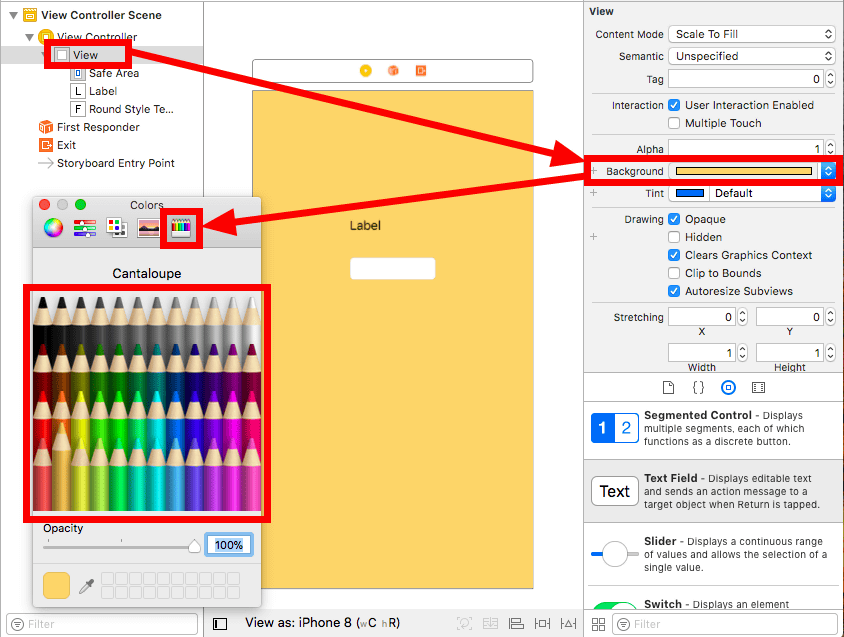
I do not feel that the background is white, so I try to make it orange. Select "View" from the document outline on the left side of the storyboard and click "Background" on the right. Since the color selection palette appears, you set the color in any way you like. In this time, I clicked on the color pencil mark on the right end and clicked on the color pencil below to select it.
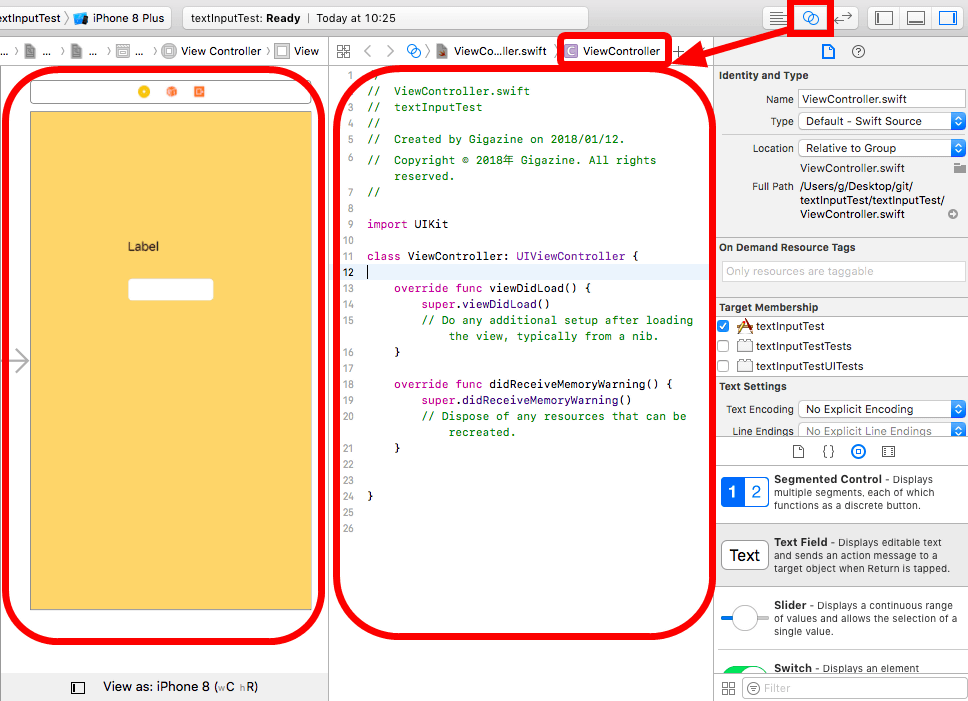
Then I will write the code to set the screen. Clicking on a mark like a double ring at the top right will bring you to the Assistant Editor mode. The screen is divided in half, "ViewController.swift" corresponding to the screen selected by the story board on the left side and the story board on the right side is displayed.
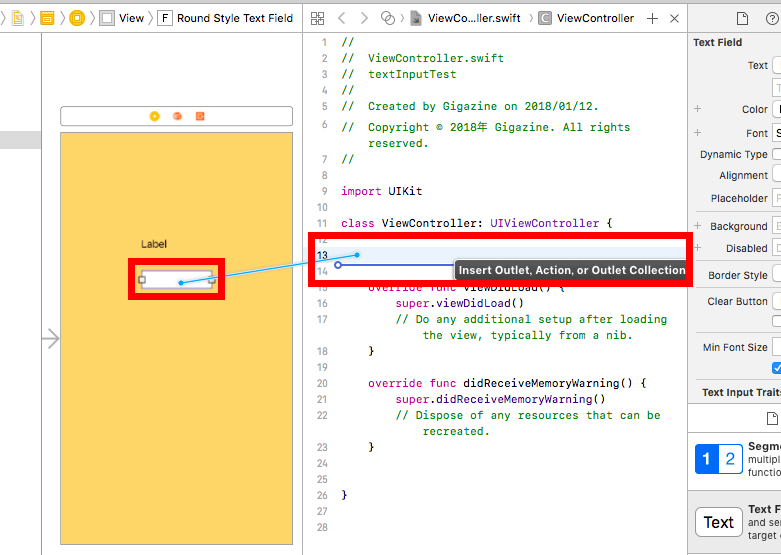
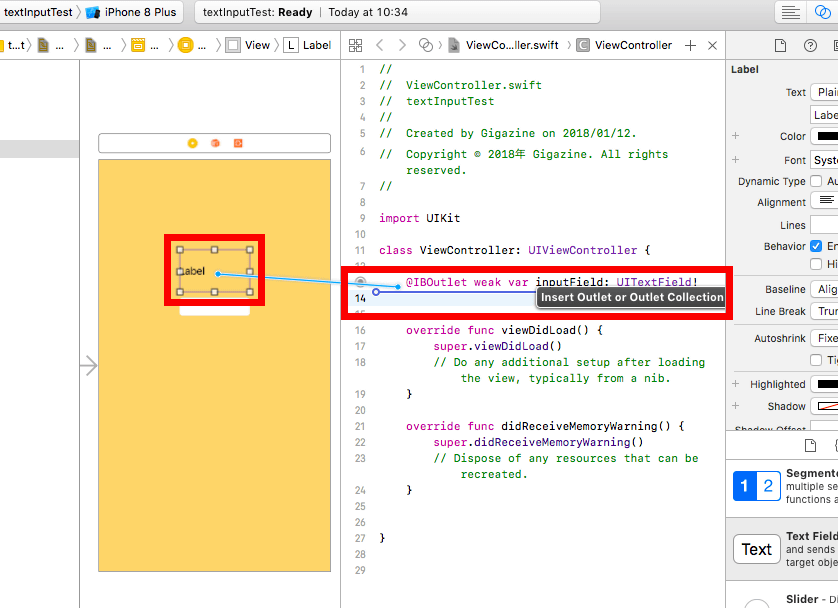
First of all connect parts of the screen to the code. Please think that it is the declaration "operate this part with this code" OK. Hold down the "control" key while dragging the text field of the screen to the line under "class ViewController: ~". Notice that it is the "control" key to the left of the "A" key, not the "command" key under the "Z" key.
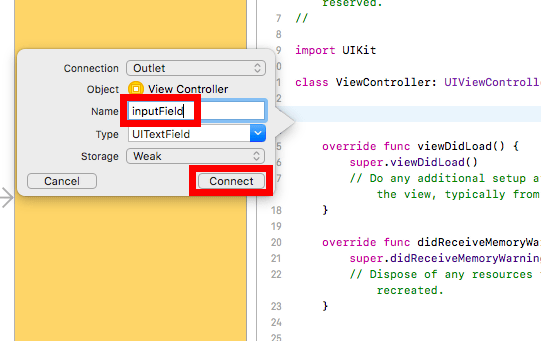
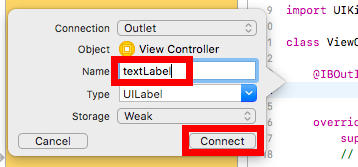
In the "Name" column, give a name to the part to be connected. Anything is OK, I entered "inputField" and clicked "Connect" because I thought that I would use it in the input field.
Similarly hold down the control key and drag, bring the cursor to the bottom of the line created earlier and release it.
This time I named "textLabel". Leave the rest as it is and click "Connect".
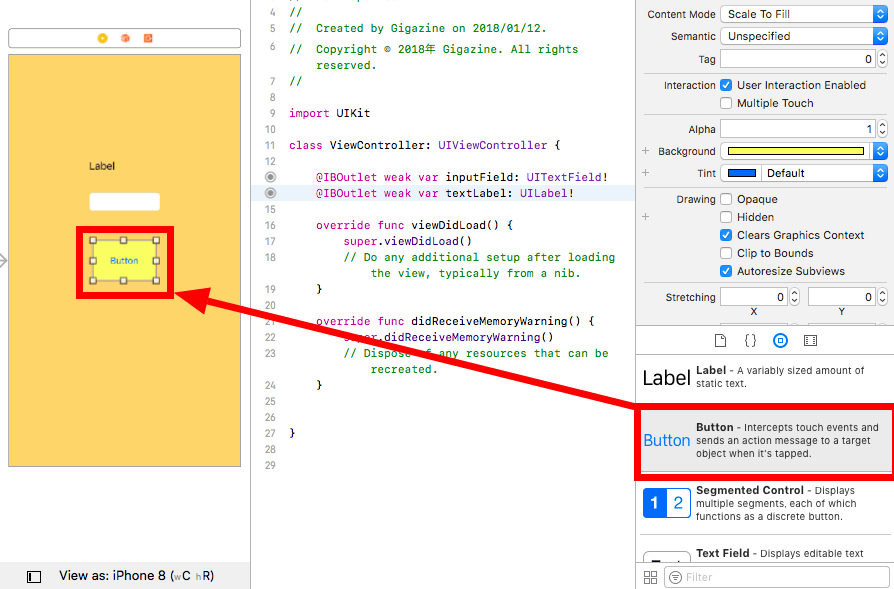
Since the button is not yet arranged, find "Button" from the object library in the lower right and install it by dragging and dropping.
Now I do not want to manipulate the buttons themselves, but I'd like to set the behavior "to do when the button is pressed", so unlike the previous control + drag to the top of "didReceiveMemoryWarning ()" I will.
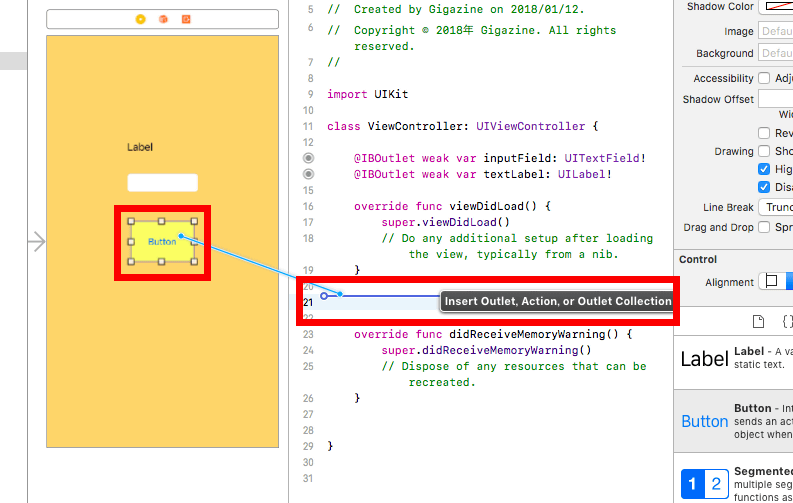
Then set the "Connection" field to "Action".
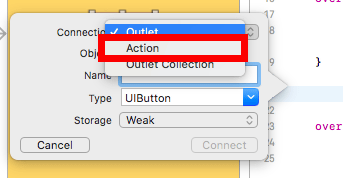
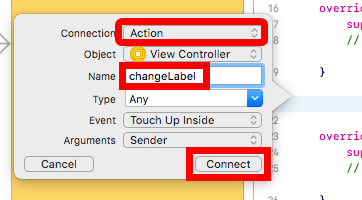
If you set the top to "Action", whatever it is, name it and click "Connect". This time I made it the name "changeLabel".
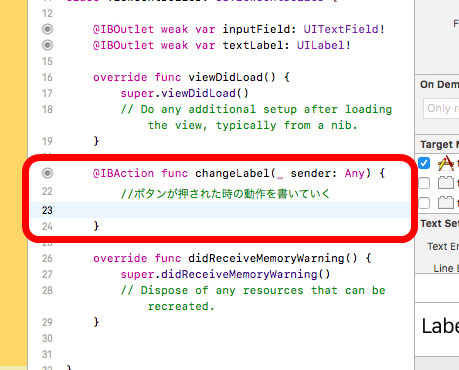
The code is generated automatically. As in the image below, "@ IBAction func ~ sender: Any){"In the third row,"}I will write the code while closed. This time we write "to output the input characters as they are on the screen" with the code "The characters of the labels on the screen are the same as the characters that are entered in the input field where this is placed again on the screen This is the code to do. Make a note as "// write the action when the button is pressed", which makes it easier to understand what you are doing. In the specification of Swift, if you write two slashes, you can regard the line feed as a comment after that and you can leave memo writing freely.
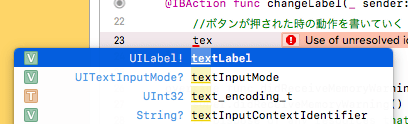
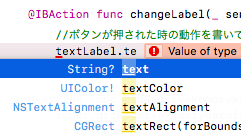
I used the name "textLabel" when connecting labels placed on the screen to the code, so I use that name to access the labels on the screen. Completion candidates will appear automatically below when you enter "tex". Confirm that "textLabel" is selected in blue and press the enter key.
As it is, the dot "."You can access the properties that textLabel has. Since we want to change the character displayed in textLabel this time, enter "text". What other properties are there?Official document (English)Please refer to such as.
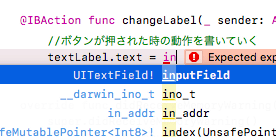
I will not deepen details as to details, but "="Is a sign meaning" make the one on the left the same as the one on the right. " Since "textLabel.text", that is, "character to be displayed on the label arranged on the screen" has been set on the left side on the left, next time we write the code meaning "characters entered in the input field" on the right side I will. When connecting the input field arranged on the screen to the code, we named "inputField", so first enter that name first. Since the complementary function also works here, if you enter halfway and "inputField" is displayed below, press the enter key to enter.
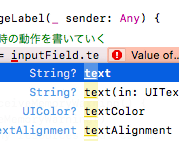
As it is in the case of textLabel ".I will write "text".
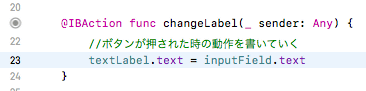
To summarize it looks like the image below. This single line of code means "let the text displayed in textLabel be the same as the character entered in inputField".
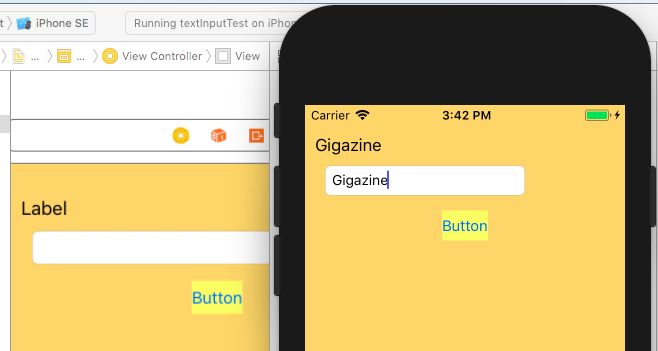
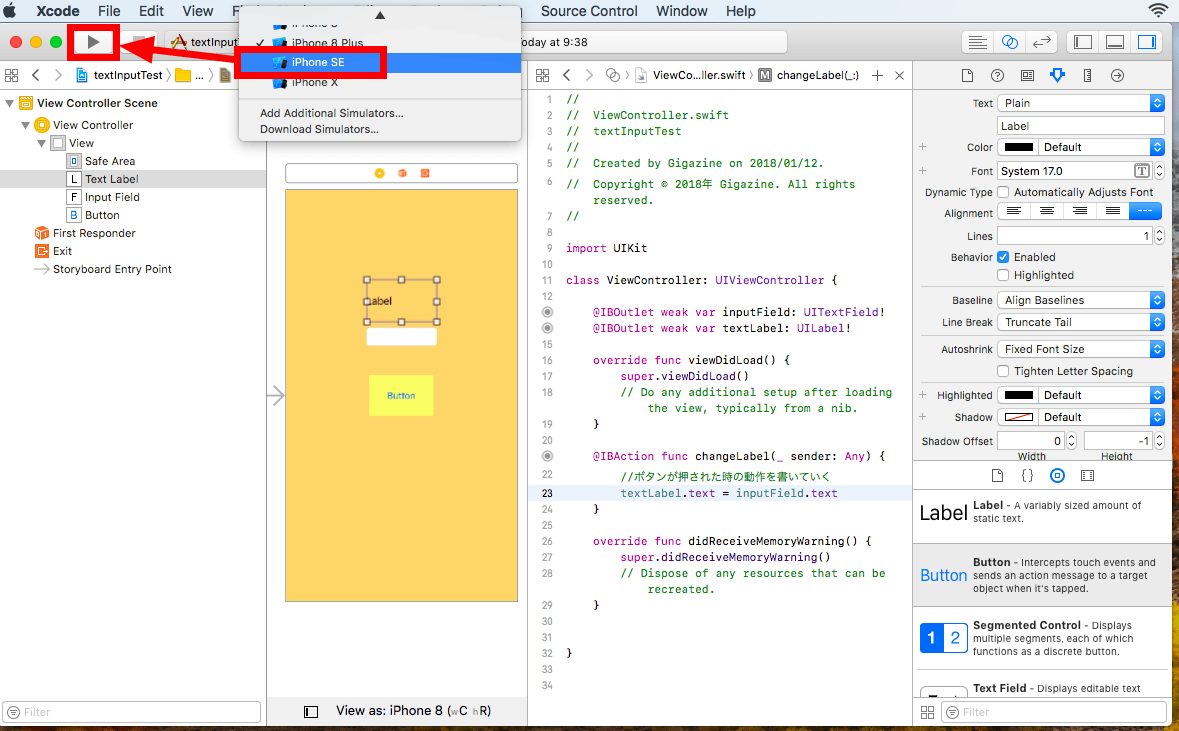
I will try it at once. However, since the simulator that starts up as standard is the one of "iPhone 8 Plus", it is too large and it is difficult to grasp the whole screen, so click on "iPhone 8 Plus" displayed on the right side of the execution button Then change it to "iPhone SE". Just click on the upper left triangle to execute.
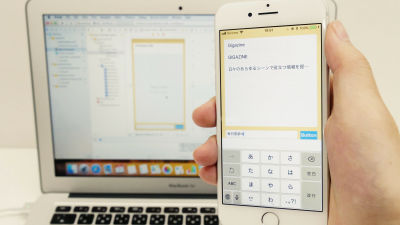
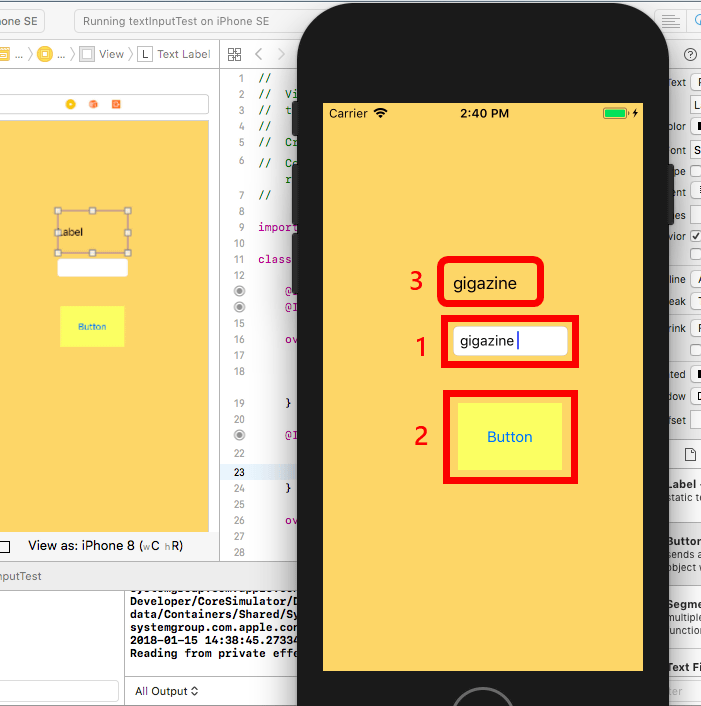
Since the simulator starts up, enter a character in the input field of "1" in the image below and click the button of "2". Then, the same characters as the characters entered in the label of "3" were displayed. The code works fine, but because I made the simulator to iPhone SE, the display has shifted. I will modify it gradually as it is somewhat concerned.
Click the horizontal line mark in the upper right corner of Xcode to restore the editor mode to the standard one.

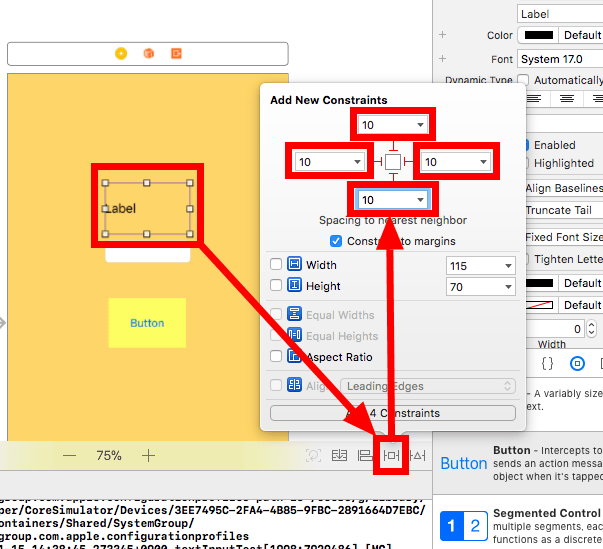
Then you will return to the screen of the storyboard. Click here to select the label, and then select "| □ |"Click on the marks to set constraints on the layout. For example, if you set 10 points away from the nearest parts and press the enter key ......
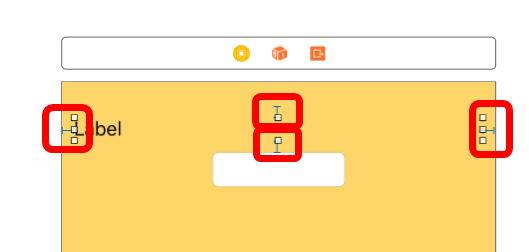
It is automatically rearranged so that the distance between the upper, lower, left and right parts is 10 points each. This is characterized in that it is maintained even if the terminal changes, and it will automatically lay out so that the iPhone 8 Plus and iPhone SE leave 10 points in the same way, so it is possible to display in the same way.
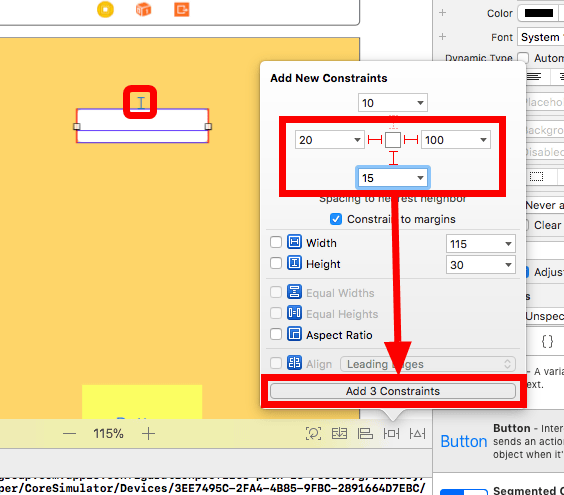
Let's set layout constraint also in the input field under the label. Since the space with the above is the same as the "space under the label set in" above, set the other three appropriately and click "Add 3 Constraints" below.
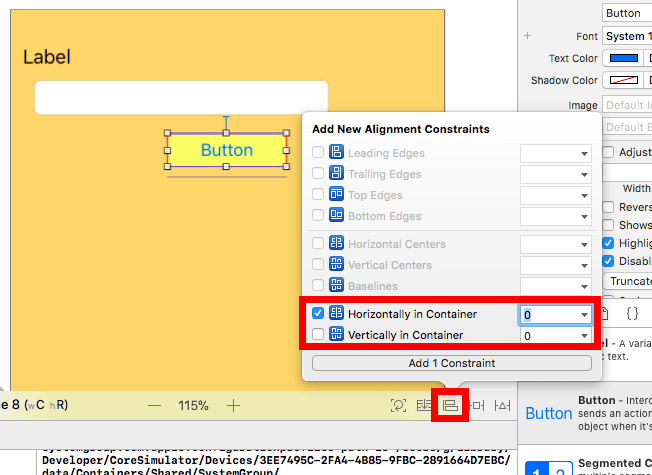
Because I want to place the button in the middle,| □ |Press the "Align" button of a mark such as two overlapping squares next to the left, check the "Horizontally in Container" and press the enter key.
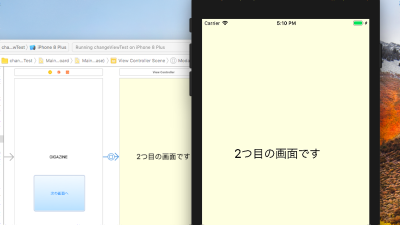
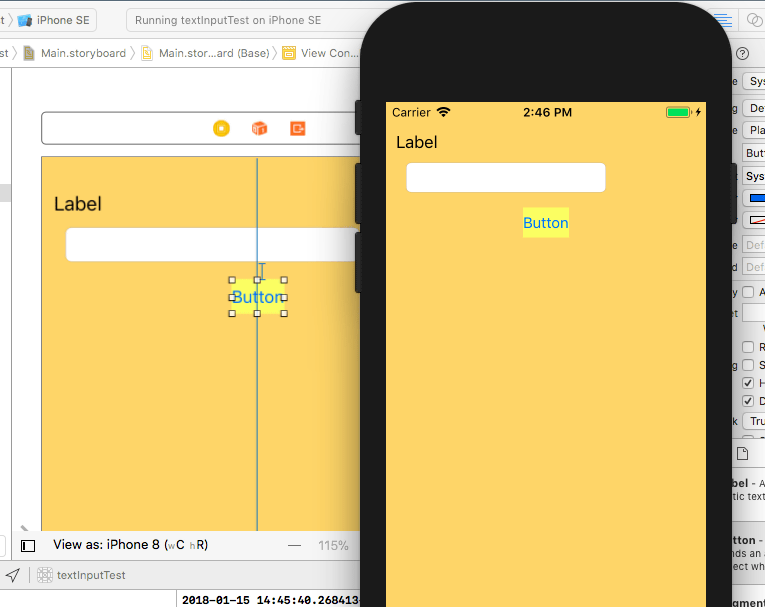
When I ran it, it was displayed as the layout as shown in the image below. By setting various constraints, it will be possible to display the same way on different terminals.
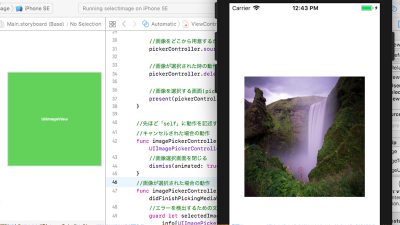
Next time, I'm planning to create an application that reads and displays images in the iPhone.
· Continued
IOS application development starting from scratch "Selecting and displaying images saved on iPhone" - GIGAZINE
Related Posts: