I tried using the Chrome extension "Deskun" that allows multiple email accounts and SNS customer support to be operated collectively on Gmail
Many people who operate net shops and creative projects often introduce products and works on their own sites, SNS and other platforms, and purchase and purchase products and works Questions about products and works may be gathered from users who are studying or doing things. However, if you have multiple consultation windows from users, it is very hard to deal with each. Chrome which can manage the help center function on Gmail, perfect for those who have trouble saying "You can not turn your hand to the tasks that are kept warm by the question mails and SNS messages coming in one after another ... ..." Extended function "DeskunI tried using it.
Multichannel helpdesk system inside Gmail | Deskun
https://deskun.com/
◆ Installation
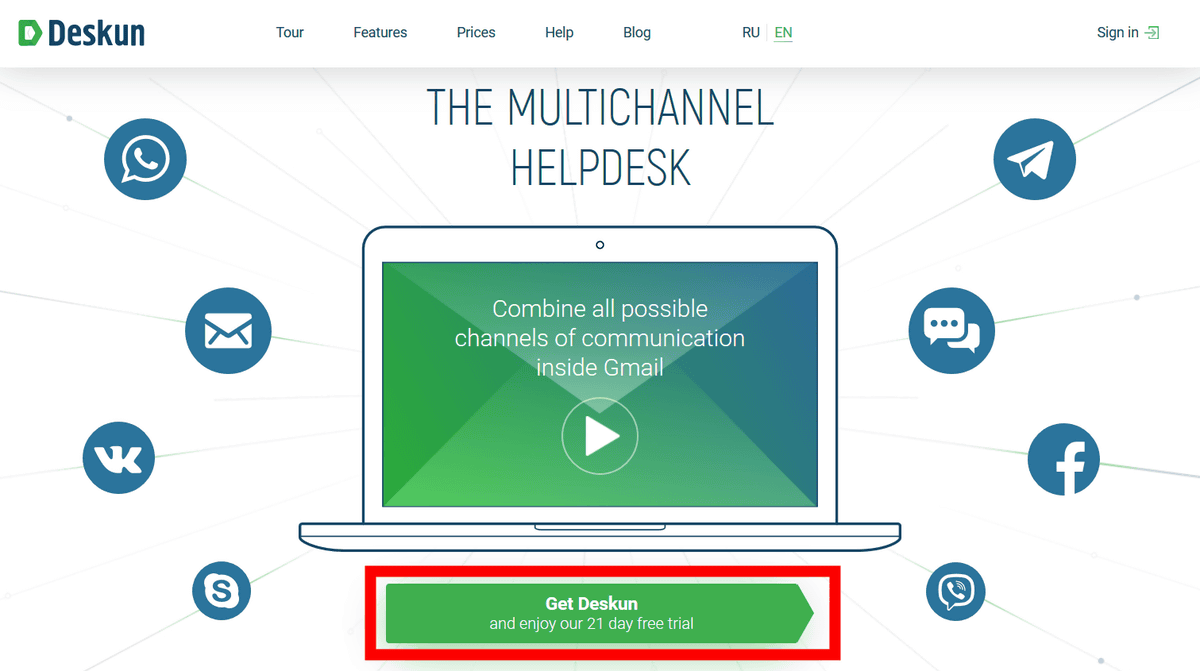
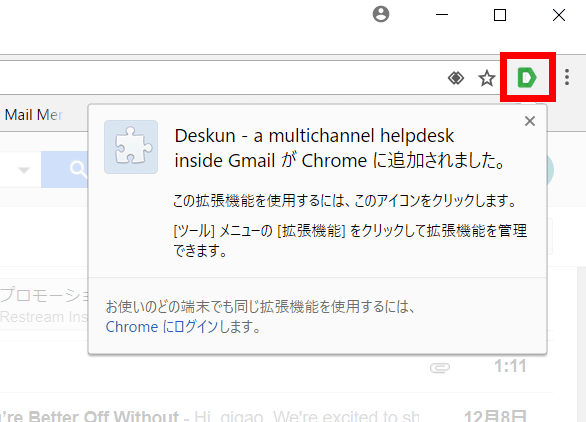
In Google Chrome "Deskun"Official pageOpen "Get Deskun" at the bottom.
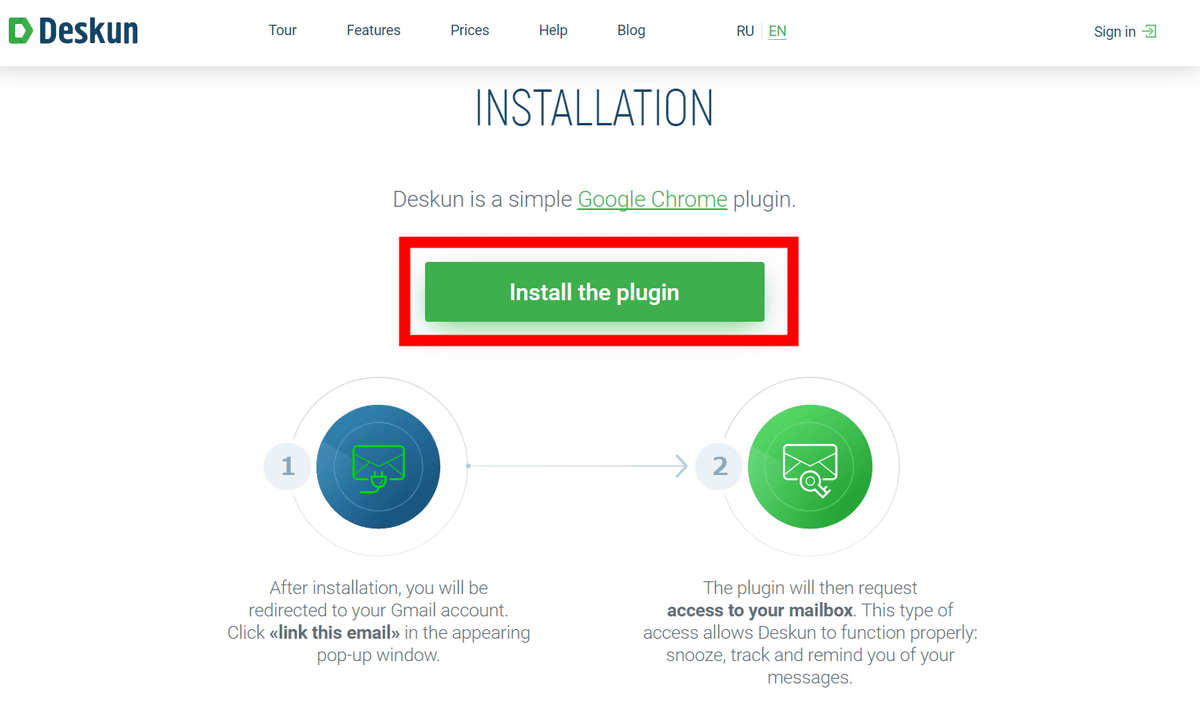
Click "Install the plugin".
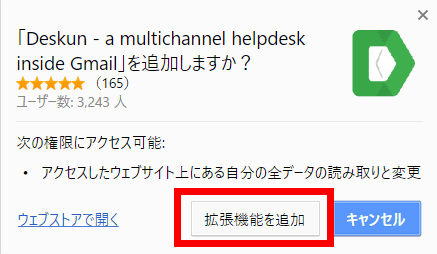
Since the confirmation popup for adding extended functions is displayed, click "Add extended function".
Then you will be asked if you want to allow cooperation between Gmail address and "Deskun", so click on "Link this email" if you are ready to collaborate now. If you want to finish cooperation later, click "Not now" OK.

"Deskun" is an extension of Google Chrome so you can link with Gmail at any time by clicking on the icon in the upper right corner of Google Chrome.
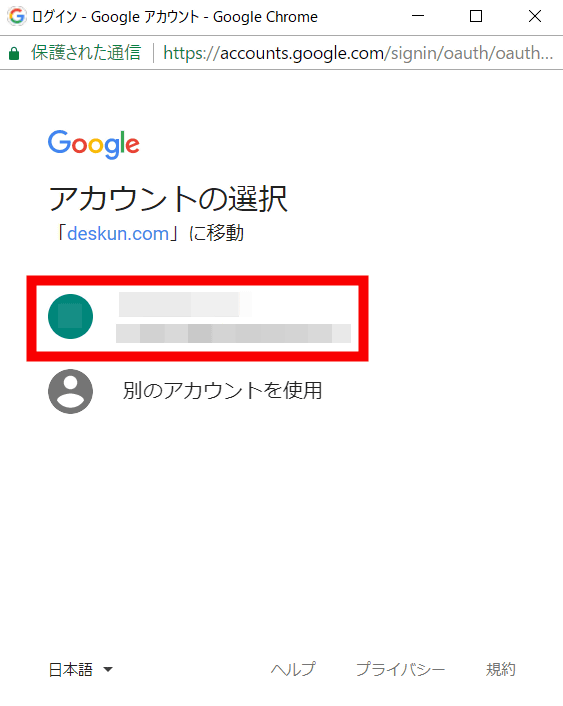
Clicking "Link this email" opens a popup for account selection, so click on the Gmail address you wish to link with.
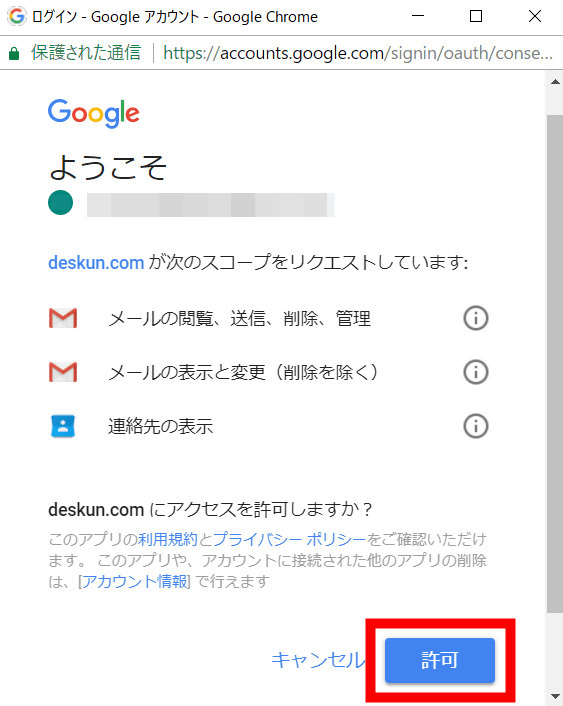
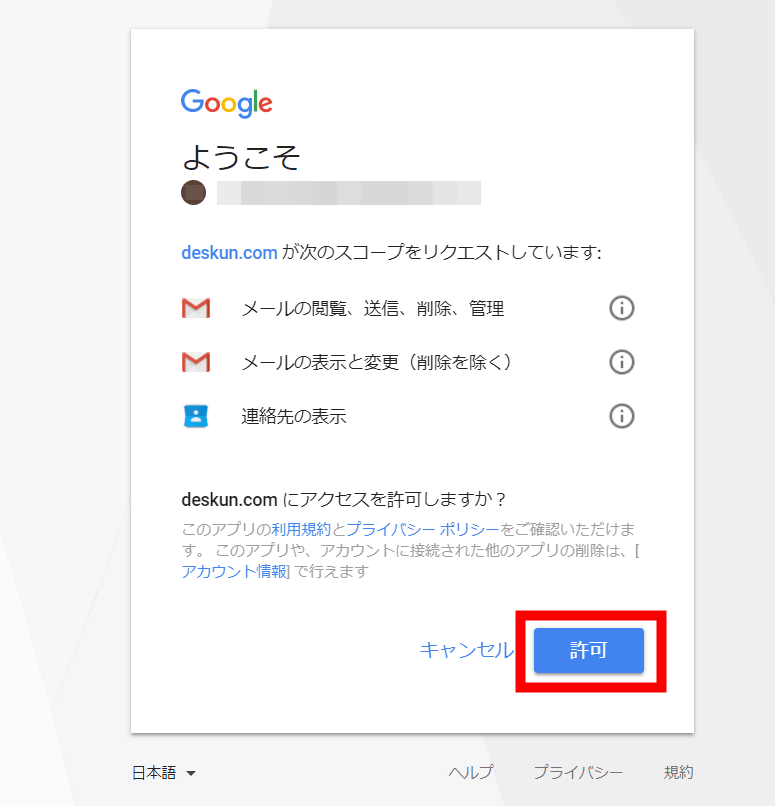
"Deskun" asks for permission to access Gmail, so click "Permit".
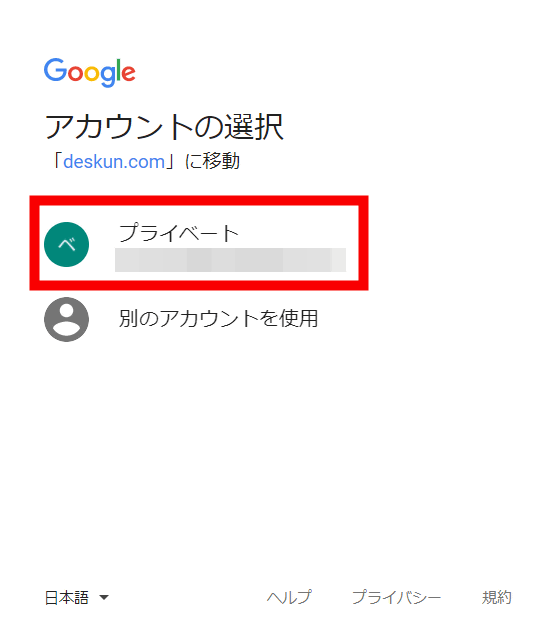
Then a popup will open that will prompt you to move to your Gmail account again, so click on the Gmail address associated with "Deskun".
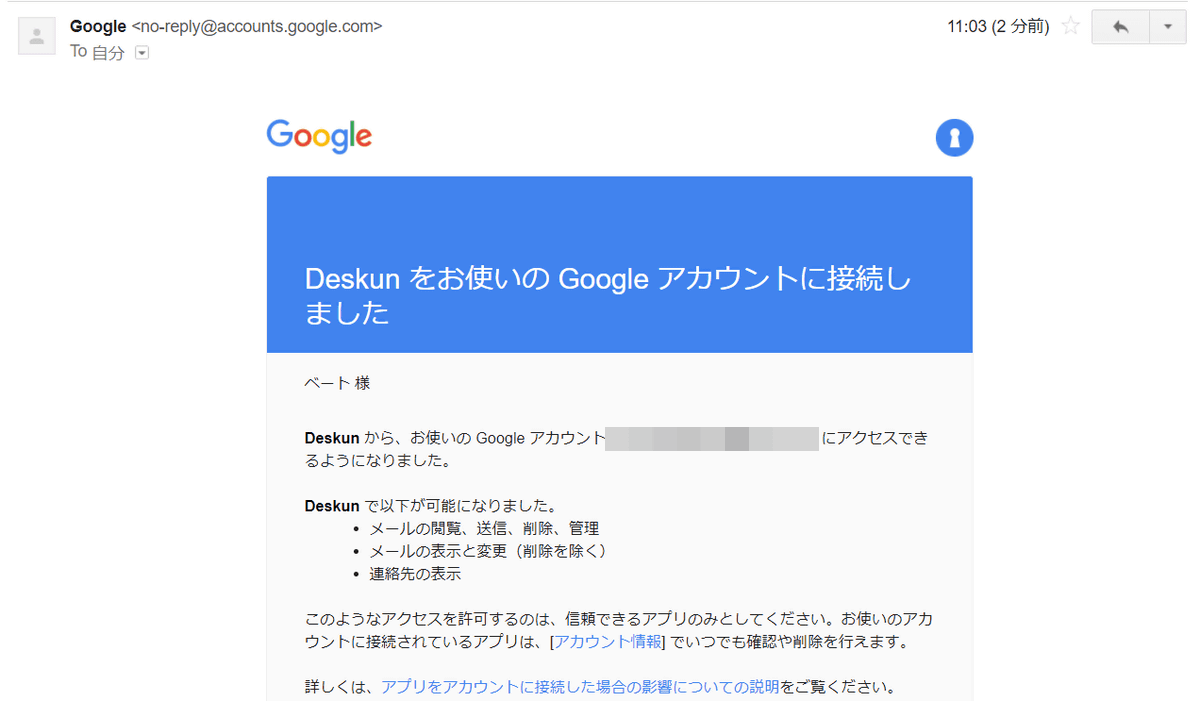
Since you receive an email notifying that the linkage with "Deskun" is completed to the registered Gmail address, installation of "Deskun" is completed.
◆ Create a project and invite team members
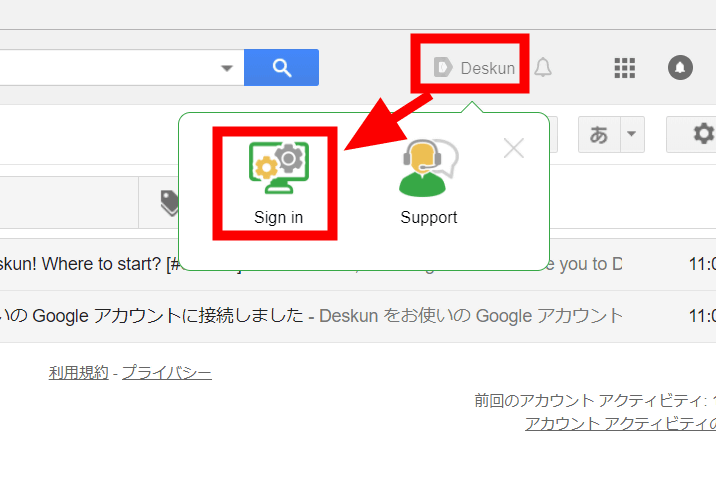
With "Deskun", you can manage mails sent to multiple email addresses as one project with one Gmail address and manage them with other team members. Since you need to sign in to use the "Deskun" function, click the "Deskun" button at the top right of Gmail's page linked with "Deskun" and click "Sign in".
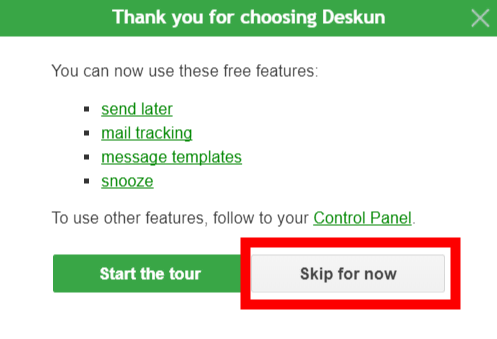
For the first time, a popup will appear that will take you to the page introducing the features of "Deskun". This time, click "Skip for now".
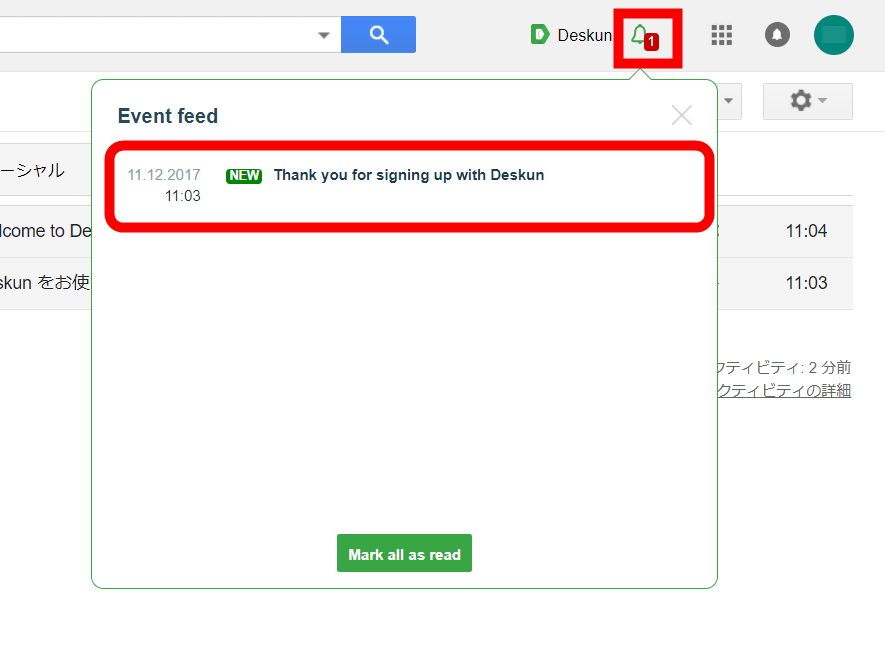
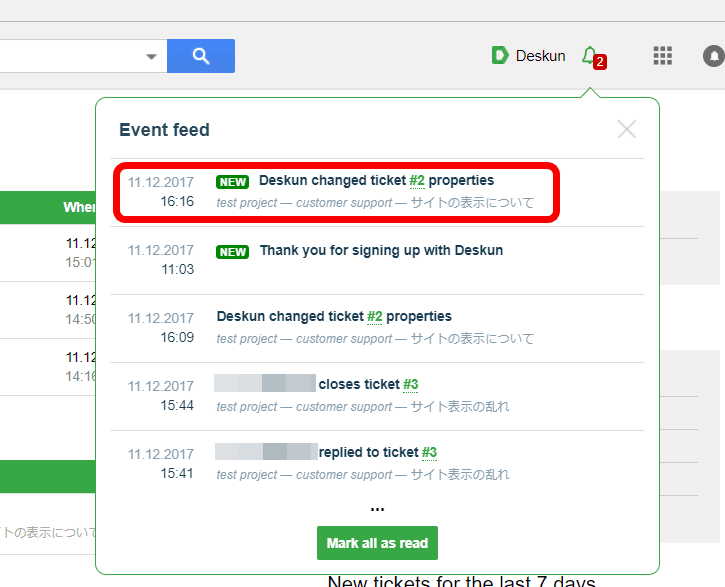
When signing in "Deskun" is completed, a bell mark will be displayed at the upper right of the screen. By clicking the bell mark you can read the notice from "Deskun".
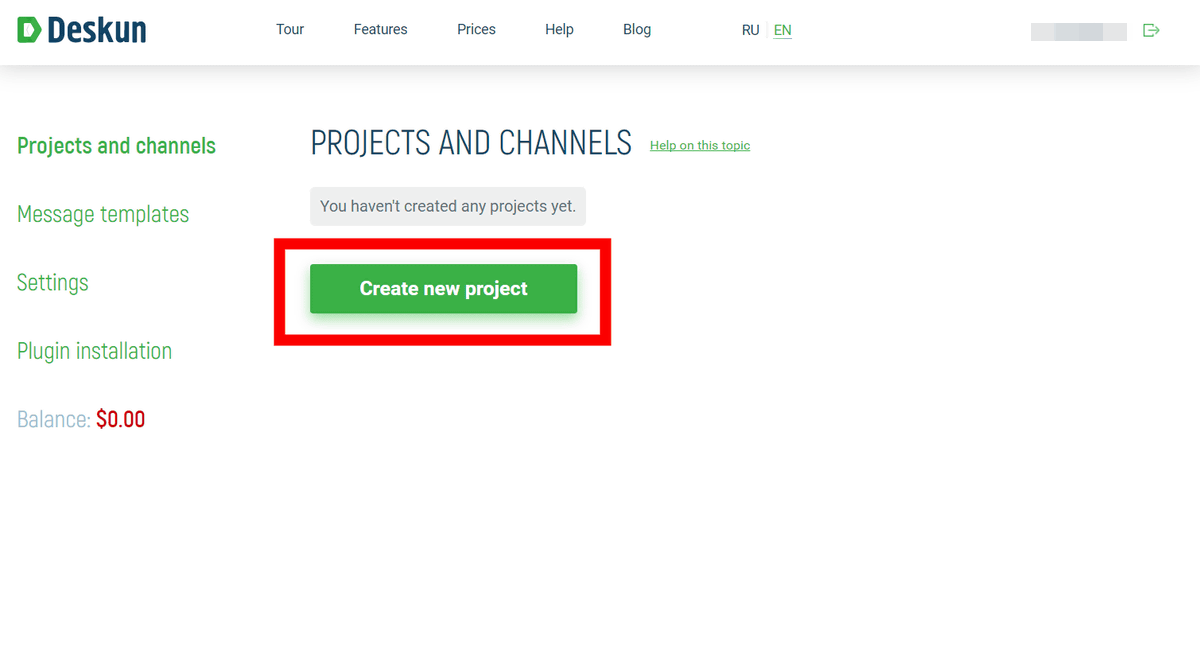
After logging in again click the "Deskun" button, the "Deskun" menu screen opens. Click "Control Panel".

The project creation screen using the "Deskun" function opens. Click "Creat new project".
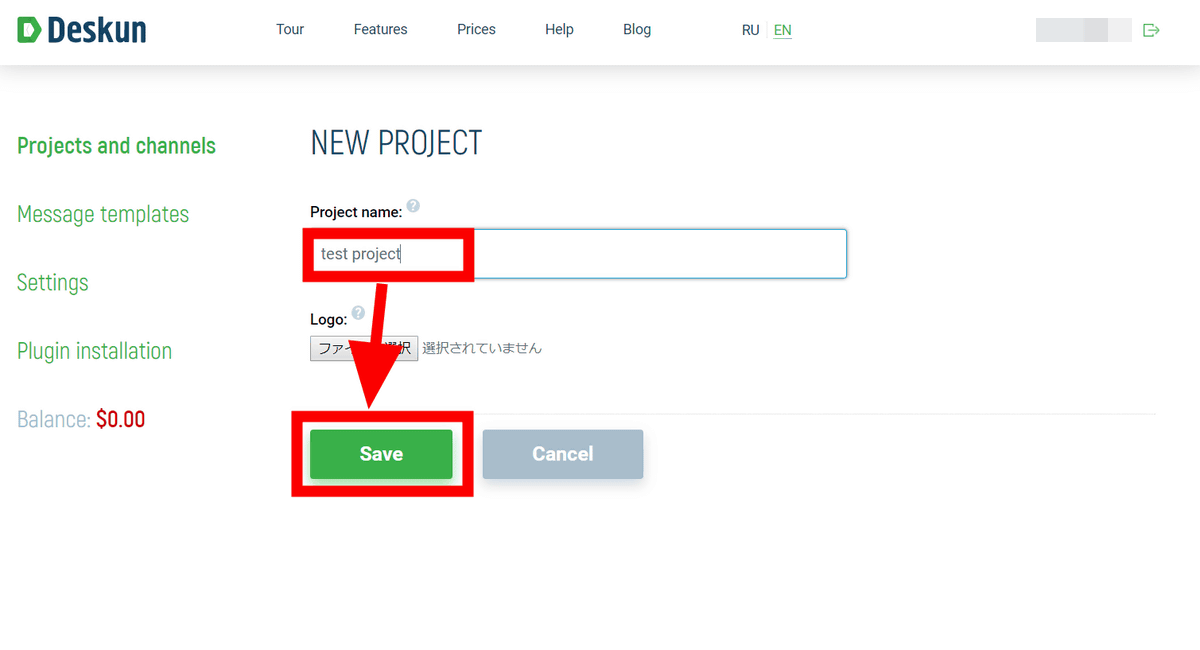
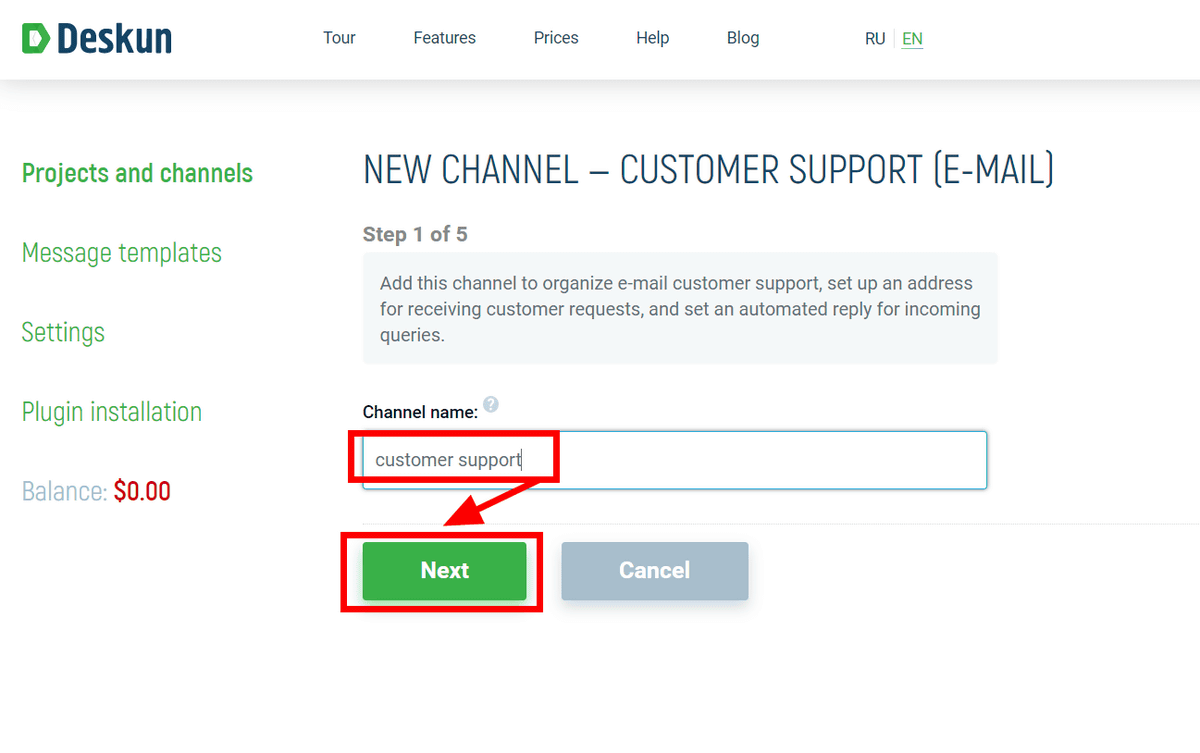
Enter the project name and click "Save".
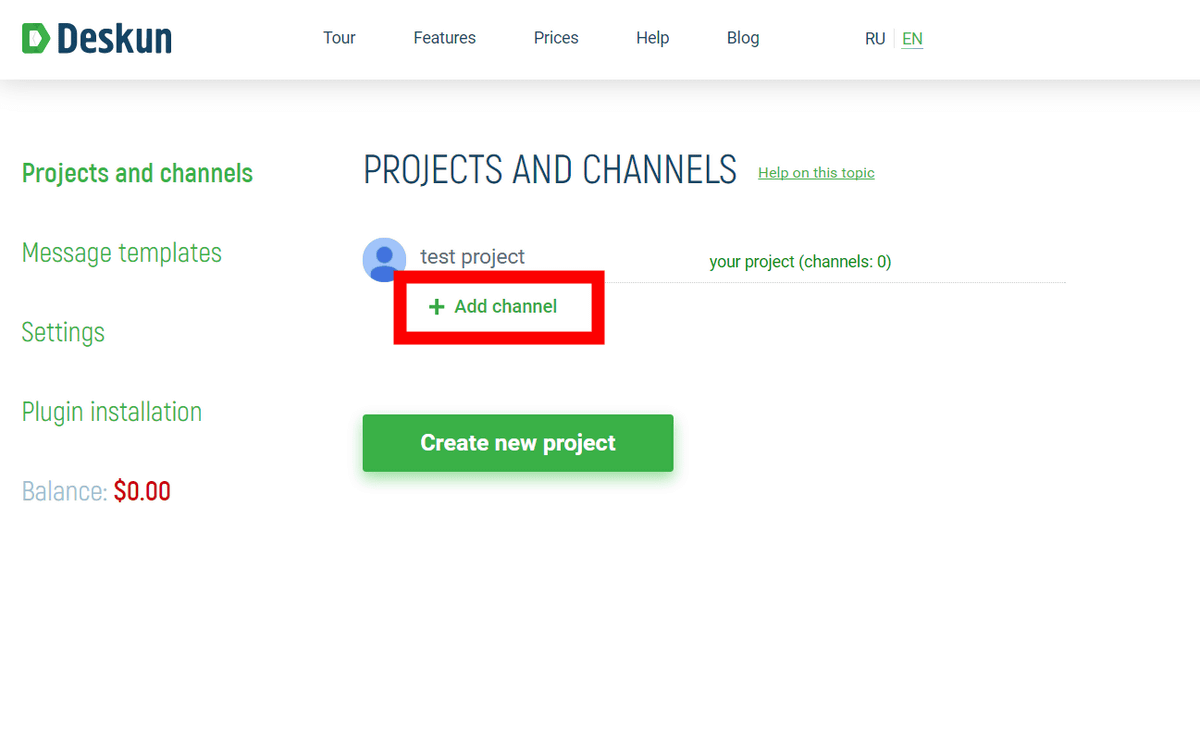
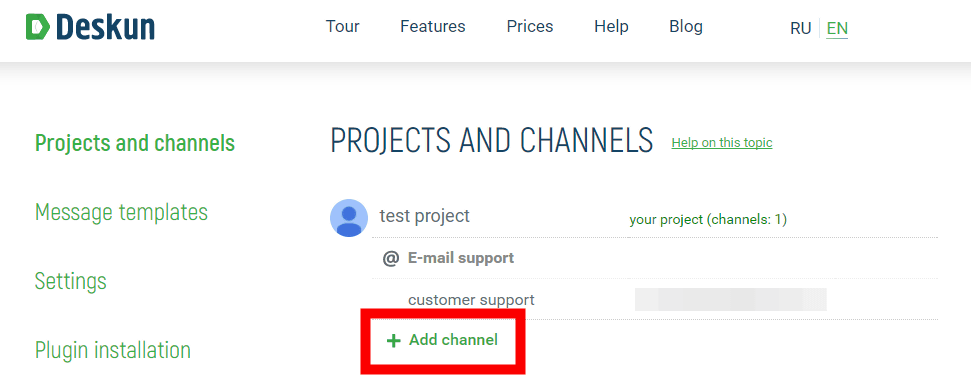
The project has been created. To edit the project, click "Add channel".
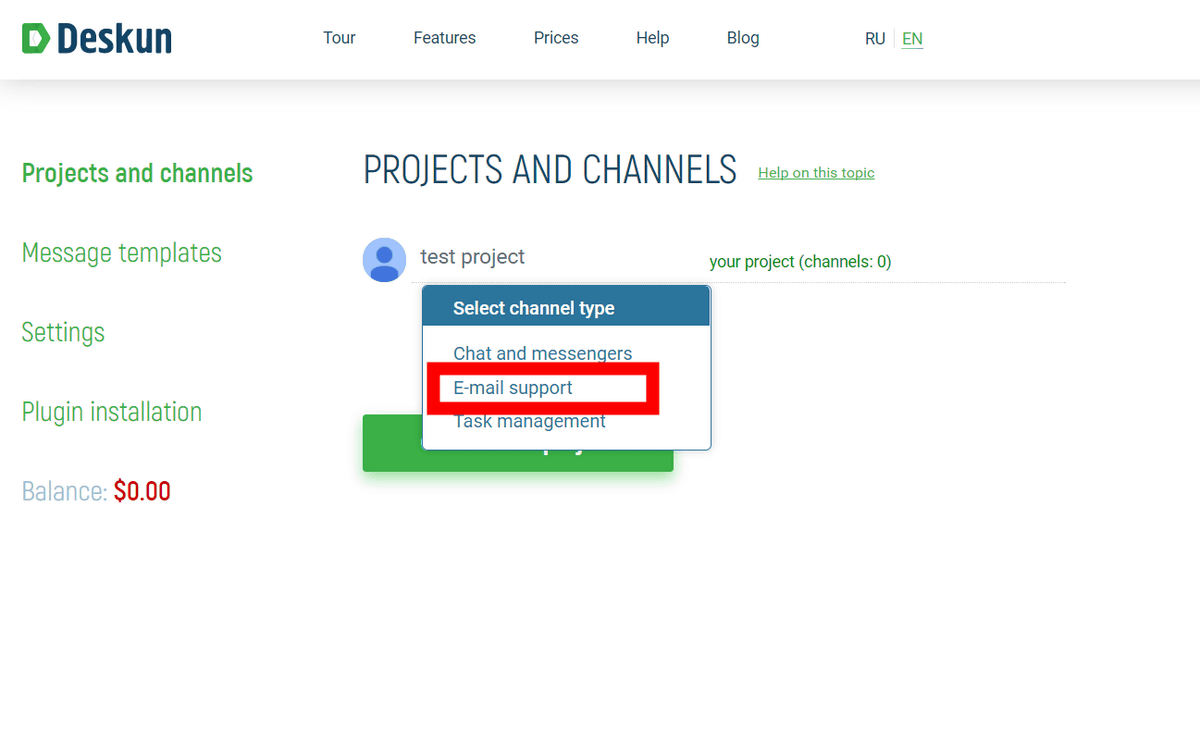
To link other mail accounts to the project, select "E-mail support". For e-mail addresses to be linked here, for example, it is recommended to choose what you post as a question form on your site or contact form on SNS.
In "Deskun", linking a project with an external mail account or SNS is called "creating a channel". In this time, in order to link with other project created with "Deskun", enter the channel name and click "Next".
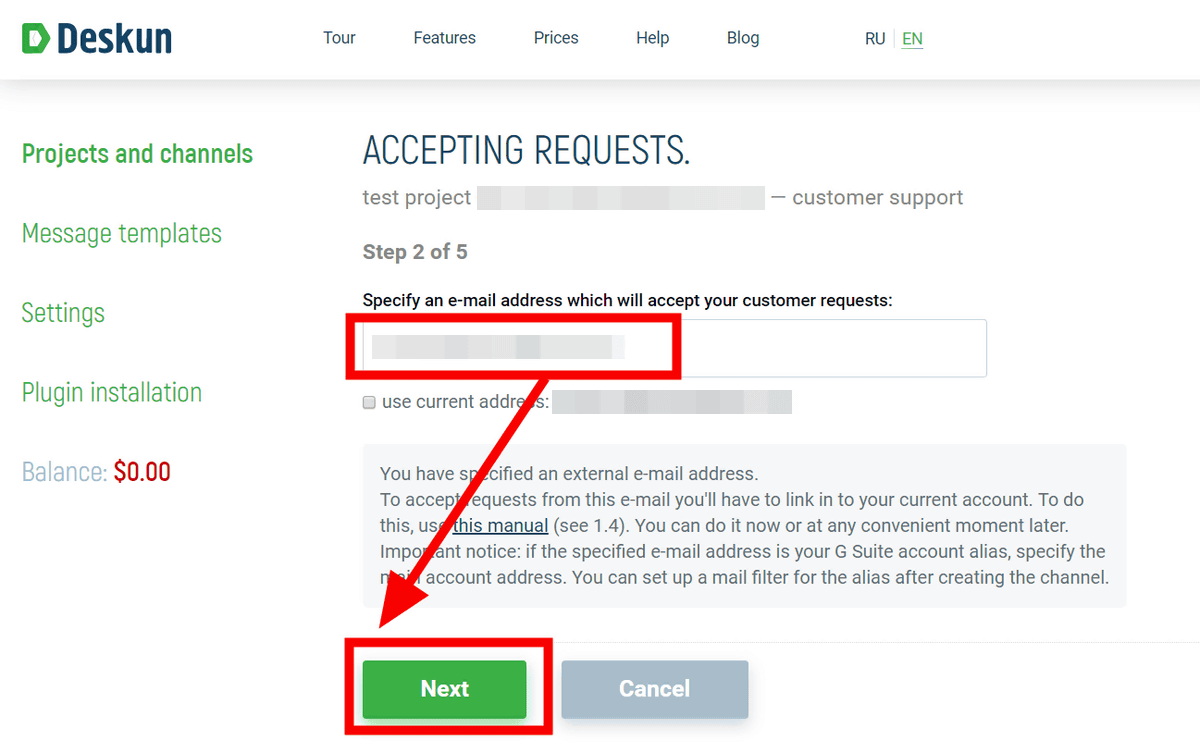
Enter the mail address you want to link and click "Next". Even if you use a mail service other than Gmail, the cooperated mail address here is OK.
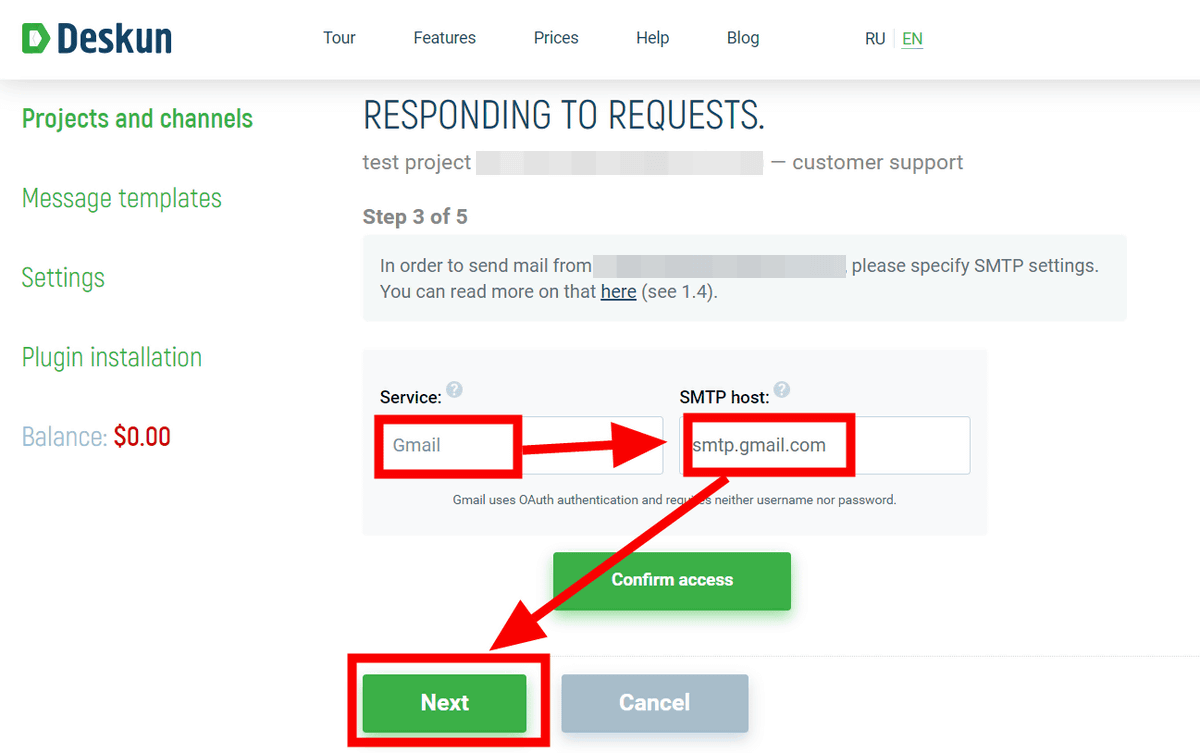
Then, a form for selecting the mail service and SMTP host to link with the project opens, so that appropriate mail service andSMTP hostSelect "Next".
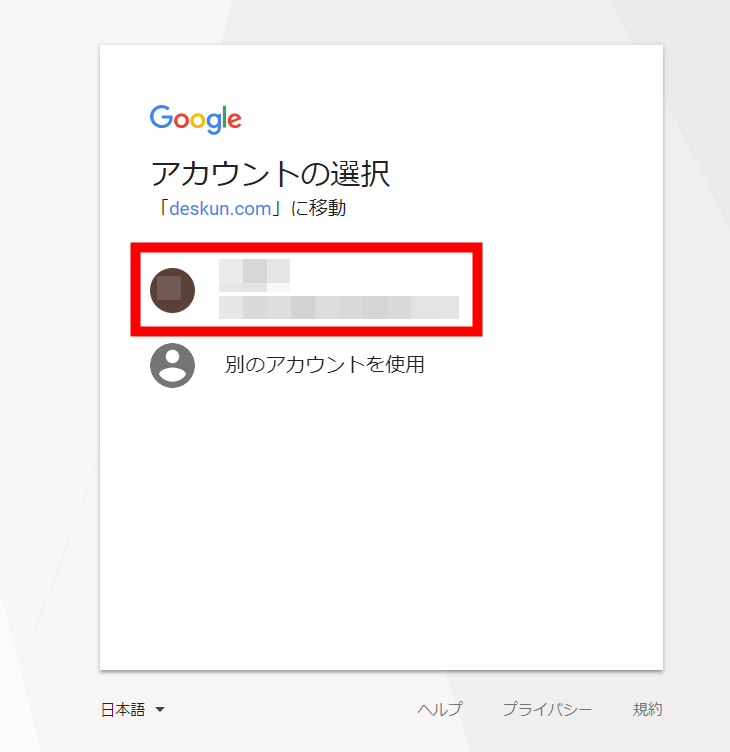
Click on the mail address to be linked ... ...
Click "Permit".
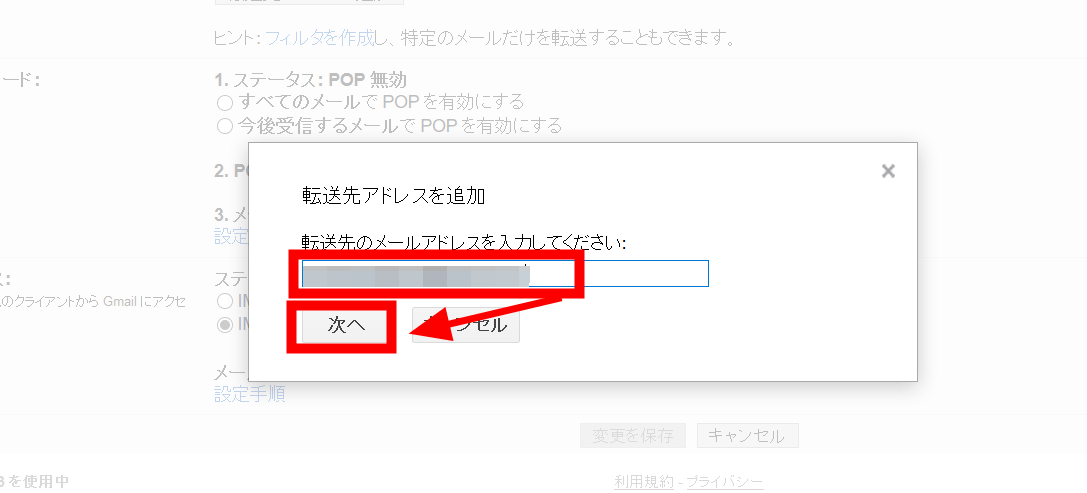
Mail transfer setting is done from the setting screen of the linked mail account.
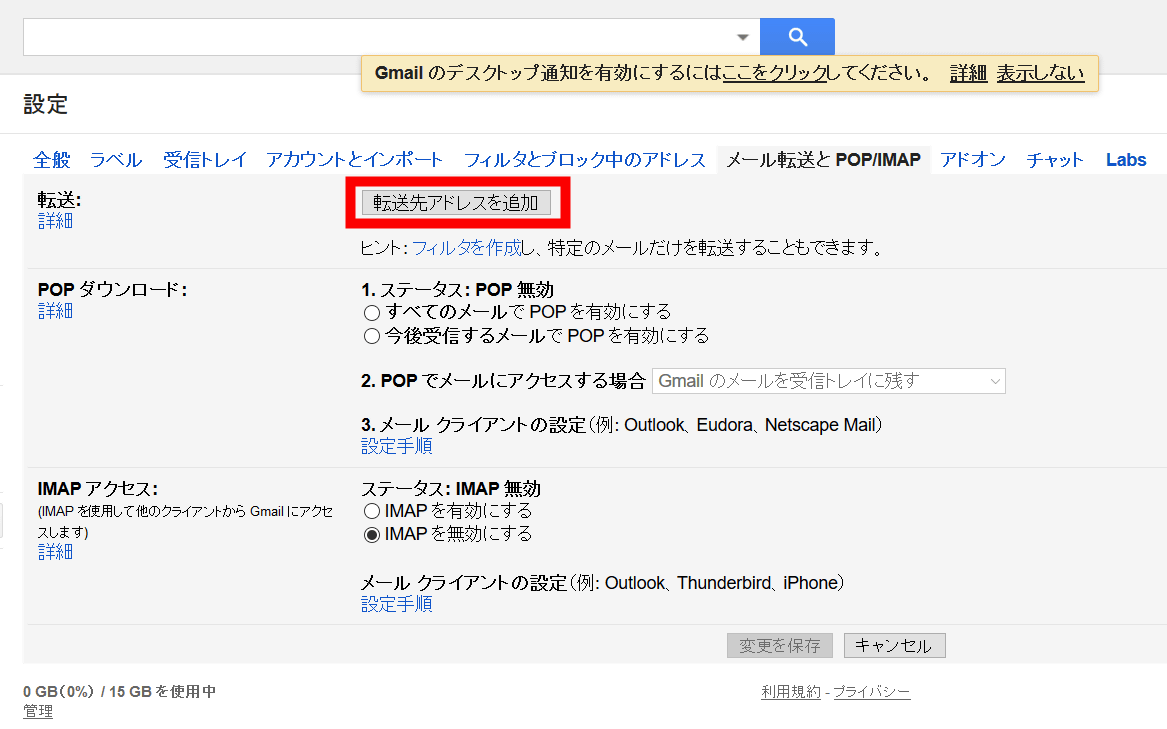
It is OK to set the transfer destination as the e-mail address that created the project of "Deskun".
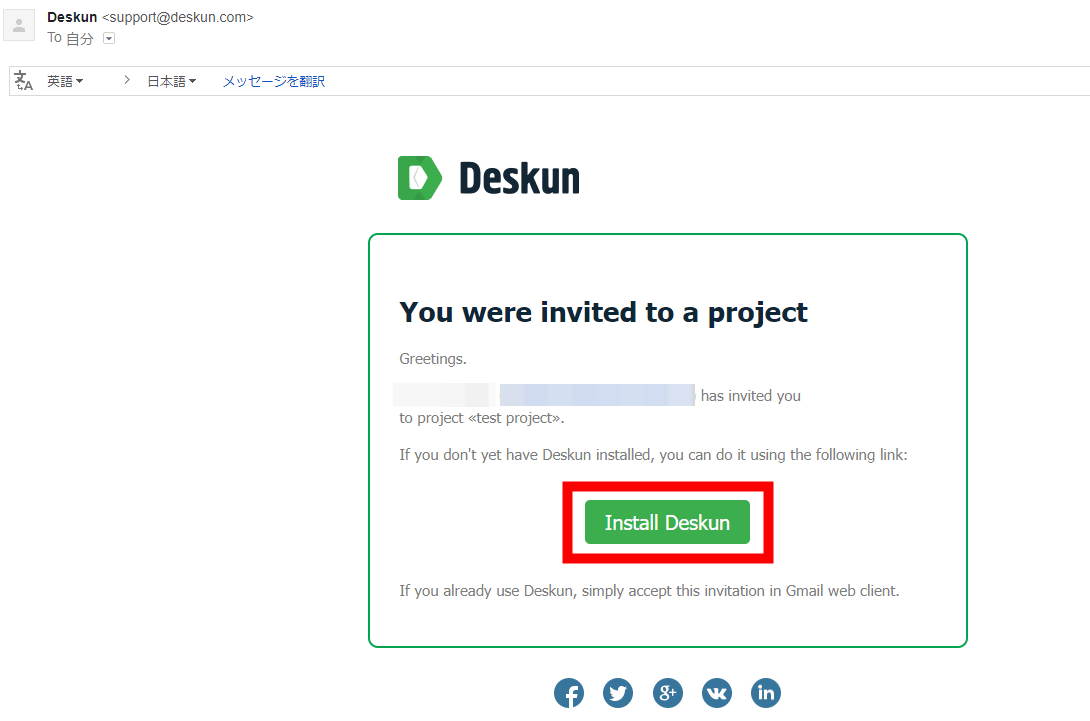
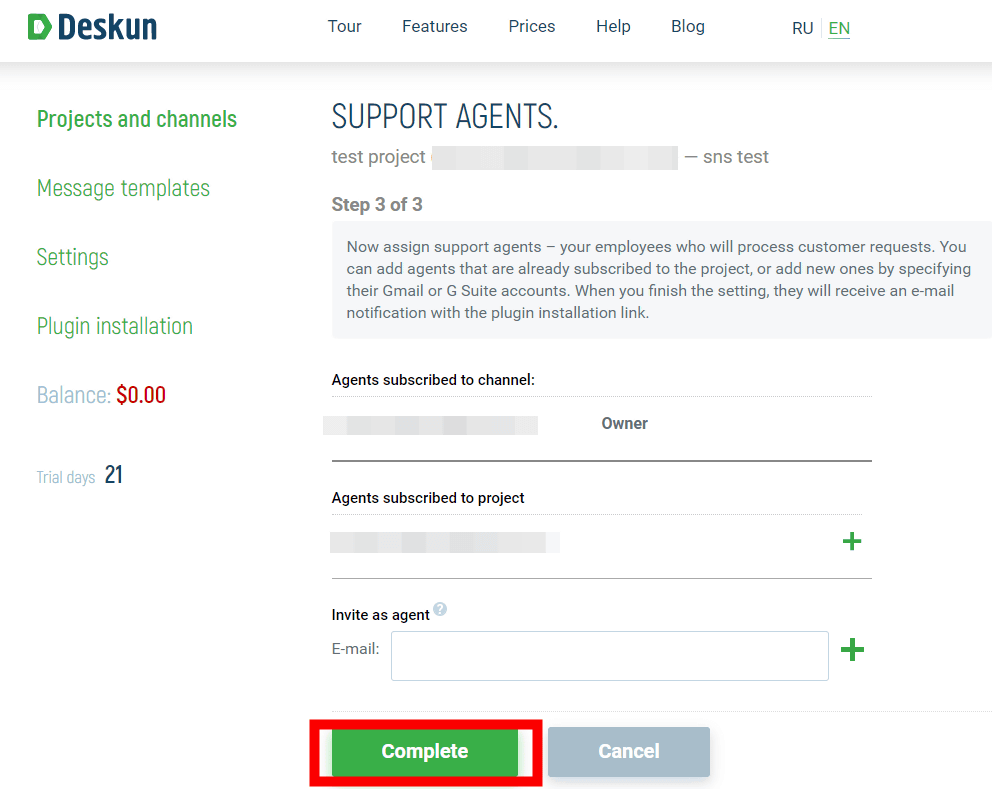
Next, I invite members to join the project. Enter the email address of the member you wish to invite and click "Save".
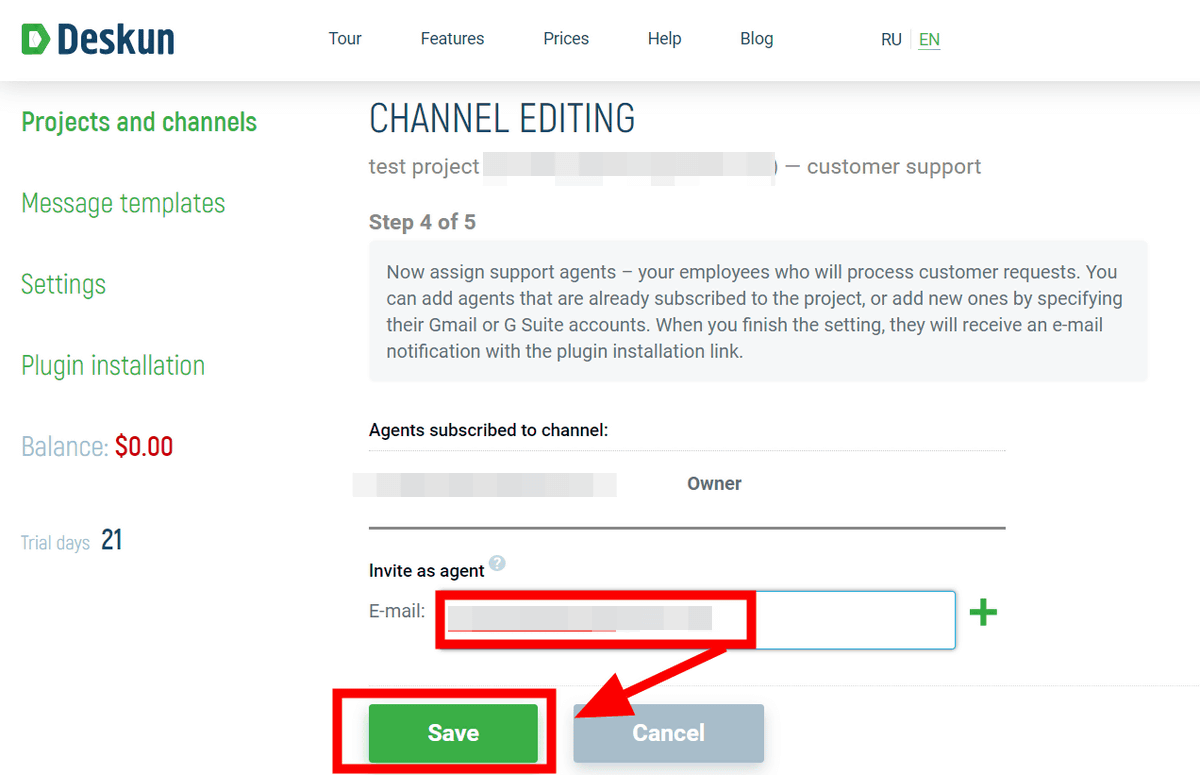
Since the mail will be delivered from "Deskun" to the invited members, if you click "Install Deskun" the members will also be able to use "Deskun".
The invited members will be asked whether they will join the invited project after signing in, so click "Accept" if you want to join.
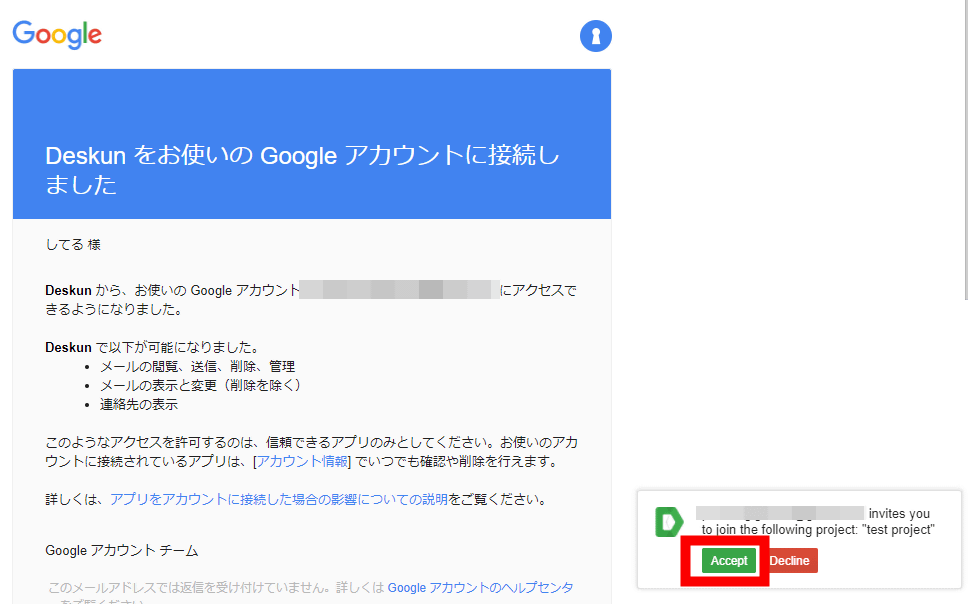
Invited members can join the project invited from "Deskun" control panel.

The project setting is now complete.
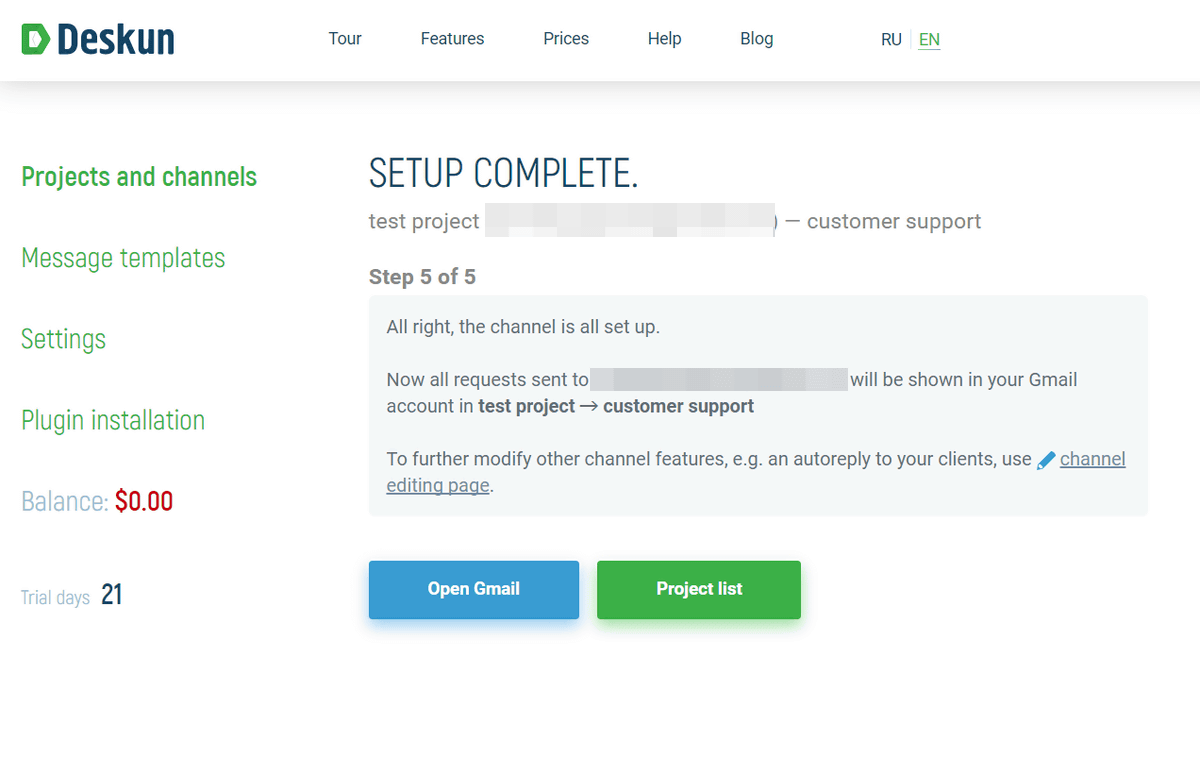
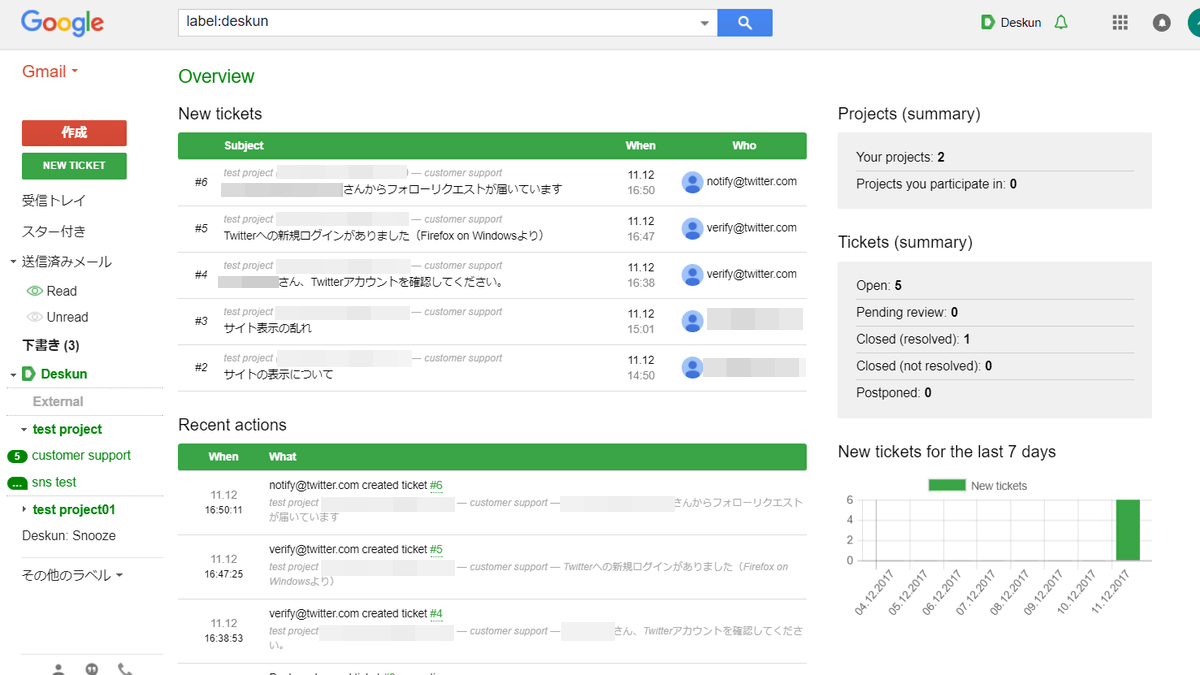
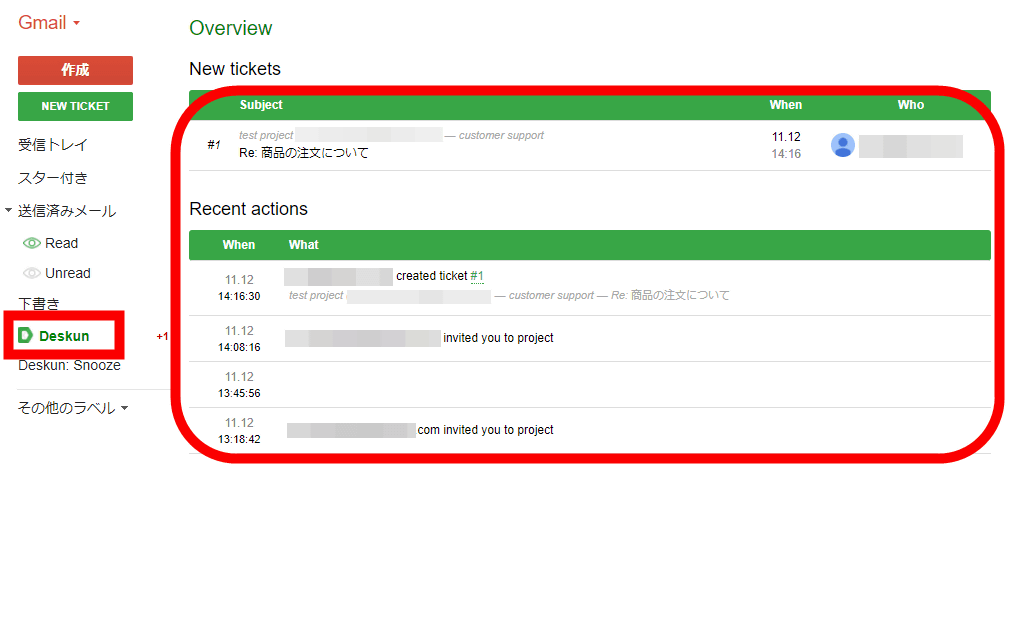
To check the mail related to the project, click "Deskun" on the left side of Gmail's Home screen OK. In the project creator's screen, the status of e-mails and project updates on all created projects is displayed, and each project can be managed from Gmail's screen.
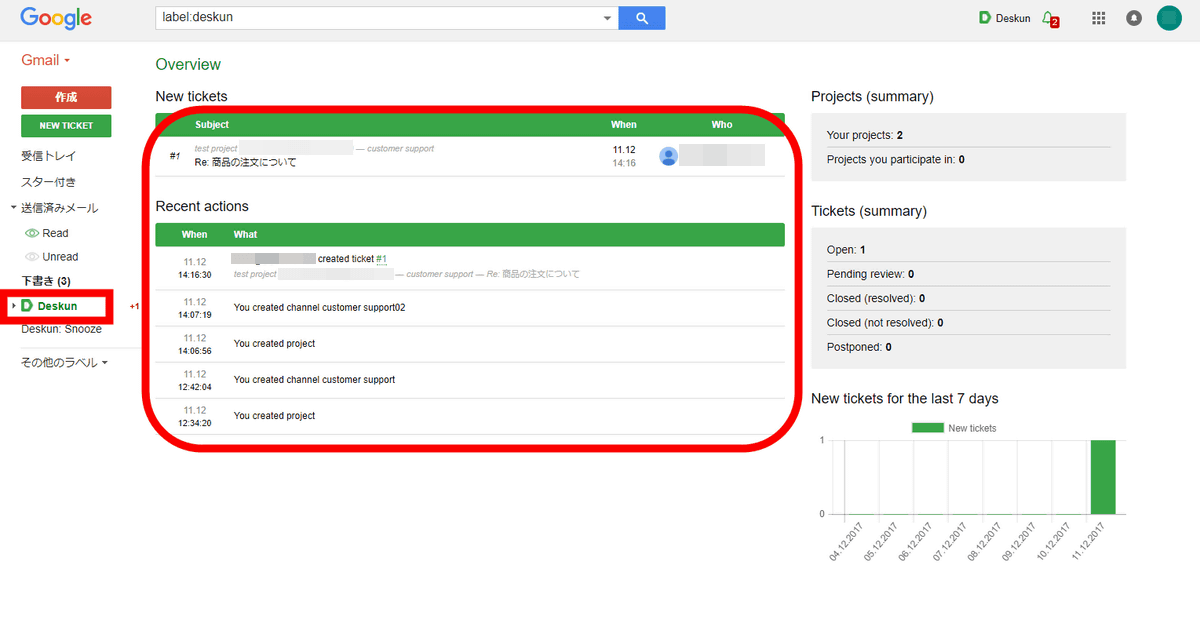
On the screen of the invited member, only the update status of the project and the e-mail related to the participating project is displayed.
◆ Automatically reply to the mail that arrived in the project
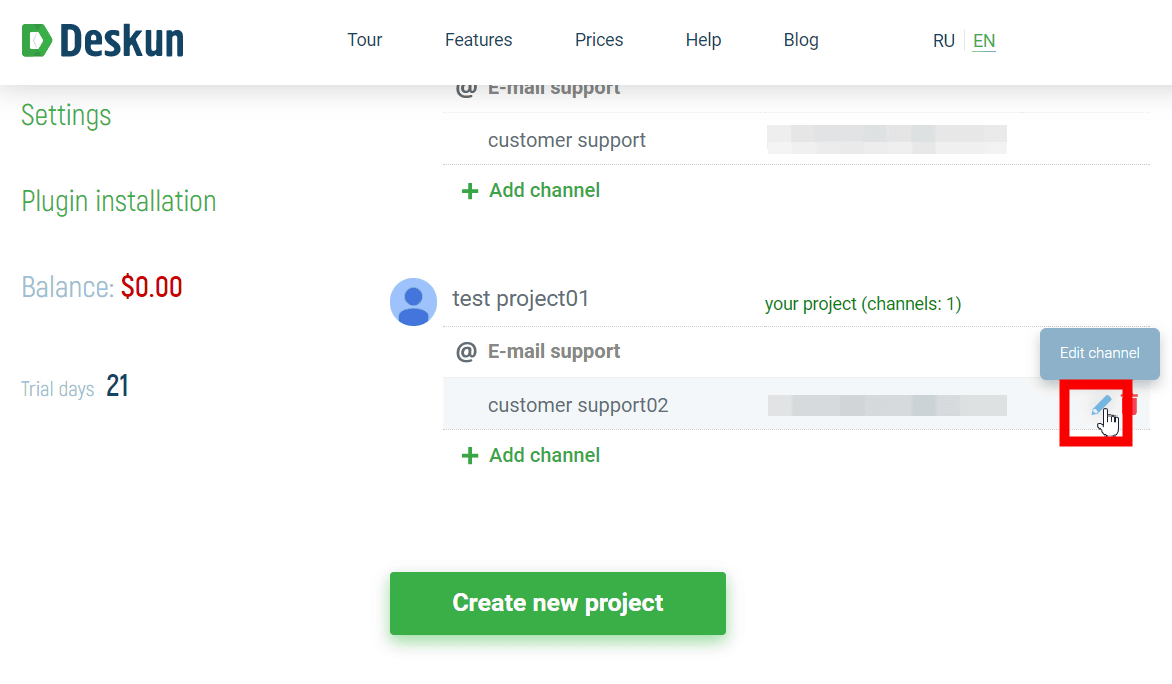
In "Deskun", it is possible to set the automatic reply to the mail arriving at the project. Select the project from the Deskun control panel and click the pencil icon on the right side of the channel.
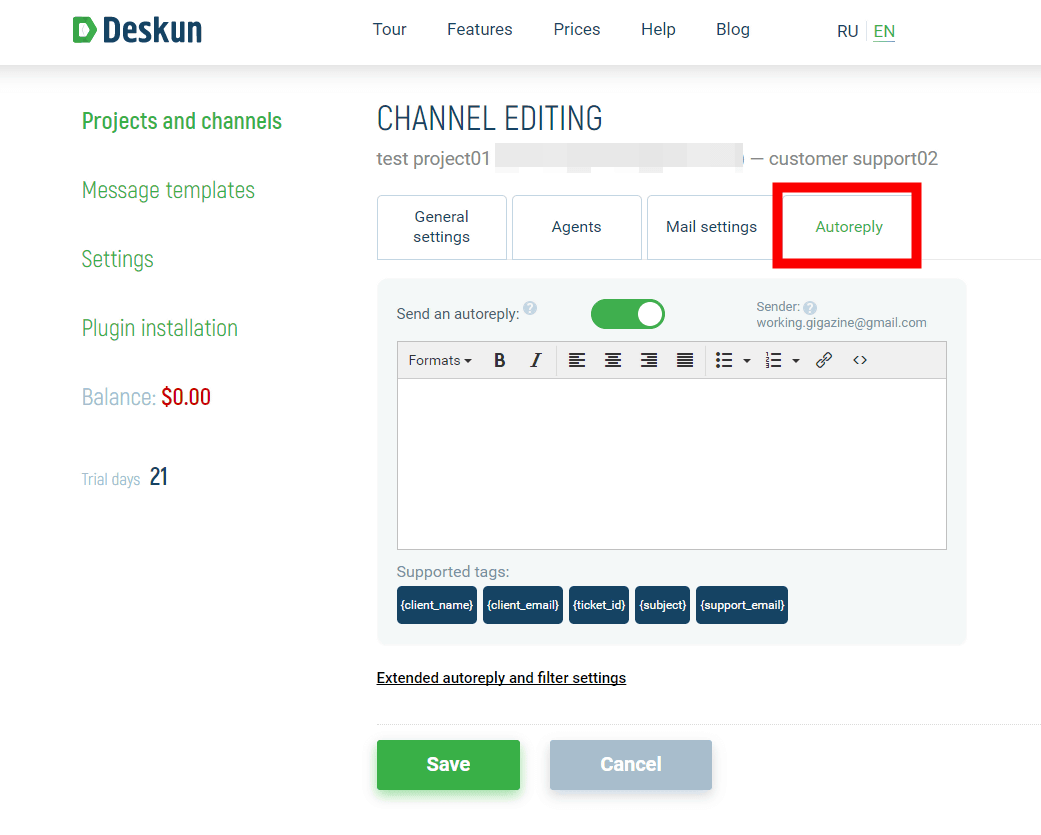
Since the editing screen opens, selecting "Autoreply" from the tab at the top opens a form for entering the text of the automatic reply.
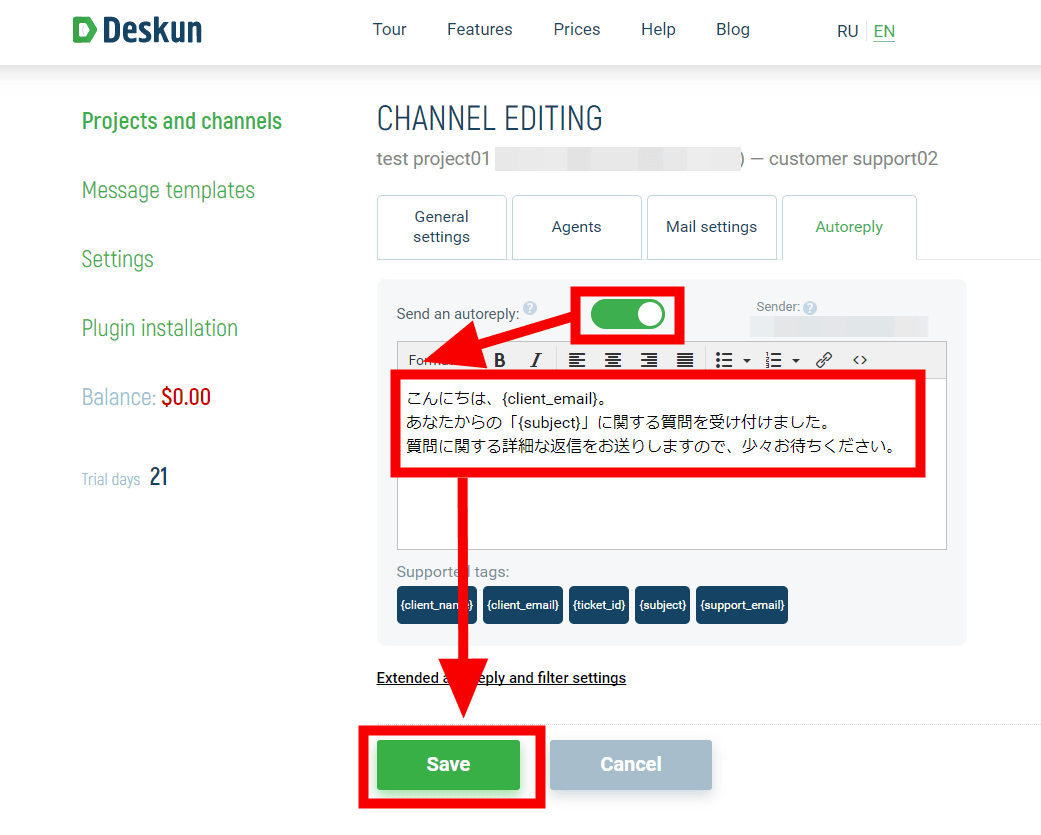
By using the tool at the bottom of the input form, you can insert individual email addresses and subjects for the automatically replying mails in the text. When the automatic reply text is completed, click "Save".
Then, an automatic reply mail according to the created template was sent to the mail received by the project.
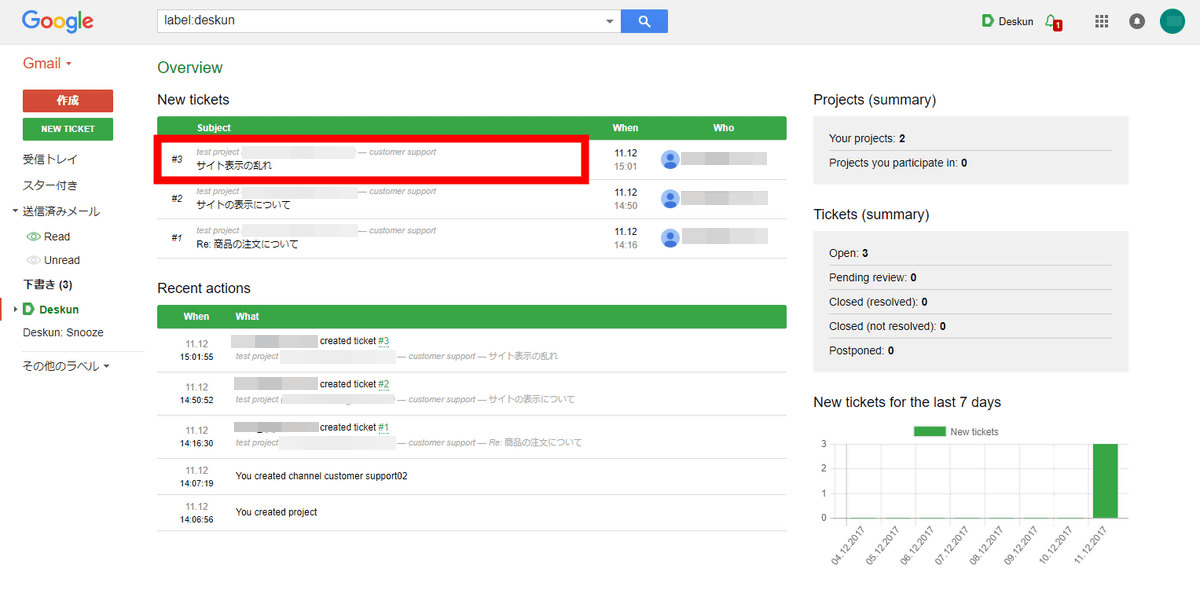
◆ Manage tasks with "Ticket"
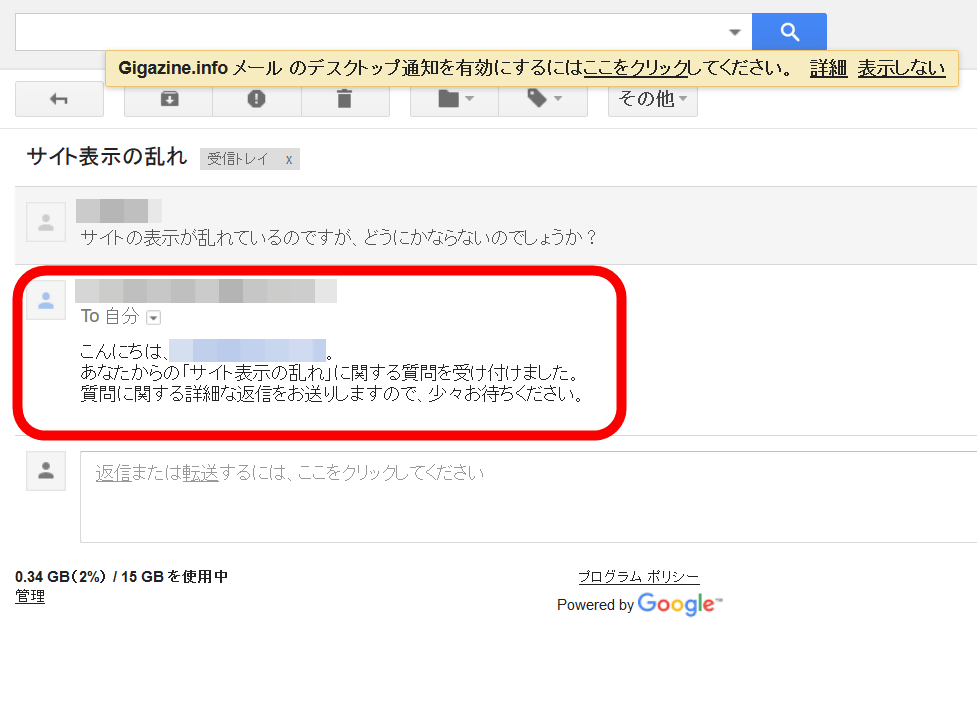
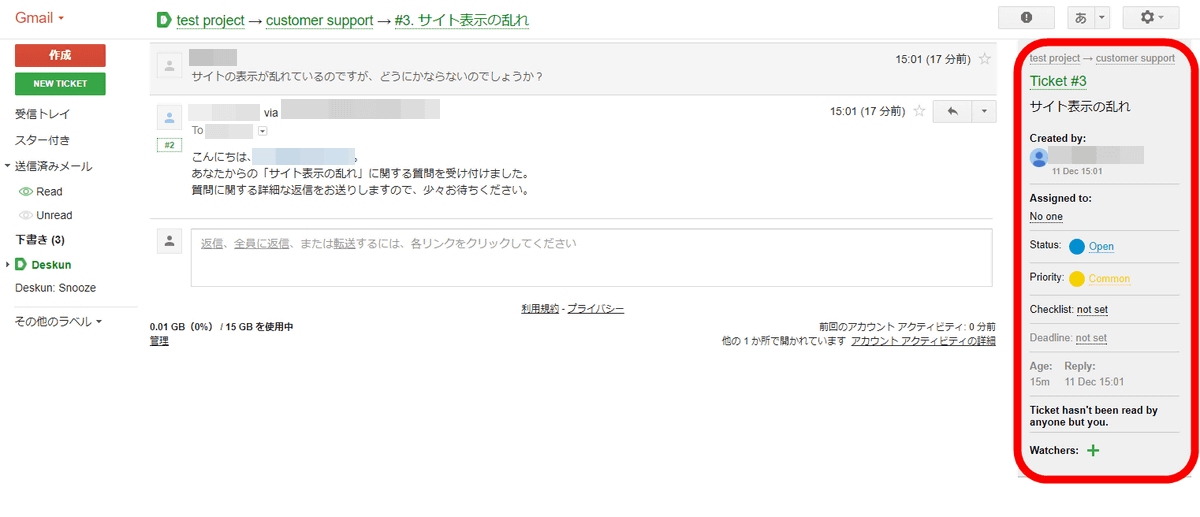
In "Deskun", it is possible to manage tasks as "tickets" arriving from users, and allocate tickets to participating team members. To use the "ticket" function Open the "Deskun" folder from Gmail and click on the mail received from the user.
Then, a thread of arrived mail and a reply mail corresponding to it will open. If you need to reply more detailed correspondence mails, you have to reply to the user by automatic reply, but you have to allocate this ticket to members to deal with it. The ticket status can be changed from the edit form on the right side of the screen.
First of all, we select members to deal with tickets. Click "Assigned to" in the ticket edit form ... ...
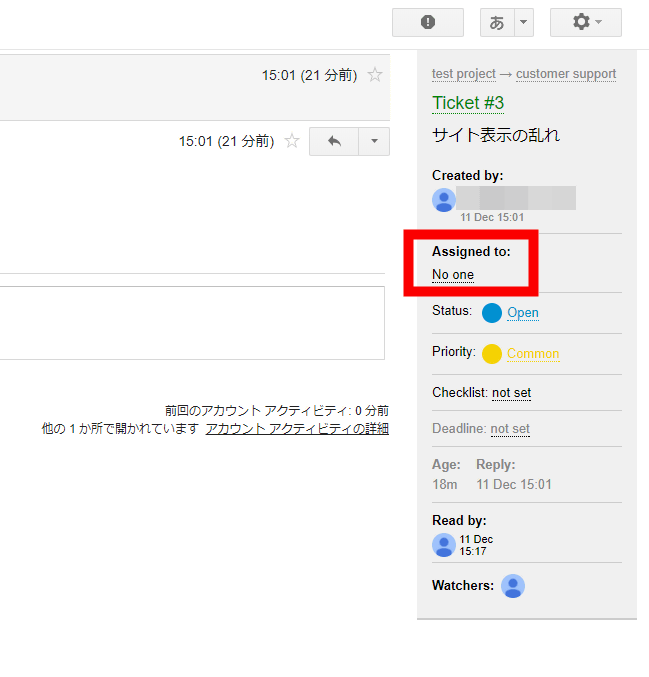
As members participating in the project are displayed, select the members to whom you would like to allocate tickets.
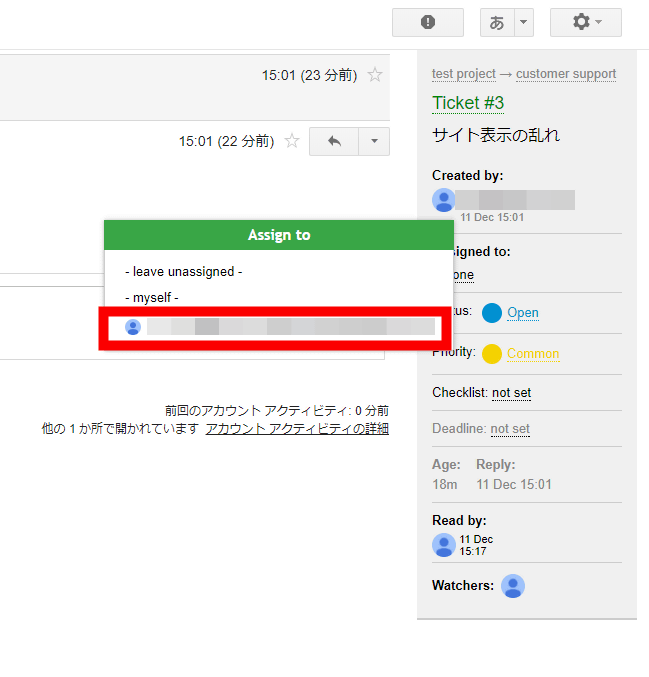
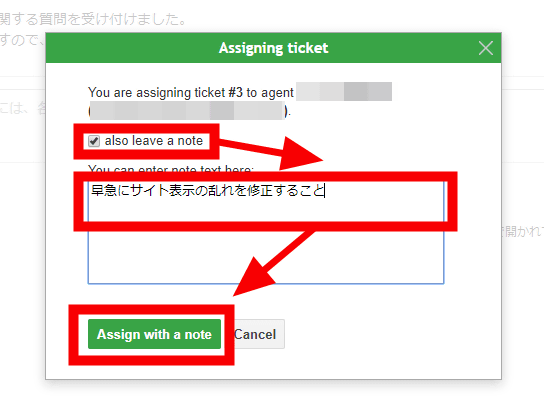
Since a confirmation screen is displayed, if you want to keep a memo for the member to allocate, put a check in "also leave a note", write a note and click "Assign with a note".
Then the ticket was allocated to the member.
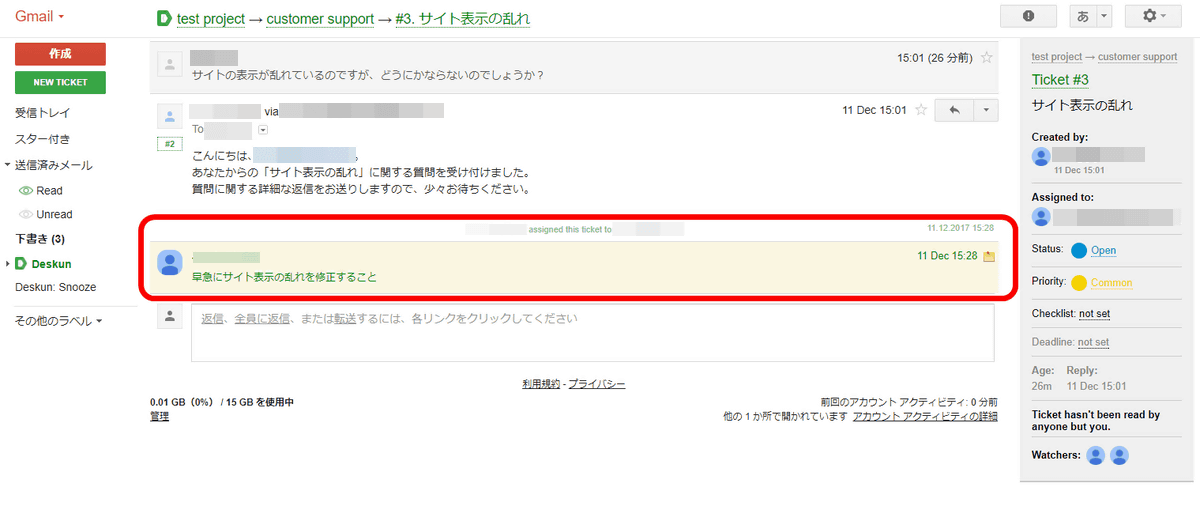
On the "Deskun" screen of the allocated member, the notification form at the top and the ticket allocated to the "Recent actions" column were displayed. Try clicking on the ticket ......
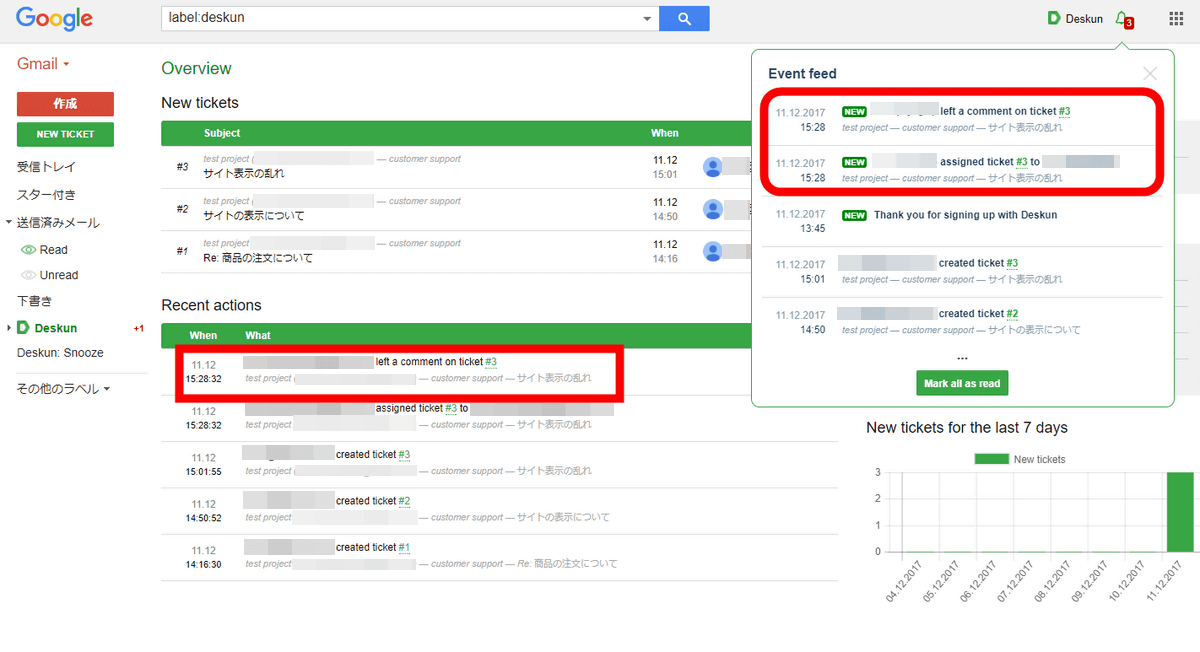
Along with a note from the administrator, you can see the mail of the allocated ticket. Members assigned tasks deal with tickets and reply.
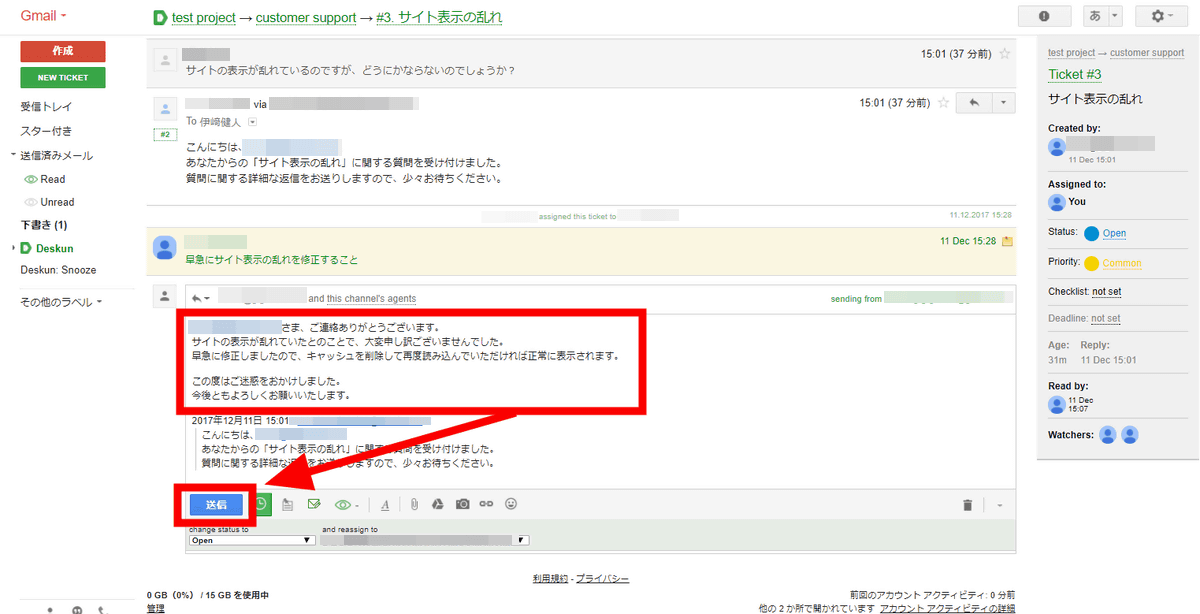
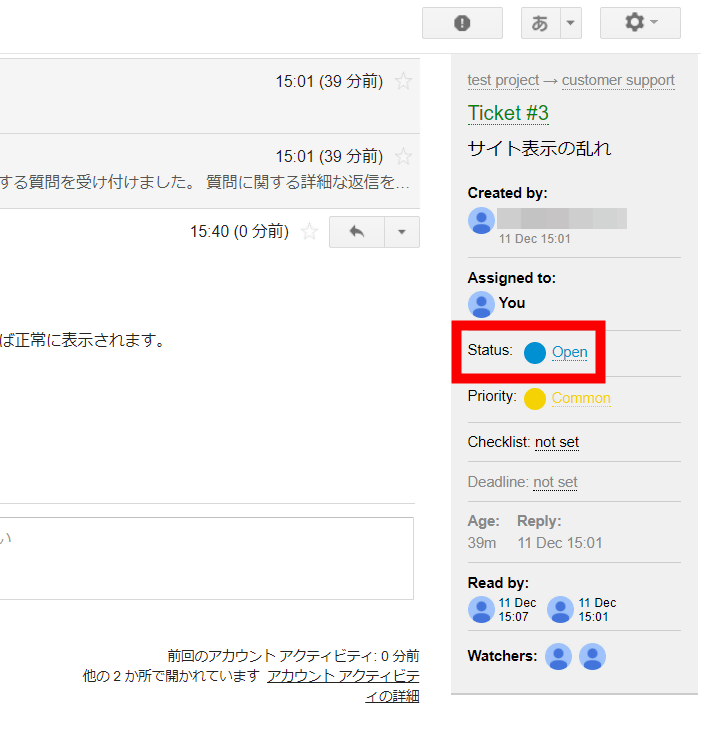
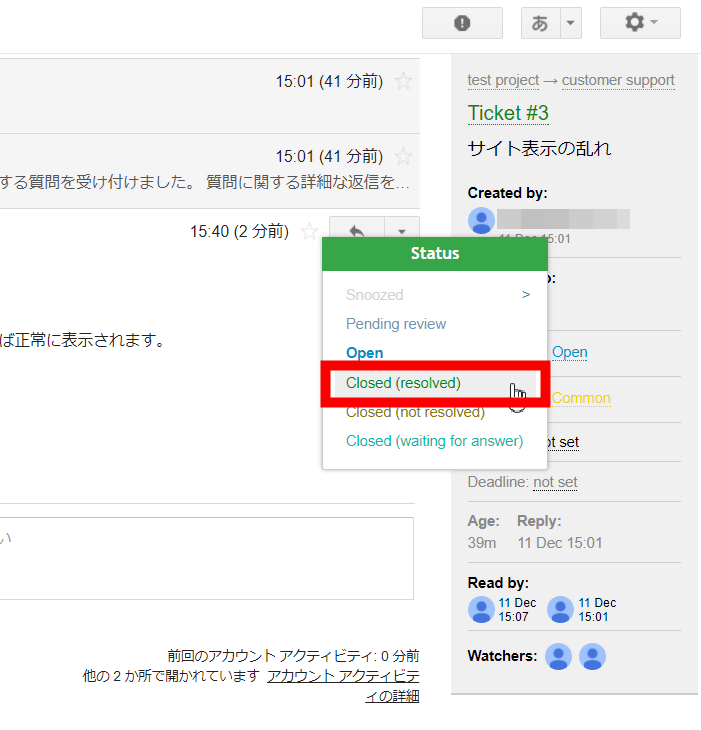
When coping with the ticket is completed, click "Status" on the ticket edit form.
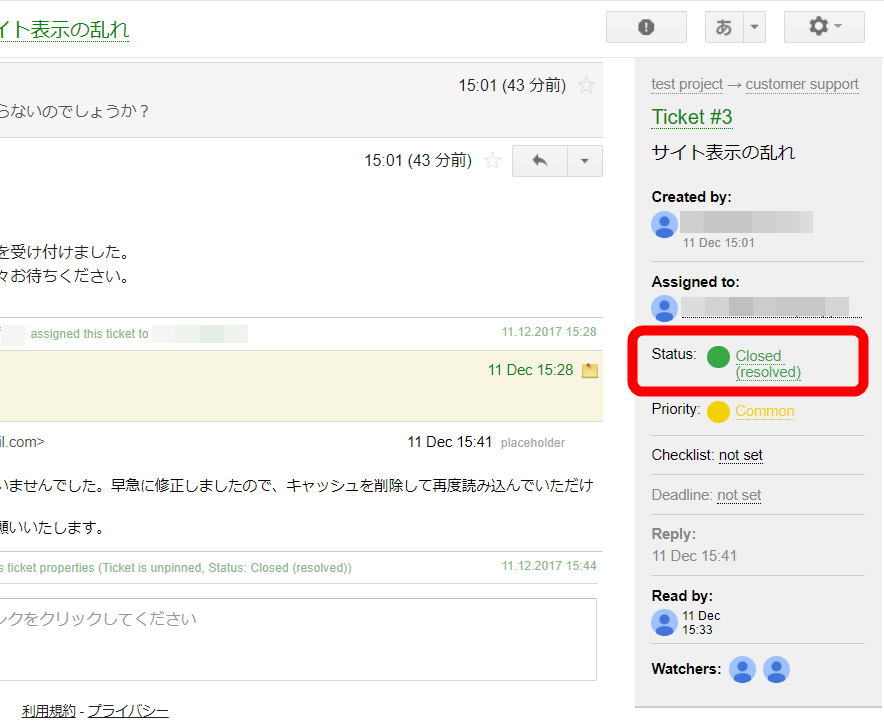
If you click "Closed (resolved)" ...
You can confirm from the administrator screen that the coping with the ticket to which the member was allocated is completed.
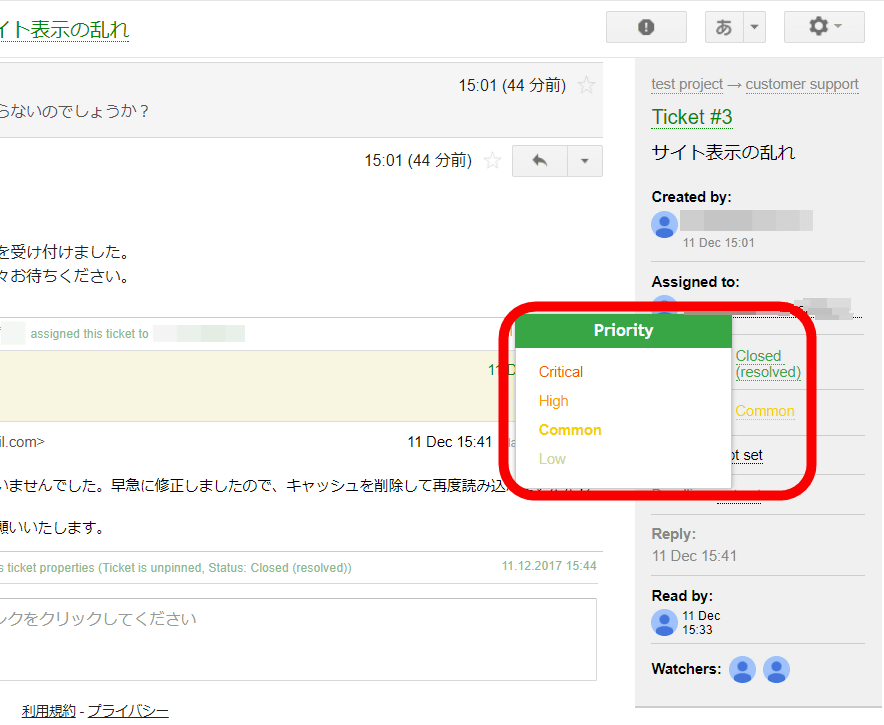
The ticket function not only allocates mail handling, but also allows the administrator to prioritize tickets allocated to members ......
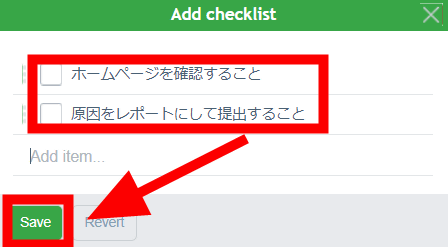
It is also possible to attach a checklist to a ticket.
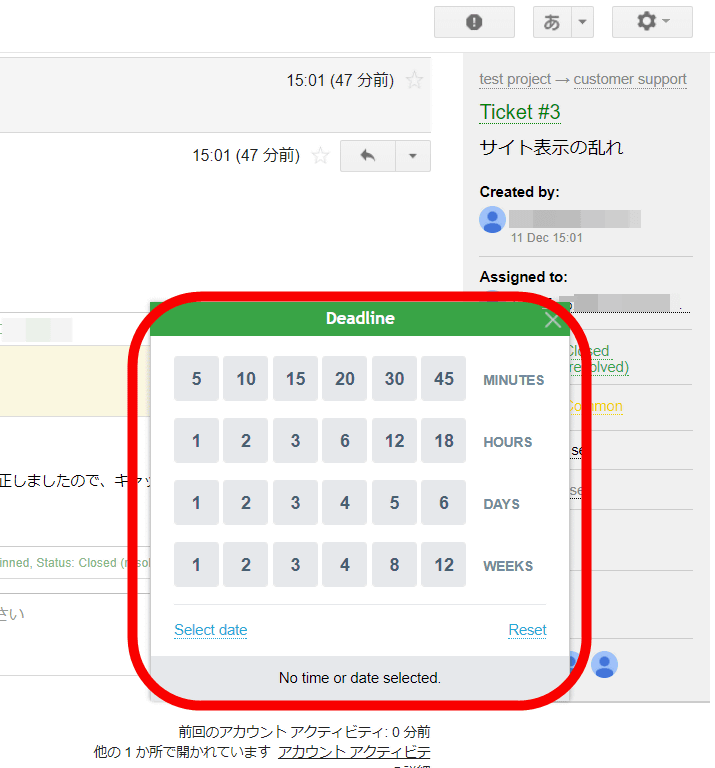
In addition, you can also have a deadline for tickets.
Right click on the ticket edit form, you can set more detailed tickets. A snooze function has also been implemented to inform the user of the type of ticket "I have to deal with it right now, but I do not forget it for a while" in a certain time.
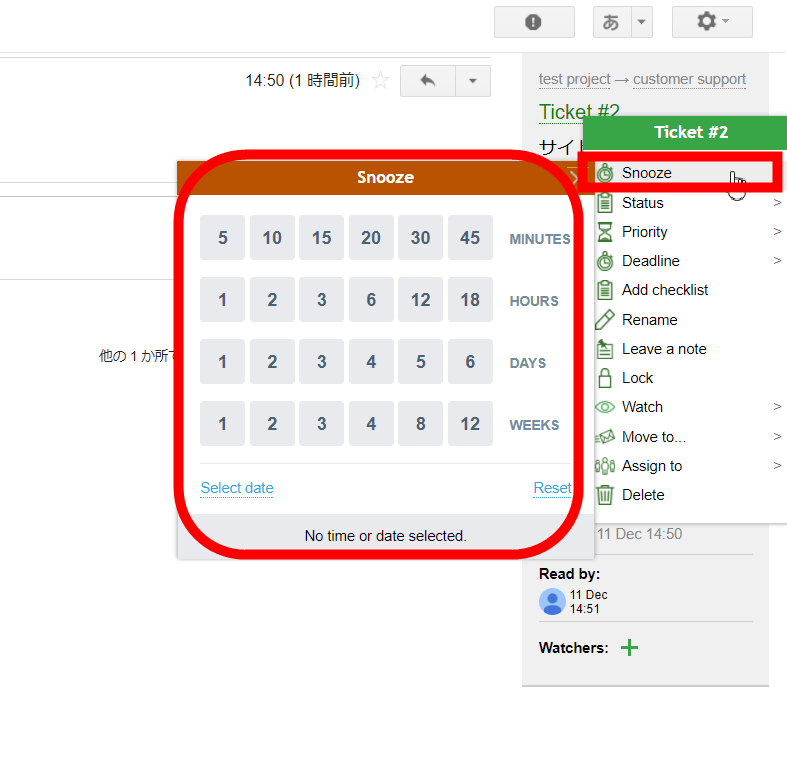
When the time you set the snooze comes, a new display will appear on the notification form and you will be reminded.
◆ Cooperation with SNS
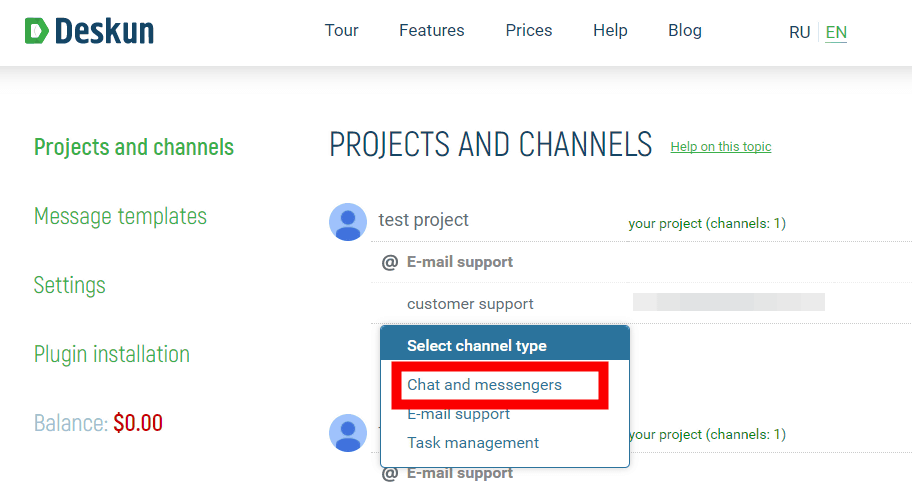
"Deskun" can cooperate with SNS by adding a new channel to the project as well as other mail accounts. Click "Add channel".
Click "Chat and messangers".
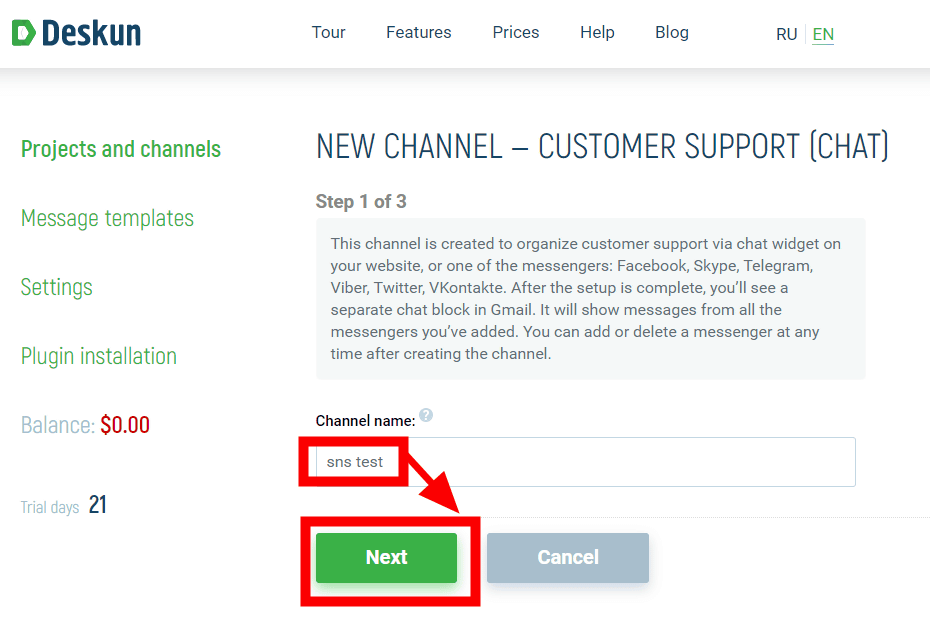
Enter the channel name and click "Next".
Select the SNS of the message system to be linked. In "Deskun" you can choose "Chat widget", "Facebook", "Skype", "Telegram", "Viber", "VK", "Whatsapp", "Twitter" as collaboration destination, but this time we will work with "Twitter".
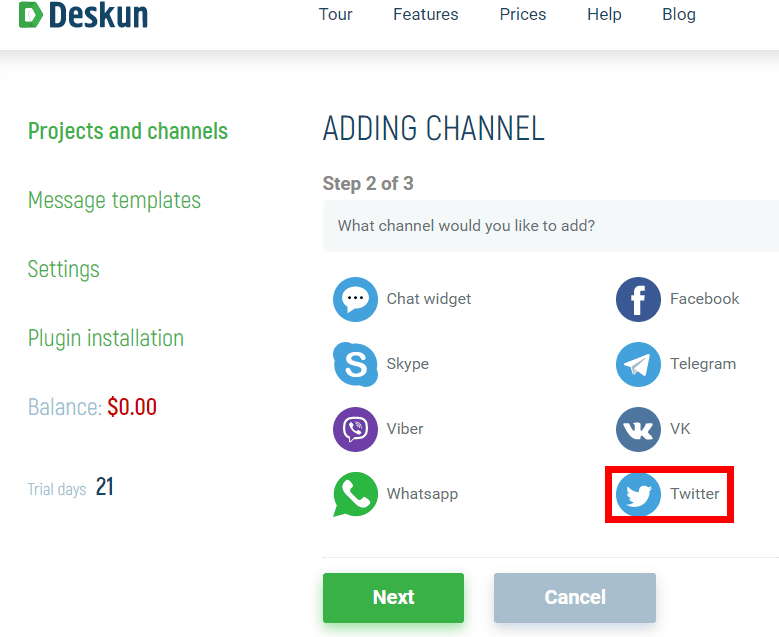
If you link "Deskun" to SNS, the message for the account is displayed on "Deskun" and can be made into a task as a ticket. Click "Link an account".

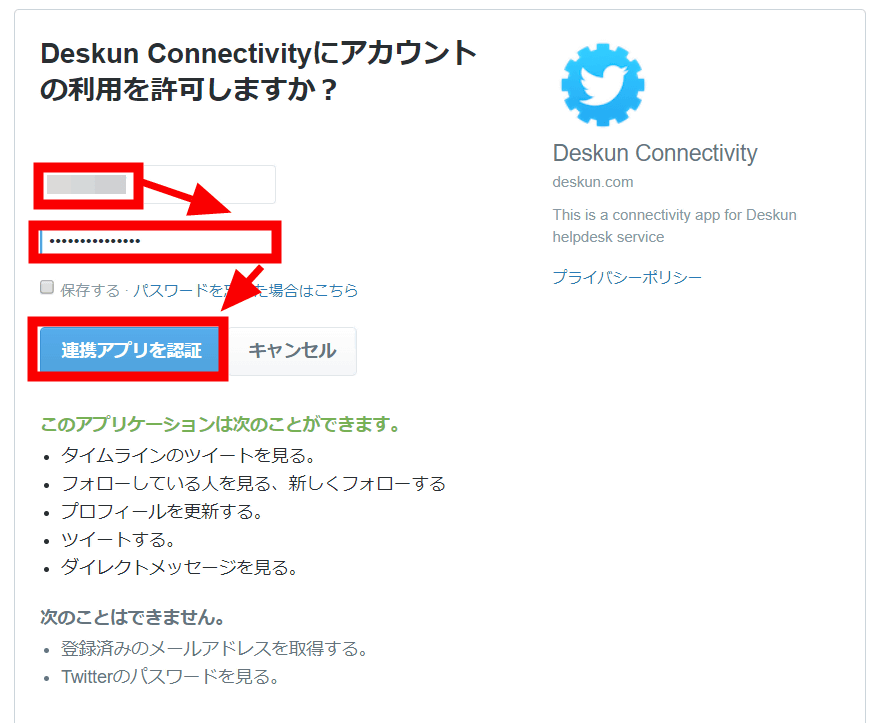
Since the cooperation screen with Twitter opens, enter the user name and password and click "Authenticate cooperative application".
Click "Save" when you check that the SNS you want to link is checked.
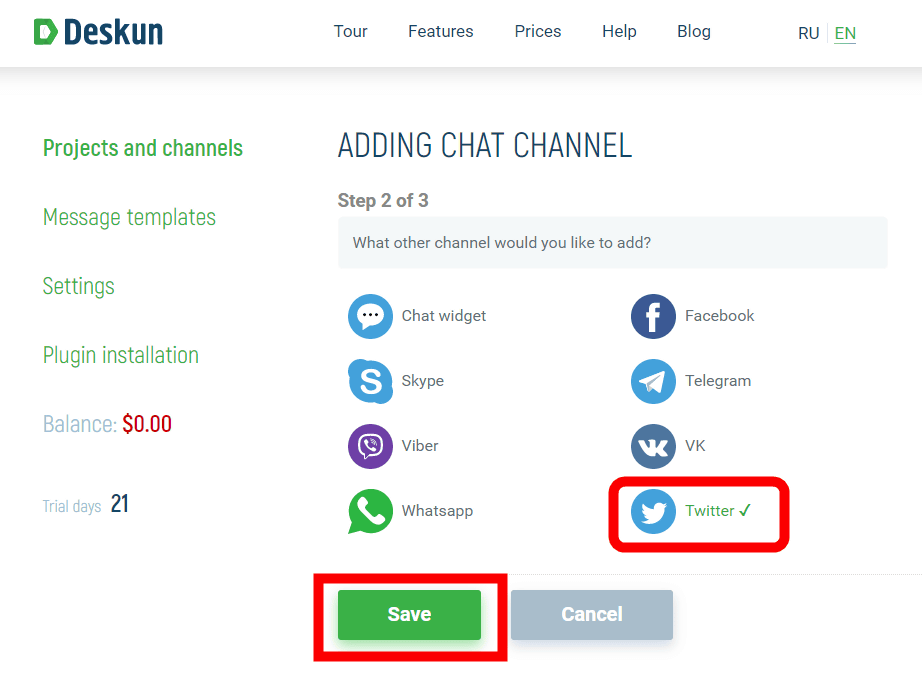
Then, it becomes the member addition screen, but if there is no member that you want to add to the new project, click "Complete" as it is. Coordination with SNS is complete with this. Even if you do not need to add members at this time, you can add them any time by going to the project edit screen from the "Deskun" control panel.
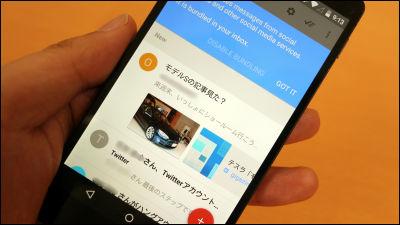
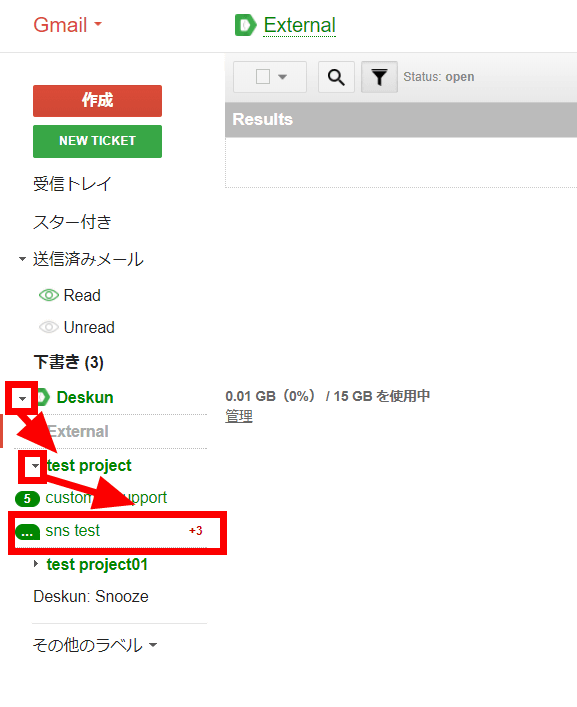
To check the SNS message, click the inverted triangle on the left side of the "Deskun" button, click on the target project, and click on the channel name where the SNS cooperated last.
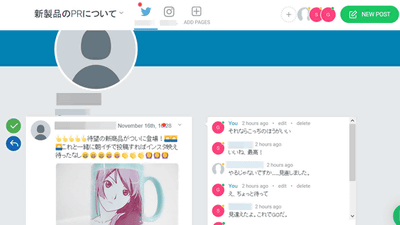
Then, messages from SNS are displayed on Gmail in the list. Click "Accept conversation" at the bottom ... ...
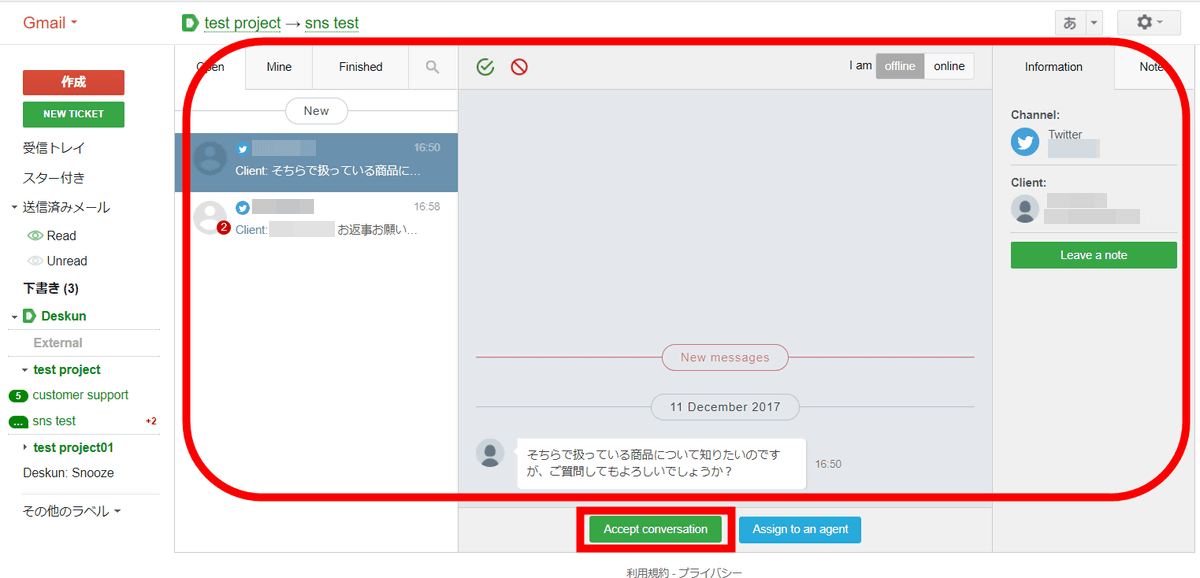
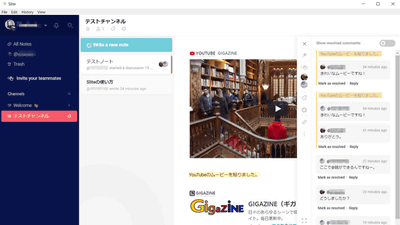
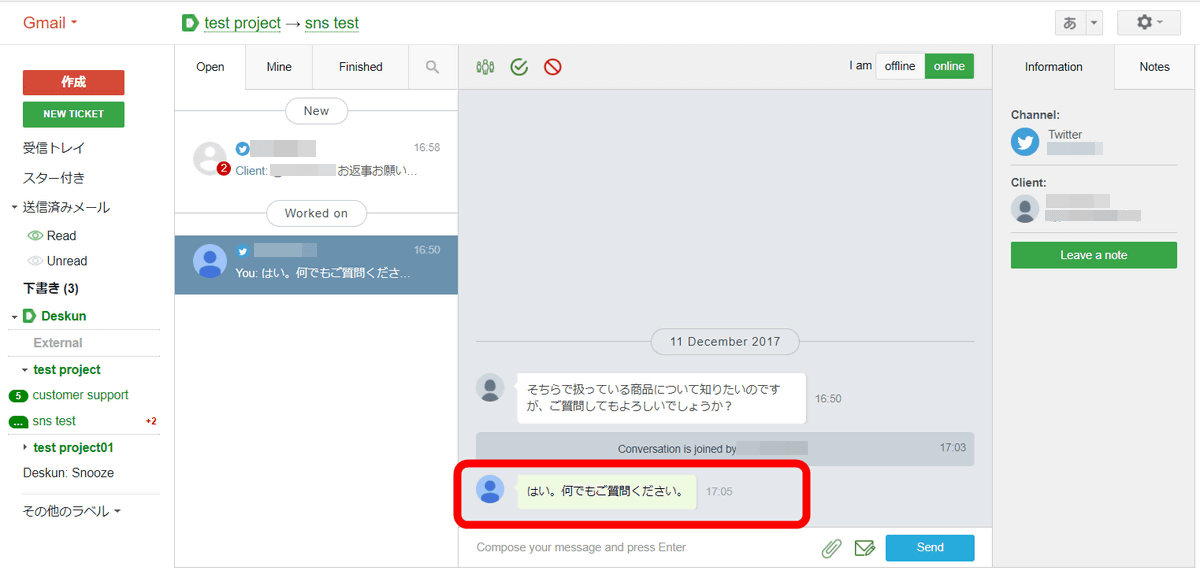
In this way it is possible to talk to users on chat in Gmail. In the case of Twitter, the exchange between this user and the user was done by a direct message.
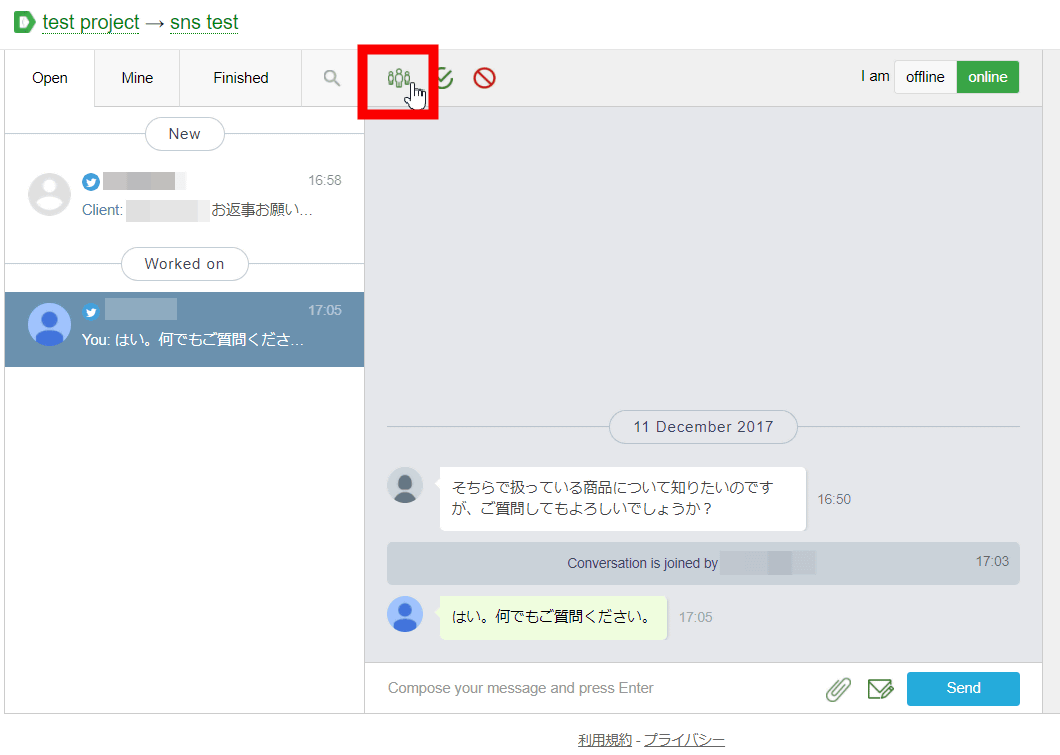
By clicking the person icon at the top of the chat screen, you can assign tasks to members as tickets.
"Deskun" was able to group users' correspondence on multiple platforms on Gmail, it was a web service suitable for managing team services by collectively managing cumbersome customer support. In addition, "Deskun" offers a 21 day trial period, and after the trial period the cooperating mail address and SNS channel will be $ 1.99 per month (about 220 yen) per second after the second mailbox, The members who manage together can continue to use by paying a fee of 2.99 dollars a month (about 340 yen) per person after the second person.
Related Posts: