How to Multiplayer with Multiple People at Minecraft Server Free on Google's Cloud
When you play Minecraft with everyone, you need to prepare a server, but when setting up a server on your own PC, you need to leave your PC on when someone else is playing, There is a problem that it becomes heavy by using at the same time. So, this time, we tried free trial of Google using cloud computing service free trial and enjoyed multiplayer playing.
Google's Cloud Computing, Hosting Service, API | Google Cloud Platform
https://cloud.google.com/
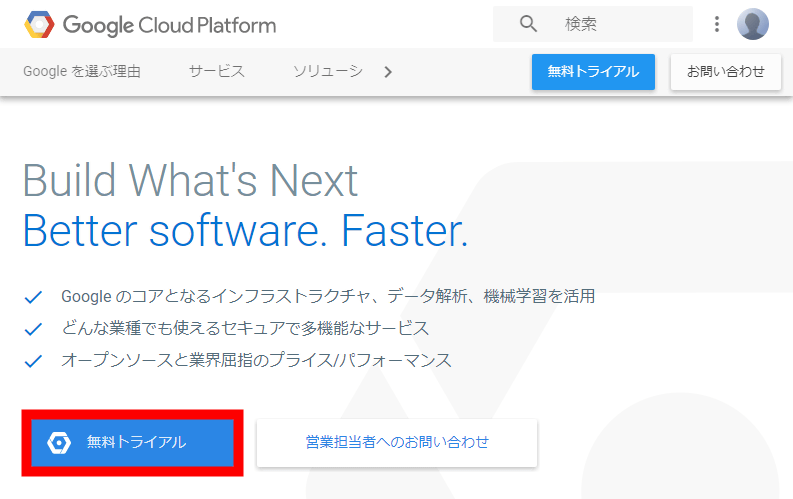
Go to "Google Cloud Platform" page and click "Free Trial".
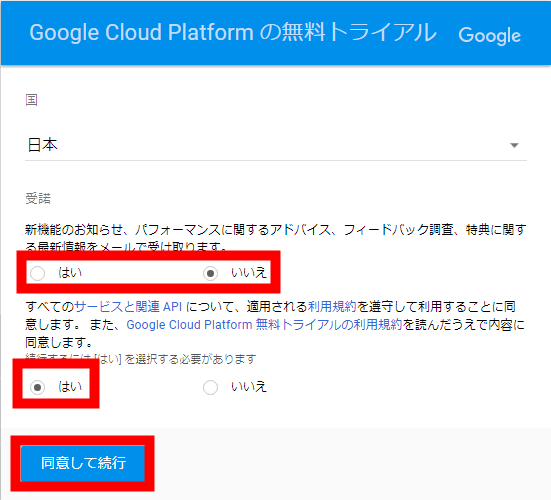
Select whether to accept notification mail, select "Yes" depending on whether you agree to the terms of service, and click "Agree and proceed".
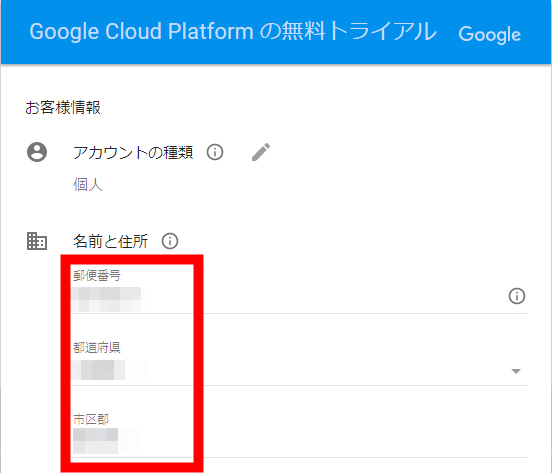
We will enter your name, address and phone number.
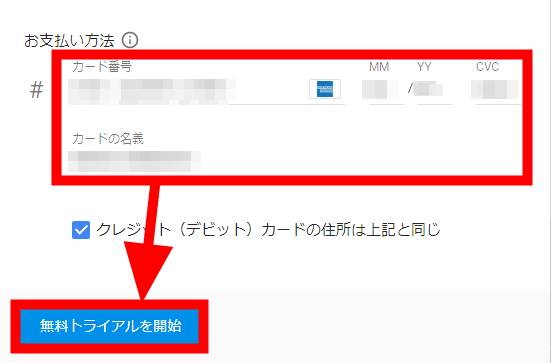
Lastly, register your credit card information and click "Start Free Trial". It is to prove that it is not a robot to register a credit card here, so payment will not be made arbitrarily.
Also, because you get a notification that you get 300 dollars (about 33,300 yen) of credits for trial, click "OK".

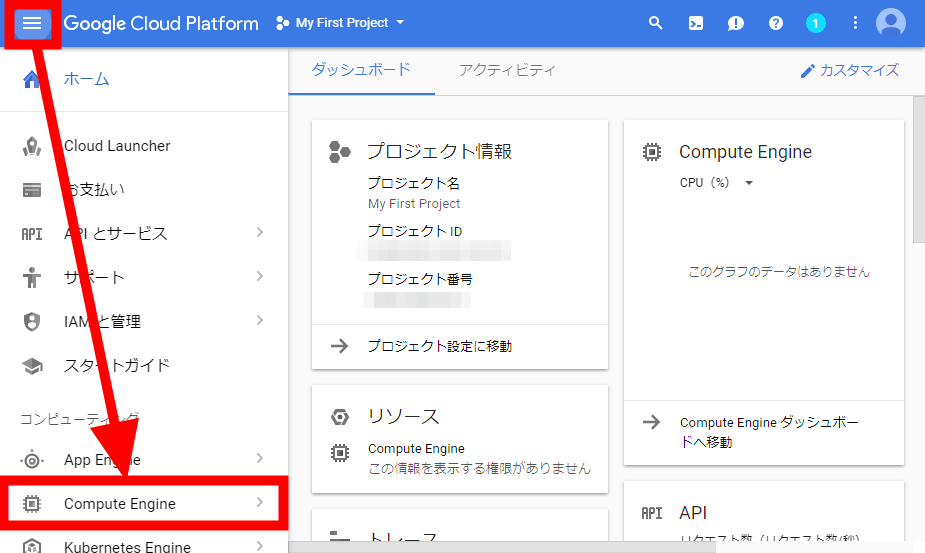
Since the dashboard screen is displayed, click "Compute Engine" from the hamburger menu in the upper left.
Click "Create" as it will become "VM Instance" screen. When accessing for the first time, it may be kept waiting for several minutes for initial setting.

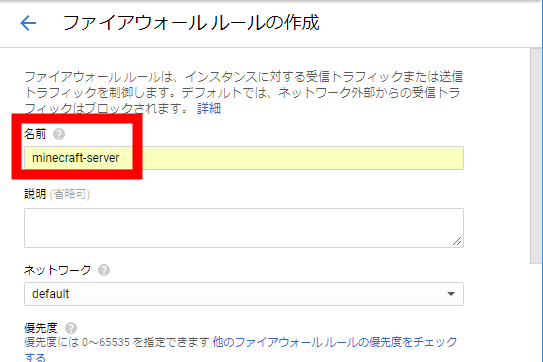
The "Create Instance" screen will appear, so we will make the settings. I made it to "minecraft-server" so that it is easy to understand that the name is Minecraft's server. The zone is where the server is located. In fact, I would like to select the asia zone whose distance is close, but since only the us zone has the free frame of the machine set up, we select "us - west 1 - a" closest to Japan in the us zone did. For the machine type, select "micro" for which a free frame is set. An indication of the price is displayed on the right, but it says "The usage amount of f1 - micro instance of this month is free for the first 744 hours". Since one month is 24 × 31 = 744 hours, if it is only this instance it is a dimension that you can enjoy Mine Craft for quite a long time free.

When these settings are completed, leave the others at their default values and click "Create" at the bottom of the screen.

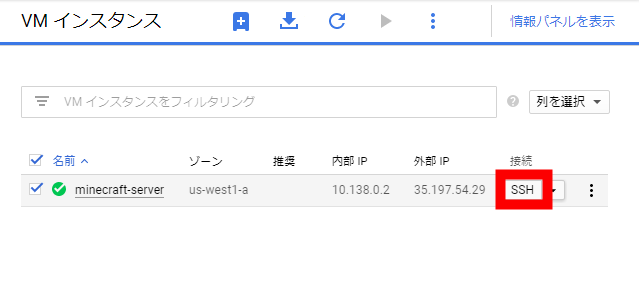
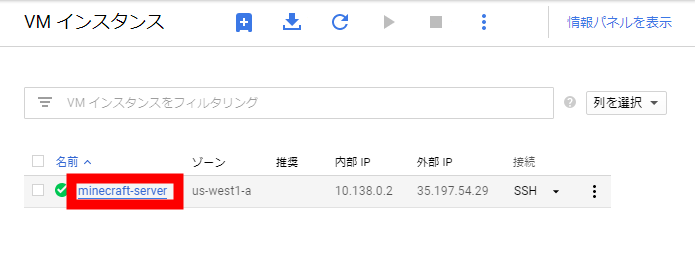
The instance created on the "VM Instance" page is displayed. Since I connect to the instance, click "SSH".
If pop-ups are blocked, click on the icon displayed at the right end of the address bar in Google Chrome, select "Always allow pop-ups" in the red frame portion, click "Finish", and click on " Click SSH ".

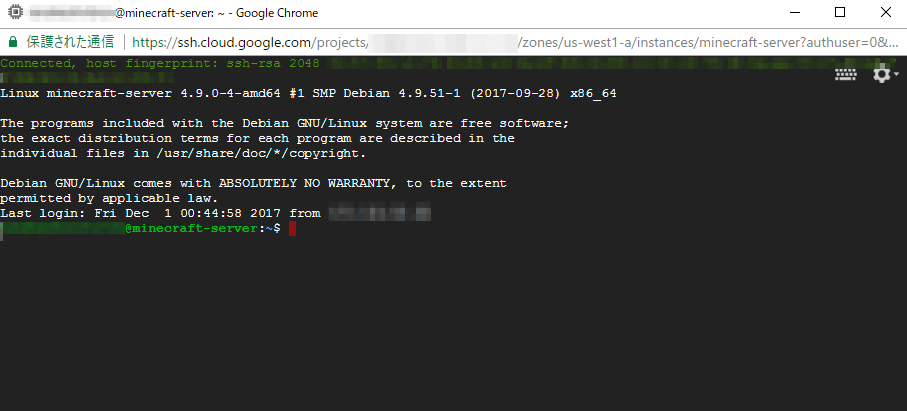
When you connect, a white character screen will be displayed in a separate window on a black background.
I will set up Minecraft's server for this instance, but the original server is very heavy and can not be run on the "f1-micro" instance I am using this time. Therefore, we use "CUBERITE" which is a lightweight server of Minecraft which is being developed with open source. In order to investigate the installation method,Official pageAccess "and click" Manual "below.
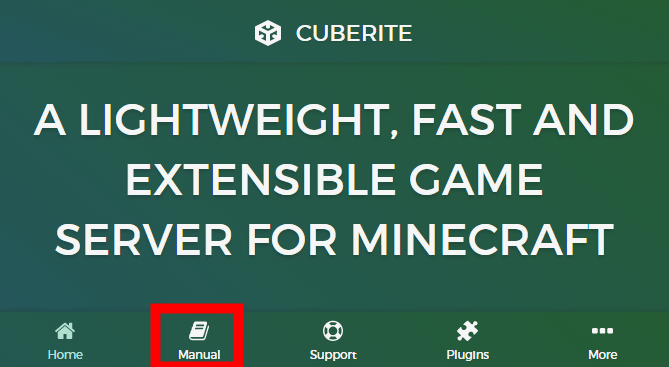
As the table of contents of the manual is displayed, click "1 - INSTALLING".

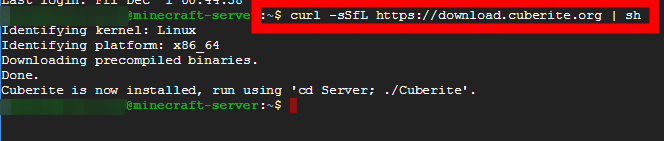
[code]curl -sSfL https://download.cuberite.org | sh[/code]
As it is written to input, you can copy the red frame ... ...

Paste it on the SSH screen opened in a separate window and press the enter key to complete installation.
How to run the server
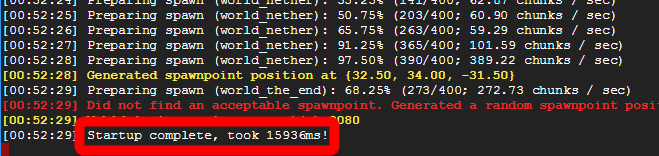
[code]cd Server; ./Cuberite[/code]
As you enter it, copy and paste and press the enter key will start up the server.

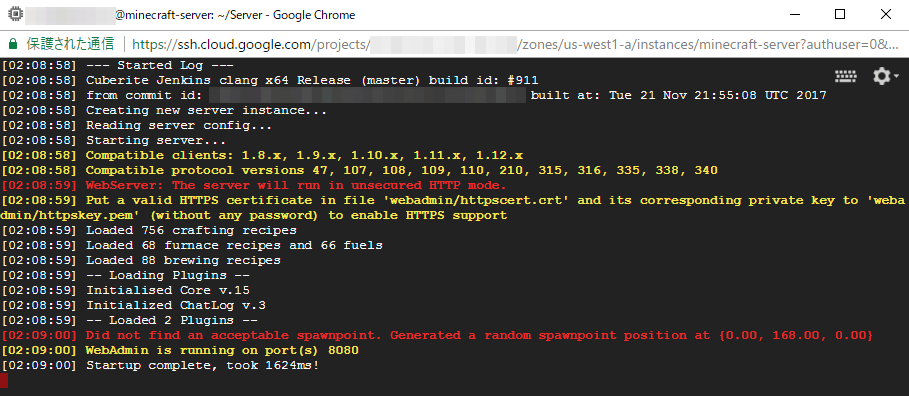
The initial setup takes several tens of seconds, so please wait for a while. Finally it will be ready if "Startup complete" is displayed.
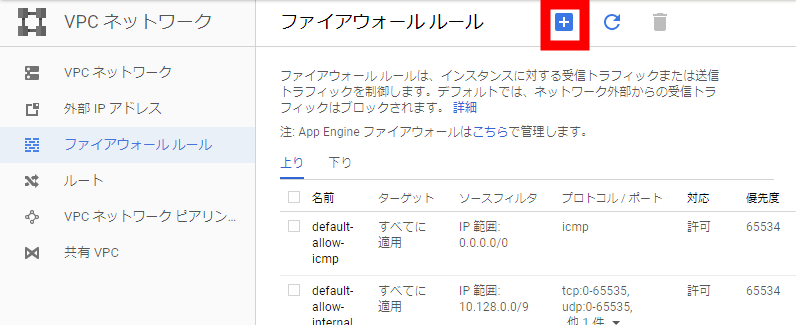
Next we will configure it to be able to connect to this instance from the outside. From the hamburger menu at the top left, place the cursor on "VPC Network" and click "Firewall Rule" from the menu displayed on the right.

Click the "+" mark button at the top to add a new rule.
I made it to "minecraft-server" so that it is easy to understand that the name is a rule used by Minecraft's server.
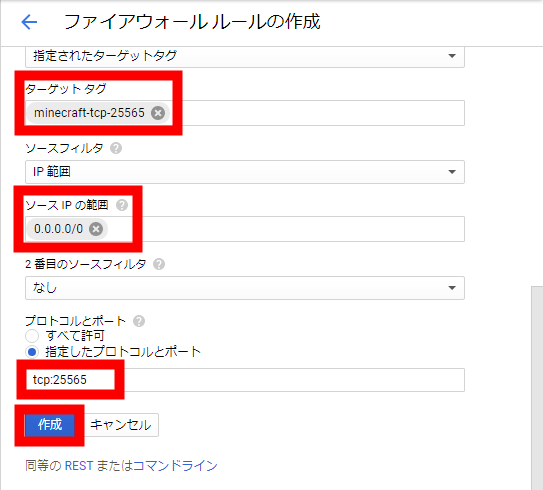
Scroll down and continue setting. Also for the tag of the target tag, I set it as "minecraft - tcp - 25565" so that you can understand the setting with only the tag. The range of source IP is "0.0.0.0 / 0" so that it can be accessed from anywhere in the world. For protocol and port, enter "mcraft default setting" tcp: 25565 "and click" Create "button.
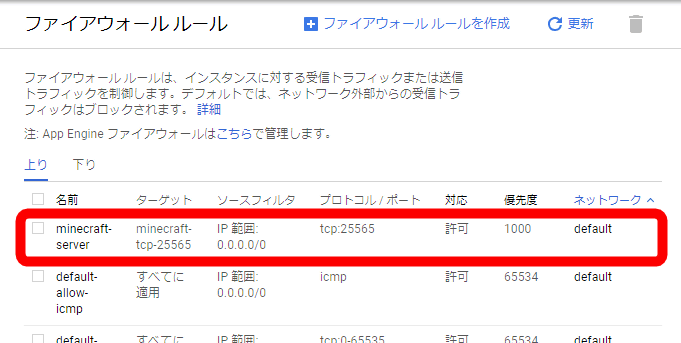
You can confirm that a new rule has been added to "Firewall Rule".
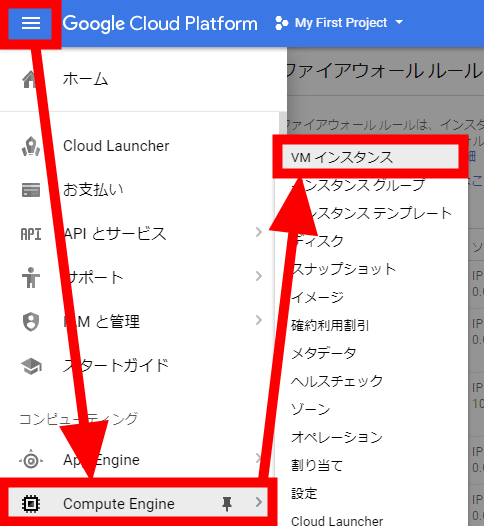
Next, apply the "firewall rule" created earlier to the instance running Minecraft server. Place the cursor on "Compute Engine" from the hamburger menu in the upper left and click "VM Instance" from the menu appearing to the right.
From the VM instance list, click on the name part of "minecraft-server".
As you move to the details screen, click "Edit" in the upper right to go to the setting screen.

Write "minecraft - tcp - 25565" which is the same tag as "target" set when creating the firewall rule in the setting of "network tag" in the middle of the setting list.
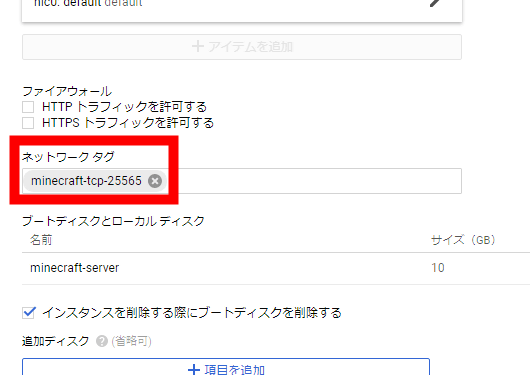
Scroll to the bottom and click "Save".

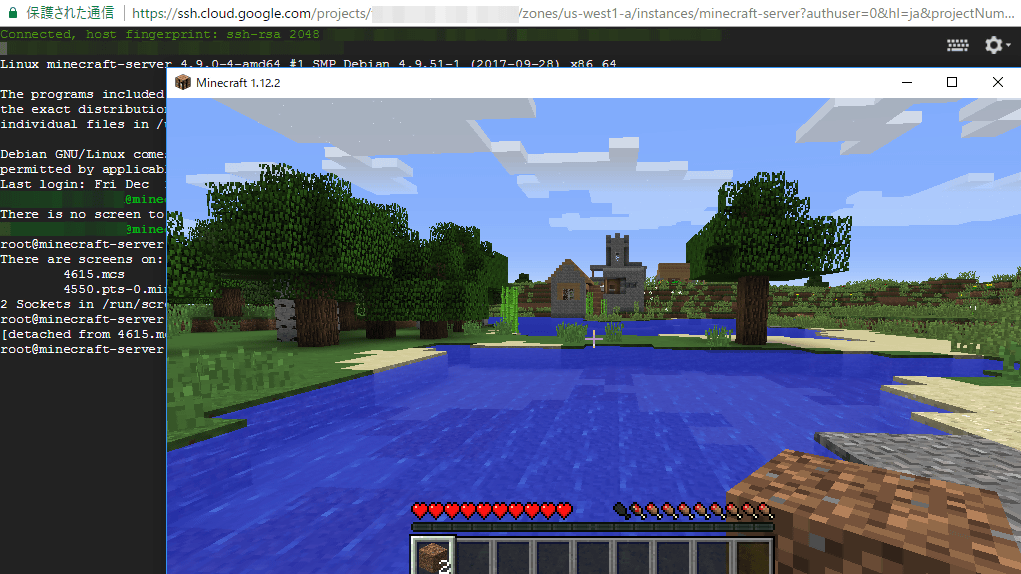
You can now access it. Access using "external IP" which can be confirmed in "Instance List".
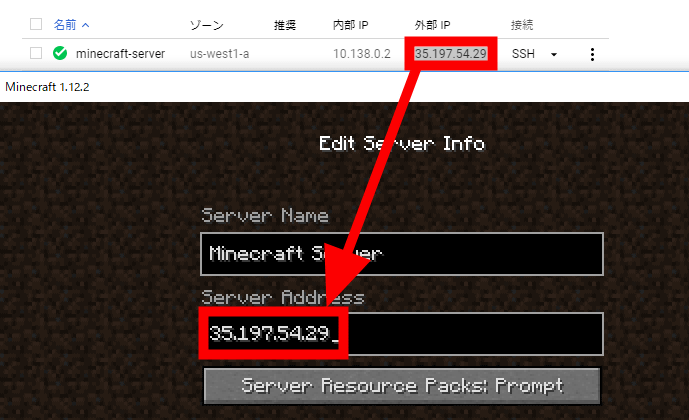
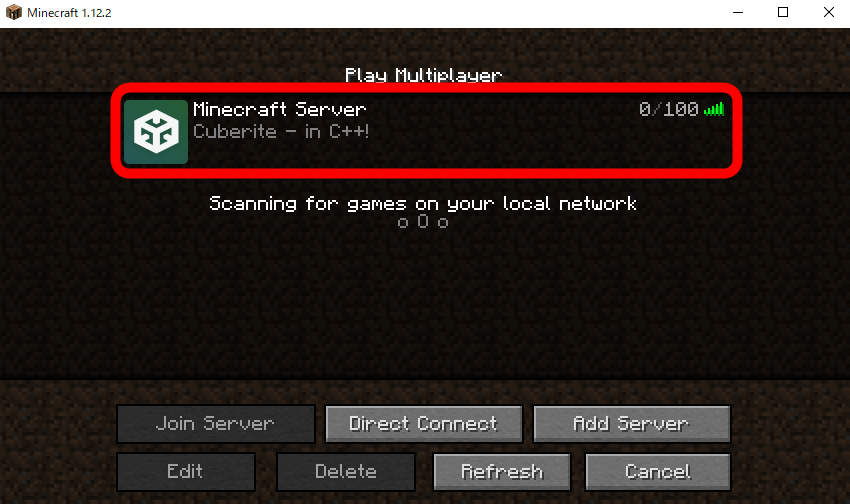
The server is recognized and accessible.
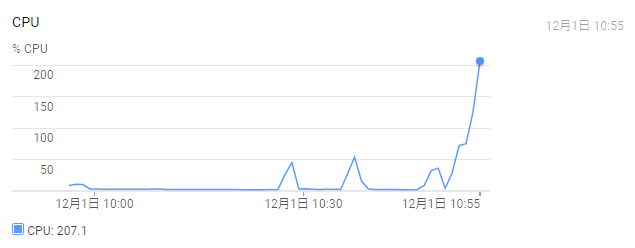
Because the CPU power of the "f1 - micro" instance is poor, there are scenes where the CPU usage rate exceeds 200% in the situation that "the world goes on and on and on and on the adventure trip". The play itself seems to be "a little heavy", so it did not become impossible to play.
Memory usage is about 2 MB. As expected, there is only a server written in C ++ language and it is very small suppressed.

Although it started up successfully, if you keep it, the server of Minecraft will also fall at the same time when closing the browser. To avoid this we use the screen command. If you are keeping the Minecraft server running, since the console screen is displayed, just type "stop" and stop the Minecraft server by pressing the enter key. When the server of Minecraft is terminated and it is displayed as "~ / Server $"
[code]screen -S mcs ./Cuberite[/code]
And press the Enter key.
Here again, if "~ $" is displayed instead of "~ / Server $", first
[code]cd Server[/code]
And press the Enter key.
Confirm that "~ / Server $" is displayed, then enter screen ~ code.

This keeps the Minecraft server running even if you close the window. You can return to the original screen by entering "Ctrl + A" and "D" key in succession. To open the server console again
[code]screen -r mcs[/code]
Please enter and press enter key is OK.
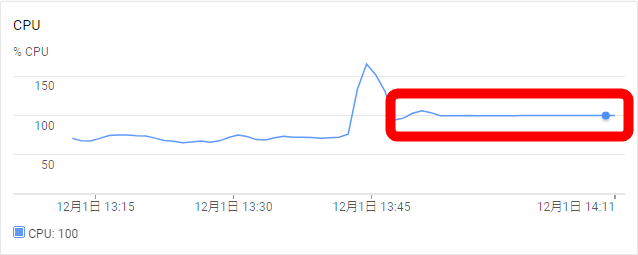
However, if one is logged in to the server, f1 - micro that worked properly also got doubtful as the second person came in, and when the third person logged in, the broken block It has become quite difficult for me to play without hesitation or monsters and animals hitting the ground. The CPU utilization during that time appears in the image, but it is always stuck at 100%, you can see that the processing speed is not in time.
Google Compute Engine solution introduction pageAs you can see, I tried using an official heavy server instead of a lightweight server, using quite a bit of comfort, using n1-standard-1 which costs about 3000 yen per month instead of free f1-micro. Unlike f1-micro, n1-standard-1 is not free for free, but it can be used for free until the usage amount reaches 300 dollars (about 33,700 yen), even if it exceeds $ 300 Instances are stopped once instead of being charged on a regular basis,Continuous use will be confirmed againSo, as a person who says "For the time being, it is only necessary for the server to stand for about half a year", a combination of n1-standard-1 and the official maincraft server is recommended.
Related Posts:


in Web Service, Review, Posted by log1d_ts