I tried using AWS's "Cloud 9" which can create a programming environment that allows super easy programming

"Cloud 9"Is an integrated development environment (IDE) that can be used online. It runs on AWS of cloud service deployed by Amazon.com, but it can be used within free frame for one year, and it can be used at about 1 yen / hour even if it exceeds 1 year. I tried using actually to see how much features are attached with this conscious price.
AWS Cloud 9 (cloud IDE for code writing, execution, debugging) | AWS
https://aws.amazon.com/jp/cloud9/
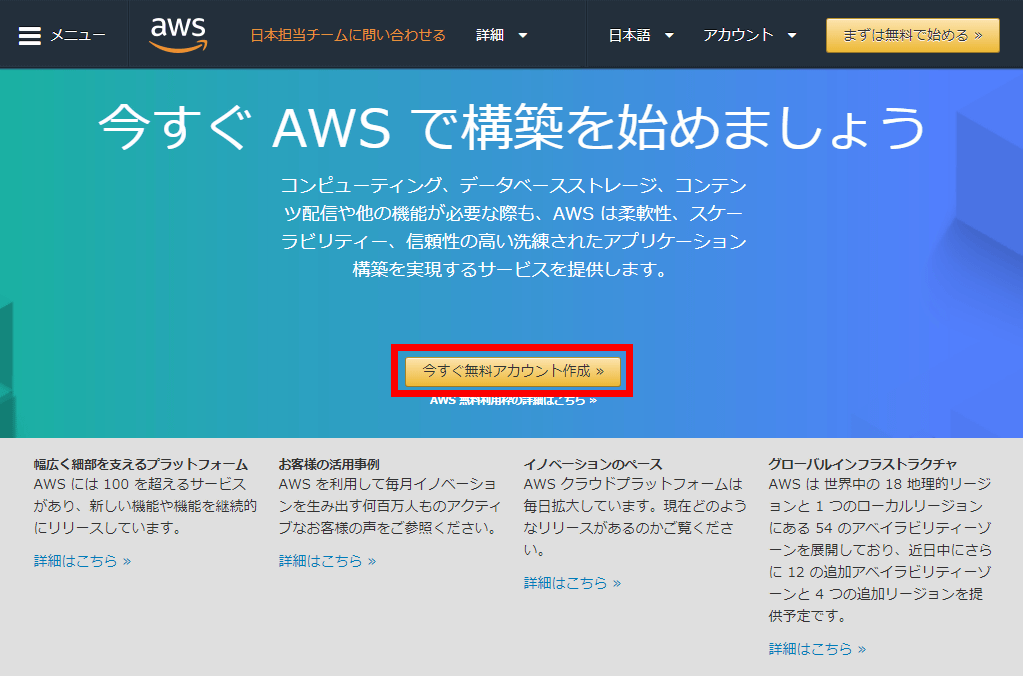
AWS pageGo to "Create a free account now" Click.
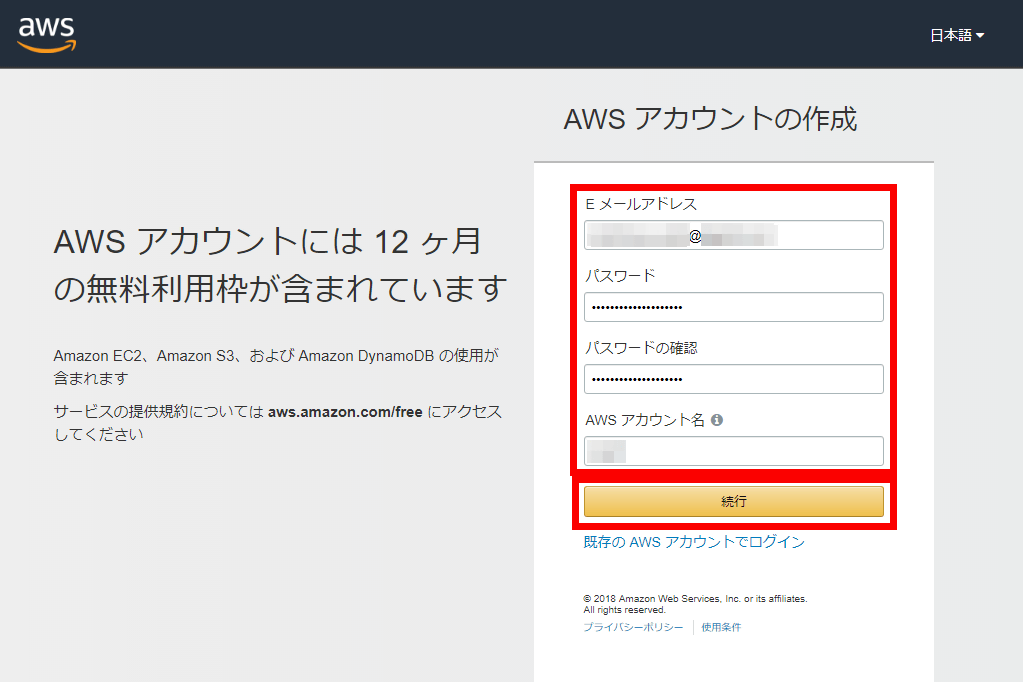
Enter your e-mail address and password, and the AWS account name and click "Continue".
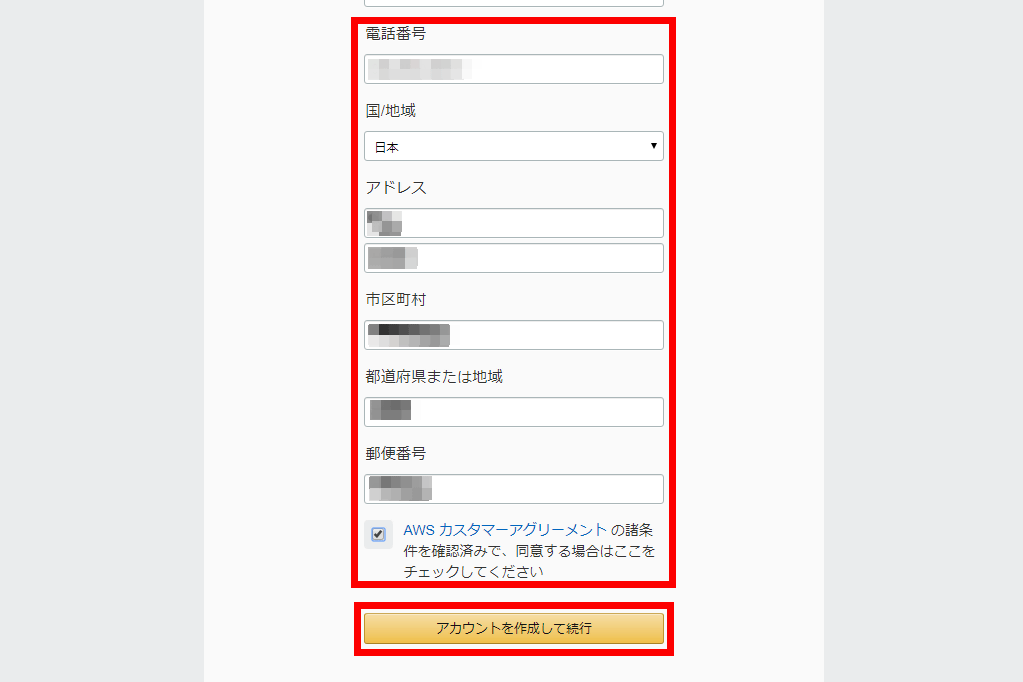
Then enter the phone number and address. The address is an American style to write from the street address and it is necessary to enter it with an alphabet. When you fill in, click "Create Account and Continue".
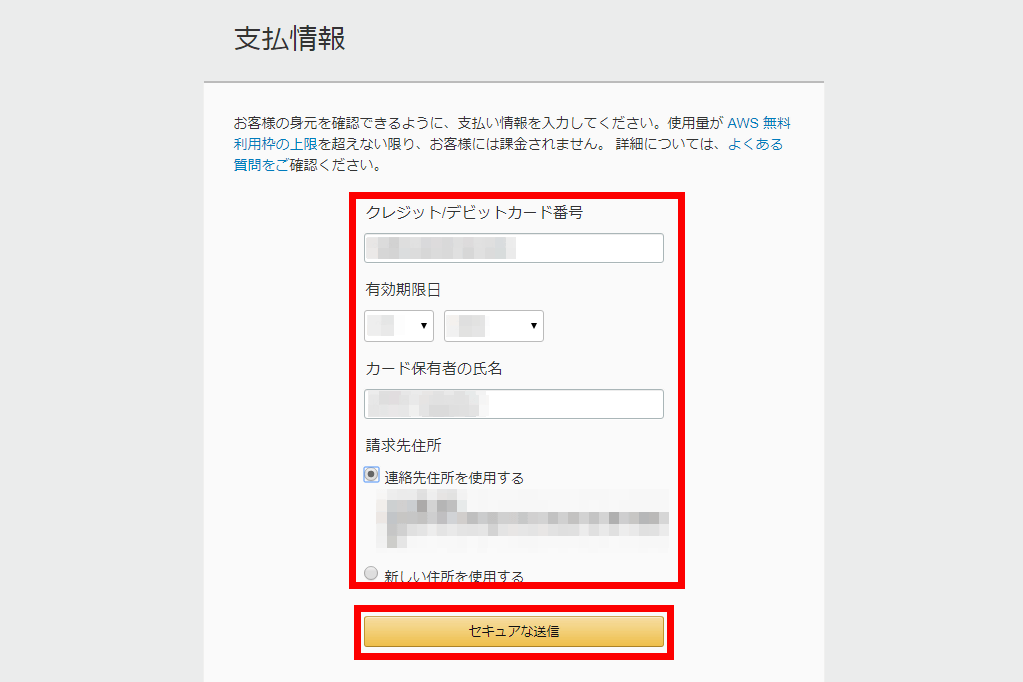
Enter credit card information. The service used in this article is not charged because it is free for 1 year, but it may be charged if you use too much other AWS service.
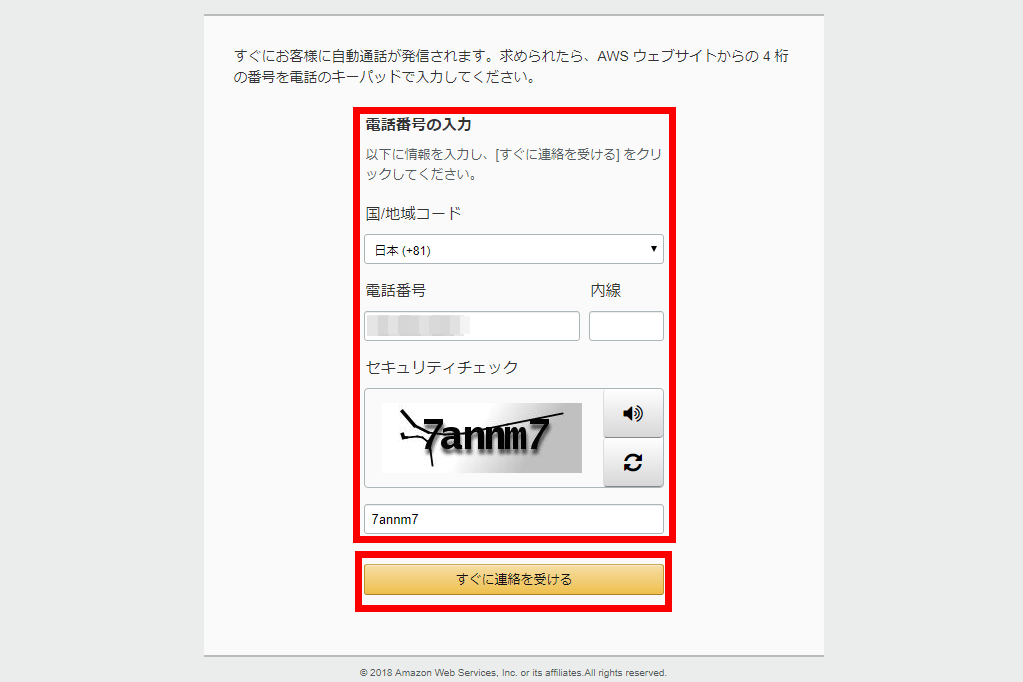
I have phone number confirmation. After entering a phone number and clicking "Get in touch immediately", a call comes in, so push 4 numbers according to voice instructions.
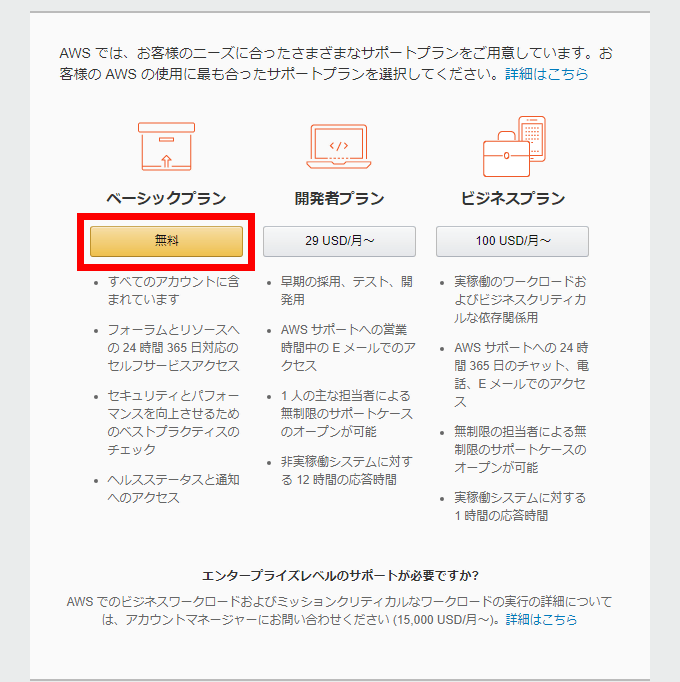
Go to the plan selection screen. Select "Basic Plan" this time. Although it says "free", this is just support free, but if you overuse AWS 's service you will be charged for a fixed amount so be careful.
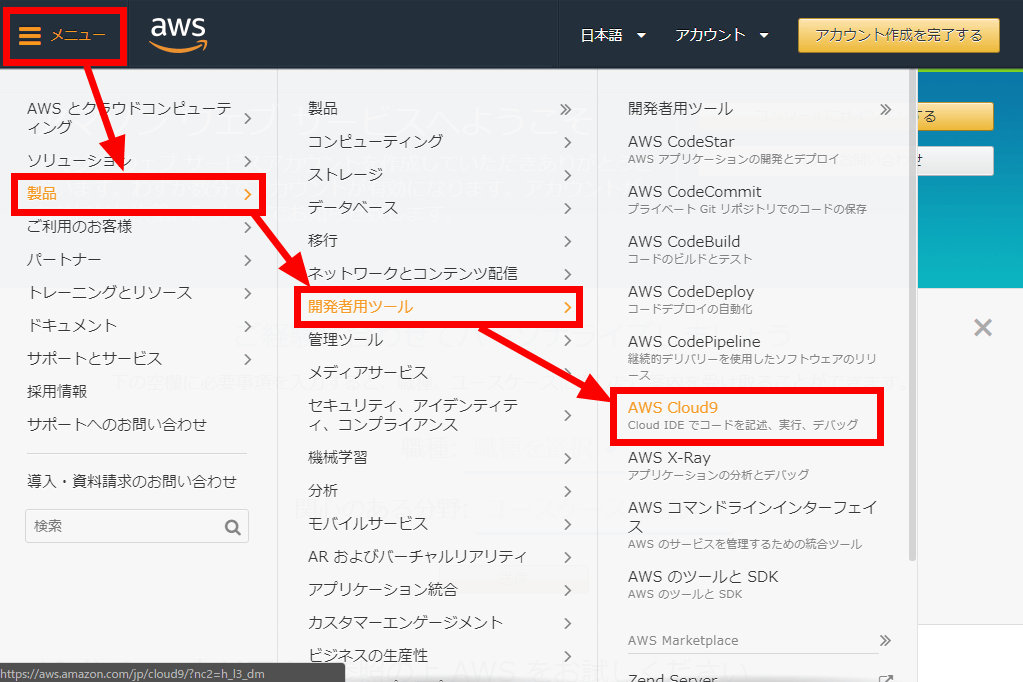
Your account is now created. Next, select "product" -> "developer tool" -> "AWS Cloud 9" from the menu in the upper left and click on it. Please note that it is not recommended to work directly with AWS account, and you can use "AWS account"IAM accountIt is good to create and work with that account, but this time I use an AWS account.
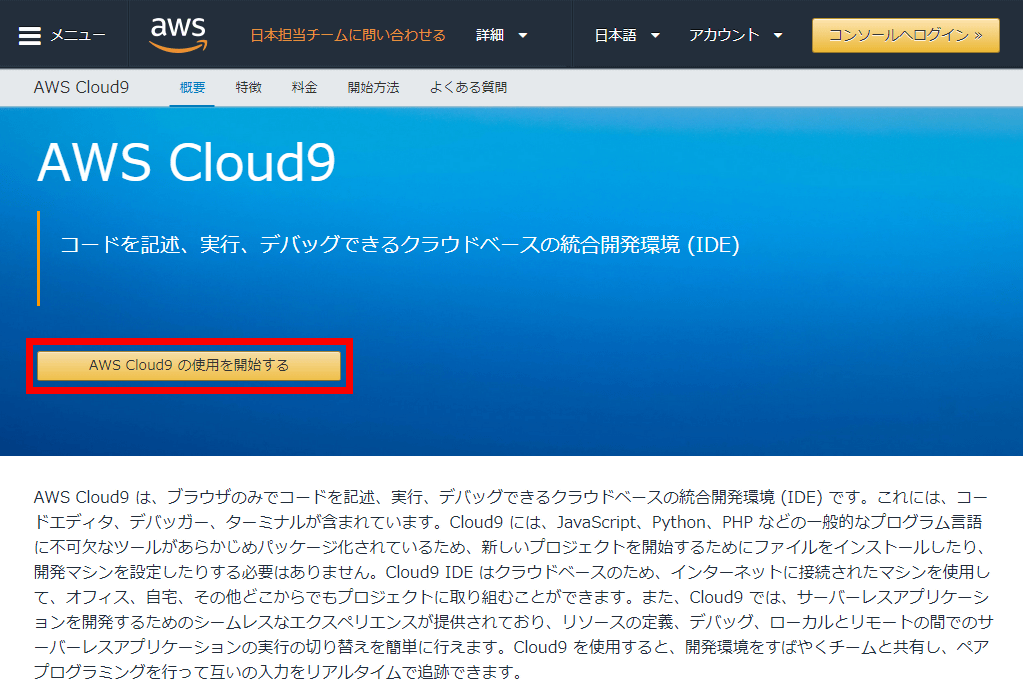
Click "Start using AWS Cloud 9".
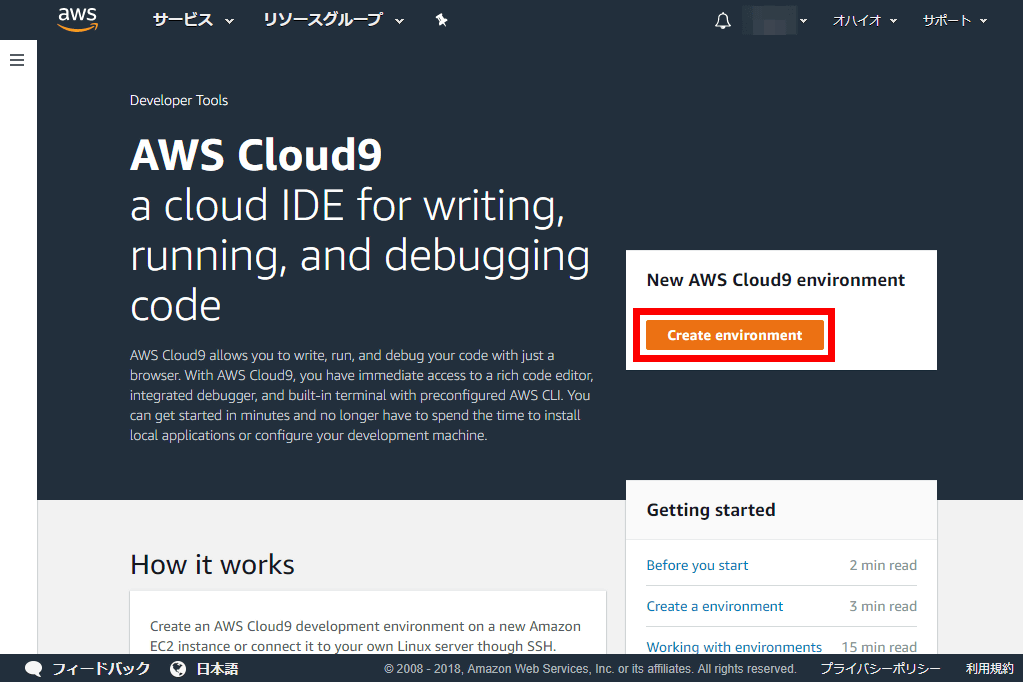
Click "Create environment" on the right.
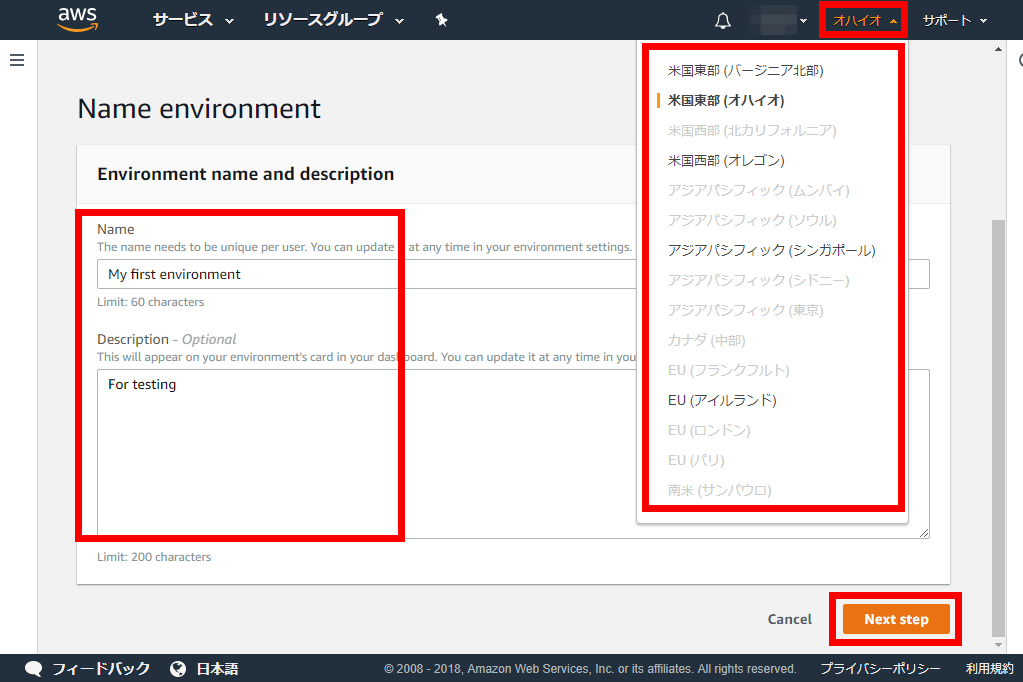
You can select a region to place the server from the button on the upper right, but this time I chose the default "Ohio." Write the name and description of the environment and click "Next Step" in the lower right.
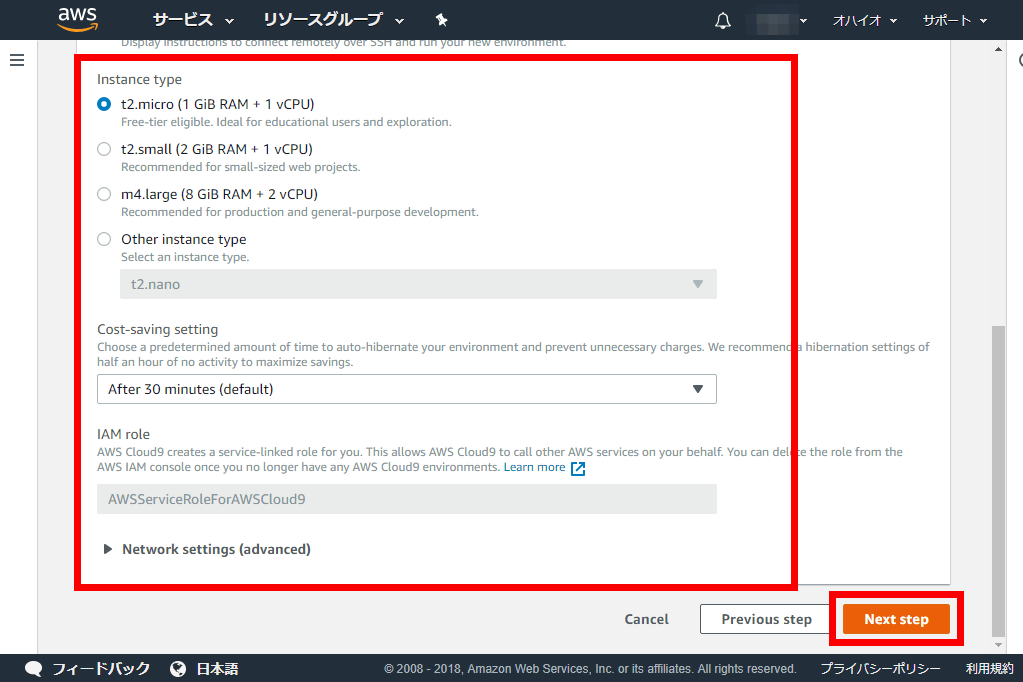
There are instance type and cost saving setting etc, but this time please click "Next Step" with default.
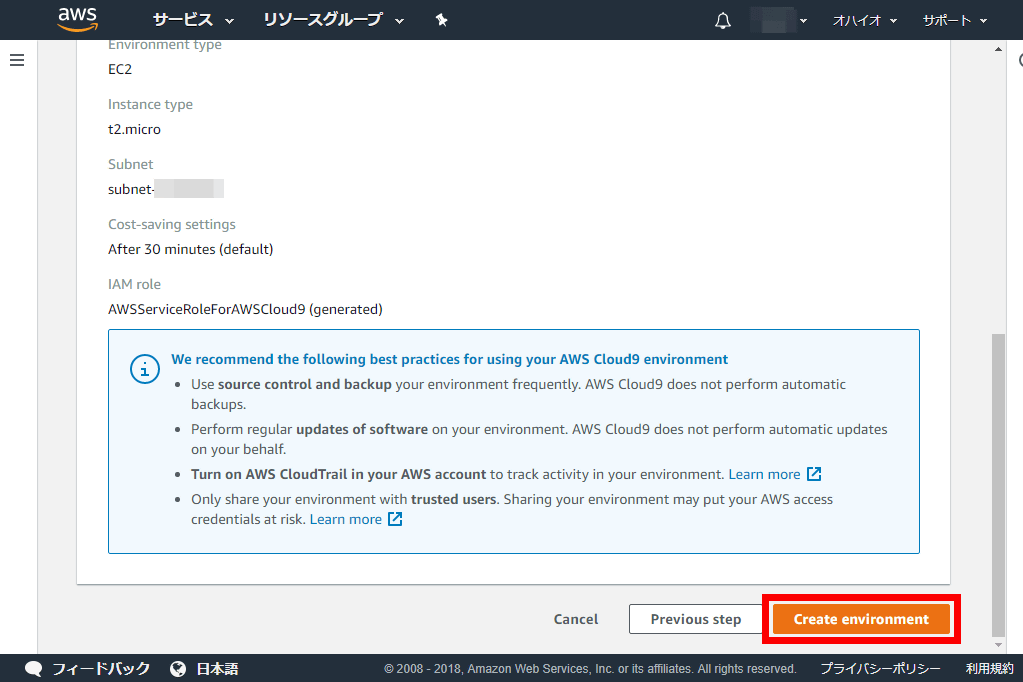
Since the confirmation screen is displayed, click "Create environment" in the lower right.
The environment has been built and Cloud 9 is now available for use.
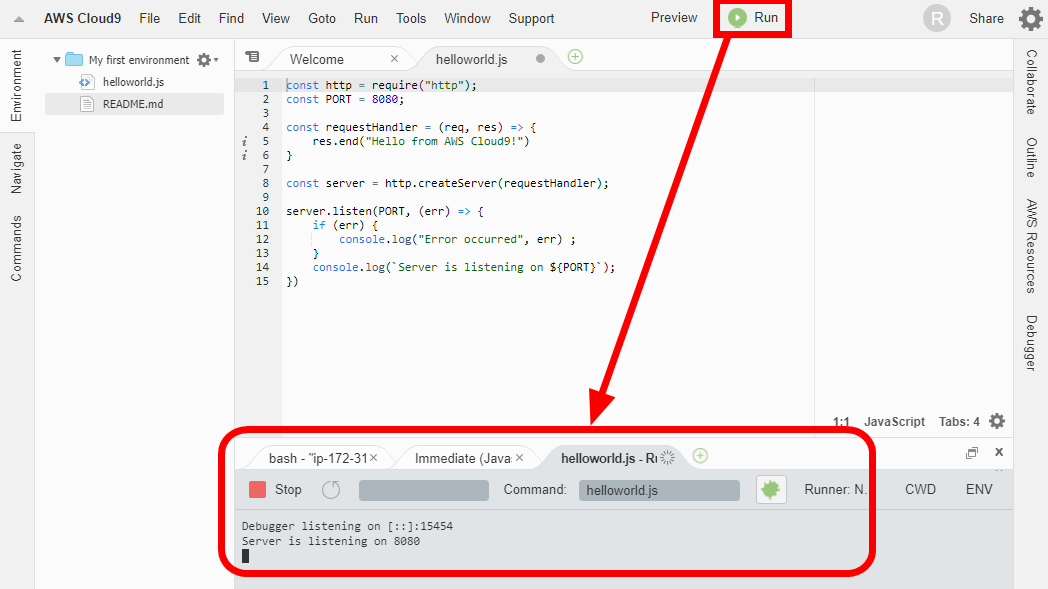
Try setting up a web server with Node.js. Select "New From Template" from "File" in the upper left corner, and click "Node.js Web Server".
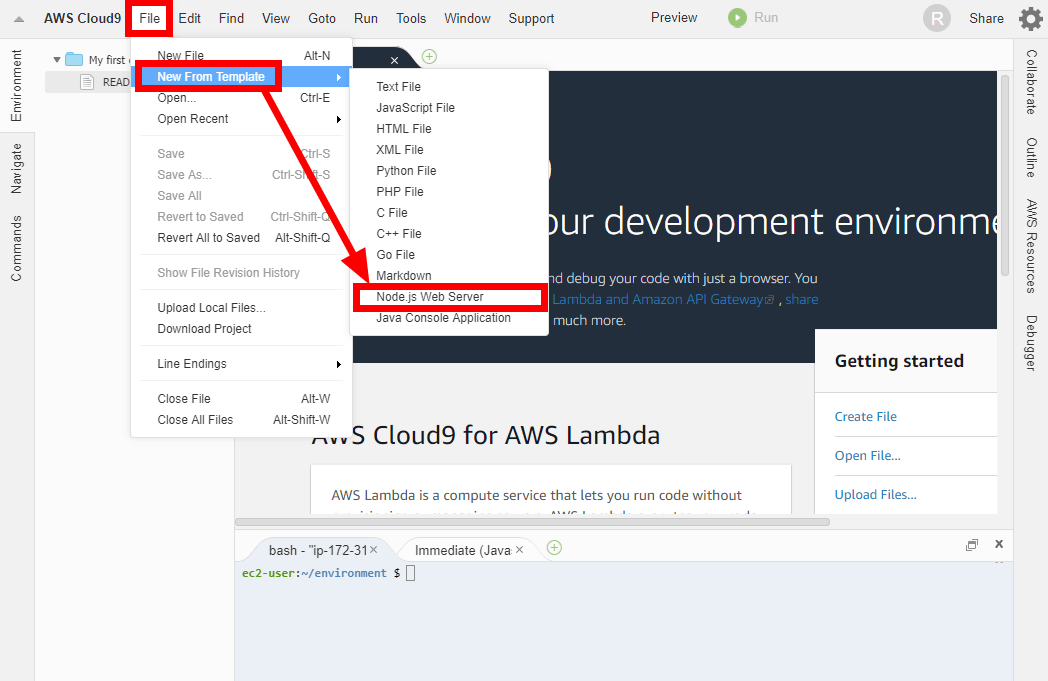
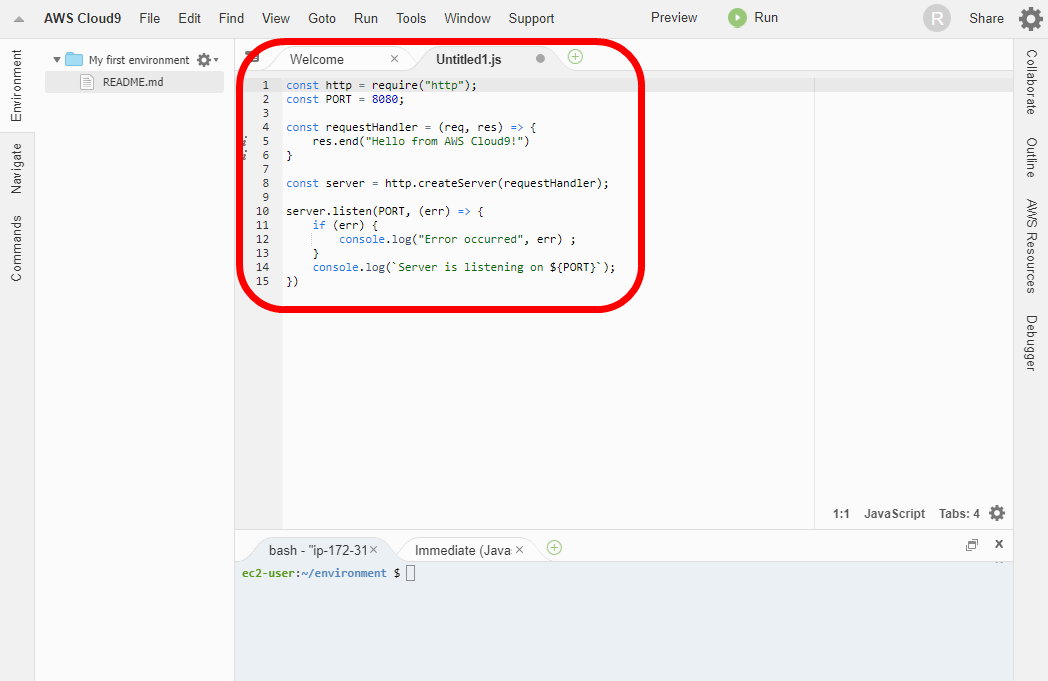
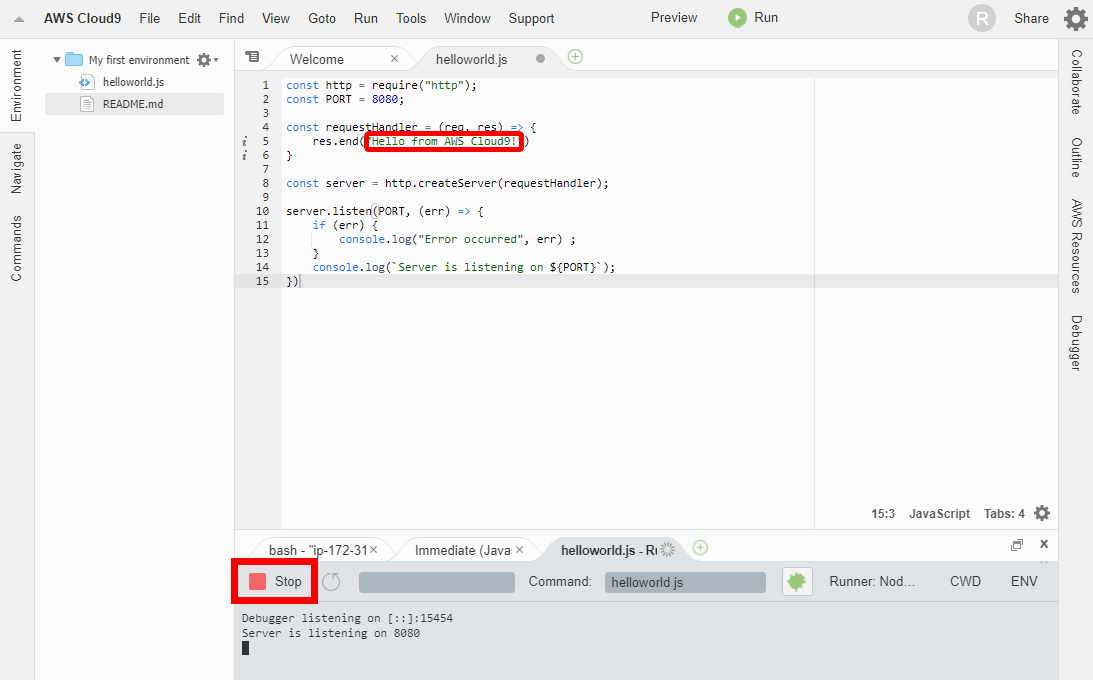
A Web server code that displays "Hello from AWS Cloud 9!" As a template is prepared.
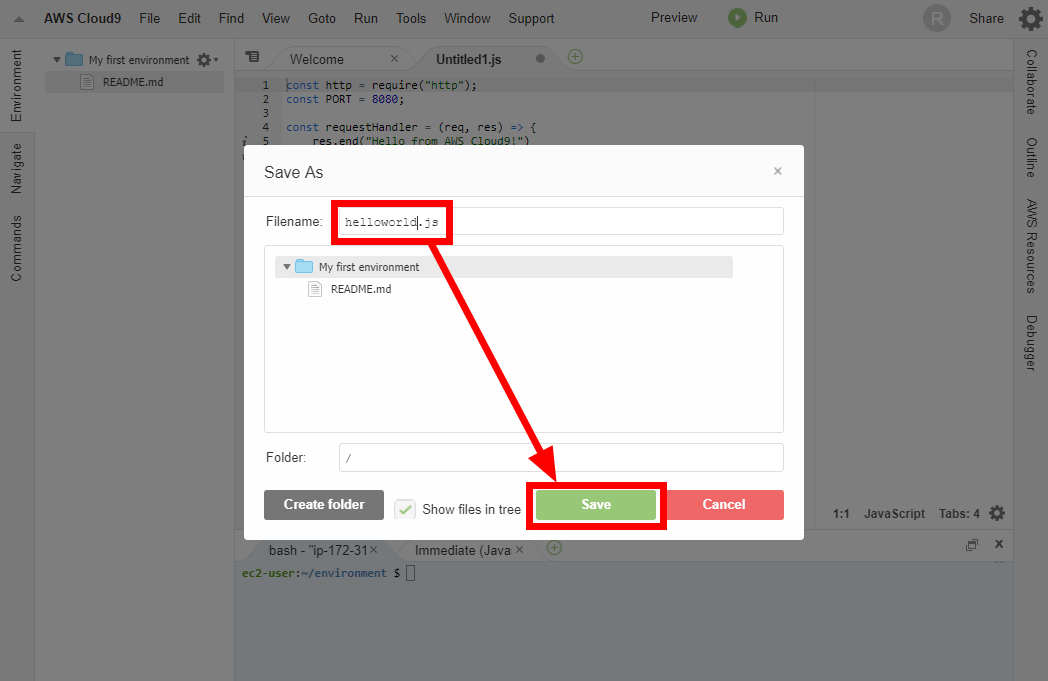
Simply press "Ctrl + S" and save the name as "helloworld.js".
Press "Run" in the upper right to start up the server. However, since access is denied as it is as it is, next setting is to allow access to this server.
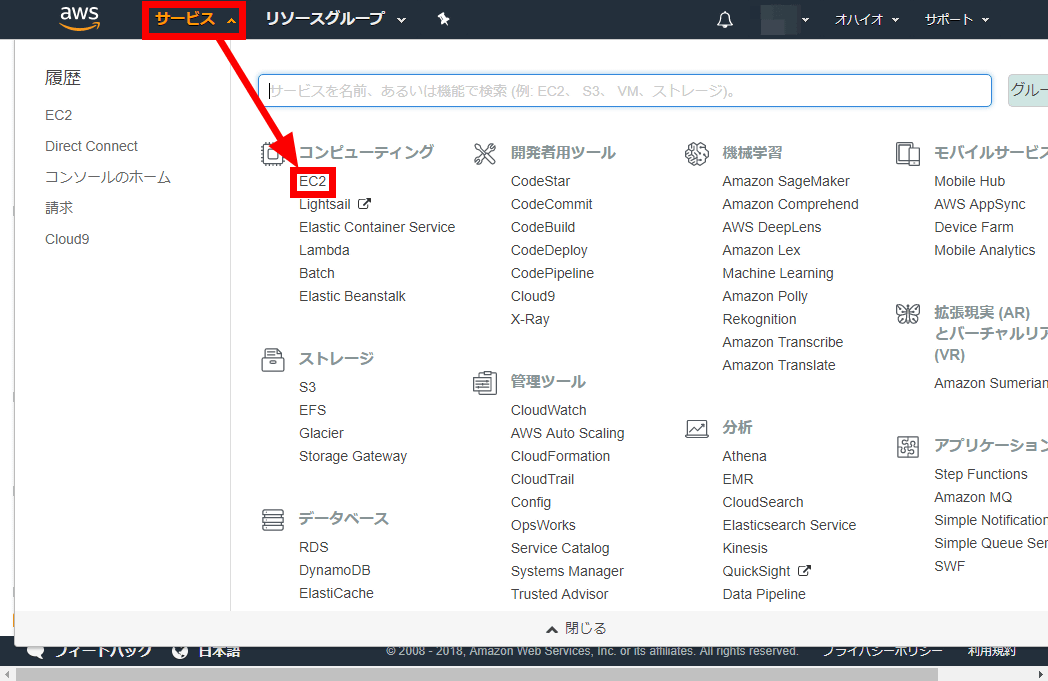
Go to the AWS console screen and click "EC 2" from "Service" on the upper left.
Select "Security Group" in the "Network & Security" section, click the one whose group name starts with "aws - cloud 9 - ~~", click "Edit" on the "Inbound" tab below To do.
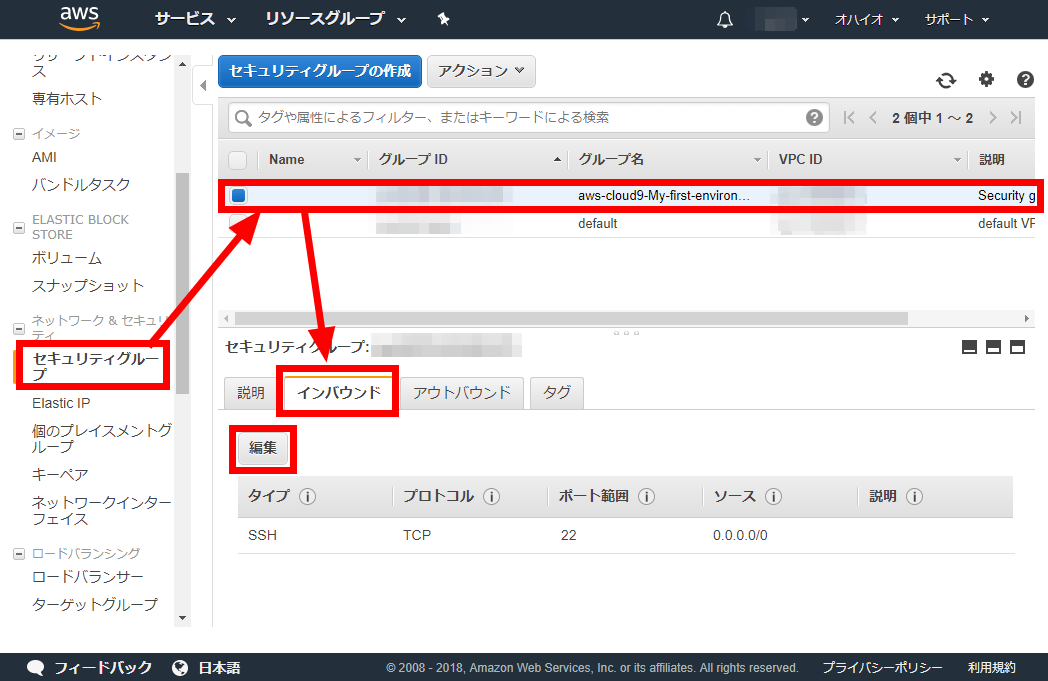
Click "Add Rule" to add a line, and set the port range to "8080" and click "Save". You can now access the server you started up earlier.

To find out where to access please open the menu "Instance" of EC 2 and click on the instance named "aws - cloud 9 - ~ ~" OK. Copy "Public DNS" displayed in the lower right ... ...
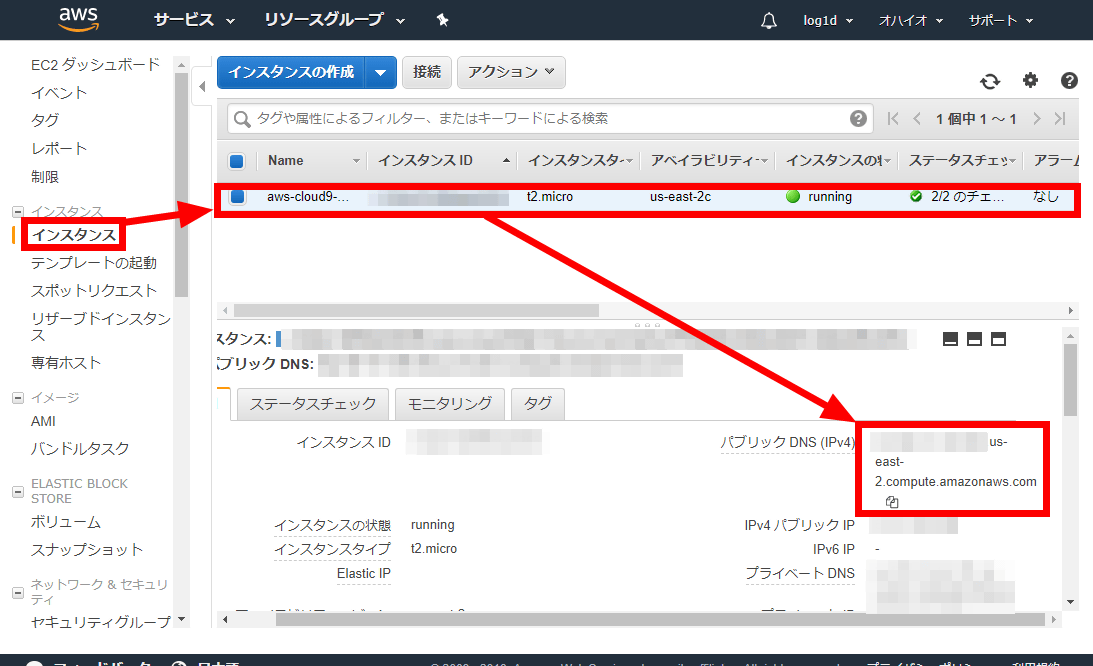
Paste it in the address bar. Regular Http access uses port 80, but since this time we have set up the server at port 8080, we add ": 8080" to the back of the URL. And when you press the enter key "Hello from AWS Cloud 9!" Is displayed.

This is the character that I confirmed earlier, you can see that it is connected properly. To stop the server, click "Stop" in the lower left.
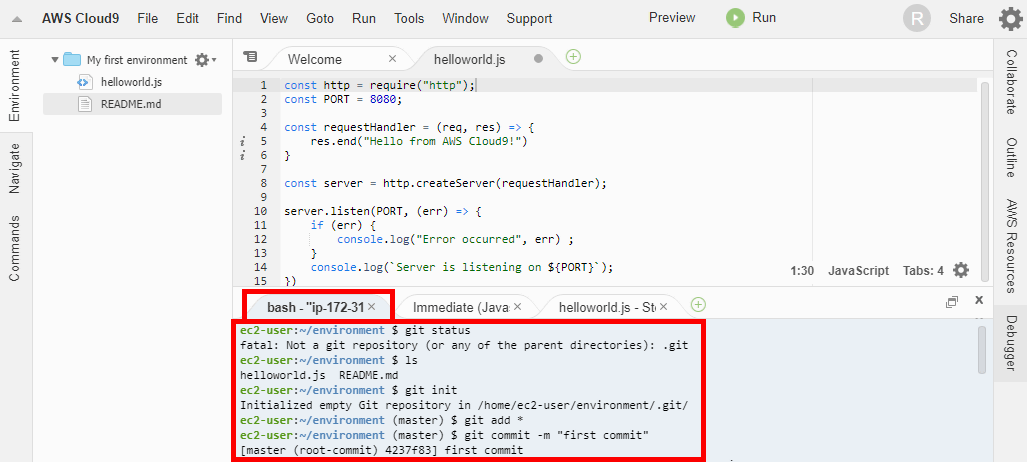
In addition, on the lower screen, connected terminals are prepared, you can perform version control using git and install libraries using npm and pip.
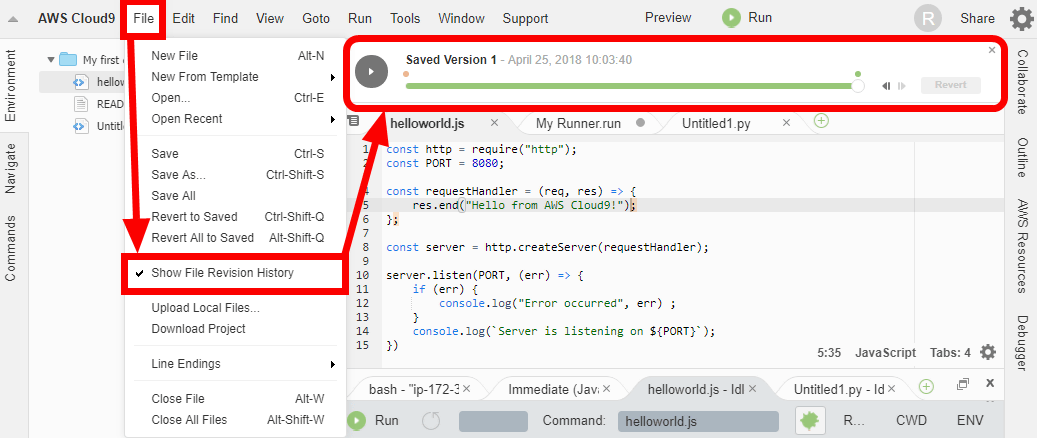
If you want to check the editing history of a single file, you can turn on "Show File Revision History" from "File". You can check how the version history appears on the file edit screen and how it has been changed.
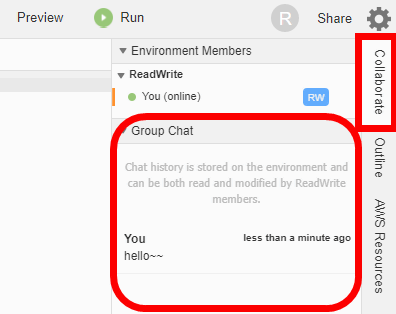
Click "Share" on the top right to see the same in the same AWS accountIAM userYou can invite and program multiple people at the same time.
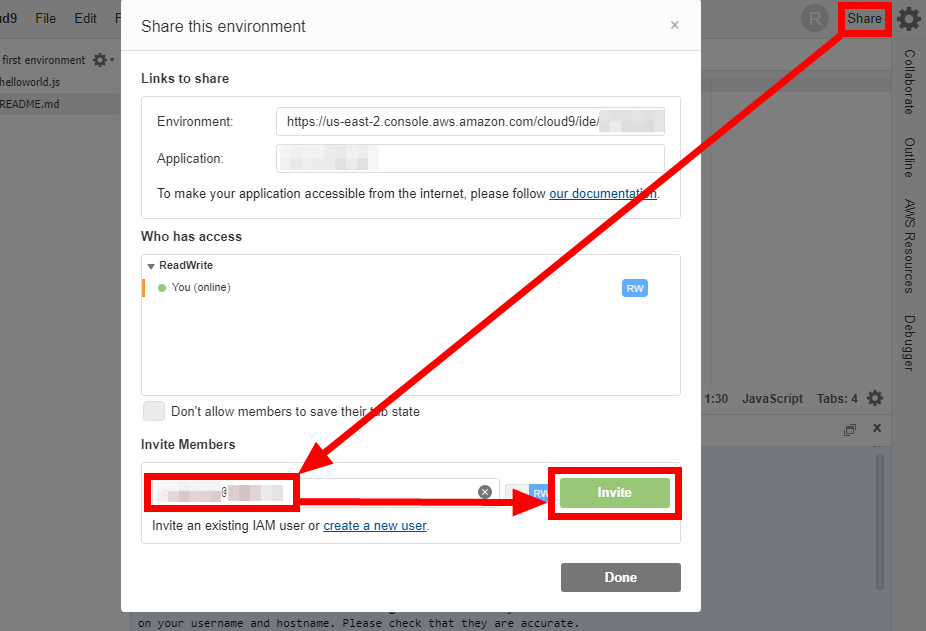
By clicking the "Collaborate" column on the right side, you can start chatting immediately, so you can easily pair program.
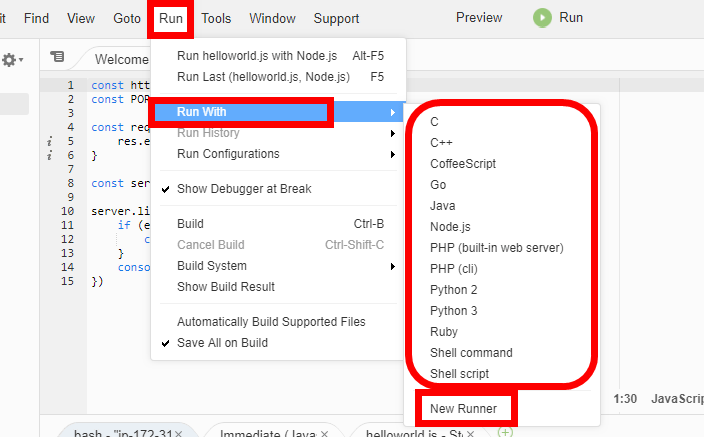
By looking at "Run" -> "Run With" in the menu, you can check the environment that can be used as standard, and "C" "C ++" "CoffeeScript" "Go" "Java" "Node.js" "PHP" "Python 2 & 3 "Ruby" "Shell command" "Shell script" has become. In addition to the languages on the menu, "C #" "CSS" "Dart" "Haskell" "HTML" is supported. To use other settings, click "New Runner" and set the command to be executed.
The configuration file has the following format ... ...
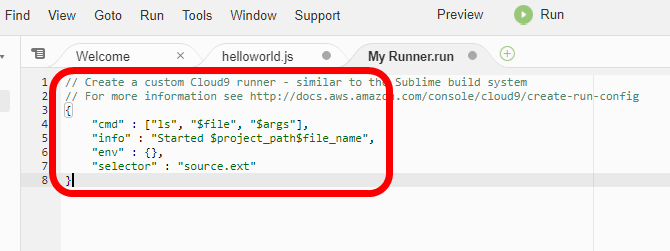
For example, the following is an example of setting when compiling c ++ files with g ++.documentVarious settings are possible if you look at. Since Cloud 9 itself is running on the instance of EC 2,Make environment of another language such as Common LispIt is also possible.

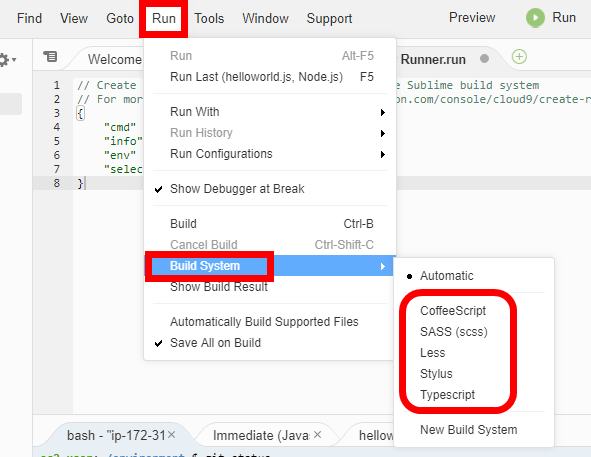
You can also check that "CSS / JavaScript preprocessors such as" CoffeeScript "" SASS (scss) "" Less "" Stylus "" Typescript "are prepared by looking at" Build System "at the bottom of the" Run "menu .
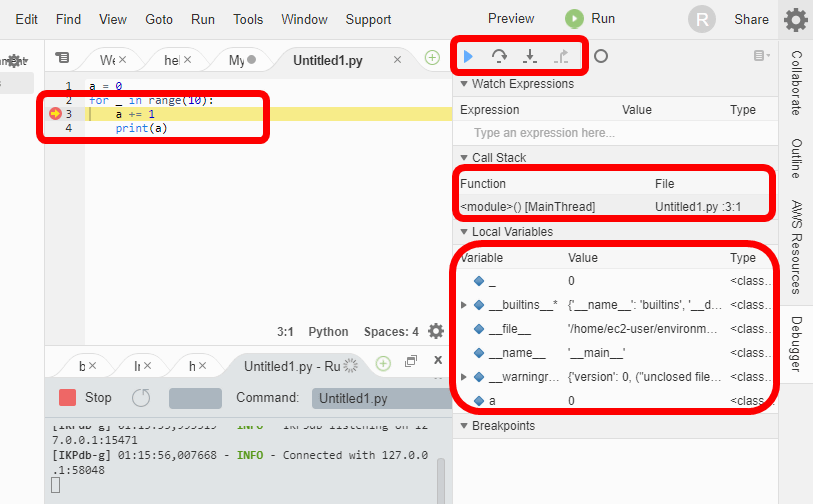
You can also select the processing system from the "Runner ..." button at the right end of the lower window that appears by pressing "Run" once. Furthermore, turn on the debug mode next to the left, set a breakpoint in the code, and click on "Run" ......
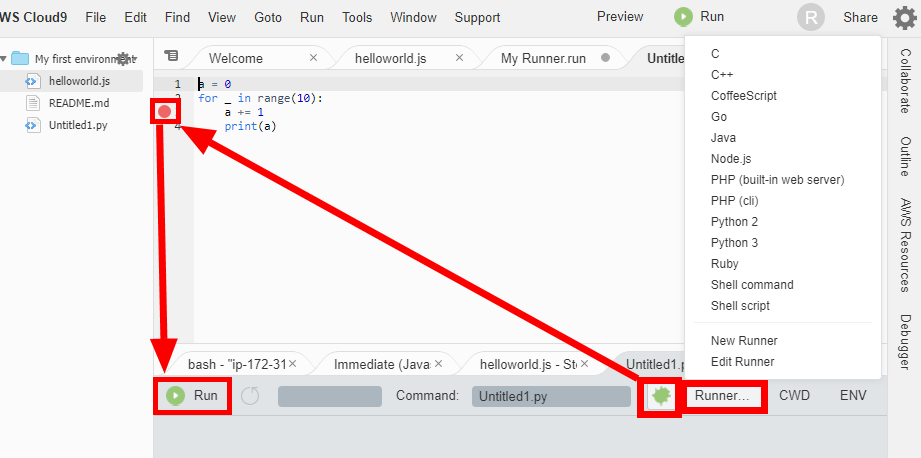
A debugger appears on the right, and you can check the status of the stack / variable at the stage where the breakpoint is reached. At the top of the debugger, you can step over and other operations.
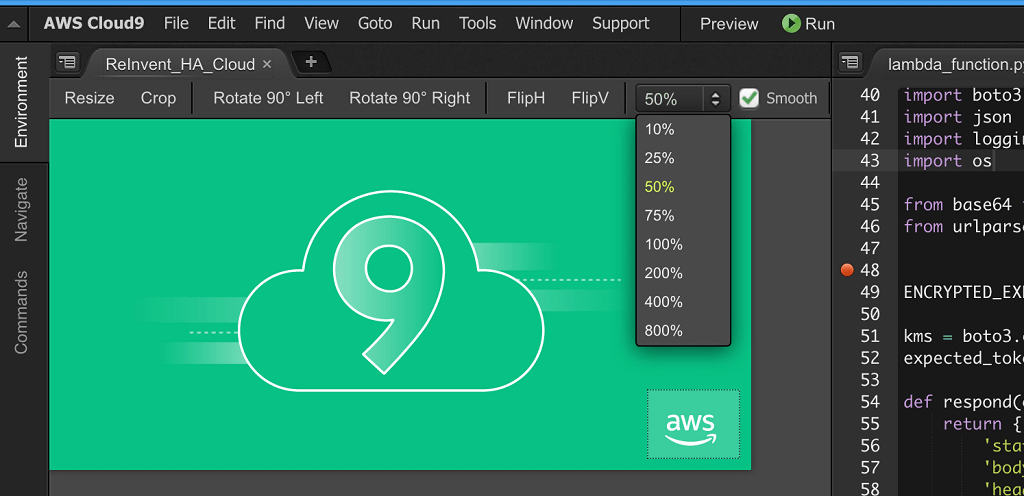
In addition, since a simple image editor is built in, you can also open images and perform operations such as resize, crop, rotate, flip.
In this way, it is the service "Cloud 9" that provides a development environment that allows easy programming with multiple people, as well as putting in a programming environment that is commonly used as it is being built. Although Cloud 9 itself is not charged, fee for the instance of EC 2 running Cloud 9 will be raised. However, if you are using AWS for the first time, selecting "t2.micro" for the instance allows you to use it for free for a year, making it a very user-friendly service.
Related Posts:
in Web Service, Review, Web Application, Posted by log1d_ts