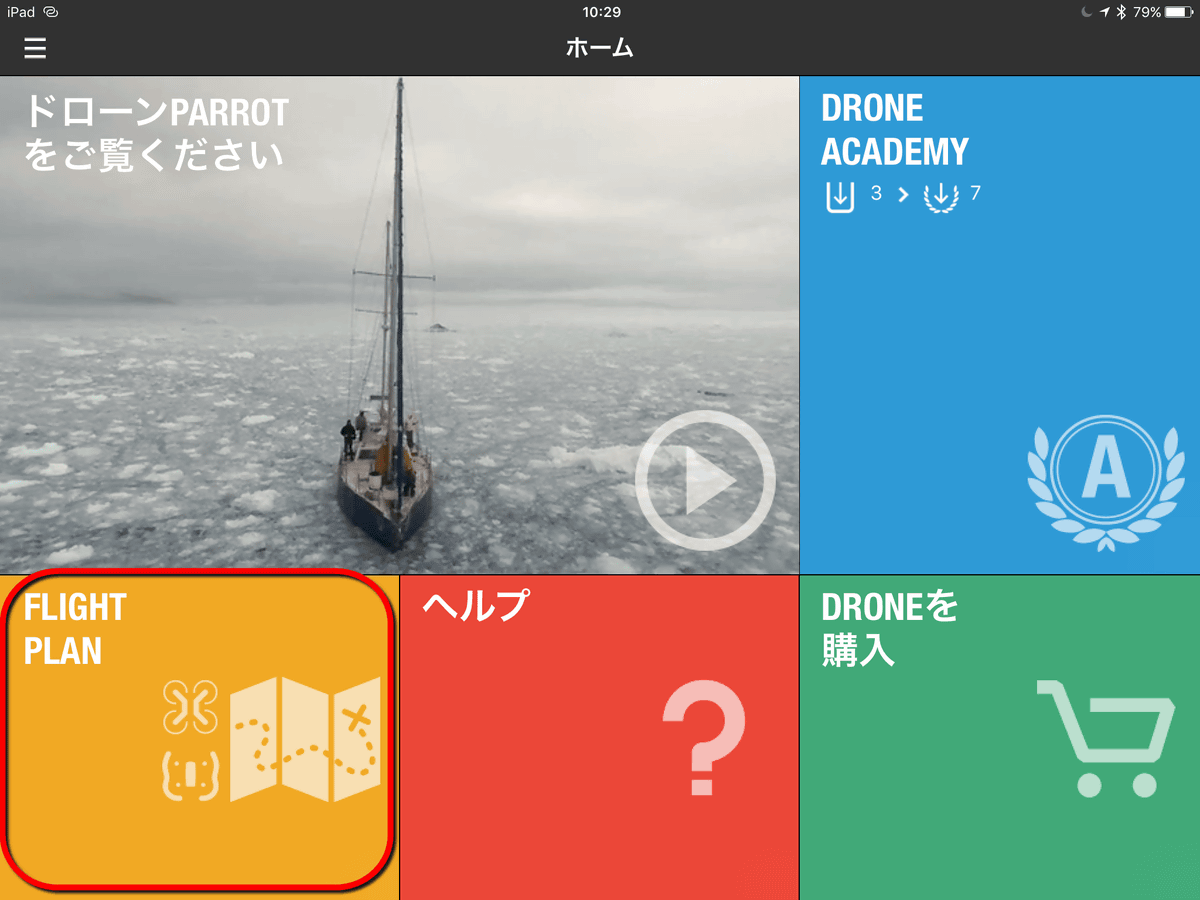
I tried automatic shooting with Parrot Bebop 2 by "Flight Plan" function which can make auto flight & aerial shoot by arbitrary route
Parrot's new drone "Bebop 2"Has become a drone that you can enjoy aerial shooting & first-person name flight with a maximum of 25 minutes flight, but also the auto flight function" Smart Flight 3 "installed in smartphone and tablet applications" Free Flight 3 "Flight PlanBy using, you can automatically flight aerial routes that you set yourself and even take aerial shots. Aerial shooting with manual operationI reviewed it in the last articleSo I decided to actually skip how much shooting can be done with 'fingerless touch' this time literally.
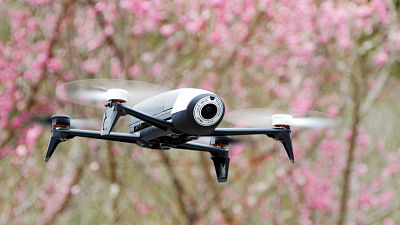
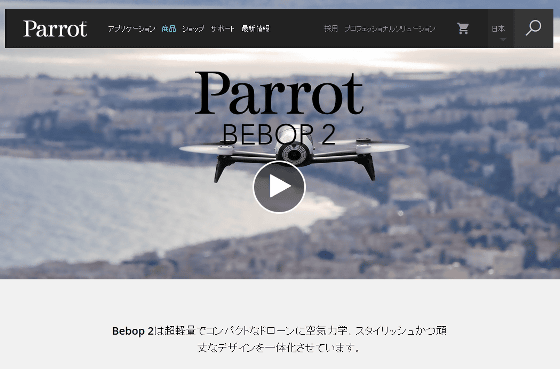
Parrot Bebop 2. "Ultra Flying Otomo" of a design that emphasizes ultra lightweight, compact and durability.
http://www.parrot.com/jp/products/bebop2/
◆ I was able to shoot such an aerial shot image
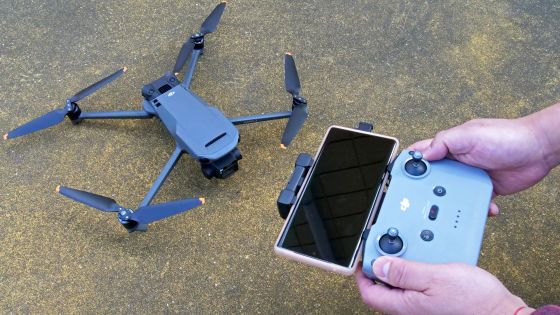
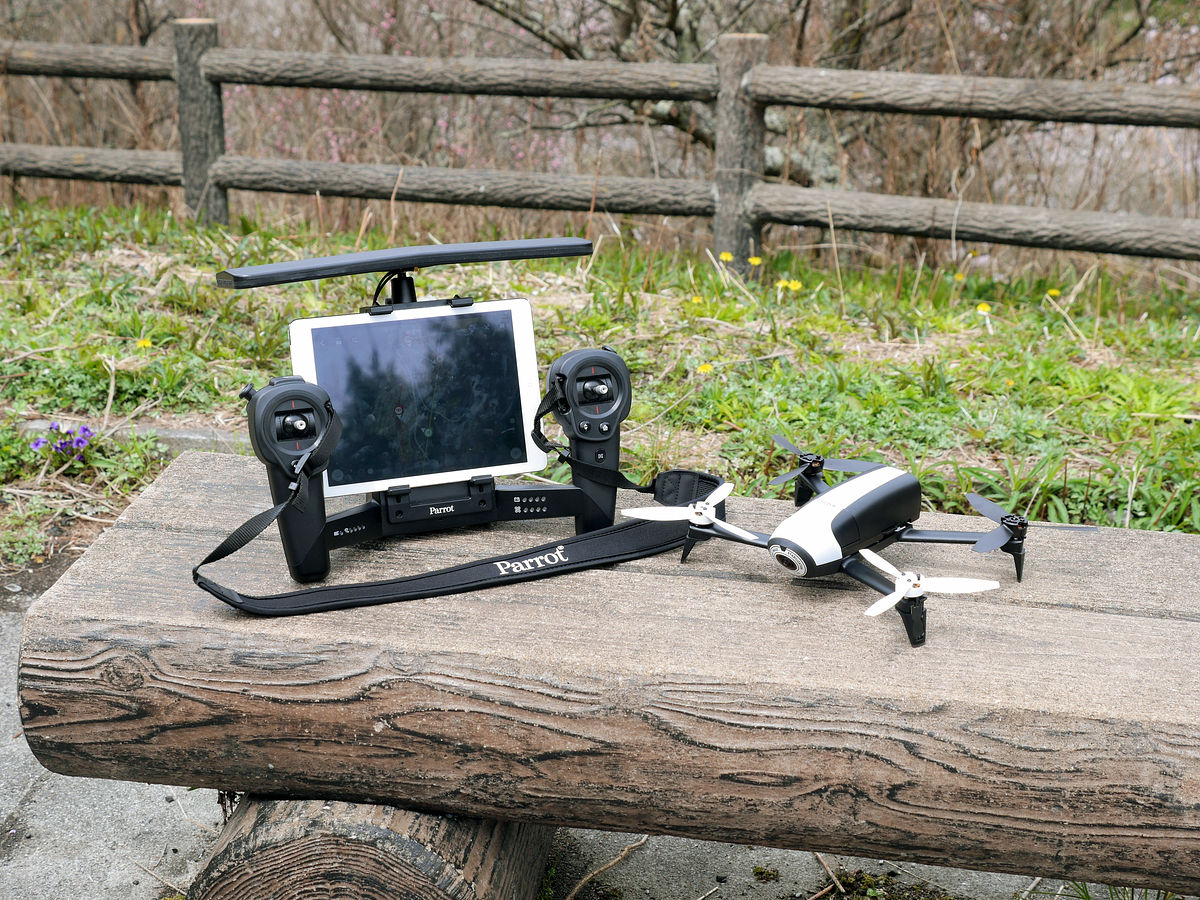
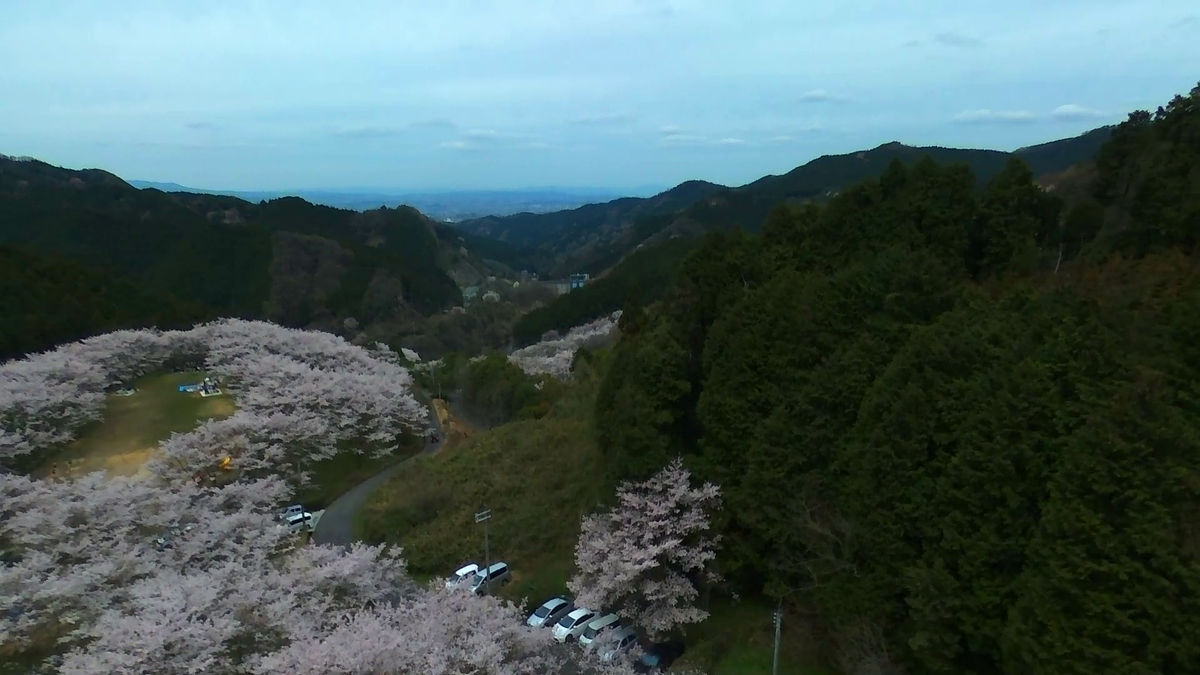
So I took a picture with Bebop 2 and SkyController (Sky Controller). IPad Air is set in the Sky Controller. For this time, I will try to take aerial shots of cherry blossoms in full bloom from above.
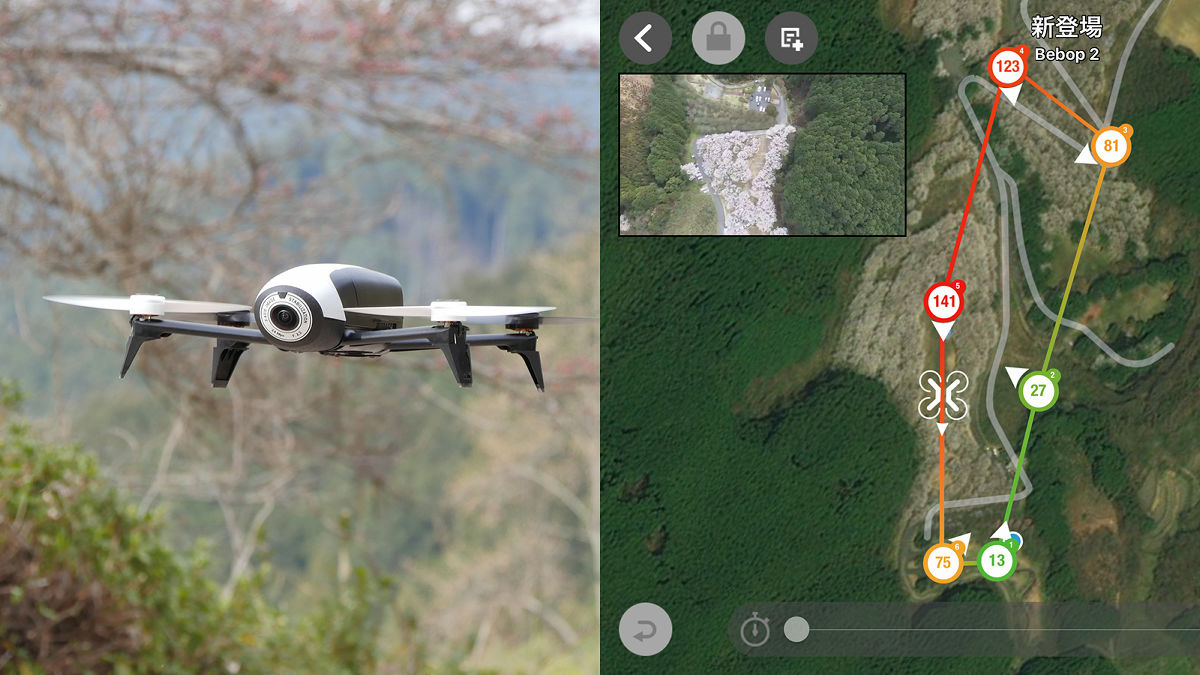
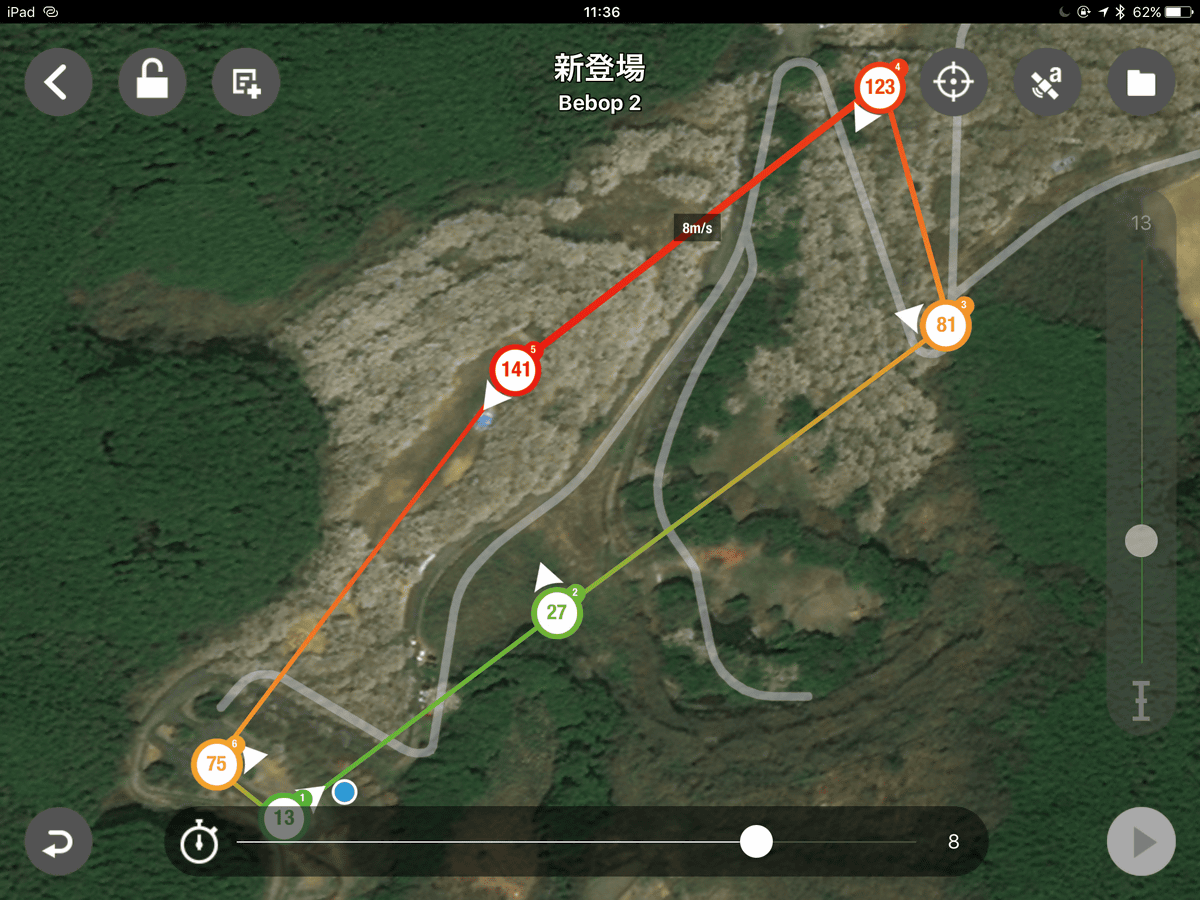
Application "FreeFlight 3Using the "Flight Plan" which is a charged function of "You can set your own waypoint (passing point) on the map like this. In addition to the position information, the waypoint can set the altitude, the moving speed, the changing speed of the camera angle and angle, the turning of the airframe and its speed. This time it is the aerial shooting while flying this route counterclockwise.
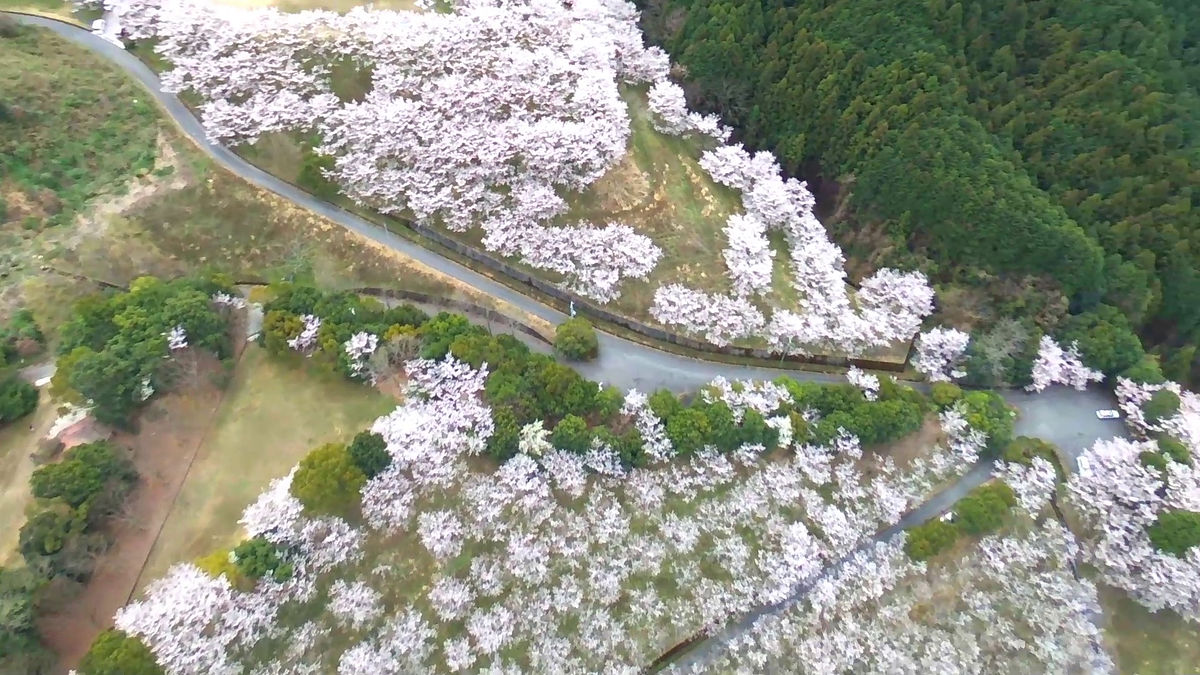
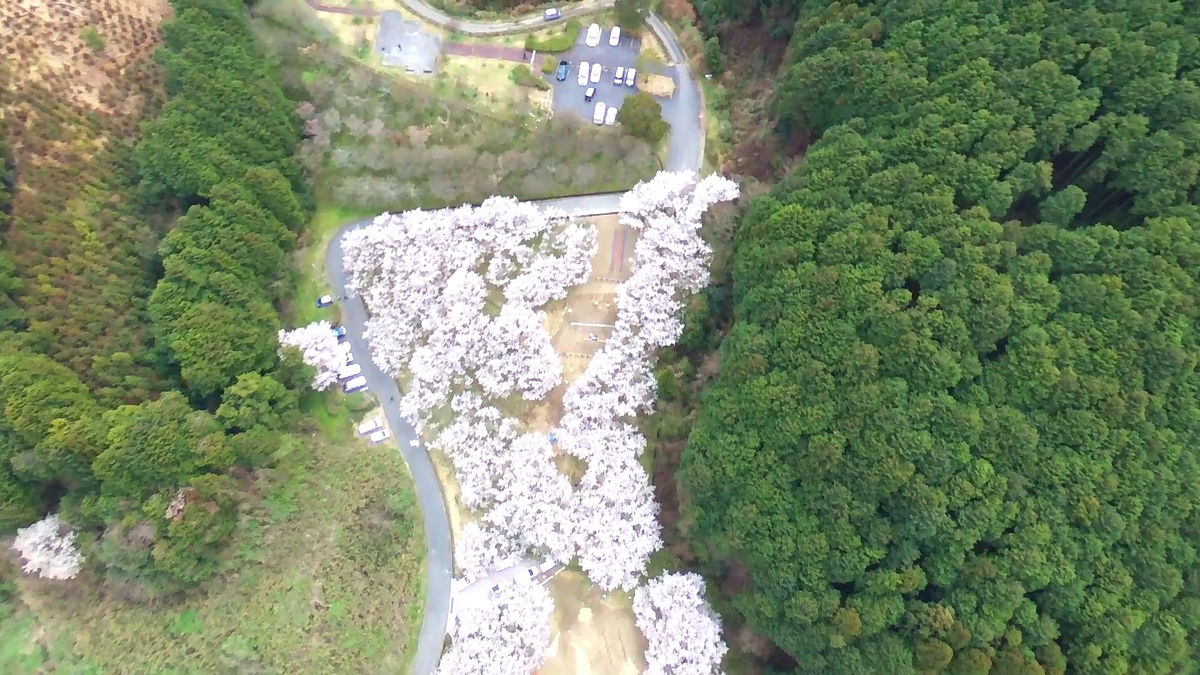
So, the movie that I actually shot is kore. We are working on making the image taken with Bebop 2 slightly brighter, increasing the saturation and placing BGM, basically all processes from the start to the end of the shooting are stored as it is.
I tried the aerial photograph of the cherry blossoming mountain using the auto flight function that can be used with Parrot Bebop 2 - YouTube
Tap the triangle icon at the bottom right of the application screen to start auto flight. In the movie, there is a voice called "Ho Hokokeo" of Hototogis by chance, and it is a state where you feel the springiness in full.
Bebop 2 which jumps up with the sound of the propeller "Pwang".

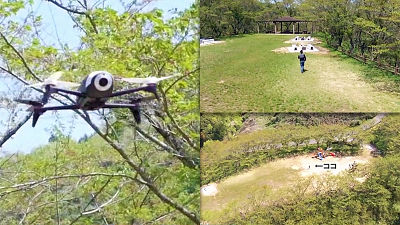
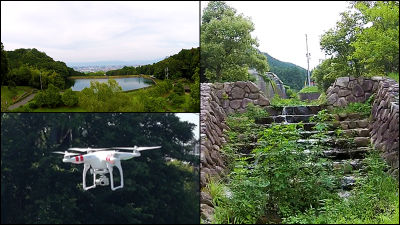
Here is the picture actually captured by Bebop 2. Since the camera exposure was taken by auto, the initial few seconds became a little darker.
However, when you move the angle to the mountains, detail is stored well in this way.

It was my first challenge to autopilot this time, but I tried skipping why my route was reproduced at what level. However, despite such worries, it seems that the way the trace with the designated route is tricky will pass the surprise and conversely "admirably".
The place where the most blooming is also like this. As there were many people coming to see the cherry blossoms this time, the area where people are located has altitude set to 100 meters or more.

This movie was taken literally to the controller as "fingerless touch". Simply repeating the rehearsal several times, it was easy to do the aerial shooting with auto flight.
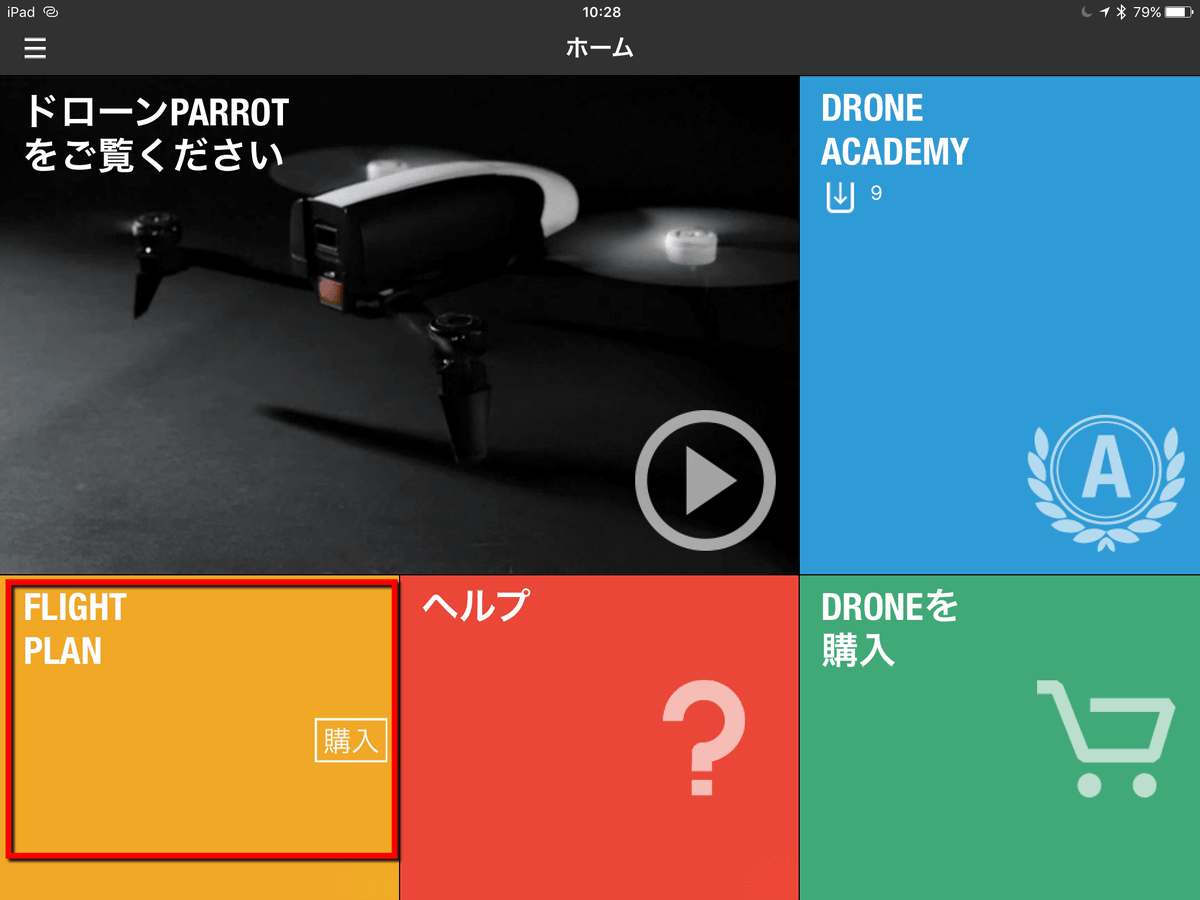
◆ Additional function of application "Free Flight 3" "Flight Plan"
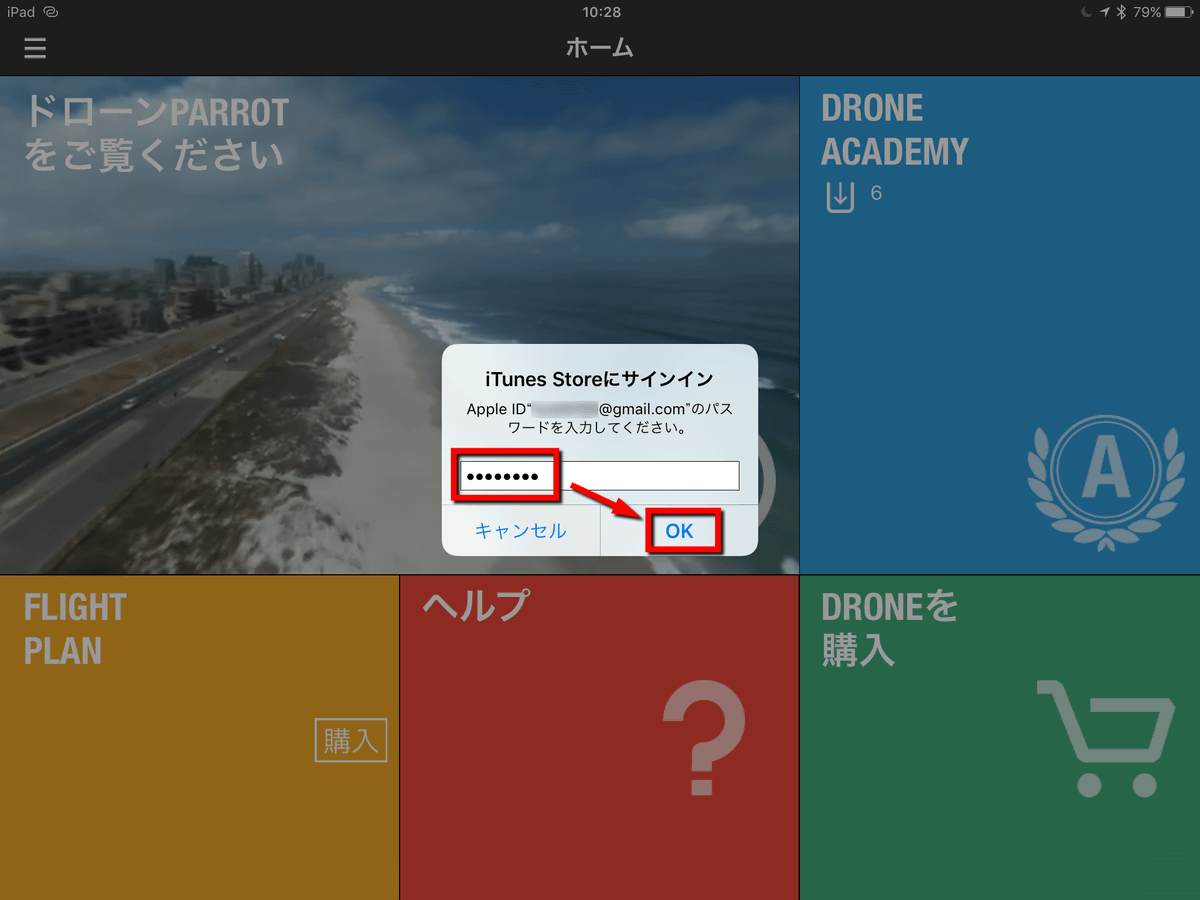
Flight Plan is a charge function of Parrot's drone application "Free Flight 3".IOS versionOrAndroid versionInstall the application, tap the "purchase" icon of "FLIGHT PLAN" at the bottom left of the screen.
Insert the account password and tap "OK"
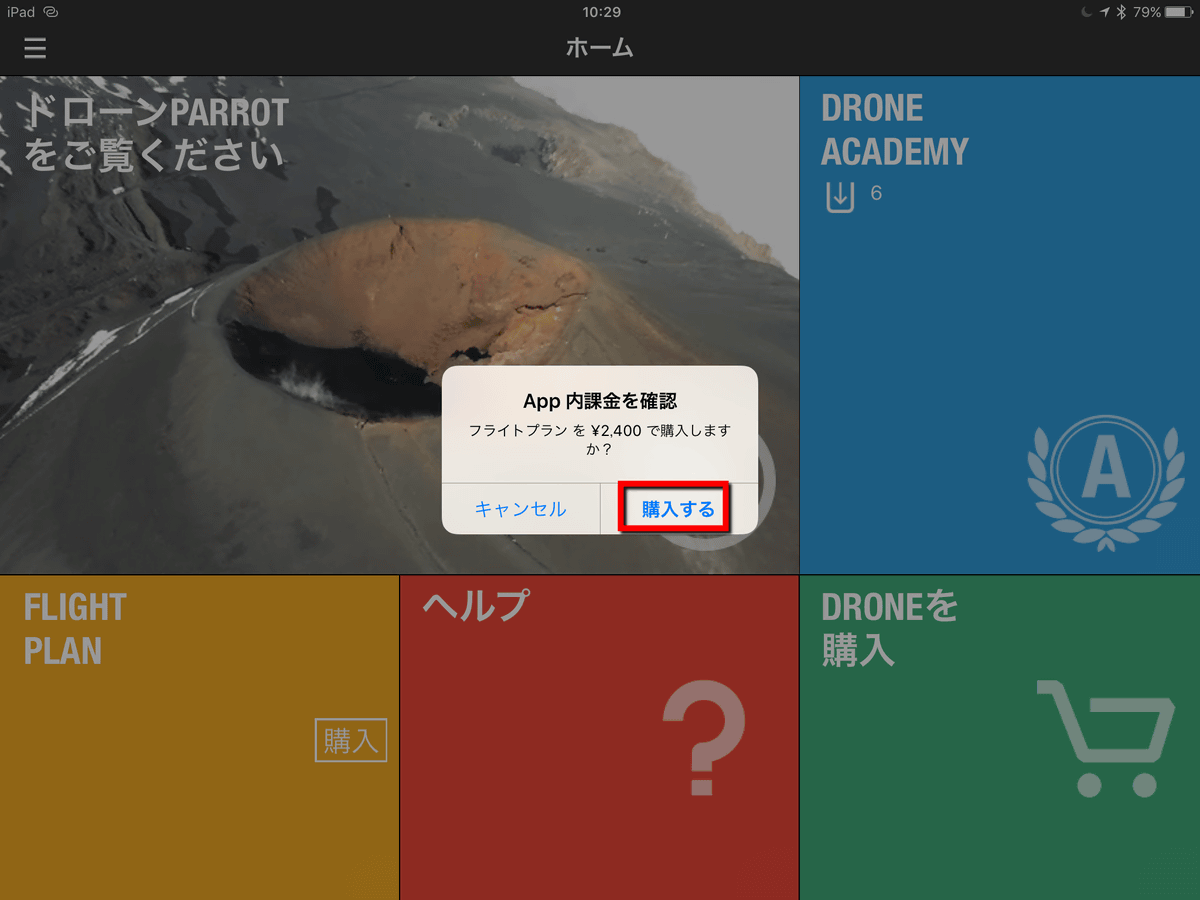
Tap "Buy". Flight Plan is a charge function of 2400 yen.
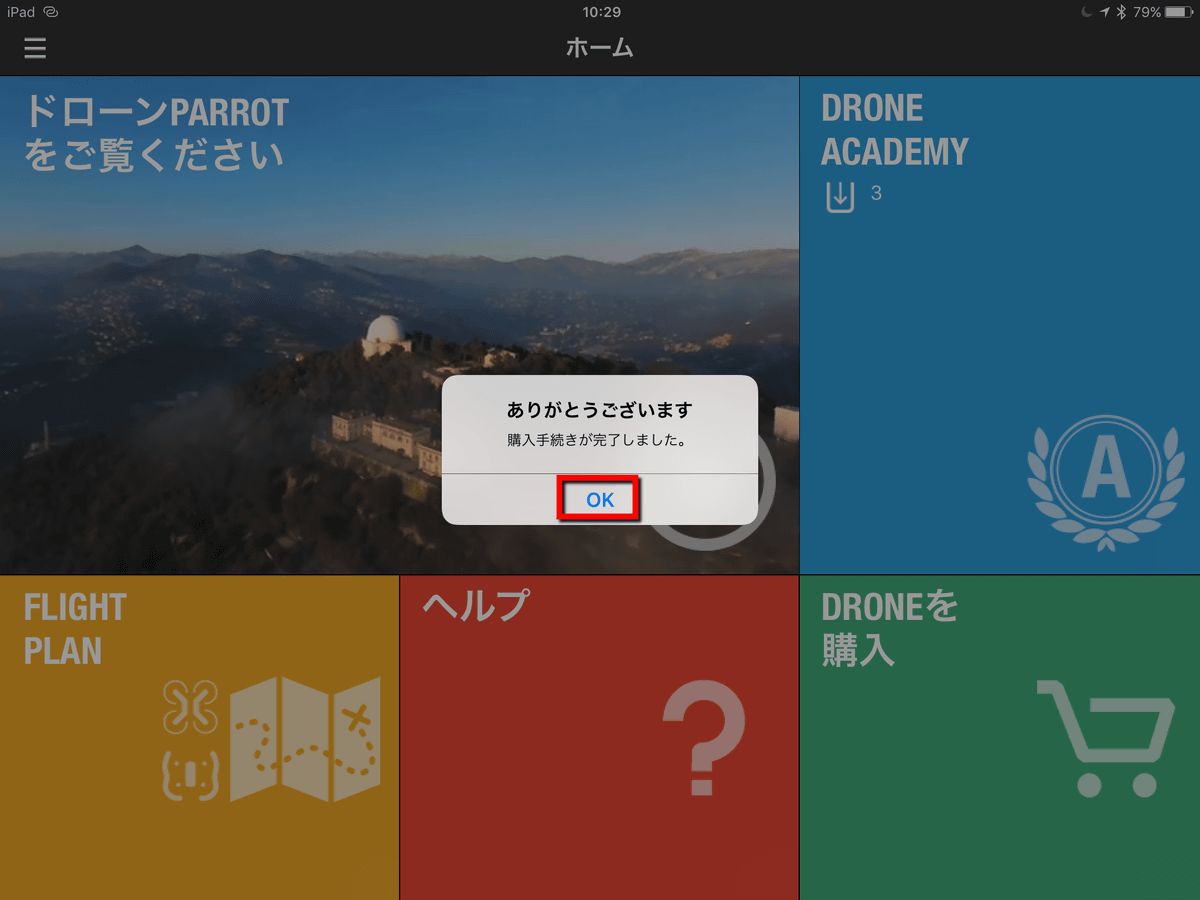
When processing is completed, tap "OK" and purchase is completed.
Turn on the power of the Sky controller ......

When Bebop 2 is turned on, it will be connected automatically with the Sky Controller. Afterwards, if you connect to the Sky Controller via Wi-Fi from a tablet or smartphone such as iPad, here also automatically connect with the application so it is Rakuchin.
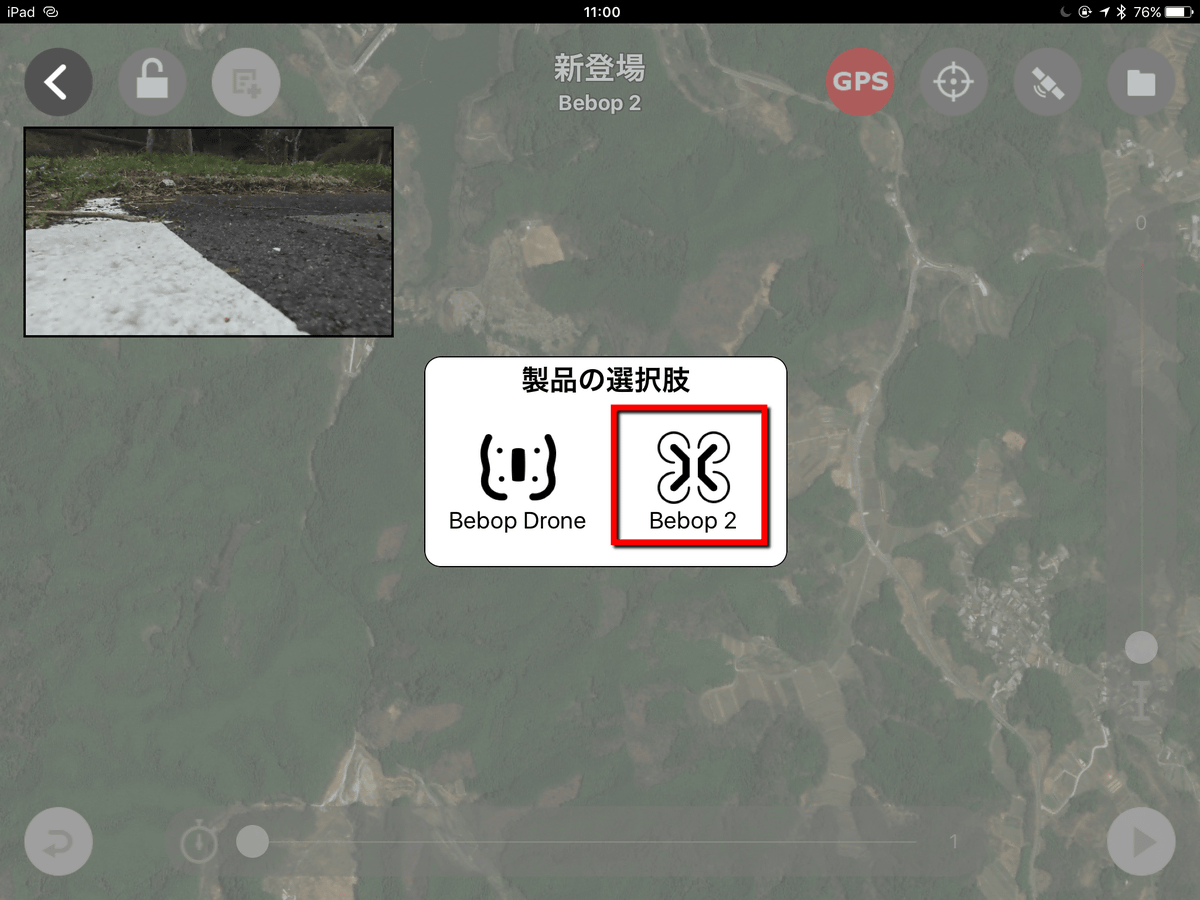
Launch the application and tap on the area labeled "Flight Plan". If purchase is completed, you can see that the display on the screen has changed slightly.
At startup, I will ask for the type of drone I am currently using, so tap "Bebop 2" this time.
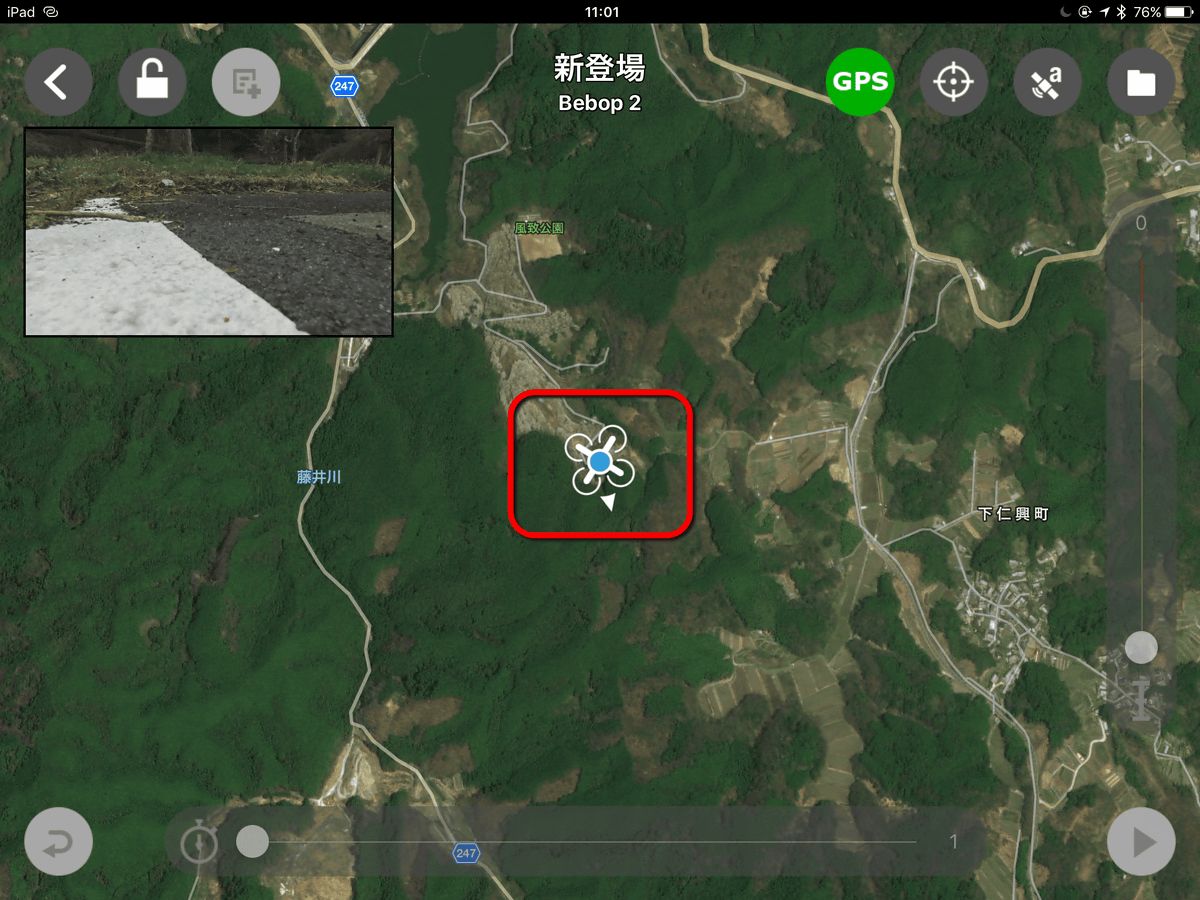
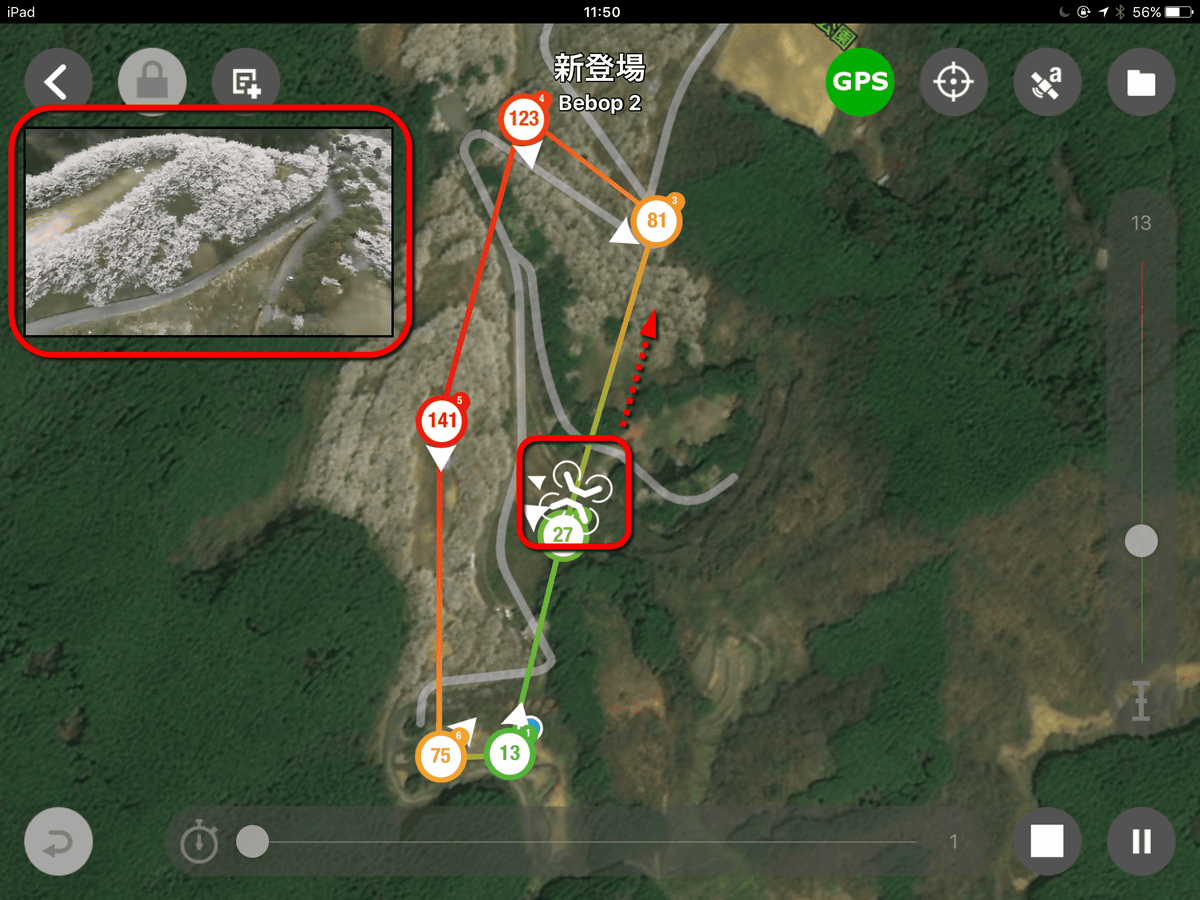
Later, the current position of Bebop 2 was indicated by an icon. Satellite images of Google Maps are used on the screen. Although it is possible to display a map of a vector image which is not a satellite image, it is better to display the satellite image anything, such as grasping the positional relationship on the ground.
◆ Setting waypoints
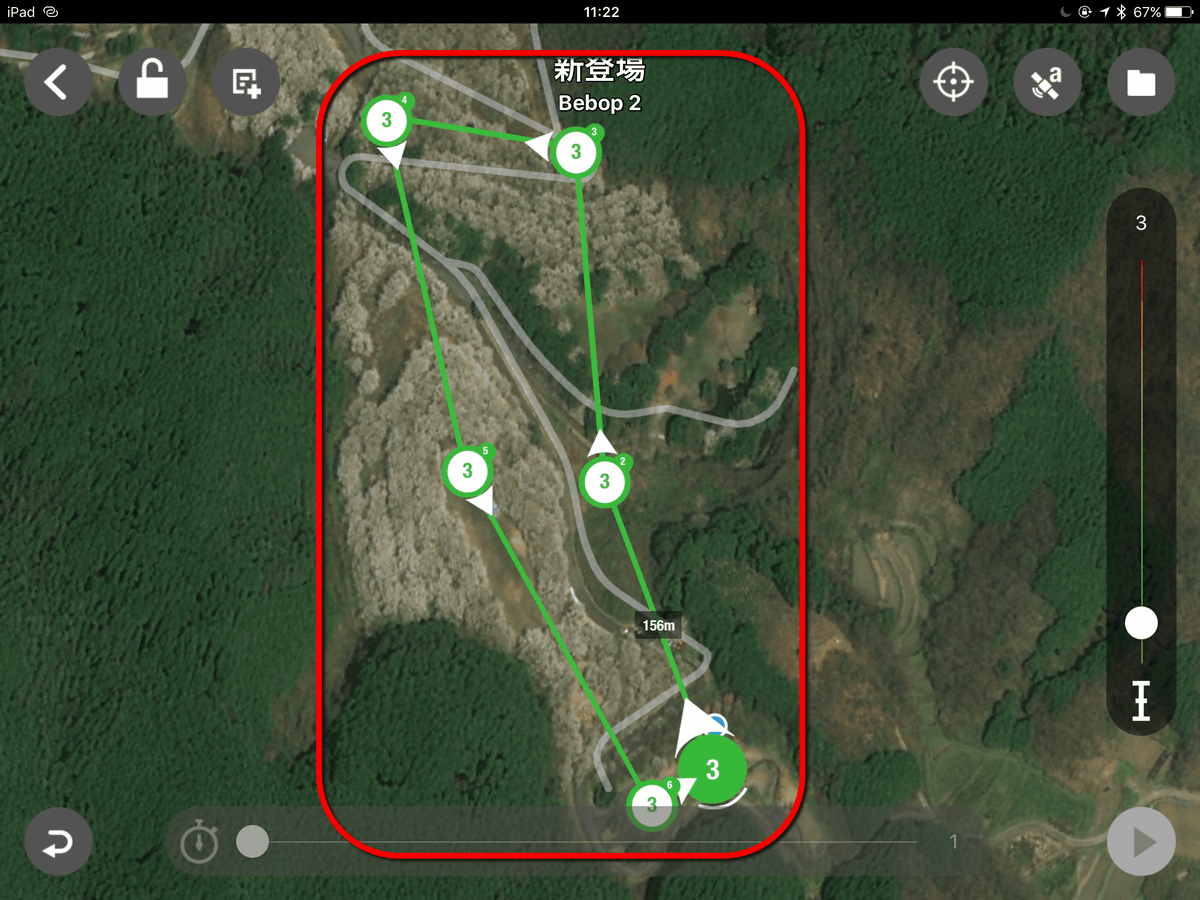
Set the route that actually skips Bebop 2. The waypoint setting is simple such as tapping the screen with your finger. When actually tapping it, the green circle written as "3" like this and the one like the arrow were displayed. "3" means "altitude 3 meters", and the arrows indicate the orientation of the camera and airframe. Of course it is possible to freely change this orientation.

So, tap on the screen and screen and set waypoints.
There is also a screen that displays each point in order, and it is also possible to make more detailed settings by using this screen. This part will be described later.

The map can also be displayed with different angles. In this state, it is still not interesting as it is set to rotate around 3 meters altitude, so we will set altitude and angle etc from here.

By tapping and selecting each waypoint and moving the slider icon on the right of the screen you can set the altitude of that point.
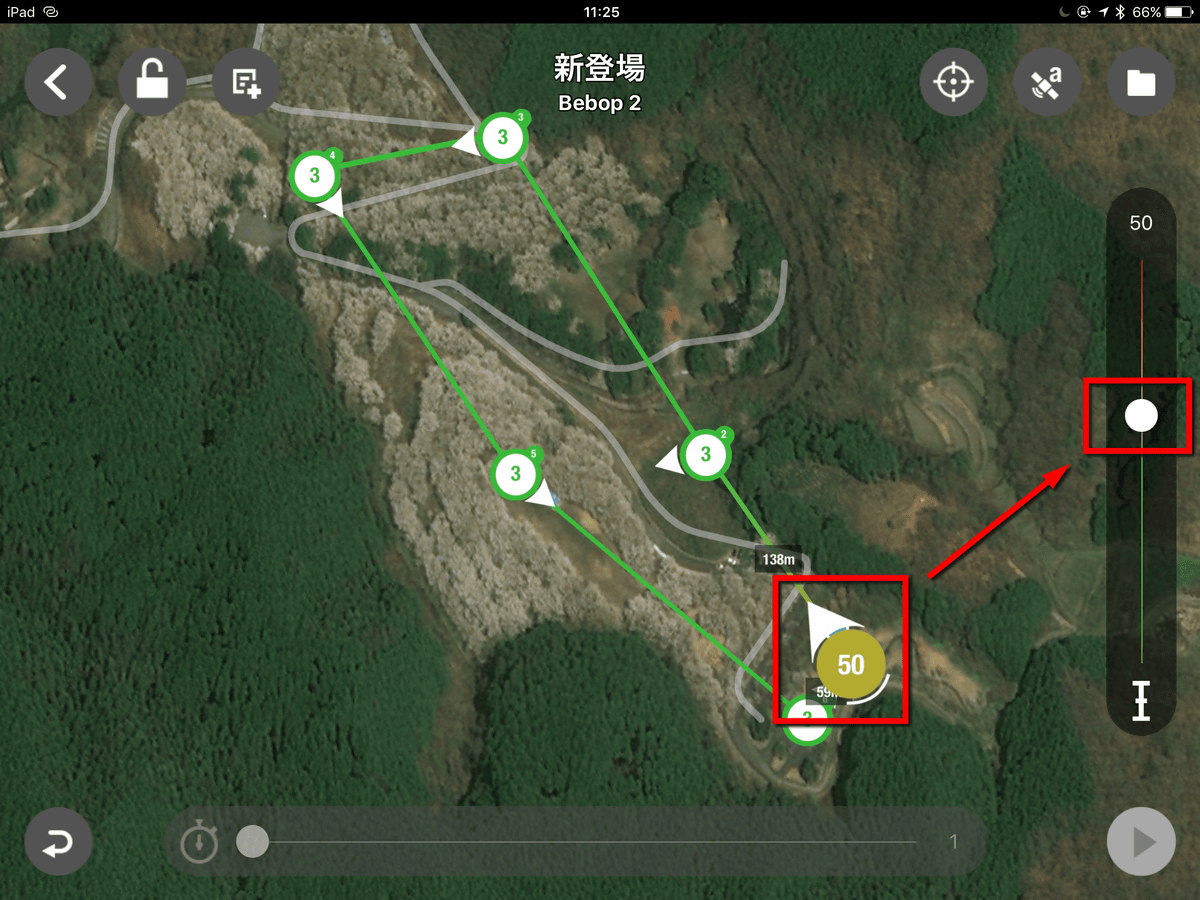
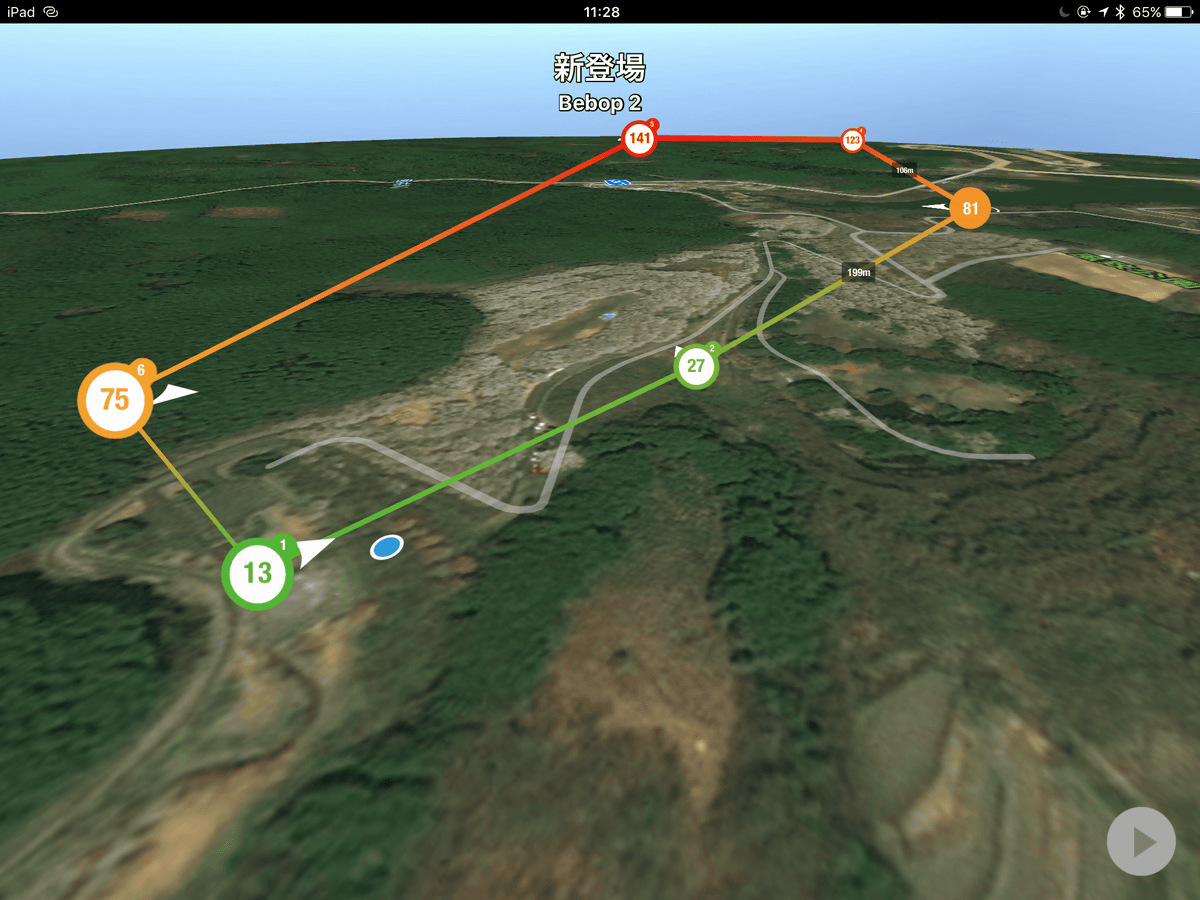
Setting the altitude of each point and displaying it on a map looks like this. Depending on altitude, you can see how the color of the icon and line changes from green to red. Since each point is designed to be connected linearly, if you need a route drawing a curve, you can set points finely. Rather, it is better because it reduces the risk of colliding with obstacles that are unexpected.
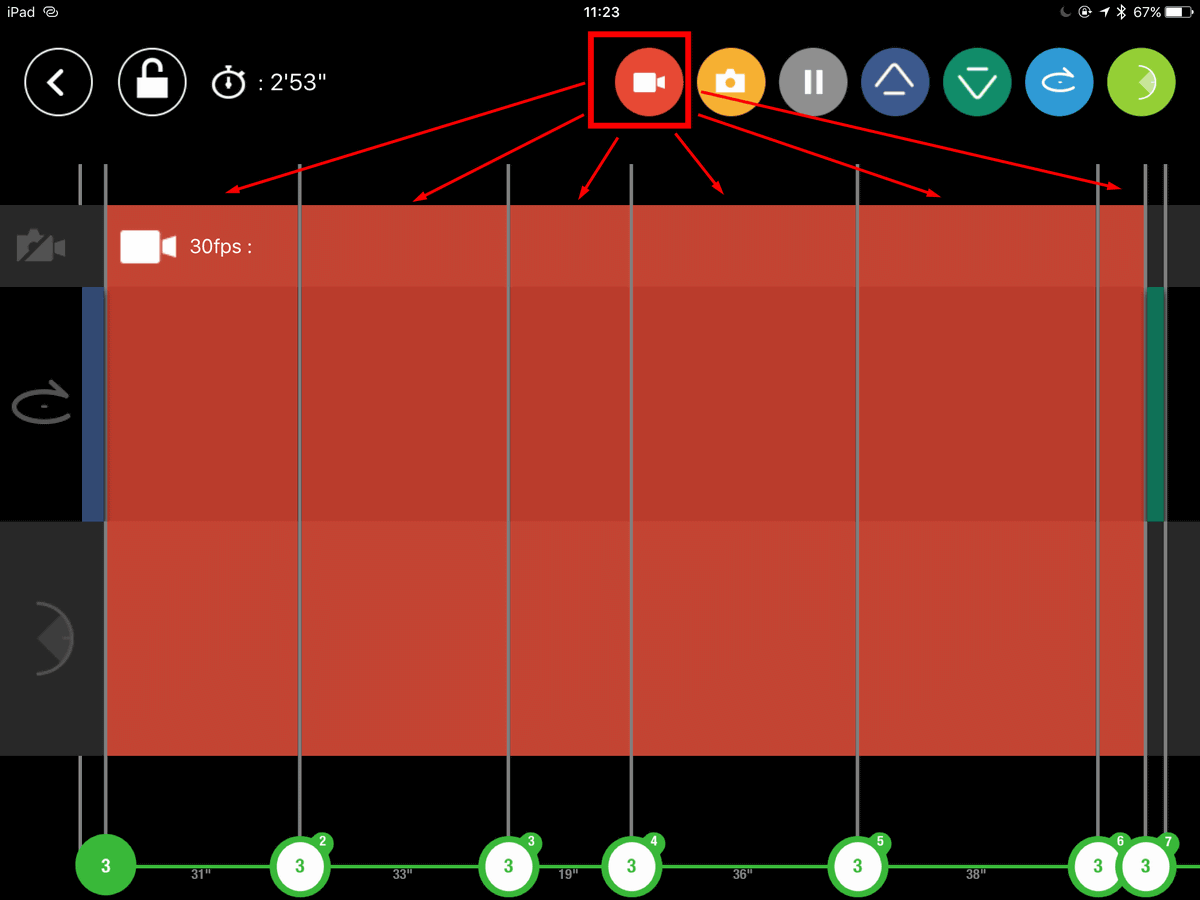
By displaying the screen showing the waypoint order again, dragging the red camera icon and placing it between each point, it is possible to decide the timing to shoot the camera.
The blue icon is for turning the aircraft. Just like a camera icon, drag it with your finger and place it at the point you want to turn.
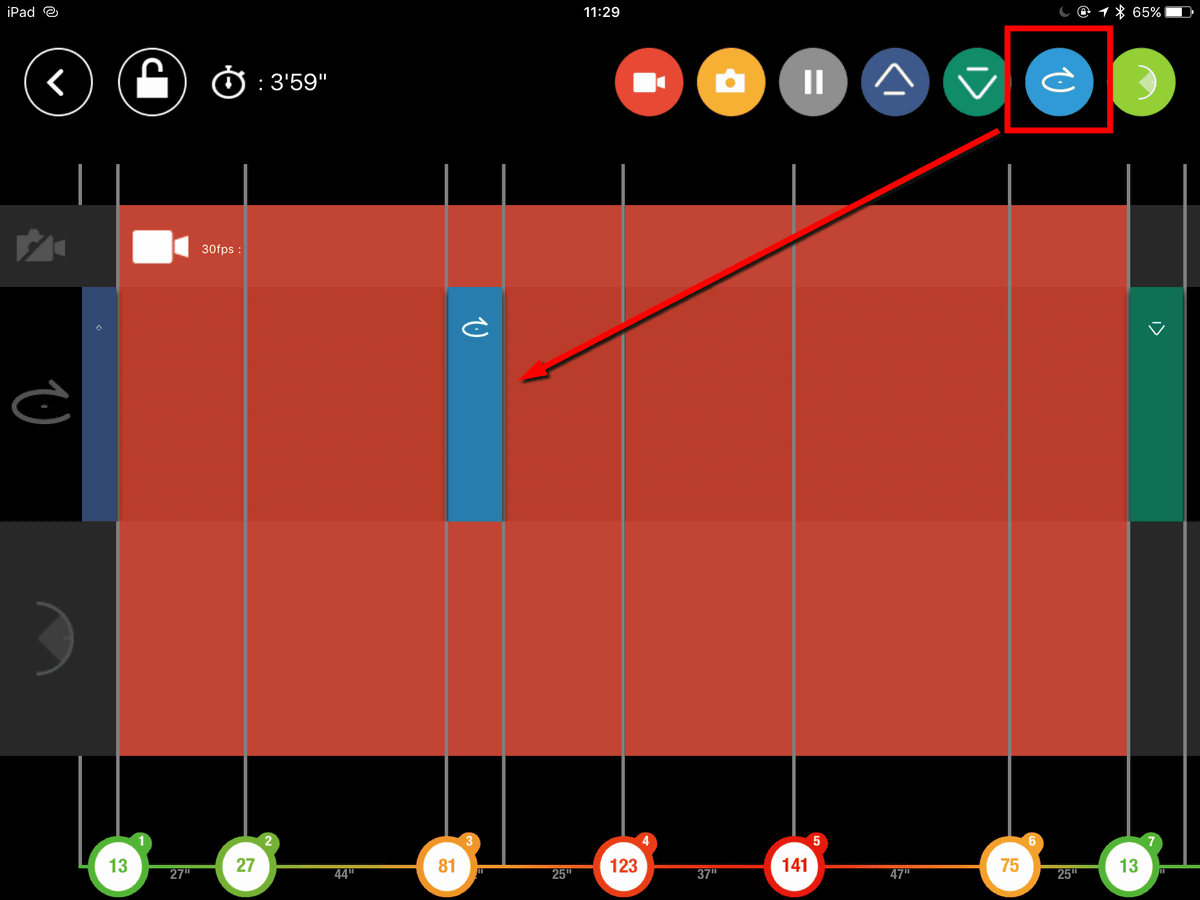
If you zoom in, you can also set finely the turning angle and turning speed. Depending on the turning speed, the time required for turning is calculated automatically, and it is nice function to be displayed at the bottom of the screen.
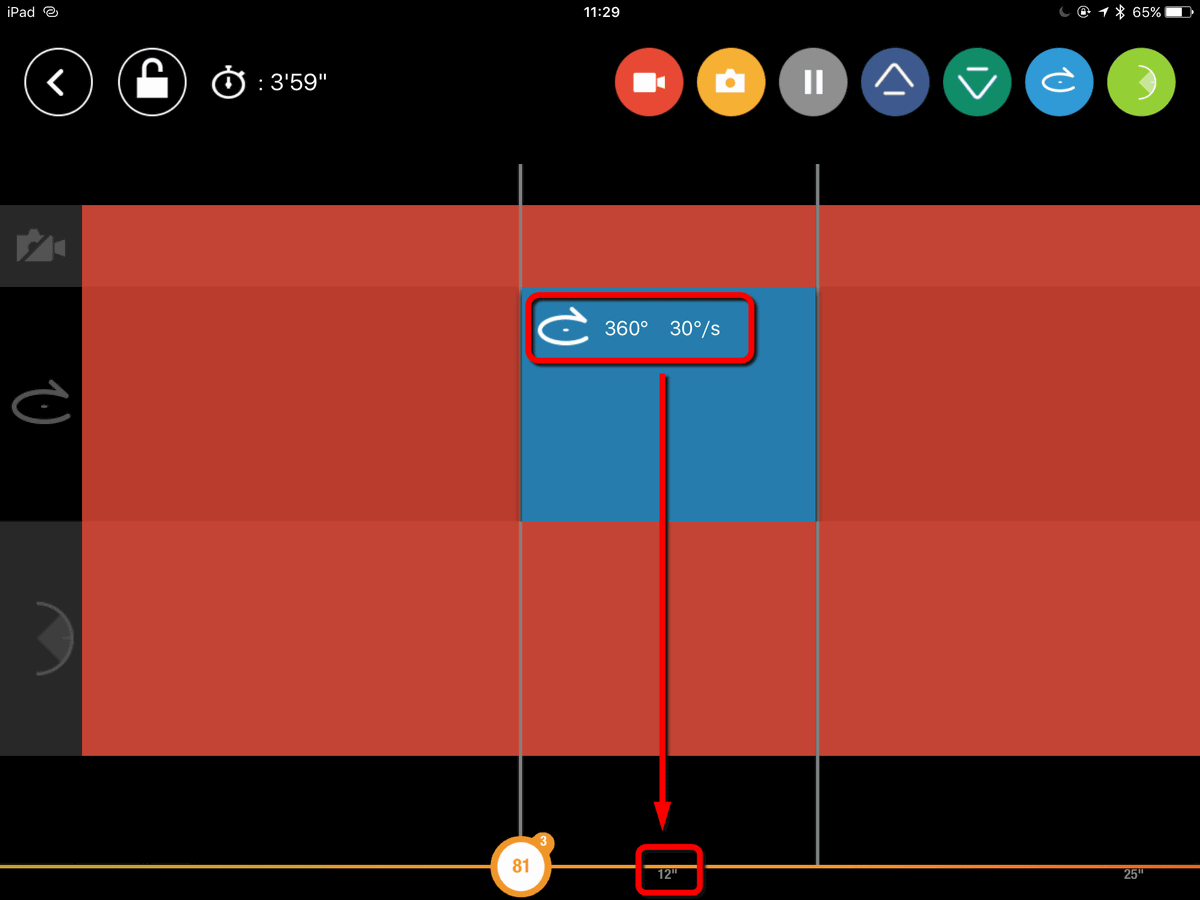
In this way, you can specify numbers in 1 degree increments.

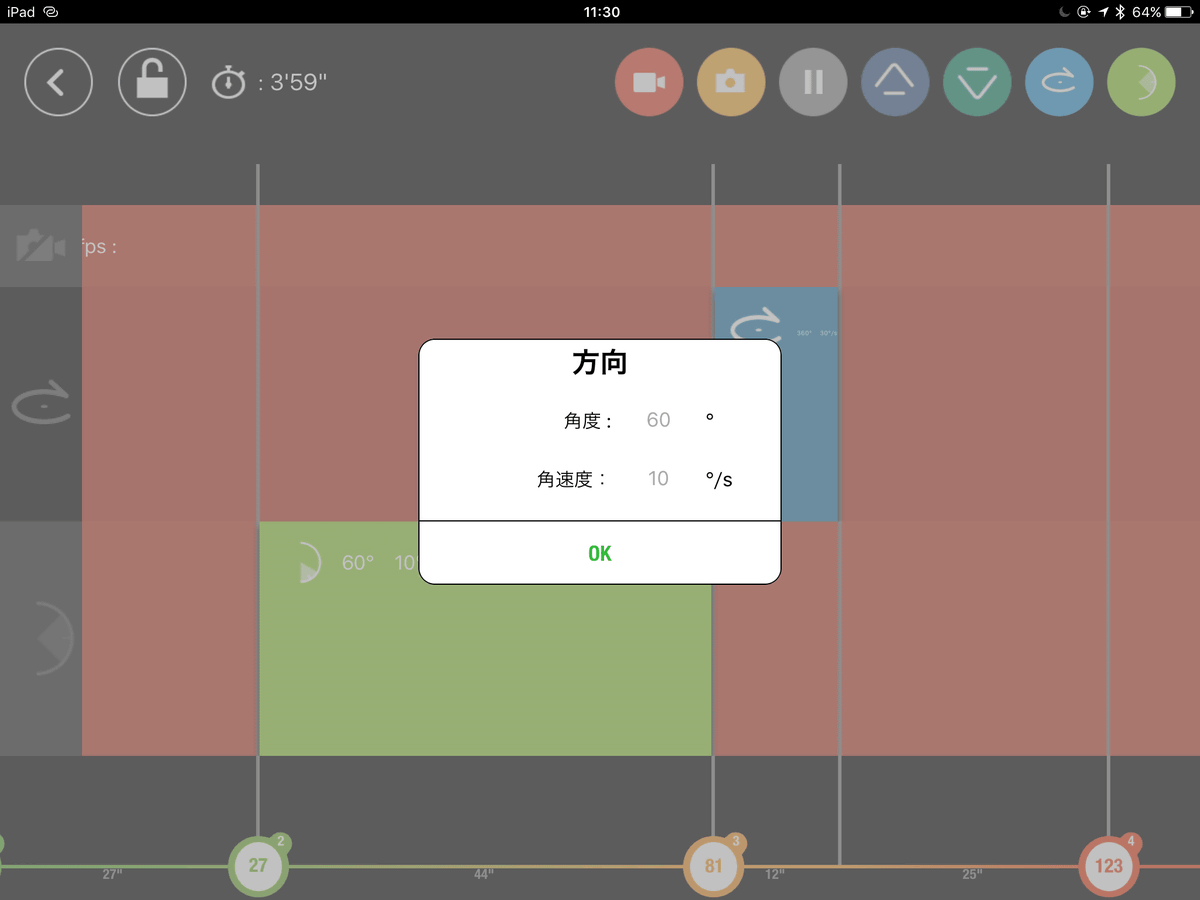
The young grass color icon on the far right is for deciding the angle of the camera. You can set the angle for each waypoint.
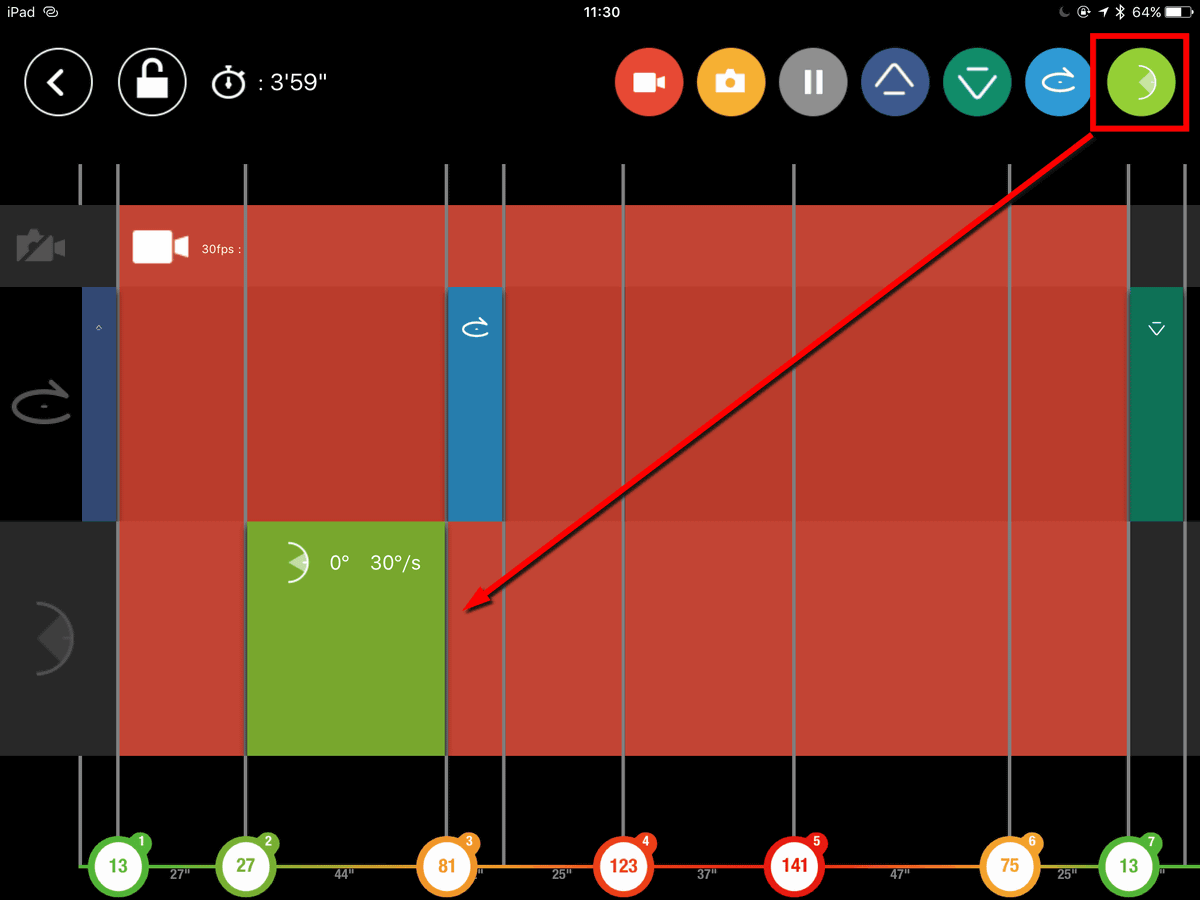
The angle can be set from 0 ° pointing in the horizontal direction to 83 ° pointing directly downward. Again, you can specify the speed at which the angle changes.
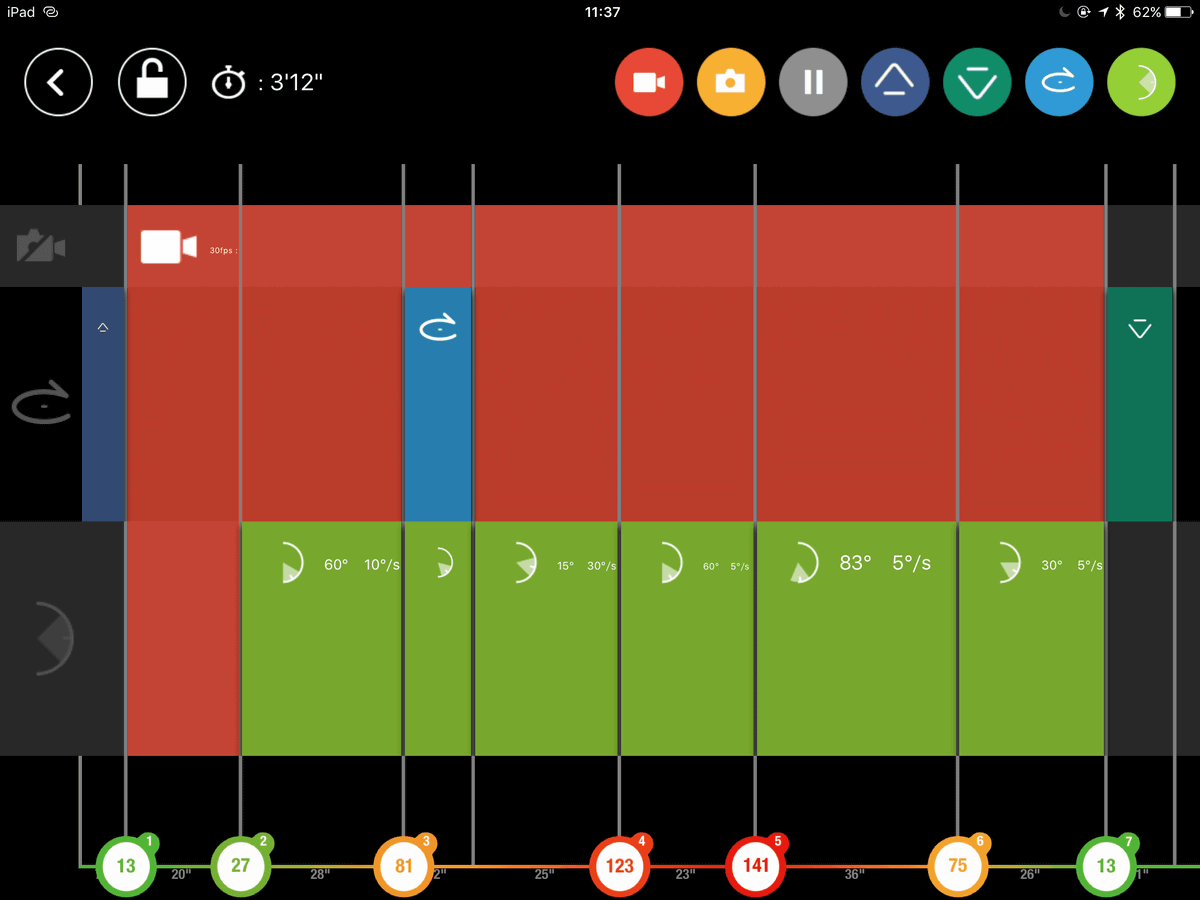
With this kind of feeling, the setting of the waypoint actually set became like this. Basically I kept shooting all the time, I changed the angles of the upper and lower by every waypoint, I made a 360 degree turn only once, and tried to shoot the surrounding landscape.
In addition, for setting this waypoint,It is possible even when not connected to Bebop 2It seems to be said that it is a very big point. Even if you do not go to the site, it is a very useful function that you can set a route in advance at home etc.
◆ I actually skipped it
When setting is completed, we are going to actually skip Bebop 2. Just tap the triangle icon at the bottom right of the screen as you touched in the movie, "Puwan" and Bebop 2 were easy to start flight.

During flight, the current position is displayed as an icon on the map like this. In addition, the actual video is transmitted on Wi-Fi, and it is displayed small on the upper left of the screen. In addition to checking the actual image, this will also help to confirm dangerous obstacles.
With this kind of feeling, by using Flight Plan it was very easy to do the aerial shooting with auto flight. If you actually touch it you will be able to shoot very convenient and accurate flight and shoot, so anyone who has Bebop 2 and has a chance to do aerial shots should never lose.
Related Posts: