'Sensor Watch' is an open-source replacement board for CASIO's legendary digital watch 'F-91W'
CASIO's digital watch '
Sensor Watch
https://www.sensorwatch.net/

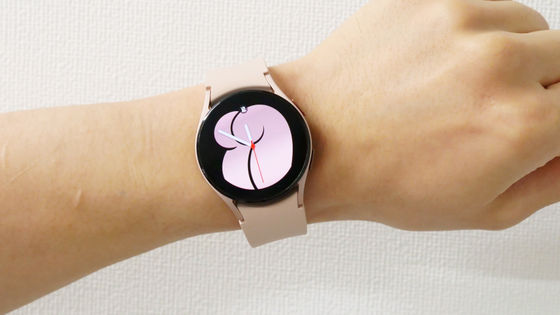
◆CASIO 'F-91W'
Casio's 'F-91W' was released in 1989, and its design has remained almost unchanged since its debut up until the time of writing. Coupled with its impressive cost performance, it's also known as a 'cheap Casio.' It's also known for a number of legendary moments, such as the following:
- It has all the necessary functions, the LCD display is simple and easy to read, and it feels comfortable to wear.
The battery life is supposed to be 7 years, but it only had an error of 7 minutes after 20 years of operation.
・Overseas, it is compared to the latest models such as G-SHOCK and has gained popularity as 'CASIO VINTAGE.'
・Due to its popularity, a large number of copies were sold, but CASIO continued to produce the original, so it has not been outdone by the copies.
- Former US President
- Osama bin Laden also used it
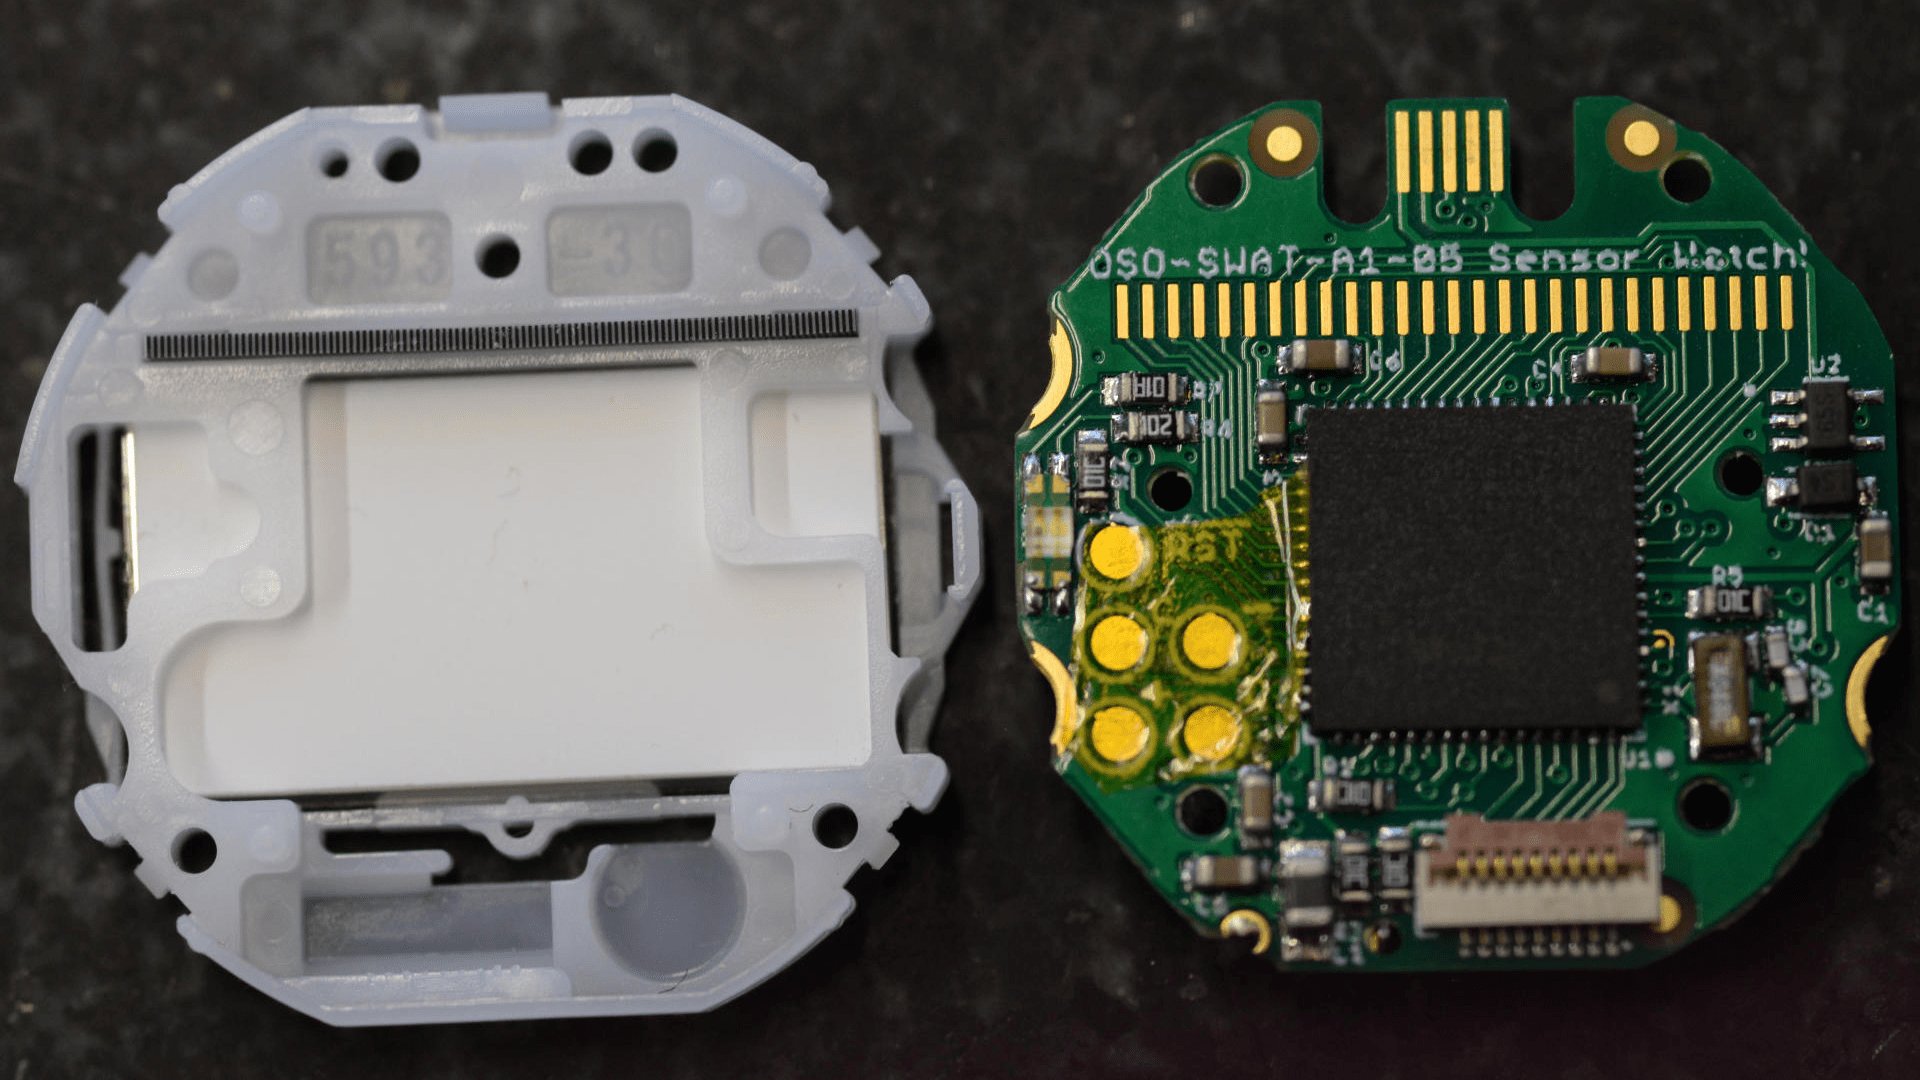
◆Replacement board 'Sensor Watch'
The F-91W is a long-selling product, so unfortunately, some owners have reached the end of their useful life and stopped working. It's likely that some owners are looking to revive their F-91W somehow. Furthermore, some gadget enthusiasts may want to upgrade the internals while preserving the F-91W's appearance and feel. Perhaps in response to such needs, Sensor Watch, an open-source platform designed to replace the F-91W's internal circuit board, has been released. While the replacement process itself seems simple, it is considered a modification and carries certain risks, such as voiding the manufacturer's warranty and reducing waterproof performance. Therefore, the replacement is carried out at your own risk.
The main specifications of Sensor Watch are as follows:
・ARM Cortex M0+ microcontroller
・32KHz quartz real-time clock with alarm function
10-digit segment LCD with 5 indicator segments
- Three interrupt-enabled buttons
- Red/green LED backlight with PWM dimming function
・Piezoelectric buzzer (optional)
- Onboard USB Micro-B connector
-UF2 bootloader with double tap as reset button
・9-pin flex PCB connector
◆Sensor Watch replacement procedure
There is a video on the Sensor Watch website that explains the replacement procedure, so I will explain the procedure based on the contents of the video.
Sensor Watch Assembly - YouTube
The tools you need for the job are as follows:
・Precision screwdriver
·tweezers
・Soldering iron (for precision work)
・Solder and flux
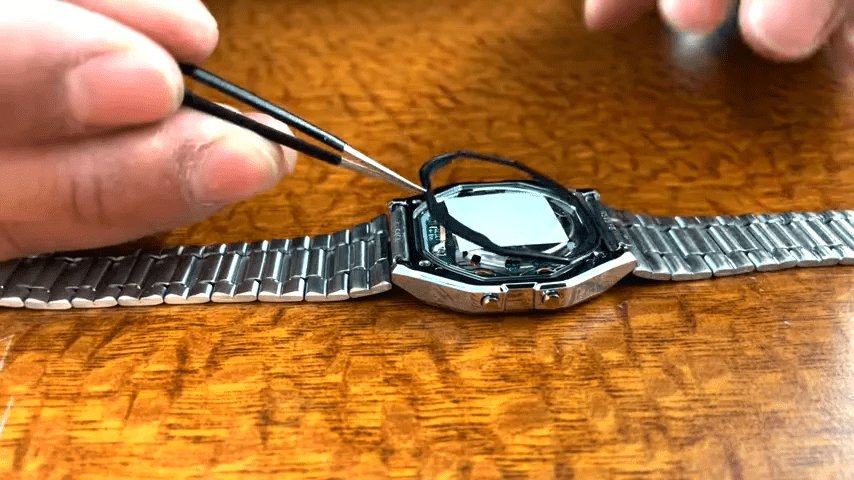
Disassembly procedure
F-91W is the model for which the circuit board is to be replaced.

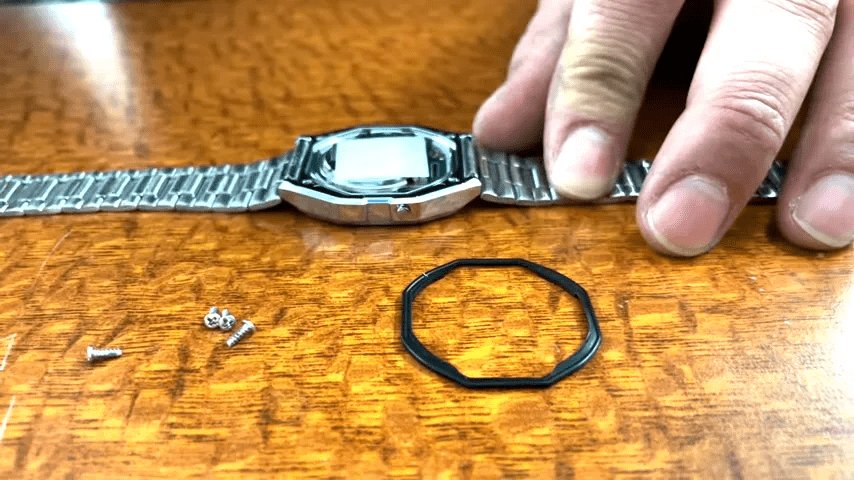
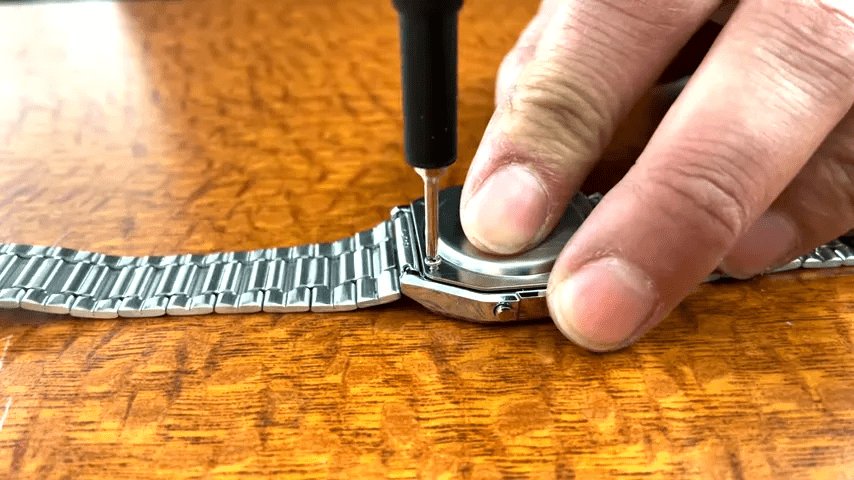
Remove the screws on the four corners of the back cover using a precision screwdriver.
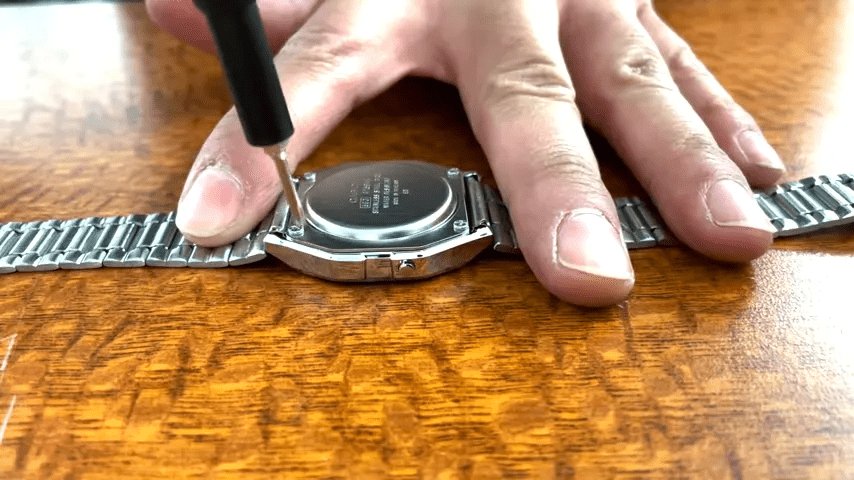
After removing the four screws.
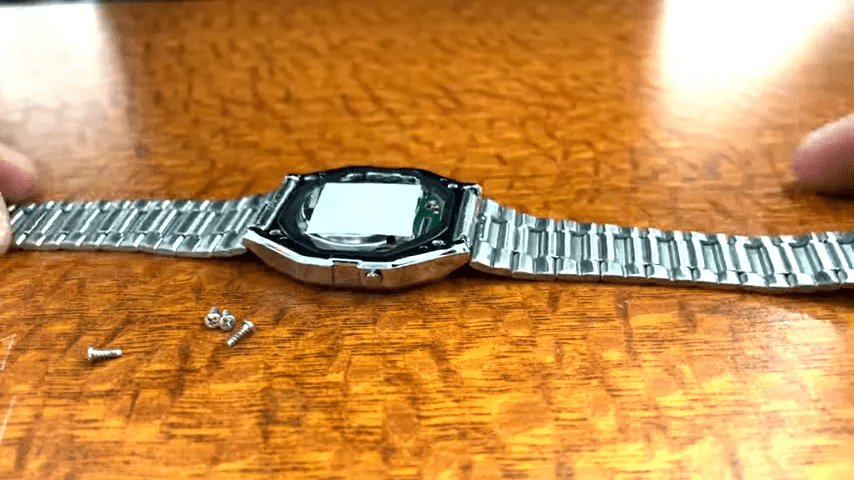
Use tweezers to carefully remove the rubber gasket between the body and back cover.

Gasket removed.
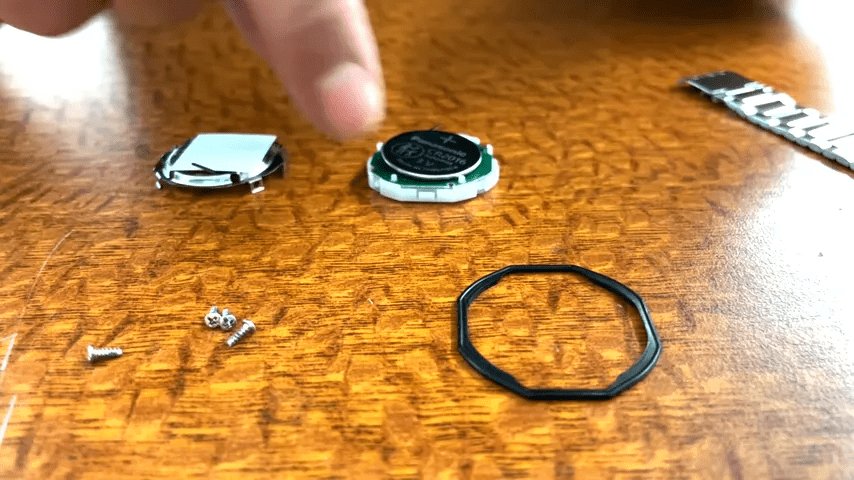
The movement will come off immediately.

We will disassemble the removed movement.

The movement back is secured to the case by four metal claws, and can be removed from the movement by lifting all of the claws.

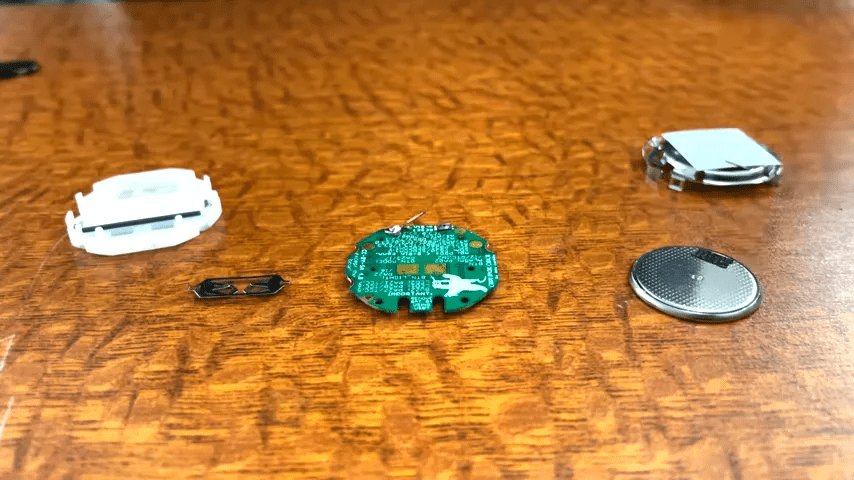
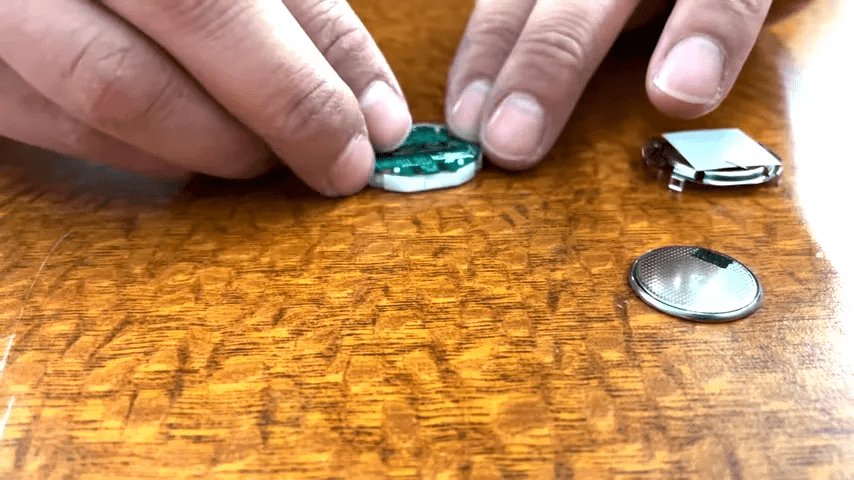
The back cover of the movement has been removed, revealing the button cell battery.
The button battery and circuit board can be easily removed from the movement housing.
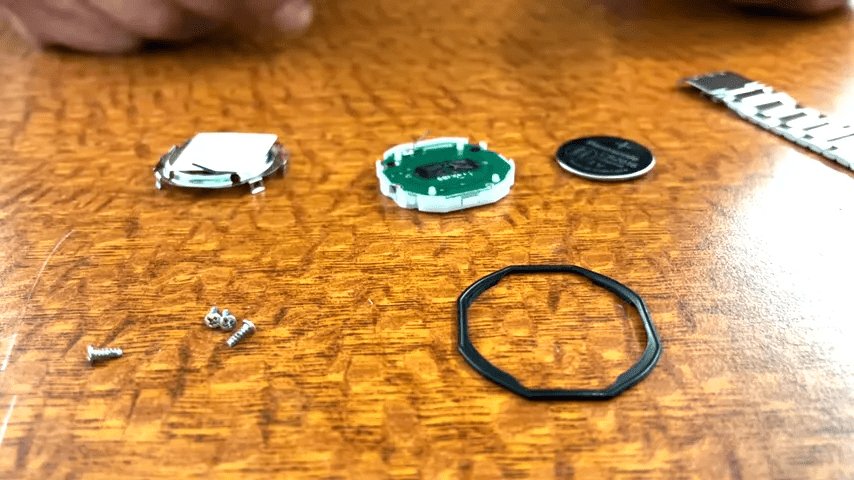
Remove the battery terminal in the center of the board. It is just hooked onto the board so can be easily removed with tweezers.

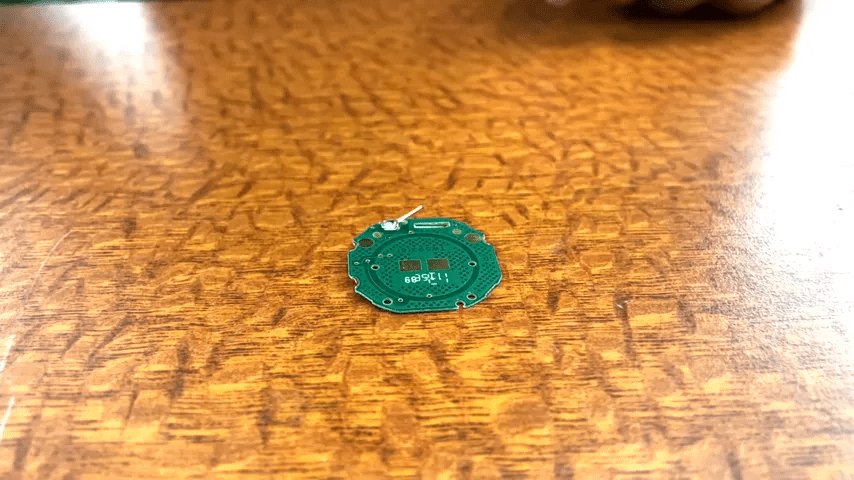
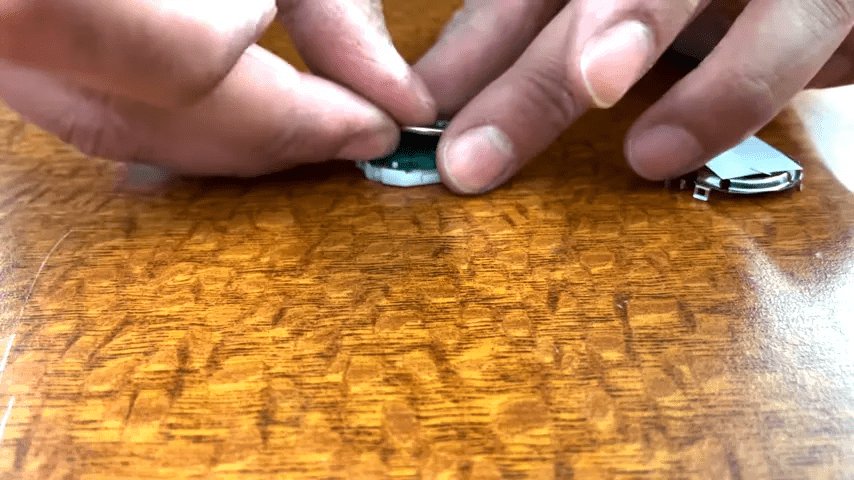
Removed from the movement except for the circuit board. This step is a little more difficult as you will need a soldering iron for the next steps.
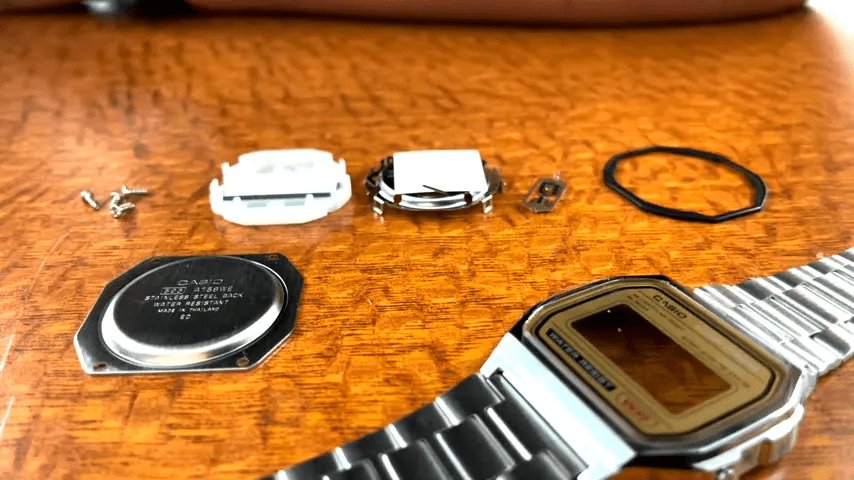
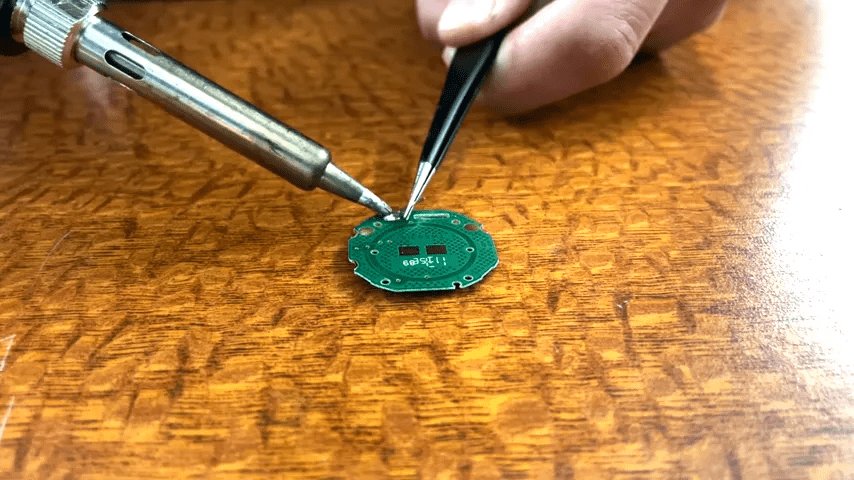
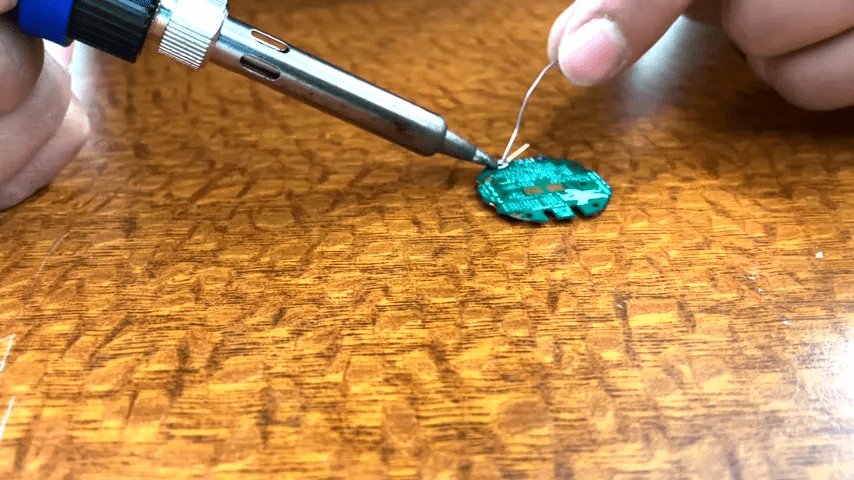
The buzzer connector can be seen sticking out from the board. Remove it with a soldering iron.
Hold the buzzer connector with tweezers and apply a soldering iron to the mounting location to easily remove the buzzer connector.
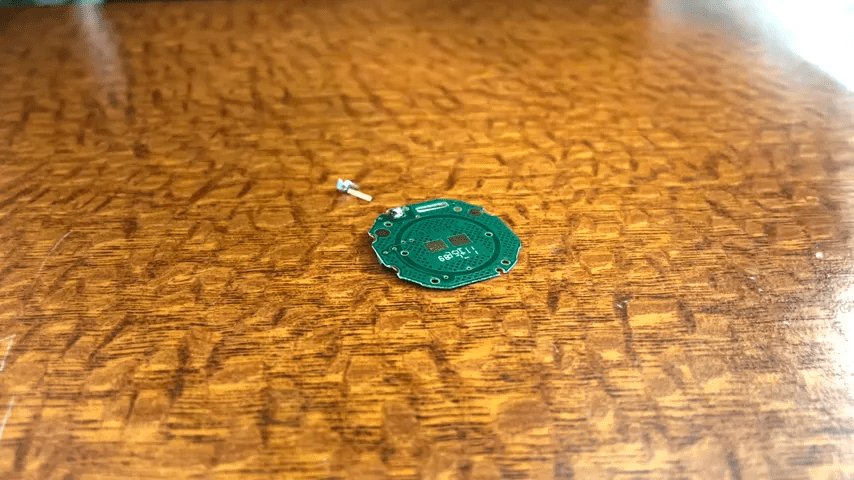
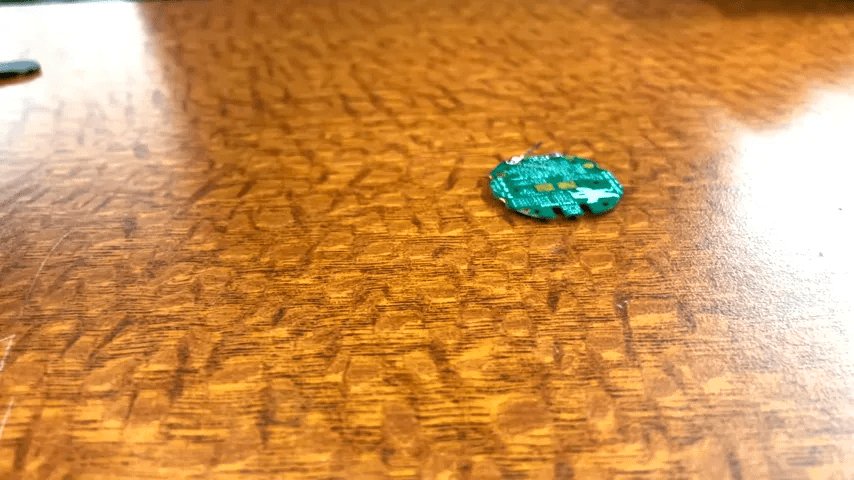
The buzzer connector has been removed. This completes the disassembly process.
・Assembly procedure
Assembly is the reverse of the disassembly process, so first solder the buzzer connector to the circuit board. From this point on, the circuit board becomes the 'Sensor Watch.'

Use tweezers to carefully align the buzzer connector.
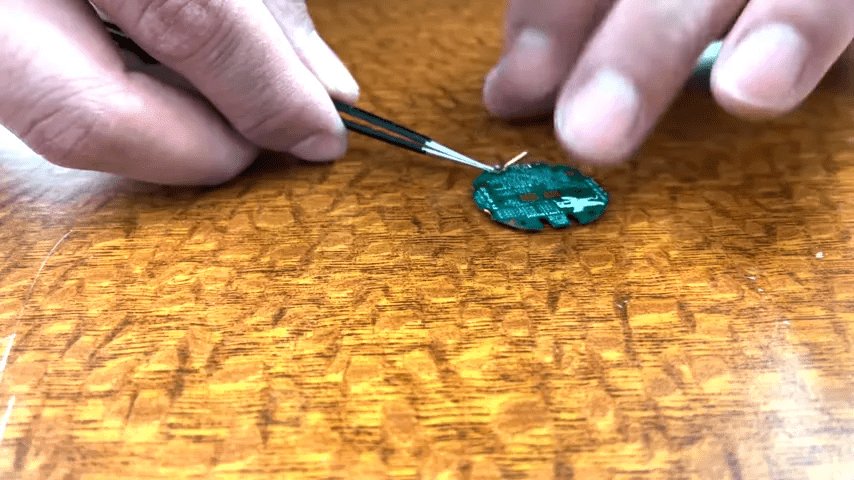
Solder the buzzer connector onto the board. Unlike removing it, this is probably the most difficult step in the entire process because holding the soldering iron and solder requires both hands and you can't hold the buzzer connector.
The buzzer connector has been successfully soldered.
We will assemble the movement.
Set the circuit board into the movement housing.
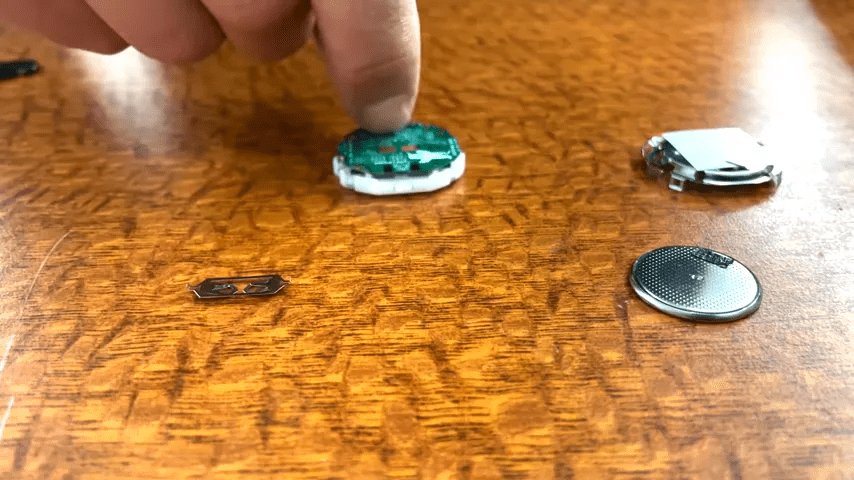
Attach the battery terminal to the center of the board.
Insert the button battery.
Now we will set the back cover of the movement.

The movement is now assembled. The clock is displayed because it is powered by a button cell battery.

Now we will set the movement into the main body.

Place the gasket back in place. Be careful, as the original waterproof performance cannot be expected from a reused gasket.
Secure the back cover with screws.
Completed.
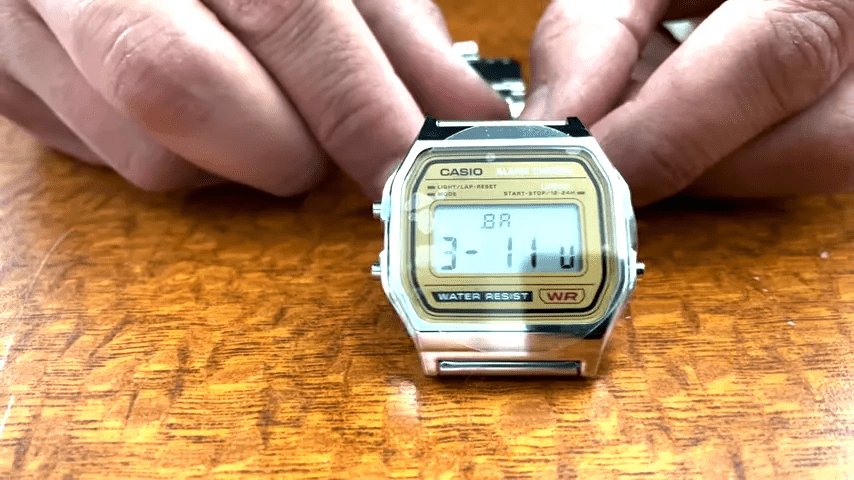
◆Sensor Watch operation procedure
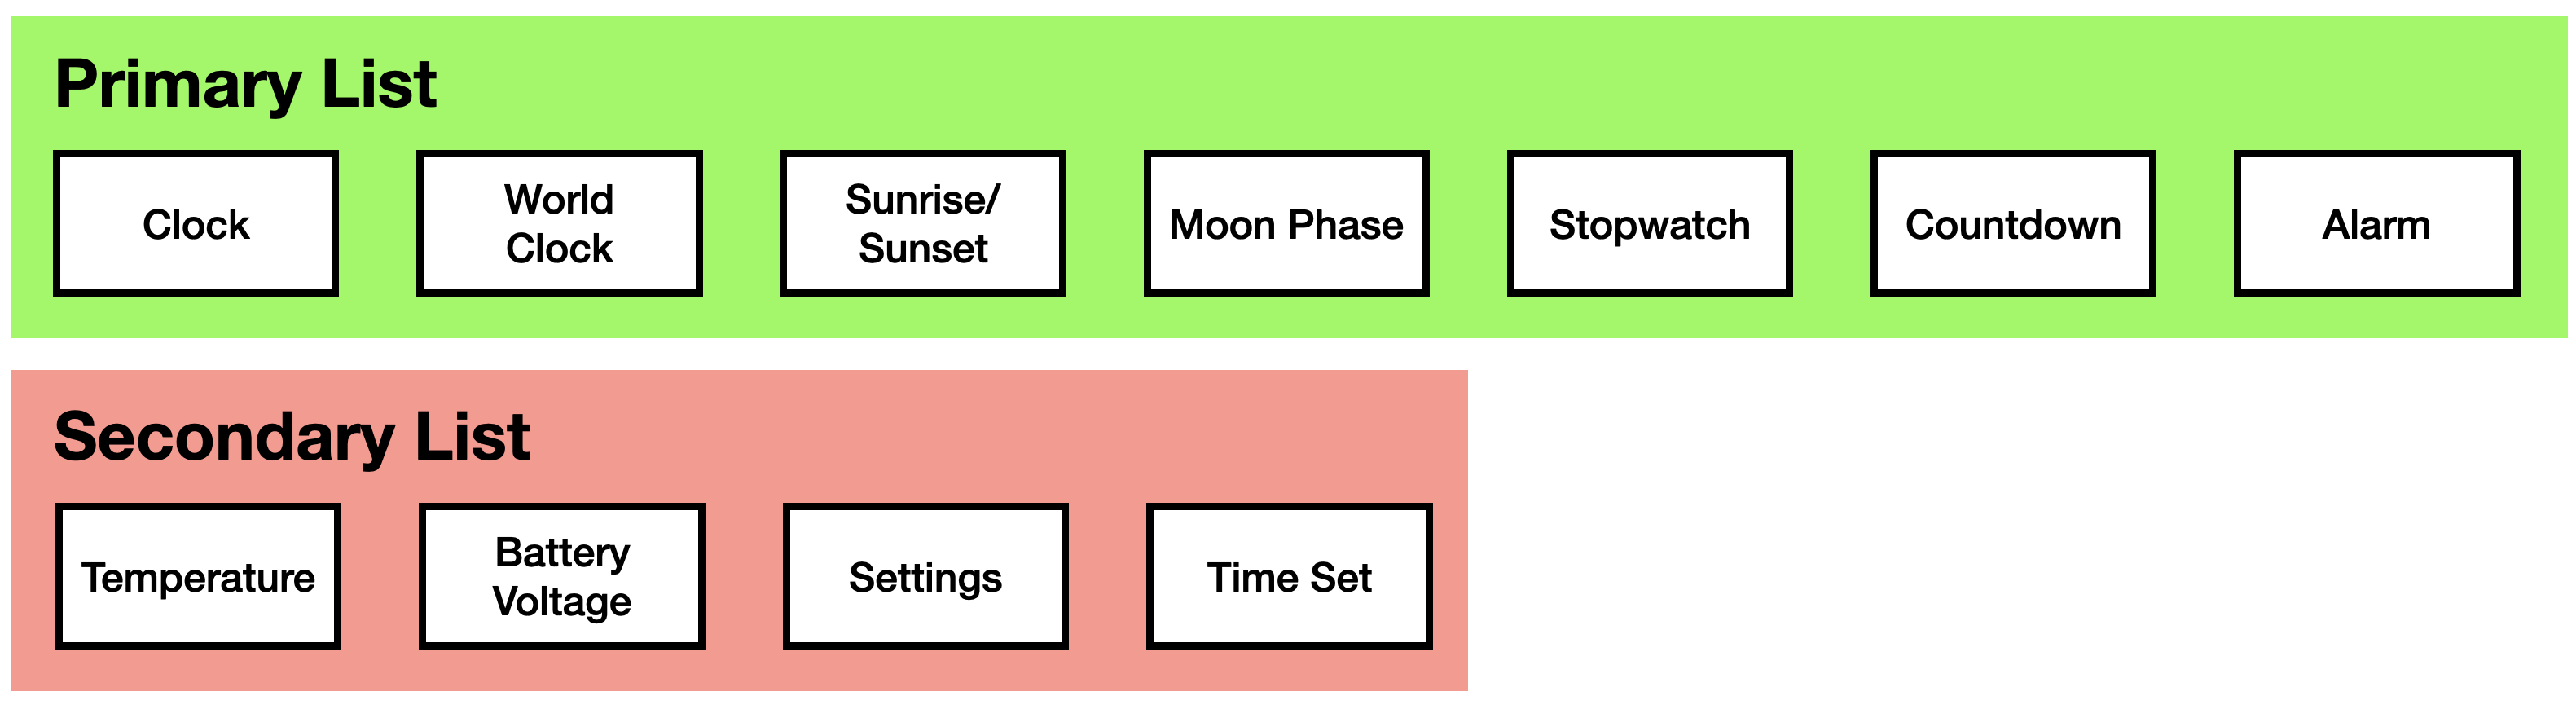
The Sensor Watch watch face consists of two lists. The one that is normally displayed is called the 'primary list,' and consists of screens that display general information and functions that you use on a daily basis. The other is called the 'secondary list,' and consists of screens for diagnostic information and settings that you don't normally need.
The CASIO F-91W has three buttons: the MODE button, the ALARM button, and the LIGHT button. You can operate the watch by pressing each button.
・MODE button
A short press of the MODE button will transition to the next watch face in the currently selected list. A further short press of the MODE button from the last watch face in the list will return to the top of the list if you are viewing the primary list.

When you press and hold the MODE button, its behavior changes depending on which watch face is currently displayed. If the current watch face is 'Clock,' pressing and holding the MODE button will transition to 'Temperature Display,' which is at the top of the secondary list. After that, repeatedly pressing the MODE button will transition to the watch face by advancing through the secondary list, and pressing it again at the end of the secondary list will return to 'Clock,' which is at the top of the primary list.

If the current watch face is 'Clock,' press and hold the MODE button to return to 'Clock' from any watch face.
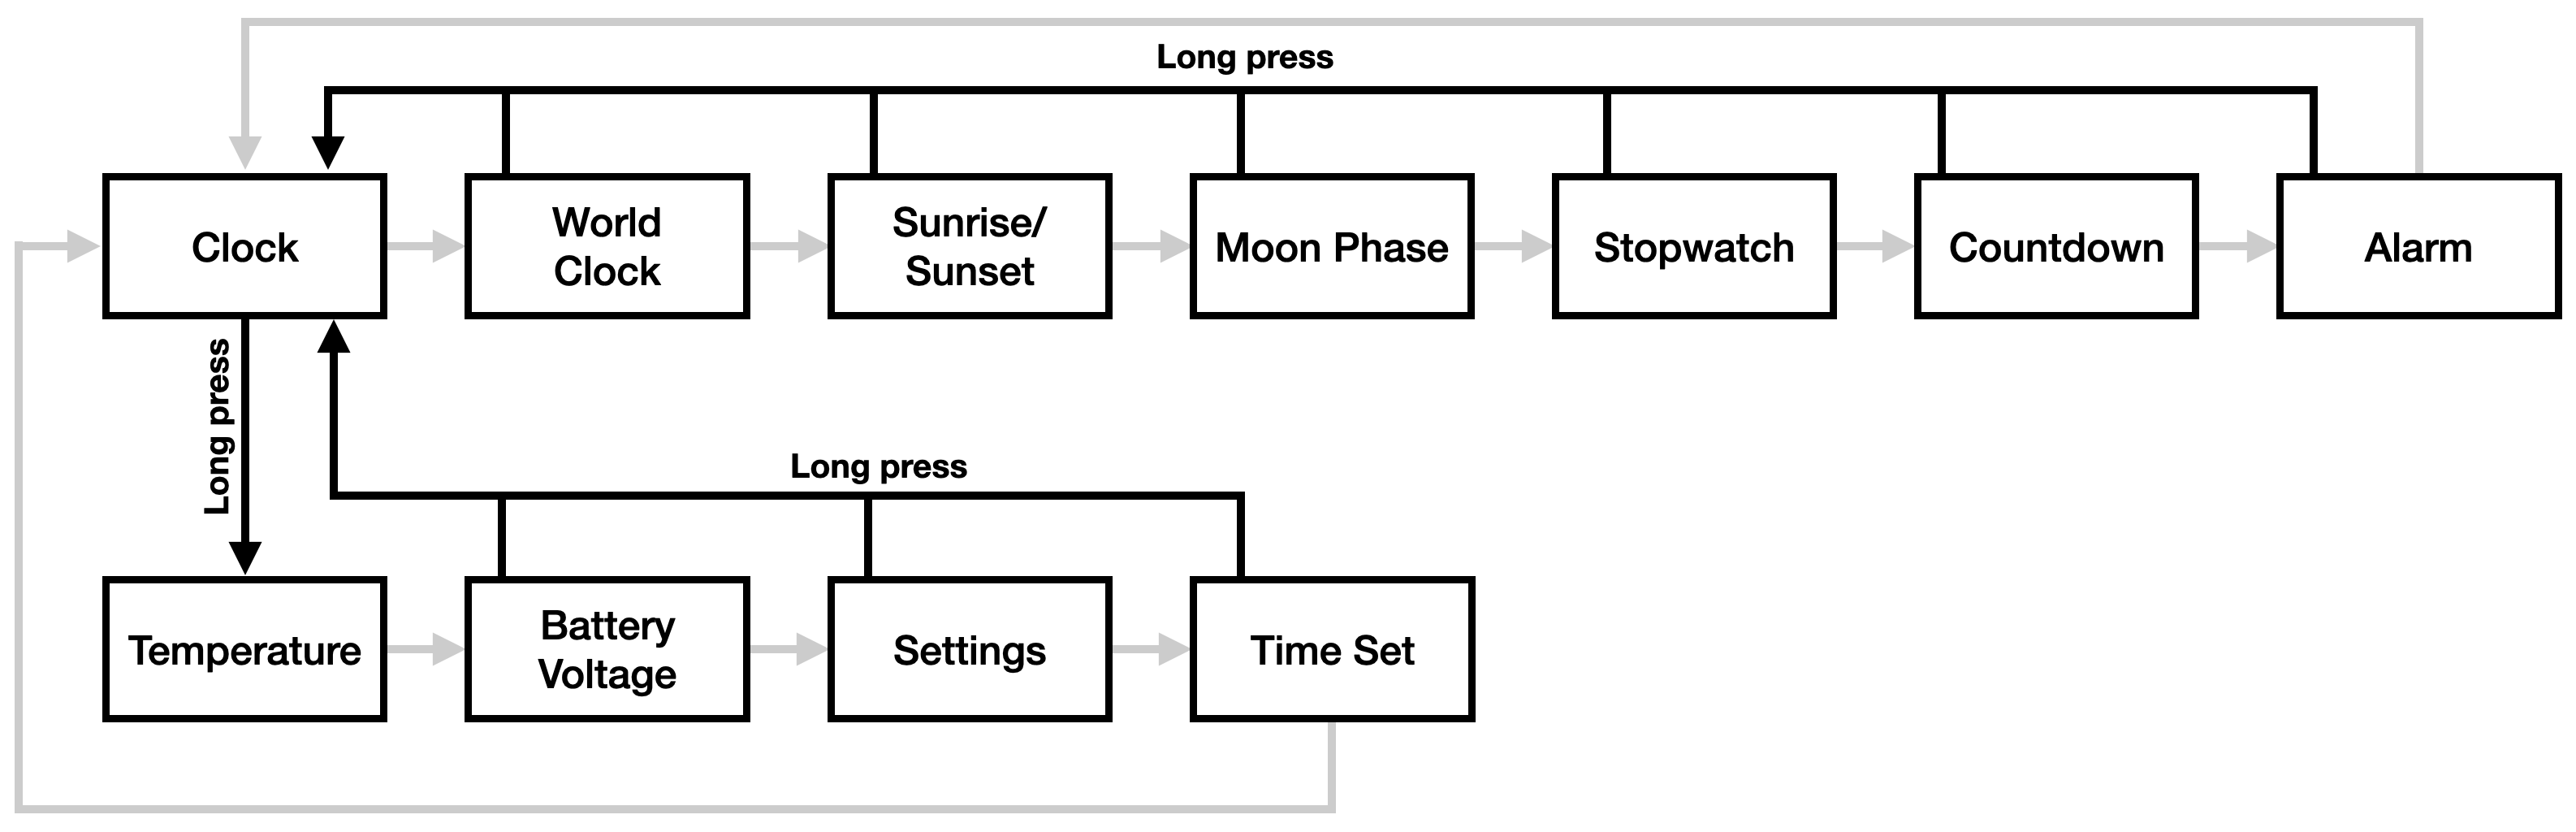
・ALARM button
The ALARM button is a general-purpose button. For example, if the watch face is a 'stopwatch' or 'countdown,' it switches between 'start' and 'stop.'

For watch faces with configurable options, you can press and hold the ALARM button to change those options directly or enter a secondary mode for configuring the watch face.
- Clock: Switch hourly chime
Temperature: Switch between metric and imperial units (Celsius or Fahrenheit)
・Sunrise/Sunset: Displays the latitude/longitude setting screen
- World Clock: Add a name and set the time zone
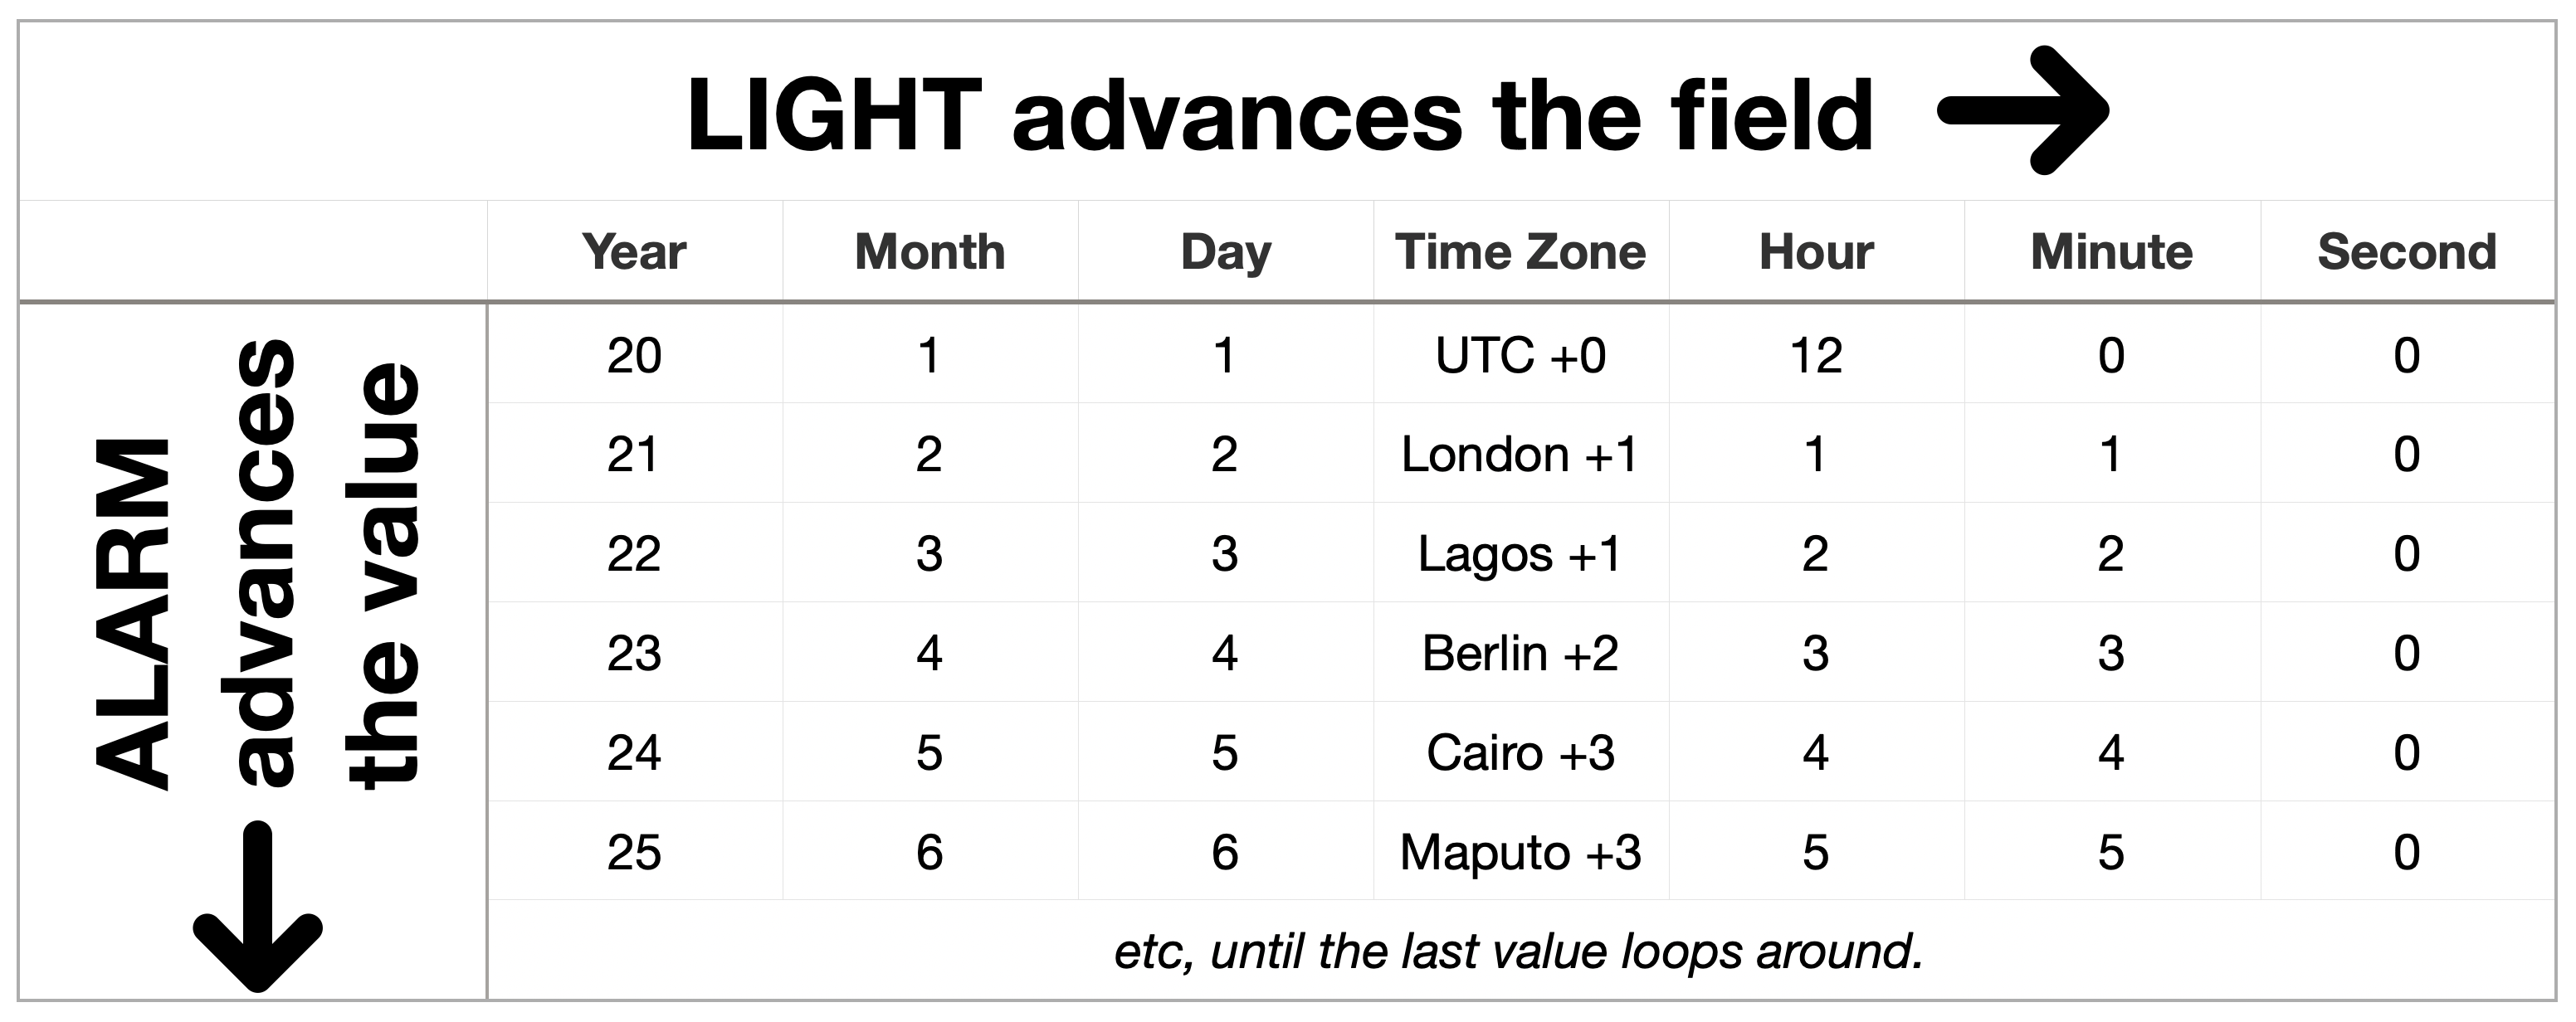
When you briefly press the ALARM button, it will advance the value on certain watch faces.
・Time setting: When setting the month, advance the month by one. At the maximum value (December for the month), the setting loops to the minimum value.
・LIGHT button
On most watch faces, pressing the LIGHT button will turn on the LED backlight unless you have assigned it to another function. On some watch faces, such as 'Set Time,' it may work in combination with the ALARM button; that is, the ALARM button toggles values, while the LIGHT button toggles fields.
Summary
Although there are certain risks involved in using the Sensor Watch, if you have a strong desire to revive your F-91W that no longer works, it may be worth considering using it.
Related Posts: