AI DIY review: I trained an AI model to distinguish the type of USB cable and made an AI camera [Raspberry Pi AI Camera]

The
Raspberry Pi AI Camera – Raspberry Pi
https://www.raspberrypi.com/products/ai-camera/
Raspberry Pi -Ultralytics YOLO Documentation
https://docs.ultralytics.com/en/guides/raspberry-pi/
SONY IMX500 - Ultralytics YOLO Docs
https://docs.ultralytics.com/ja/integrations/sony-imx500/
·table of contents
◆1: What is the Raspberry Pi AI Camera?
2: Preparing the dataset
3. Training the AI model
◆4: Conversion of AI models
5. Load the AI model into the camera and run it
◆1: What is the Raspberry Pi AI Camera?
The Raspberry Pi AI Camera is a camera module for the Raspberry Pi series, equipped with Sony's intelligent vision sensor ' IMX500 '. The IMX500 has an AI processing processor and memory for storing AI models inside the image sensor, allowing AI processing to be performed on the camera side instead of the Raspberry Pi.
Review of the 'Raspberry Pi AI Camera' camera with built-in AI chip, AI processing is performed on the camera side so it is OK even if the host device is weak - GIGAZINE

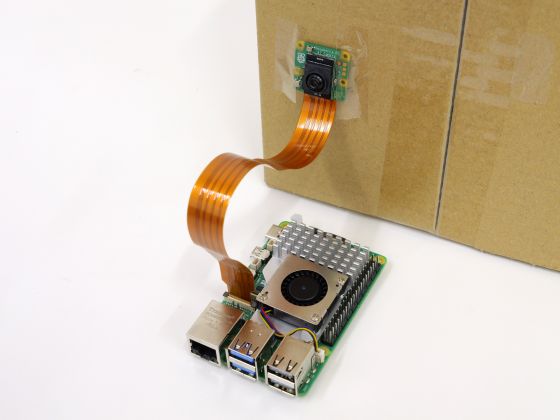
When you attach the Raspberry Pi AI Camera to the Raspberry Pi 5 , it looks like this.

This time, we will create an AI model that can distinguish the type of USB cable and run it on the Raspberry Pi AI Camera. Note that the following steps are current as of December 6, 2024.

2: Preparing the dataset
The AI model is created in the following steps: 'Collect image data for model training,' 'Train the model using the dataset,' and 'Convert the trained model so that it can be run on the Raspberry Pi AI Camera.' This time, instead of preparing the dataset myself, I will download and use the 'Dataset containing a total of 3,567 images of 'USB Type-A Cables,' 'USB Type-C Cables,' 'Micro-USB Cables,' and 'Mini-USB Cables,'' which is available at the following link.
Type of Cable Dataset
https://universe.roboflow.com/professional-elective-3/type-of-cable
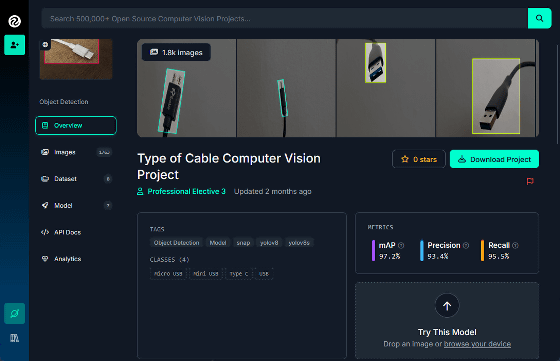
To download the dataset, you need a Roboflow Universe account, so click the human-shaped button in the upper left corner of the screen.
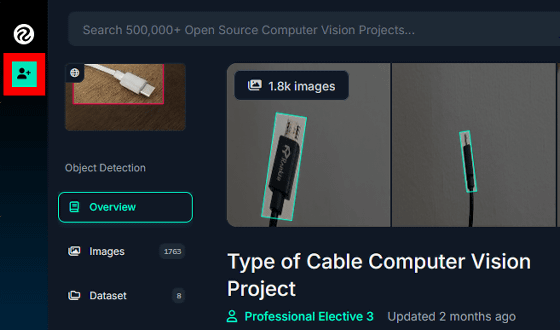
Click 'Sign in with work email'.

Enter your email address and click 'Next'.

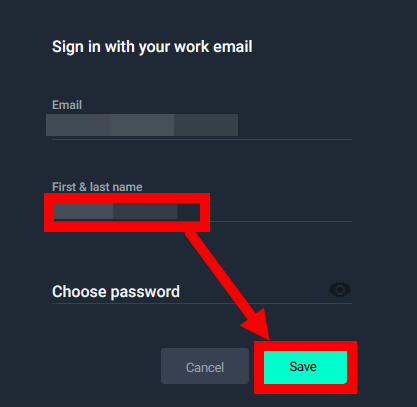
Enter a name and click 'Save'.
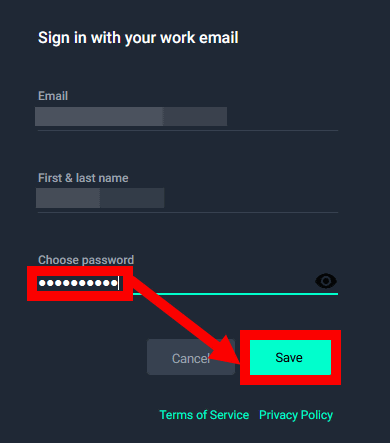
Enter your password and click 'Save'.
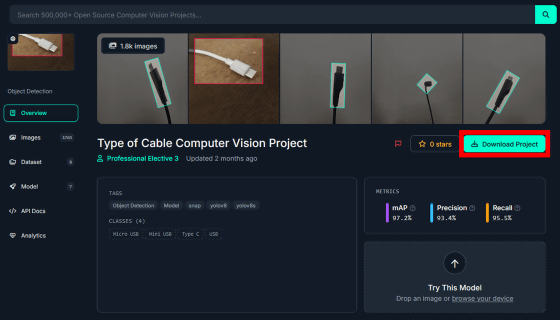
Once your account is created, you will automatically be returned to the original screen and click 'Download Project'.
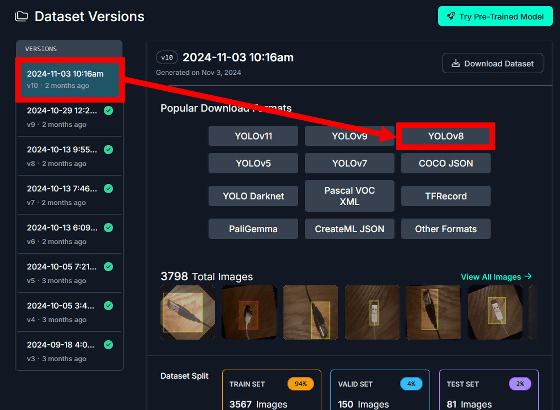
Select the dataset version on the left side of the screen and click 'YOLOv8'. This time, we selected the November 3rd version.
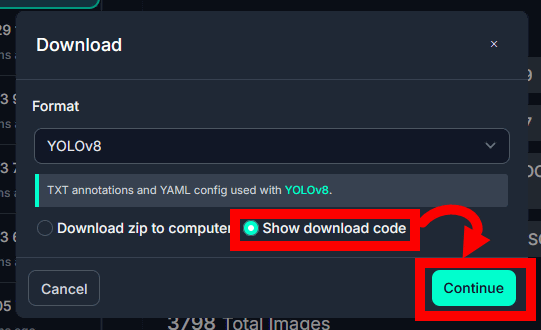
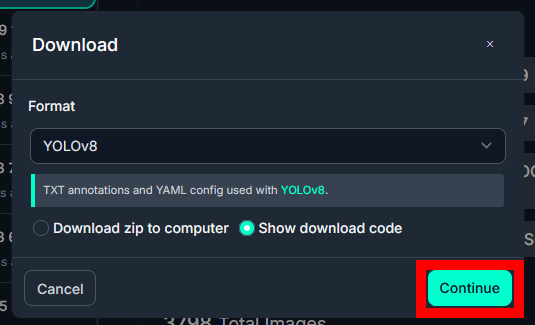
Check 'Show download code' and click 'Continue'.
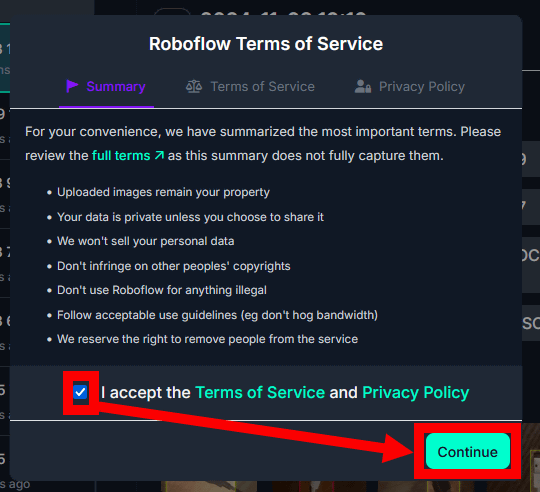
Please read the terms and conditions and privacy policy carefully, check the box to agree, and then click 'Continue'.
Click 'Continue' again.
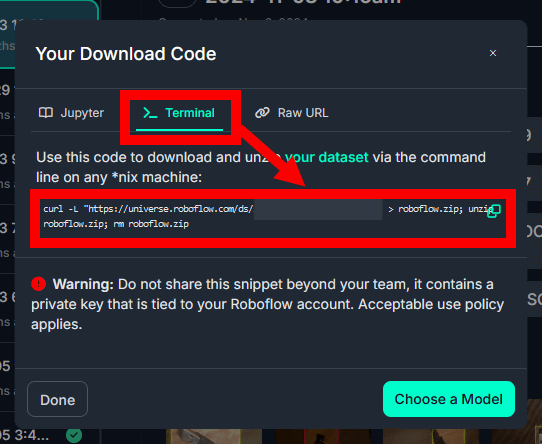
When the code output screen appears, click 'Terminal' to display the command for downloading the dataset. You will execute the command later to download the dataset, so for now copy the command and write it down somewhere.
3. Training the AI model
The AI model training will be performed according to the Ultralytics documentation . Training can also be performed on a Raspberry Pi 5, but it will take an extremely long time, so this time we will train on an Ubuntu machine equipped with a GeForce RTX 3090 .
First, run the following commands to update various packages to the latest version and install the required packages.
[code]sudo apt update && sudo apt upgrade
sudo apt install docker.io curl[/code]
Next, install the latest NVIDIA driver. First, run the following command to find the package name of the latest driver.
[code]sudo apt search nvidia-driver[/code]
The execution result this time looks like this. You can see that the latest version is 'nvidia-driver-550'.
……
nvidia-driver-535-server-open/noble-updates 535.216.03-0ubuntu0.24.04.1 amd64
NVIDIA driver (open kernel) metapackage
nvidia-driver-550/noble-updates,noble-security,now 550.120-0ubuntu0.24.04.1 amd64 [Installed]
NVIDIA driver metapackage
nvidia-driver-550-open/noble-updates,noble-security 550.120-0ubuntu0.24.04.1 amd64
NVIDIA driver (open kernel) metapackage
……
Run the following command to install 'nvidia-driver-550' and reboot.
[code]sudo apt install nvidia-driver-550
sudo reboot[/code]
After rebooting, run the following command to check if the GPU is correctly recognized.
[code]nvidia-smi[/code]
If the GPU model name and other information are displayed correctly as shown below, it's OK.
+-------------------------------------------------------------------------------------------+
| NVIDIA-SMI 550.120 Driver Version: 550.120 CUDA Version: 12.4 |
|---------------------------------------+------------------------+----------------------+
| GPU Name Persistence-M | Bus-Id Disp.A | Volatile Uncorr. ECC |
| Fan Temp Perf Pwr:Usage/Cap | Memory-Usage | GPU-Util Compute M. |
| | | M.I.G.M. |
|==========================================+=========================+=======================|
| 0 NVIDIA GeForce RTX 3090 Off | 00000000:01:00.0 Off | N/A |
| 76% 61C P2 203W / 350W | 2875MiB / 24576MiB | 87% Default |
| | | N/A |
+-----------------------------------------+------------------------+----------------------+
Next, install '
[code]curl -fsSL https://nvidia.github.io/libnvidia-container/gpgkey | sudo gpg --dearmor -o /usr/share/keyrings/nvidia-container-toolkit-keyring.gpg && curl -s -L https://nvidia.github.io/libnvidia-container/stable/deb/nvidia-container-toolkit.list | sed 's#deb https://#deb [signed-by=/usr/share/keyrings/nvidia-container-toolkit-keyring.gpg] https://#g' | sudo tee /etc/apt/sources.list.d/nvidia-container-toolkit.list
sudo apt-get update
sudo apt install -y nvidia-container-toolkit[/code]
Next, pull the Ultralytics container.
[code]t=ultralytics/ultralytics:latest
sudo docker pull $t[/code]
Next, create a working directory and move into it. In this example, I named it 'imx500_test'.
[code]mkdir imx500_test && cd imx500_test[/code]
Once you have moved to the working directory, execute the command for downloading the dataset that you saved in ' ◆2: Preparing the dataset '.
[code]curl -L 'https://universe.roboflow.com/ds/○○○?key=○○○' > roboflow.zip; unzip roboflow.zip; rm roboflow.zip[/code]
Next, save the Python script for model training in the working directory. Create a Python script with the following content in any editor. In this example, we saved the script in a file named 'test.py'.
from ultralytics import YOLO
model = YOLO('yolov8n.pt')
results = model.train(
data='data.yaml',
epochs=100,
imgsz=640,
device='0'
)
Once you've done this, start the container.
[code]sudo docker run -it --ipc=host --gpus all -v ~/imx500_test:/imx500_test $t[/code]
Once the container is started, go to the working directory and run the Python script to begin training. On a machine with a GeForce RTX 3090, training took about 30 minutes to complete.
[code]cd /imx500_test
python test.py[/code]
When training is complete, the 'directory where the results are saved' will be displayed at the end of the standard output.
Results saved to /ultralytics/runs/detect/train5
Go to the directory where you want to save the results.
[code]cd /ultralytics/runs/detect/train5[/code]
Copy the entire 'weights' directory included in the 'Destination directory for deliverables' to the working directory.
[code]cp -rf weights/ /imx500_test/100epoch_model[/code]
Once the copying is complete, exit the container.
[code]exit[/code]
Go to the working directory and check the contents.
[code]cd ~/imx500_test
ls[/code]
The contents look like this. If it contains a directory called 'weights_100epoch', the training was successful.
100epoch_model README.dataset.txt README.roboflow.txt data.yaml roboflow.zip runs test test.py train valid weights_100epoch yolo11n.pt yolov8n.pt
◆4: Conversion of AI models
Once the AI model training is complete, the model data is transferred to the Raspberry Pi 5 and converted so that it can be run on the Raspberry Pi AI Camera. First, connect the Raspberry Pi AI Camera to the Raspberry Pi 5. Note that the Raspberry Pi 5 uses a model with 8GB of RAM.
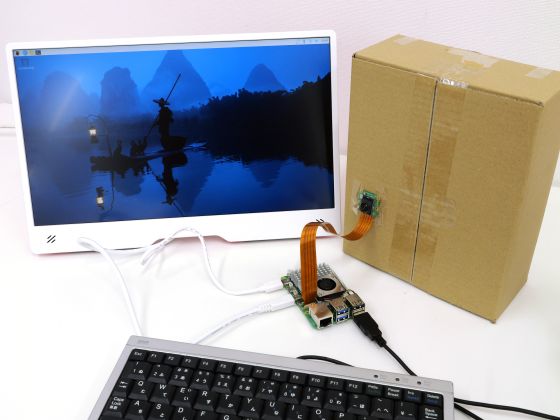
Connect a monitor and keyboard to the Raspberry Pi 5 and start the OS.
Copy the directory 'weights_100epoch' created on the Ubuntu machine to the Raspberry Pi 5 using physical media or command line tools. In this example, I copied it directly under the home directory.

Install the necessary packages on the Raspberry Pi 5 and reboot.
[code]sudo apt install imx500-all imx500-tools python3-opencv python3-munkres
sudo reboot[/code]
Next, install Python-related packages.
[code]sudo apt install python3-pip python3.11-venv[/code]
Create a virtual environment for model conversion and enter the created virtual environment.
[code]python3 -m venv ~/imx_python
source ~/imx_python/bin/activate[/code]
Once you're in the virtual environment, install the required packages and reboot.
[code]pip install -U pip
pip install ultralytics[export]
sudo reboot[/code]
After rebooting, enter the virtual environment again and create a working directory and move into it. This time I created a directory named 'imx500'.
[code]source ~/imx_python/bin/activate
mkdir imx500 && cd imx500[/code]
Execute the following command in the working directory to start the model conversion process.
[code]yolo export model=~/weights_100epoch/best.pt format=imx[/code]
An error will occur during the process, as shown below, but it will be resolved automatically, so just wait for a while until the conversion is complete. It took about 15 minutes on a Raspberry Pi 5 with 8GB RAM.
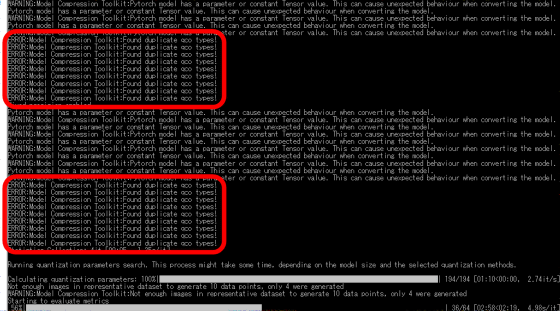
Once the model conversion process is complete, various files will be output to “home directory/weights_100epoch/best_imx_model”. Go to the output location and create the model data to be loaded into the Raspberry Pi AI Camera.
[code]cd ~/weights_100epoch/best_imx_model
mkdir output
imx500-package -i packerOut.zip -o output[/code]
When the model data named 'network.rpk' is output to 'Home directory/weights_100epoch/best_imx_model/output', the conversion process is complete. The virtual environment is no longer needed, so exit the virtual environment with the following command. I will leave it there.
[code]deactivate[/code]
5. Load the AI model into the camera and run it
In order to load the AI model created in this procedure into the Raspberry Pi AI Camera, you will need
[code]cd
git clone -b next https://github.com/raspberrypi/picamera2
cd picamera2
git checkout c2f8ab5ce55f3b240fe3db2471a47bfec72d8399[/code]
Next, run the following command to install the packages contained in 'picamera2' on your system:
[code]pip install -e . --break-system-packages[/code]
Once the installation is complete, go to “examples/imx500” in “picamera2”.
[code]cd examples/imx500[/code]
Finally, execute the following command to load the AI model into the Raspberry Pi AI Camera and start the AI camera. The first time you run it, there will be a wait of several tens of seconds while the AI model is loaded.
[code]sudo python imx500_object_detection_demo.py --model ~/weights_100epoch/best_imx_model/output/network.rpk --fps 25 --bbox-normalization --ignore-dash-labels --bbox-order xy --labels ~/weights_100epoch /best_imx_model/labels.txt[/code]
The execution result looks like this. A new window opens and displays the image from the camera.
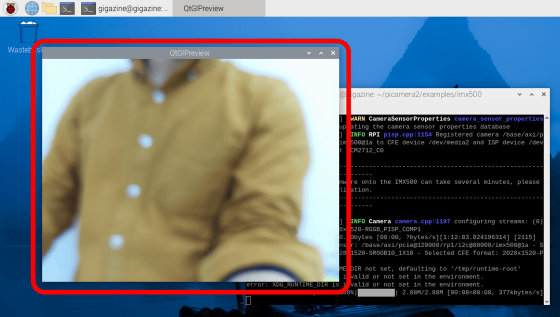
When the USB Type-A cable was shown on the camera, it was displayed as 'USB.'
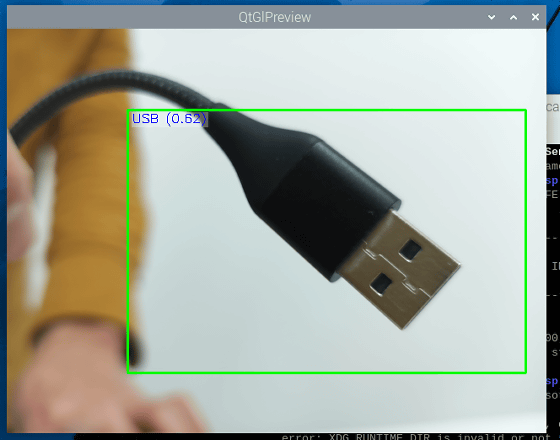
When I brought the USB Type-C cable close, it was correctly recognized as 'Type C.' It was able to properly identify the type of USB cable.

Since the Raspberry Pi AI Camera performs AI processing on the camera side, there is no load on the Raspberry Pi 5. The system status of the Raspberry Pi 5 when running the 'AI model to distinguish the type of USB cable' The results of checking with '
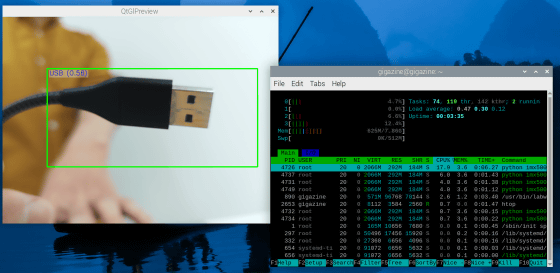
I tried recording the operation of the 'AI model that distinguishes the type of USB cable' using
I made an AI that distinguishes the type of USB cable [Raspberry Pi AI Camera] - YouTube
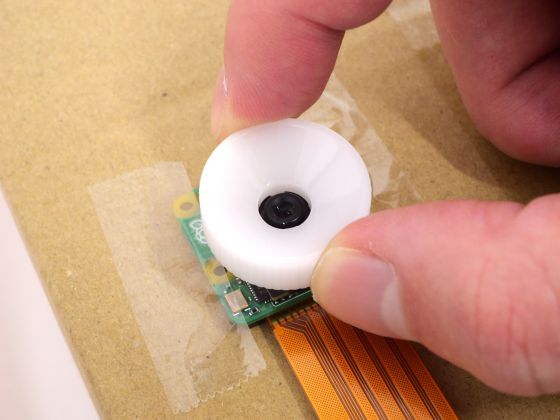
By the way, the Raspberry Pi AI Camera comes with a white donut-shaped 'focus adjustment tool.'
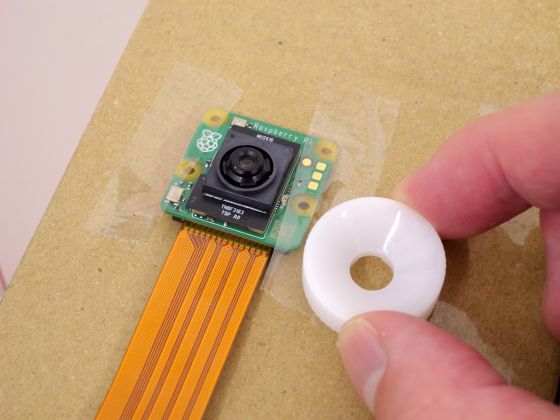
By attaching the focus adjustment tool to the camera and rotating it clockwise, you can adjust the focus distance farther, and by rotating it counterclockwise, you can adjust the focus distance closer. This allows you to focus on small objects such as the 'AI model that identifies USB cables.' It can handle a wide range of tasks, from small objects to large objects such as an AI model that identifies objects on the road.
In addition, the Raspberry Pi AI Camera is available at online shops, etc., and at the time of writing, it is available at Amazon.co.jp for 14,980 yen including tax.
Amazon.co.jp: Raspberrypi AI Camera Raspberry Pi AI Camera: Computers & Peripherals

Related Posts:


