The making of the paperback version of 'We're the Gas Man!' on Amazon
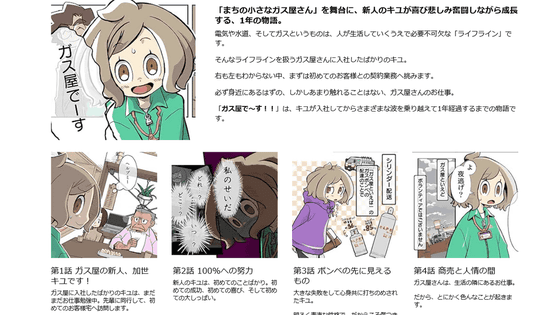
The full-color manga ' Gas Shop Desu!! ' is being released simultaneously
◆Creating a paperback part 1: What is the difference between a paperback and an e-book?
◆Paperback creation part 2: Creating the front cover, back cover, and spine
◆ Procedure for uploading data
◆How prices are determined
◆What difficulties did you face before sales started?
◆Creating a paperback part 1: What is the difference between a paperback and an e-book?
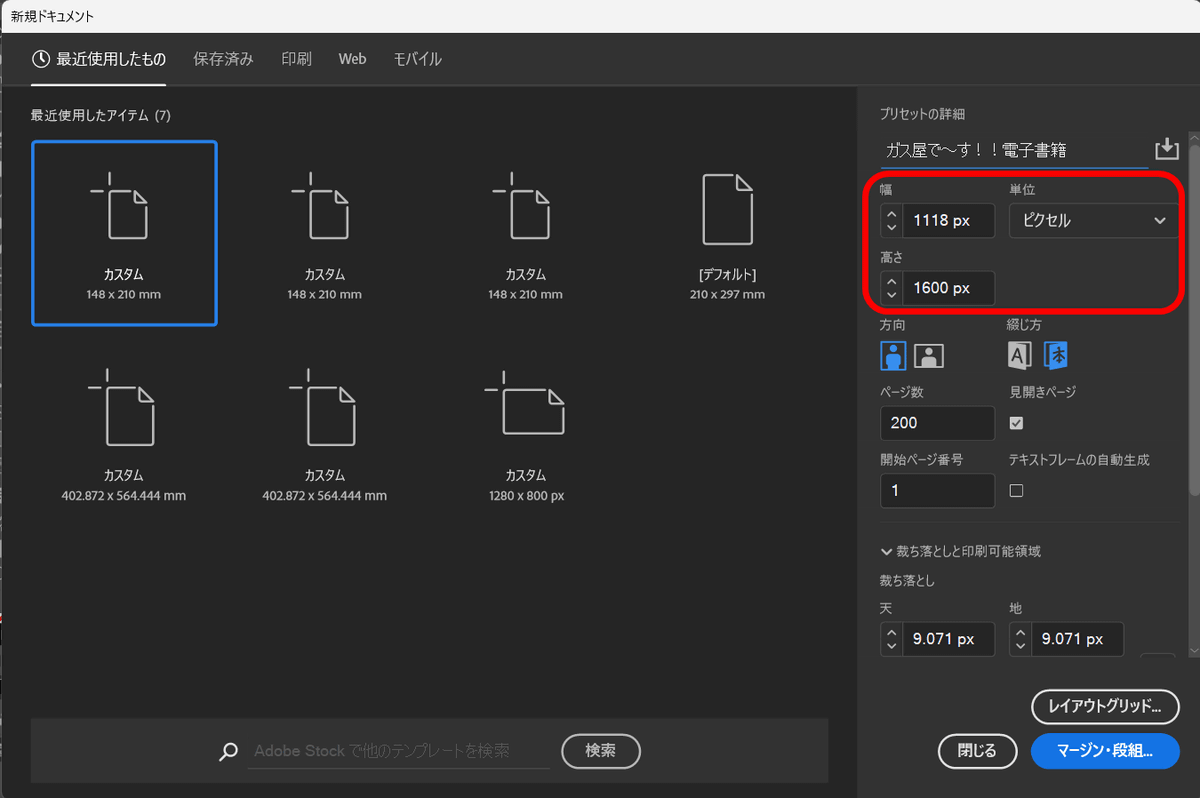
The 'Gas Man!' comics, both e-book and paperback, were created using Adobe Indesign . In Indesign, you first enter the page size of the book you want to create. Below are the settings for creating an e-book, with the unit being 'pixels' and the width and height being the same as the image data.
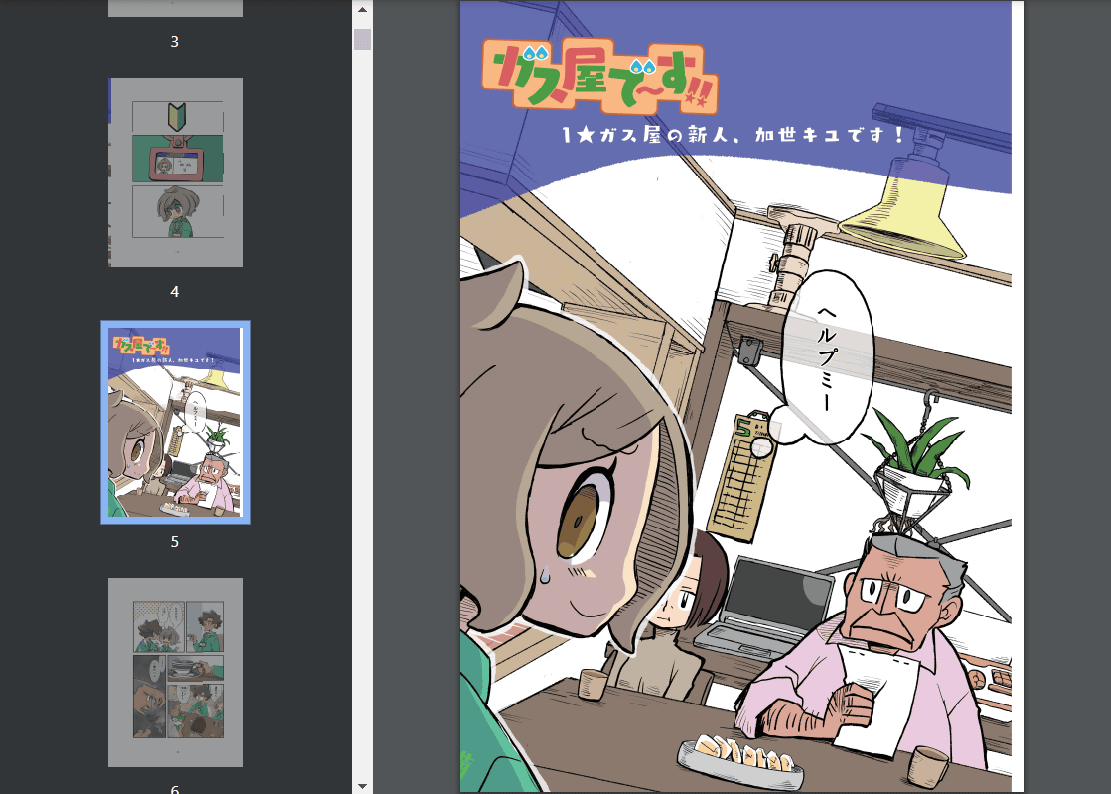
Therefore, as you can see in the image below, the image is displayed large and fills the entire page.
When you actually open an e-book from the Kindle app, it looks like this.

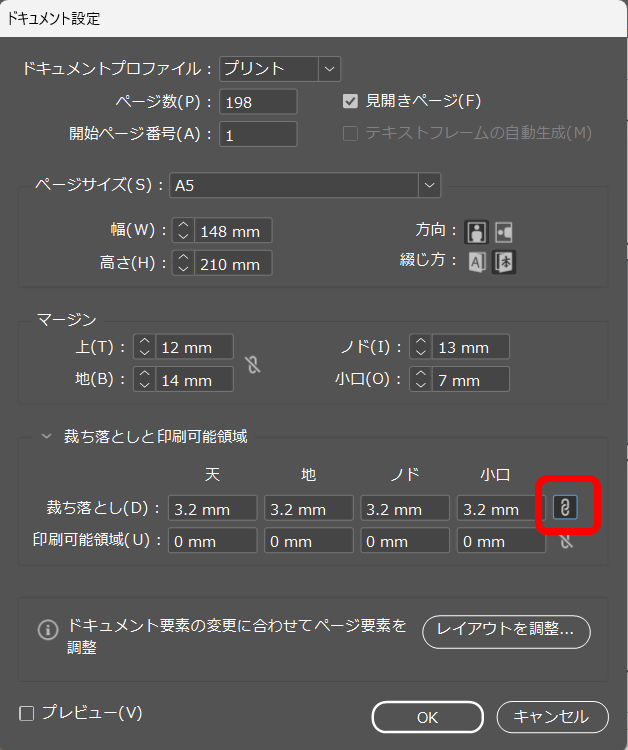
On the other hand, for paperbacks, the page settings must be set to match the book's
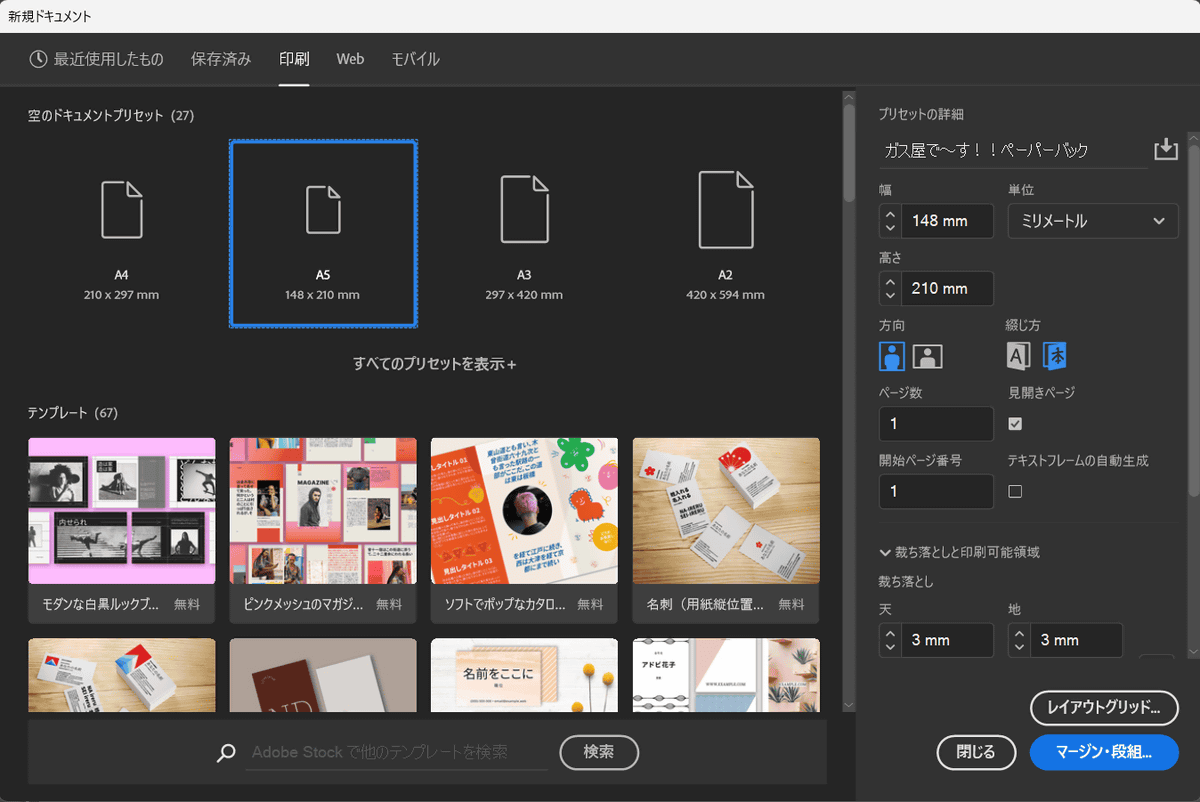
In addition, for paperbacks, you need to set 'bleed' and 'margins.' First, bleed means that if the image is placed exactly at the edge of the page, the shred will shift slightly and white areas will remain, so it is necessary to place it beyond the page size at the data stage. Amazon's paperbacks require '3.2 mm of bleed from the edge of the page,' so after setting it at 3.2 mm, click 'Margins and columns' to set the margins next.
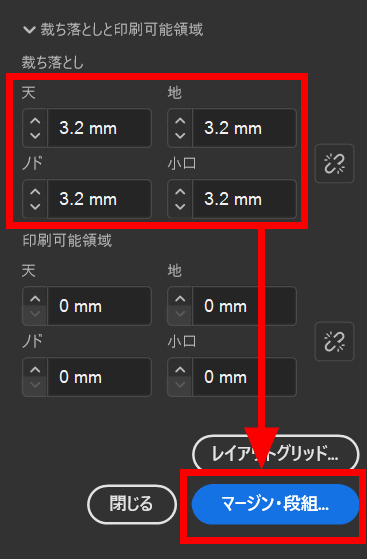
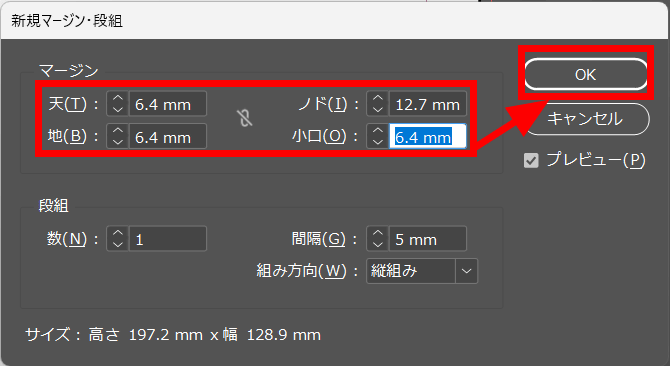
Margins are the space that needs to be left open when placing content on a page so that it is not cut off by printing or hidden by the binding of the book. For Amazon paperbacks, the required margins are specified according to the number of pages, and for the 200-page book 'Gas Shop!!', the inside margin (gutter) is 12.7 mm and the outside margins (top, bottom, and fore-edge) are 6.4 mm. Click 'OK' when you have finished setting.
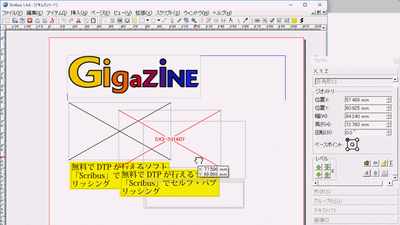
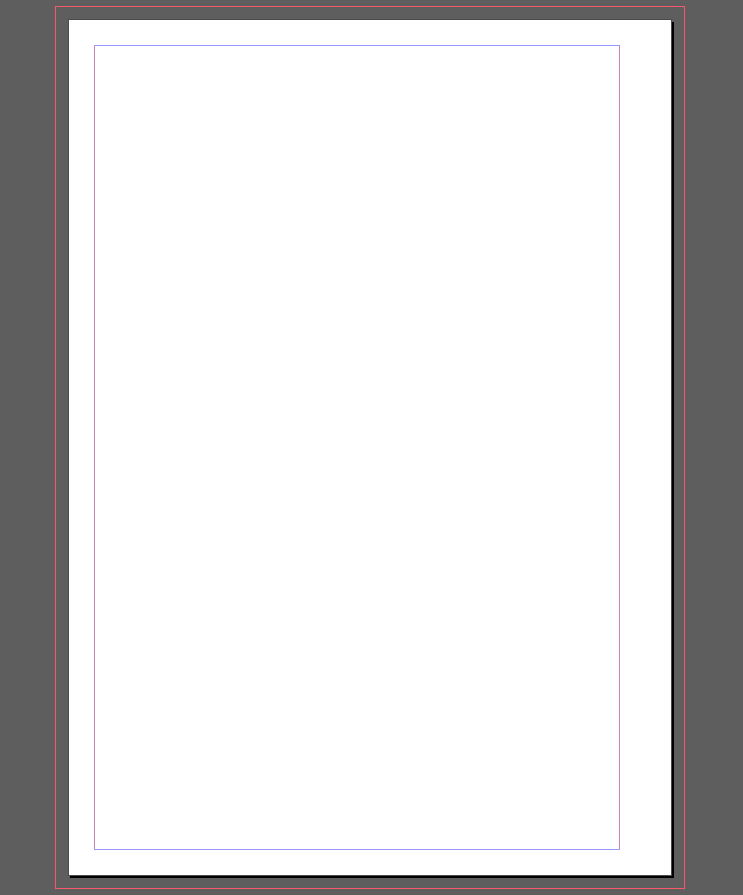
A blank page was created, as shown in the image below. The outermost red line is the bleed line, and the gray background is the area that will not be printed, but the image you want to place to the edge of the page must extend up to this line. The red and blue gradients on the white page are the margin lines, and important content, especially text, must be inside this.
When creating the paperback edition of 'We're the Gasman!', the top and bottom margins were made wider due to the ratio of the manga image. Also, initially the bleed was entered so that it would be uniform in all directions, but later problems arose, so only the 'gutter' was set to '0'. Details of the problems can be seen in
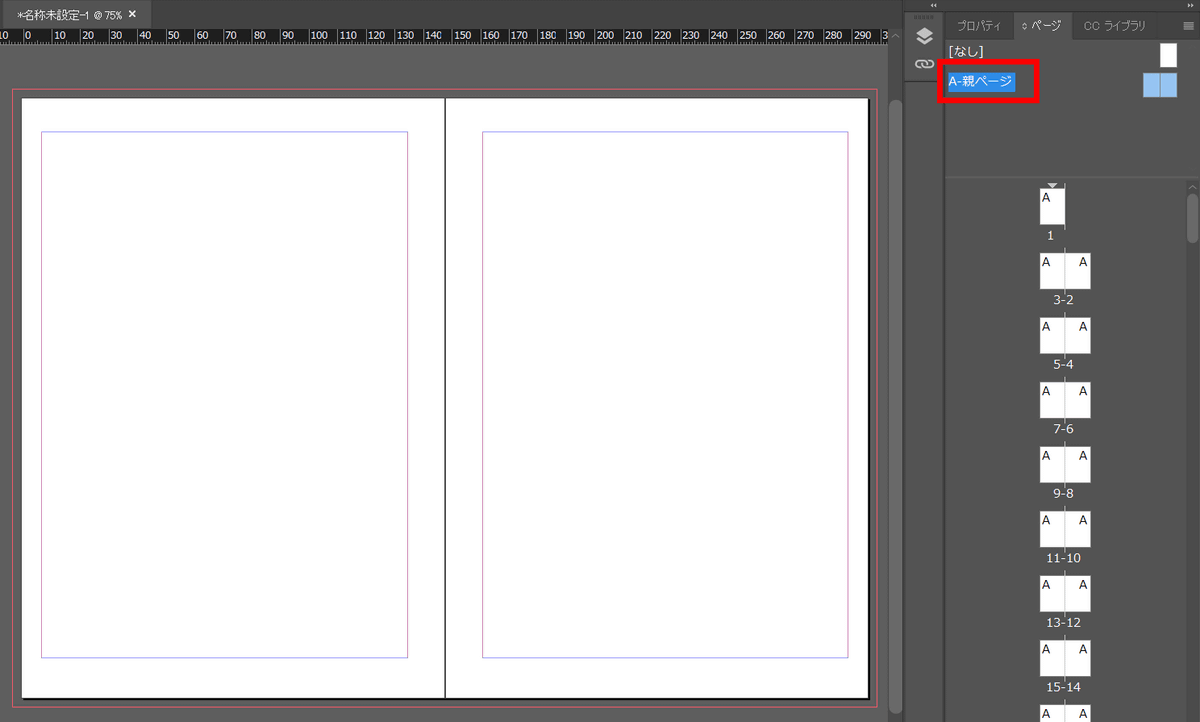
A feature of Indesign is the parent page (master page). By inputting designs that are common to many pages into the parent page and creating a main page based on the parent page, you can reflect the same design all at once. To use the parent page, click 'A-Parent Page'.
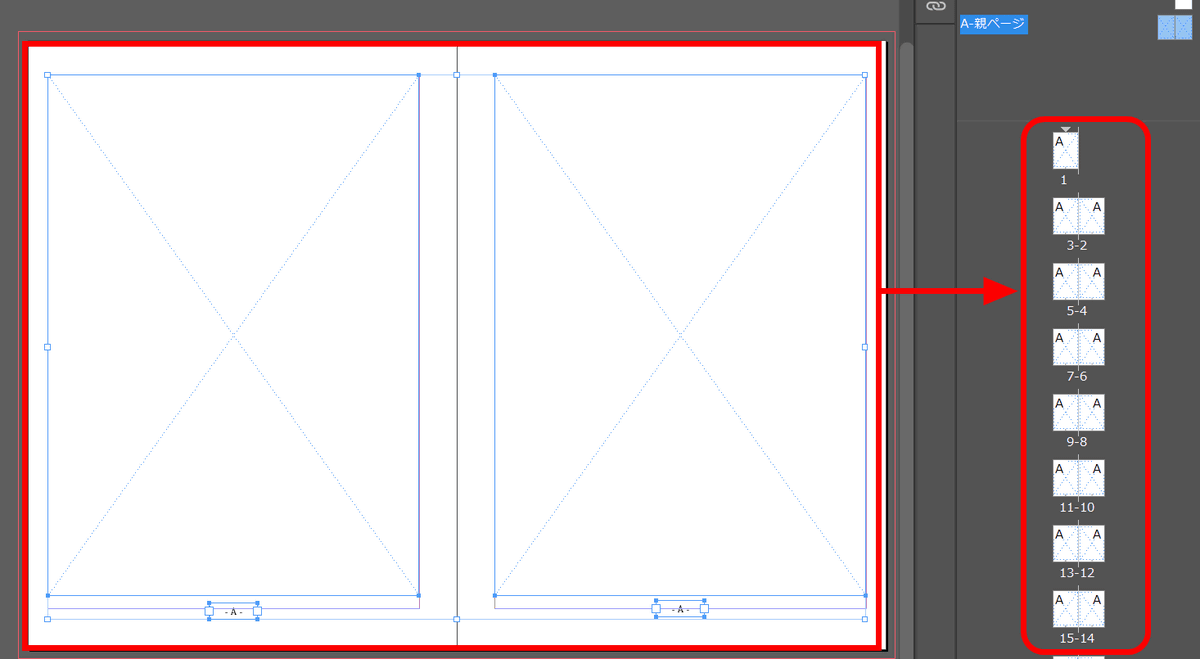
When I placed a 'frame' for pouring images into the parent page and a 'text window' for displaying page numbers on the parent page, the page list on the right was also reflected on all pages. All you have to do is pour images into all pages.
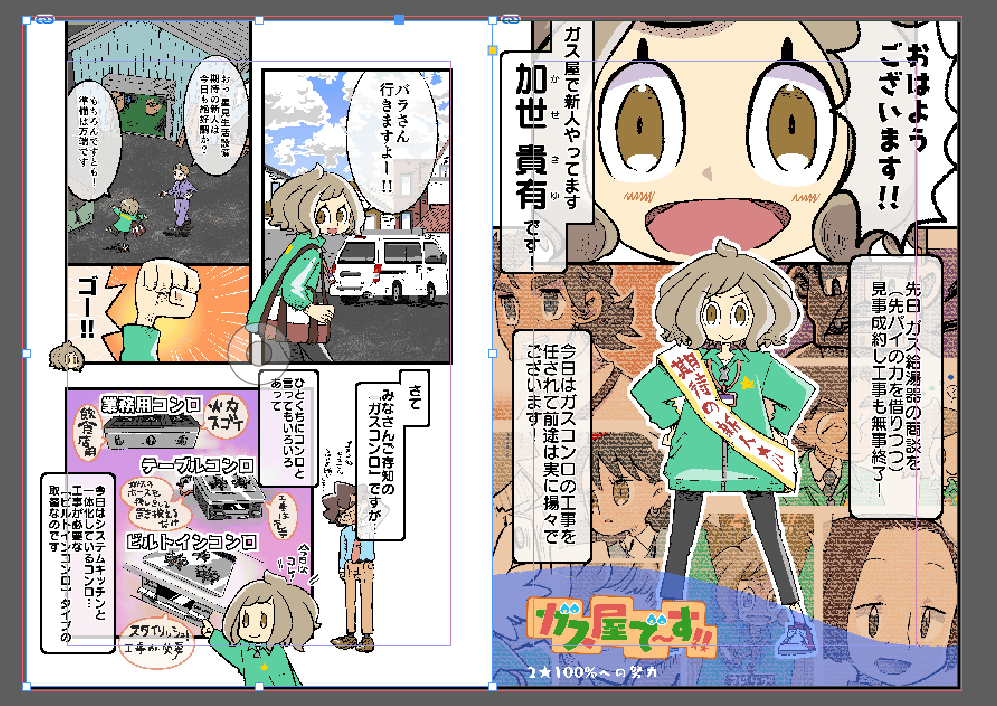
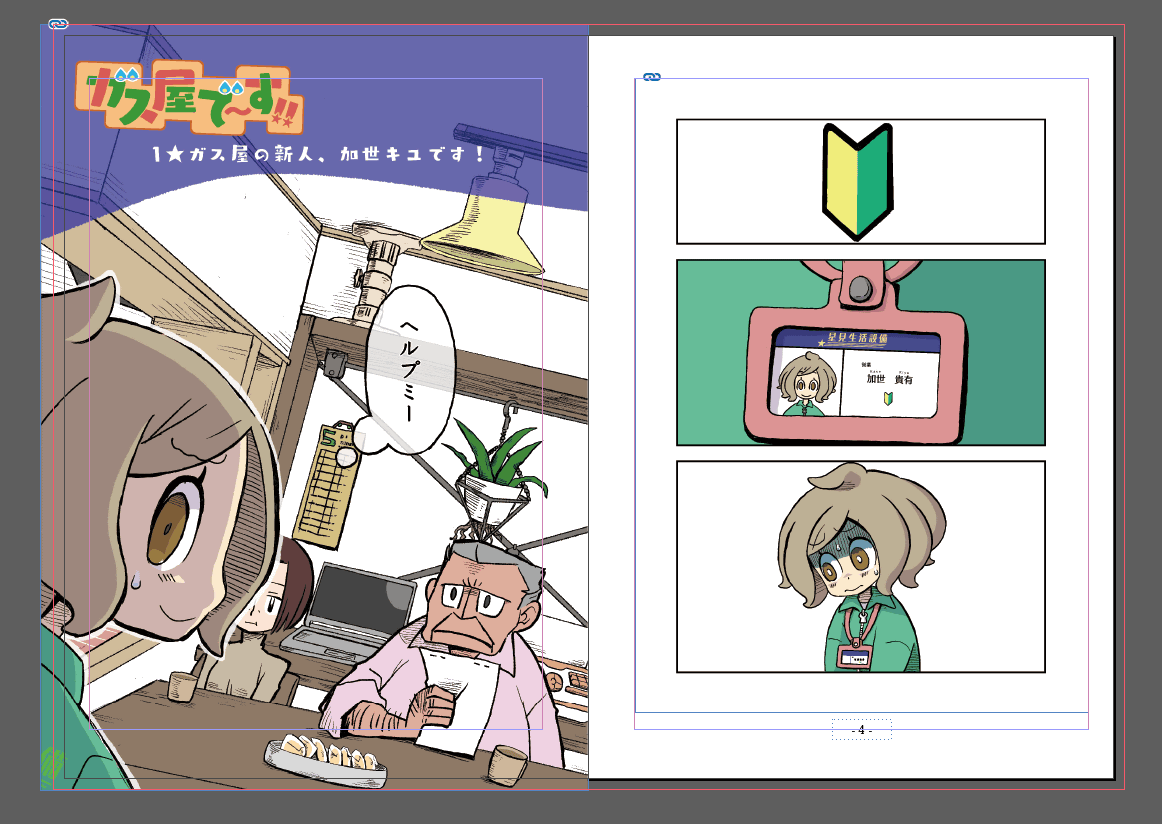
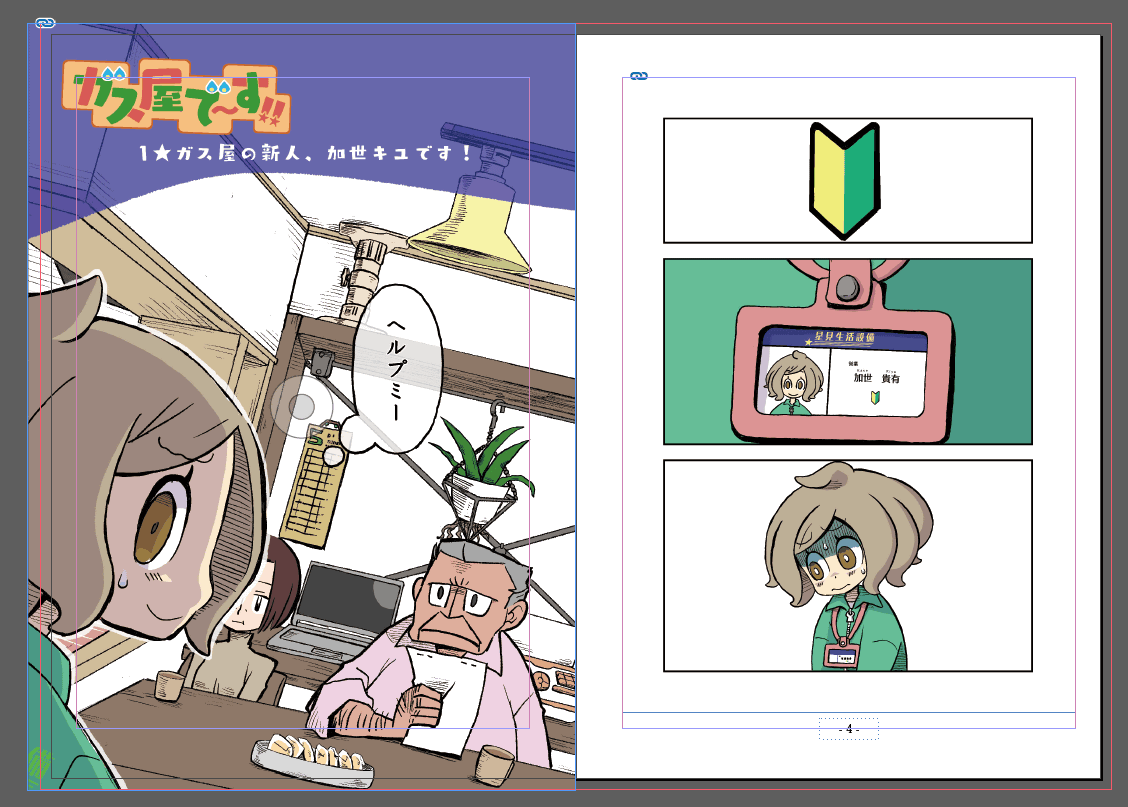
In the image on the left below, a manga page has been inserted directly into an image frame that has been aligned with the margins. On the right, the manga has been enlarged to the bleed line on the outside of the page in order to fill the entire screen. Note that simply enlarging the image would result in the title logo and subtitles going outside the margins, so the position of the text has been fine-tuned while referring to the margin lines. This is why it is necessary to set bleed and margins.
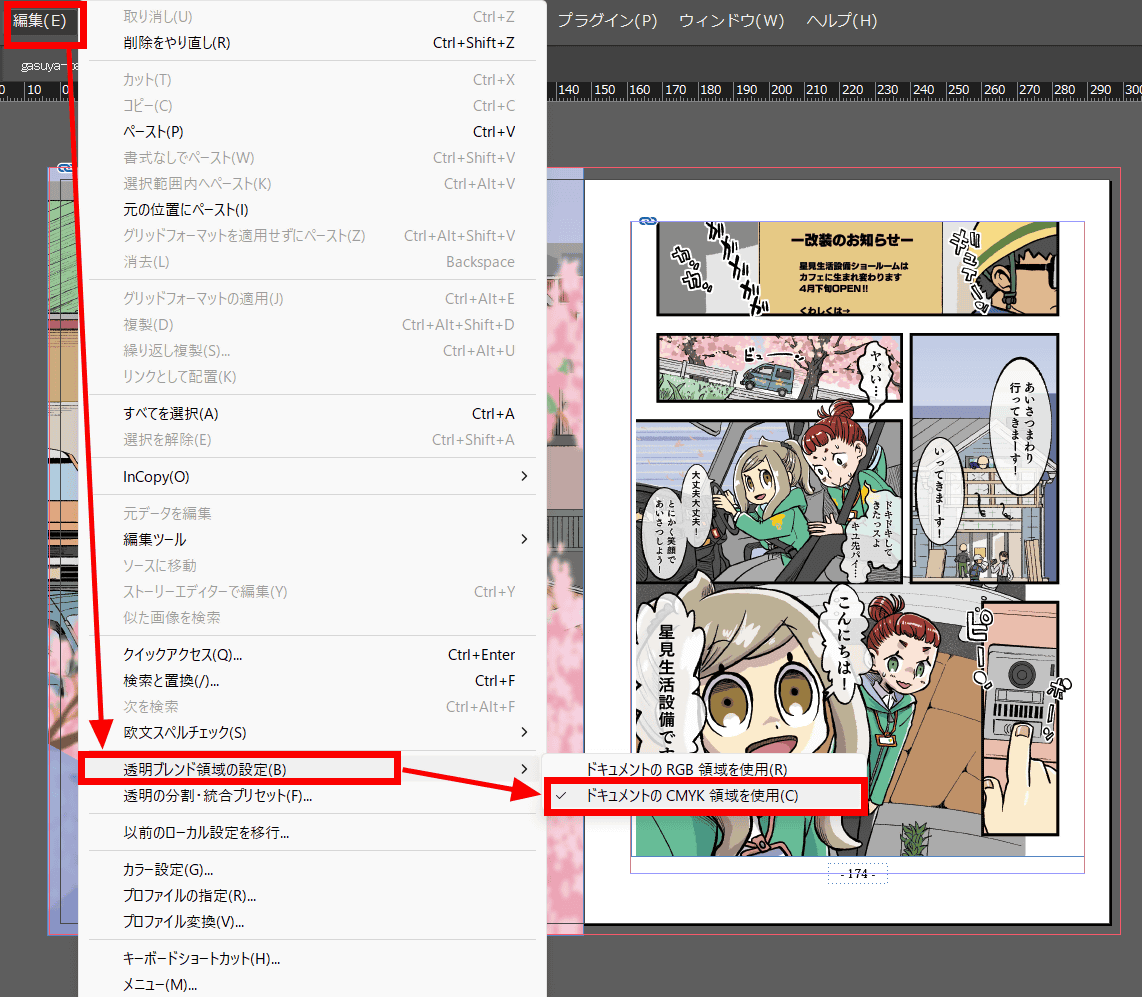
After you fill all the pages with images, check and adjust to make sure each page does not encroach on the margins. Finally, select 'Set Transparent Blending Areas' from the 'Edit' menu in Indesign and click 'Use CMYK Areas of Document.'
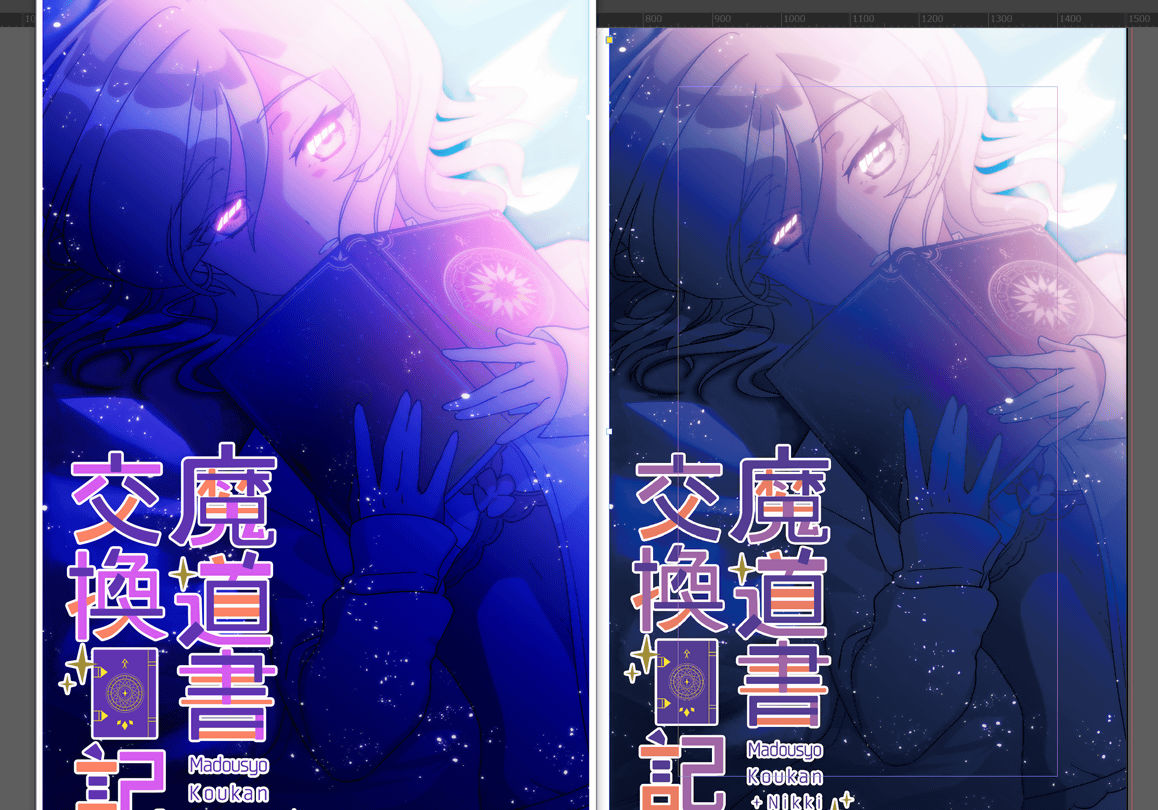
If you do not set the color to RGB for e-books and CMYK for printed books such as paperbacks, the colors may appear muddy. Below is an example of an e-book version of '
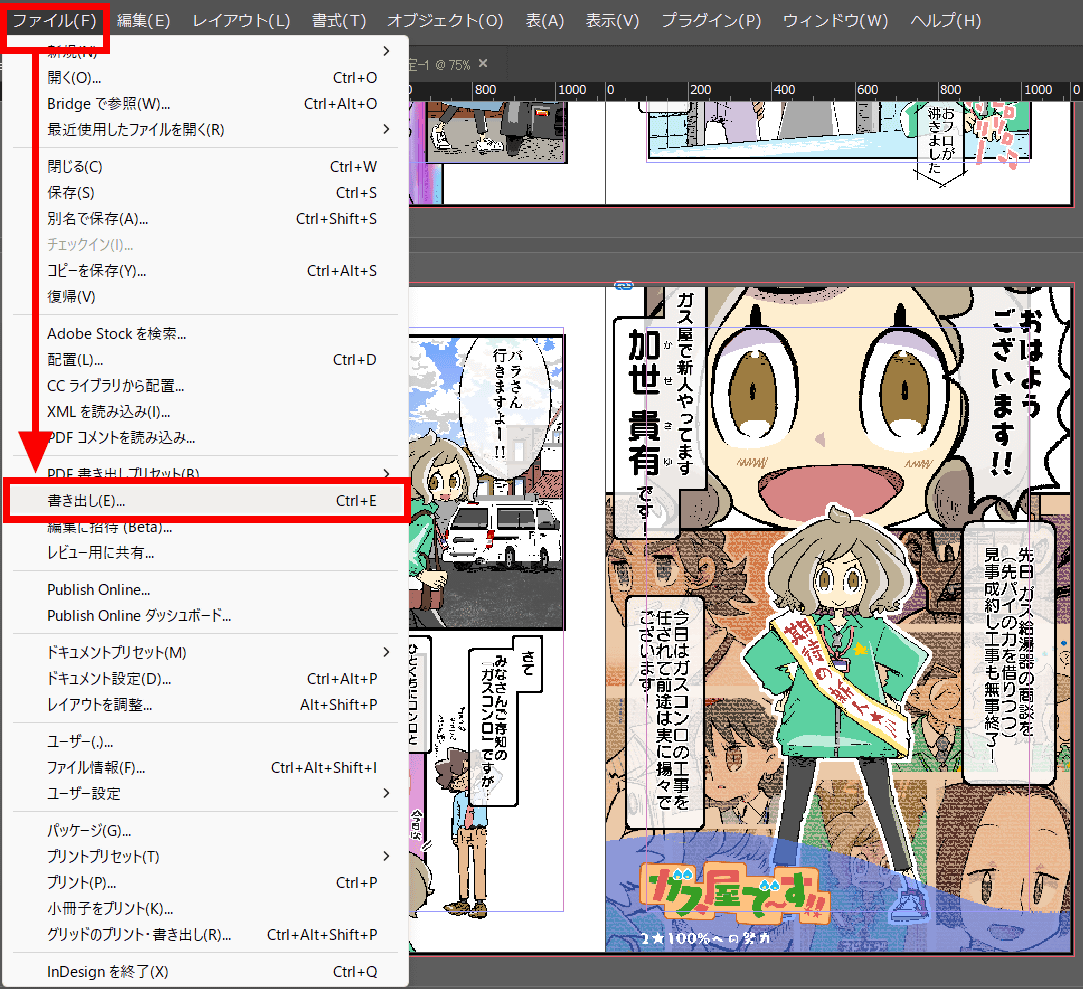
Once you've finished setting up, click 'Export' from the 'File' menu.
E-books use
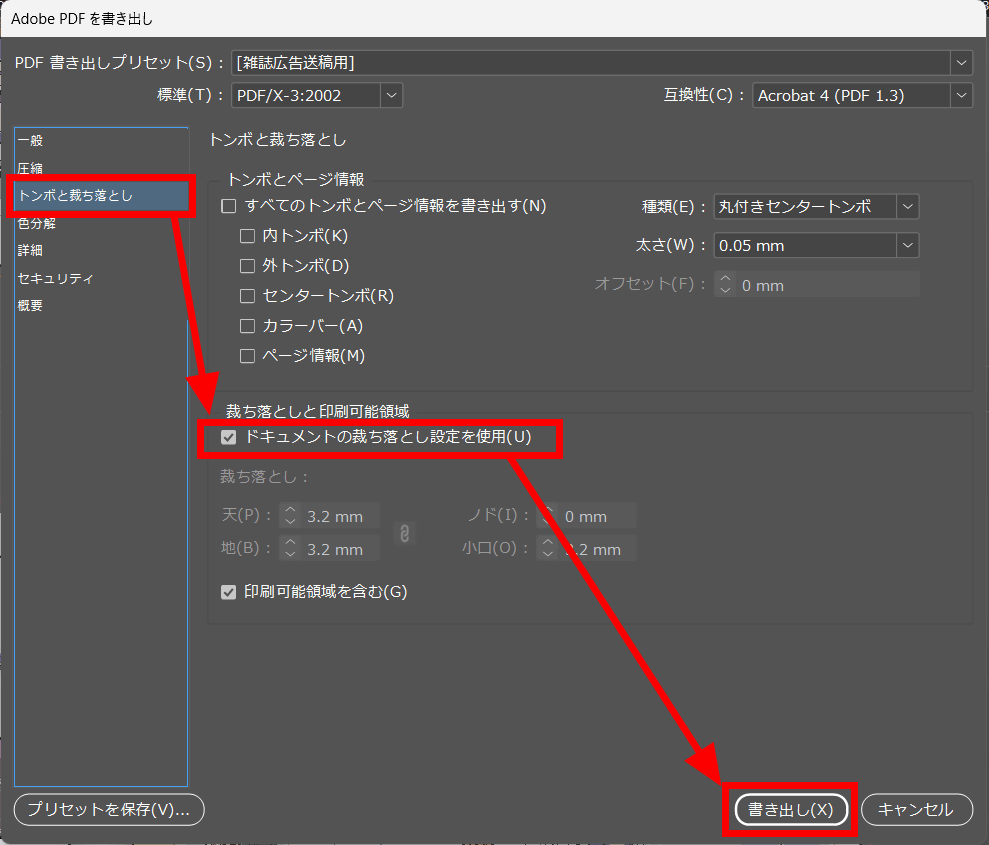
In the export options, check 'Use document bleed settings' from the 'Marks and Bleeds' tab. This allows you to reflect the pages you created according to the bleed you set in advance in the PDF. Once you've checked the box, click 'Export' to complete the creation of your manuscript.
◆Paperback creation part 2: Creating the front cover, back cover, and spine
For e-books, only the cover that will be displayed in the store or bookshelf is required, but for paperbacks, the back cover and spine are also required. In particular, the size of the spine changes depending on the number of pages, so access the Kindle Direct Publishing
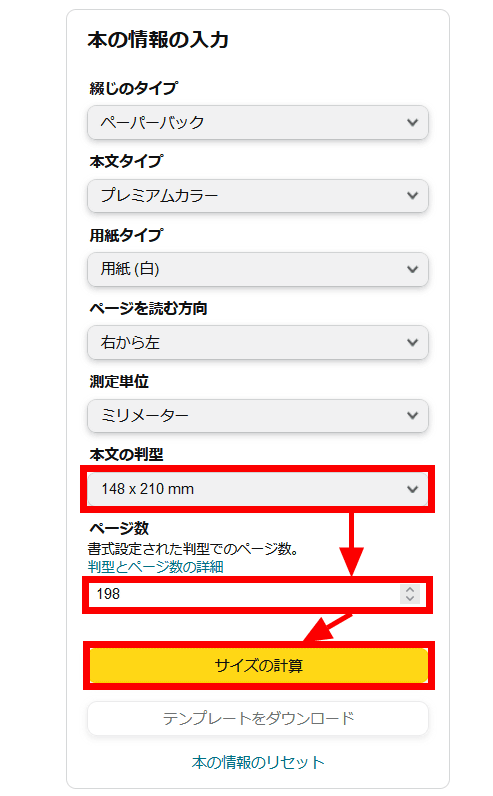
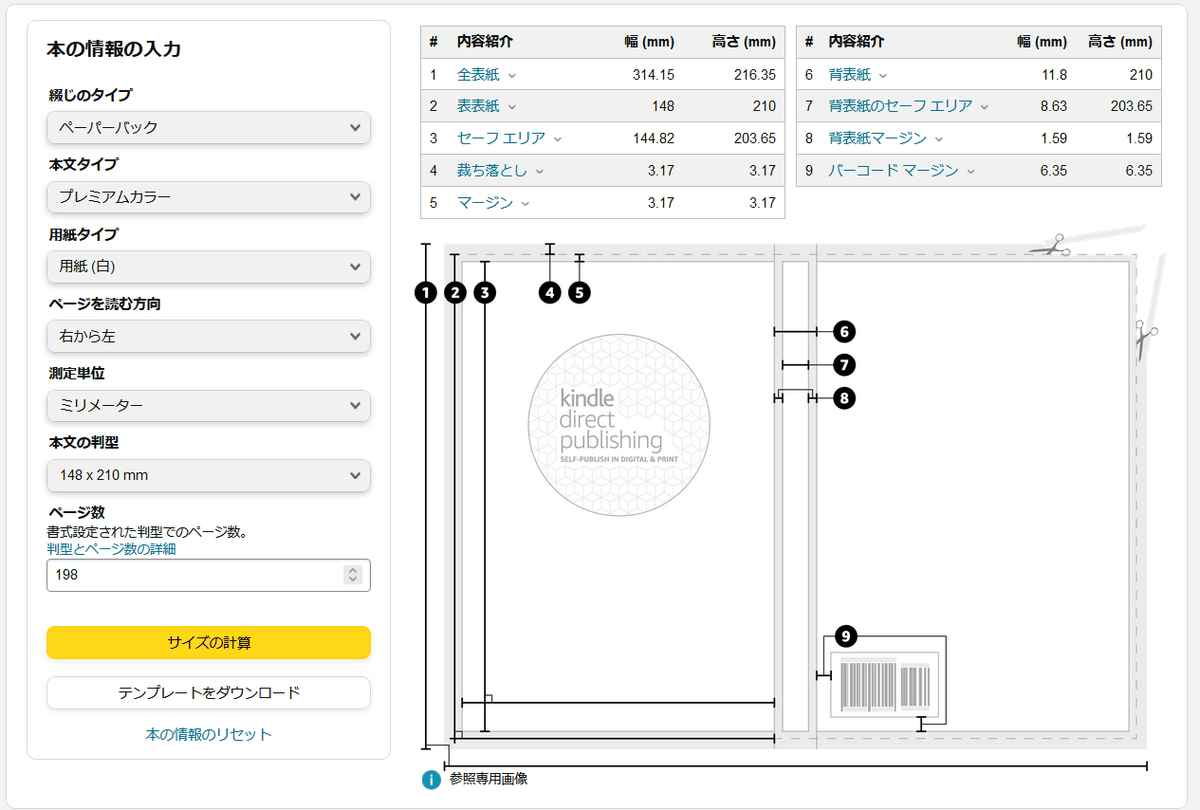
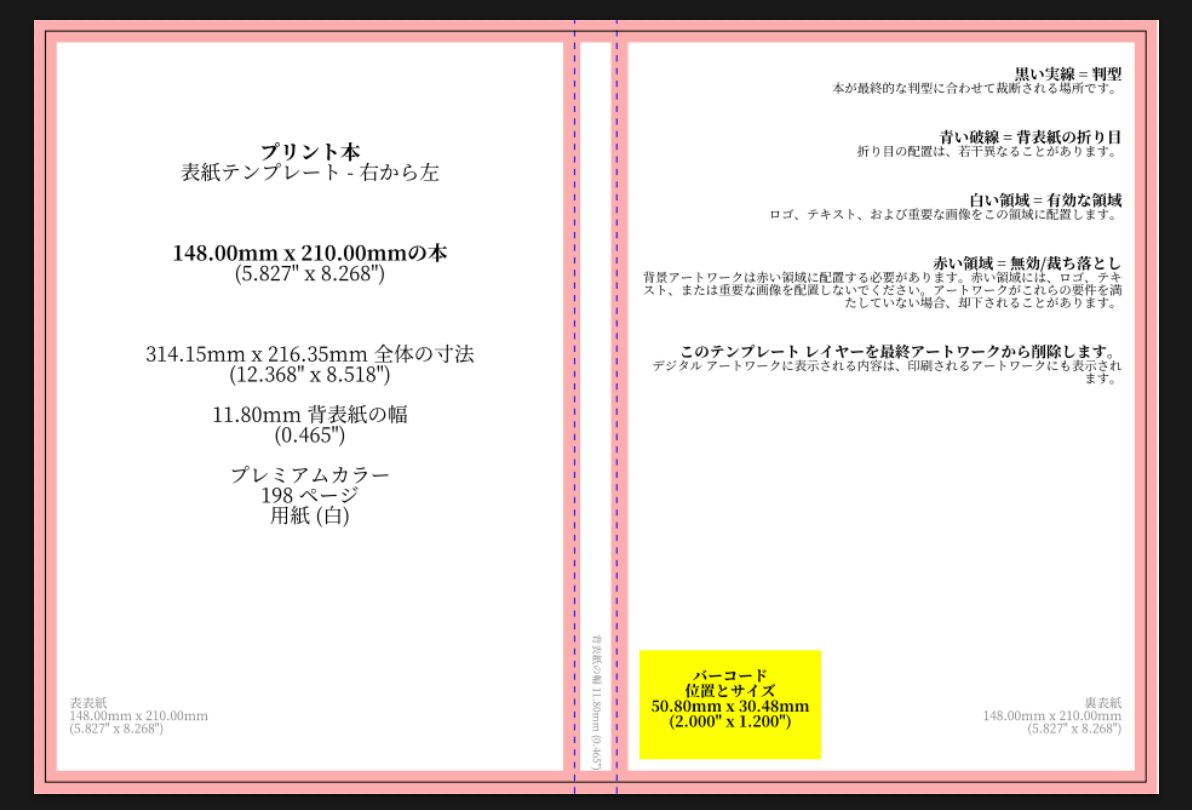
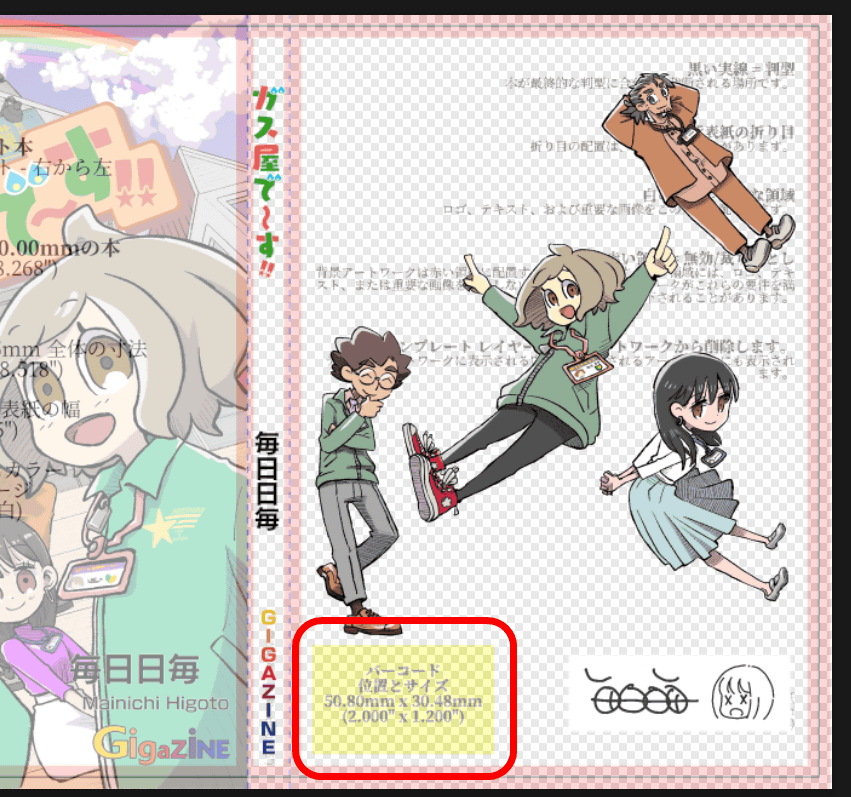
As shown below, the cover size, bleed/margins, spine size, and the position of the 'barcode' on the back cover are displayed.
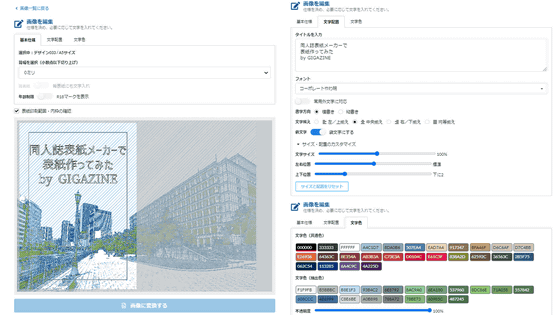
We will create the cover in Adobe Photoshop. First, download the template created with the template generation tool as an image and open it in Photoshop.
After that, open it in Photoshop and change the opacity of the cover template to '50%' from the 'Layers' panel.
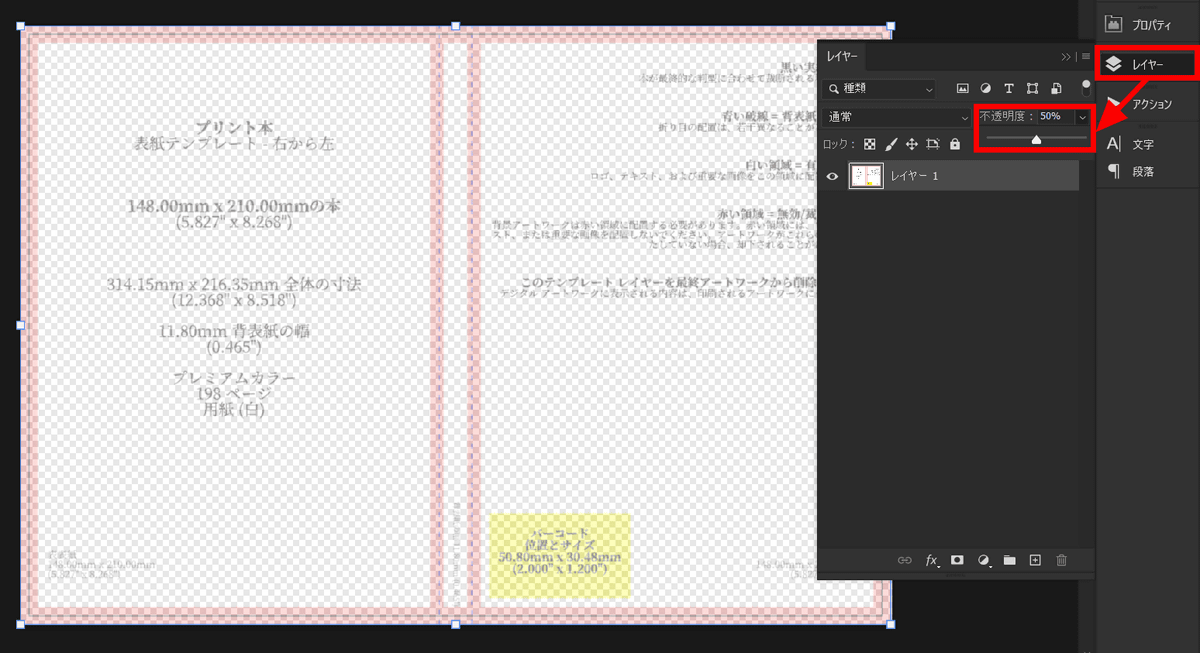
By creating layers under the semi-transparent template, you can place them while looking at the template guides. The area indicated by the red band on the template is the bleed margin, and important content such as text should not be included in the red area as it may be cut off when cutting or folding. First, pour in the cover illustration on the left side.
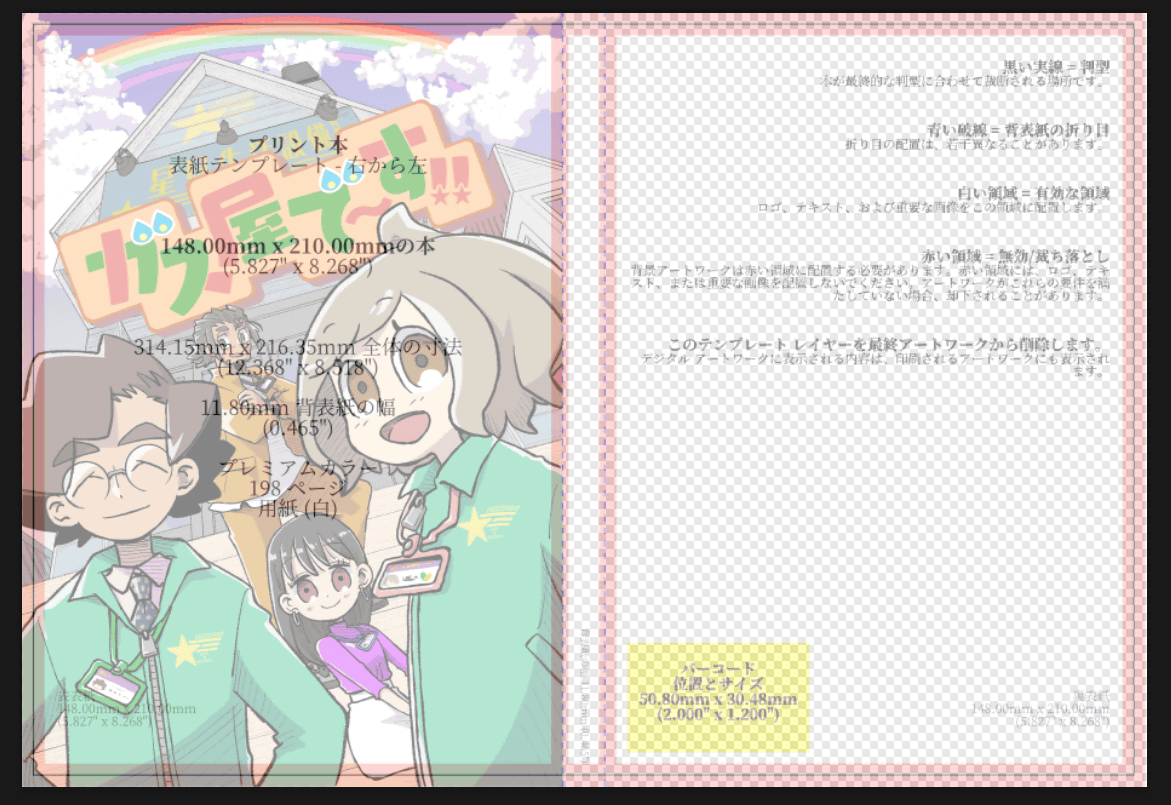
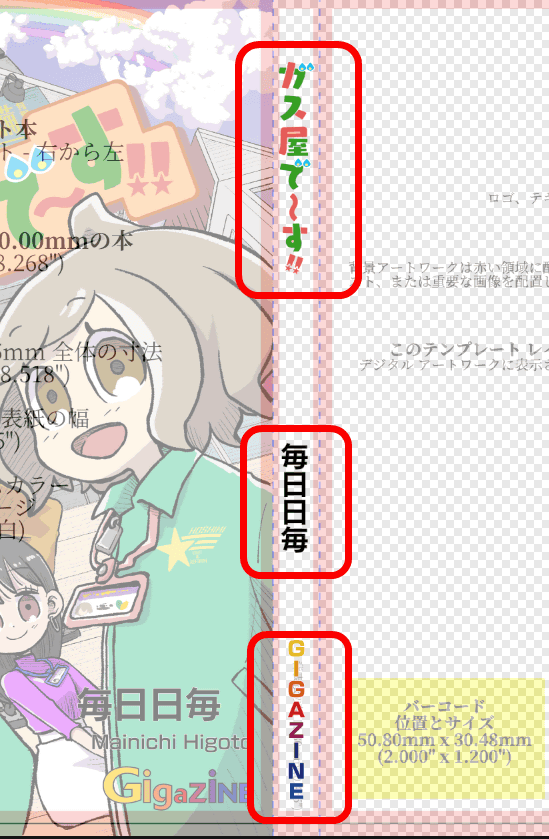
After entering the necessary information on the cover, place the book title, author name, and GIGAZINE logo on the spine. Again, be careful because even a small amount of protrusion into the red area may cause an error.
Finally, place content on the back cover on the right side of the image to complete the cover design. On the back cover, an identification barcode is automatically placed in the yellow area shown in the red frame below. Therefore, content cannot be placed in this area.
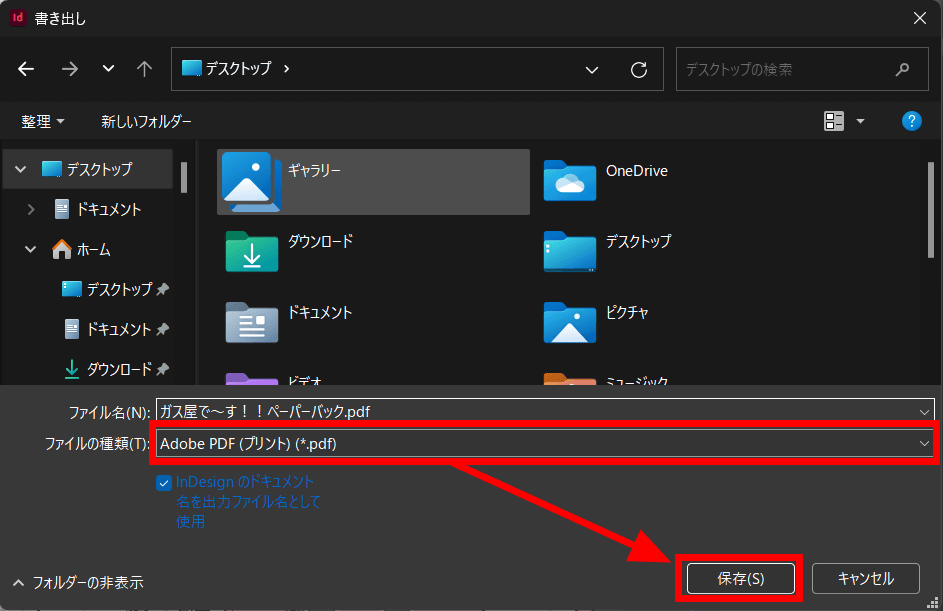
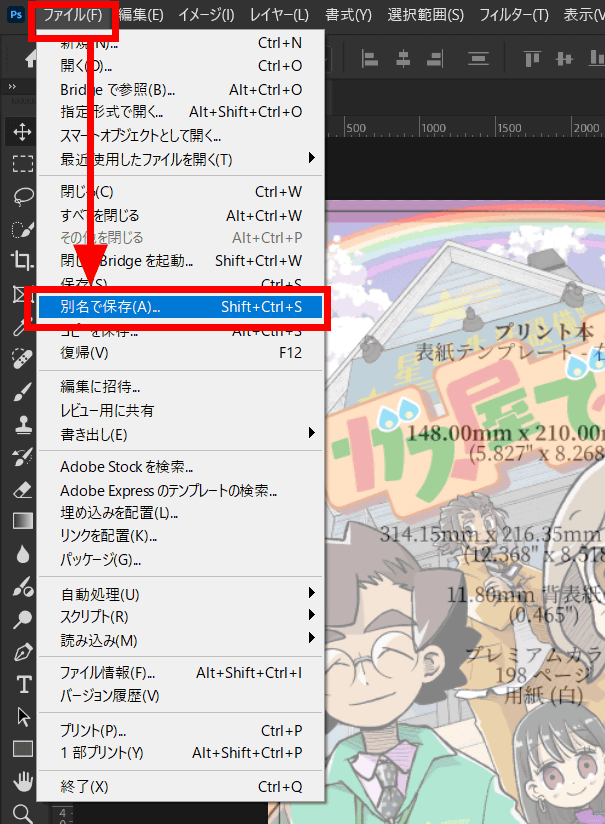
The cover data must be submitted in PDF format, just like the main text. If you are using Photoshop, click 'File' and then 'Save As.'
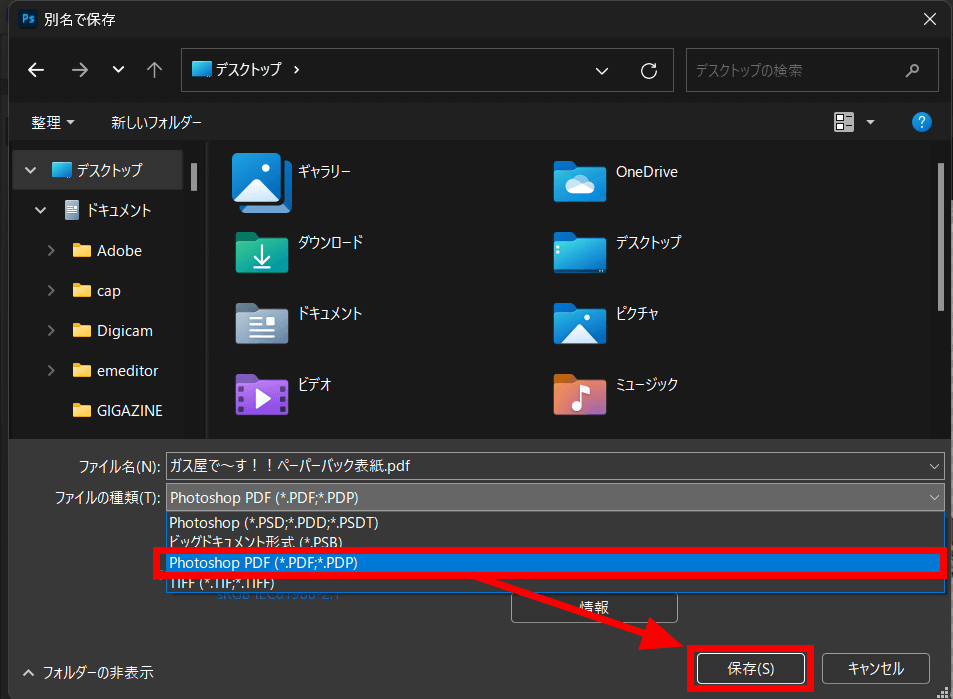
Under 'Save as type,' select 'Photoshop PDF' and click 'Save.'
The cover data was completed as follows:

◆What difficulties do you face when uploading data?
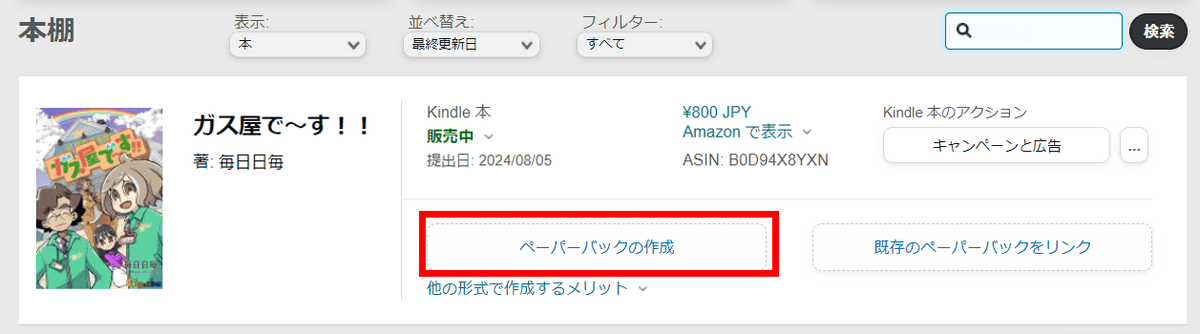
Now that the manuscript data is ready, we will register the paperback from Kindle Direct Publishing. For works for which e-books have already been created, a menu for paperbacks has been added, so click 'Create Paperback'.
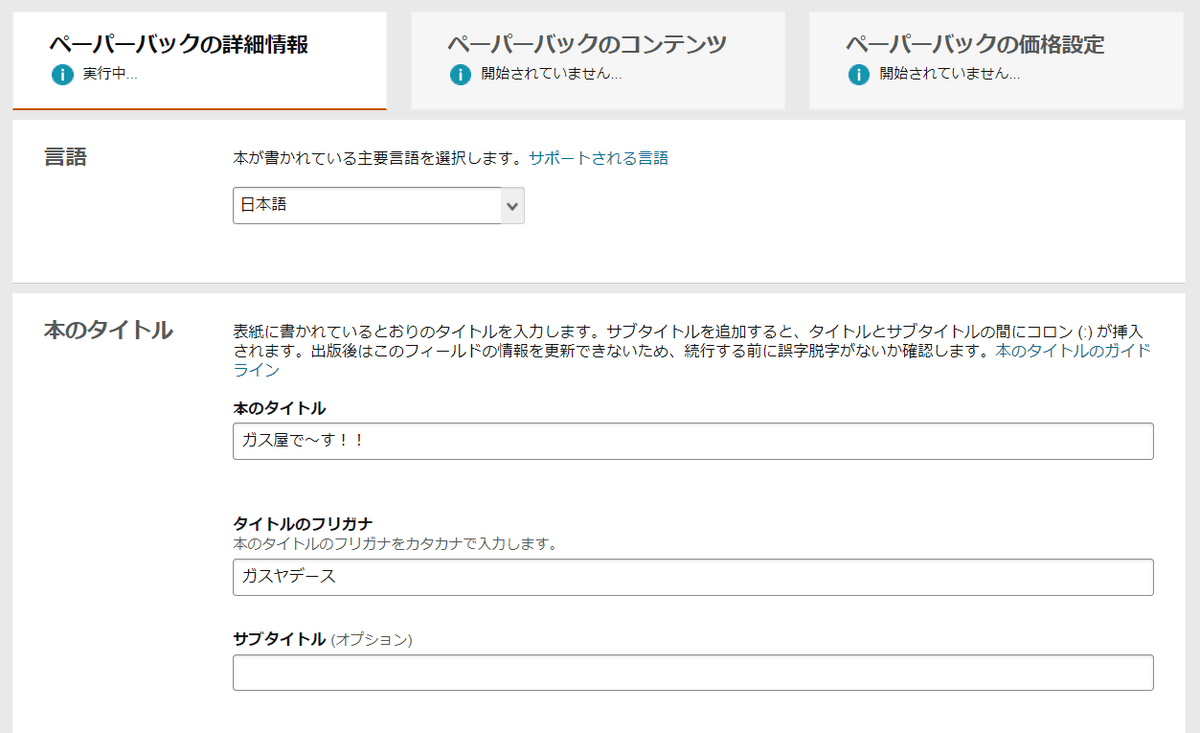
First, you will need to set detailed information such as the book title, author name, and synopsis. If you have already created an e-book, the information you set in the e-book will be automatically entered.
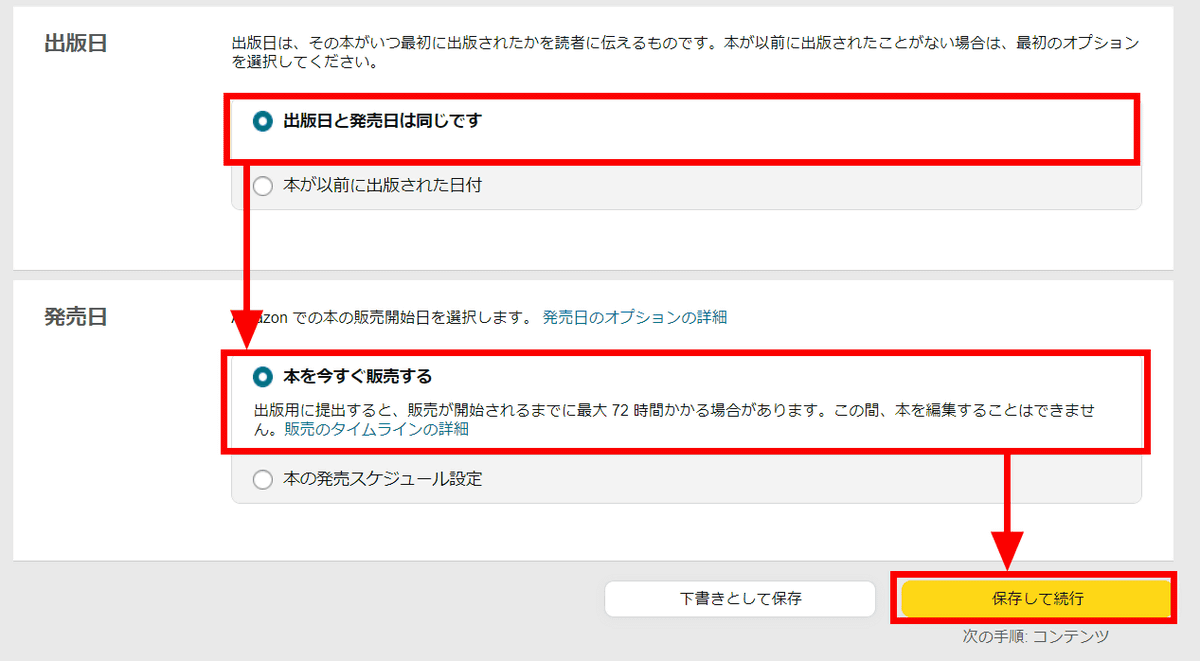
After checking that there are no changes to the details, select 'Publication date and release date are the same' for the publication date and 'Sell the book now' for the release date, then click 'Save and Continue.'
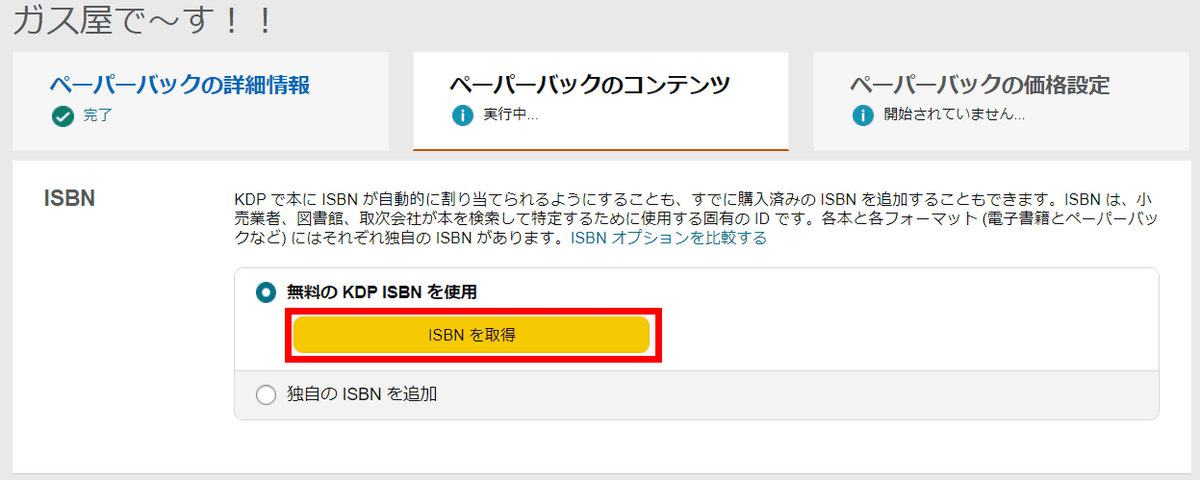
Next, register the content information. Since books require
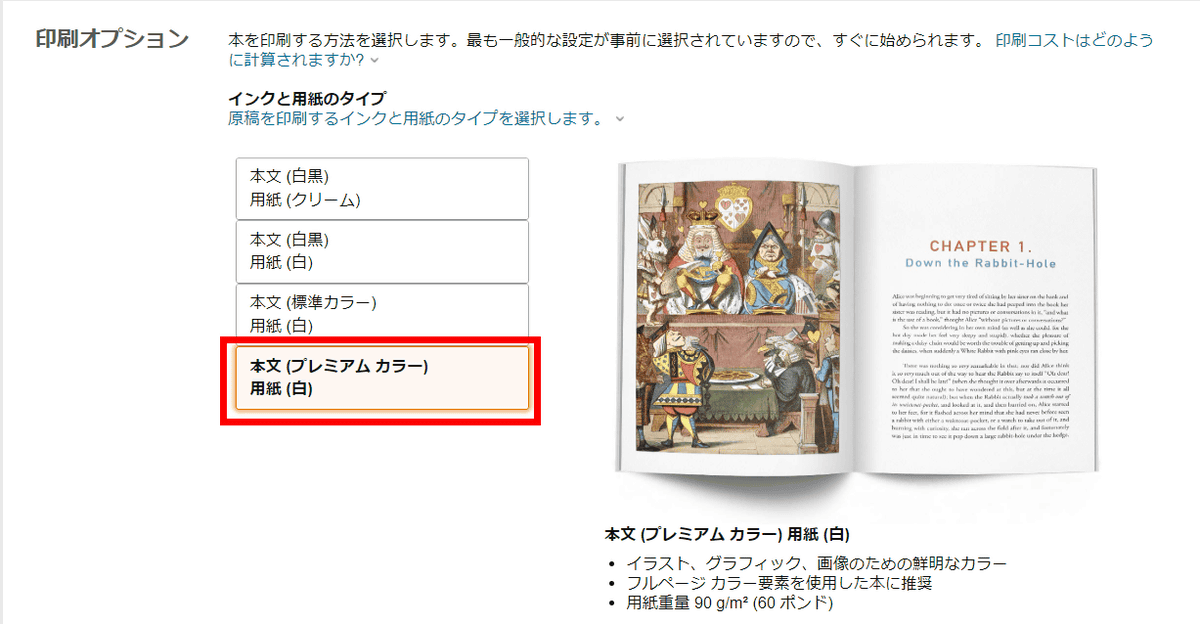
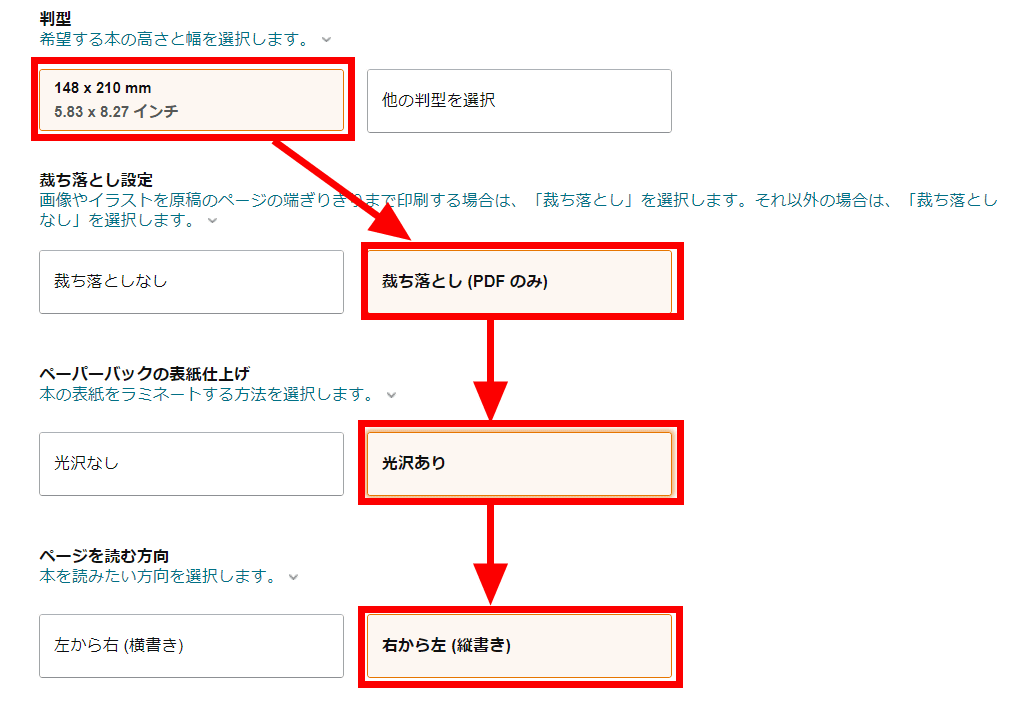
After that, set the print options. First, for the type of ink and paper, select 'Main text (premium color) Paper (white)' since 'Gas Shop Desu!!' is full color. There is also a 'Standard color' option, but this is an option that is not available in Japan at the time of writing.
The size is 148 x 201 mm, and the bleed setting is enabled, so select Bleed (PDF only). The paperback cover finish is set to glossy, and the reading direction is right to left (vertical).
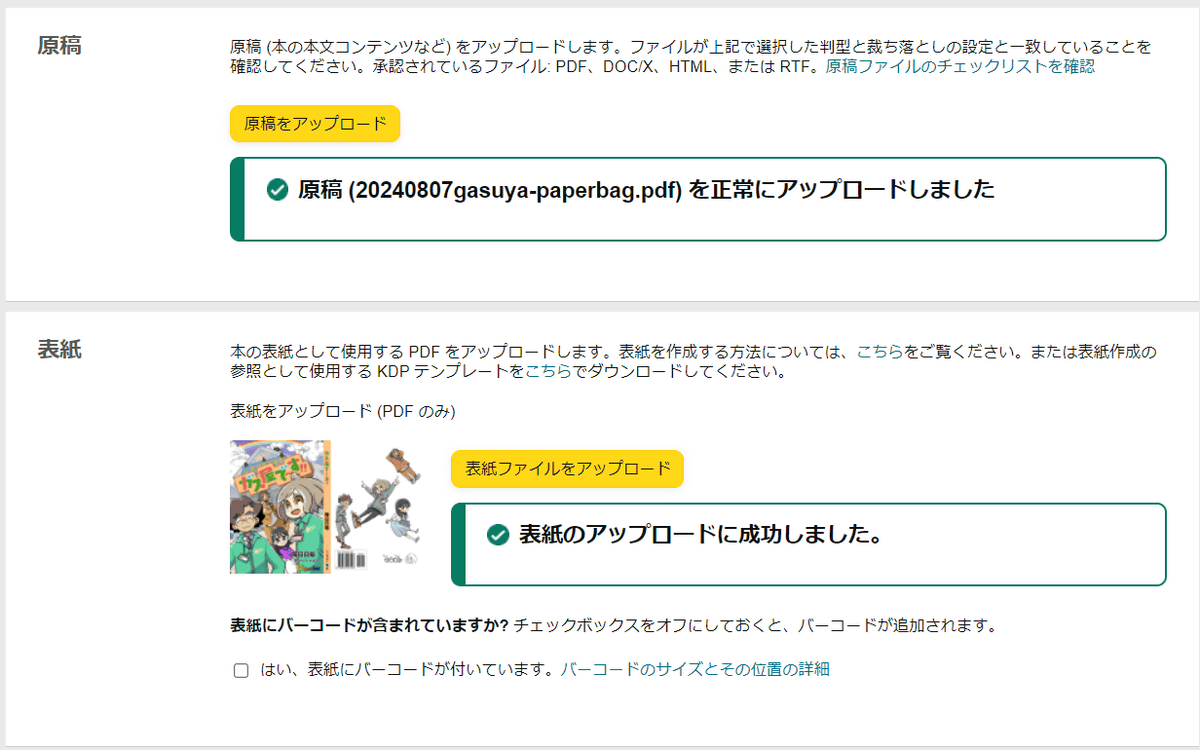
Once you have completed the settings, click 'Upload manuscript' to upload the PDF file of the main text you created.

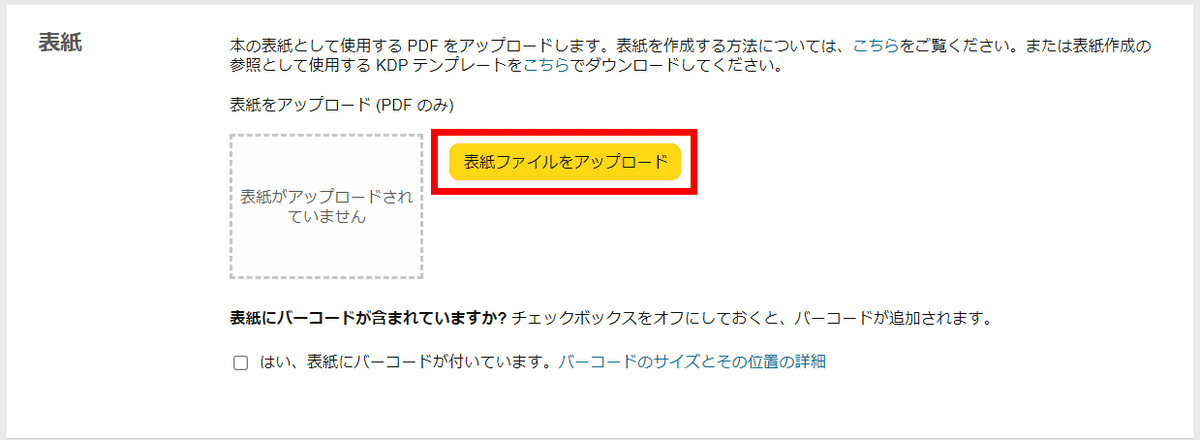
Next, upload the cover PDF data by clicking 'Upload cover file'.
It's OK if you see the messages 'Manuscript uploaded successfully' and 'Cover page uploaded successfully' as shown below.
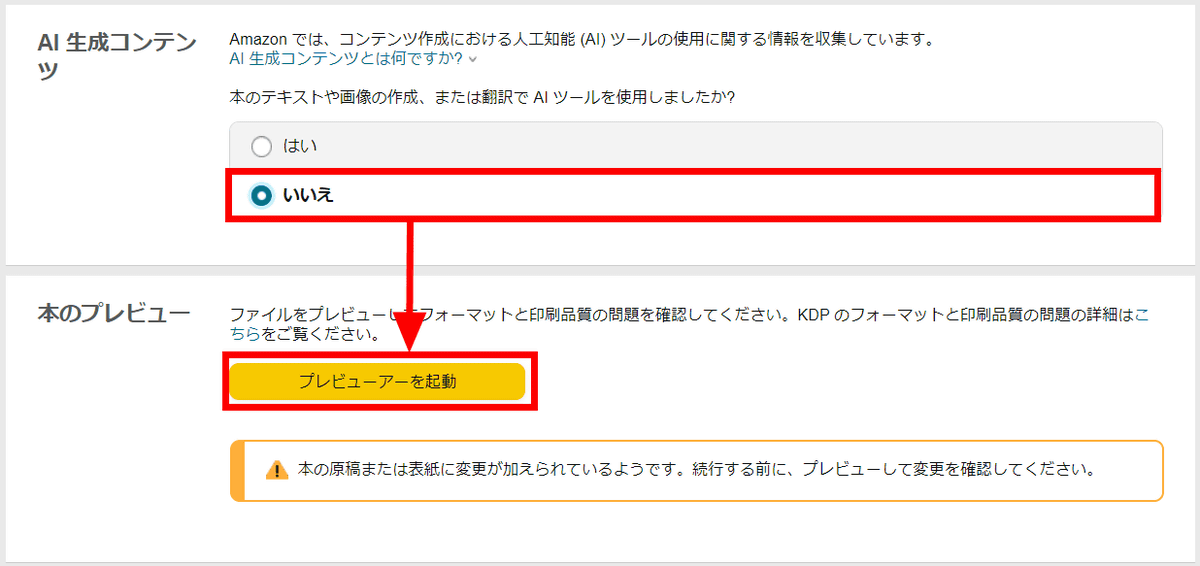
After answering the question 'Did you use AI tools to create or translate the text or images in your book?', click 'Launch Previewer' to check your uploaded book. If you are releasing an e-book, you can also upload your manuscript and then check it in the online previewer, but previewing an e-book is optional, whereas a paperback cannot be published without checking it in the previewer.
The previewer looks like the following, and you can click through the pages to check. Quality checks are performed automatically to make sure the content does not extend beyond the margins, and if there are no problems, you can click 'Approve' to complete the preview. If the automatic check finds text outside the margins, you will not be able to proceed unless you re-upload the corrected data.
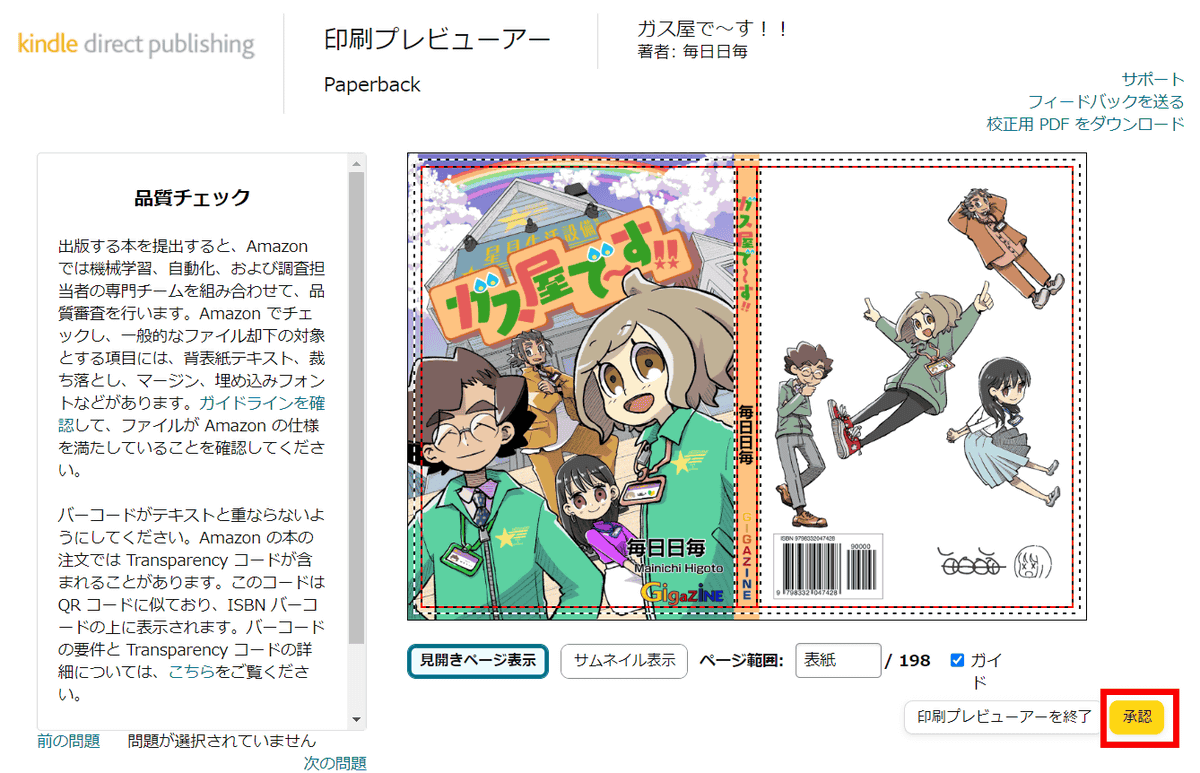
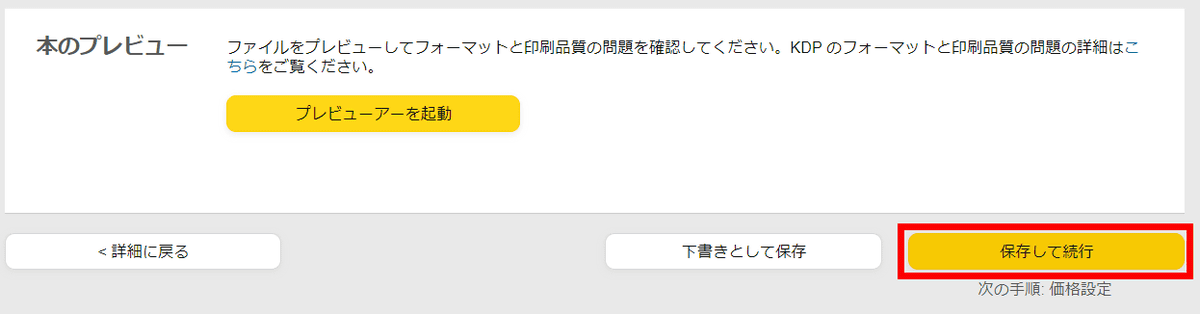
Once you have previewed and approved it, you can move on to the next step, so click 'Save and Continue'.
◆How prices are determined
The paperback version of 'Gas Shop!!' is more than twice as expensive as the e-book version. The question 'Why is it so expensive?' is related to the 'printing costs' and 'royalty percentage' when releasing a paperback on Amazon. Amazon's paperbacks are printed and delivered each time you order them from the data you submit, so there is a 'printing cost' for each order. You can calculate printing costs using KDP's '
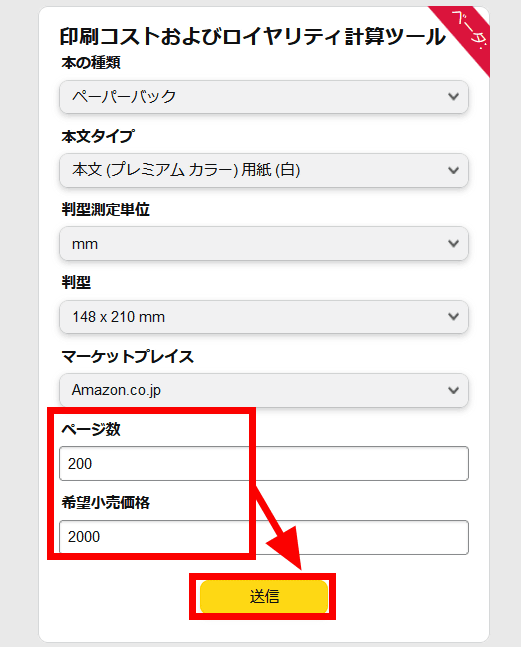
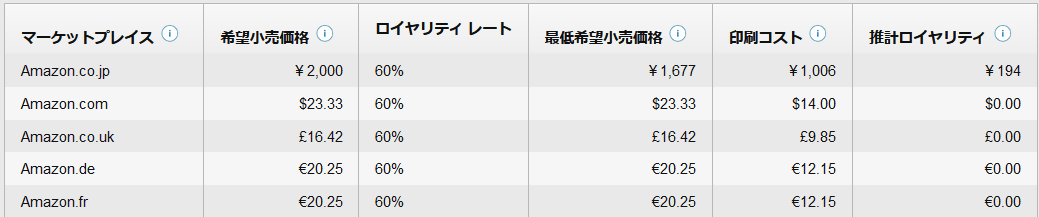
In this setting, the printing cost is 1006 yen, and the minimum price that can be set is 1677 yen. Why is the 'minimum suggested retail price' set to '1677 yen' even though the printing cost is 1006 yen? The reason is that in the case of paperbacks, 60% is the publisher's royalty, but the printing cost is deducted from the publisher's royalty. If you set a 200-page book for 2000 yen, the royalty calculation formula is '2000 (set price) x 60% - 1006 (cost)', so the royalty is 194 yen per book. In addition, if you set it at 2000 yen, consumption tax will be added, so the actual selling price will be 2200. In addition, in markets other than Amazon.co.jp, the royalty was 0 because the printing cost was different.
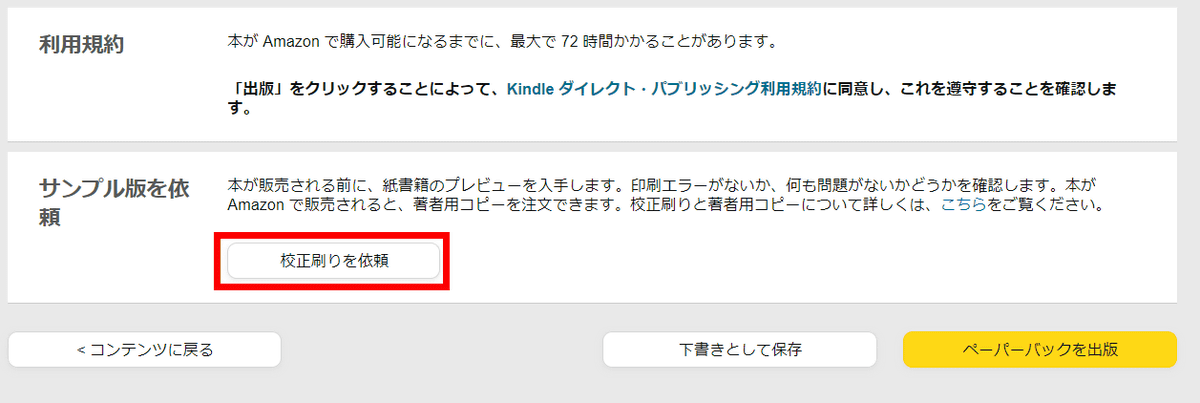
Once you're happy with your pricing, you can order a sample by clicking 'Request Proof.'
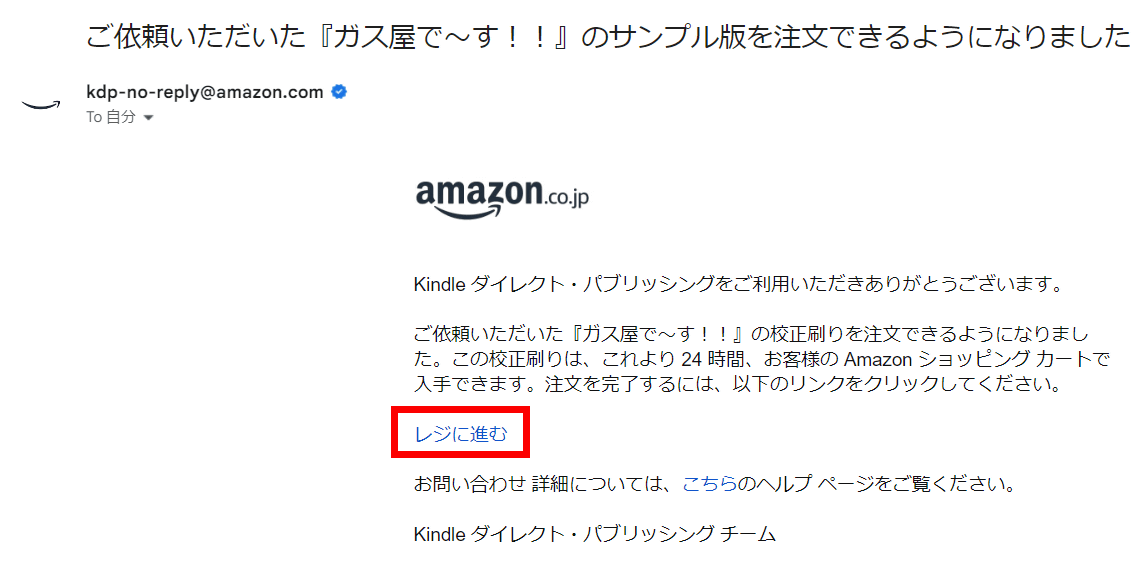
When I requested a proof copy, I received an email to my registered email address saying, 'You can now order a sample version of your requested 'Gas Shop!'' You can order a proof copy by clicking the 'Proceed to Checkout' link in the email. Please note that the proof copy has a 'No Resale' label on the front and back covers, and costs printing costs plus 410 yen for shipping.
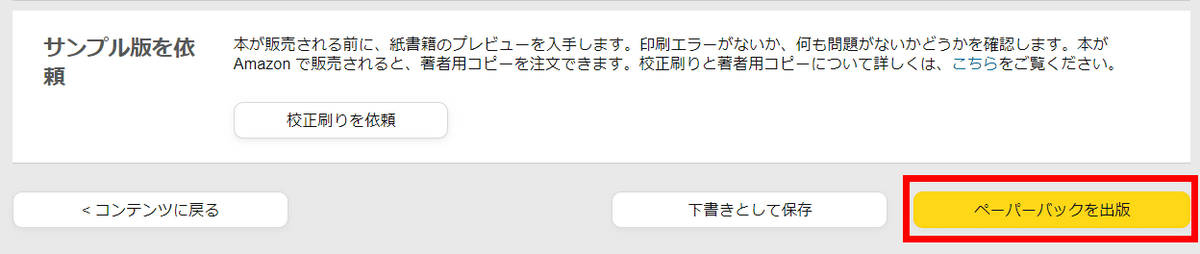
If you have checked the proof and there are no problems, click 'Publish Paperback' to complete the registration.
◆What difficulties did you face before sales started?
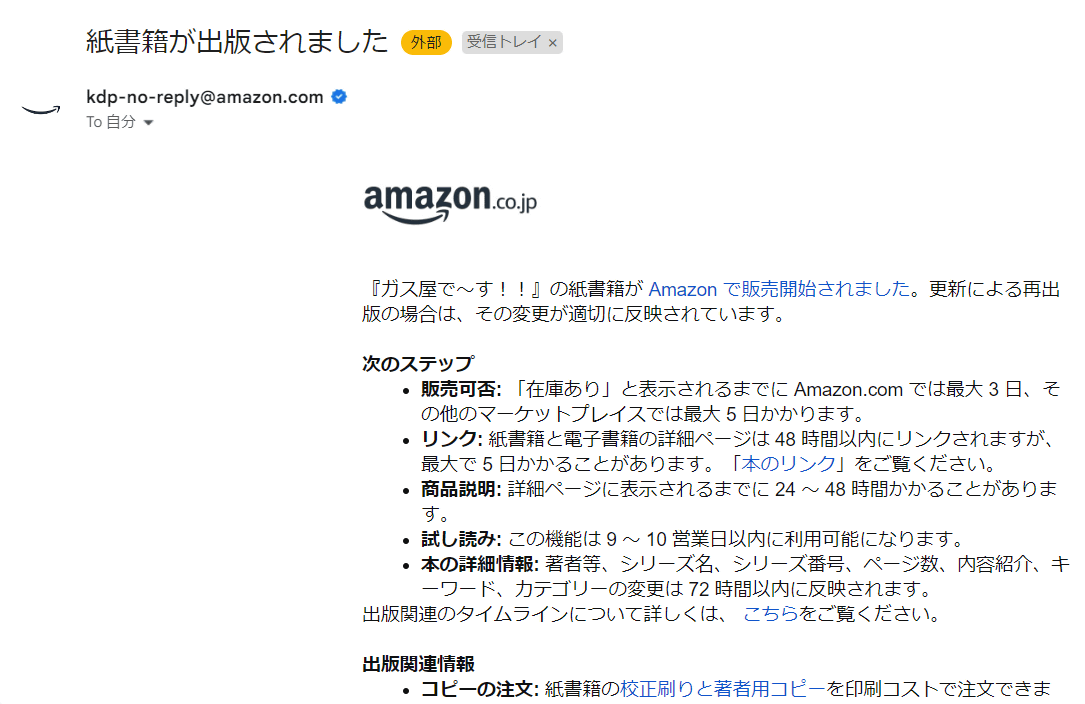
Once you have completed the steps to 'Publish a Paperback', you will have to wait 1-2 days for the store to be created and for it to go on sale. However, even if you pass the automatic check when uploading your manuscript and confirm that the proof copy is OK, it may still be rejected by a human check. In the case of 'Gas Shop!!', I received the following email after registering.
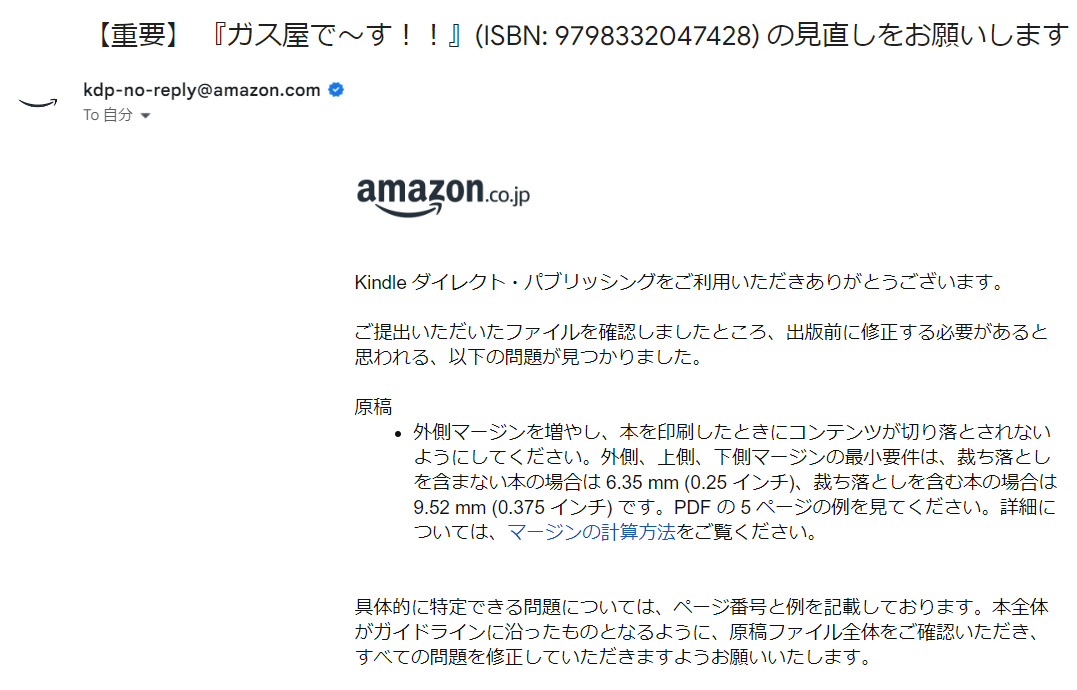
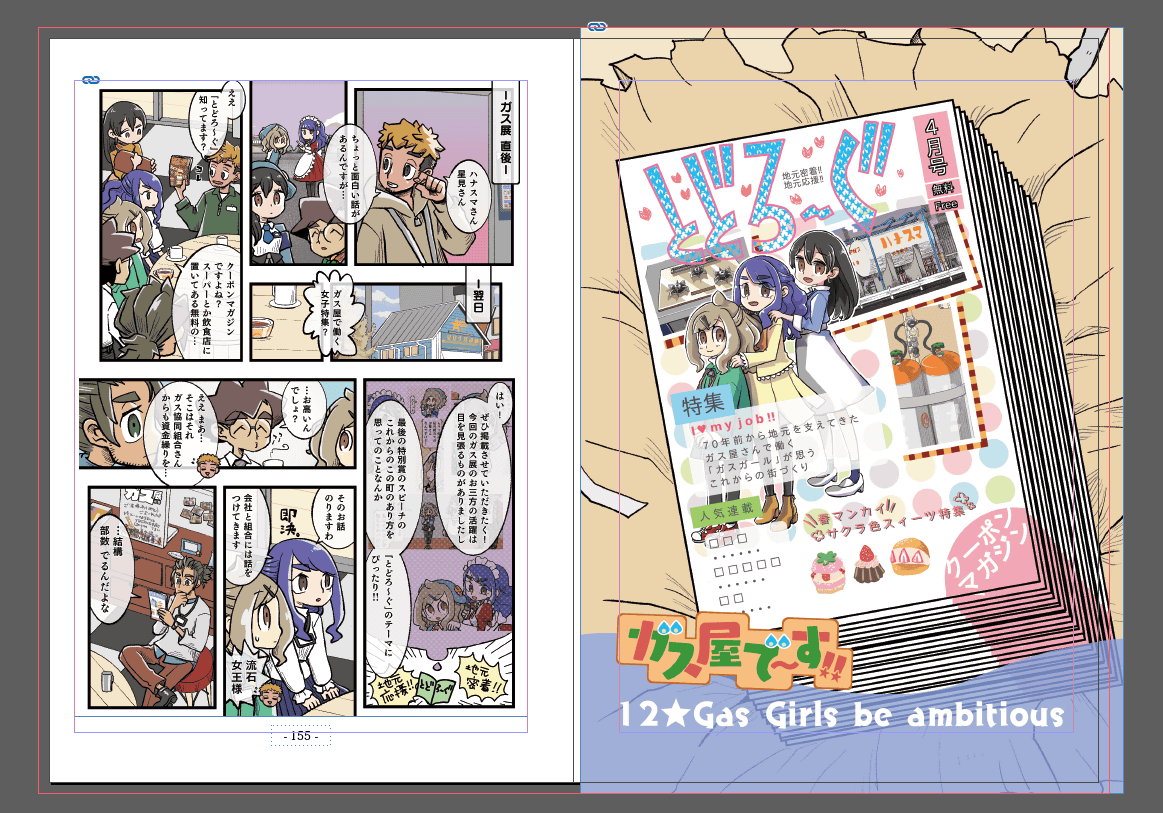
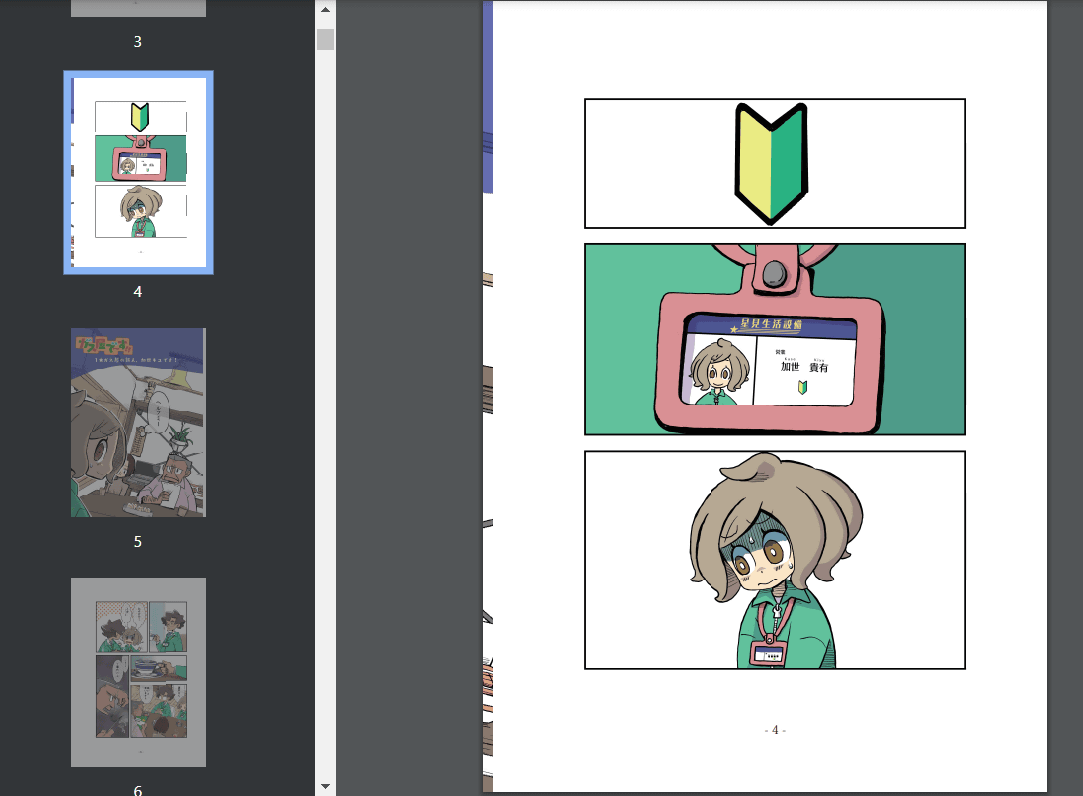
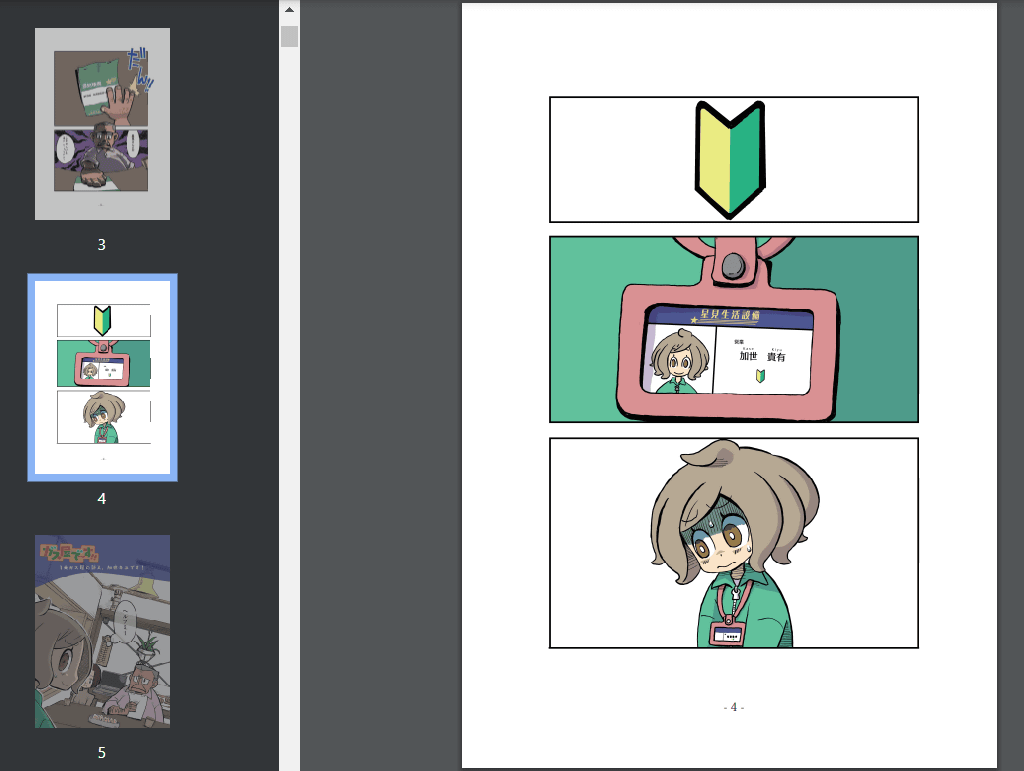
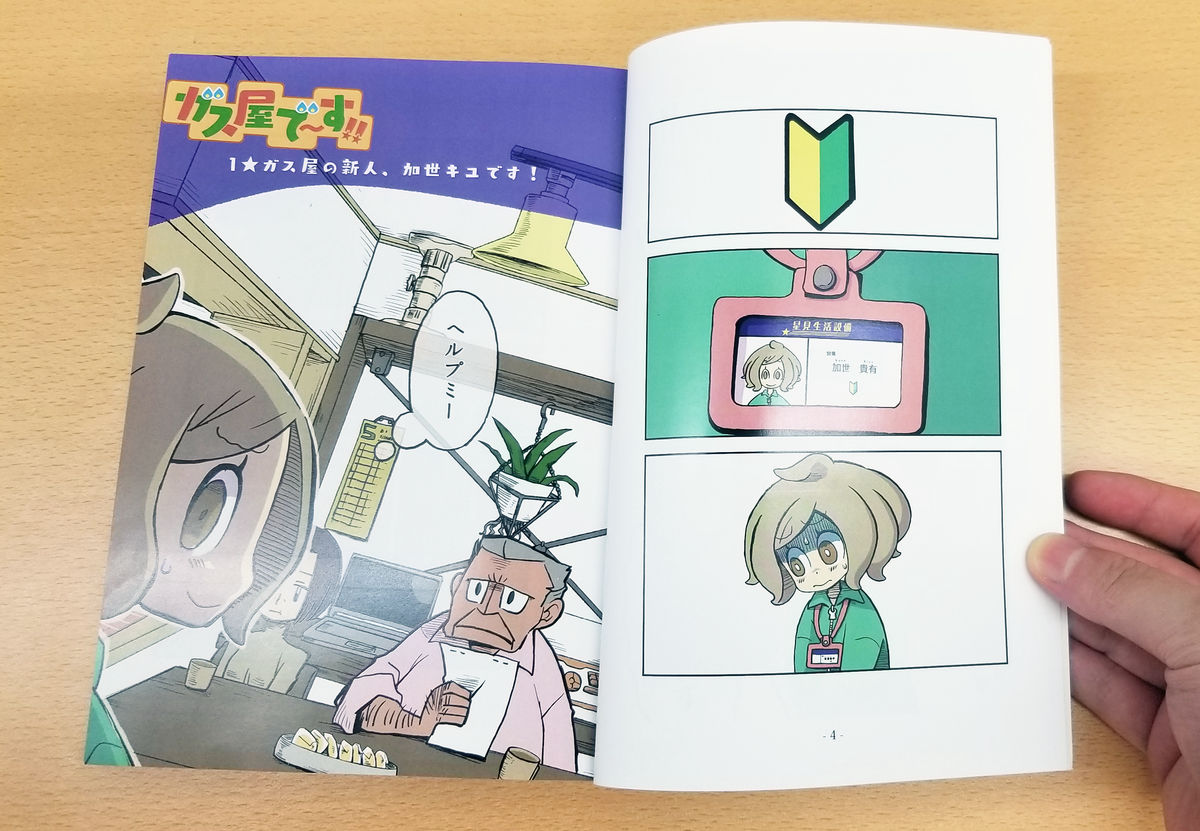
The email informing me of the registration error said, 'Increase the outer margins so that the content is not cut off when you print the book,' but since I set the margins in Indesign to be greater than the specified margins initially, this shouldn't be a problem. In the example, page 5 has an image stretched to the edge of the page, but the text is kept within the margins.
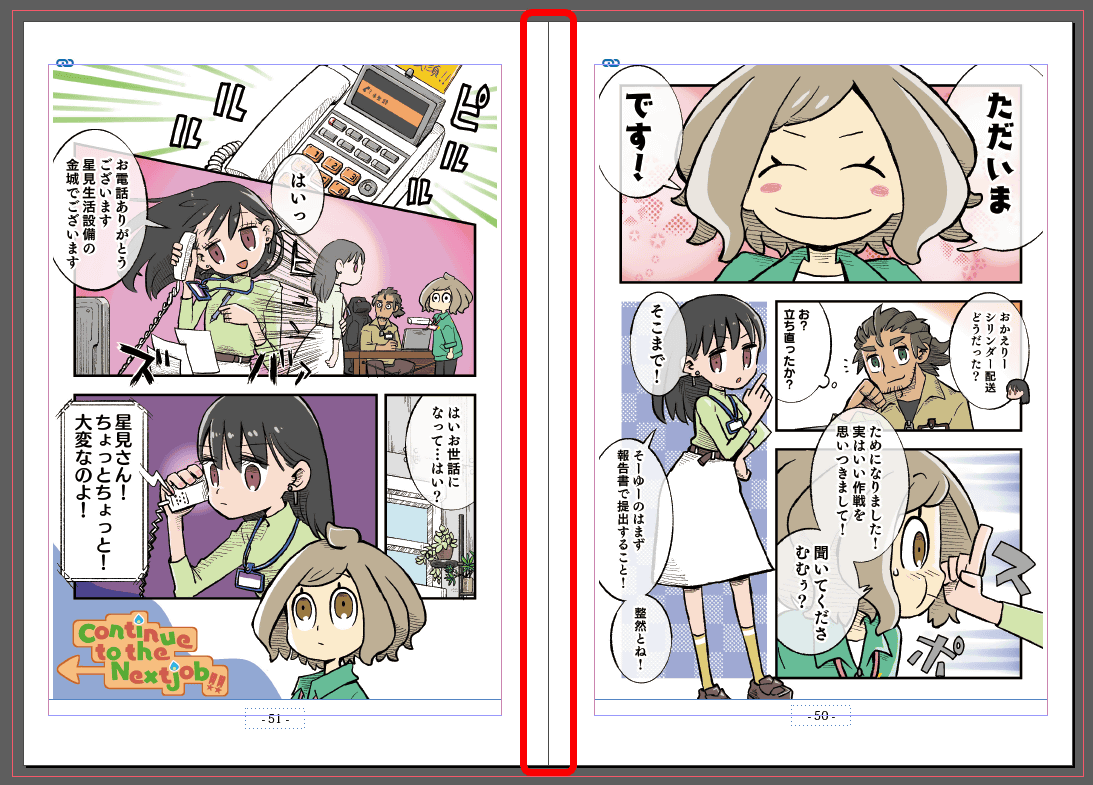
In the past, we had a case where an illustration that we thought was 'OK even if it was cut off' was flagged as 'NG because it's cut off' by Amazon, so we contacted them and the error was accepted without any problems. So this time, we contacted them about the registration error, and they sent us an additional explanation saying, 'The problem is not with the outer margins, but with the part that is placed beyond the center line.' When we checked again in Indesign, we found that the page on the left in the image below has been enlarged to fit perfectly up to the center line.
However, when I checked the PDF of the page in question, I found that it had encroached on the right-hand page. This was the problem that prevented the application from passing the review.
Even if you check the proof copy, you won't notice this because it's the binding part.
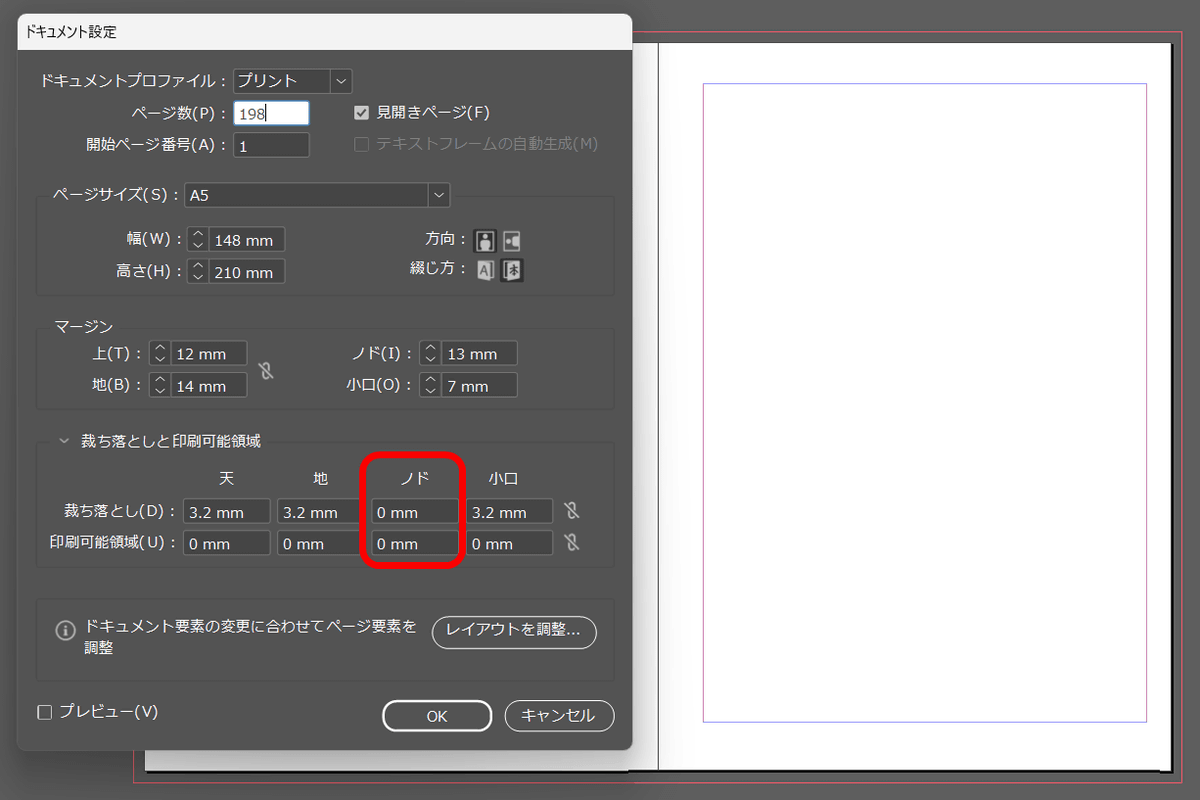
The cause of this problem is the bleed settings. The chain icon shown in the red frame in the image below sets all the settings for the top, bottom, gutter, and fore-edge to be the same. With this turned on, bleed was set for all areas.
In Indesign, because I'm working on a two-page spread, the top, bottom, and fore-edge bleeds I set are displayed in red, but the gutter bleed is not displayed. However, the gutter bleed does exist in the settings. This difference seems to have caused the error, 'It's fine in Indesign, but it goes wrong when I output it to PDF.'
Now that you know the cause of the problem, click 'File' > 'Document Settings' to solve it.
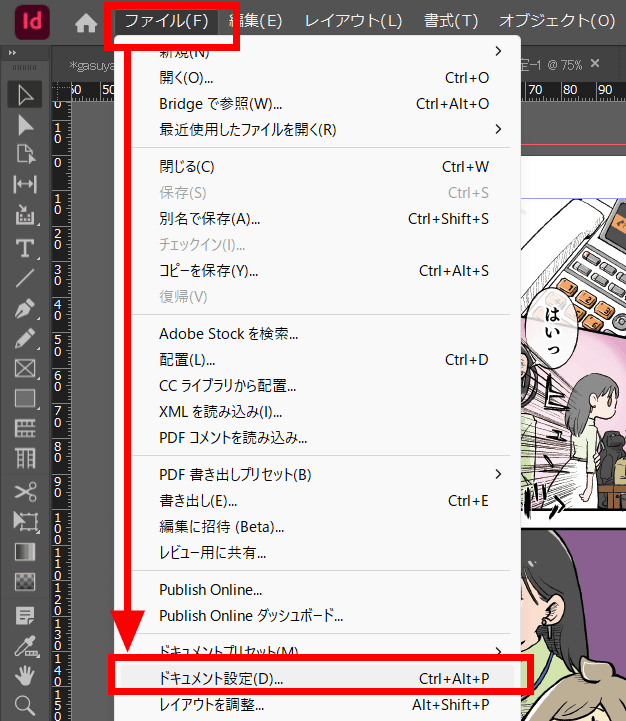
Click the chain icon to unsynchronize the numbers, then change the node number to '0' and click 'OK.'

There is no particular difference in appearance in Indesign.
However, the PDF did not encroach on the content of adjacent pages, solving the problem.
I uploaded the PDF again and proceeded to 'Publish Paperback', and received an email saying 'The paperback version of 'Gas Shop!!' is now on sale on Amazon', and I was able to release it without any problems. As you can see, publishing a paperback is prone to printing errors that don't occur with e-books, so you need to be careful when doing so, such as checking the detailed settings and layout.
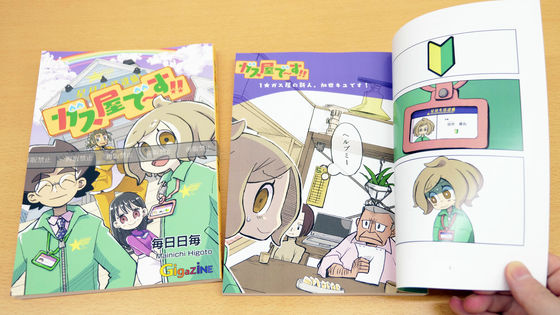
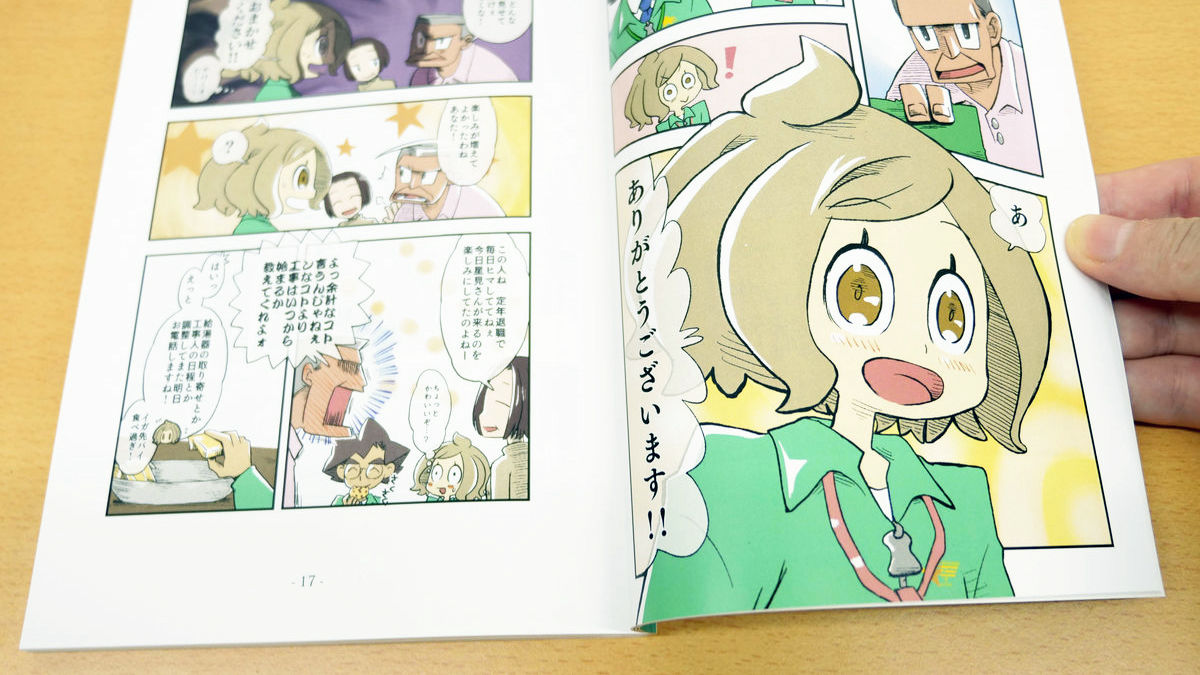
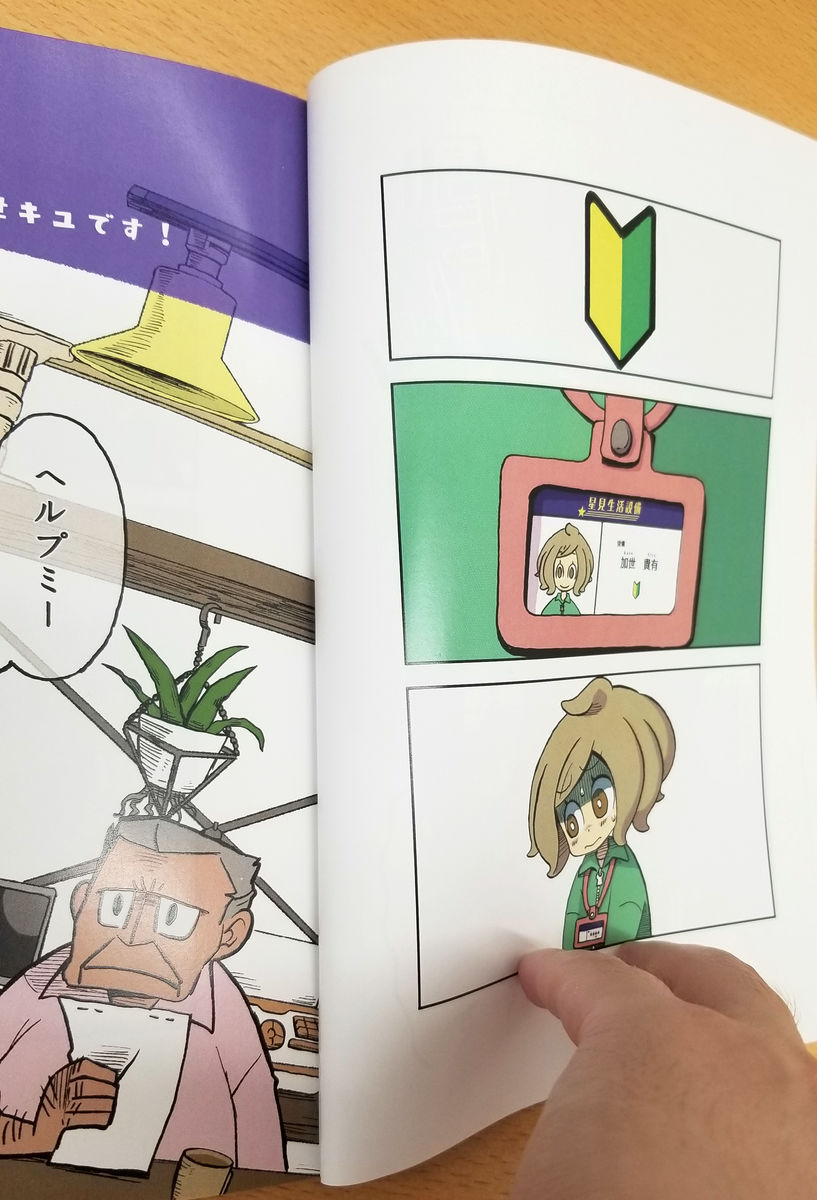
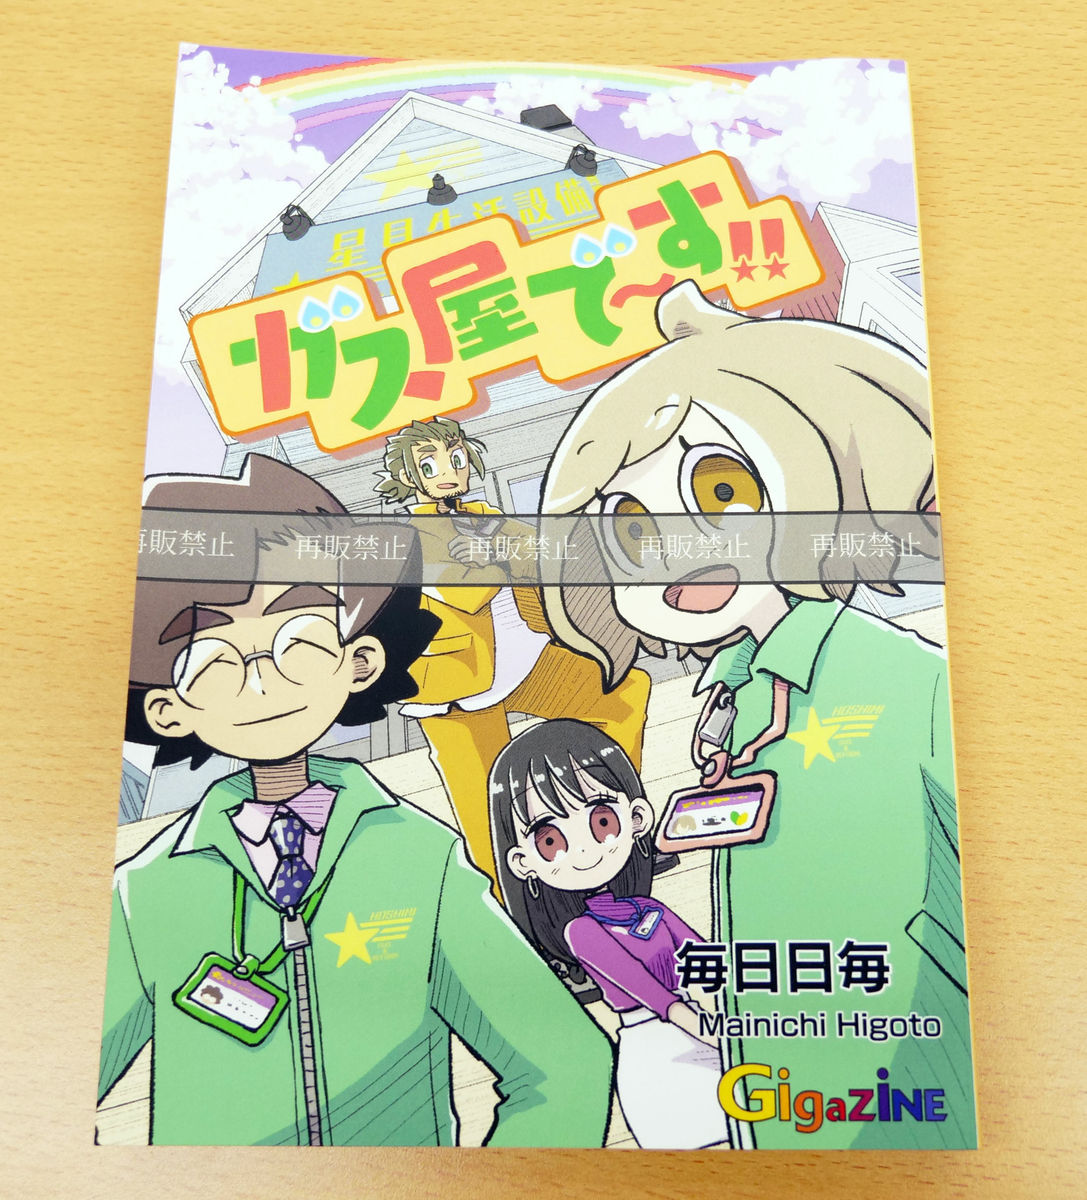
The actual paperback looks like this. This is a proof copy, so it has a 'Not for Resale' label printed on it.
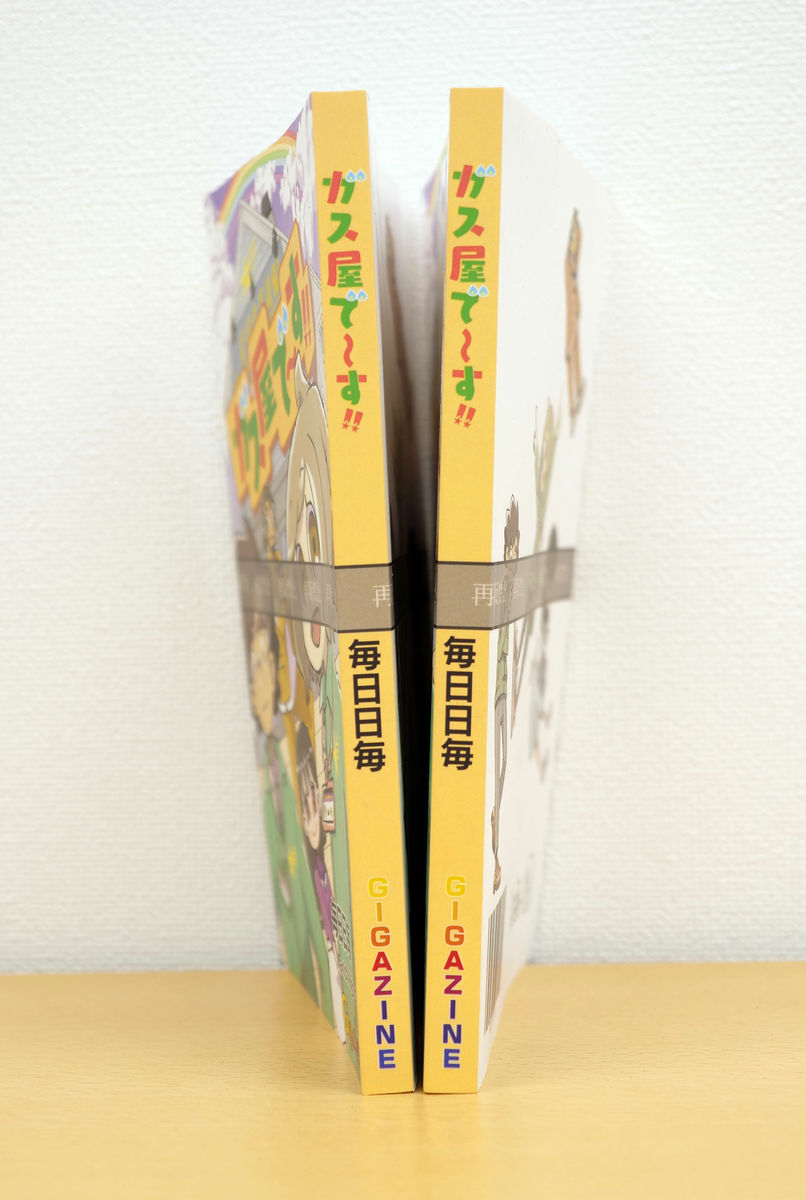
The spine was also nicely fitted.
Even on pages where the image was enlarged to the edge of the page, the image was displayed large and clear without any unnatural cutting off.
The e-book version of 'We're the Gas Man!' is always available to download for free if you are a Kindle Unlimited member, and a paperback version has also been released, so be sure to check it out.
Amazon.co.jp: Gas Shop!! (GIGAZINE): Every Day, GIGAZINE: Kindle Store
Related Posts: