Mozilla has released ``Didthis'', a service that allows you to quietly record photos and texts on the Internet for free, so I tried using it

Mozilla, the developer of Firefox, has released ' Didthis ', a service specializing in recording hobbies. Didthis allows you to post records of your activities categorized by content, and in order to create a `
Didthis
https://didthis.app/
Didthis A New App for Hobbyists
https://blog.mozilla.org/en/internet-culture/introducing-didthis-a-new-app-for-hobbyists/
·table of contents
◆1: Steps to create a Didthis account
◆2: Steps to post your first activity record
◆3: Steps to edit the project
◆4: Steps to add activity records
◆5: Steps to add a project
◆6: Steps to publish activity records
◆1: Steps to create a Didthis account
Didthis has a web app version and an iOS version, and an Android version is also in development. At the time of article creation, the web app version is available worldwide, and the iOS version is only available in the United States and Canada. So, this time I will use the web application version of Didthis. First, click on the link below to access Didthis.
Didthis
https://didthis.app/
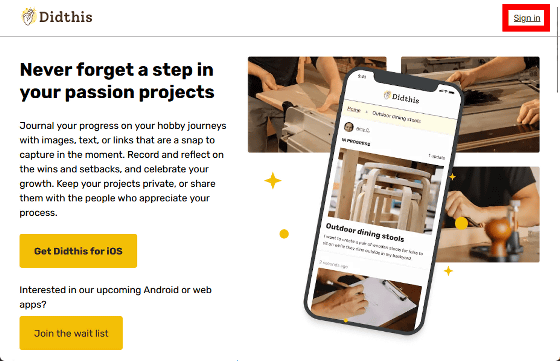
First you need to create an account, so click 'Sign In'.
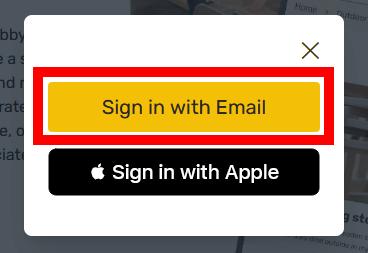
Click 'Sign in with Email'.
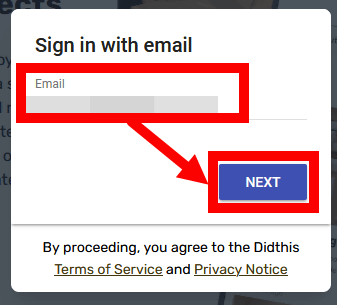
Enter your email address and click 'NEXT'.
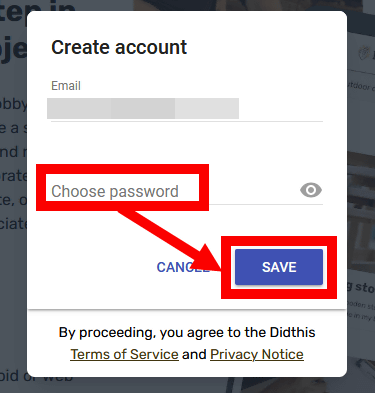
Next, enter the password and click 'SAVE'. Your Didthis account creation is now complete.
◆2: Steps to post your first activity record
Didthis allows you to create 'projects' for each type of activity, and add activity records to each project at any time. Click 'Add post' to post your first activity record.
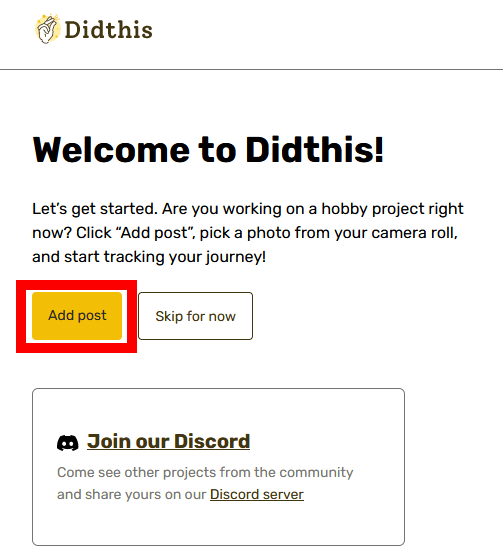
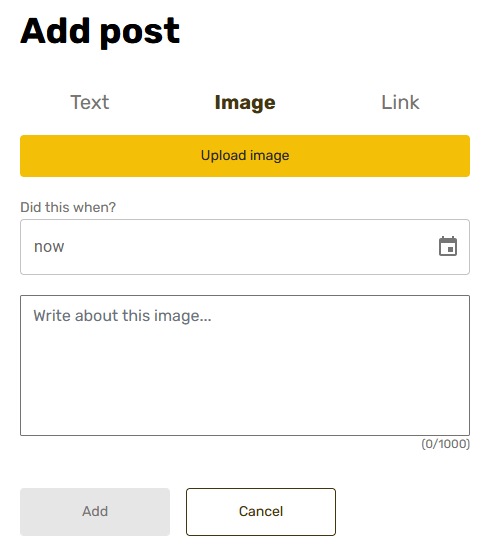
Then, the activity record posting screen will be displayed. Activity records can include ``activity record images,'' ``links related to activities,'' ``activity dates and times,'' and ``activity descriptions.''
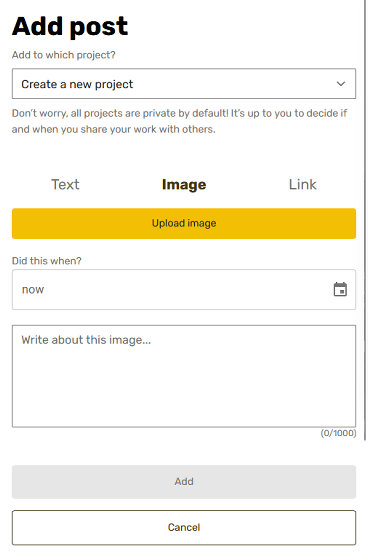
This time, I'm going to make a record of trying various things with
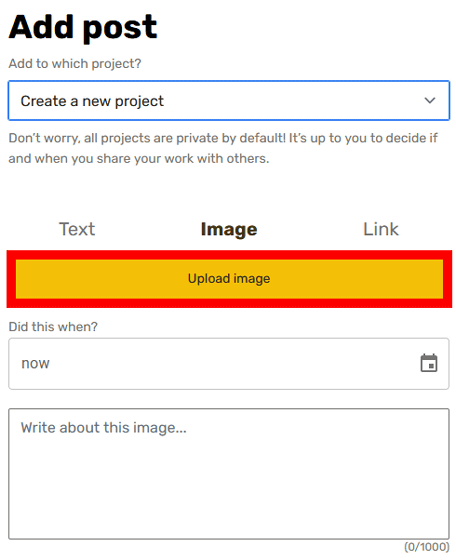
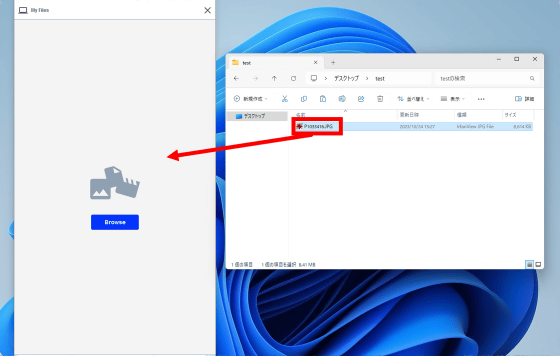
When the image upload screen is displayed, drag and drop the image you want to upload onto the screen.
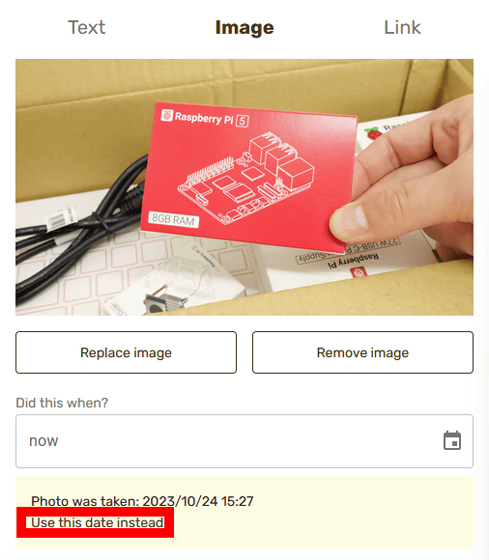
When you upload an image, the date and time will be automatically suggested, so click 'Use this date instead'.
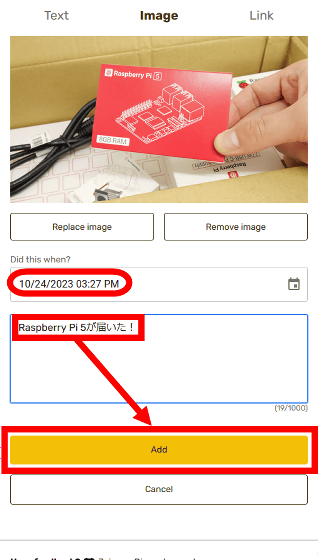
Once the date and time are entered, enter a description of the activity and click Add.
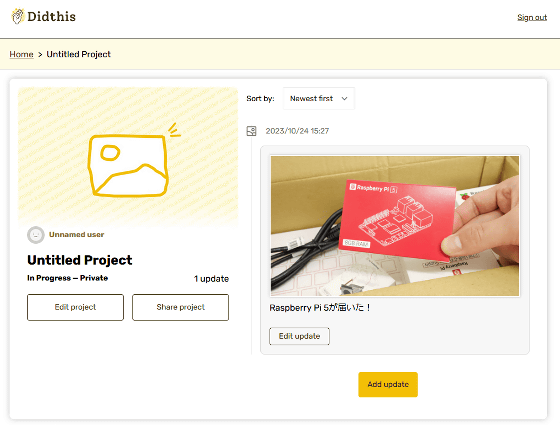
You have now posted your first activity record.
◆3: Steps to edit the project
In the initial state, activity records are added to an empty project, so edit the project to make it easier to understand what kind of project it is. First, click 'Edit project'.
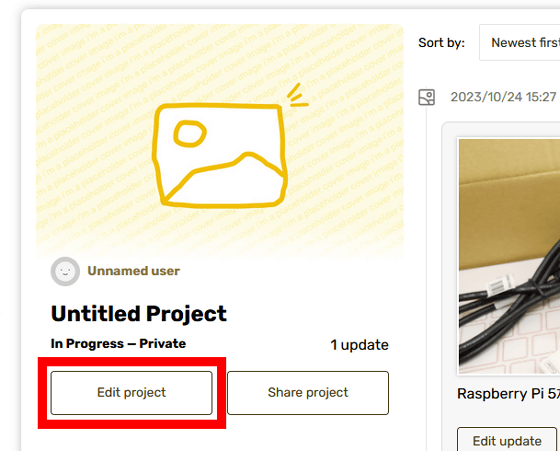
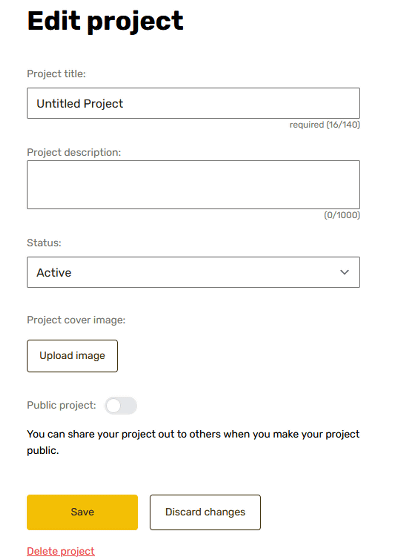
The project editing screen will then be displayed. On this screen, you can set the project title, project description, project cover image, and whether to make the project public or private. By default, the project is private.
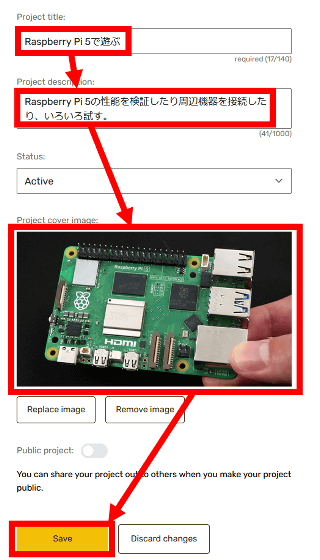
This time, I entered the 'Project Title', 'Project Description', and 'Project Cover Image', and clicked 'Save' while leaving the public setting private.
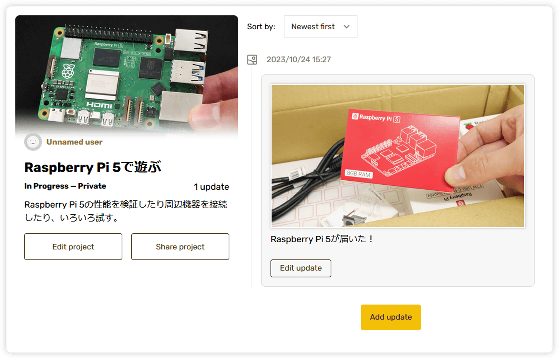
The project screen after editing is as follows.
◆4: Steps to add activity records
To add activity records, click 'Add update' on the project screen.
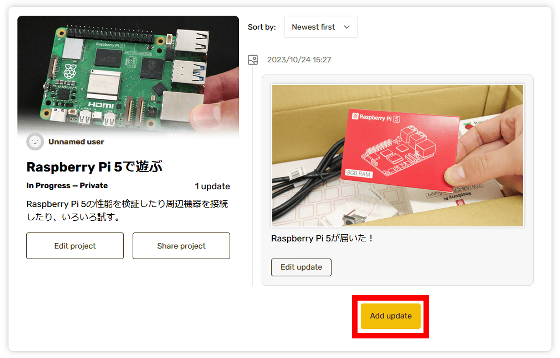
Then, the activity record posting screen will be displayed.
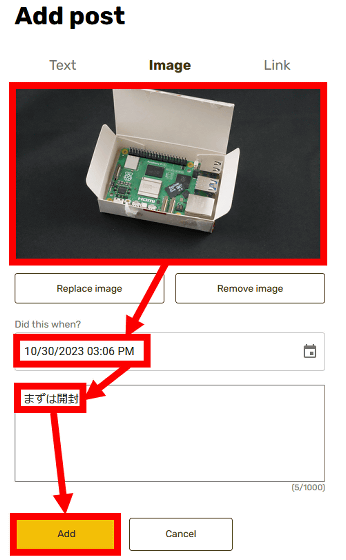
Enter 'activity record image', 'activity date and time', and 'activity description' and click 'Add'.
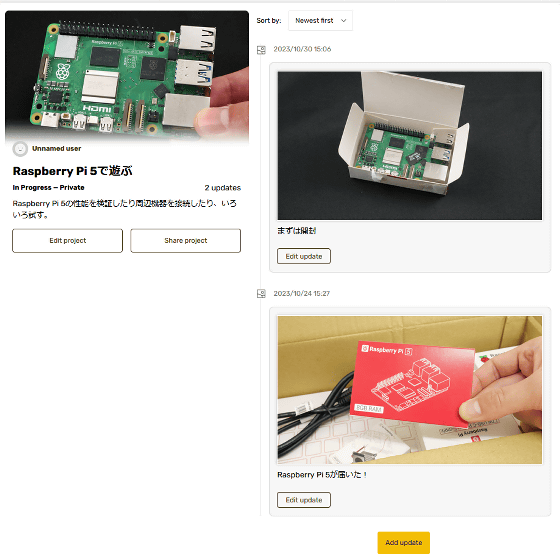
Now you can add the post record.
◆5: Steps to add a project
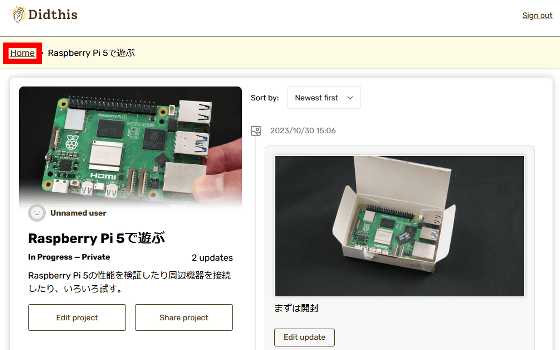
Didthis allows you to create multiple projects. To create a new project, click 'Home' at the top right of the screen.
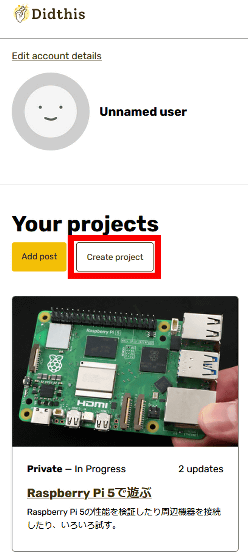
Click 'Create project'.
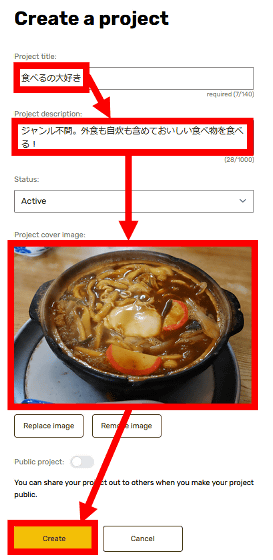
When the project creation screen is displayed, enter the 'project title', 'project description', and 'project cover image' and click 'Create'.
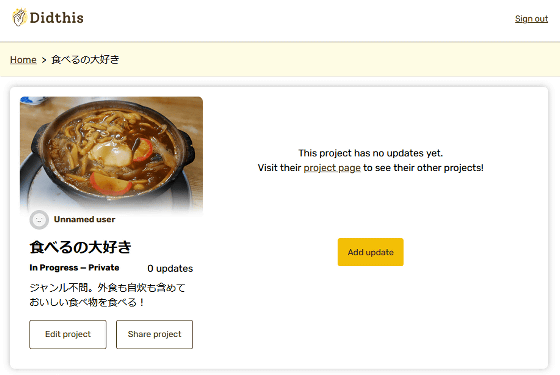
You have now created a new project. After that, you can add activity records at any time by clicking 'Add update'.
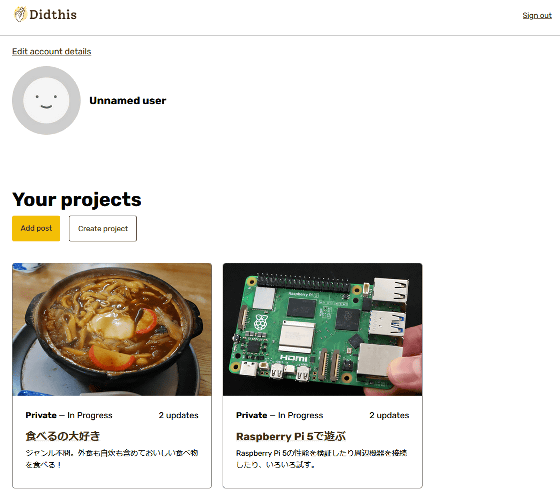
A list of created projects can be displayed on the home screen.
◆6: Steps to publish activity records
Didthis is a service developed with the aim of being a ``healthy alternative to existing SNS'', and activity records and projects are set to ``private'' by default. For this reason, Didthis allows you to post activity records like a personal diary without worrying about how others will see them. On the other hand, depending on the settings, you can also make your project public to the world and share your activity records widely.
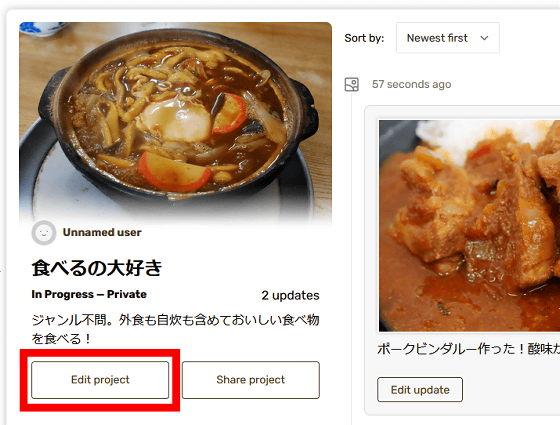
Click 'Edit project' to publish the project.
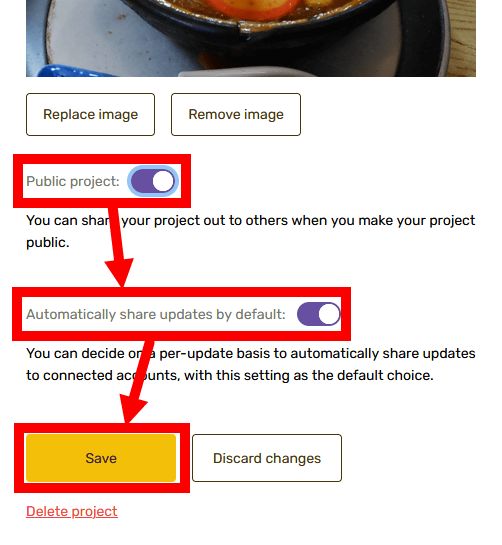
You can publish the project by switching the 'Public project' toggle switch to ON and clicking 'Save'. Also, if you switch 'Automatically share updates by default' to ON, post records added to the project will be automatically published.
Once you have published your project, you can make it visible to others by publishing the project URL on a messaging app, etc.
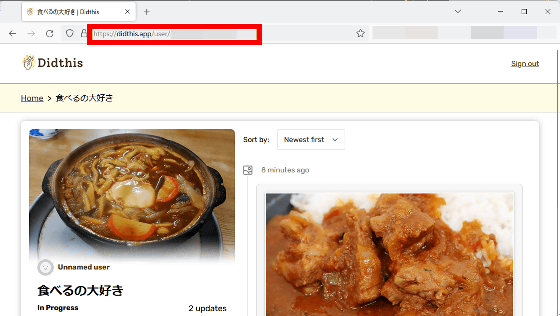
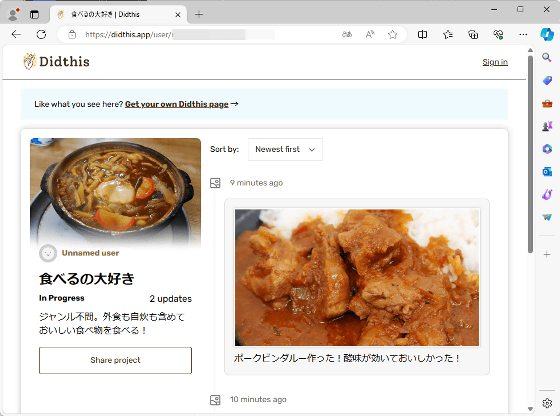
This is what it looks like when someone else views your project.
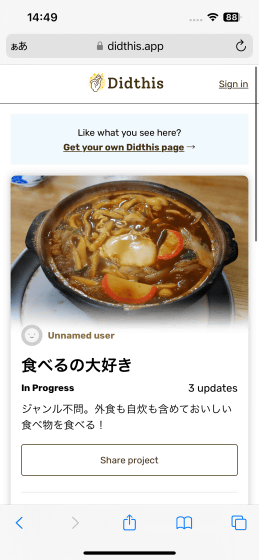
You can also view it from your smartphone.
Please note that at the time of writing this article, Didthis does not have a ``feature to follow others'', and it is recommended that you share the link on Didthis's official Discord server .
Related Posts:
in Review, Web Application, Posted by log1o_hf


