Review of ``WebP / Avif image converter'' browser extension that can convert, download and save WebP / AVIF images to JPEG and PNG format

An increasing number of websites are adopting 'WebP' and 'AVIF' as the format for images inserted into pages. However, many image viewers and image editing software do not support WebP or AVIF, resulting in situations such as ``I downloaded an image from a web page, but because it was in WebP format, I couldn't open it with the editing software or viewer.'' Many people must have encountered this. If you use the browser extension ' WebP / Avif image converter ', you can convert images in WebP or AVIF format to easy-to-handle formats such as JEG or PNG and download them, so check the actual installation procedure and how to use it. I tried it.
WebP / Avif image converter – Get this Extension for ???? Firefox (en-US)
WebP/Avif image converter
https://chromewebstore.google.com/detail/webp-avif-image-converter/pbcfbdlbkdfobidmdoondbgdfpjolhci
'WebP/Avif image converter' exists in Firefox and Chrome versions. To install 'WebP / Avif image converter' on Firefox, first access the distribution page and click 'Add to Firefox'.

When the following pop-up appears, click 'Add'.

Then click 'OK' to complete the installation.

Now, when you right-click on an image, a menu called 'Convert and save image as' will be displayed that allows you to convert and save at the same time.

Next, set the conversion format for 'WebP/Avif image converter'. First, click the puzzle piece-shaped extension button at the top right of the screen, then click 'WebP / Avif image converter'.
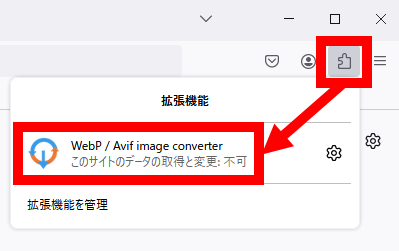
Then, the save format setting screen for saving images with 'WebP / Avif image converter' will be displayed. The image storage format can be set for each type of image. In the initial state, AVIF and WebP are converted to PNG and saved, and other images are saved without conversion.
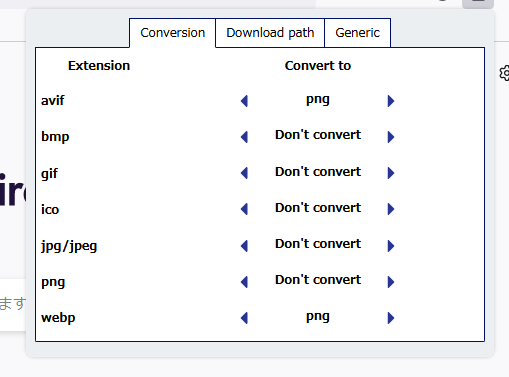
Settings can be changed by clicking the blue triangle. This time, I tried setting it to convert WebP to JPEG before saving.

Now that the settings are complete, let's actually save the image using 'WebP / Avif image converter'. This time, as an example, I will save an image from the WebP demo page provided by Google.

First, to see what happens when you save with Firefox standard functions, right-click the image and click 'Save image as'.

A save dialog will then appear. The image format was WebP.

This time, in order to save while converting, click 'Convert and save image as' in the right-click menu.

A save dialog then opened. The image format is JPEG. Click 'Save' on this screen to save the image in JPEG format.

When I checked the saved image in Explorer, it was saved in JPEG format as expected.

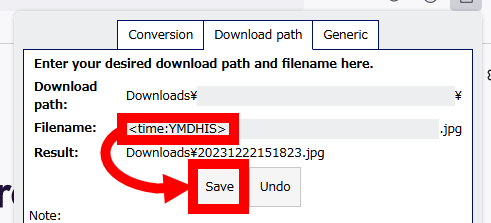
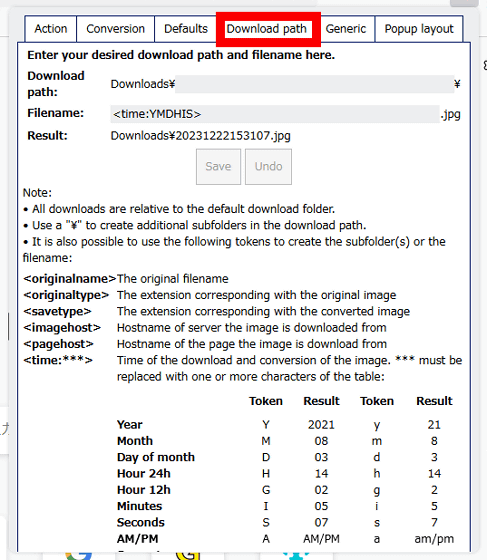
Click 'Download path' on the settings screen to set the image save destination and file name.
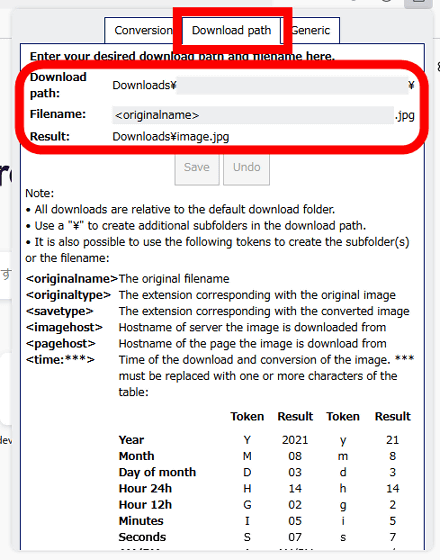
It is also possible to automatically add the date and time to the file name. For example, if you want to save the file with a file name in the format 'Year Month Day Hour Minute Second.jpg', enter '<time:YMDHIS>' in the 'Filename' field and click 'Save'.
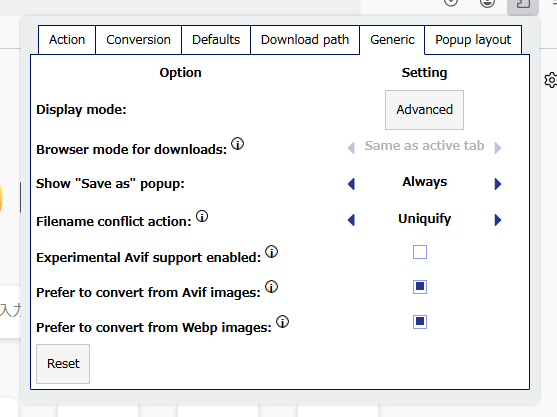
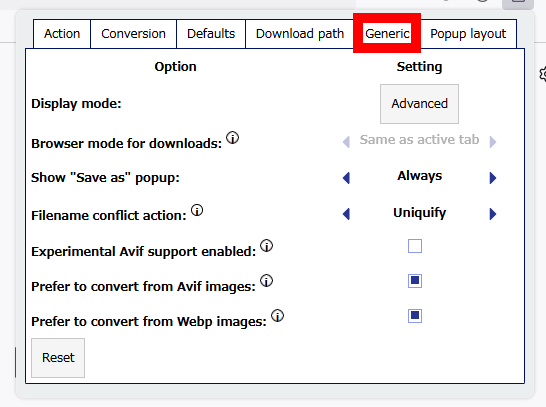
The setting screen is in Basic mode by default, and the configurable items are limited. To release the restriction, click 'Basic' in 'Generic'.

This will switch to Advanced mode and increase the number of configurable items.
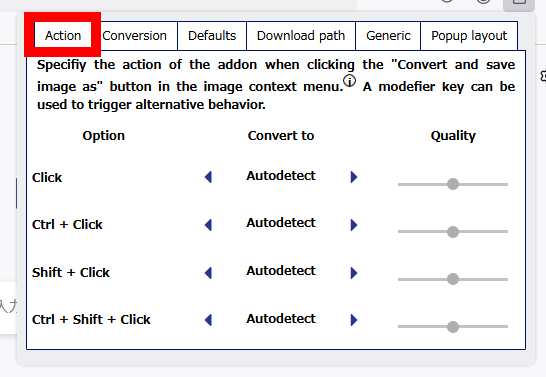
The settings that can be configured on each tab in Advance mode are as follows. On the 'Action' tab, you can set the behavior when clicking the 'Convert and save image as' button while holding down the Ctrl key or clicking while holding down the Shift key.
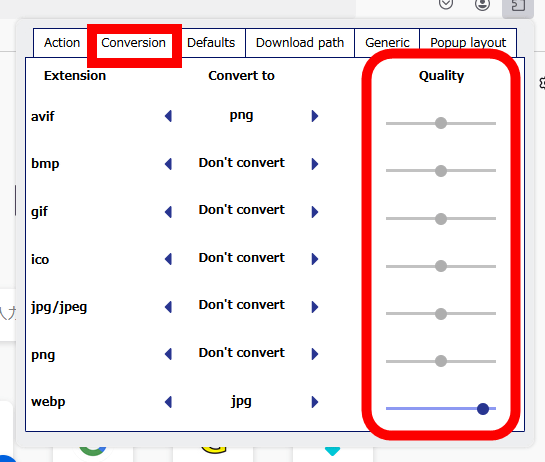
On the 'Conversion' tab, in addition to the image conversion format, you can also set the storage quality.
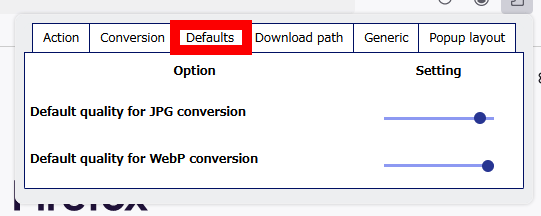
'Defaults' allows you to set the quality when saving images in JPEG and WebP formats.
The 'Download path' tab is unchanged from Basic mode.
On the 'Generic' tab, you can set whether there is a download history or reset the settings.
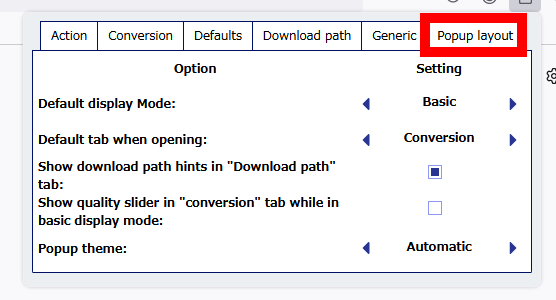
In 'Popup layout', you can set the standard mode of the settings screen and the tabs that are displayed when you open the settings screen.
Related Posts:

