Starting from scratch iOS application development "Let's develop efficiently using library"

There are a lot of developers in the world, and they write different programs. However, it seems that there are many things that even if you look at the whole program, you have written the same kind of processing as others, partly. "We have already struggled with code that someone has already written up and planning again"Reinventing the wheelIn order to prevent "Library"There is a mechanism called a. A library is a "summarized so that specific processing can be reused". This time I will explain how to introduce libraries into Xcode project.
As a typical tool for introducing libraries into projects, "CocoaPods"When"CarthageAlthough it exists, this time we will use "CocoaPods".
CocoaPods.org
https://cocoapods.org/
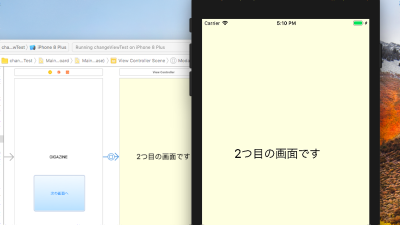
This "development starting with zero" application is a project to develop an iOS application from zero prerequisite knowledge, the first article "I try to make an application without writing code" can be accessed from the following link I will.
IOS application development starting from scratch "Application to switch screens with buttons" - GIGAZINE
First we will introduce CocoaPods. Open "Launchpad" from the Dock under the desktop screen ... ...
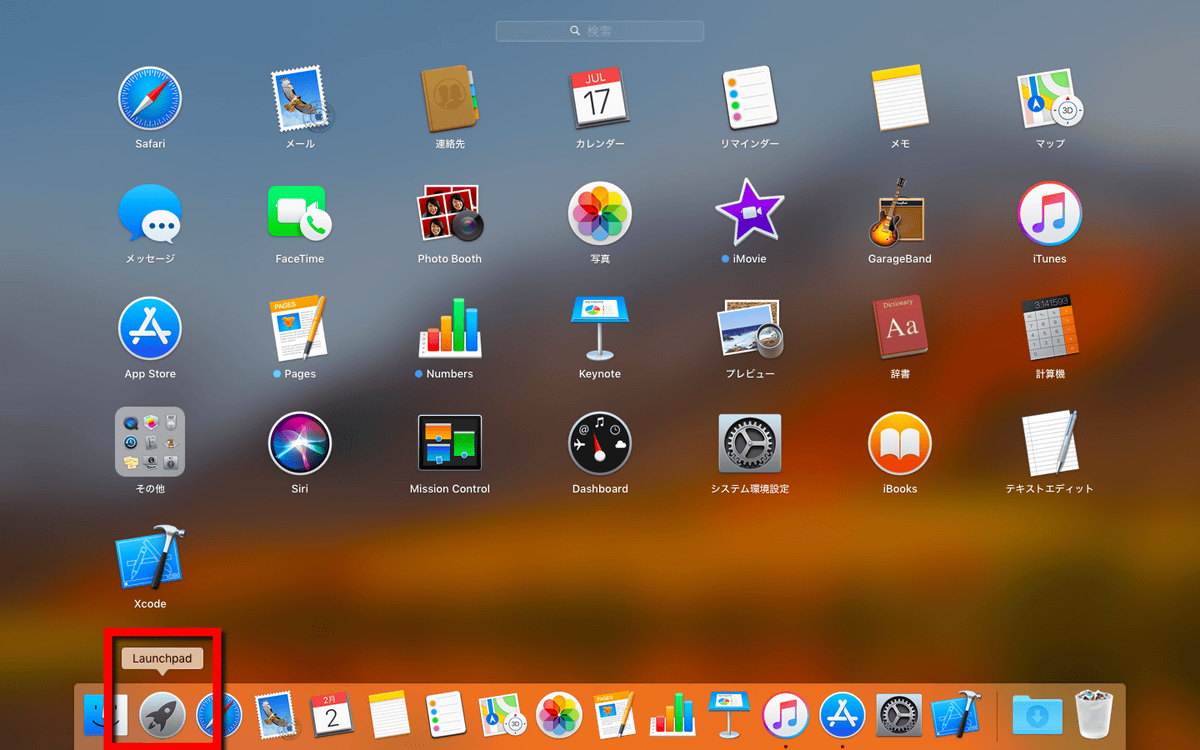
If you enter "term" as it is, "Terminal" is displayed, so press the return key to start up.

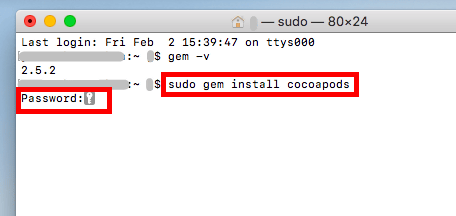
When the terminal opens
[code]sudo gem install cocoapods[/code]
Then enter your Mac login password.
[code]pod --version[/code]
"1.4.0" will be displayed and you can confirm that CocoaPods has been installed.

[code]cd [プロジェクトフォルダ][/code]
To move to the folder where Xcode's project "○○. Xcodeproj" is saved. This time enter "desktop / git / tableview". When moving, the "~" mark on the left side changes to the name of the folder. continue
[code]pod init[/code]
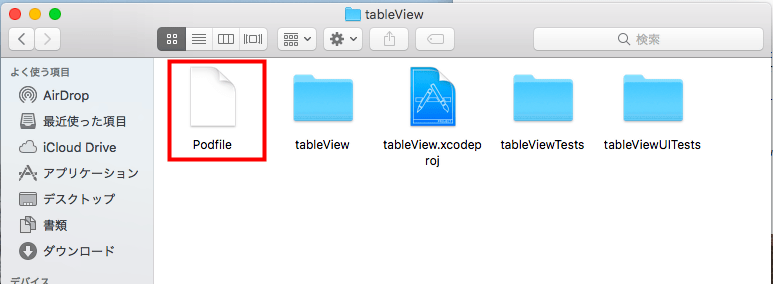
To generate "Podfile" which is a file describing the settings of CocoaPods. When you enter the command "ls" to check the files included in the folder, you can see that "Podfile" is generated.

Open "Finder", move to the project folder, and open "Podfile". We will leave the terminal open as we will use it again later.
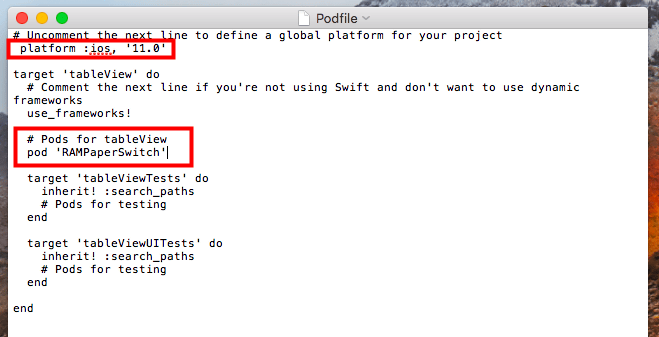
Since the template has already been filled in, I will change this.
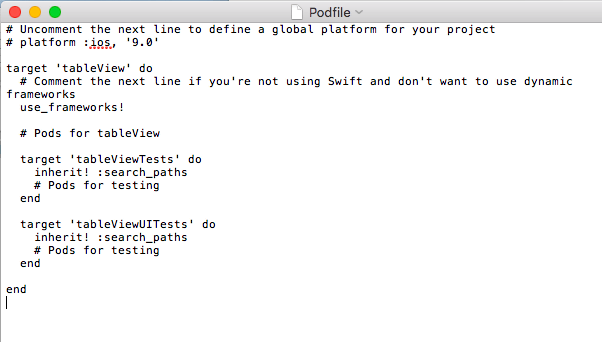
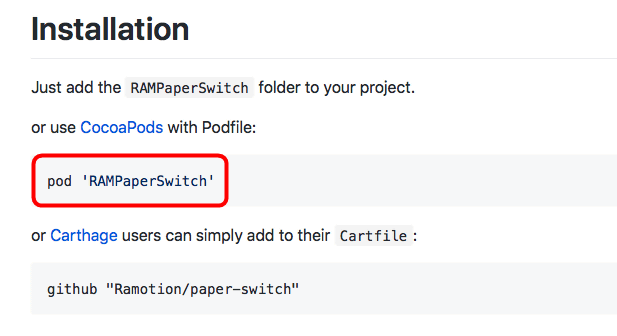
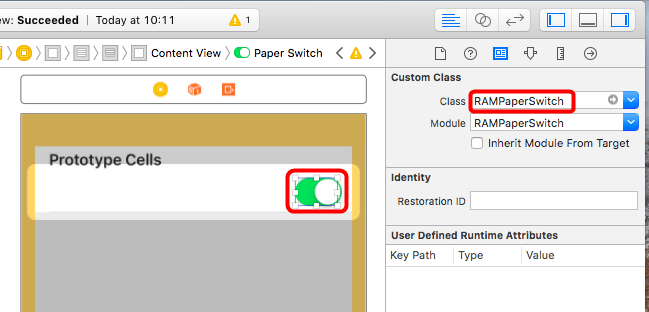
The content to fill in the Podfile is described on the library page. This time it is "RAMPaperSwitchI will introduce a library named "
First, delete the first letter "#" in the second line and limit the platform to iOS version 11.0 or higher. Next, under "# Pods for [project name]" somewhat below,
[code]pod '[ライブラリ名]'[/code]
Enter.
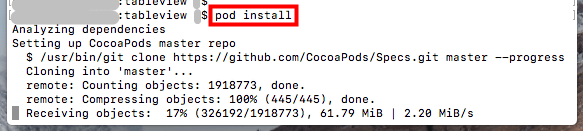
Returning to the terminal,
[code]pod install[/code]
To install the library. It takes about 10 minutes for CocoaPods to be set up for the first time.
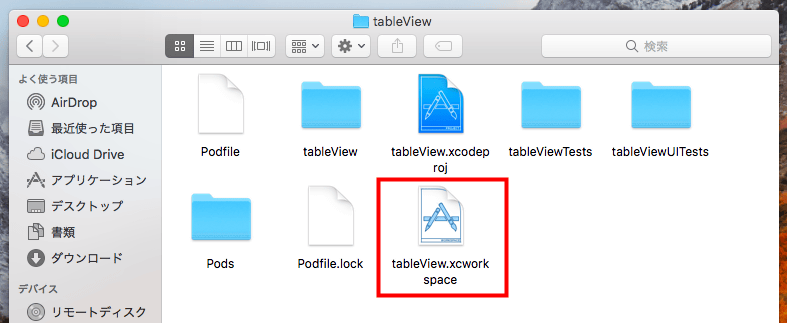
When installation is completed, a file called "○○. Xcworkspace" is created in the project folder. You need to use this "xcworkspace" file to use the library. Double click to open ......
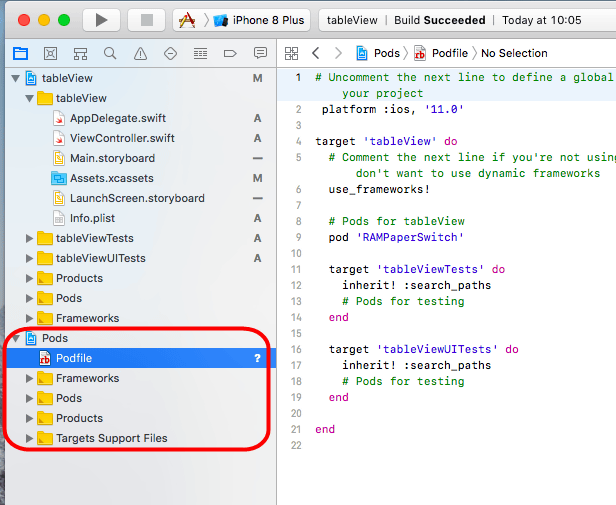
You can see that the item "Pods" is increasing in the files included in the project. To enable Xcode to properly recognize CocoaPods related files, once you press "Command + B", build it.
The library "RAMPaperSwitch" introduced this time is now available. How you use libraries differs from library to library, so check on the page of the installed library.
Library functions vary widely. "Summary of site summarizing iOS library - QiitaLook at what kind of libraries are available, etc., and if there is a library with the function that you think that "I wanted to do is a kore", please introduce it.
Related Posts:

in Software, Smartphone, Review, Posted by log1d_ts