I made a "New pinhole planetarium" that can display the Milky Way in the room

The present Tanabata is held in the new calendar, it is usually in the middle of the rainy season and it is hard to see stars,National Astronomical ObservatoryHas been a traditional Tanabata since 2001 since July 31 to August 30 of the new calendarLunar July 7It is close to the day. However, if it is a planetarium, even if it is rainy or cloudy, you can see the sky full of sky even on snowy days, an adult science magazine reproducing the fine stars to the Milky Way "New pinhole type planetariumActually assembled and tried to create a starry sky.
New Pinhole Planetarium | Adult Science Magazine | Adult Science .net
http://otonanokagaku.net/magazine/vol39/
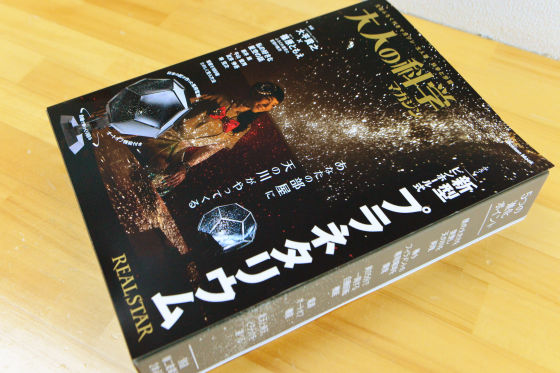
This is an adult science magazine with a new pinhole type planetarium attached to a bath.

A4 variant style, it is almost occupied by appendix when viewed from the side.

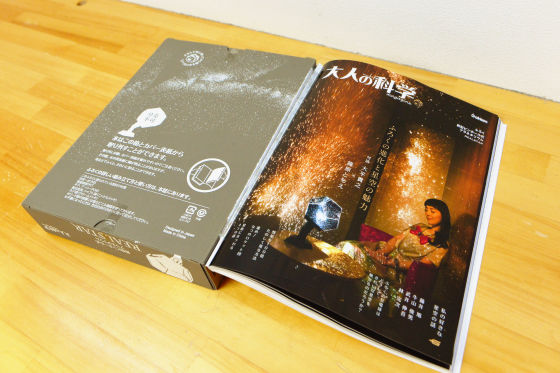
When opening inside it is like this.

Magazines are removable.

How to make the planetarium was written in the magazine.

Preparation is scissors · Phillips screwdriver · Two AA batteries.

The content of the kit is like this.

As soon as you enter from the creation of the stand. First attach the motor to the gearbox and tighten the screws.

Put the silicone ring on the pulley and pulley with gear.

Attach the four gears to the pulley with pulleys and gears to the gear box with motor assembled earlier ... ...

Set the gearbox and bulb socket on the spindle.

Tighten the screws firmly.

Once you remove the bulb socket from the gearbox, pass it through the spindle gear with a slight inclination.

Once the main shaft gear can be installed between the light bulb socket and the gear box, fix it with screws.

At this time, if you have not confirmed that the gears are engaged properly, you will need to be careful as it will be disassembled and redone later.

Squeeze the spindle with the column, tighten the bolt and nut with the nut knob.

When setting the mount on the pedestal, completion has come somehow.

Next turn the pedestal upside down, plug the bulb cord connector into "LAMP" on the printed circuit board, and insert the battery cord connector into "BATTERY".

Secure the printed circuit board to the pedestal using screws.

In addition, insert the connector of the motor cord into the contact metal fitting of the printed circuit board as shown in the figure.

Put the batteries ......

Screw the bulb into the light bulb socket. When the button at the end of the pedestal is pushed, a light bulb is attached, when pressed again, the motor rotates, and when it is pushed again, it confirms that the light bulb and the motor turn off.

Because the motor slowly and quietly turns, it becomes uneasy as "It fails ... ...?", But if you look at it gently you will see that it is spinning.

This completes the gantry. Next I will create a stellar sphere. First of all, we will make folds one by one on a star plate with a total of six.

When attaching a crease, paste double-sided tape on the overlapping part.

When finishing pasting double-sided tape on the surface to be stuck, it looks like this.

Then remove the double sided tape ...

I will stick together the same alphabets and numbers that are written on the margin.

Note that there are some parts in the star plate that are used for projection in the northern direction and projection for the southern projection. This time I used a star star plate for northern projection.

When all the parts are pasted together, it looks like this.

There is a part where the hole is opened in the stellar ball, so attach the base there.

Next we will remove the protective sheet about the star plate. When removing the protective sheet, hold the base and let's not touch the star plate after removing the sheet as much as possible.

Put a black seal on the part of the margin to prevent leakage of light. It is also possible to reinforce the stellar ball by sticking a seal.

Extra margin is scissors and joked.

It is completed.

So I will actually project in the room.

When you turn off the light, the inside of the room is filled with stars.

The Milky Way is well projected.

I'm going to have a good dream to use instead of a nightstand by the bed.

When used on the stairs it is like this.

When used in bath, light is projected to hot water and romantic atmosphere.

Because it is a size that does not get in the way, it can be put in a little space

The booklet is 100 pages in total. There is also an application section on how to play with the furosuki planetarium, etc. There is magnificence. When turning over the page with a percussion, it seems that you are using a planetarium in various scenes.

The light bulbs attached to the planetarium are handmade one by one.

A state of the low-cost private rocket development plan by spacecraft engineers, writers, cartoonists, illustrators, former IT presidents, etc., was also taken up.

Price is 3500 yen including taxThe assembly time is 90 minutes. Spreading stars in the room and enjoying the stars of the night sky regardless of the season and the weather, it became a good item not only for those who like stars but also for people who want to make the room romantic or relaxation items It was.

Related Posts:


