Free software "HDConvertToX" that easily converts M2TS files ripped from Blu-ray to XviD / DivX / X264 / files with subtitles
"AnyDVD HDUsing the XviD · DivX · X264 · WMV codec for M2TS files backed up from Blu-ray and backed up from Blu-ray, VOB files backed up by ripping from DVD and TS / MKV · AVI files etc. Free software that can easily convert to movie files such as AVI, MKV, MP4, WMV, M2TS files,HDConvertToX"is.
Since it is also possible to encode while multiplexing AVCHD or Blu-ray and maintaining its internal structure, it is possible to easily create movie files that can switch subtitles, switch audio tracks, and so on. It is also possible to trim and resize, and it is easy to analyze automatically after choosing the original source, and it will almost completely automate the setting, so if you encode it for the purpose of backing up entirely it's pretty easy is.
Download and actual usage is as follows.
First off, the official site.
HDConvertToX v.2.1.458.3528 (XviD / DivX / X264 / WMV / SAP / NMT) - Doom 9's Forum
Download the main file RAR file from "Full Download" or "Full Donwload MIRROR".

After uncompressing the RAR file, for Windows Vista and Windows 7, right-click "AVIMux_GUI.exe" in the applications folder and select "Properties".

Click the "Compatibility" tab, check "Run this program in compatibility mode", select "Windows XP (Service Pack 2)", and click "OK". It will now work with Vista and 7 as well.

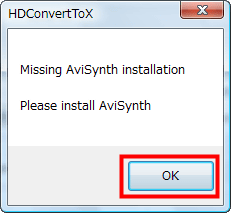
Next, click "HDConvertToX.exe" to start it

However, it does not start because it needs something "AviSynth".
When I look it up, "Ffdshow tryout"Haali media splitter"AviSynth"XviDIt is necessary to install in advance.
As an easy-to-understand procedure, firstly "Windows Essentials Codec PackIf you install 'AviSynth' after installing it, the minimum startup environment is complete.
That's why "AviSynth"Has been downloaded. Click to start.
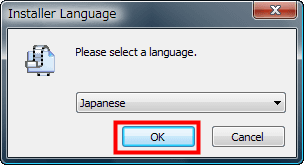
Select "Japanese" and click "OK"
Click "I agree"

Click "Next"

Click "Install"

Click "Next"

Click "Finish". You are ready.

Click "HDConvertToX.exe" and it will start up properly in this way. We will proceed from here on the premise that there is a file that has already been ripped and backed up using "AnyDVD HD" and so on. Click "Open File".

Since the file with the largest file size is mostly the main part, please click on "Open" after selecting it

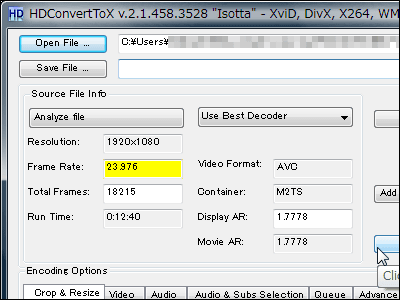
Click "Analyze file" to start full automatic analysis

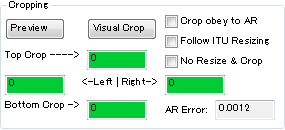
It ends in about 1 minute. Resolution, frame rate, etc. are all automatically entered. The black part is also automatically analyzed, and the numerical value to be cropped is automatically input, but if you want to actually see by trimming by eye, click "Visual Crop".

Several frames are cropped and coded for trimming, and they are displayed in this way.

By specifying a numerical value, the blue part is supposed to spread, and it is a mechanism that it knows how much to trim visually. Let's click "Accept" when you decide.

Also, even if you do not set it visually, you can also trim by changing the value of the part of the green background.
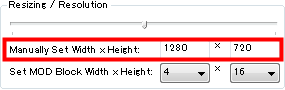
Since you can specify the resolution from the "Resizing / Resolution" area, it is easy to resize. This time I tried changing the width 1920 to 1280. The vertical width is automatically entered automatically maintaining the aspect ratio.
Various settings such as codec and bit rate at the time of encoding are available from "Video" tab.

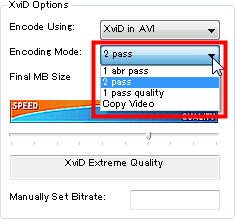
From "Encode Using" you can specify the codec used for encoding and the final output format (container format).

From "Encoding Mode" it is possible to select 1 bit for bit rate specification, 2 pass for file size specification, 1 pass quality and so on.
Audio format can be specified from "Audio" tab

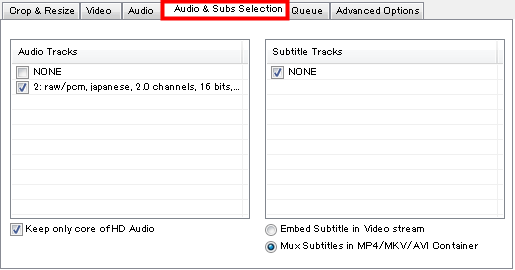
Audio tracks and subtitles can be specified from the "Audio & Subs Selection" tab. Audio tracks can be selected from "Audio Tracks", subtitles can be selected from "Subtitle Tracks", if you check "Embed Subtitle in Video stream", encode with subtitles superimposed on the video, "Mux Subtitles in MP4 / MKV / AVI Container ", it is possible to switch subtitles because it will be in a format that allows subtitles to be switched.
After that, click "Save File", specify where you want to output the file name, click on "Generate Encode" and start conversion.

During the conversion, the command prompt is started in this way and the contents of work are displayed one after another.

DGAVCIndex starts up and starts processing

Processing progresses more and more automatically

As soon as it reaches this point, information such as the start of the encode of the movie part in full scale and what% of the whole part was converted is displayed at a time.

When this screen comes out it is on the verge of completion, and this window will disappear and it is completed.

If you click "Add to Queue", you can save the contents so far, so you can encode multiple movies at once, that is, you can also batch encode.

Related Posts: