Rackula is a free drag-and-drop server rack layout solution that can also be self-hosted.

Rackula - Rack Layout Designer
https://count.racku.la/
◆ Creating a rack
If you open the site without creating a rack yet, a pop-up will appear to allow you to create a new rack. Enter the name of the rack and select one of the following two layouts:
・Column : Single configuration ・1 to 42 units (up to 100 units can be specified if custom specified)
Bayed : 2-3 units in parallel configuration, 10-24 units
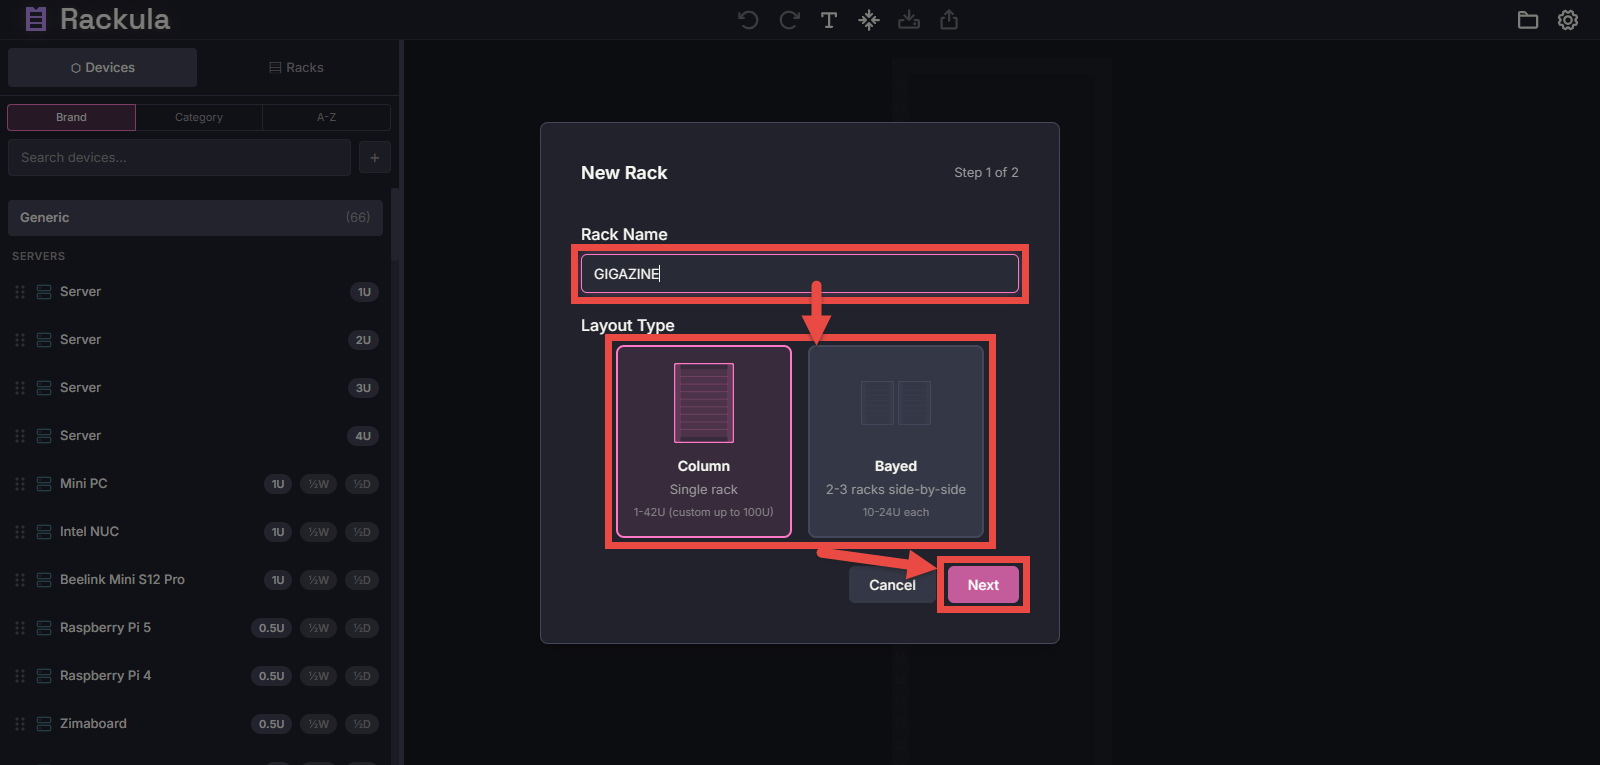
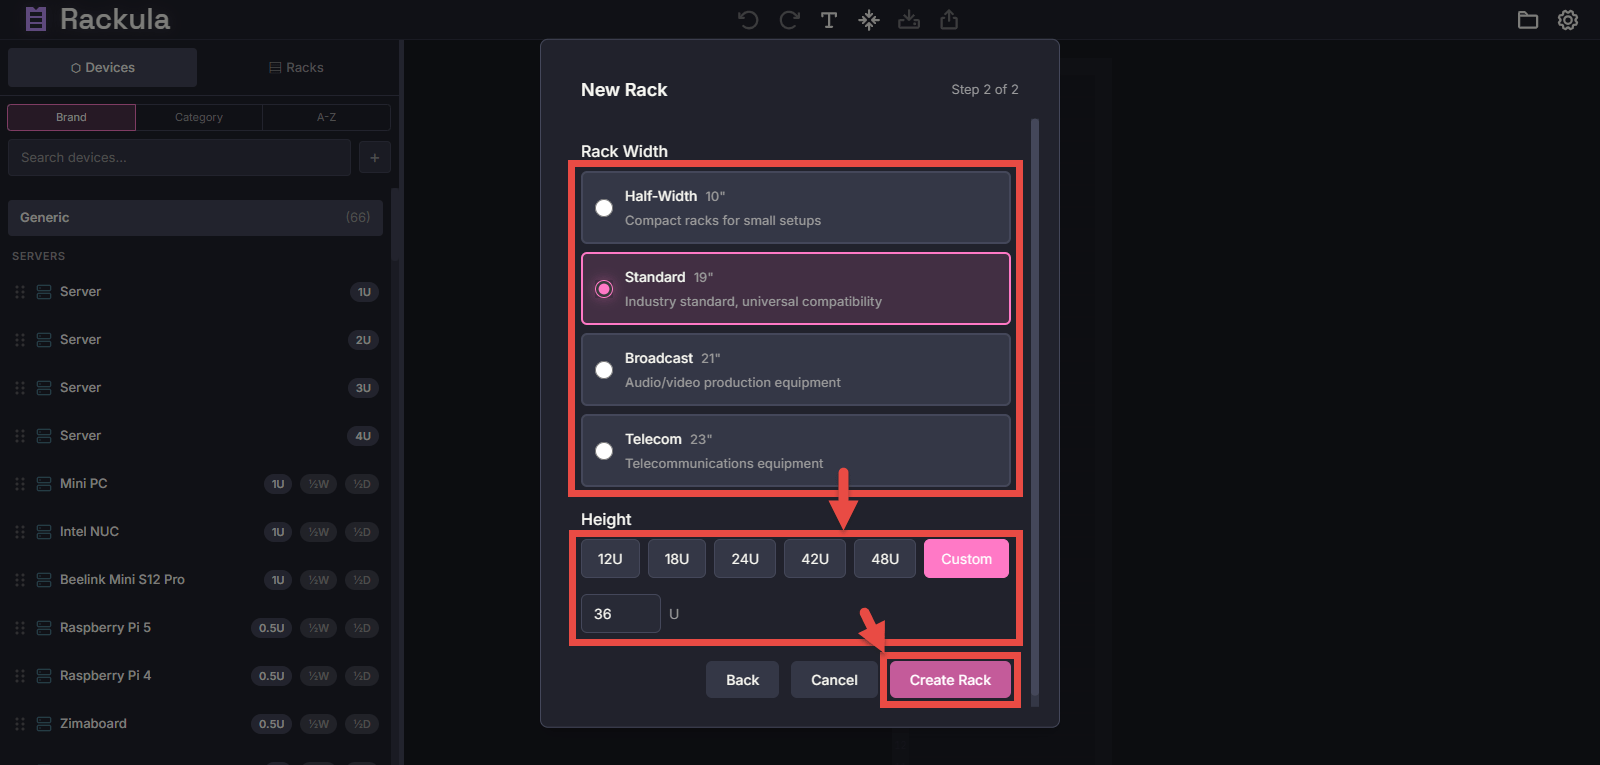
After selecting a column and clicking the 'Next' button, a popup will appear where you can enter the rack size. First, select the rack width from the options below.
Half-width : 10 inches wide
・Standard : 19-inch width
・Broadcast : 21-inch width
・Telecom : 23 inches wide
Next, select the number of units from the options below. The number of units is a unit that represents the height of the equipment to be placed in the rack, with 1 unit equivalent to 1.75 inches (approximately 44.5 mm).
・12 units
・18 units
・24 units
・42 units
・48 units
- Custom : Up to 100 units can be specified by direct input
Finally, click the “Create Rack” button to create the rack.
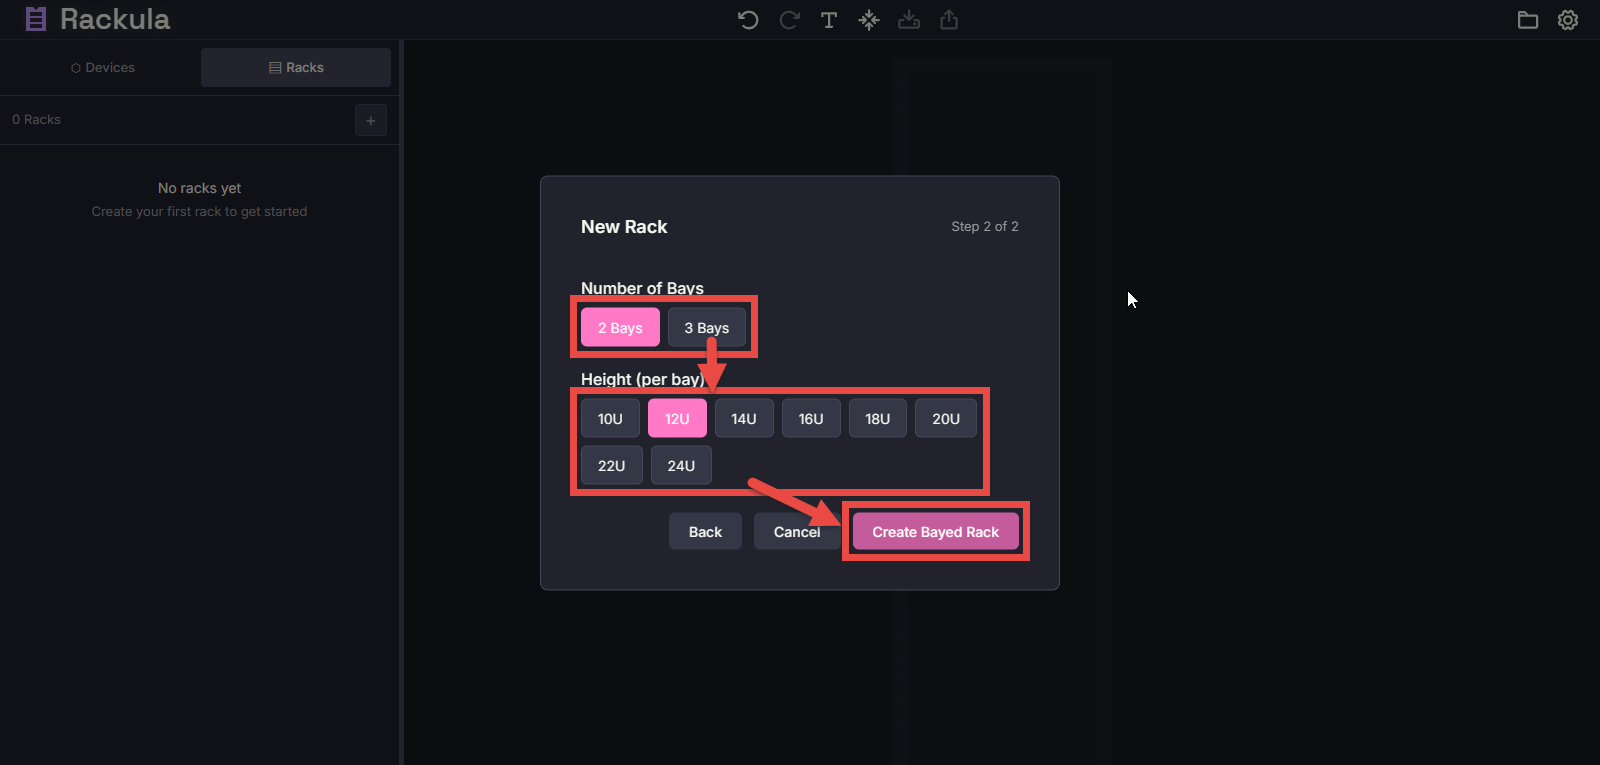
If you select Bayed and click the 'Next' button, a pop-up will appear asking you to specify the number of bays and units.
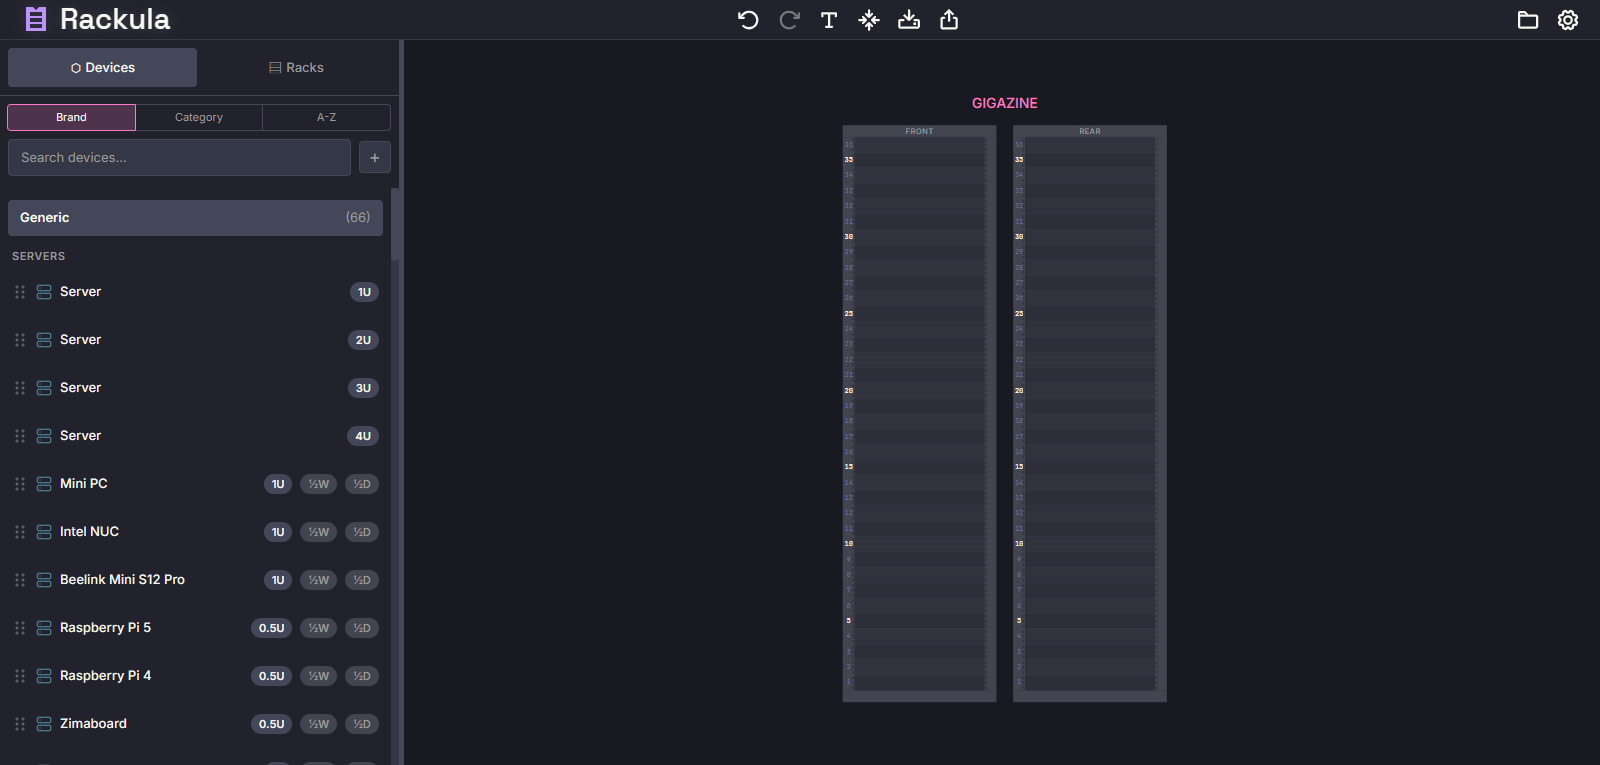
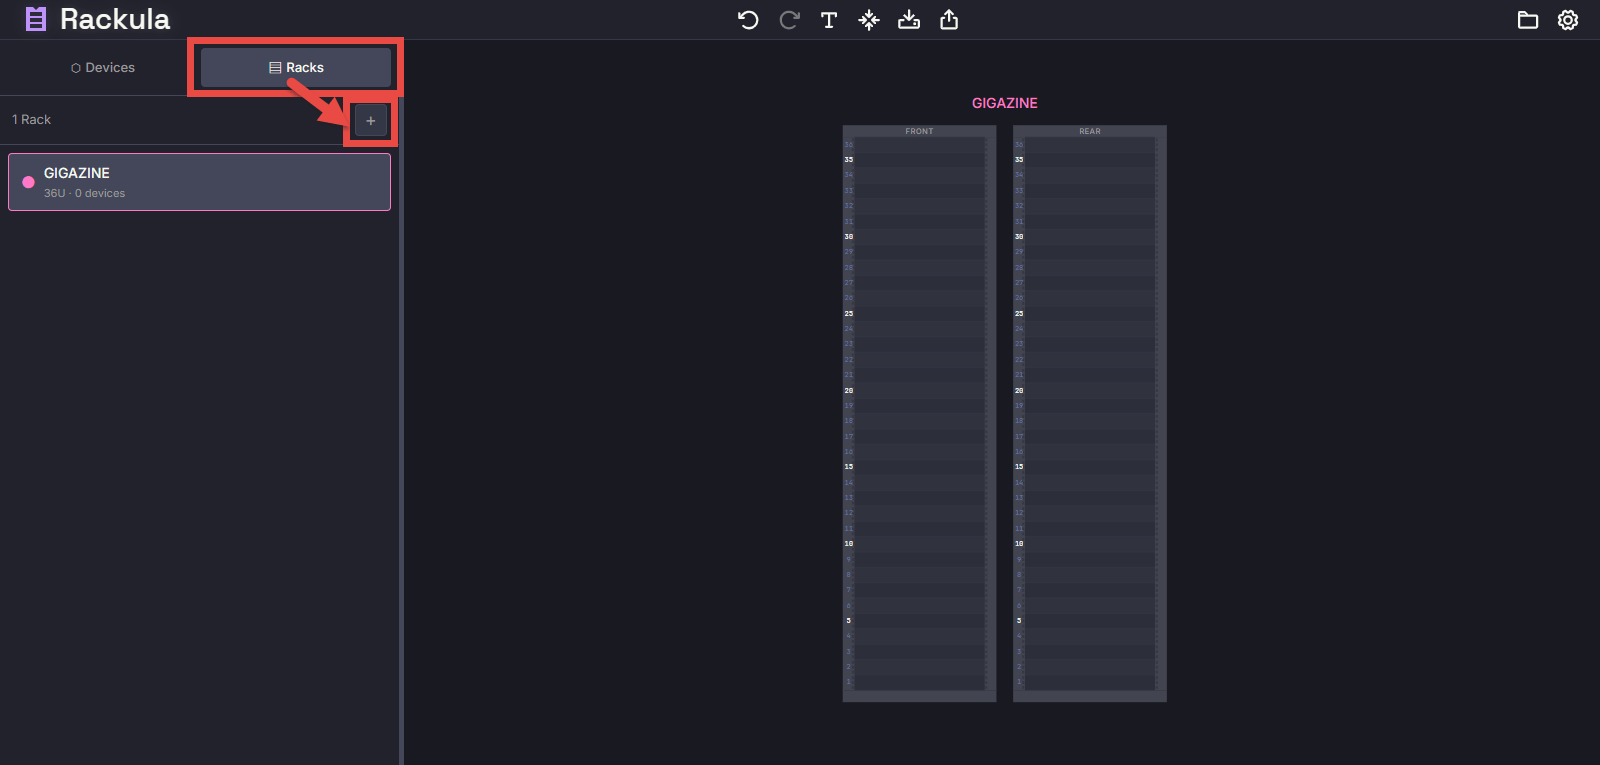
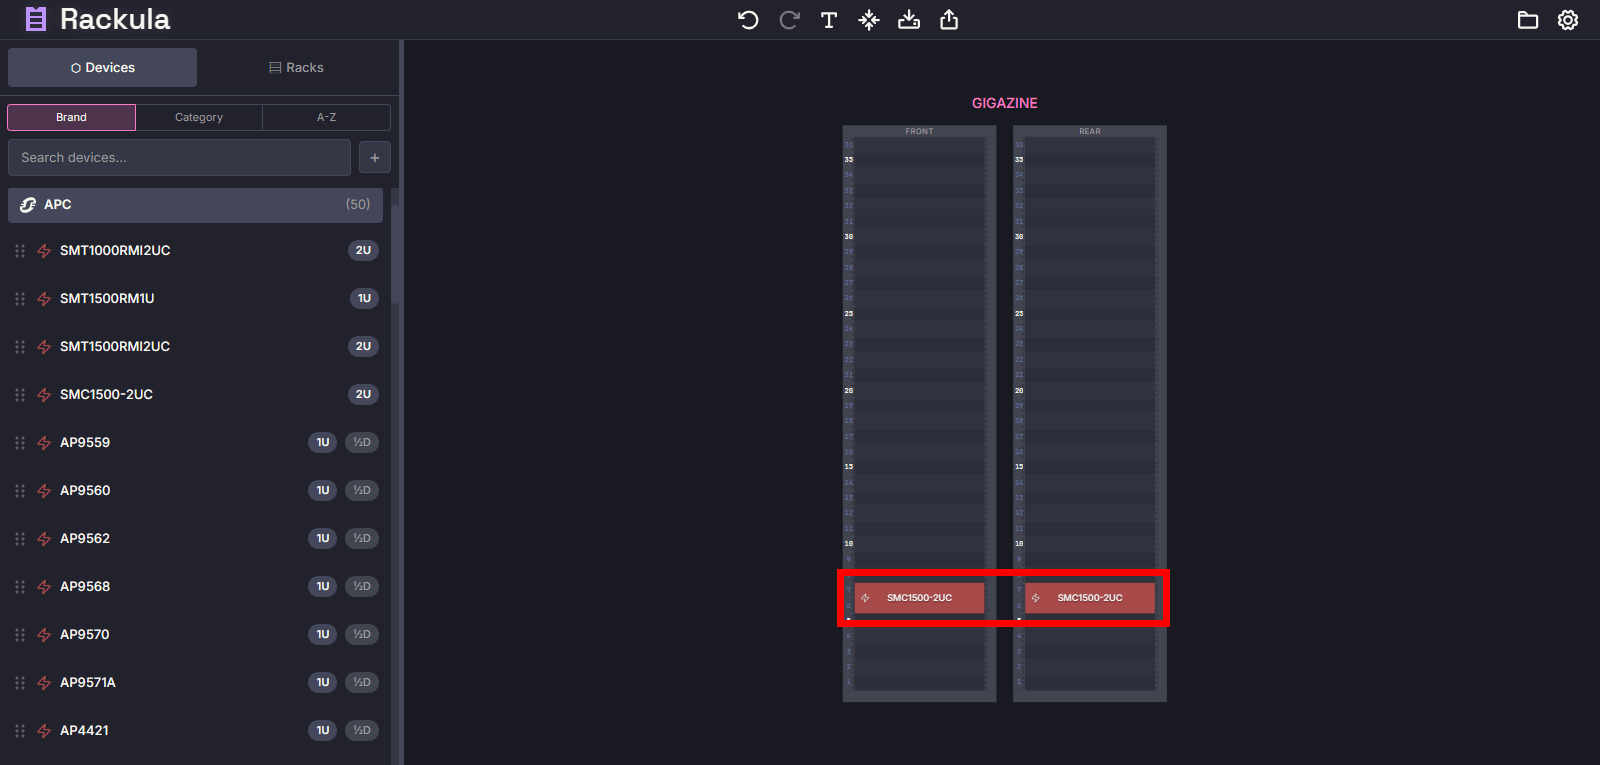
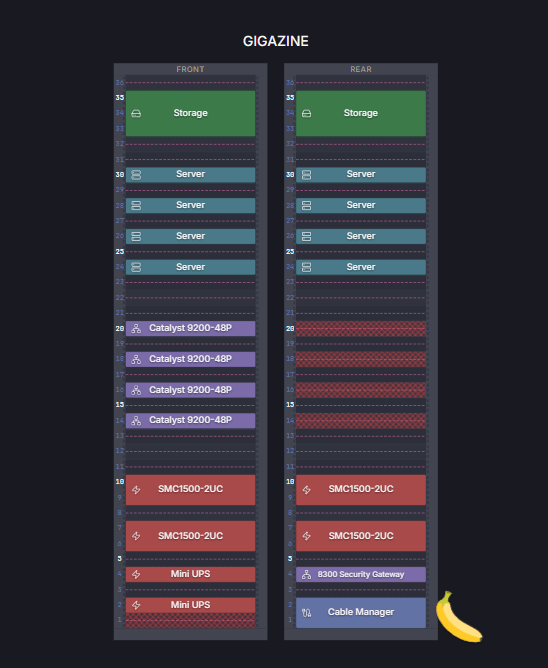
The rack I created. It looks like there are two of them because I'm showing the front and back.
You can check the racks you've created so far by clicking the 'Racks' button in the upper left of the screen. To create another rack, click the '+' button directly below.
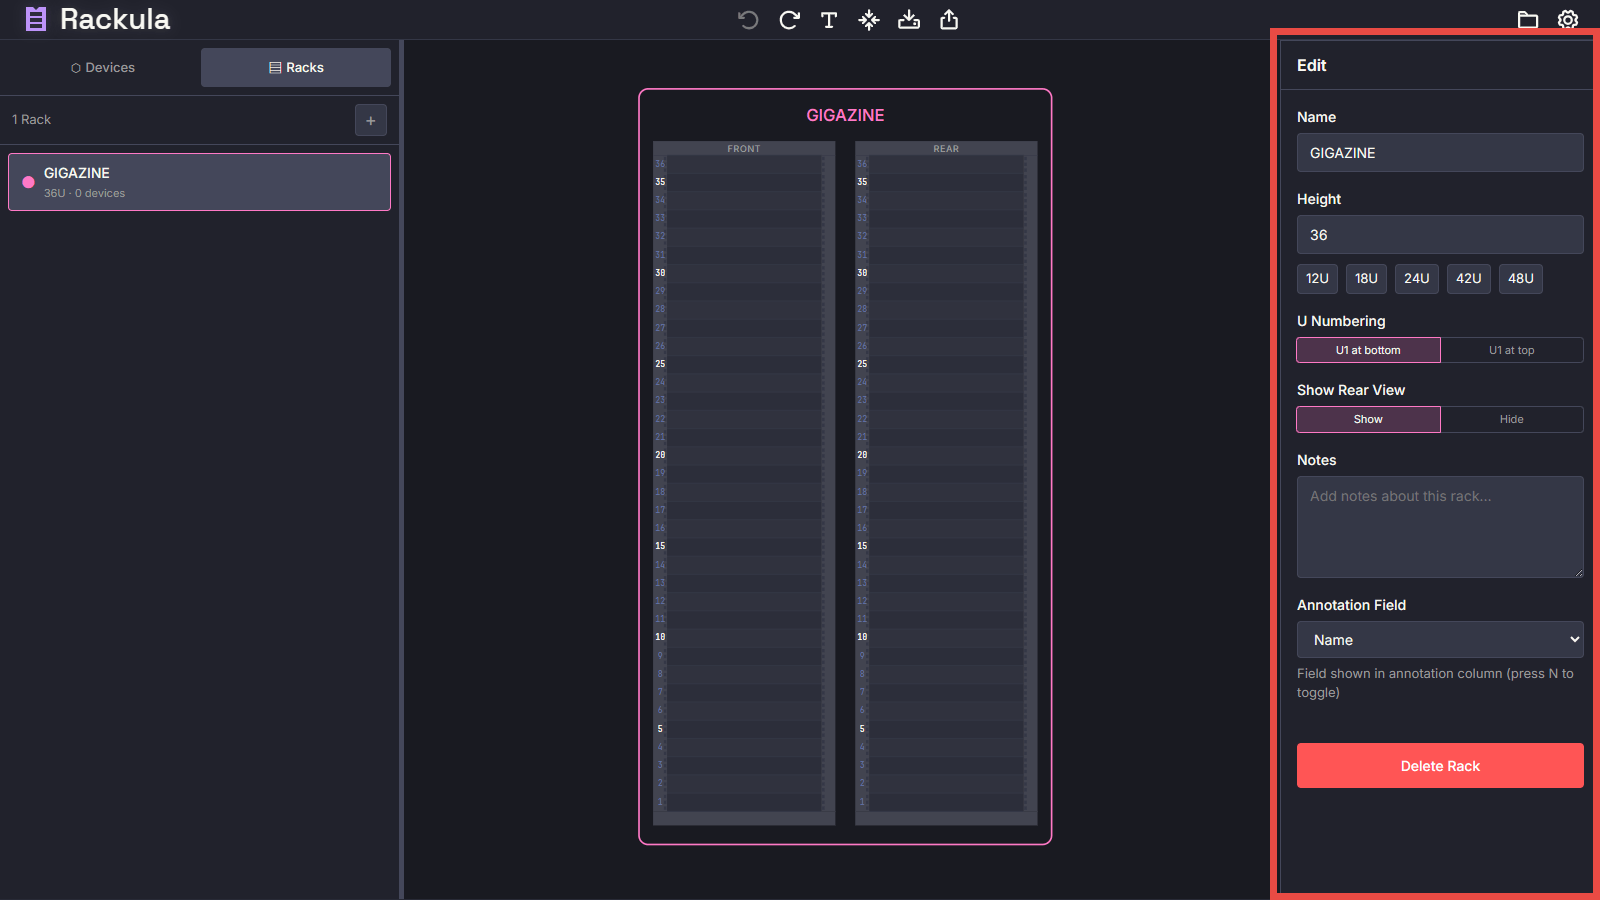
◆Editing the rack
Clicking on the rack diagram in the center of the screen will display the rack settings on the right side of the screen, where you can change the settings. The following items can only be set here.
・U Numbering : Unit numbering order (U1 is at the top or bottom)
・Show Rear View : Whether to display the rear view of the rack
・Notes : Notes about the rack
・Annotation Field : Which field to use when displaying annotations on the rack diagram
◆Installation of server equipment
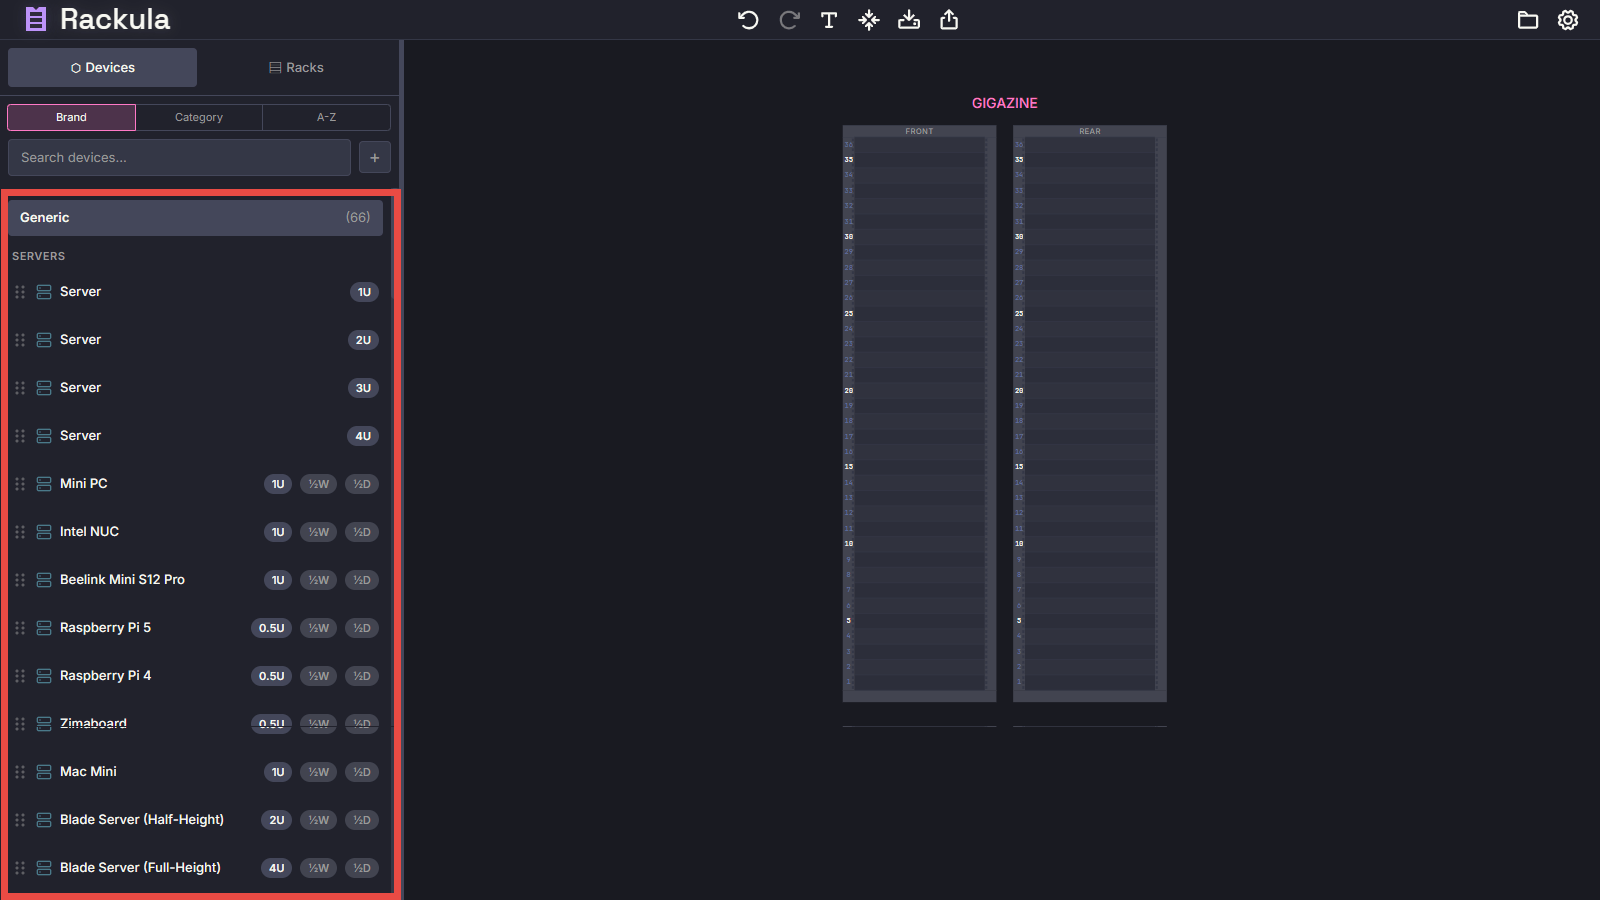
Click the 'Devices' button in the upper left of the screen, then select the 'Brand' tab directly below to display a list of server devices grouped by manufacturer brand.
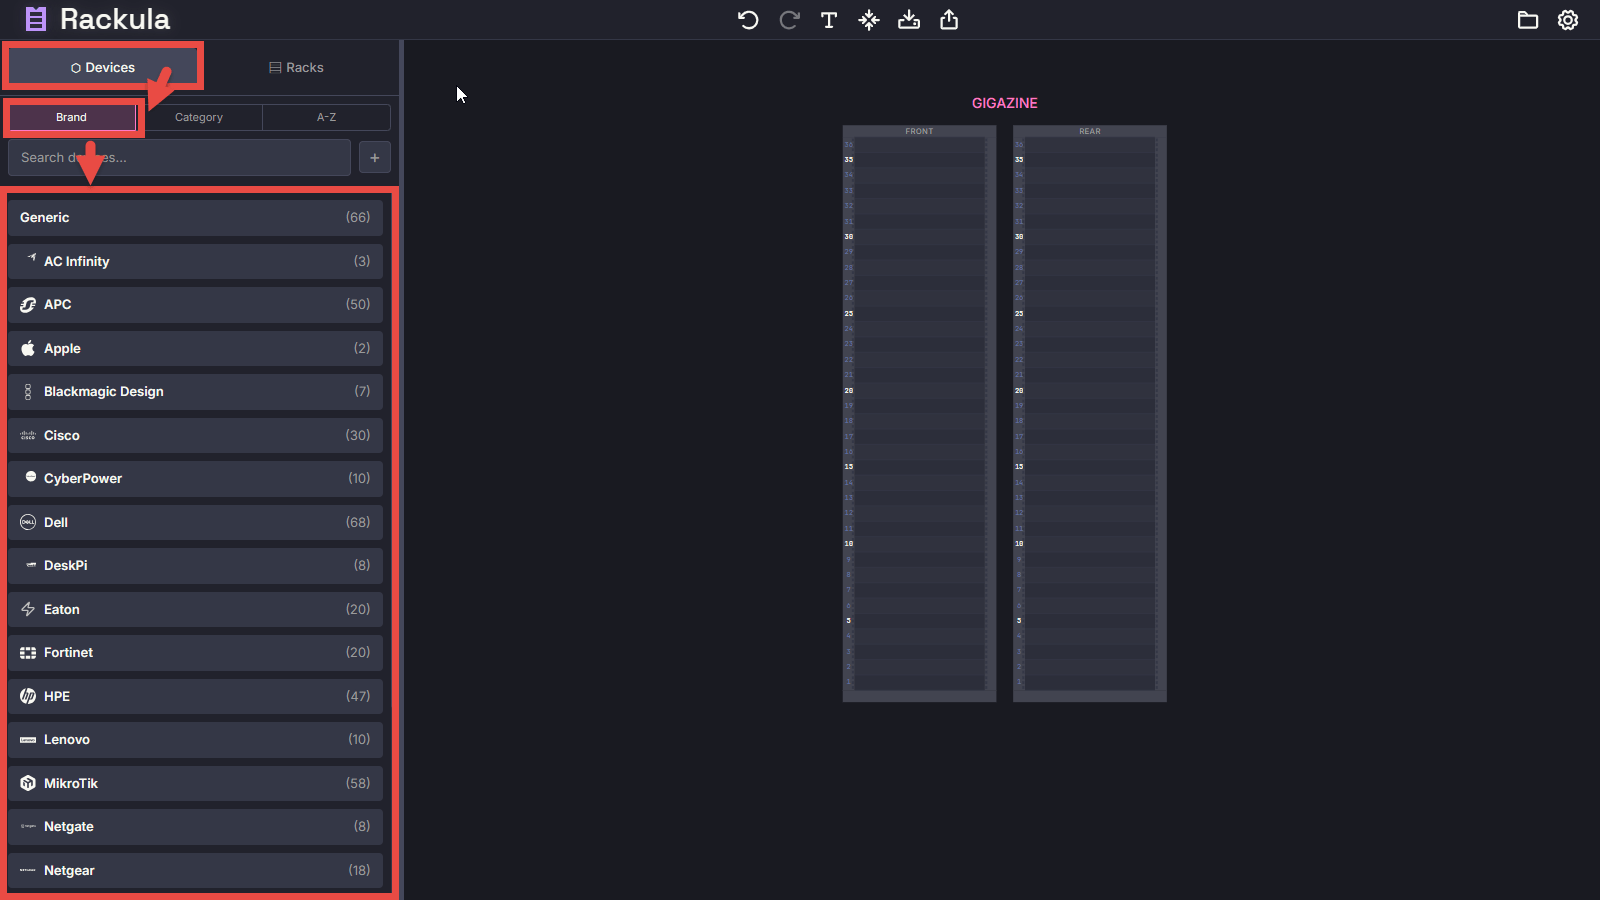
The list is organized in an accordion format, and clicking on a brand name will display a list of server equipment from that brand. The height (number of units) of each server equipment on the list is displayed, along with any special widths and depths, which can be used as a reference when placing it in a rack.
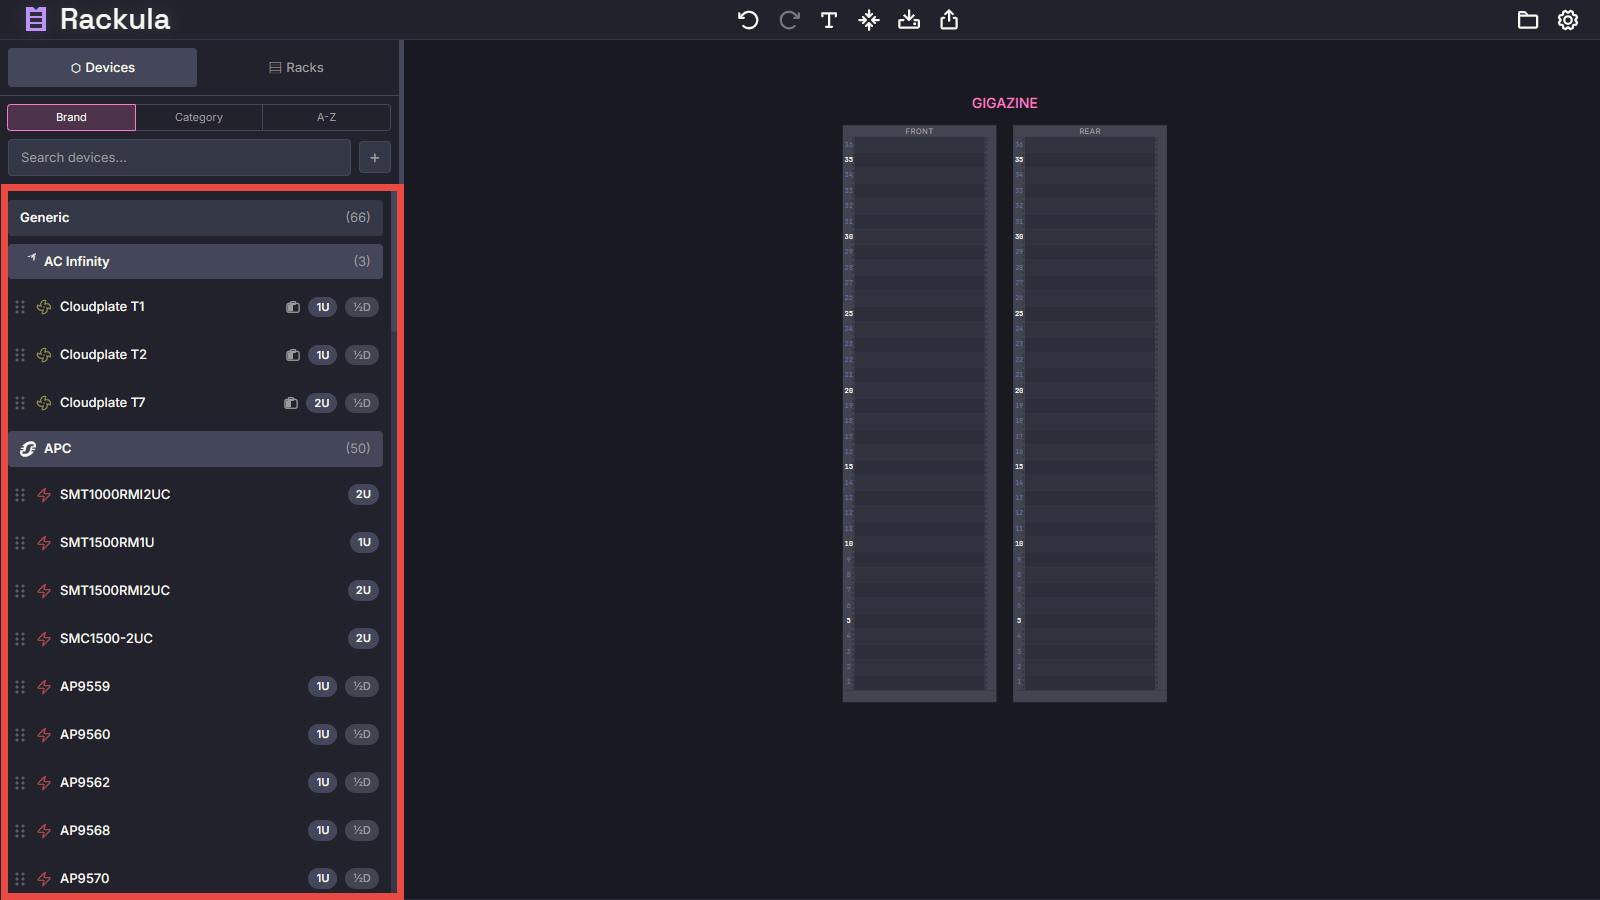
If the brand name or device name is not in the list, you can also select a generic server device from 'Generic.'
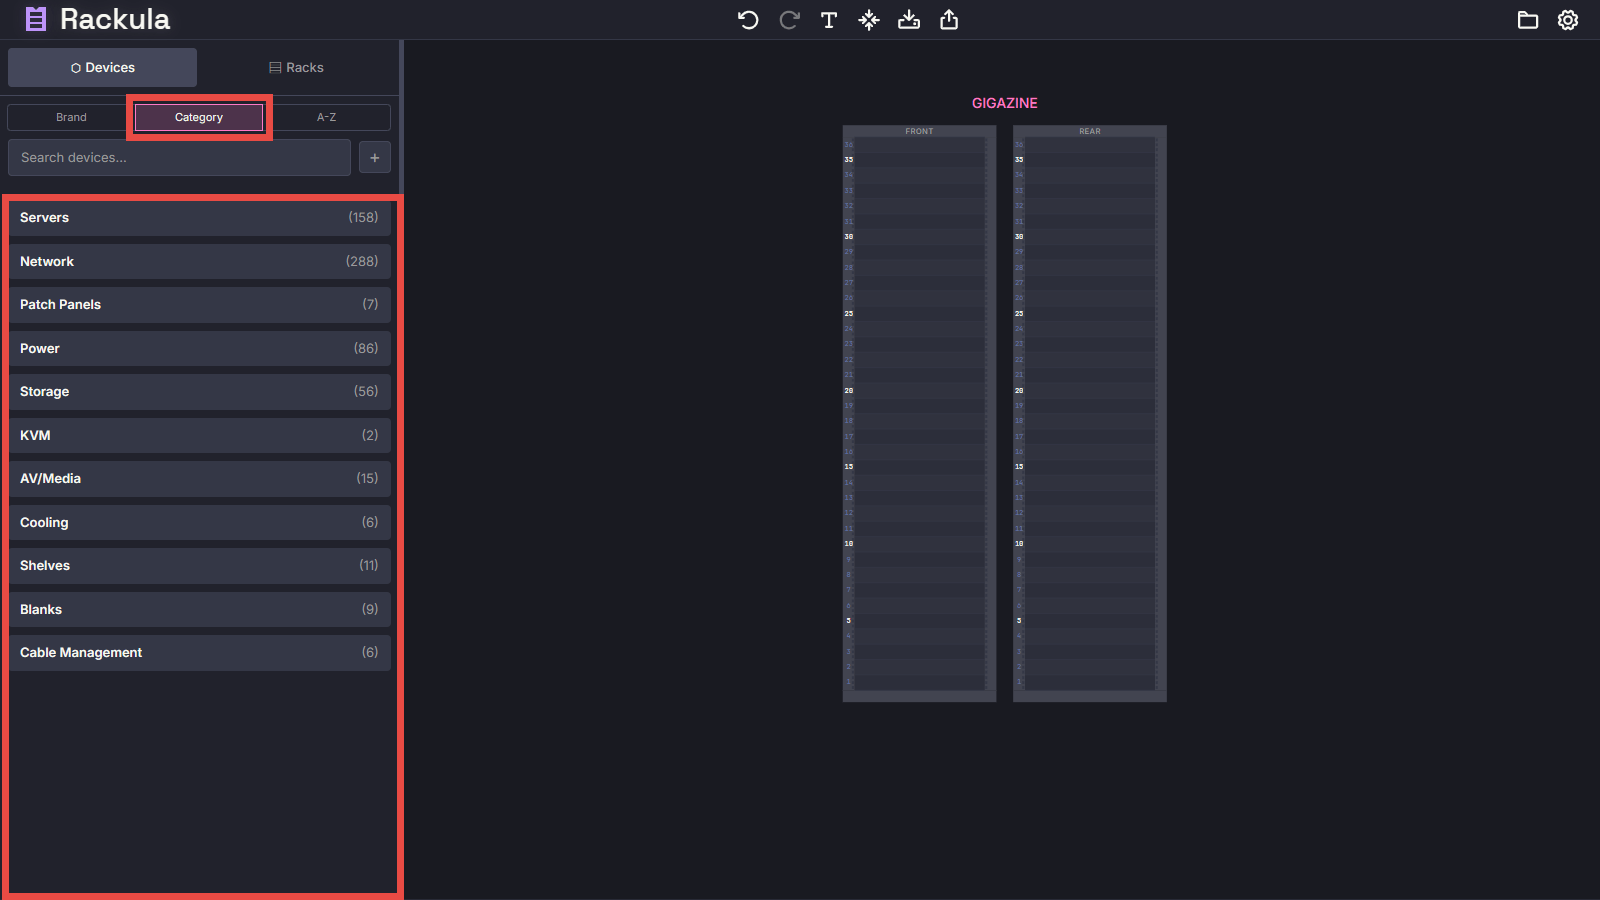
Selecting the 'Category' tab will group the list of server devices by type.
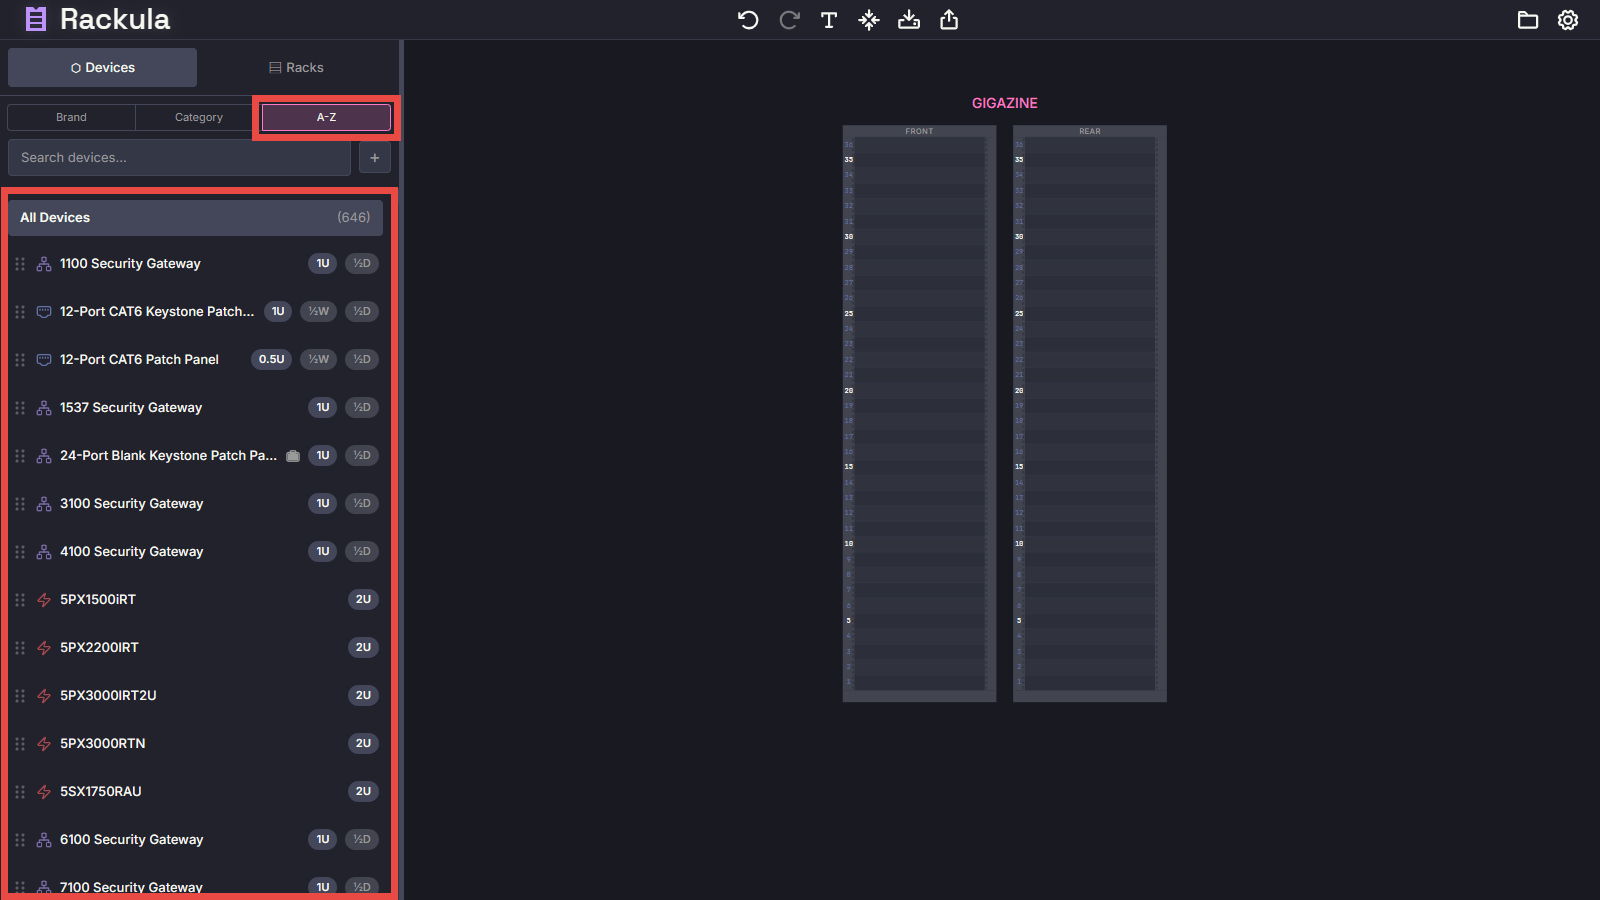
Select the 'AZ' tab to display all server devices in alphabetical order by device name.
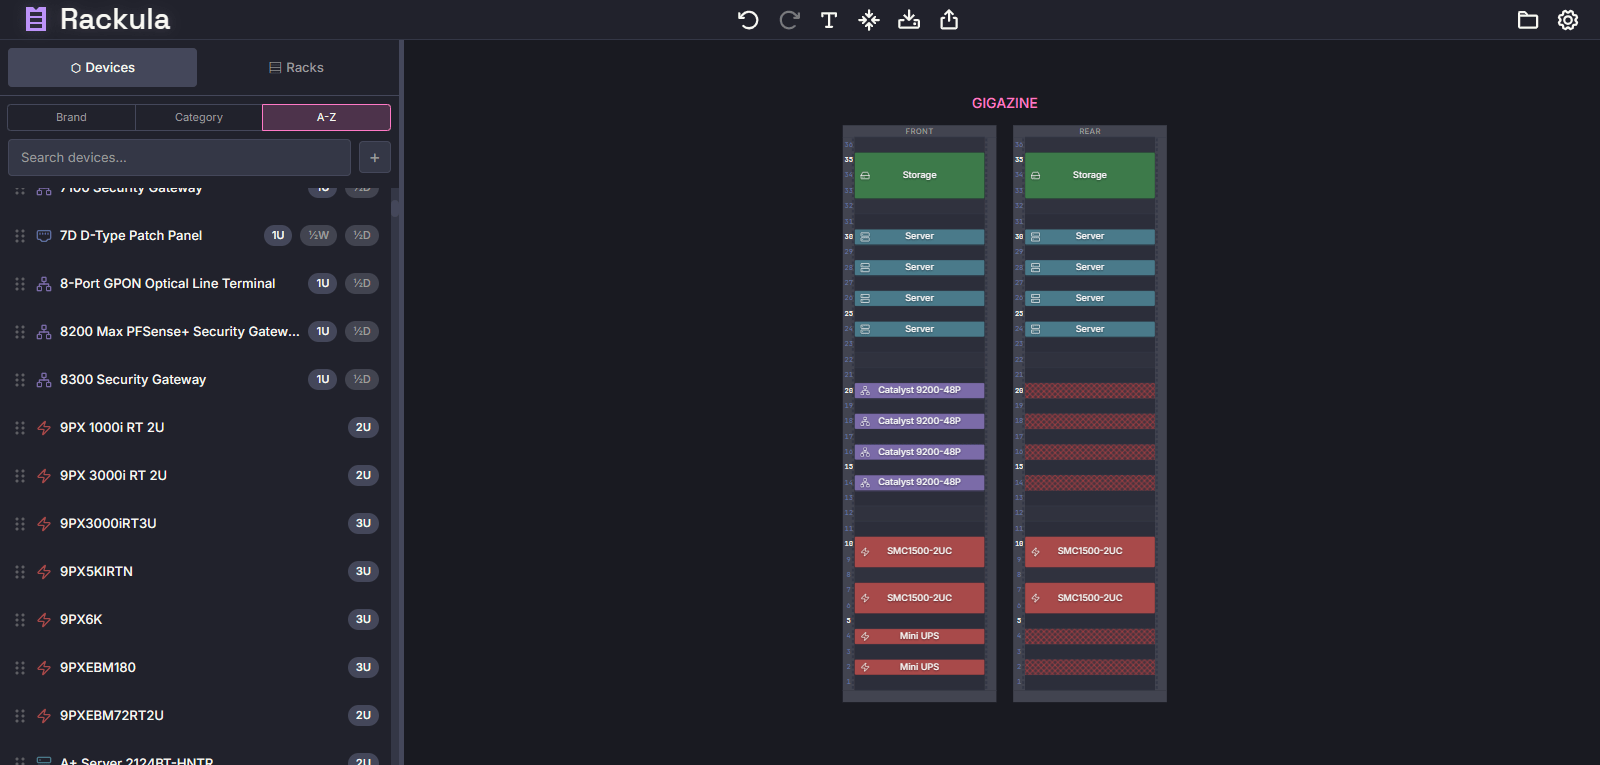
Click and drag the desired server equipment to place it in the rack.
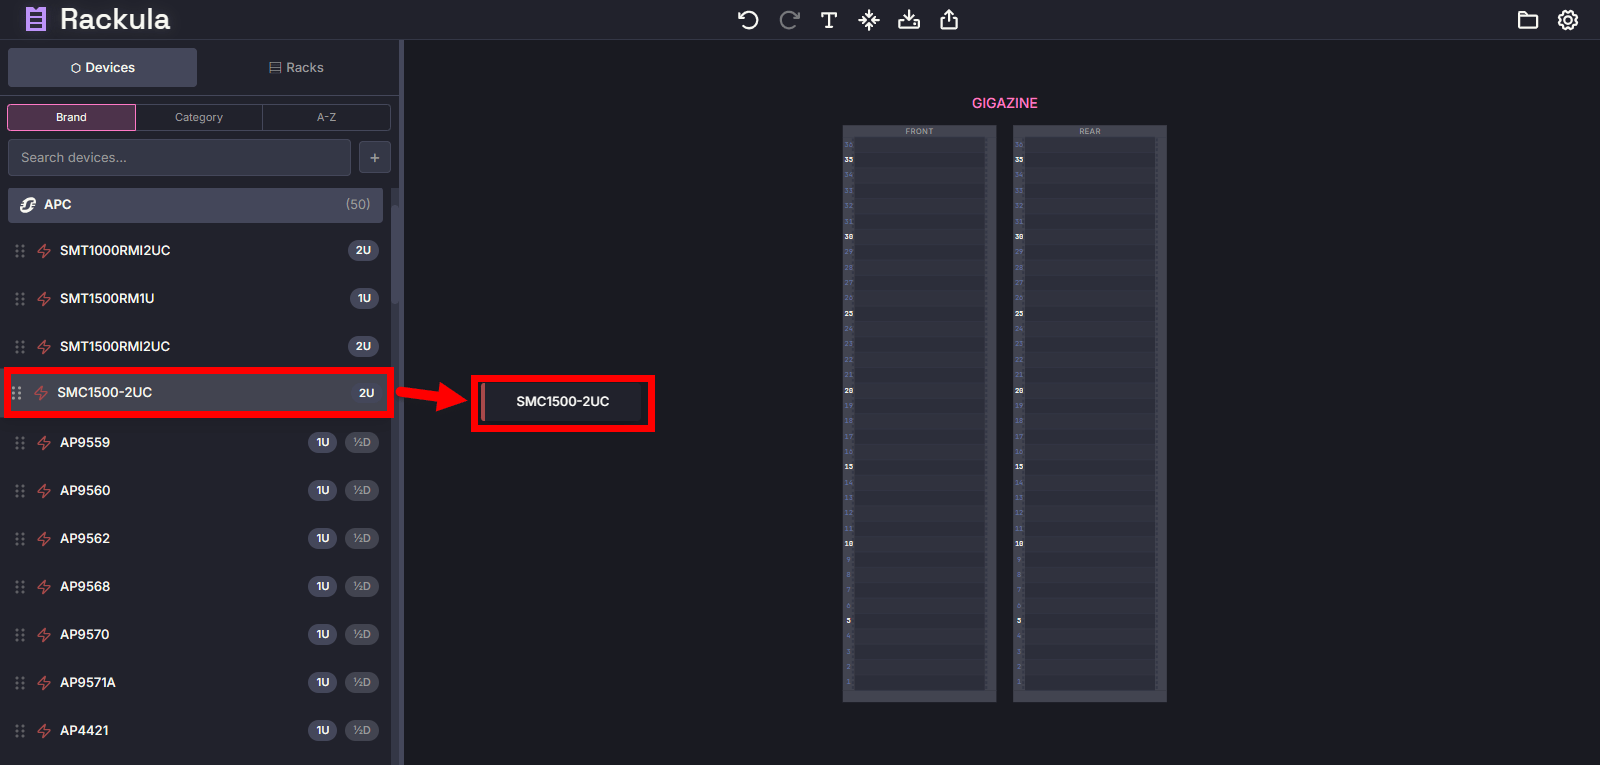
Dropping a server onto the rack diagram will place it where you dropped it.
When the front side is completed it looks like this.
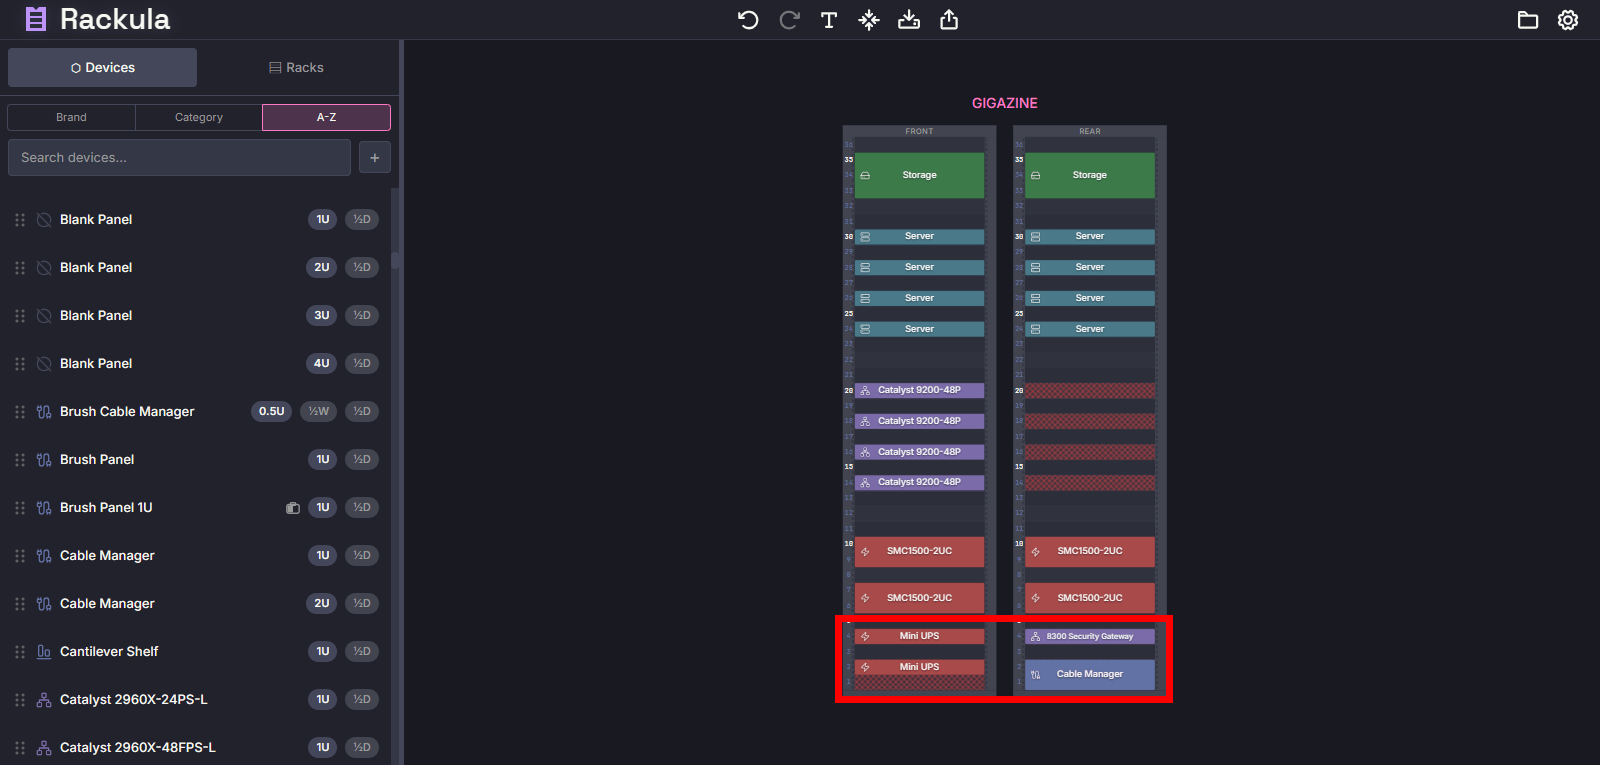
If the back of a device with a depth of 1/2 is empty, you can place another device with a depth of 1/2 on the back view, allowing you to place different devices on the front and back.
◆Other features
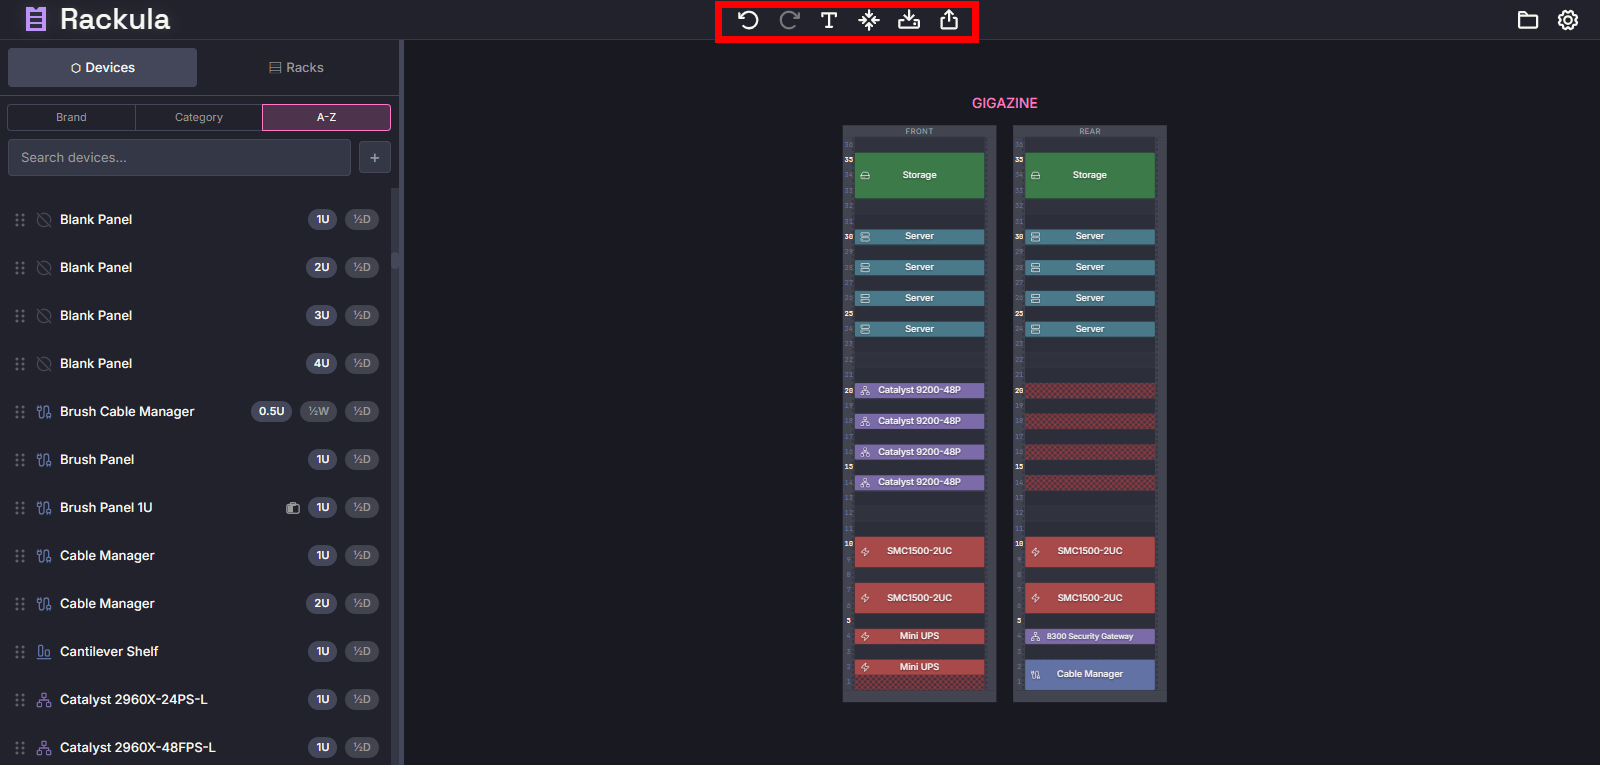
The functions of the icons displayed at the top of the screen are as follows, from left to right:
・Undo : Undo the previous operation
・Redo : Redo the undone operation
・Display : Switch the display of server equipment (label, diagram, diagram and label)
・Reset View : Reset the display position and zoom of the rack diagram
・Export : Export the rack diagram as an image
・Share : Share the rack diagram
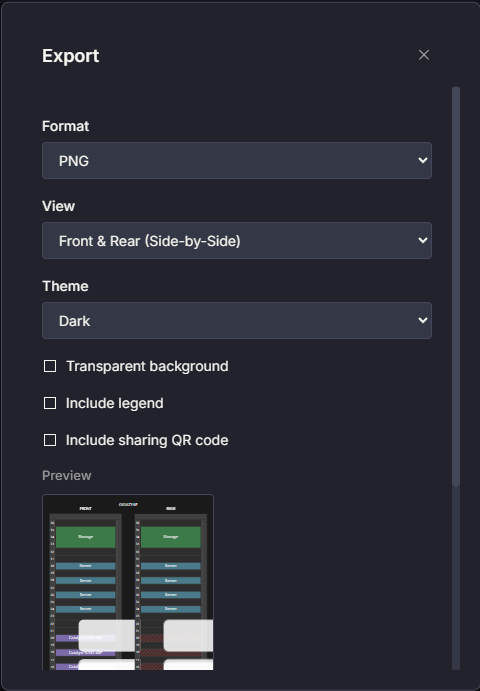
Clicking the 'Export' icon will display the following popup, allowing you to specify the format and style of the rack diagram.
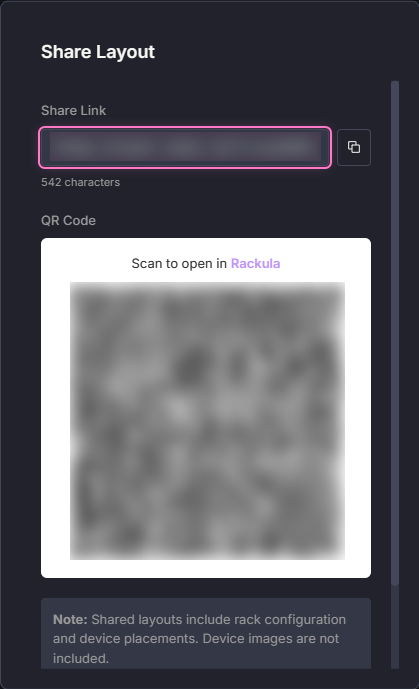
When you click the 'Share' icon, the following pop-up will appear, allowing you to share the rack diagram via URL or QR code.
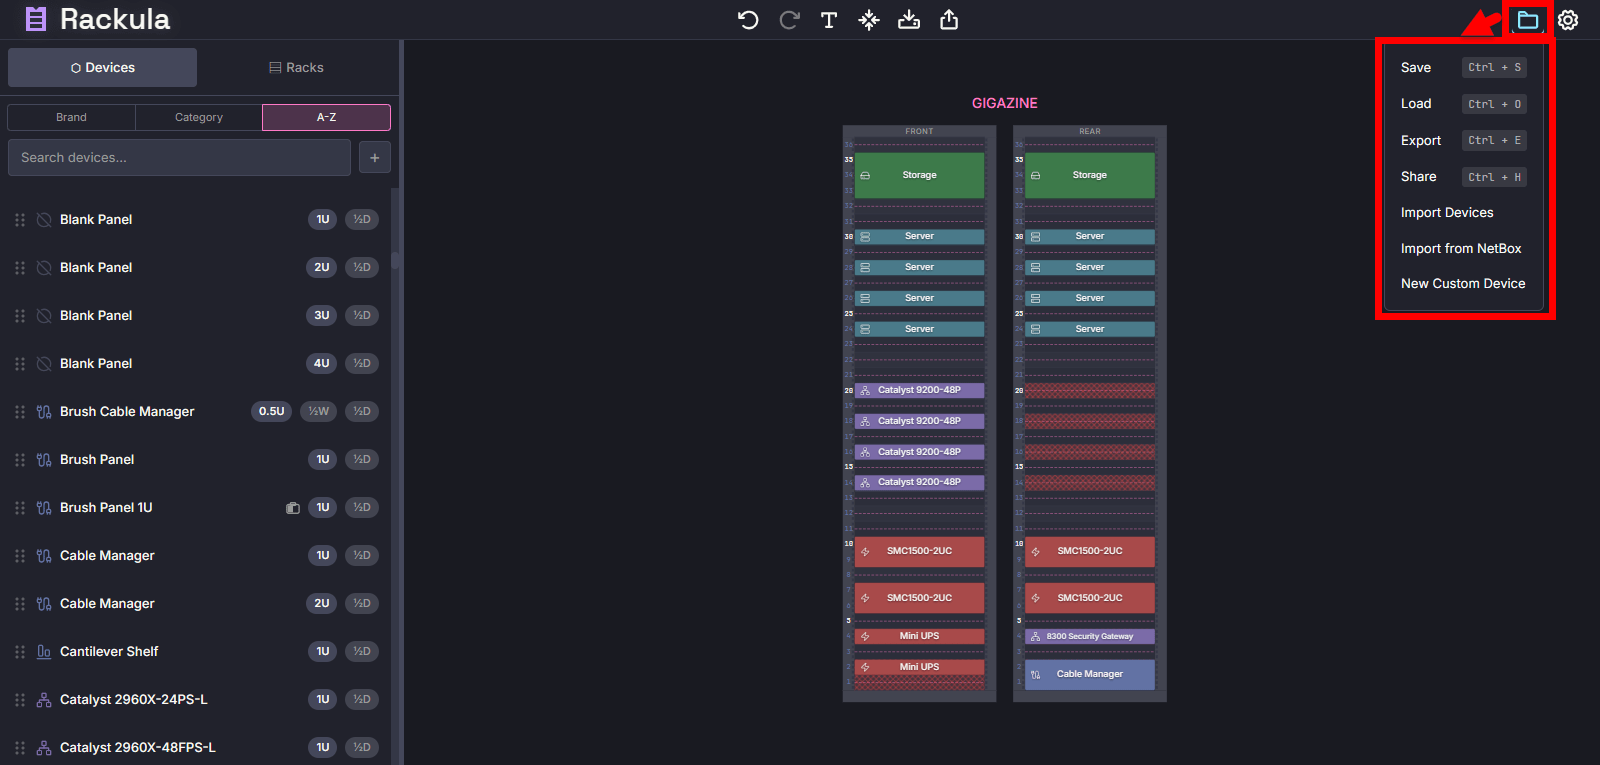
Click the folder icon in the upper right corner of the screen to save and load the rack you created.
・Save : Save the edited rack as a Zip file
・Load : Load a saved Zip file
・Export : (same function as the 'Export' icon at the top of the screen)
・Share : (same function as the 'Share' icon at the top of the screen)
・Import Device : Import a custom device
・Import from NetBox : Import from
・New Custom Device : Create a new custom device
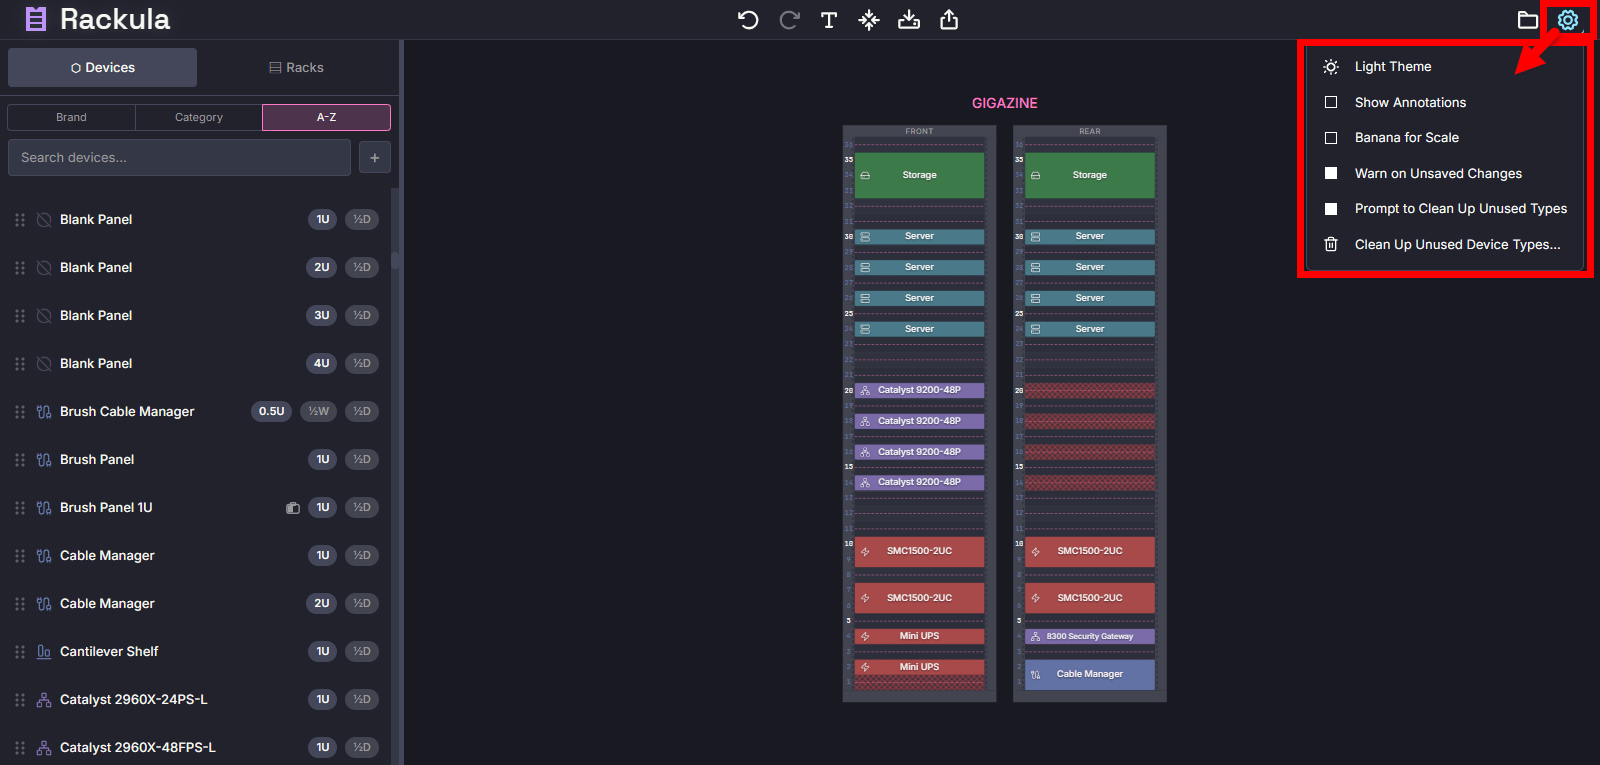
You can change various settings by clicking the gear icon in the top right corner of the screen.
・Theme : Switch between light and dark themes
・Show Annotation : Toggle annotation visibility
・Banana for Scale : Show/hide bananas to get a sense of size
・Warn on Unsaved Changes : Warn if there are unsaved changes
・Prompt to Clean Up Unused Types : Confirm whether to clean up unused device types
Clean Up Unused Device Types : Clean up unused device types
By the way, this is what a banana looks like.
◆Self-hosting
Rackula can be self-hosted, and the official recommendation is to run it on Docker.
[code]
# Download docker-compose.yml
mkdir rackula && cd rackula
curl -fsSL https://raw.githubusercontent.com/RackulaLives/Rackula/main/deploy/docker-compose.persist.yml -o docker-compose.yml
# Maintaining the data directory
mkdir -p data && sudo chown 1001:1001 data
# Start Rackula
docker compose up -d
[/code]
Summary
Rackula makes it easy to design server rack layouts and gives you a sense of how your server equipment will actually be arranged. It also has a wide range of functions, so if you're interested in server rack layout design, be sure to give it a try.
Related Posts:

in Software, Web Service, Review, Posted by log1c_sh