JR East has officially released commercial railway driving experience software ``JR East Train Simulator'' for home use, so I tried playing it.
JR East's official commercial
JR East Train Simulator: JR East
https://www.jreast.co.jp/simulator/
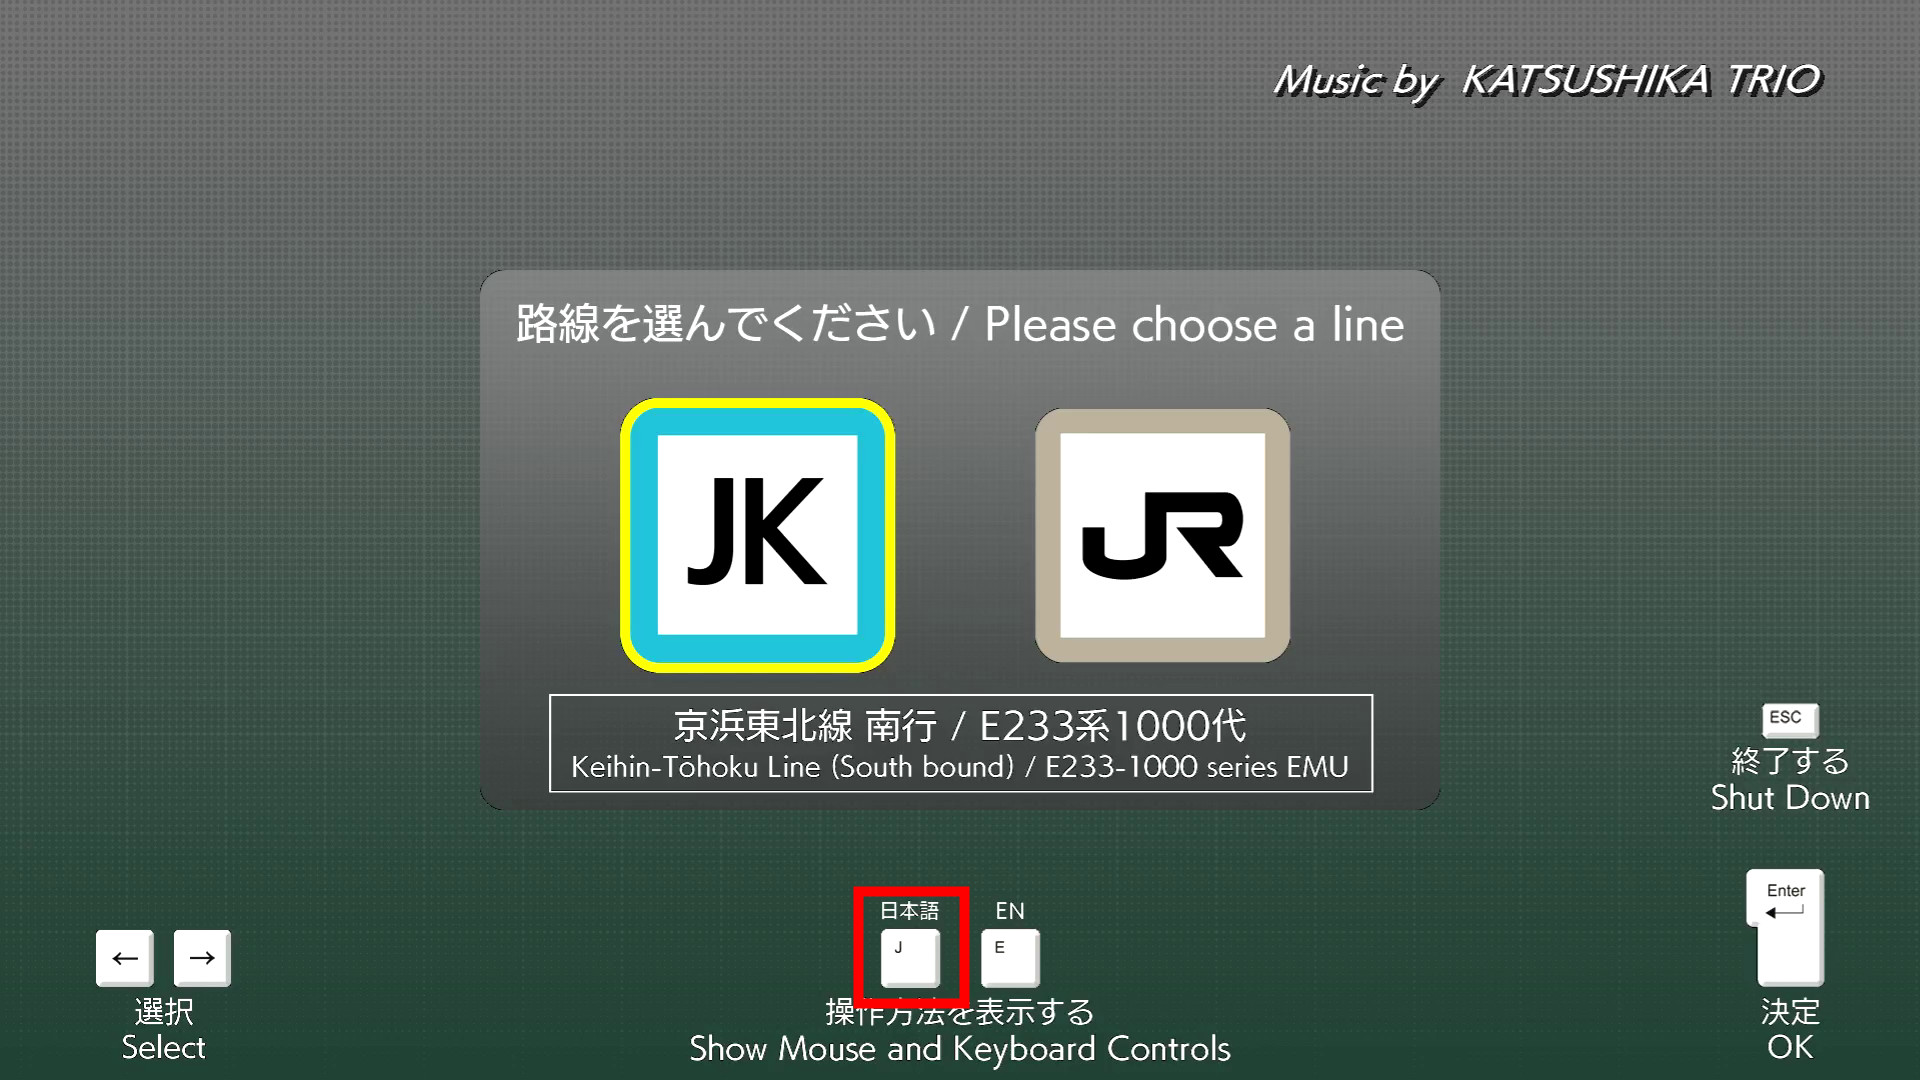
When you start JR East Train Simulator, it looks like this. At the time of article creation, the early adopter version is only available on Steam, and you can only play on two routes: the southbound Keihin-Tohoku Line and the upbound Hachiko Line.
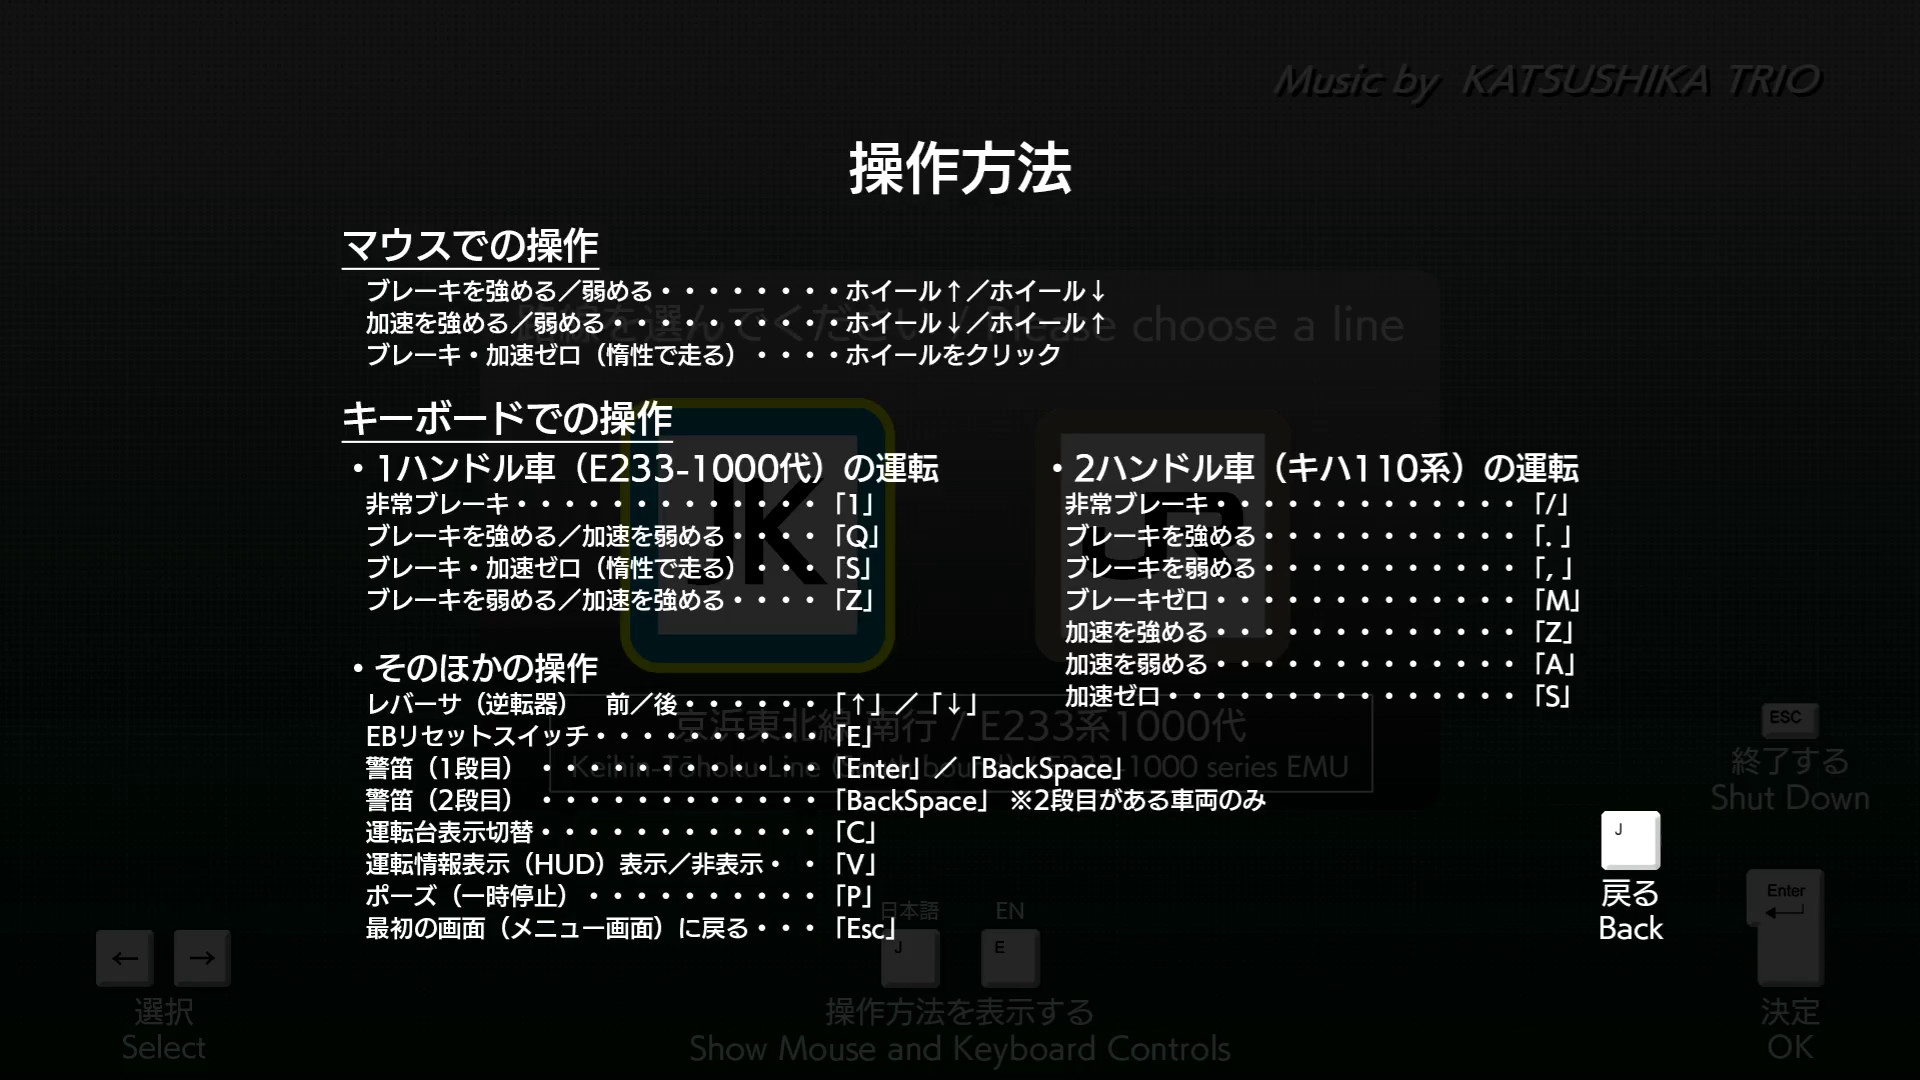
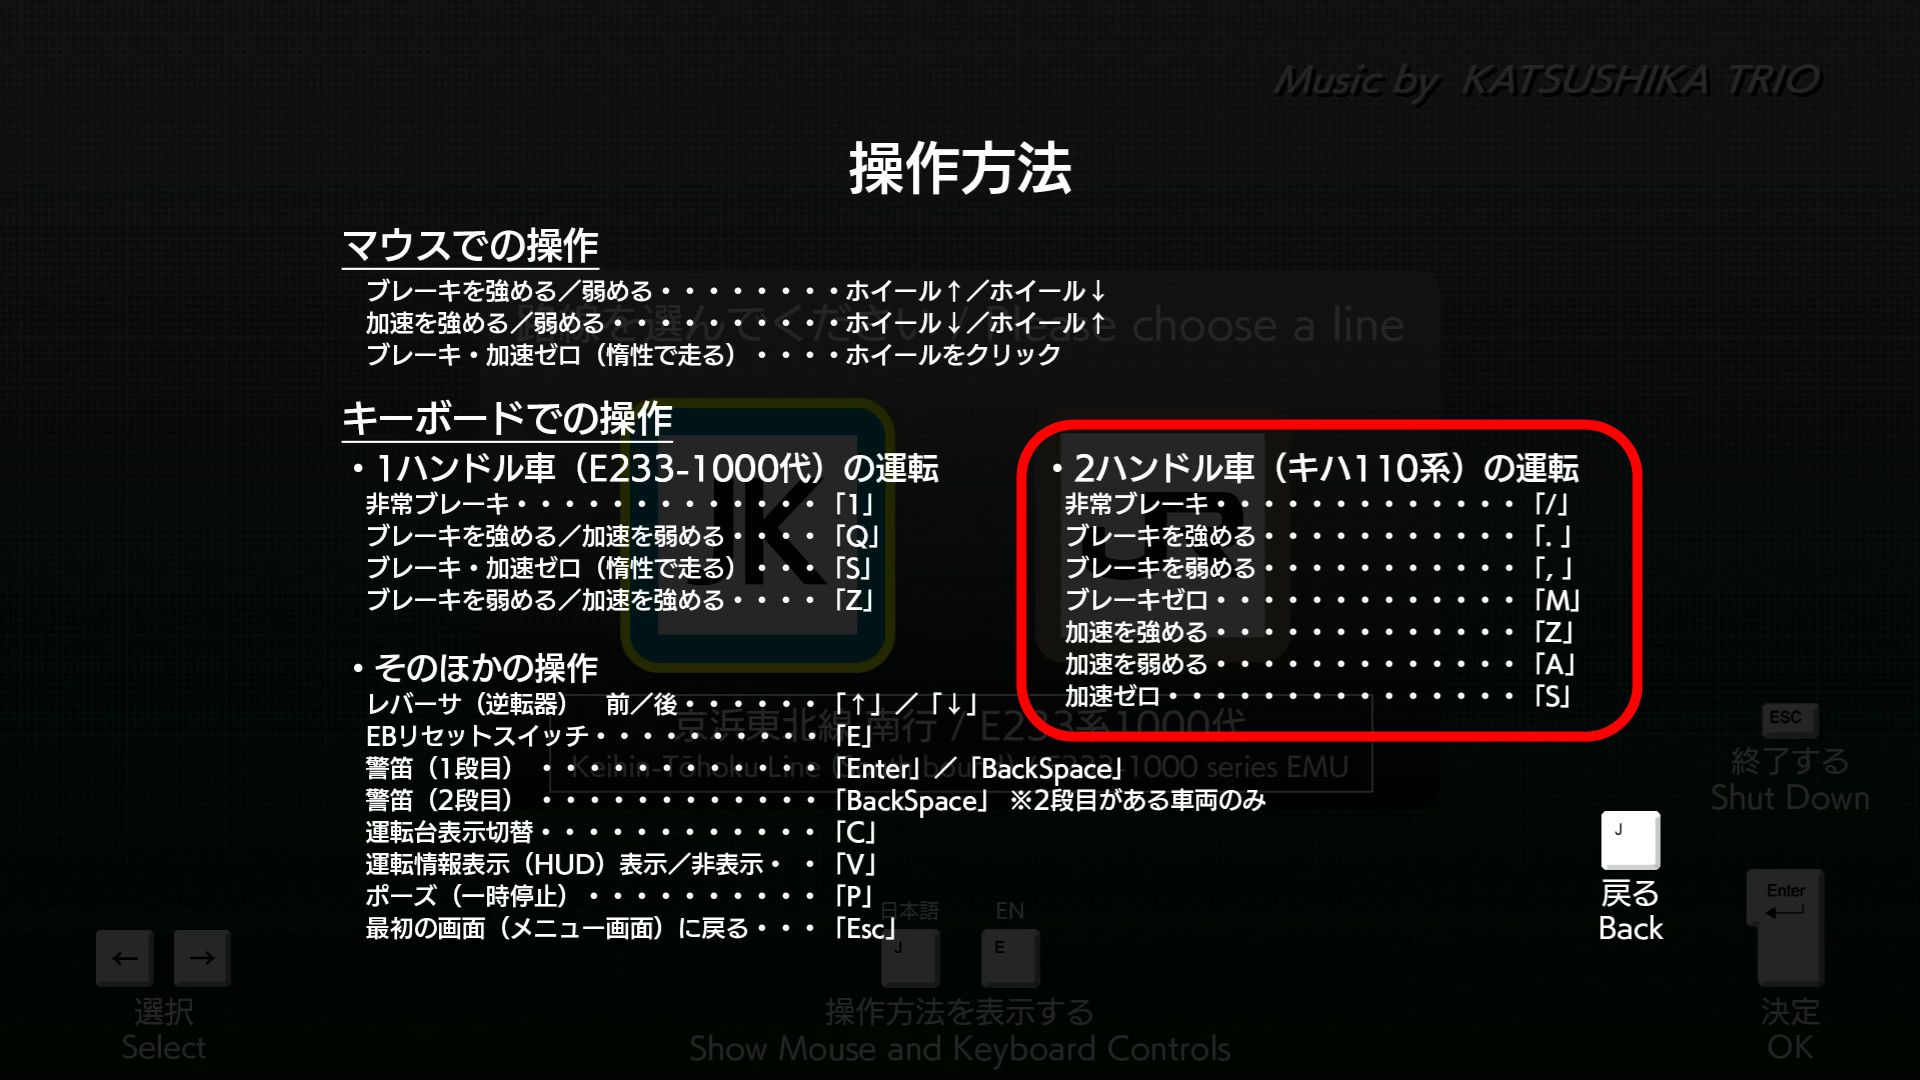
The operation is like this. Can be operated using mouse wheel or keyboard. Since it is an early adopter version, there is no key configuration function, so you will need to remember this operation method well before playing.
First, let's drive on the Keihin Tohoku Line.
There are 3 levels of difficulty: beginner, intermediate, and advanced. The presence or absence of an operation guide, the presence or absence of driving information, and the permissible range for stopping a train at a station vary depending on the difficulty level. This time I chose Beginner.
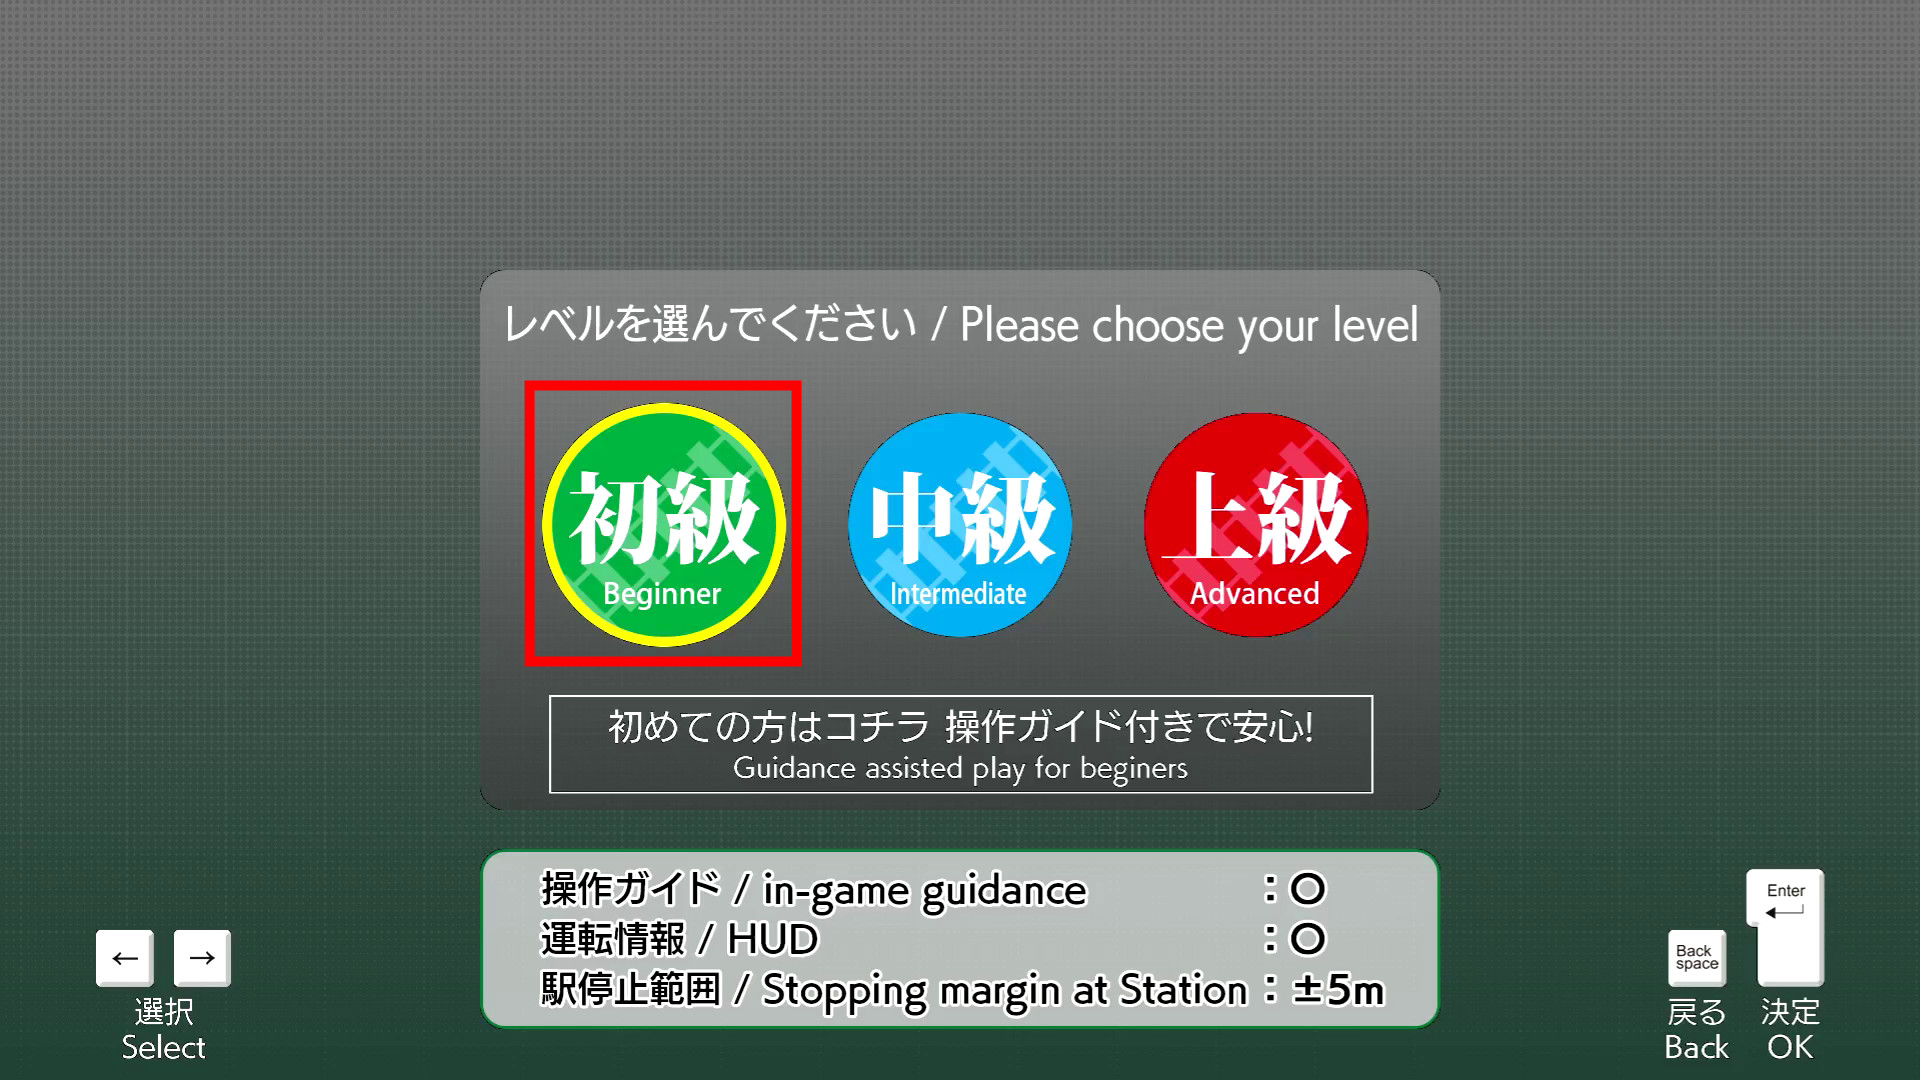
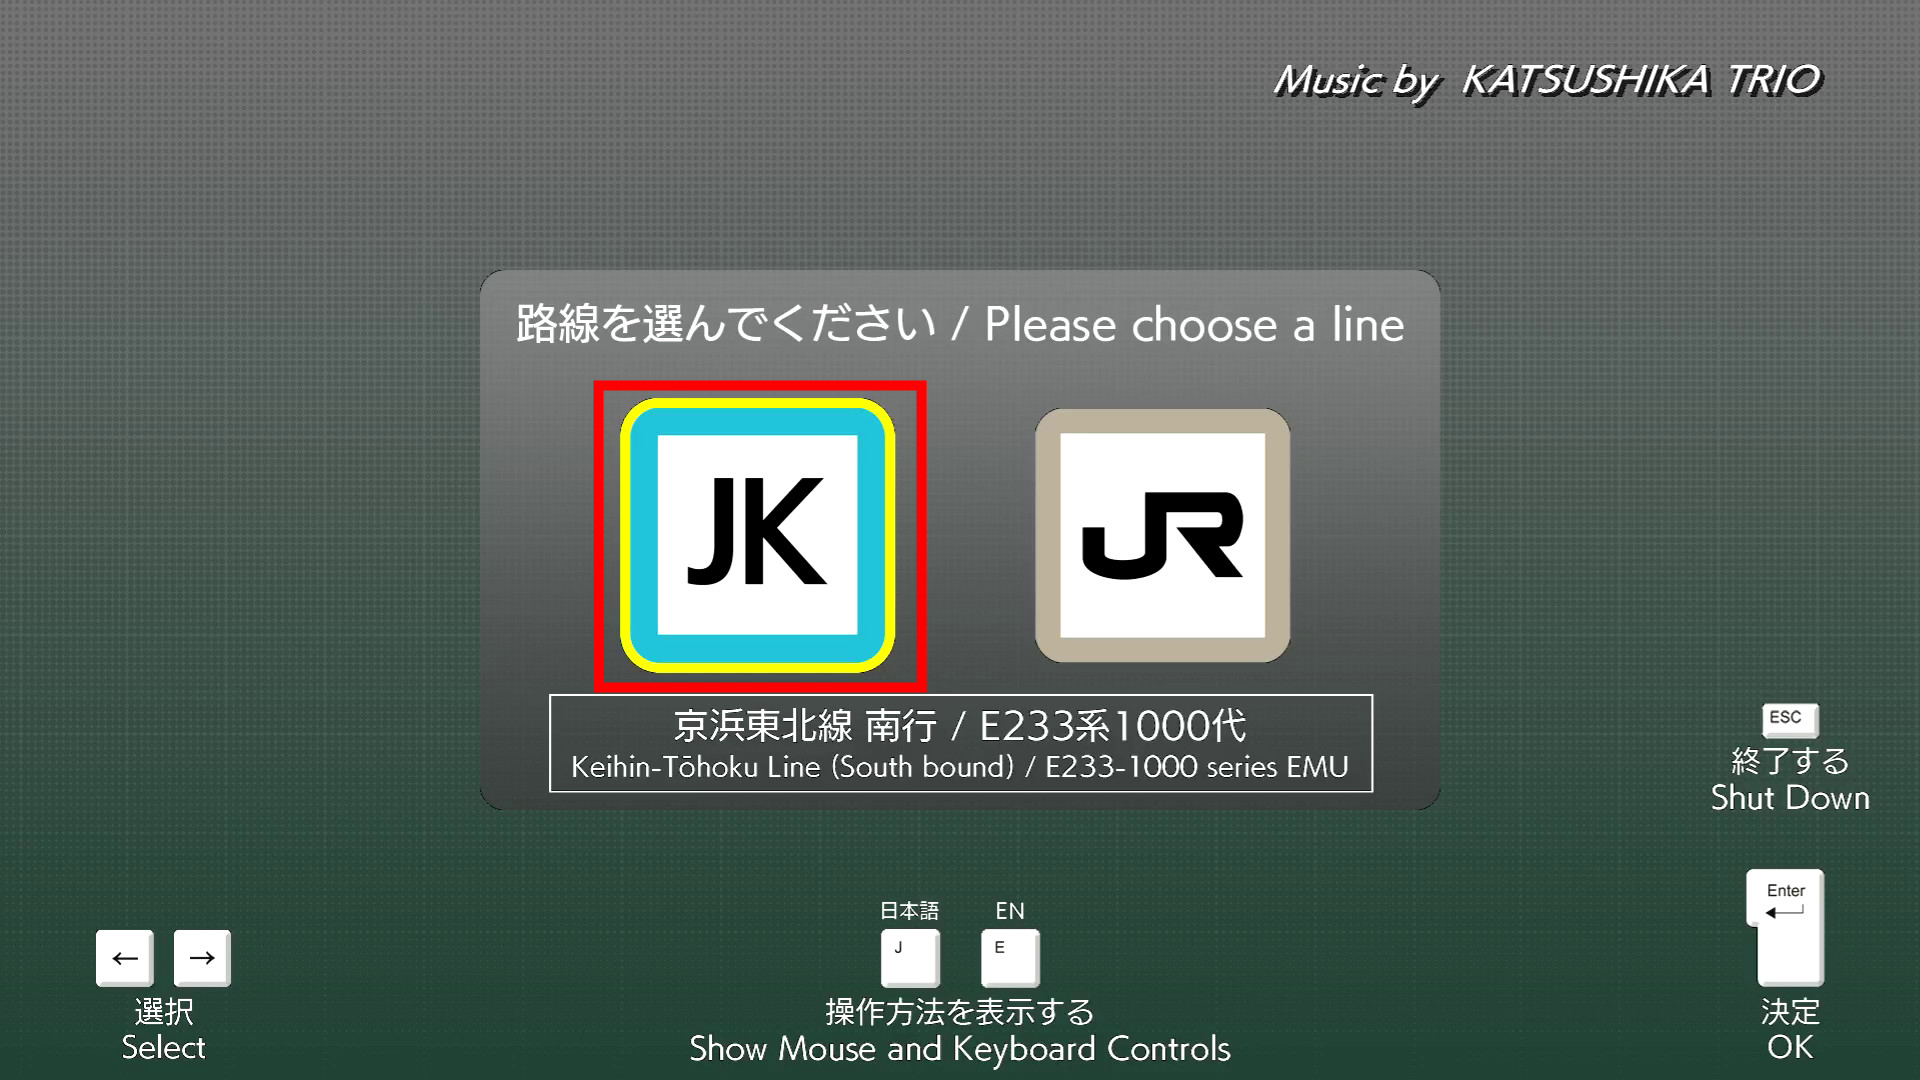
Select 'Start/OK'.

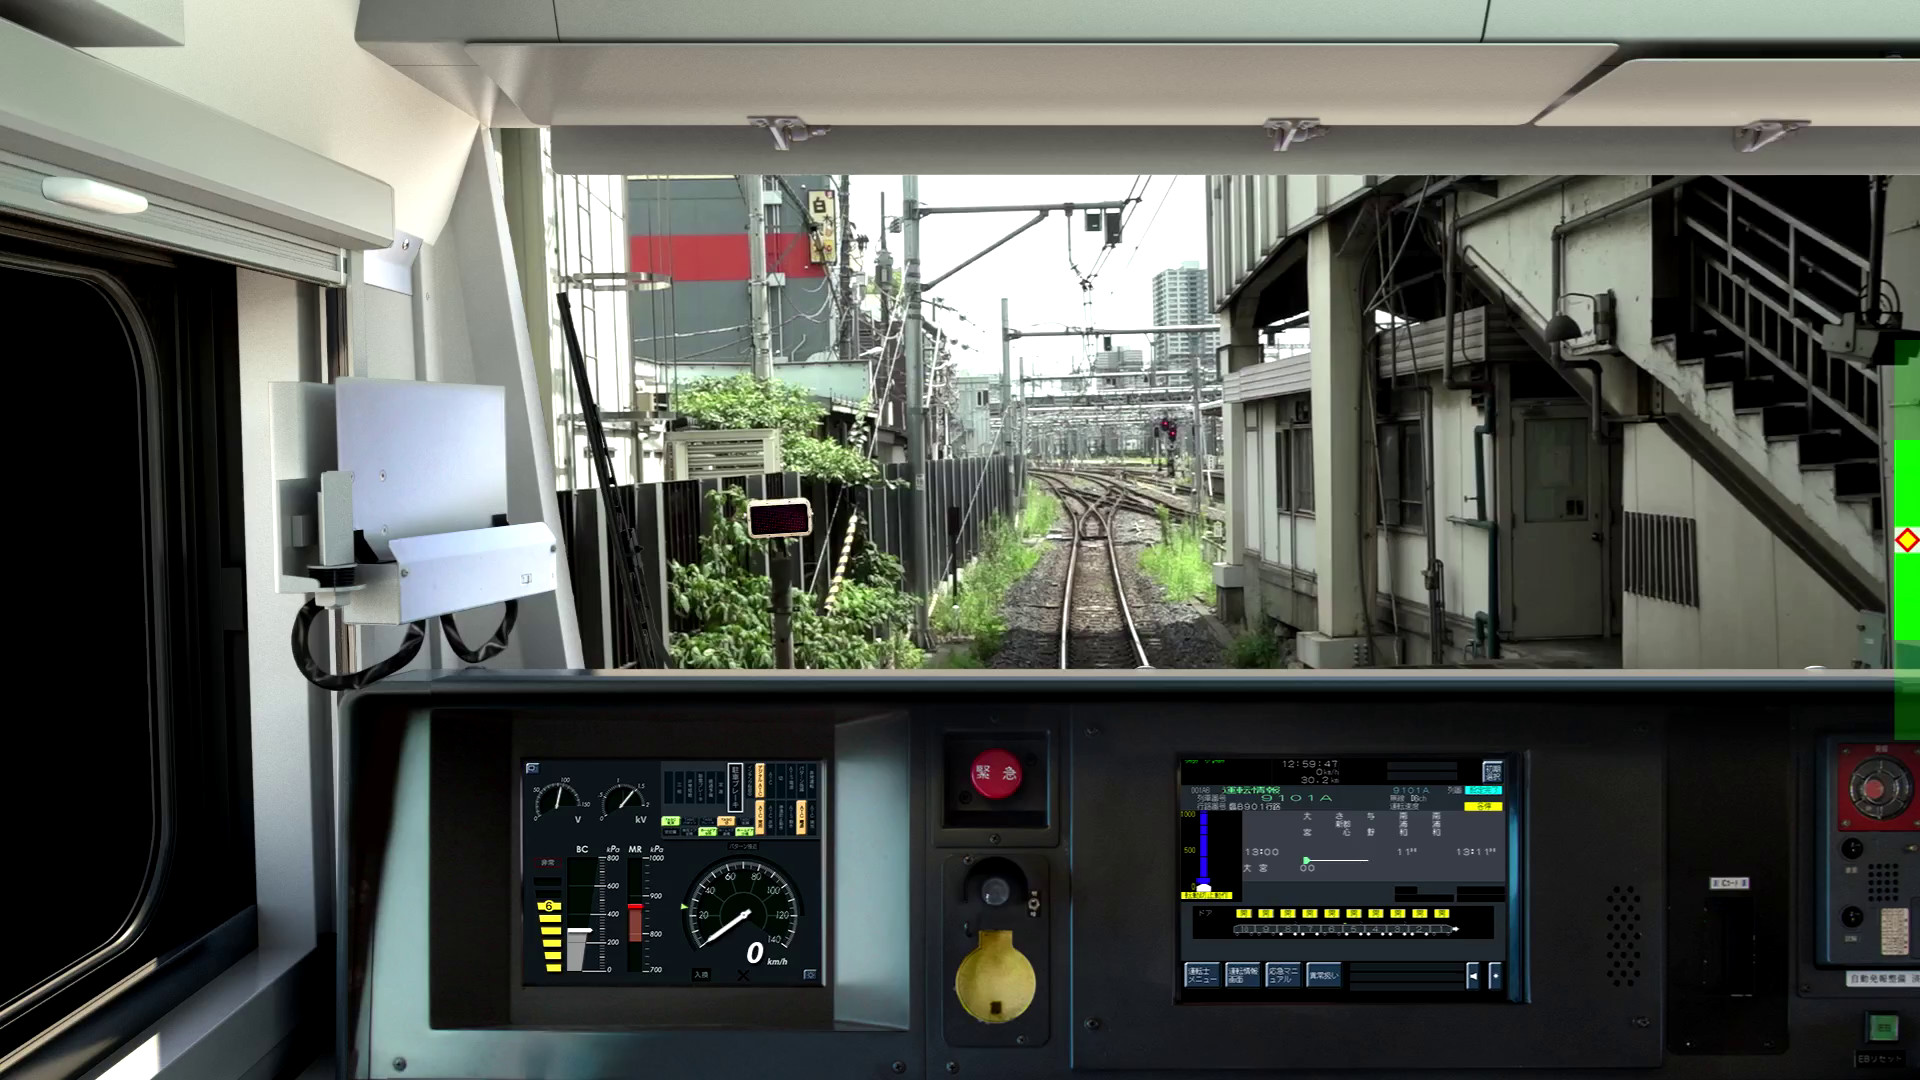
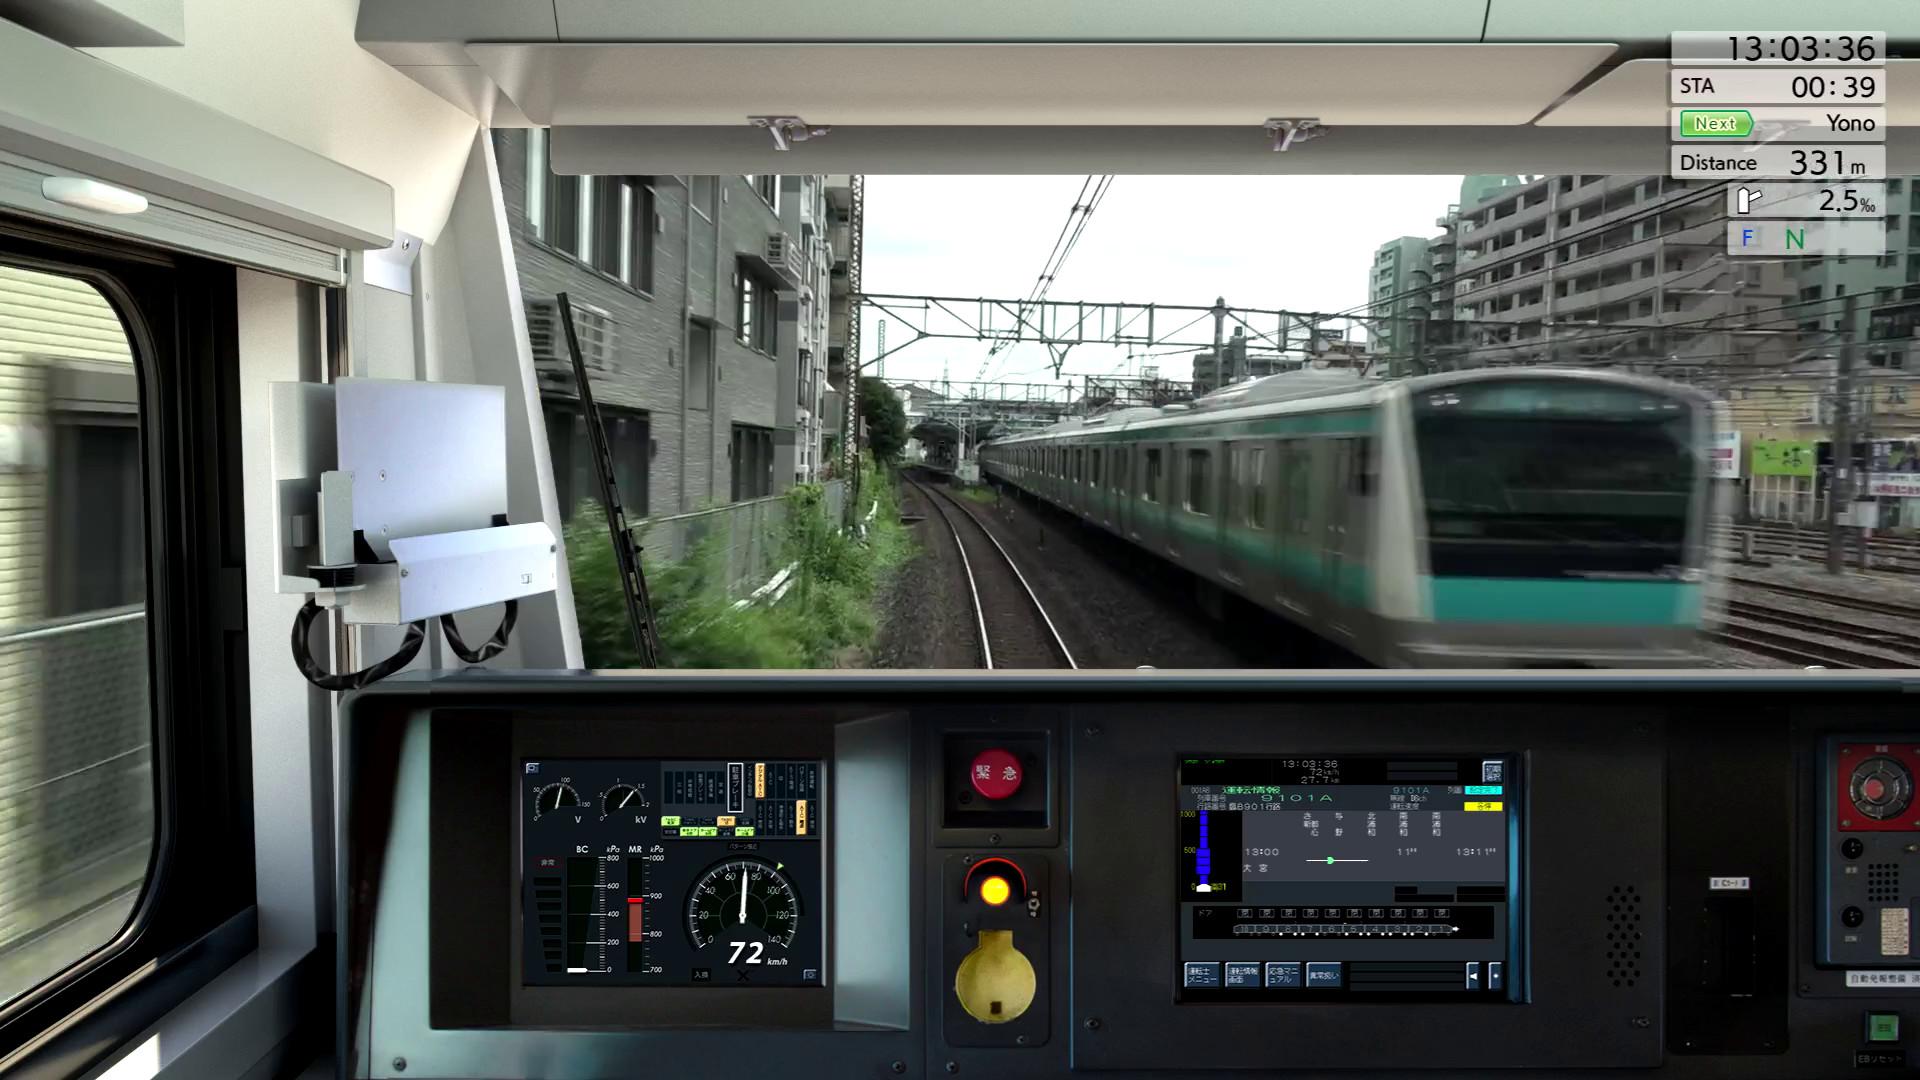
The following movie is actually the JR East train simulator running on the Keihin Tohoku Line between Omiya and Saitama Shintoshin.
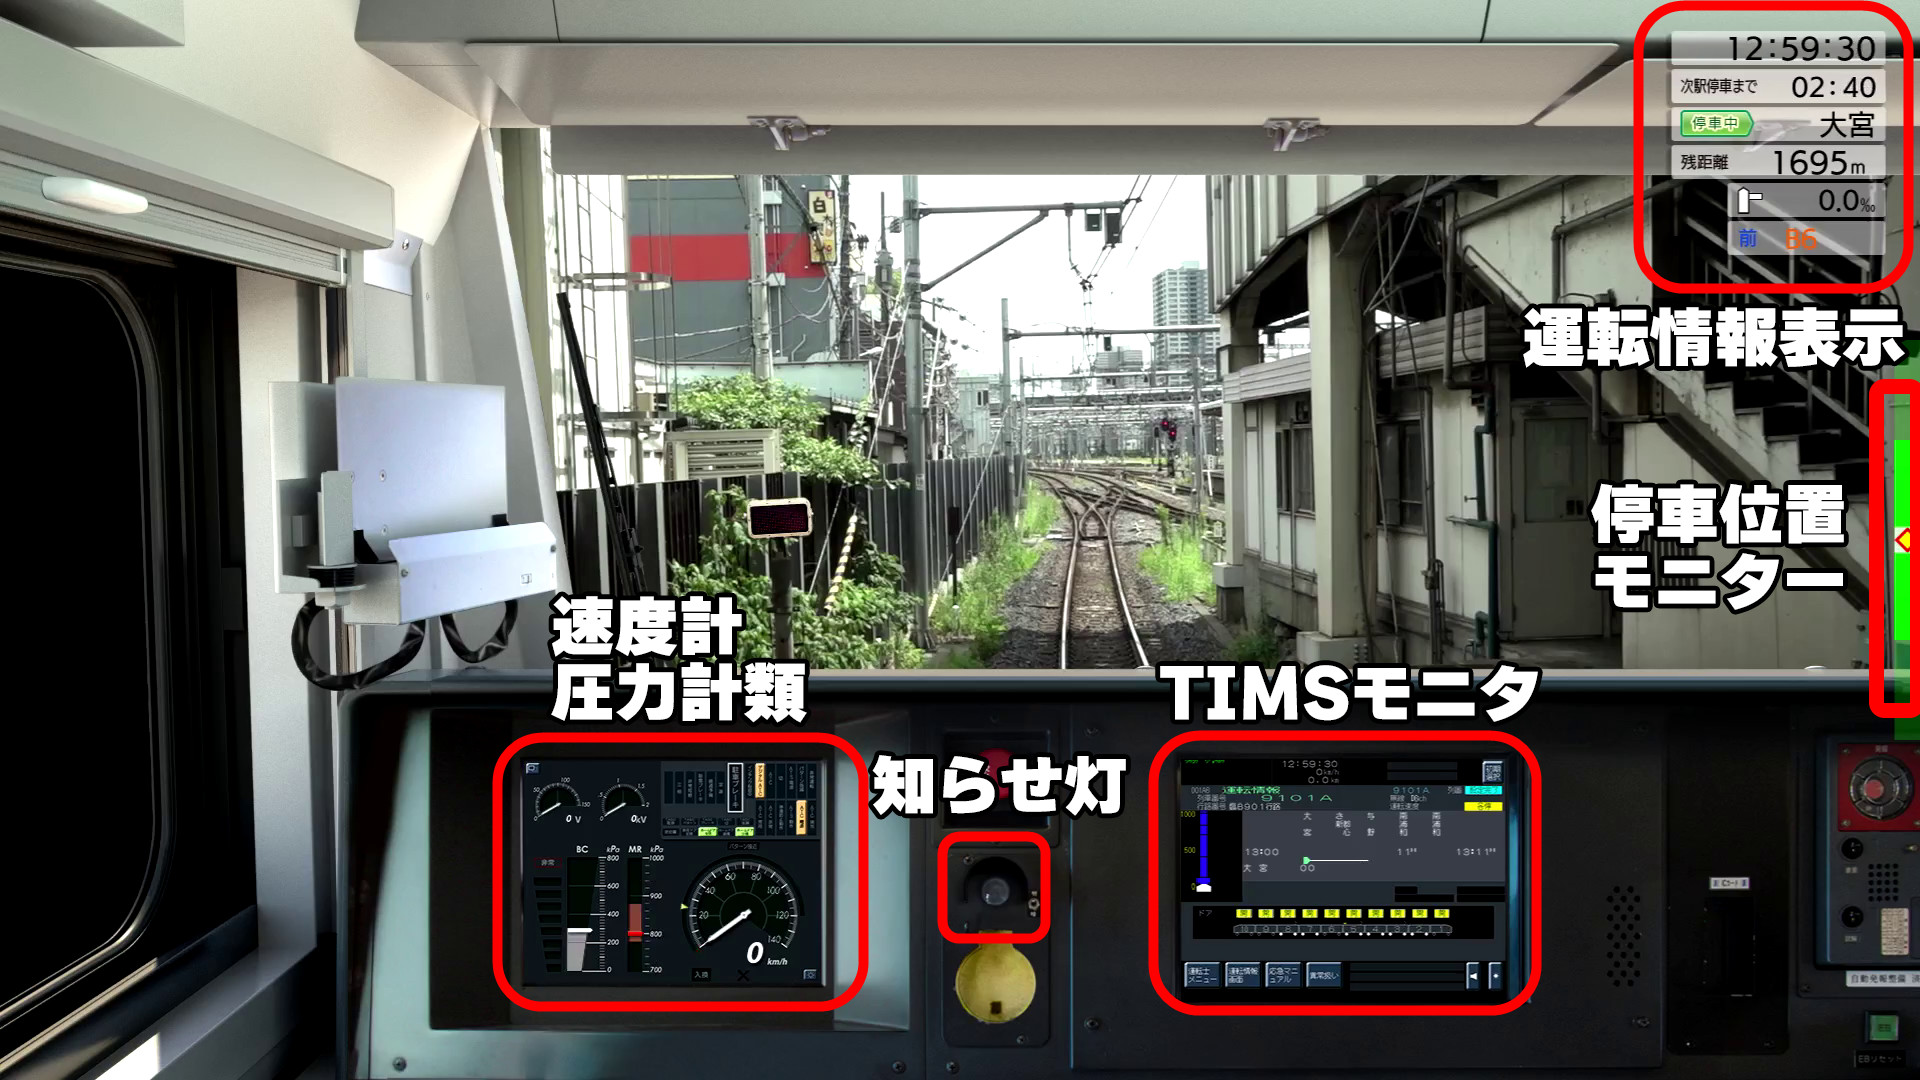
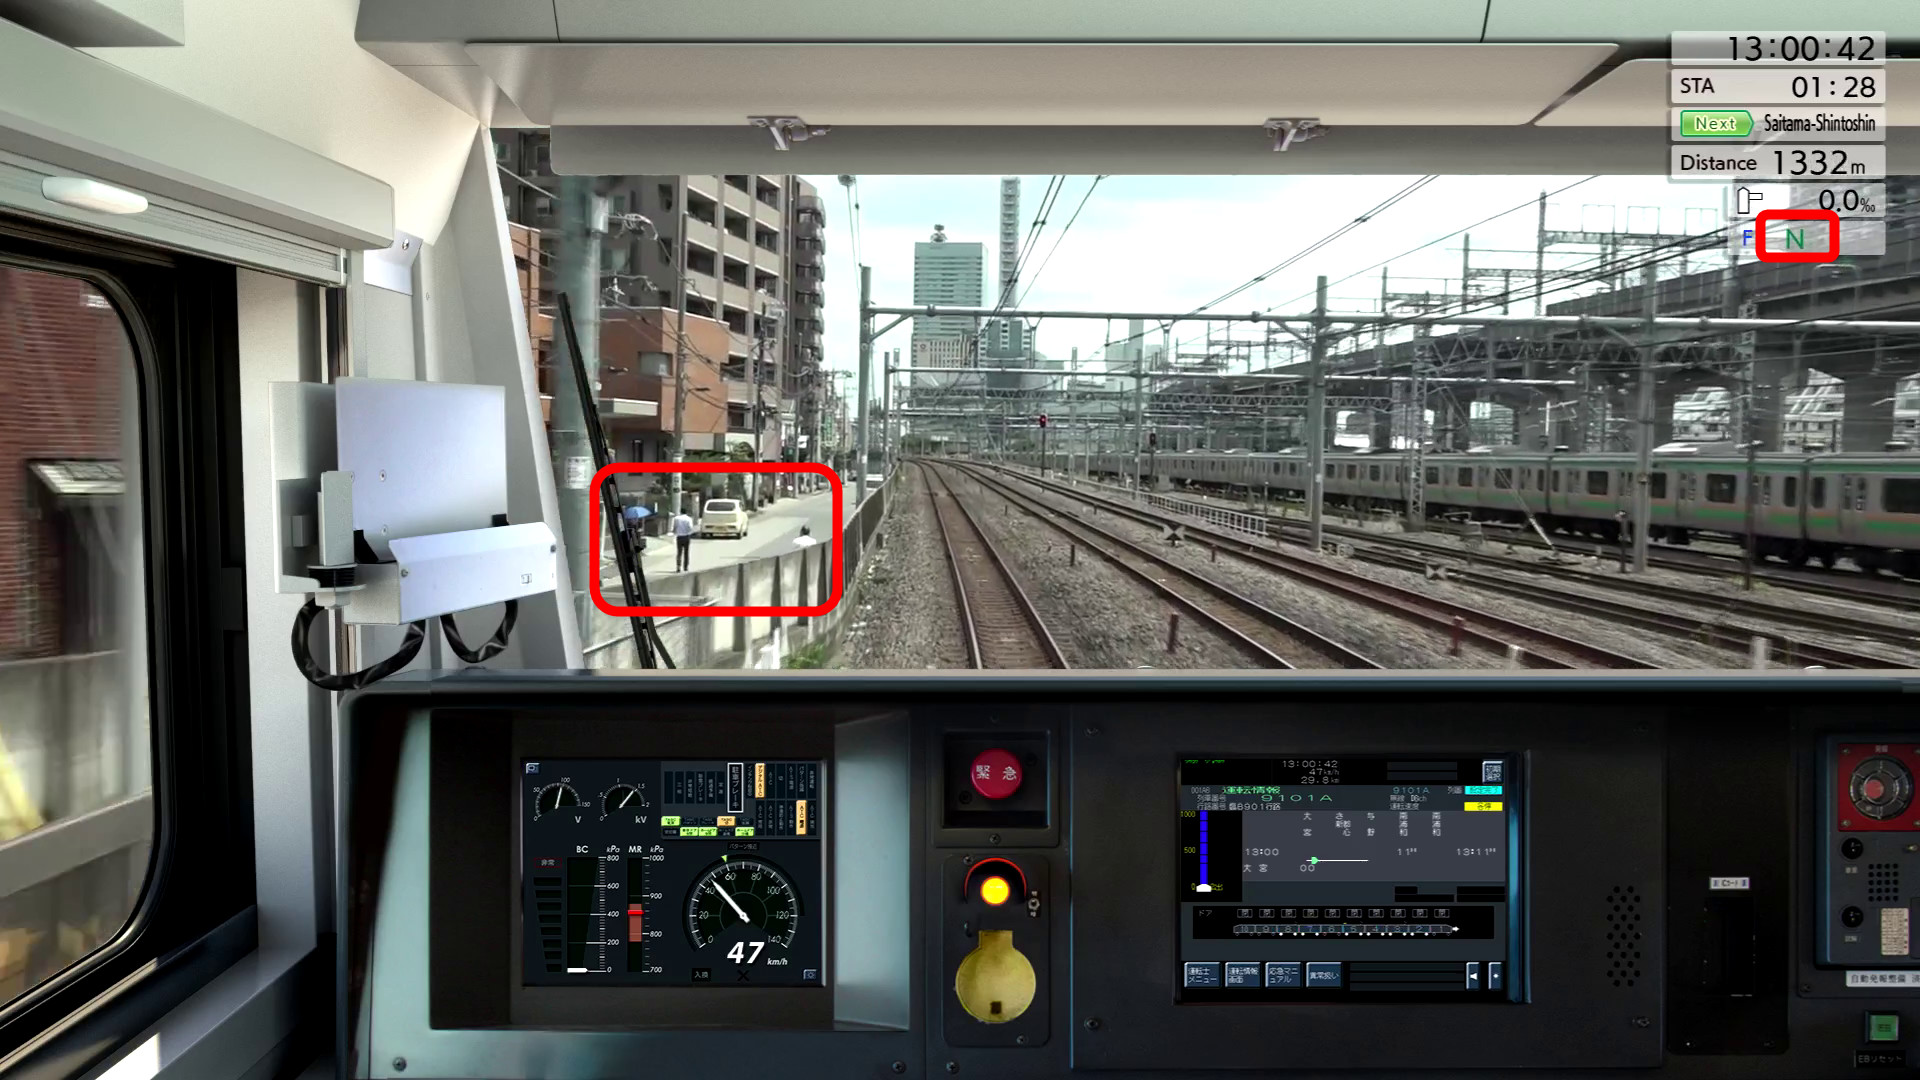
The Keihin Tohoku Line will run between Omiya and Minami Urawa. The information displayed in the driver's seat is as follows.
You can switch around the driver's seat by pressing the 'C' key. It looks like this when only the driver's cab is displayed.
The driver's cab display can also be turned off, so you can enjoy the view from the driver's seat. However, since the speedometer and warning lights will no longer be displayed, the difficulty of playing will increase considerably.
You can also switch the driving information display on the top right by pressing the 'V' key.
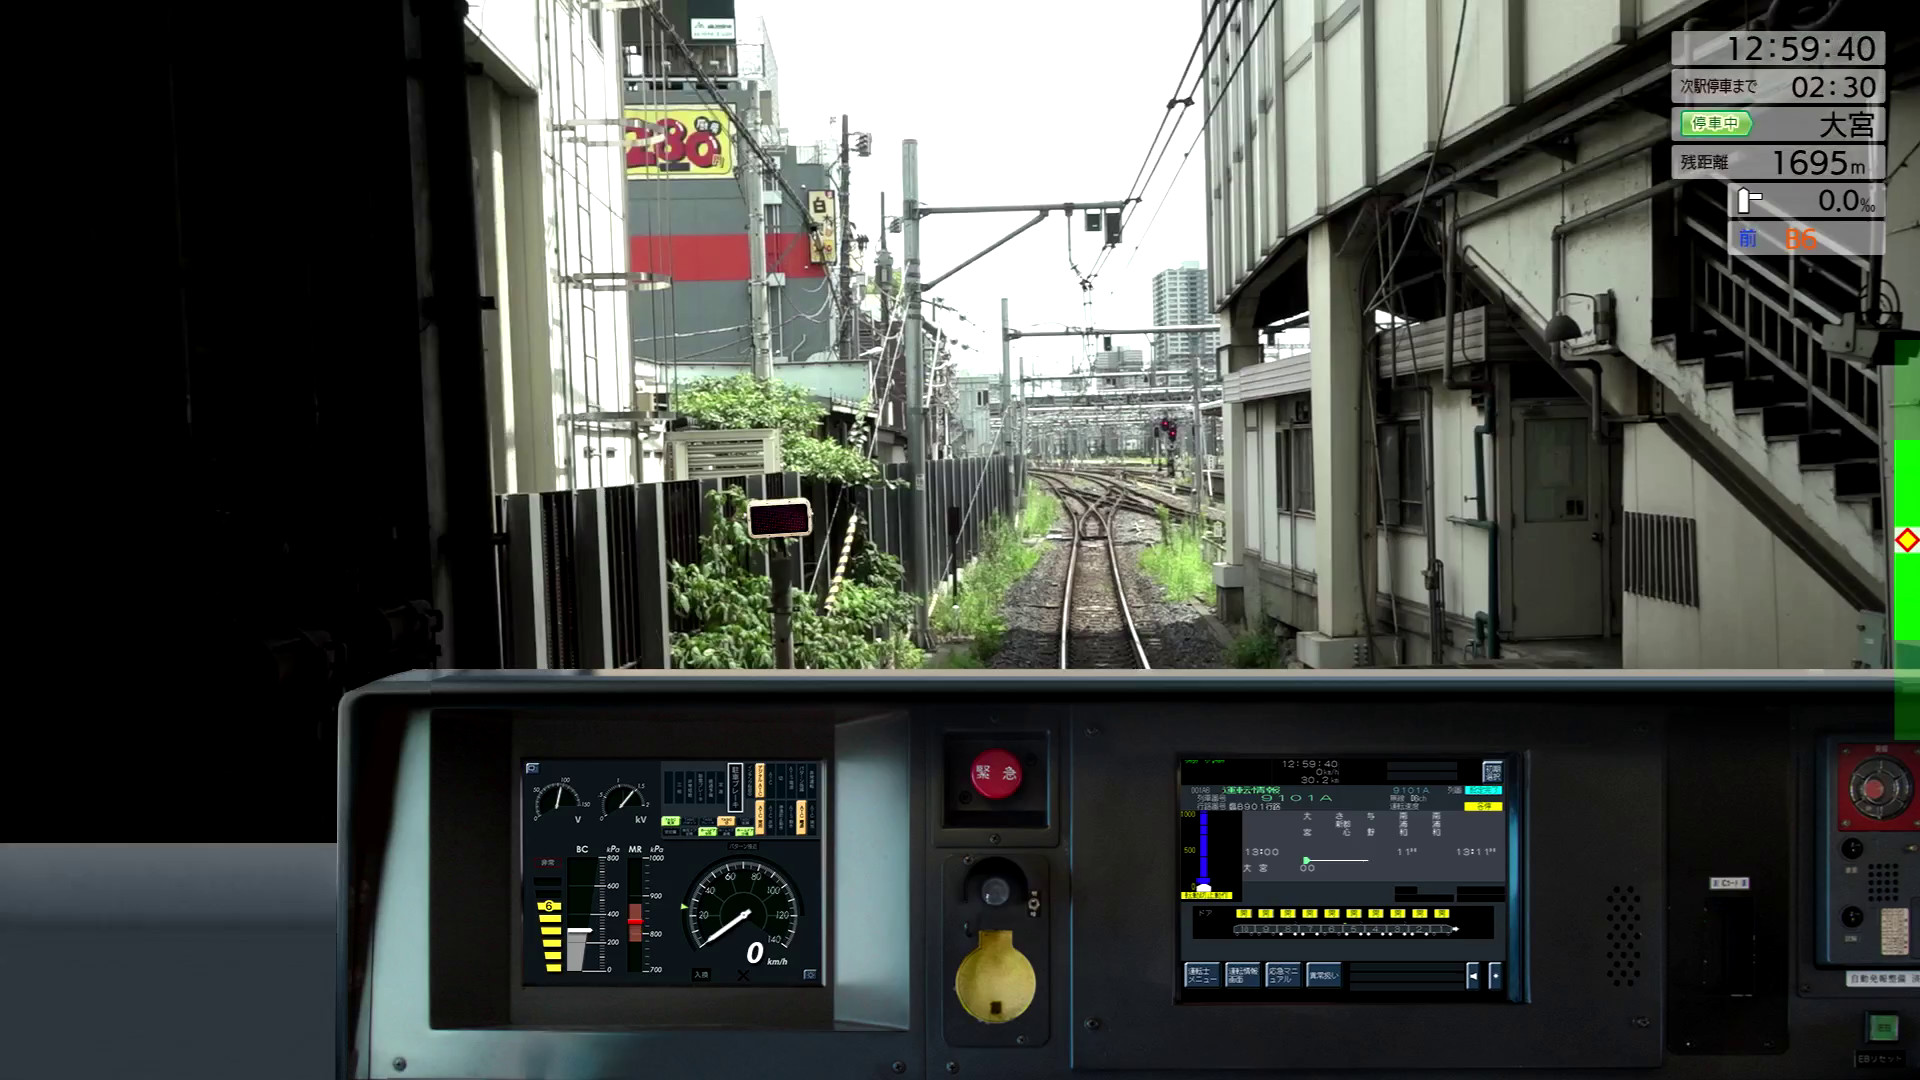
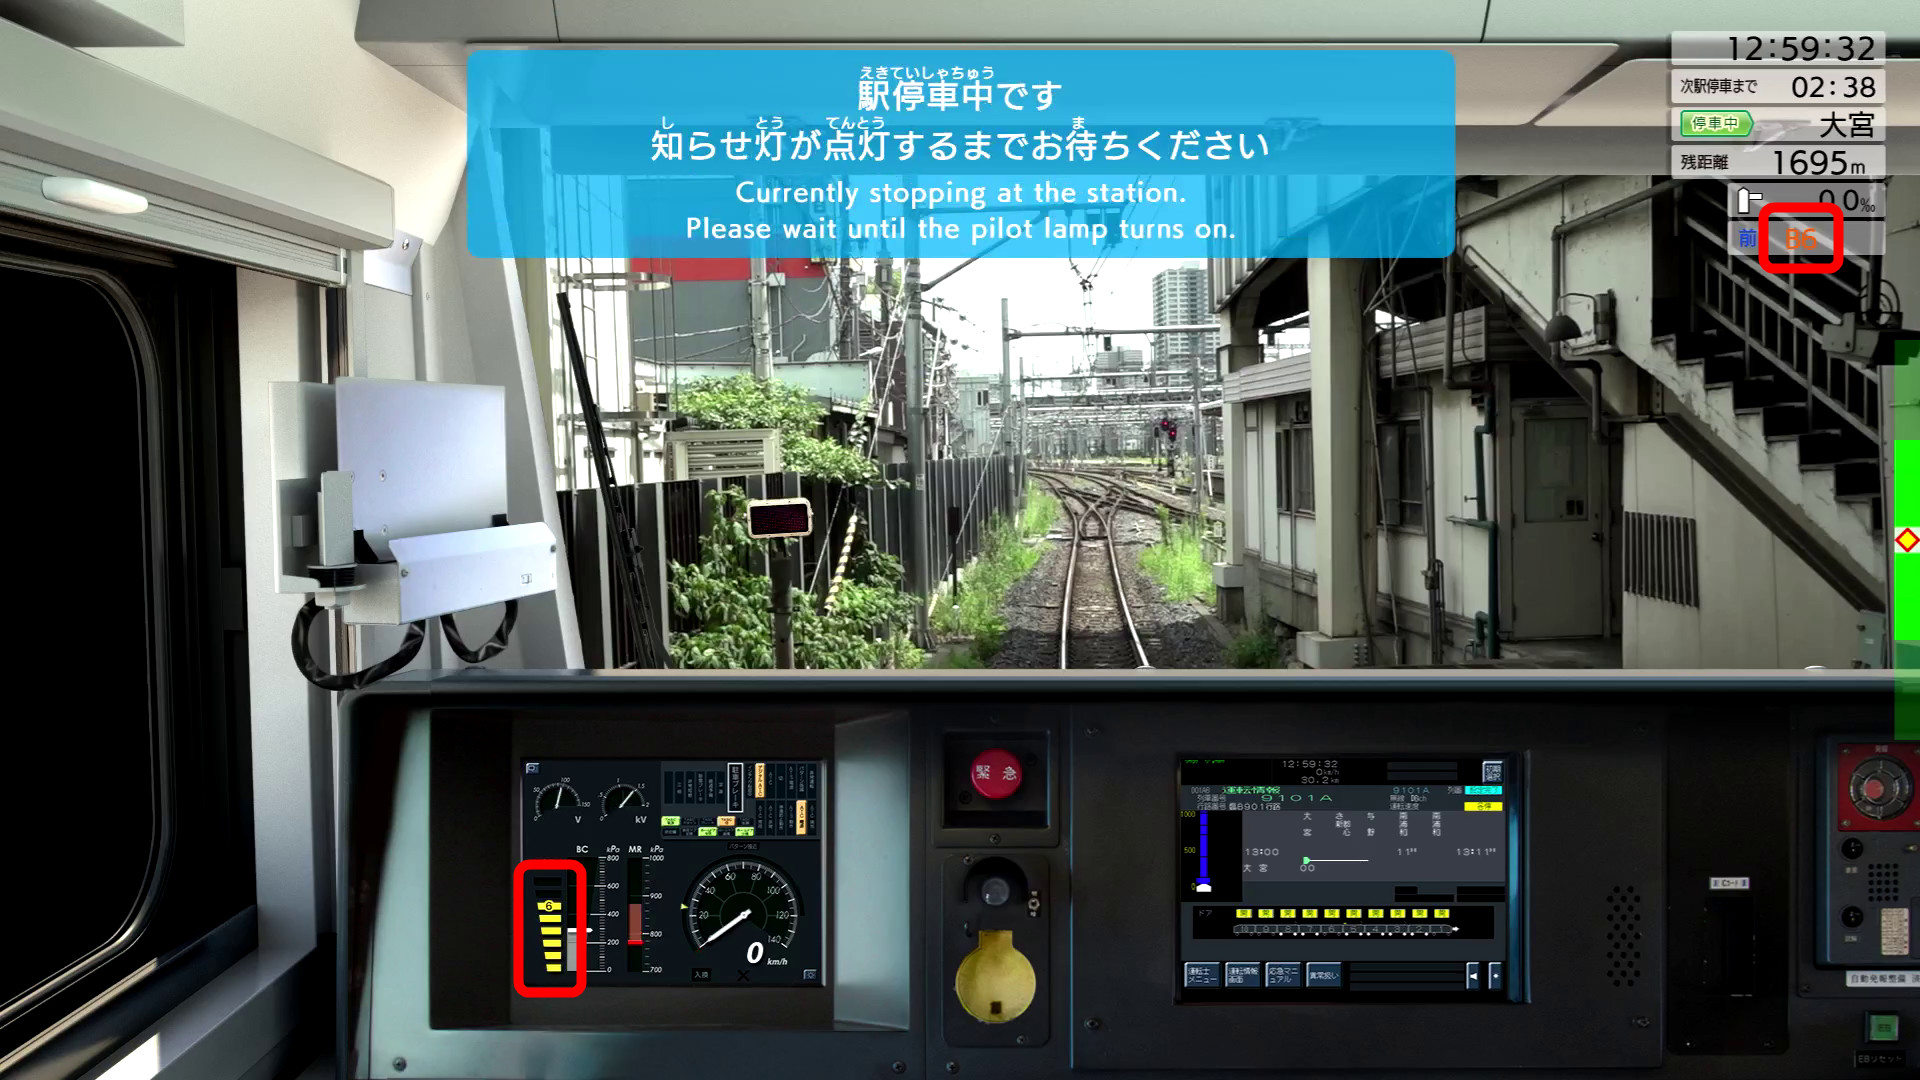
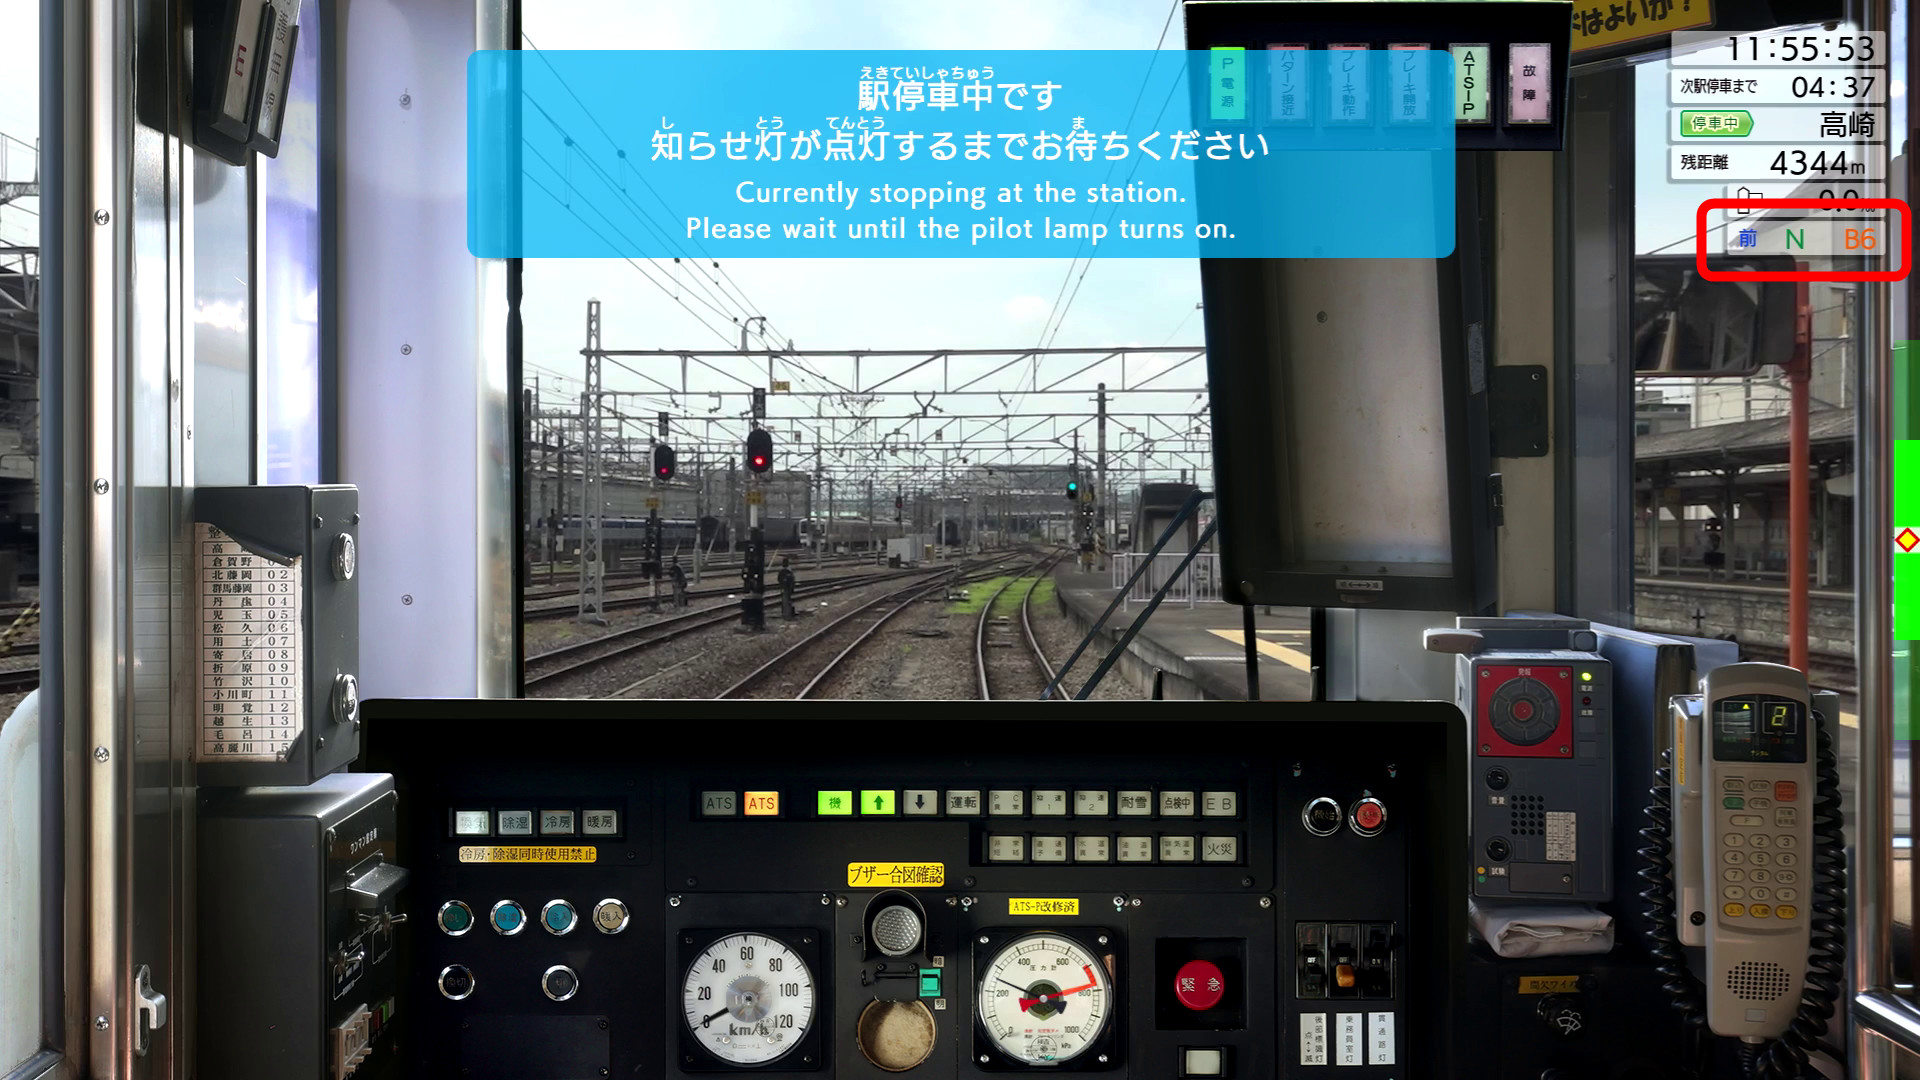
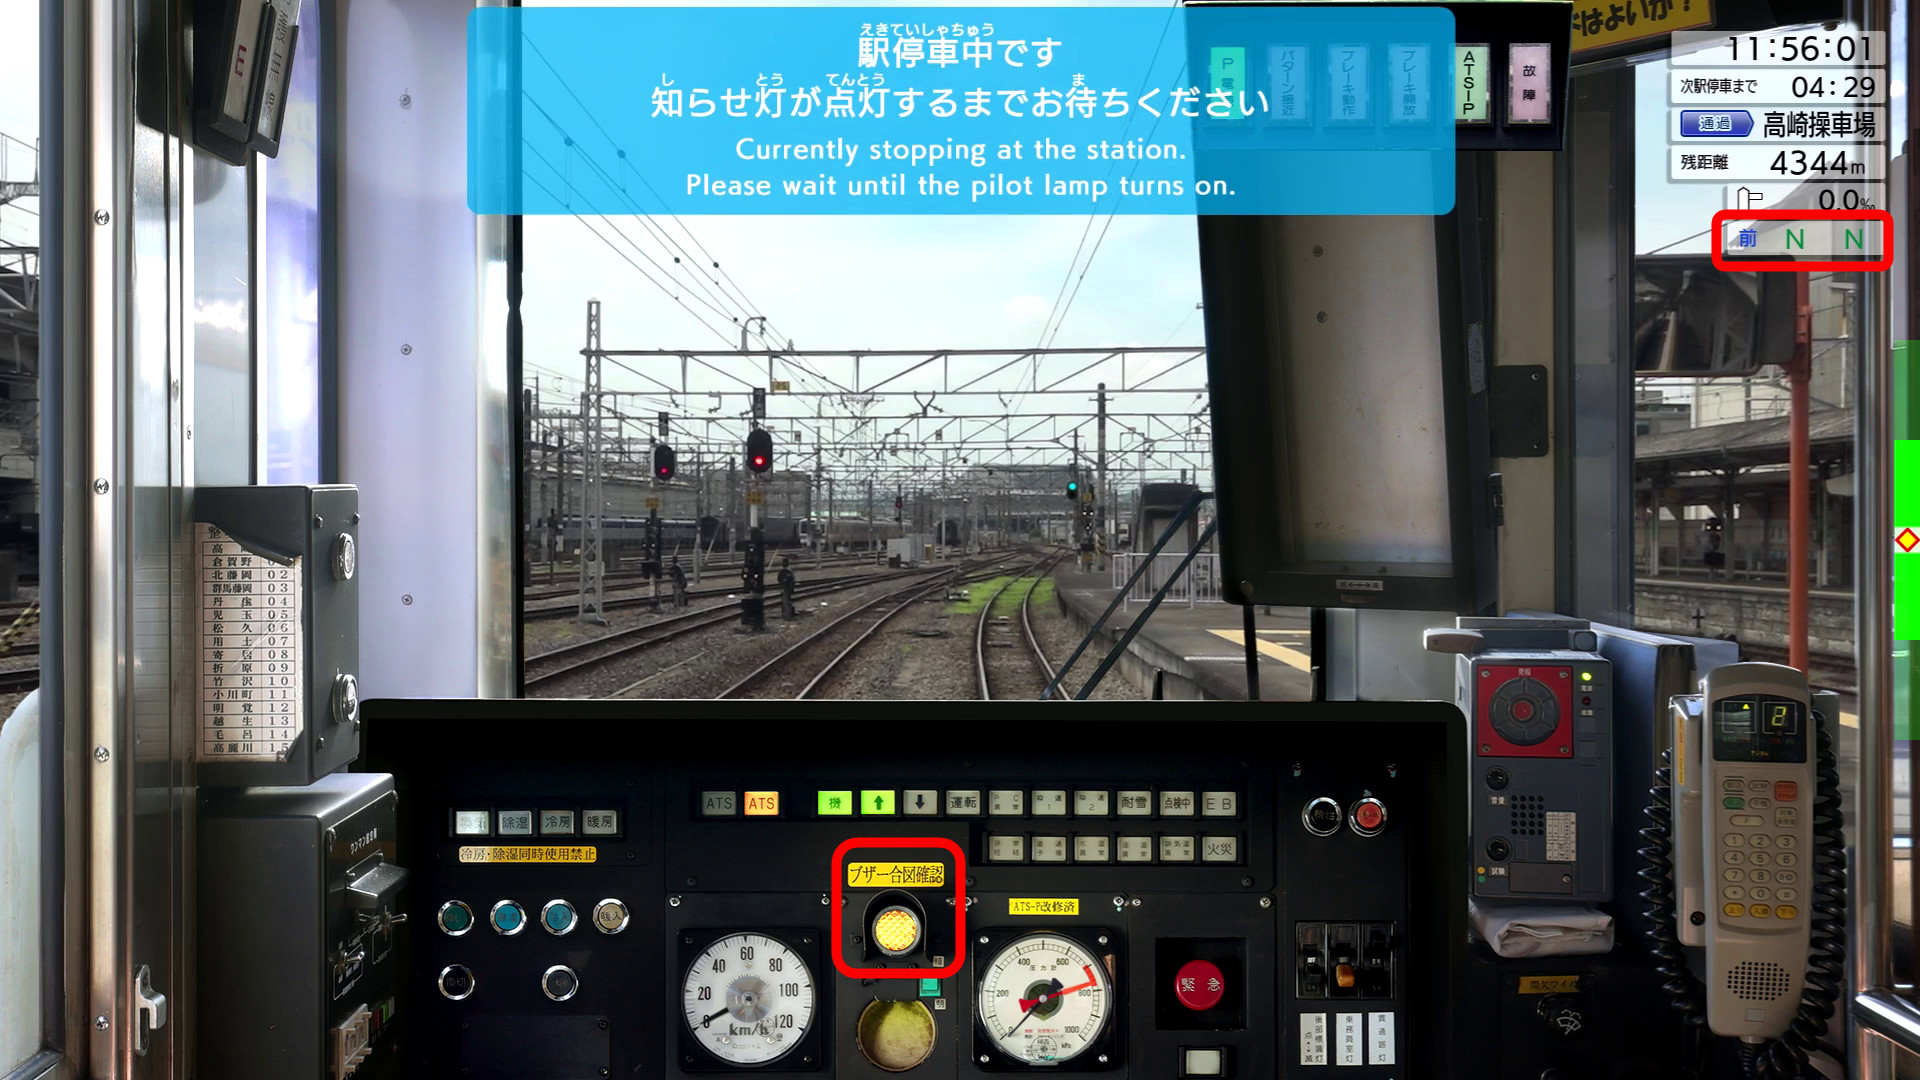
The train is stopping at the station. The buzzer sounds to notify you of the departure, but the station departure melody does not play. Since there are passengers on board, the brakes are applied, and the brake level is shown on the meter displayed to the left of the speedometer, and the brake level is also displayed on the driving information display at the top right of the screen. Since the mass control part that the driver actually operates is not displayed, it is important to look at the driver's cab and the driving information display properly in order to understand the level of braking and acceleration.
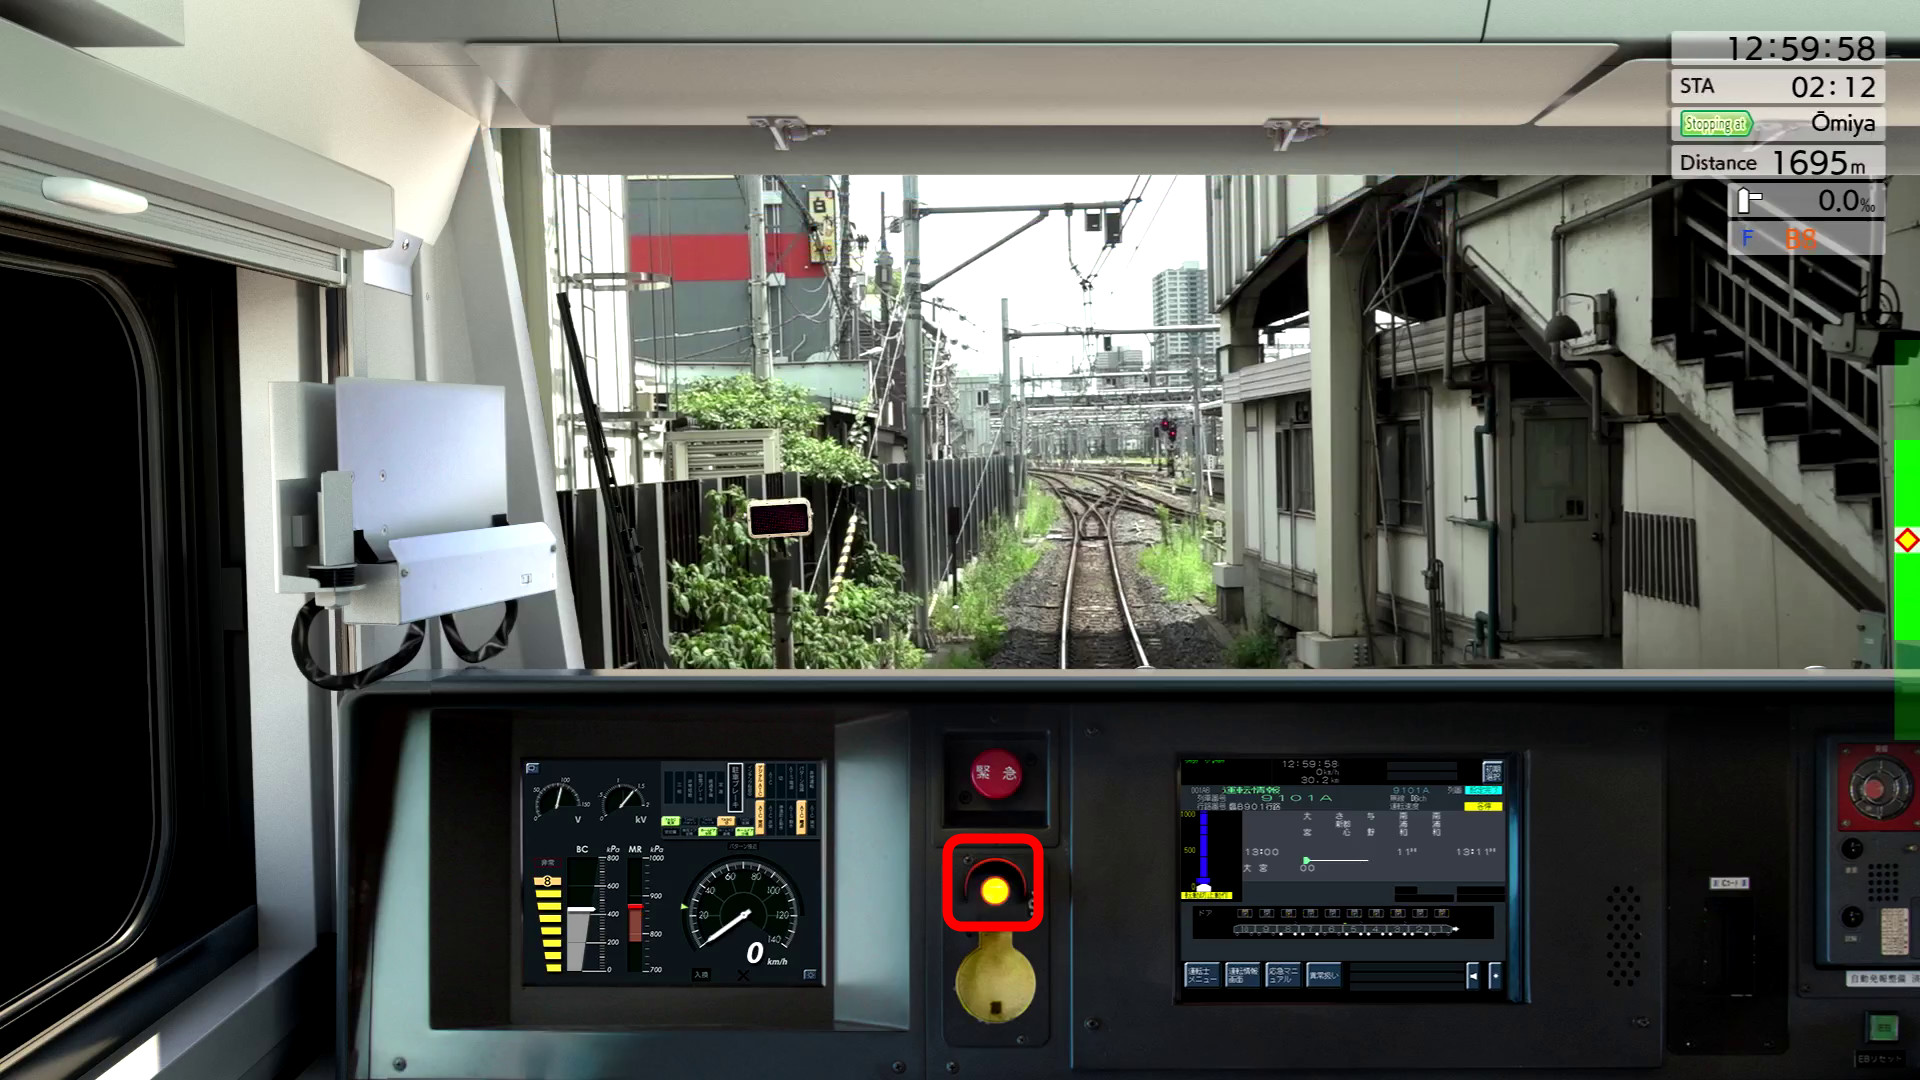
When the ride is over, you hear the sound of the door closing and the warning light turns on.
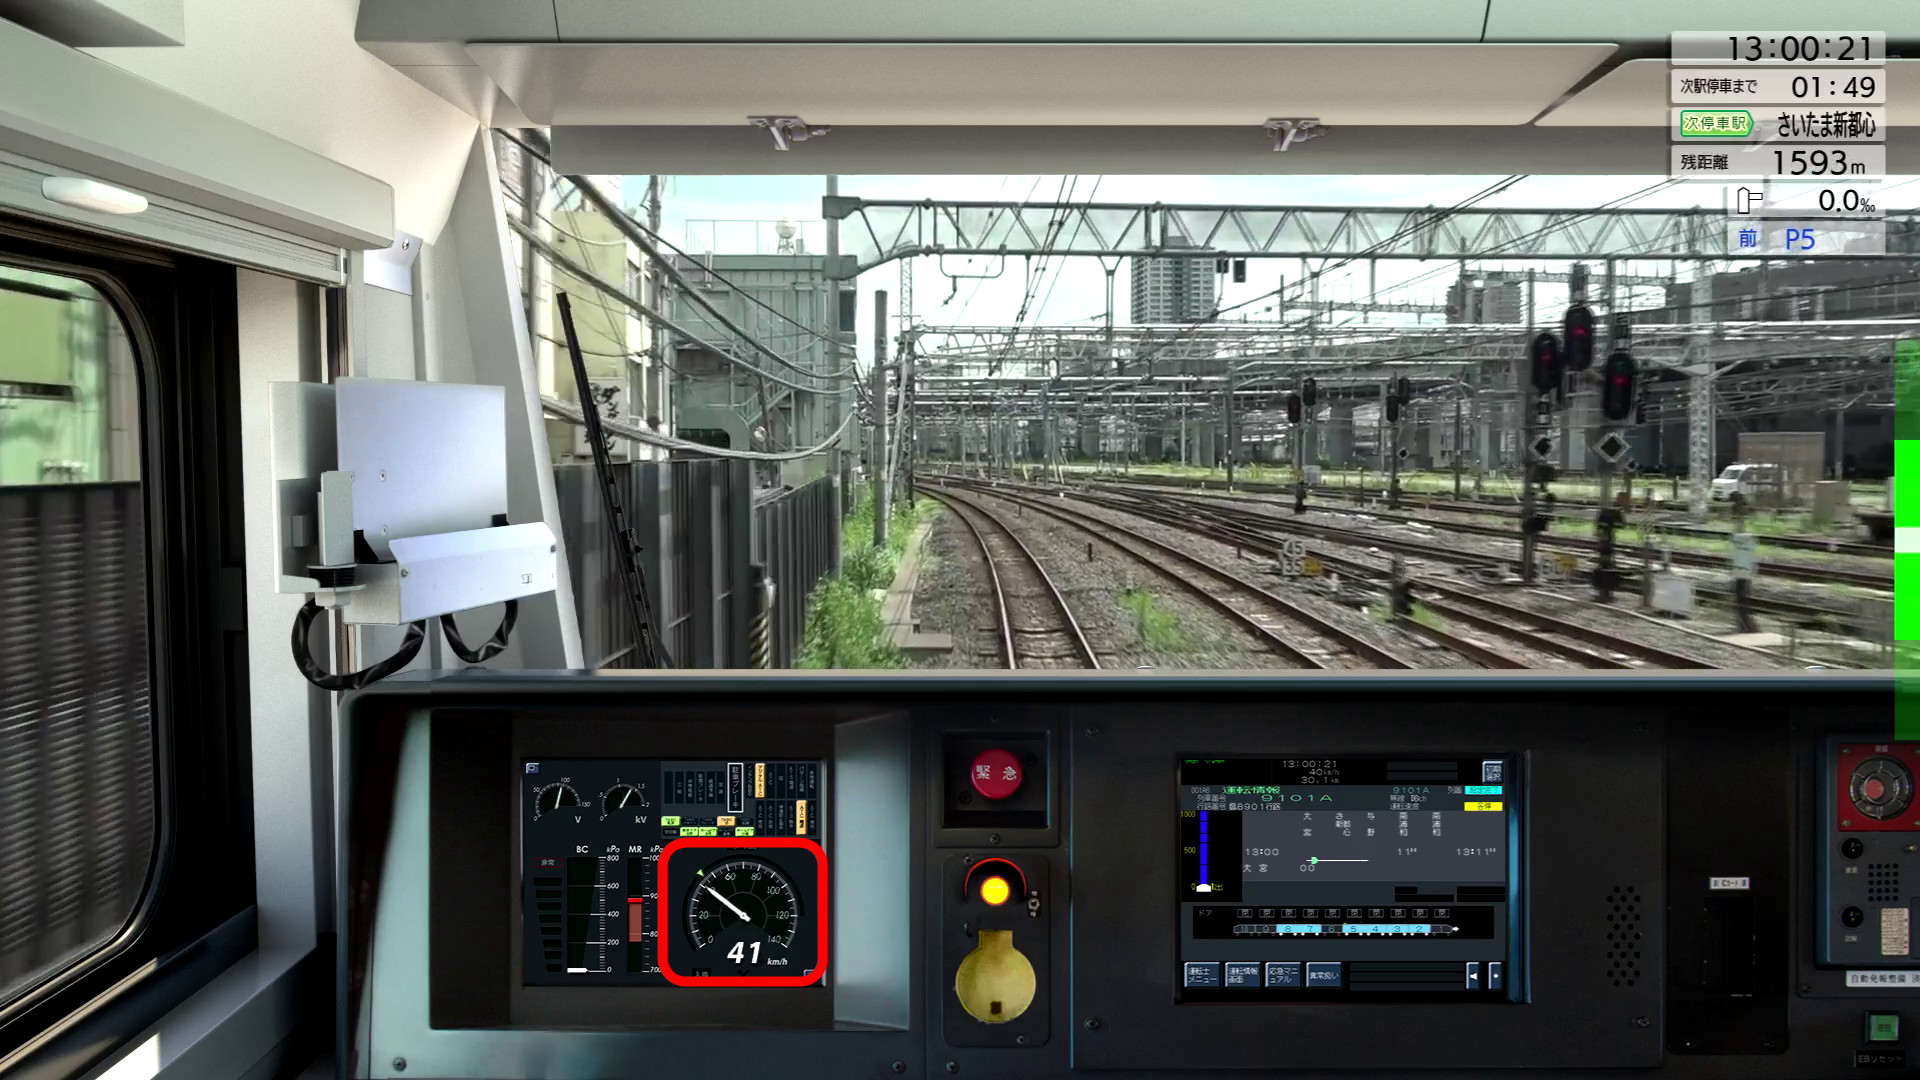
When I removed the brake and put the master controller up to 5th gear, 'P5' was displayed on the driving information display in the upper right corner. In addition, the E233 series 1000 on the Keihin Tohoku Line operates acceleration and braking with one handle. In addition, the operation is basically limited to braking and acceleration, and does not perform tasks such as opening/closing doors or making announcements.

The train accelerates rapidly, and the number on the speedometer increases. You can also experience how the inverter's sound changes little by little as you accelerate.
Once you have some speed, reduce the acceleration to zero and put it in neutral. By doing this, it will continue to move forward while maintaining a certain speed due to inertia. When I looked to my left, I saw people walking along the railroad tracks.
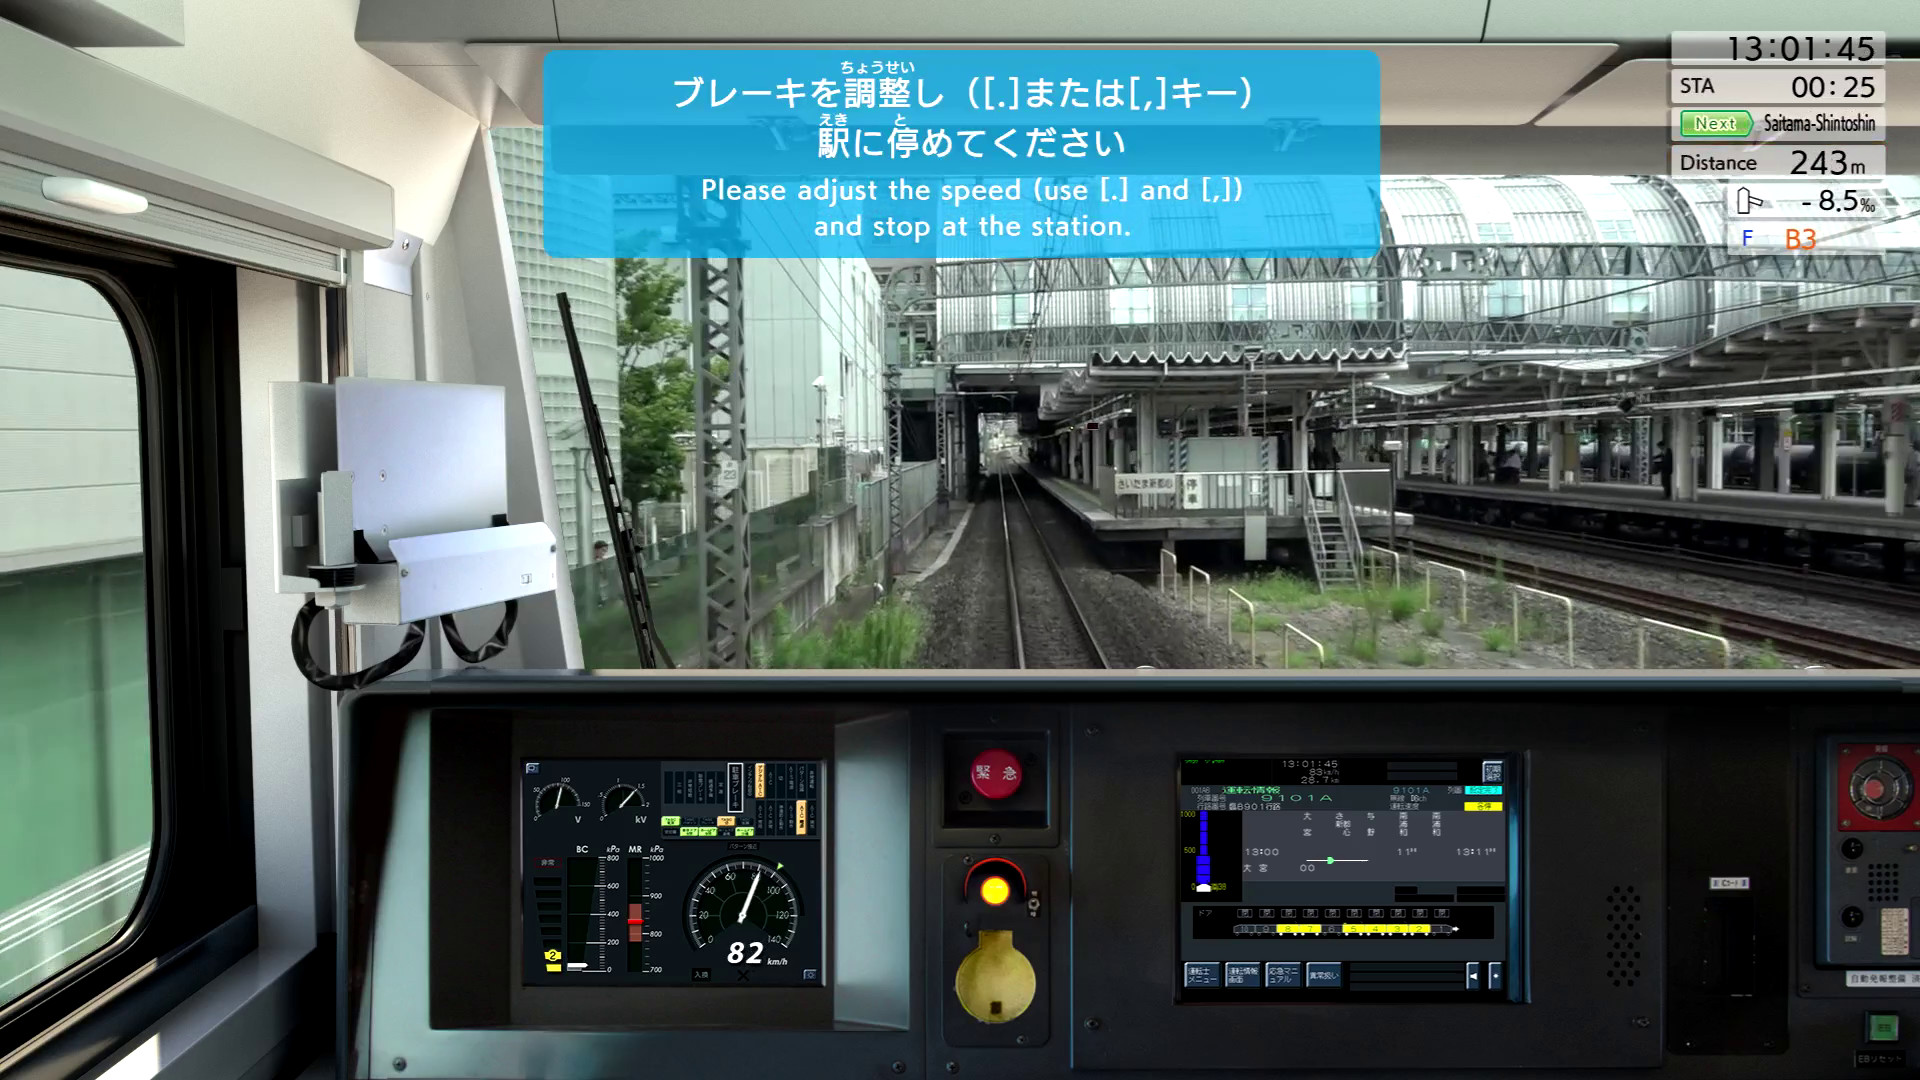
However, as I looked at the surrounding scenery, I quickly arrived at Saitama-Shintoshin Station. The train slides onto the platform at a speed of 82km/h because the driver accidentally loses track of the timing of the brakes.
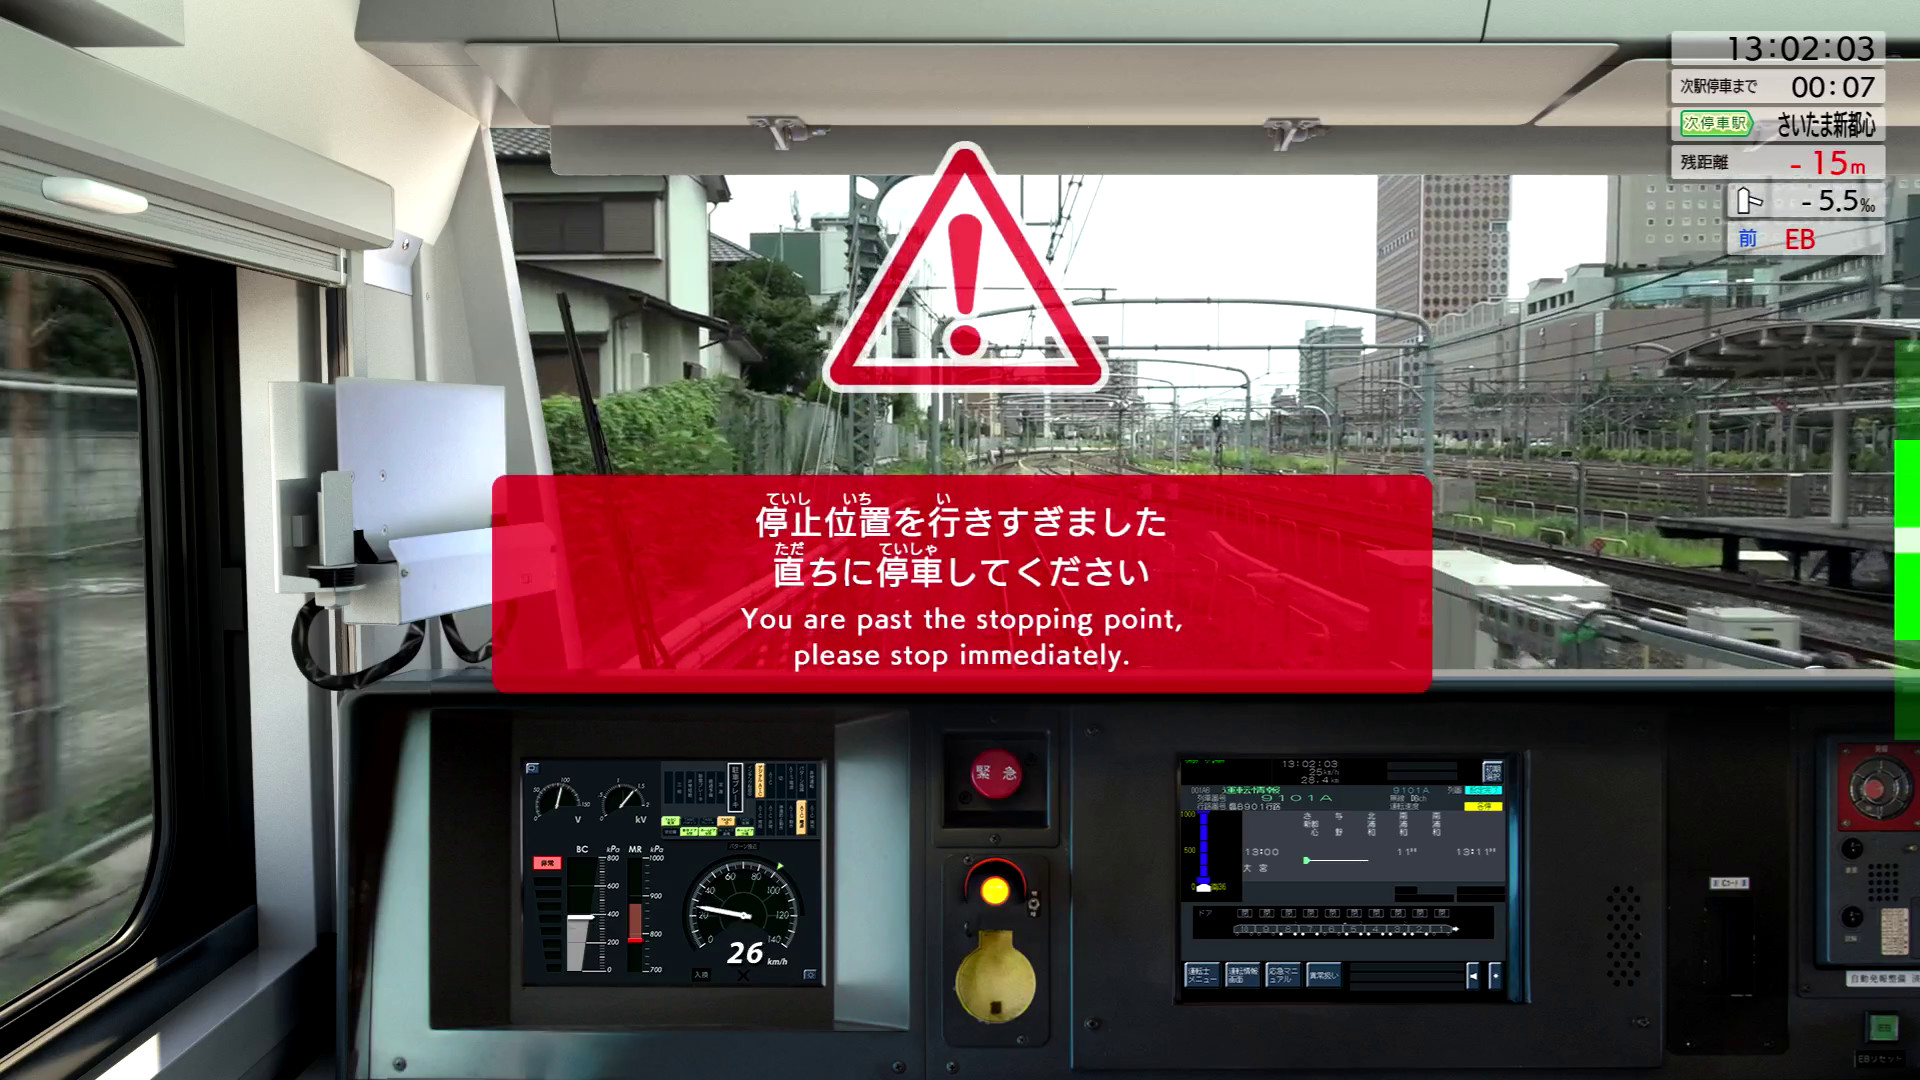
I panicked and applied the brakes to stop, but the train passed the stop line...

A whopping 15m overrun. ``If this were real, it would be all over the news in the newspapers and on TV...'' he said with great regret.
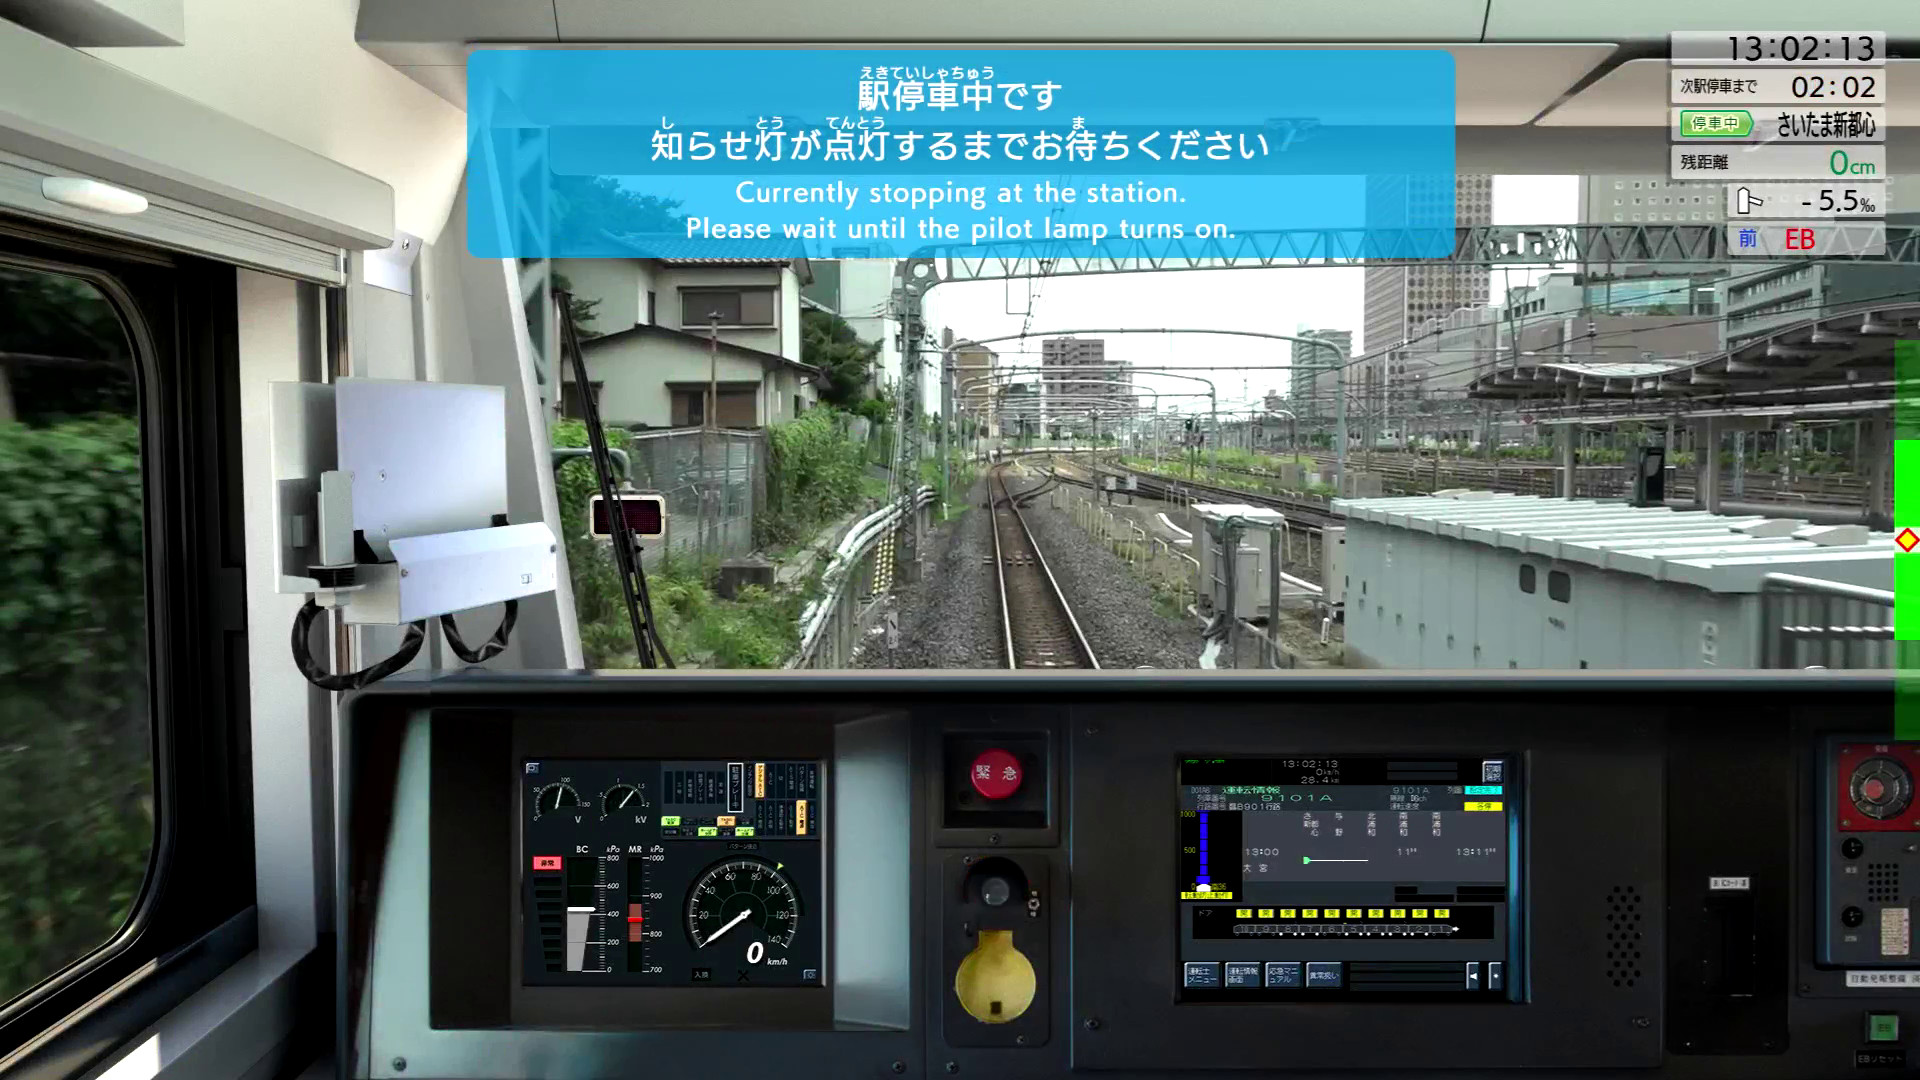
However, this JR East Train Simulator is not just a game but a commercial simulator, so there is no score calculation or game over, and the train will continue to operate from Saitama Shintoshin.
The sounds that are heard while the train is running are exactly the same sounds that you would hear while riding a train, and the scenery is also realistic because it is a live-action movie. Below is a place where I passed a train running in the opposite direction.
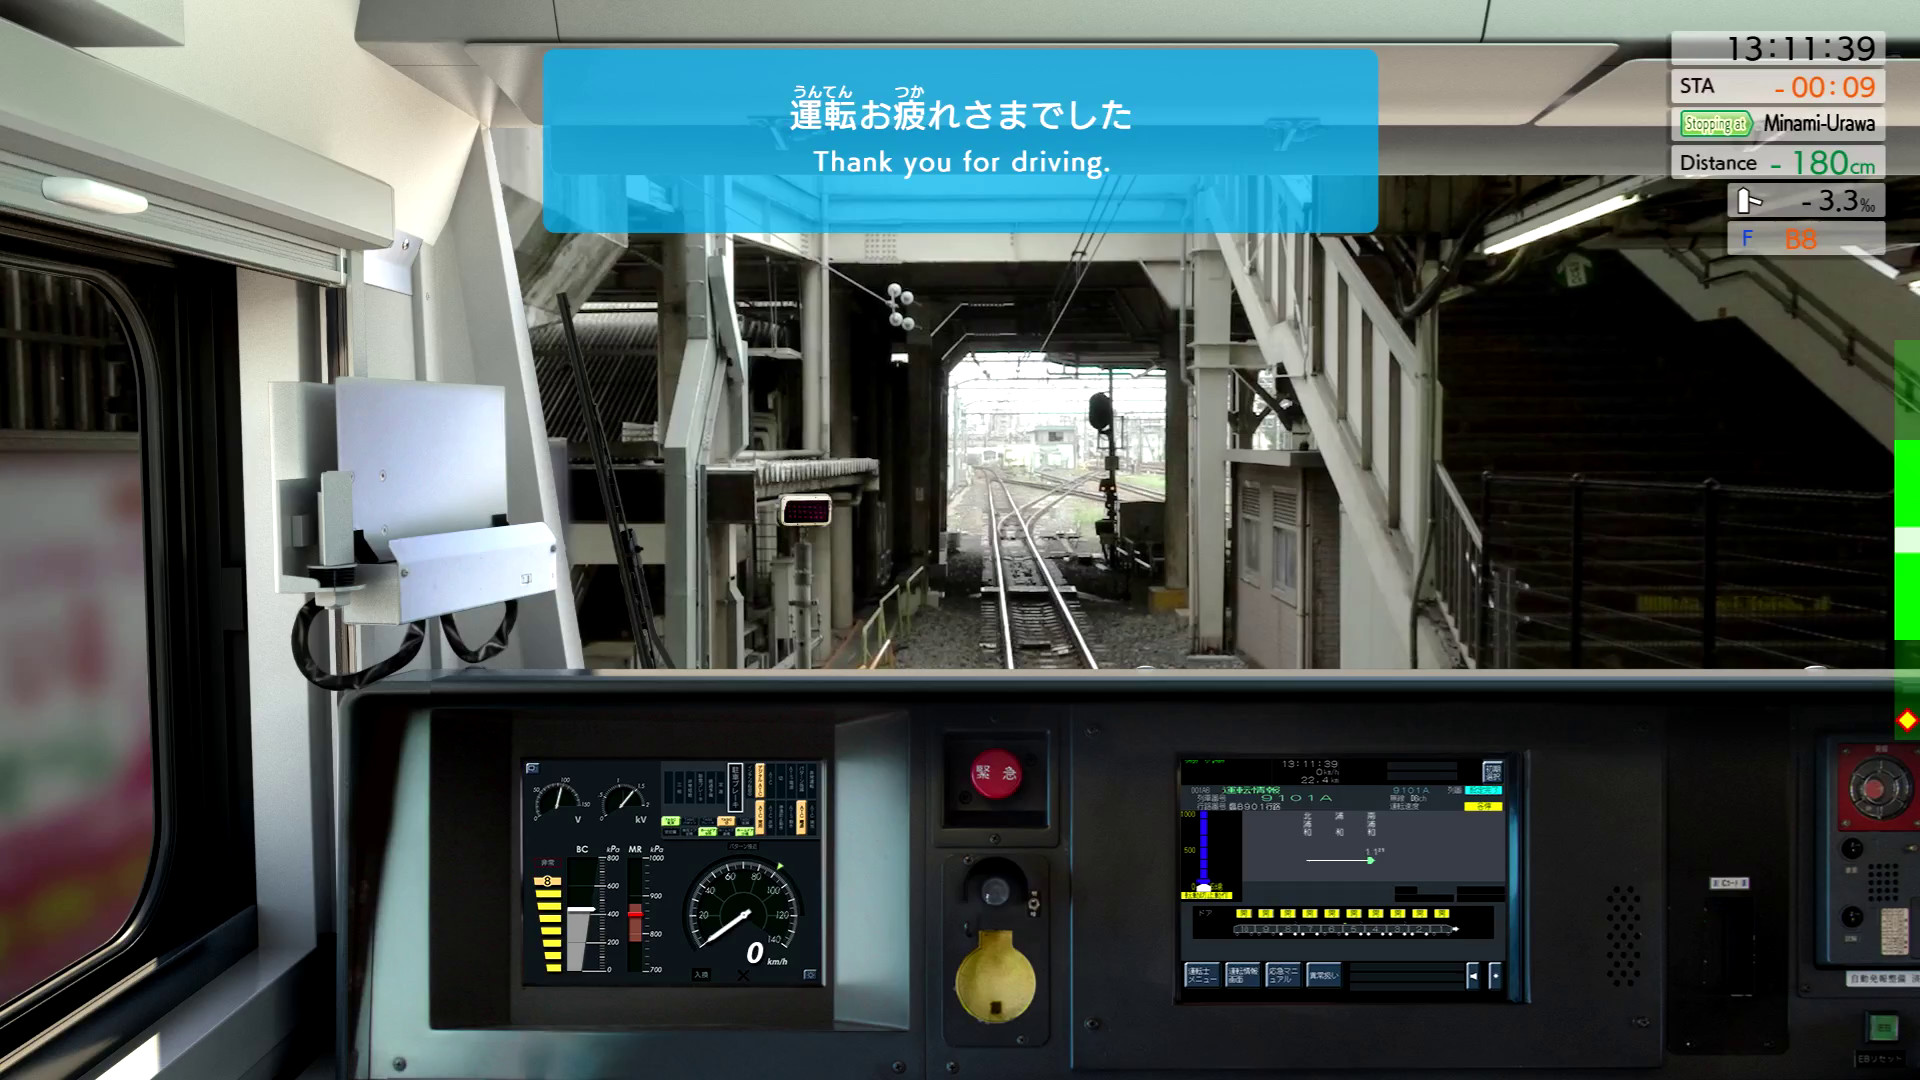
When the train arrived at Minami Urawa, a message saying 'Thank you for your hard work' appeared and the train stopped operating. Return to the top screen.
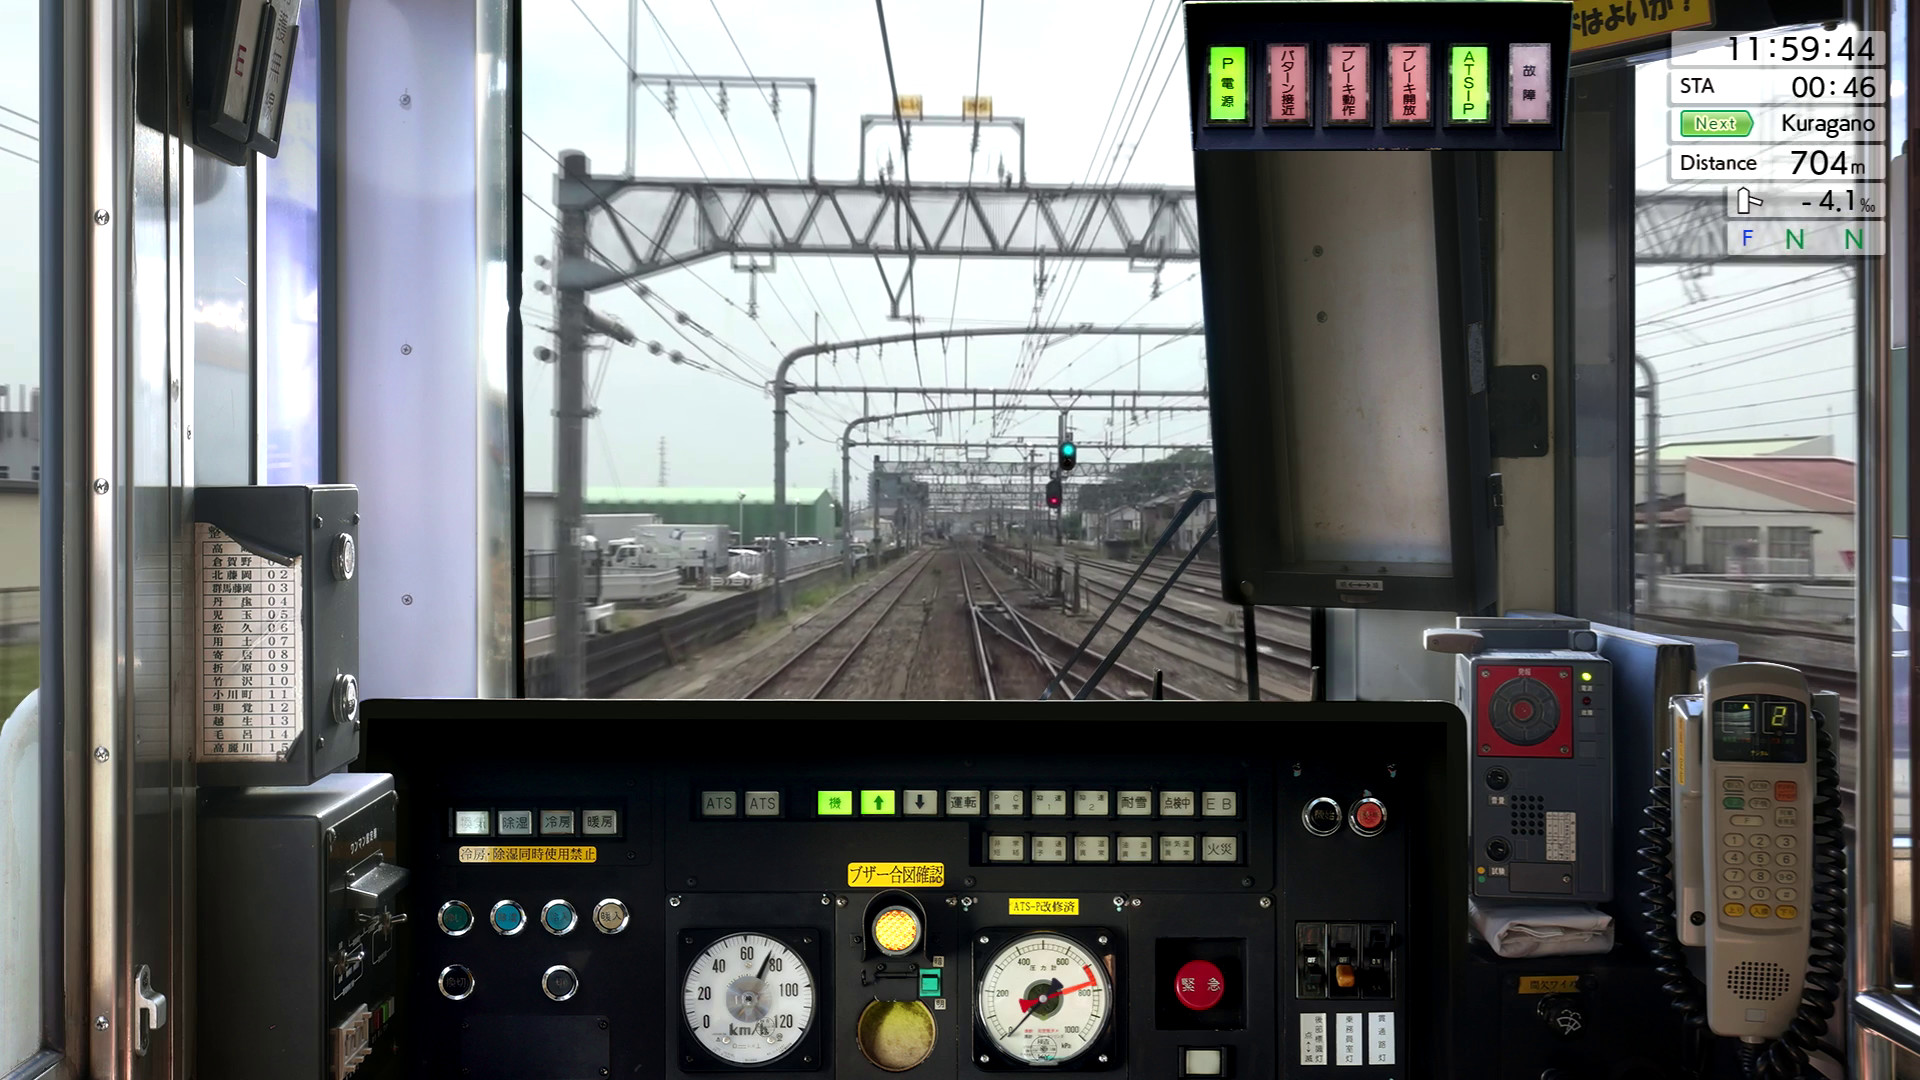
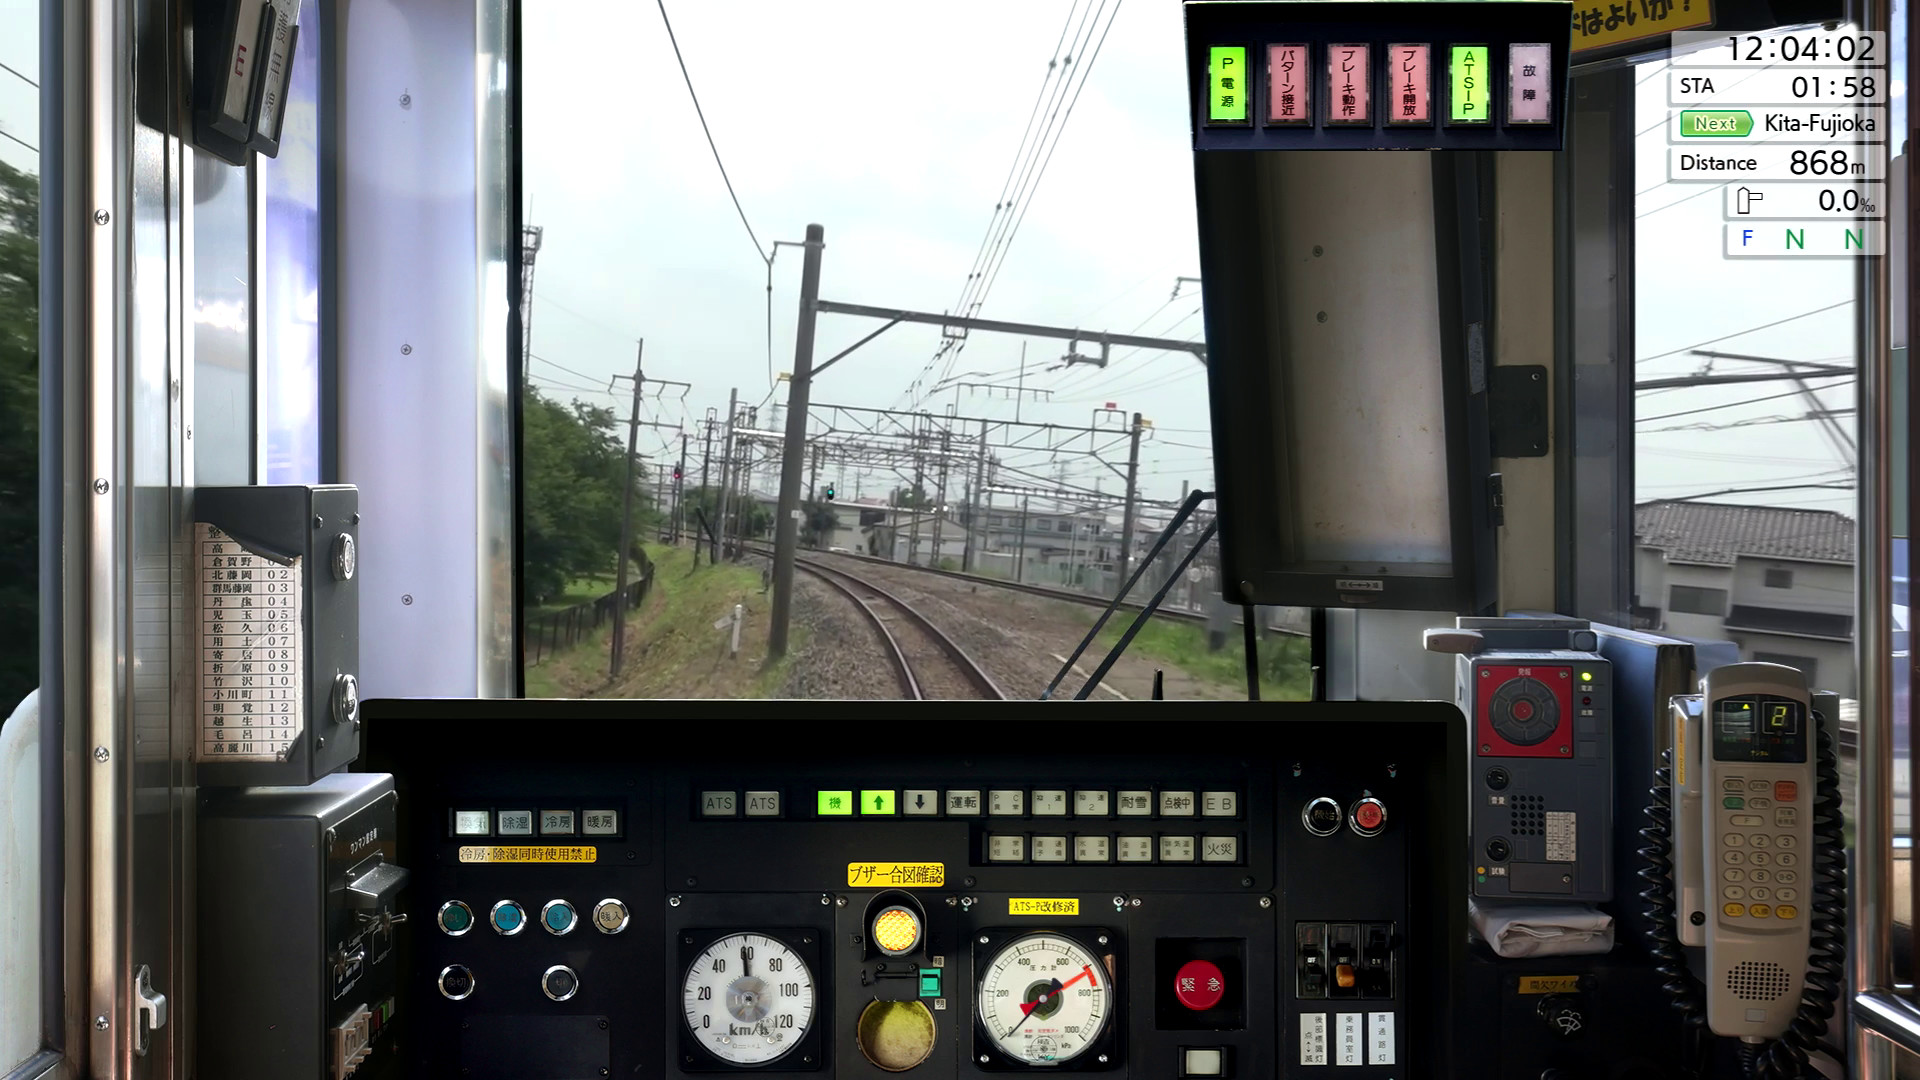
Next time I will play the uphill section of the Hachiko Line. The service section is between Takasaki and Gunma Fujioka.

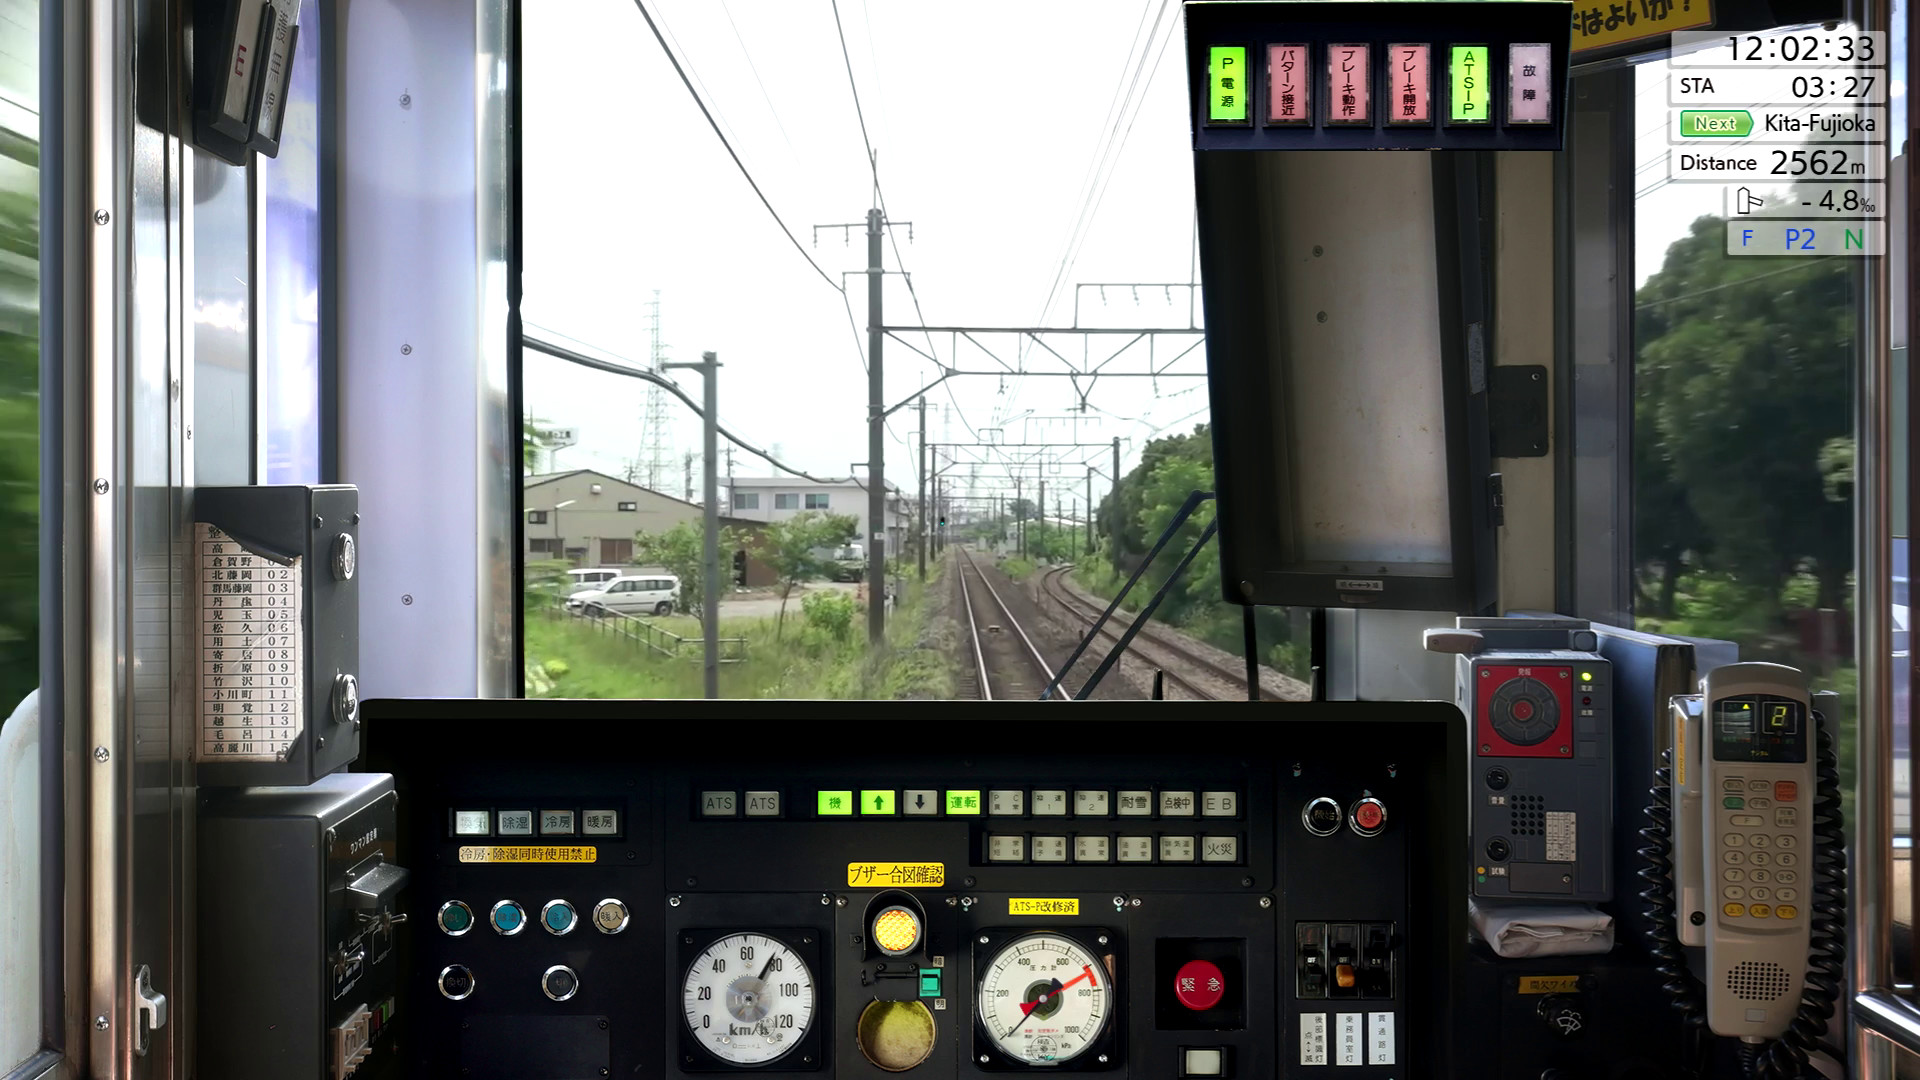
The Kiha 110 series on the Hachiko Line is a two-handle car that operates acceleration and braking with separate handles. Therefore, the driving operation is a little more complicated than the E233 series 1000 series with one handle.
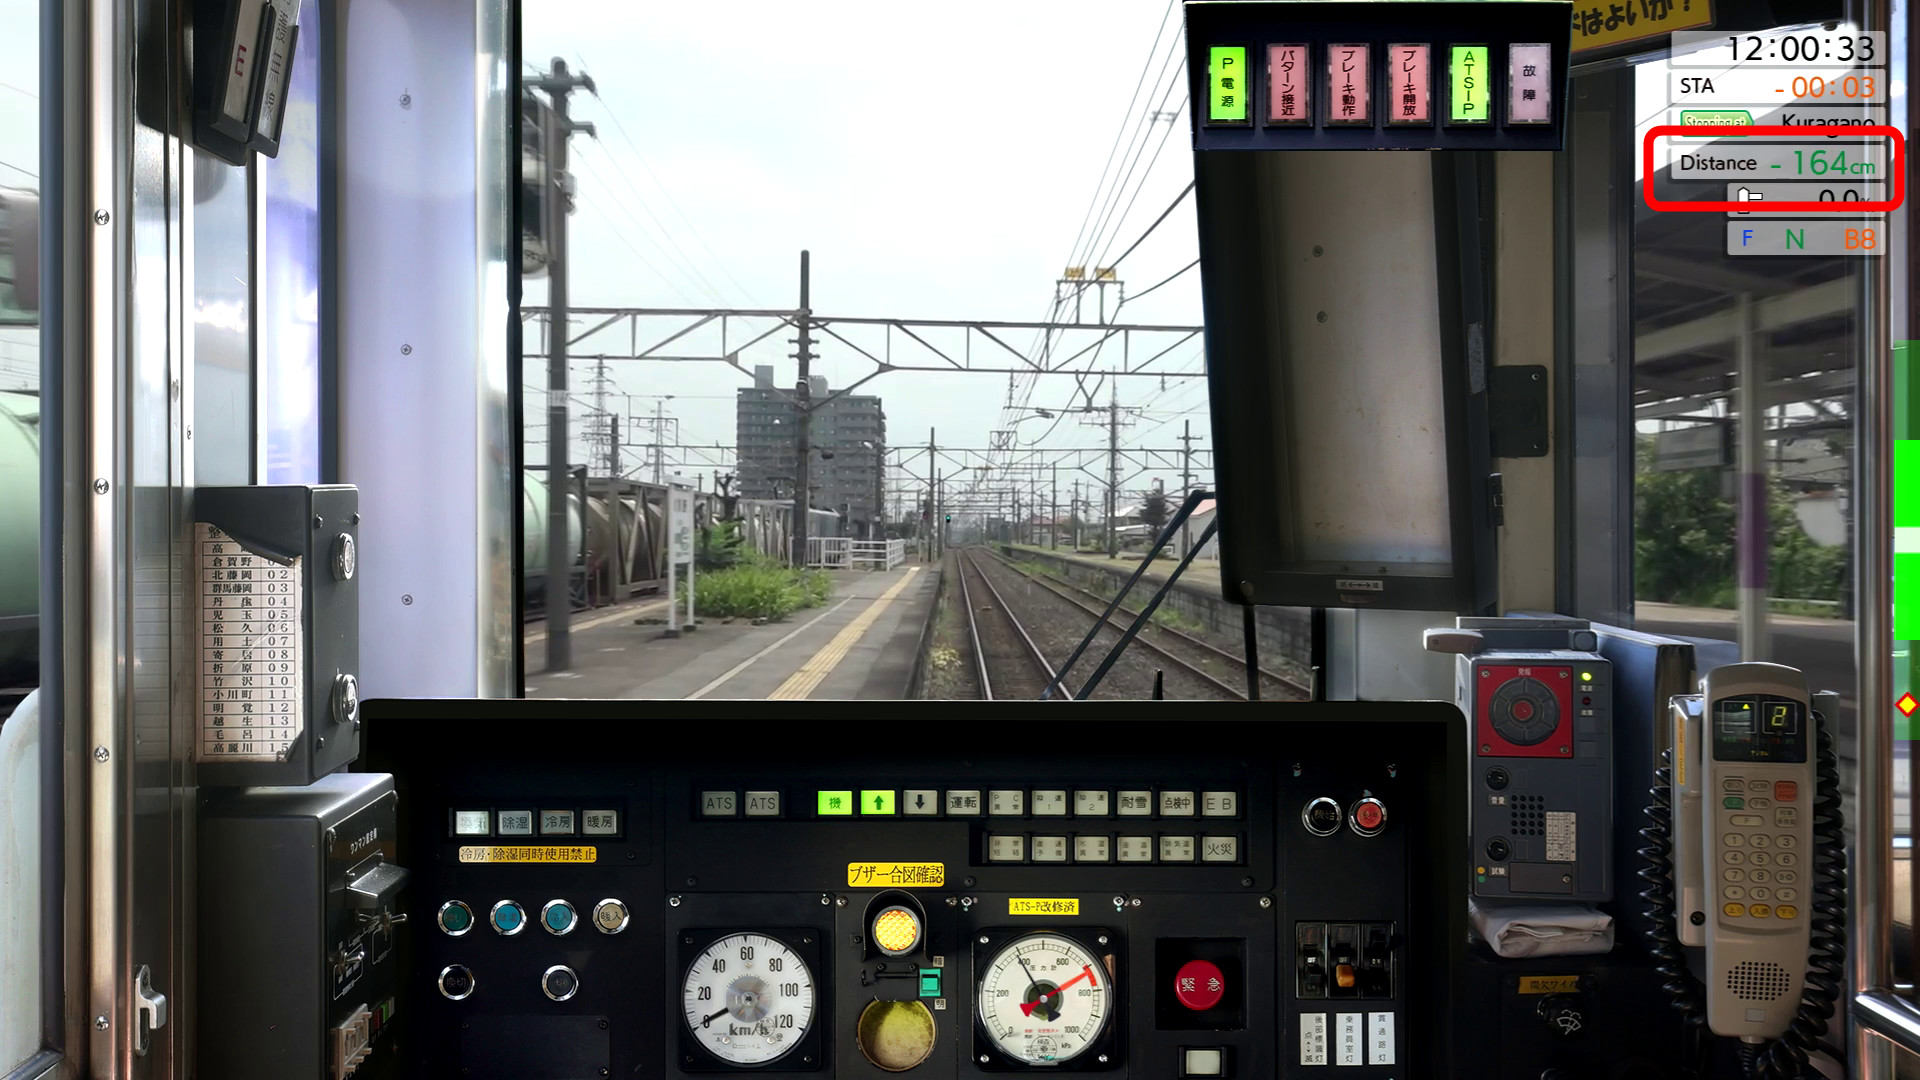
So, below is what I ran from Takasaki to Kuragano on the Hachiko Line. On the way to Kuragano, you will pass the Takasaki Yard.
The driver's cab of the Kiha 110 series on the Hachiko Line looks like this.
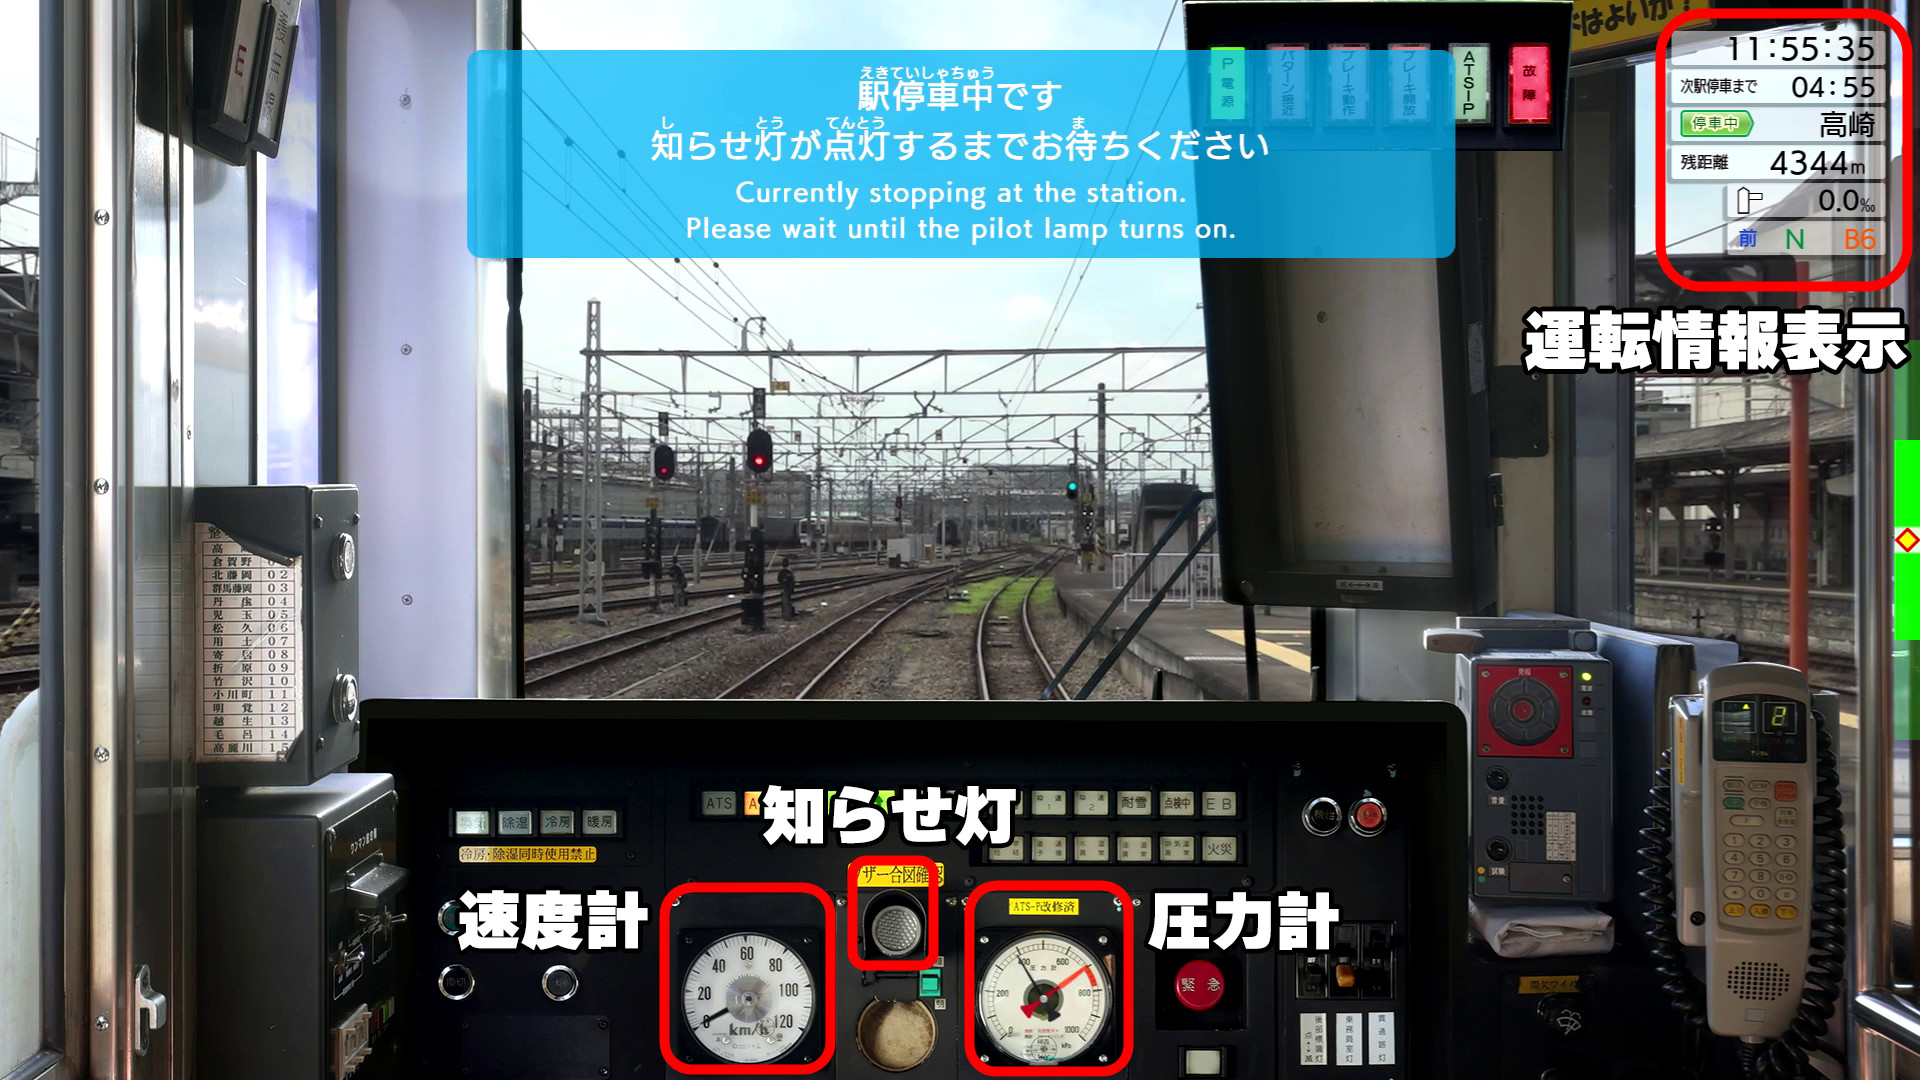
The driving information display shows acceleration and braking levels.
When the warning light comes on, remove the brake, put it in neutral, and then accelerate. Please note that if the mascon, brake, and horn are not operated beyond a certain level,
It will accelerate little by little. Between Takasaki and Kuragano, the train passes through the Takasaki Yard.

As the Kuragano platform came into view, I lowered the master controller, reduced acceleration to zero, and prepared to decelerate.

However, he was unable to make it in time and ended up overrunning by 164cm. Still, compared to the 15m overrun, it could be said that it has grown.
The scenery from the train window on the Hachiko Line is quite different compared to the Keihin Tohoku Line.
Sometimes you have to cross a railway bridge. As you approach the iron bridge, the sound of the train changes to a thud.
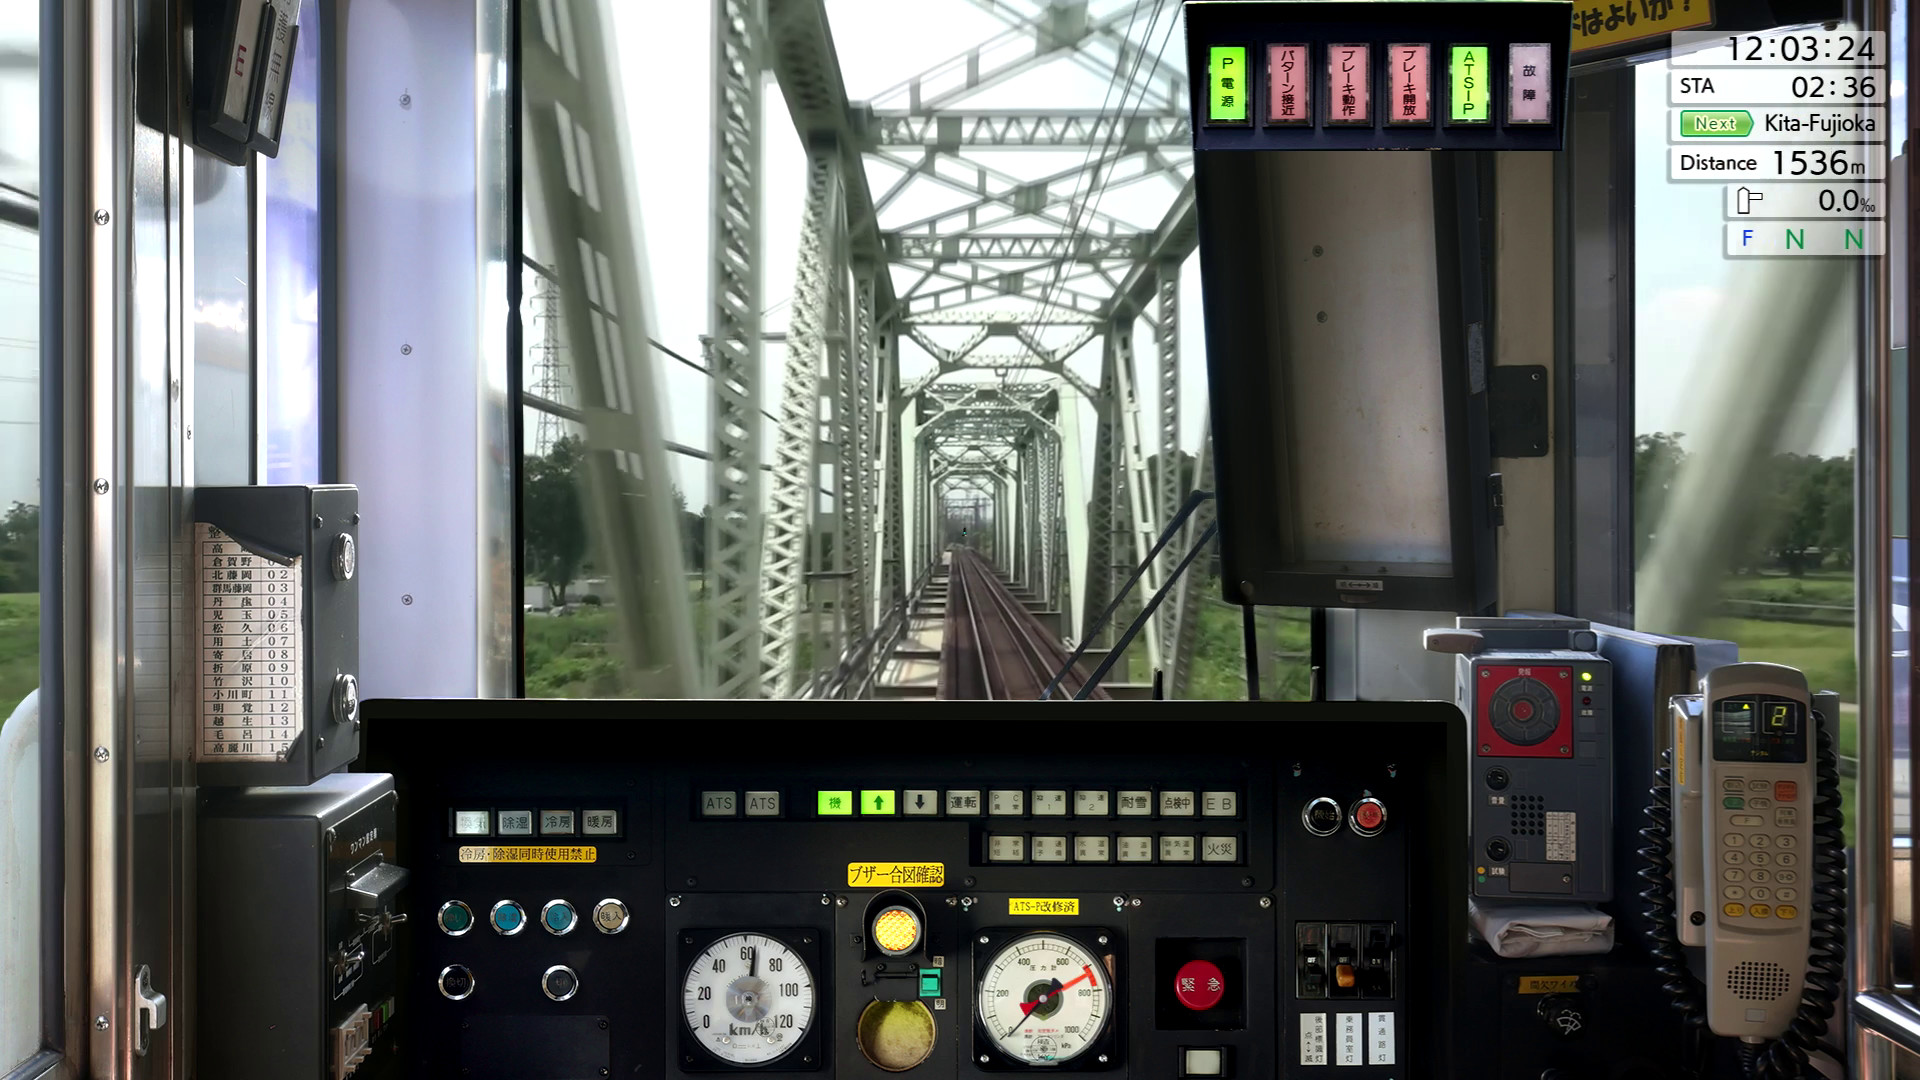
In addition, the car body leans on curves, and the wheels rub against the rails, making a squeaking sound.
When I actually played it, I got the impression that it was more of a simple simulator than a game. The basic operations are only acceleration and deceleration, but you need to measure the timing by staring at the instruments in the driver's cab. However, by repeating the train many times while remembering, ``How fast was it going when I was actually riding the train?'', the deviation in the stopping position will gradually become smaller. feels a sense of accomplishment.
At the time of article creation, it is an early adopter version, so only the Keihin Tohoku Line and Hachiko Line are available, but in the future, there will be more routes that can be played with downloaded content. Also, since it is only equipped with the minimum necessary functions, I would like to expect features such as a key configuration function, support for external controllers, and display of the master control and brake parts. JR East Train Simulator is available for download and purchase on Steam for 980 yen including tax.
Steam Publisher: East Japan Railway Company
https://store.steampowered.com/publisher/jr-east

Related Posts:


in Free Member, Video, Review, Game, Vehicle, Posted by log1i_yk