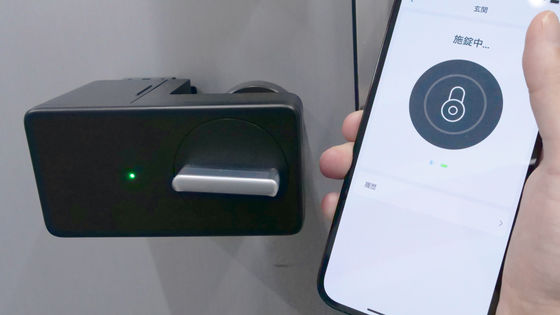
"SwitchBot" review that allows you to remotely control any home appliance by turning the switch on / off by pressing it from the outside or the outside via the net
Just installing it next to an analog switch does not require any difficult setting, upgrade the device to remotely control lamps and home appliances from the smartphone "SwitchBot"Is a cloud-funding platformKickstarterIt is an item that was widely popularized and commercialized. A small robot has become a simple and clear device that "physically pushes the switch" on behalf of human beings, and the application can also operate intuitively.Previously posted at GIGAZINESometimes I got a part of the product I contributed, so I actually tried using it.
SwitchBot - Retrofit Old Devices For IoT
https://www.switch-bot.com/
When you operate with a smartphone, the robot reaches out and presses the switch. It is simple, but it is designed to be widely applied.

I received one large box, three small boxes, and a ballpoint pen set for a stake in kickstarter with a set of extra ballpoint pens.
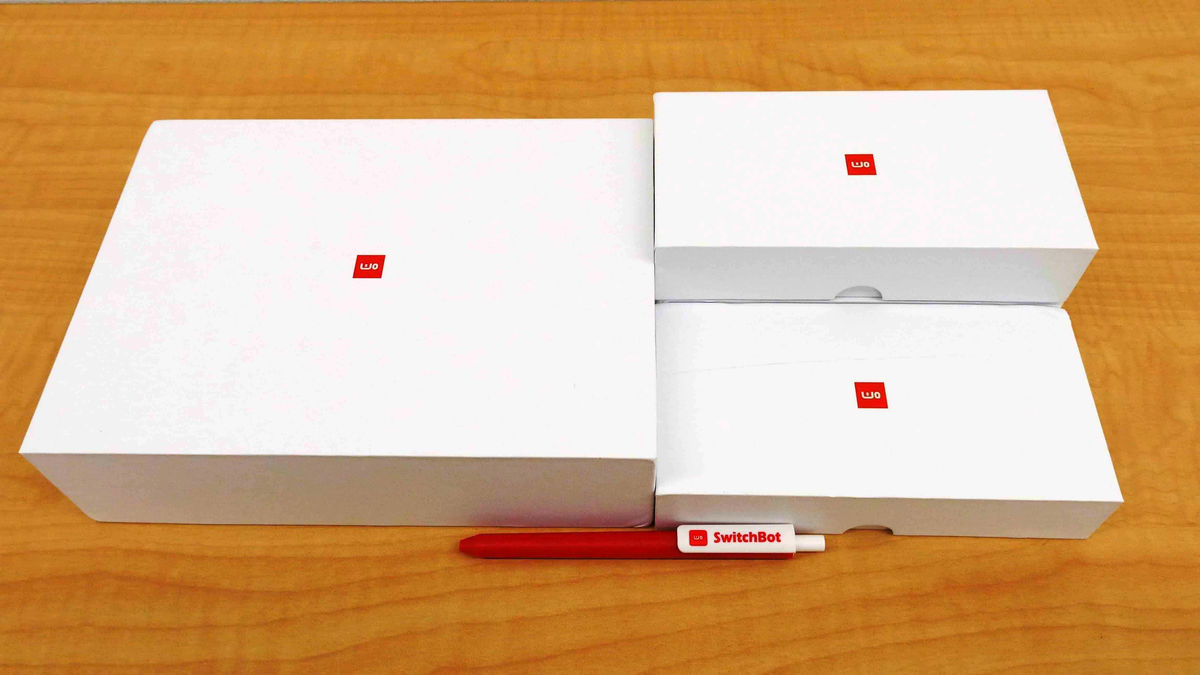
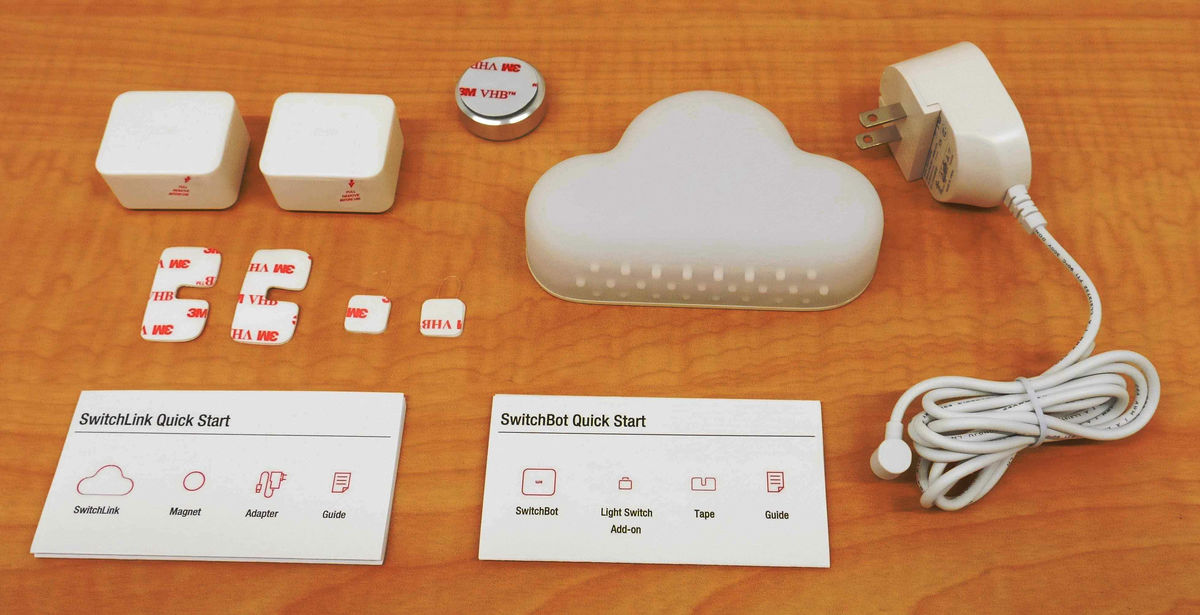
This time I will review using one set that was in a big box. The contents are like this.
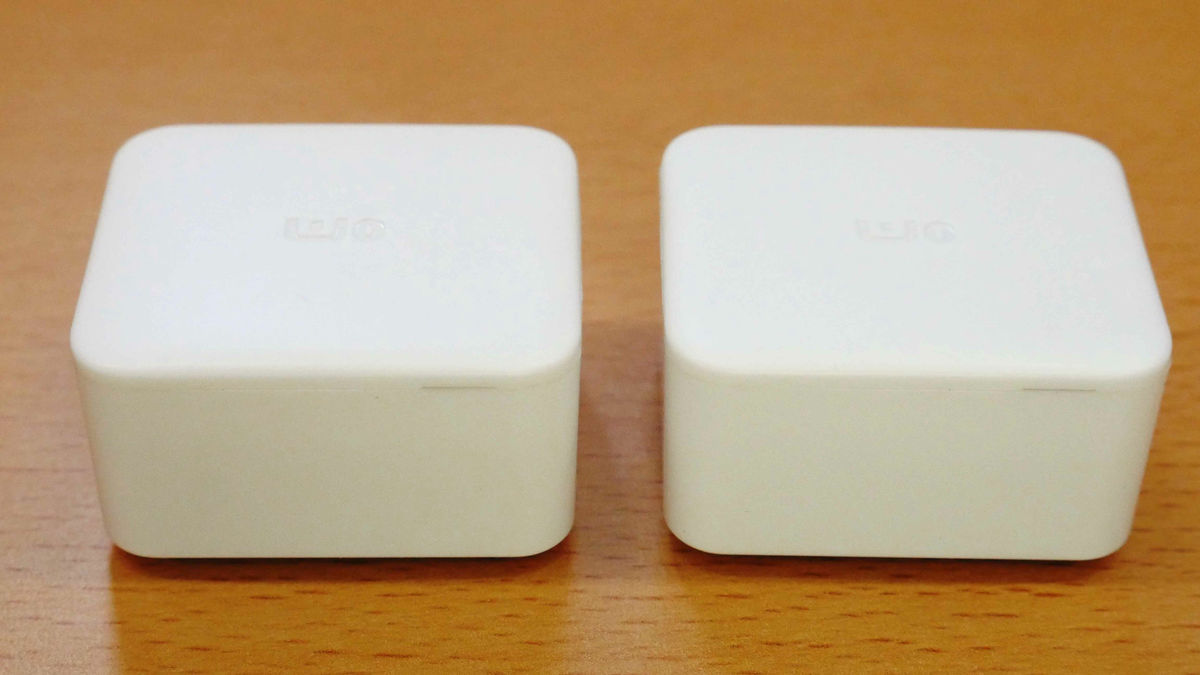
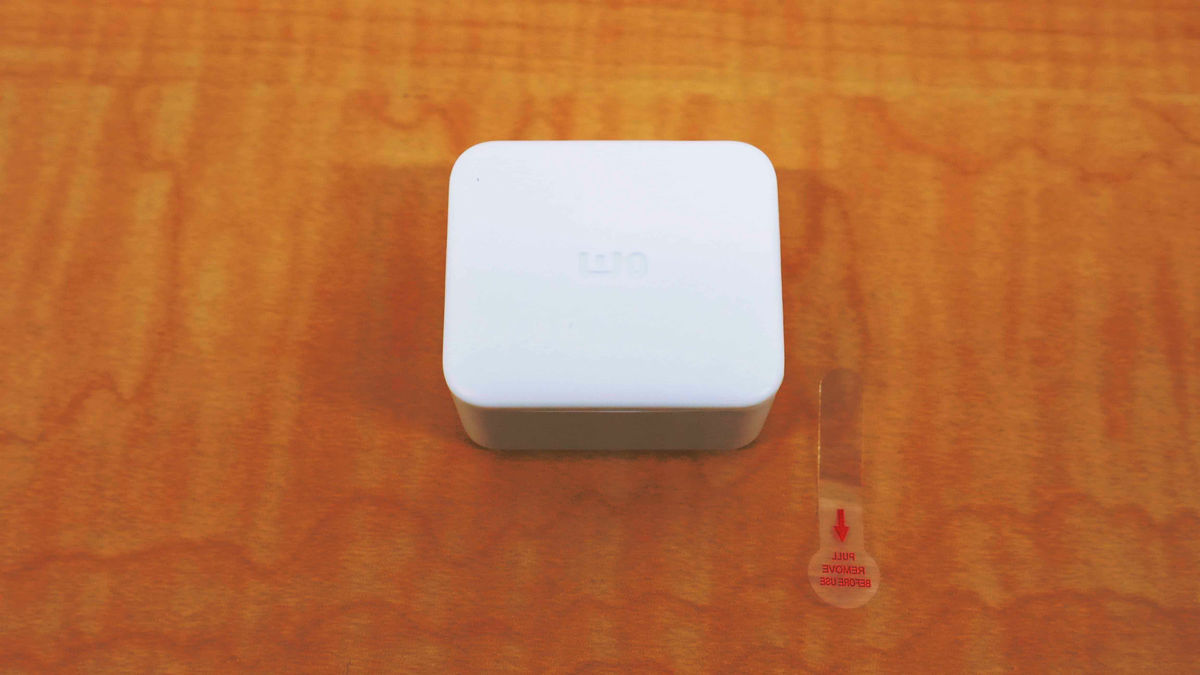
The body of the SwitchBot looks like just a square object.
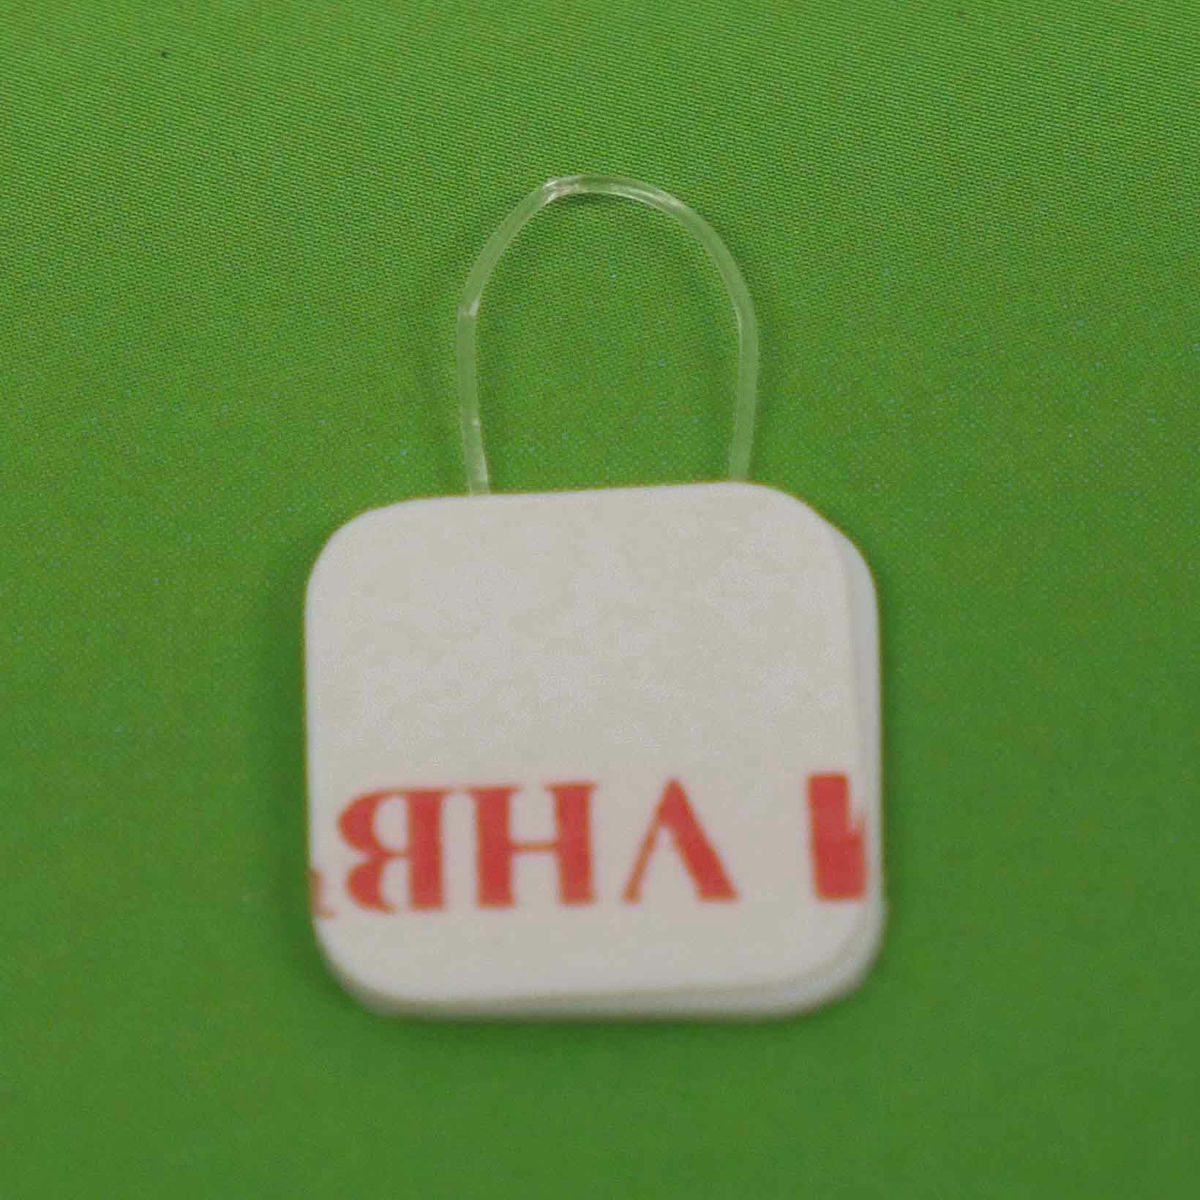
This is a part called "Light Switch Add-on", and it is a part with a transparent rings on double-sided tape. It is necessary for "pulling up the switch" operation.
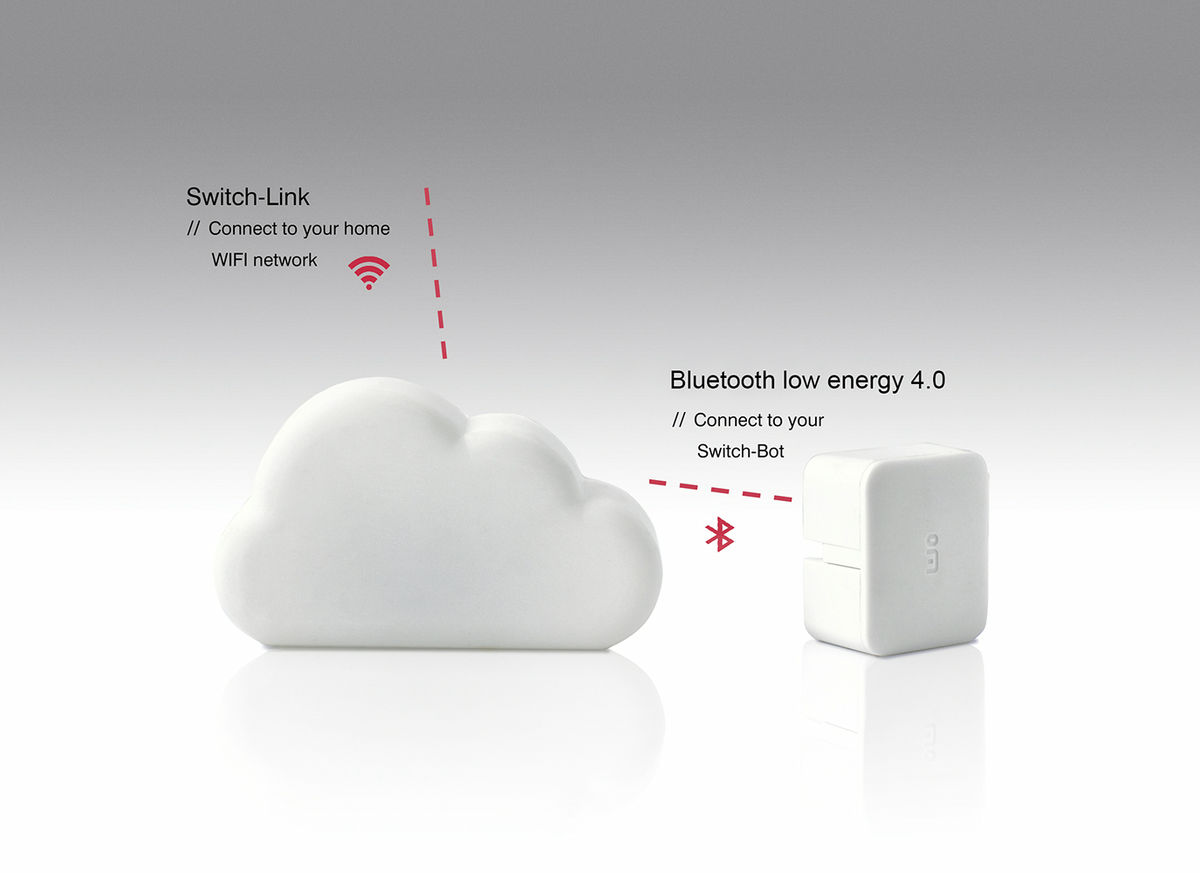
SwitchLink is the shape of this cloud. Devices necessary to operate SwitchBot from a remote location such as a place to go.

Let's move SwitchBot by itself. When you pull out the main body's insulating tape, SwitchBot side is ready. Batteries are interchangeable, according to the official website life expectancy is about 2 years. CR2 type lithium battery used for cameras and so on is used.
Next, I will make settings on the smartphone side. Download "SwitchBot" application from the following site.
SwitchBot on the App Store
https://itunes.apple.com/us/app/switchbot/id1087374760
SwitchBot - Android application on Google Play
https://play.google.com/store/apps/details?id=com.theswitchbot.switchbot
Launch the downloaded application. A warning is displayed when Bluetooth is turned off on the terminal during installation.

If you receive a warning, turn on Bluetooth.

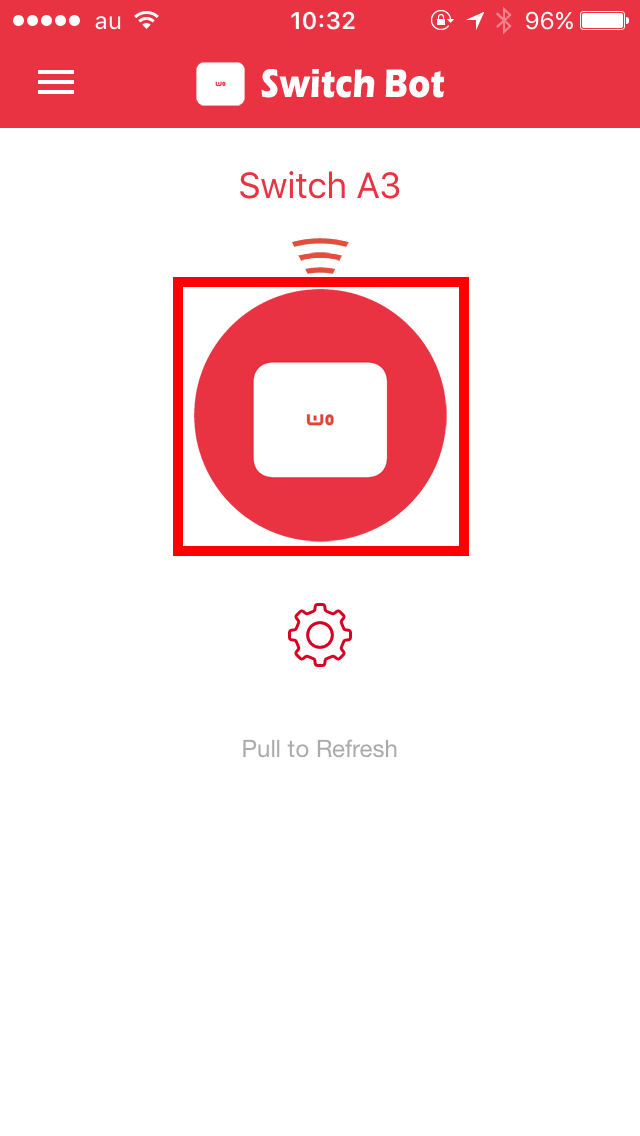
When you turn on Bluetooth it automatically recognized SwitchBot. Tap on the big circle in the middle of the screen to activate SwitchBot.
You can see how SwitchBot works by seeing the following movie in one shot.
I tried SwitchBot from smartphone - YouTube
Tap the icon ......

The bar blew out with a powerful voice called Vian. This bar will push the switch.
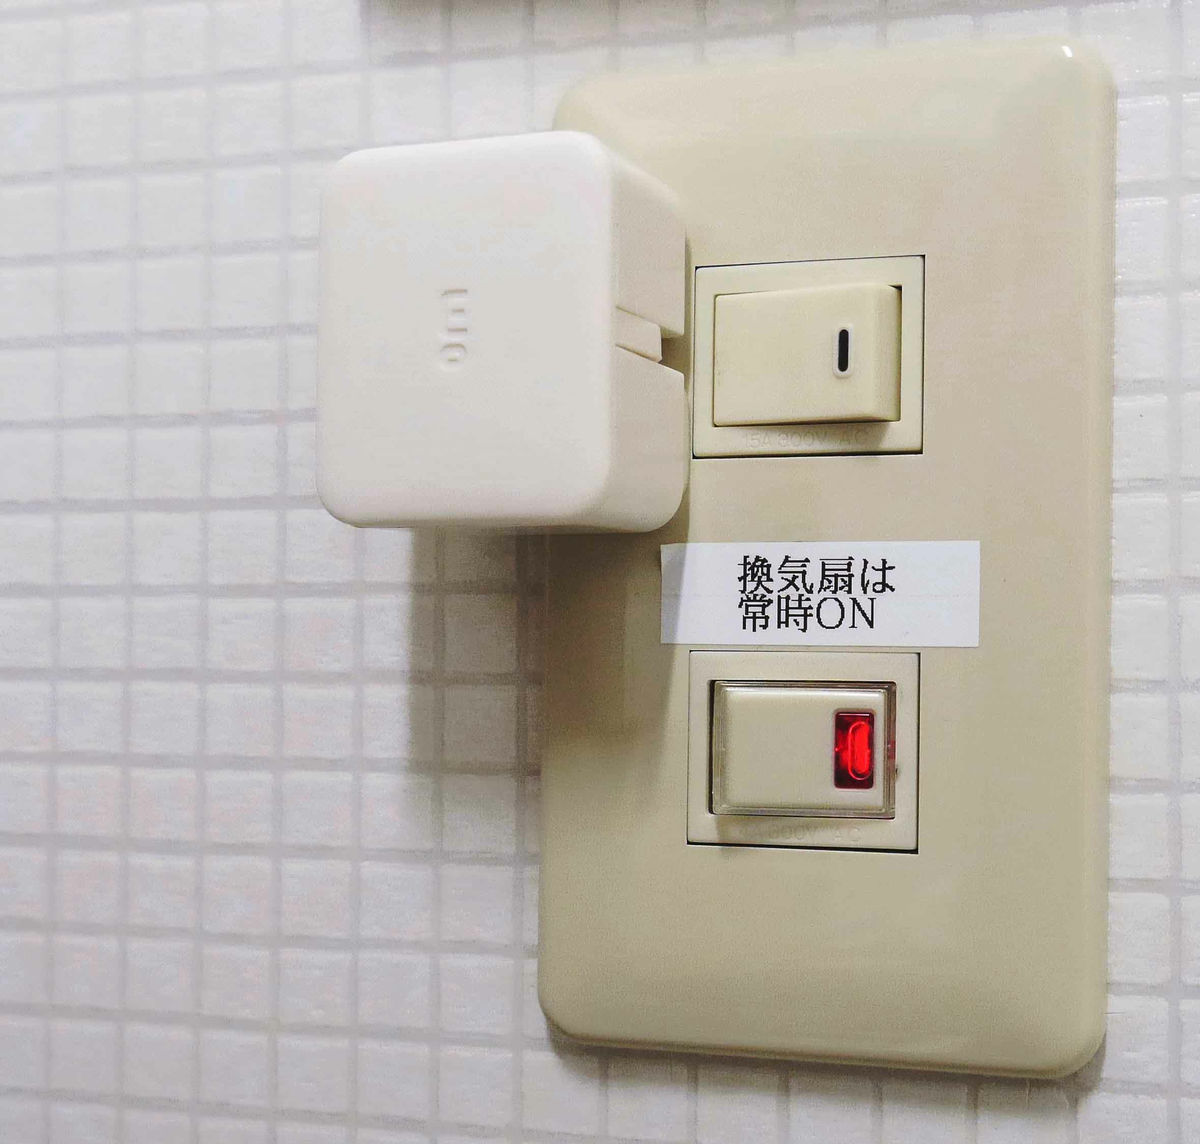
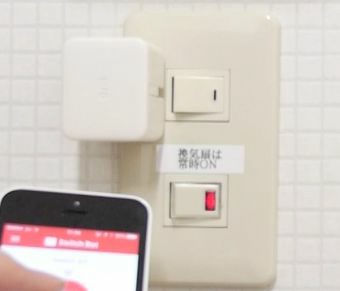
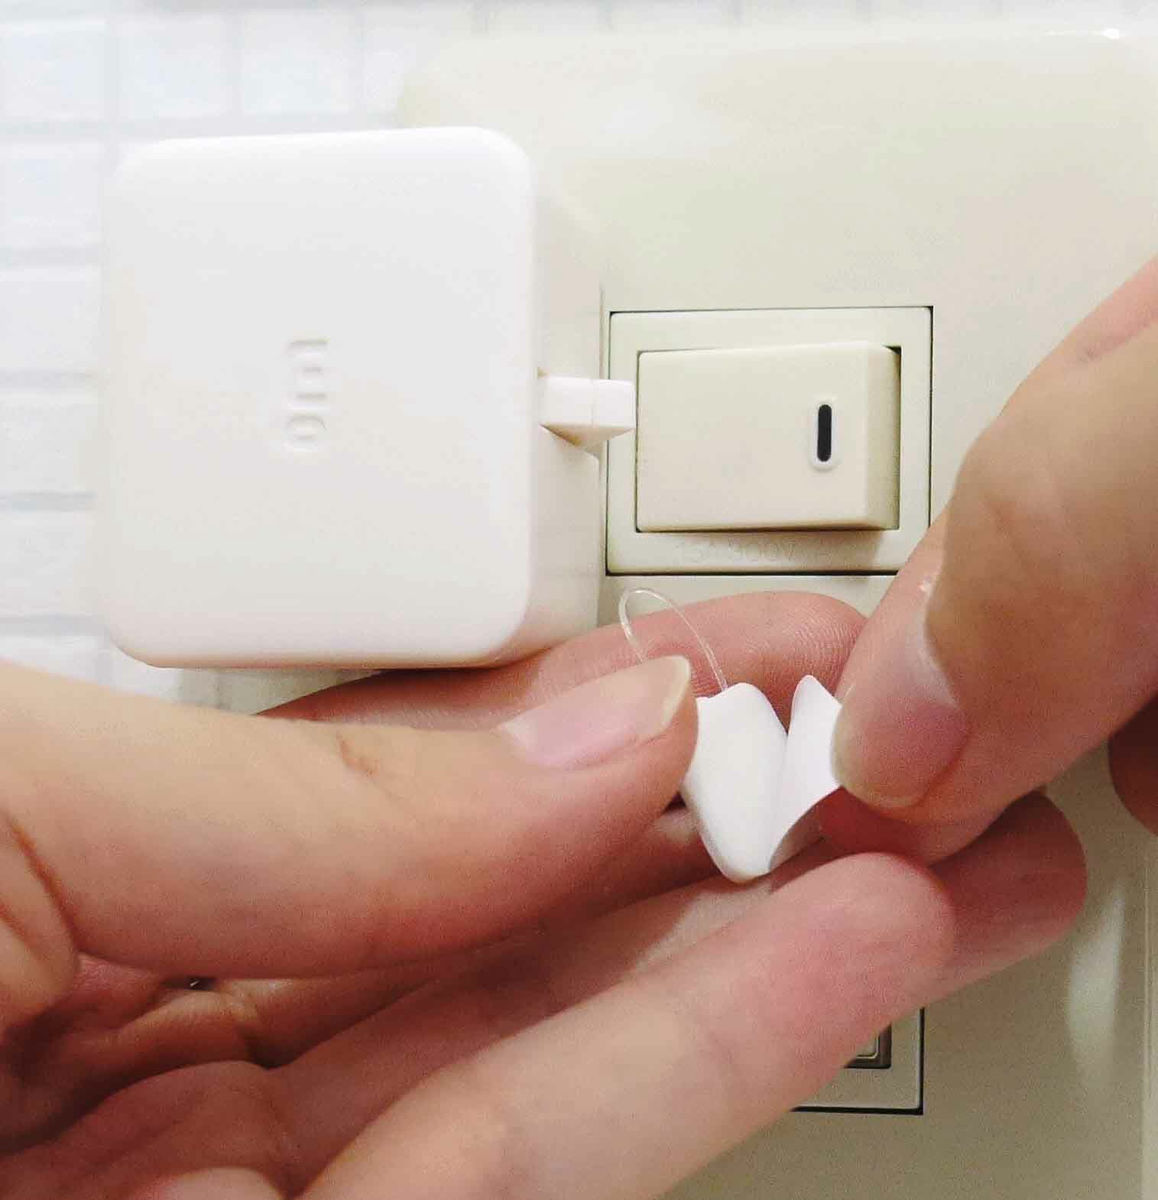
Next let's move the actual switch. Using double-sided tape on the back ... ...

If you install it right beside the switch, preparation is completed. I actually move it.
I installed SwitchBot on the switch and tried it - YouTube
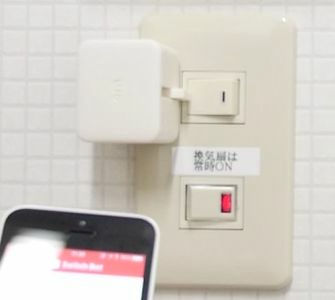
Tap the button of the smartphone ......
The bar grew from SwitchBot and it clicks. The electricity was erased remotely.
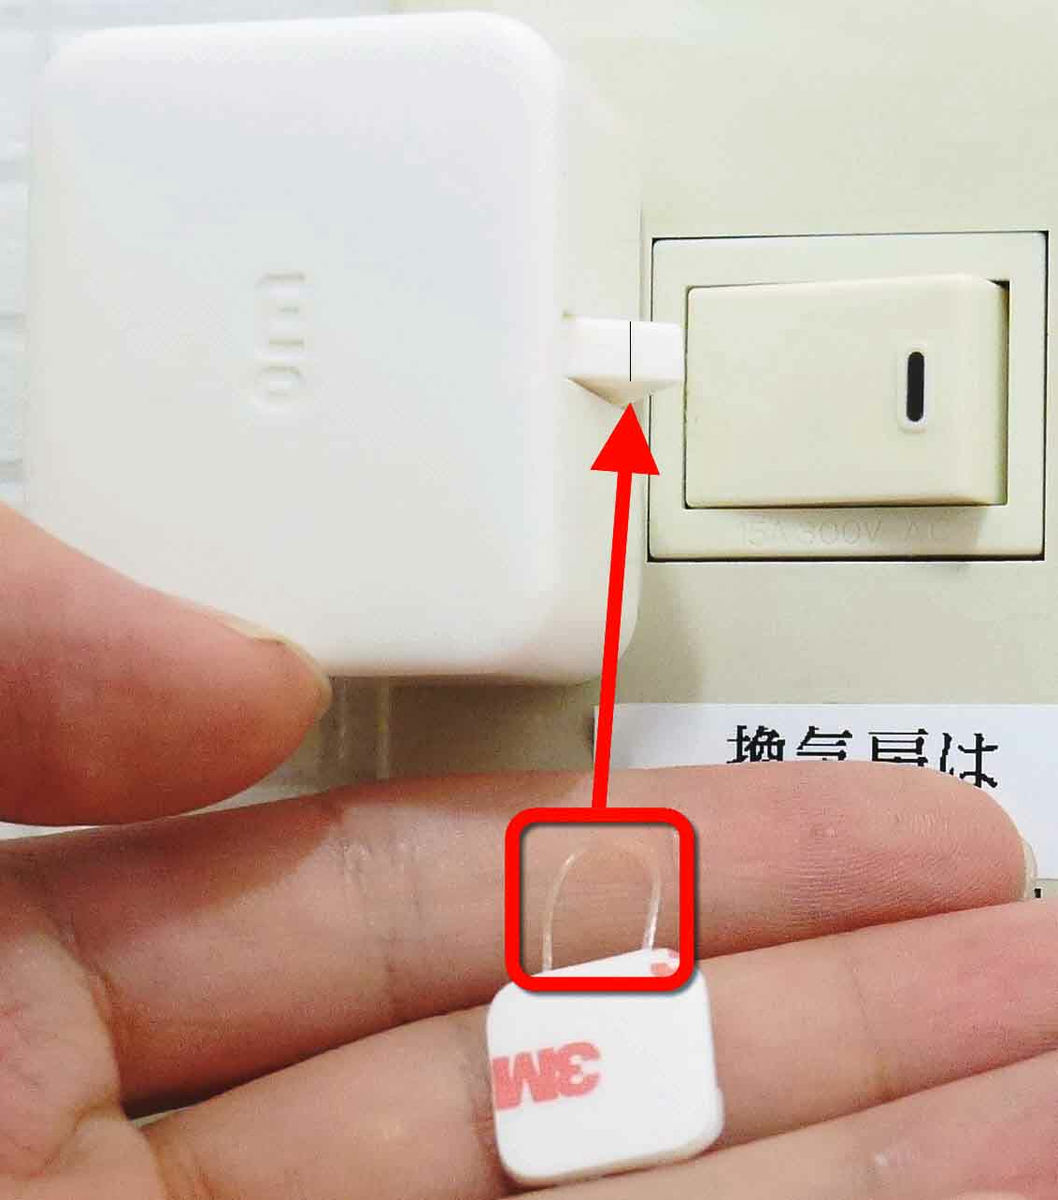
But still problems remain. In this state, SwitchBot can only turn on the off side of the switch, so it can not turn on electricity. So I will use 'Light Switch Add-on'.
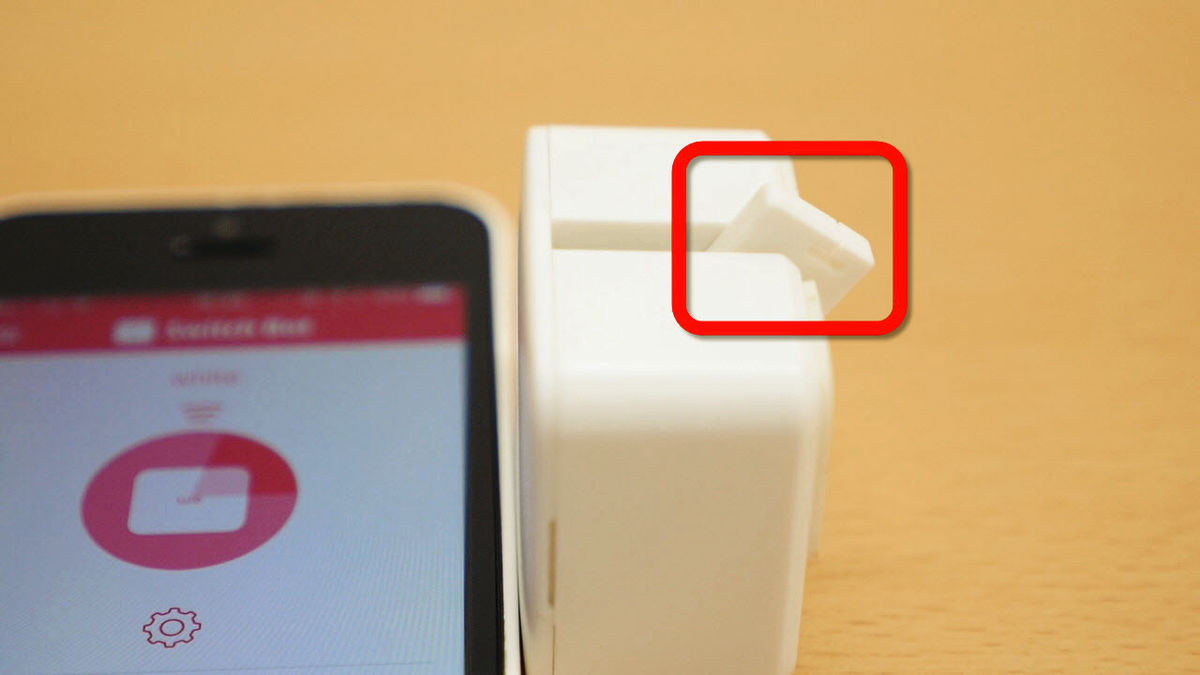
Pass the looped part through the notch in the bar of the SwitchBot and attach the rectangular part to the switch with double sided tape so that the action of pulling the "switch" with the force when the bar returns can be performed.
I'd like to install it at once, but in the state where the bar is stored like this it will not fit.
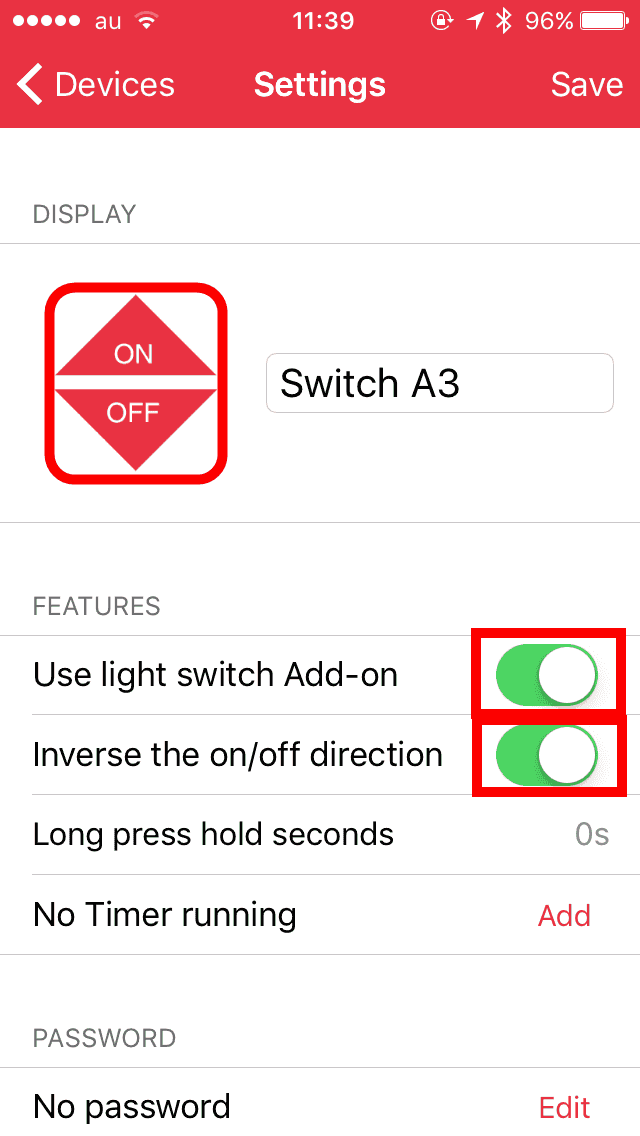
Set the bar to come up. Tap the gear mark from the screen of the smartphone to the setting screen.

When "Use light switch Add-on" is turned on, rounded icons are divided into upper and lower triangles marked "ON" and "OFF". Since SwitchBot was attached to the OFF side of the light switch this time, "Inverse the on / off direction" is also turned on this time.
In the upper right, tap "Save" → top left "Devices" to return to the previous screen.
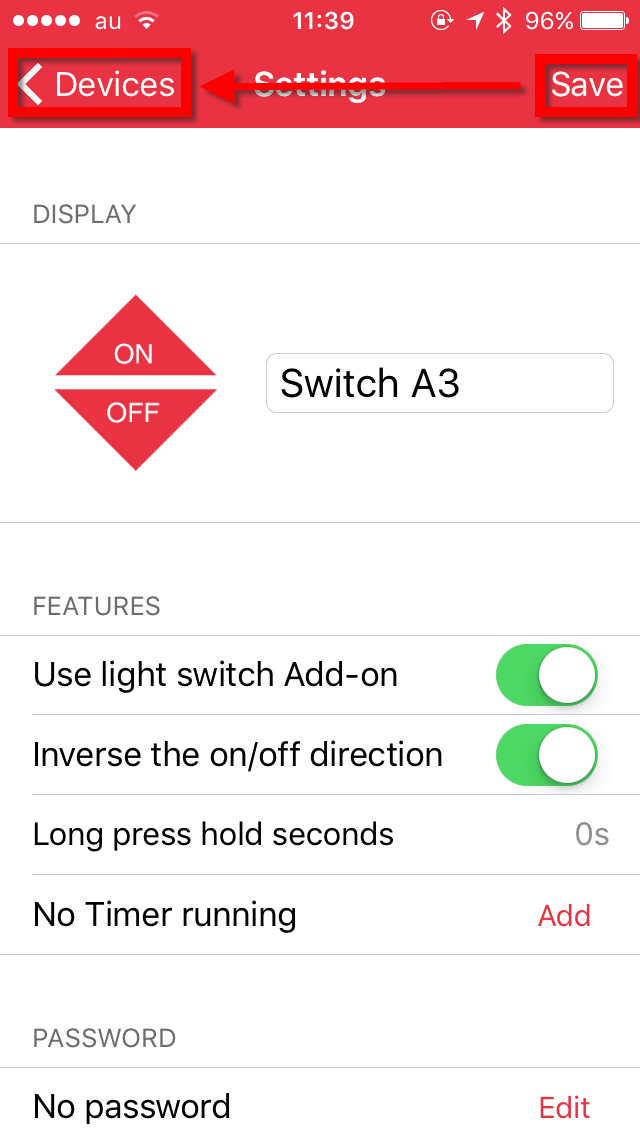
You can adjust the position of the bar so that "Light Switch Add-on" (add-on) can be easily installed by pressing "ON" or "OFF".
Peel off the add - on double - sided tape. Here we are working after peeling the double-sided tape, but it is OK even before peeling off just before pasting on the switch.
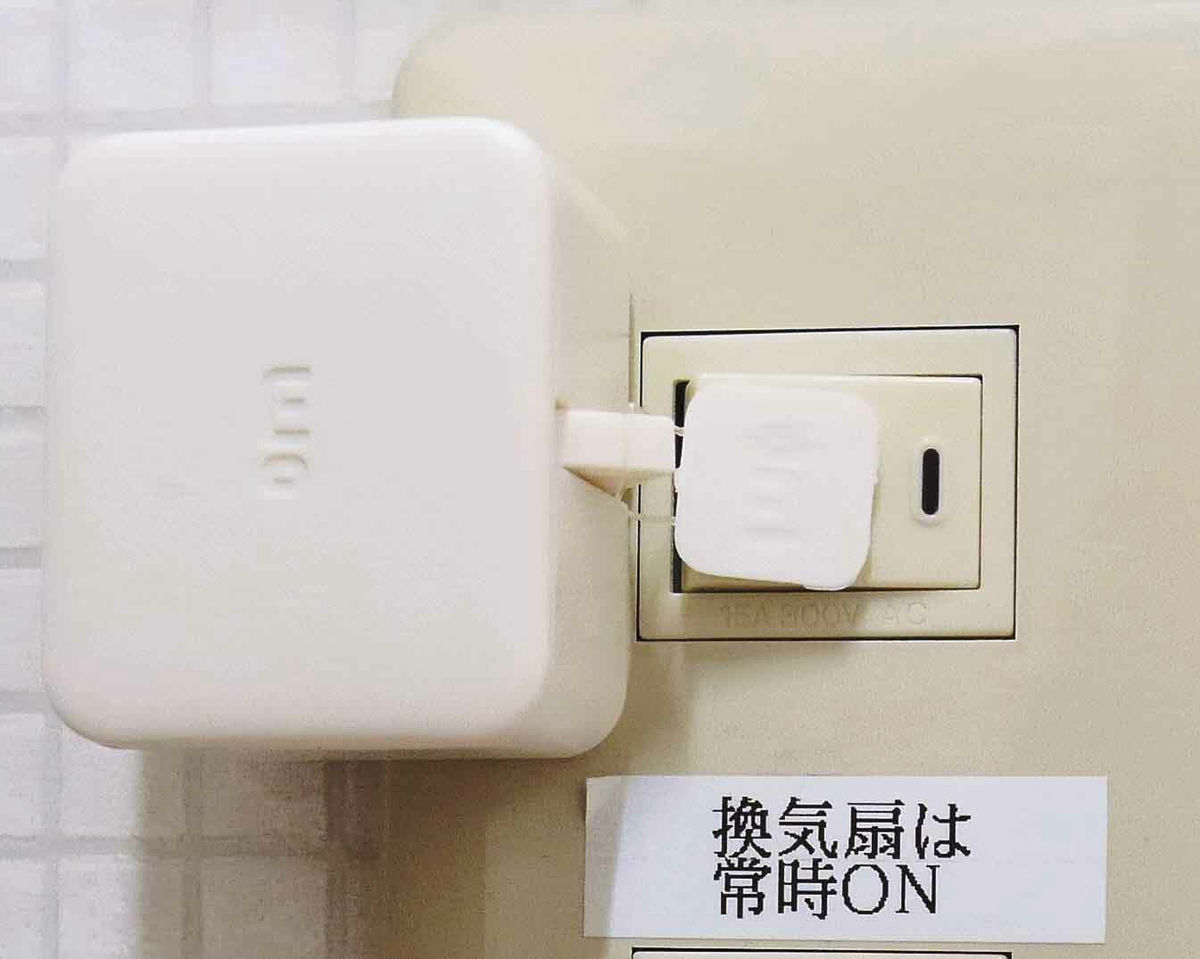
Pass the light switch part of "Light Switch Add-on" through the bar.

It was installed. Then stick it to the light switch.

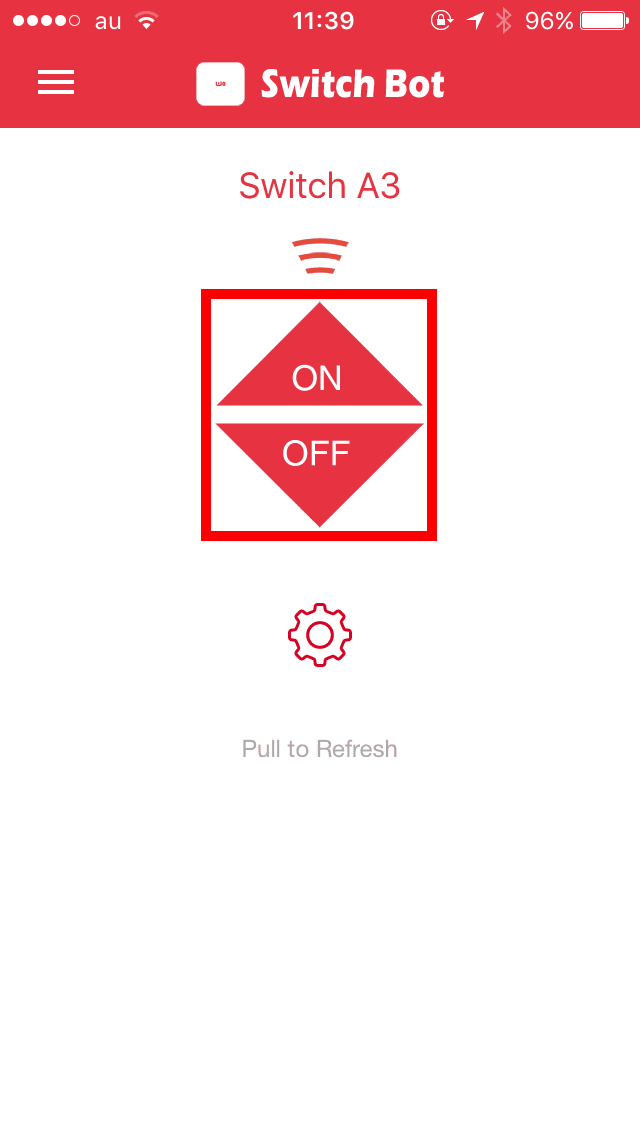
I pasted it. Now both ON and OFF are enabled. I will give it a try.
Allow SwitchBot to add an add-on to make it behave - YouTube
Tap on the smartphone's ON button ......
The bar pulled up the switch and lighted the light.
Tap OFF ......
He pushed the switch and turned off the light.
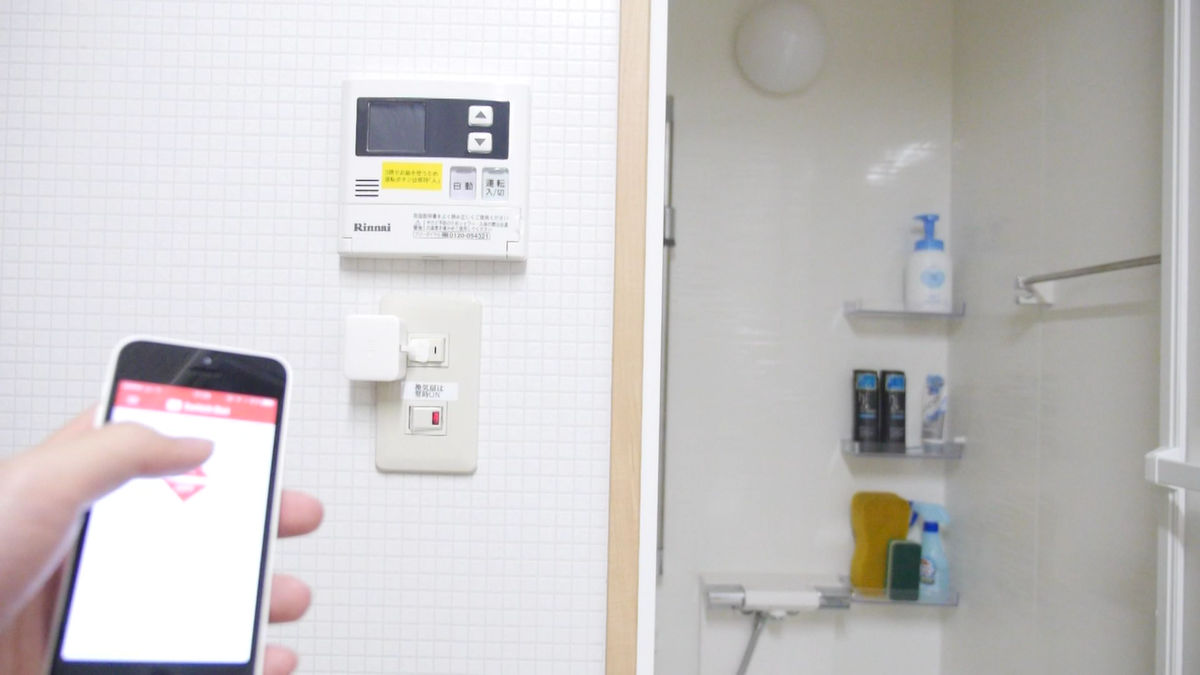
Now you can now operate lights through smartphones. However, since it connects the smartphone and SwitchBot with Bluetooth, if it is several meters away the connection will be broken and it will be inoperable. Therefore we use SwitchLink which can communicate via Wi-Fi (wireless LAN). By installing SwitchLink near the SwitchBot, you can now operate the switch through the Internet from the outside.
Connect the power supply.
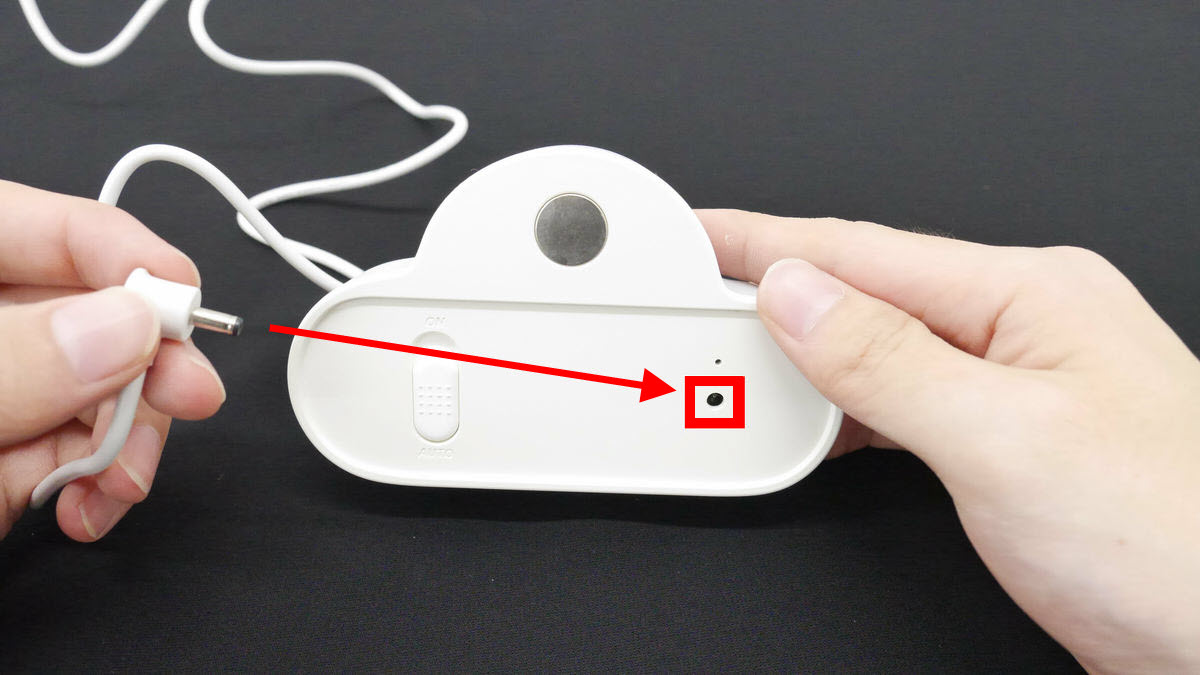
When I connected the power supply, it glowed red. Next I will set up the smartphone side.

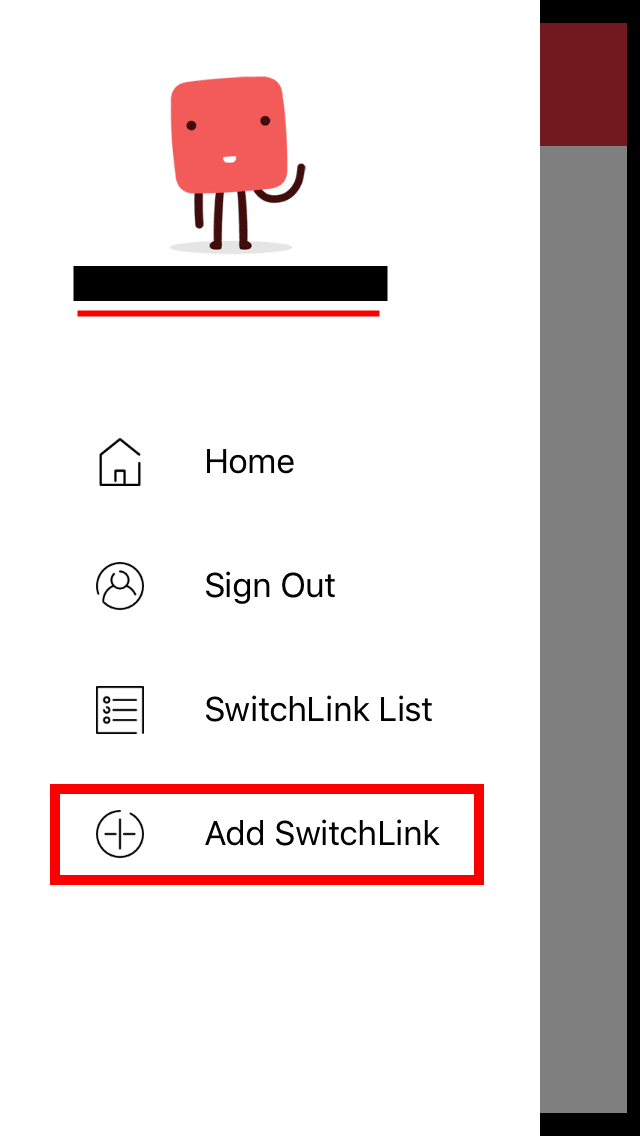
Open the hamburger menu on the upper left of the screen.
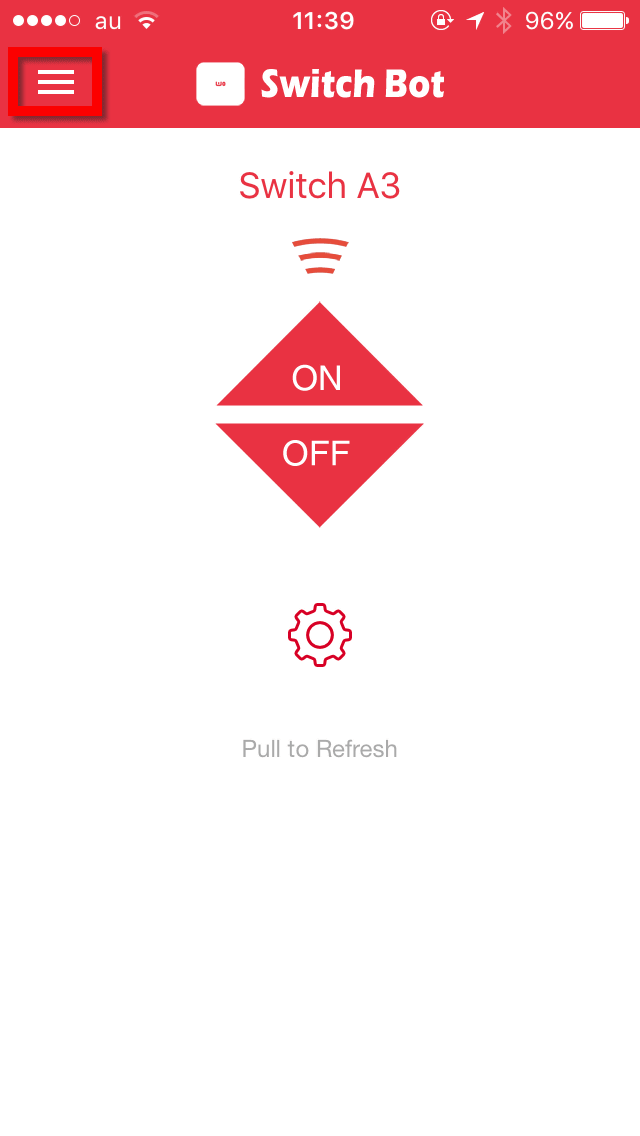
Tap "Add SwitchLink".

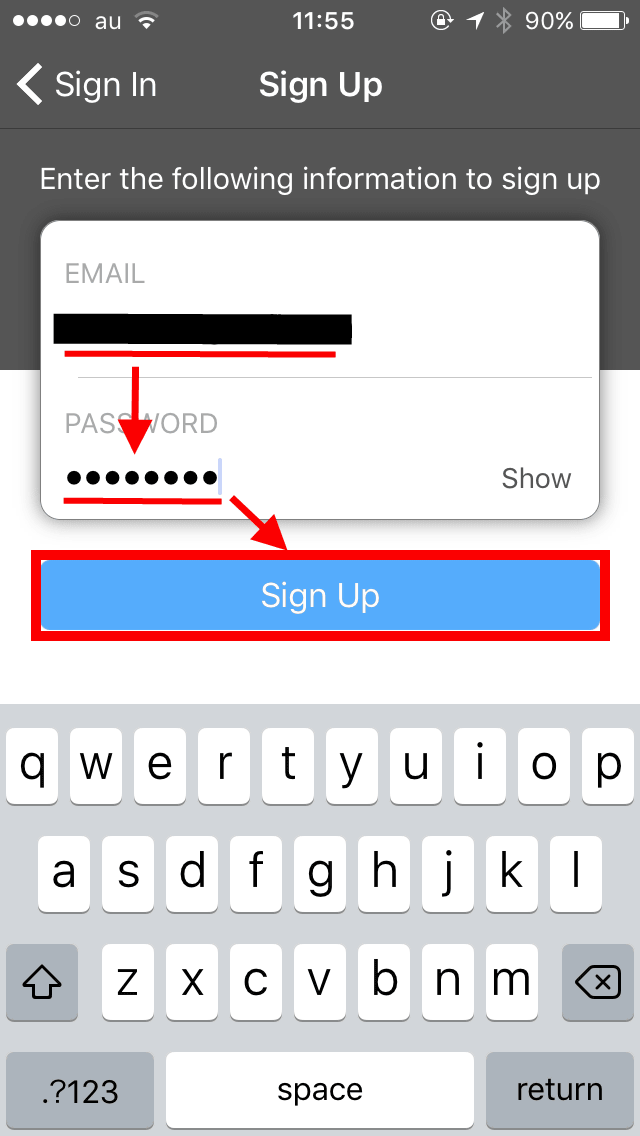
A sign-in screen appears so you can enter user information and sign in. To create an account, tap "Create new account".

Enter the e-mail address and the password you want to use, and tap "Sign Up" to send the confirmation code to the e-mail address.
Please note that e-mails are sorted out in the spam folder.
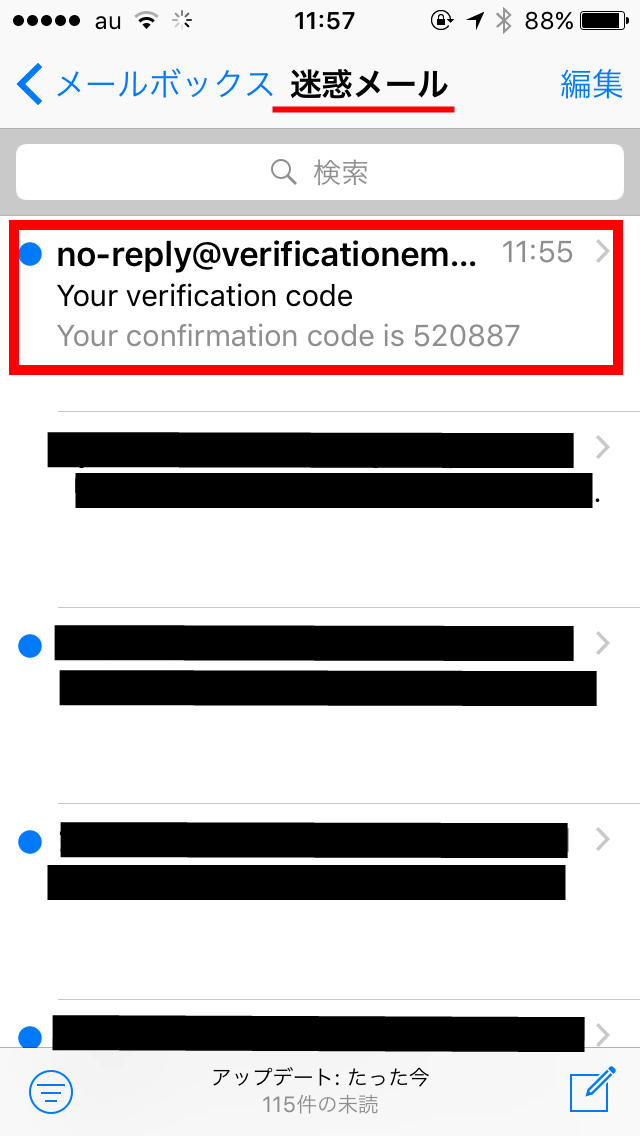
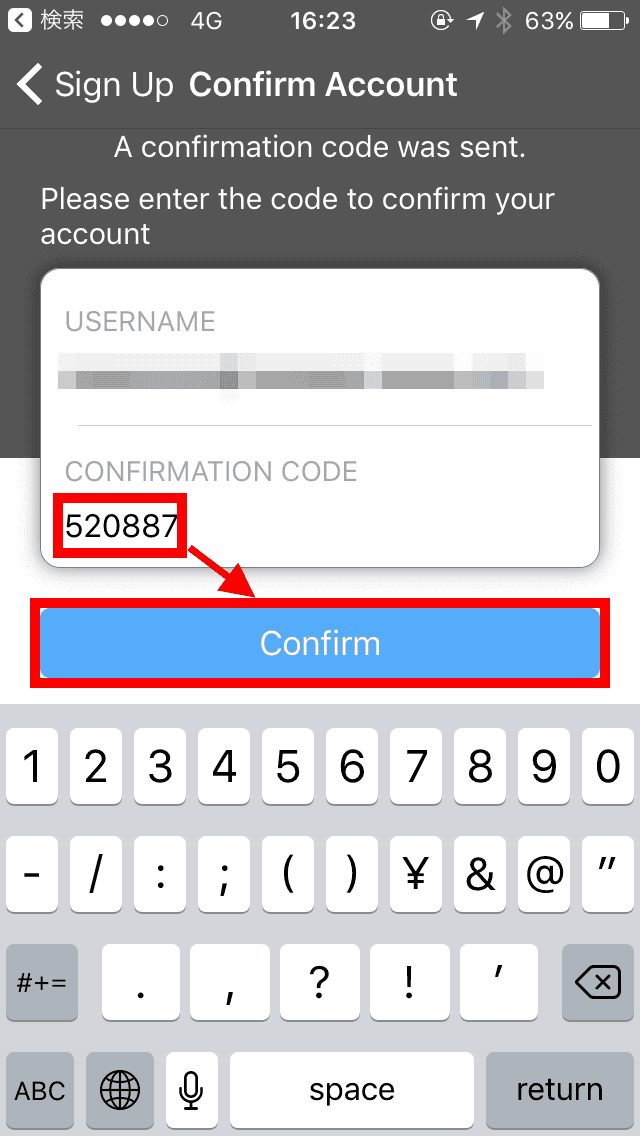
Enter the 6 digit number in the mail body in the "confirmation code" field and tap "Confirm".
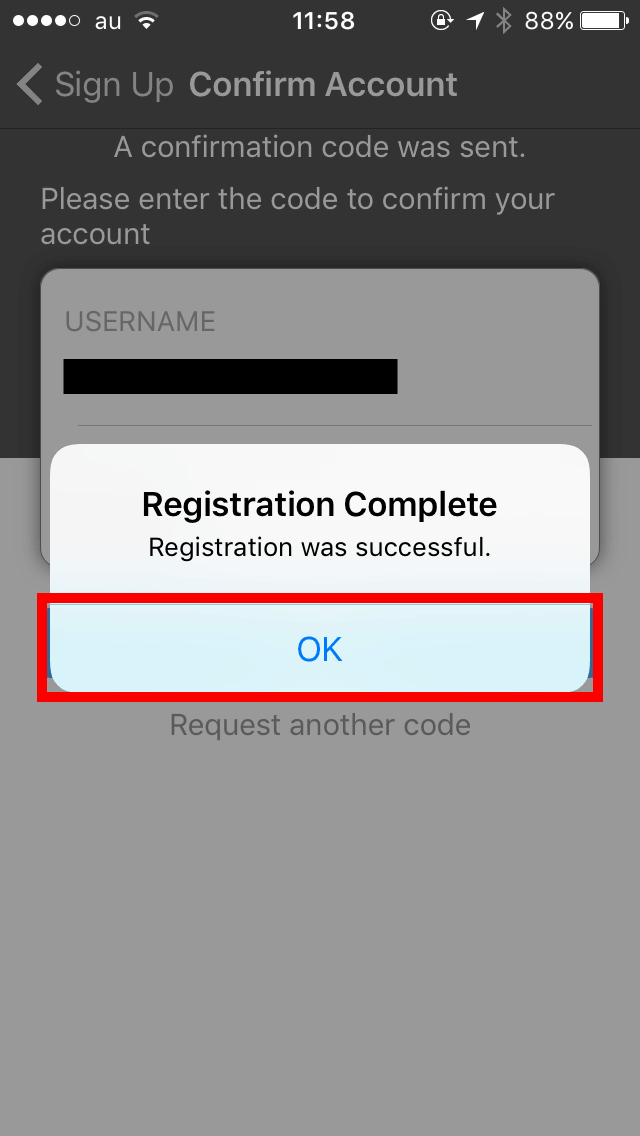
Registration is completed. Press "OK".
Enter the e-mail address and password that you registered earlier and tap "Sign In".

When signing in, the mail address is now displayed at the top of the menu. Tap Add SwitchLink again.
Instructions to turn on the button on the back of SwitchLink, and so on.
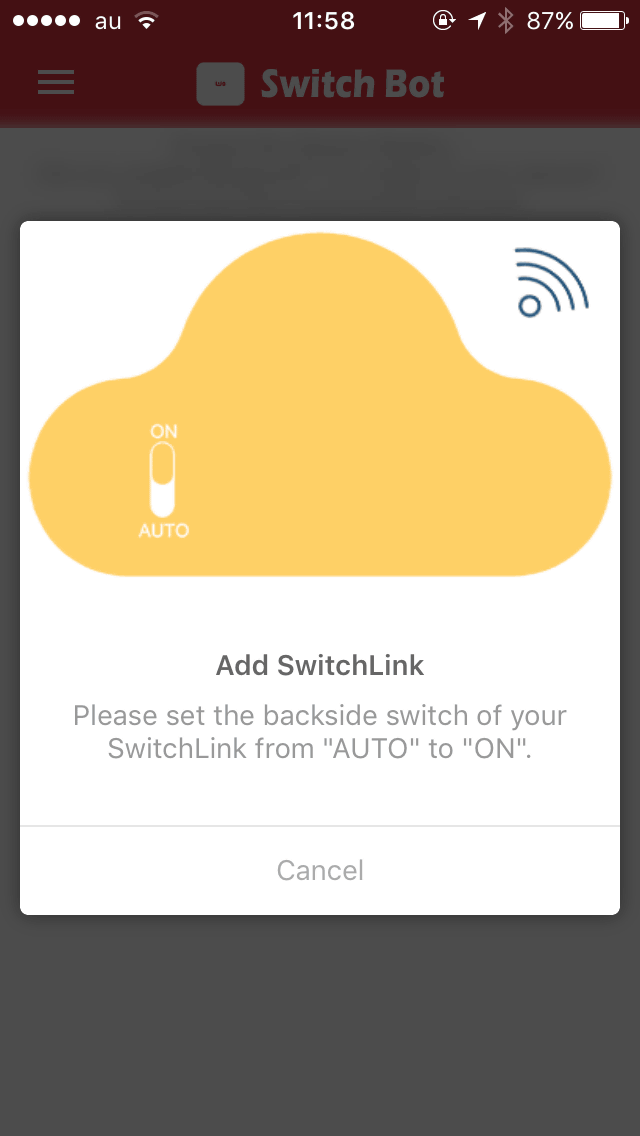
Slide the switch on the left upward to turn it on.

After recognizing the terminal, tap "NEXT".

Enter the SSID and password of the wireless LAN and tap "Done" at the lower right.

I waited for about 1 minute and it was connected.
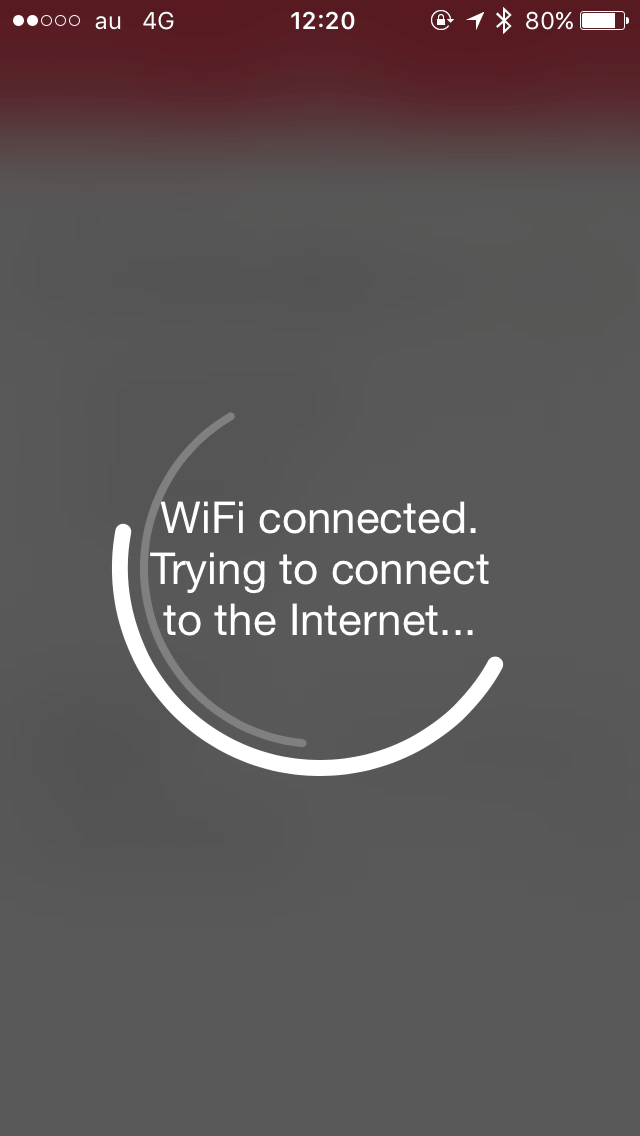
When connecting to the Internet, SwitchLink glows in rainbow colors.

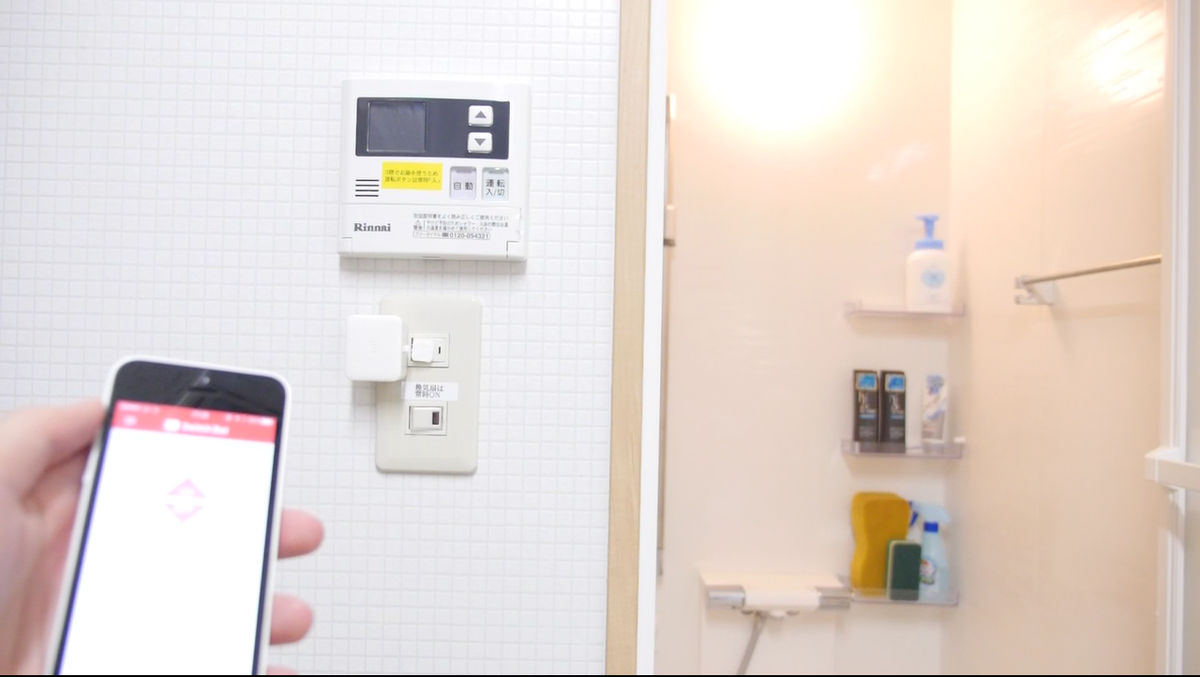
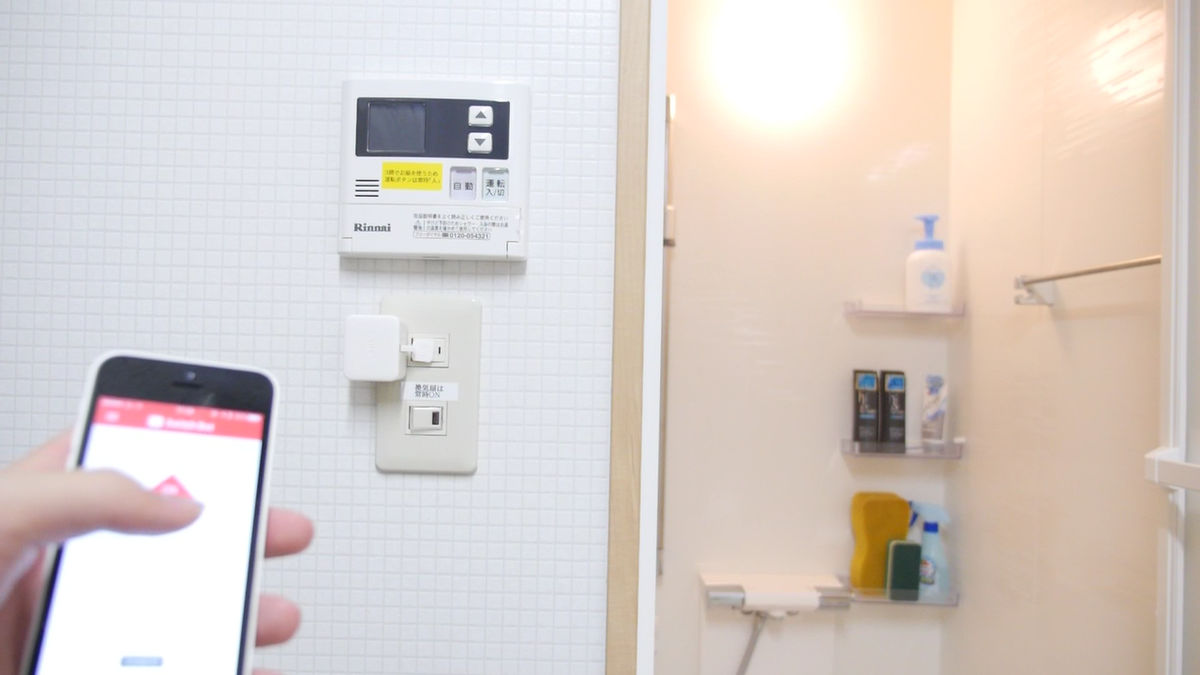
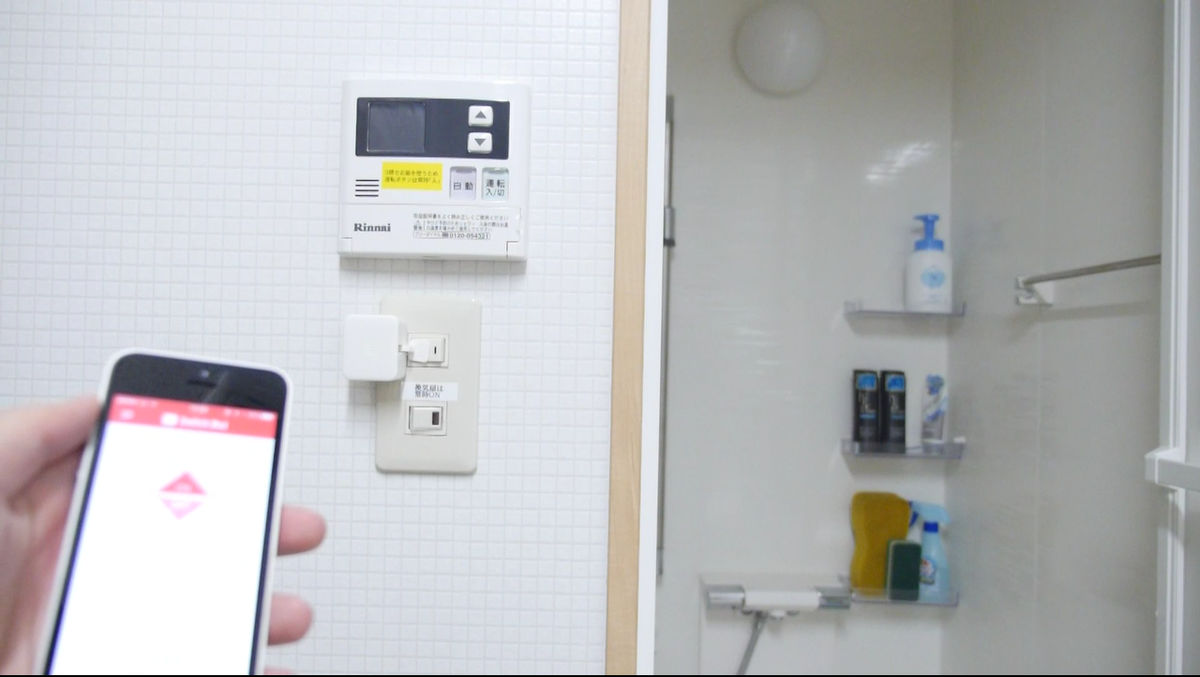
Returning to the application and trying to tap the cloud mark ......
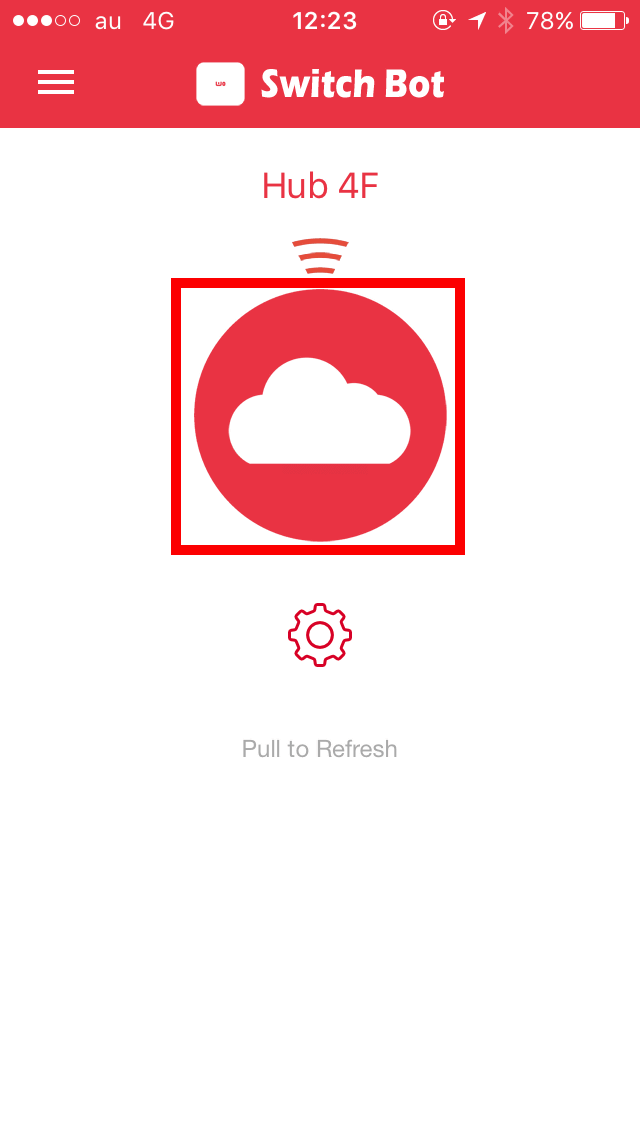
SwitchBot connected to SwitchLink is displayed. Cloud marks are displayed for connections through Cloud.
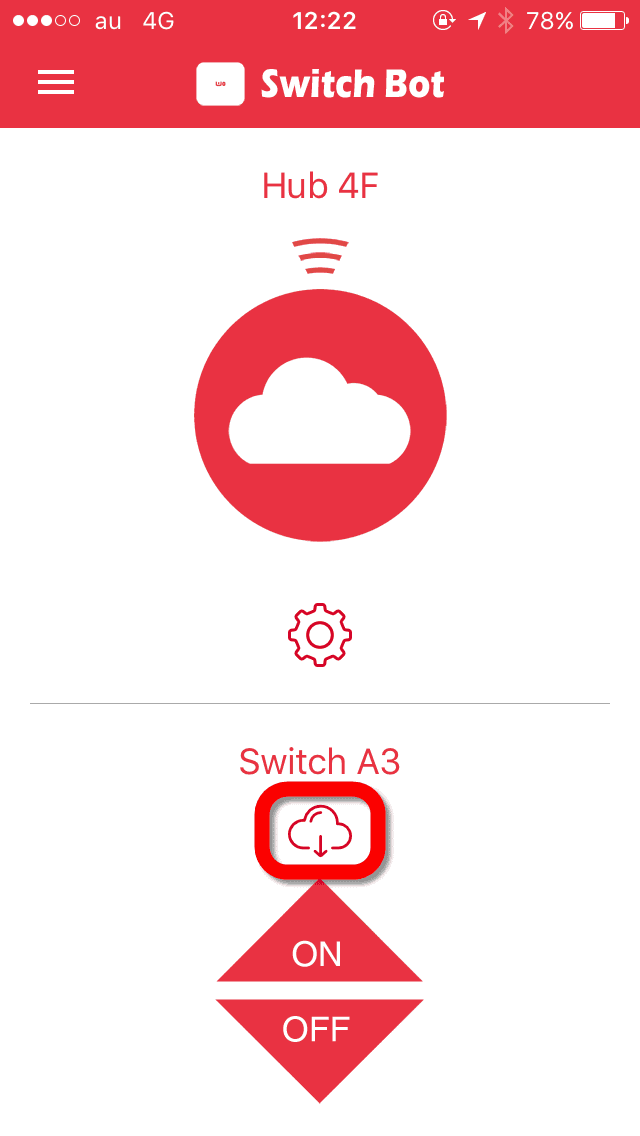
Through SwitchLink, SwitchBot worked exactly the same as when it was directly connected. Now you can operate this switch as you wish from the go. In this way, SwitchBot and SwitchLink are very easy to install and operate. The operation is simple, but its simplicity leaves much room for devise and its application range looks quite wide.
These two productsOfficial siteIt is on sale at SwitchBot for 25 dollars (about 2700 yen), SwitchLink for 45 dollars (about 4900 yen). Shipping fee to Japan is $ 10 (about 1100 yen) by mail "15-30 days", DHL or FedEX "3-7 days" is 22 dollars (about 2400 yen).
Related Posts: