I tried making paper airplanes with the "well-flying competition aircraft" which can make a competitive paper plane by cutting and pasting the printed paper and adjusting it
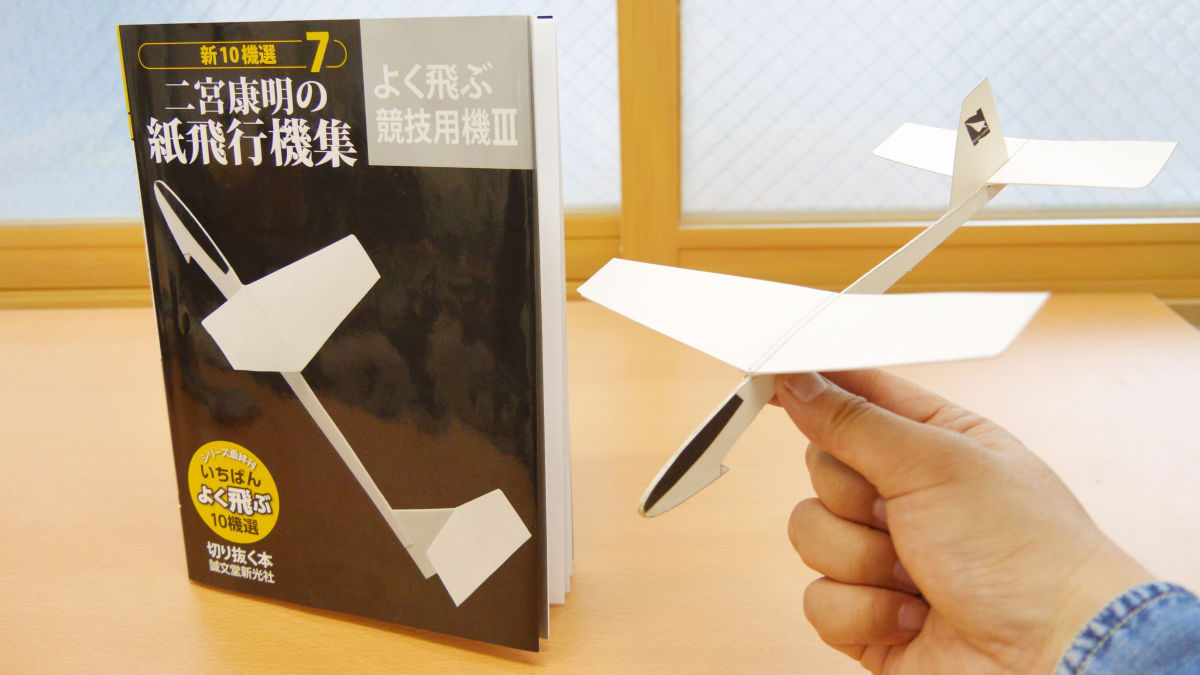
There must be a lot of people who have memories of origami making "paper airplanes" when they were children, but there should not be too many people who further entered the world of competition from there. In the science magazine for children "Children's science", Mook who collected paper workplaces of about 3000 original designs serialized by Mr. Yasuaki Ninomiya, the leading paper airplane series, for 49 years is Seikondo Shinkansha of"Ninomiya Yasuaki's paper airplane collection Frequently flying competition machineIt is a series. This time, I tried to make one machine actually from among its latest published "Flying Competitive Machine III".
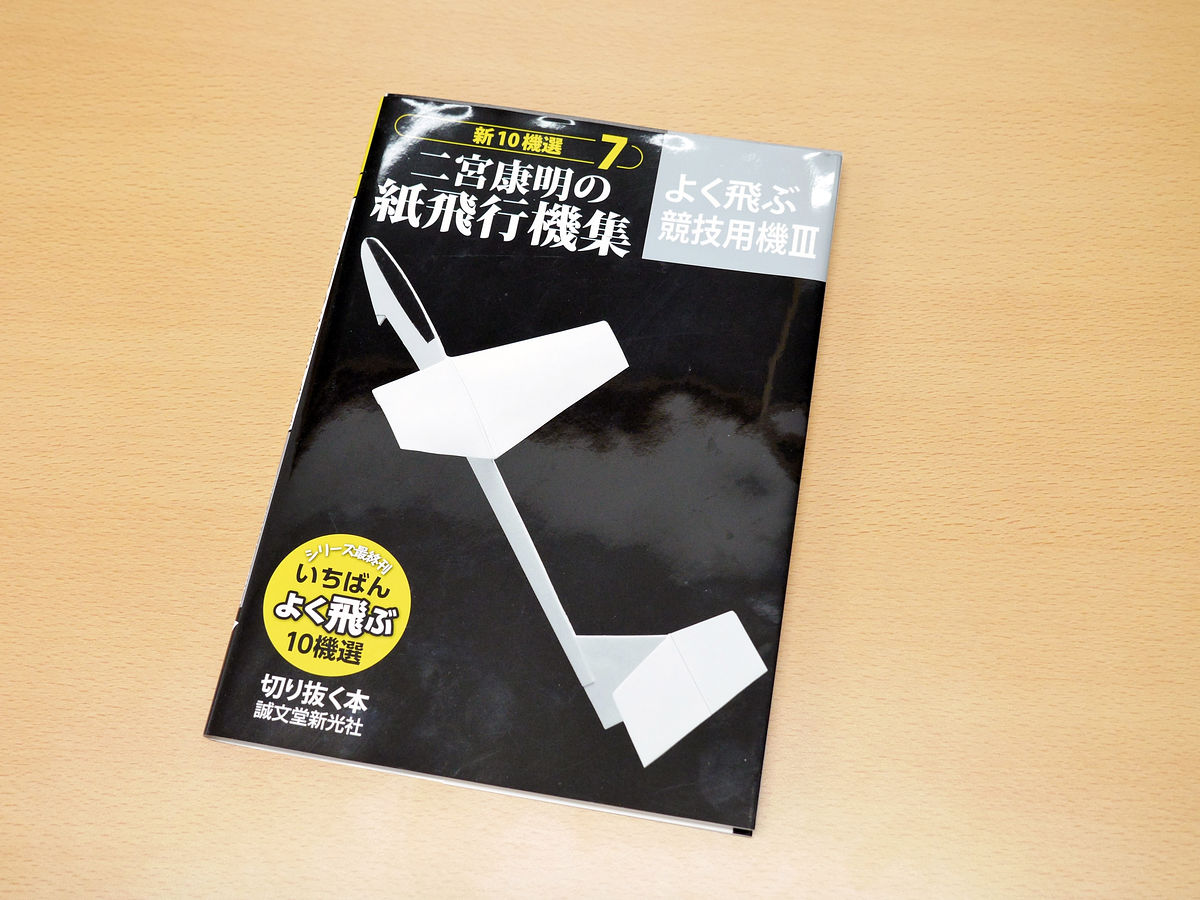
Seikimpo Shinkansha Co., Ltd. / Nagamiya Yasuaki's paper airplane collection Frequently flying competition machine
http://www.seibundo-shinkosha.net/products/detail.php?product_id=5039
A paper airplane actually assembled is like this. It was possible to create a paper airplane that can be used at the competition level simply by cutting out according to the design drawing printed on the cardboard at the end of the book and assembling it with adhesive.

The paper airplane above was assembled from 1 using the following moook. From Mook 's simple binding, I even feel the atmosphere of "just thinking of flying".
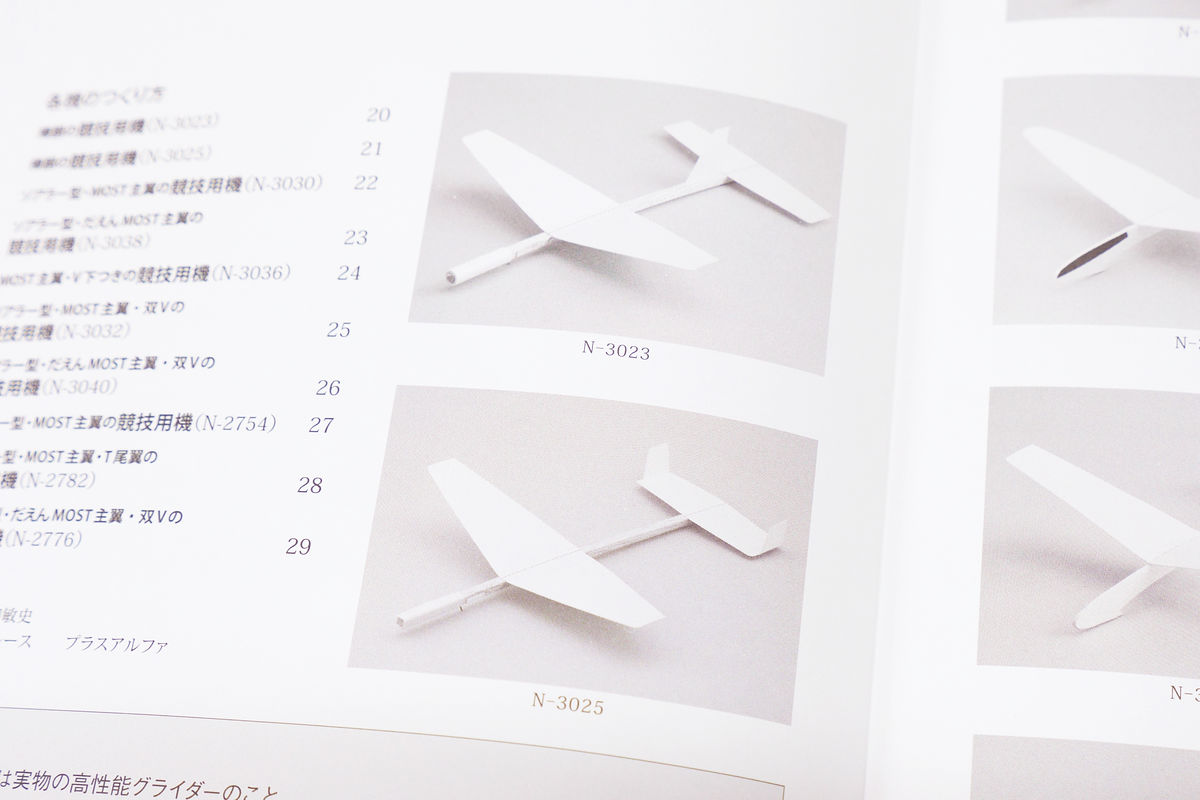
This one contains 10 designs.
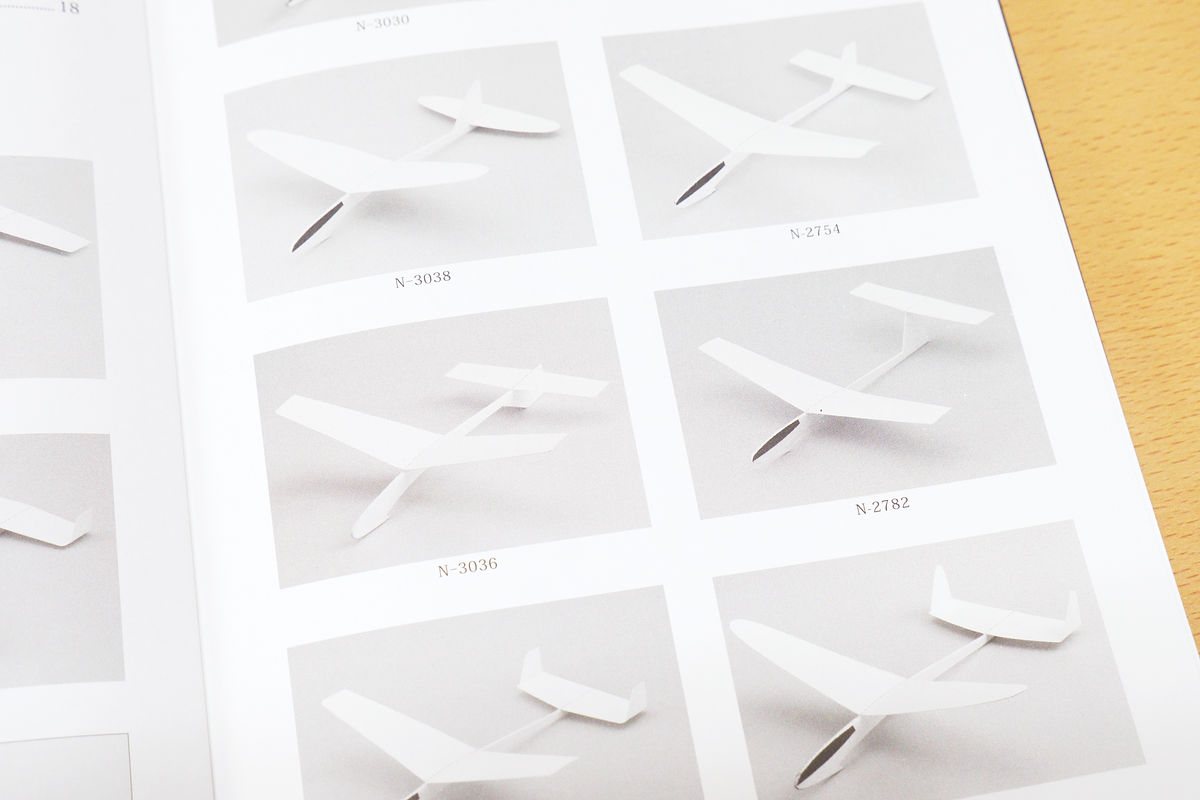
When you open the page, a list of the aircraft that is posted.

Two of them make the fuselage from wood "Barrel machineIt is becoming ... ...
The rest of the 8 aircraft are all made of paper "All paper making machine"Has become.
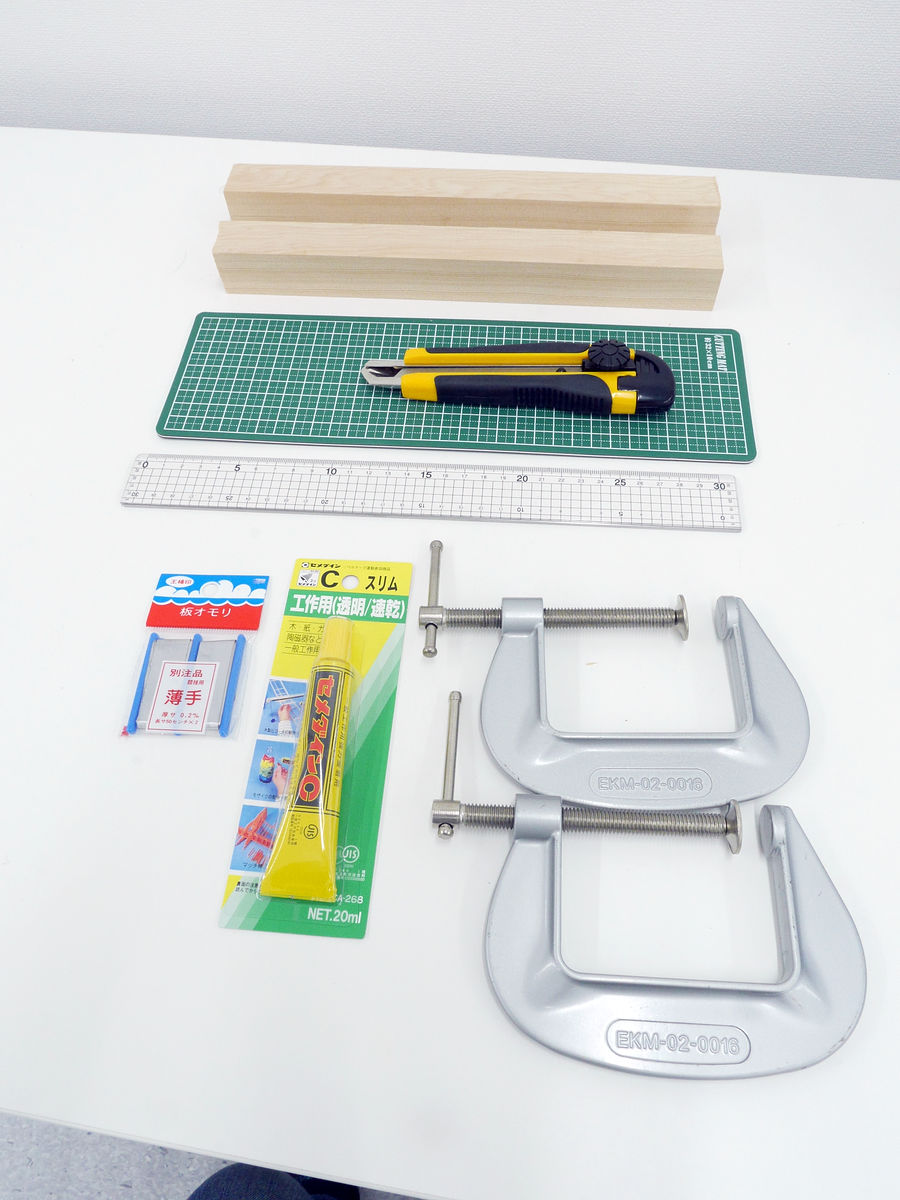
In addition to this book, the materials necessary for making the whole paper machine are "balancing plate", "adhesive" for balance adjustment, and "thread rubber and stick" for launch. In the case of a barrel machine, it is "balsa material" and "clip" for the body.
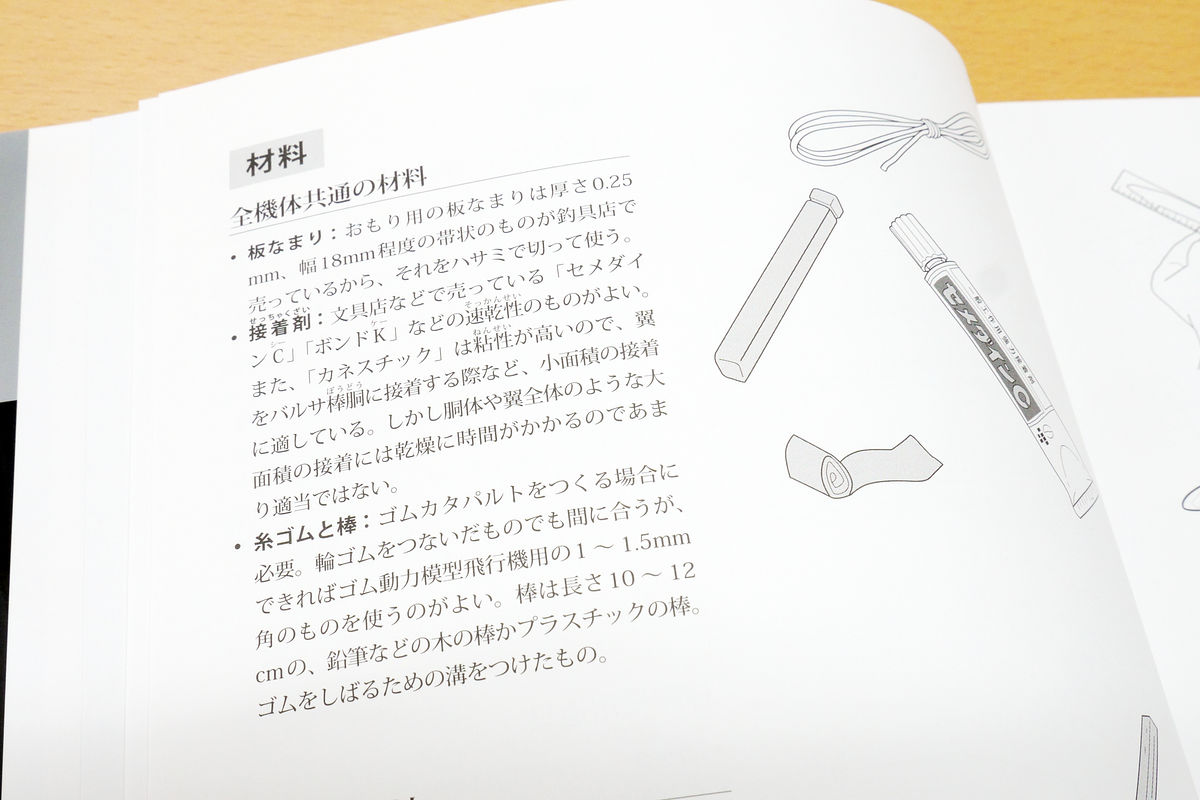
In addition, tools for tools such as scissors, rulers, tweezers, cutters, etc. are required for production. Furthermore, in the case of a barrel machine, pliers, dust and file are needed.

In the text are detailed how to adjust the aircraft ......
Actual methods of flying were described in detail.
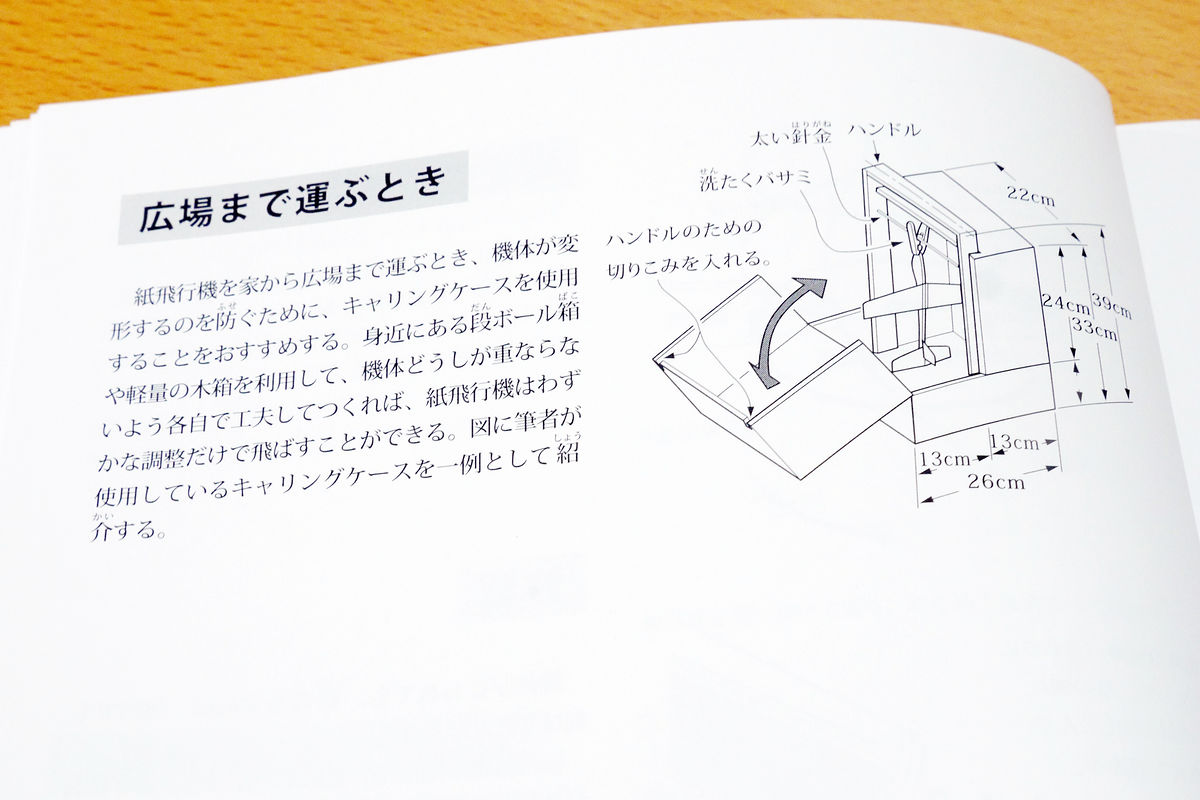
In addition, there is also a design drawing of a dedicated carrying case for paper airplane transportation that Mr. Ninomiya used. By hanging the aircraft with washing clips, it is a mechanism to prevent damage to the aircraft during transportation.
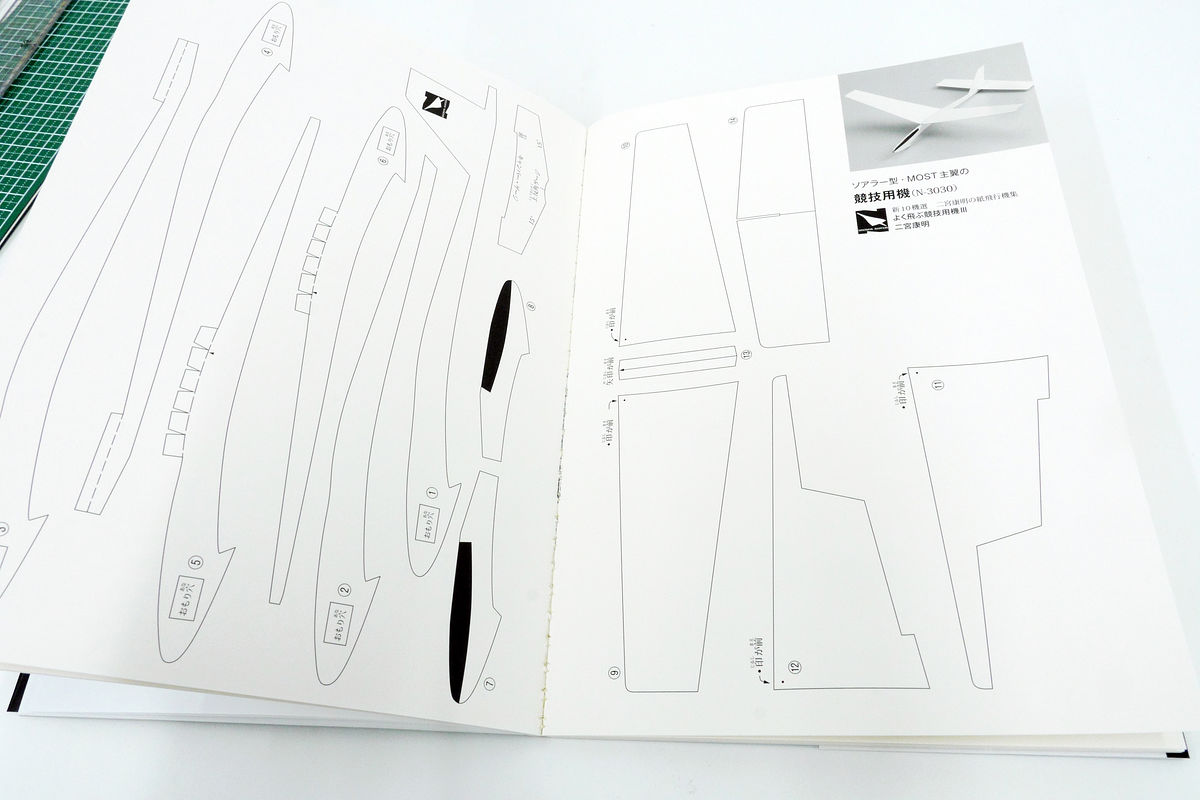
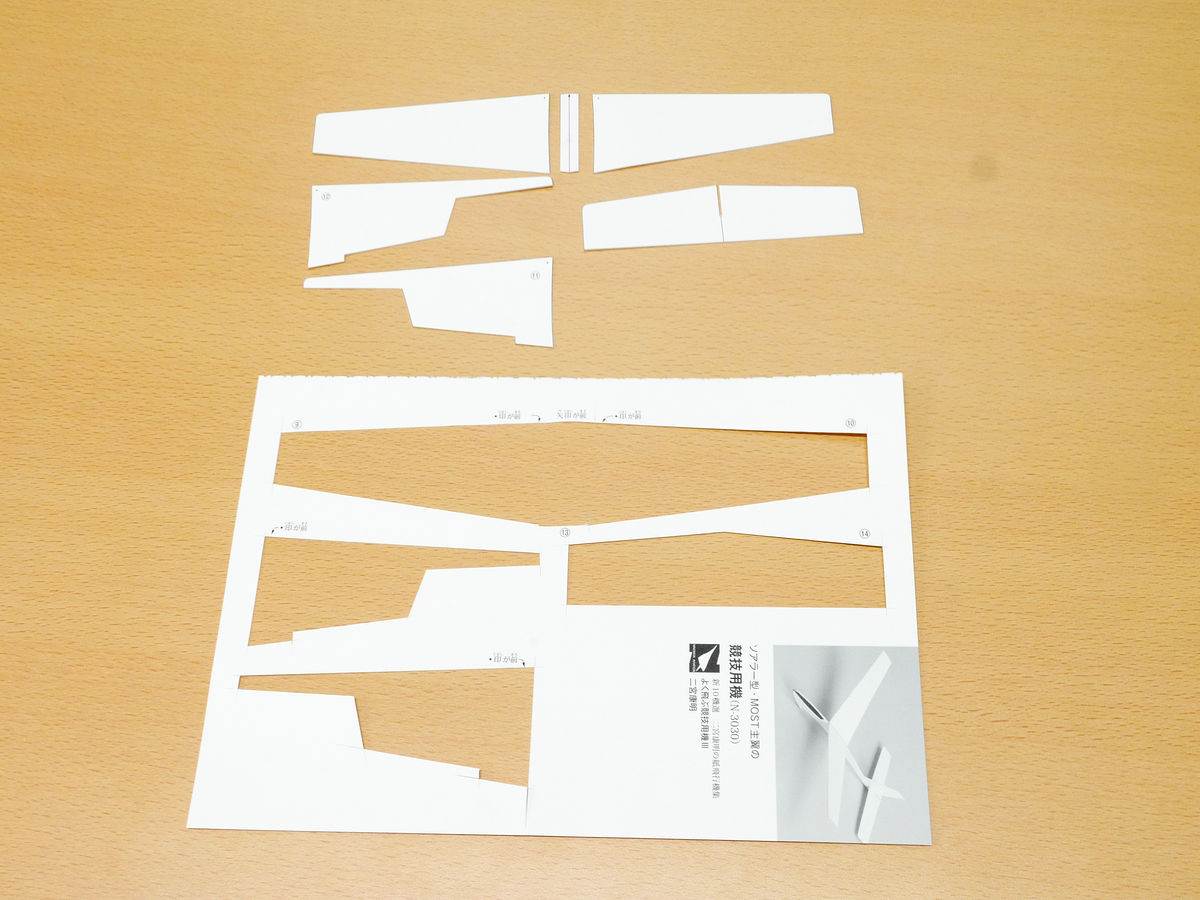
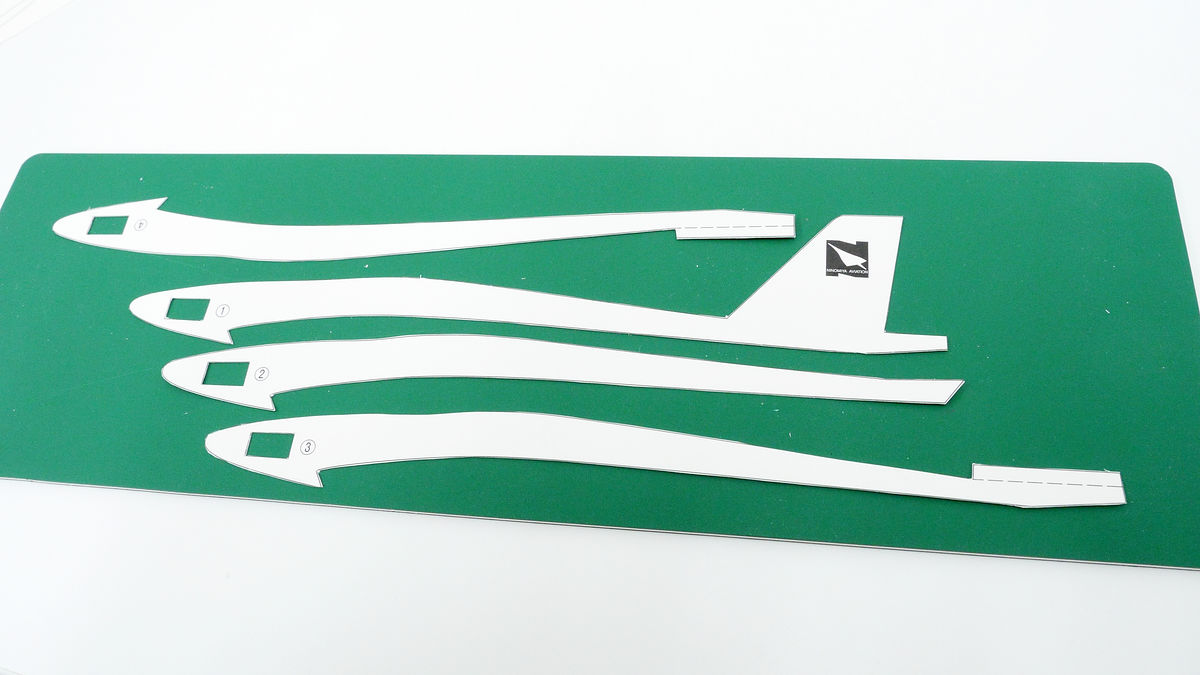
The parts of the ten machine aircraft that are posted are printed on two pages of two-page spread each.
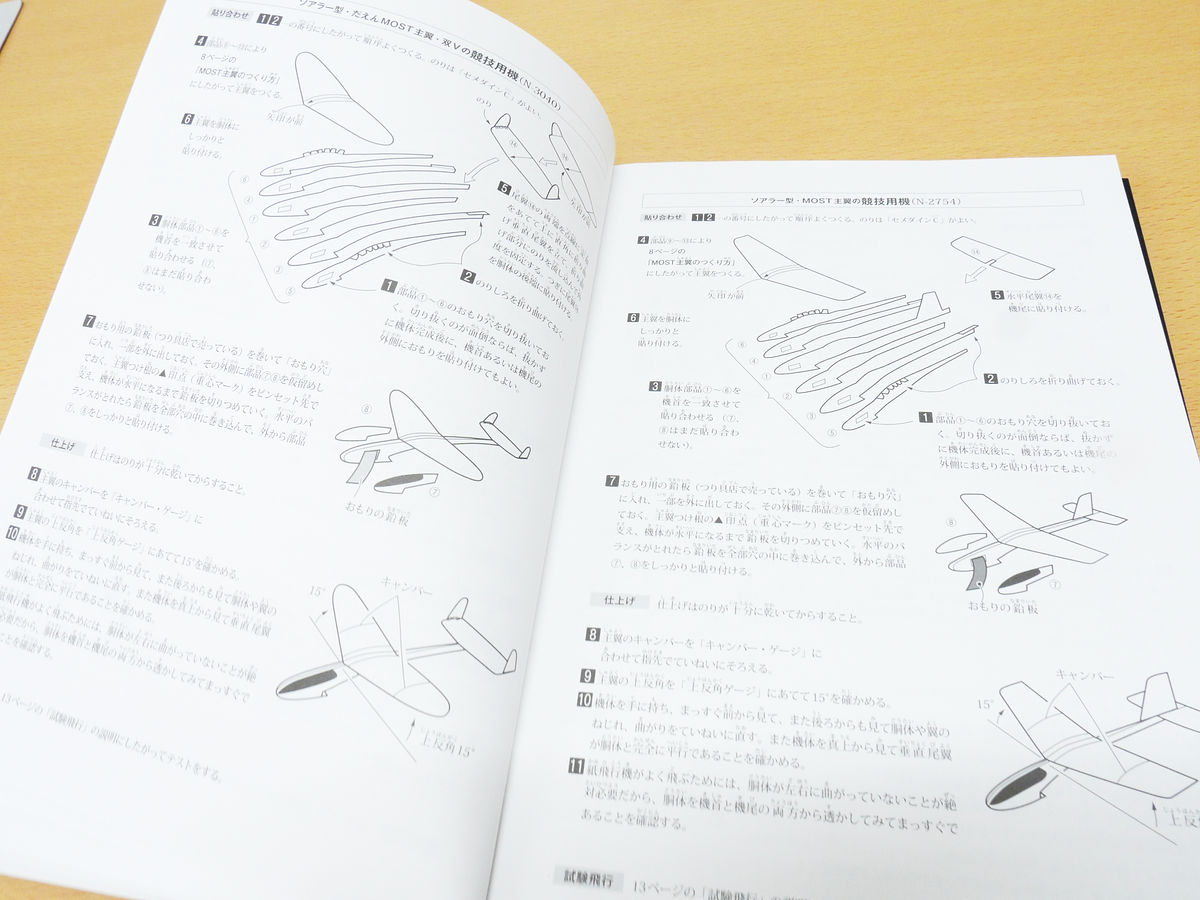
Since there is an assembly manual for each aircraft, it is ok if you carefully assemble according to the contents of the description.
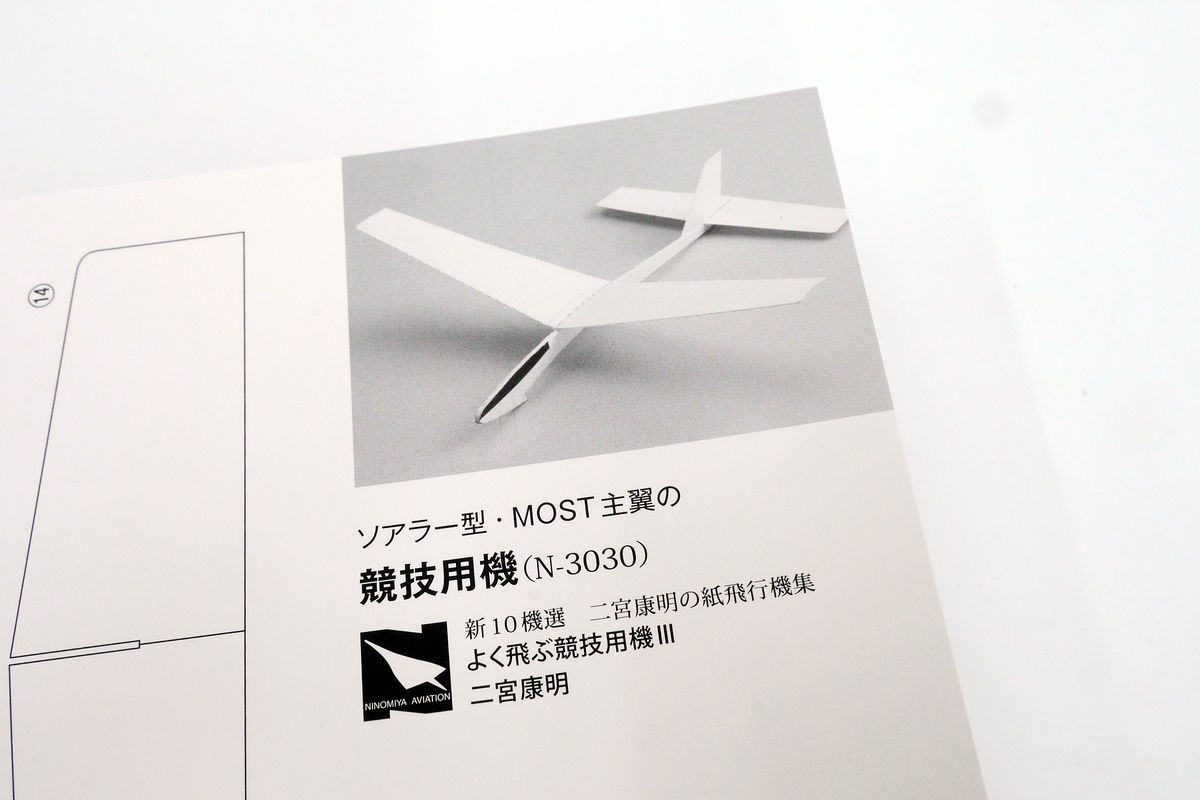
This time, "orthodox designs are adopted" Soarer type · MOST main wing "with"Competition aircraft (N-3030)I will try to make it. In addition, "MOST main wing" is named after the shape of the center resembles "saddle"MoDifiedSAddleTYpe "is the wings of the etymology, Mr. Ninomiya's original one.
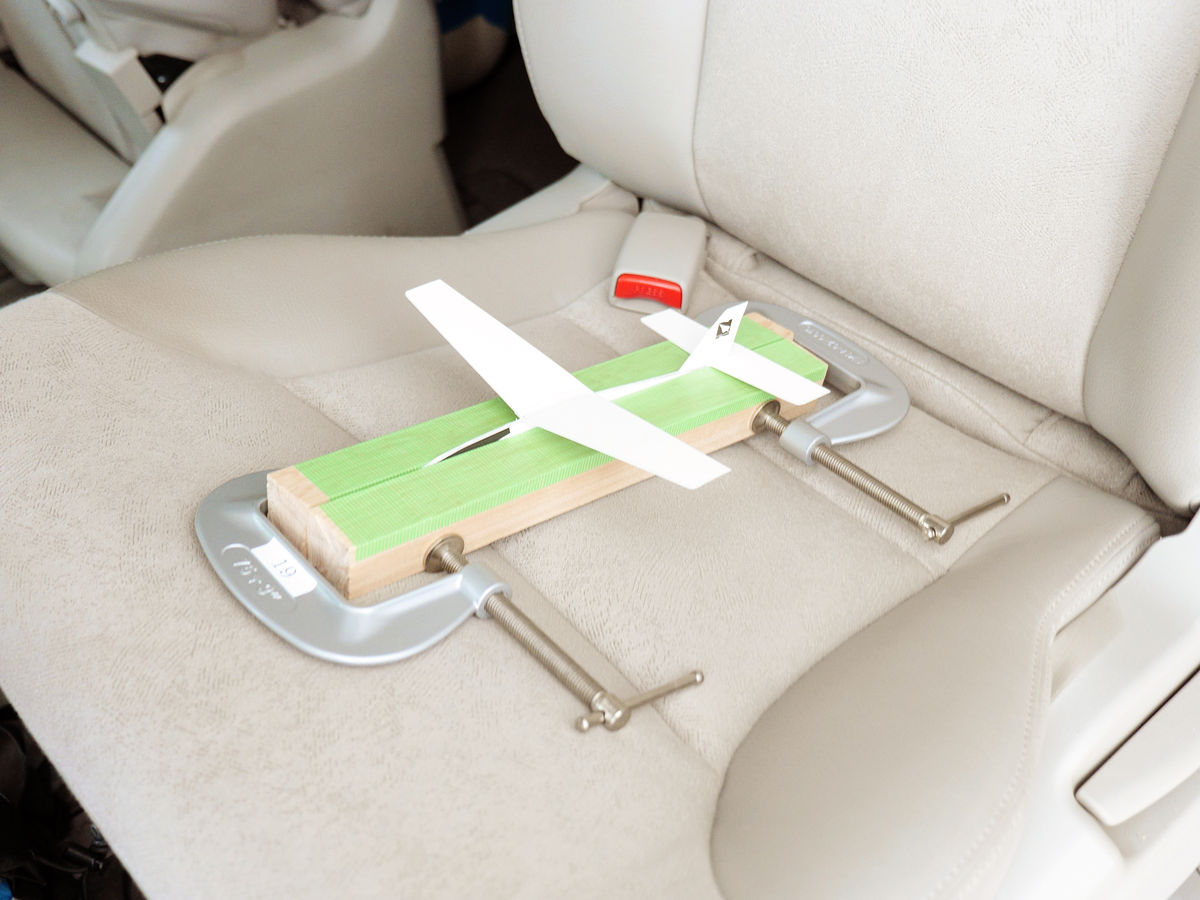
In assembling, in addition to the tools listed, we prepared squares and clamps to use as jigs to hold the aircraft.
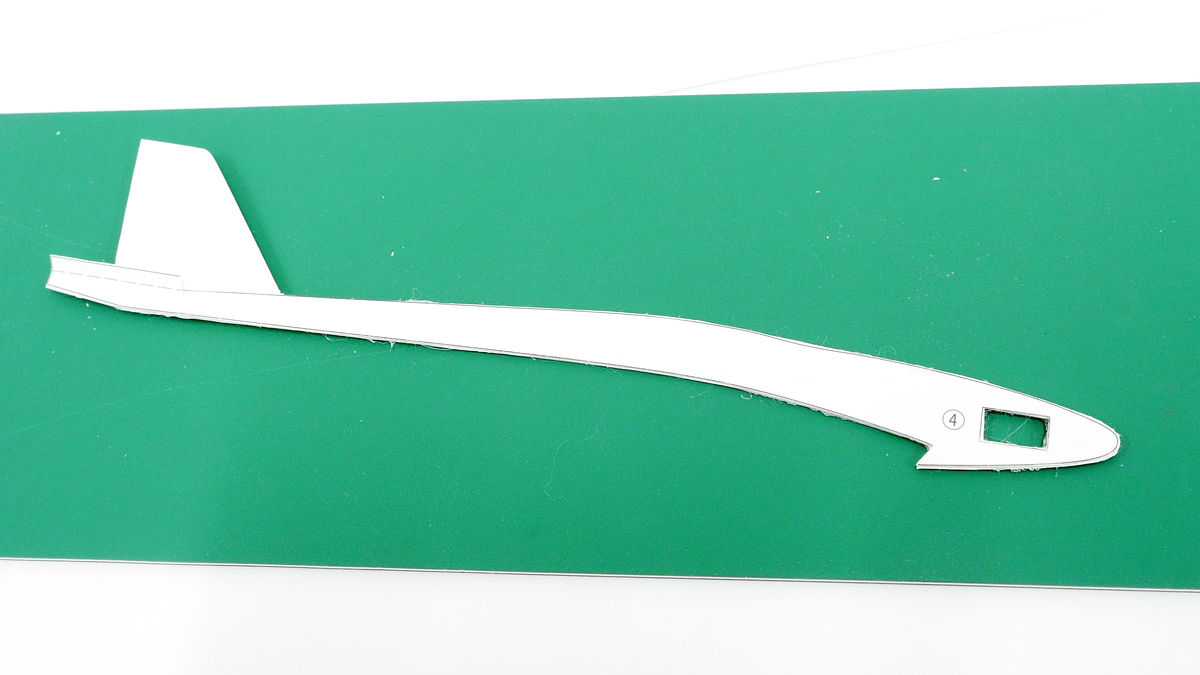
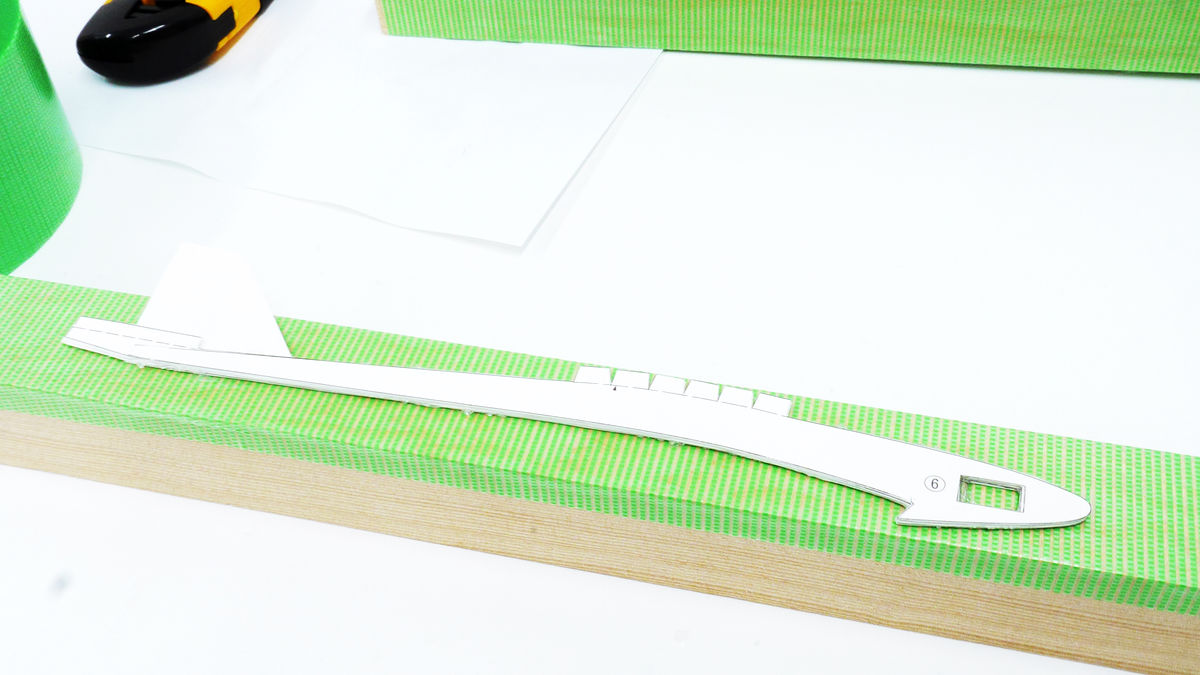
Firstly from the assembly of MOST main wing. The parts necessary for the wing are gathered on one page.

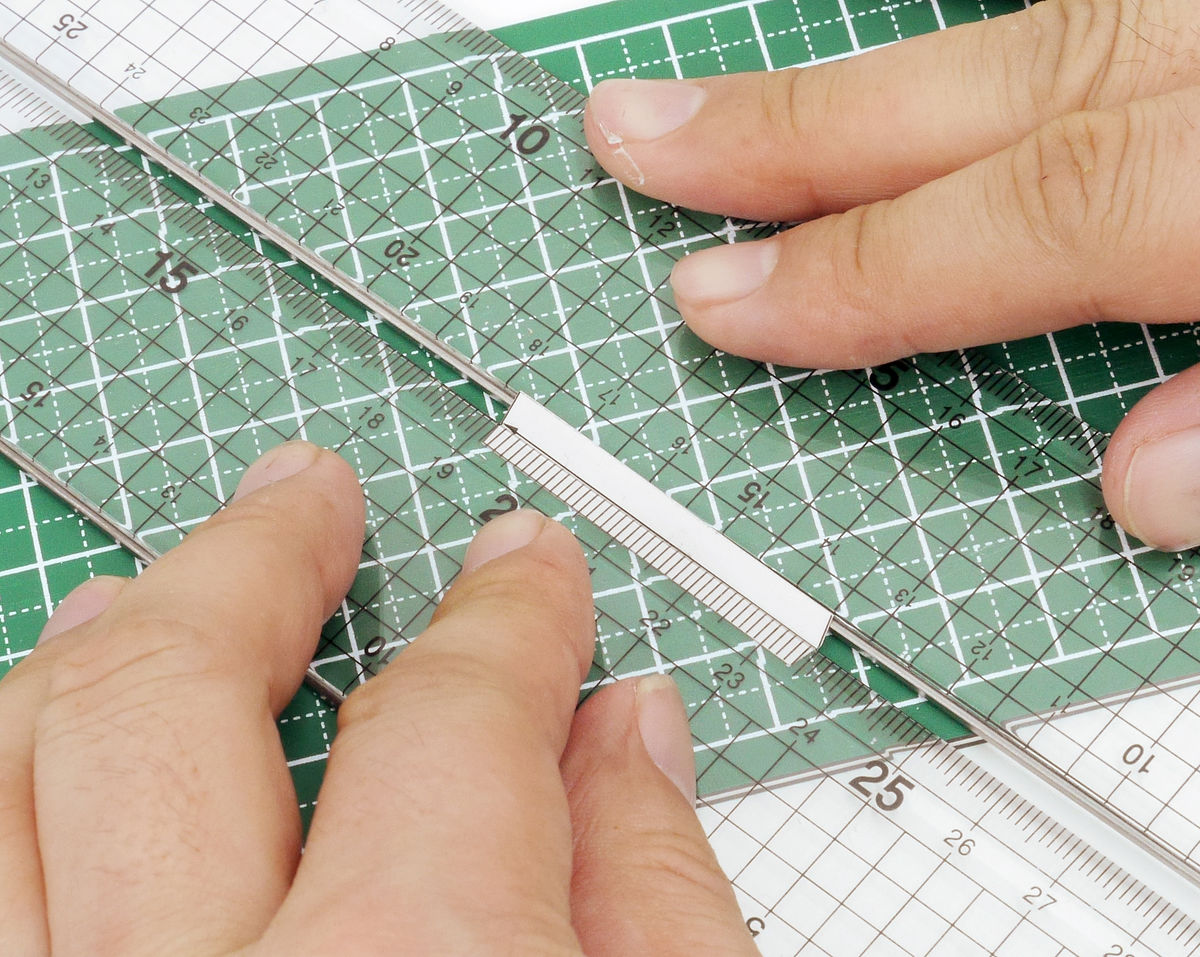
Using the ruler and the cutter for the straight part ... ....
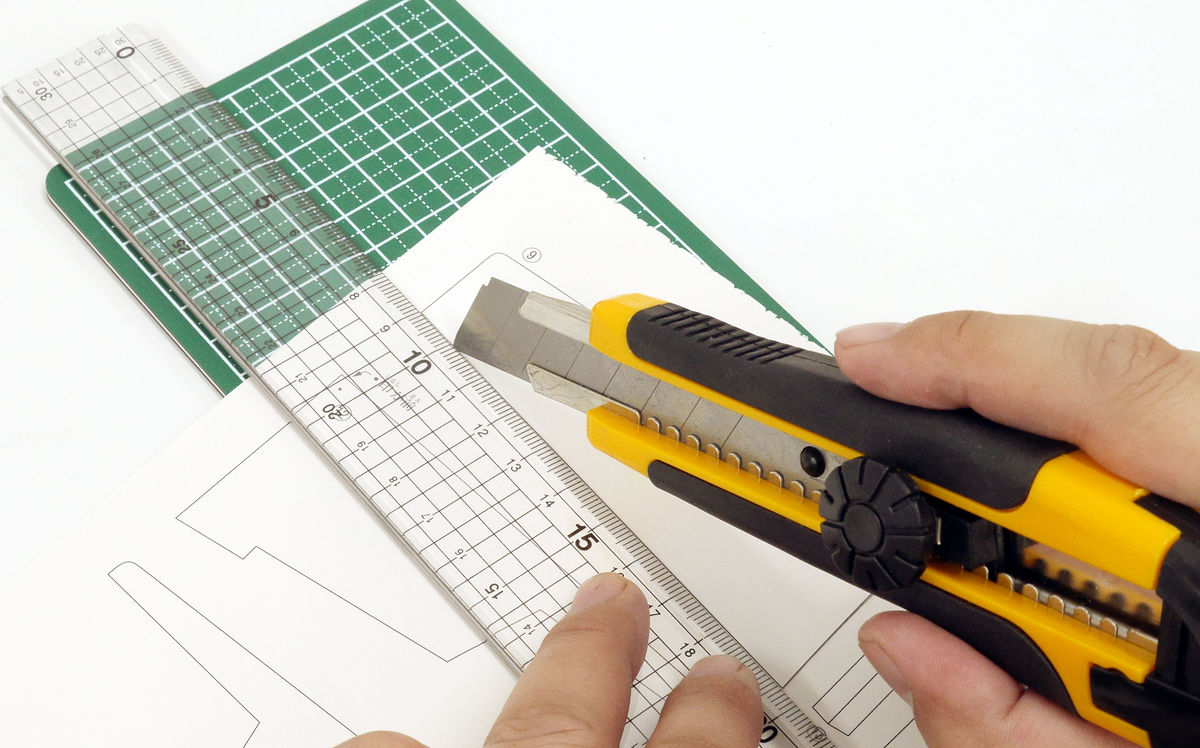
For the curved part, we cut out using cutters and scissors separately.
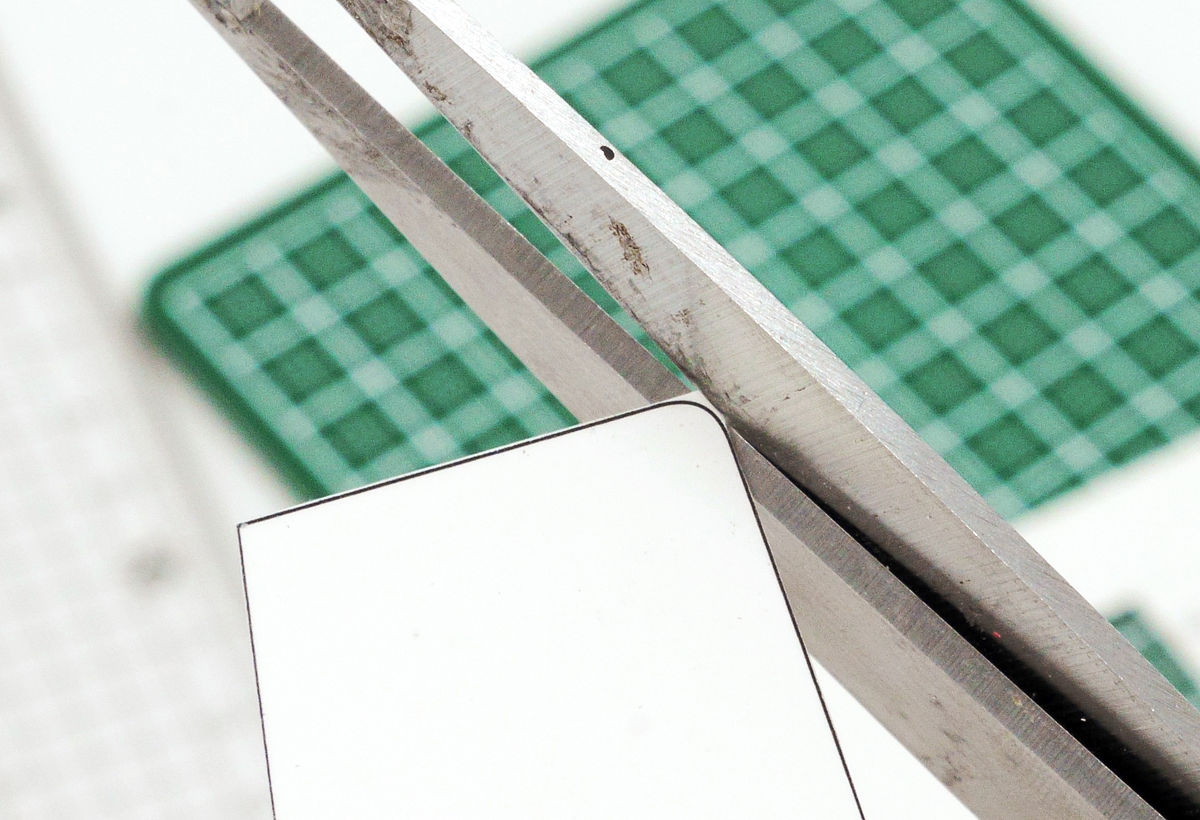
Cut out all parts
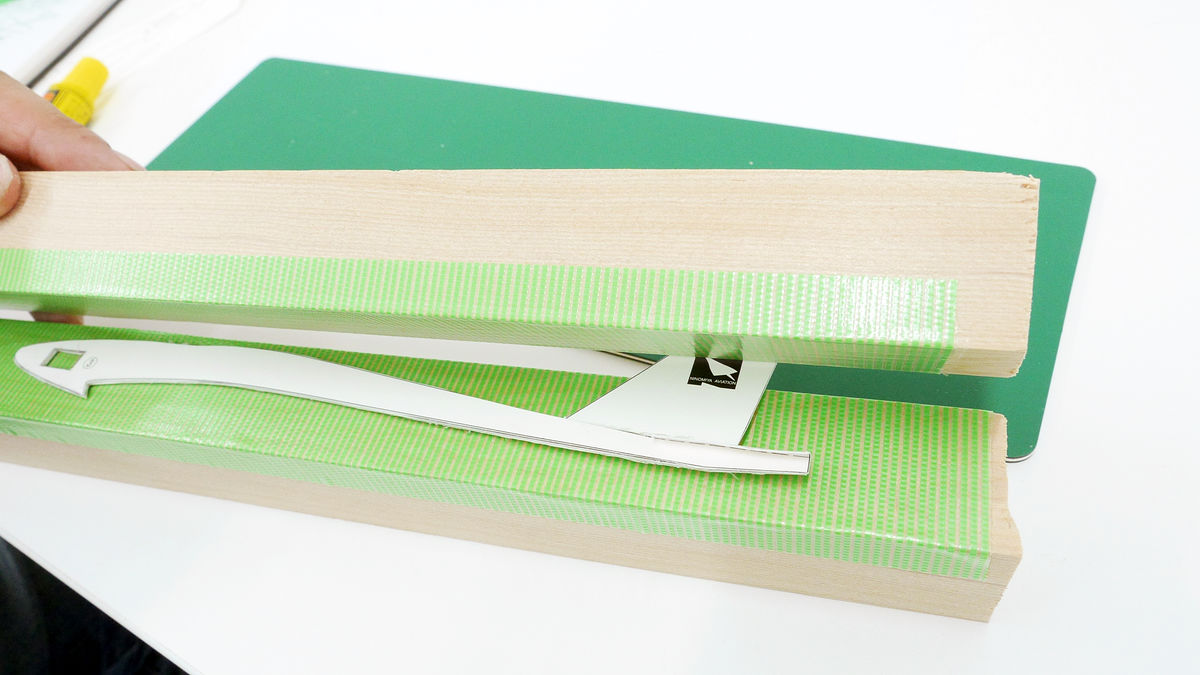
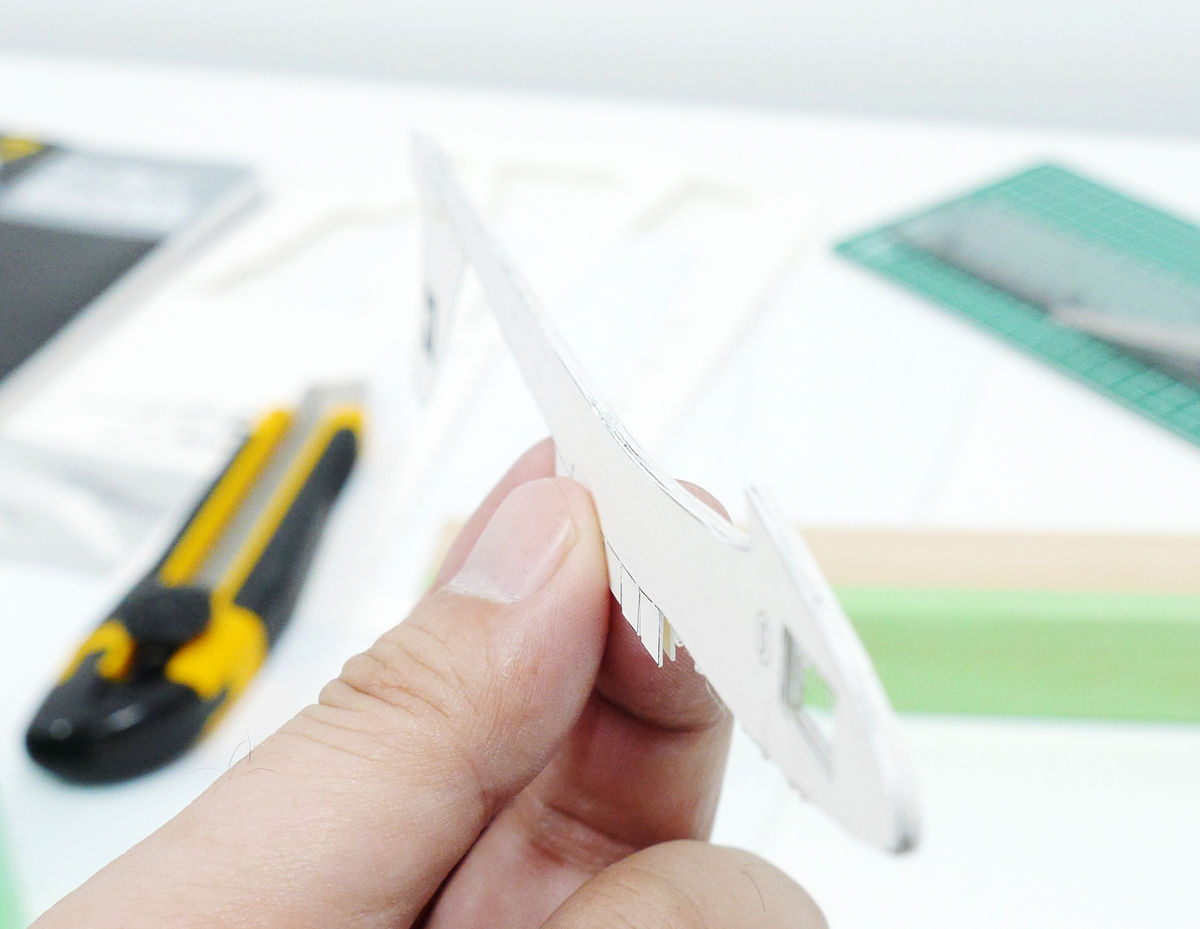
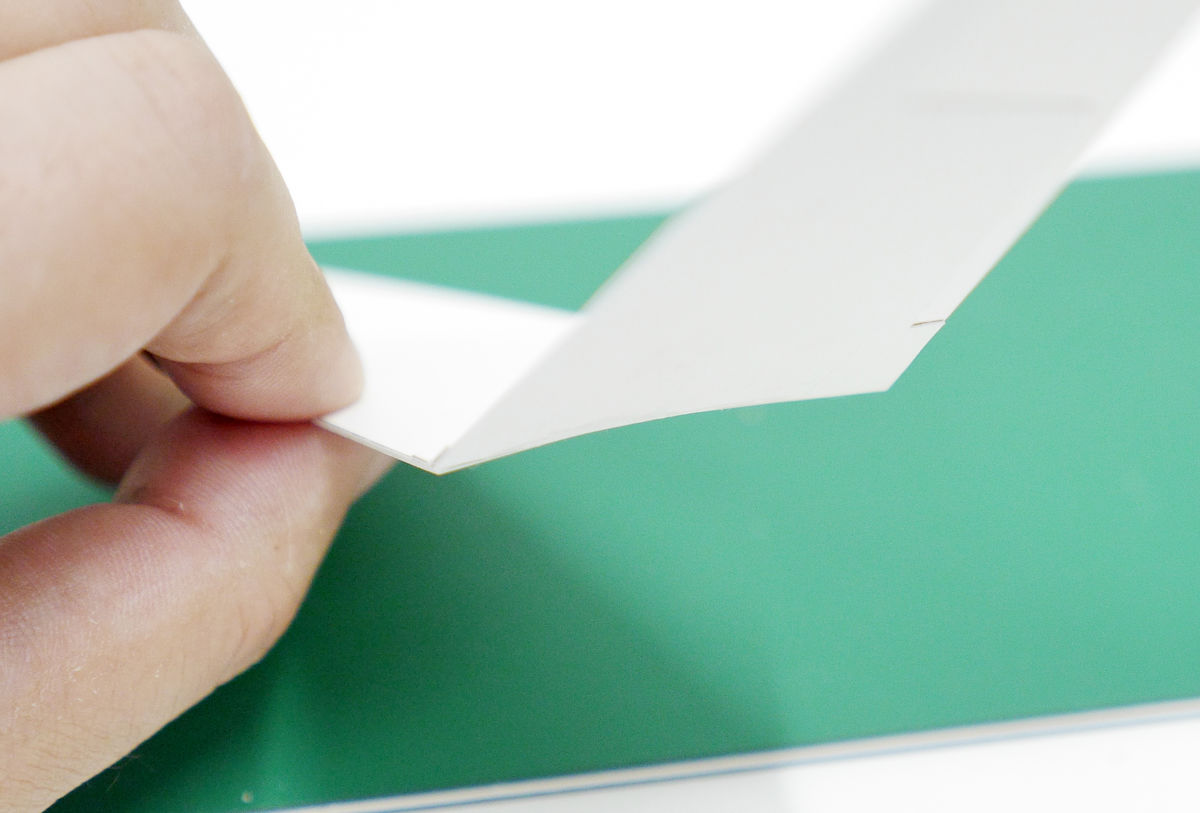
The main wing is made by combining two parts.

Flip over the smaller part and evenly apply Cemedine on one side. At this time, it is written that it spreads out using paper end material.
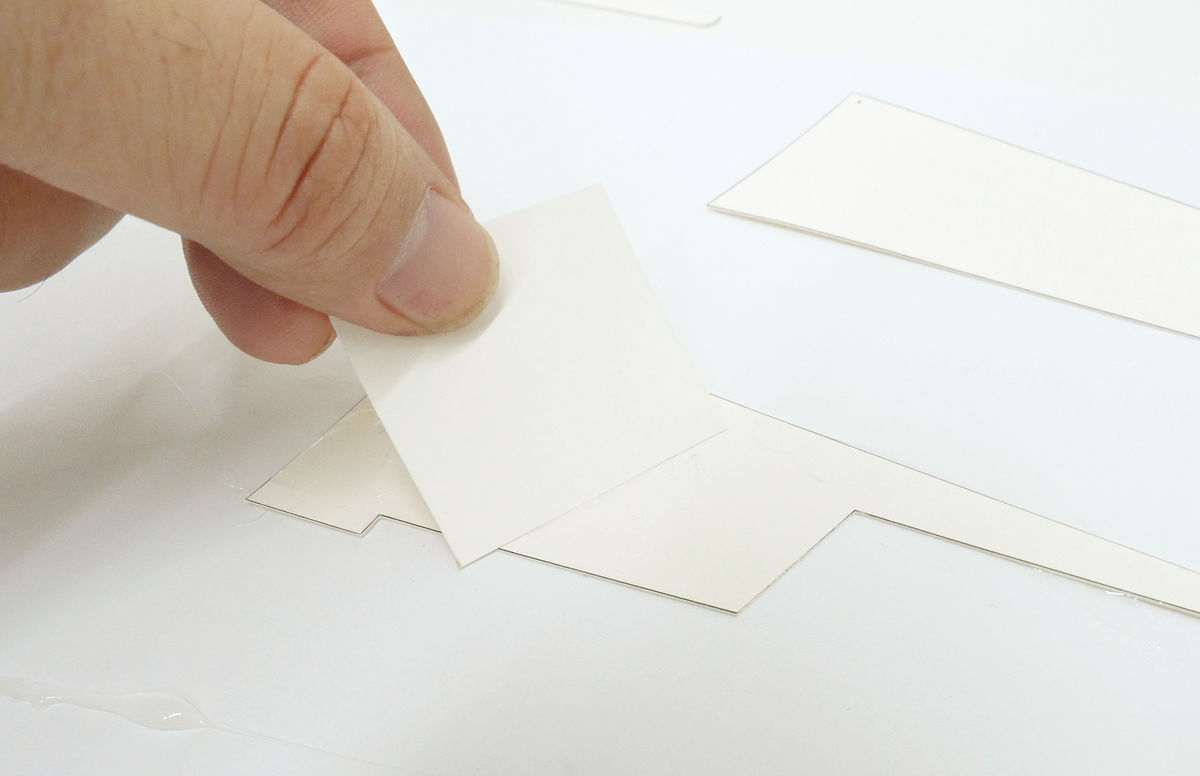
Then paste the two pieces and let it dry.

When gluing it is important to press so that two pieces stick well from the top. It is better to dry it in a completely flat state by pinching it between books if possible.
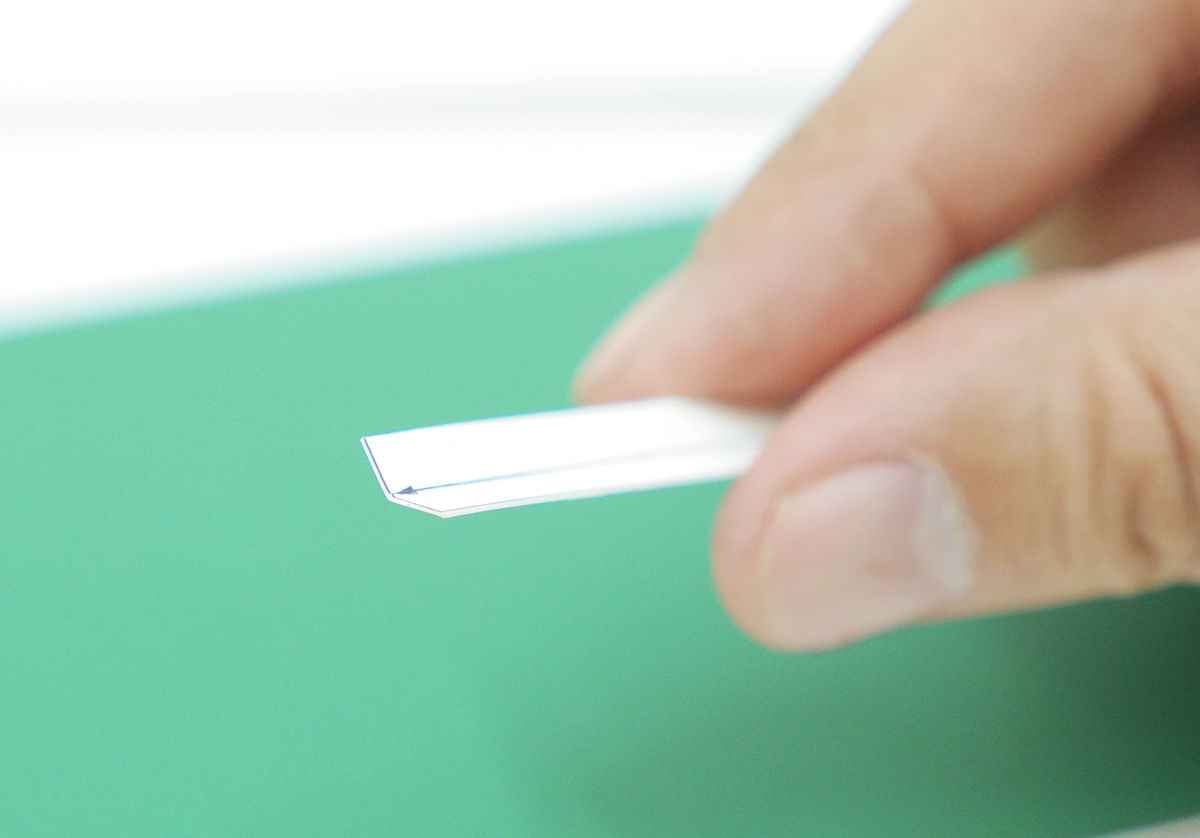
Parts that need to be folded can be assembled accurately by combining the rulers and attaching the folds as shown below.
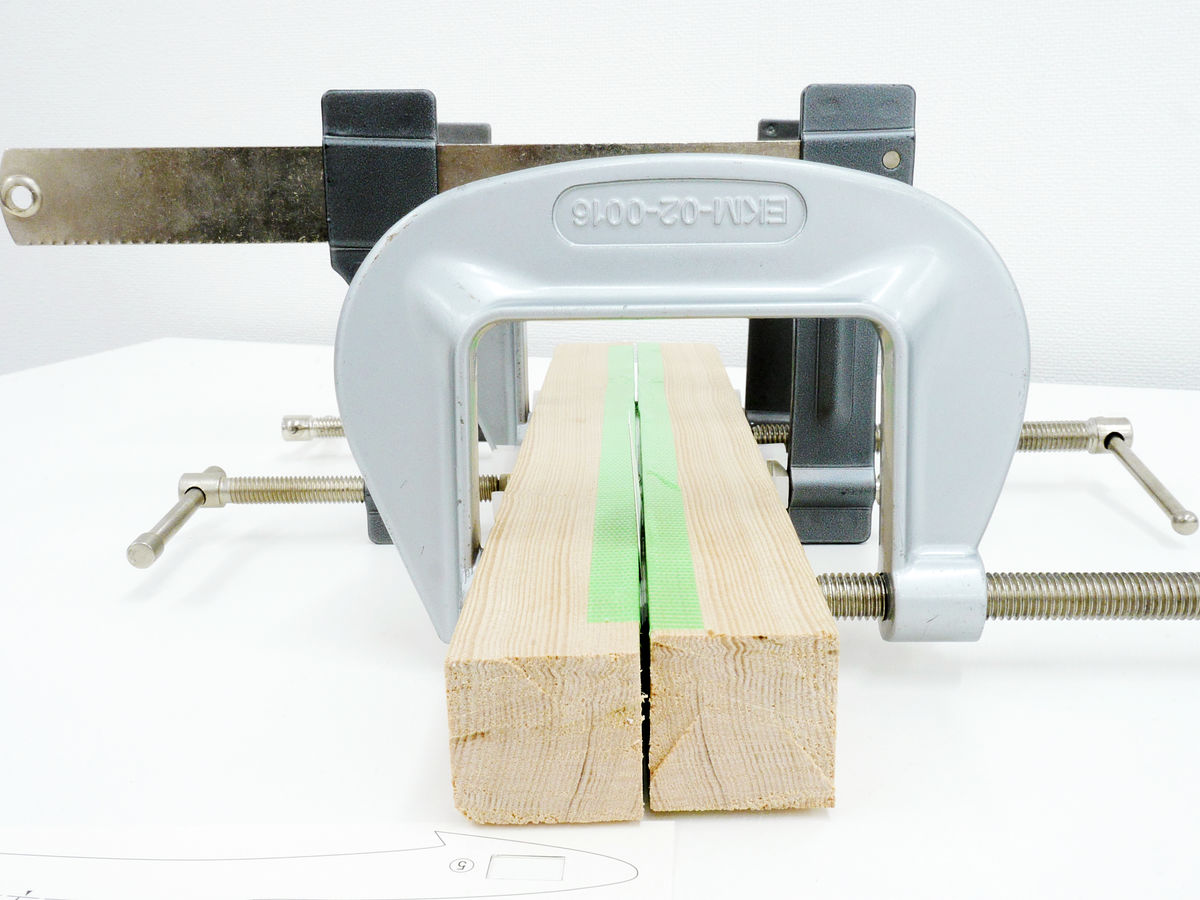
Drying the main wing, this time to make the fuselage. The fuselage is contained in another page.

For now, we prepare parts to assemble first. In this book, it is recommended that you make enough time to assemble surely, and it is written that this aircraft takes 3 to 5 days.
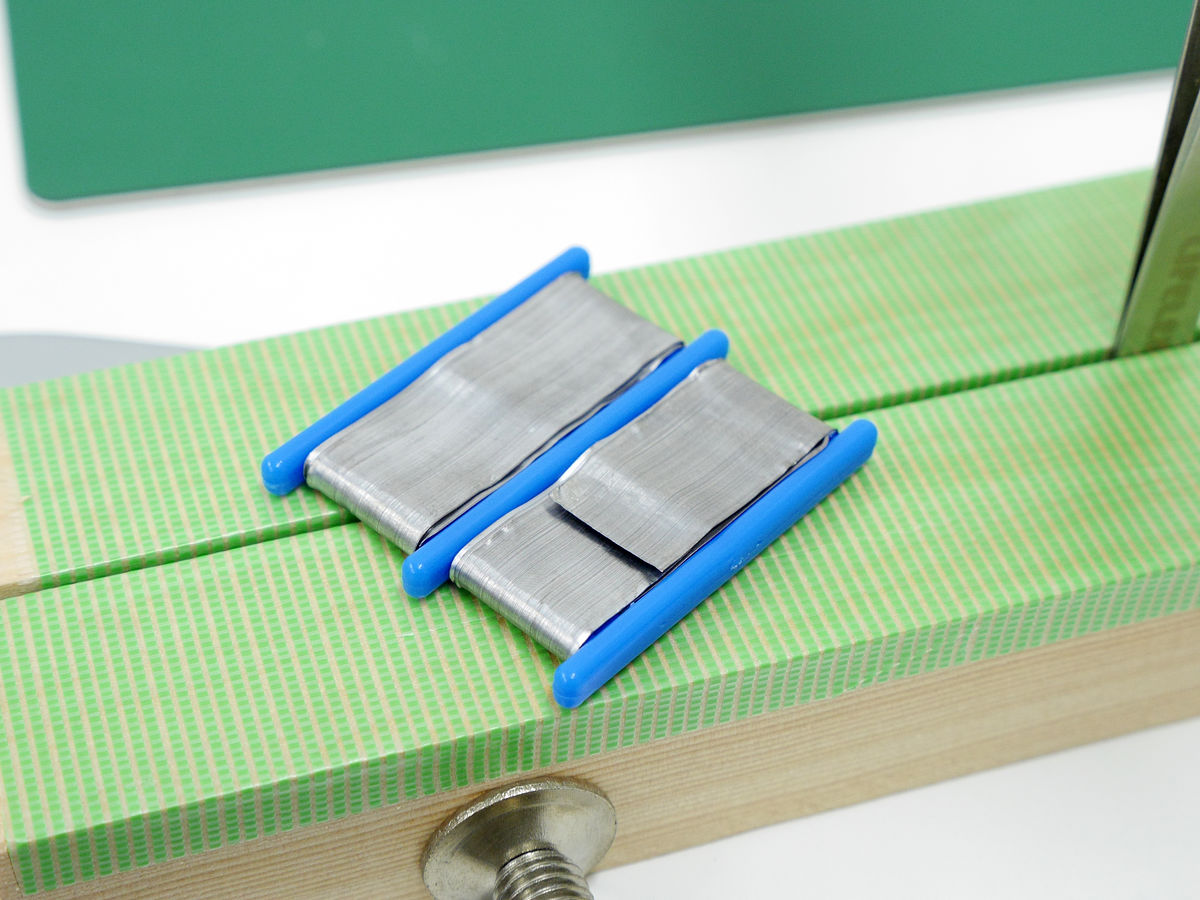
Coat the cemedine like the main wing and superimpose 4 pieces perfectly. However, it may be bent during drying as it is ....
I put a green curing tape on the two squares and decided to pinch the aircraft.
Then clamp the aircraft using a clamp and store it. Leave it for about 1 day as it is and dry it thoroughly.
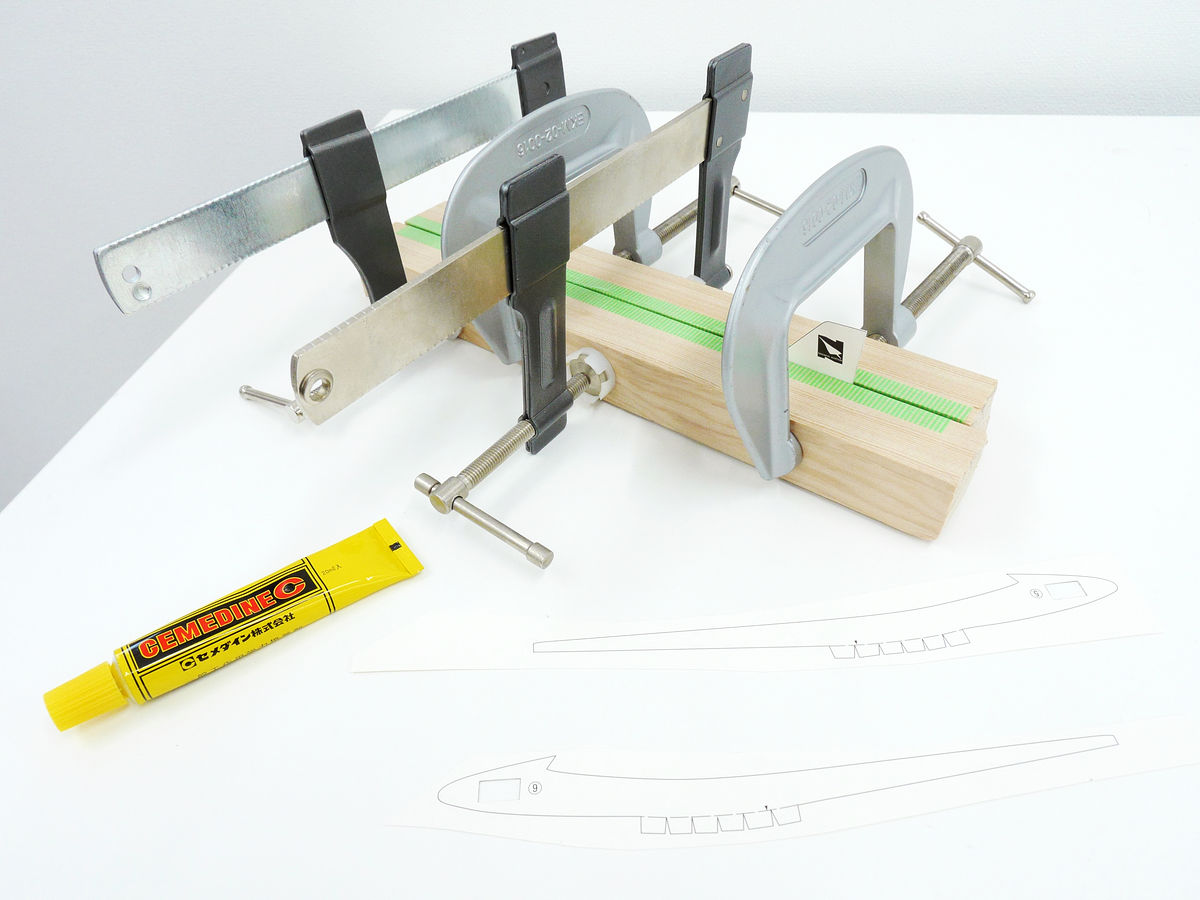
By pinching it with straight squared timber, a straight aircraft will be completed ...... Has.
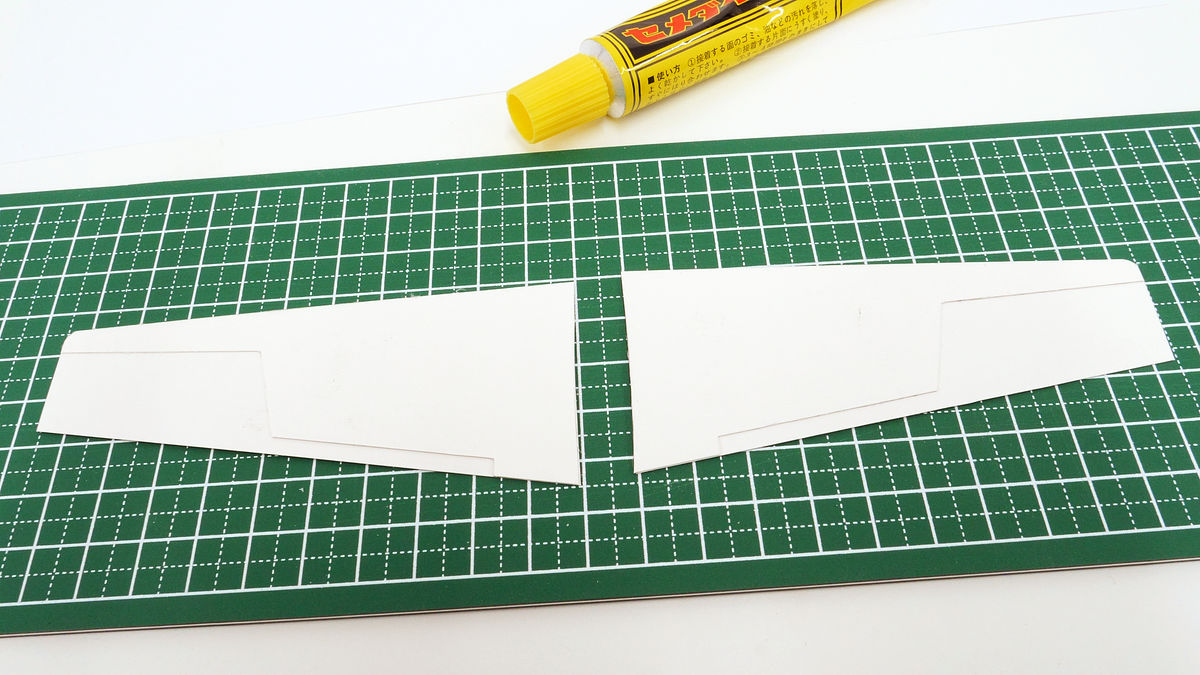
Once dried, the fuselage is completed by gluing two more parts to the outside.
A straight body was completed with the aim as it was.
At the same time, combine the left and right wings to make one main wing.

It is decided that a wing has a 15 degree upward angle. Adjust the angle by using a dedicated gauge prepared with parts.
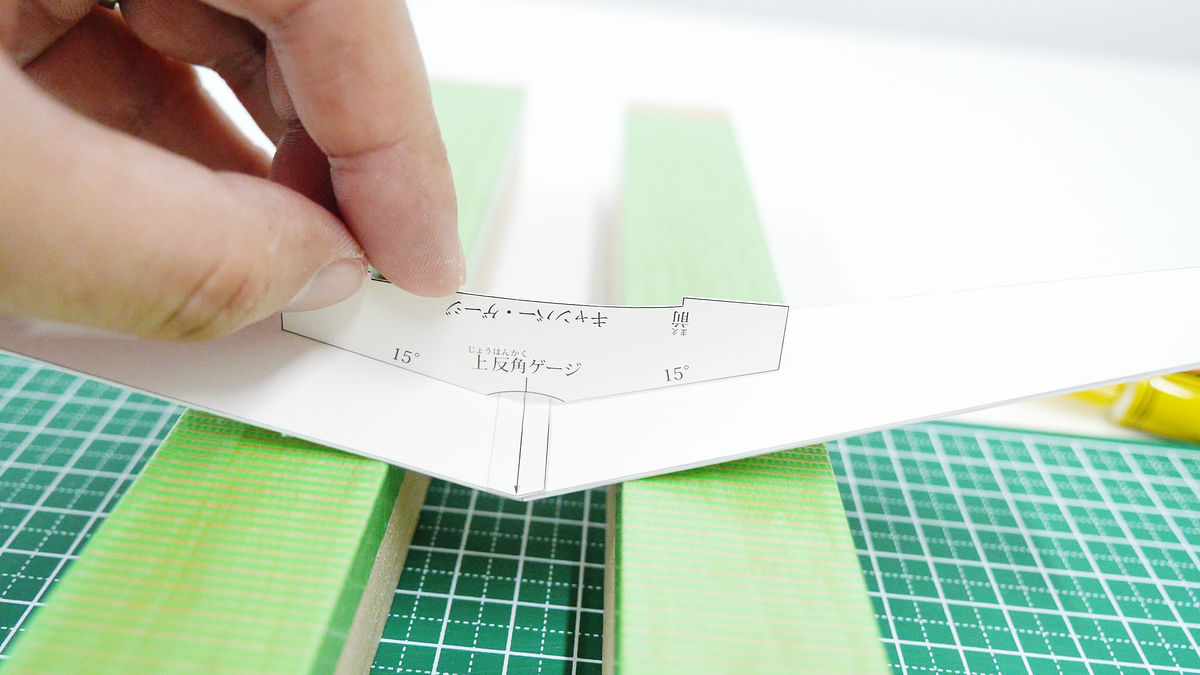
Also, leave a curved (camber) on the whole wing.
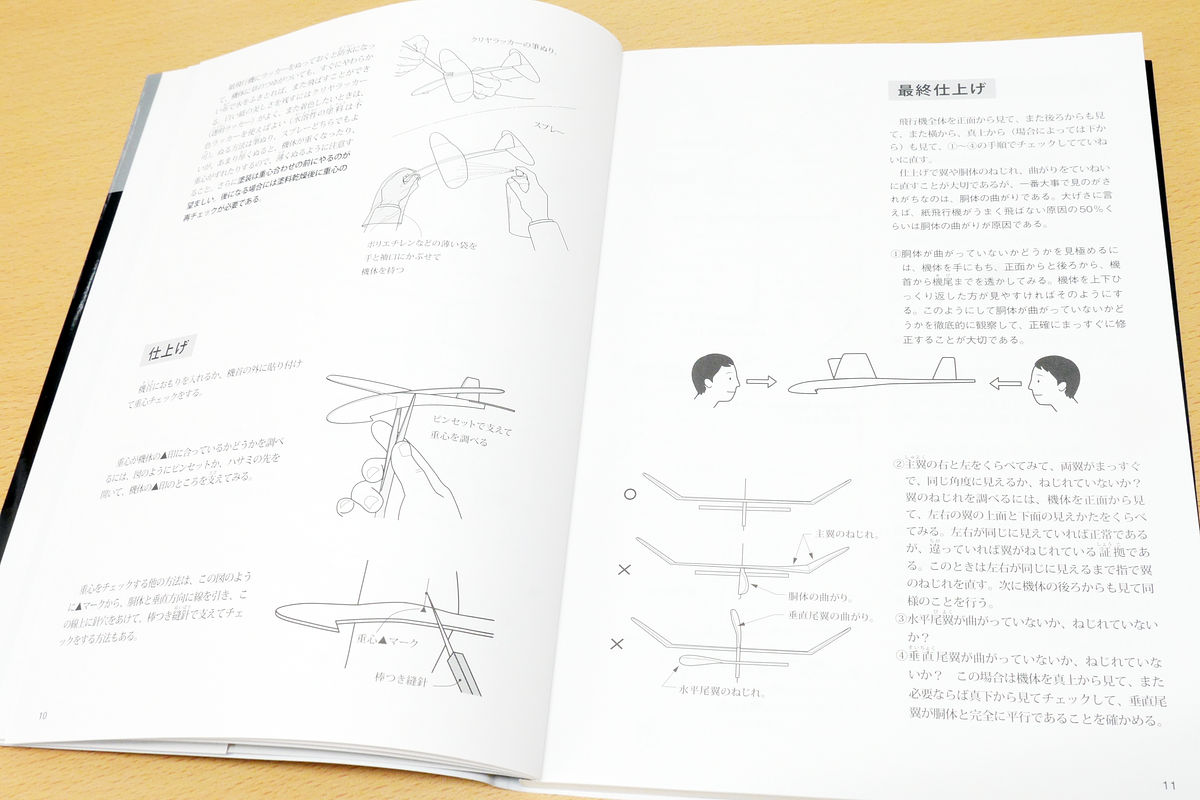
And finally, the body and the main wing, the union of the horizontal tail wing. Fix the aircraft by jig and fix ...
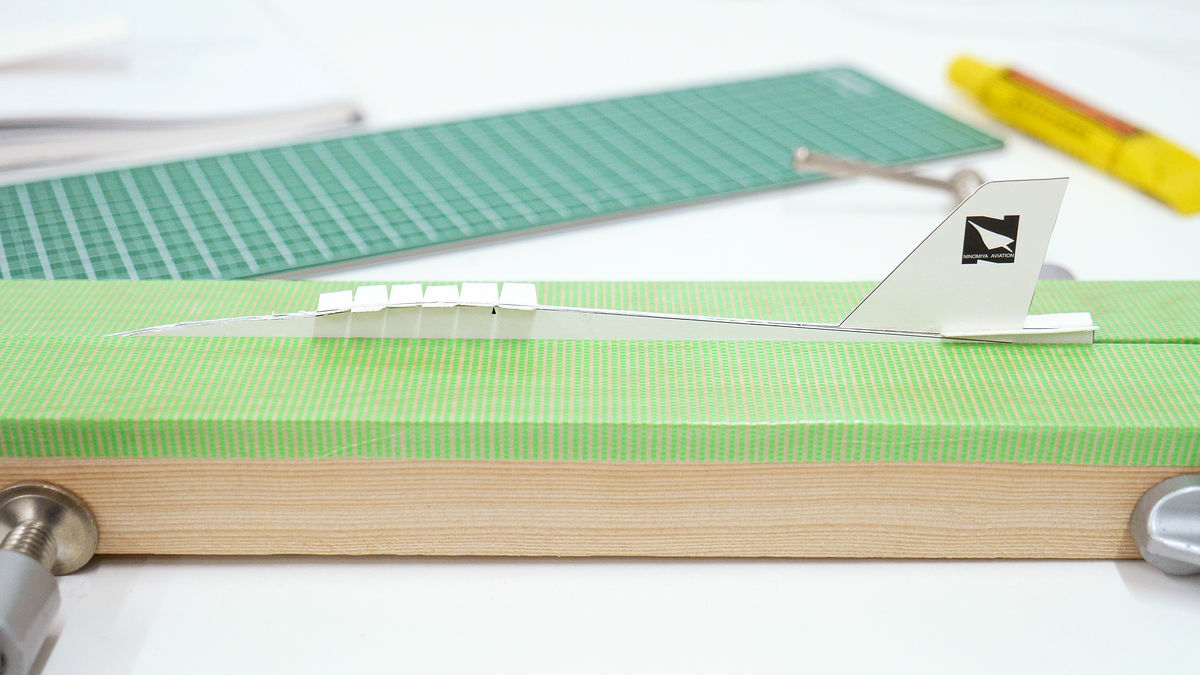
Carefully glued the main wing. At this time, extreme caution is required so that the main wing does not tilt either to the left or right.
And I adhered small horizontal tail wing a little too. The aircraft is nearly complete with this.

Since there is a lot of distortion at this point it is hard to fix, so it is essential to assemble as precisely as possible.

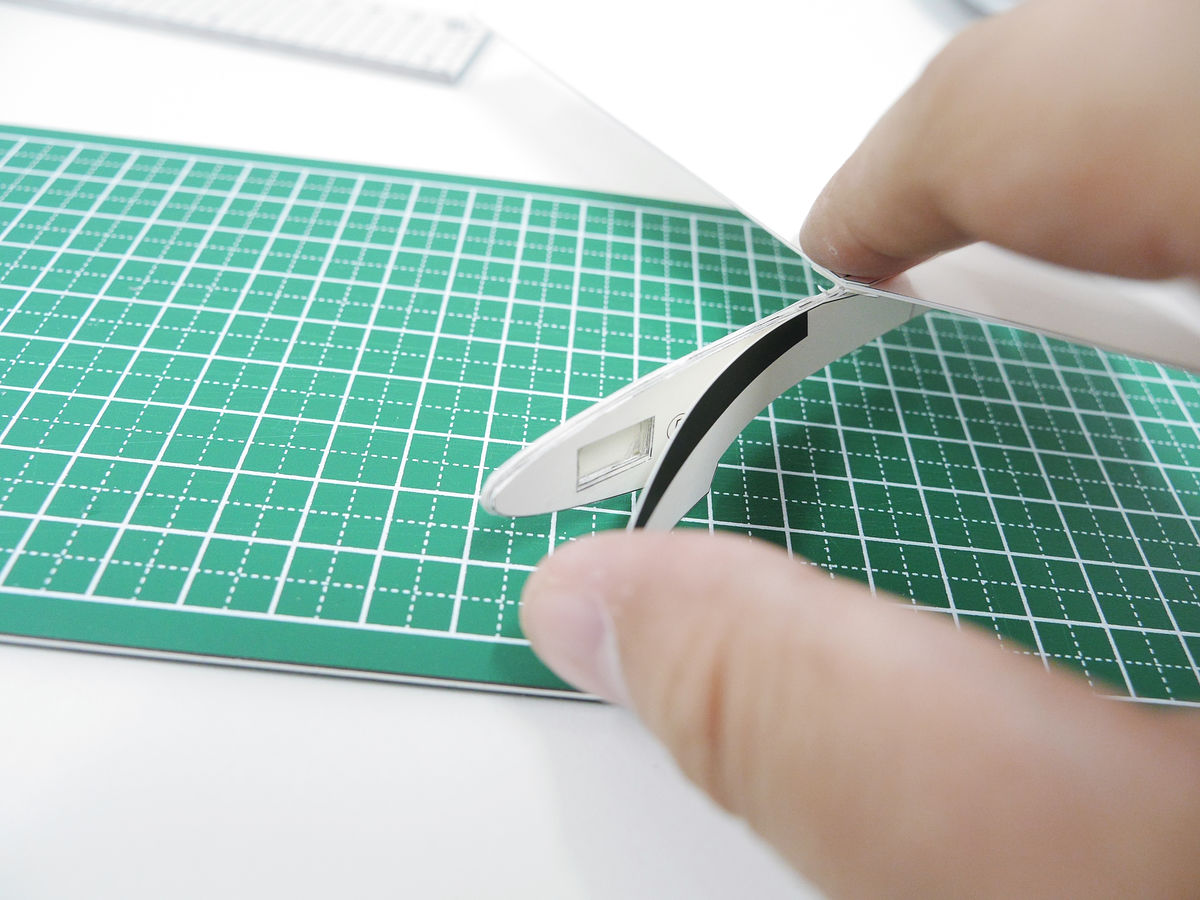
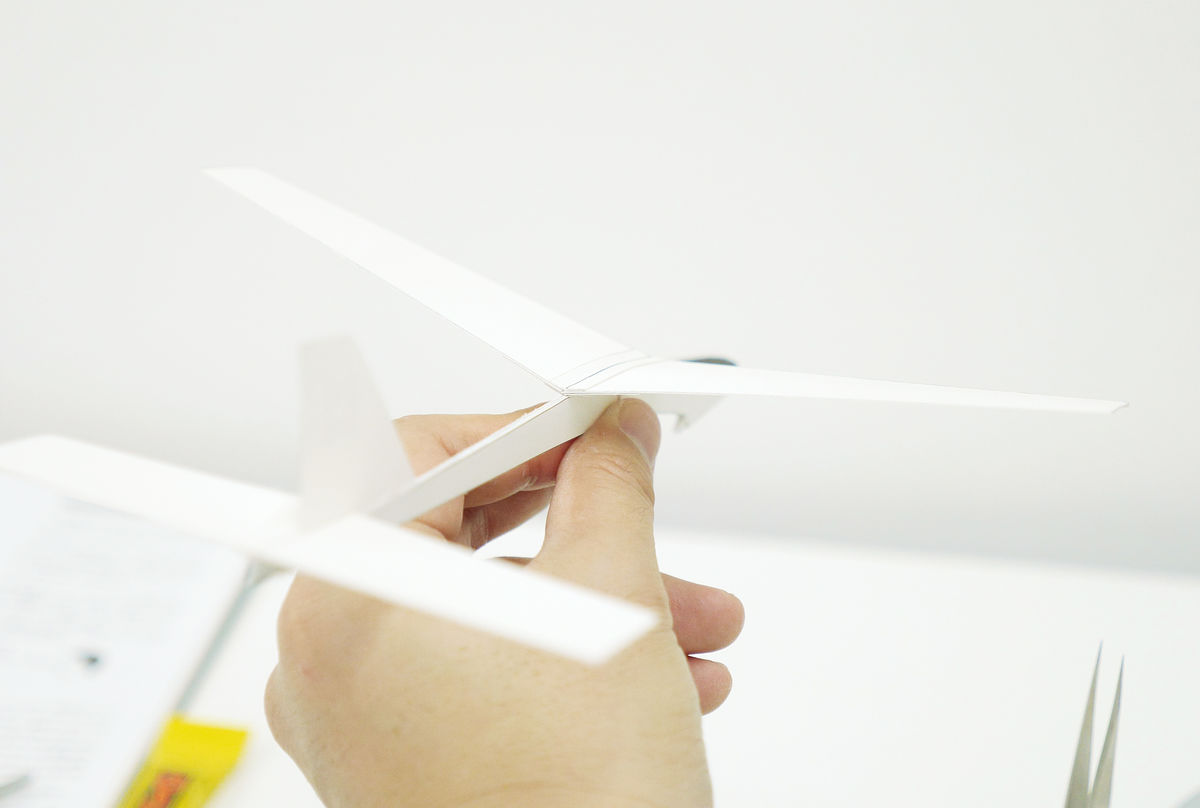
Once the adhesive has dried, adjust the weight balance before and after. Place tweezers and place the aircraft on it. Since the prescribed center of gravity position is marked on the aircraft, align the tip of the tweezers with the mark.

It is "board dari" used here. It is a plate of lead processed into a plate shape, it can be bent by hand or cut with scissors. It is mainly sold at fishing tackle stores and so on.
We will adjust the weight by stuffing the plate dolly into the space opened in the nose.
This adjustment is a series of trial & error. If the weight is put in too much, the nose will go down like this, so we will reduce the amount of weight.
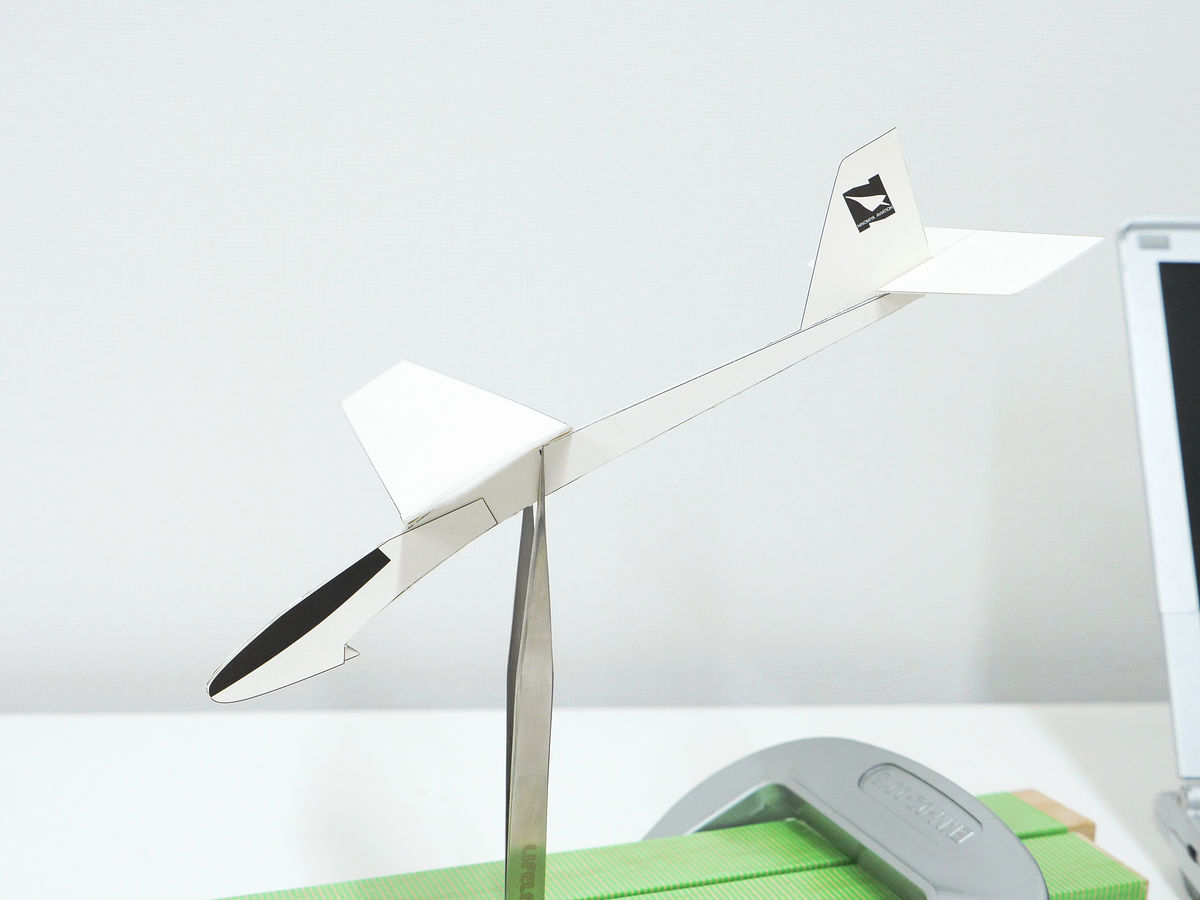
Adjustment is OK when the aircraft becomes stable and stable. Although the position of the tweezers and the center of gravity mark appear to be misaligned, this is due to the angle at the time of shooting, and actually it is placed at a position just beside.
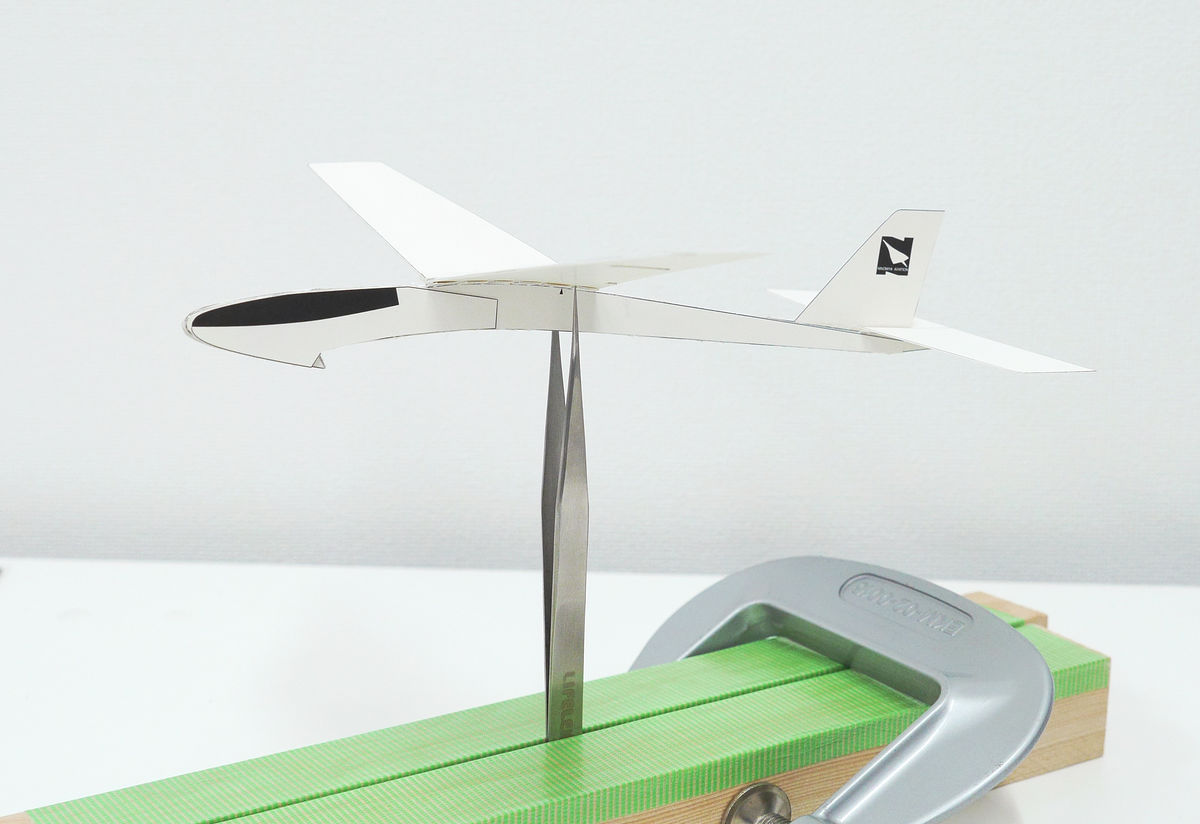
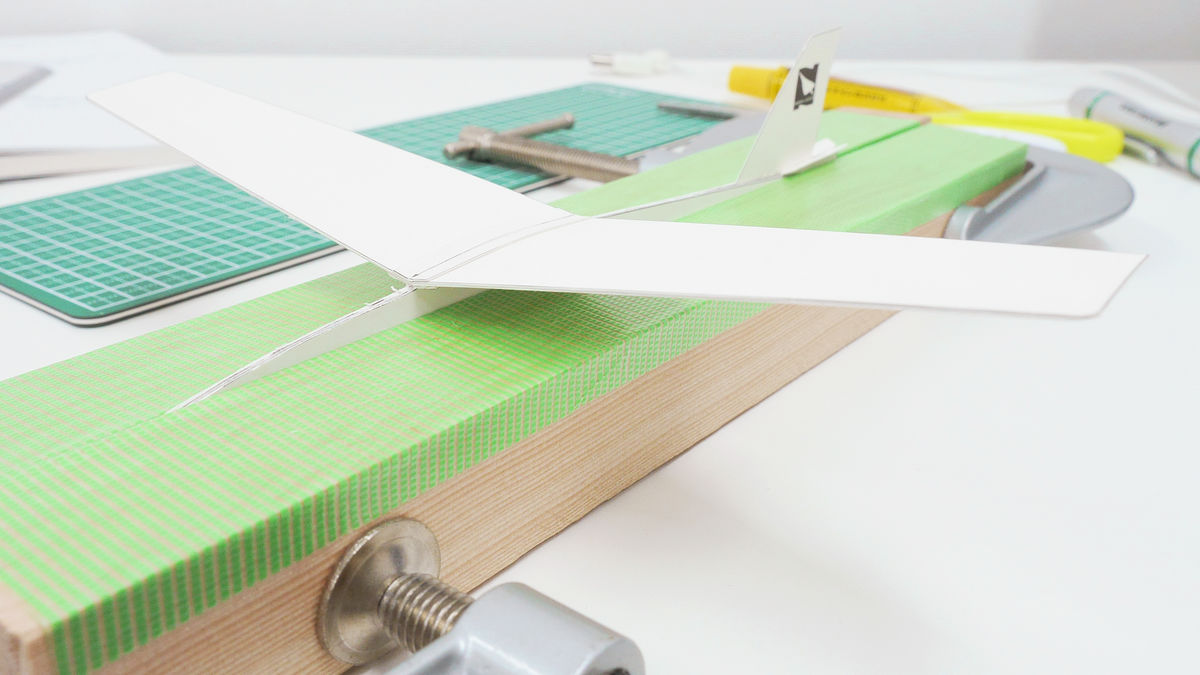
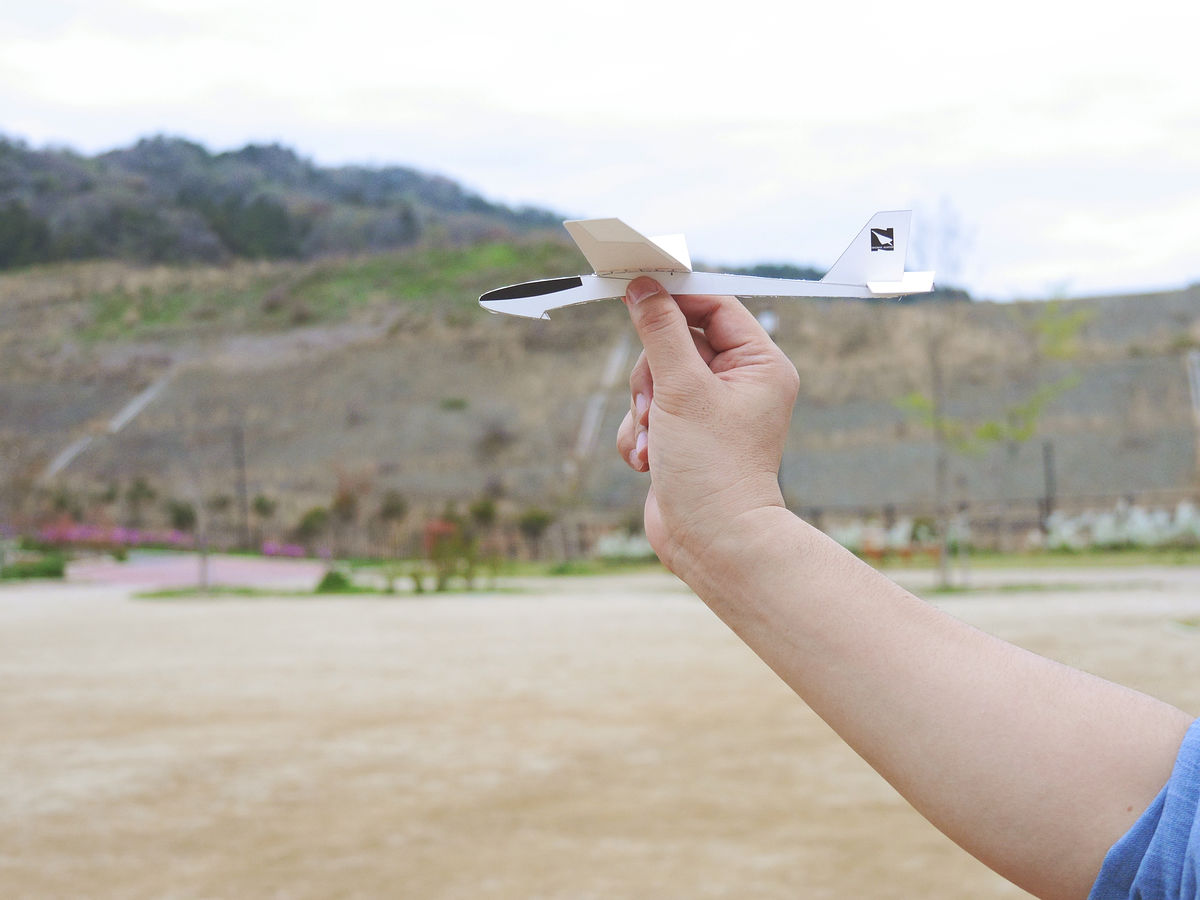
An airframe of a gentle shape, like a glider, was completed.
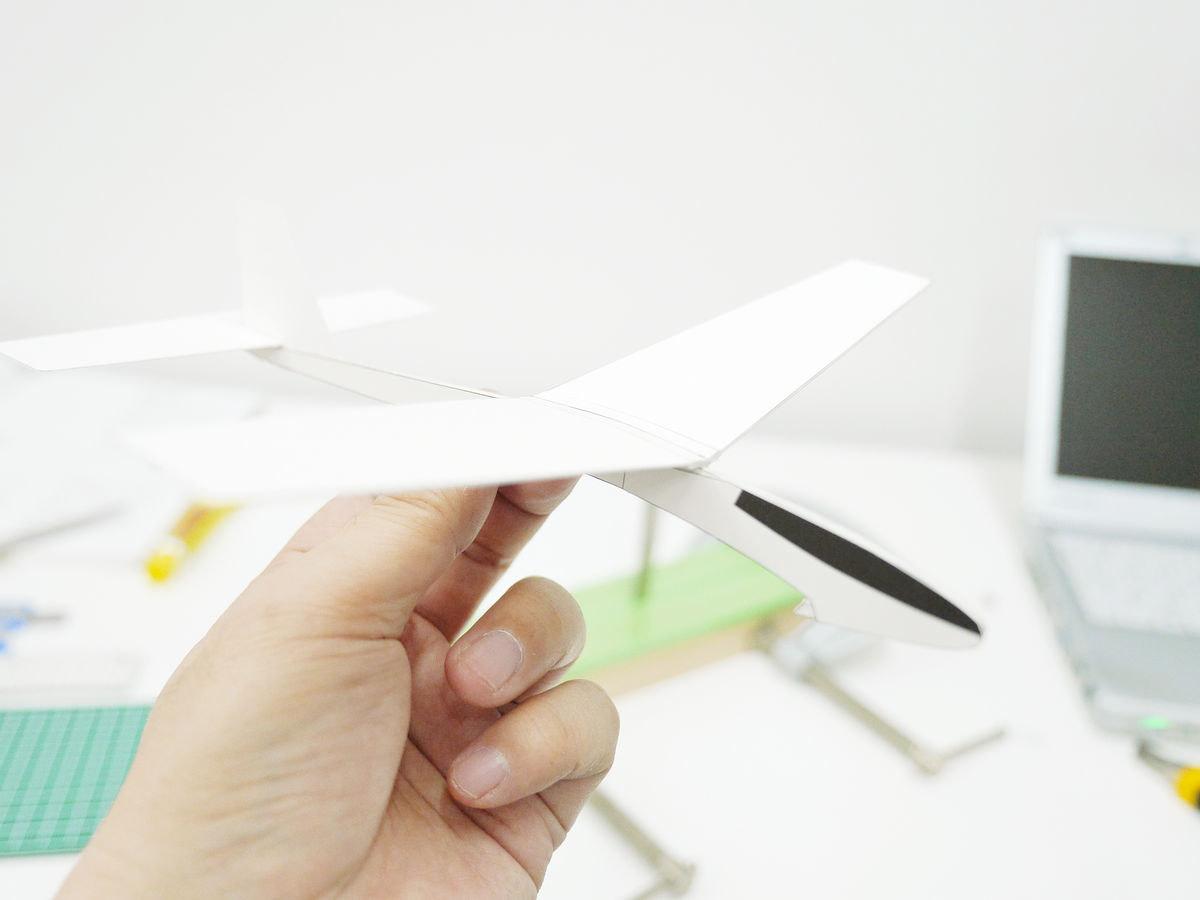
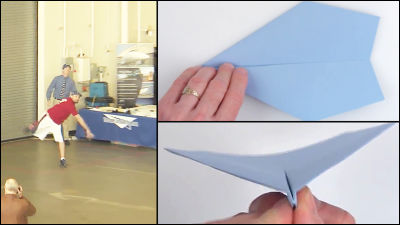
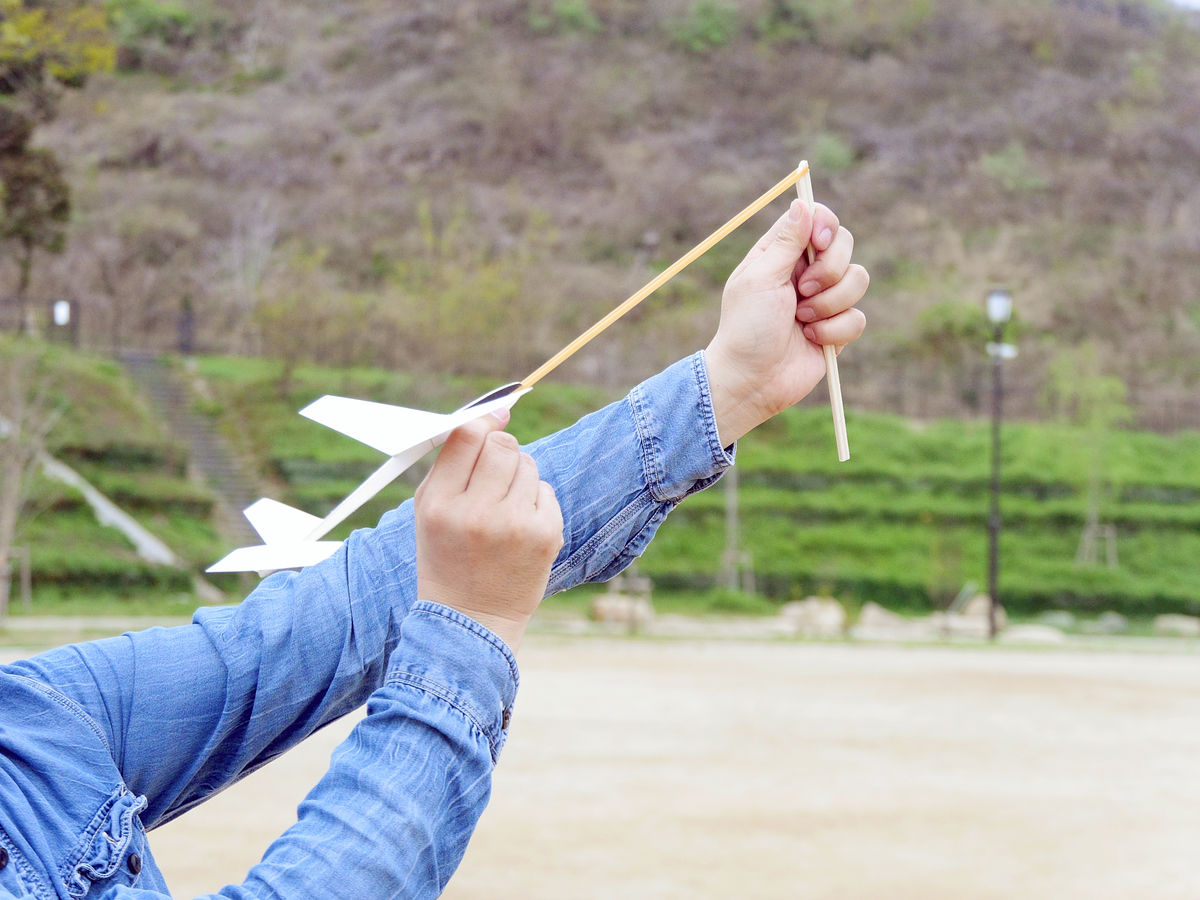
An airplane that is about to fly by spreading its wings. Take it out to the park and skip it.
Since it was not possible to prepare a dedicated carrying case, protected so as not to bend while sandwiching the fuselage with a square material.
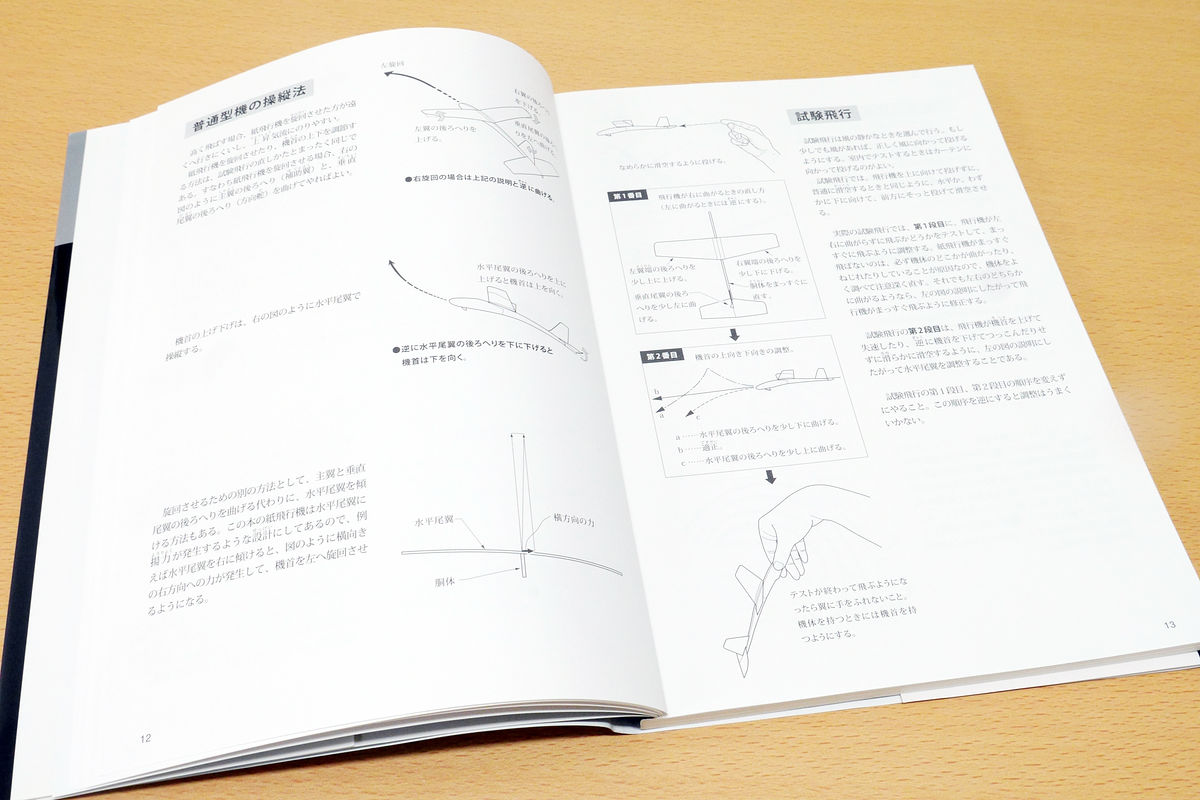
According to Muku, "The test flight is done at the quiet time of the wind, so if there is a little wind, I will throw it to the wind correctly", so I came to a large park, there is no wind I skipped the timing and tried skipping. I tried two patterns of maneuvering method described on Muc and a method of flying with catapult with rubber at the tip of the rod, but it is better to skip flying in the air with a catapult, especially when you are not familiar with it It is stable and it is good.
It actually looks like this when you skip it. In the following movies, we just crashed as soon as we started flying at the park we were not able to adjust the orientation of the wing of the airplane at all. After that I continued the adjustment for a while, but the original performance can not be demonstrated with the first flight. However, according to the official website, "It is possible to continue flying for more than 1 minute", some people recorded flight times of 13 minutes.
Paper Airplane's First Flight of "Ninomiya Yasuaki's Paper Airplane Collection Frequent Flying Machine" - YouTube
To actually skip it, I realize that the competition paper plane is delicate. There should be few winds, but because the aircraft is lightweight it will also be affected by slight winds. Therefore, when doing a full-scale challenge, it should be carried out in the indoor gymnasium etc. as many competitions are. The slightest wing angle affects the flight attitude, so adjustment can not be easy and it is very "rewarding" work. While repeating trial and error you can catch a glimpse of the deep world of the competition paper airplane.
"Ninomiya Yasuaki's Paper Airplane Collection Frequently Flying Competition Machine" that can experience the world of competition is on sale "New 10 machine selection 7" which is the latest version. Amazon can buy a Mook containing 10 aircraft at only 756 yen.
Ninomiya Yasuaki's paper airplane collection Frequently flying competition machine III: New 10 machine selection 7 | Ninomiya Yasuaki | book | mail order | Amazon

Related Posts: