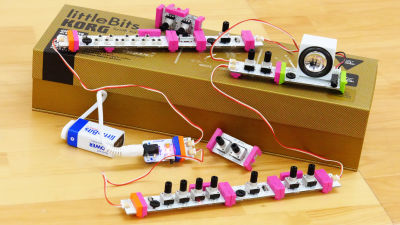
I tried making various kinds with the little Bits working kit series which completes just by connecting small modules
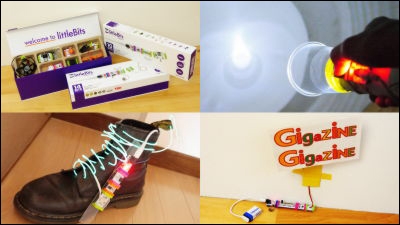
"Little Bits" released by instrument manufacturer KORG,"Synth Kit" which becomes an analog synthesizer just by concatenatingNot only the playing kit such as "EXPLORATION seriesThree kinds of kits will also be released. Work kit series "Base Kit"Premium Kit"Deluxe Kit"When joining together the machine modules, I tried to make a variety of things.
Kits Product Information - littleBits
http://jp.littlebits.com/kits/
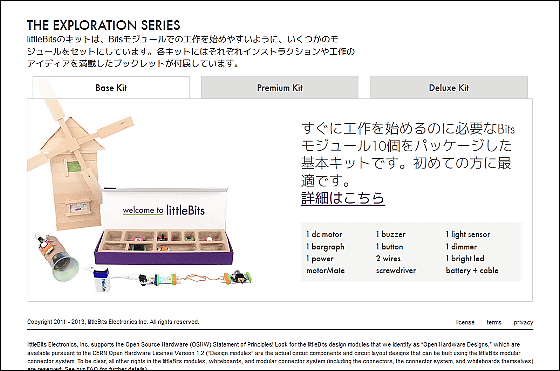
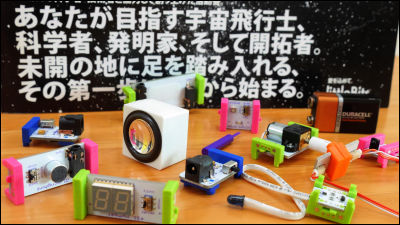
In the little Bits EXPLORATION series, the number of modules is different, and 10 modules of "Base Kit", 14 of "Premium Kit" and 18 of "Deluxe Kit" are contained.

◆ Base Kit edition
I tried opening the Base Kit. All the kits contain an English booklet, but at the time of general release the Japanese version will be bundled.
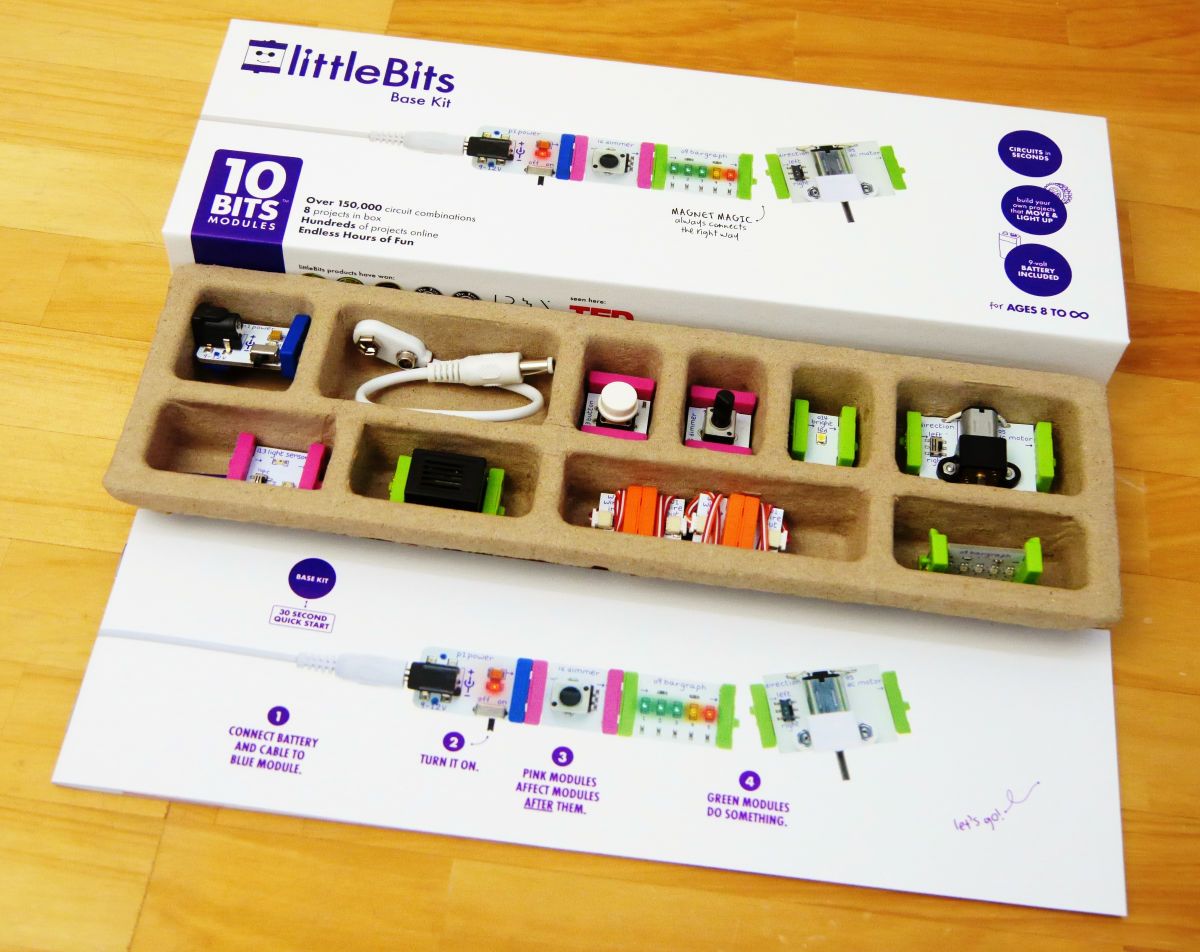
The explanation of each module is also described, and "Power" to move the battery is different from that of Synth Kit, there is no audio output. "Button" outputs a signal when pressed as the name suggests.

"Light sensor" is a module that sends signals according to the brightness, "Dimmer" can adjust the strength of the signal by turning the knob.

"BRIGHT LED" lights the LED when the signal flows, "Bar graph" visualizes the signal flow from the right to the left with the LED. "Buzzer" sounds a sharp warning sound, "DC motor" is a motor that operates when a signal flows.

The booklet also contains examples of work corresponding to each kit. For example, "TICKLE MACHINE (tickling device)" with wings attached to a motor ... ...

Attach to the arms and shake hands when you shake the buzzer "PRANK HANDSHAKE"

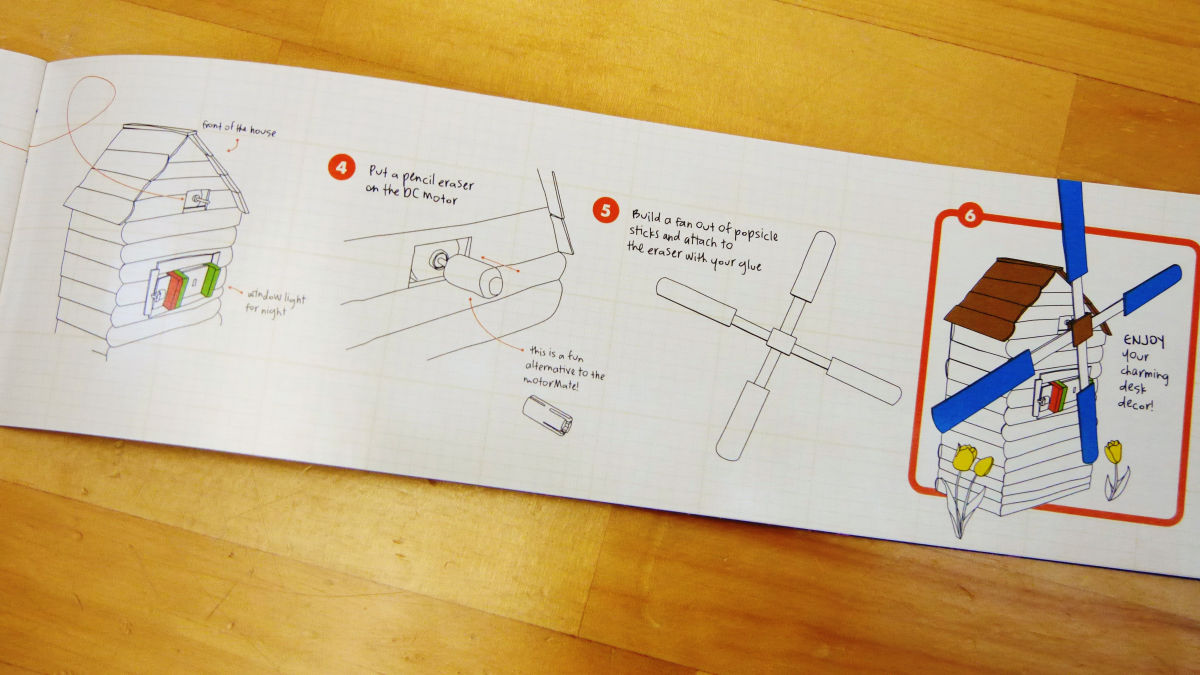
There is a thing like "LIL 'BREEZY" in which the windmill of the hut made with the ice stick rotates.

So I decided to make a flashlight "FLASHLIGHT" made with disposable plastic cup.

Required modules are Power Button · Extension Cable · BRIGHT LED. The necessary material is core / rubber band of Prakap · Toilet paper.

First of all we build a circuit. When the button is pushed, the LED light lights properly.

Place this circuit on the core of the toilet paper, winding it around the rubber band and fixing it.

Put the battery in the core ... ...

Install the BRIGHT LED so that the light faces outward from the opposite side.

As Pracup remained as it was, wrapped around the tape around ... ...

Paste the front side of the light and the cup.

It was completed!

I tried to illuminate in the dark like this. Honestly it is not a level of practical use, so it seems better not to think "to a built-in flashlight ......".

◆ Premium Kit version
Opened the Premium Kit. There are 2 modules shelves and a module not added in the Base Kit module has been added.

Added are "Slide Dimmer" which adjusts the strength of the signal by moving the knob left and right, "Pulse" to adjust the speed of the signal.

"Pressure sensor" which operates when holding a thin button casually with fingers, "sound trigger" which outputs a signal in response to sound, "roller switch" can turn on / off the signal by manually moving the switch up and down.

"Branch" which branches the signal into three, "Vibrating motor" which vibrates when the signal flows, "LONG LED" with the cable attached to the LED light.

And, it is a kit which can do direct work which can not be done with Base Kit, such as "servo motor" which wings rotate 180 degrees and "fan" of mini fan.

Examples of work include "HYPNOTIZING WHEEL (hypnotic rotation)" which rotates the paper on which the line was written round by a circle, ... ...

Pet "PLAYFUL PET" made with cardboard or plastic cup.

By installing a pressure sensor on the back, it seems to be a mechanism that the head and tail move as it lifts.

Next, let's try to arrange a little "AUTO GREETER (automatic greeting machine)" to wear a hand with a servo motor and make an odeideide.

For the circuit, use power, slide dimmer, pulse, servo motor. The necessary materials are the GIGAZINE logo, corrugated cardboard, scissors and tape of an appropriate size.

The circuit is assembled like this so that the rotation speed and on / off of the servomotor can be adjusted with the slide dimmer.

In order to paste the GIGAZINE logo on cardboard, we will adjust the size.

Cut the scissors on the cardboard with scissors.

The logo paper is also choppy.

Then paste double-sided tape on the cut cardboard ... ...

Peta to match the logo.

Fix the wings of the servo motor on the back of the cardboard with tape ......

Also paste double sided tape on the motor part.

I tried to paste the motor, as the corrugated cardboard cutter I was about to use as the foundation. Yellow tape was exposed for cardboard so it was for protection. There is no problem without sticking the tape.

This completes "moving GIGAZINE logo"! If you leave it at the entrance of the company, the advertising effect is correct.

You can check how the "moving GIGAZINE logo" works from the following movie.
I made a GIGAZINE logo that works with "little Bits Premium Kit" - YouTube
◆ Deluxe Kit version
Lastly, Deluxe Kit of a dream craft kit with as many as 18 modules. The volume of the module shelf is three rows.

For added modules, "timeout" for turning the signal output on and off with a timer ... ...

"Forks" that can branch signals into three types of fork type, "inverter" of signal conversion module, "latch" to sustain the flowing signal.

There are "RGB LED" which can adjust RGB color tone with the driver, "Light wire" which the cable lights as the signal flows.

Looking at the example of the work, "GLOWING HANDLEBARS (handle light bar that shines light)" which glows lightly by simply wrapping the light wire on the bicycle and can also improve safety ... ...

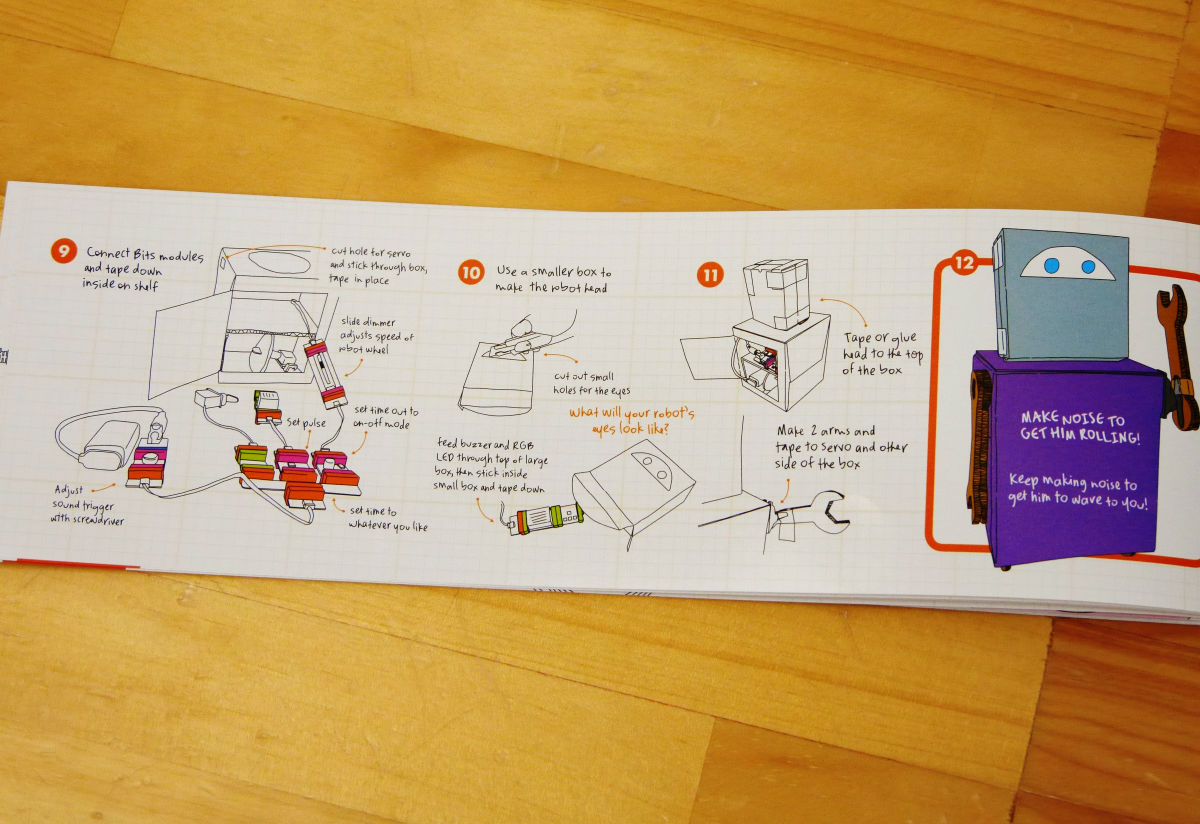
There are also some super-great works such as "ROBOT" which requires complicated circuits and many materials.

The body is made of corrugated board, you can make a robot that moves forward, the arm moves and the eyes light up.
The last thing I try to make is "STOMPING SHOES (shoes that go crazy)" in which shoelaces are lit in response to sound.

Besides power, the circuit consists of sound trigger, latch, light wire. The necessary materials are shoes with laces removed, acrylic board for circuit fixing, double sided tape, rubber band.

We will cut the acrylic board according to the circuit.

Next, place the circuit on the acrylic board, wind it with the rubber band and fix it.

I will pass light wires through my shoes.

If you fix the circuit board with rubber band also to the side of the shoe ......

Completion of shoes that shine in response to sound! It responds with clapping or footsteps when walking, but unfortunately there is only one light wire so I can only do one foot.

You can check the appearance of "Shoes shining in response to sound" shining in response to sounds from the following movies.
I tried making shoes that shine in response to sound with "little Bits Deluxe Kit" - YouTube
Three workpieces produced this time, we chose simple ones, but we could produce it in 10 to 20 minutes. There is no need for a soldering iron, and it is a mechanism that makes it easy to make and play with children, and if you like machining, it seems that you can also make a fancy mechanism using authentic materials depending on the idea. If you buy it for a child as a Christmas gift, it becomes a working kit that you can enjoy with parent and child.
For the EXPLORATION series of little Bits, reservations are accepted at KORG's online shop, and shipment of goods is scheduled for December 6 (Friday). All prices are tax inclusive, Base Kit is 11,000 yen, Premium Kit is 16,000 yen, Deluxe Kit is 21,000 yen.
Base Kit Product Information - littleBits
http://jp.littlebits.com/kits/base-kit/

Premium Kit product information - littleBits
http://jp.littlebits.com/kits/premium-kit/

Deluxe Kit Product Information - littleBits
http://jp.littlebits.com/kits/deluxe-kit/

Related Posts: