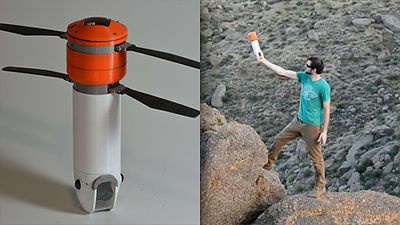
A man who made his own drone equipped with an observation radar appears, and it is possible to observe a vast area by moving in the sky

Homemade polarimetric synthetic aperture radar drone - Henrik's Blog
https://hforsten.com/homemade-polarimetric-synthetic-aperture-radar-drone.html
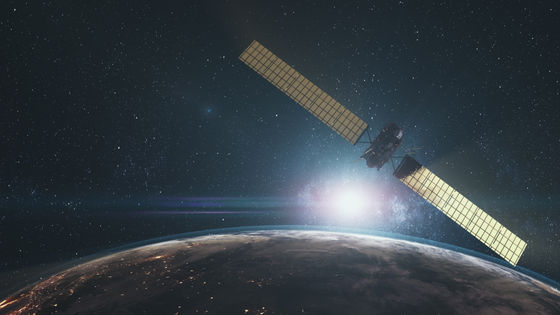
The wavelength of light used by radar is longer than the visible light and infrared light used in regular photography and infrared cameras, making it possible to observe the earth's and sea's surface through raindrops and clouds. However, the drawback of a longer wavelength is that the resolution decreases, so the aperture of the radar antenna must be made larger to obtain high-resolution images. To solve this problem, rather than making the radar itself larger, synthetic aperture radar moves the radar and synthesizes 'data observed by multiple virtual radars arranged in a straight line' to obtain high-resolution images.
Forsten has been building his own radar and testing synthetic aperture radar on the ground for some time now. He said he had always wanted to mount a radar on a drone and take synthetic aperture radar images from the sky, but a few years ago, the lowest priced drone capable of mounting a radar cost more than 1,000 euros (about 160,000 yen), so he couldn't afford it.
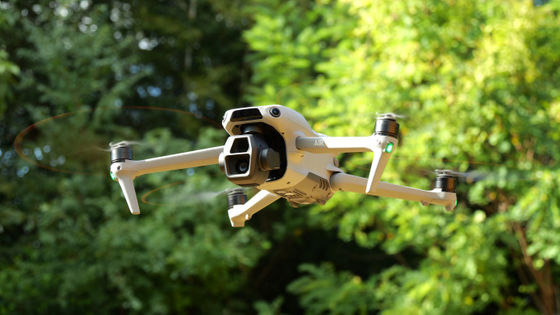
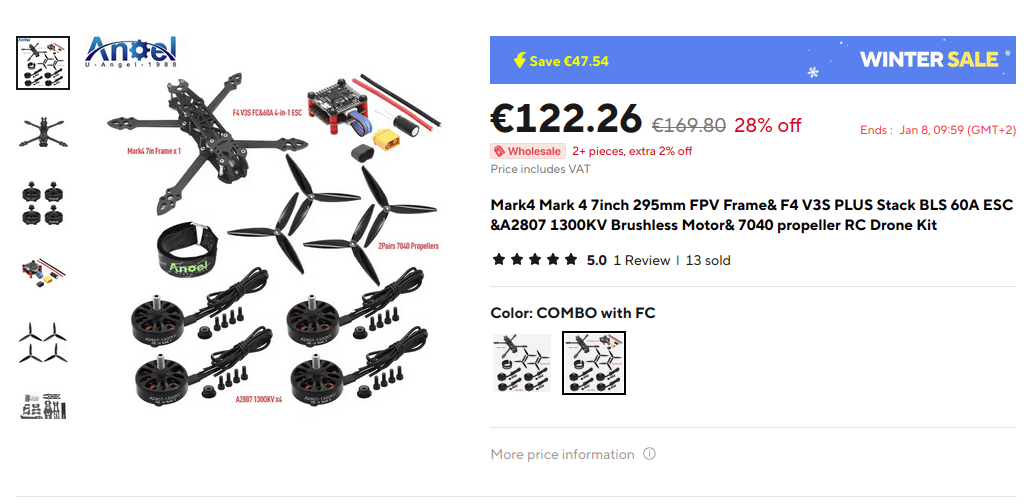
However, in recent years, the price of small drones has dropped significantly, and small 5-7 inch (about 13-18 cm) drones can be purchased from China for about 100 euros (about 16,000 yen). These small drones can carry more than 1 kg of cargo, which is enough to carry a small radar, so Forsten bought a Chinese-made 7-inch drone for about 122 euros (about 19,000 yen) and a GPS and compass module to support autonomous flight.
Below is a 3D model of the drone that Forsten actually purchased. It was quite small, only 4cm wide and 17.8cm long, and the radar had to be as thin as possible.

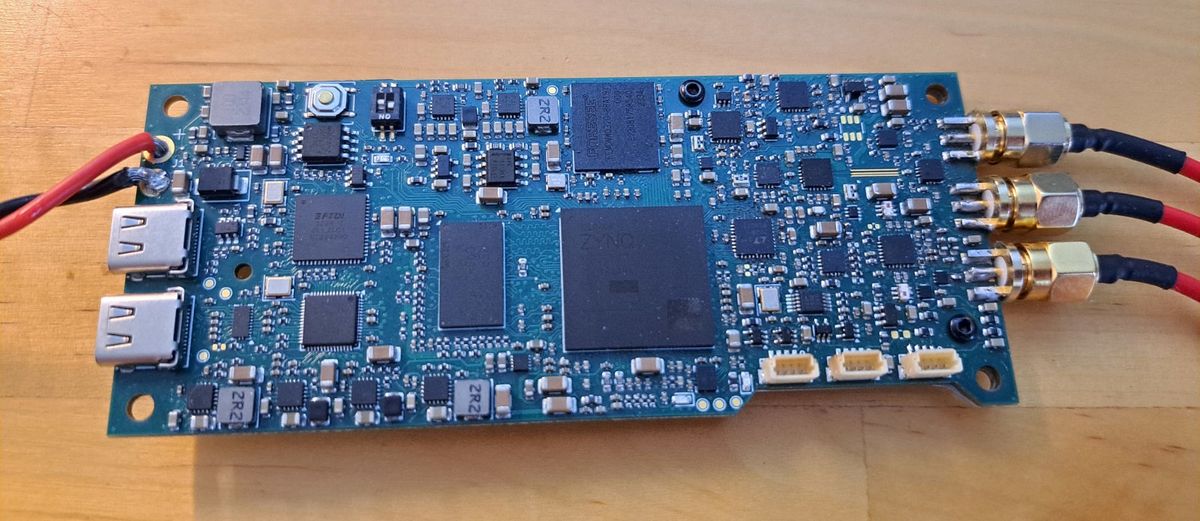
This is the actual printed circuit board that Forsten made. It has six layers, and the components are densely packed to minimize size.
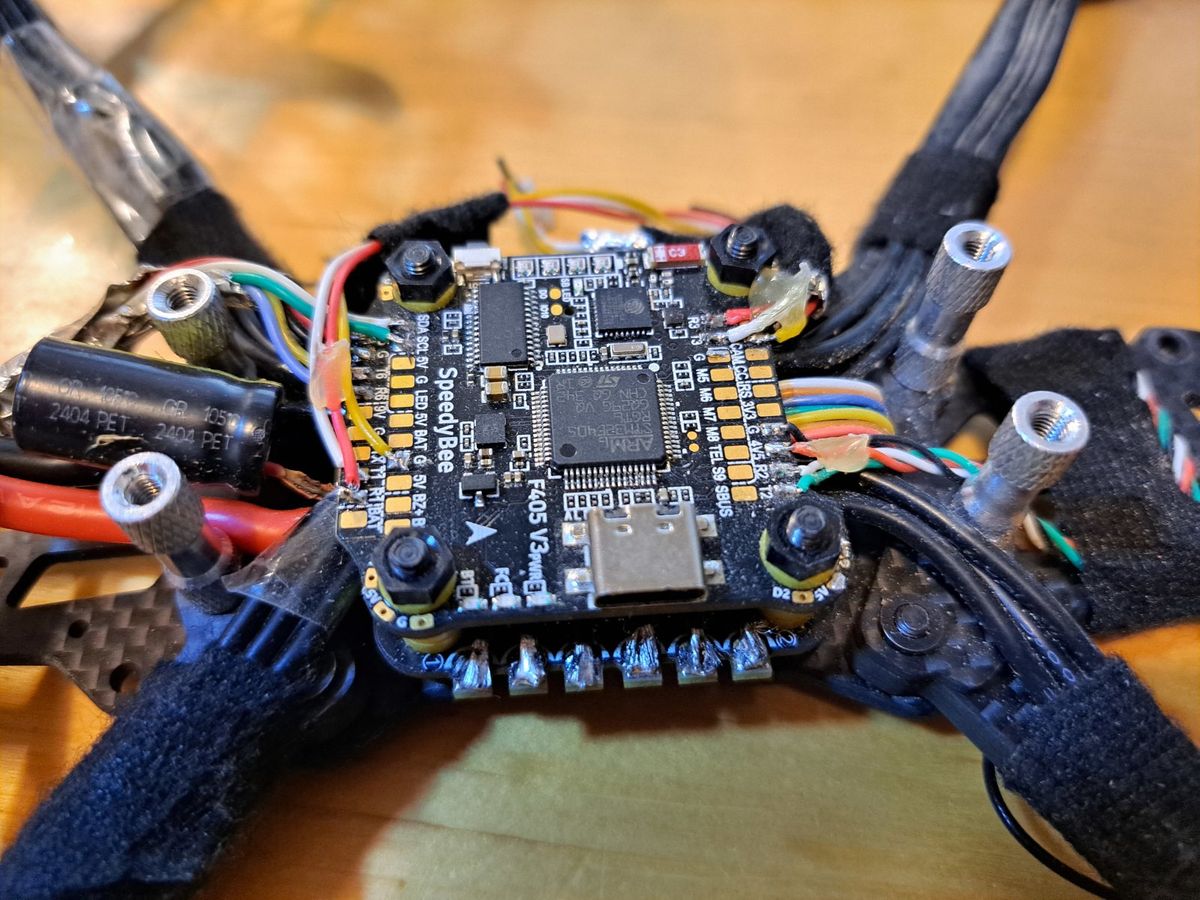
Below is the flight controller installed on the drone. The drone originally came with a low-end flight controller with 1MB of flash memory, but Forsten purchased a slightly more powerful flight controller with 2MB of flash memory. In addition,
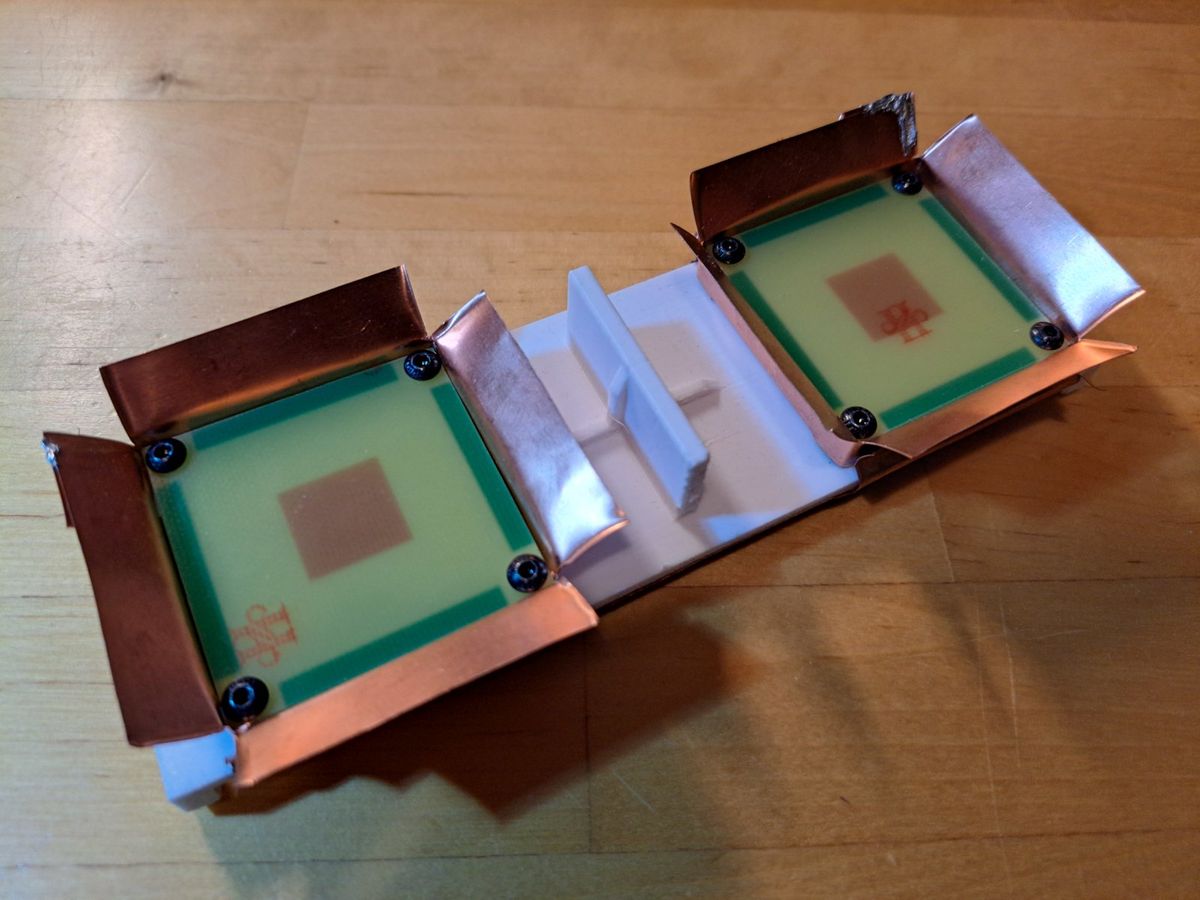
The radar antenna to be mounted on the drone is shown below. It is a dual-polarized radar that uses two types of radio waves, horizontal and vertical, and the size of the aperture is 6.5 cm x 6.5 cm.
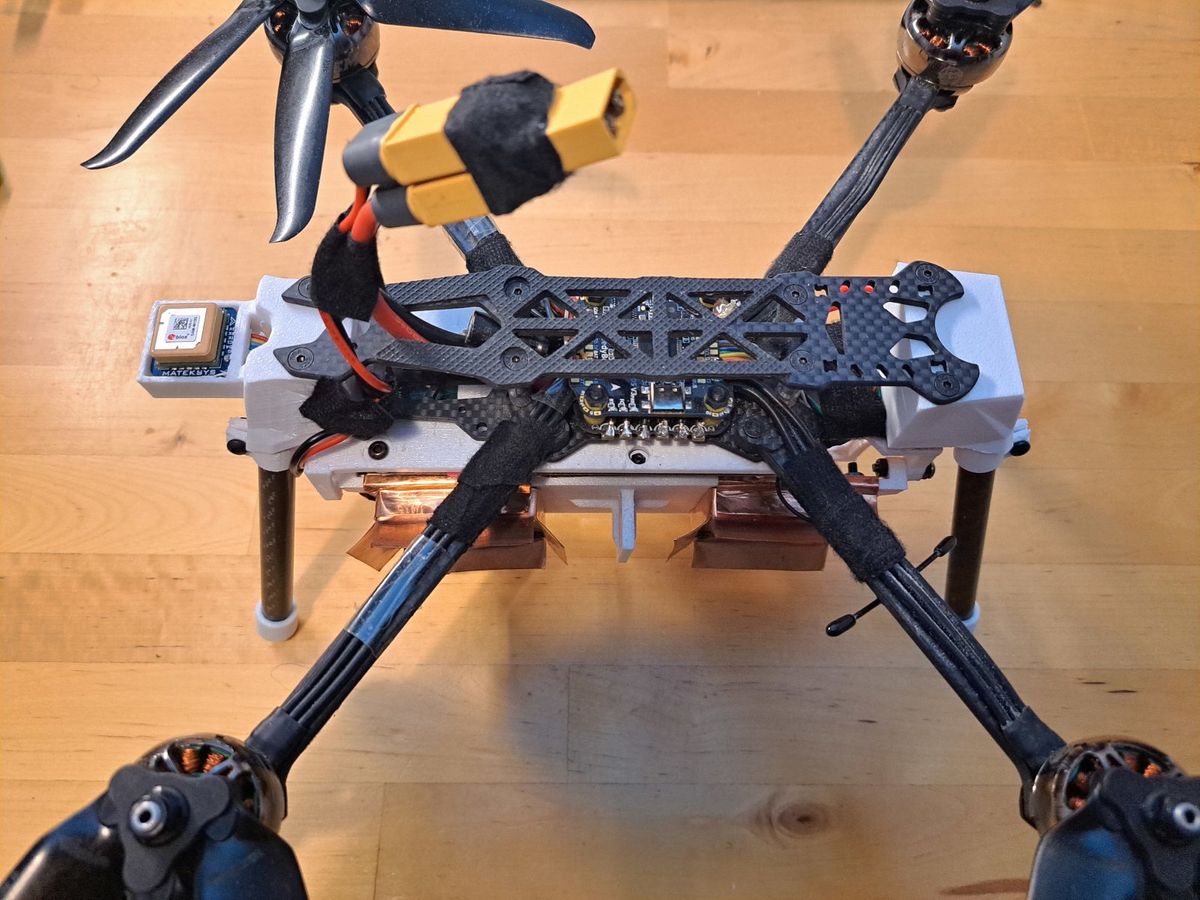
When the drone is assembled, it looks like this. In addition to the landing legs, the radar is attached backwards on the bottom.
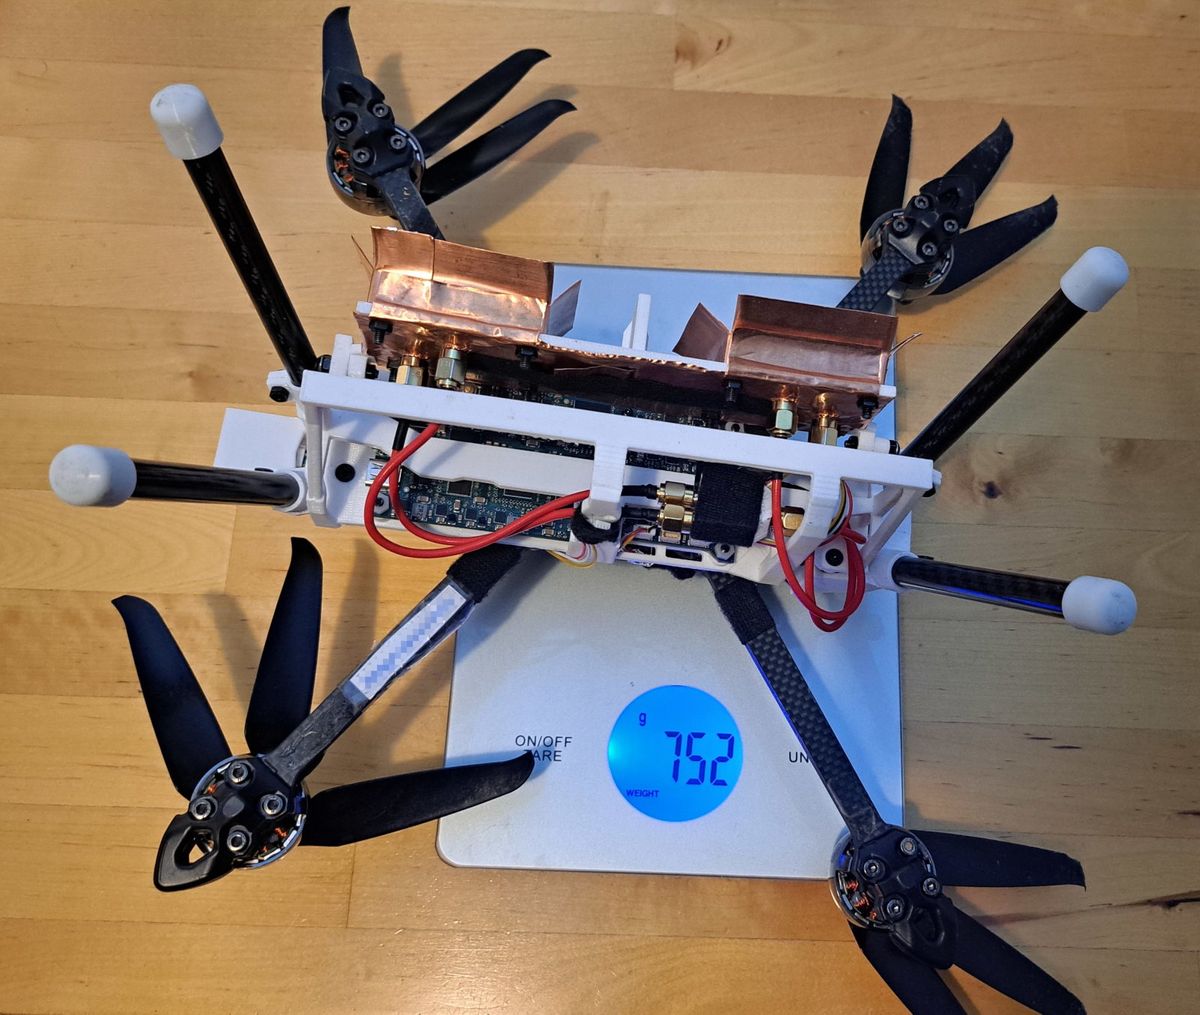
It weighs just 752g without the battery, and even with a small 1300mAh battery installed it weighs just 948g.
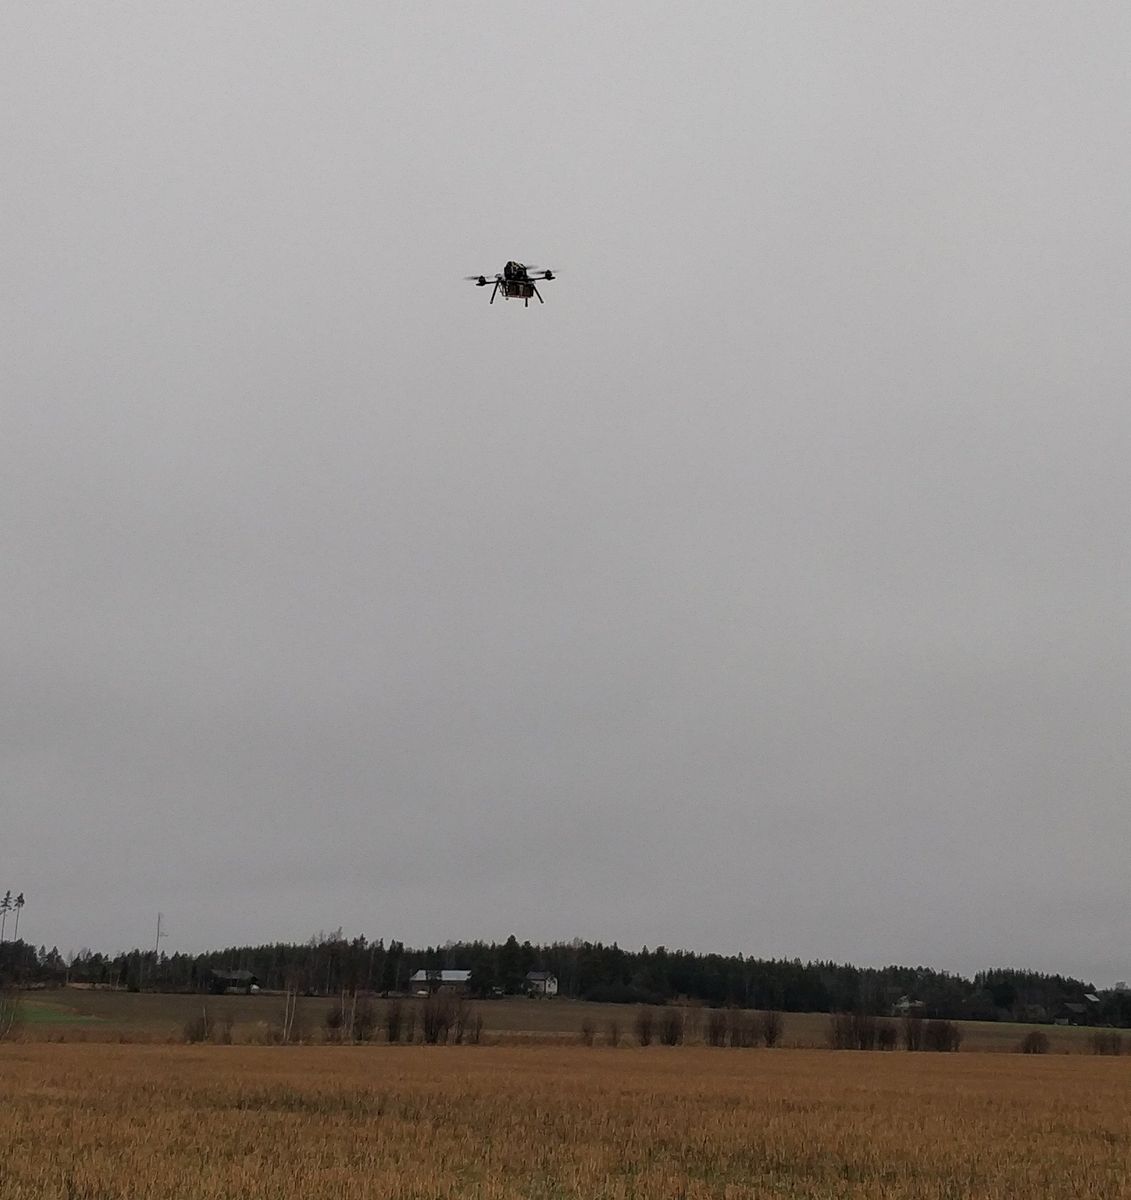
And Mr. Forsten programmed the drone's flight path in advance with ArduPilot and actually observed the synthetic aperture radar with the drone. The drone in flight looks like this.
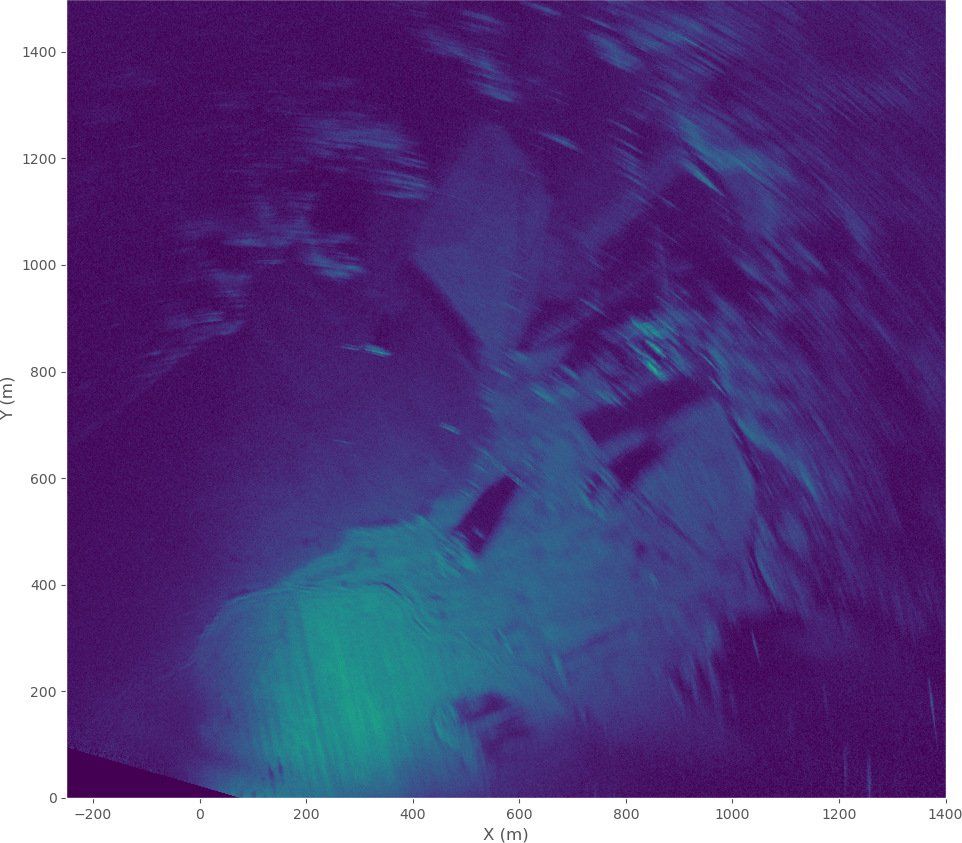
Without radar autofocus, we got the following synthetic aperture radar image: The area we captured was roughly 1.5km square, and although we could make out vague geographical features, the overall image was still blurry.
After correcting the data using

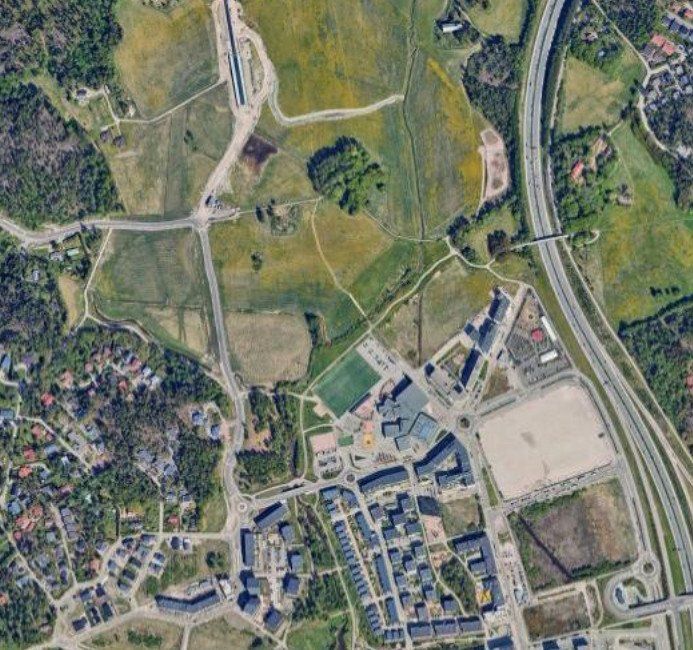
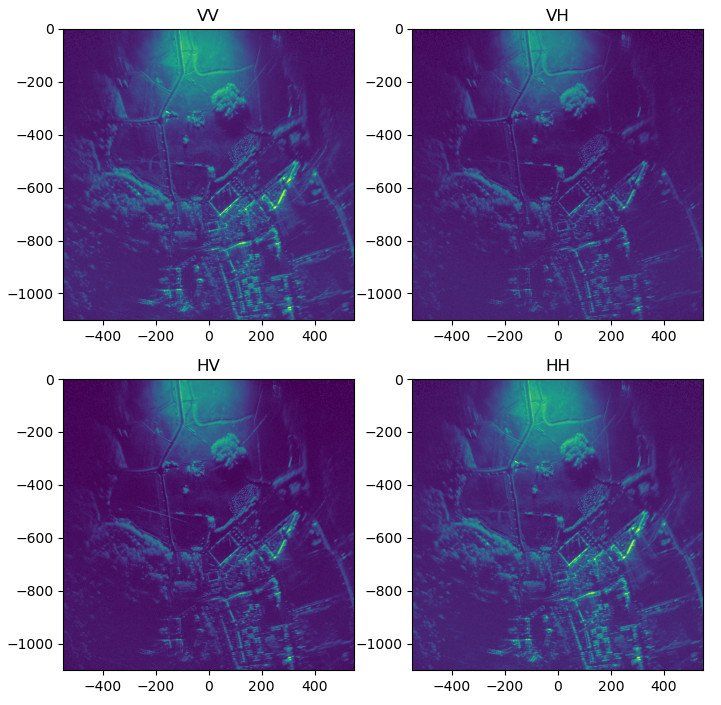
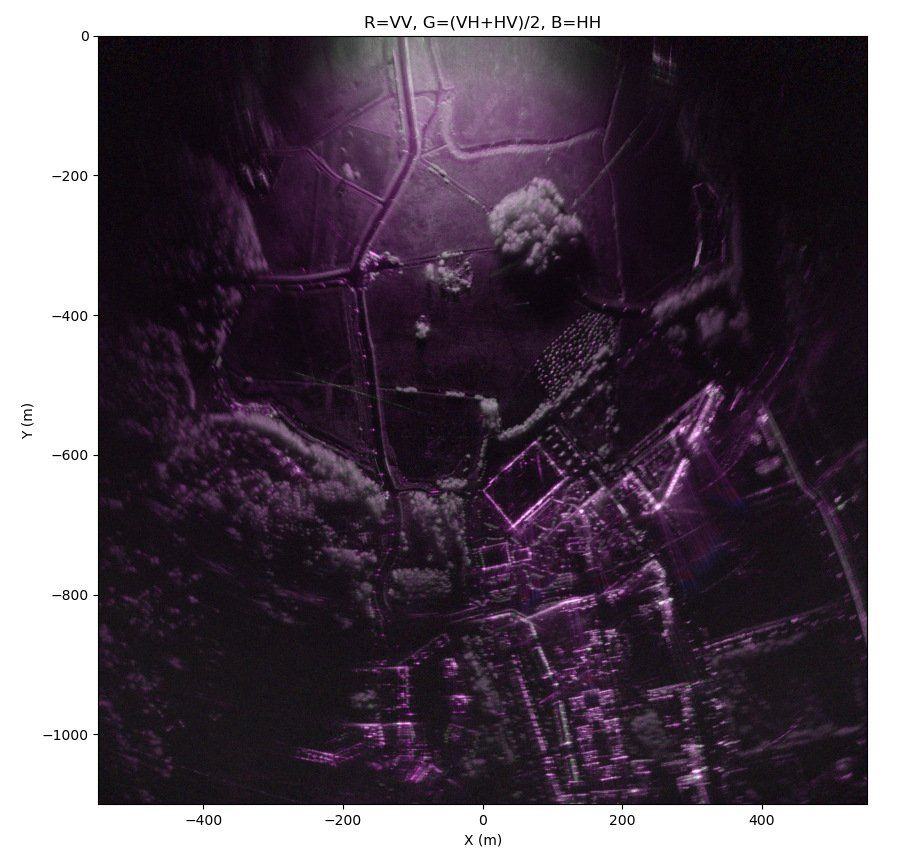
In addition, Forsten conducted observations using all four types of polarization that the radar can handle: VV (transmitting vertically polarized waves and receiving vertically), VH (transmitting vertically polarized waves and receiving horizontally), HV (transmitting horizontally polarized waves and receiving vertically), and HH (transmitting horizontally polarized waves and receiving horizontally). Below is an aerial image of the observation area.
Below are images of the same location taken with four polarizations: 'VV', 'VH', 'HV', and 'HH'.
When the four sets of polarization data are overlaid onto one image, it looks like this. A very accurate image was obtained.
According to Forsten, the cost of this project was about 200 euros (about 32,000 yen) for the drone itself and about 600 euros (about 96,000 yen) for the two radars, and he said that he worked on it for 10 months after his regular job. 'Considering the low cost, I'm pleased with the performance of the system,' said Forsten.
Related Posts: