A high-quality board game 'Humanity Project' play review where you become an astronaut and manage resources while conducting scientific experiments and expanding facilities
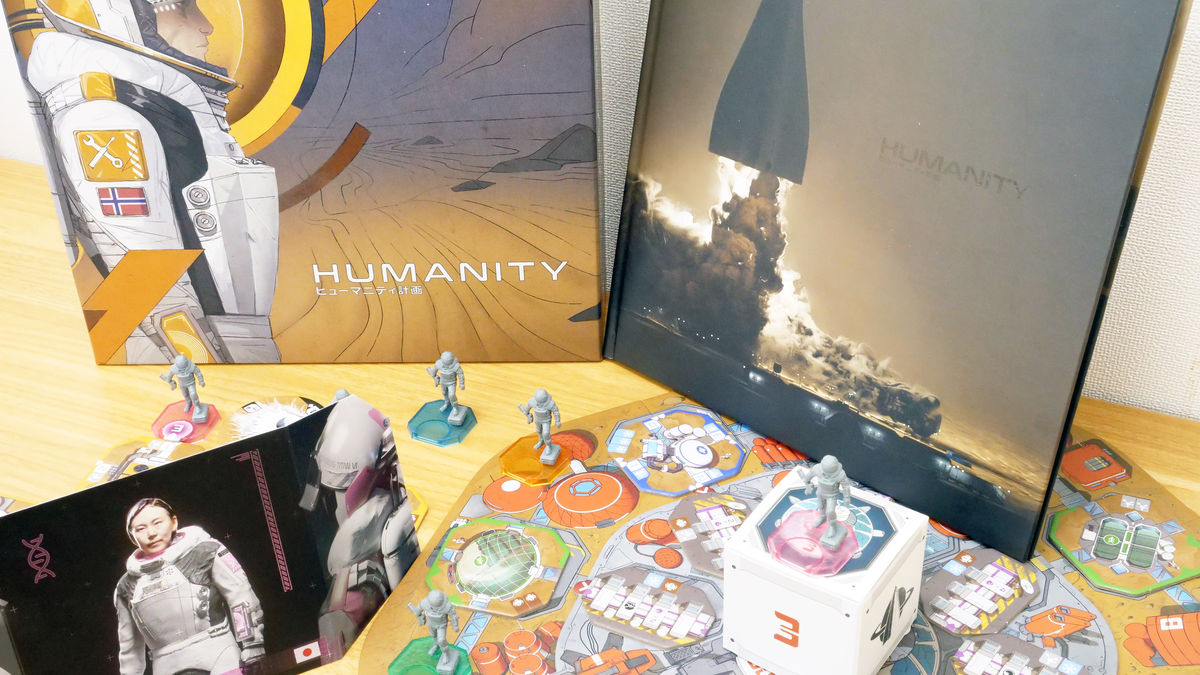
Humanity is a board game in which you control a team of astronauts on a mission to
Humanity | Bombyx
https://studiobombyx.com/en/jeu/humanity/
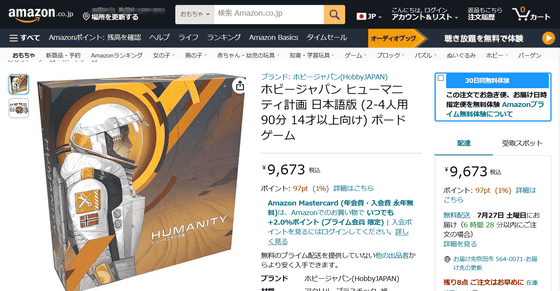
Amazon.co.jp: Hobby Japan Humanity Project Japanese Version (2-4 players, 90 minutes, ages 14 and up) Board Game: Toys
Project Humanity packaging. The box measures 28.5cm long, 28.5cm wide, and 10.5cm high.

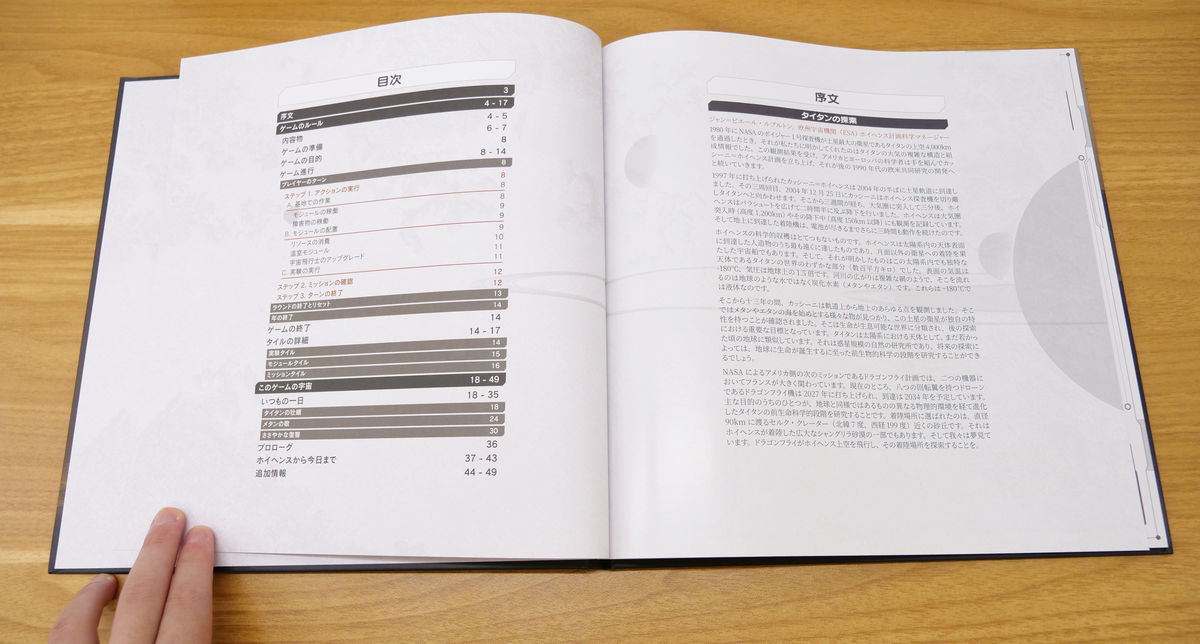
When I opened the box, the first thing I saw was the instruction manual and the play board.
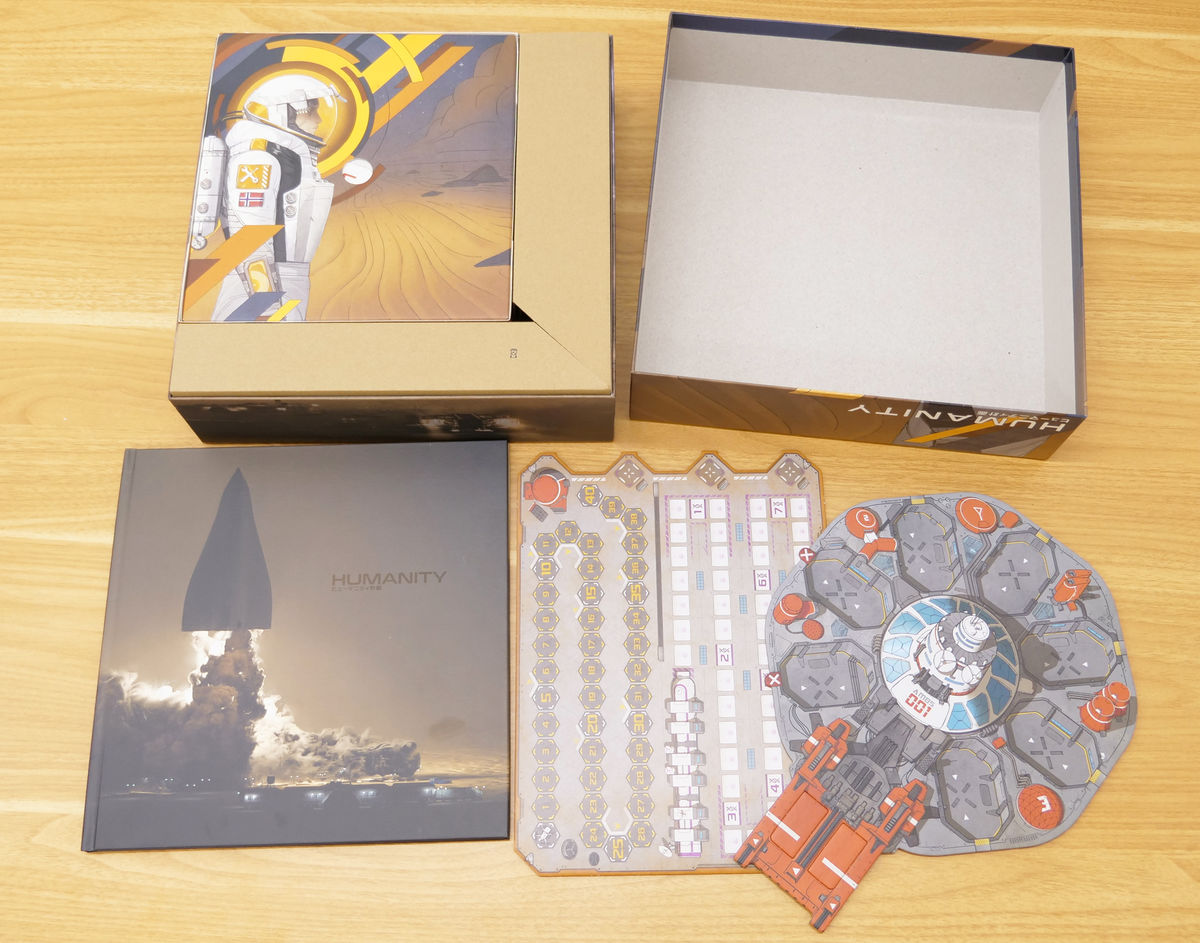
The instruction manual is a sturdy hard cover. In addition to the manual, it also includes observation records of Titan, the moon that is the concept of the board game, the history of space development, and the background story of the game set in the year 2073.
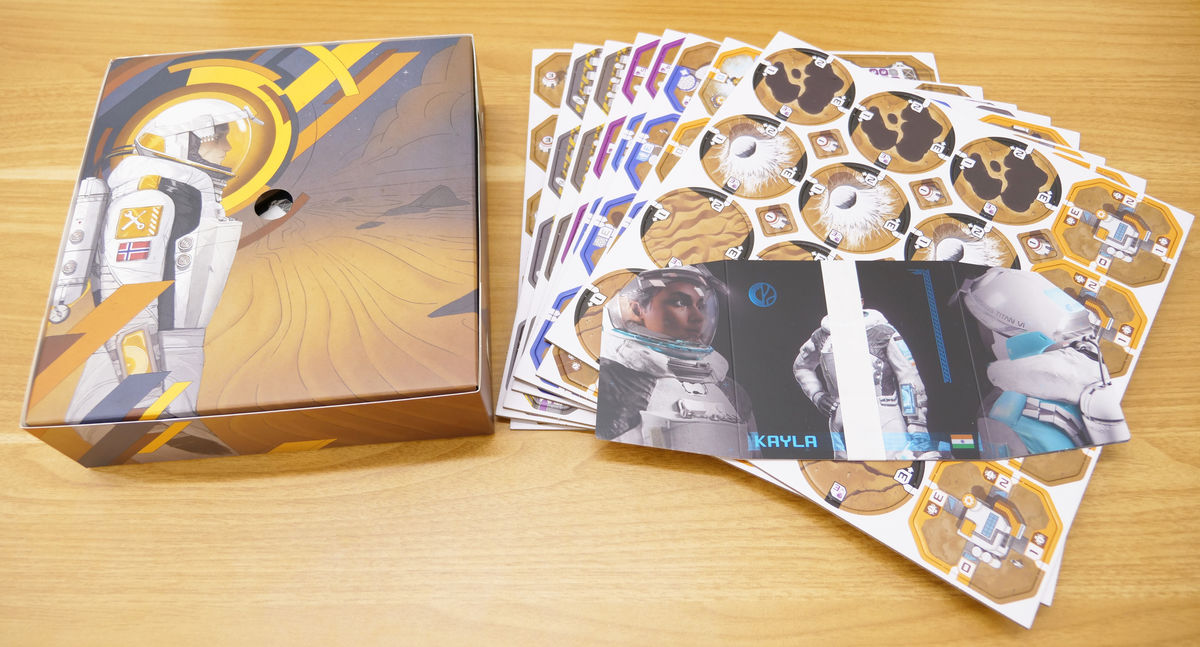
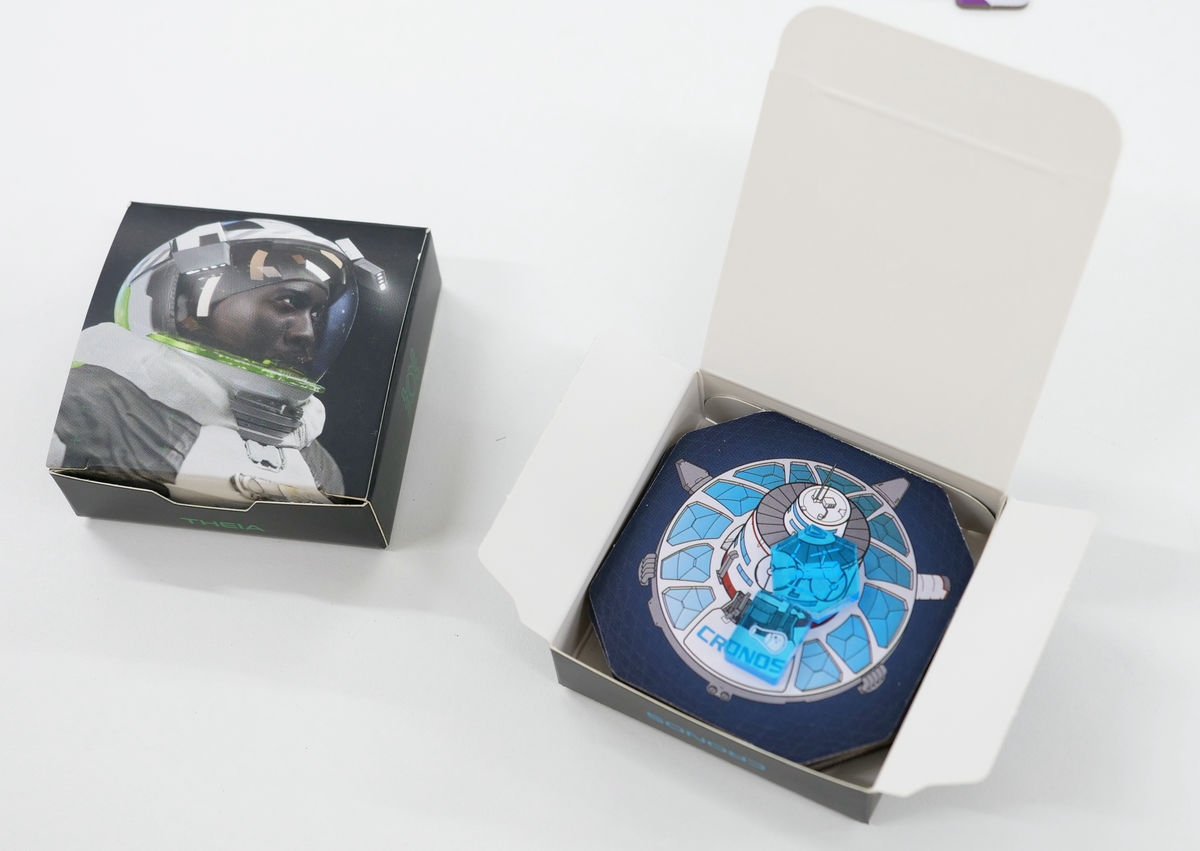
Beneath the instructions and other materials was a box that was slightly smaller than the packaging, cards indicating the playable characters, and over 200 tokens.
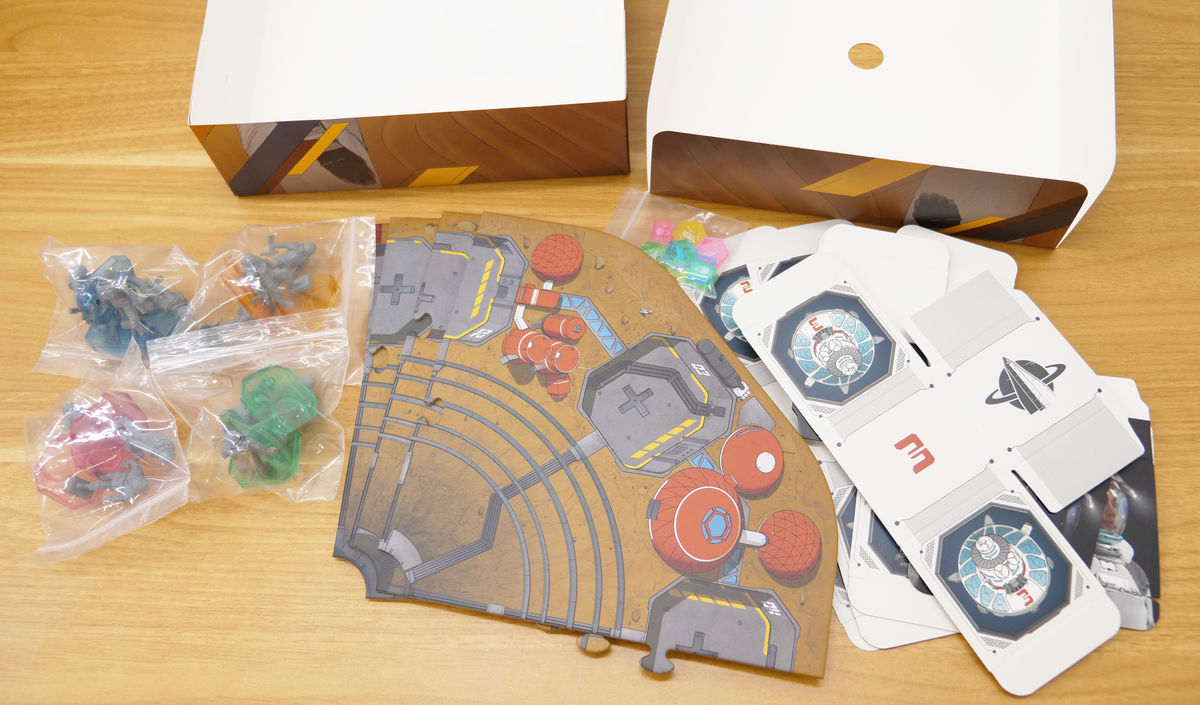
Inside the box is an astronaut figure, a board that can be assembled to become the main playing board, and a box that can be assembled to store tokens and other items.
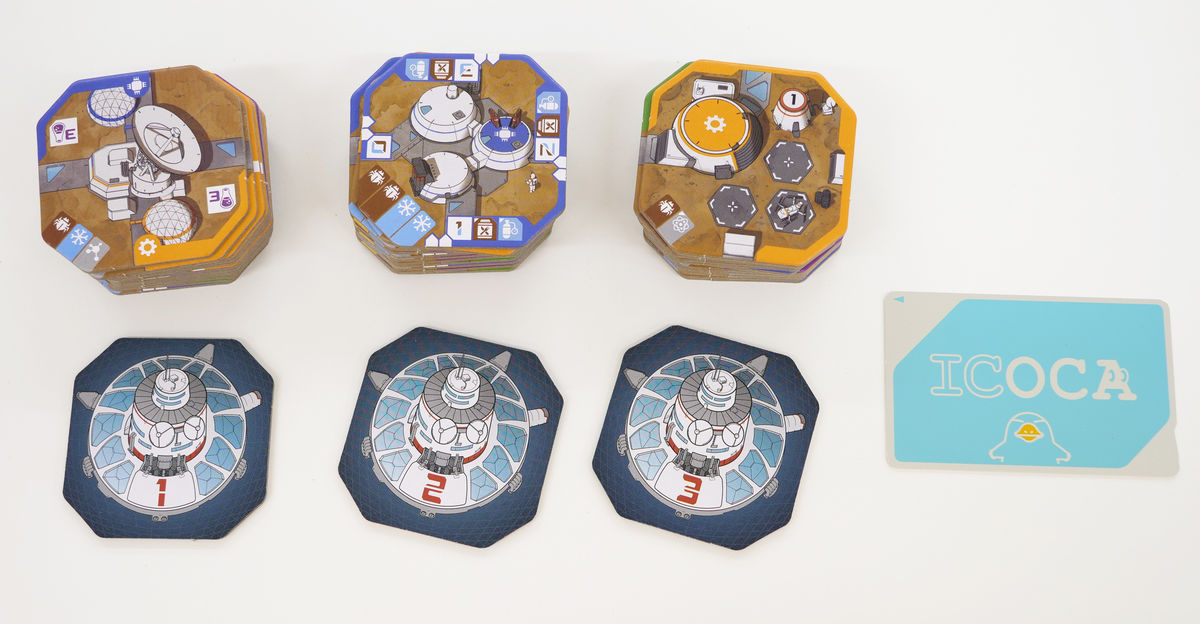
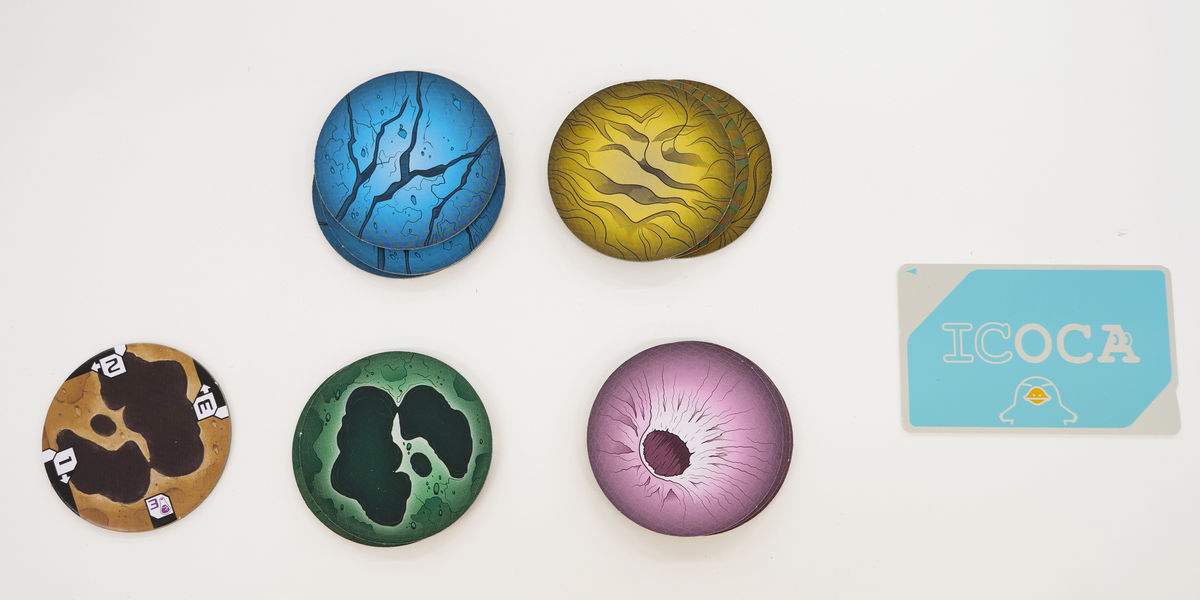
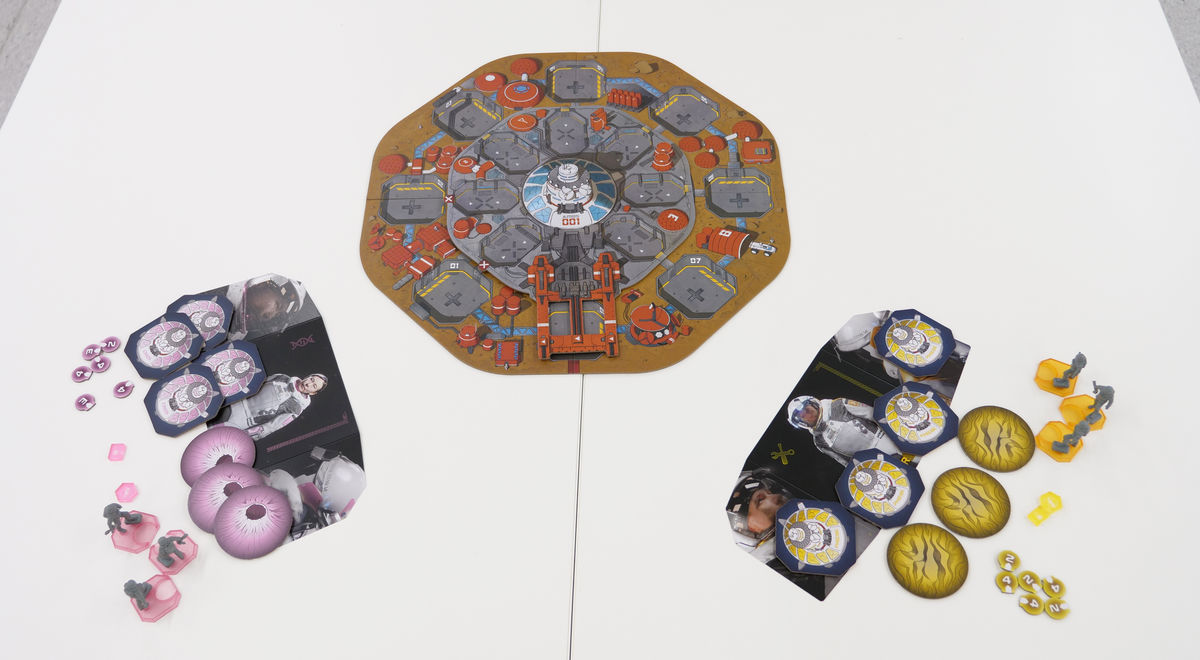
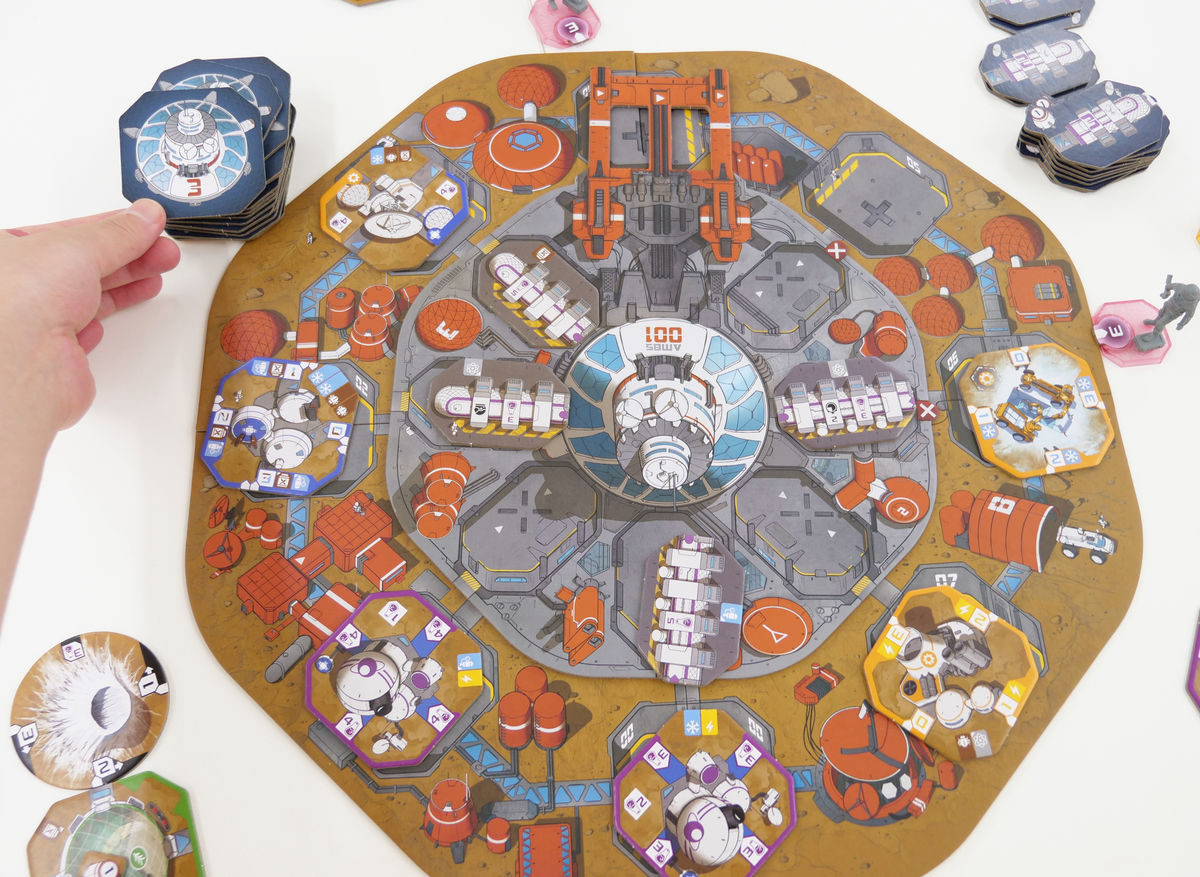
Project Humanity has many components, each of which is of high quality, so we first check all the items. We compare their size by placing a transportation IC card, which is 85.6mm wide and 53.98mm tall, next to them. Below, from the left, are the 'module' board made up of four sector-shaped boards, the 'experimental facility' disk that is attached to the main board, and the sub-board used for the score table, etc.
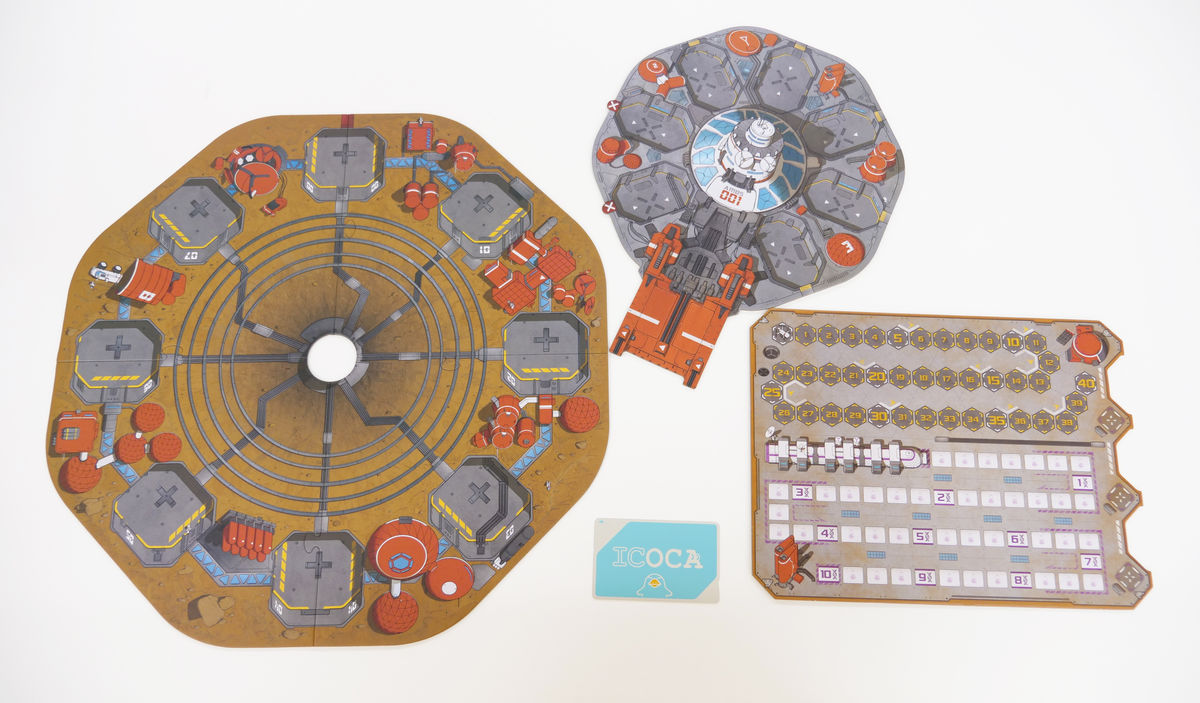
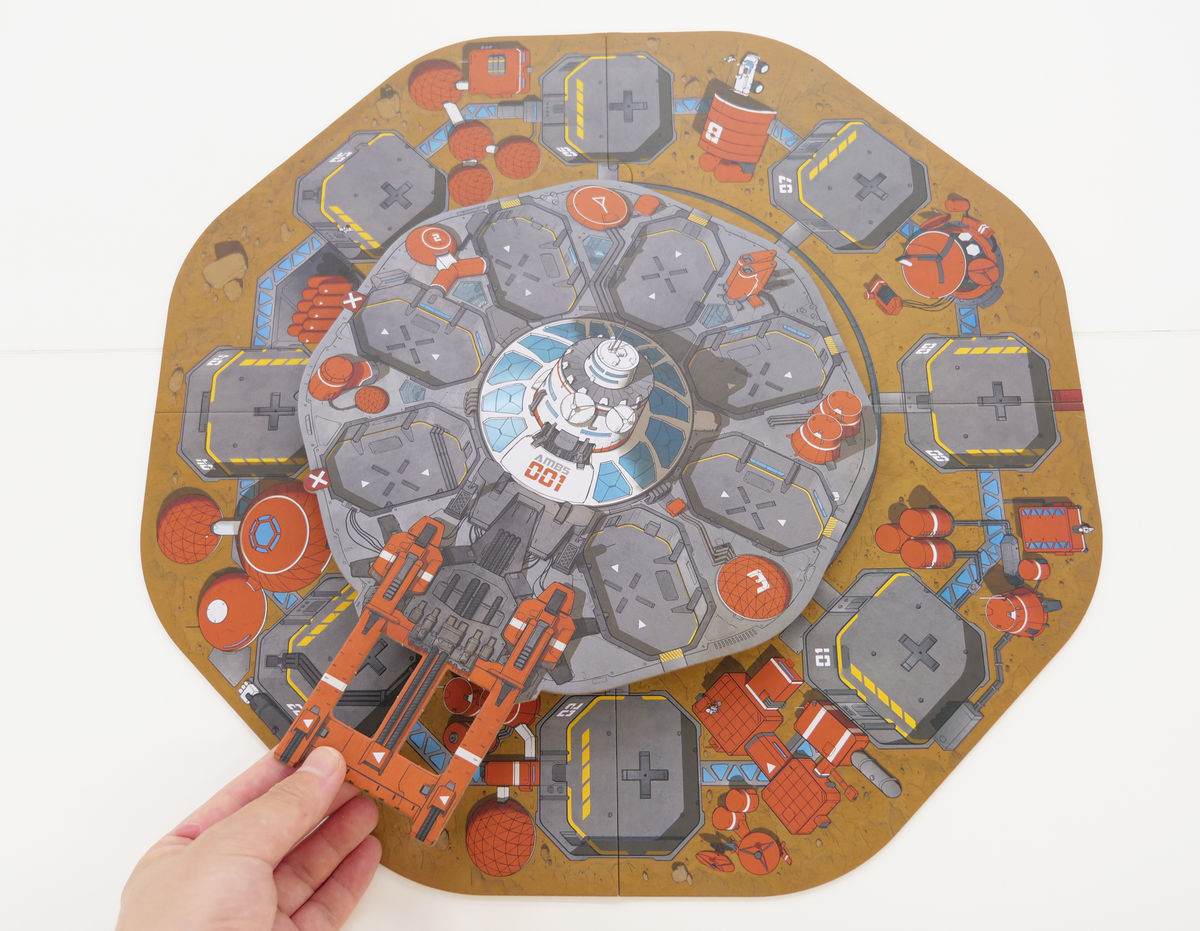
The main board is completed by overlapping the experimental facility disk on the brown module board.
There are more than 200 tiles and tokens used in the game, all packed in cardboard at first, so you have to remove them from the cardboard. Although there are a lot of them, they can be easily removed by simply pressing them lightly, and they are also easy to sort by shape and notation.
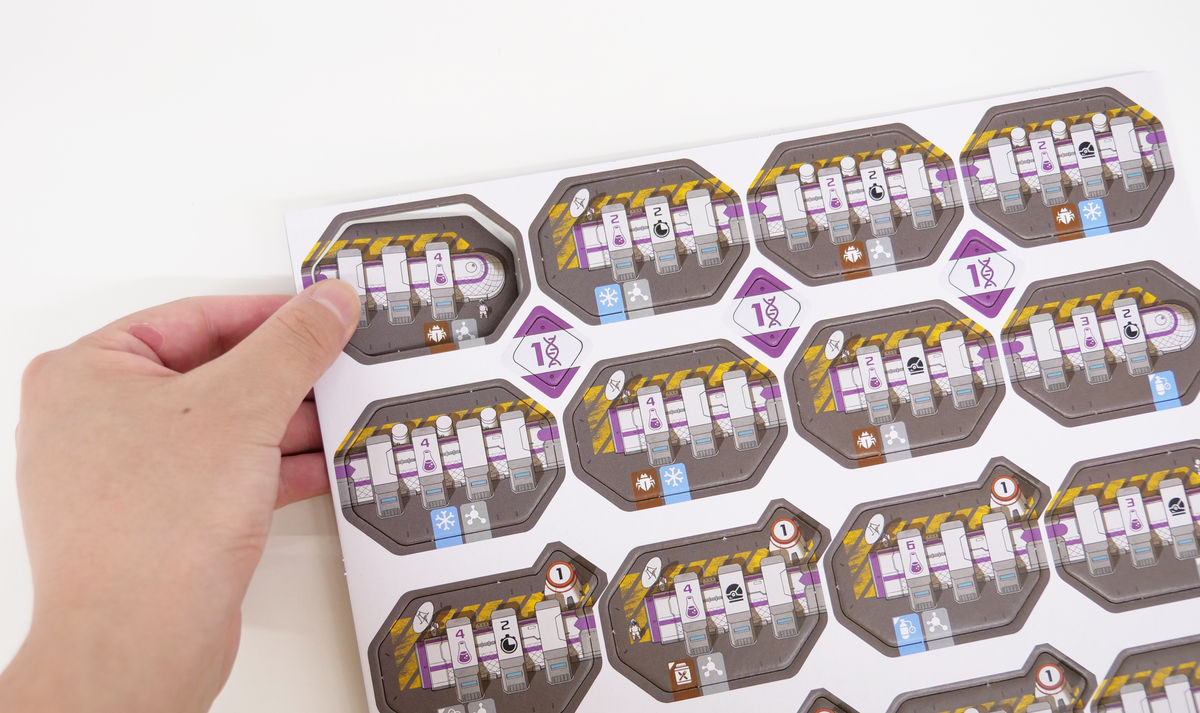
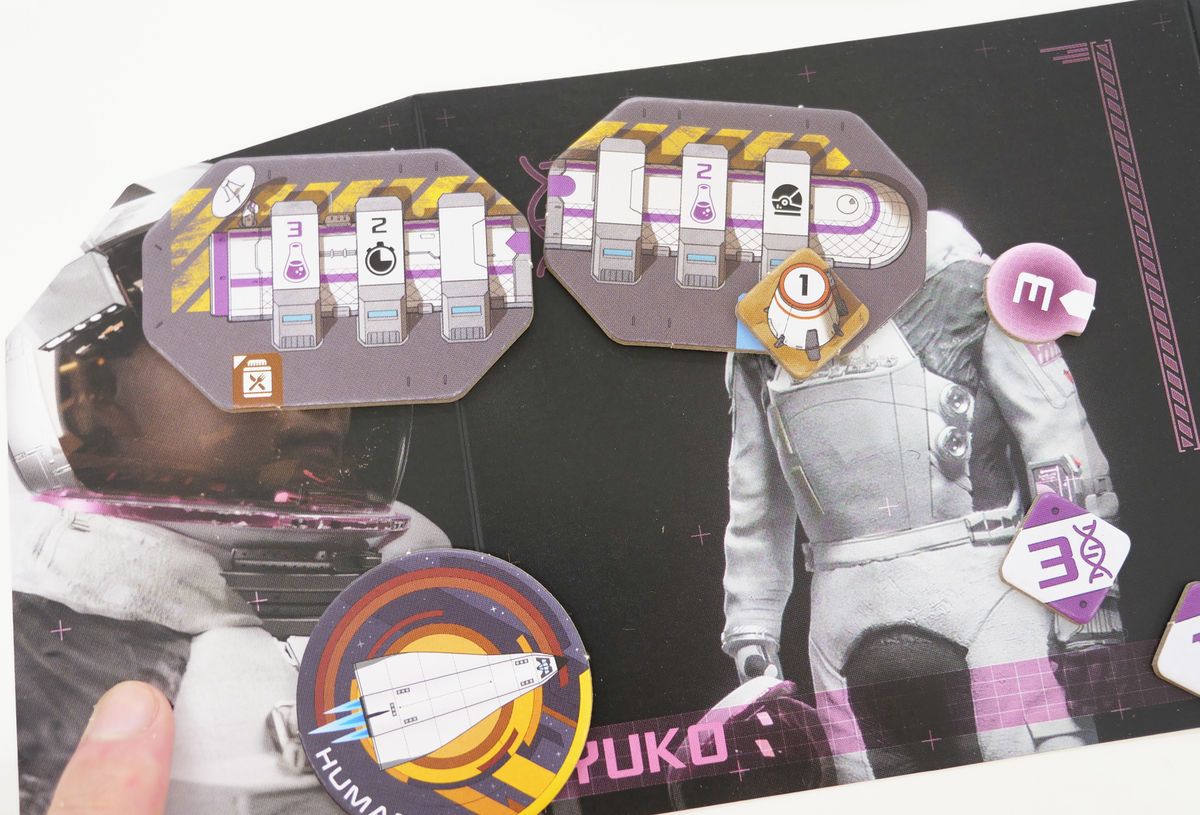
The horizontally long octagonal tiles are 'science experiment tiles.' By conducting science experiments with Titan, you can earn points that are the victory condition and receive additional benefits.
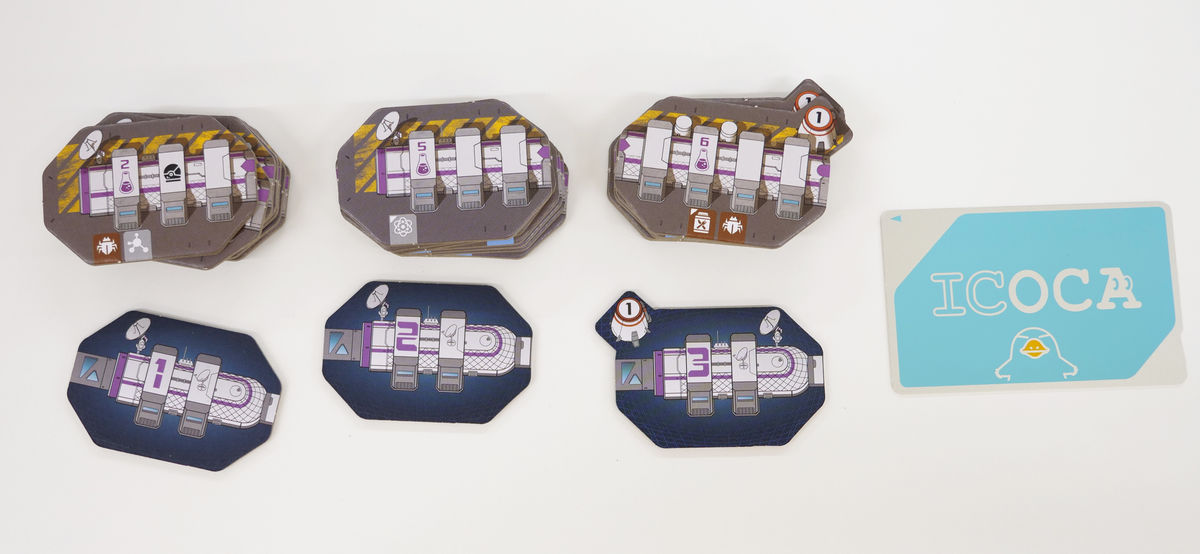
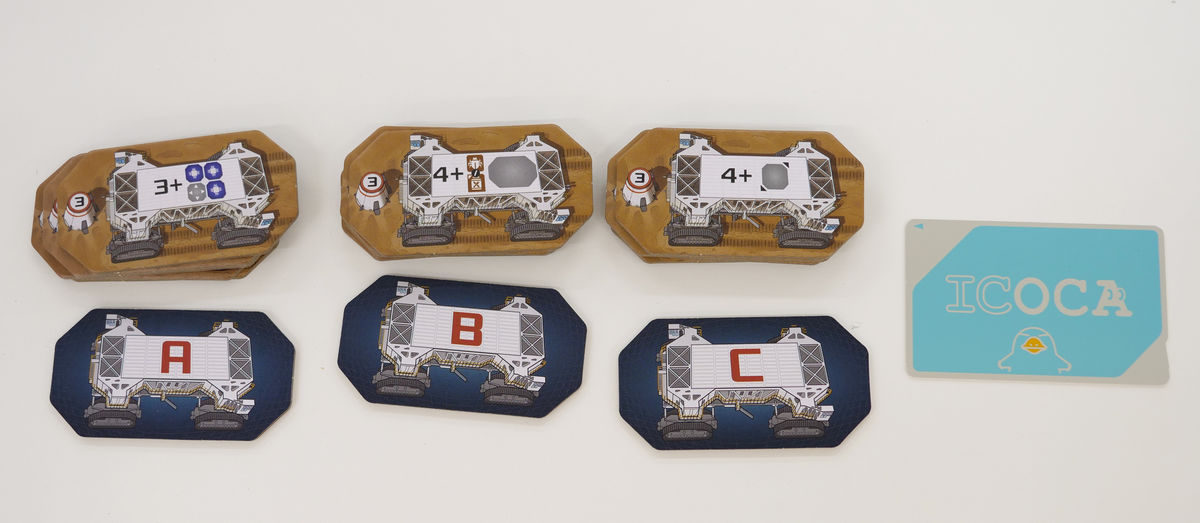
The longer tiles are 'mission tiles,' which represent missions that can be completed during play to earn additional points. There are three types of mission tiles: 'A,' 'B,' and 'C,' with A being the easiest to achieve and C being the more difficult to achieve.
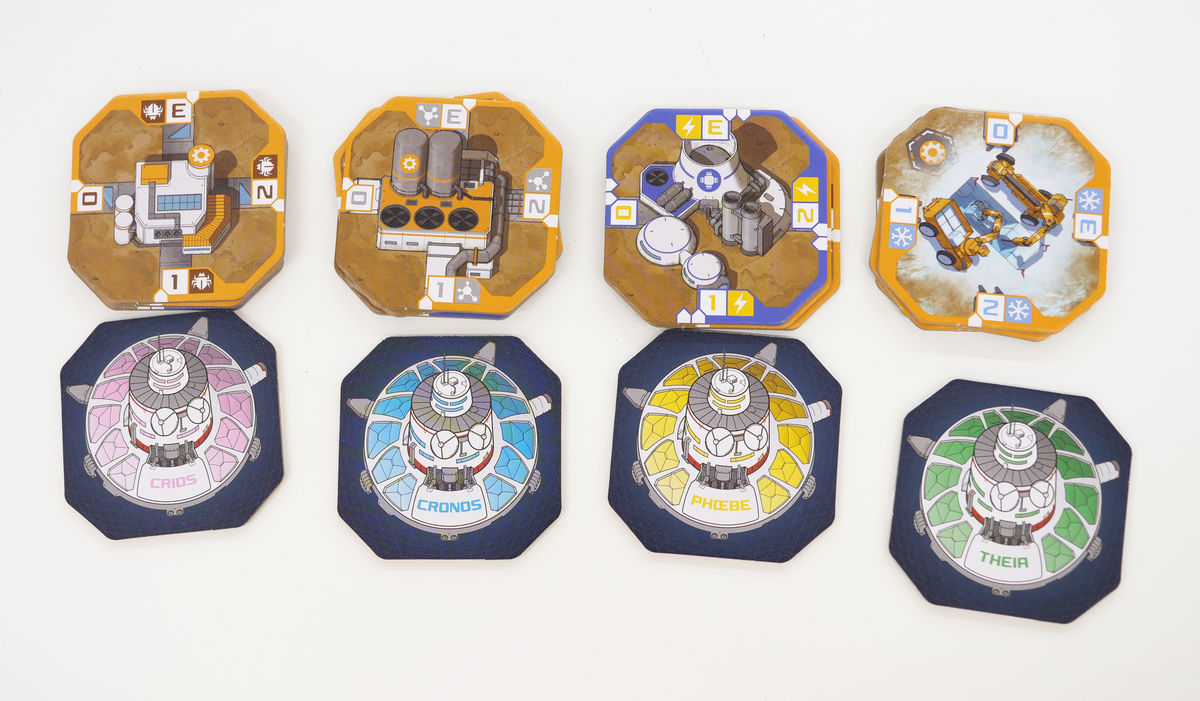
The octagonal, nearly square-sized tiles are called 'module tiles.' They come in four colors: yellow, blue, green, and purple. The basic move is to acquire them and spread them around to earn victory points. Some of the module tiles are labeled '1,' '2,' and '3,' which stand for 'first year,' 'second year,' and 'third year,' and the Humanity Project is a game in which you earn points throughout three years of activity.
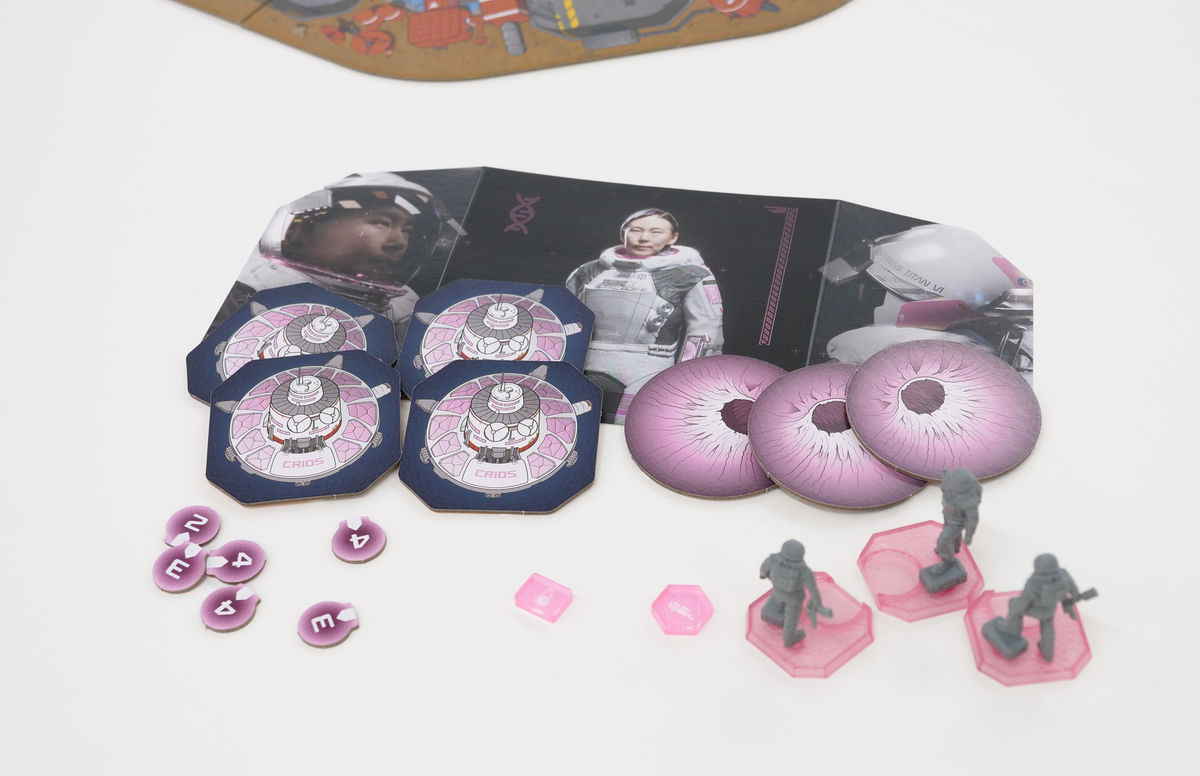
Some module tiles have pink, blue, yellow, or green backs - these four colors represent the player's colors and indicate the module tiles that are dealt to each player at the beginning.
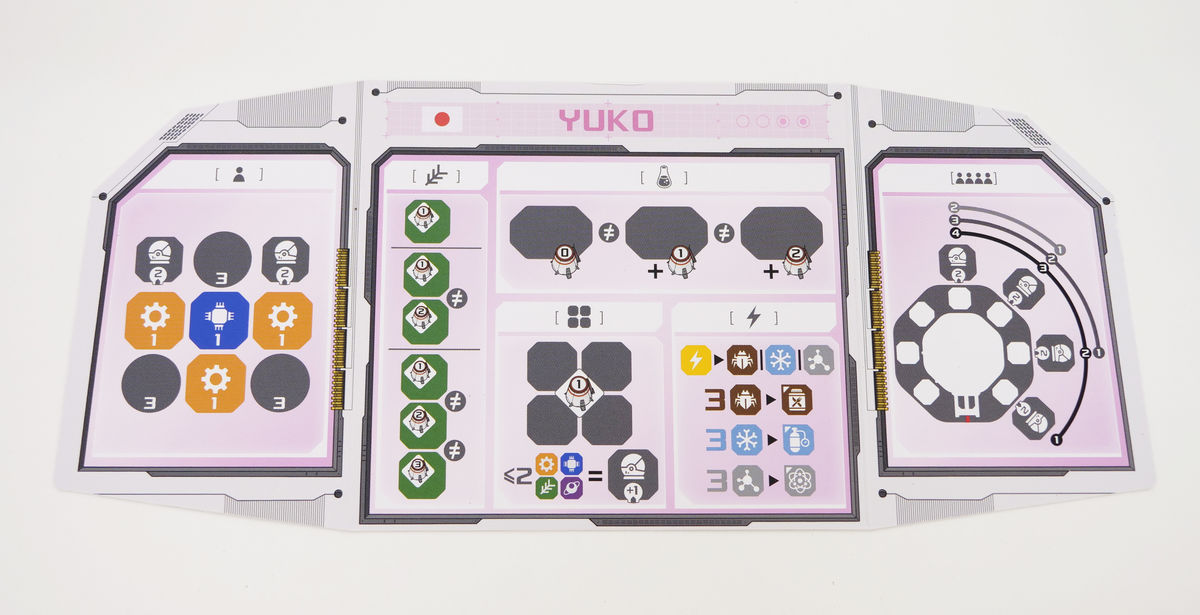
The players are four astronauts: Yuko (pink), Kayla (blue), Alexander (yellow), and Gabriel (green). Below is the 'shield' that indicates the player.
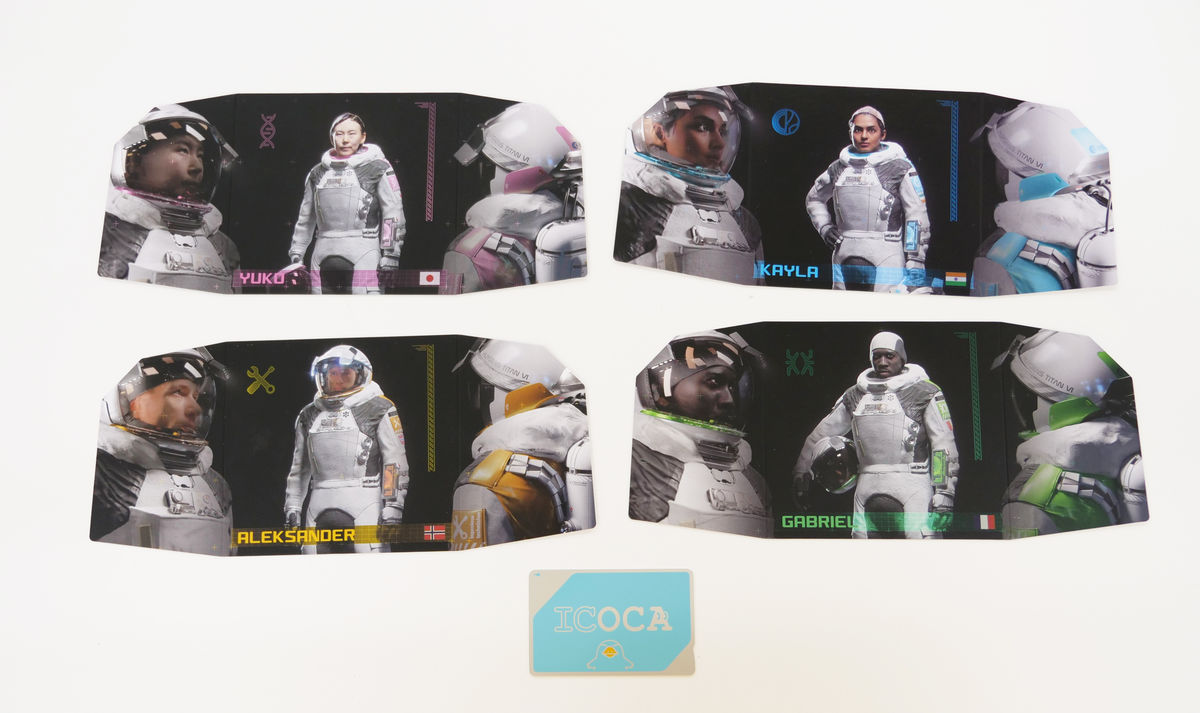
The shields are not just for showing players, but can also be folded up on both sides to stand up during play. Some of the points you earn during play are not revealed to other players, so by hiding them with a shield, it becomes impossible to know who has how many points.
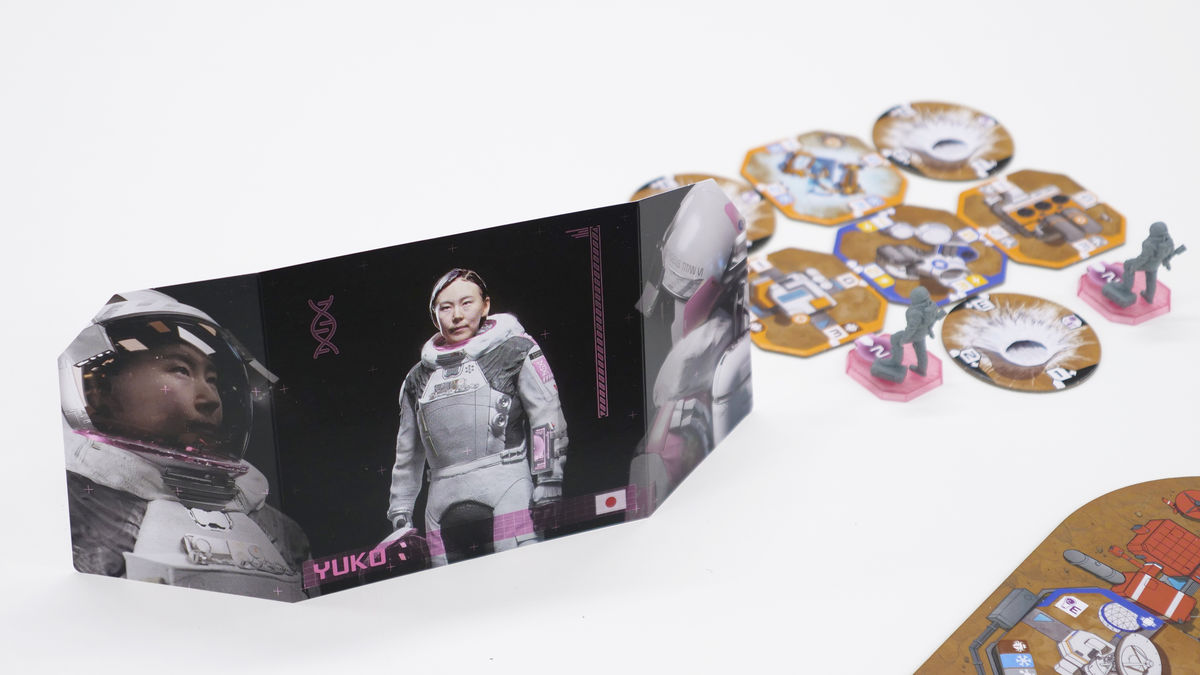
Behind the shield are icons that show how to place tiles initially and how to earn points.
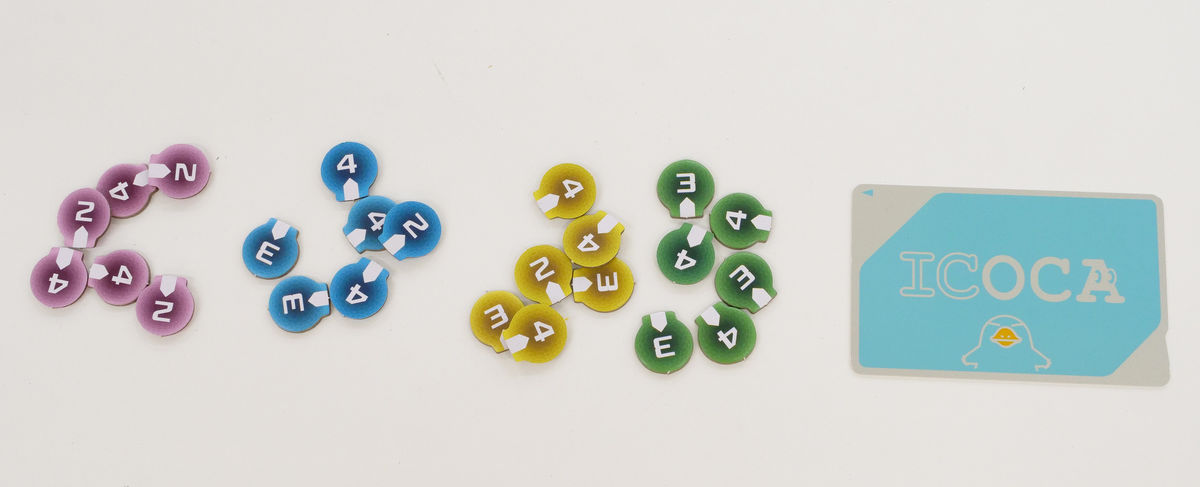
The round tiles are 'obstacle tiles.' As you can see from the four colors, they are distributed to each player as obstacles at the beginning.
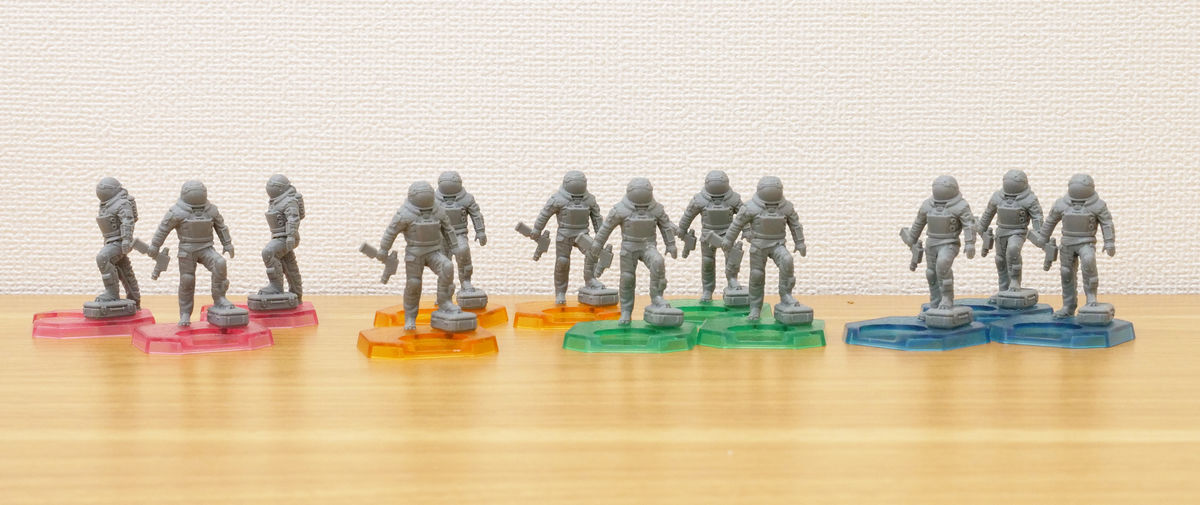
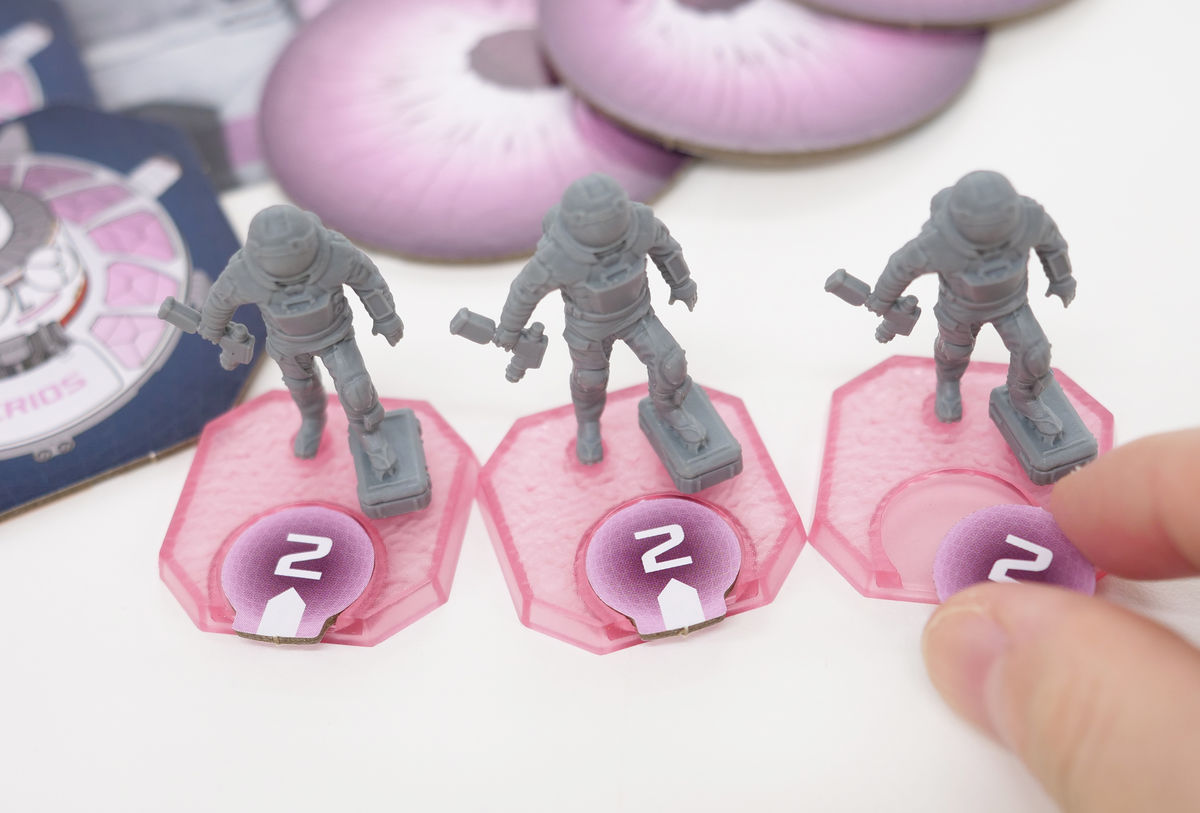
And then there are the astronaut figures that you place on the board and develop resources at hand. There are three of each of the four colors. They are small figures in a single gray color, but even the structure and wrinkles of the spacesuit are carefully crafted.
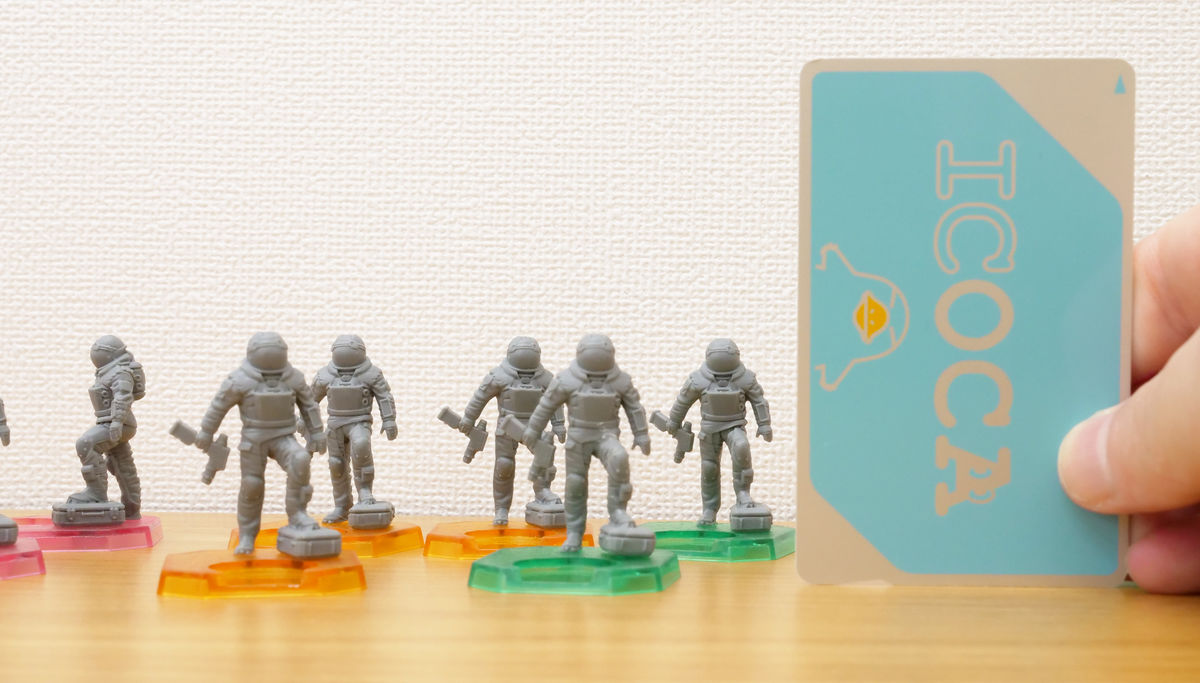
The size of the figure is as follows compared to a transportation IC card with a long side of 85.6 mm.
The small tokens with the numbers '2-4' written on them are 'task tokens.' When paired with an astronaut figure, they indicate how many tasks the astronaut has left to complete.
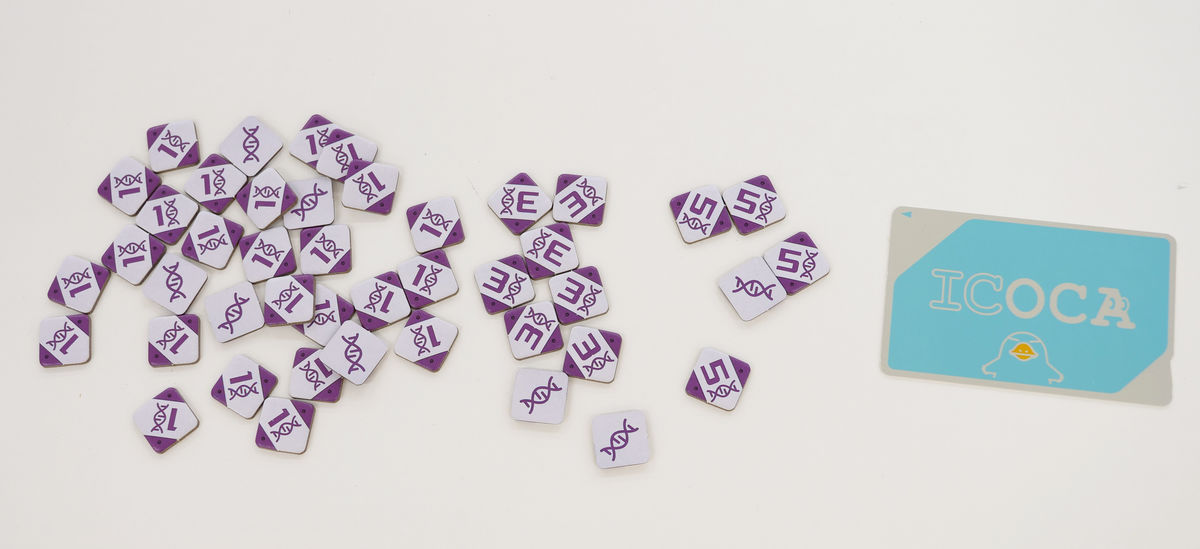
The brown diamond-shaped tokens are 'victory point tokens' - there are 45 1 point, 5 2 point, and 3 3 point tokens.

The diamond-shaped purple tokens are 'science tokens.' Like the victory point tokens, they are awarded victory points, and can be obtained mainly by completing science experiment missions. There are 33 1-point tokens, 10 3-point tokens, and 4 5-point tokens.
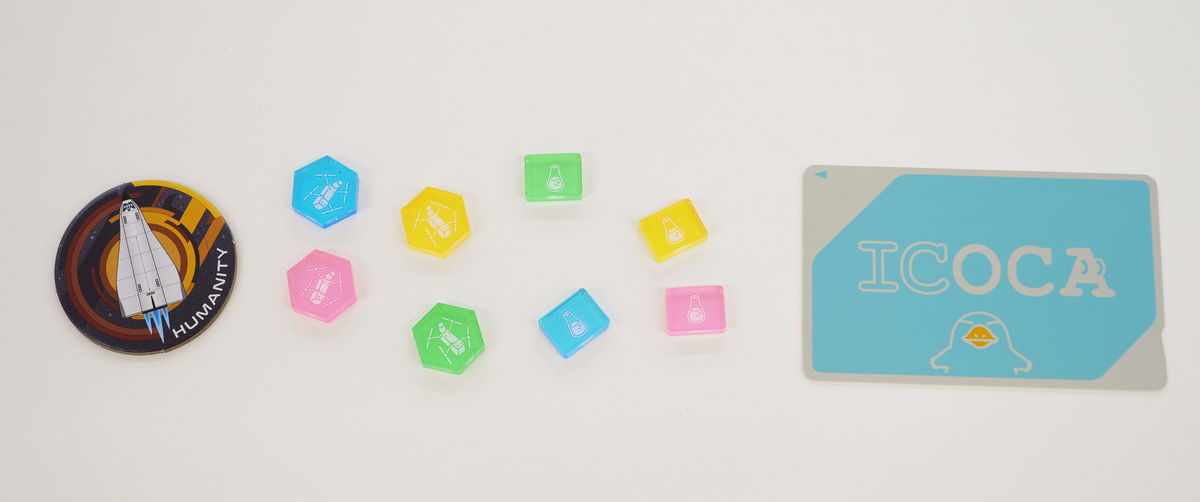
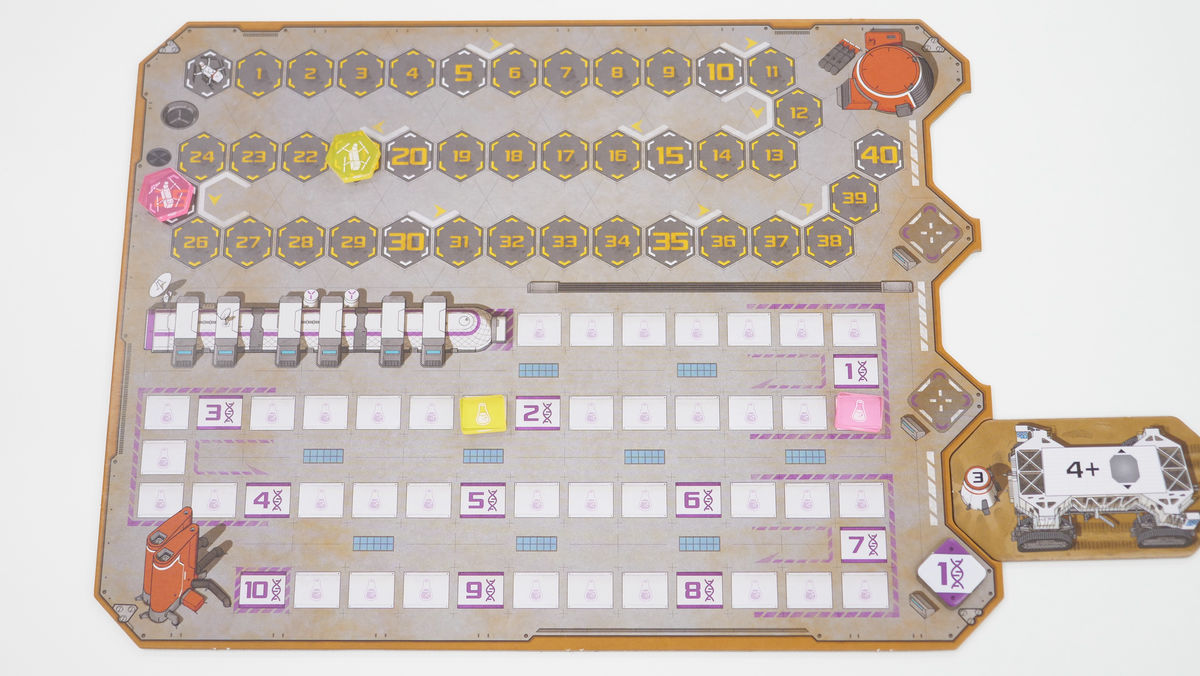
Below are the markers used to mark the play. The shuttle mark on the left is a patch token indicating the first player, the hexagonal plastic token is a marker indicating the current score, and the rectangular token is a marker indicating the current research points.
There is a large variety and number of items inside, but there was also a storage box in addition to the items used for playing, so by sorting and tidying up in these, it will be easier to set up the next time you play.
Now let's actually play. The number of players is 2 to 4, and the rules do not change depending on the number of players. This time, we will play with 2 people.
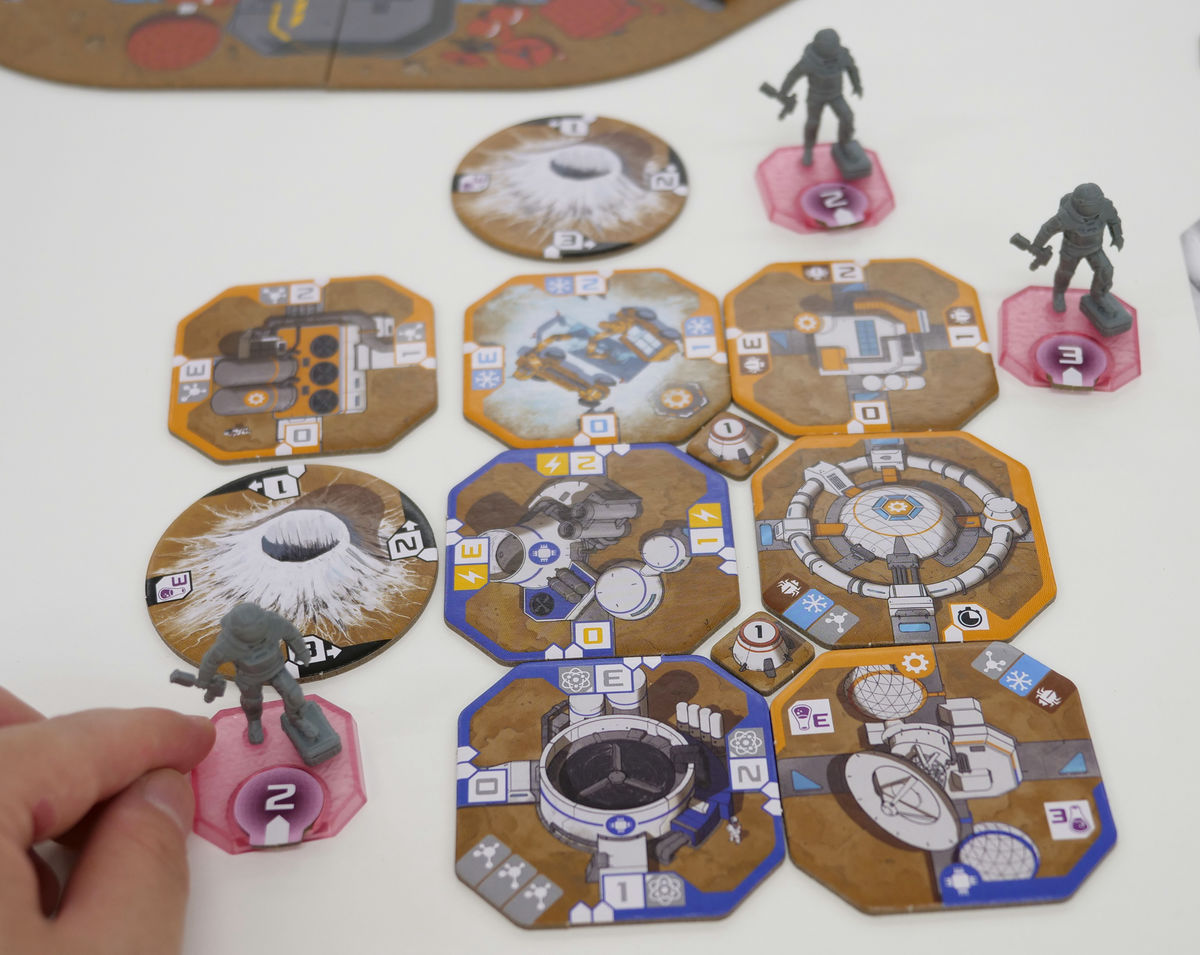
First, each player is given a shield, module tile, obstacle tile, work token, two perk markers, and three astronaut figures that correspond to the character they have chosen.
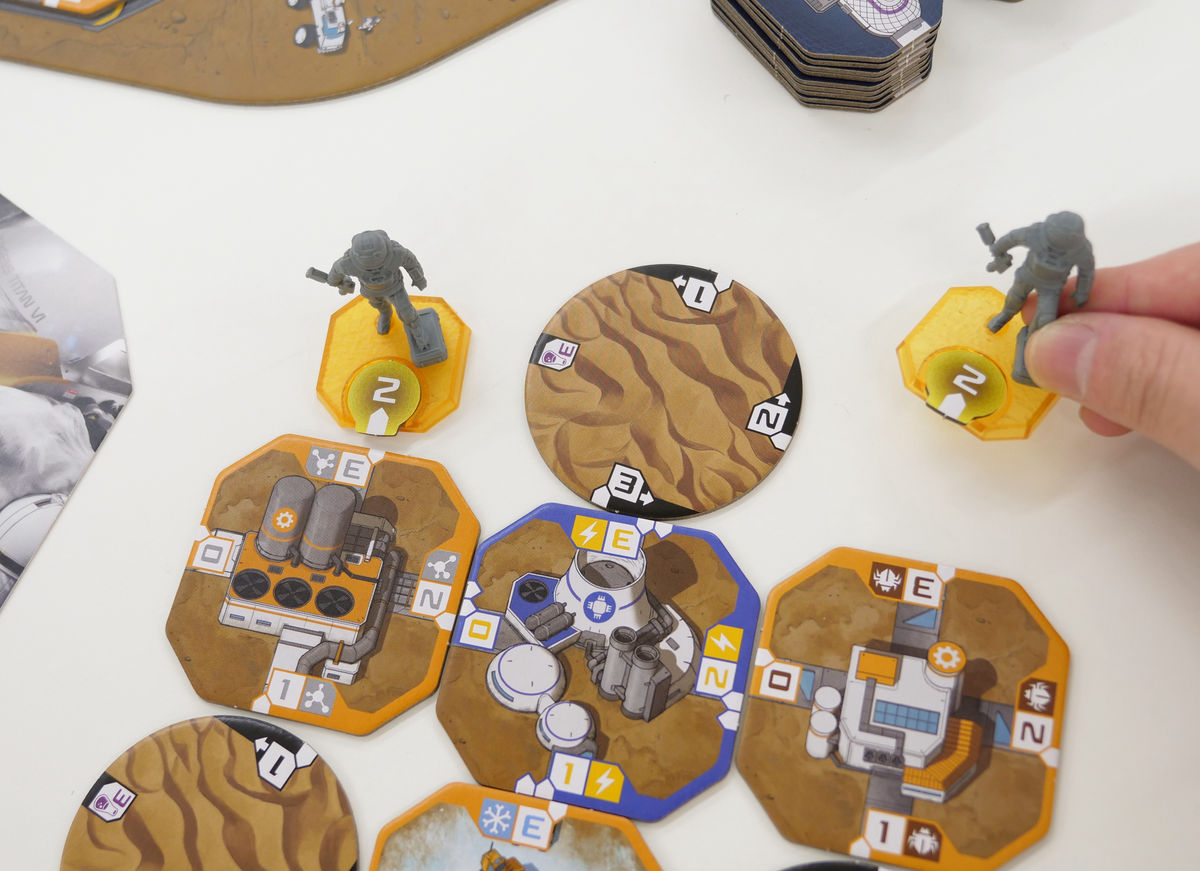
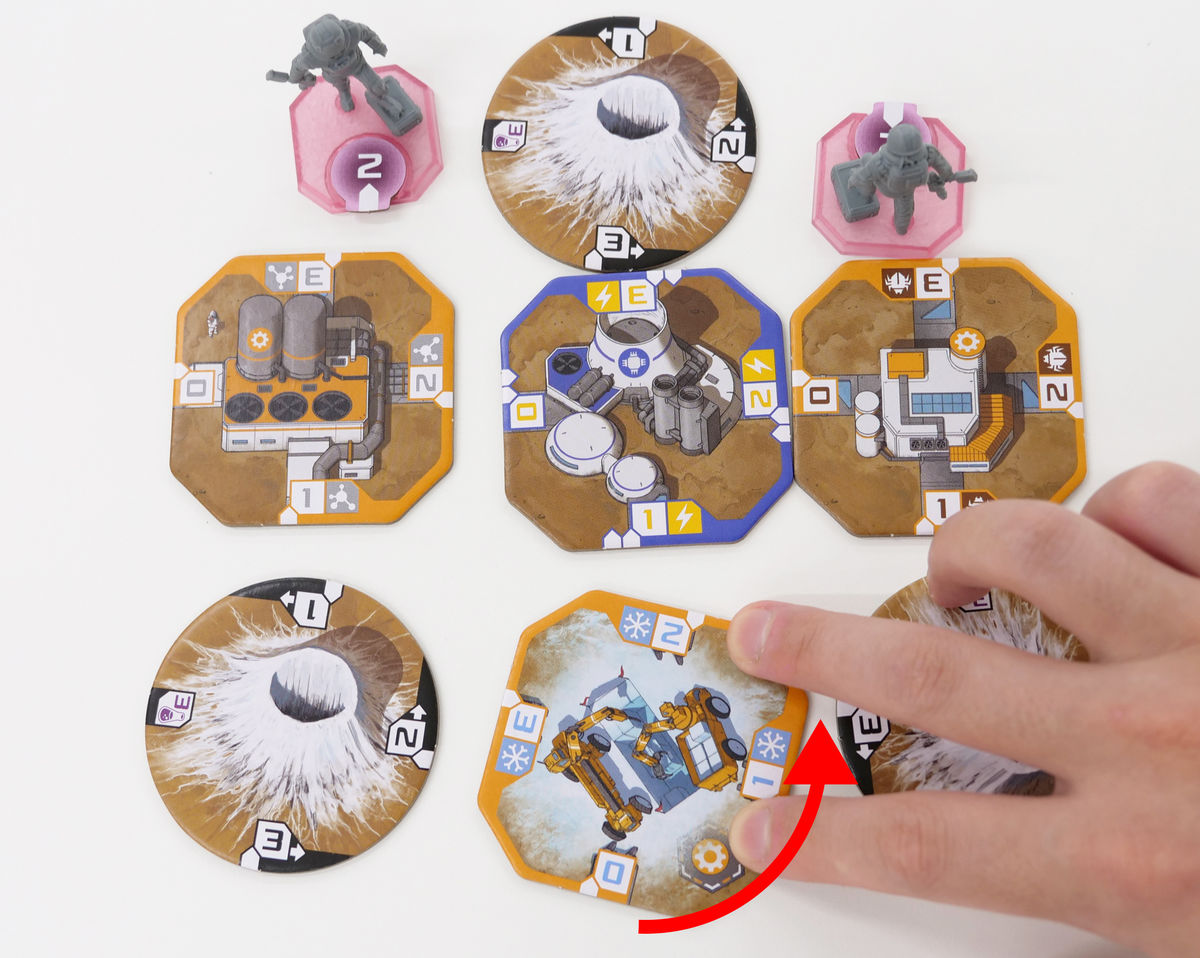
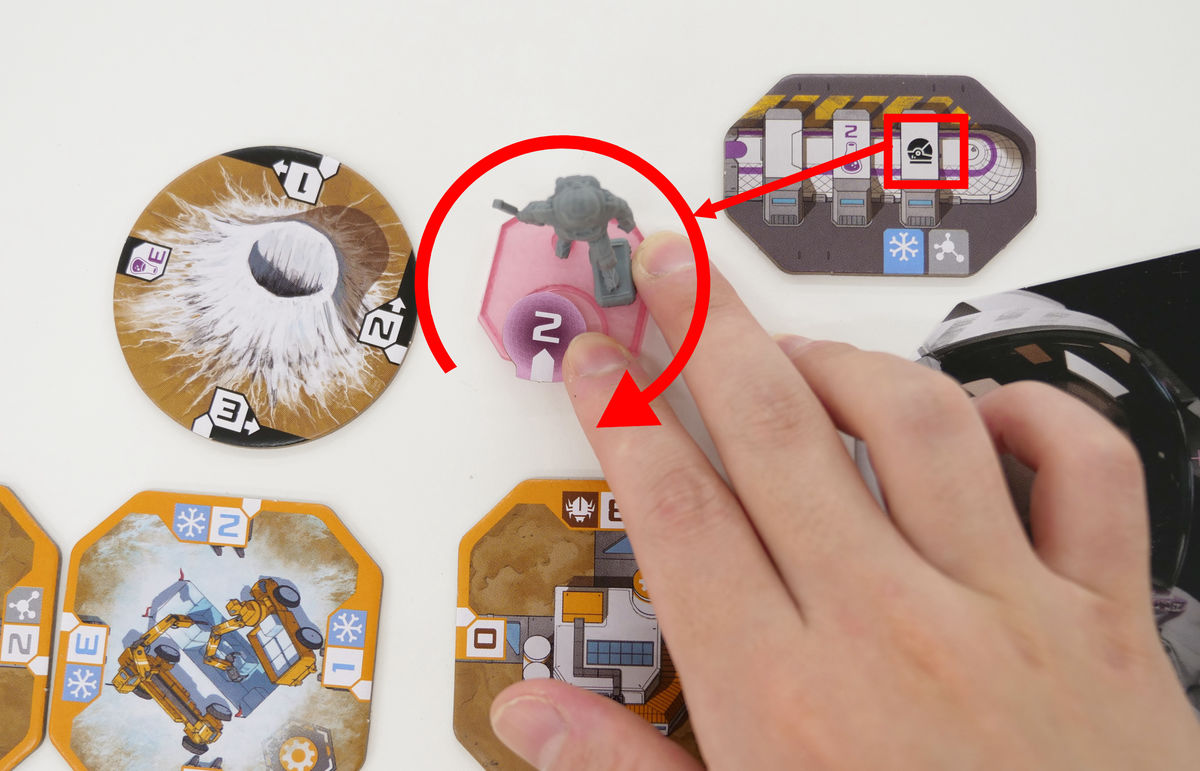
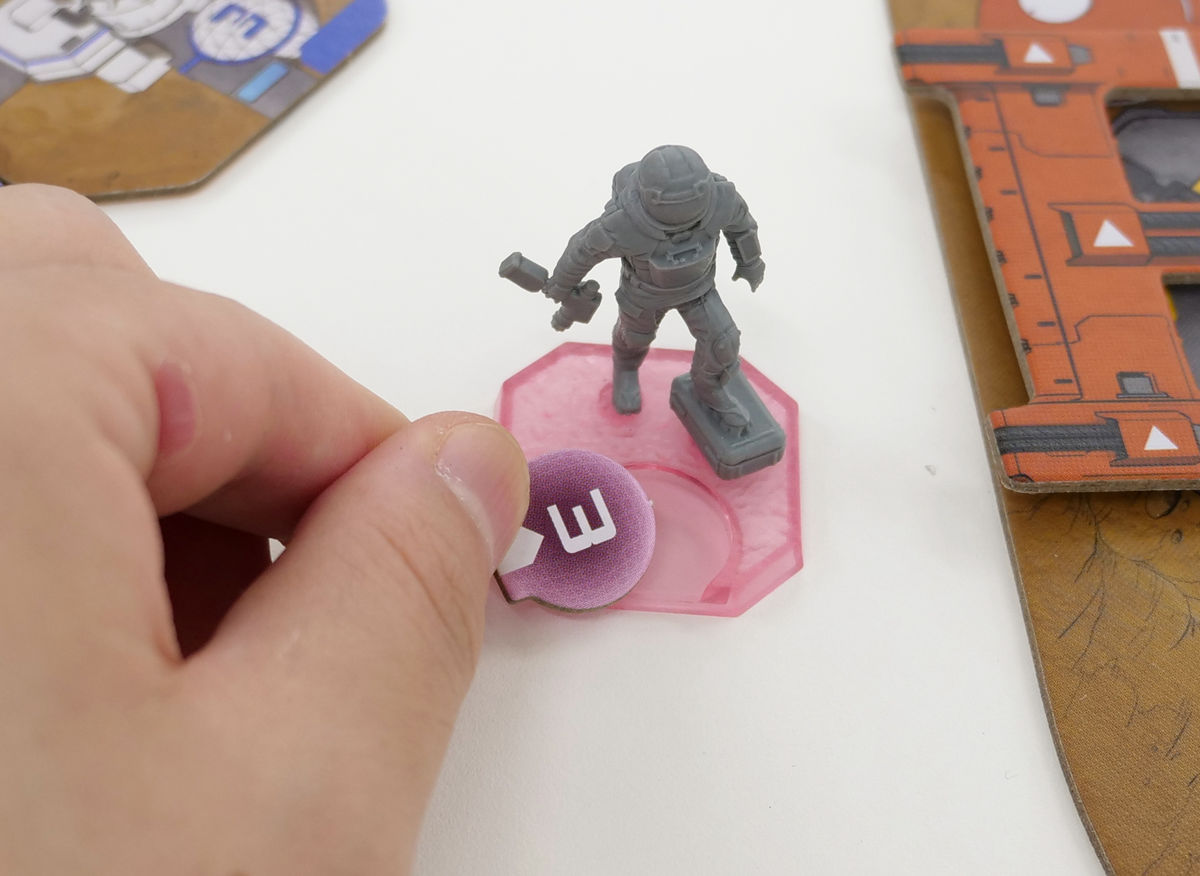
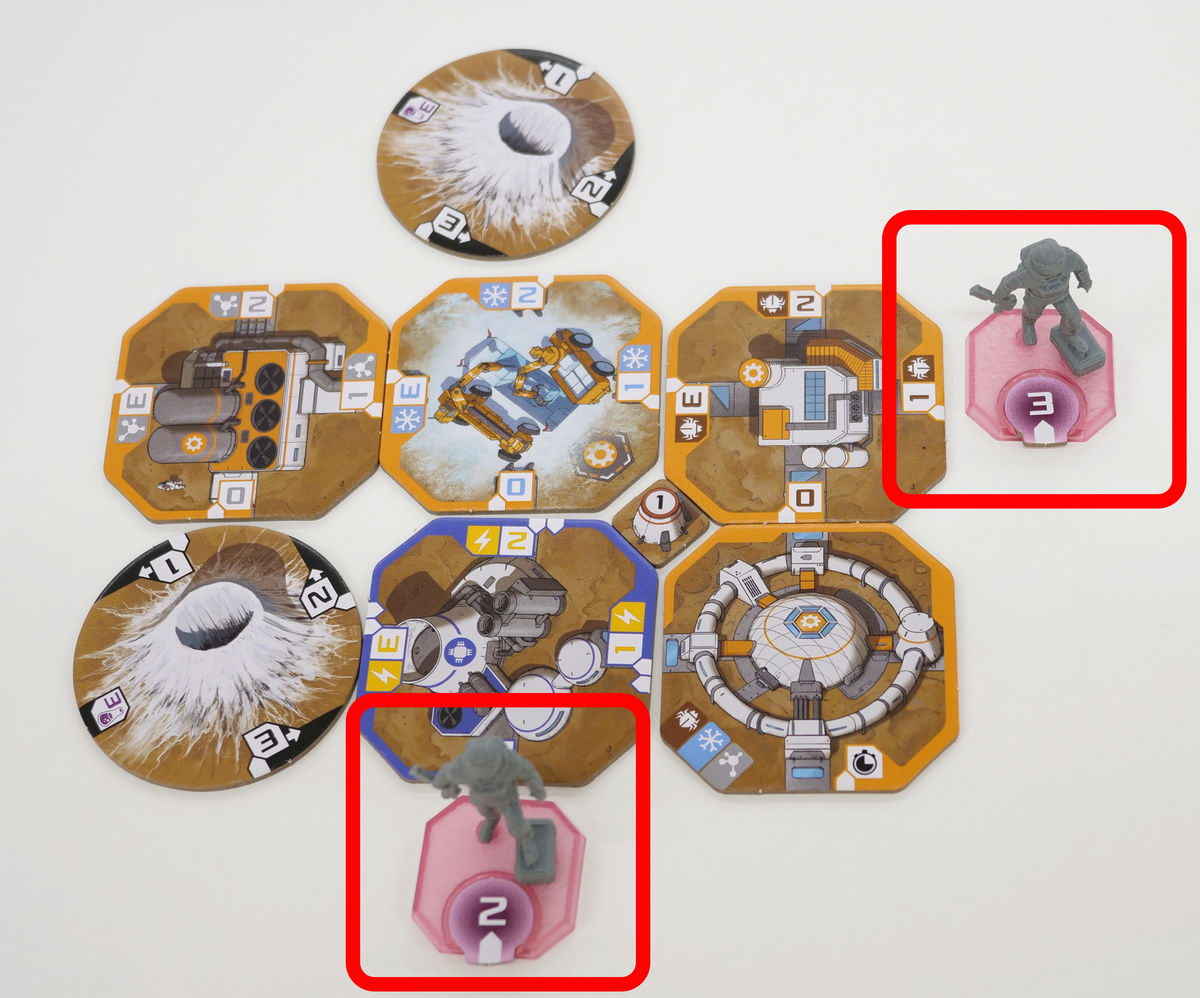
The astronaut figure is designed to hold a work token, so place it with the '2' side facing up.
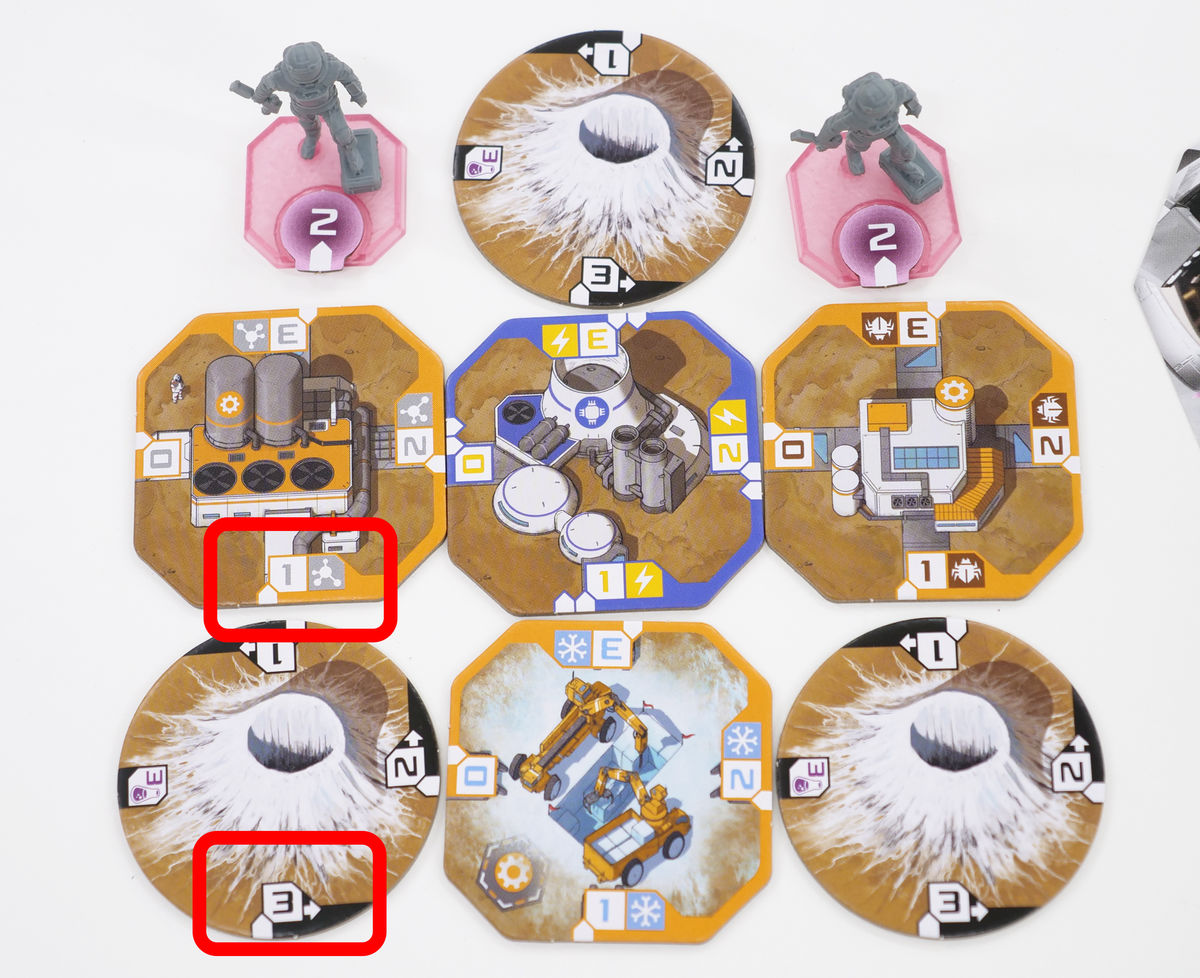
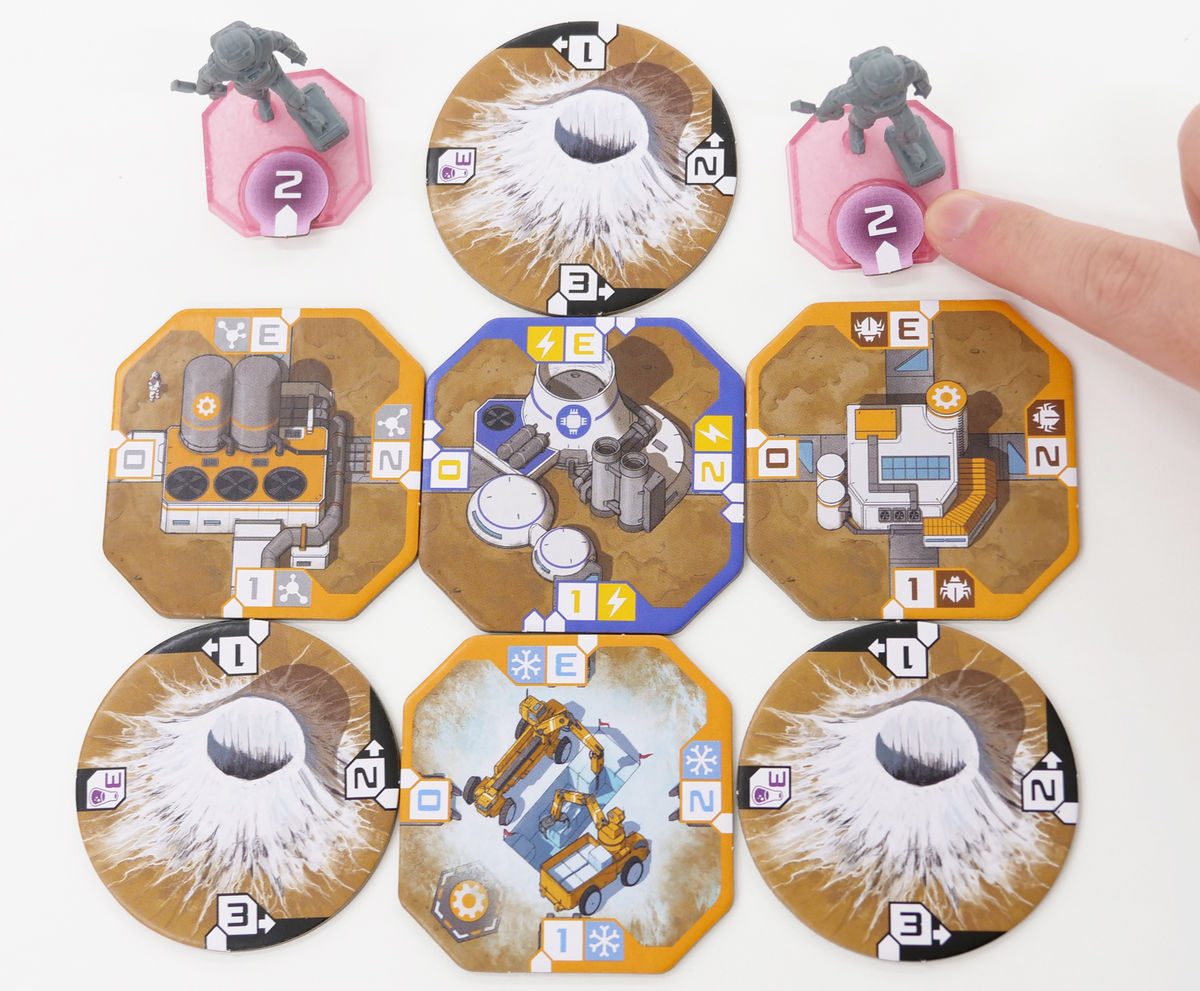
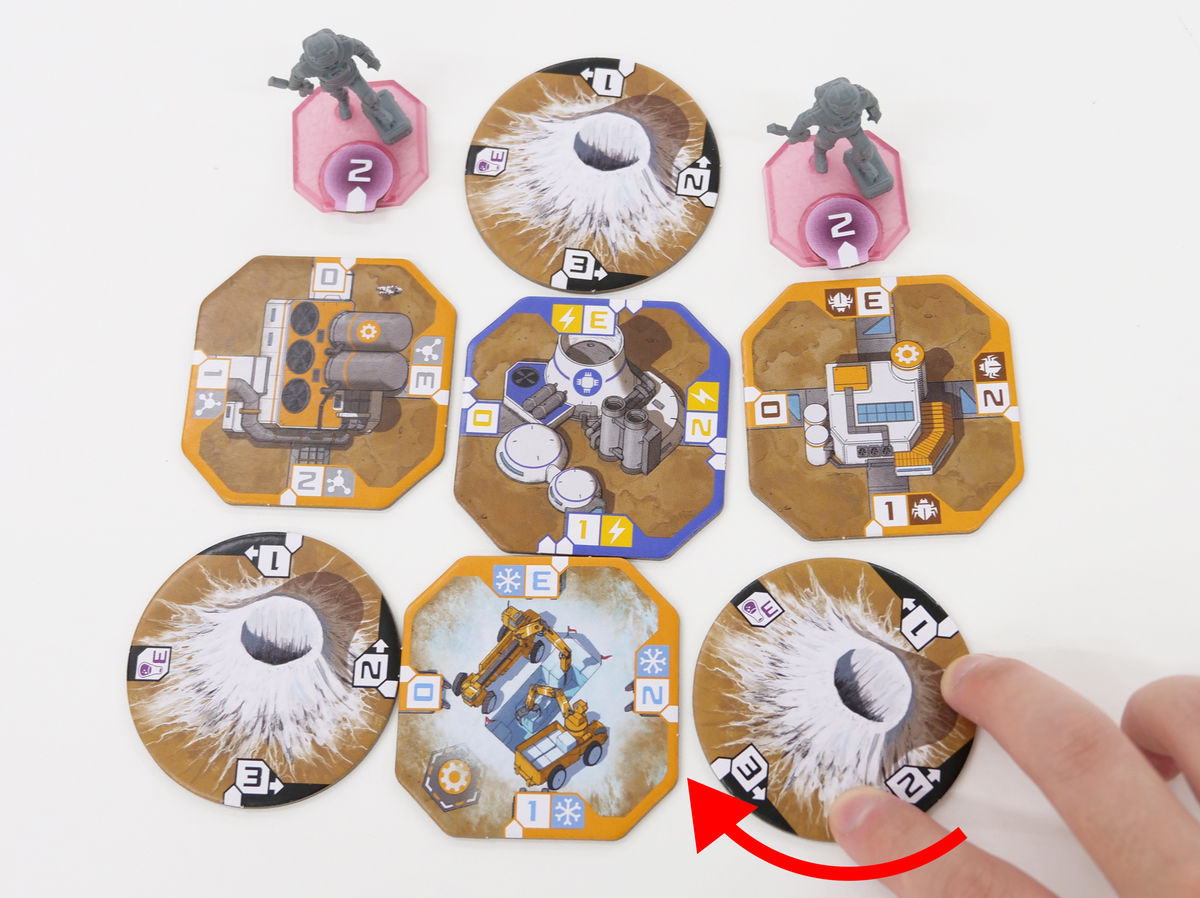
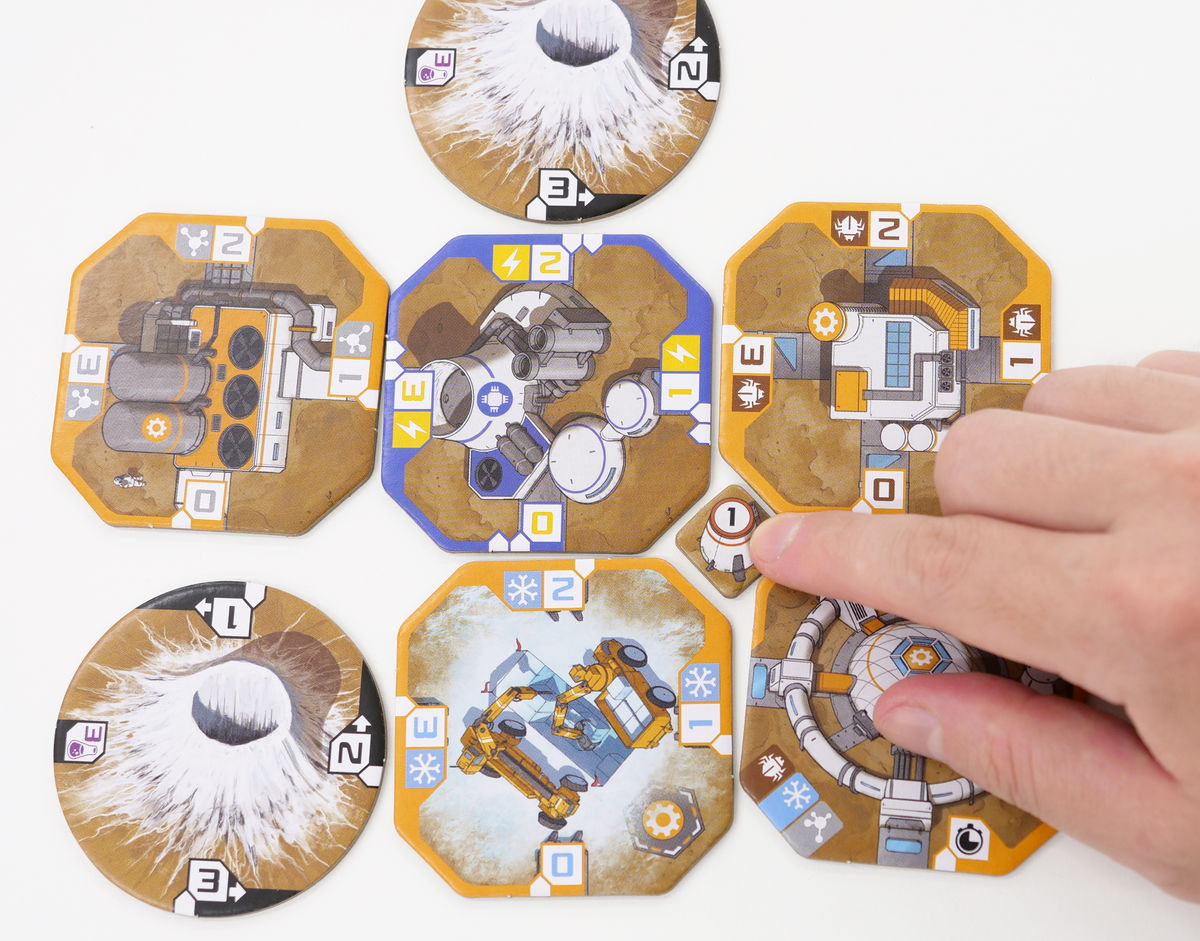
After that, create a 'base' by arranging two astronaut figures, four module tiles, and three obstacle tiles as shown below. The important thing here is the orientation of the tiles, so align the module tiles so that the number '1' is on the front side and the obstacle tiles so that the number '3' is on the front side. The number on the module tile indicates 'resources', and the initial value is '1'. If you increase the resources later, it will become '2' or '3', and if you consume the resources, it will become '0'. On the other hand, since obstacle tiles are an obstacle, they can be removed by reducing the number from '3' to 0. Also, when placing astronauts on the base, place them so that they face forward (towards the player).
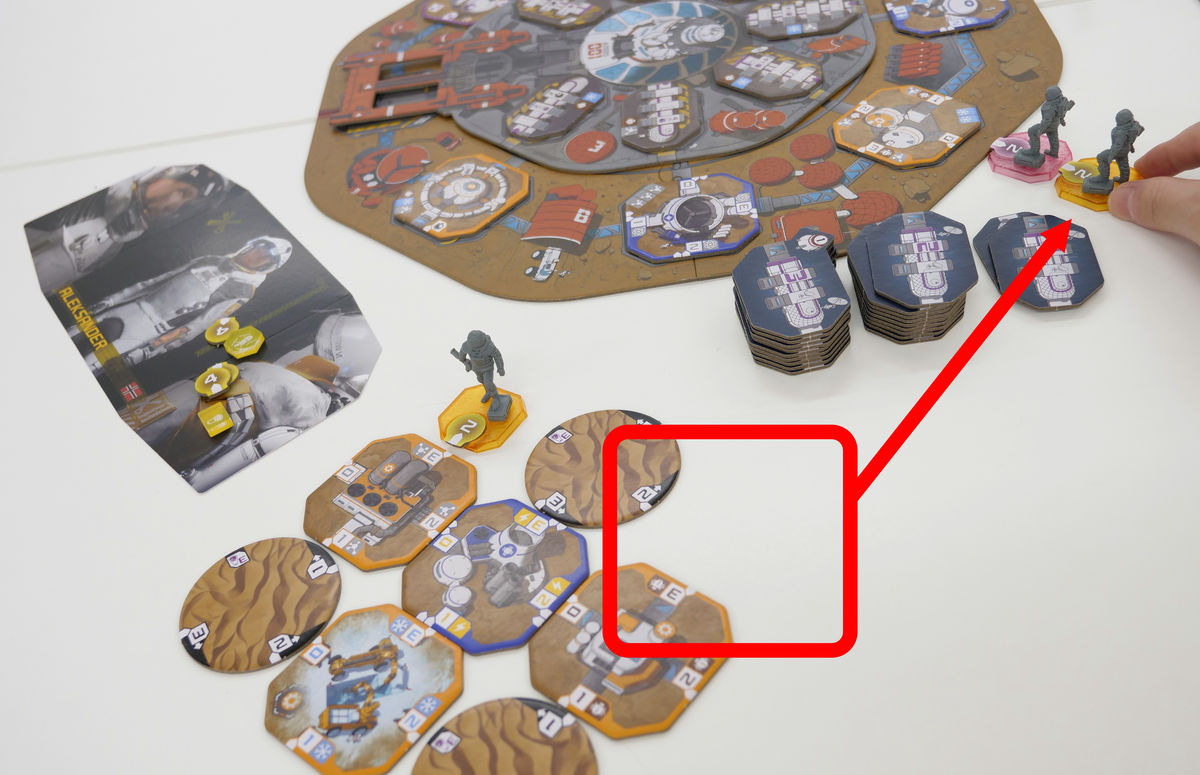
The remaining astronaut figures are placed next to the main board. The main board starts with the red arm, so the first player, Pink, places it opposite, and the second player, Yellow, places it next to it counterclockwise.
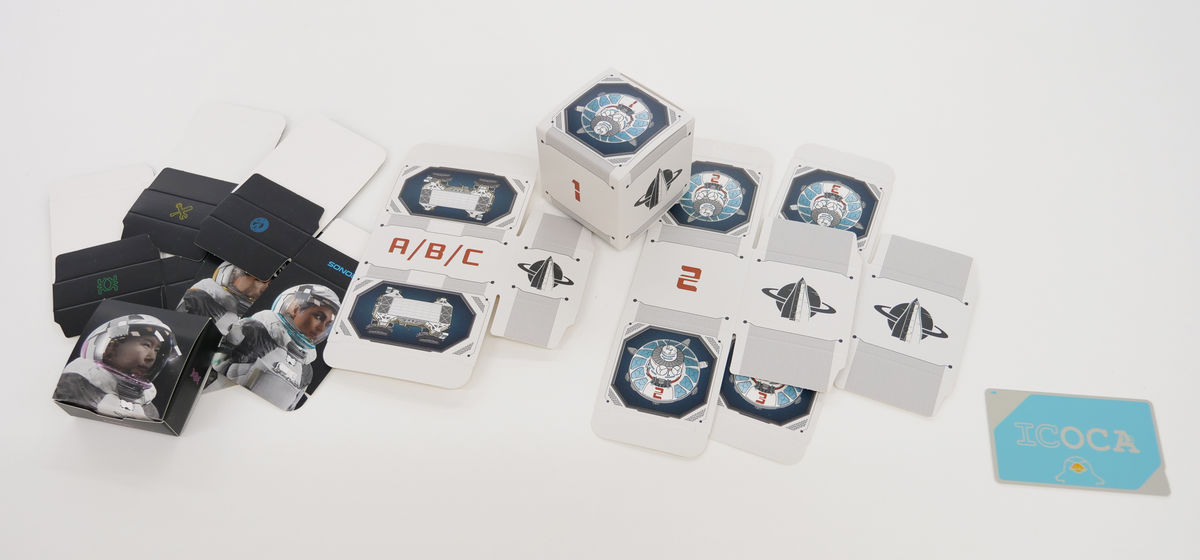
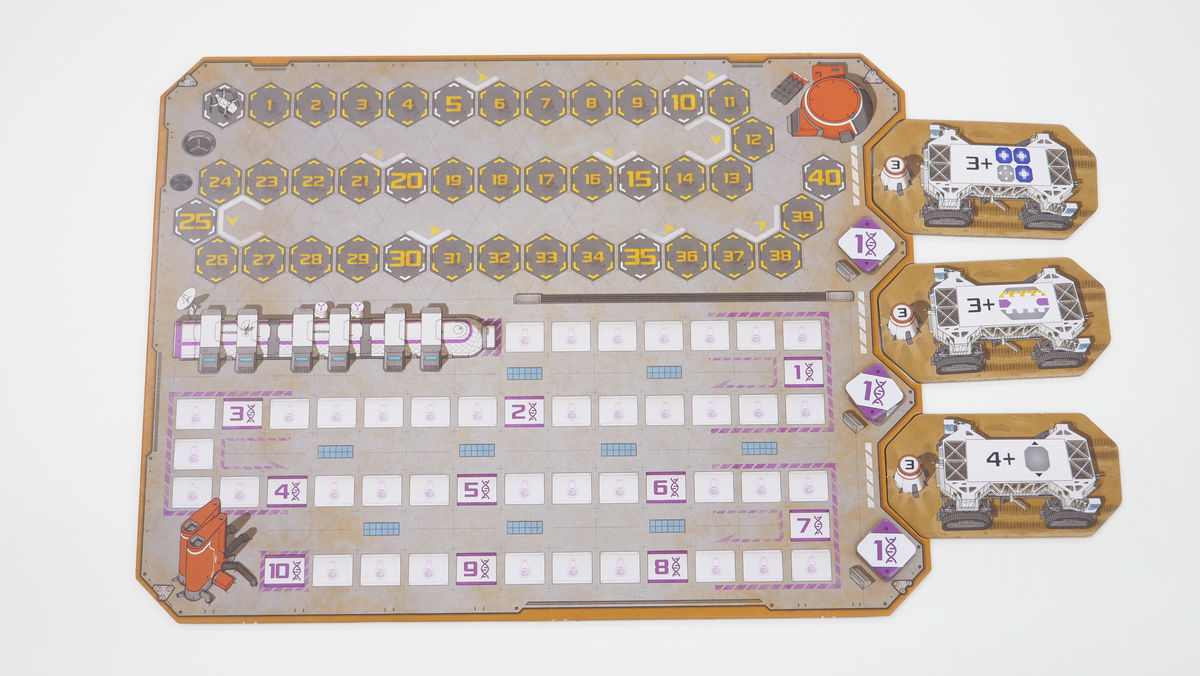
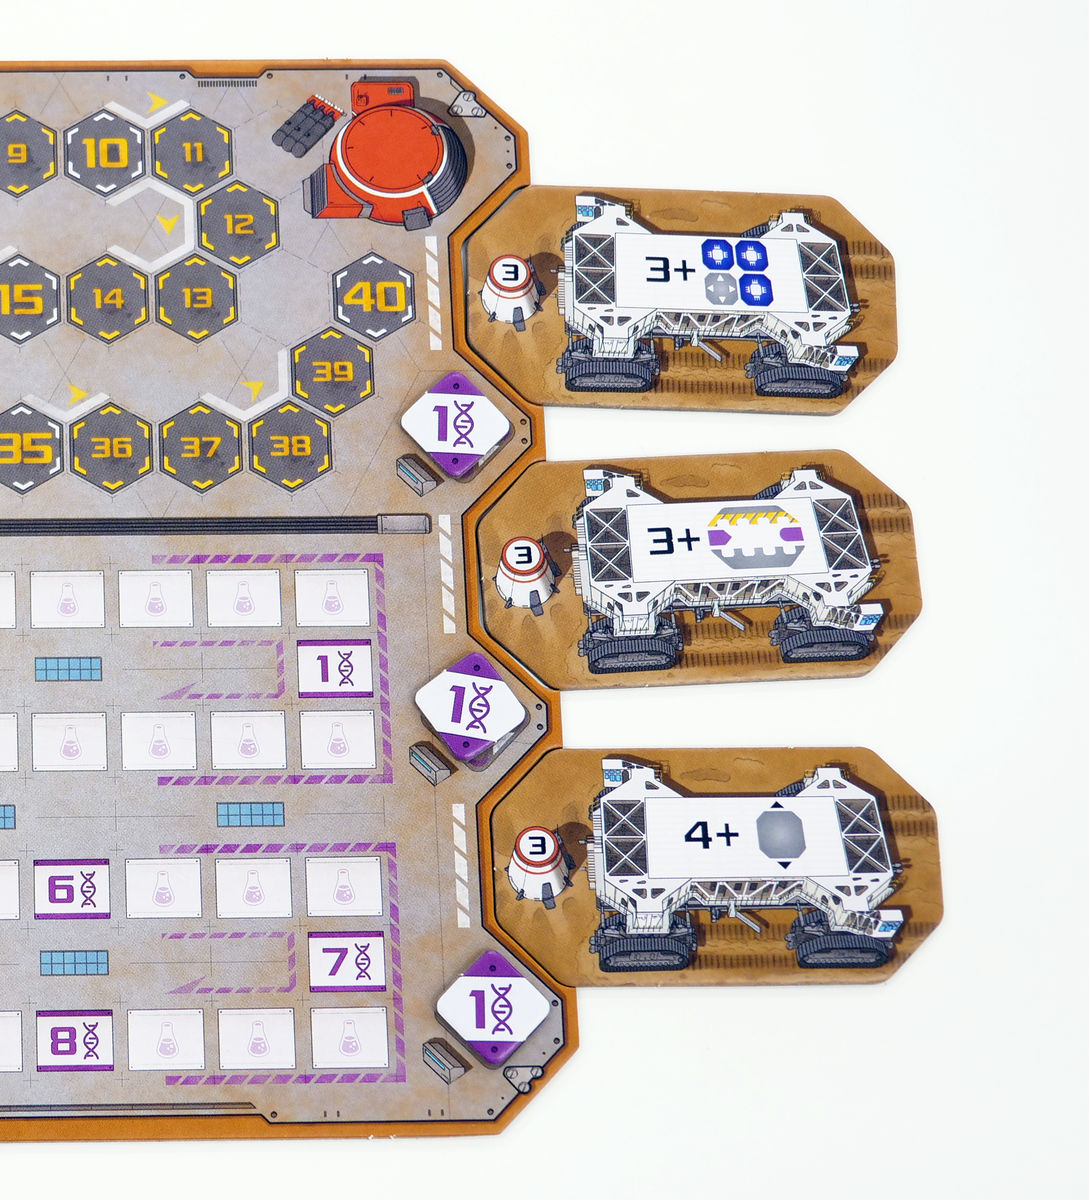
Next, prepare the sub-board. Select one each of the mission tiles 'A', 'B', and 'C' and place them on the sub-board from the top. This mission is fixed throughout the game and will not be replenished even if the player acquires it. Also, place the '1' science token that you acquire when you complete the mission next to the mission tile.
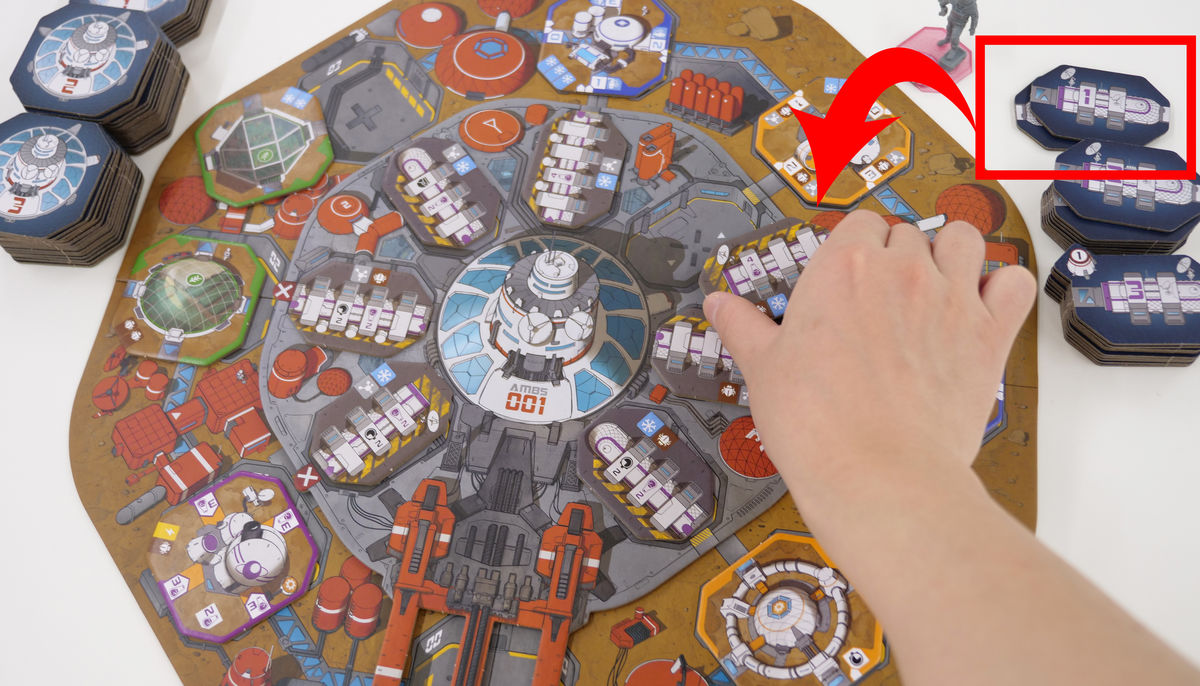
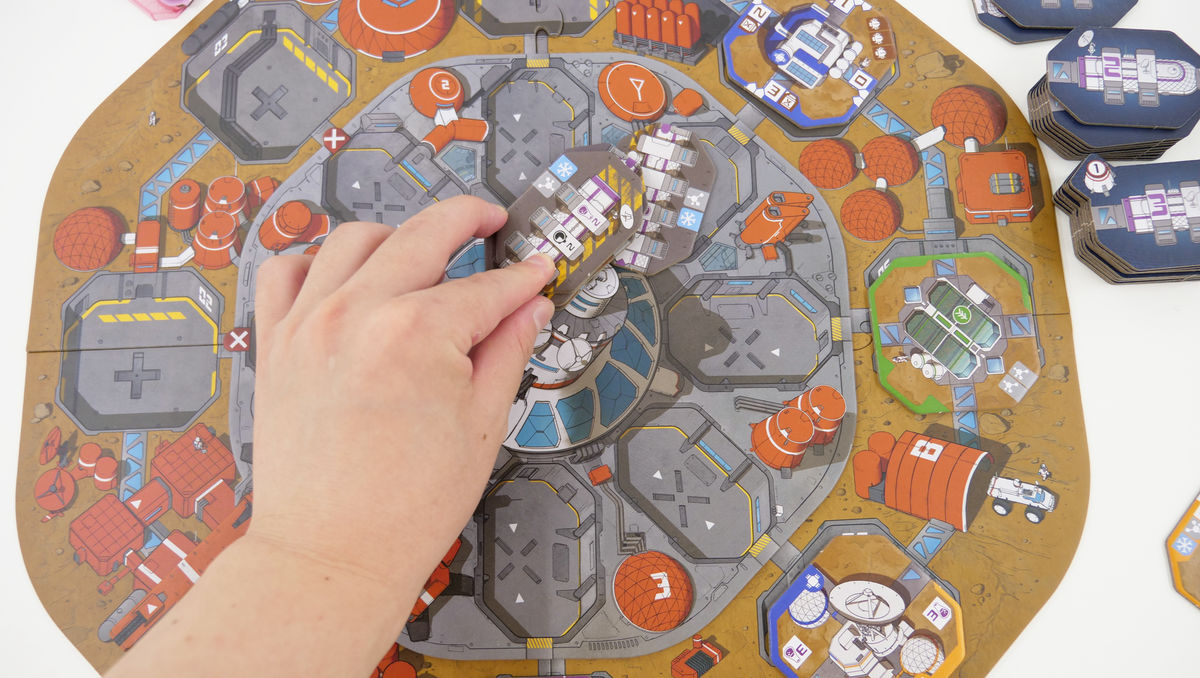
Next, place seven '1' module tiles face up in the locations that represent the modules on the main board.
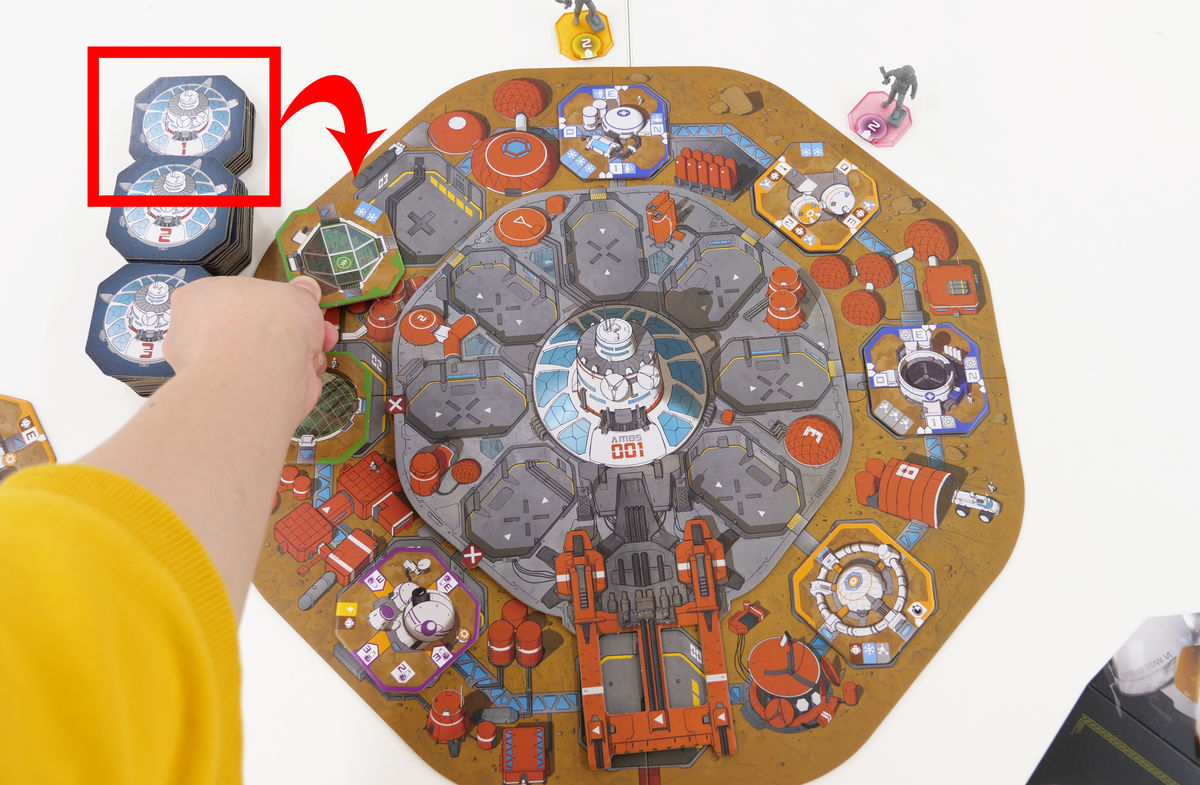
On the science experiment disc, place seven science experiment tiles face up, starting with '1', and you're ready to go.
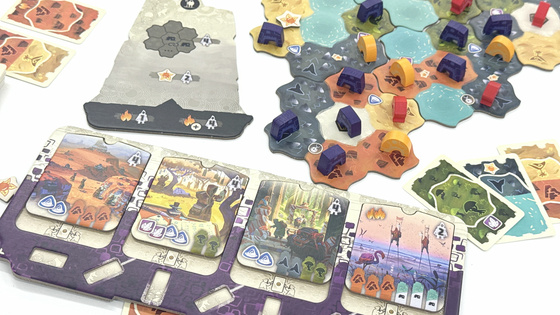
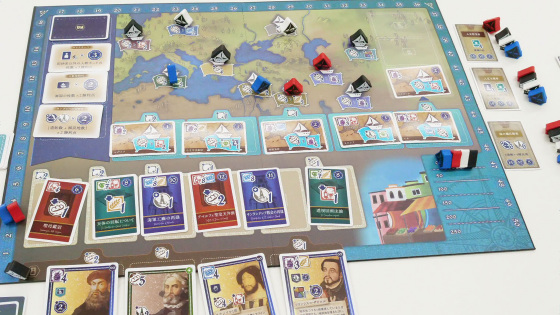
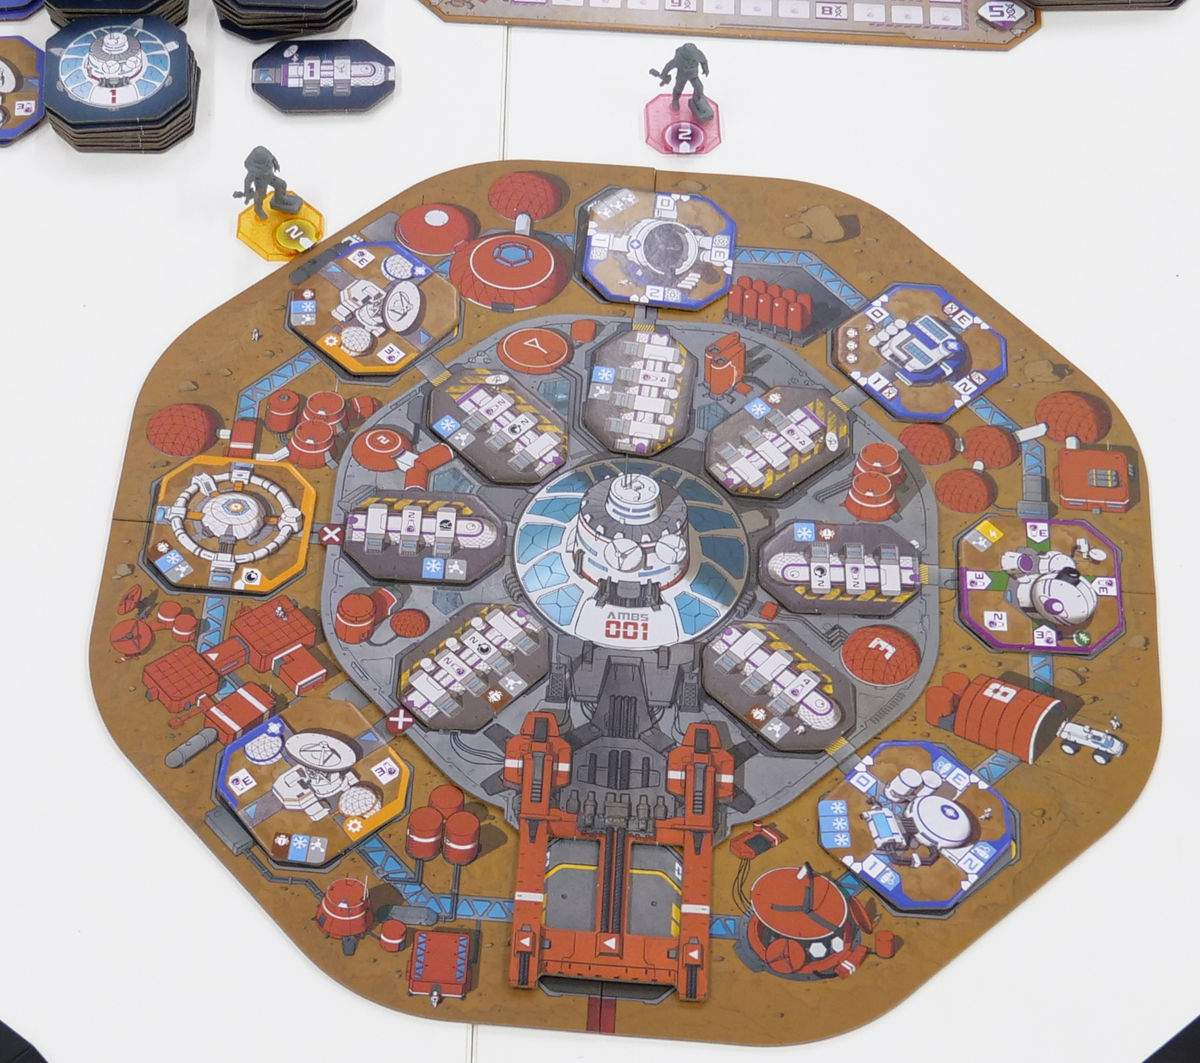
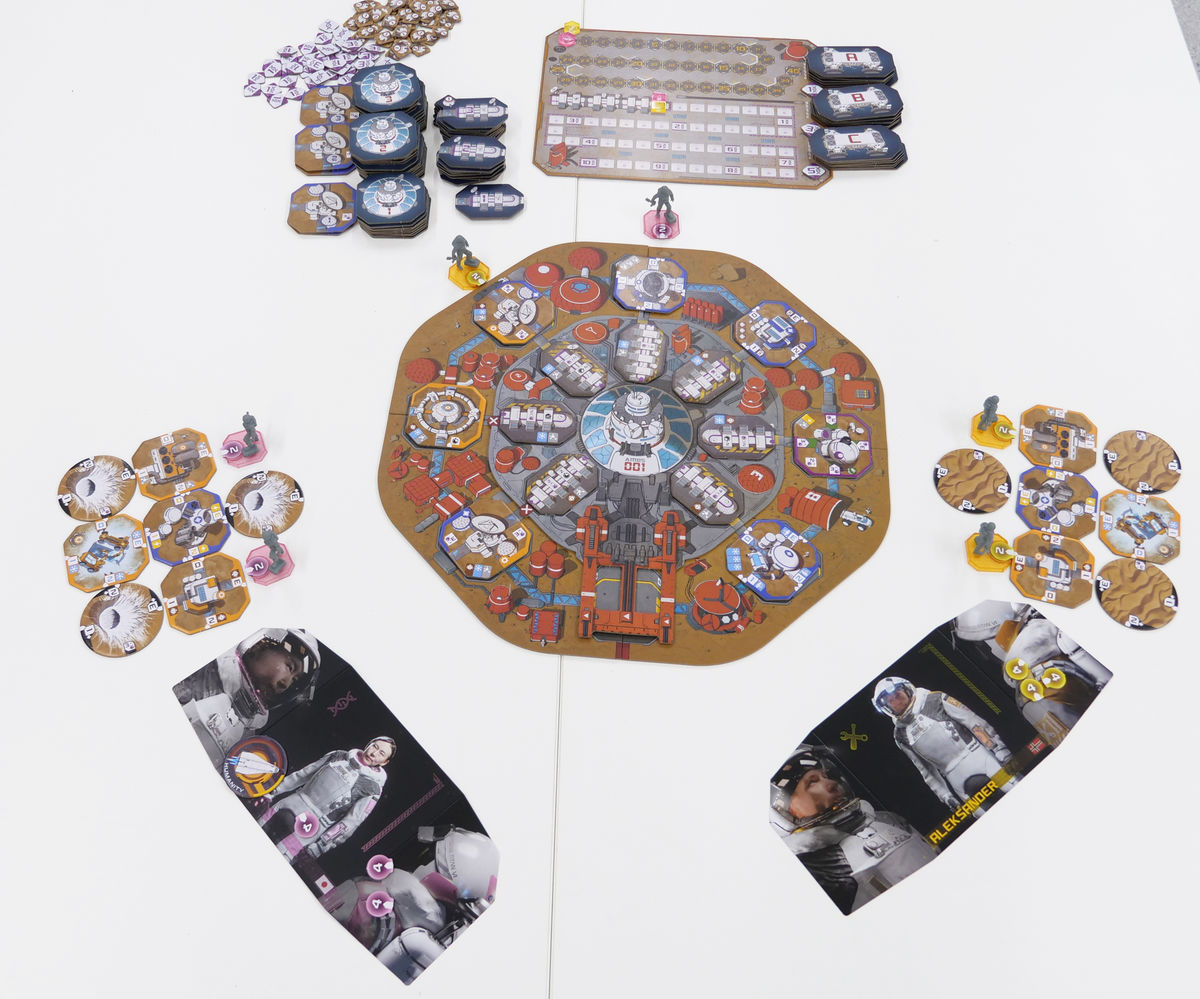
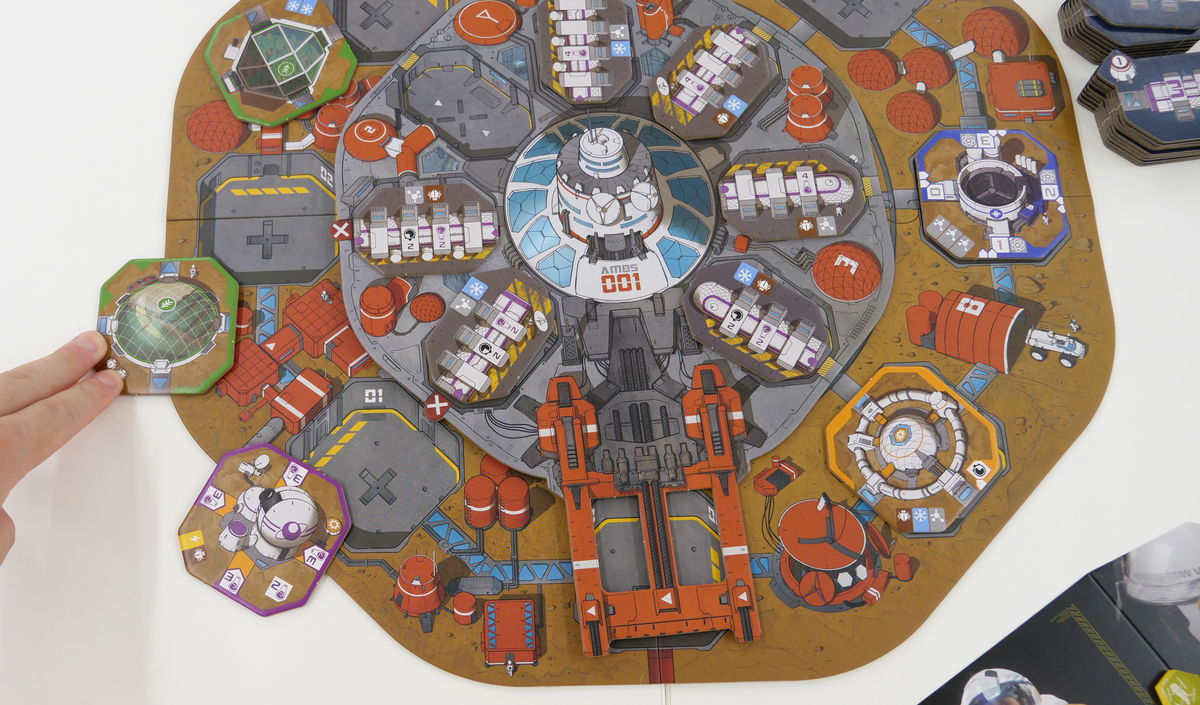
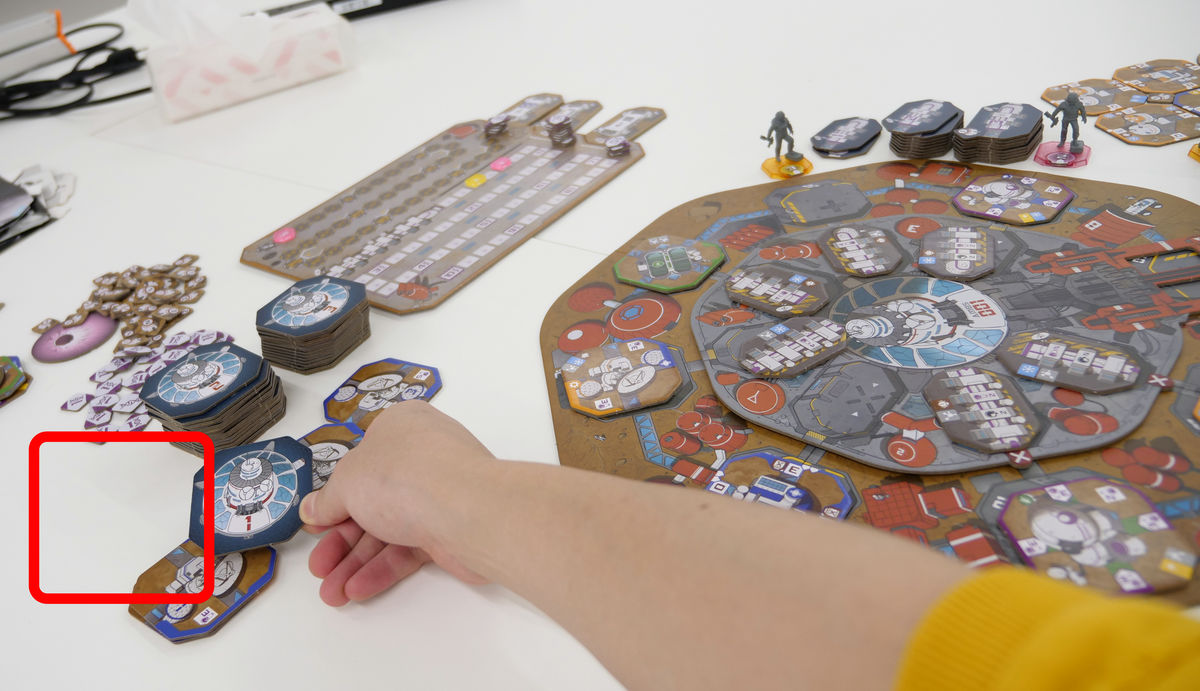
The completed preparation looks like this. Even in two-player games, about 1m x 1m is used for the board and the base at hand, and the base at hand will expand to some extent from here, so the play space needs to be large enough.
Now, let's start the game. There are three types of actions that a player can take: 'Work at the base,' 'Acquire a module,' or 'Conduct a scientific experiment.' In either case, you must first select an astronaut to act. At this time, the astronaut figure must be facing the player (toward you).
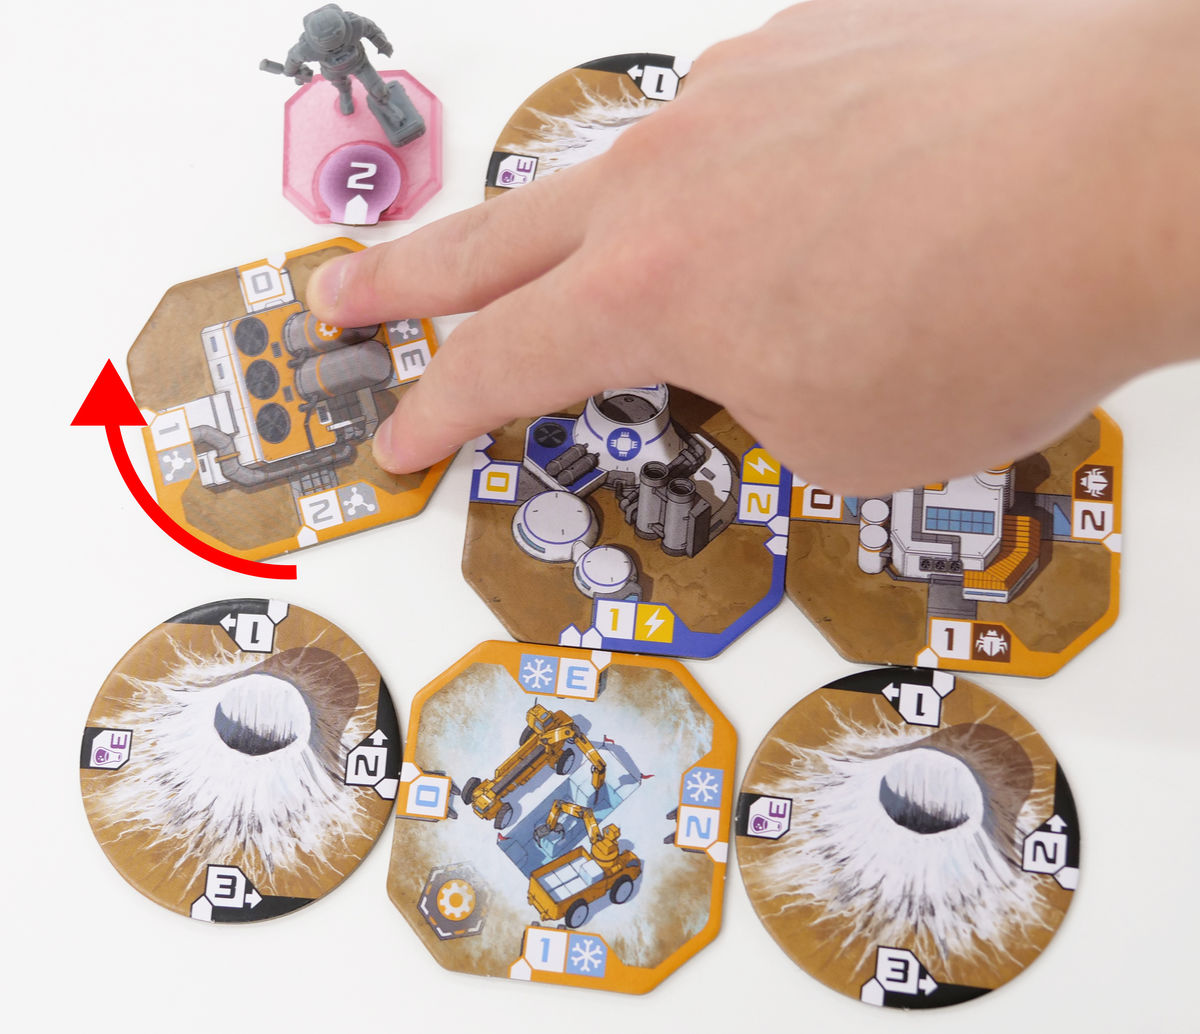
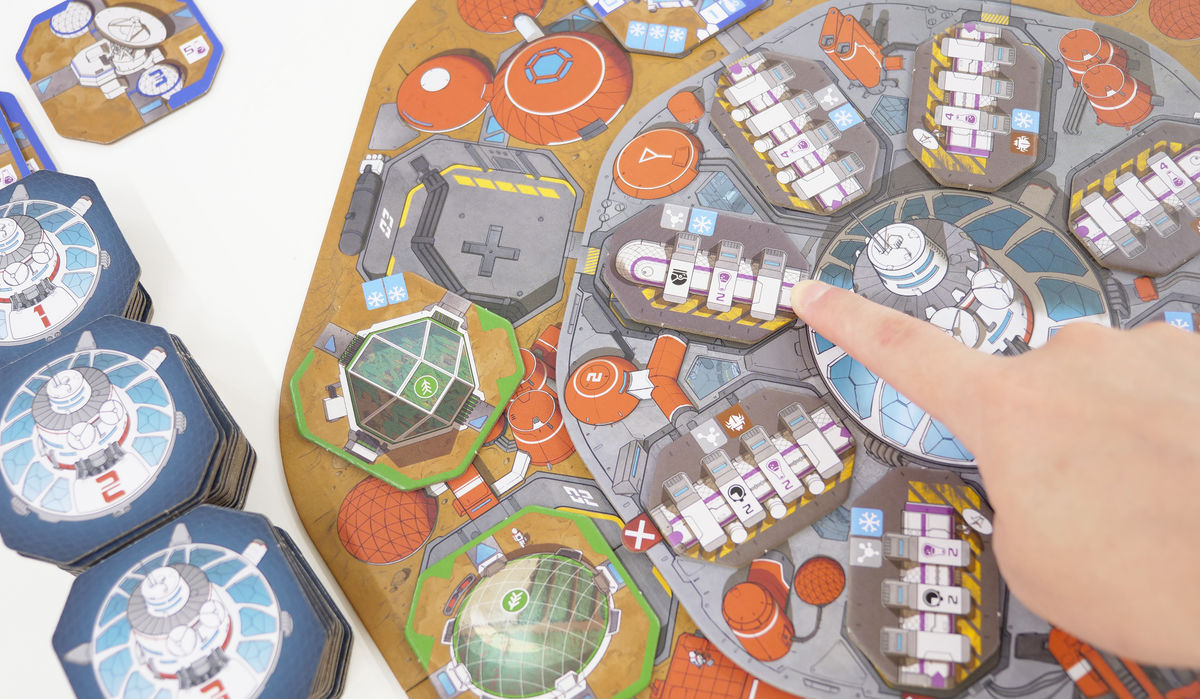
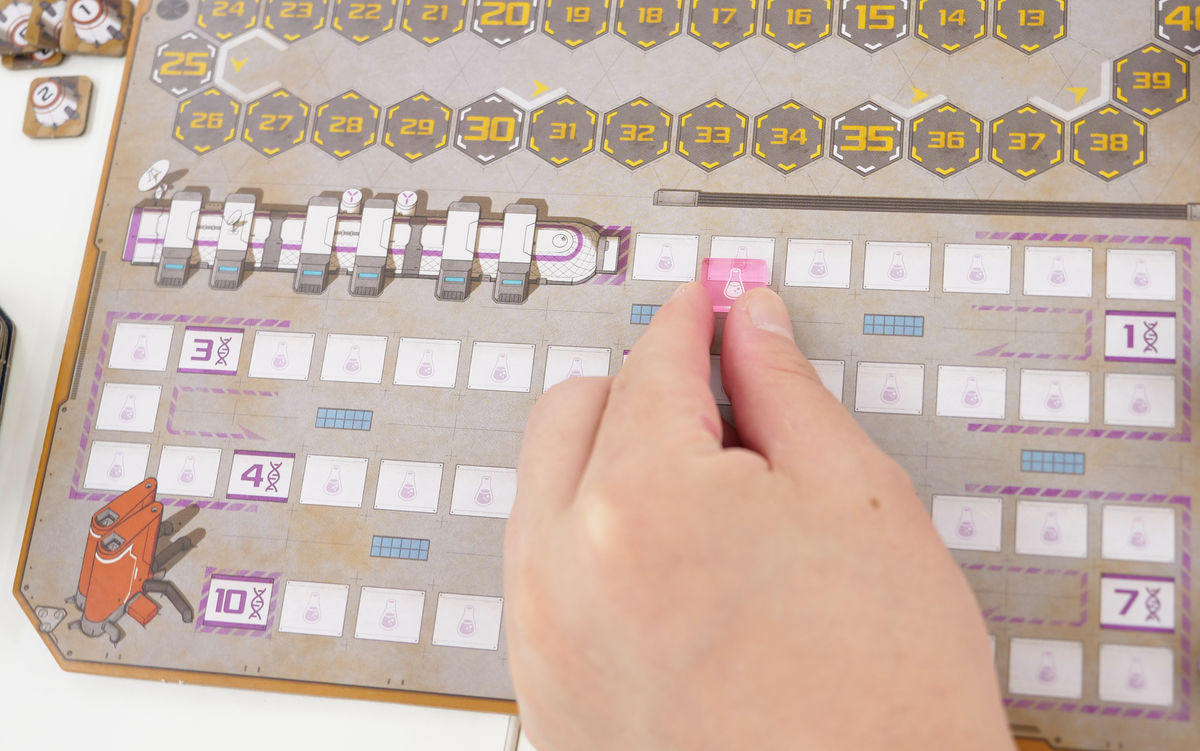
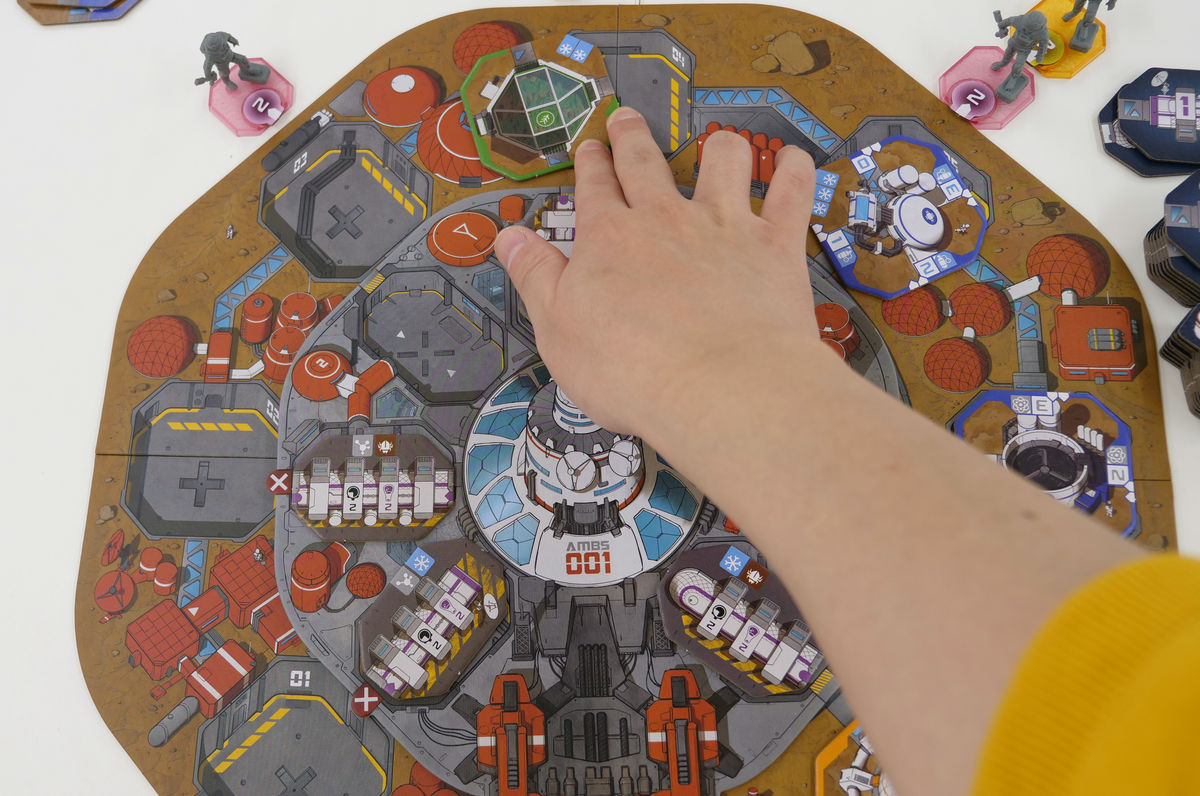
The first player selects 'Activate at the base.' Each module at the base is a 'resource,' and you can increase it from '1' to '2' by turning it clockwise.
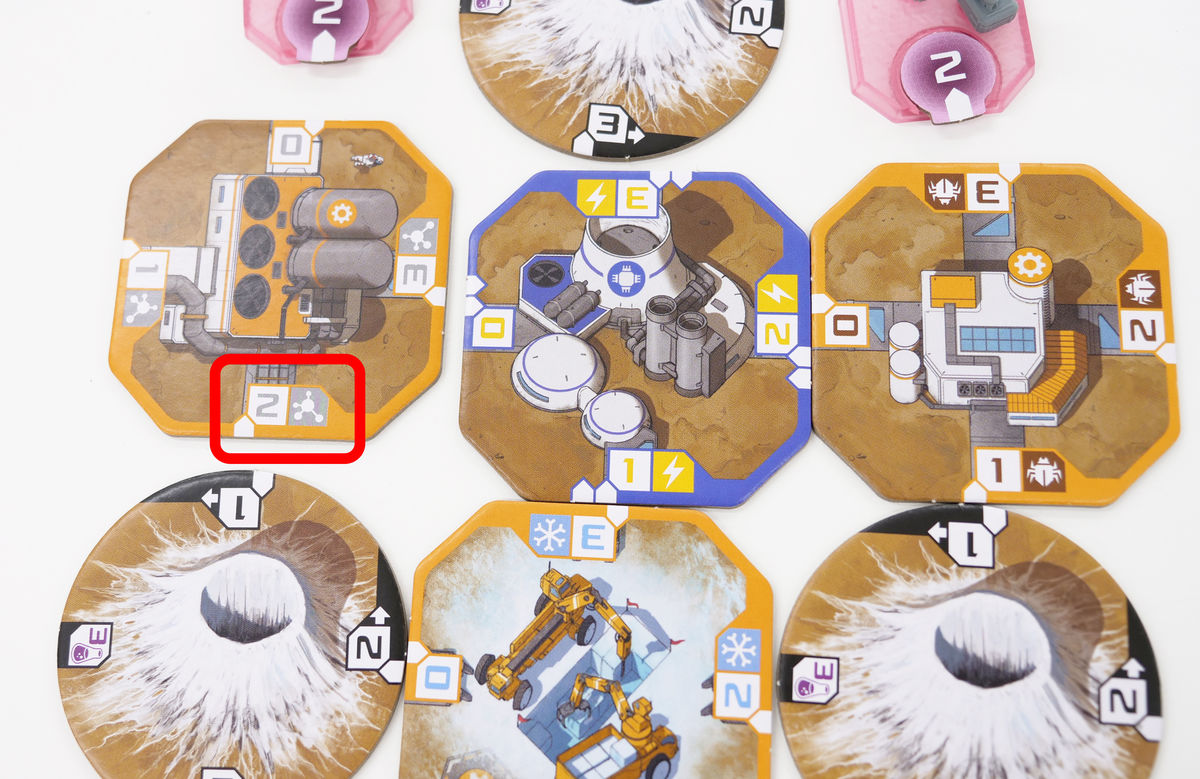
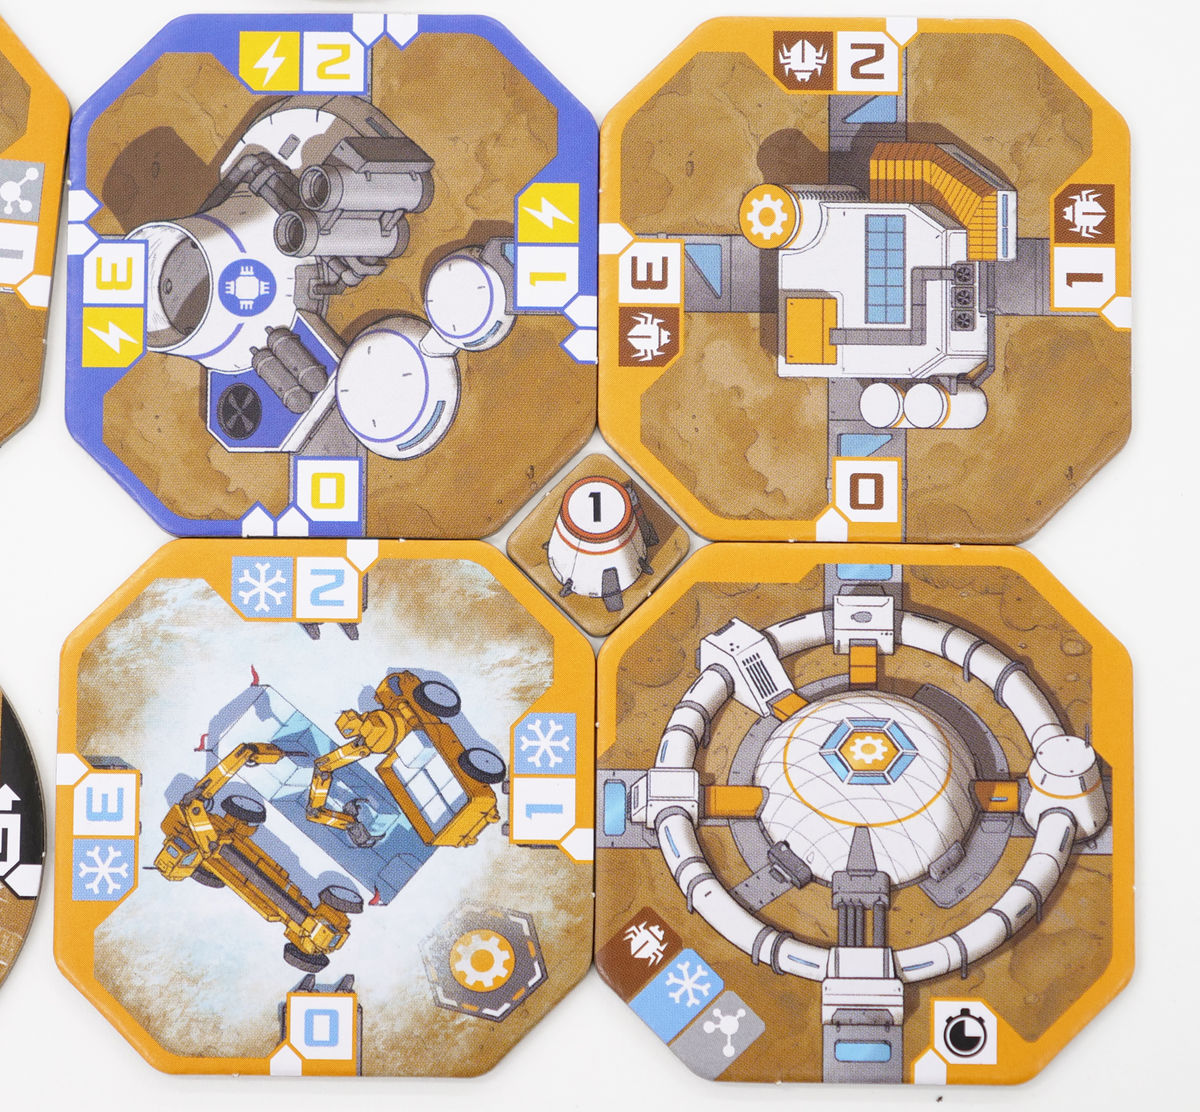
The resources are shown in the red frame in the image below. There are four types of resources and three advanced resources in the 'Humanity Project', and the gray resource is 'methane'.
Also, the astronaut figure has an action point of '2', so you can do activities at the base twice. Since you used it once to save resources, you can save any resource you like again, but this time I used it on the 'obstacle tile' to reduce it from '3' to '2'. The obstacle tiles have the numbers 'black 3', 'black 2', 'black 1', and 'purple 3' drawn on them, and you can consume resources to reduce them in the order 3 → 2 → 1. If you consume resources while in the 'black 1' state, it will become 'purple 3', and you will gain '3' research points and be able to remove the obstacle tile.
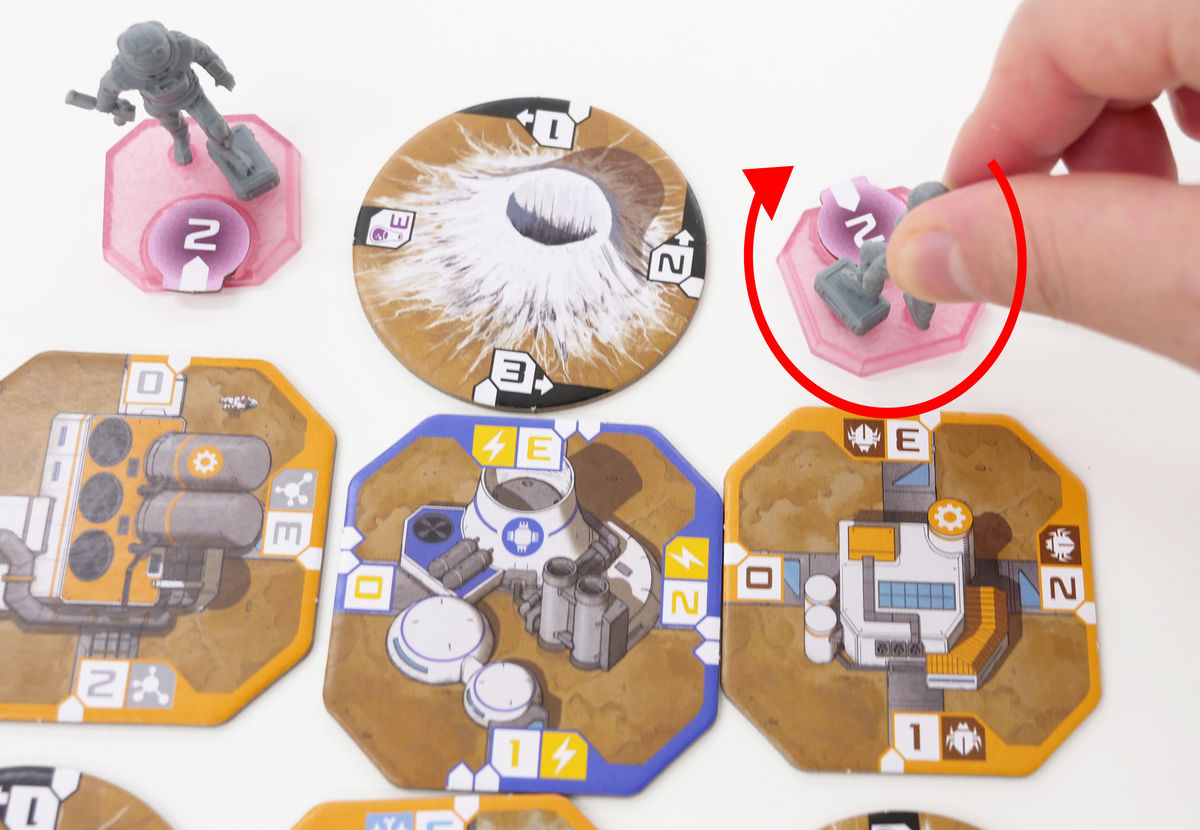
Once an astronaut has used up their action points, they can turn around. An astronaut facing the player can act, while a figure facing away indicates that the action has been completed.
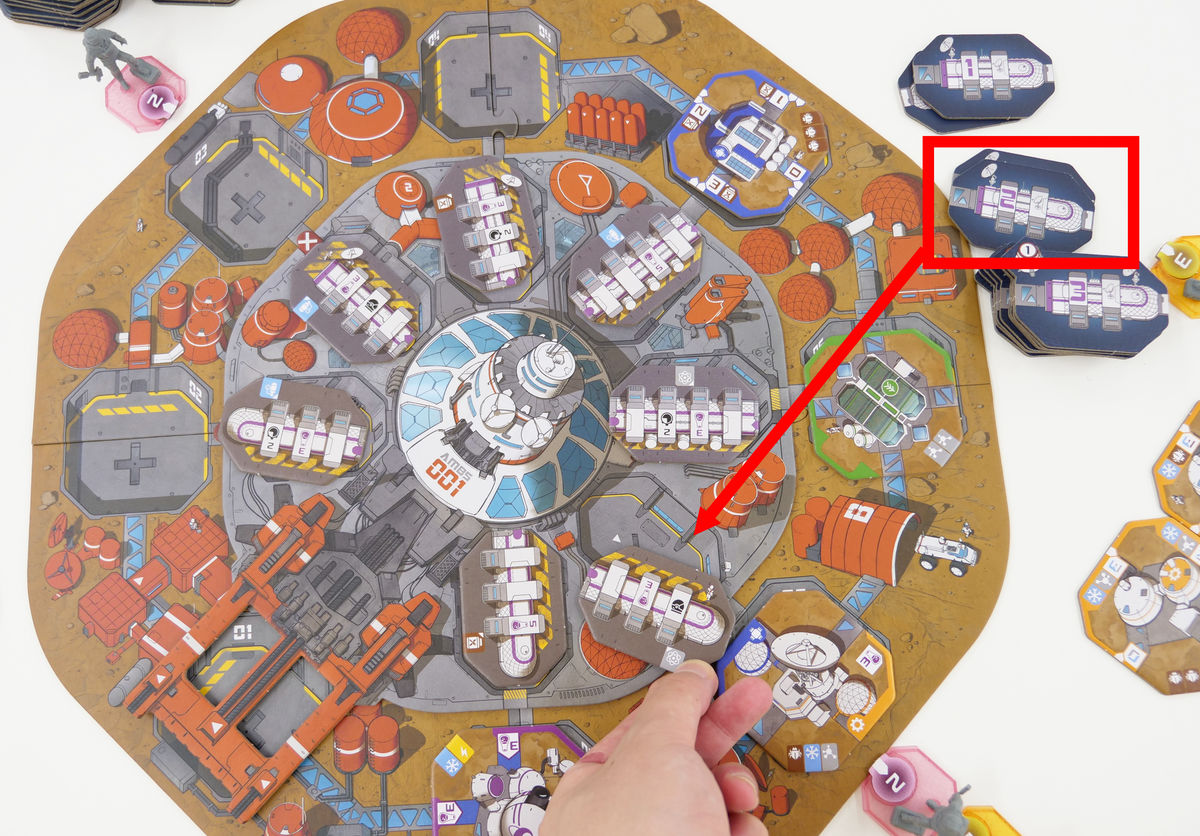
The second action is to acquire a module. First, select an astronaut who can act.
Then, select the module you want to acquire on the main board.
Send an astronaut figure to the location of the module you want to acquire.
The module I wanted to acquire this time required two light blue resources (ice).
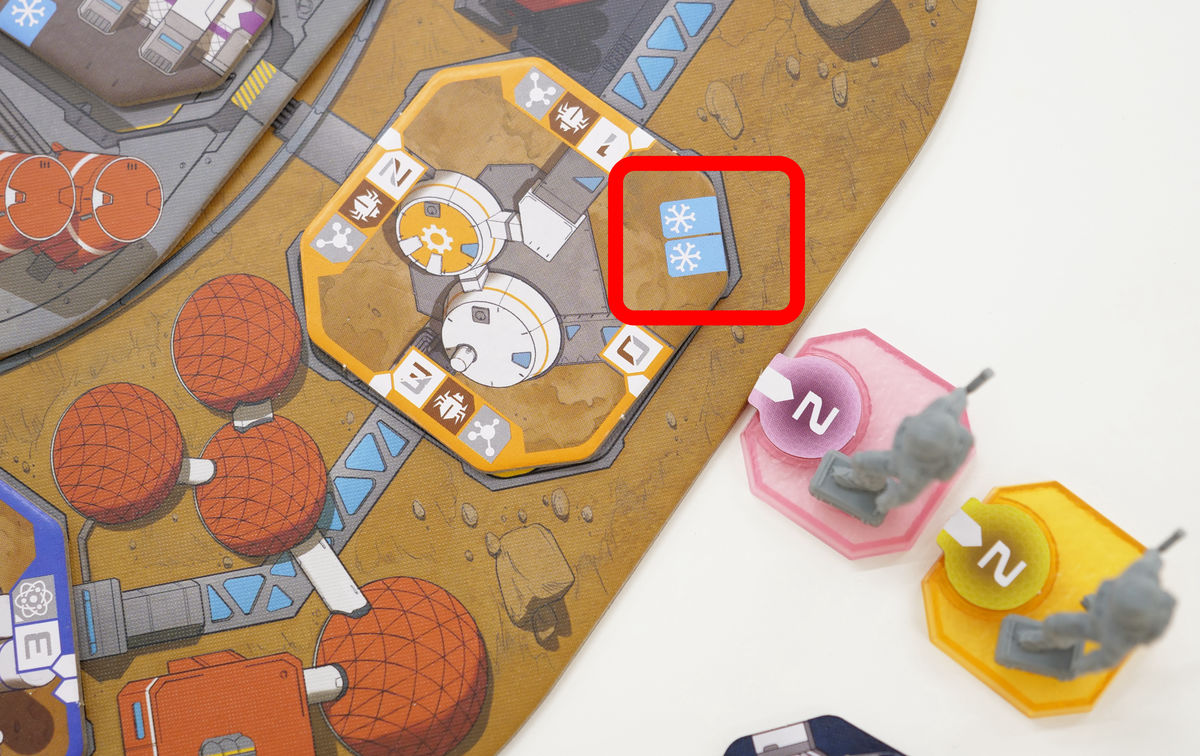
Therefore, one light blue resource in the base is consumed. When consuming, rotate counterclockwise, the opposite of when storing resources. Then, the light blue resource went from '1' to '0'.
In addition, the yellow resource (electricity) can be used in place of all resources, so the payment is completed by consuming one yellow resource.
The acquired module is placed in the location of the dispatched astronaut figure. The placement of the module is important, so where you place the astronaut when returning to the base is also an important strategy.

The third action is science experiment. Select the science experiment tile you want from the science experiment area on the main board. Just like with modules, you pay the resources listed on the tile.
Consume necessary resources.
Then, just like acquiring a module, send an astronaut to the science experiment tile.
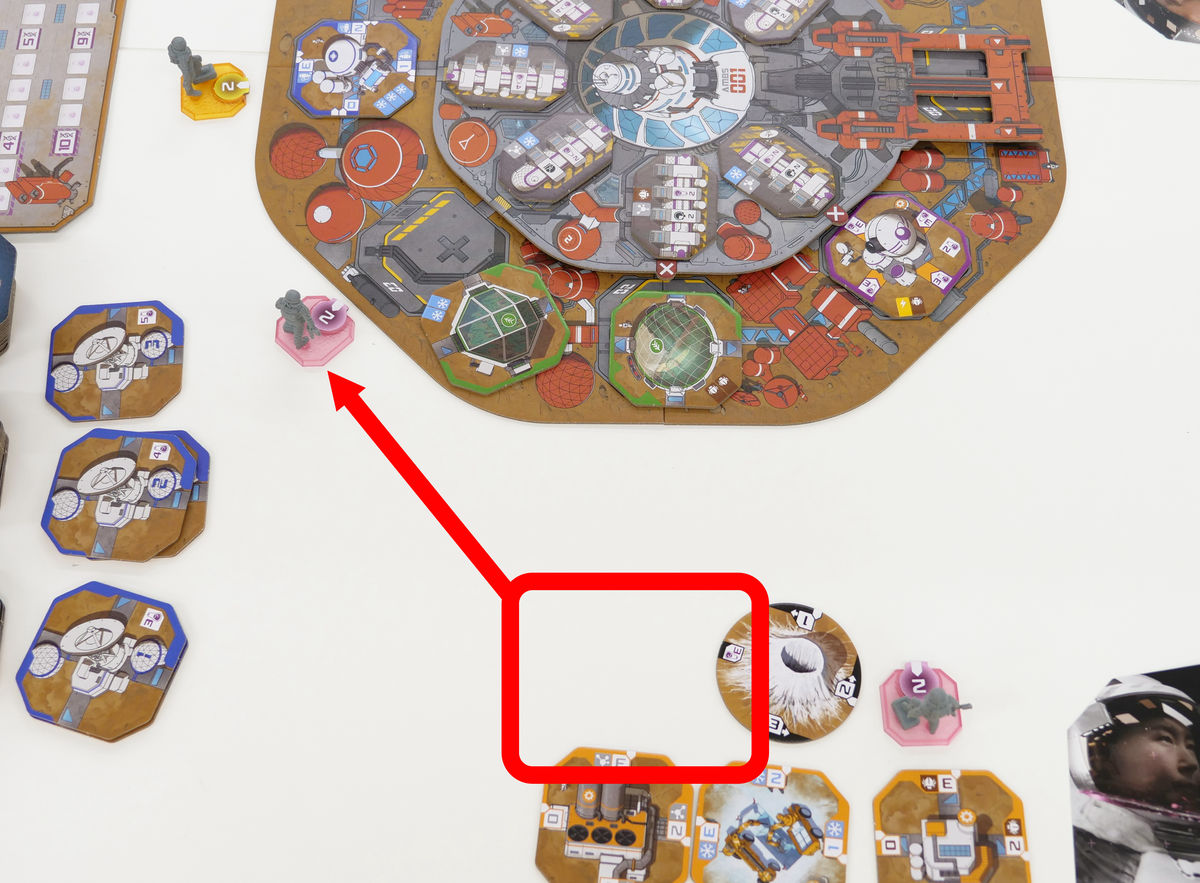
However, instead of placing the science experiment tiles like modules, place them away from the base and in a position where your opponent can see them. Science experiment tiles can be combined to earn points, so they do not count as victory points by themselves, but you can earn items that are printed on the tiles. The tiles this time have 'two flask icons' and a 'helmet icon.'
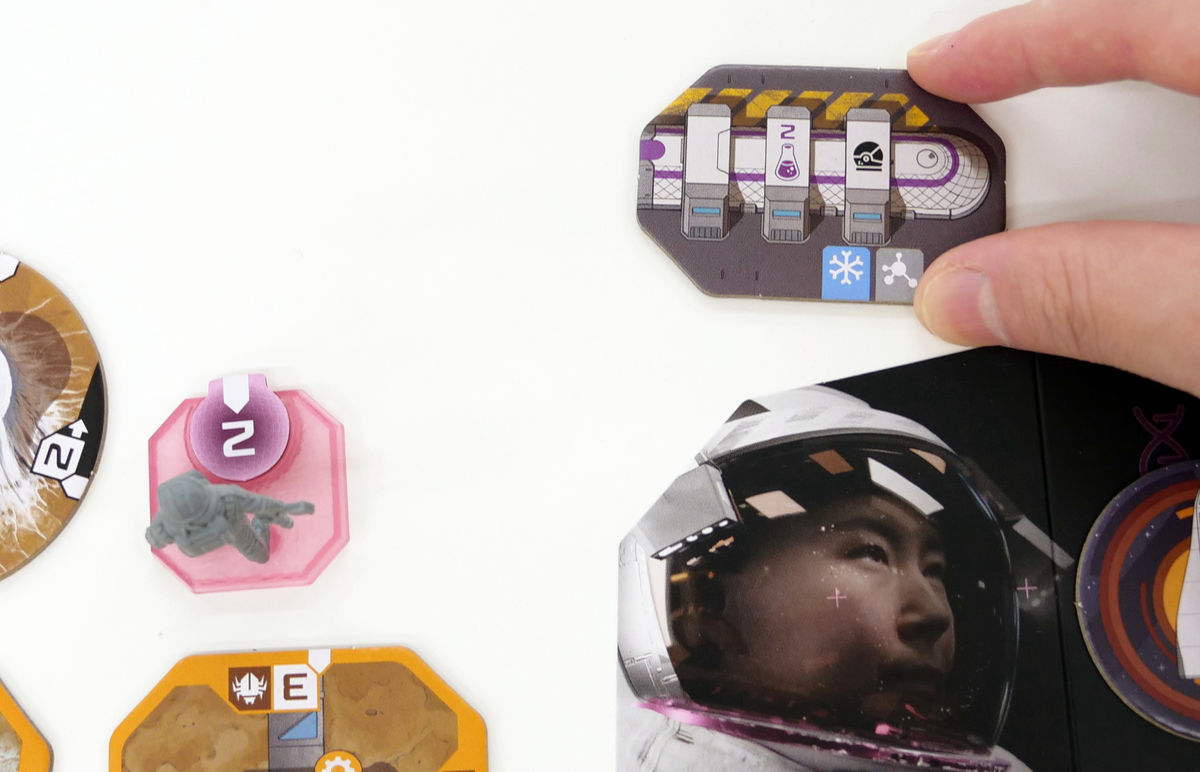
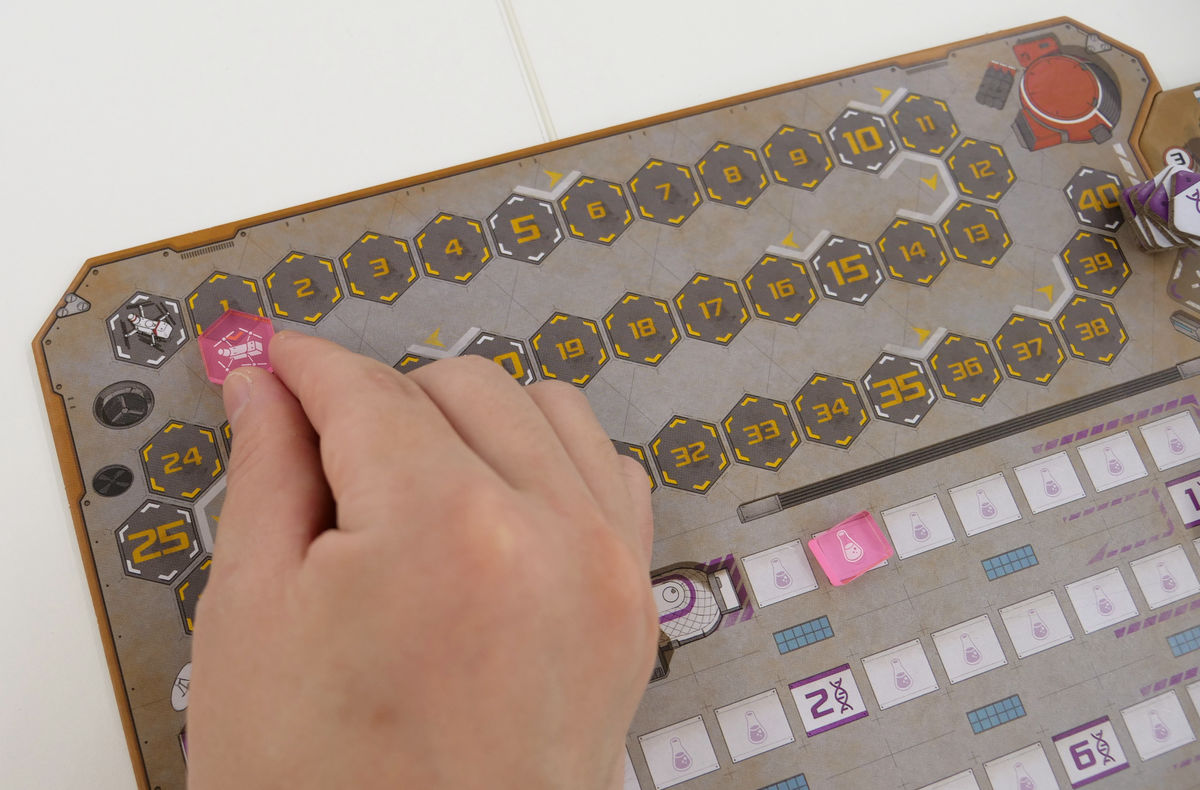
The flask icons are research points. Since you have earned 2 points, place a marker on the second position of the research track on the sub-board.
In addition, the helmet icon has the effect of reactivating astronauts. It rotates all of the astronaut figures in the base that have already been activated, and puts them in a standby state where they can act.
Each player takes one of these actions: 'Activate at the base,' 'Acquire a module,' or 'Scientific experiment,' and when that action is complete, they check the mission on the sub-board. The missions this time are, from top to bottom, 'Line up three or more blue modules,' 'Collect three or more specific experiment tiles,' and 'Place four or more modules vertically.' Since they have not yet been achieved, they cannot acquire the mission. Once they have confirmed this mission, their turn moves on.
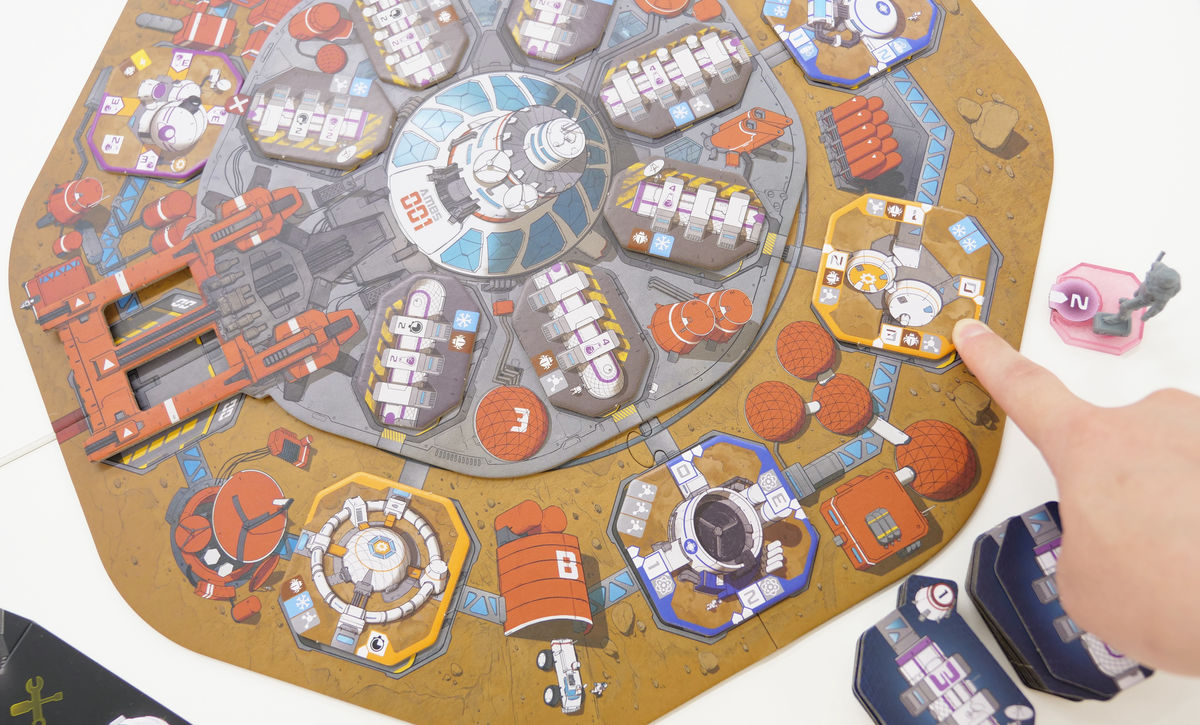
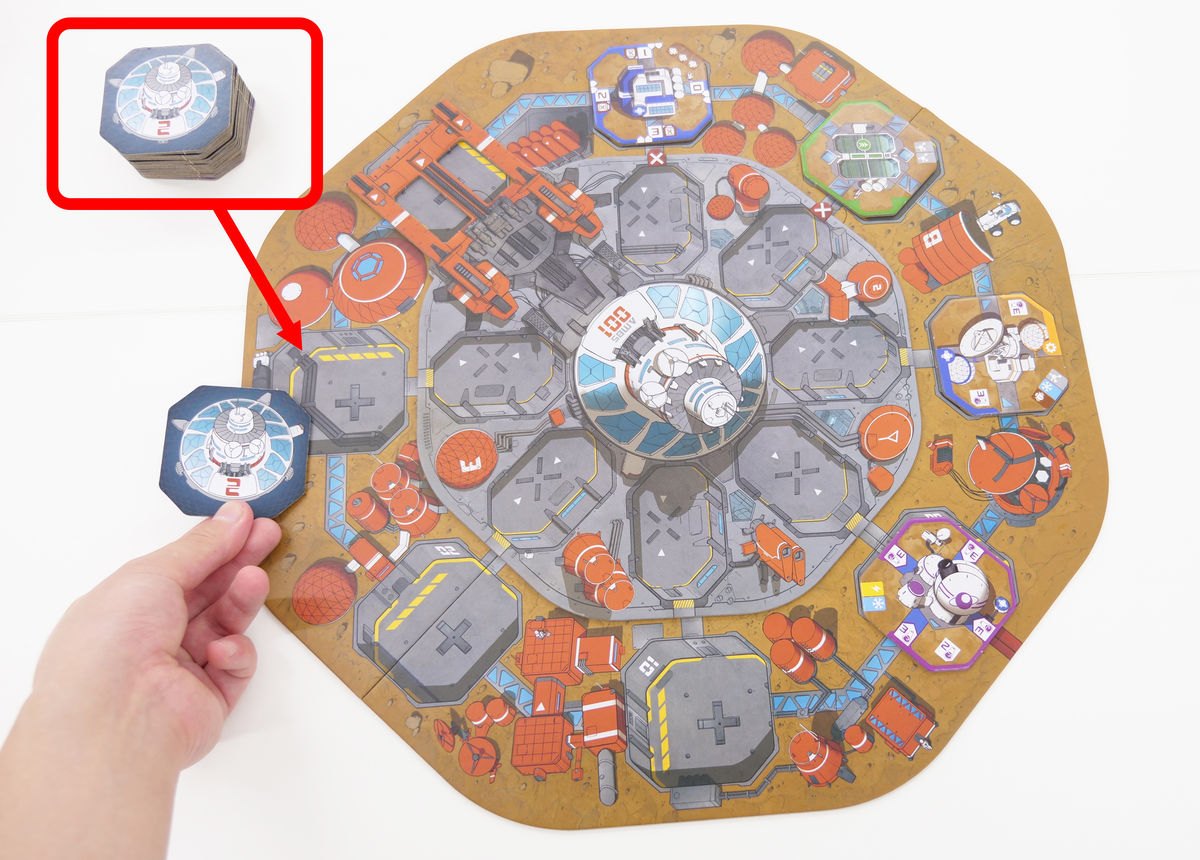
The round ends when all players have no astronauts left to act, taking turns. When the round ends, remove two modules clockwise from the position of the red arm on the main board.
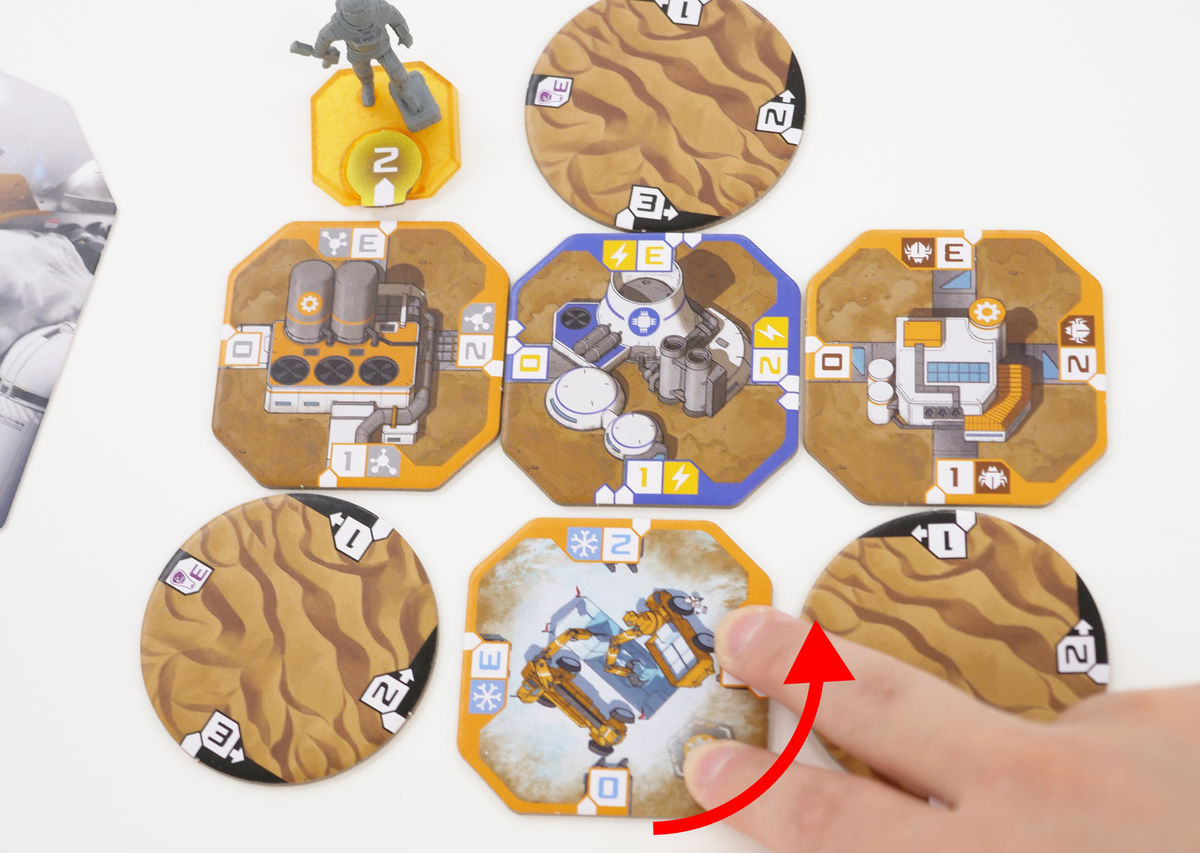
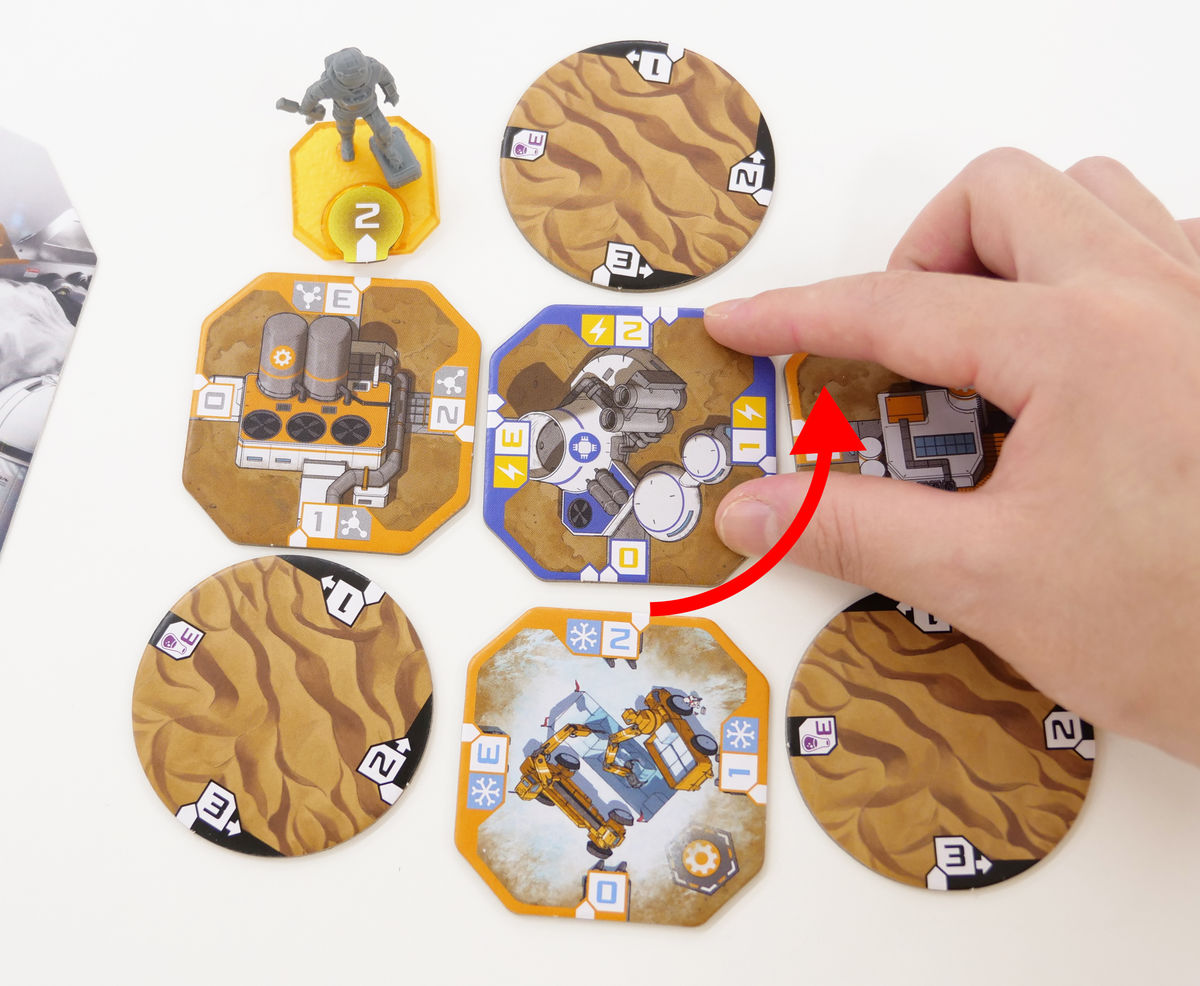
Then, the remaining modules are moved clockwise.
The arm then rotates around until the module is in the empty position.
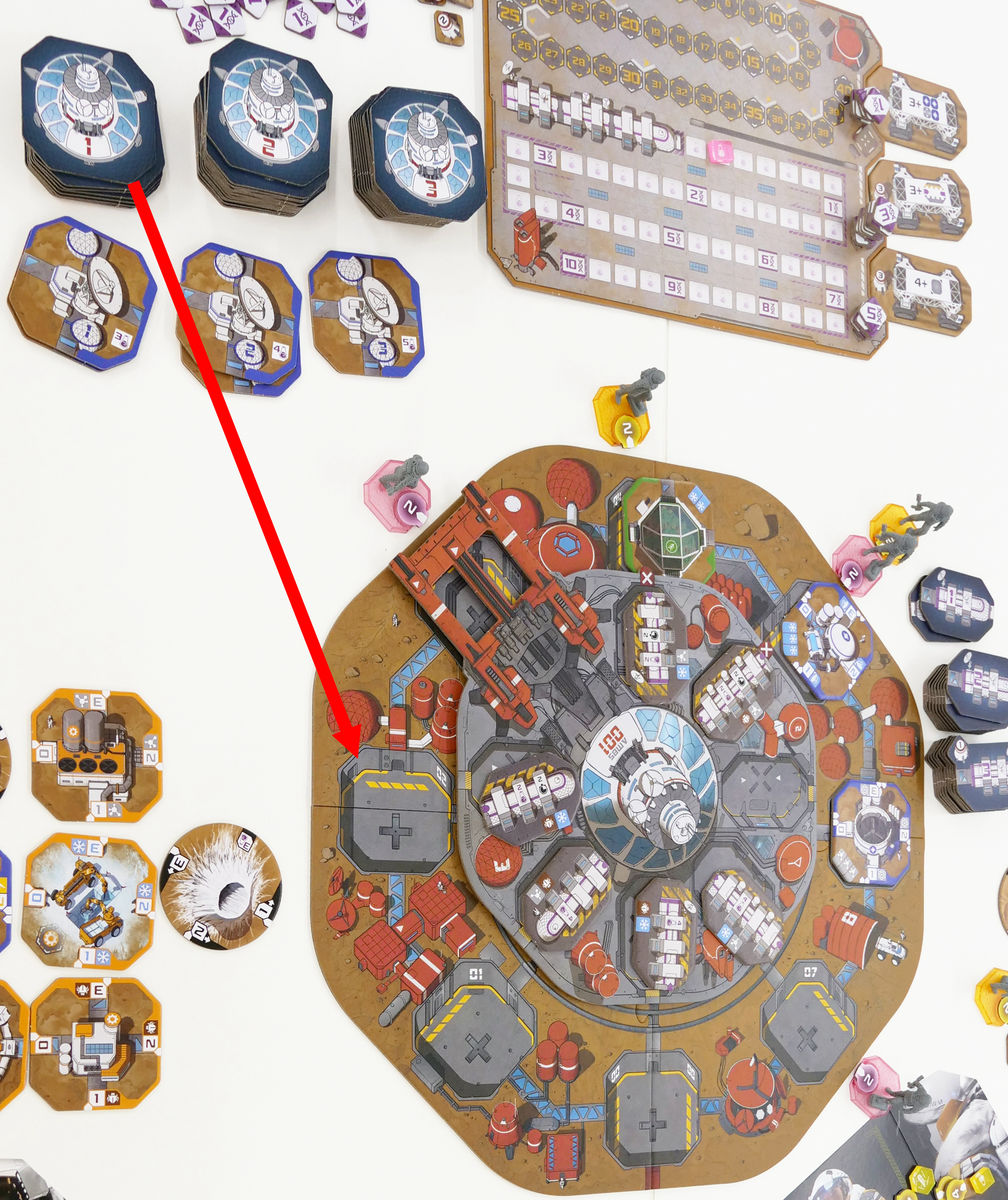
Then, refill the open positions by turning the modules from the '1' pile face up.
The round ends when the player passes the patch token indicating their first move to the player on their left.

Basically, you repeat the process of 'accumulating resources at the base,' 'acquiring and placing modules,' and 'acquiring experimental tiles.' There are several ways to earn victory points, and the most basic is to arrange modules in a square as shown below.
When modules line up in a square, you can place a victory point token between them to immediately gain points.
When you gain a victory point token, you also move the marker on the victory point track on the sub-board.
In addition, in the following case, you can create a square using only two colors, yellow and blue. If you create a square using less than two colors, you can update the astronaut.
An update means that you can increase an astronaut's action points by one. Action points are needed to accumulate resources and remove obstacles, so updating makes it easier for them to act afterwards. The astronaut you select can be either on standby or already in action, at the base, or dispatched to the main board.
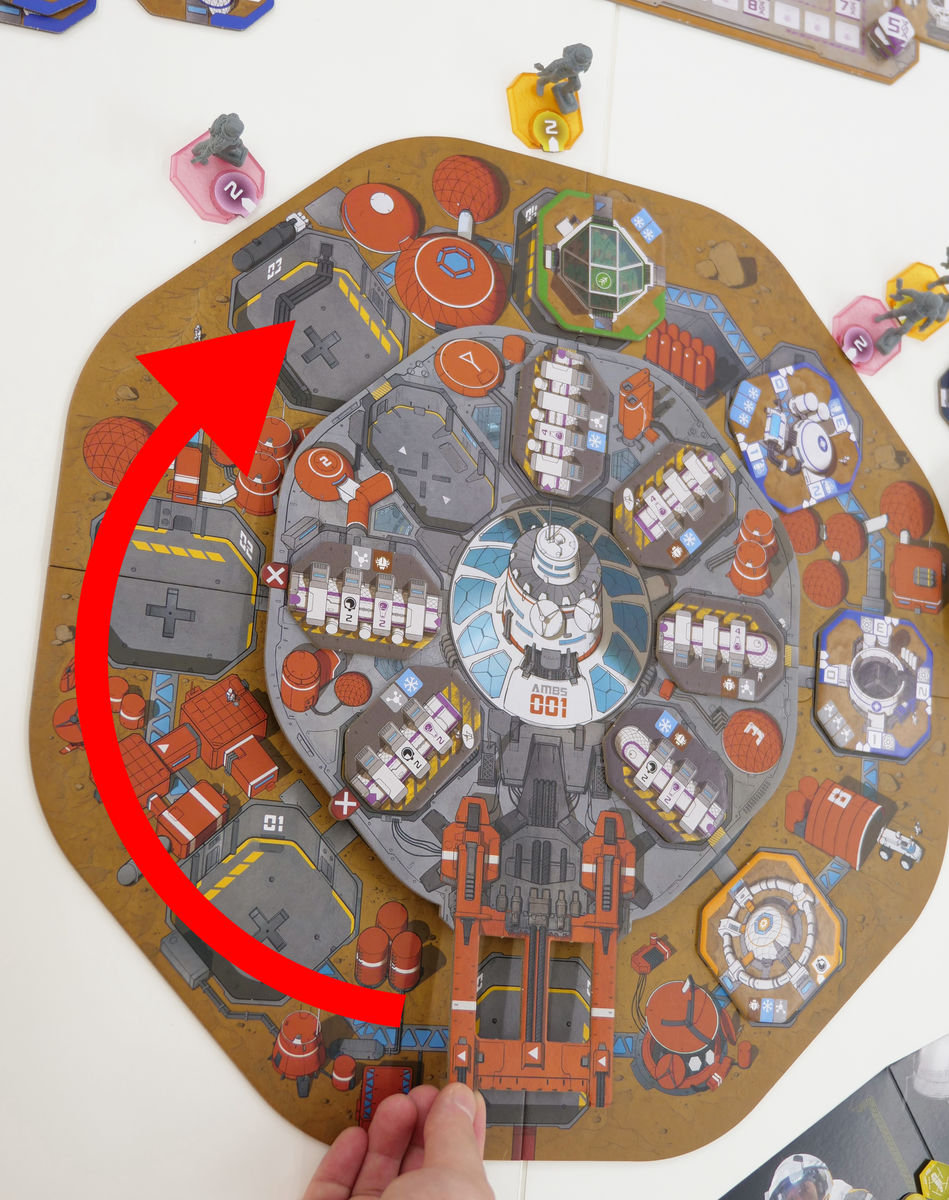
There are also various types of modules that can be acquired. The clock icon below 'moves the astronauts on the main board counterclockwise' by consuming action points in the same way as when earning resources.
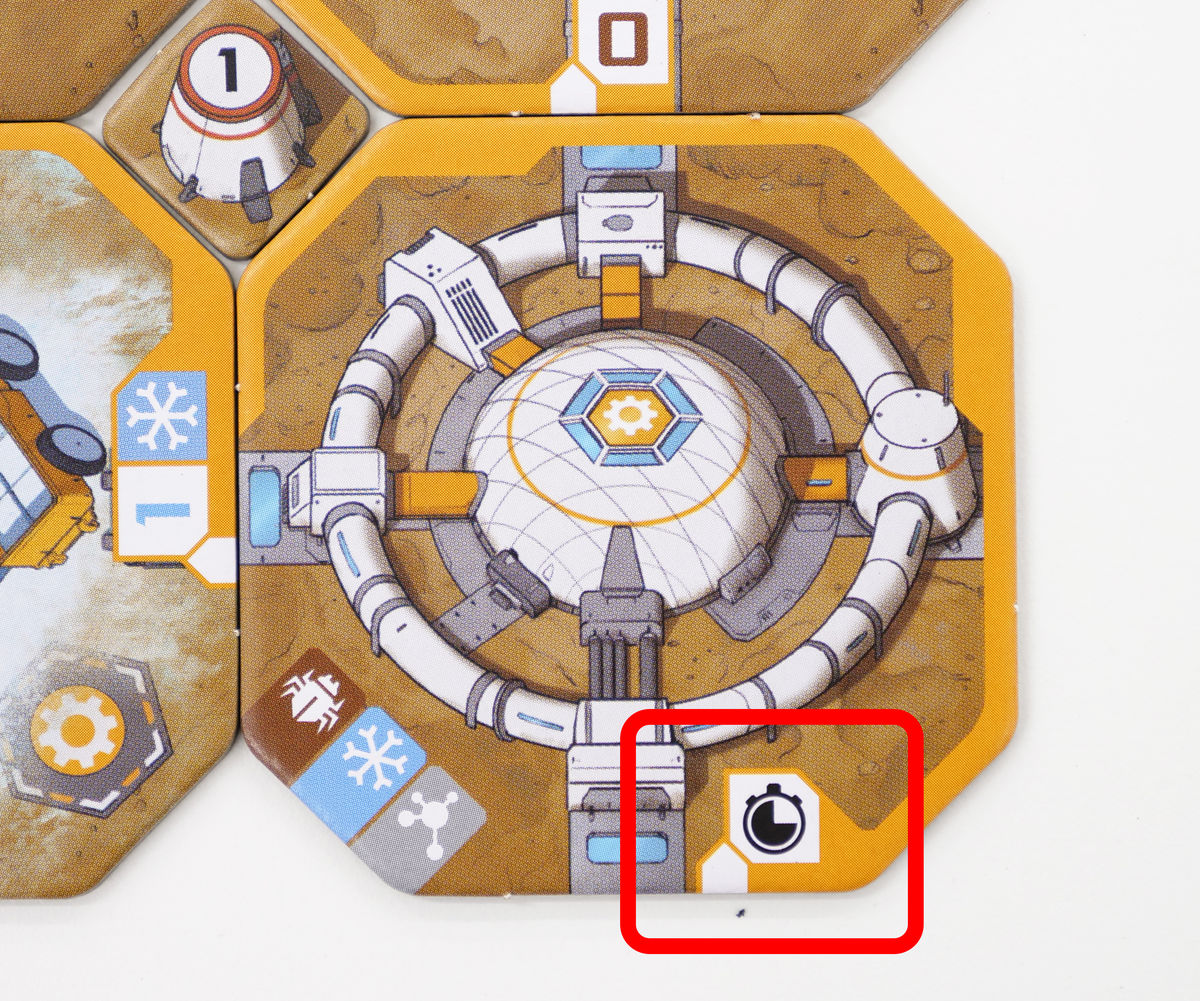
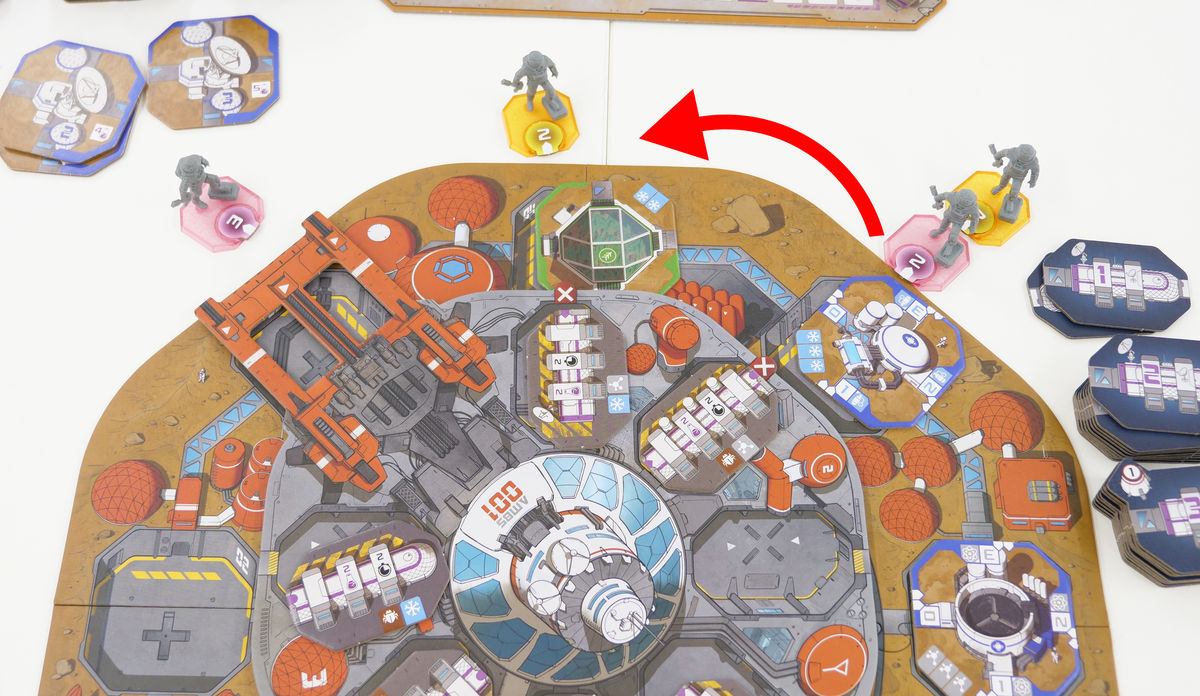
As shown by the arrows below, if the pink player spends an action point on the clock icon, all the pink astronauts move counterclockwise one space at a time. In this case, the other astronaut does not move because they cannot go beyond the arm.
At the end of this round, we learned why it is important to move the astronaut on the main board. At the end of the round, just like at the beginning, remove two modules, pack up the remaining ones, and move the arm around. At this time, the astronaut who was overtaken by the arm can return from the main board to the base. Since he cannot return if he is in the same position as the arm, the pink player used the clock module to move the astronaut, ensuring that he returned.

The astronaut you want to return will be placed adjacent to a module of your choice. When you acquire a module, it will be placed where the astronaut you are sending out was, so it's important to have a strategy of returning the astronaut to the location where you want to place the module.
Next, the pink player got a module with two colors, yellow and blue. When you get this, you declare which color you want to treat it as. This time, you declare 'blue' and get three experiment points marked on the module. Now that you have created a square, you can get one victory point marker, and since it is a two-color square, you can also update your astronaut.
Furthermore, by selecting blue, the mission 'three blue modules lined up' was achieved. The player acquires the mission tile and receives the three victory points written on the tile. Once a mission is acquired, it will not be replenished, but if another player achieves an already acquired mission under 'better conditions', the mission can be taken away. For example, in the following mission, the pink player acquires a tile for 'three blue modules lined up', but if the yellow player then 'lines up four blue modules', the tile will be taken away at the mission confirmation stage. Then, the pink player loses the three points he had earned in the mission, and the yellow player gains three new points.
When taking a mission tile from the sub-board, you also get the science token next to the mission. Science tokens are victory points just like victory point tokens, but since the victory point track does not show how many points you currently have, you can fight in a way that makes you think, 'I'm losing in victory points, but I can turn it around by collecting science tokens.' In addition, mission tiles are fought over until the end of the game, but science tokens are first to be won by the first person to complete the mission, 'A, B, C'.
If you keep repeating the same rounds, you will run out of modules for '1'. If you are no longer able to add modules even though there is still space on the main board, you will move on to the end of 'Year 1'.
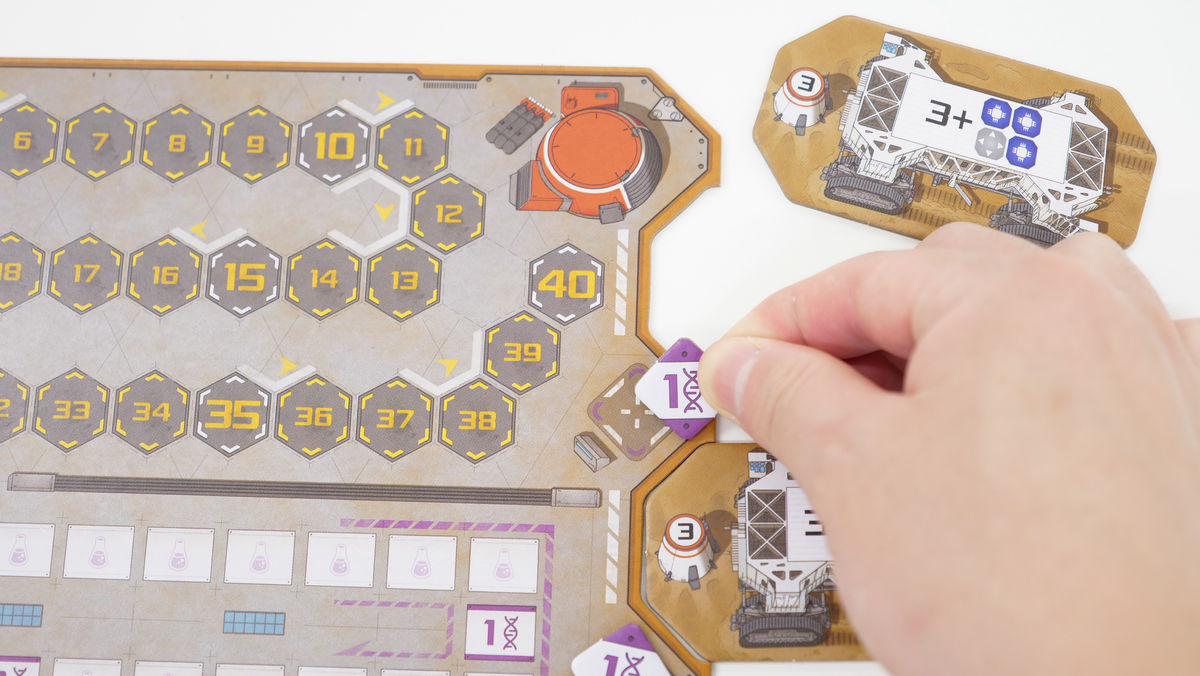
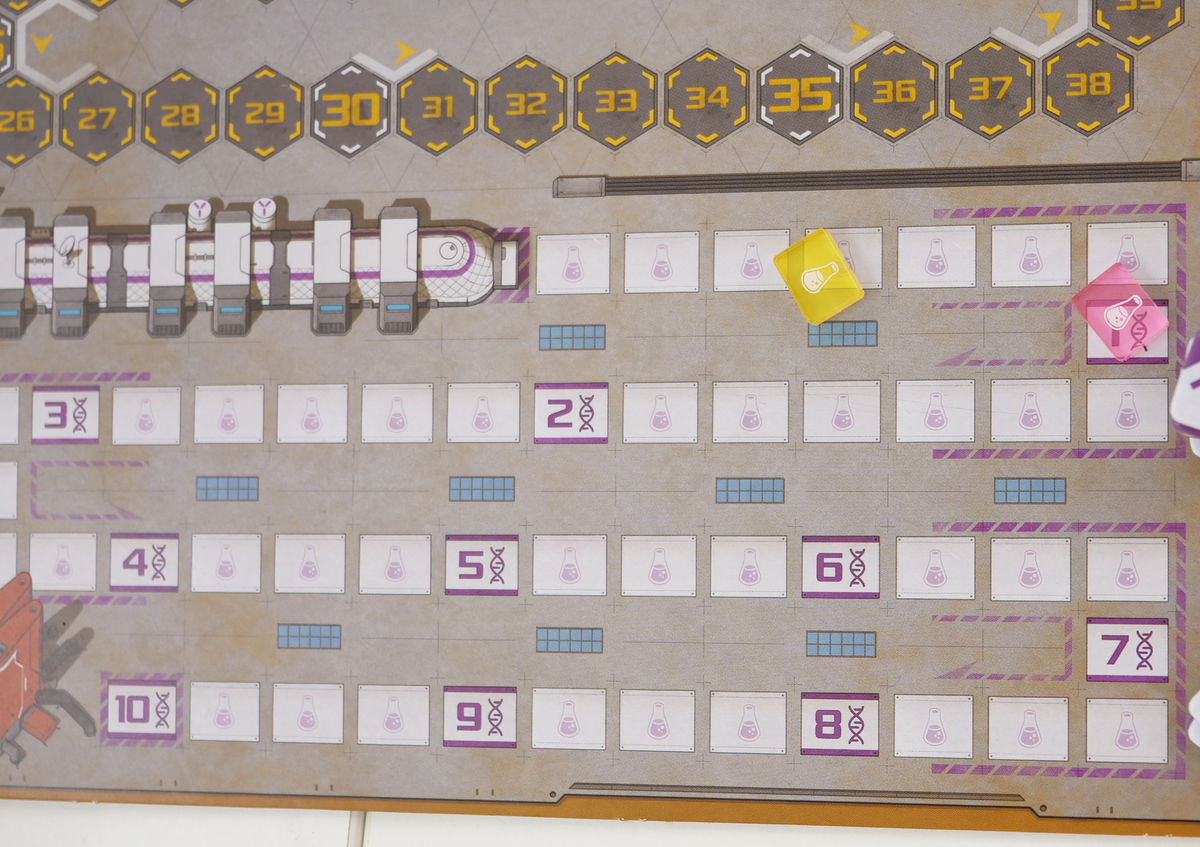
At the end of each year, the first thing you do is settle your research track. Research points earned from removing obstacles, scientific experiments, module bonuses, etc. will be converted into science tokens if you have reached the number written on the research track. In addition, you can get additional science tokens for each player who has fewer points than you. In a two-player game, the player with the most points will get an additional 2 points, and the player with the least points will get 0 points.
The pink player got 1 on the research track and had more experiment points than his opponent, so he got a total of 3 science tokens. On the other hand, the yellow player didn't get 1 on the track and had fewer points than his opponent, so he got 0 science tokens.

The science experiment tiles on the main board will be removed together at the end of the year.
Then, place a new science experiment tile from the '2' pile.
Meanwhile, leave the remaining modules in place and fill the empty spaces with the numbers from the '2' pile.
All astronauts on the main board will be returned to the base. At this time, it is important to think about where you want to place the modules and come up with a strategy for returning them.
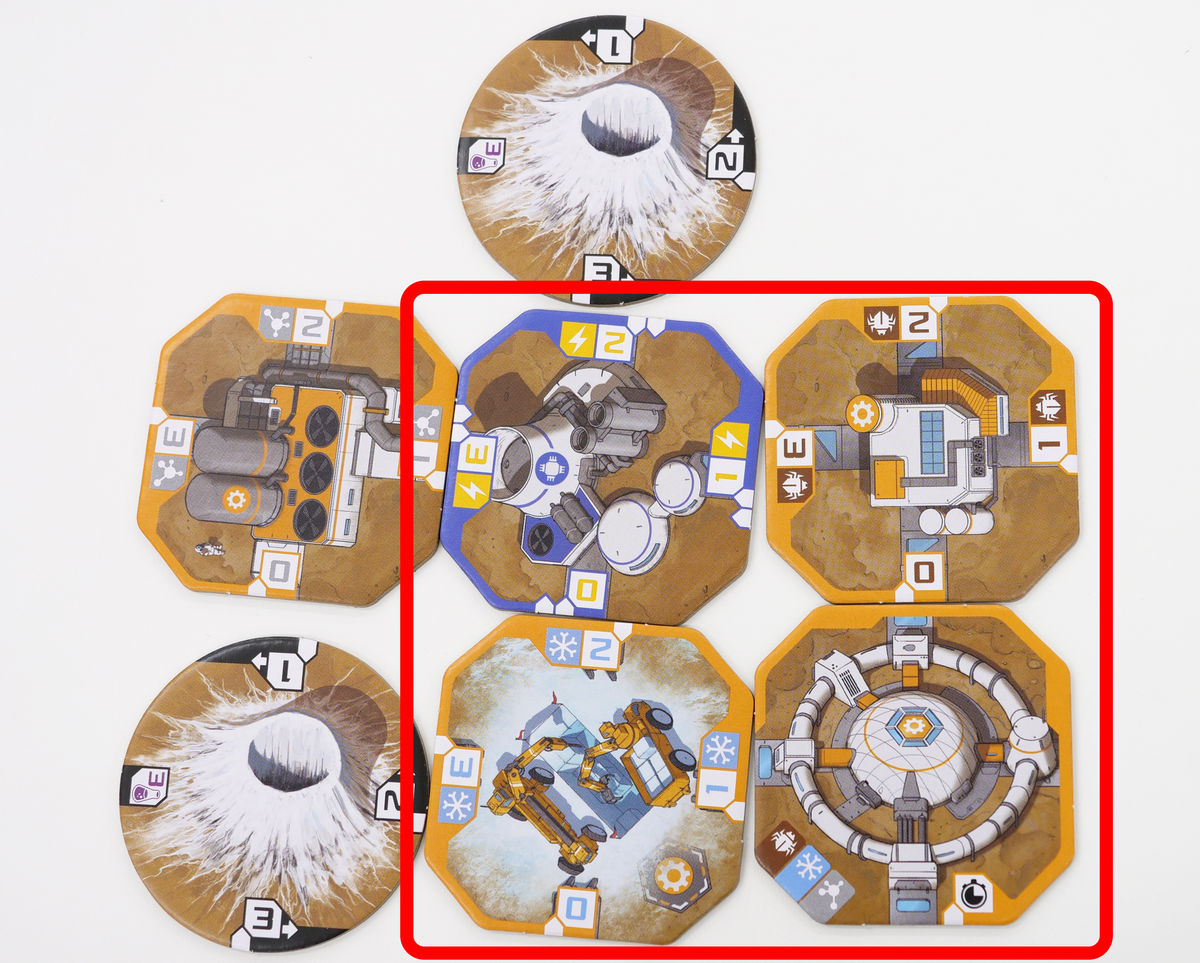
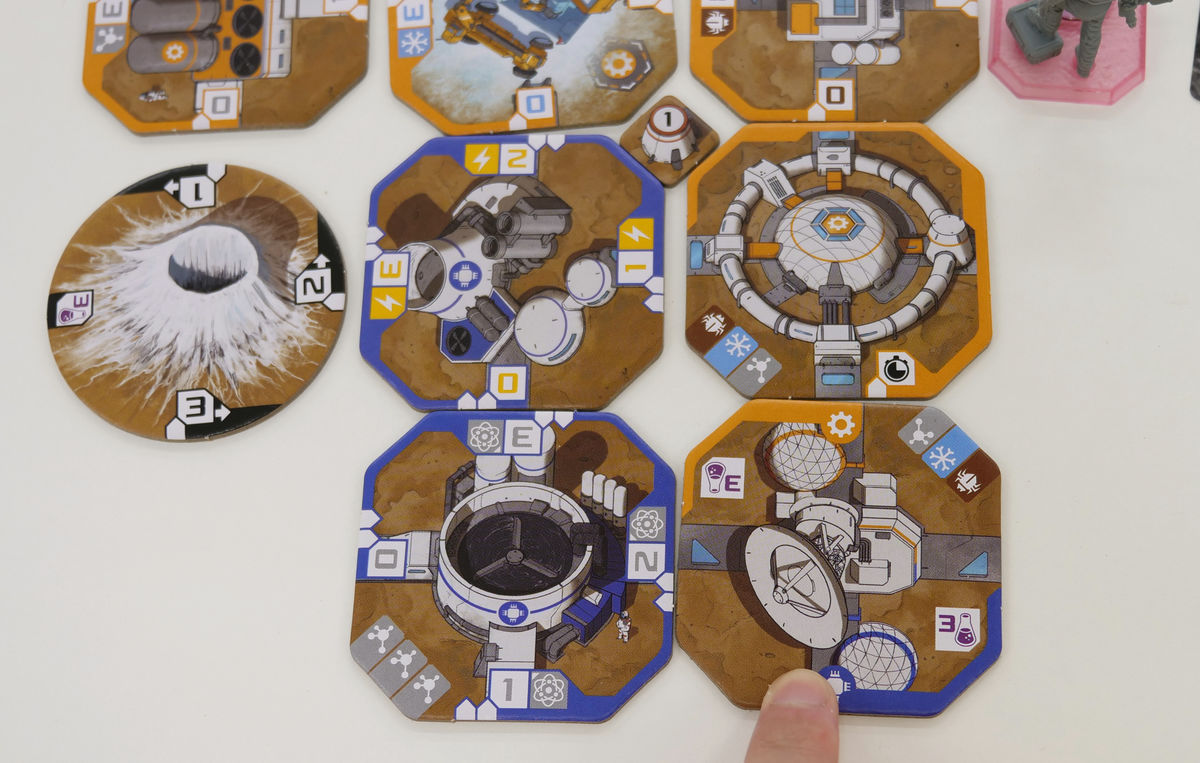
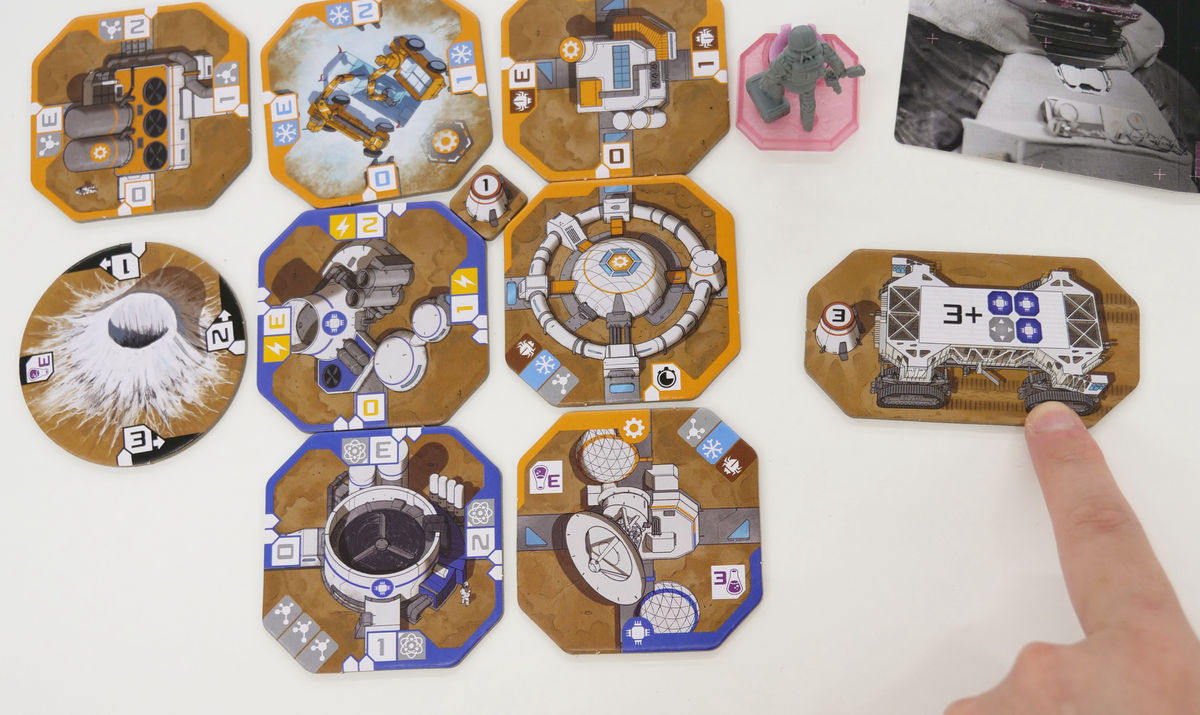
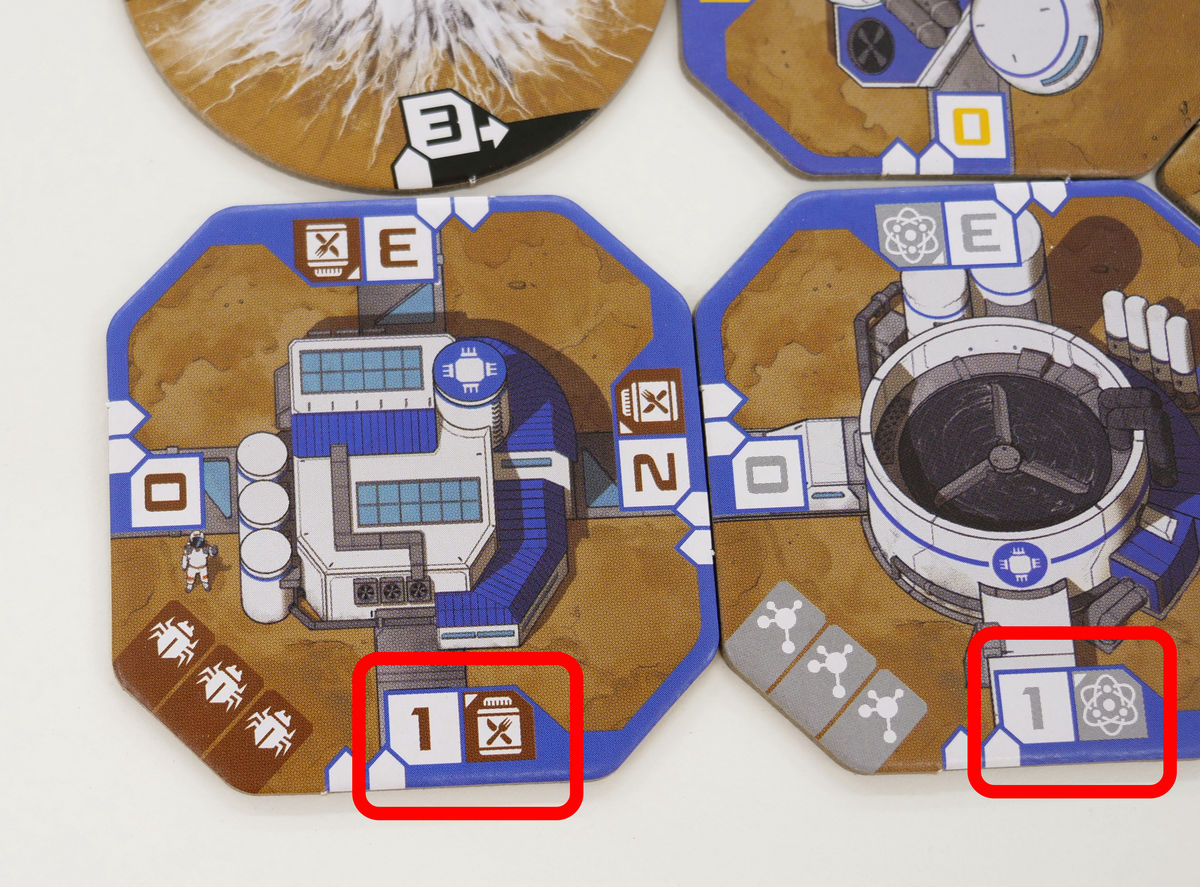
As you progress through the game, various other modules will appear. The red boxes below show 'advanced resources.' The advanced version of the brown 'insect resource' is 'synthetic protein.' The advanced version of the grey 'methane resource' is 'air carbon.' Furthermore, the advanced version of the blue 'ice resource' is 'oxygen.' Many science experiment tiles require advanced resources, but since advanced resources must be replaced with three regular resources, acquiring advanced resources from modules will make it easier to earn points through science experiments. However, advanced resources cannot be used in place of three regular resources.
In addition, the following 'variable modules' can store two types of modules at once. Since you can choose either resource when consuming, it is very convenient for times when you want to store a resource but are not sure which resource to store.

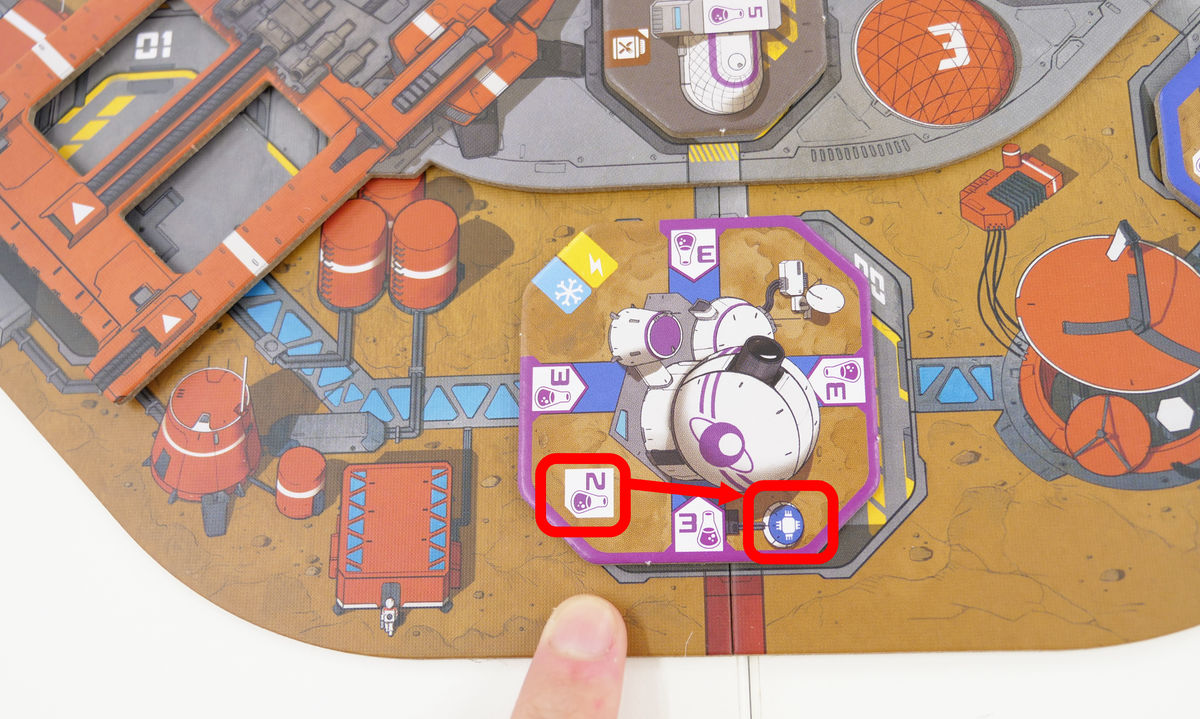
Purple modules are modules that can earn you plenty of experiment points regardless of resources, etc. In the following cases, you can get 2 experiment points immediately just by acquiring the module, and when you place it in your base, you can get an additional 3 experiment points for each adjacent blue module.
The green modules are 'greenhouse modules', which allow you to aim for bonus points in addition to the usual modules.
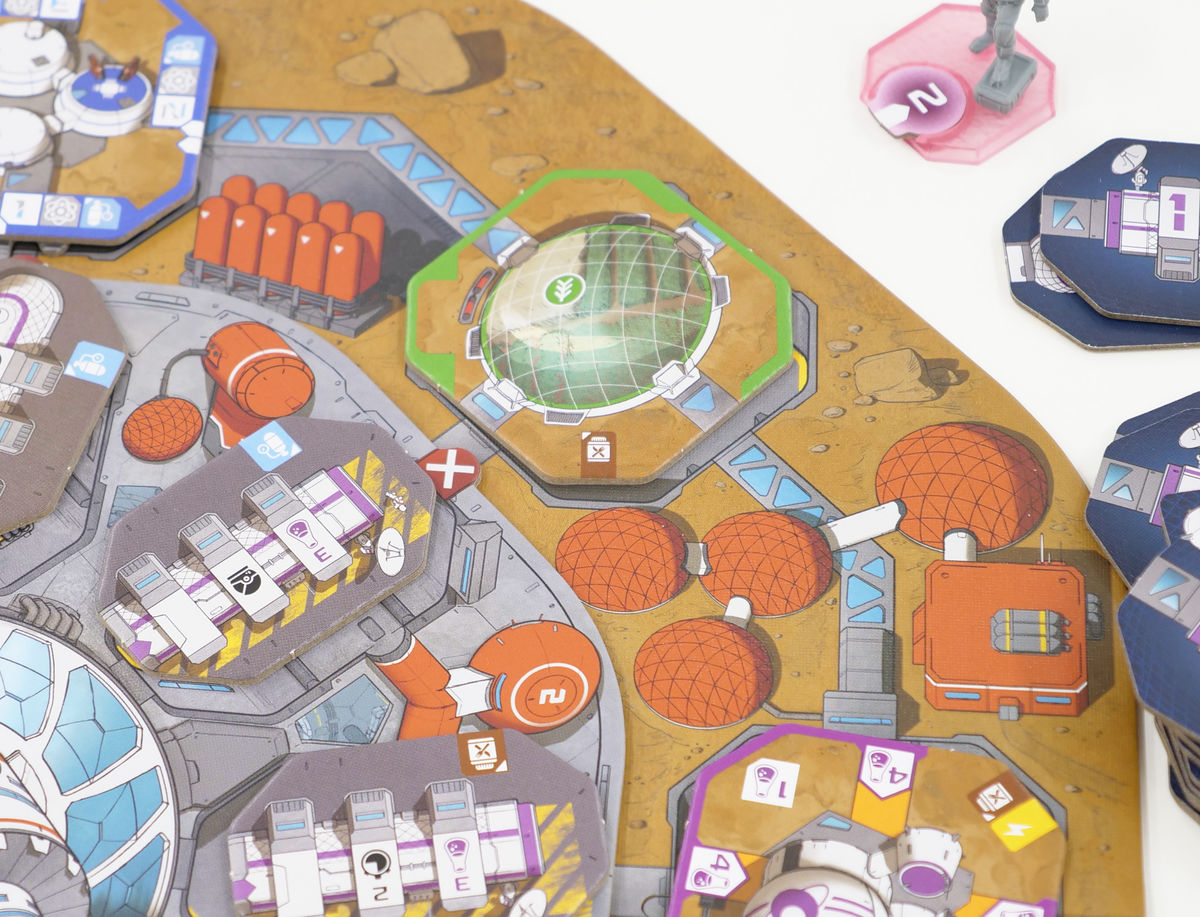
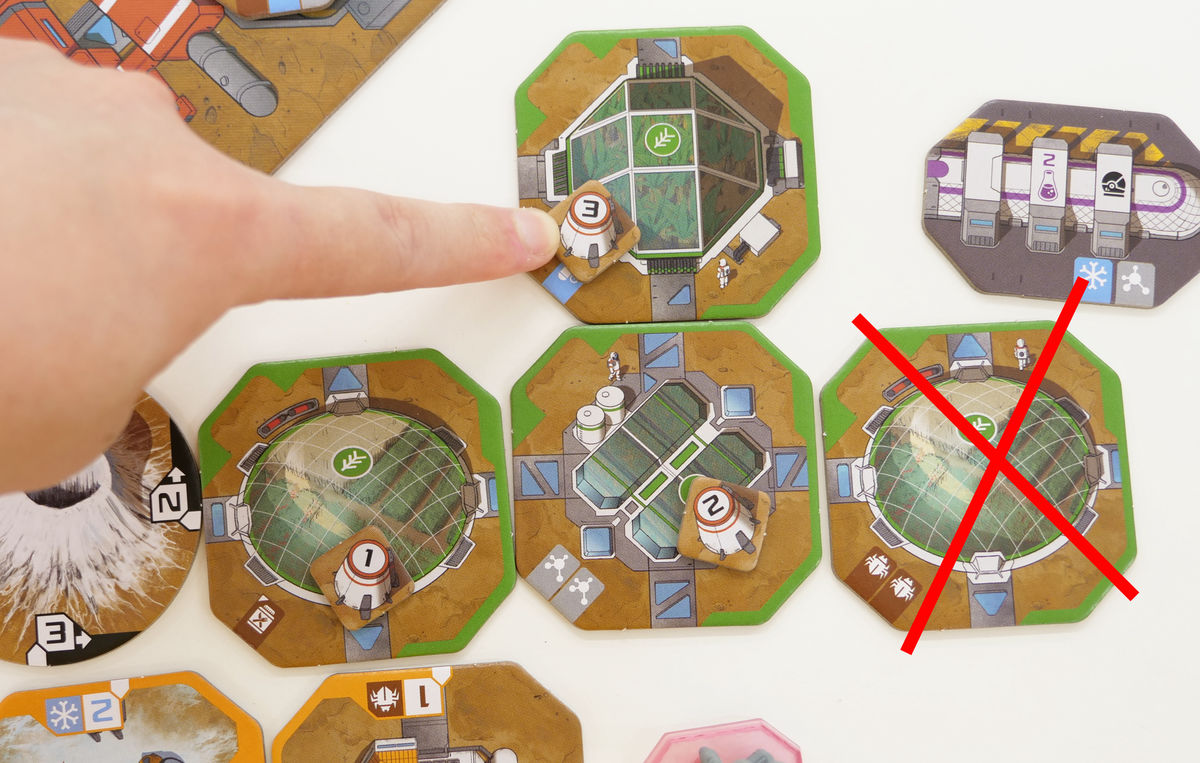
When you place one greenhouse module, you immediately receive one victory point. There are three types of greenhouses: circular, square, and octagonal, and you cannot line up the same type of greenhouse. If you can line up two different greenhouses, you will immediately receive two victory points for the second greenhouse, and three victory points for the third greenhouse. Note that you cannot line up four or more greenhouses.
Like the greenhouse, you can earn points by combining science experiment tiles. There are three types of science experiment tiles: 'left', 'center', and 'right'. You don't get points for acquiring one, but you get one victory point when you acquire the second type of science experiment tile. The third type of tile is worth two victory points, so if you match 'left', 'center', and 'right', you get three victory points.
Repeat the action of acquiring and placing modules and performing scientific experiments to accumulate resources and points, and when the '2' module tiles are gone, the year ends again. If the '3' module tiles are gone and the main board cannot be filled, the game ends.
At the end of the game, after you have settled your research track, you will calculate your final score. Your score will be calculated based on the score track on the sub-board and the science tokens you kept secret. In addition, you will receive 1 point for each resource remaining in your base.
My impression after actually playing Project Humanity was that it was hard to understand the rules and make the initial placements, as there were many items to handle and a wide variety of modules and scientific experiments. However, the gameplay itself was simple, with simple actions to follow and easy to understand visually, such as 'rotating a figure to complete an action' and 'rotating a module to increase or decrease resources,' so when I actually played it, I got the impression that it was quite easy to play. In addition, it requires detailed resource management and there are many ways to gain victory points, so the more you play, the more you'll want to try different strategies.
In addition, the quality of the content is simply high, and the fun of combining and expanding the modules at the base, as well as the three-dimensional fun of moving the astronaut figures, was quite high. Above all, the way the main board moves around at the end of the round was visually easy to understand and interesting, providing the high-quality experience that only a high-quality board game can offer.
The initial preparations seemed difficult, but the game came with things like boxes to store all the items that you want to distribute to players at first, so it seems like things will go much smoother the second time around.
The Japanese version of Project Humanity is sold by Hobby Japan, and the price on Amazon is 9673 yen including tax.
Amazon.co.jp: Hobby Japan Humanity Project Japanese Version (2-4 players, 90 minutes, ages 14 and up) Board Game: Toys
Related Posts: