I tried using "3D incident / accident illustration designer" that can describe the situation of accidents and incidents in a 3D model like a reproduction image of a news program

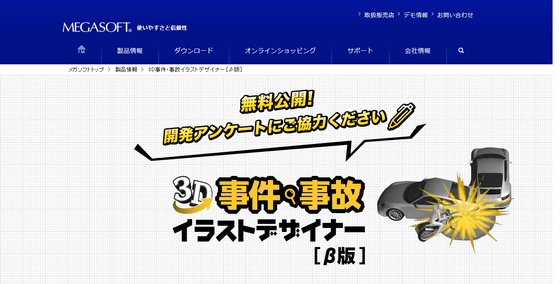
When you are in a traffic accident or involved in an incident, you need to explain to the investigators of police and insurance companies the circumstances at the time of the accident and what they witnessed, but the position relationship of the cars and what kind of actions were done It is rather difficult to explain with your mouth, the situation of the accident may not be transmitted correctly. "3D incident / accident illustration designerBy using, you can reproduce the complex situation at the time of accident with various 3D CG models and check from 360 degrees. "3D incident / accident illustration designer" is released free for a limited time from January 30 (Tue) to August 31 (Fri) in 2018.
3D incident / accident illustration designer [beta version] download
http://www.megasoft.co.jp/accident/
◆ Download & Installation
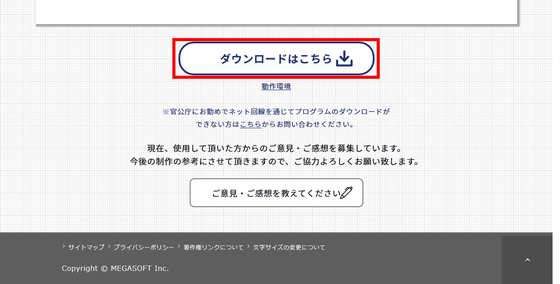
First, click "Download here" at the bottom of the official website.
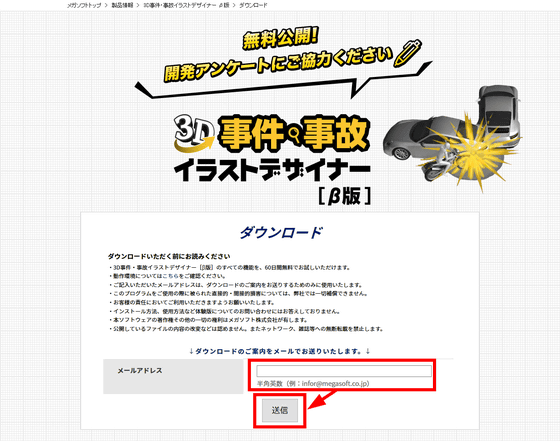
In order to acquire the download key, enter the mail address and click "Send".
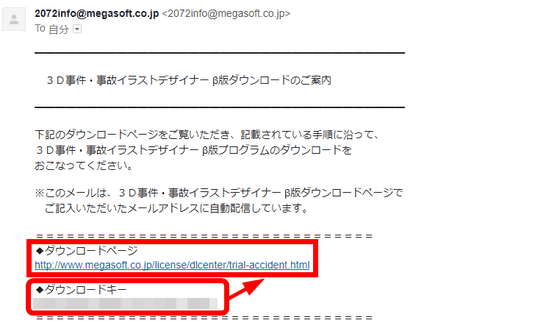
The downloaded URL and downloaded mail will be sent to the registered e-mail address. Select the download key, copy it, and click the URL of the download page.
Click on the "Start download" button in the "Download procedure" column on the download page, downloading "Downloader.exe" will start and save. The capacity is 386 KB.

When downloading is completed, start "Downloader.exe". Then the software download will start, so click "Next".

Since you are prompted to enter the download key, paste the download key previously written in the email as it is and click "Next".

As download confirmation is done, click "Next".

The save destination of the download file is confirmed. The free space required to save the downloaded file is 2.11 GB. Click "Next".

When downloading is completed, click "Next".

Installation starts automatically as it is, so click "Install".

After confirming the installation destination, click "OK".

Installation took about 5 minutes. Click "Finish" to complete the installation.

When "3D incident / accident illustration designer" is started, the operation check wizard starts at the first time. Click "Next".

A window for checking the operation like the following screen starts. When you confirm that the left and right images are displayed the same way, click "Yes".Operating Environment Table of Official SiteAccording to the supported OS is Japanese version after Windows 7, the display is 1280 × 768 or more.

The "3D incident / accident illustration designer" released free of charge this time is a beta version before the development, the trial period is 60 days. Click "Close this note and start up software".

◆ Actually use it
When the software starts up, the main menu screen is displayed. In this time, click "Create 3D illustration".

When you start it is like this. There is a 3D illustration list on the left, and there is a field screen that arranges illustration in the center.

At the beginning there is still nothing but the blue sky still spreading so we will try setting up a road to try. If you select "Road" from the "Parts" tab on the upper left, select your favorite road and bring the cursor to the center, it will be placed automatically. This time I tried to place "Douro 1 lane V02". If you move the mouse while holding down the right click, you can move the direction of the camera, enlarge and reduce with mouse wheel.

Let's put the car's CG model on the road this time. Select 'Vehicle', select your favorite car and place it on the road. When you select the car model, you can open and close the door by moving the bar "movable area" on the right panel.

If you select 'People / Animals', you can put models of people and dogs. Each joint has a small movable area, you can set it one by one from the right column. Instead of moving automatically in conjunction with each other, it is necessary to set the motion of each joint individually, so it takes a long time to set an elaborate pose.

I chose "dog 26" from "people / animal" and placed it.

W, D, and H on the upper right represent width, depth, and height, respectively, and by adjusting this number it is possible to change the size of the model.

Models such as flame, smoke, shock effect, etc. are also prepared as soft for the purpose of reproducing the situation of the incident / accident. Just place the flame model as it is in the screen just like cars and people.

Select "Save Image" from "File" and select "Perspective diagram", you can save the illustration shown on the current screen as it is.

Click "Output" to save. Besides the PNG file, bitmap file, JPEG file, the image is "PNG file for red / blue glasses" "Bit map file for red and blue eyeglasses" "JPEG file for red and blue eyeglasses" "3D television · portable multi picture file" It was also possible to save.

In order to explain the accidents and incidents that happened at home, you will need a detailed model of the house. There is also a mode that makes home 3D model from the plan. From the main menu, select "Create from a house floor plan".

Select room · corridor · door · premises from the left column and place a floor plan, click "three-dimensional" below the left column.

Then, the house model was created as shown in the floor plan.

You can also place 3D models around your house and in the house.

◆ What you get to know
Actually using the operation with less habit, even beginners who have no experiences of 3D model illustration could easily create illustration of incident / accident. It is said that we have over 3000 rich 3D materials and that not only does the joint of the person's model move, but also the door of the car is open, and there are more than 20 models in the dog alone It is a gorgeous content that seems to be able to reproduce precisely in detail. "3D incident / accident illustration designer" is still under development and it is said that we are also looking for development questionnaires, so we can expect to update in the future.
Related Posts:
