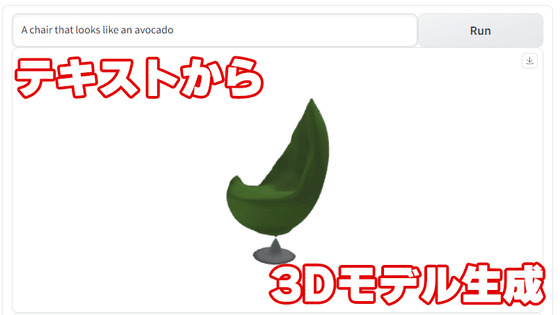
I tried using AI 'Shap-E' to create 3D models from text and images on Google Colaboratory
OpenAI, the developer of the chat AI ChatGPT and the voice recognition AI Whisper, announced the 3D model creation AI 'Shap-E' in May 2023. Shap-E is developed as open source and is available to anyone, so I actually tried using it on Google Colaboratory.
shap-e/sample_text_to_3d.ipynb at main · openai/shap-e · GitHub
For more information on what you can do with Shap-E, please see the article below.
OpenAI announces 'Shap-E,' an open-source AI that generates 3D models from text and images - GIGAZINE
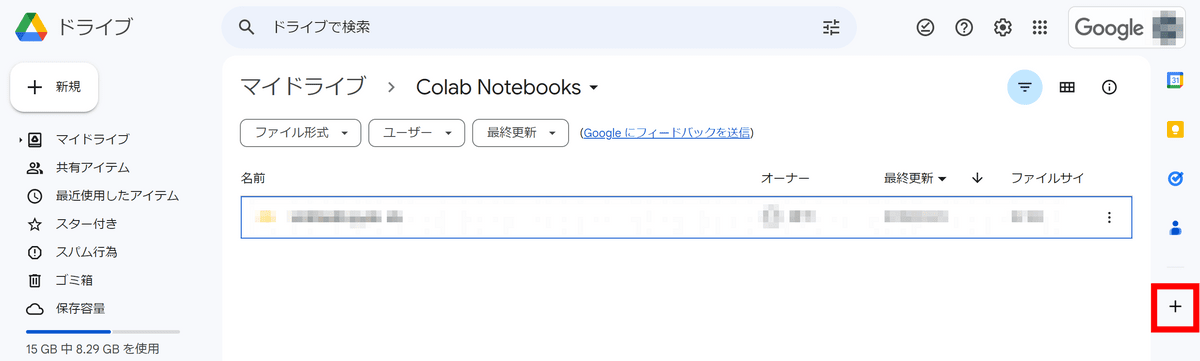
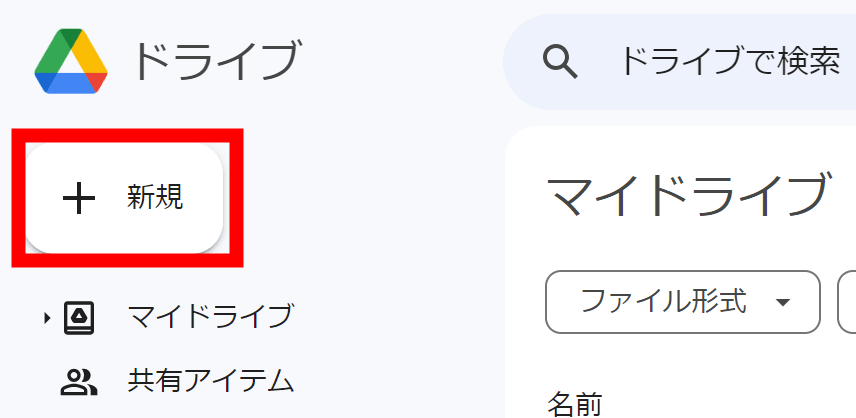
First, go to Google Drive and click the '+' sign on the far right.
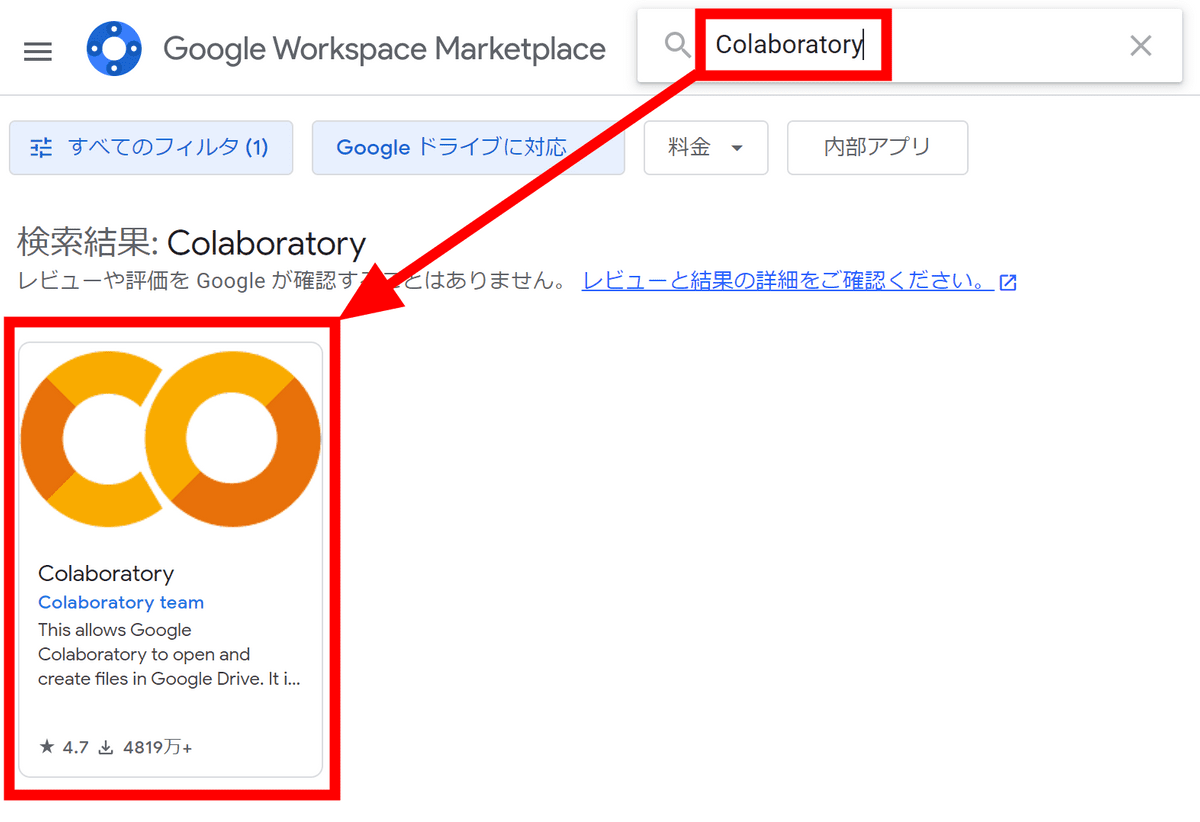
Enter 'Colaboratory' in the search field and click the Colaboratory app that appears.
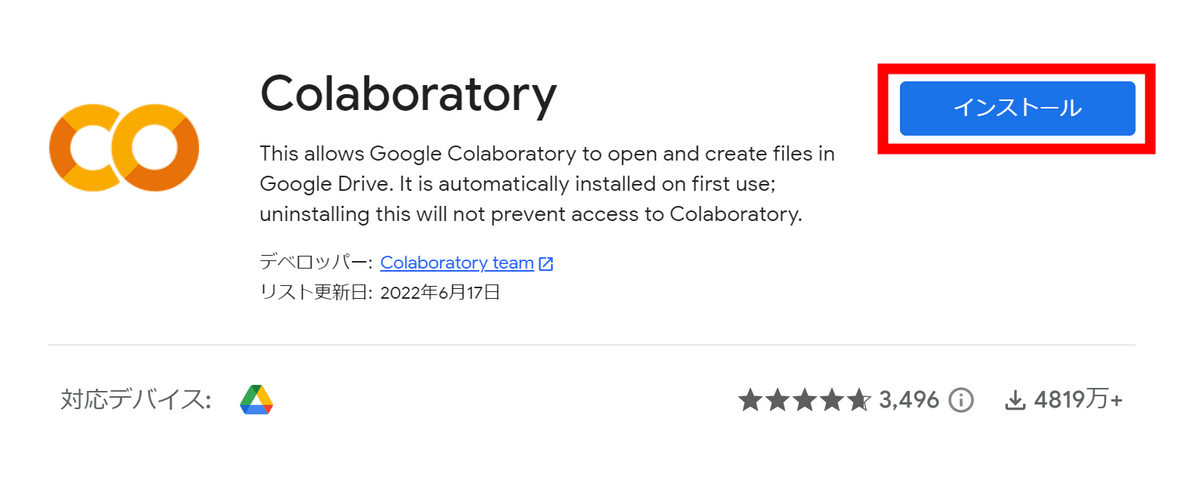
Click 'Install'.
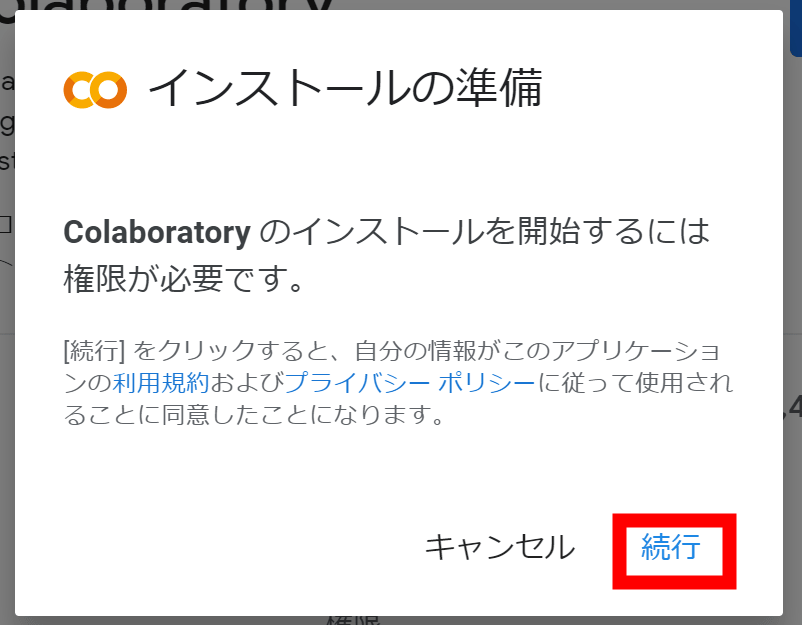
You will be asked for permissions, so click 'Continue'.
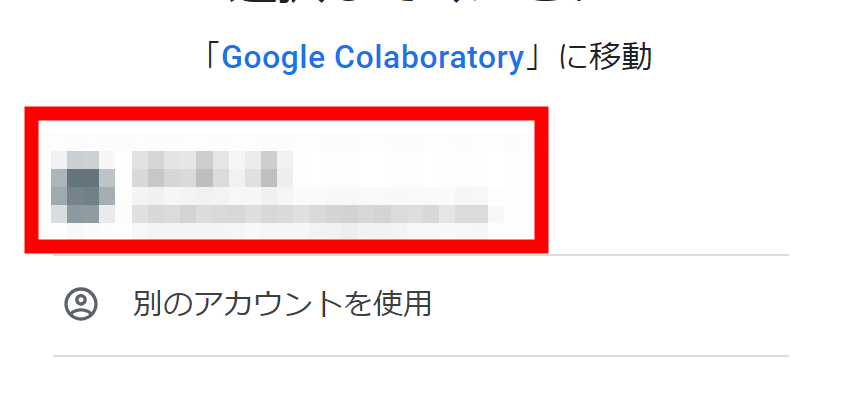
Select the account you want to install Colaboratory on.
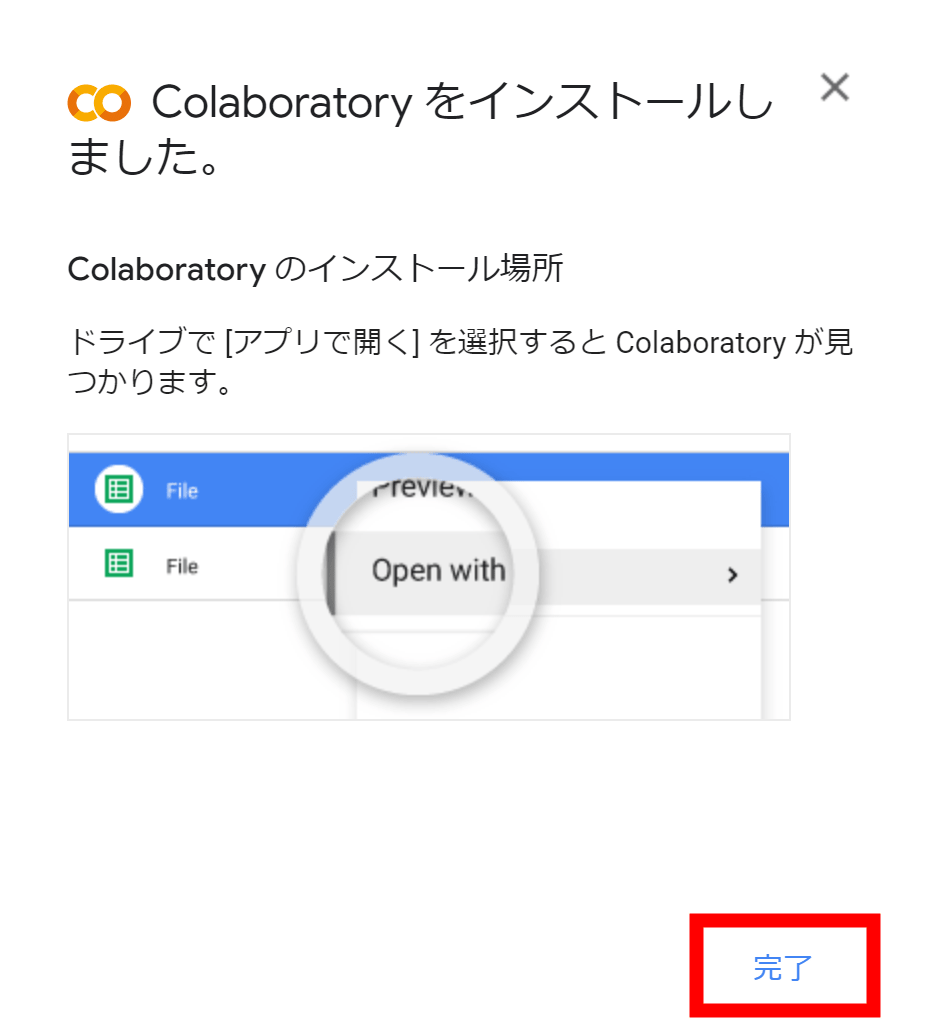
The installation is now complete. Click 'Finish.'
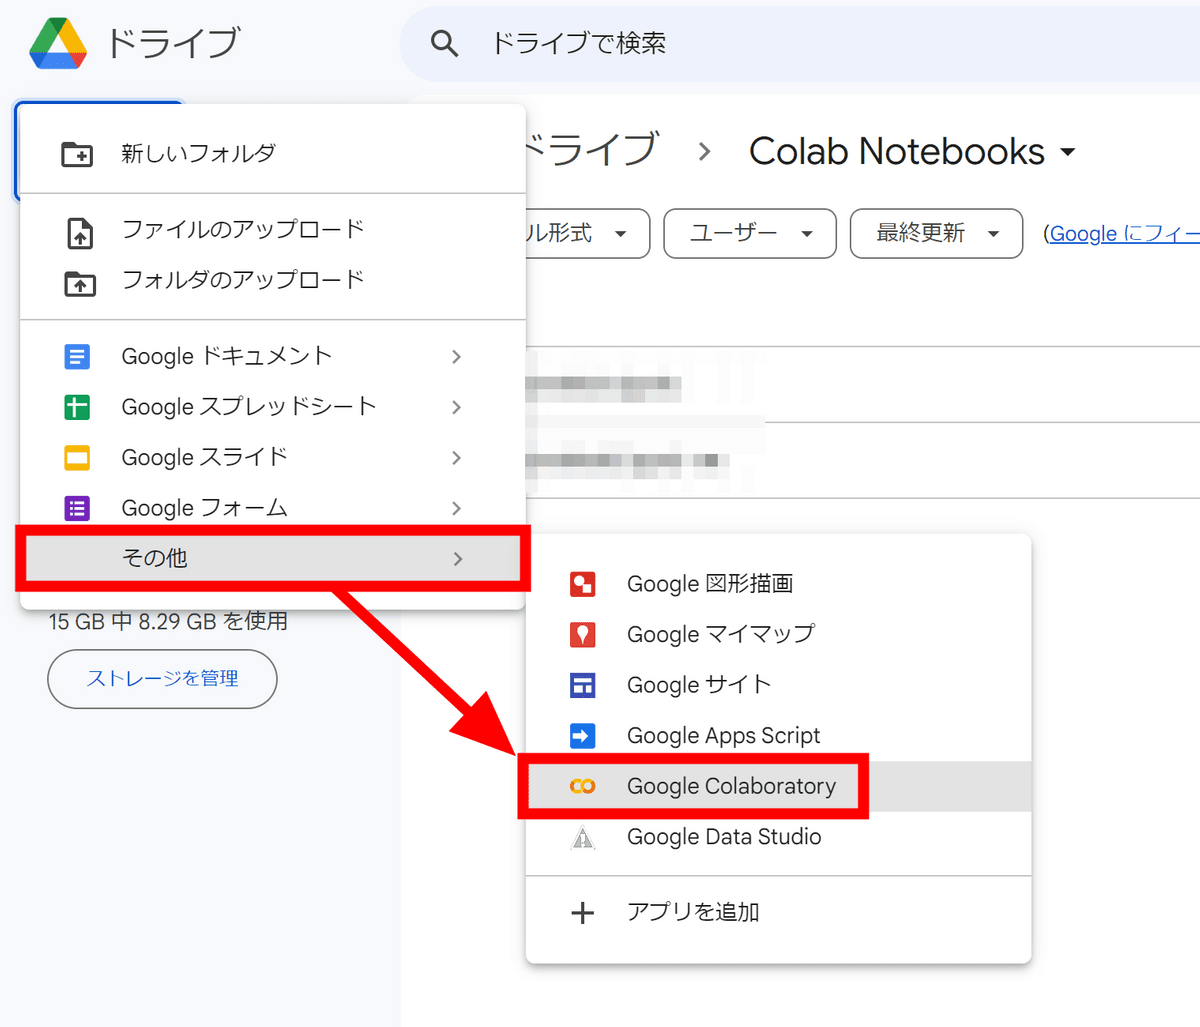
Click 'New' on the left side of the Google Drive screen.
'Google Colaboratory' has been added to 'Other', so click on it.
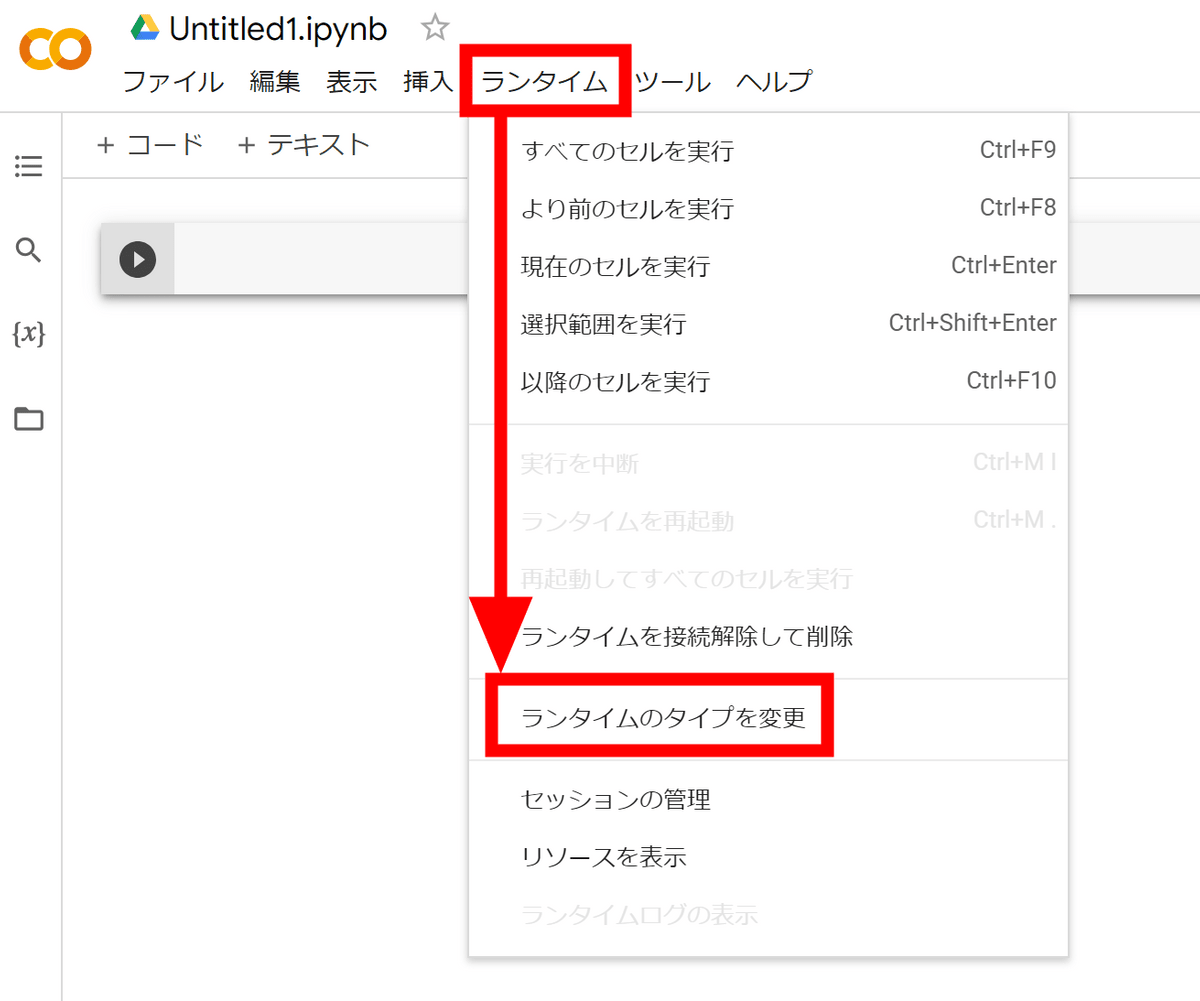
Once Colaboratory opens, first change the settings to use the GPU. Click 'Change runtime type' in the 'Runtime' menu.
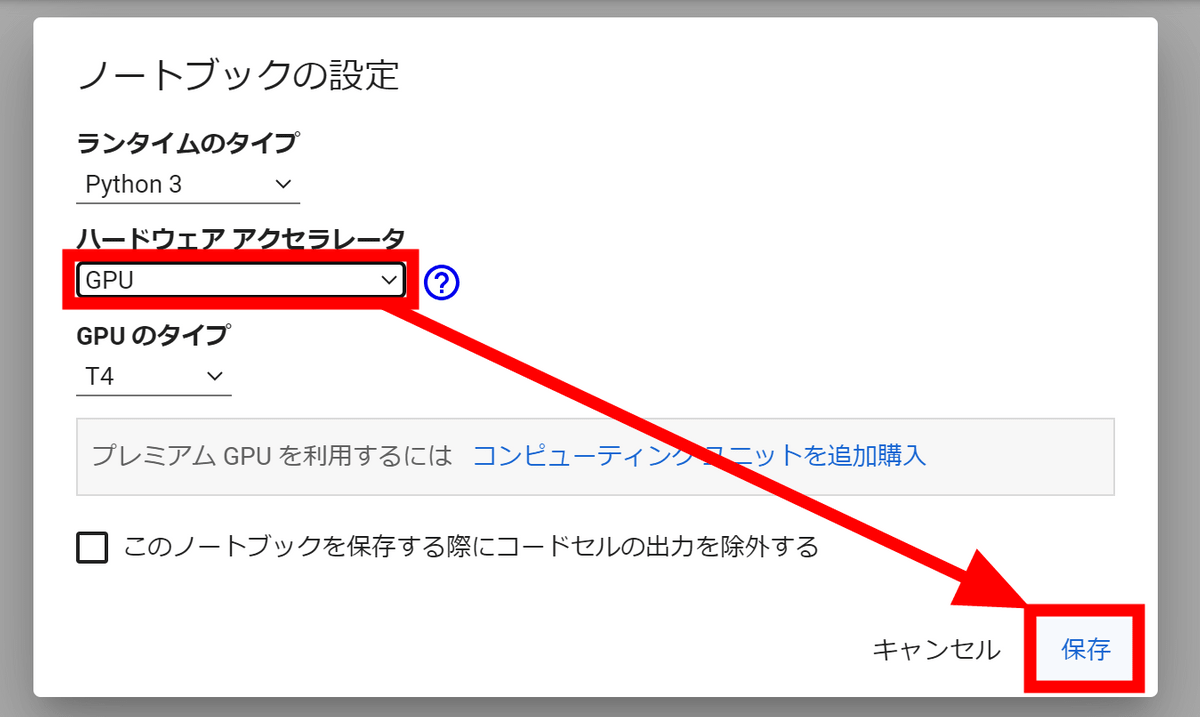
In the 'Hardware Acceleration' field, select 'GPU' and click 'Save.'
Now we will enter the Python code. First, we will import the Shap-E data, so the code to enter is as follows:
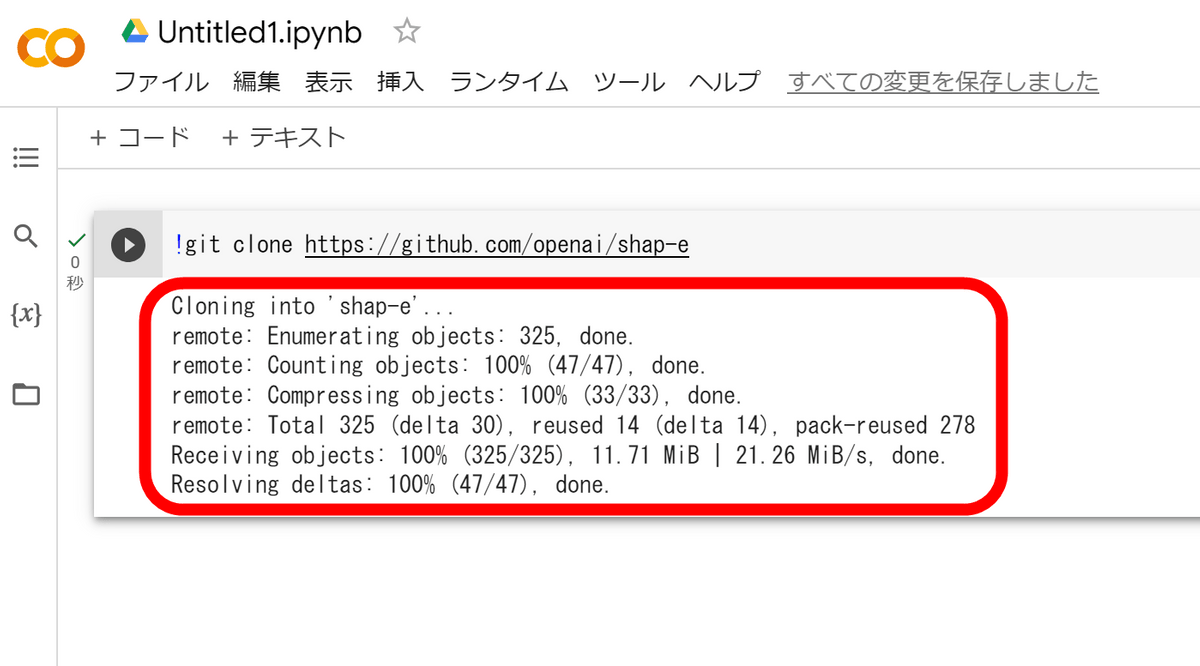
[code]!git clone https://github.com/openai/shap-e[/code]
In Colaboratory, you can run the code by entering it in the box on the right and clicking the play button on the left.

Once execution is complete, a log will be displayed below the code.
When entering new code, simply add a code block using the '+ Code' button above.
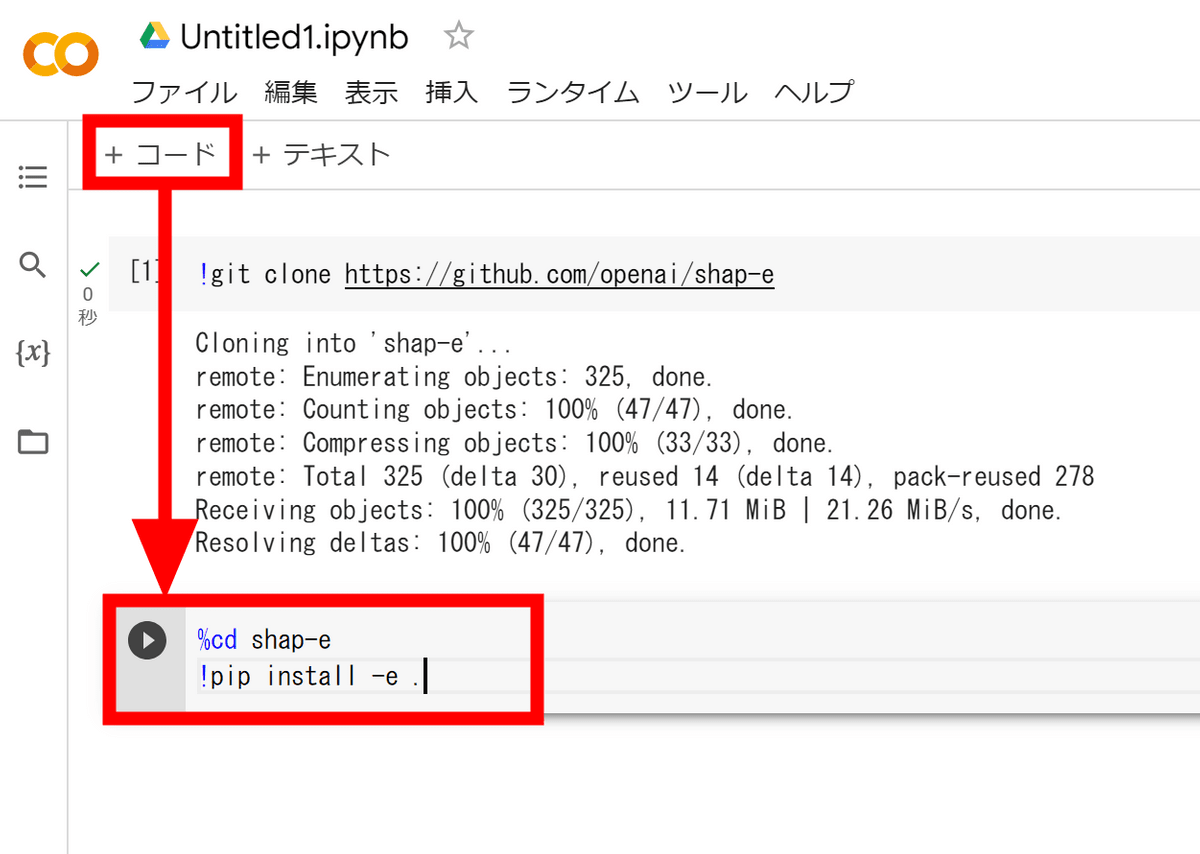
So, install the required libraries with the following code:
[code]%cd shap-e
!pip install -e .[/code]
The following code loads the necessary functions from the library.
[code]import torch
from shap_e.diffusion.sample import sample_latents
from shap_e.diffusion.gaussian_diffusion import diffusion_from_config
from shap_e.models.download import load_model, load_config
from shap_e.util.notebooks import create_pan_cameras, decode_latent_images, gif_widget[/code]
Use the following code to configure the GPU.
[code]device = torch.device('cuda' if torch.cuda.is_available() else 'cpu')[/code]
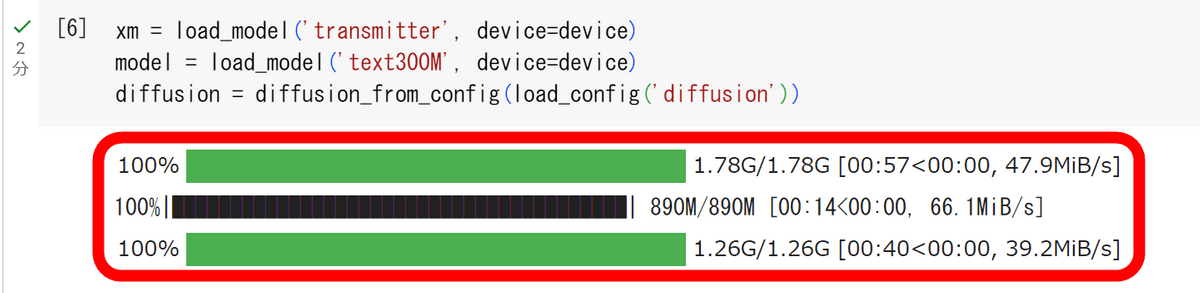
Load the AI model that will be used to generate the 3D model.
[code]xm = load_model('transmitter', device=device)
model = load_model('text300M', device=device)
diffusion = diffusion_from_config(load_config('diffusion')) [/code]
Loading took about 2 minutes.
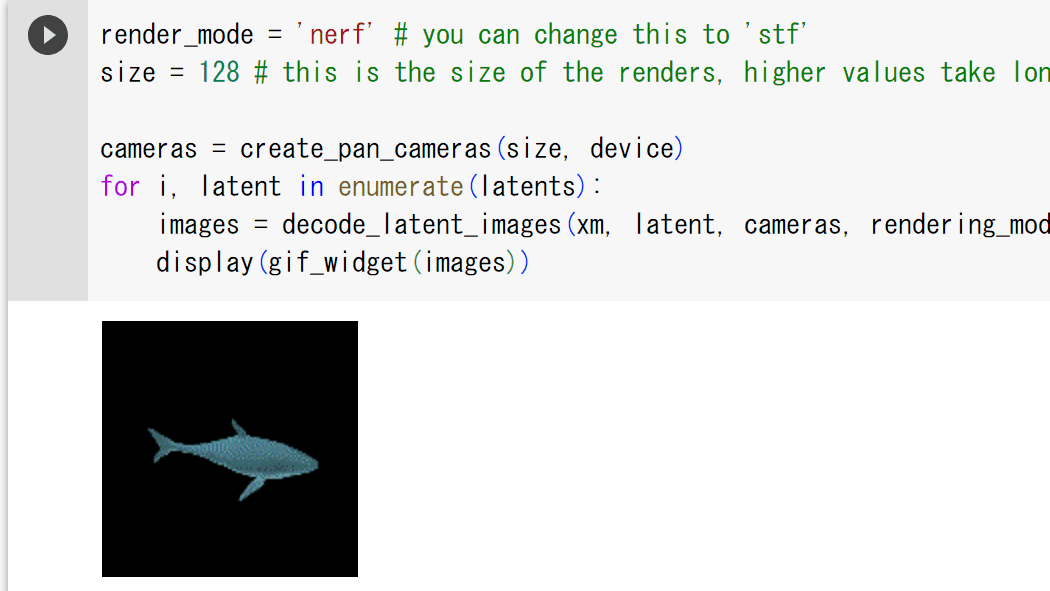
Then, generate a 3D model with the code below. 'batch_size' is the number of 3D models to generate, and 'guidance_scale' indicates the fidelity to the prompt. You can specify the type of 3D model to generate with 'prompt.' In this example, we'll output a shark, so we entered 'a shark.'
[code]batch_size = 1
guidance_scale = 15.0
prompt = 'a shark'
latents = sample_latents(
batch_size=batch_size,
model=model,
diffusion=diffusion,
guidance_scale=guidance_scale,
model_kwargs=dict(texts=[prompt] * batch_size),
progress=True,
clip_denoised=True,
use_fp16=True,
use_karras=True,
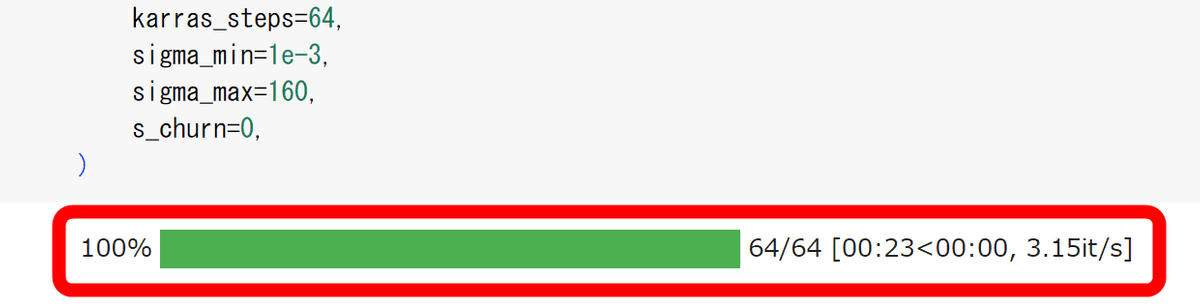
karras_steps=64,
sigma_min=1e-3,
sigma_max=160,
s_churn=0,
)[/code]
With this setting, the 3D model was generated in 23 seconds.
Entering the code below will display the generated 3D model as a rotating gif image.
[code]render_mode = 'nerf' # you can change this to 'stf'
size = 64 # this is the size of the renders, higher values take longer to render.
cameras = create_pan_cameras(size, device)
for i, latent in enumerate(latents):
images = decode_latent_images(xm, latent, cameras, rendering_mode=render_mode)
display(gif_widget(images))[/code]
A shark like this was generated.

To save the generated 3D model, use the following code:
[code]from shap_e.util.notebooks import decode_latent_mesh
for i, latent in enumerate(latents):
t = decode_latent_mesh(xm, latent).tri_mesh()
with open(f'example_mesh_{i}.ply', 'wb') as f:
t.write_ply(f)
with open(f'example_mesh_{i}.obj', 'w') as f:
t.write_obj(f)[/code]
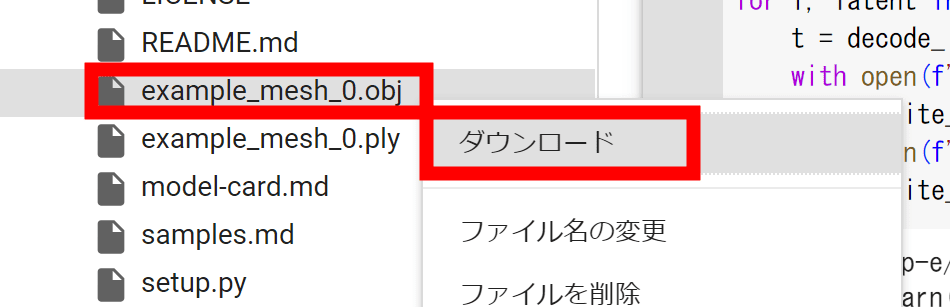
When you run the code, an obj file and a ply file named “example_mesh_0” will be generated in the file field.
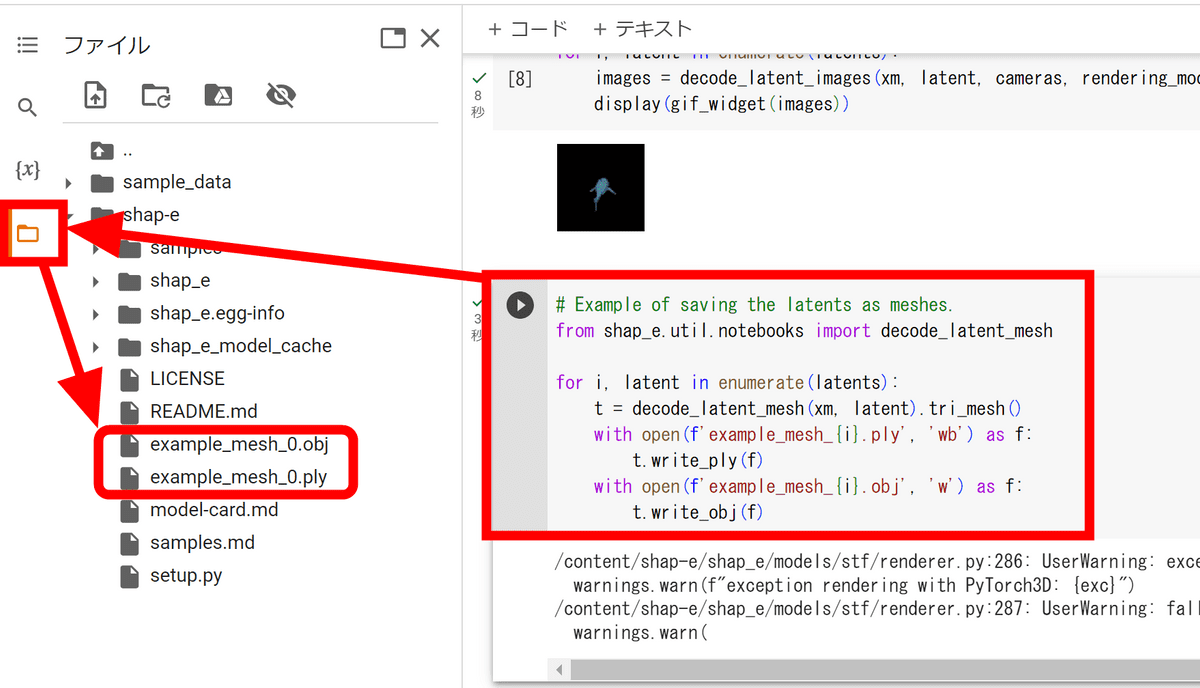
Right-click and click 'Download.'
All you have to do is import the downloaded file into 3D model editing software. This time we covered the steps to create a 3D model from text, but the Shap-E repository also includes examples of creating 3D models from images , so if you're interested, please check them out.
Related Posts: