Summary of how to introduce ``Stable Diffusion web UI'' that can build the execution environment of image generation AI ``Stable Diffusion'' on Windows for free
AI '
GitHub - hlky/stable-diffusion
https://github.com/hlky/stable-diffusion/
--ULTIMATE GUI RETARD GUIDE--
https://rentry.org/GUItard
◆ Contents
・ 1: Download and prepare the necessary files
・2: Install Miniconda
・ 3: Install Stable Diffusion web UI
◆ 1: Download necessary files and prepare
To install the Stable Diffusion web UI on your PC, you need the Stable Diffusion model data distributed on the AI-related community site 'HuggingFace' and the Stable Diffusion web UI source code distributed on GitHub. A HuggingFace account is required to download model data from HuggingFace, so if you do not have an account, please refer to the first half of the article below to create an account. Note that a machine with an NVIDIA GPU is required to generate images with the Stable Diffusion web UI. The specs of the PC used this time are 'GeForce RTX 3060' with 12 GB video memory for GPU, 'Intel Core i7-6800K' for CPU, and 'Windows 11 Pro' for OS.
Summary of how to use image generation AI ``Stable Diffusion'' even on low-spec PCs for free and without waiting time - GIGAZINE
After creating a HuggingFace account, go to the link below.
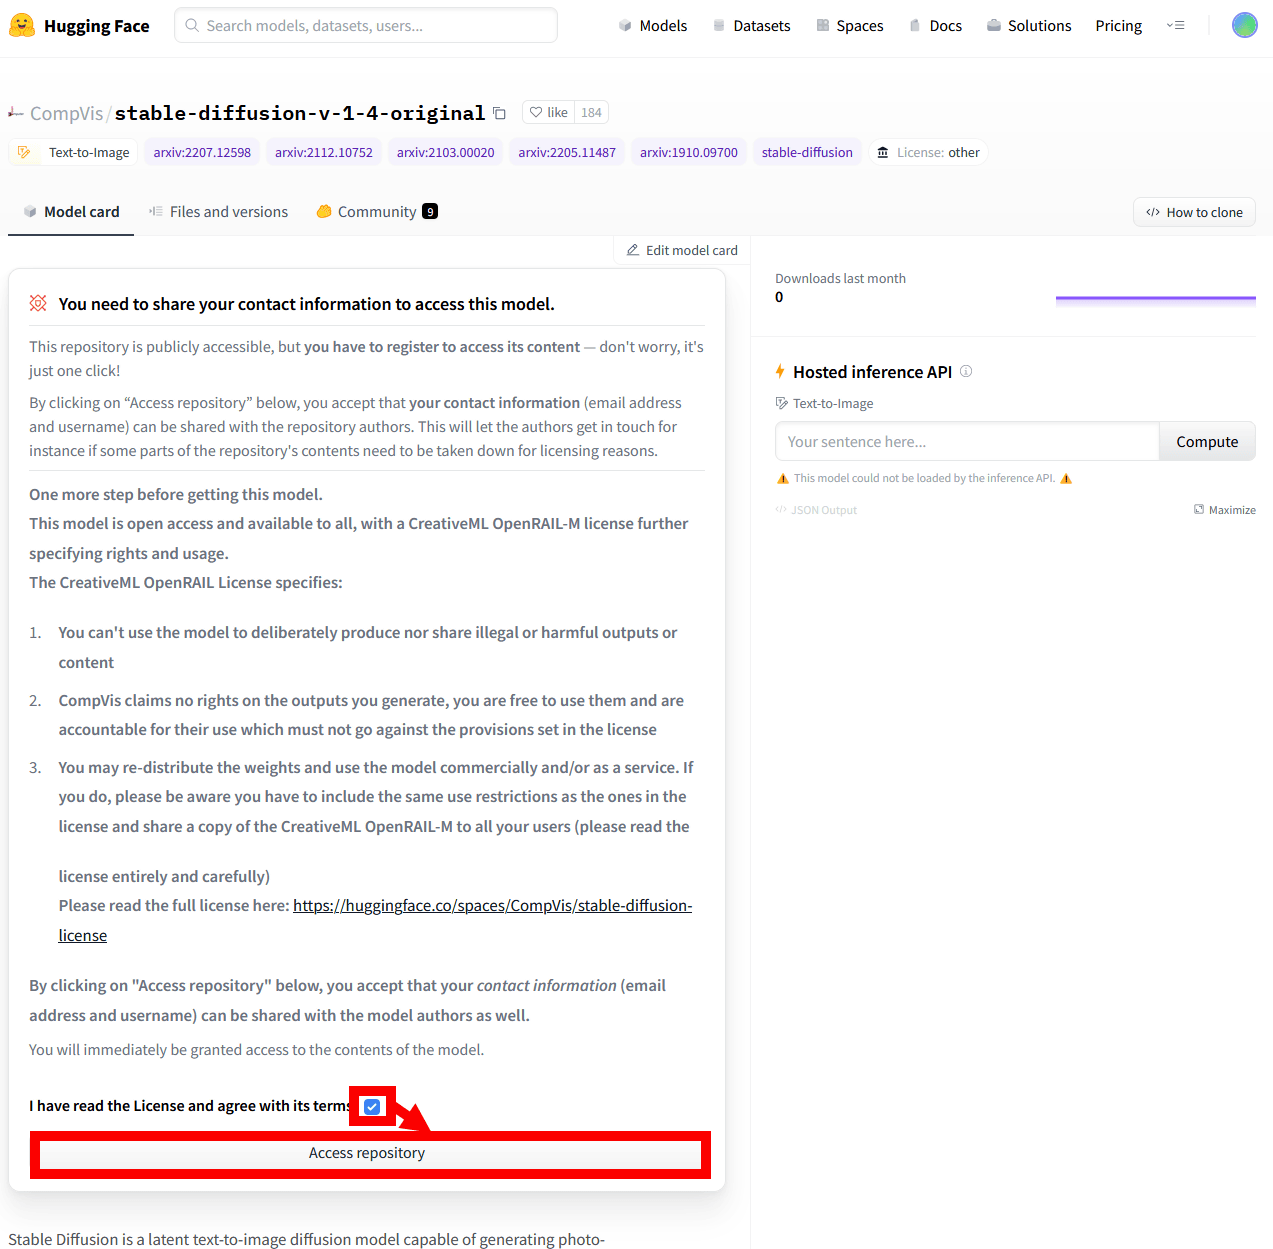
CompVis/stable-diffusion-v-1-4-original Hugging Face
https://huggingface.co/CompVis/stable-diffusion-v-1-4-original
Then, the license of Stable Diffusion is displayed, so check the agreement and click 'Access repository'.
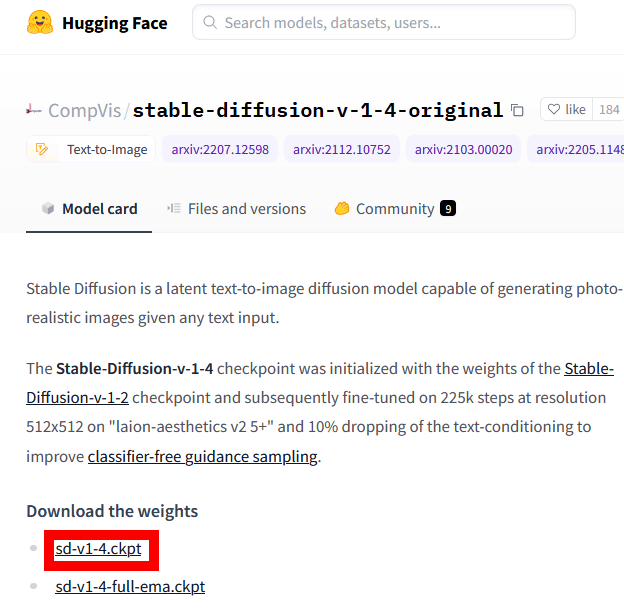
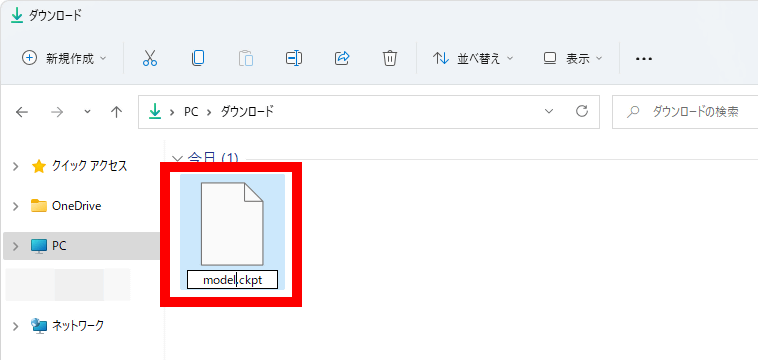
Then, the download link of the model data is displayed, so click 'sd-v1-4.ckpt' to download it. The file size was 3.97 GB.
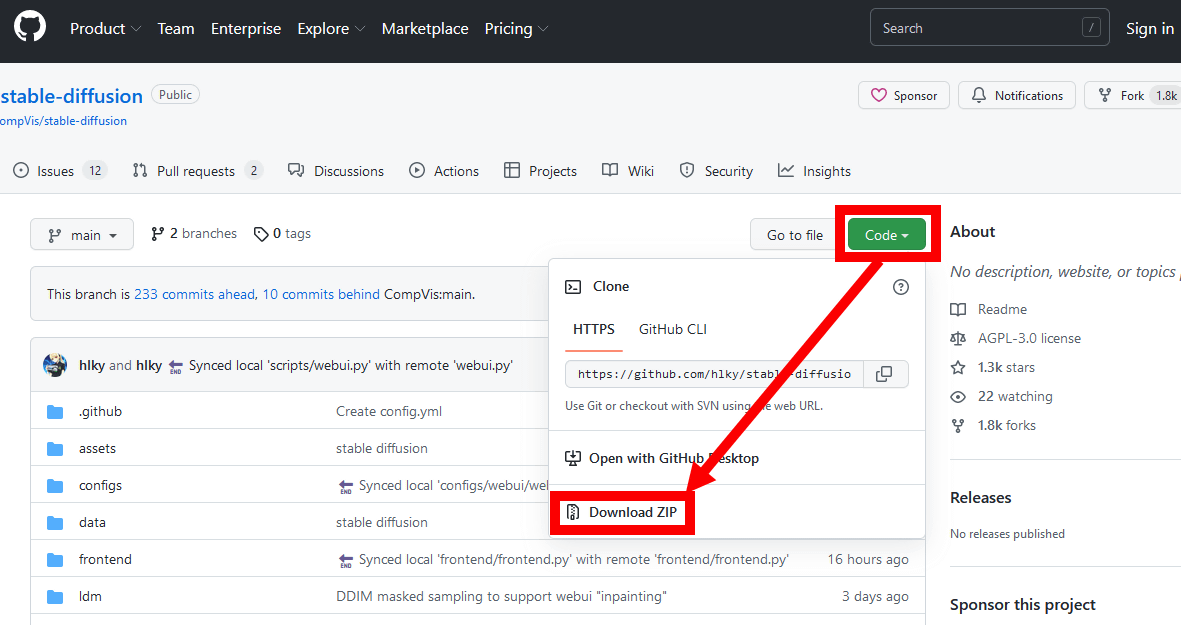
Next, access the following link to download the source code of Stable Diffusion web UI.
GitHub - hlky/stable-diffusion
When the GitHub page is displayed, click 'Code' and then 'Download ZIP' to download the source code. The file size was 42.2MB.
After downloading the ZIP file, decompress it using the Windows standard function or various decompression software.

After extracting the file, it is OK to delete the original ZIP file.

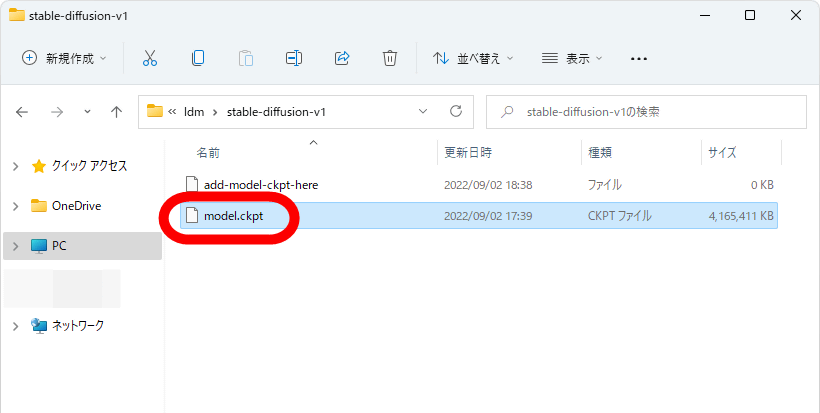
Next, change the file name of 'sd-v1-4.ckpt' to 'model.ckpt'.
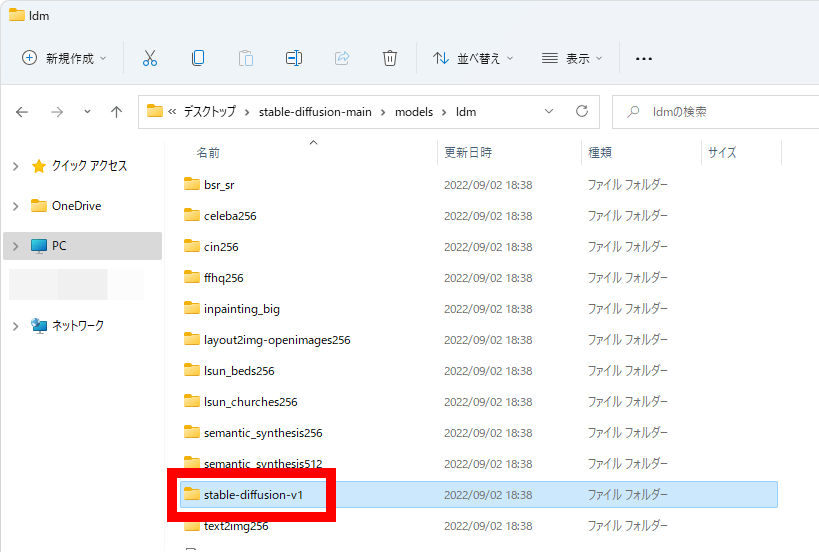
Next, open the 'stable-diffusion-main' folder where the source code is saved and move to the lower folder 'models' → 'ldm' → 'stable-diffusion-v1'.
Move 'model.ckpt' into the 'stable-diffusion-v1' folder.
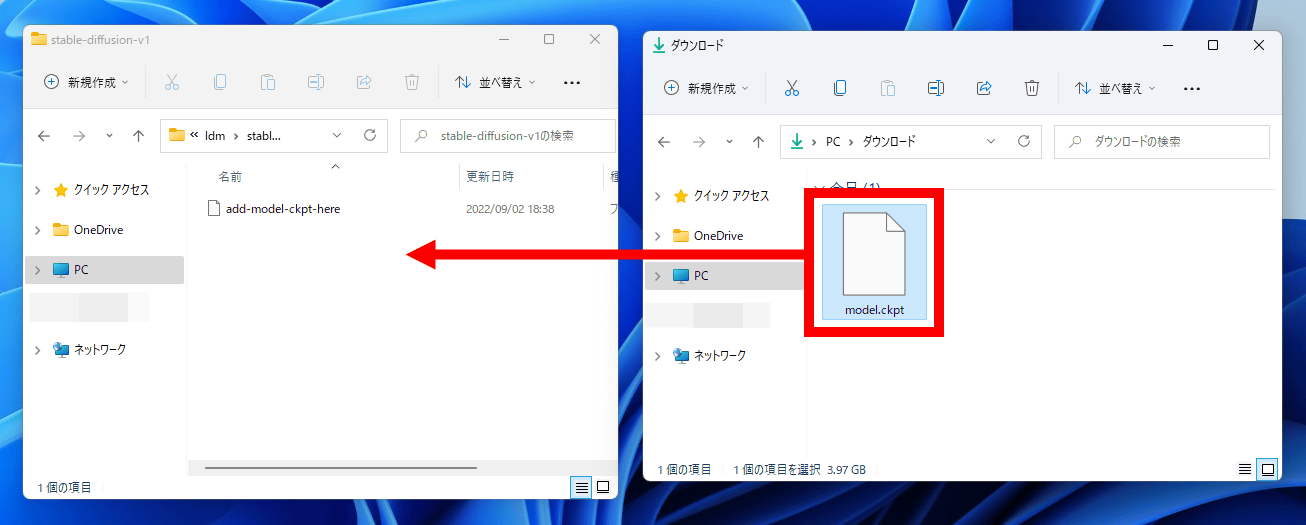
It is OK if 'model.ckpt' is placed in the 'stable-diffusion-v1' folder.
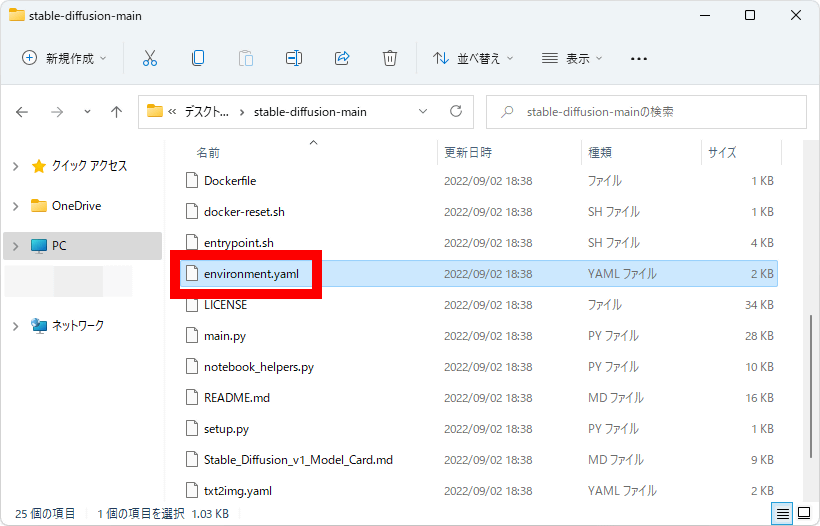
After placing the model data, open 'environment.yaml' saved directly under the 'stable-diffusion-main' folder with a text editor such as Notepad.
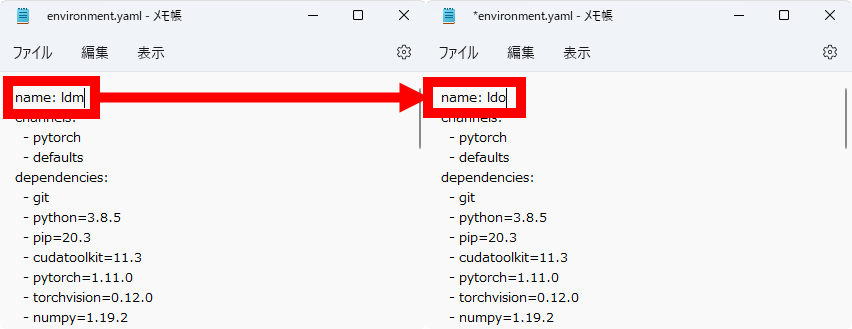
After opening 'environment.yaml', change 'name:ldm' on the first line to 'name:ldo' and save it. Preparations are now complete.
◆ 2: Install Miniconda
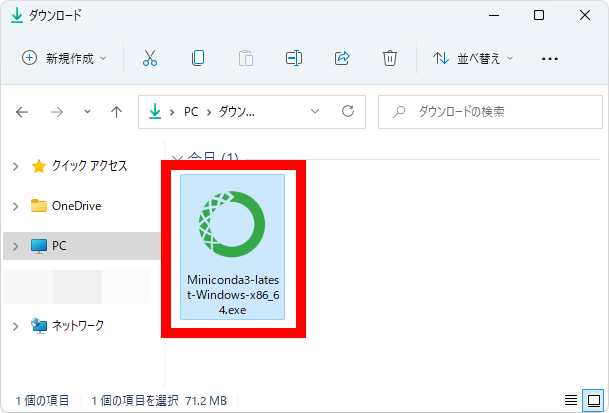
After completing the preparations, install Miniconda, which is required for Stable Diffusion web UI to work. First, access the link below.
Miniconda — conda documentation
Next, download the installer for 64-bit Windows.

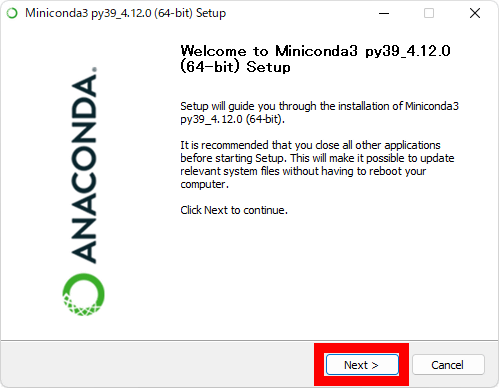
After the download is complete, double-click the installer to launch it.
When the installer starts up, click 'Next'.
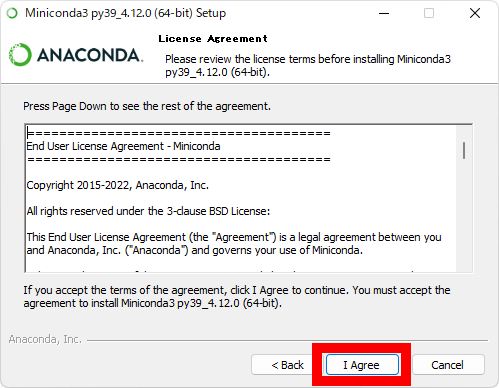
Next, the license will be displayed, so read it carefully and click 'I Agree'.
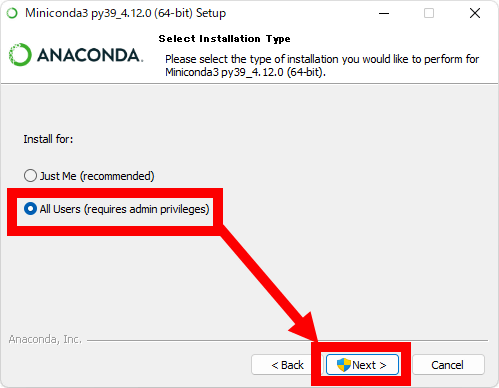
When the installation destination user selection screen is displayed, select 'All Users' and click 'Next'.
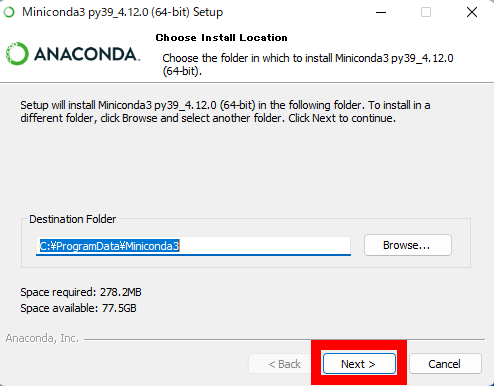
When the download destination folder selection screen is displayed, click 'Next' without changing anything.
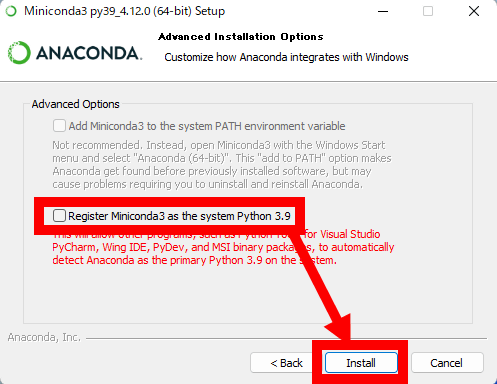
When the following screen is displayed, uncheck 'Register Miniconda3 as the system Python 3.9' and click 'Install'.
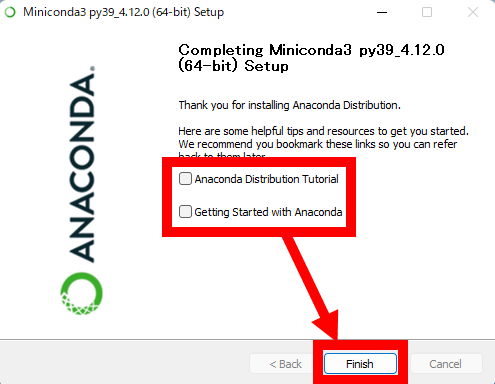
After the installation is complete, uncheck the two checkboxes and click Finish.
◆3: Install Stable Diffusion web UI
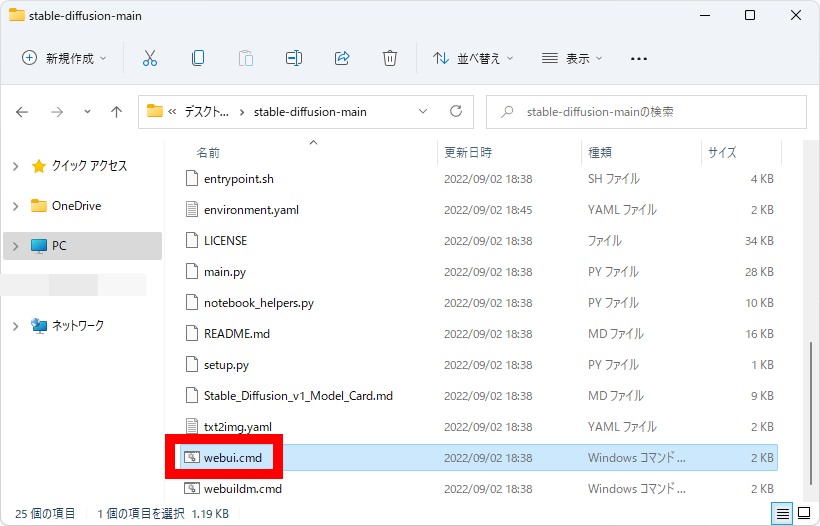
After installing Miniconda, double-click 'webui.cmd' saved directly under the 'stable-diffusion-main' folder.
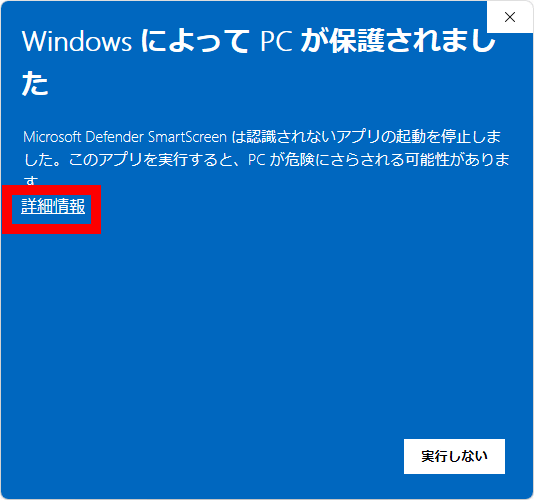
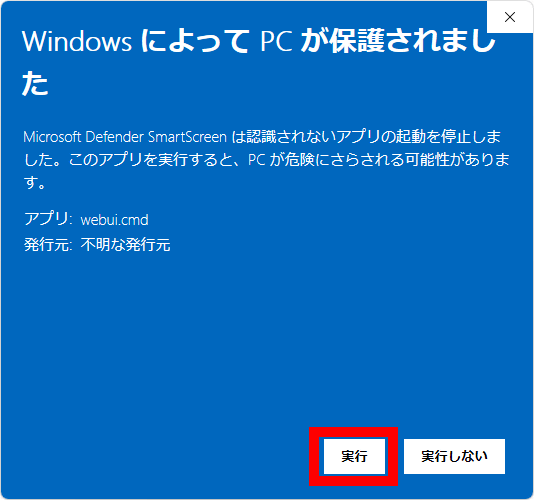
When a warning from Windows appears, click 'Detailed information' ... ...
Click Execute.
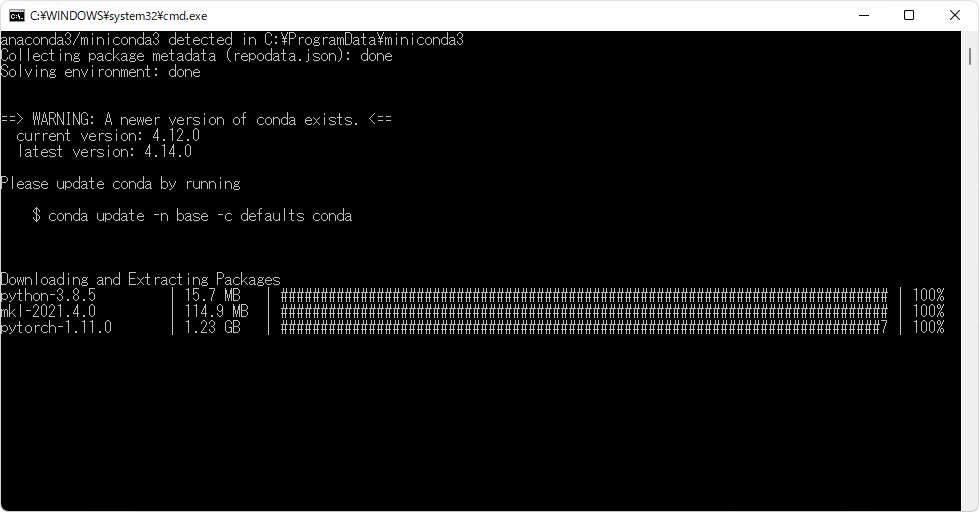
Then, the following black screen will be displayed and the download of necessary files and settings will start, so wait for a while.
Wait for a while and if 'http://localhost:7860/' is displayed, preparation is complete.
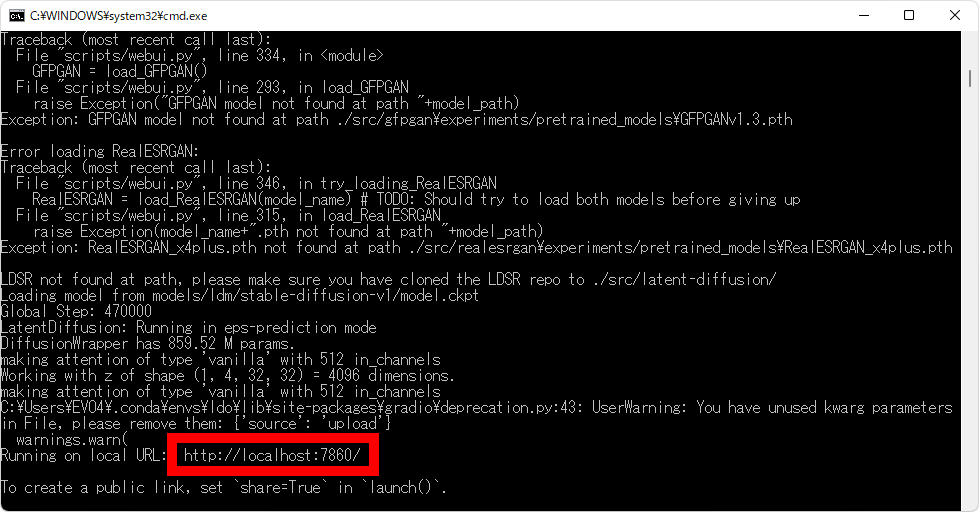
Next, without closing the black screen, launch a web browser and access 'http://localhost:7860/'.
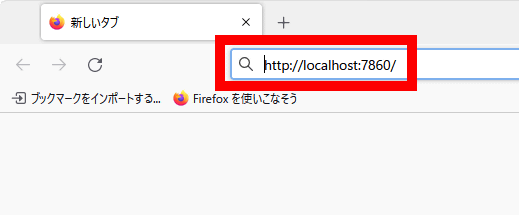
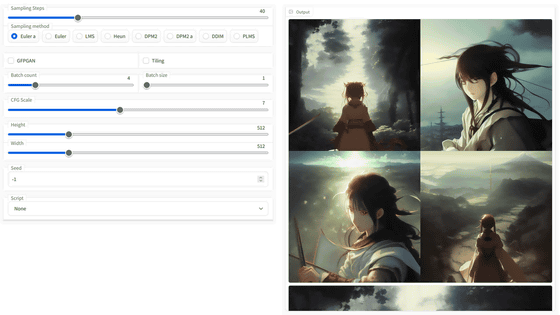
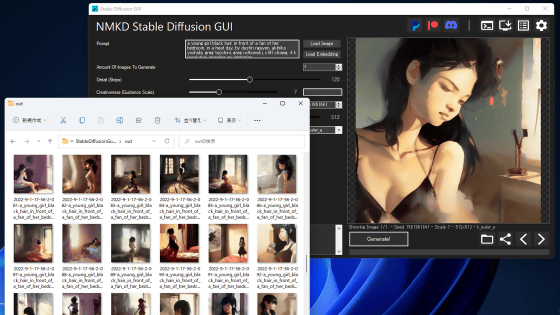
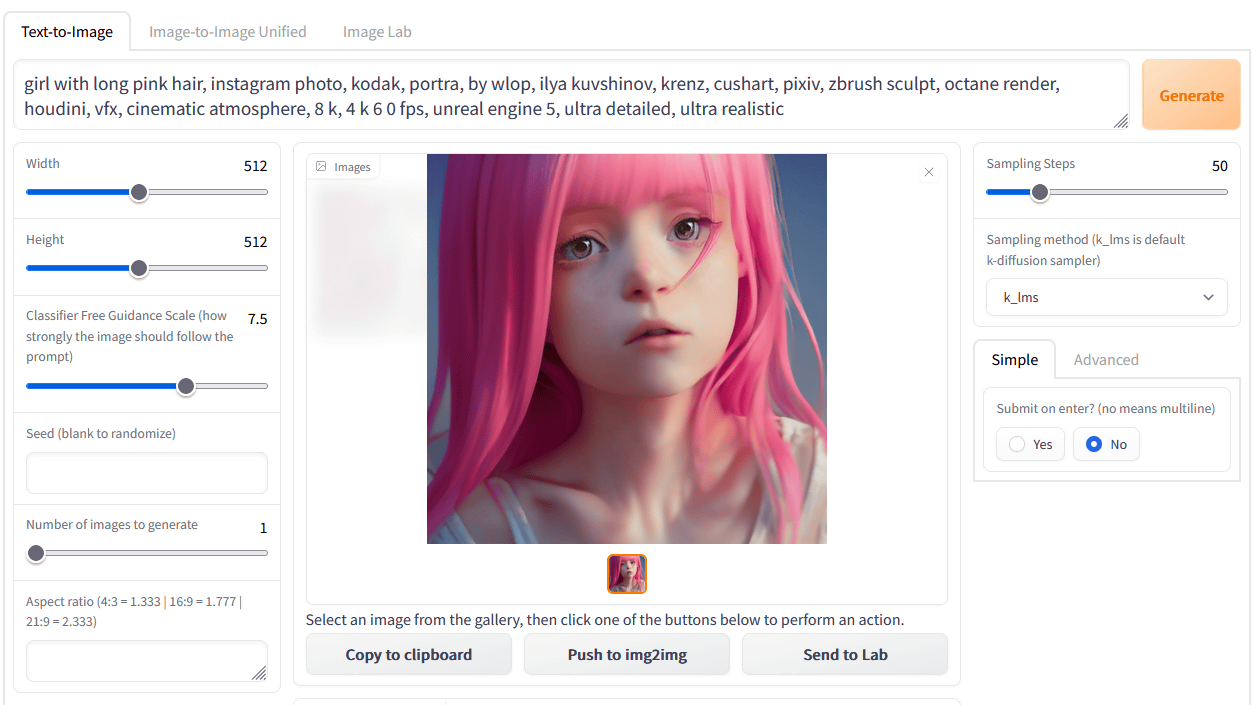
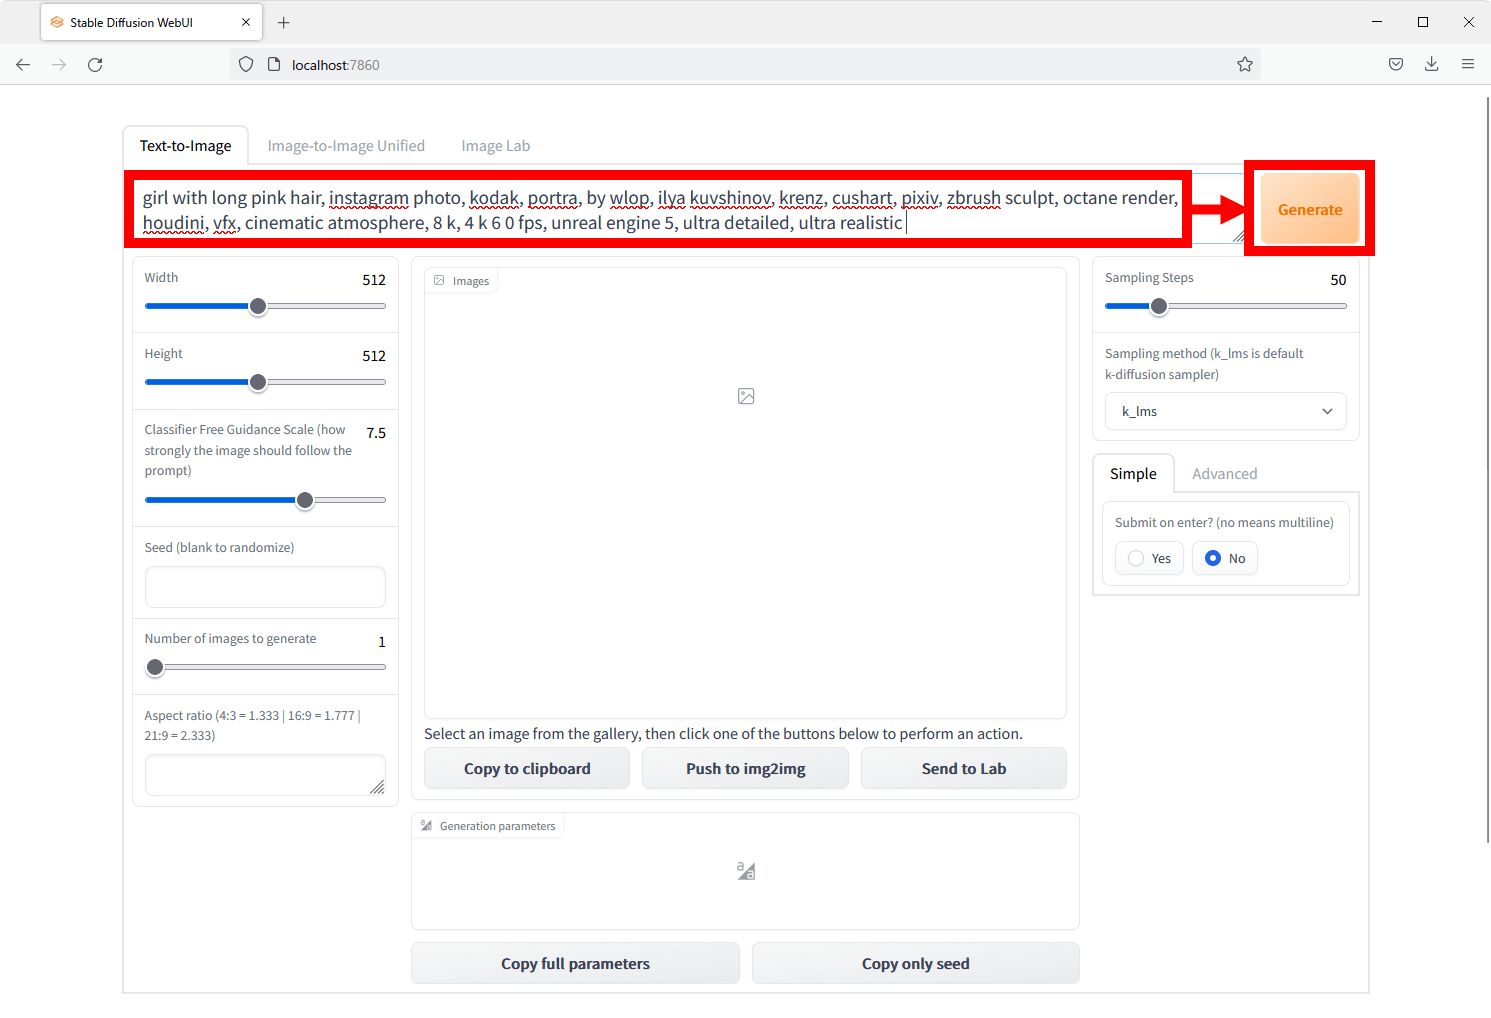
Then, the operation screen of Stable Diffusion web UI is displayed as follows. From now on, when starting the Stable Diffusion web UI, start 'webui.cmd' and display 'http://localhost:7860/', then open 'http://localhost:7860/' in your web browser. Access is OK.

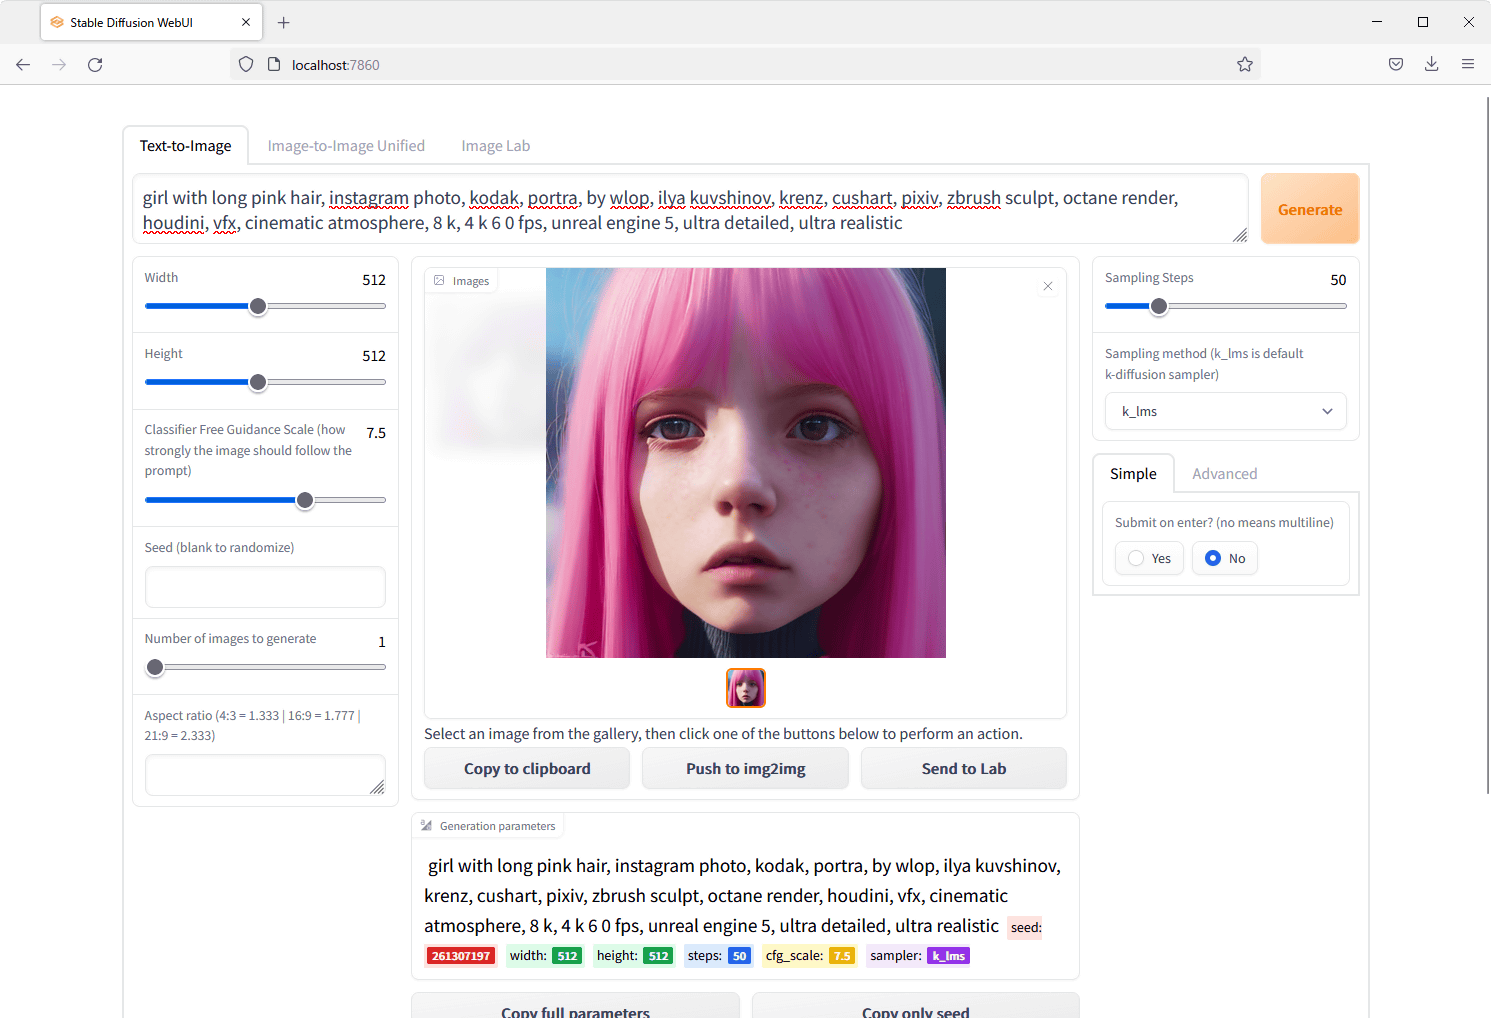
As a test, enter 'girl with long pink hair, instagram photo, kodak, portra, by wlop, ilya kuvshinov, krenz, cushart, pixiv, zbrush sculpt, octane render, houdini, vfx, cinematic atmosphere, 8 k, 4 k 6 0 fps, unreal engine 5, ultra detailed, ultra realistic (pink long hair girl, Instagram photo, Kodak, PORTRA, by wlop, Ilya Kuvshinov, Krenz Cushart, pixiv, modeled with zbrush, Octane Render, Houdini, VFX, Cinema style, 8K, 4K 60fps, Unreal Engine 5, Fine, Real)' and click 'Generate' ...
The image was generated as instructed as follows.
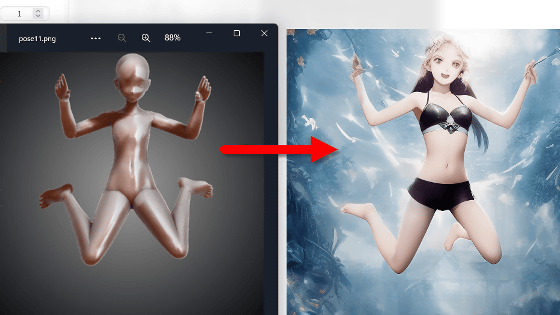
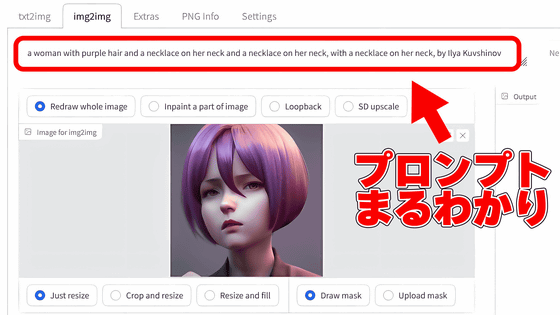
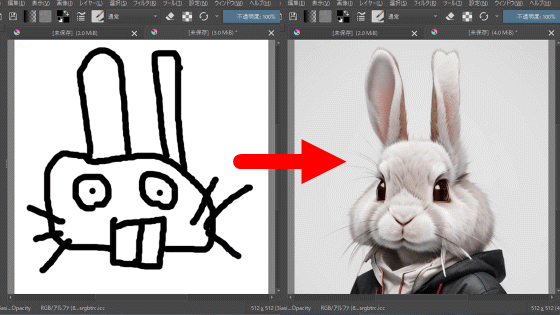
Stable Diffusion web UI also supports img2img, allowing you to generate images that are as close as possible to your taste.

Related Posts: