How to get the most out of the standard Windows security system 'Microsoft Defender'

In order to protect your PC from virus infection, it is often thought that dedicated antivirus software is required, but in fact, Windows has a virus countermeasure mechanism called ' Microsoft Defender (formerly known as Windows Defender)' developed by Microsoft. Is prepared. Security engineer Hoek explains how to make this Microsoft Defender more defensive.
Windows Defender is enough, if you harden it
Cloud Protection and Microsoft Defender Antivirus | Microsoft Docs
https://docs.microsoft.com/en-us/microsoft-365/security/defender-endpoint/cloud-protection-microsoft-defender-antivirus
Microsoft Defender boasts sufficient performance as you can see on anti-virus software comparison sites such as AV-TEST and AV-Comparatives , but Hoek says that the following settings can be used to further improve protection. That. All the settings described here can be done on the Home edition of Windows 10 or 11.
◆ Local group policy settings
The local Group Policy Editor is required for the settings to enhance Defender. In Windows 10 and 11 Pro edition and Enterprise edition, the local group policy editor can be executed from the beginning, but in the case of Home edition, create a text file with the following contents and name it 'gpedit-enable.bat' Save it with and run it as an administrator.
[code] @echo off
pushd '% ~ dp0'
dir / b% SystemRoot% \ servicing \ Packages \ Microsoft-Windows-GroupPolicy-ClientExtensions-Package ~ 3 * .mum> List.txt
dir / b% SystemRoot% \ servicing \ Packages \ Microsoft-Windows-GroupPolicy-ClientTools-Package ~ 3 * .mum >> List.txt
for / f %% i in ('findstr /i .List.txt 2 ^> nul') do dism / online / norestart / add-package: '% SystemRoot% \ serving \ Packages \ %% i'
pause [/ code]
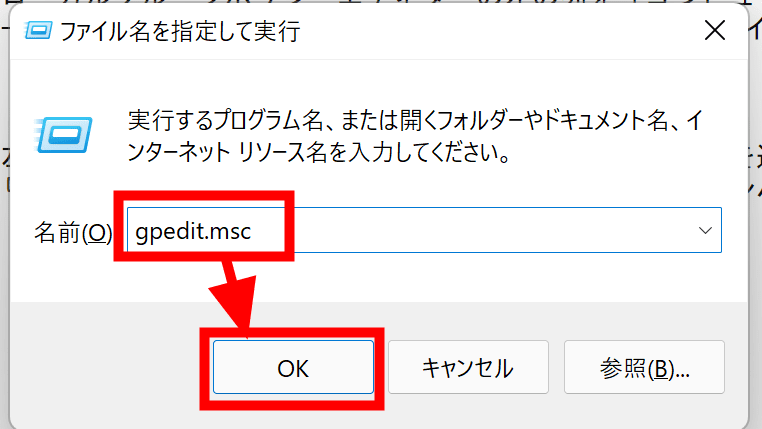
Wait a few minutes and the execution will be completed, so restart your PC. Open Run with Win + R and type gpedit.msc to open the Local Group Policy Editor. Continue with the settings on this screen.
◆
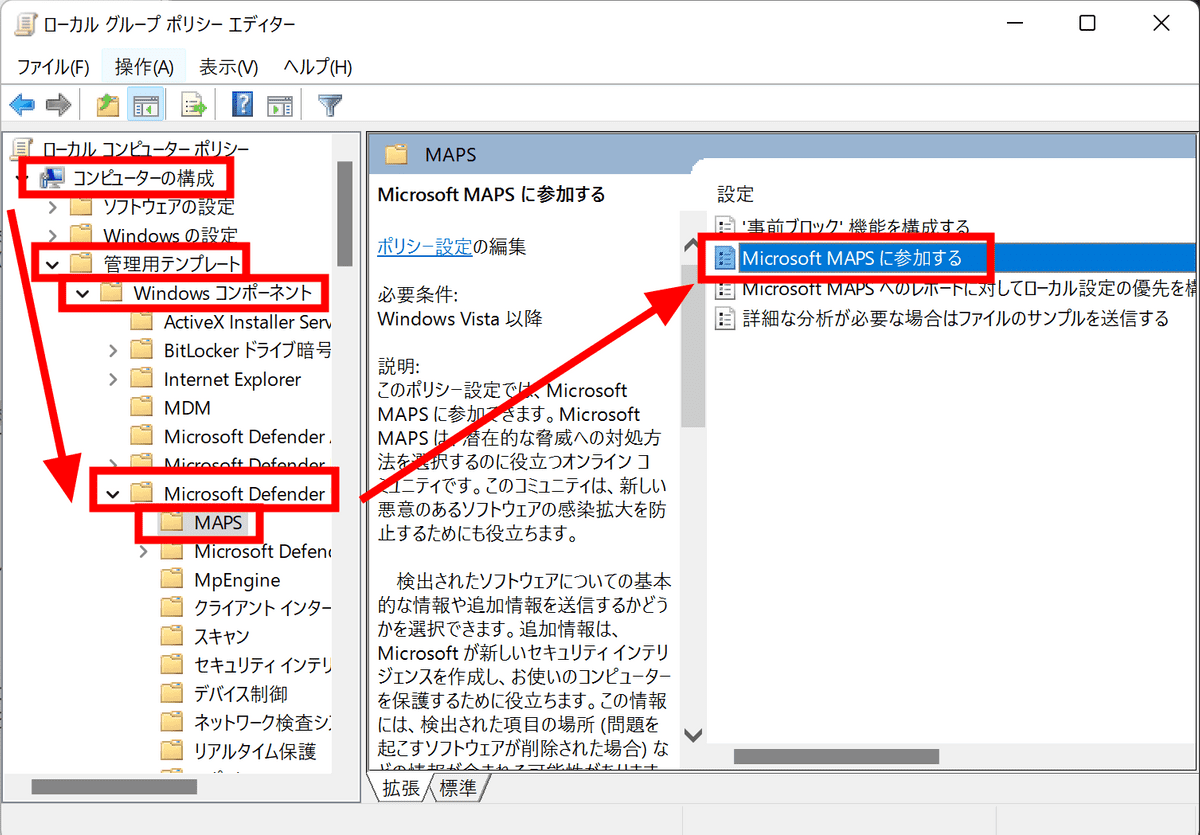
Go to 'Computer Configuration'-> 'Administrative Templates'-> 'Windows Components'-> 'Microsoft Defender Antivirus'-> 'MAPS' in the left column of the Local Group Policy Editor, and double 'Join Microsoft MAPS' on the right. click.
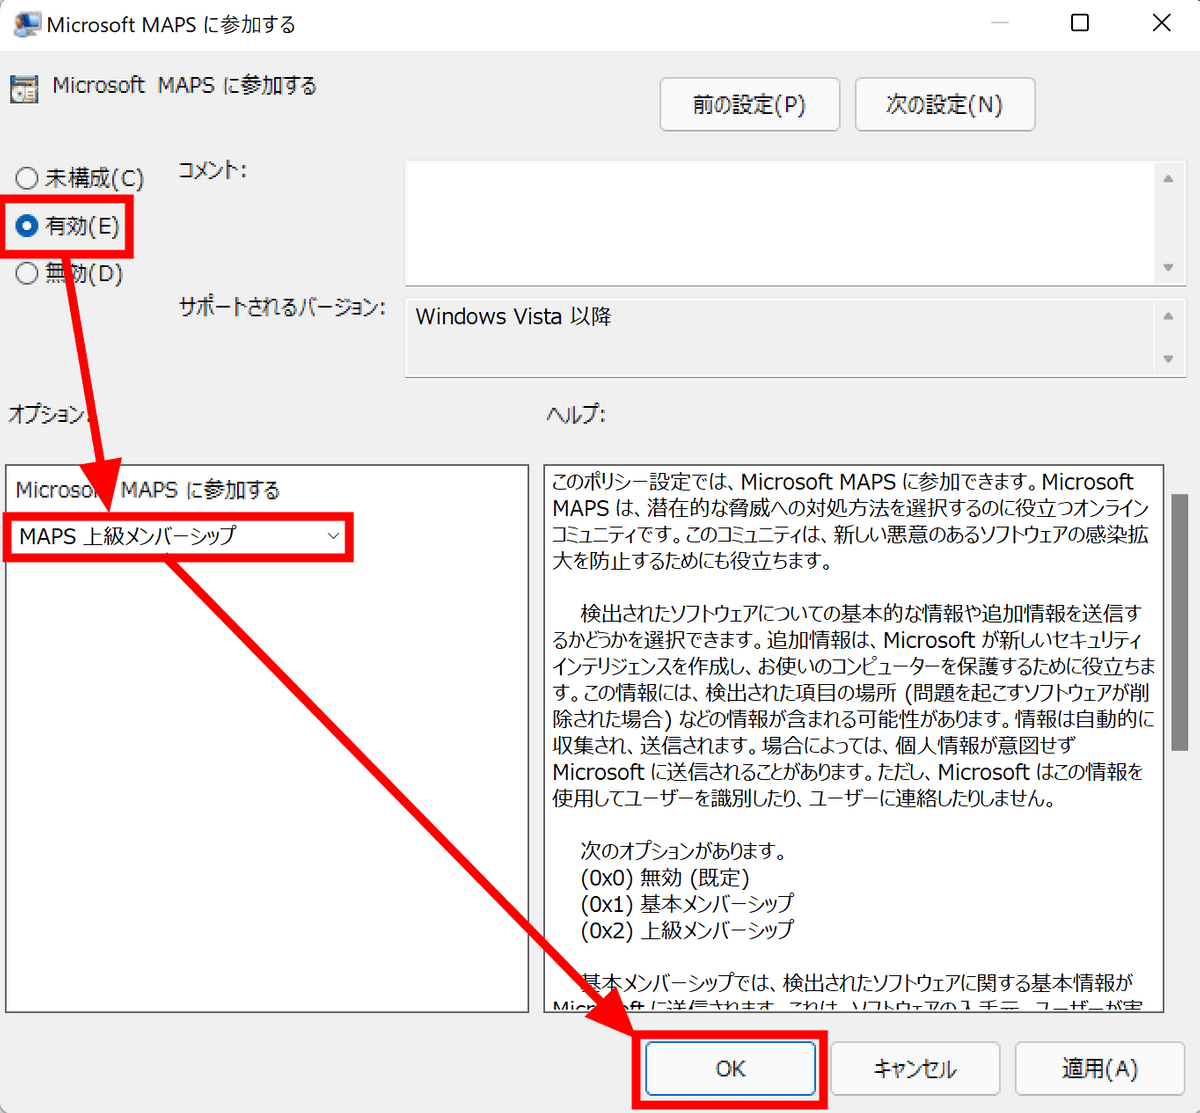
Select Enabled in the upper left option, then select Membership below. There are two types of membership, with detailed instructions on the right. This time, select an advanced membership and click 'OK'.
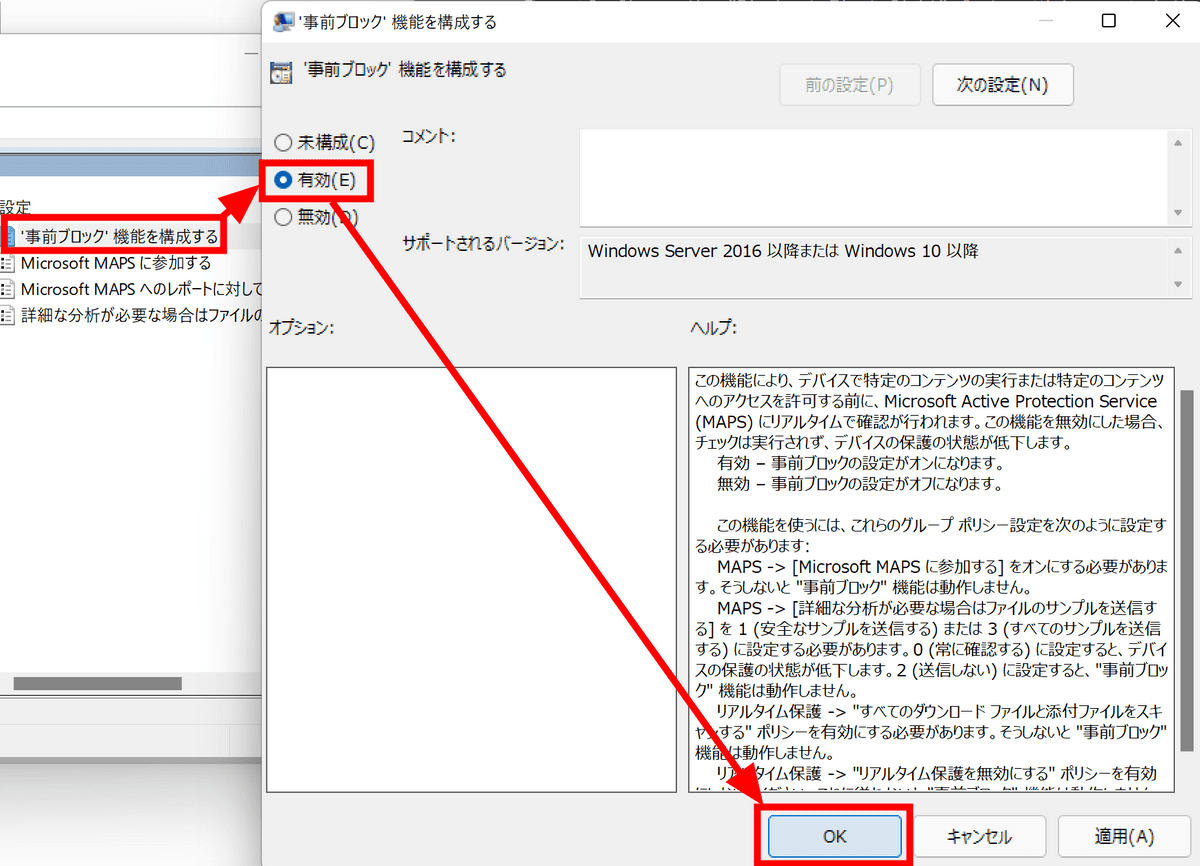
In addition, for 'Configure the'pre-block'feature' and 'Configure local settings priority for reports to Microsoft MAPS', double-click to open the settings, select 'Enabled' and 'OK'. 'Click.
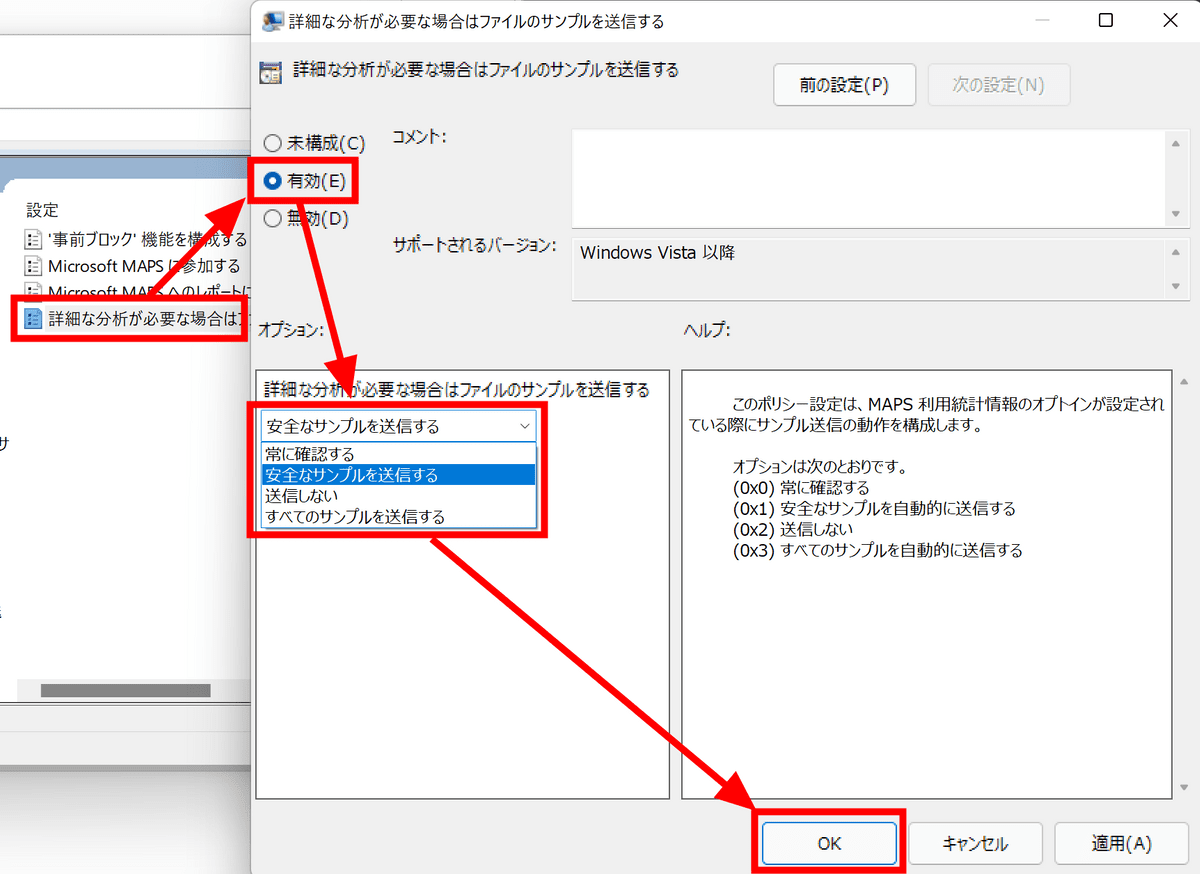
Regarding 'send a sample of the file when detailed analysis is required', it is sufficient to set as necessary. Hoek recommends 'send a secure sample'.
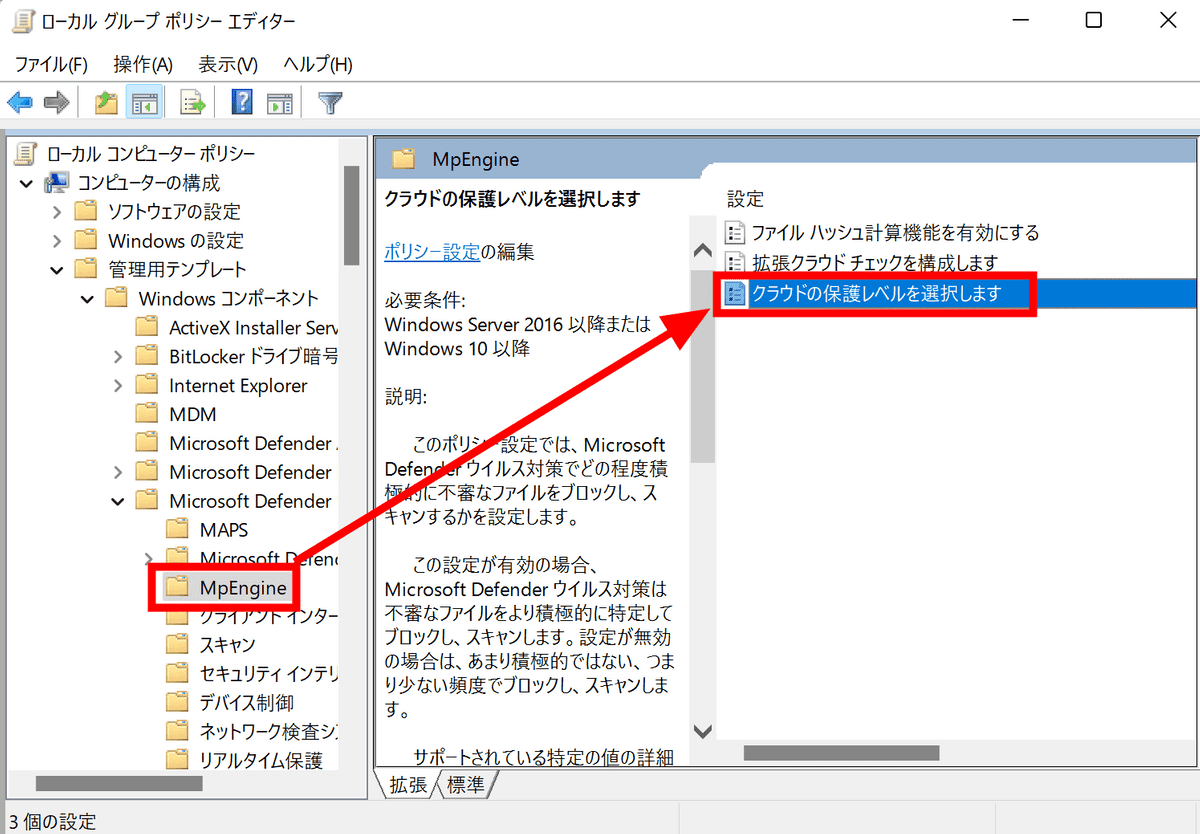
Next, open 'MpEngine' under MAPS and double-click 'Select cloud protection level'.
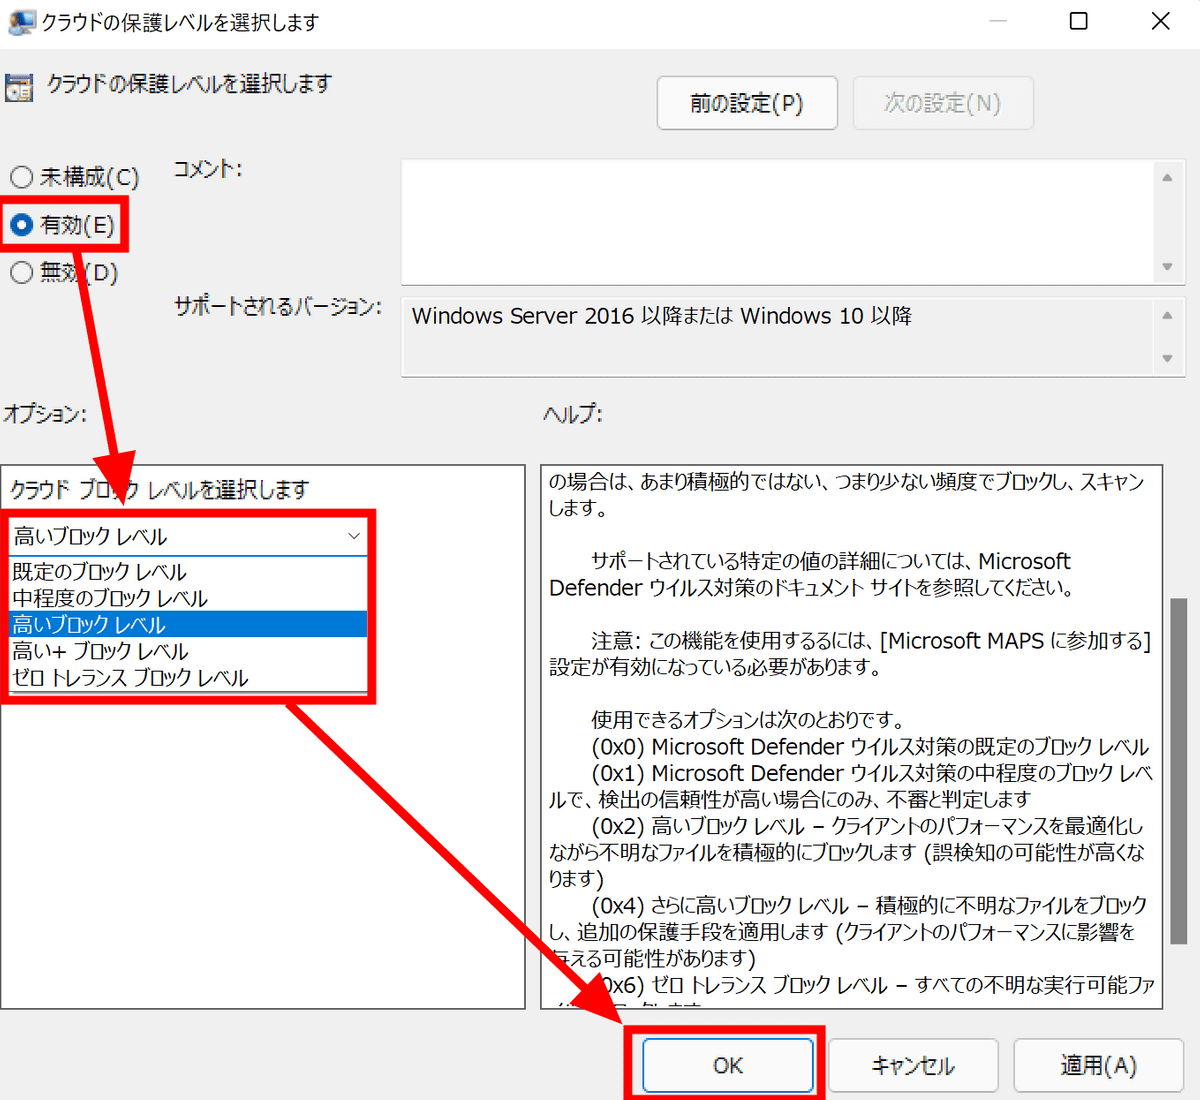
Enable the setting and select 'High Block Level' for the level. By enabling this setting, Microsoft Defender will be more proactive in detecting suspicious files.
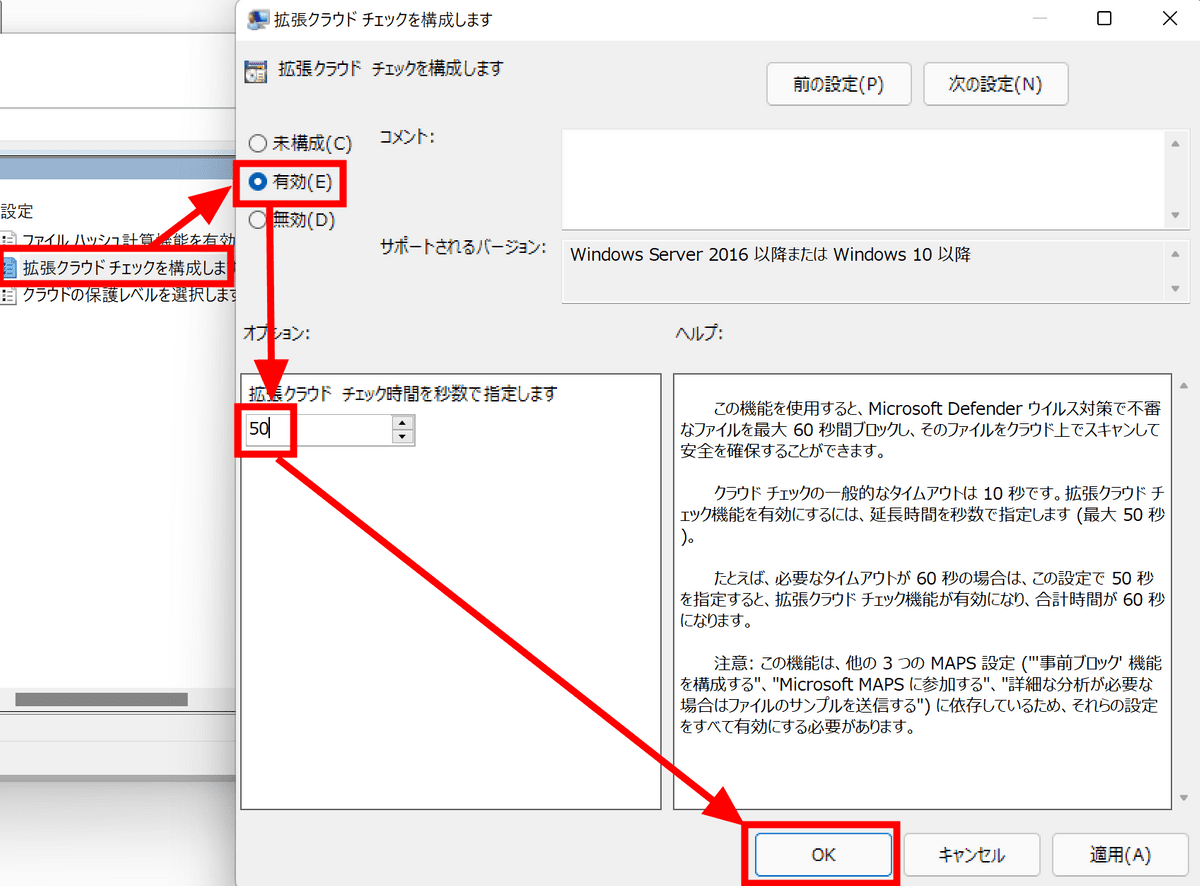
Then double-click Configure Advanced Cloud Check, select Enabled, and enter 50 in the Seconds field. This setting is the extension of the timeout period when Microsoft Defender finds a suspicious file, blocks the file and scans it on the cloud, and it is basic to set it to the maximum '50'. It will check up to 60 seconds including 10 seconds. However, it should be noted that it will not be effective unless the setting to send the sample is set in the 'Send file sample when detailed analysis is required' setting.
◆ Windows security settings
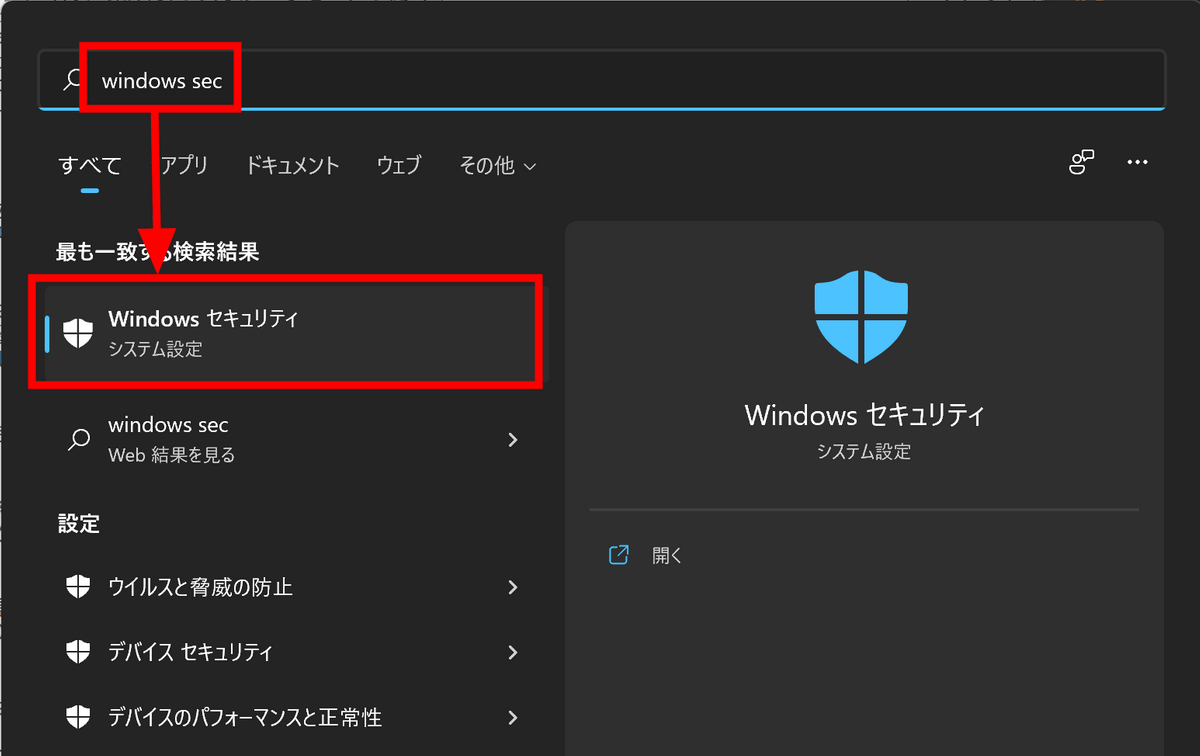
Open 'Windows Security' from the Start menu.
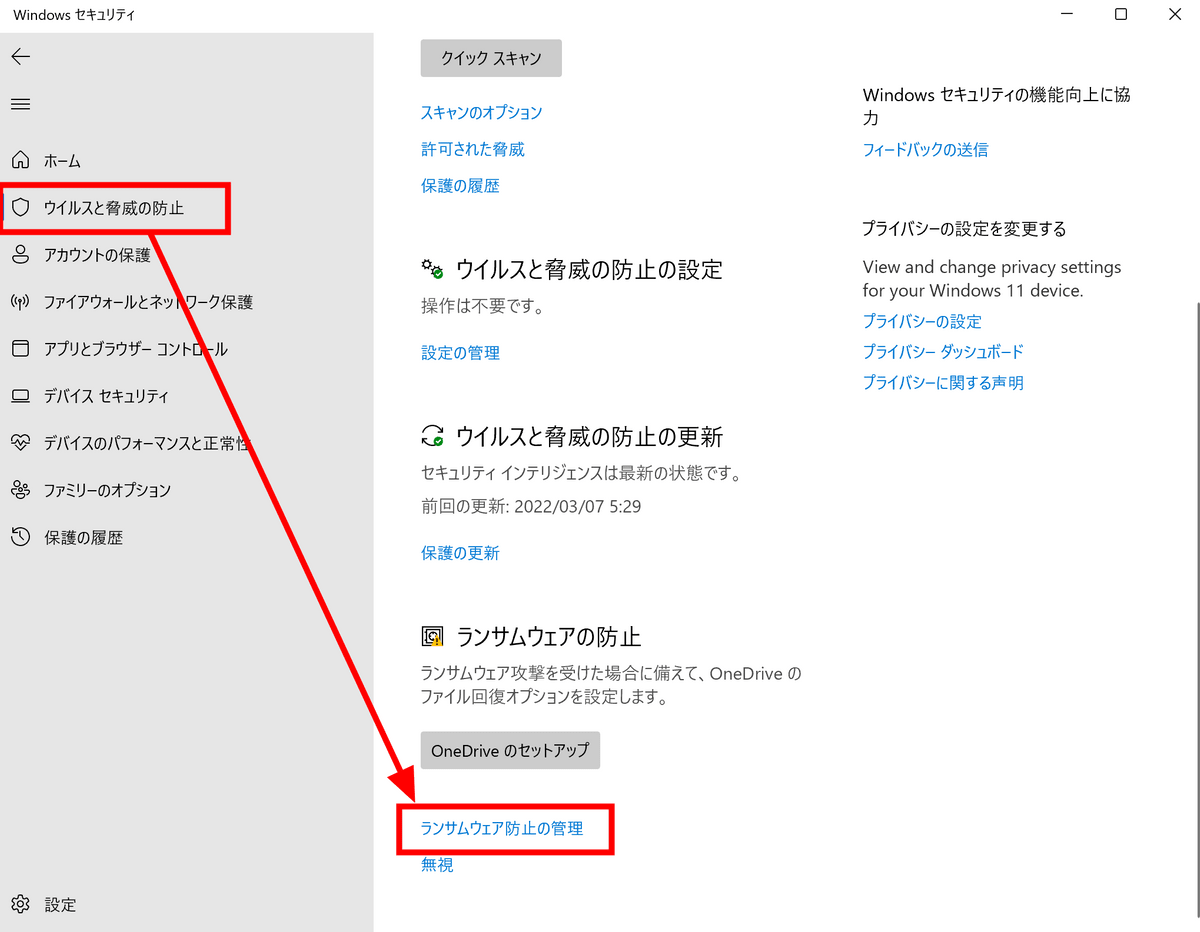
Click 'Manage Ransomware Prevention' from the 'Virus and Threat Prevention' tab.
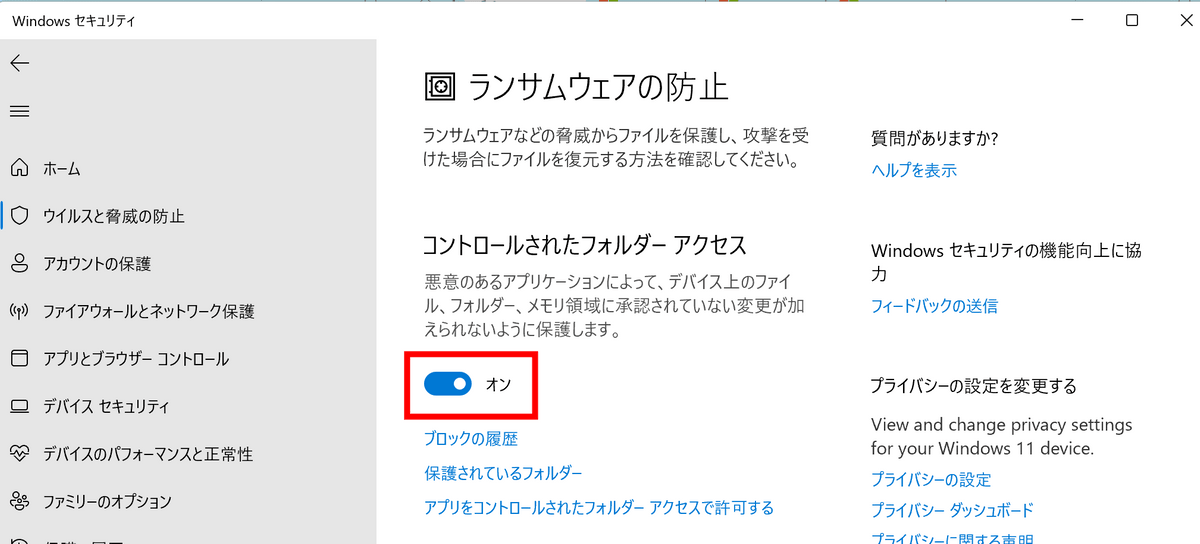
Check the 'Controlled Folder Access' item.
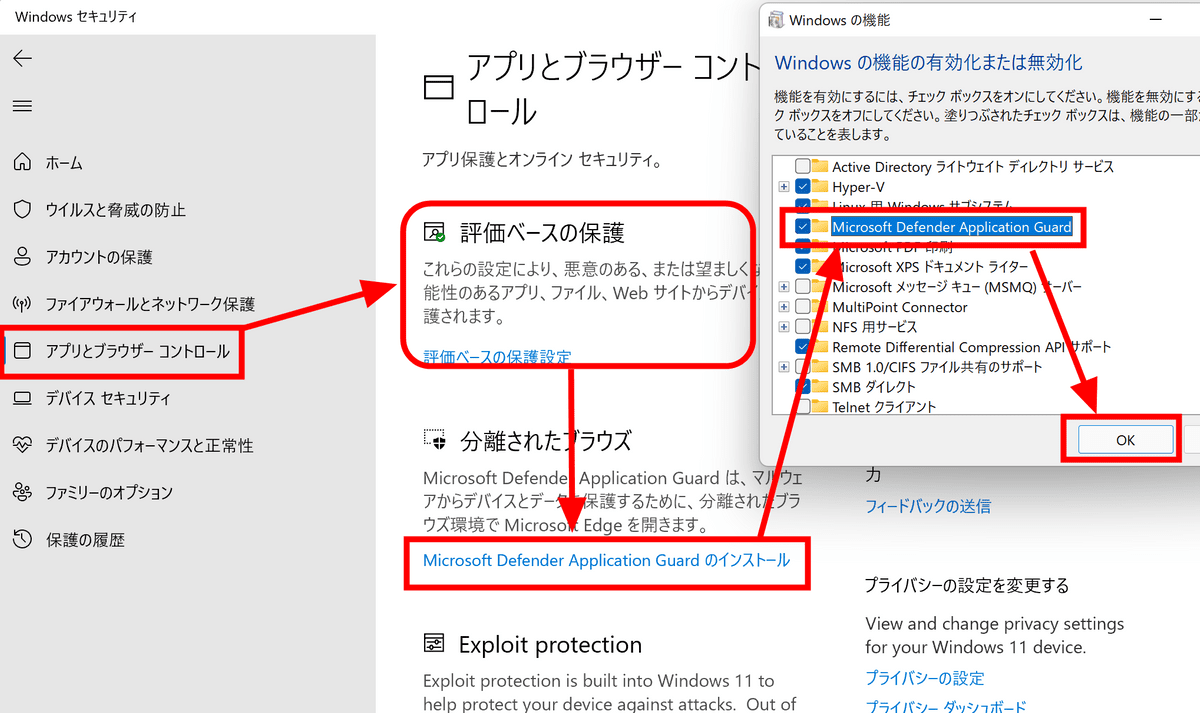
Then go to the Apps & Browser Controls tab and enable Rating-Based Protection if it's not already enabled. After that, click 'Install Microsoft Defender Application Guard' in 'Isolated Browsing', check 'Microsoft Defender Application Guard' in 'Windows Features' that pops up, and click 'OK'.
◆ PowerShell
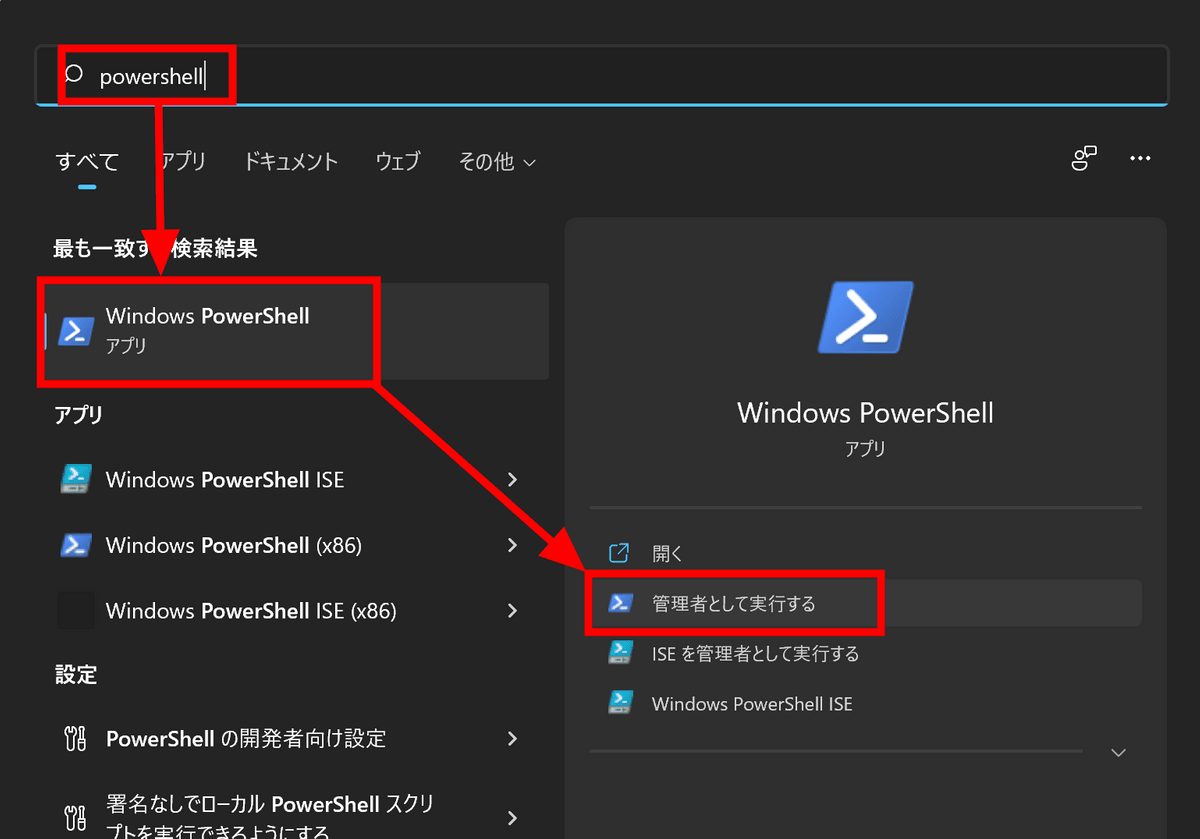
Since there are some items that can not be set without using PowerShell in Defender, first start PowerShell with administrator privileges from the start menu.
The command to set the signature update every hour and forcibly update the signature before the scan starts is as follows. Detailed information on the options can be found in the official documentation .
[code] Set-MpPreference -SignatureUpdateInterval 1
Set-MpPreference -CheckForSignaturesBeforeRunningScan 1 [/ code]
After all the settings are done, a reboot is required for the settings to take effect.
Related Posts:


in Security, Posted by log1d_ts