I actually used the Panasonic 'Door camera with monitor' VS-HC400K-W 'that can respond to customers at home with a smartphone even on the go
On the line-up of Panasonic 's home network system "Suma @ Home System" that allows you to easily watch the inside and outside of the house with a smartphone even on the go, from 18th October 2018 (Thursday), "Door Camera Kit VS - HC400K " Is added. Since it is easy to install the door camera without installing work or complicated setting, I tried using the real thing that I got to the editorial department at once.
Home network system "Suma @ Home System" door camera VS-HC400 with monitor released | Press Releases | Panasonic Newsroom Japan
https://news.panasonic.com/jp/press/data/2018/08/jn180821-5/jn180821-5.html
VS-HC400-W | Home Network System | Panasonic
https://panasonic.jp/hns/products/hc400.html
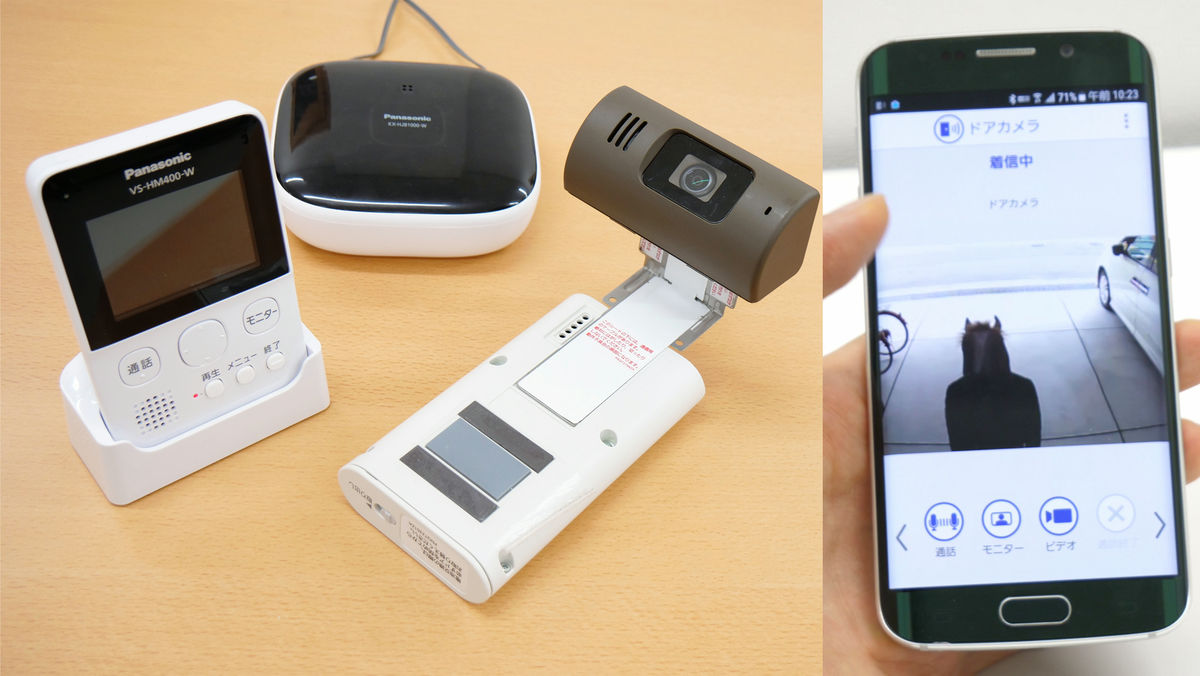
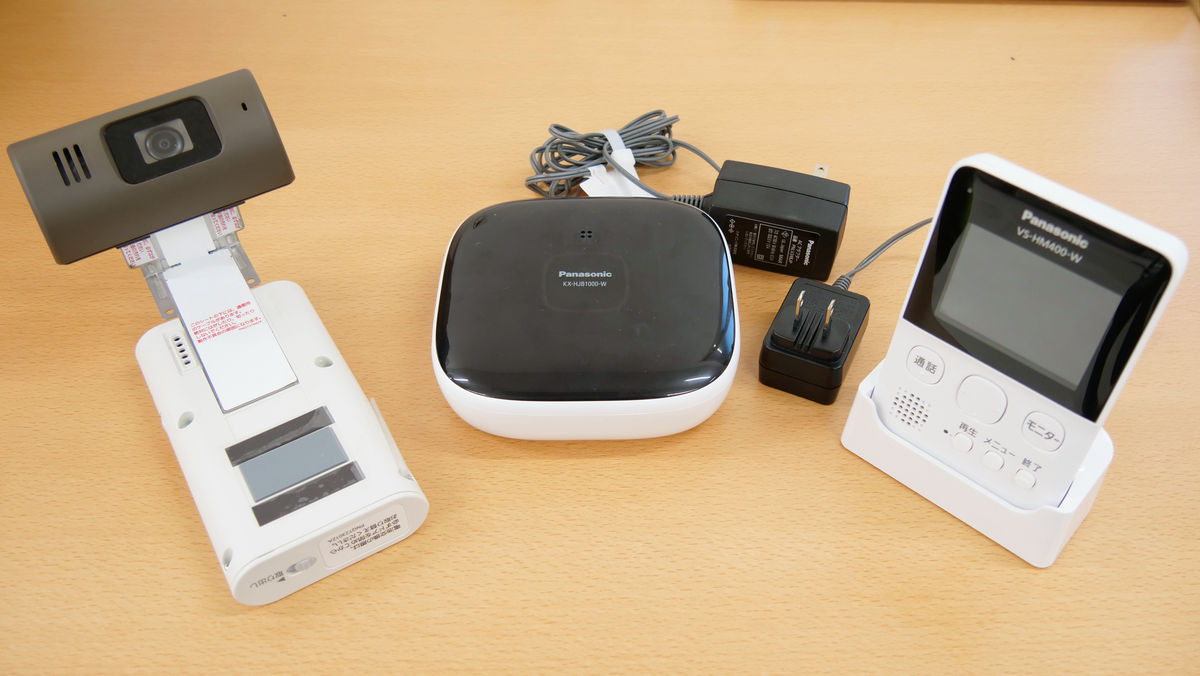
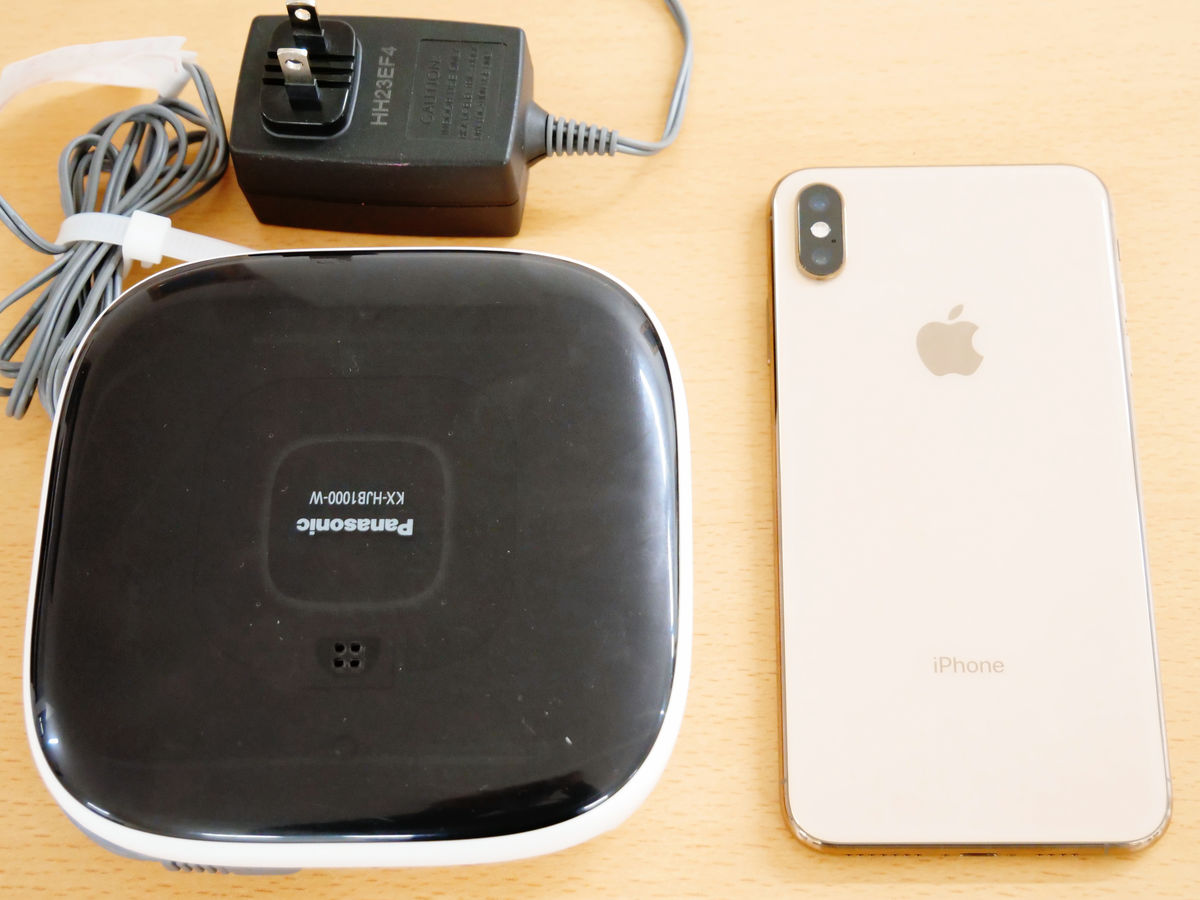
◆ Exterior review - Door camera kit with monitor consists of wireless door camera (left), home unit (center), monitor (right). There is also "Door camera with monitor VS - HC400" which does not include home unit. This is because the home unit is unnecessary if you do not use the corresponding function etc on the go while displaying the image of the door camera on the smartphone.
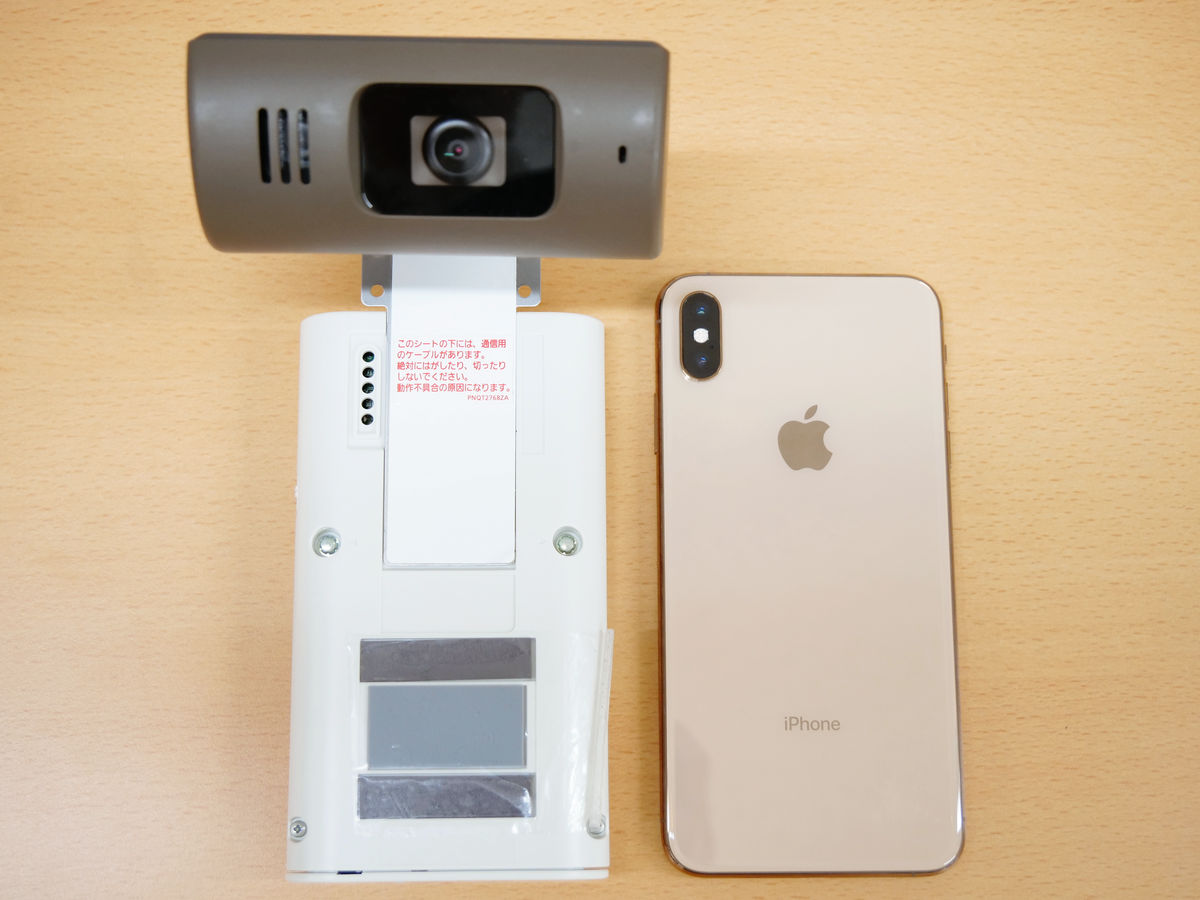
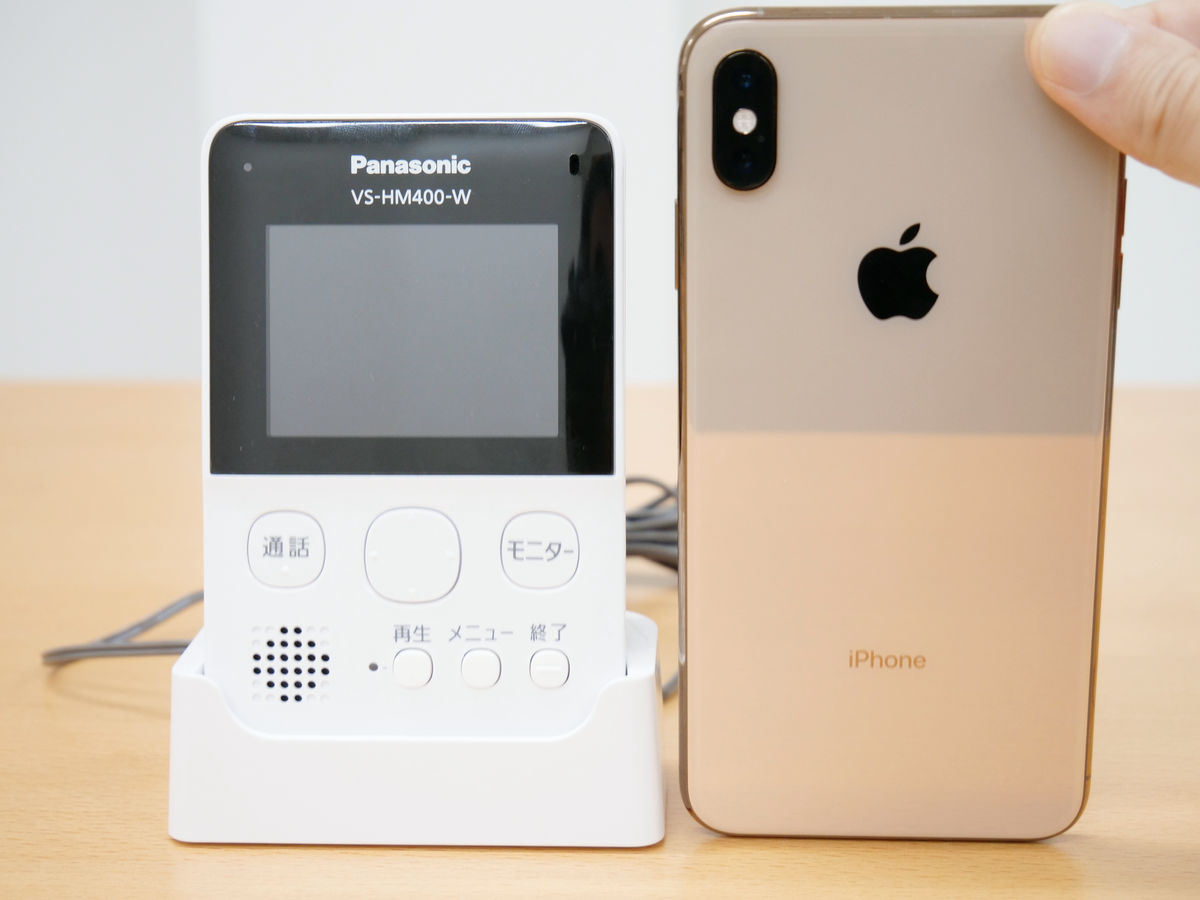
Compared with iPhone XS Max with a door camera this is like this. The white wireless unit is slightly smaller than the iPhone XS Max about 15.7 cm tall.
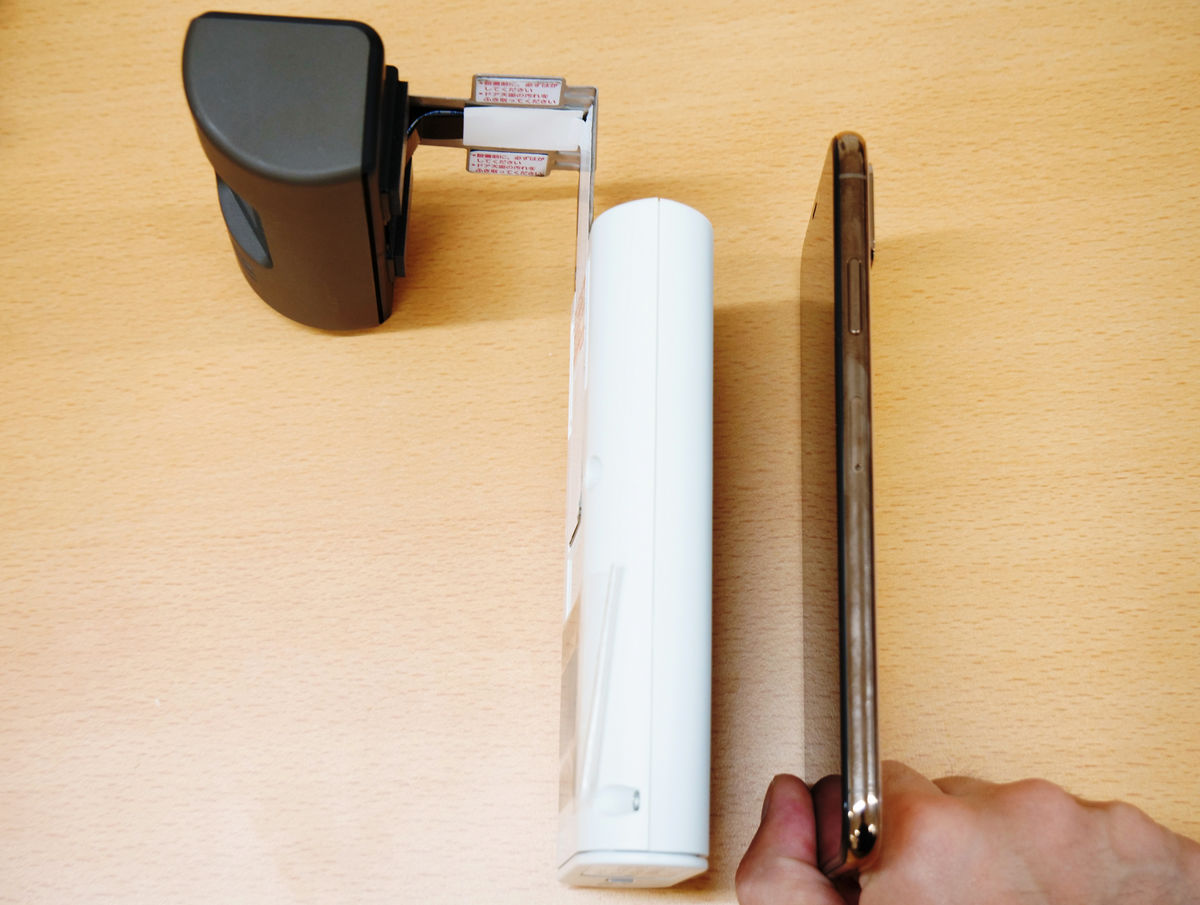
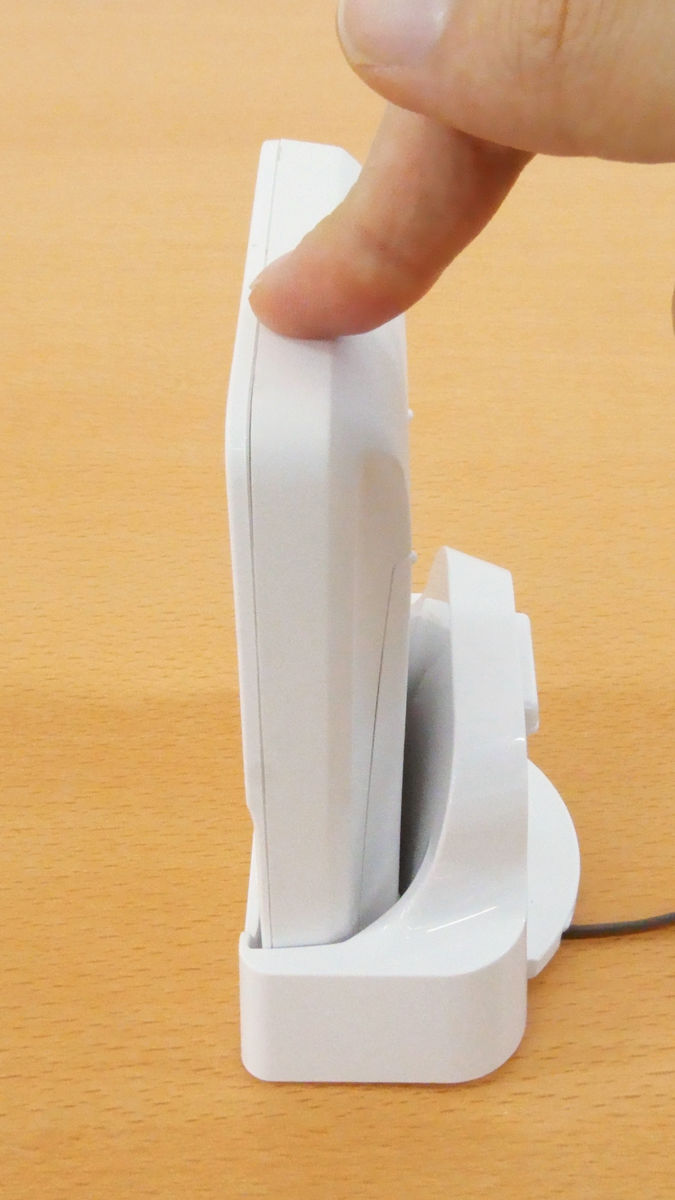
From the side it looks like this. It is structured to hook the metal part which connects the brown camera unit and the white wireless unit to the door.
This is where I put the monitor on the charging base. I always put the monitor on the charging stand when not in use, but this will not take place if this is the case.
There is considerable play between the monitor machine and the charging base, so it is somewhat unstable as it is loose. It is easy to remove and return from the charging base, but please be careful because the monitoring machine will be disconnected from the charging stand unless you choose a place where the charging base is horizontal and will not shake. Also, since the monitor machine is a mechanism to perceive the sound of the chime, please move to the place where the sound of the chime can be heard well if the chime does not respond even if it rings.
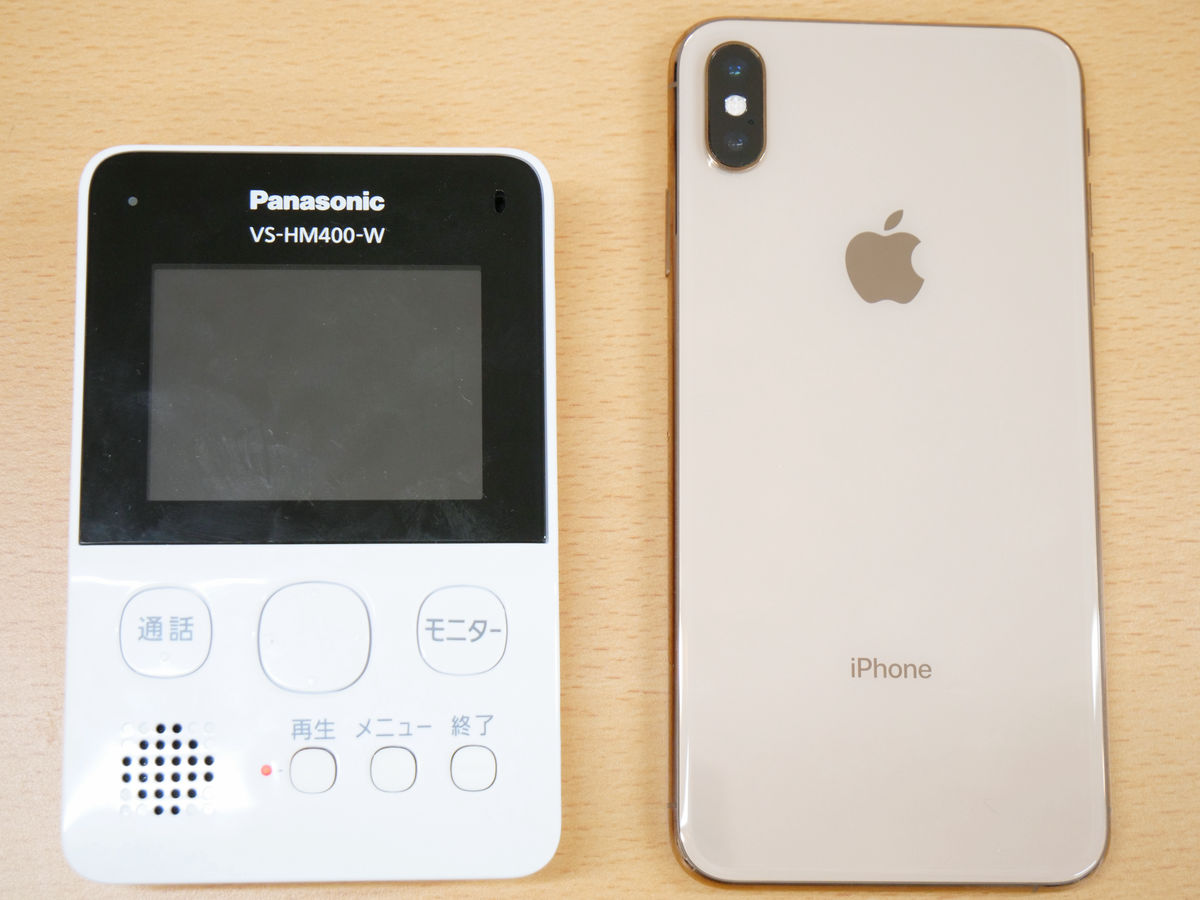
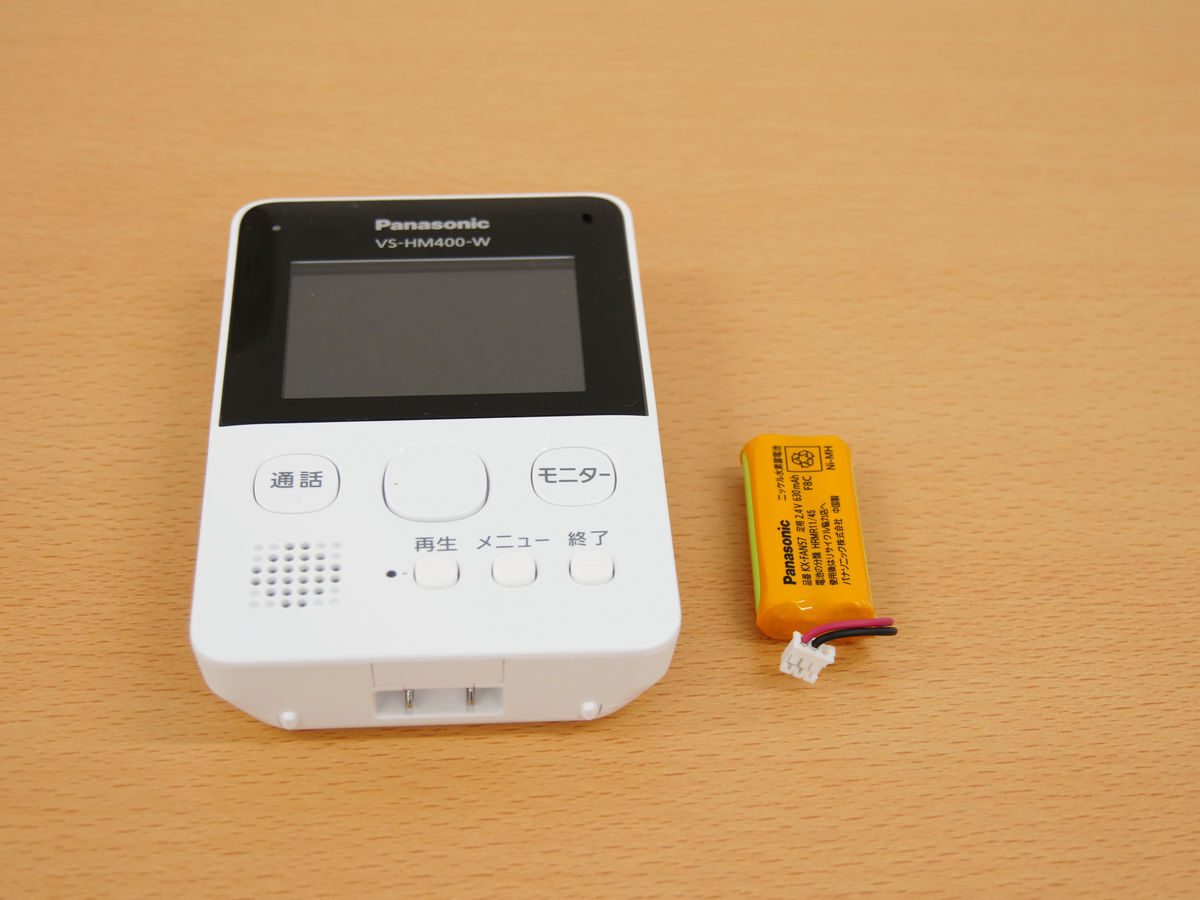
The monitor is one size smaller than the iPhone XS Max about 15.7 cm tall, it is a size feeling like an air conditioner remote control.
Compare the thickness and this.
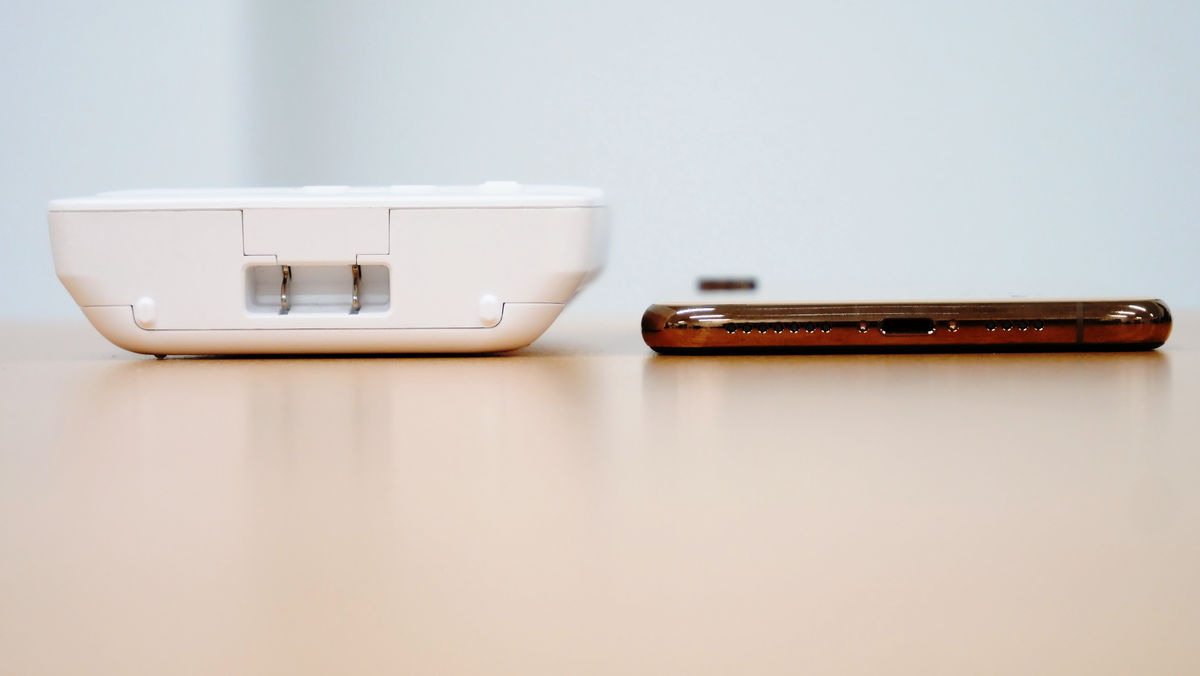
The weight was 152 g when the battery was put in.

This is the home unit. It is necessary equipment to watch the camera's image from a place with a smartphone, tablet, etc., the size was about 13 cm in both length and width.
◆ Preparation of Monitoring Machine First of all, we will set the battery packed in the monitor.
Push the battery cover on the back of the monitor down and open the lid ... ....
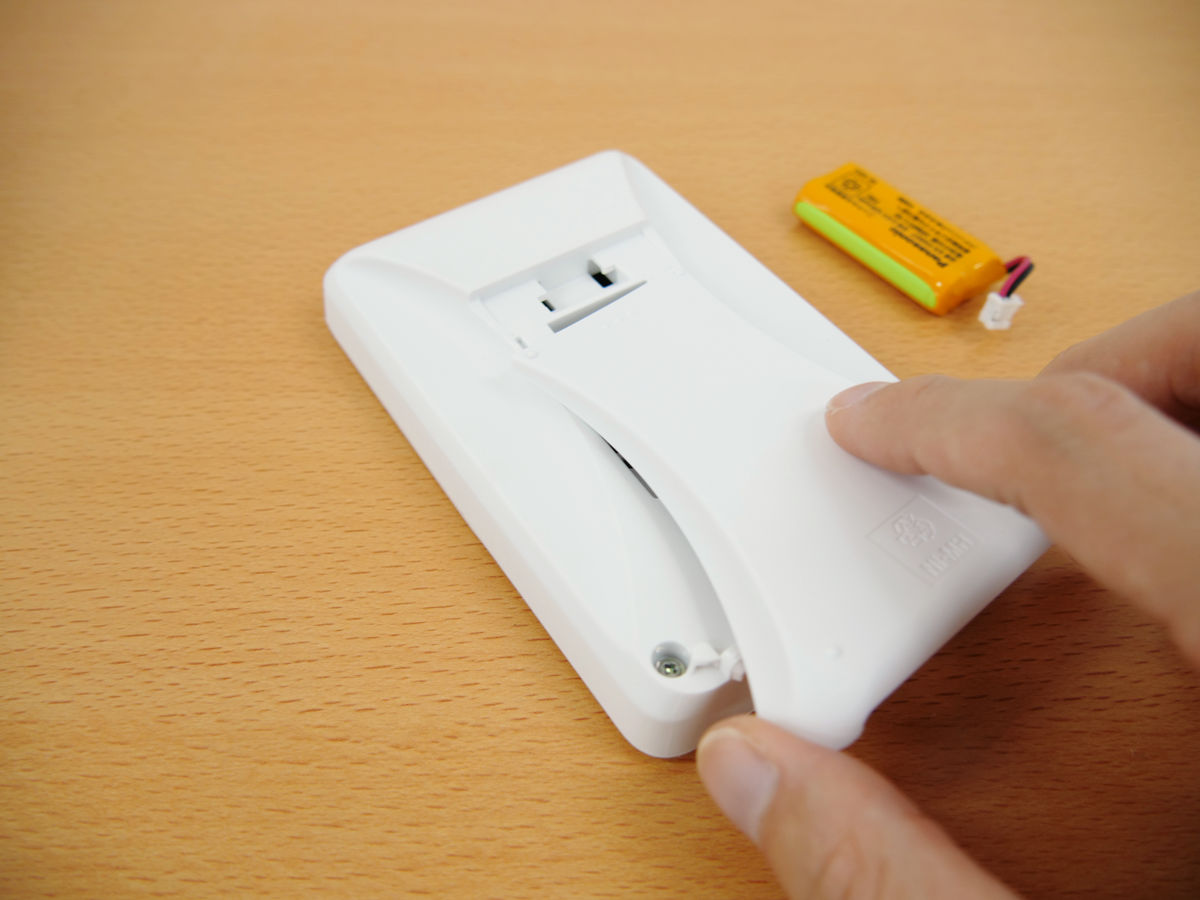
Insert the connectors carefully so that red is on the left and black is on the right after fitting the battery.

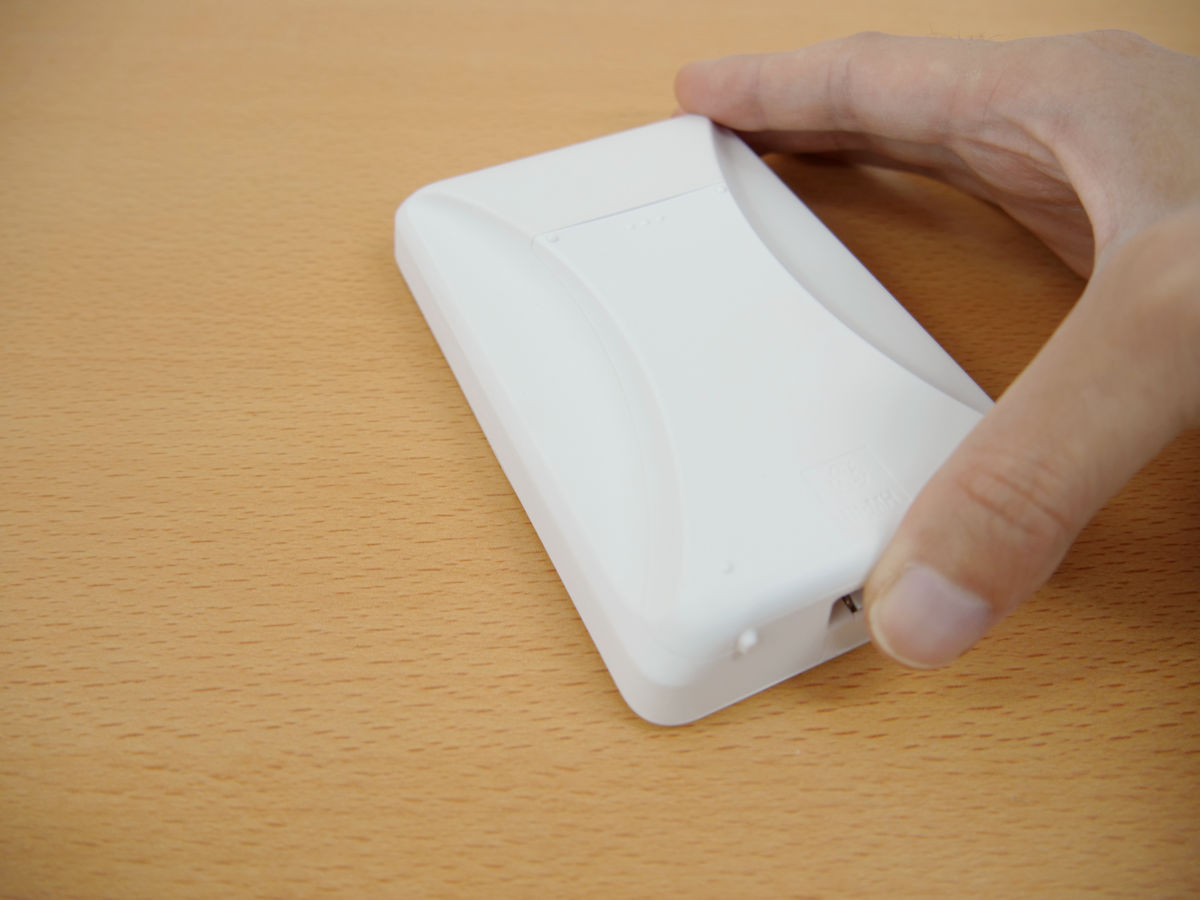
Attach the cover.
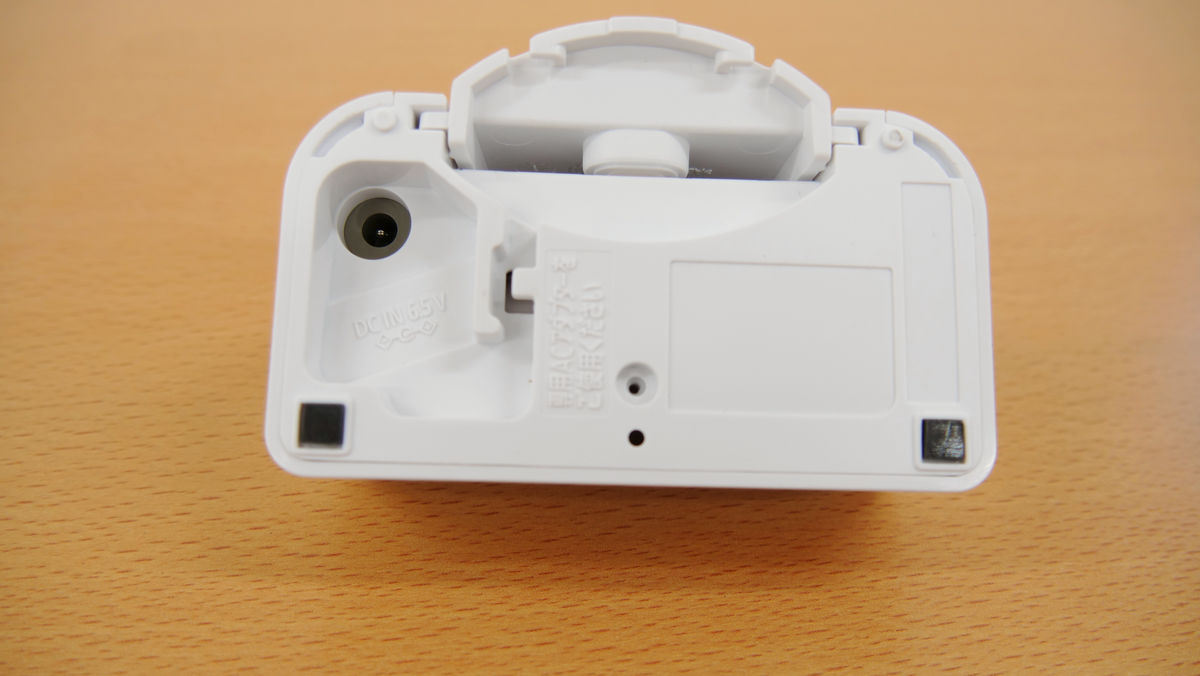
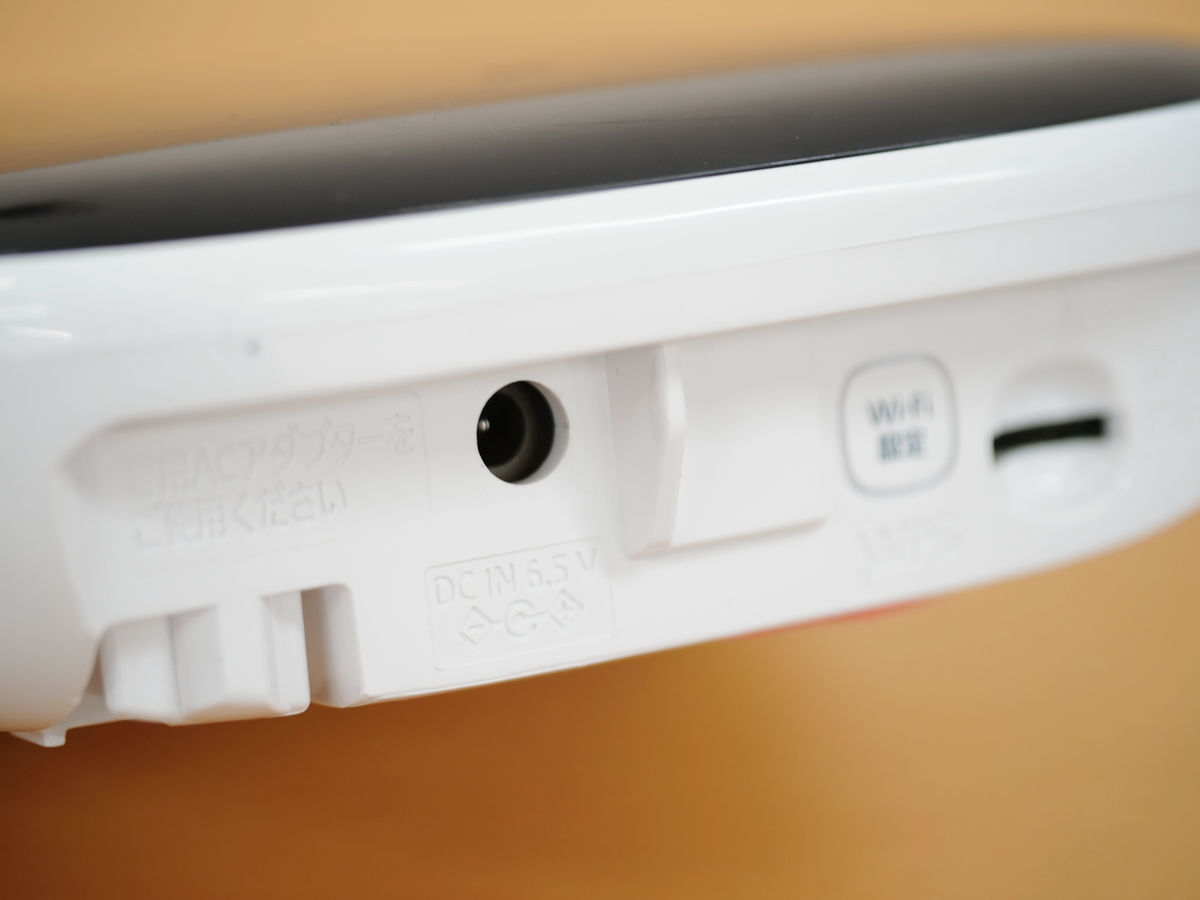
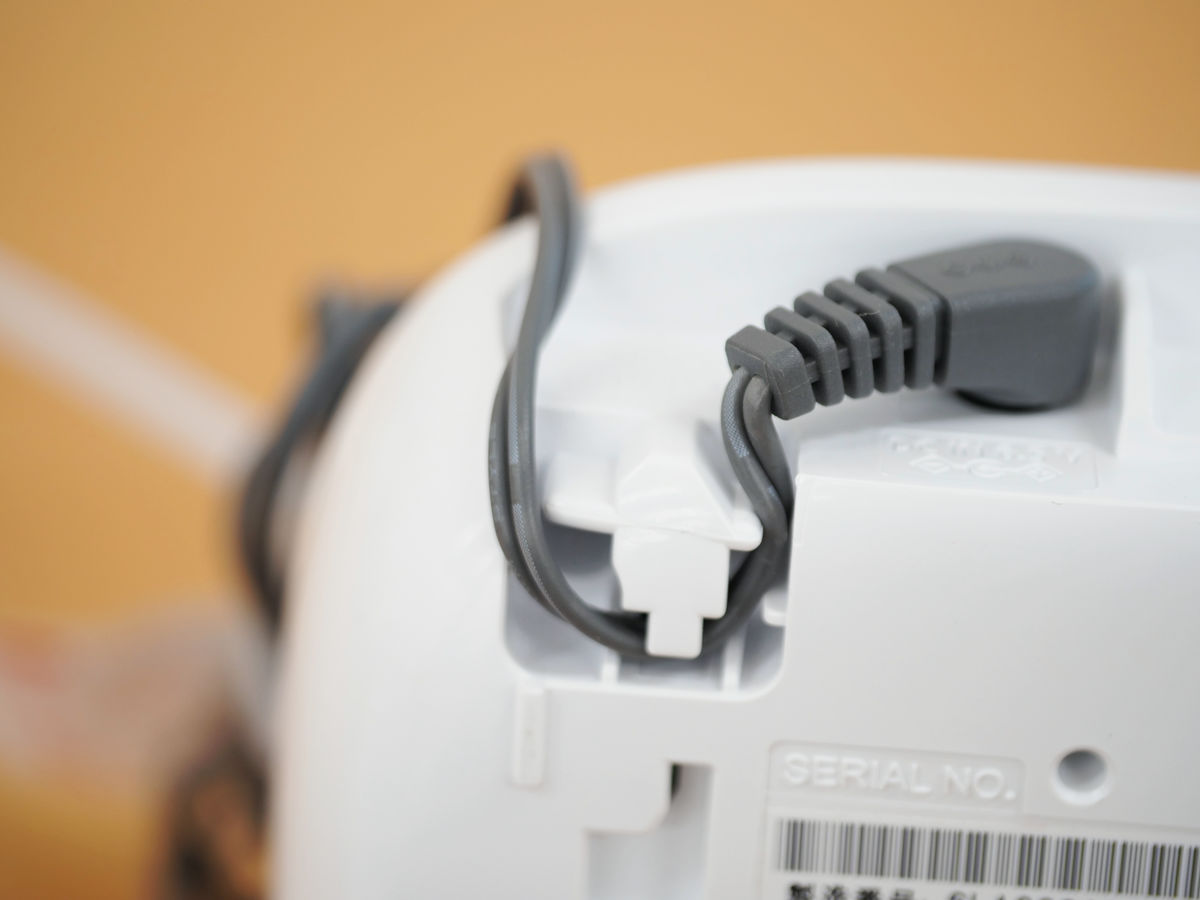
Next is the charge stand prepared. Connect the plug of the AC adapter to the bottom part ......
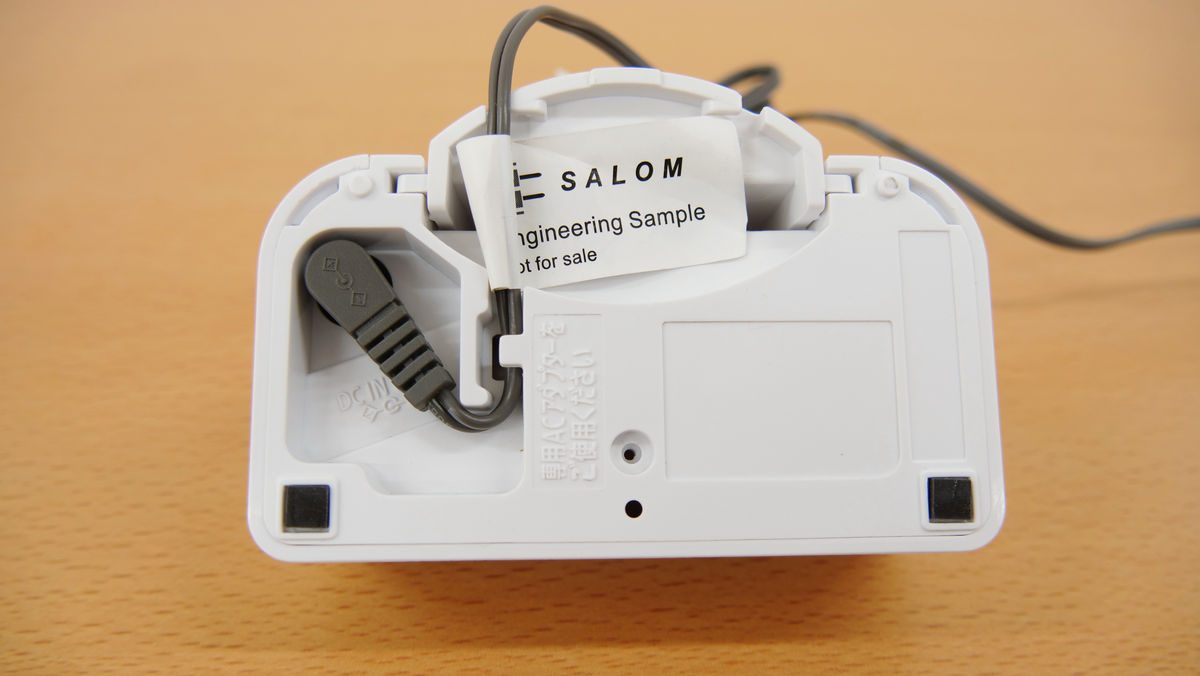
Fit the cable into the groove so that the cable does not get caught by the bottom of the charging base.
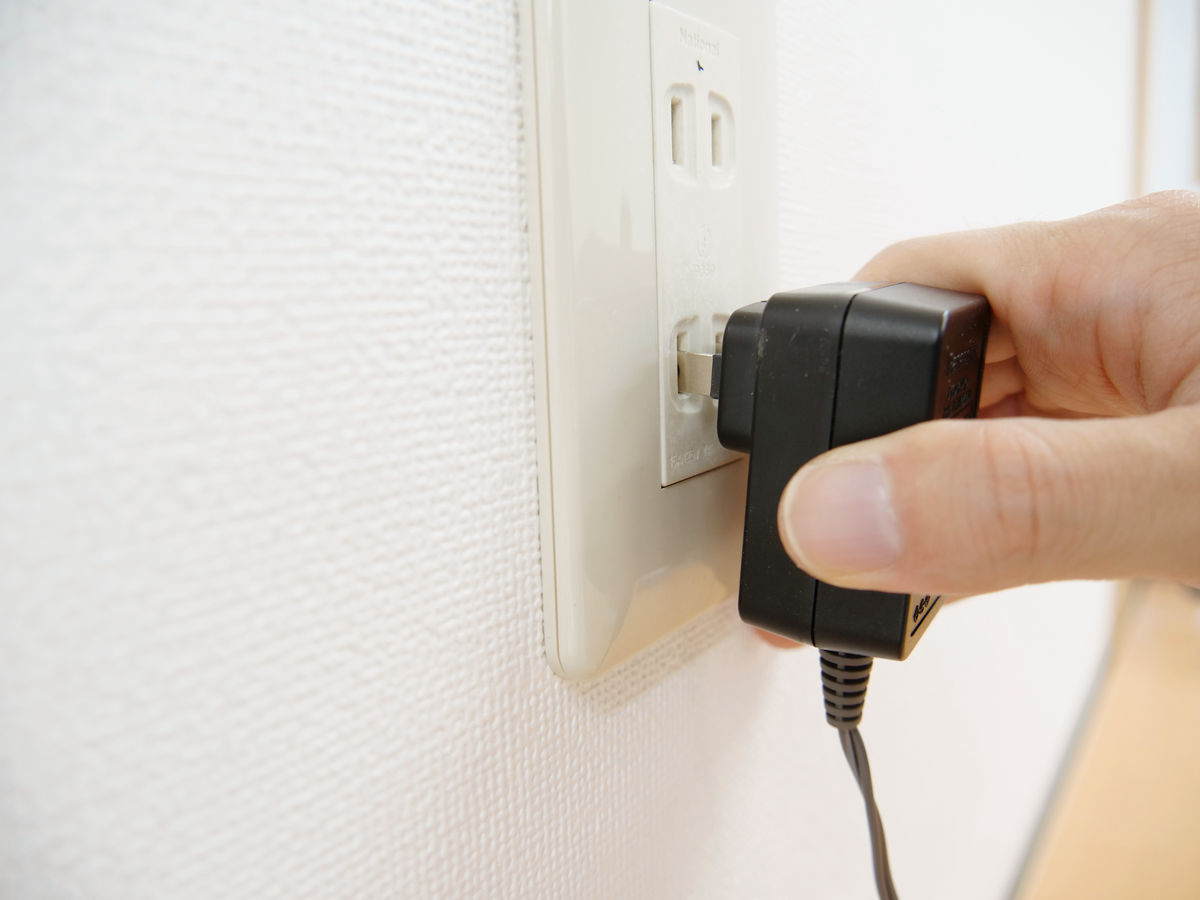
Installation is completed if plug the AC adapter into the outlet.
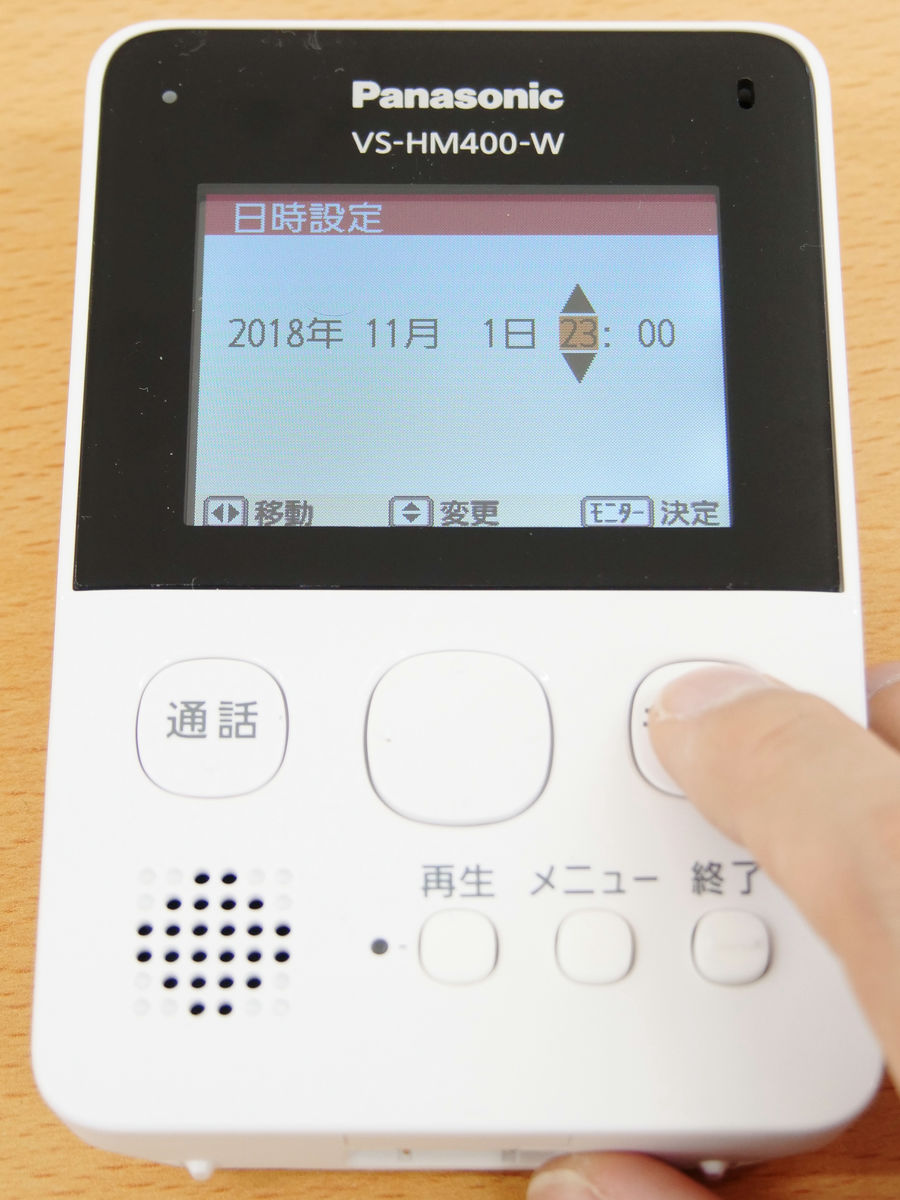
First from the date setting of the monitor. The date is automatically acquired after the monitor is connected to the home system, but if you do not set the date first, the chime link function (the function to detect the sound of the chime and display the picture automatically ) Can not be set correctly. Press the menu button until "Please set clock" appears.
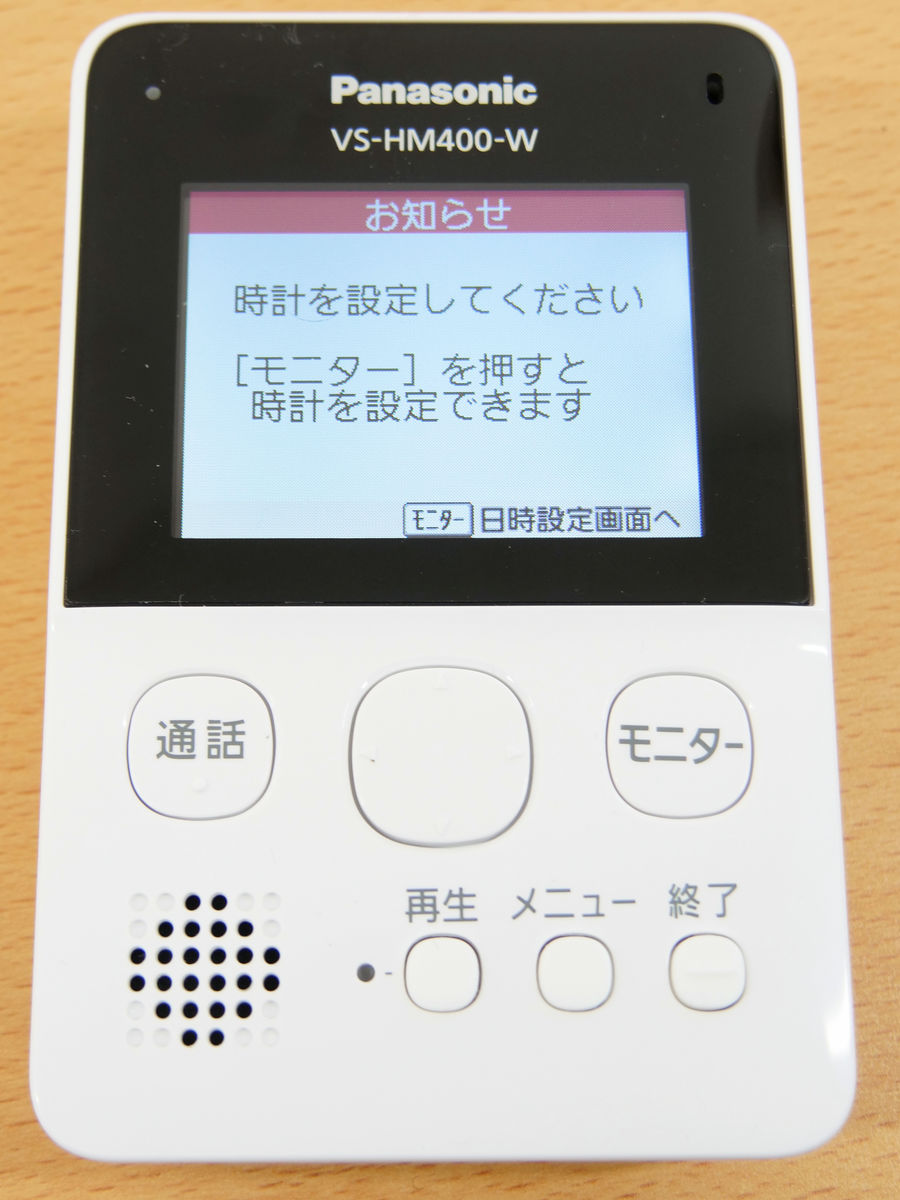
Go to the setting screen with "Monitor" button.

After setting the time, pressing the monitor button ends the date setting.
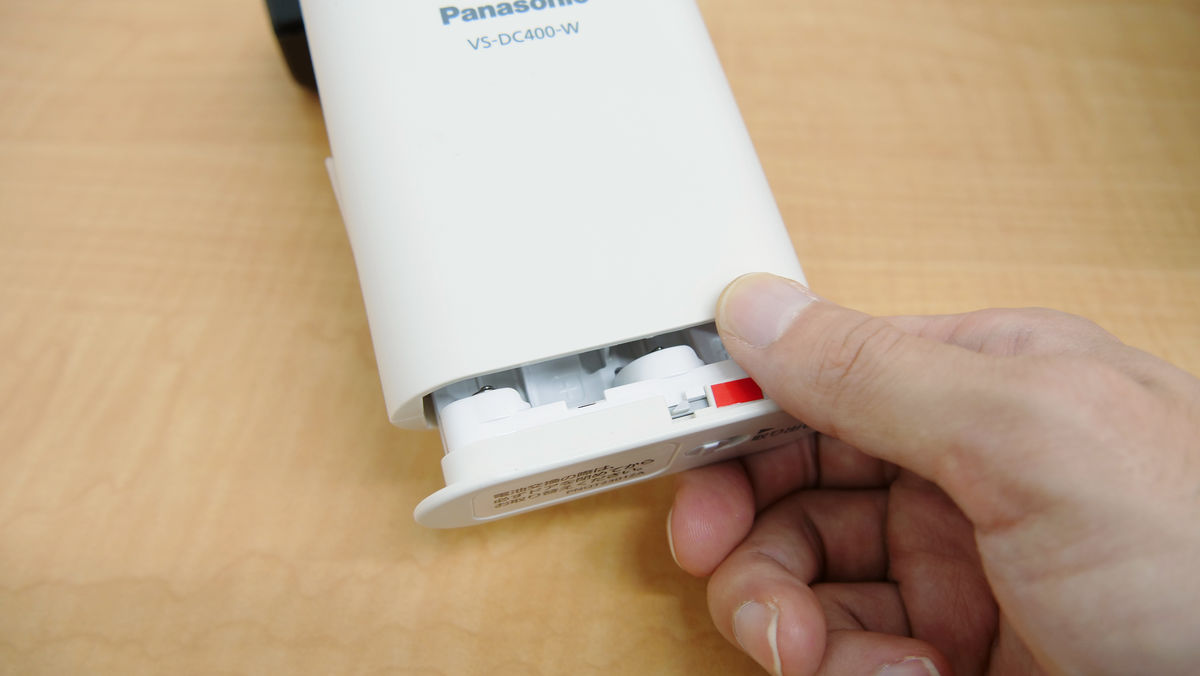
◆ Door camera installation - Next, prepare the door camera. There is a lever written as "take out" at the bottom of the wireless unit of the door camera so slide it to the right ...

Pull out the battery case. Since it is supposed to be caught on the way so that the battery does not fall when replacing the battery in the state installed in the door, please pull out with a little effort.
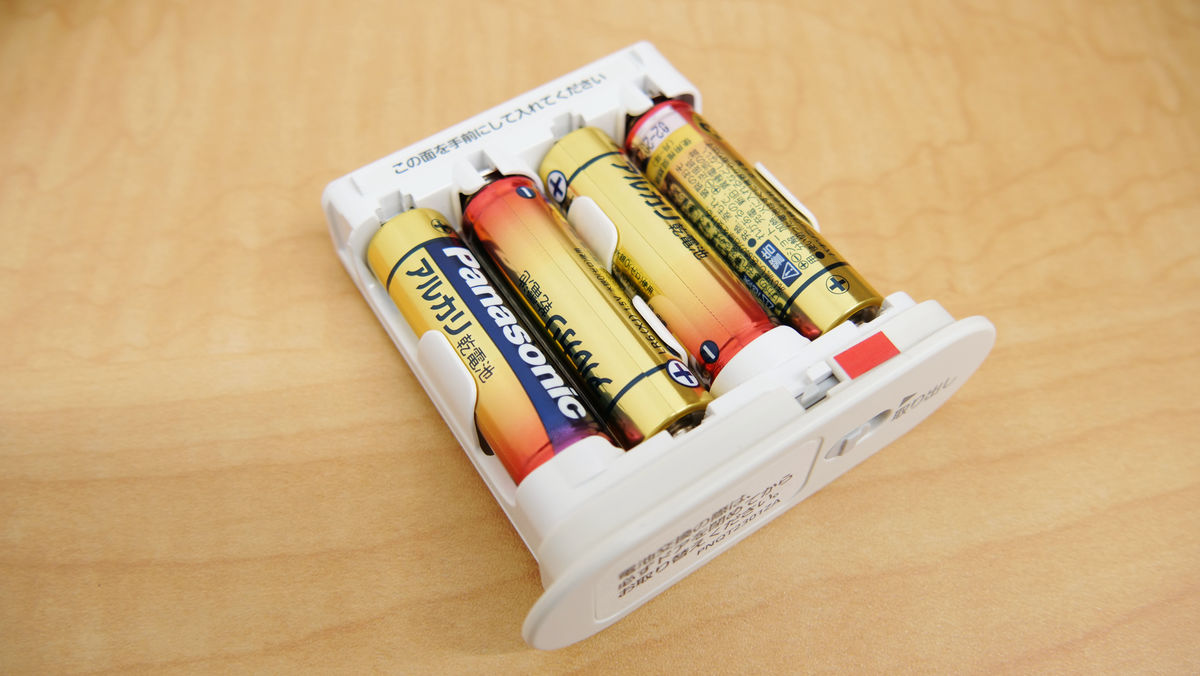
The necessary batteries are four AA batteries. Unlike the monitor's battery, batteries are sold separately, so you need to prepare in advance.
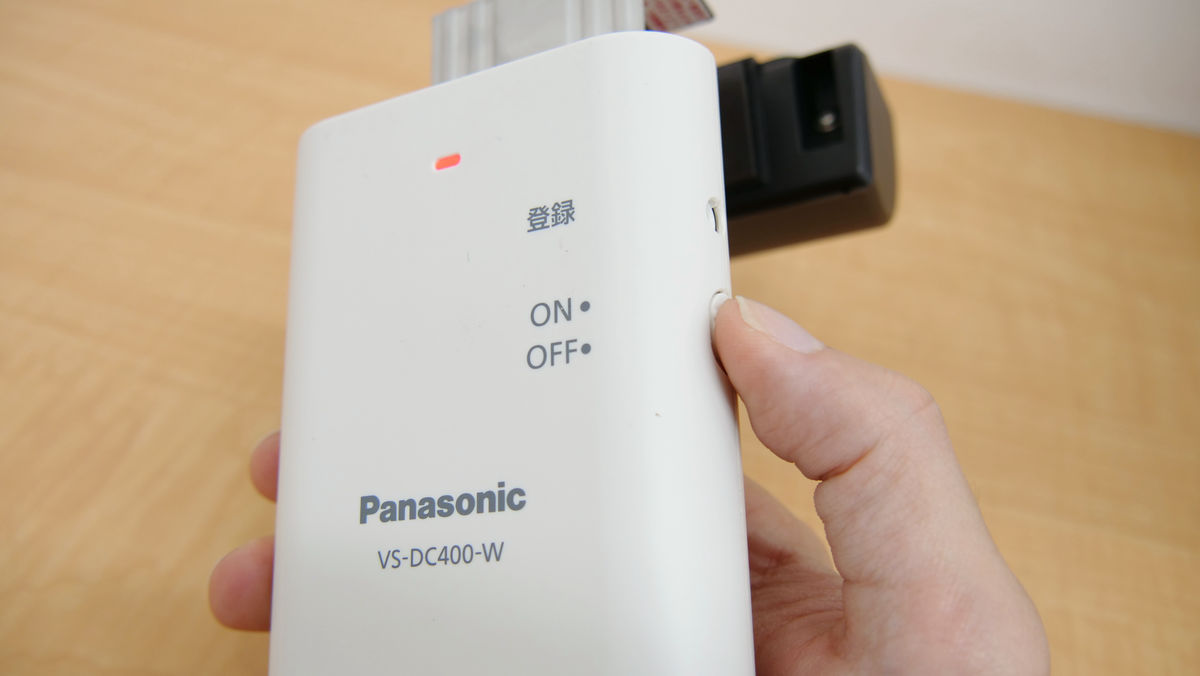
After inserting the battery, push up the slide switch on the side, and it is OK if the red lamp lights briefly.
Next, install the door camera on the door. Loosen the fixing screw with the included hexagonal wrench ......
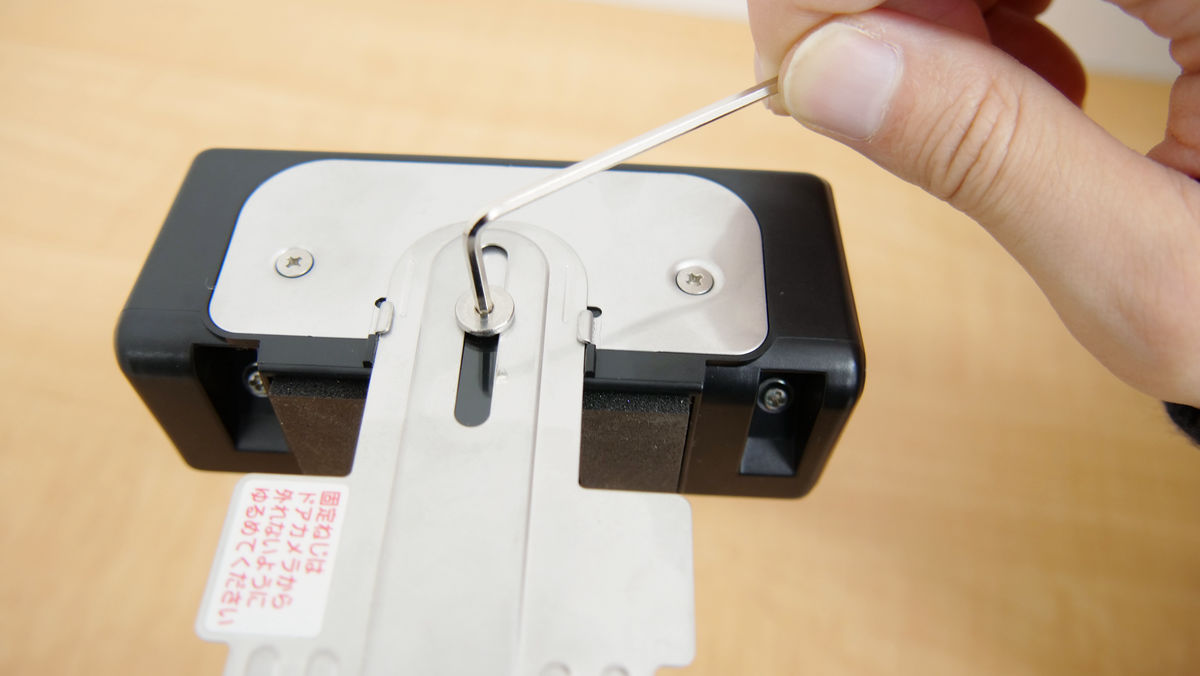
I'm hooked on the door. I will fix it later by tightening the screws, so place now lightly to determine the position. Since doors and cameras are fixed with adhesive tape, let's clean it if the top of the door is dirty. Also, please be careful when working with high altitude when using a stepladder.
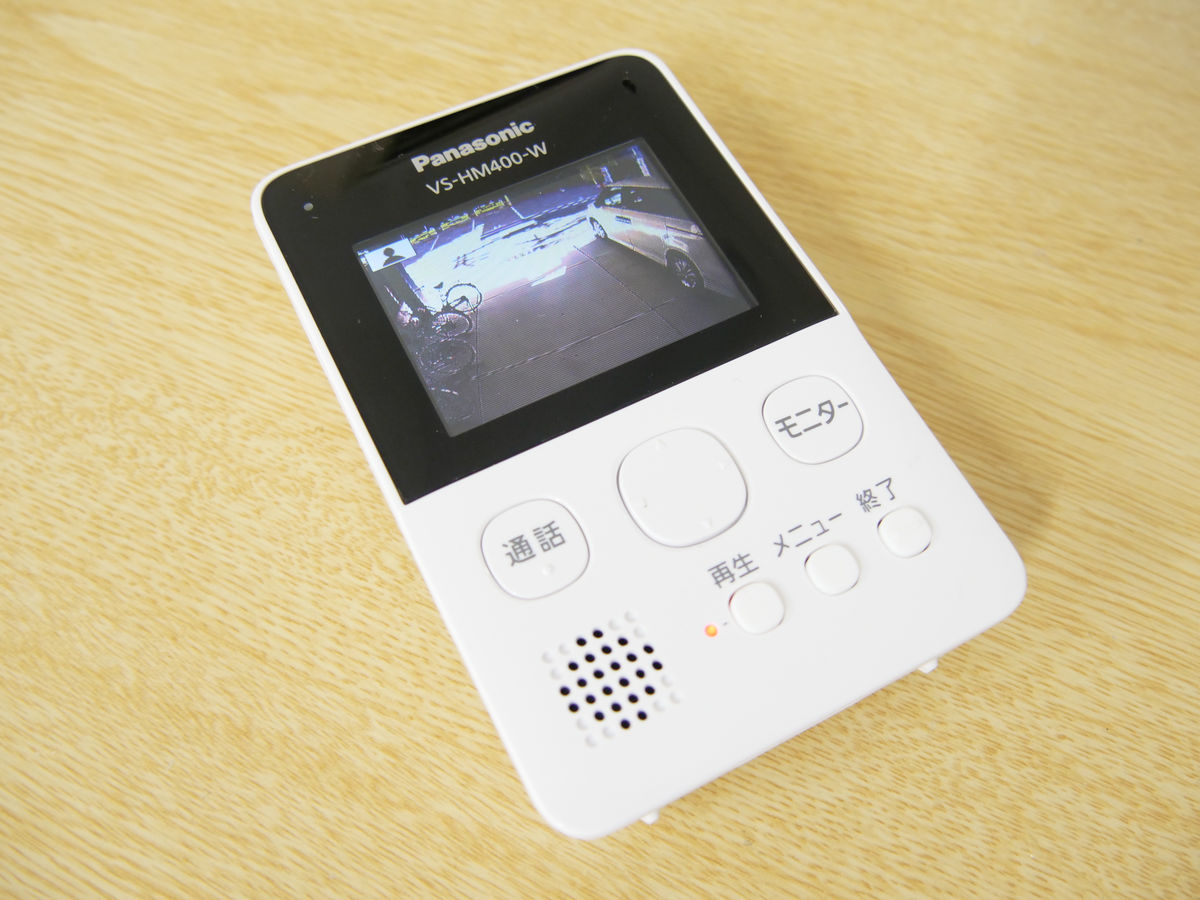
Next, press the "monitor" button on the monitor to display the image and check for any problems. Since the monitor and the door camera are paired in advance, the image is displayed without setting anything in particular.
If there is no problem, tighten the screw lightly so that the camera unit does not move. Since it is removed after this, it is not necessary to tighten the screws tightly.

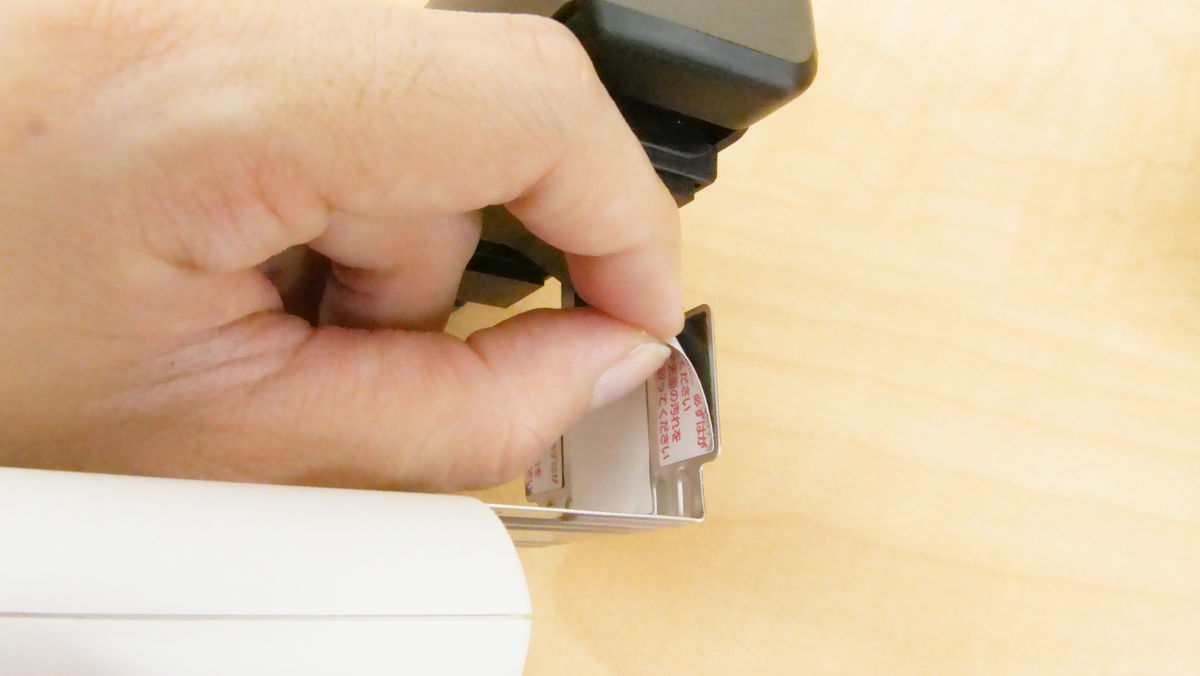
When you remove the door camera, peel off the double-sided tape under the metal connecting the camera unit and wireless unit.
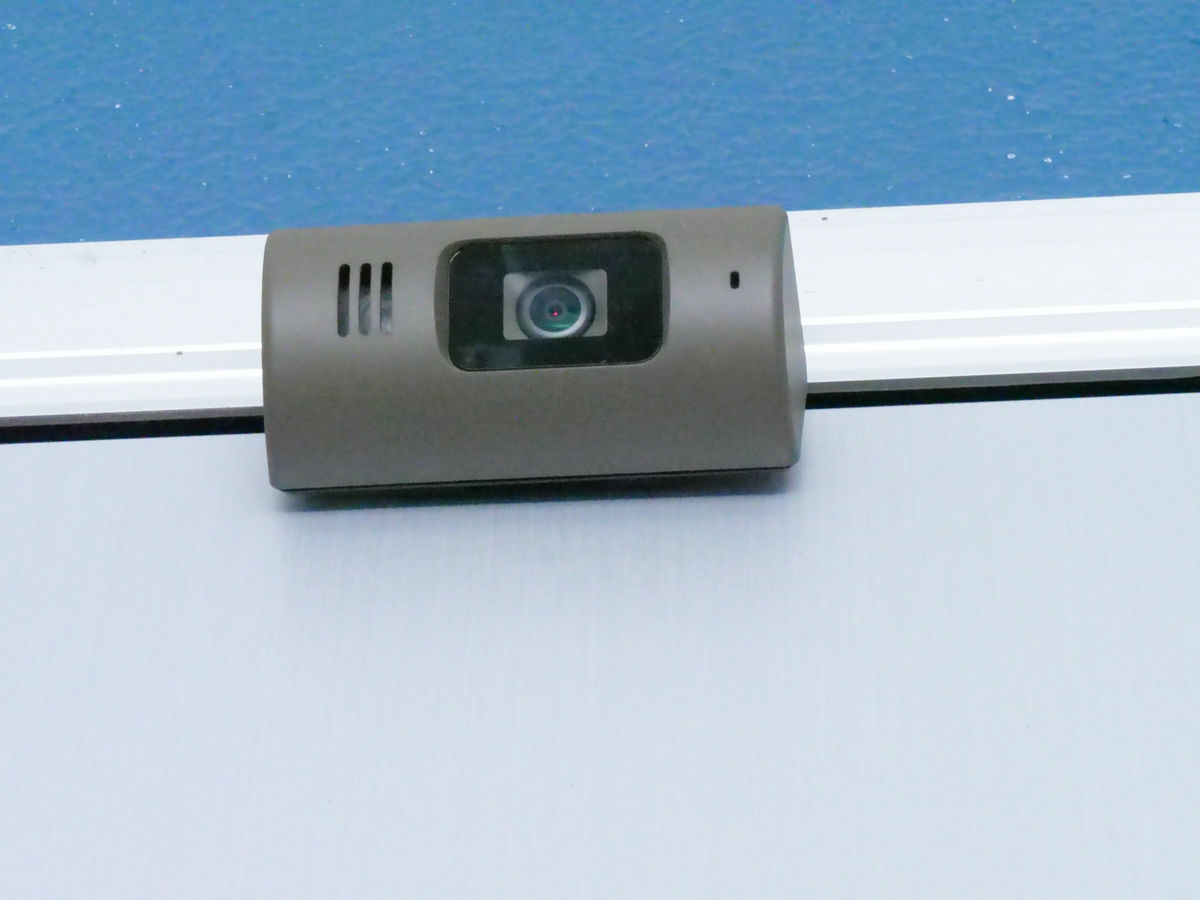
After that, place the door camera at the position you decided earlier, hold down the adhesive tape securely, then tighten the fixing screw tightly to complete the installation. This is where I looked at the camera from the outside. The outside camera unit is compact so there is no intimidating feeling so much, in some cases you may not notice it.
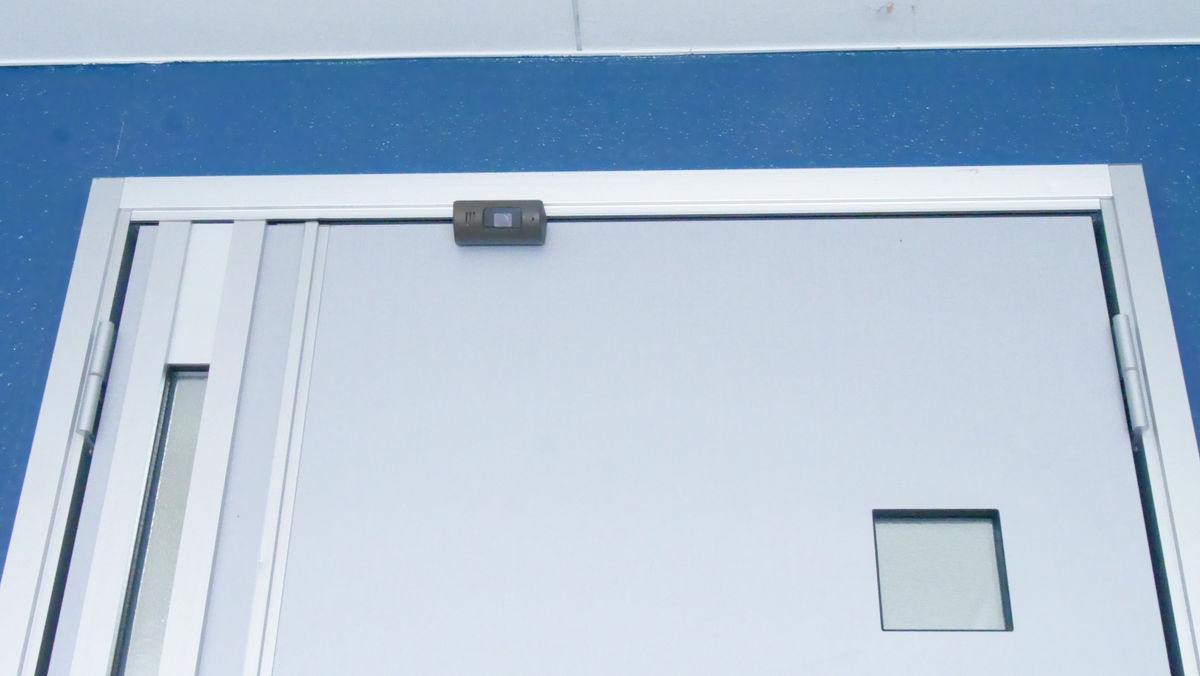
This is where I looked at the camera from the outside. The outside camera unit is compact so there is no intimidating feeling so much, in some cases you may not notice it.

In addition, the door camera can not be attached to doors that open inside, sliding doors, and doors that have a refreshing feel in the door frame. You can check on what kind of door you can install on the Panasonic website .
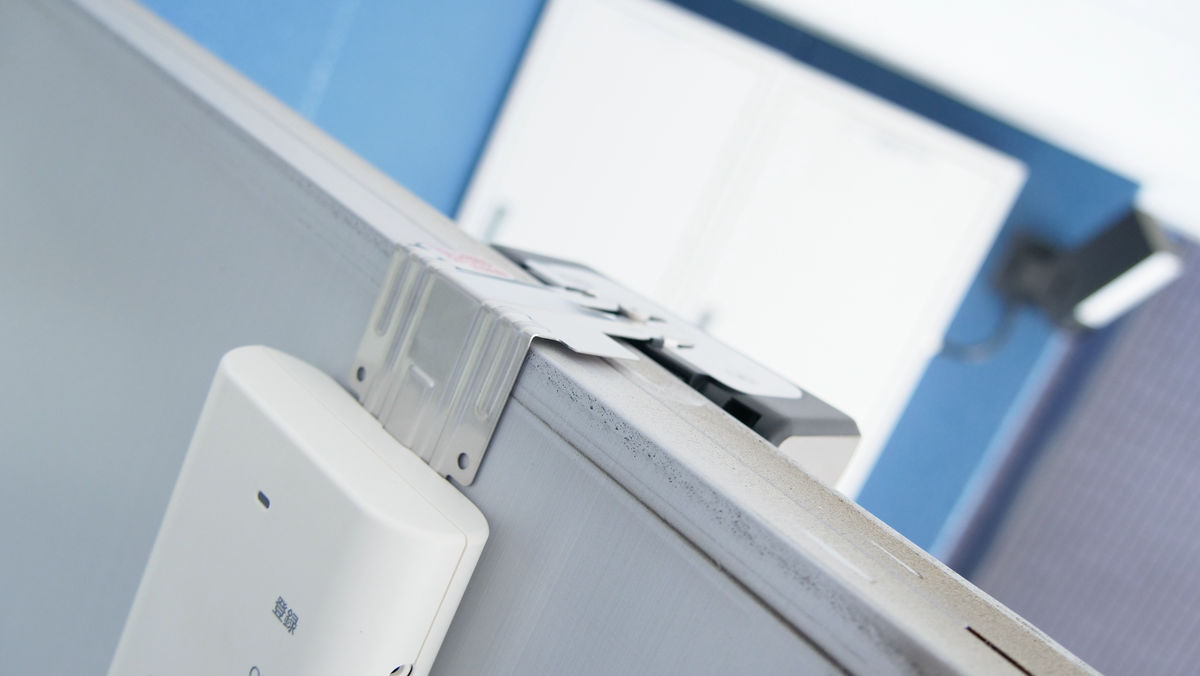
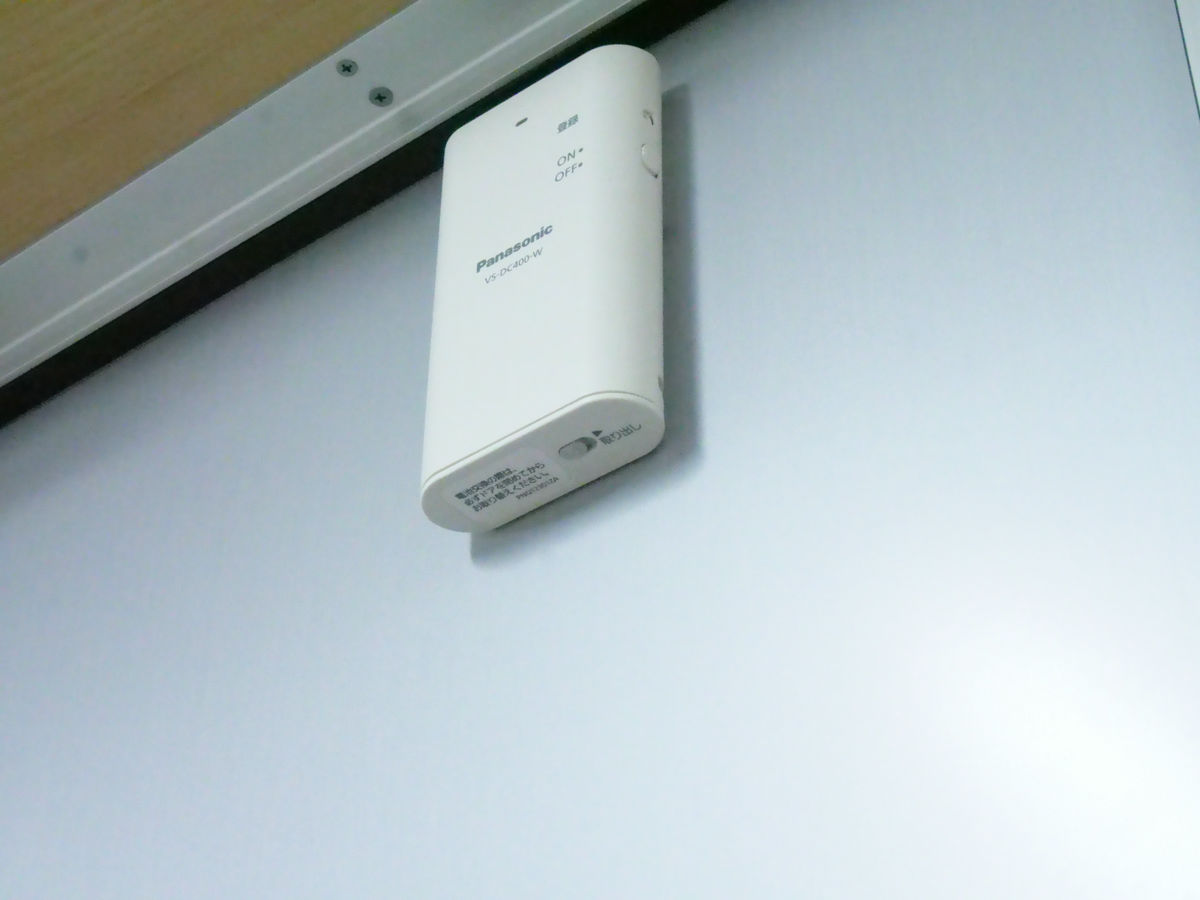
Looking from inside the house like this.
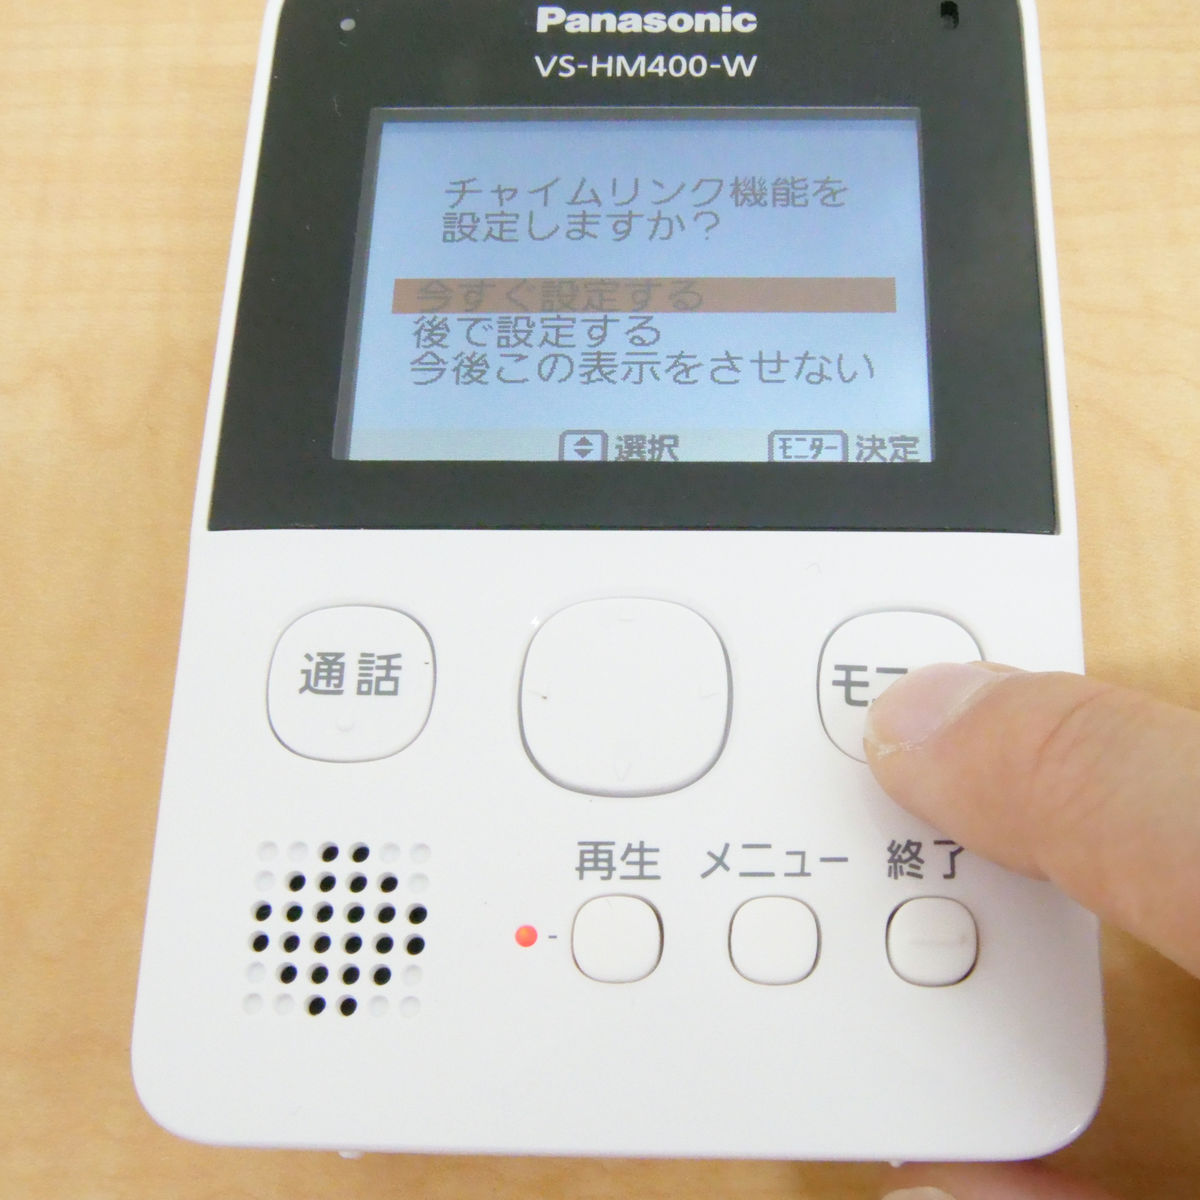
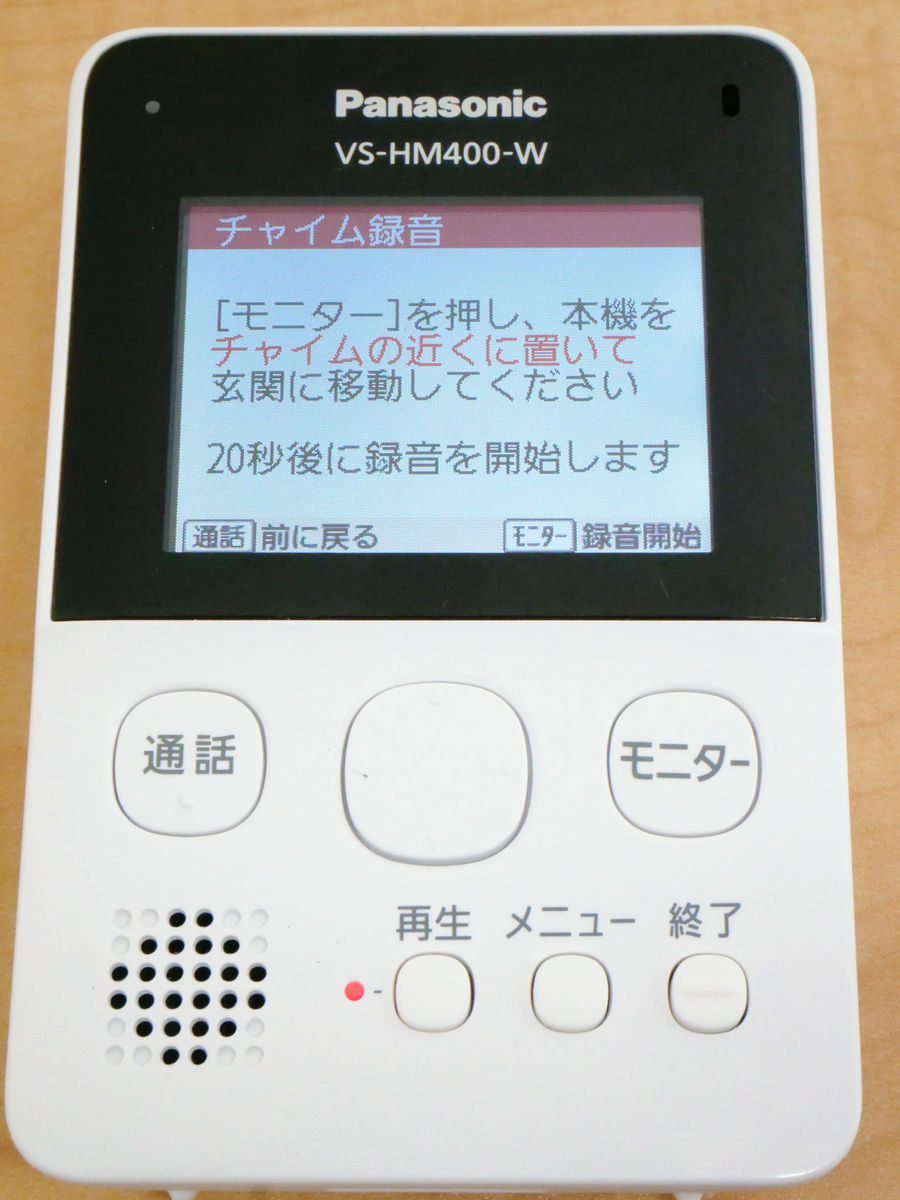
After setting up, we will set up the chime link. When you see the "Do you want to set the chime link?" Screen by pressing the menu button, select "Set it now" and press the monitor button.
When this screen appears, push the monitor button again, and place the monitor near the machine of the chime sound out machine. If you do not know where the sound comes out, it is easy to hear the sound of the chime and it is okay if you put it in a place where there is no noise around you.
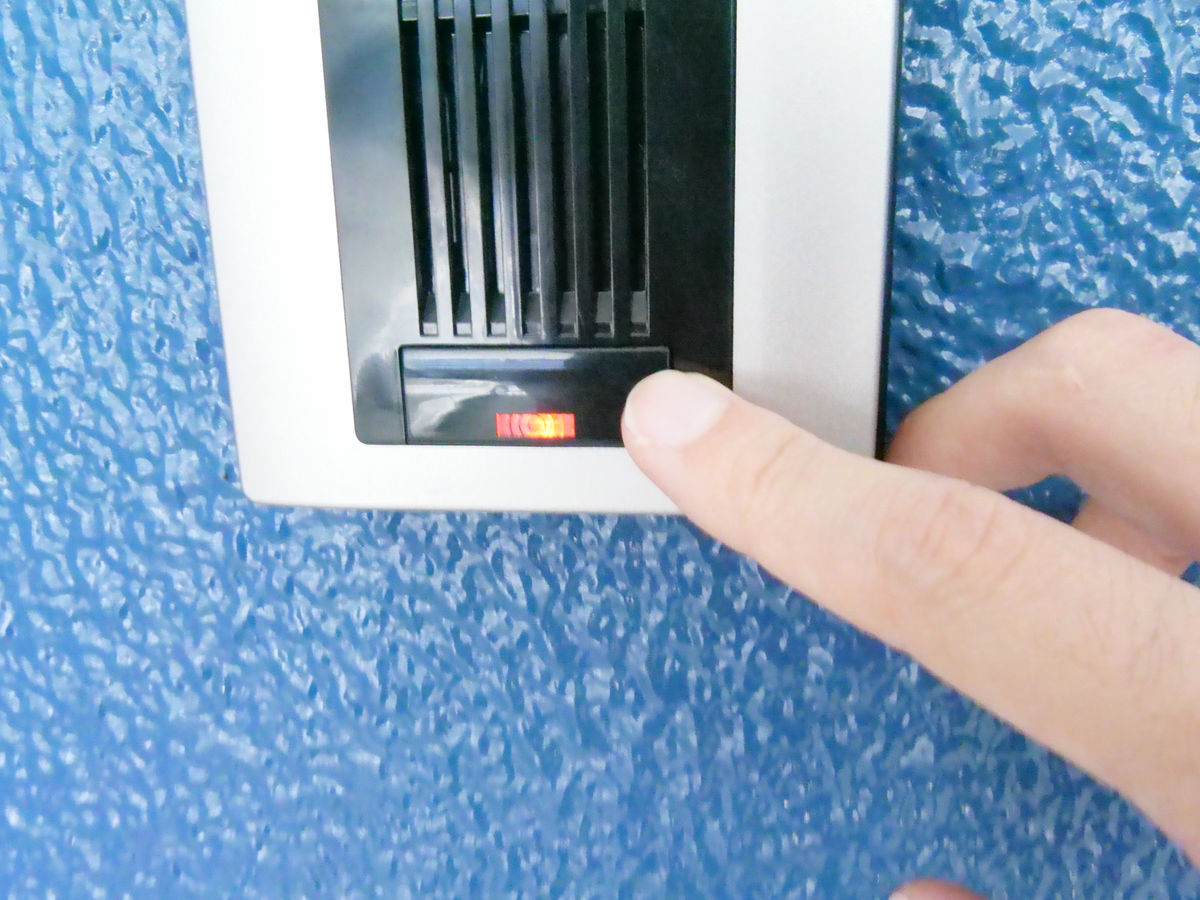
Go to the door and go to the front of the chime. After a while you will hear a guide saying "... after a beep ... ..." with the sound from the door camera, so we will chime and record according to the guide.
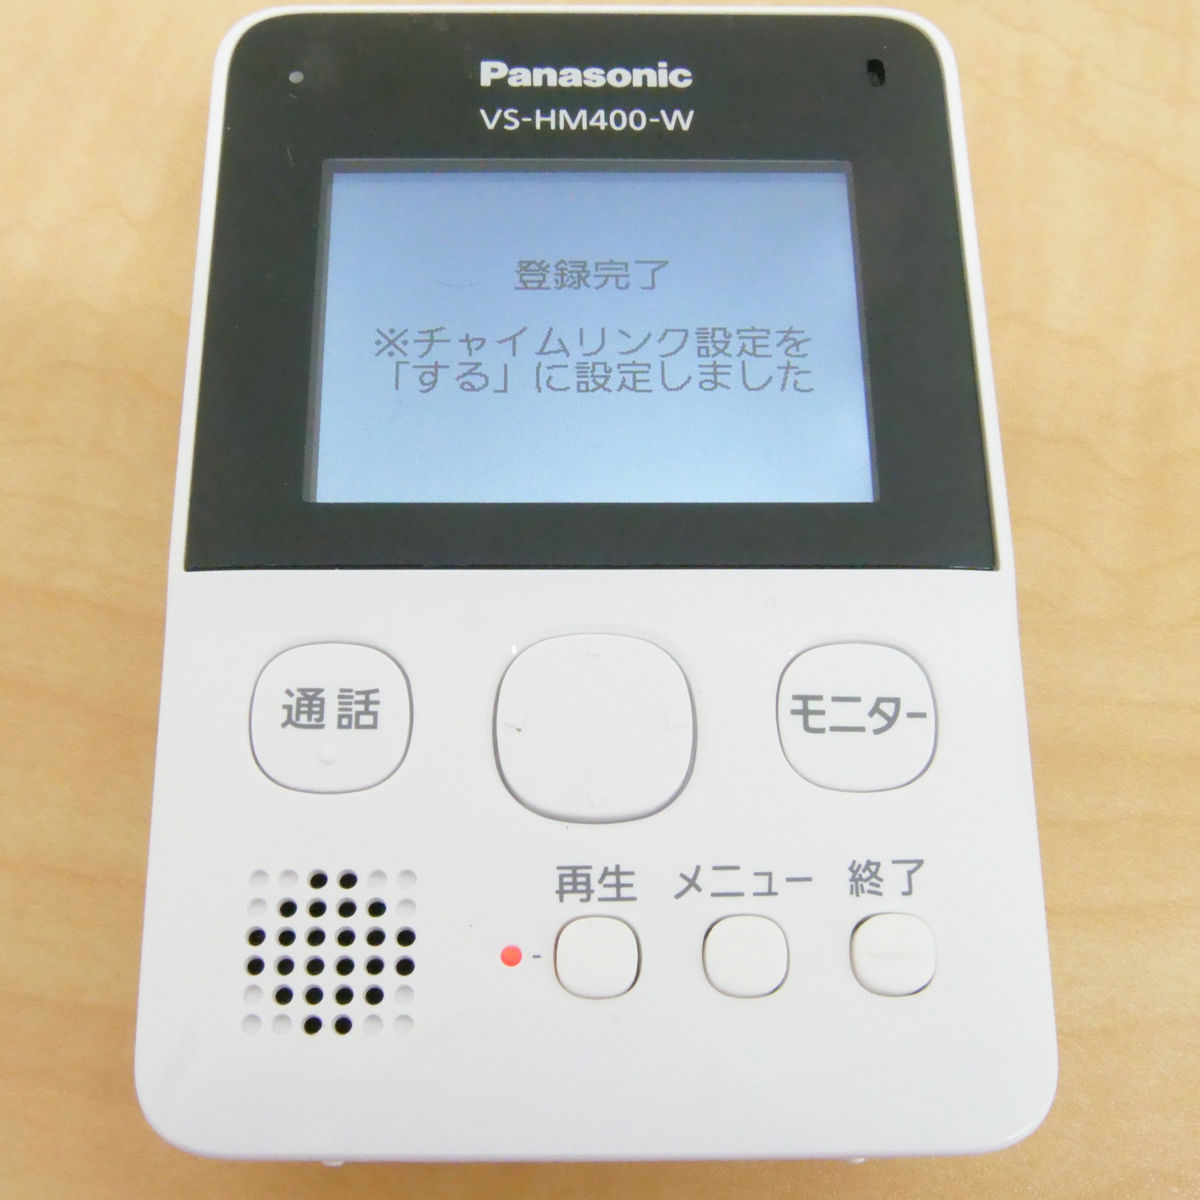
When the recording is completed, the chime link setting automatically becomes "ON".
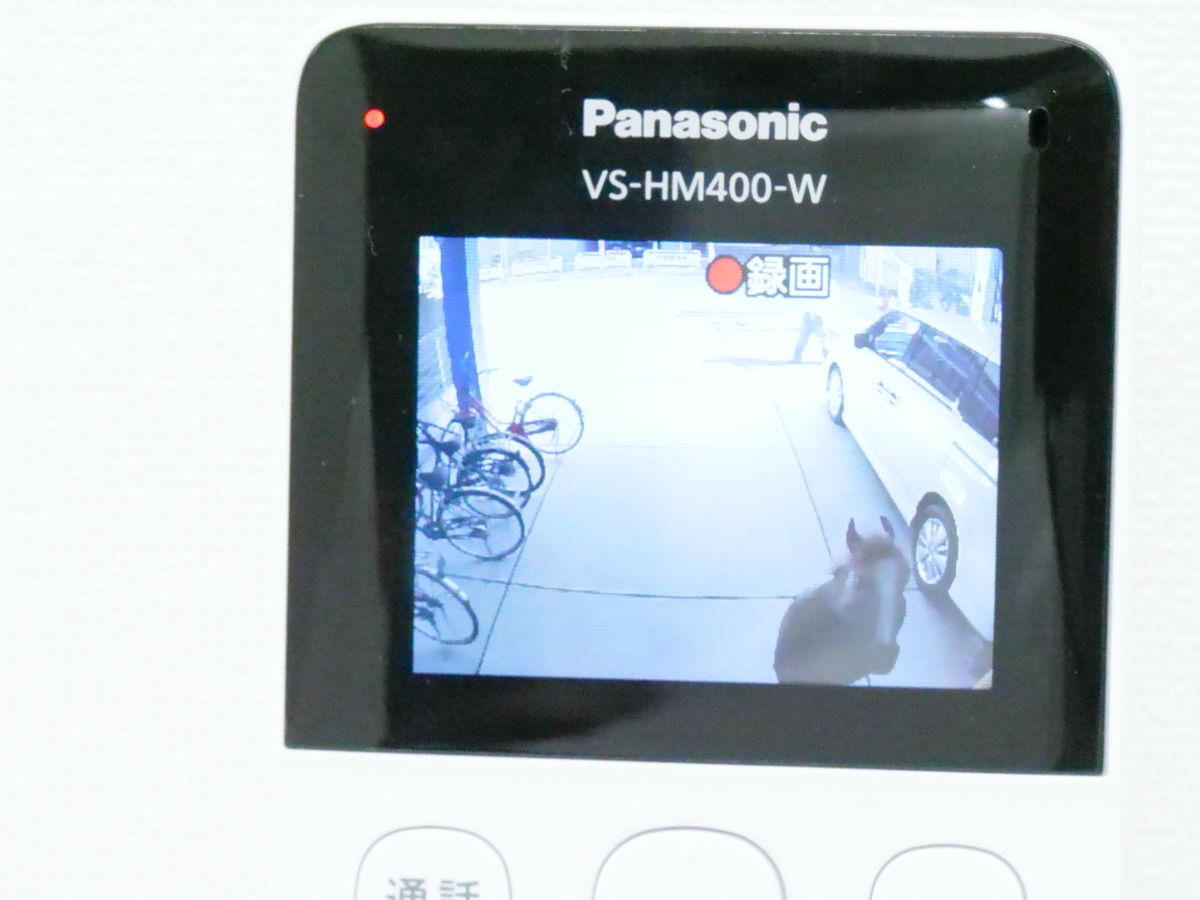
If it is set correctly, when the chime rings the state of the door will be displayed on the monitor automatically.
◆ Setting up the home unit and connecting the smartphone <br> Next we will install the home unit. Insert the plug of the AC adapter into the insertion opening at the back of the home unit ... ...
After fitting the cord into the hook, connect it to the outlet as well as the monitor is OK. If there is no obstacle between the home unit and the door camera or monitor, communication is possible up to 70 m, but if you place it in a room separate from the monitor machine, the communication may become unstable So I would like to set it as close as possible to other equipment.
Next, in order to set up the home unit, install the application on the smartphone. I have an iOS version and an Android version, but this time I will install the Android version. Also, during the initial setup of the application, you may wait for a few minutes from the operation to the next operation, but in some cases it may be necessary to start over from the beginning if the terminal goes to sleep in the meantime, It is safe to set it longer.
Home Network - Apps on Google Play
https://play.google.com/store/apps/details?id=com.panasonic.psn.android.hmdectjp
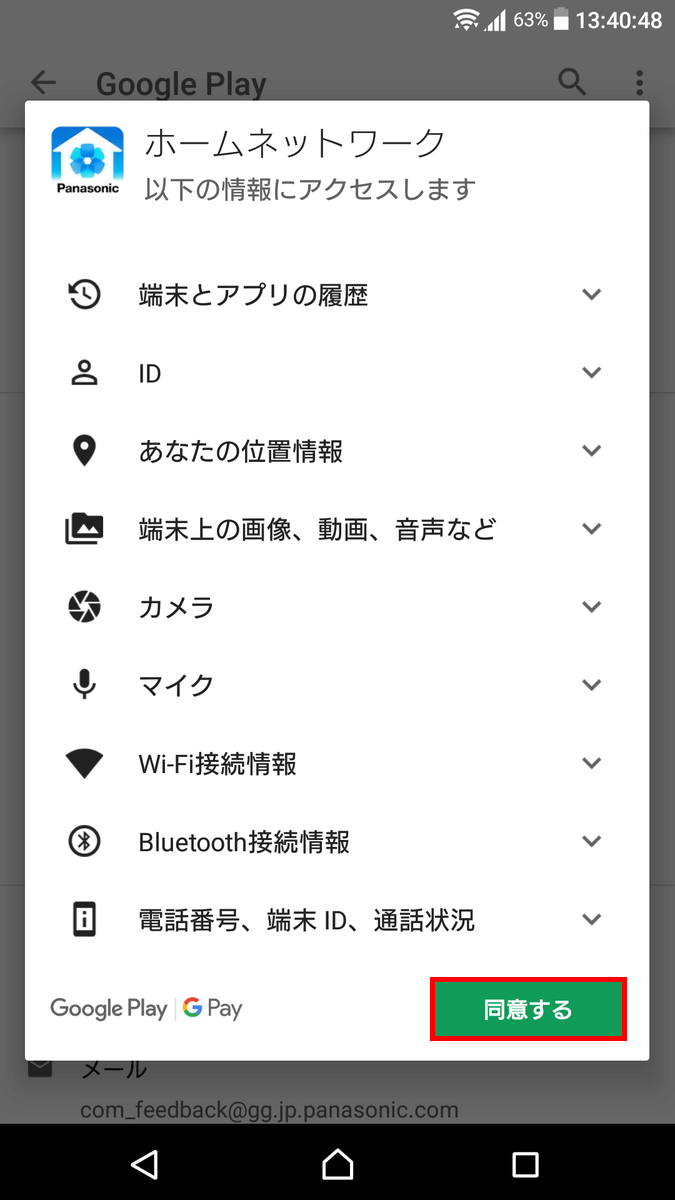
On Google Play, find the home network application and tap "Install".

Tap "I agree".
Since regulations are displayed when opening the application, once again "agree"
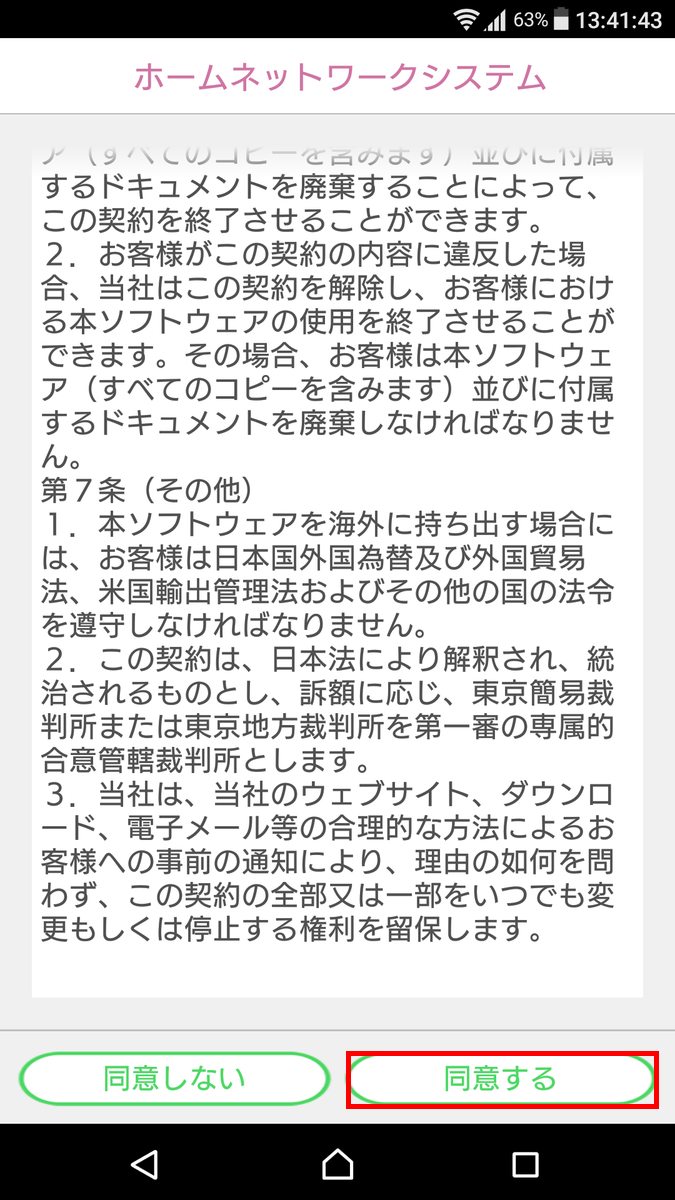
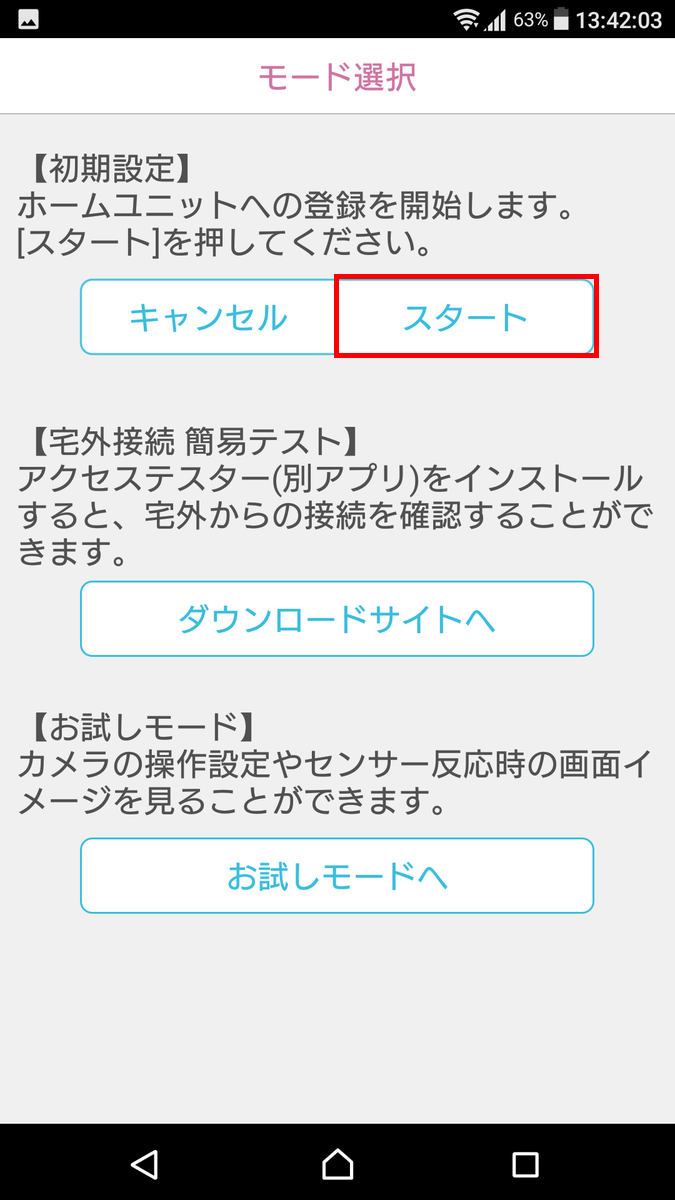
Tap 'Start'.
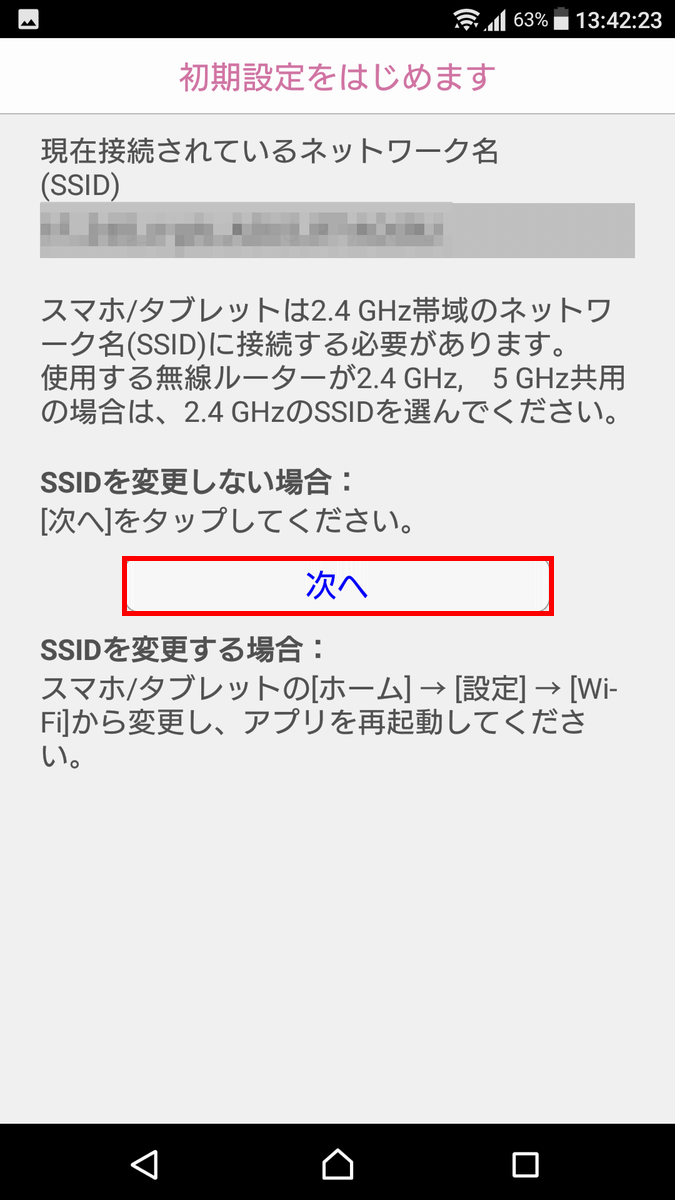
Since it is compatible only with Wi-Fi in the 2.4 GHz band, if you are using 5 GHz and a shared router, connect it to the 2.4 GHz network name (SSID). Make sure you are connected to 2.4 GHz Wi-Fi and tap "Next".
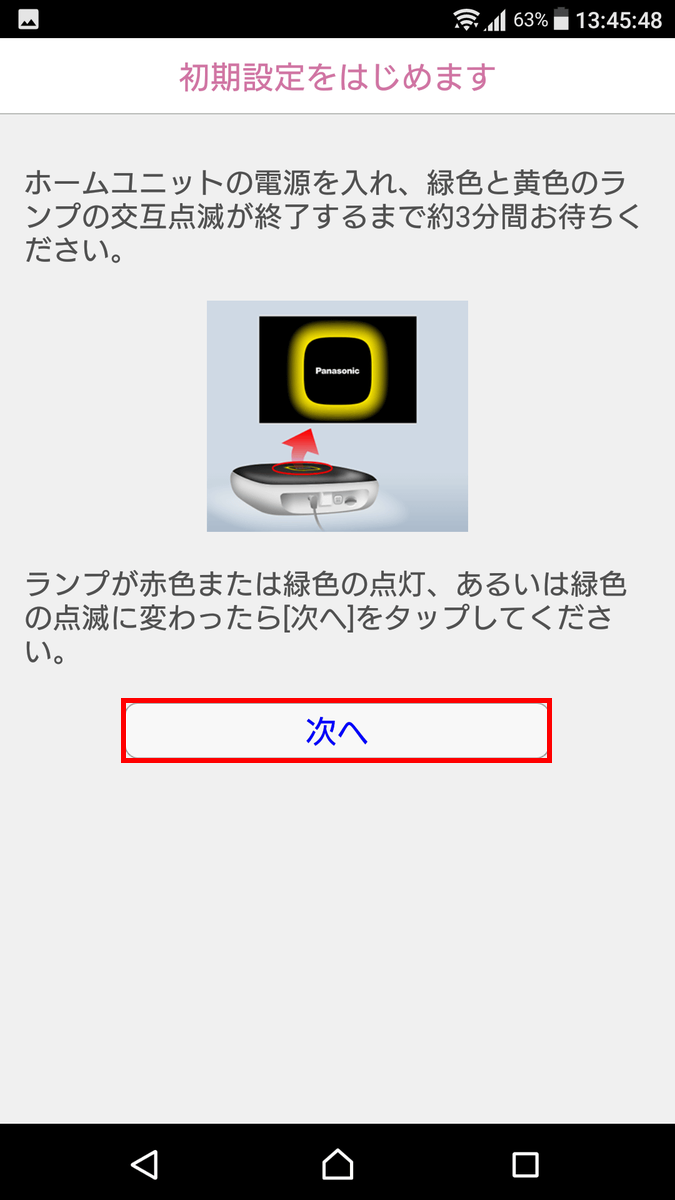
There is no power button on the home unit body, so unplug it once it is connected to the wall outlet and plug it in again. When the power turns on, green and yellow will begin flashing, but if you wait for a while, it turns to flashing red or green, so after changing, tap "Next".
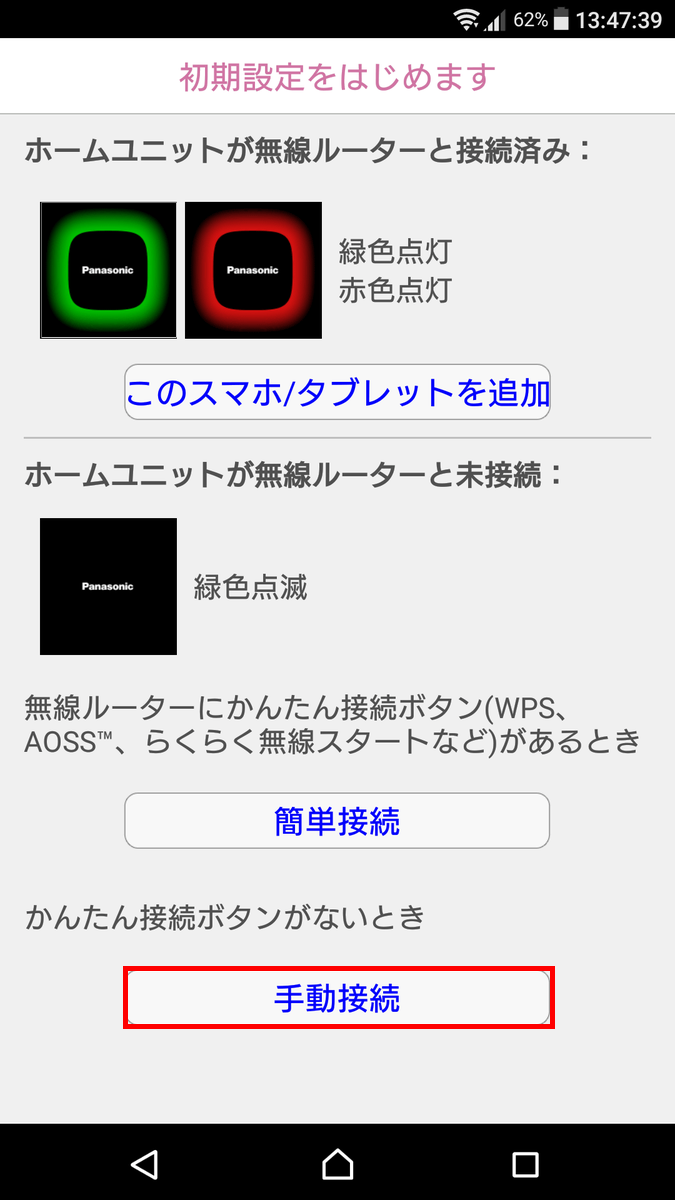
If the router supports "simple connection", it is easier to select that, but here we select "manual connection".
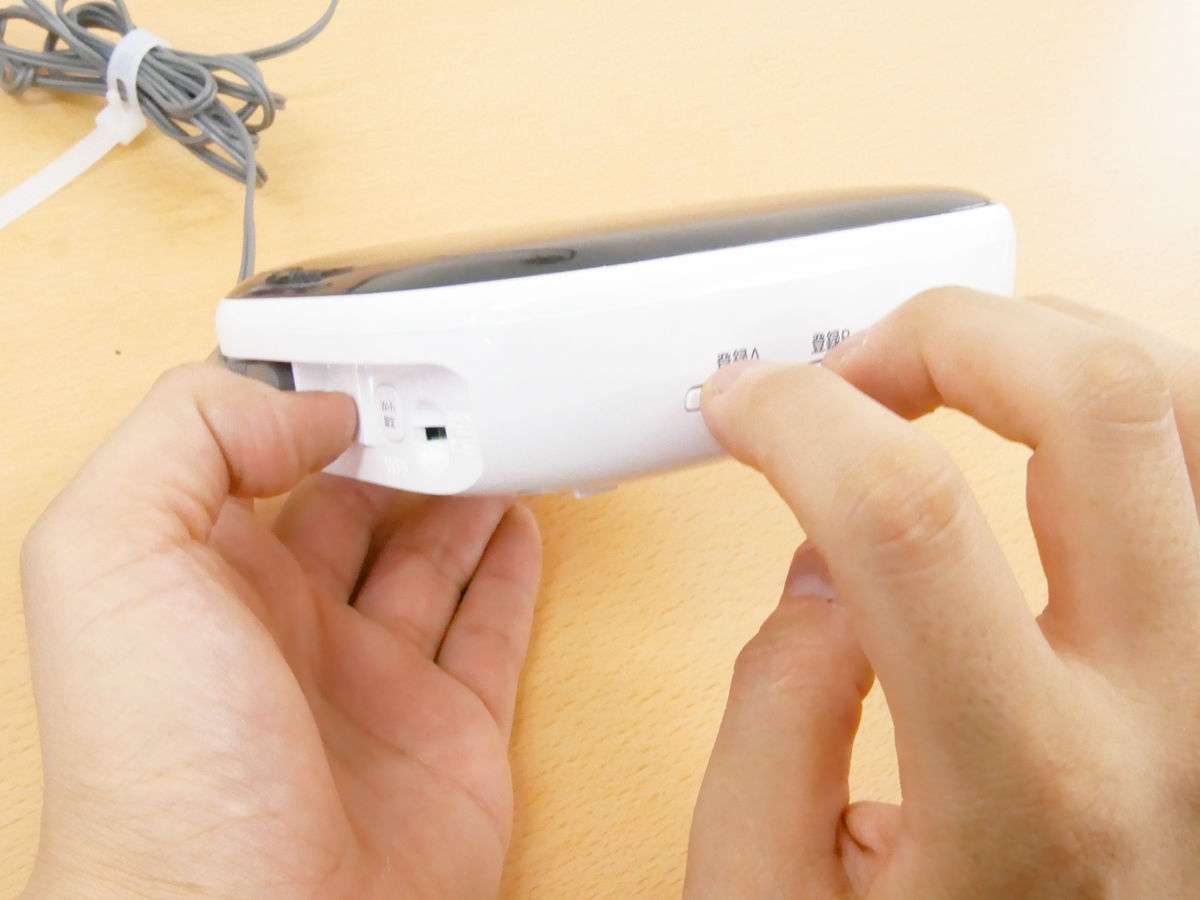
When this screen comes out, pick up the home unit ... ...
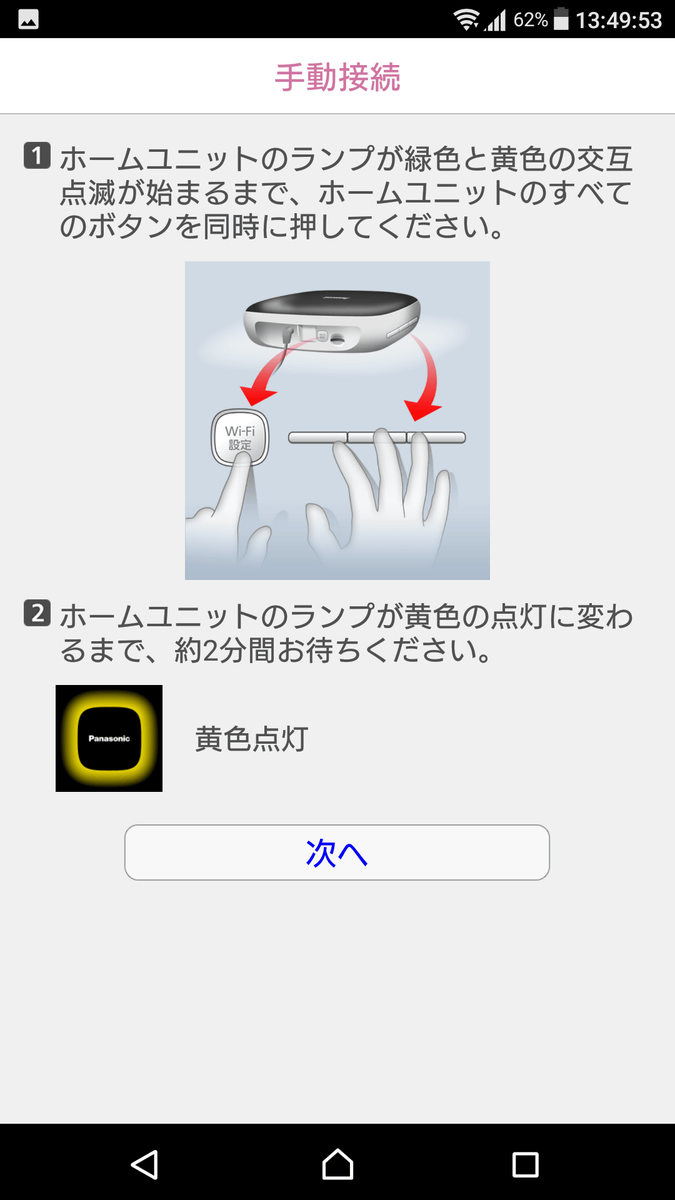
Press all four buttons on the main unit at the same time. After the beep sounds, green and yellow flashing starts, so let go of the button and wait until the yellow light turns on.
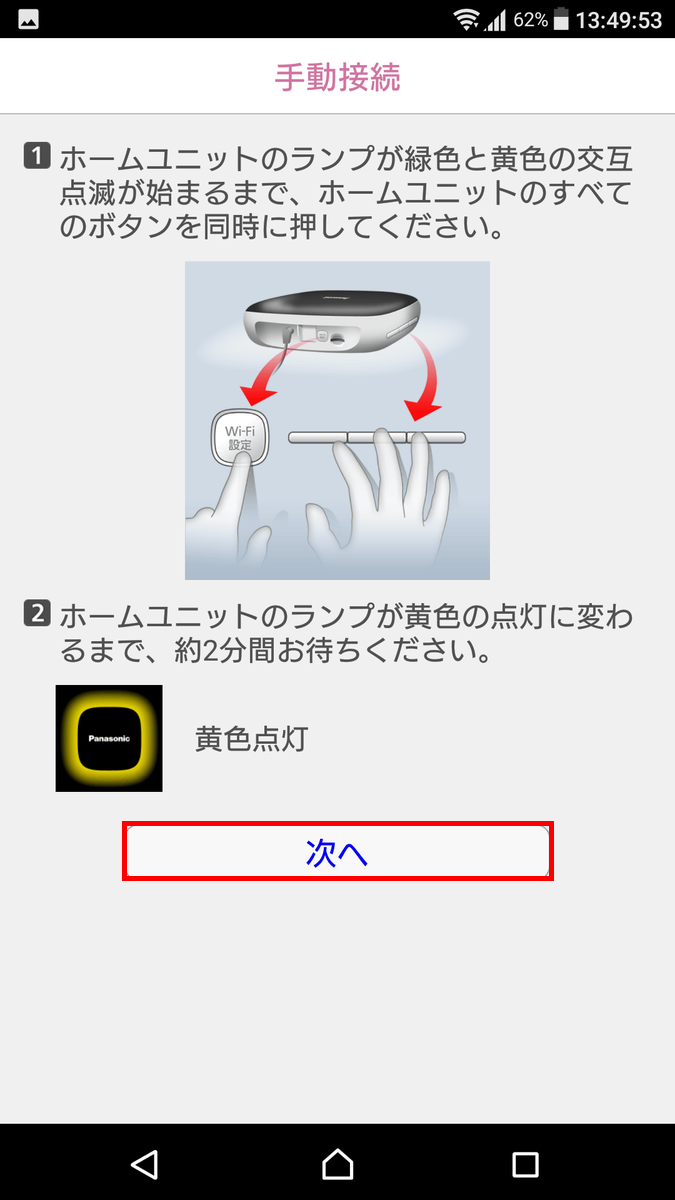
When the lamp of the home unit turns on yellow, return to the screen of the smartphone and tap "Next".
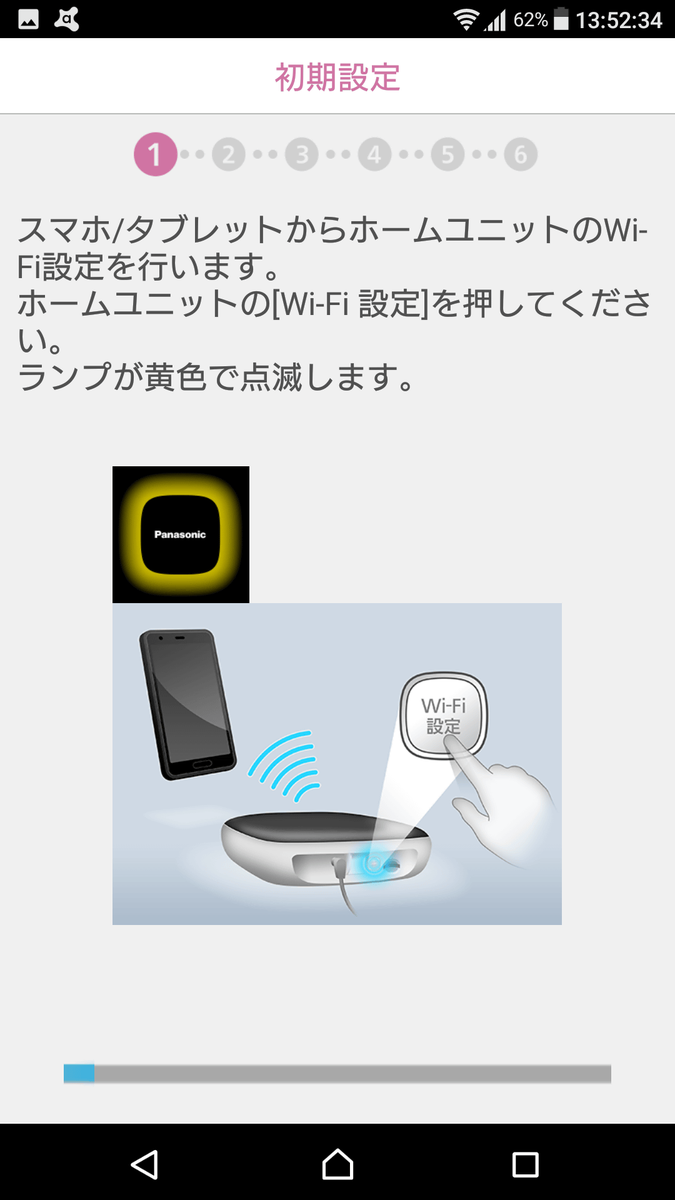
When you press the "Wi-Fi connection" button of the home unit, the lamp will turn yellow blinking.
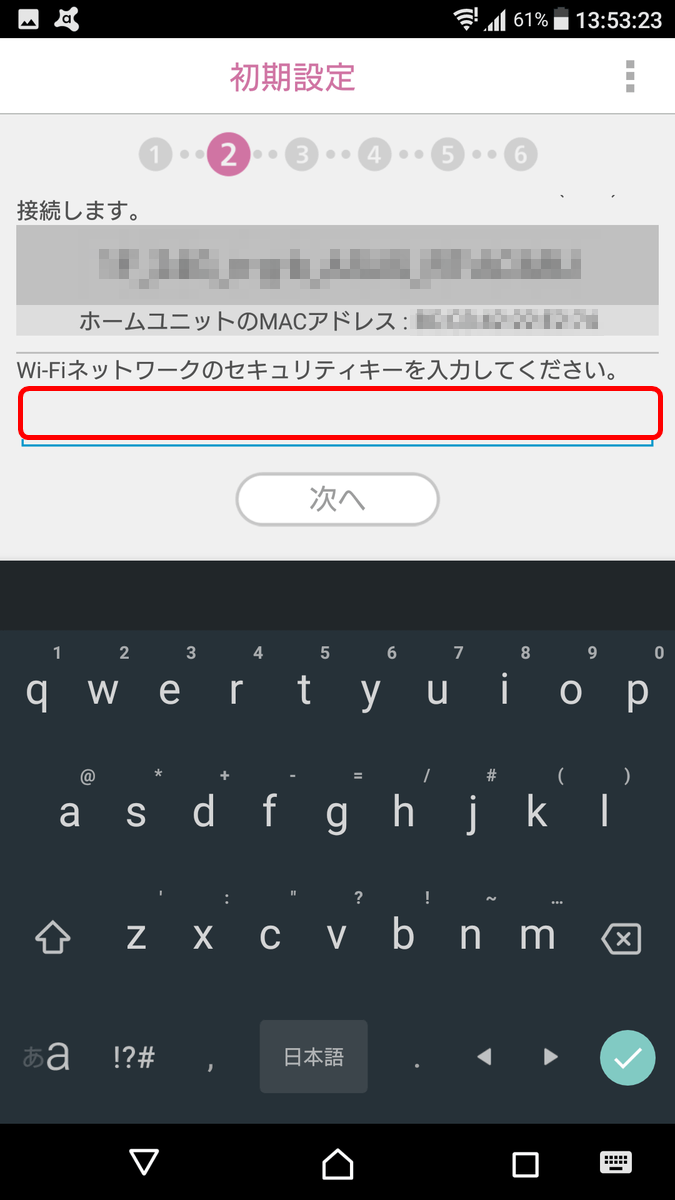
As you proceed to enter the screen for entering the security key, enter the security key. The security key is usually stated in the seal of the router etc.
If you wait for a while, the home unit will restart.
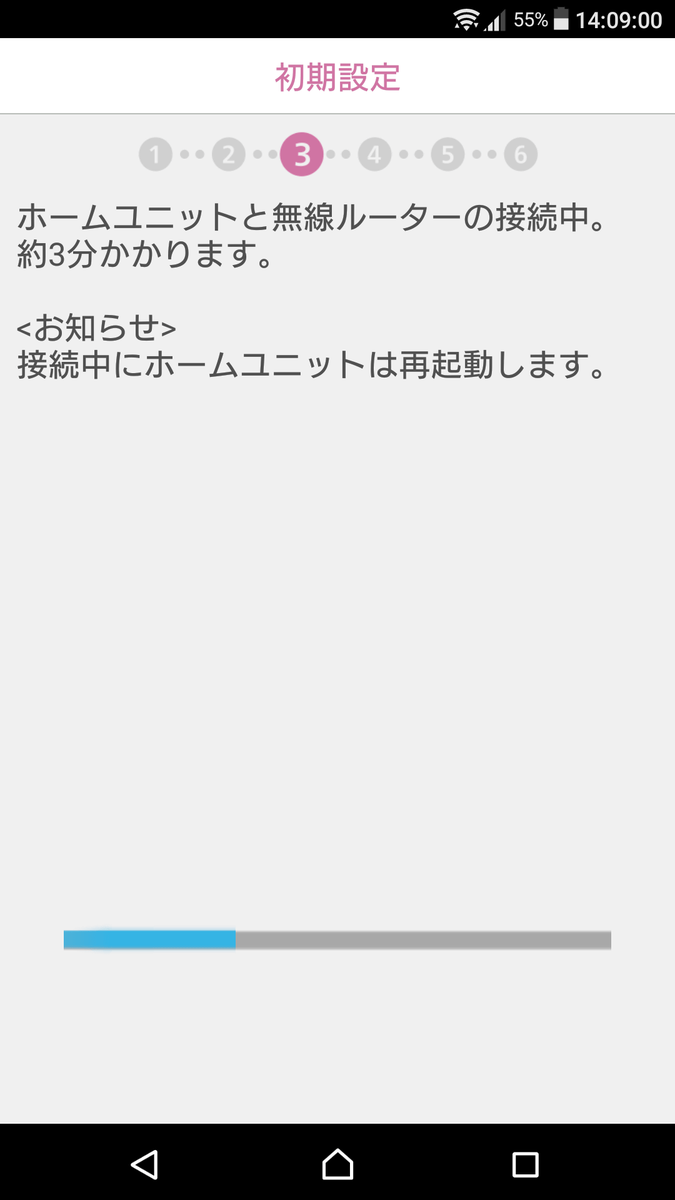
Wait further after the connection between the home unit and the router is completed.
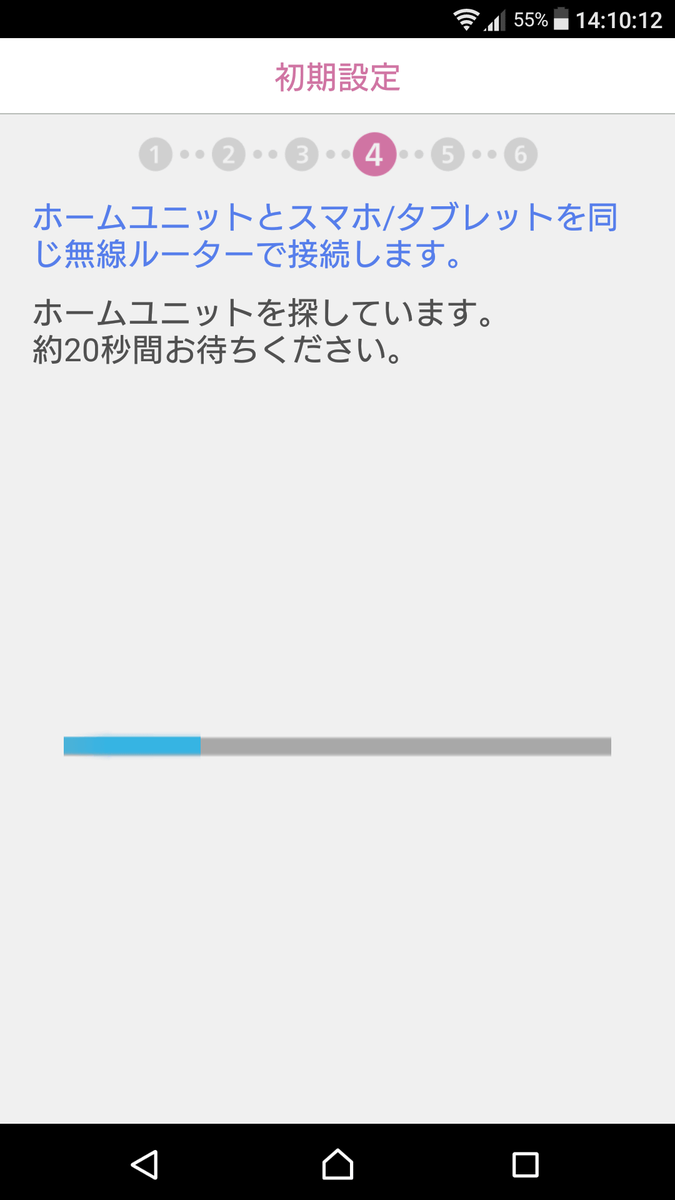
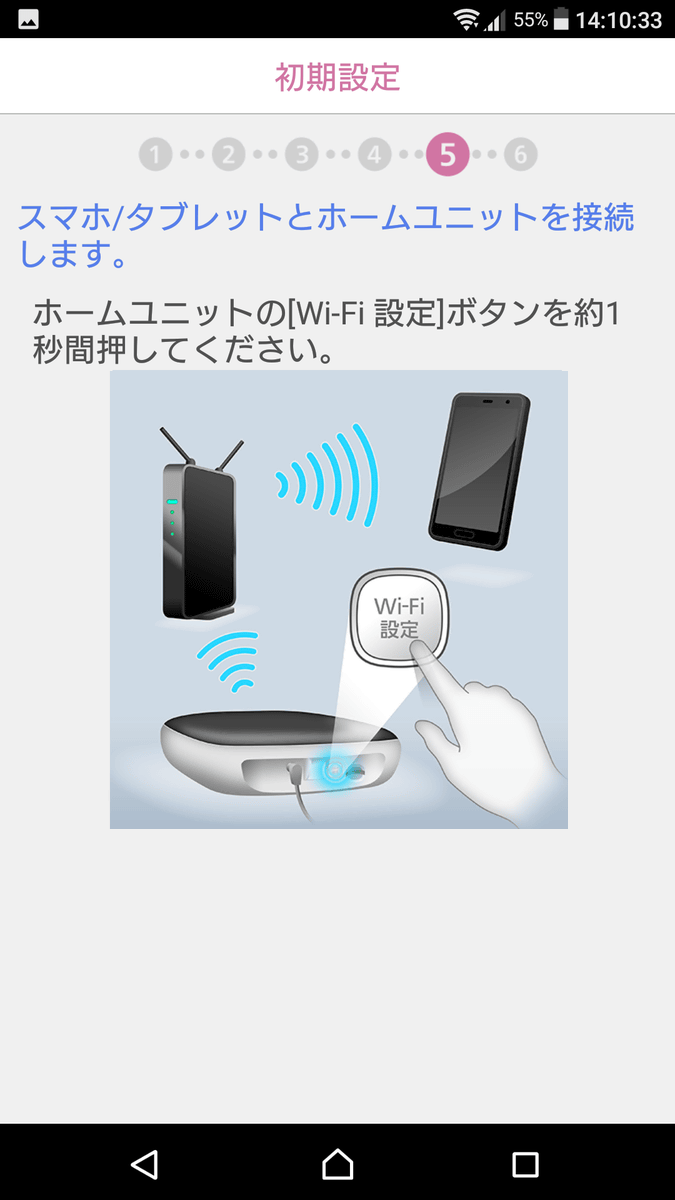
Lastly, since the connection between the home unit and the smartphone starts, press the "Wi-Fi connection" button. At this time, you can not connect by pushing it long, so be careful to release it immediately after pressing the button.
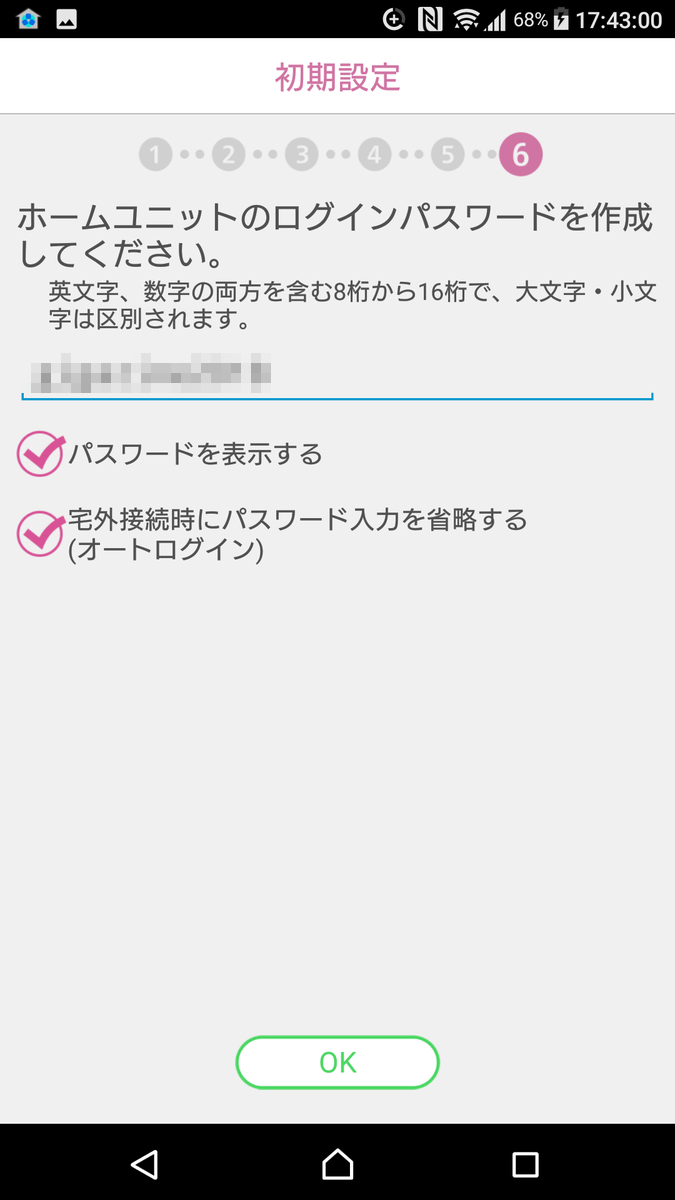
A popup urging you to set the login password appears, so tap "OK".

Combine alphanumeric characters and decide the login password of 8 digits or more.
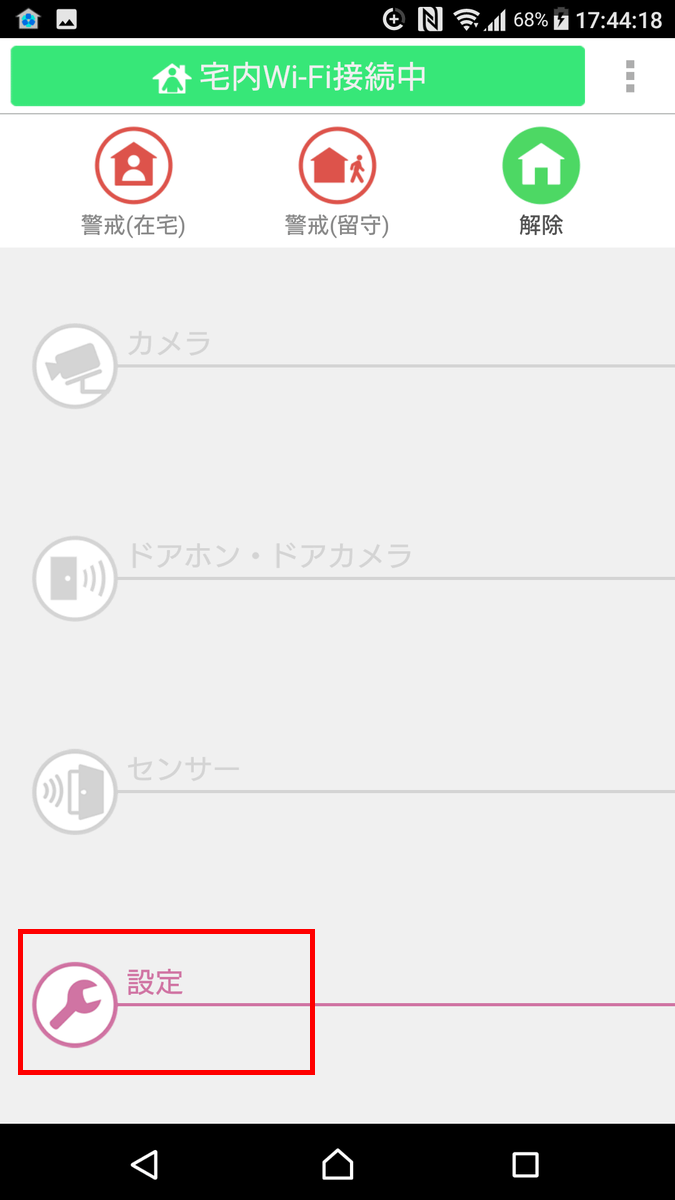
Installation will be completed if this top screen is displayed. Currently only the smartphone and the home unit are linked, so we will register the door camera and monitor machine. Tap 'Settings' ......
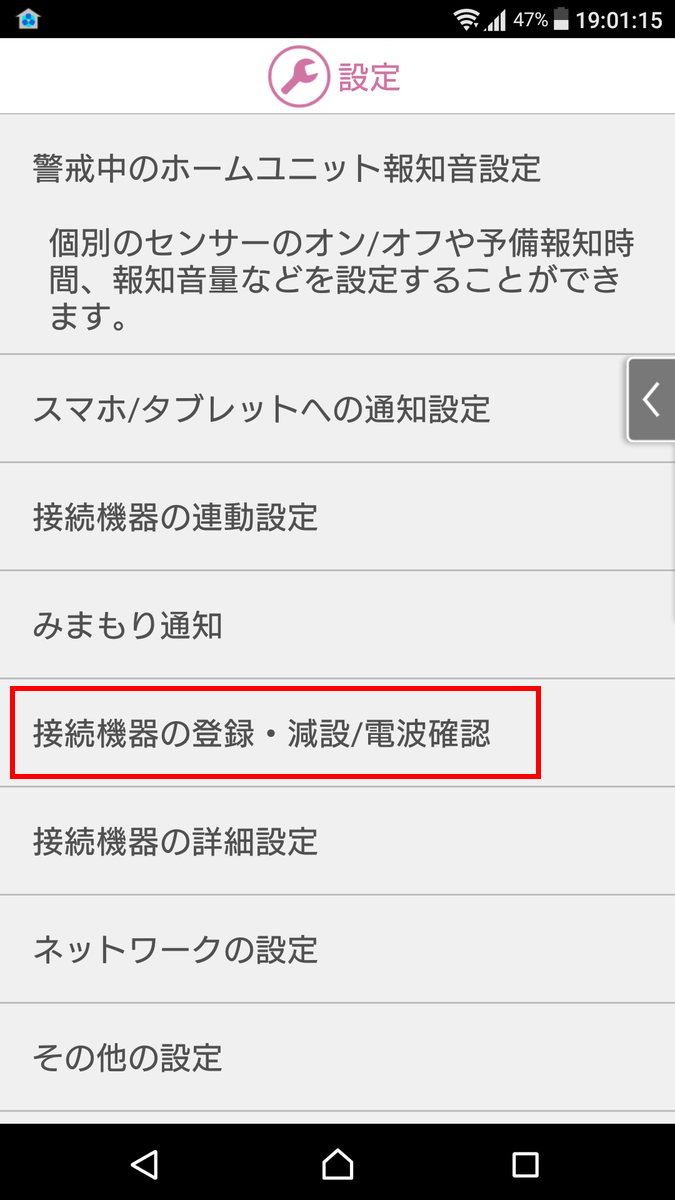
Tap "Register / Reduce / Check radio" of connected device.
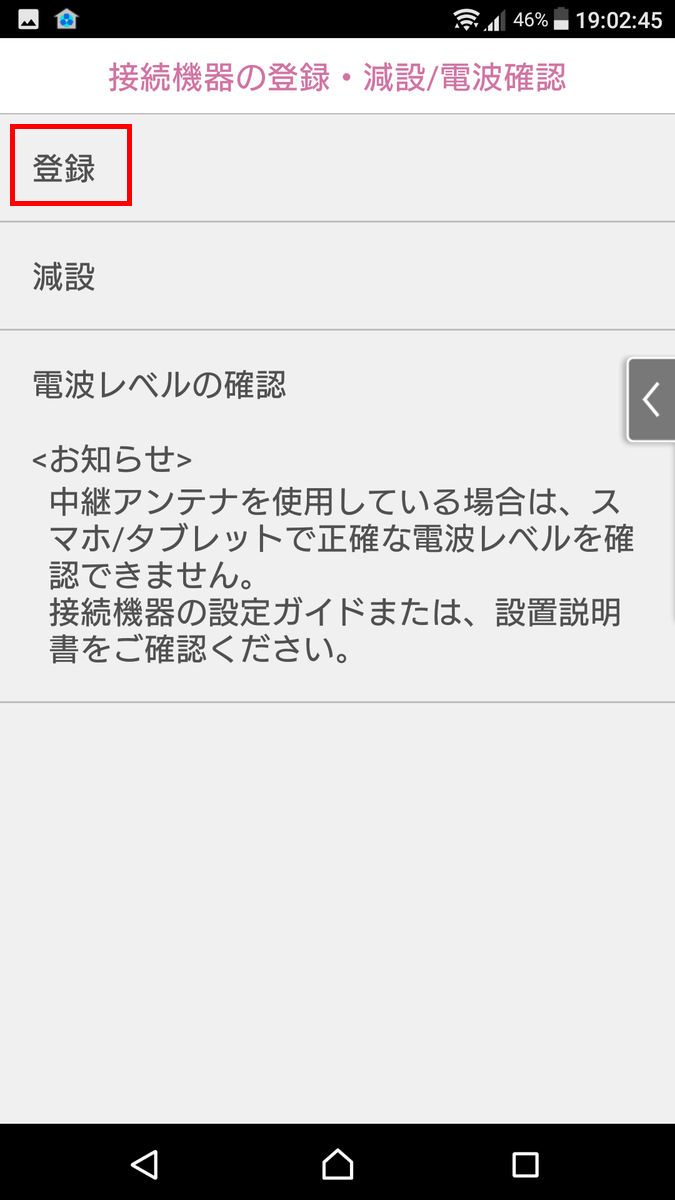
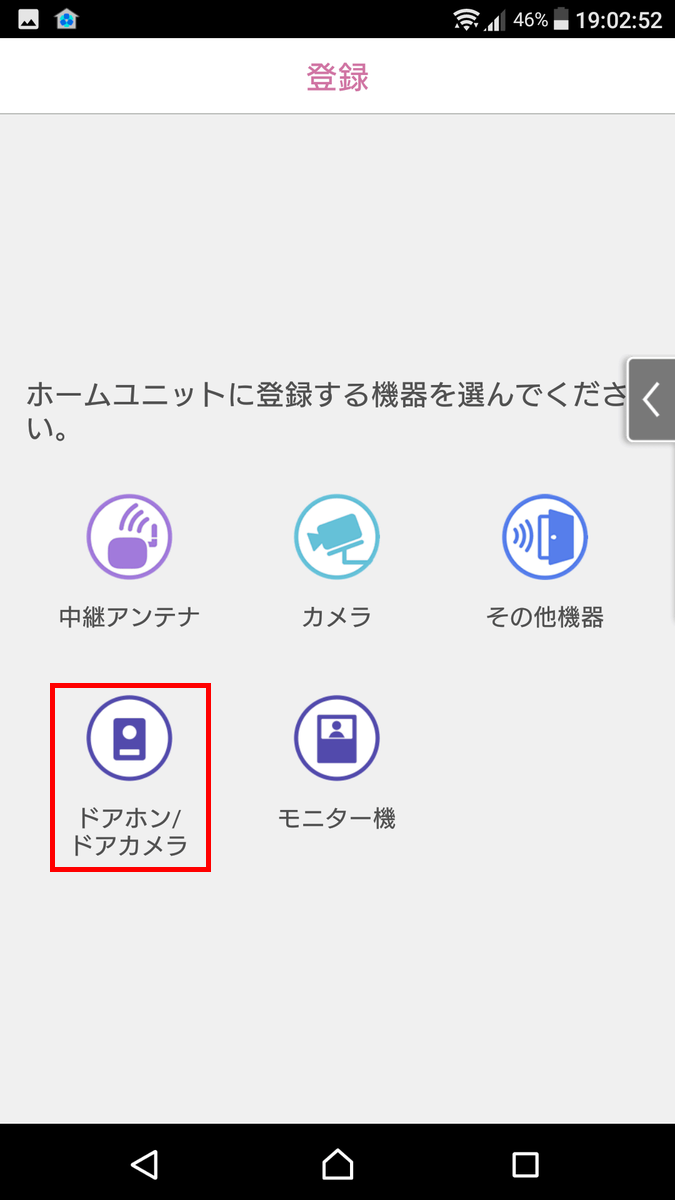
Tap "Register".
Tap "Doorphone / door camera".
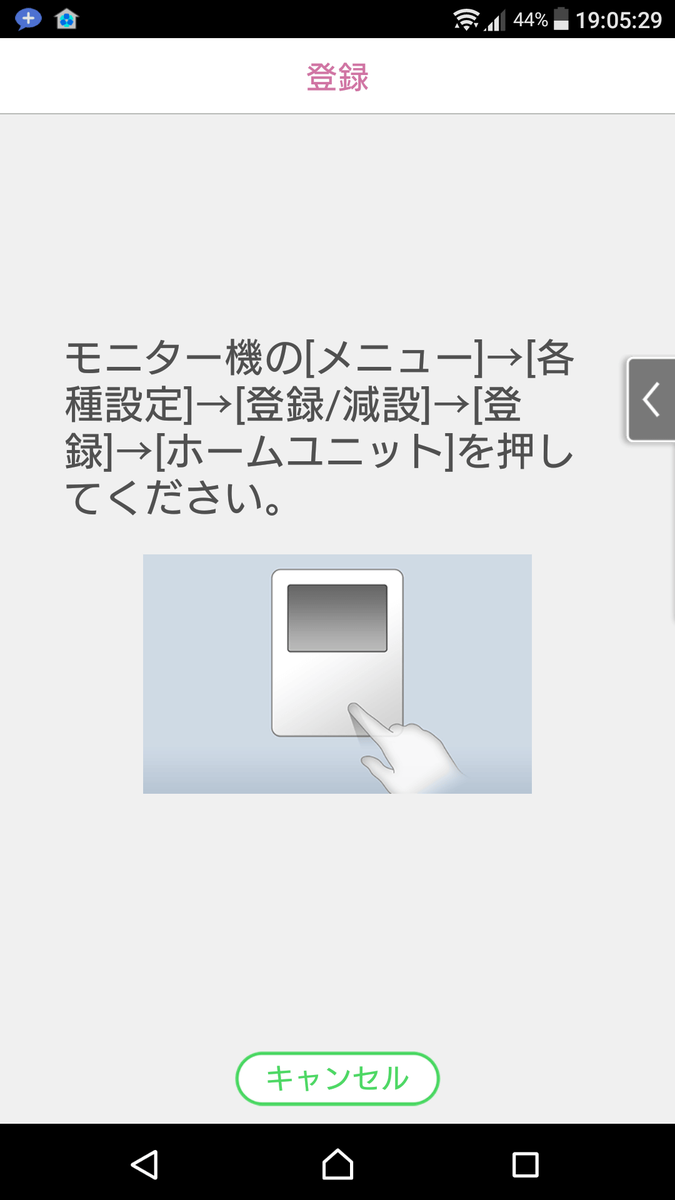
When this screen comes out I went to the door camera ......
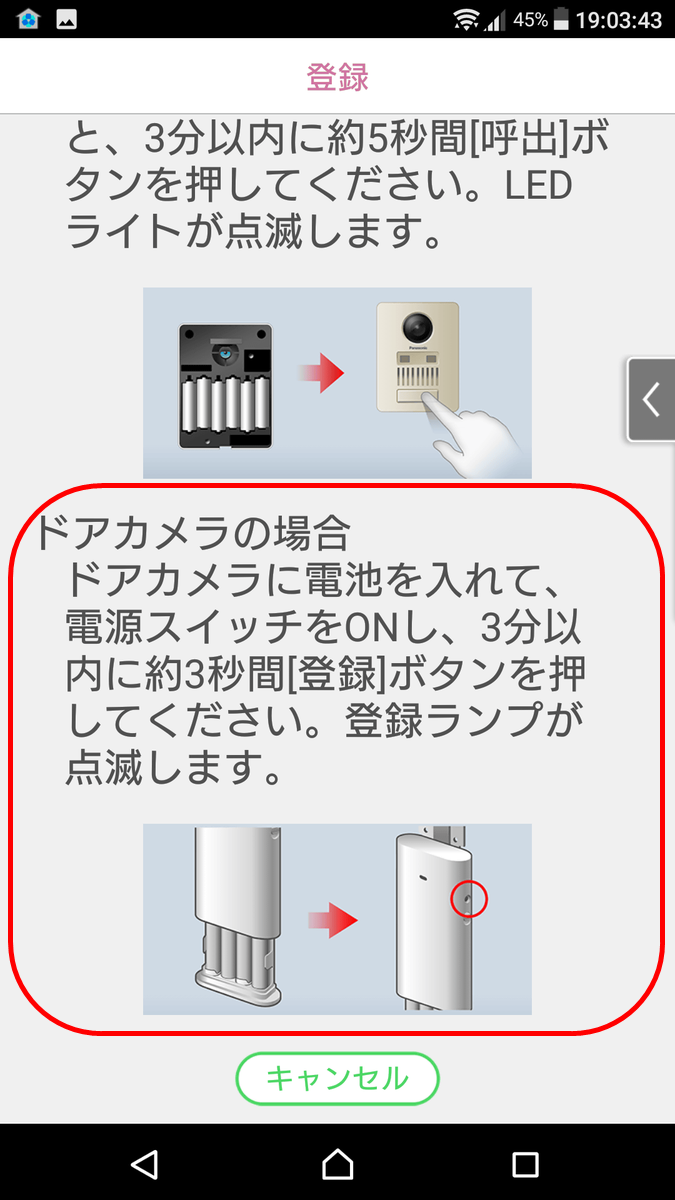
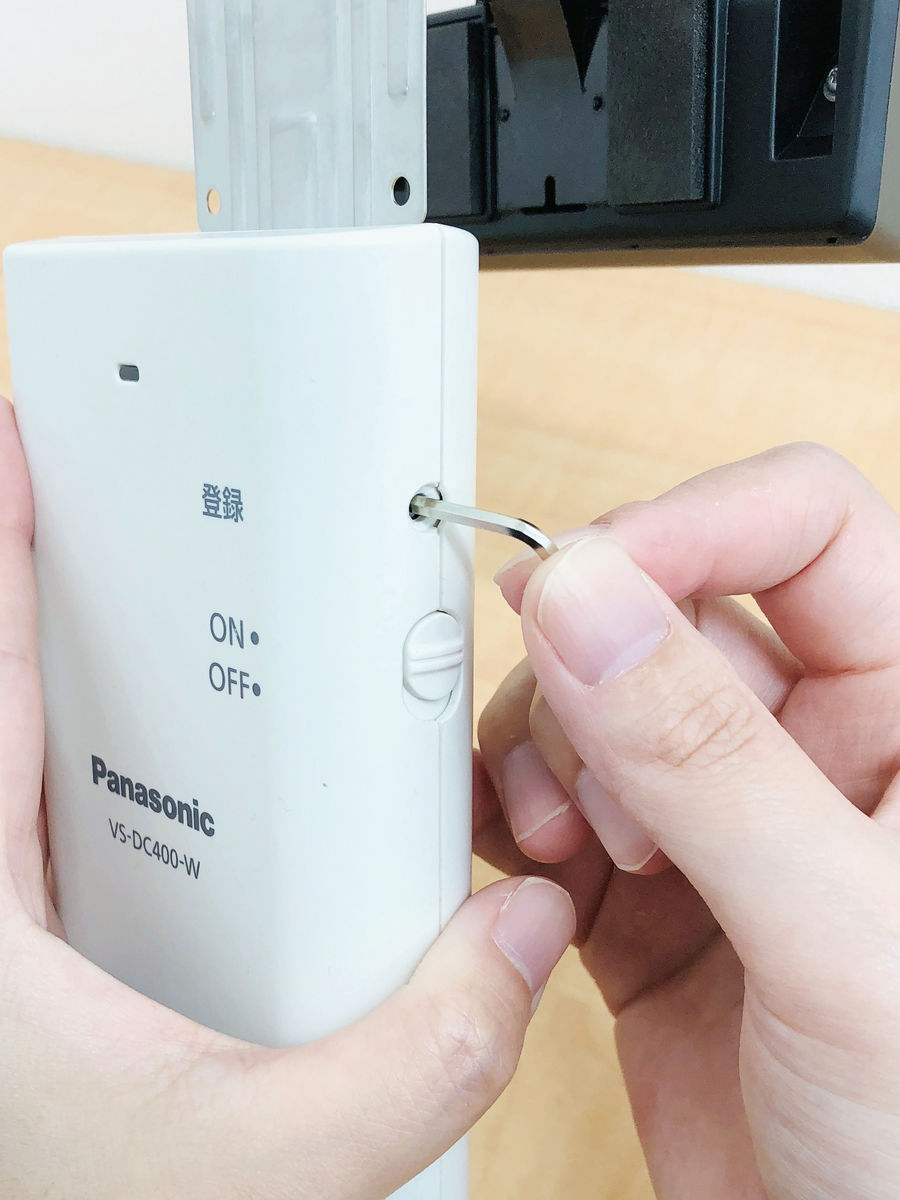
Press the "registration switch" located at the position of the following picture. Although the button is in the back of the indentation, you can press it with a thin thing such as the included hexagonal wrench or pen tip. It is a signal that you can connect when you keep pushing for about 3 seconds and a sound comes out from the door camera.
Since it returns to the registration screen, next tap "monitor machine".
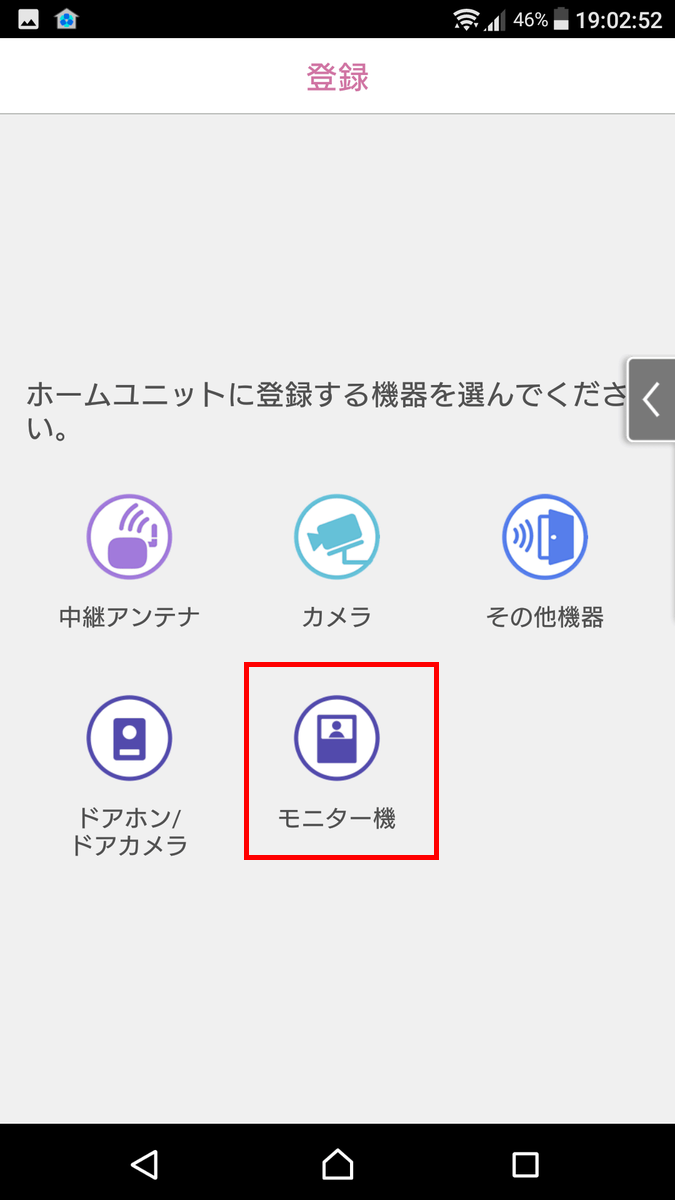
Follow the instructions and register the monitor machine in the home unit, the setting is completed.
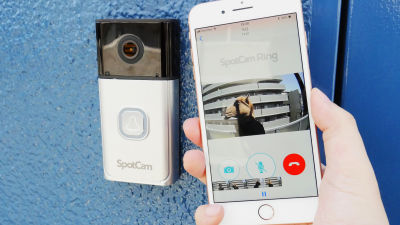
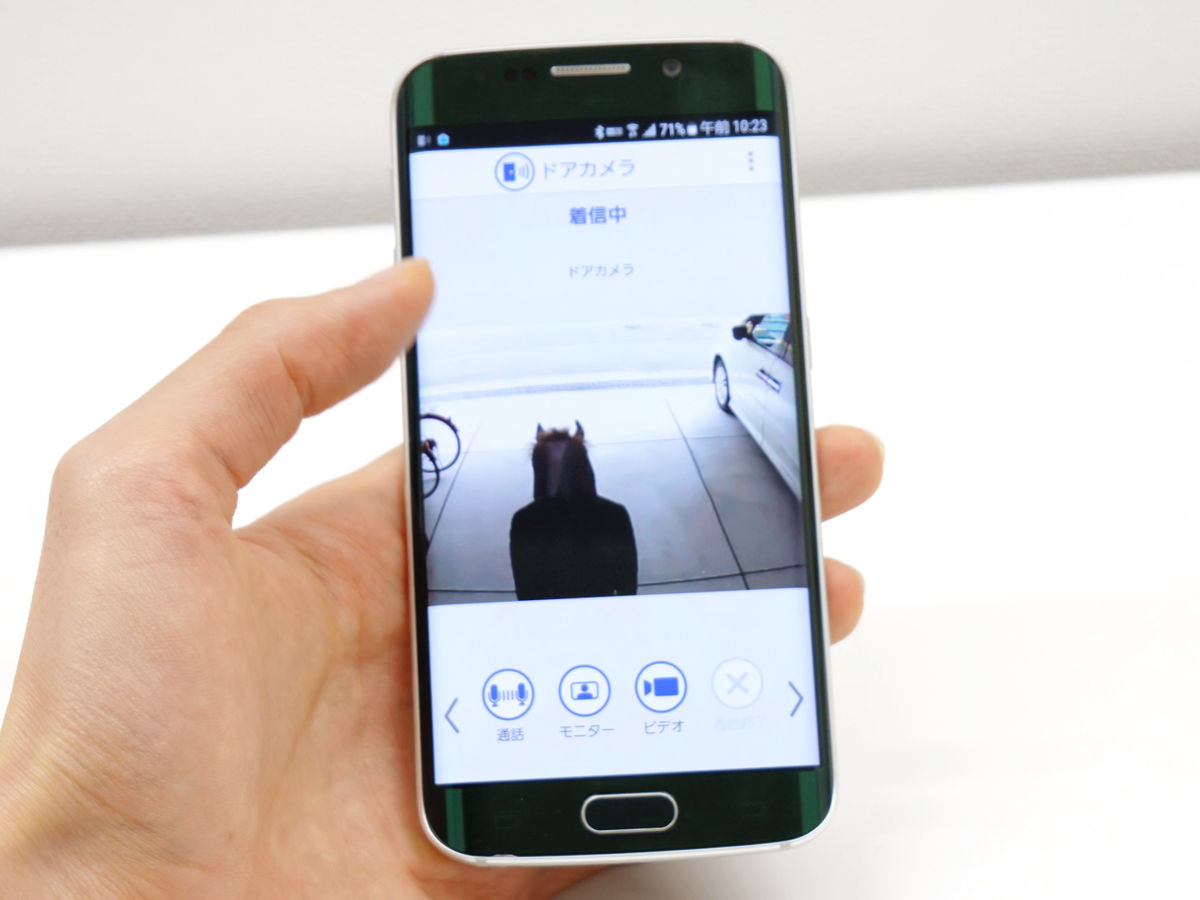
◆ Actually trying out - After confirming that the chime actually rang with a push notification of the smartphone in the next movie, you can see the situation that guests are handling without going to the entrance. You can see that there is no time lag and you can talk smoothly.
We tried visitor correspondence with door camera VS-HC400K-W with monitor - YouTube
When the chime rings, the image of the door camera is displayed on the smartphone, and unscheduled visitors are shown ......
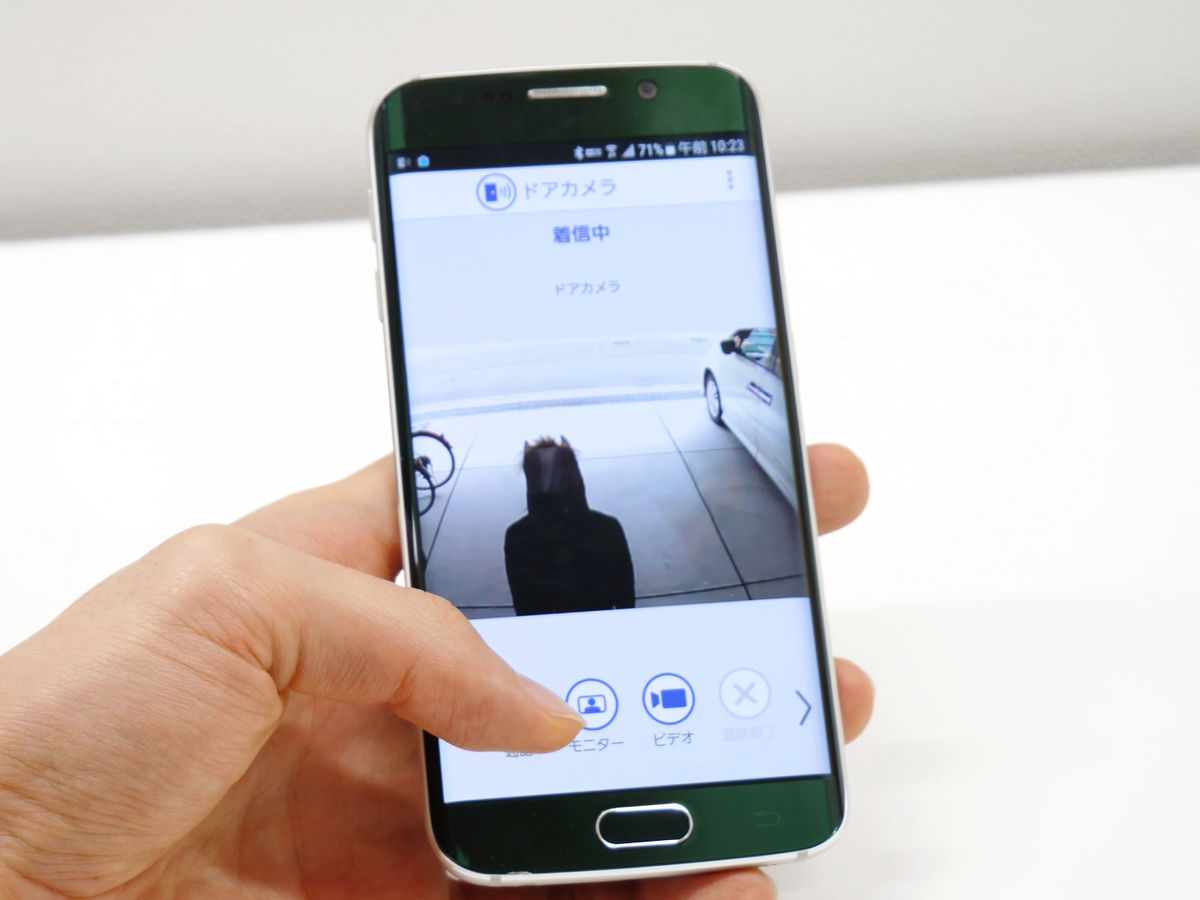
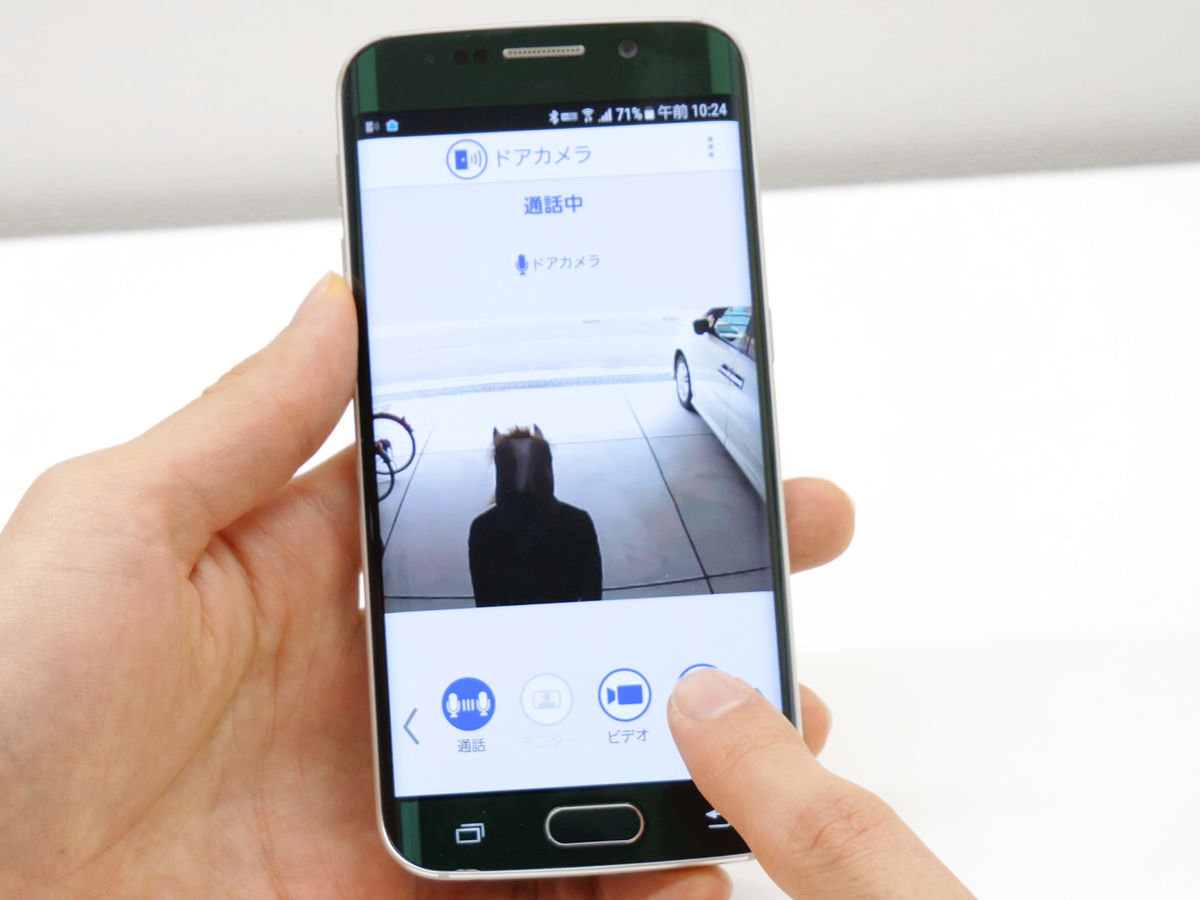
I tapped the call button and listened to the story and found that I came to deliver the mail.
I decided to respond by pushing the end call button.
"Door camera with monitor VS - HC400K - W" can be installed easily in rental housing because tools and installation work are unnecessary. It may be most suitable for a living alone woman saying "I am afraid to go to see the entrance's peephole" because I know what kind of people came even before going to the door and not answering. Also, even if you are on the go, you can respond to customers, so when a delivery member of a courier arrives while you are away, say "Please do not receive directly now, please put it in the delivery box", or tell the scheduled time to go home Because it is also possible to do so, it is perfect for single-person households who are not limited to women but who tend to stay abroad.
On the other hand, in order to use the chime link function, it is necessary to keep the monitor at all times on the charging stand, the point that the wireless communication is weak against obstacles and the communication becomes unstable if the devices are in different rooms , I felt that it was unsuitable for wider houses and detached houses with more than two stories. Moreover, it can not be used depending on the shape of the door and the Wi-Fi environment, so I'd like to check firmly on the Panasonic website before purchasing.
Related Posts: