A review of Reolink's security camera 'RLC-833A' that can shoot in 4K and has an infrared sensor for nighttime shooting
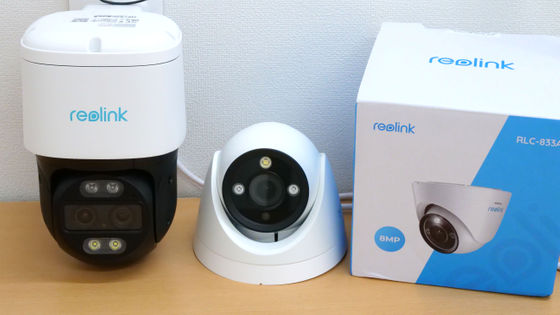
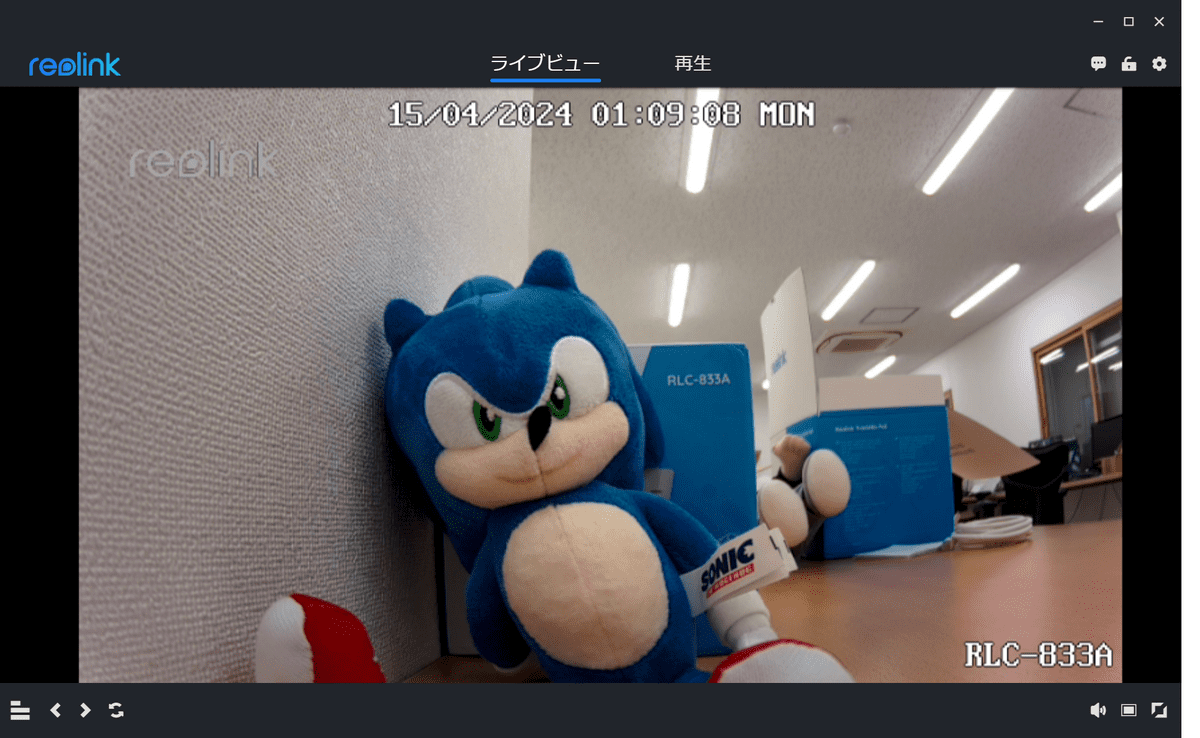
The security camera ' RLC-833A ' sold by Hong Kong's Reolink is priced at around 30,000 yen, but it supports 4K Ultra HD image quality and has a full range of functions such as two-way communication, human and vehicle detection, and infrared night vision shooting. Reolink provided us with the RLC-833A, so we tried it out.
Reolink RLC-833A - 4K Security Camera with a Spotlight | Reolink Official
Table of Contents
1: Check the appearance and connect to the router
2: Installing the client software and initial settings
3: Basic functions
4. Useful features
5: Other settings
6. Smartphone apps
7: Summary
◆1: Check the appearance and connect to the router
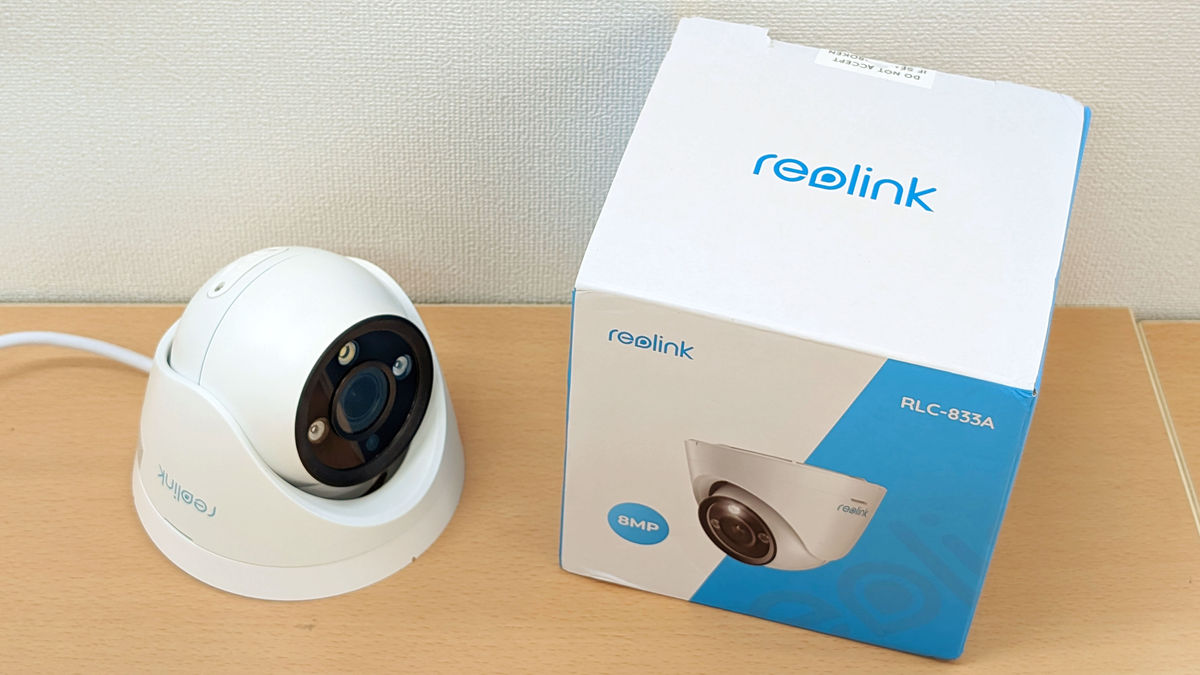
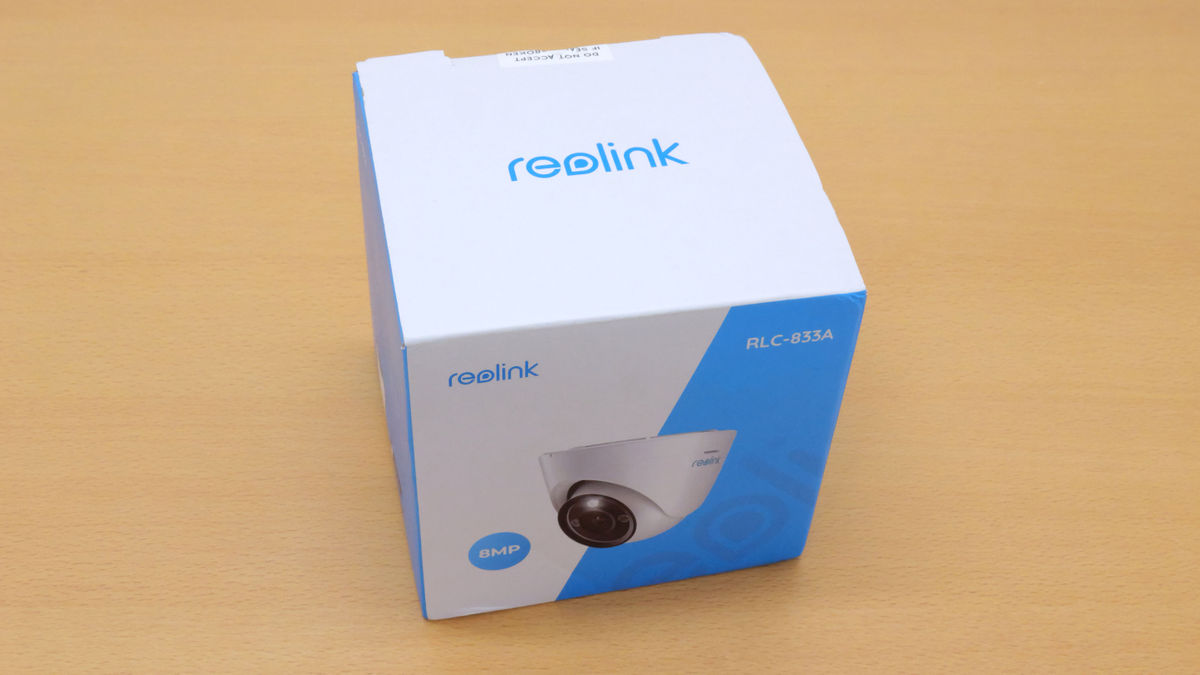
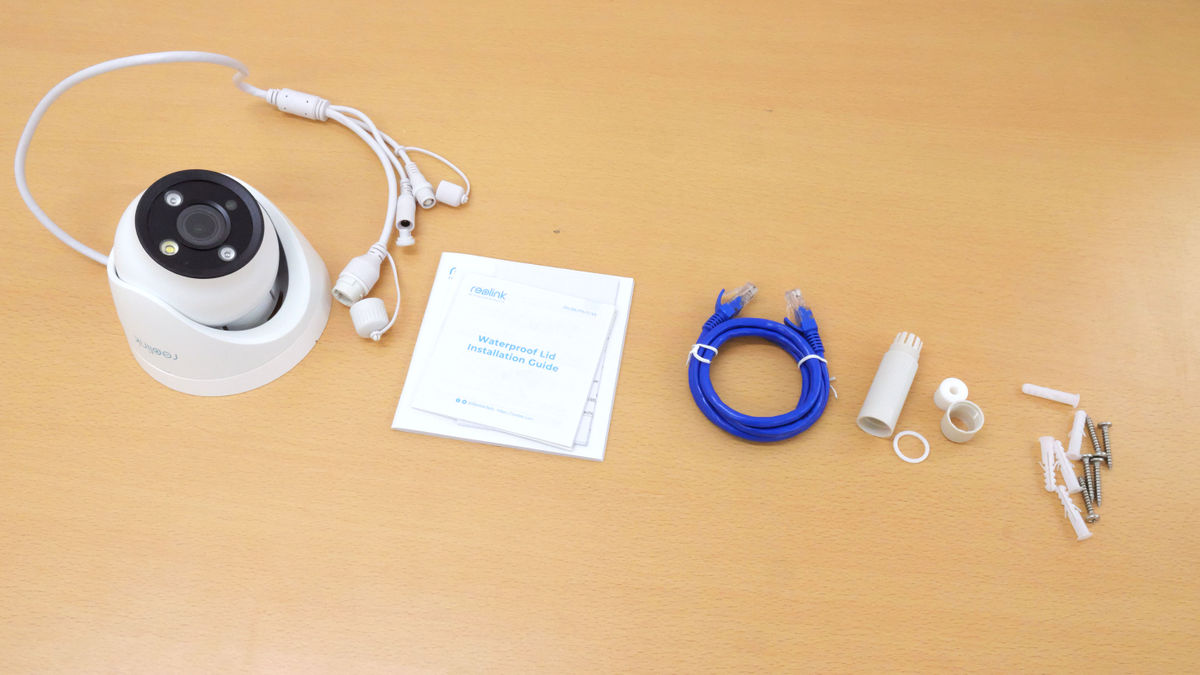
This is the 'RLC-833A' package.
The contents include the camera body, instruction manual, one LAN cable, a waterproof cover, and screws.
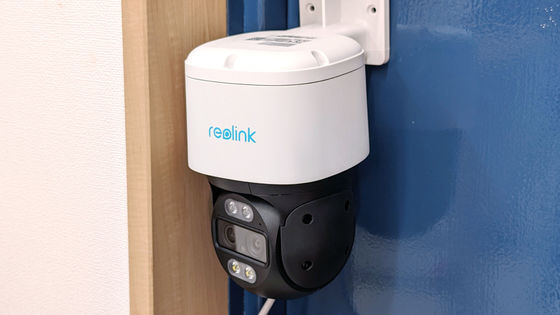
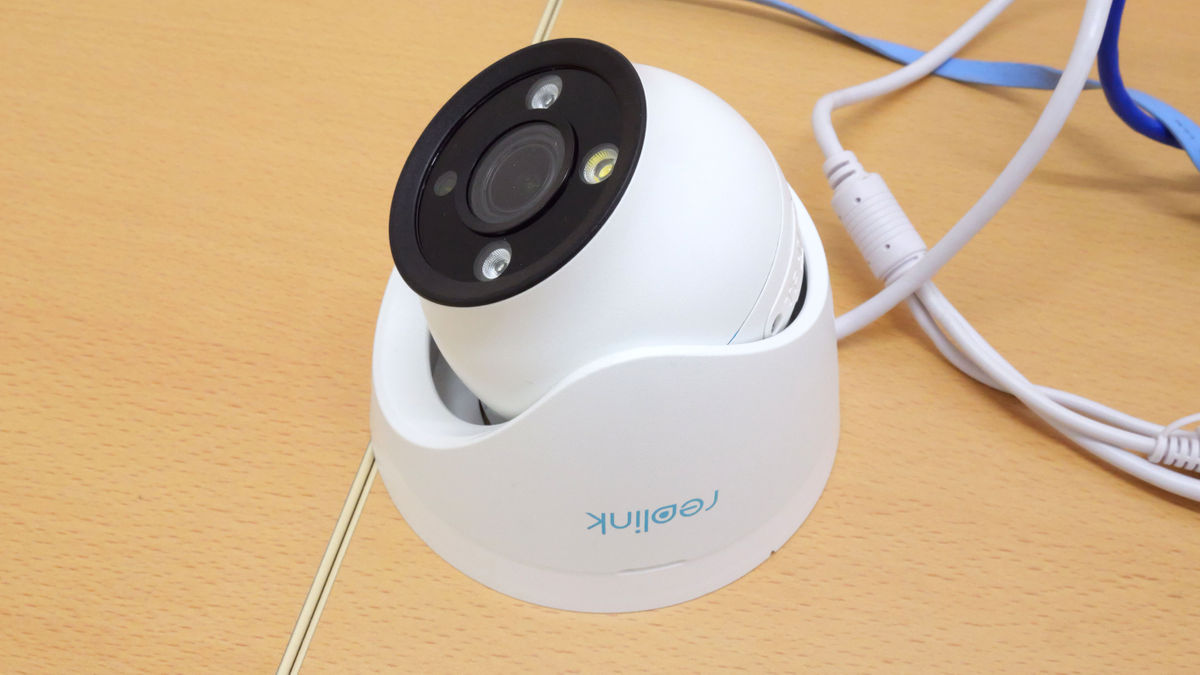
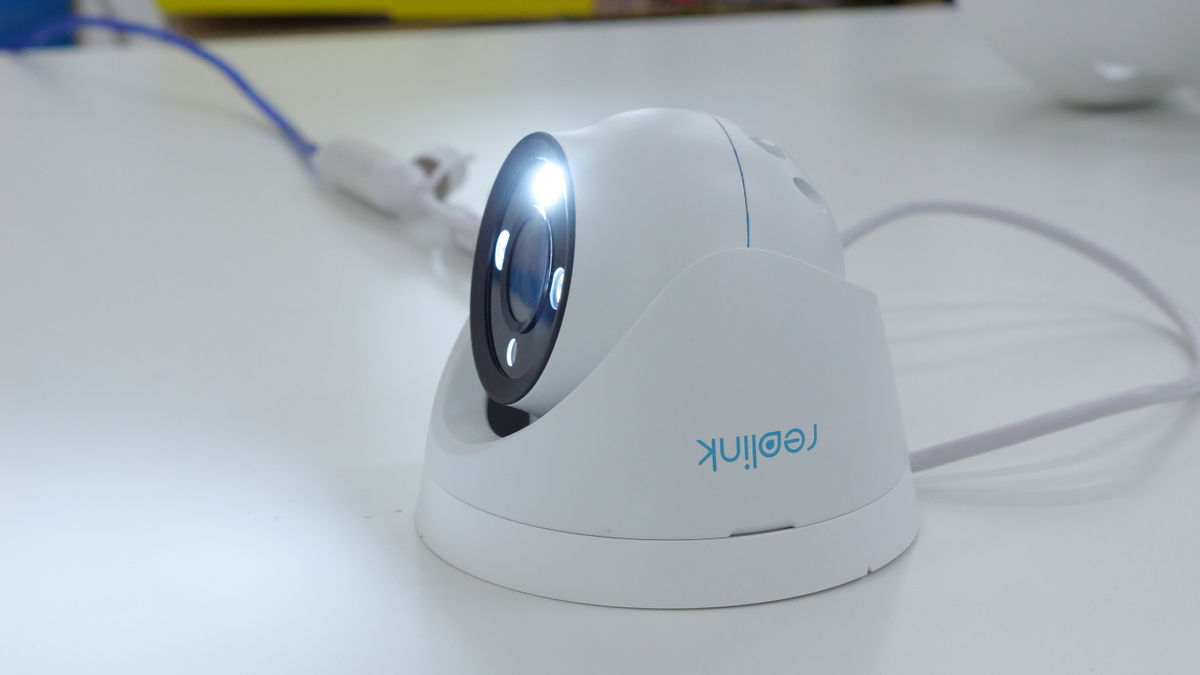
The camera looks like this.
It is designed so that the round camera fits snugly into the round base.
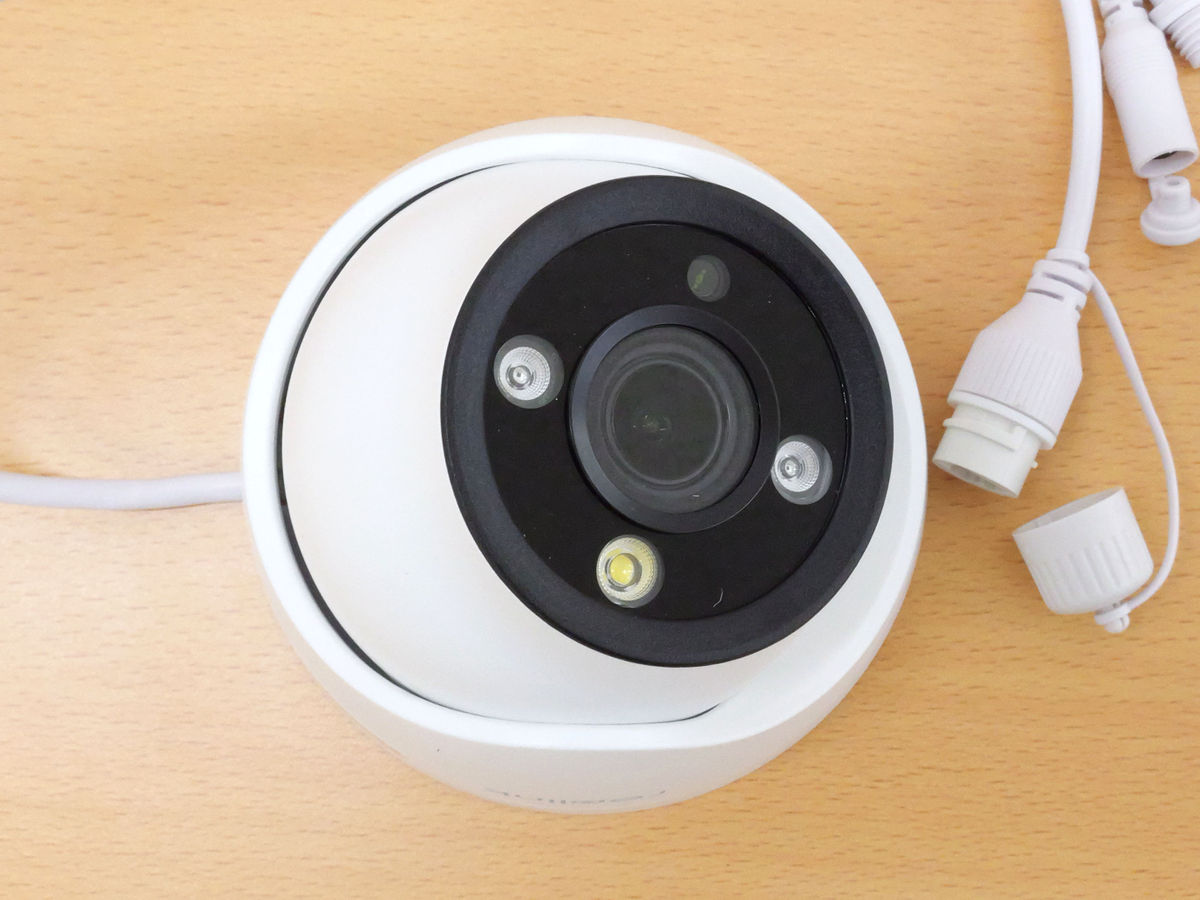
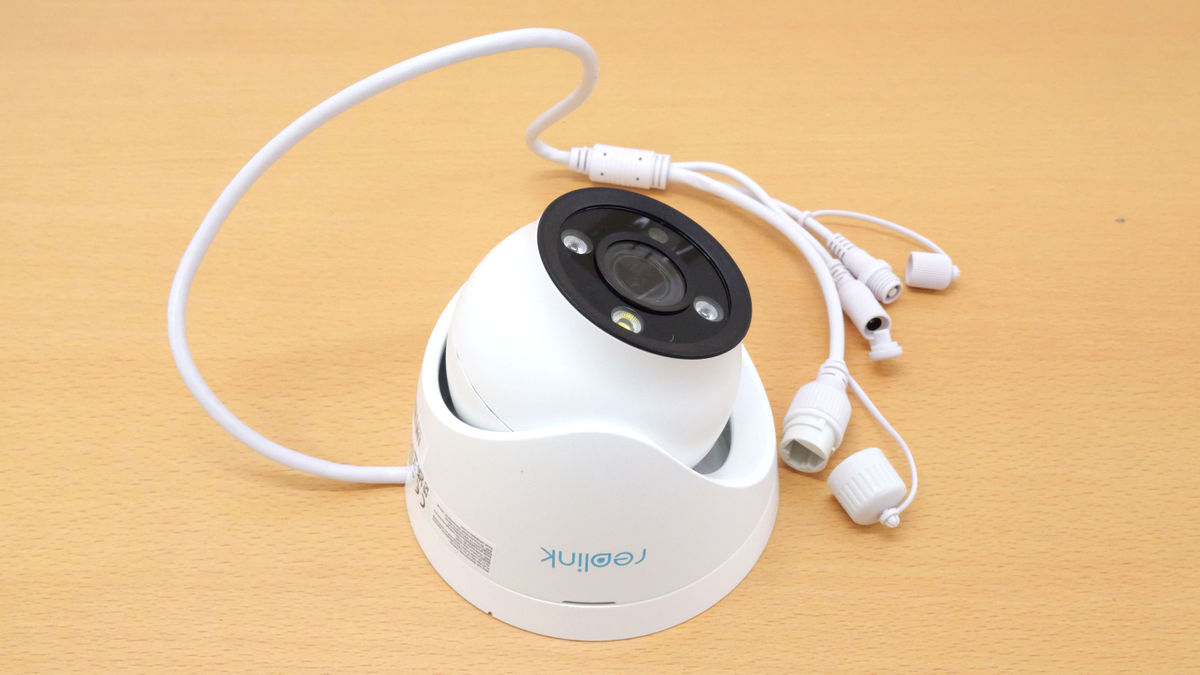
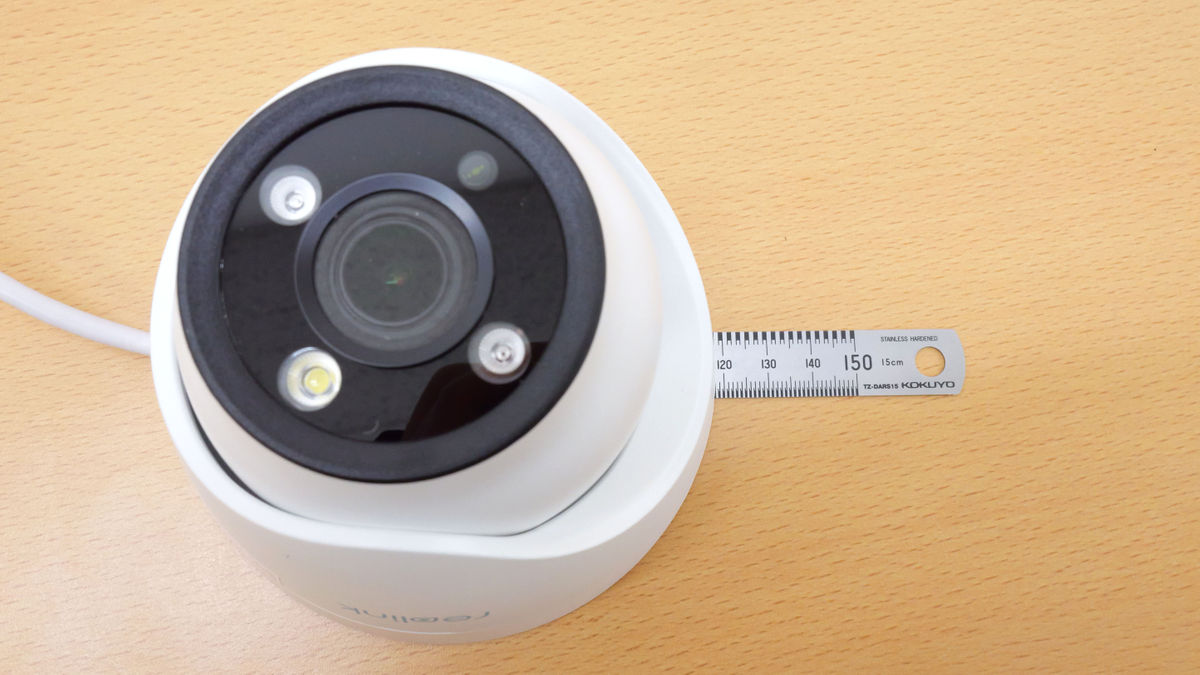
The large circular object in the center is the lens. It can shoot video at 3840X2160 resolution and 25 FPS, and has a focal length of 2.8-8mm. The viewing angle is 50-94 degrees horizontally and 30-53 degrees vertically. Above the lens is a spotlight, and on both sides of the lens are infrared LEDs. Below the lens is a daylight sensor.
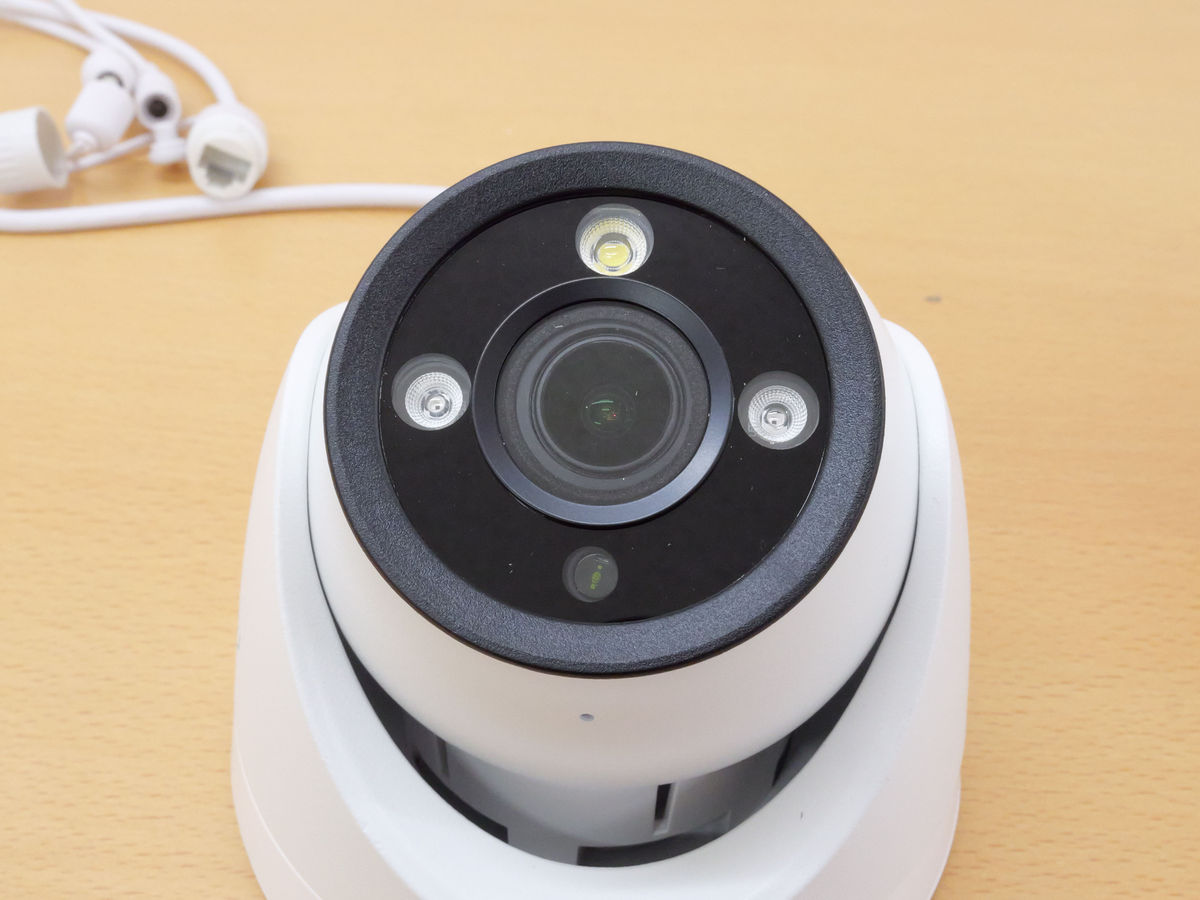
The camera angle can be changed manually.
The camera can be rotated 360 degrees, and when you turn it around, the speaker will appear.
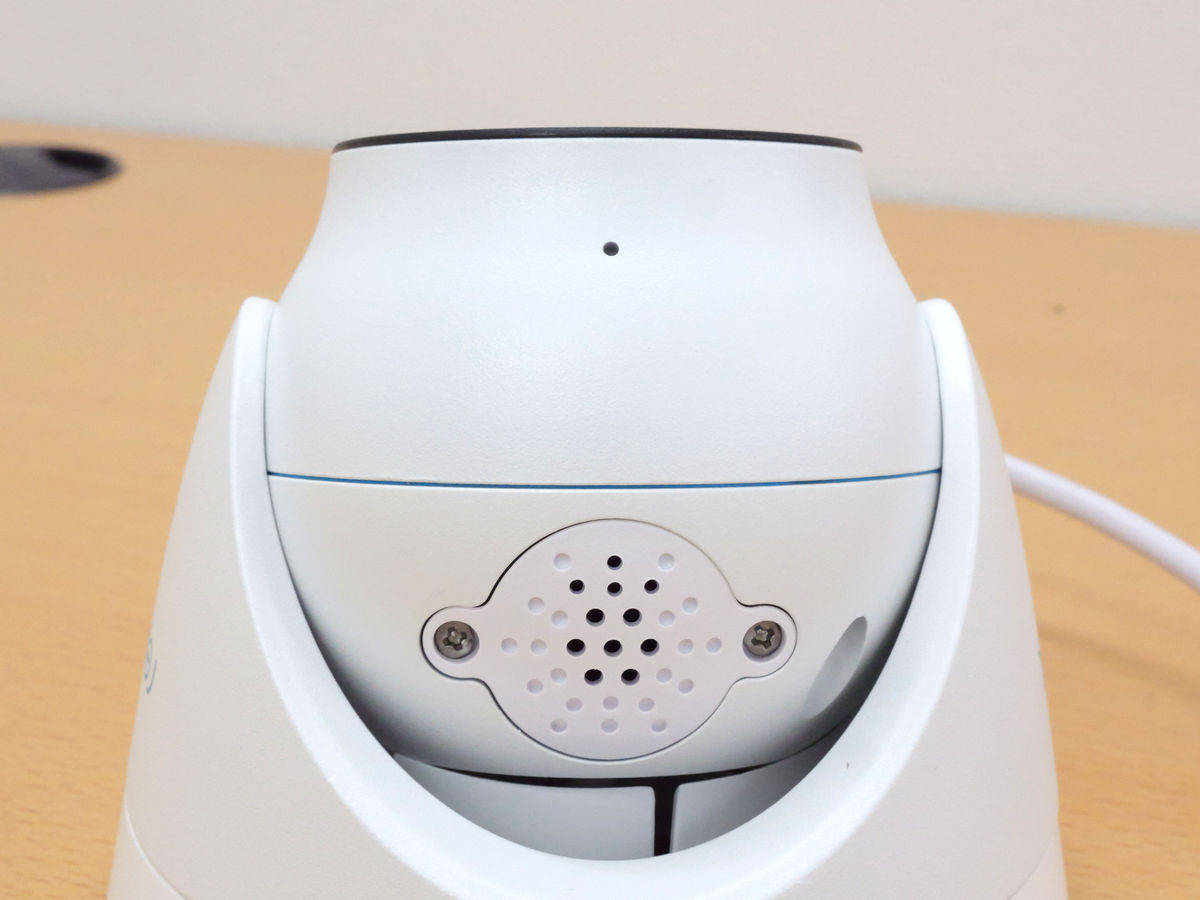
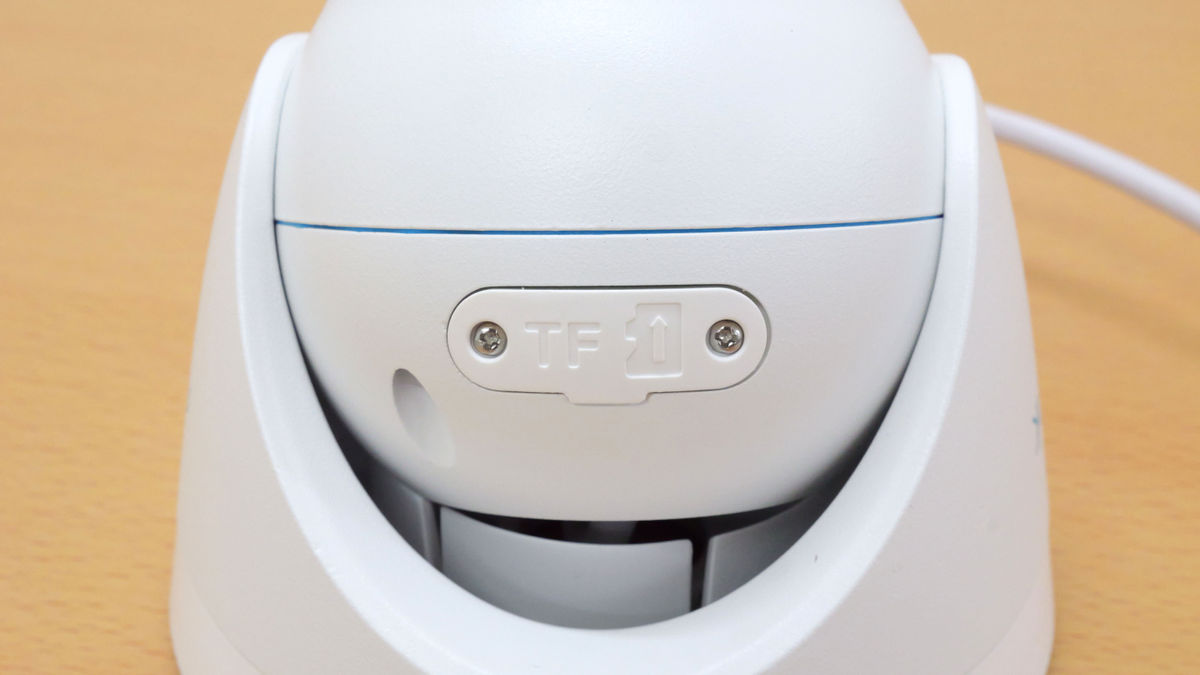
If you turn it around again, the microSD card slot will appear.
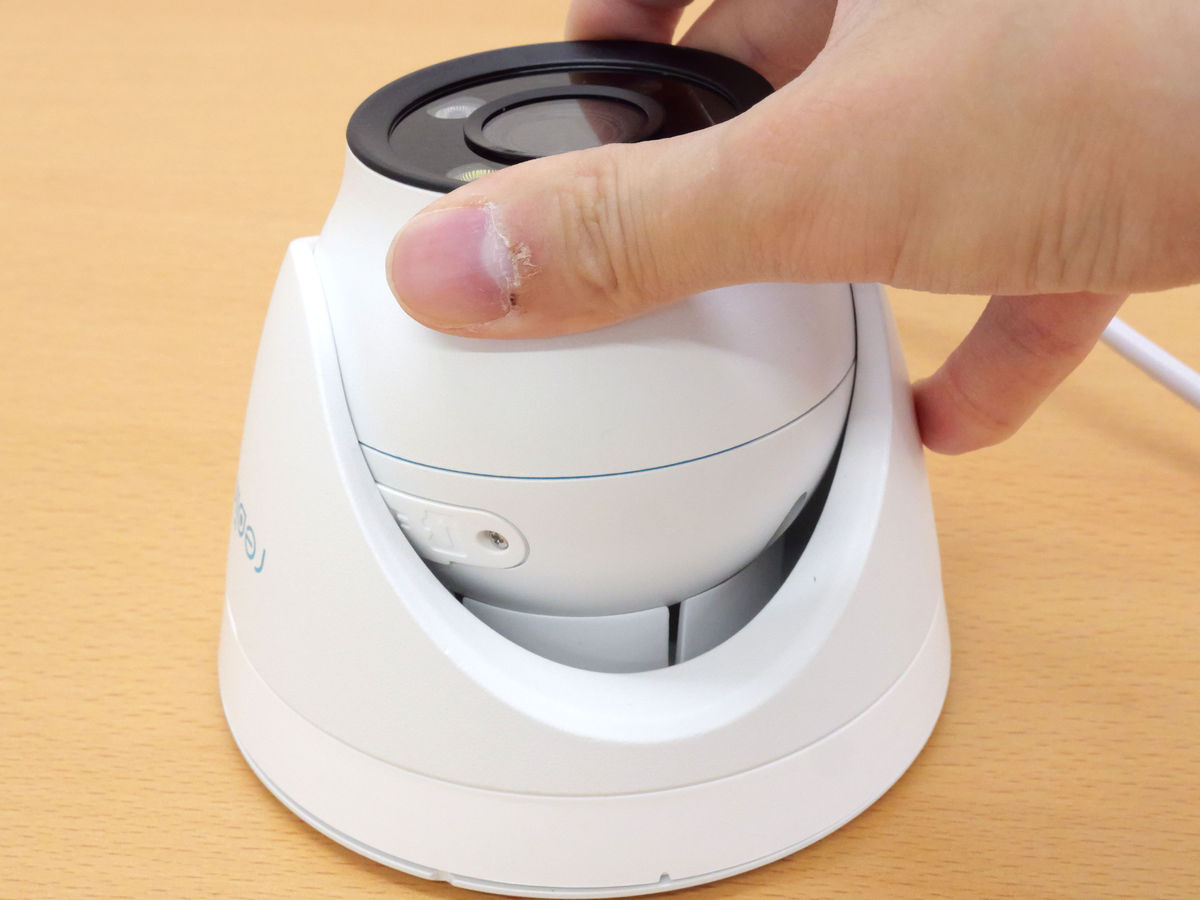
You can easily open it with a Phillips head screwdriver.
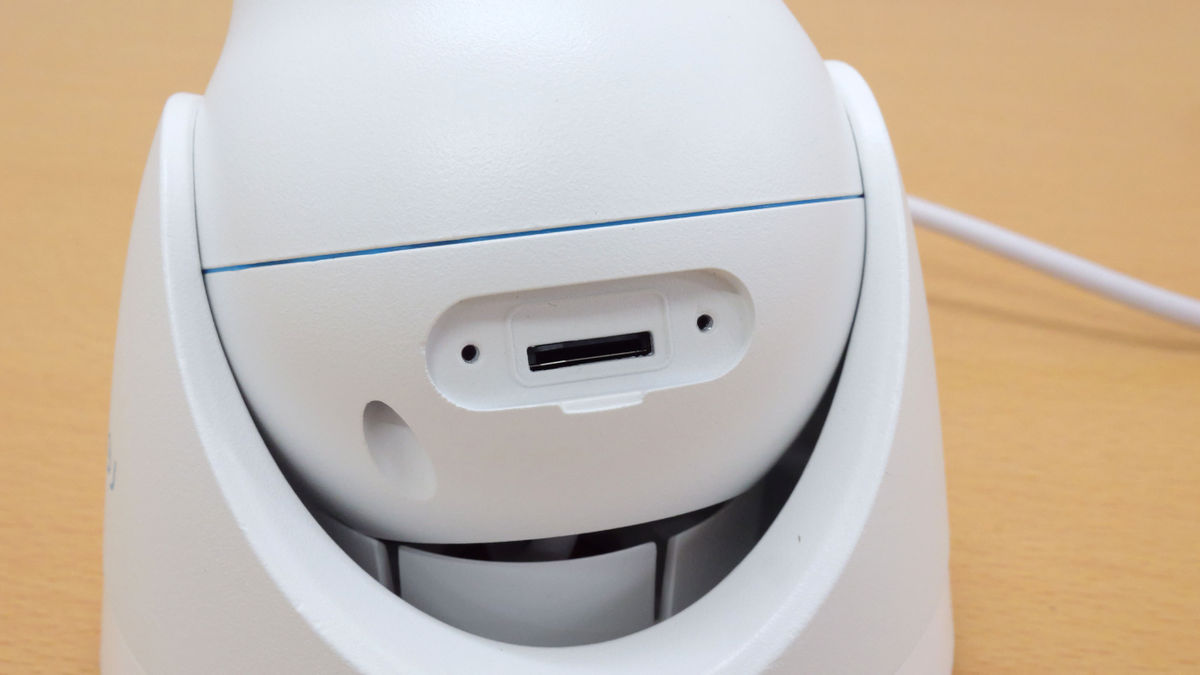
The inside looks like this. You can insert a microSD card (sold separately). The RLC-833A basically saves all recorded footage to the microSD card, so inserting one is almost essential. This time I inserted a commercially available microSD card.
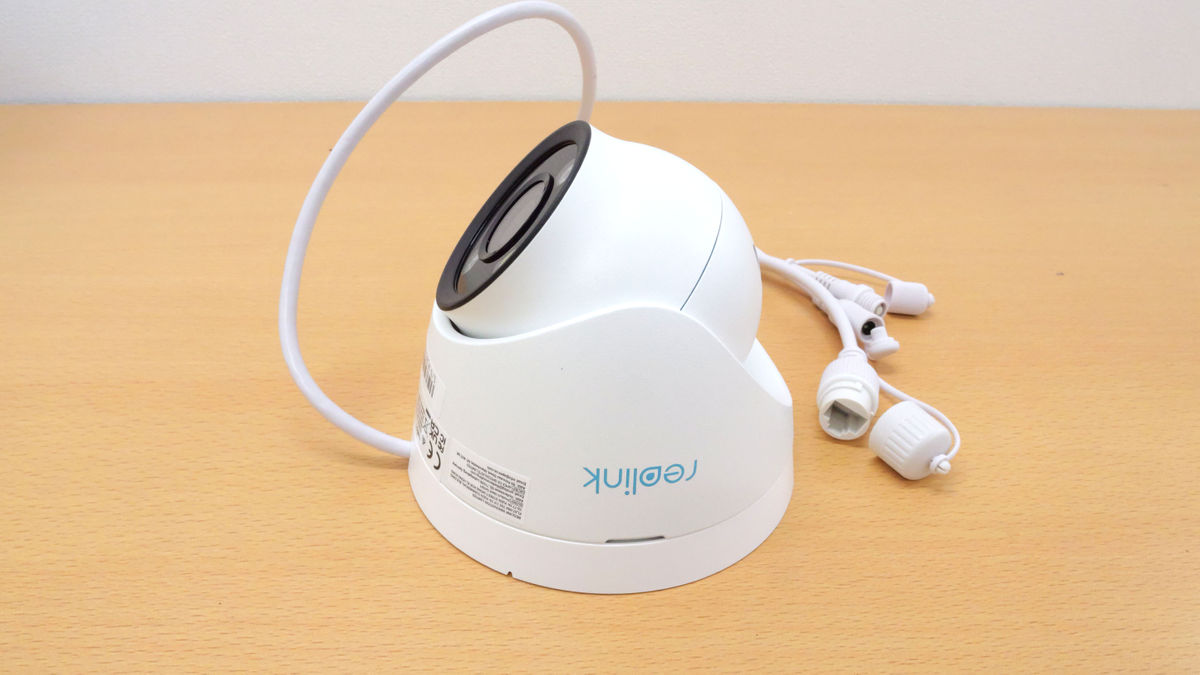
There is a base on the bottom of the camera for mounting it to a wall.
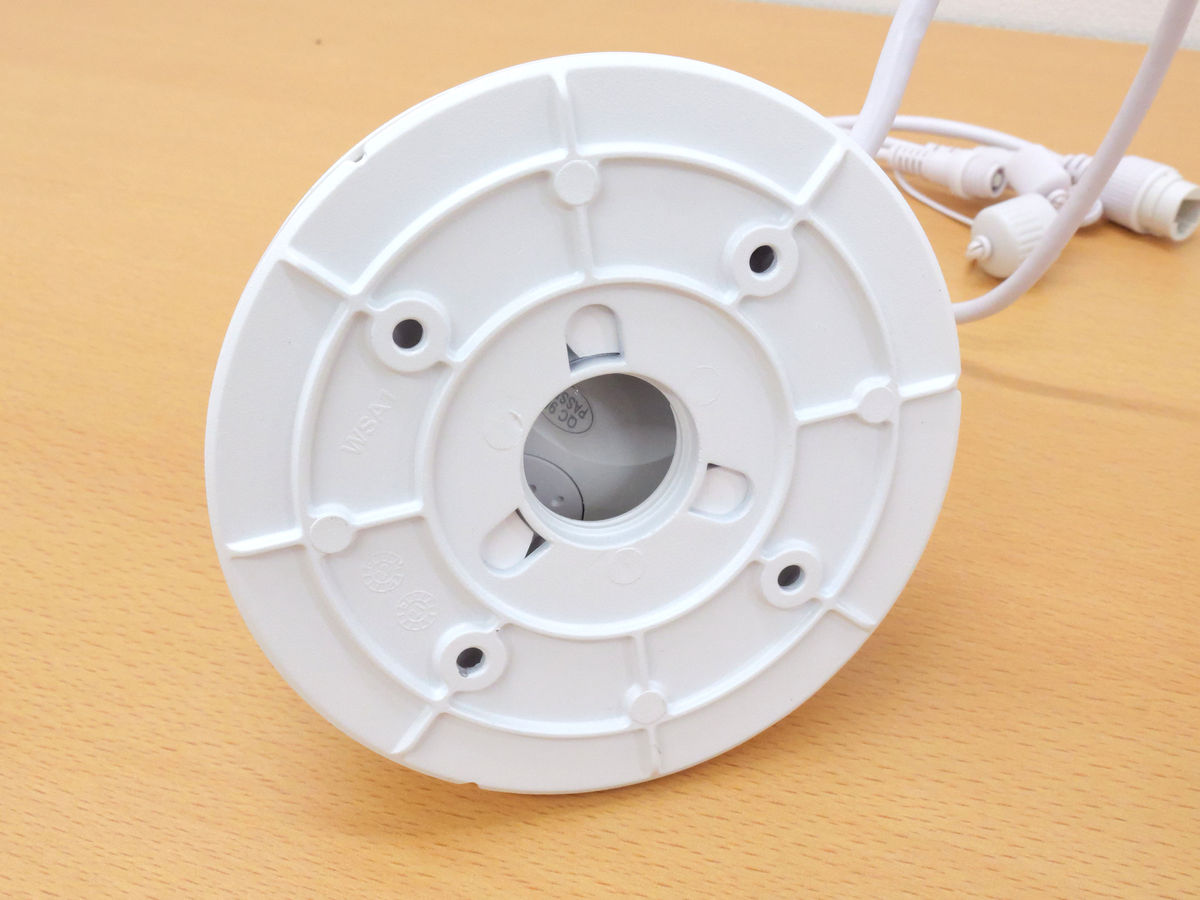
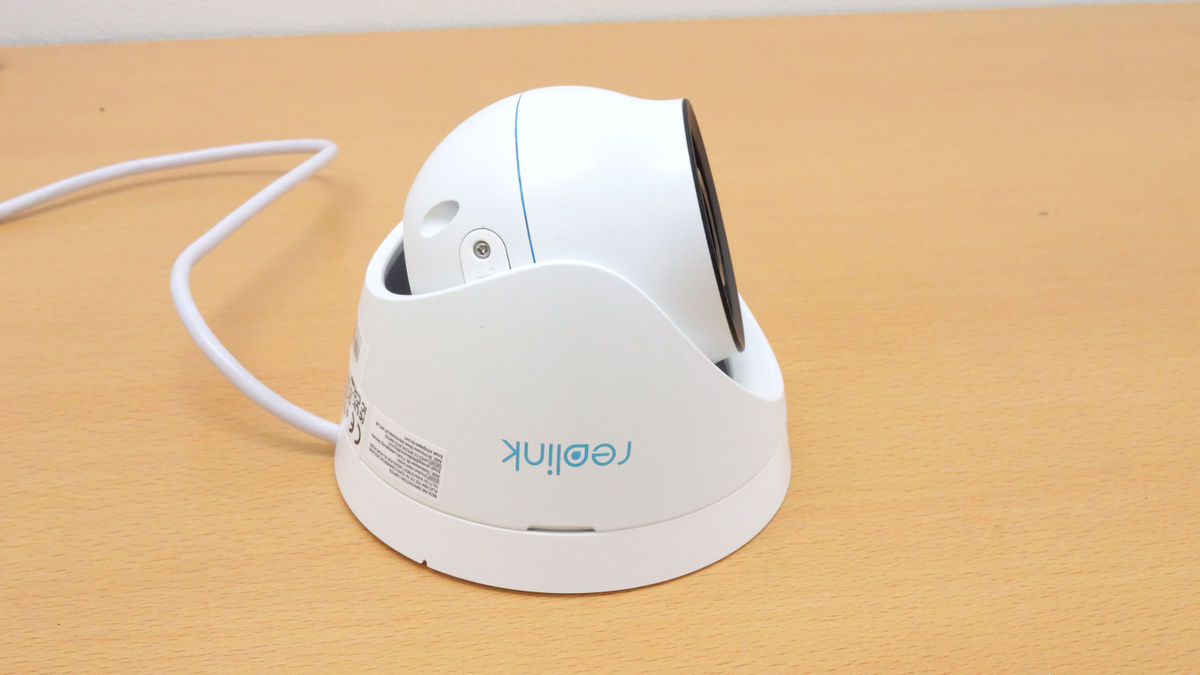
This is what it looks like when removed.
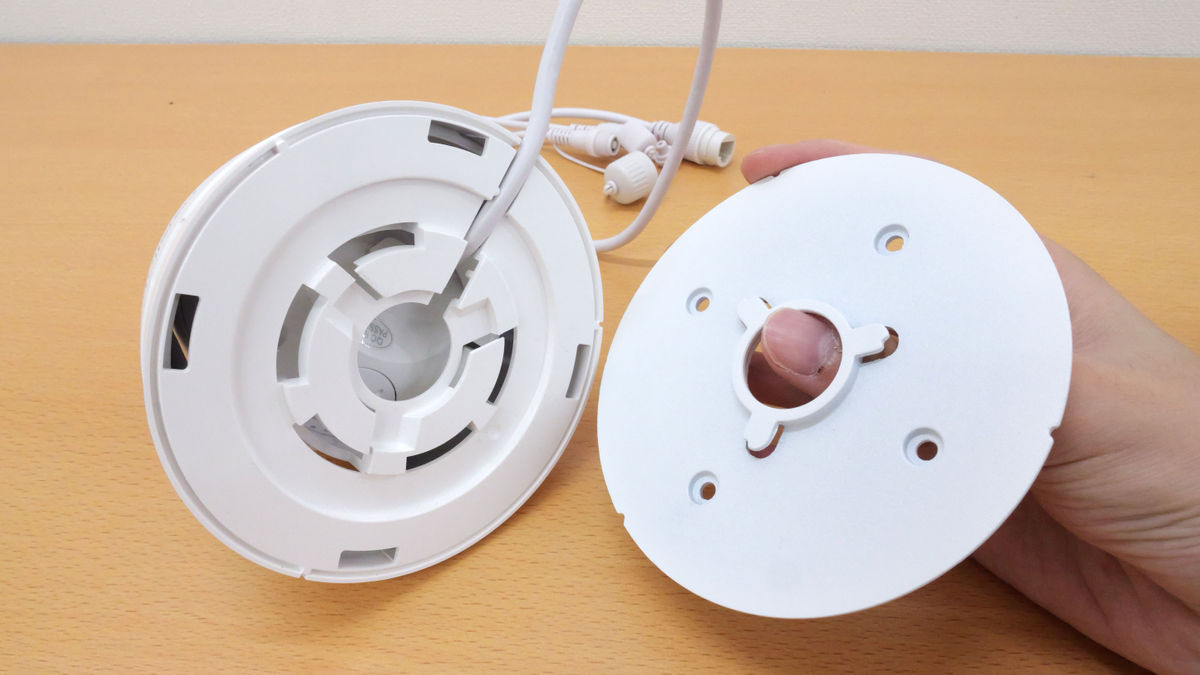
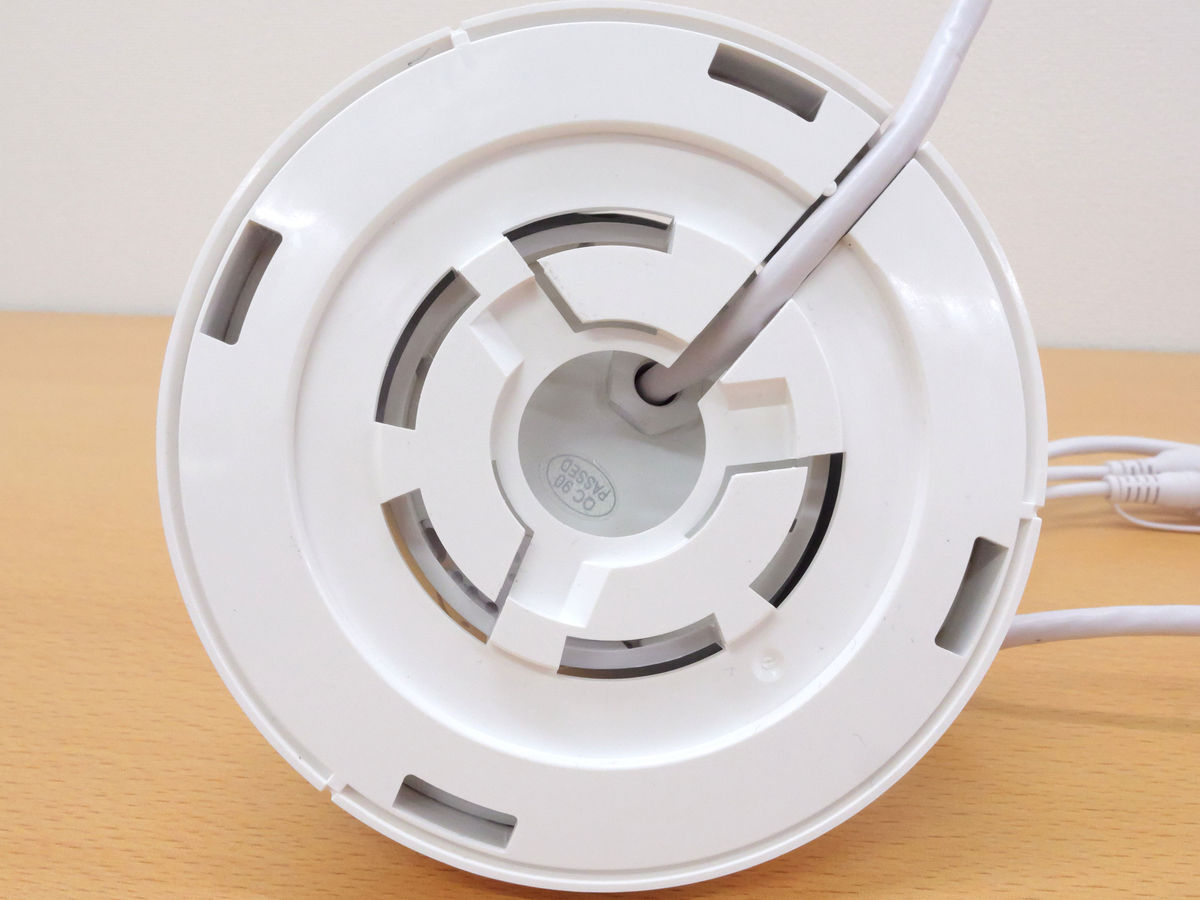
When you remove the base, the back of the camera and the cable connections become visible from the outside.
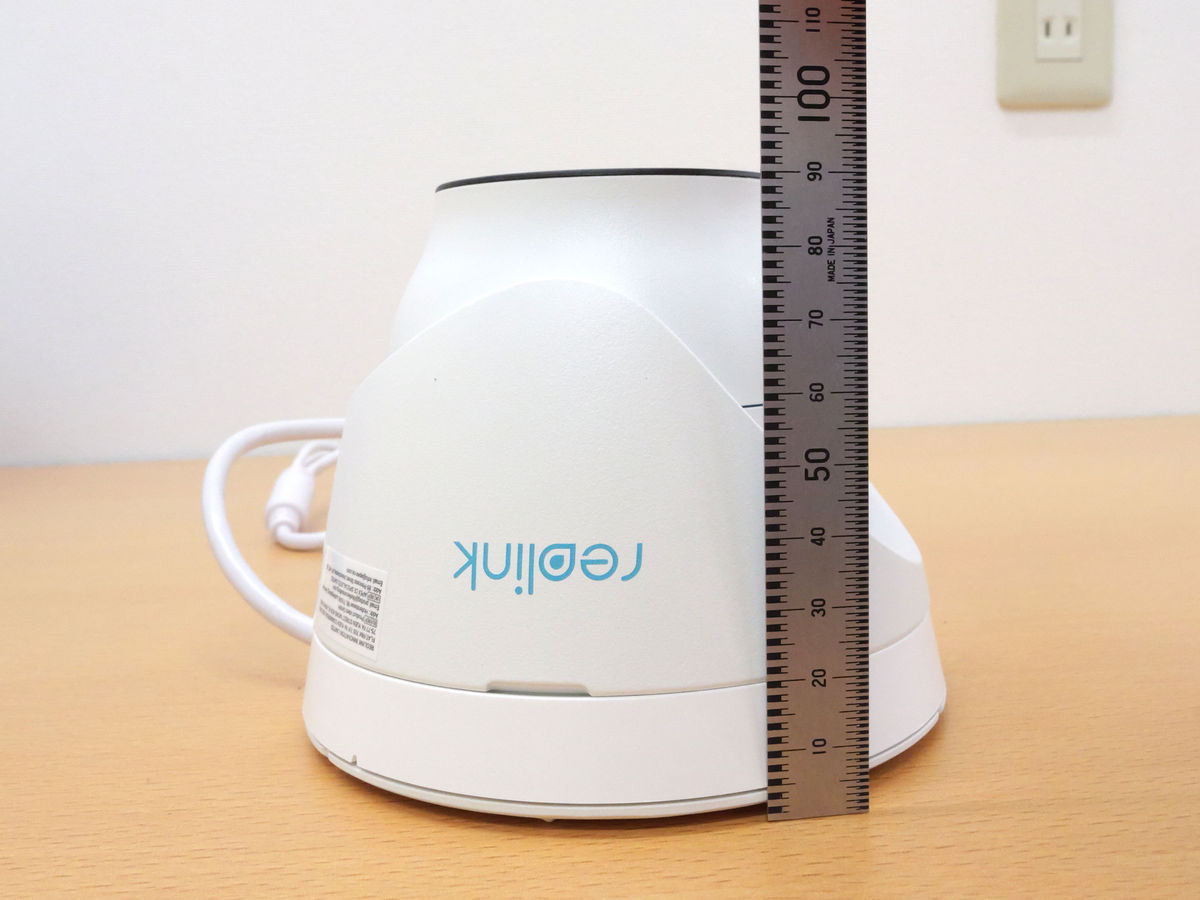
The actual size is approximately 11.8cm in diameter.
The maximum height is approximately 9cm.
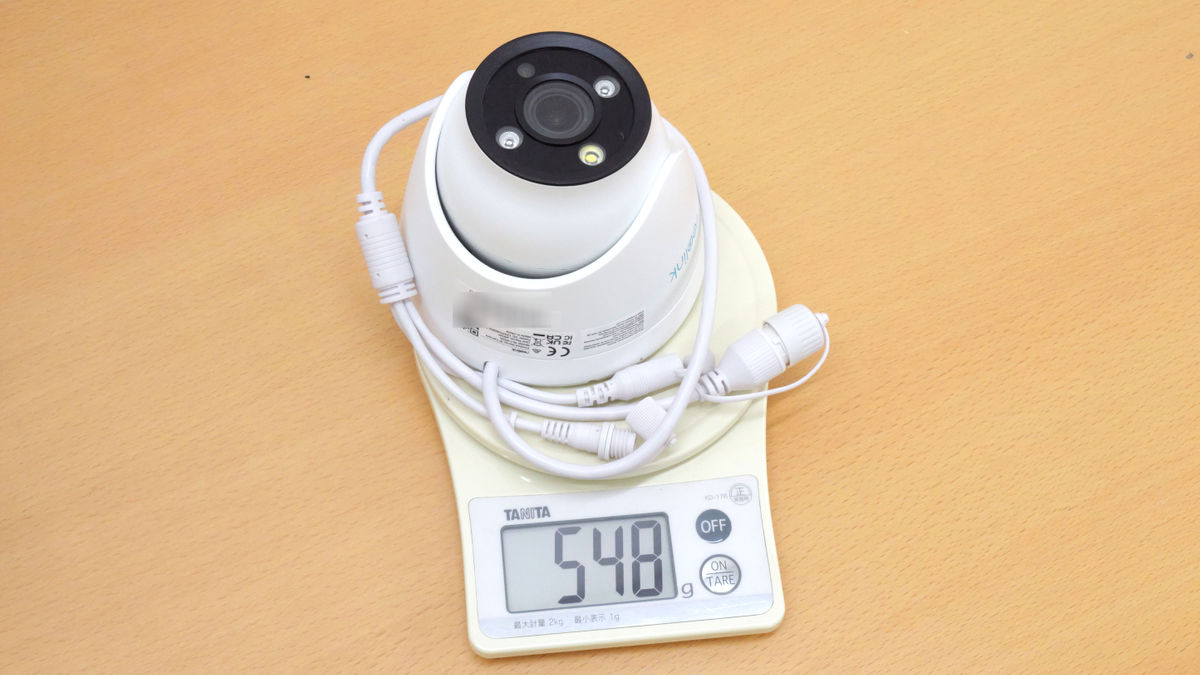
The weight is 548g.
A cable of about 60 cm extends from the main unit.
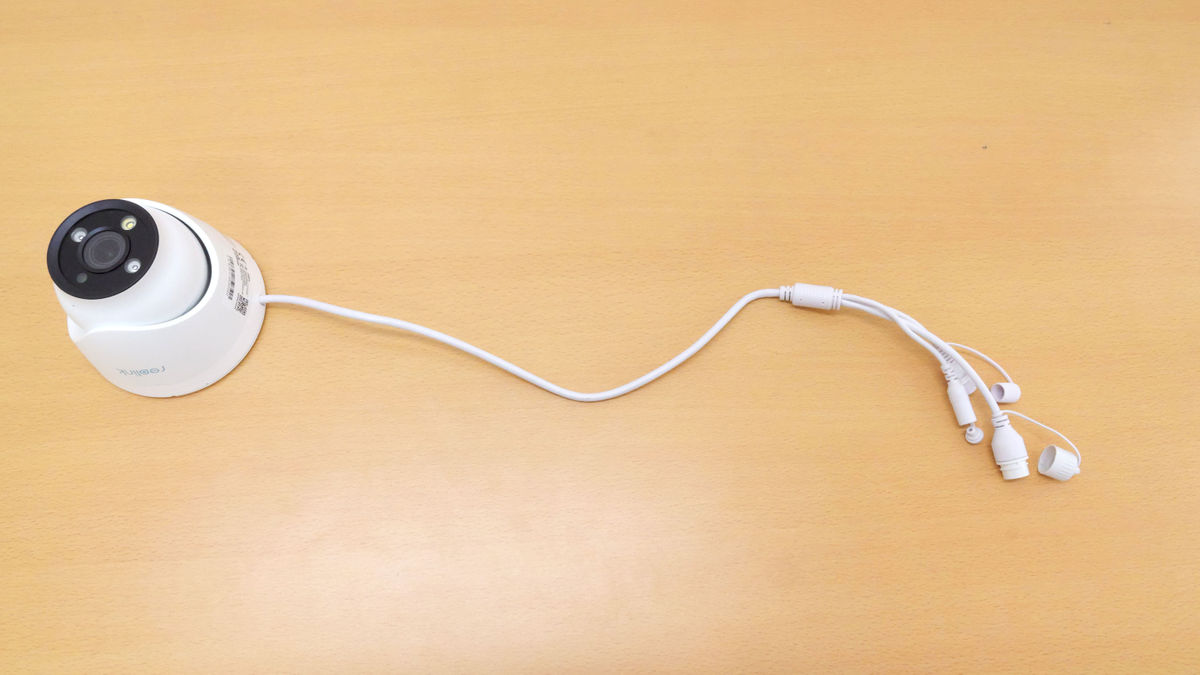
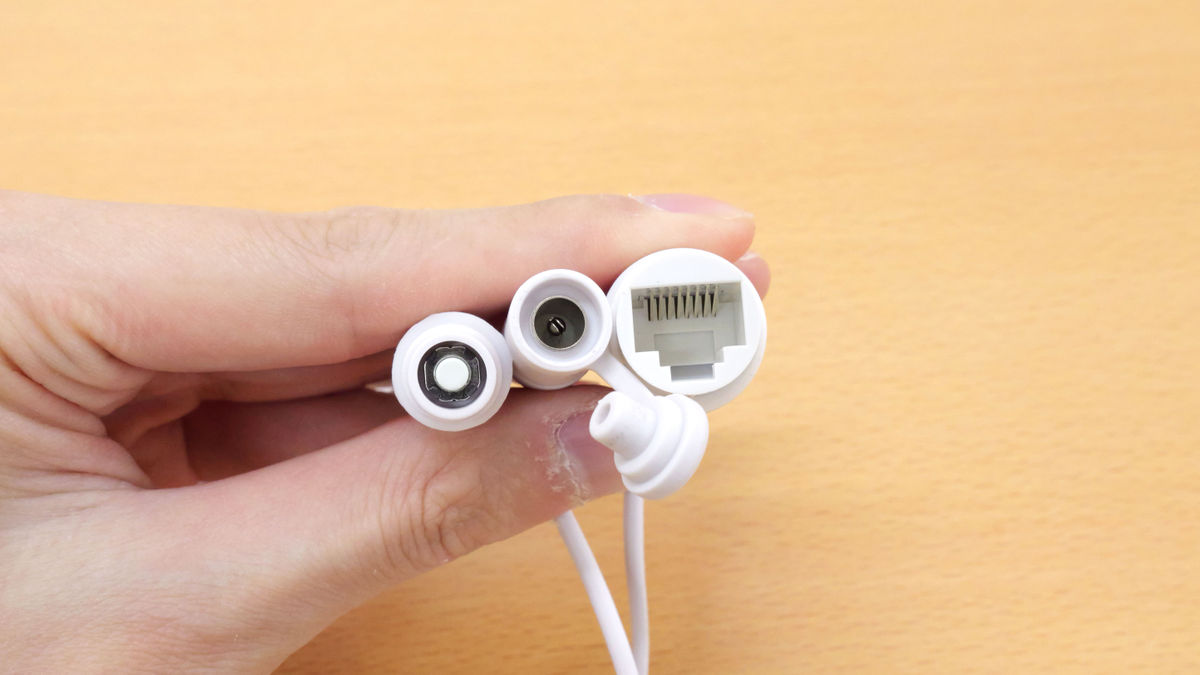
The cable has three prongs at the end, each of which has a waterproof cover.
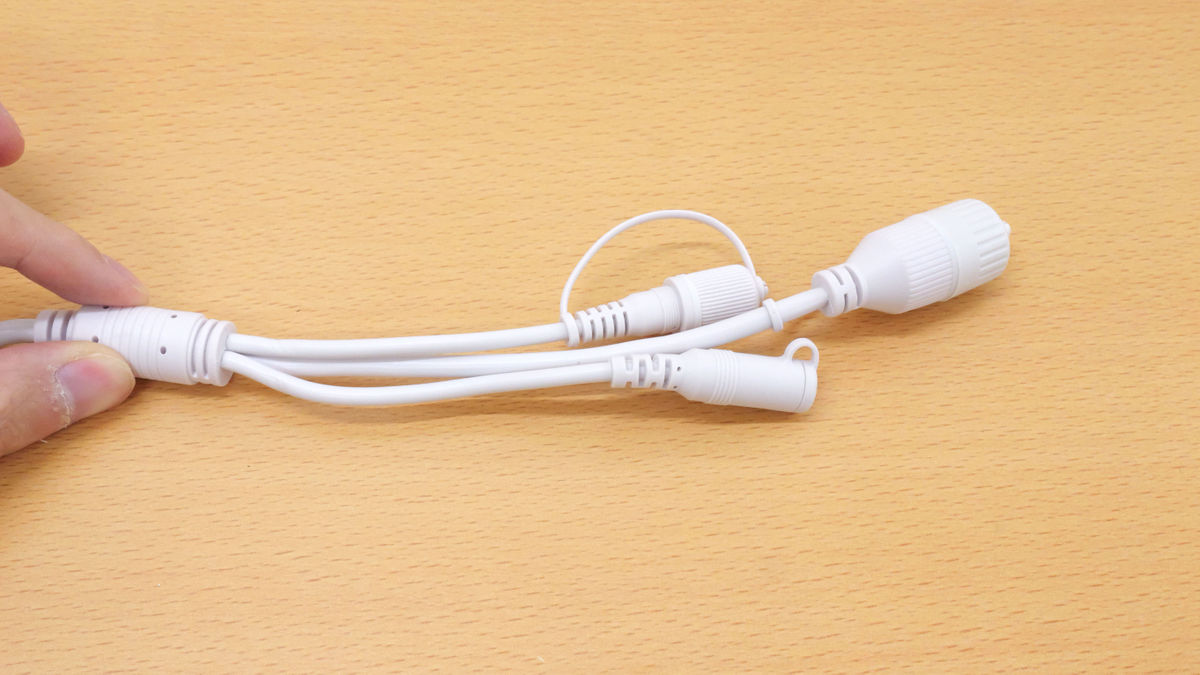
The contents of the cover are as follows. From the left, there is a reset button, a power port, and a network port. Basically, nothing other than the network port is used.
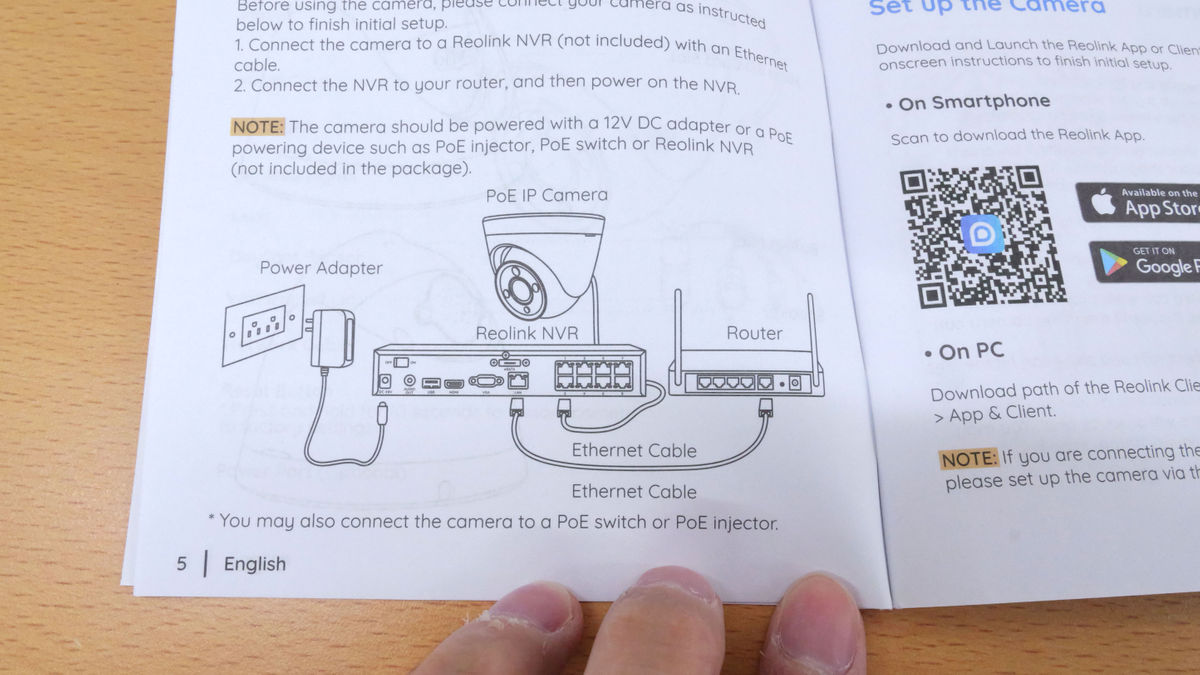
The camera connection method is described in the manual. To use the RLC-833A, you need a PoE switch and router (sold separately) in addition to the camera. The manual recommends using a Reolink NVR (network video recorder), but you can also use a commercially available PoE switch. PoE is IEEE 802.3af, 48V compatible, and operates at DC 12.0V, 1A, and 12W.
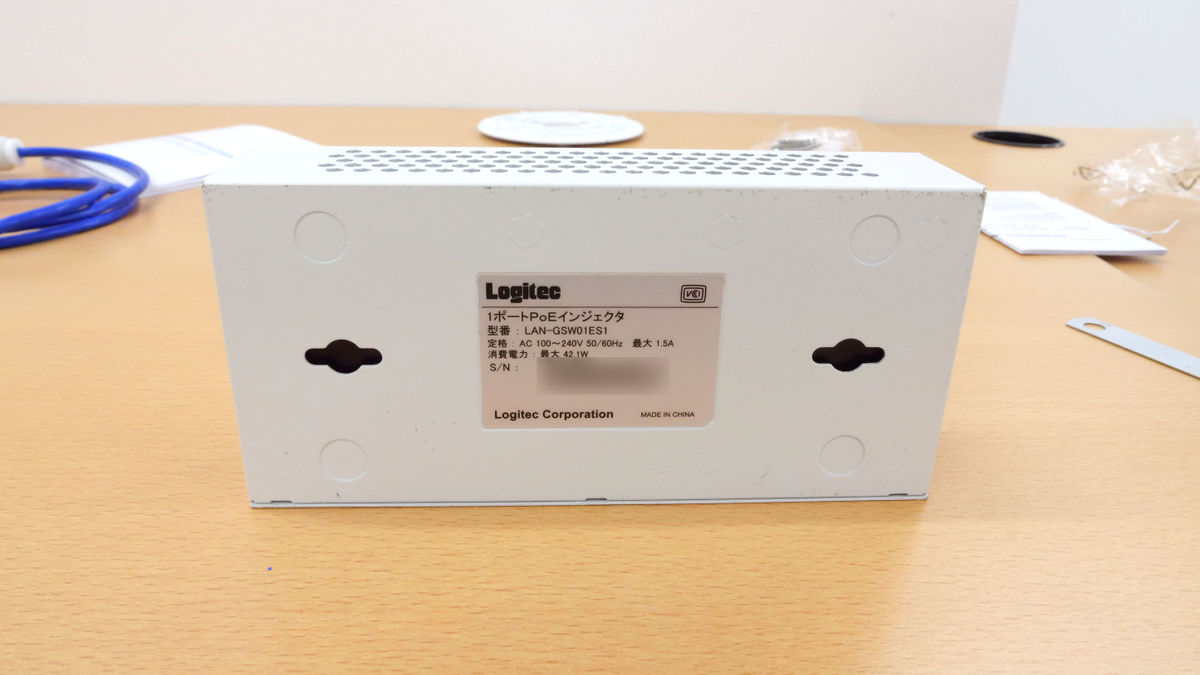
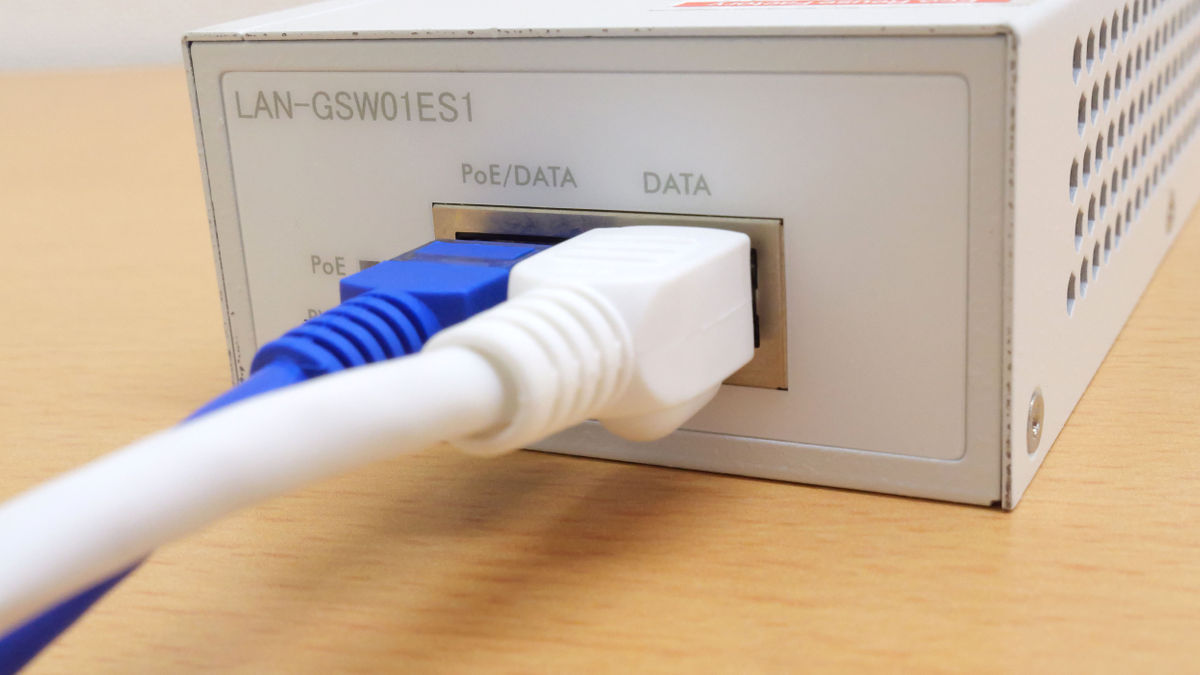
So this time we will use a Logitec
First, attach the waterproof cover and waterproof rubber to the LAN cable.
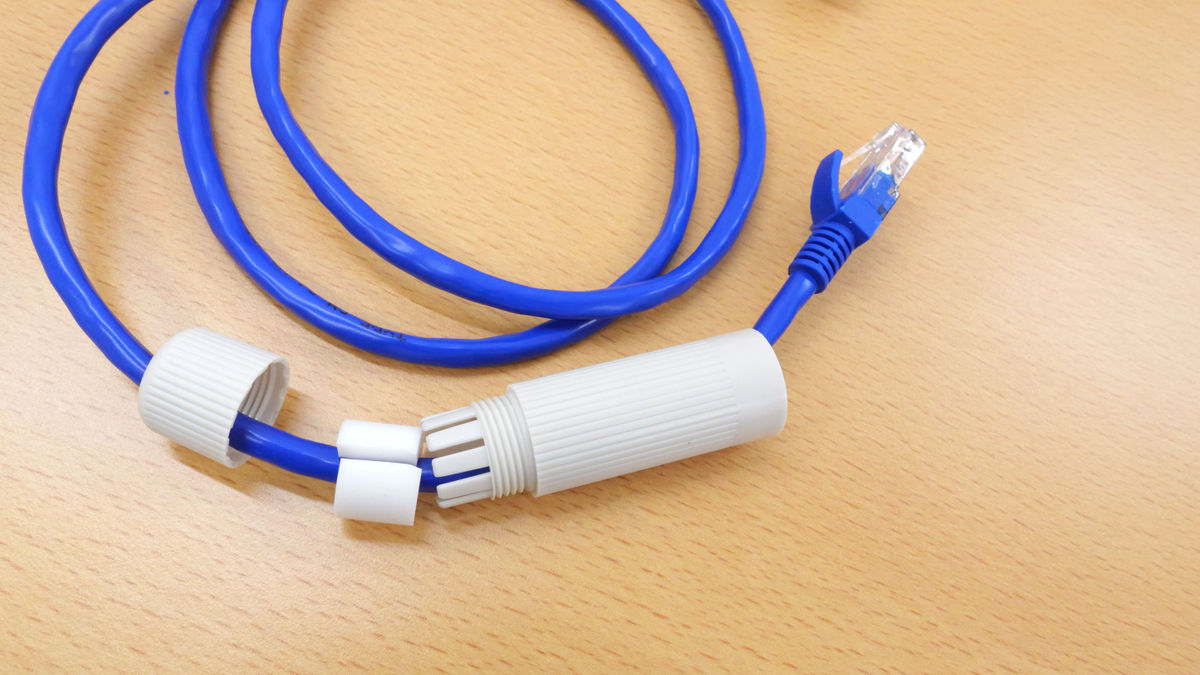
Next, connect the LAN cable to the network port on the camera.
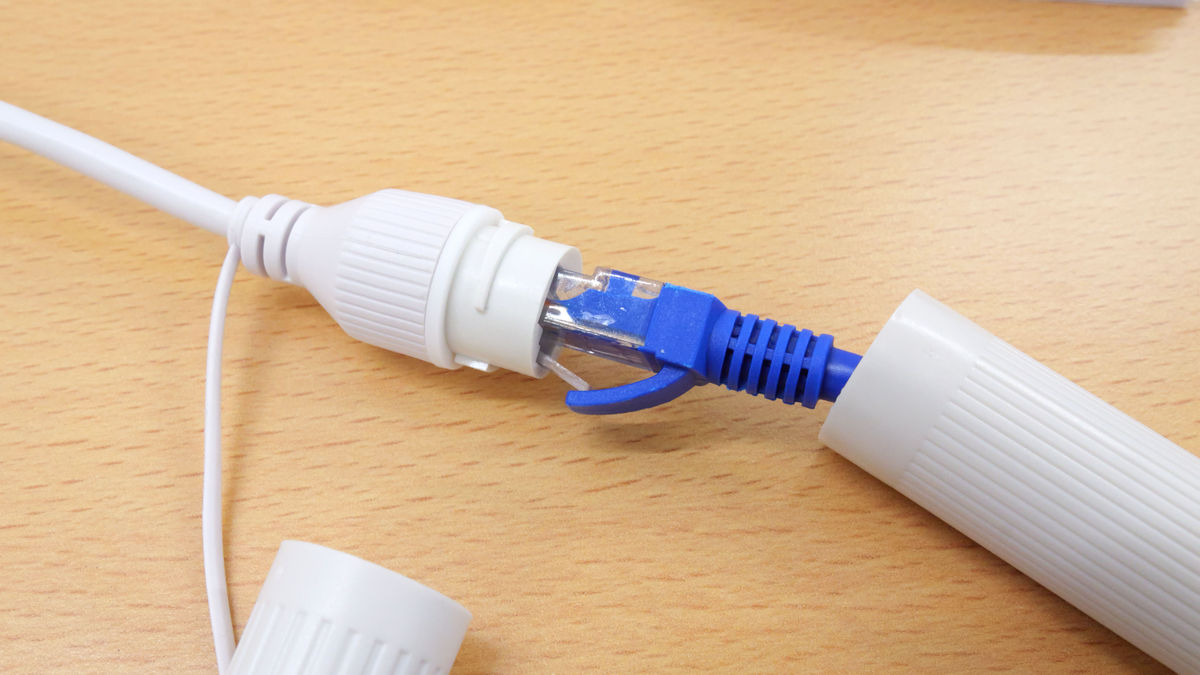
Close the lid tightly to prevent water from getting in.
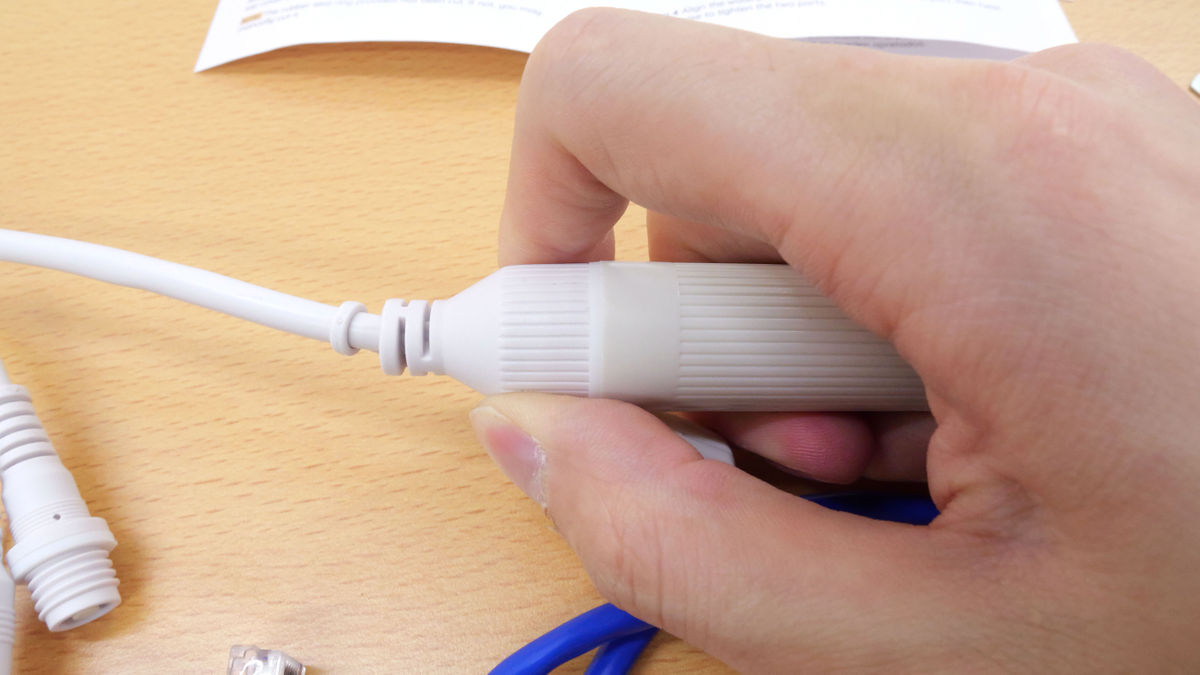
Install the waterproof rubber like this.
Close the lid and you're done.

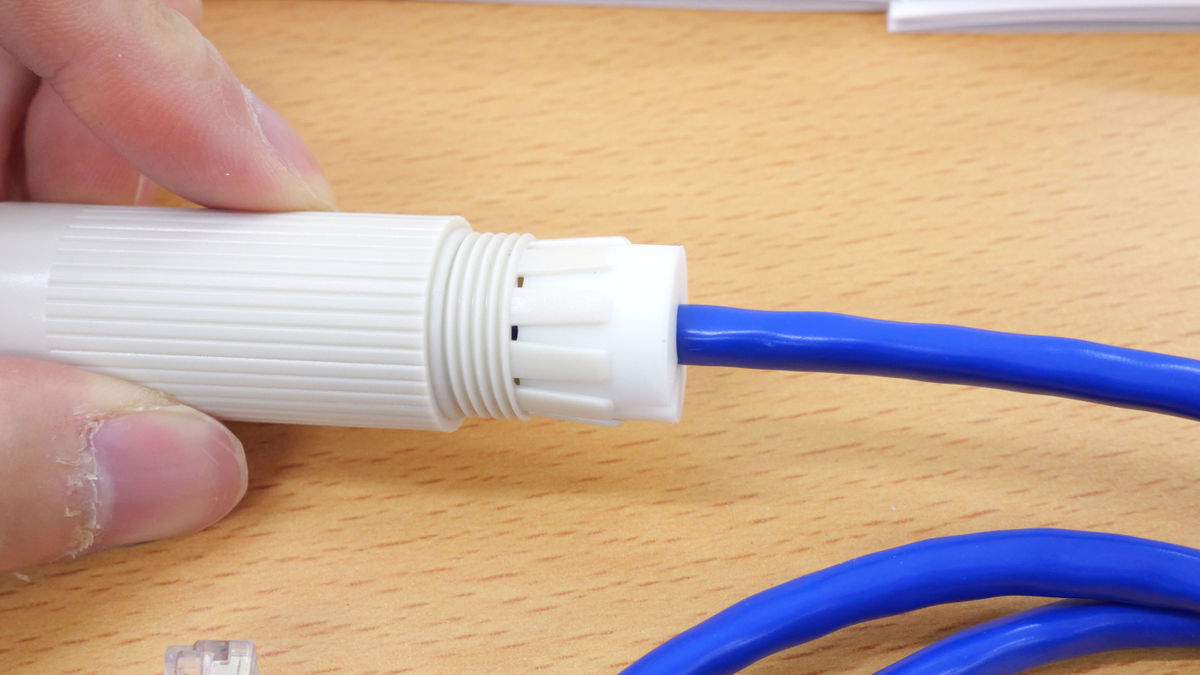
Next, connect the terminal without the waterproof cover to the PoE injector, then connect the LAN cable extended from the router to the PoE injector. Connect the PoE injector to a power source.
The camera doesn't emit any light or sound effects when turned on, but it does make a small buzzing noise when powered on.
◆2: Installation and initial settings of client software
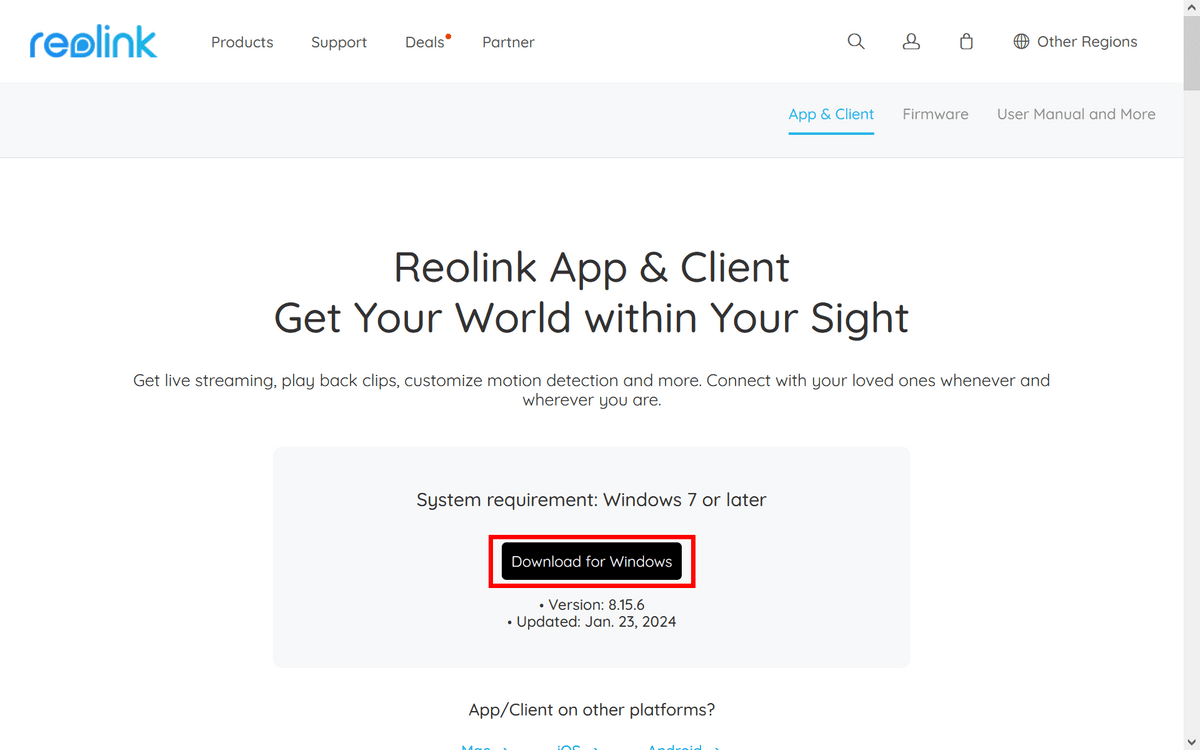
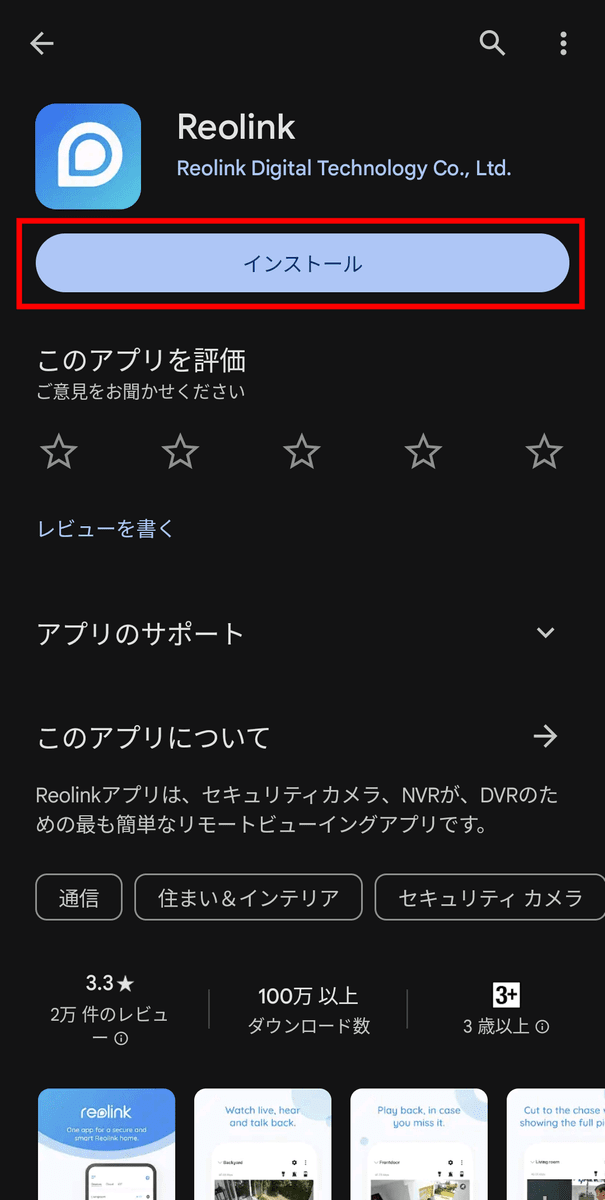
You can manage the camera from the iOS/Android app or the Windows/Mac client software. Since I'll be using the Windows version this time, go to the link below and click 'Download for Windows.'
App & Client - Reolink
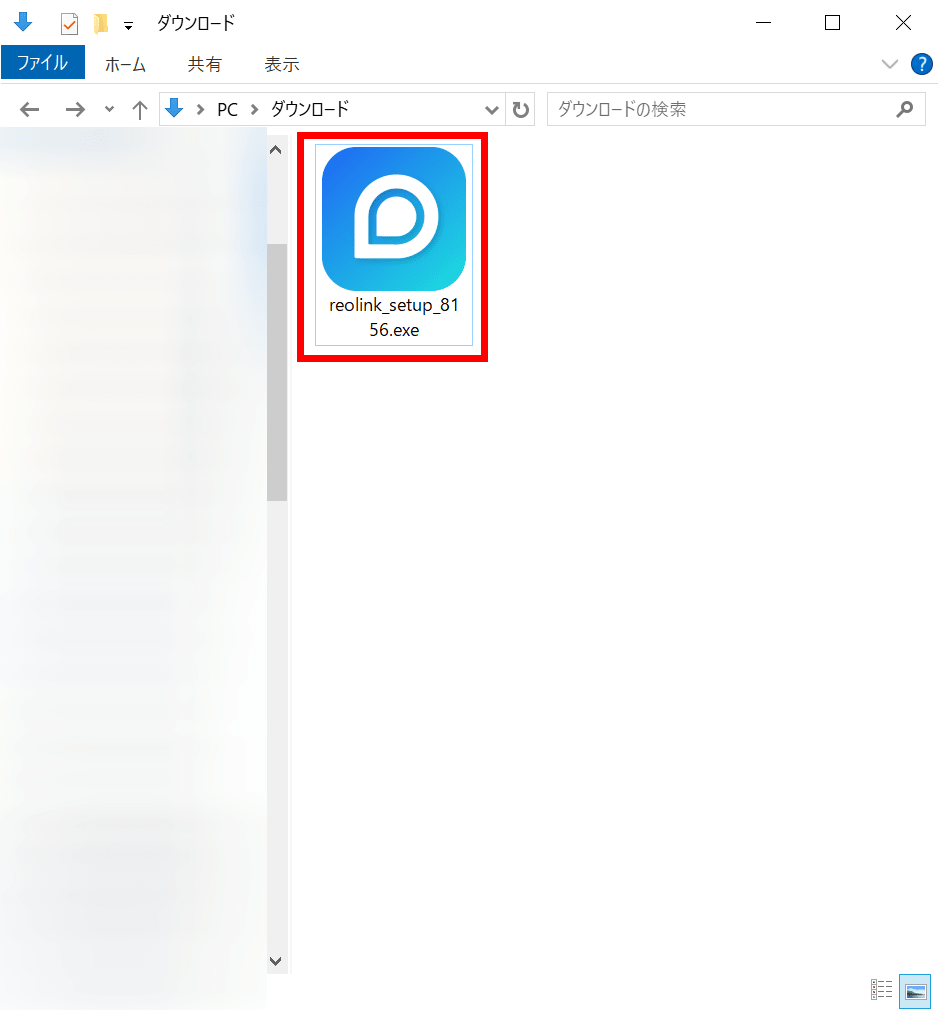
Run the downloaded file.
The setup wizard will start, so click 'Next'.
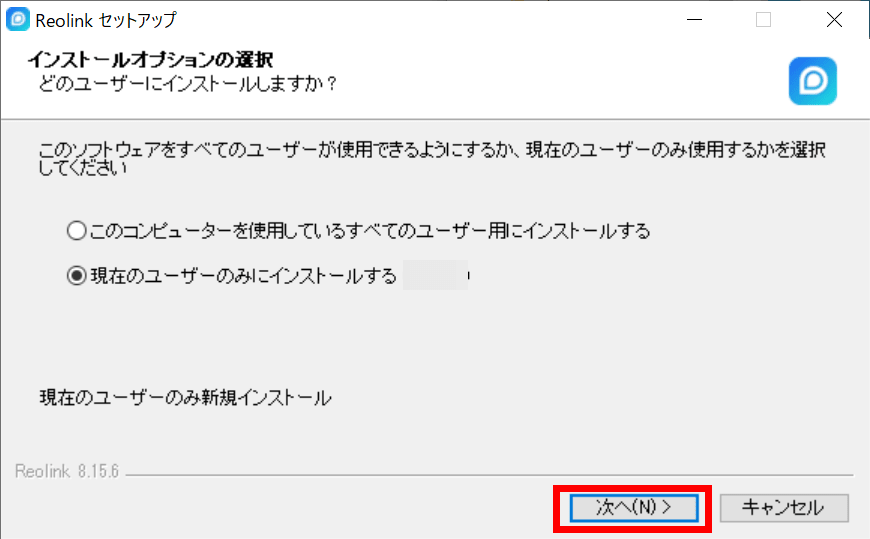
Check the installation destination and click 'Install'.

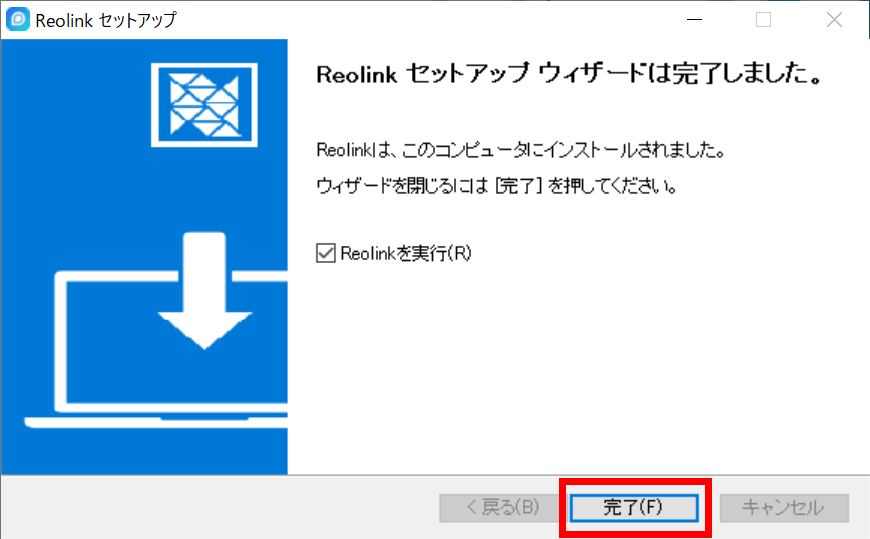
Click 'Finish' to close the setup wizard and launch the Reolink client.
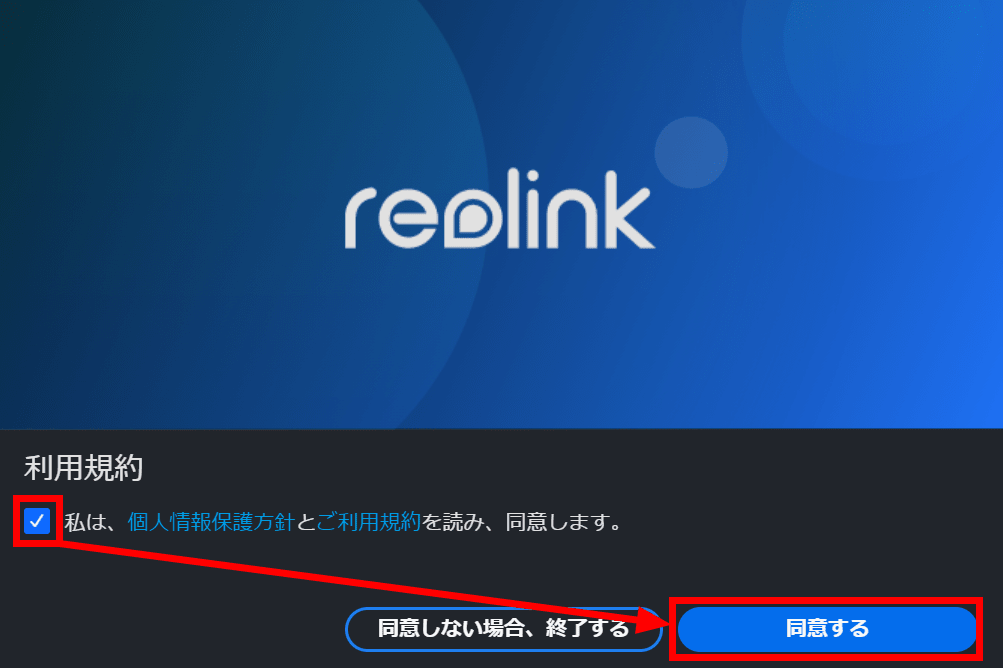
When the Reolink client starts, check the checkbox to agree to the terms of use and click 'Agree'.
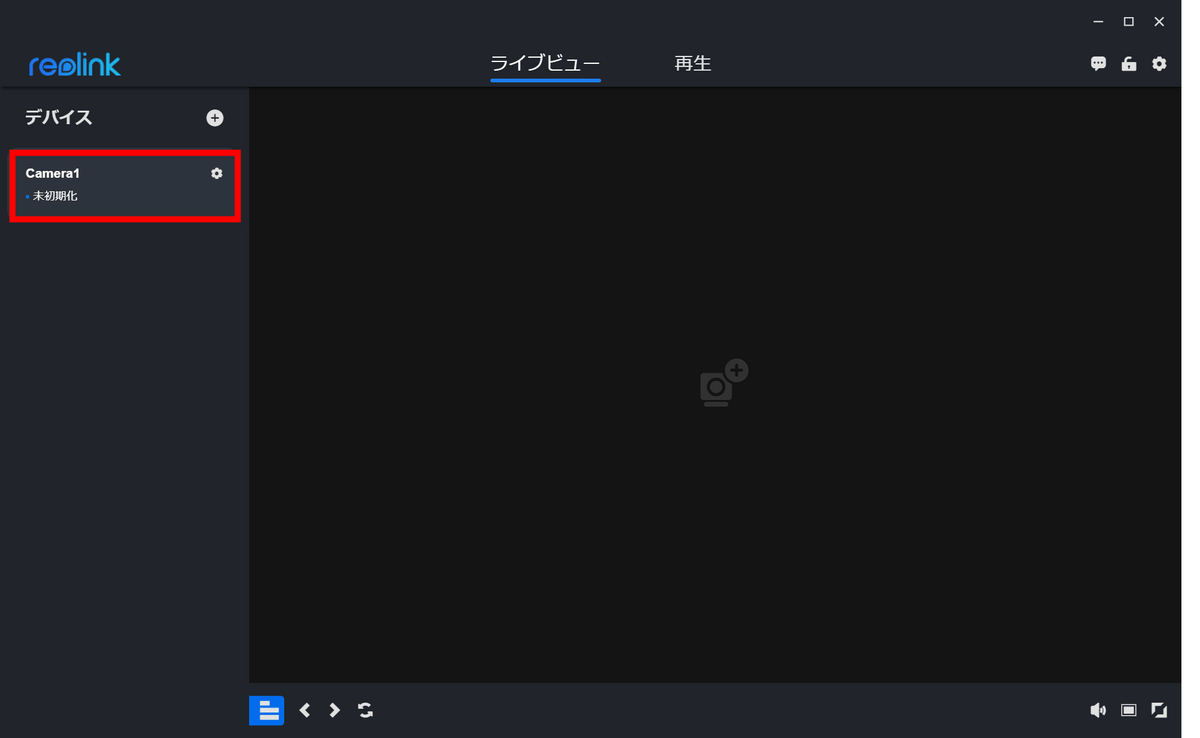
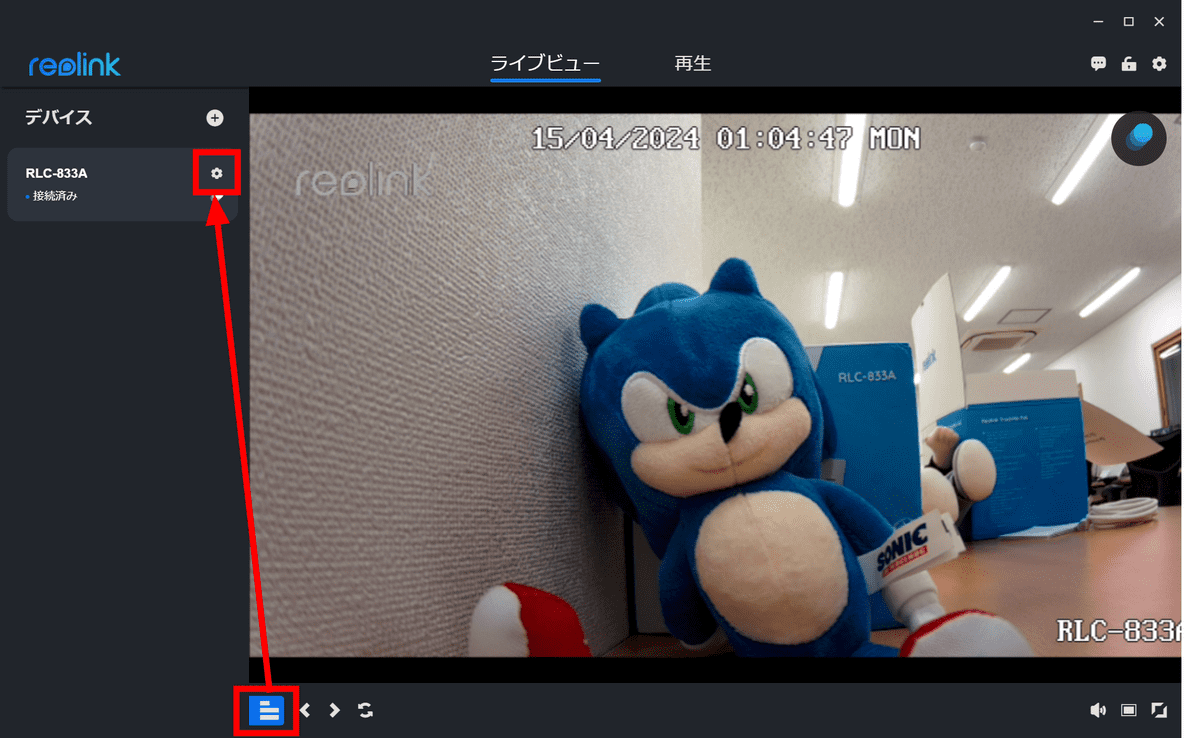
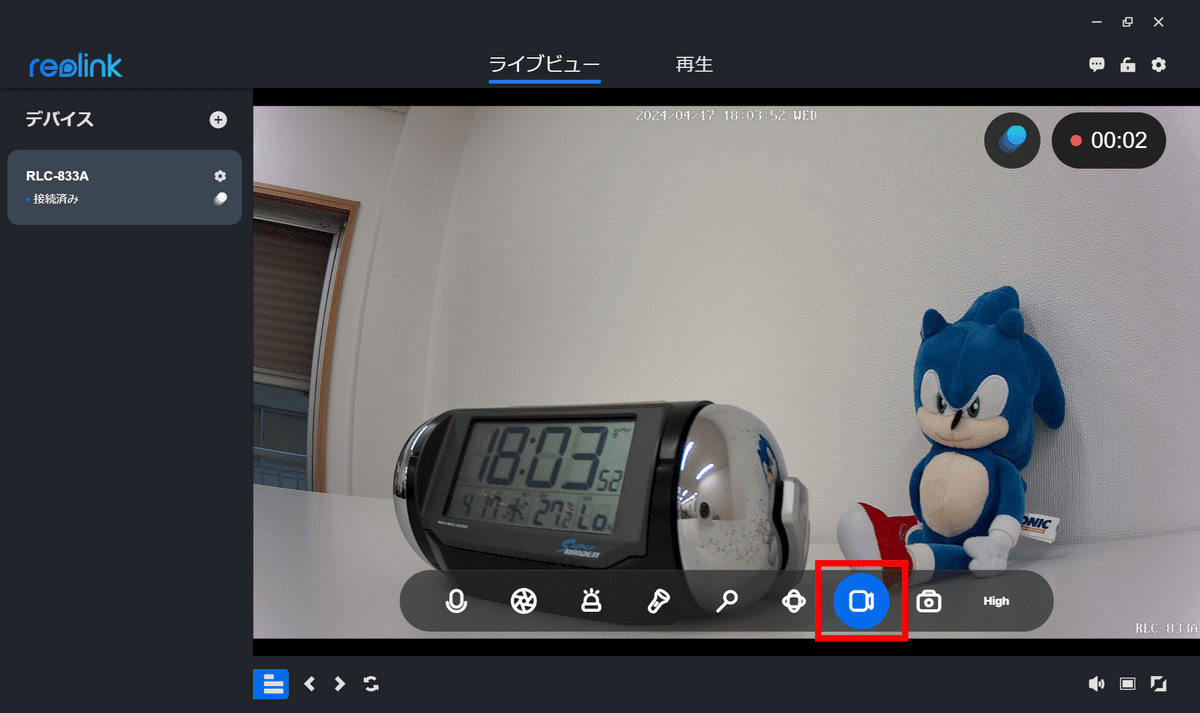
The Reolink client will start. The camera you just connected to the router will be displayed on the left side of the screen, so click on it to perform the initial settings.
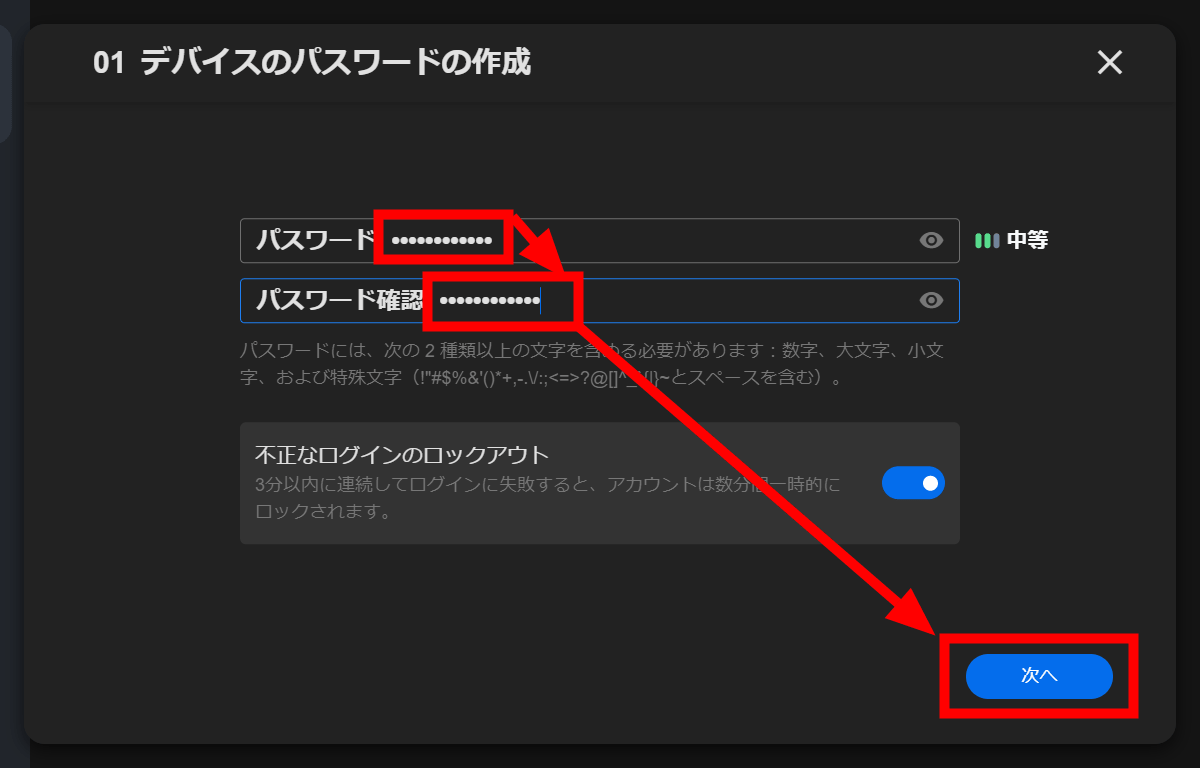
First, decide on a password to connect to the camera, enter it, and click 'Next.'
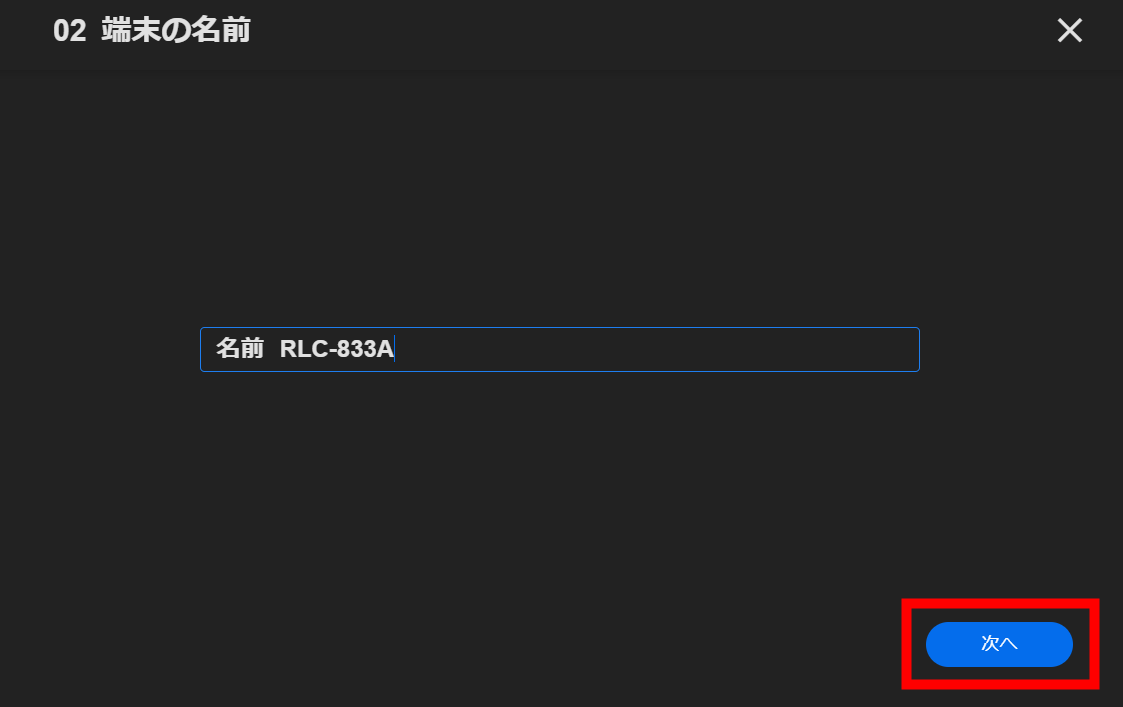
Next, enter a name. This time, use the default name 'RLC-833A' as is, so click 'Next'.
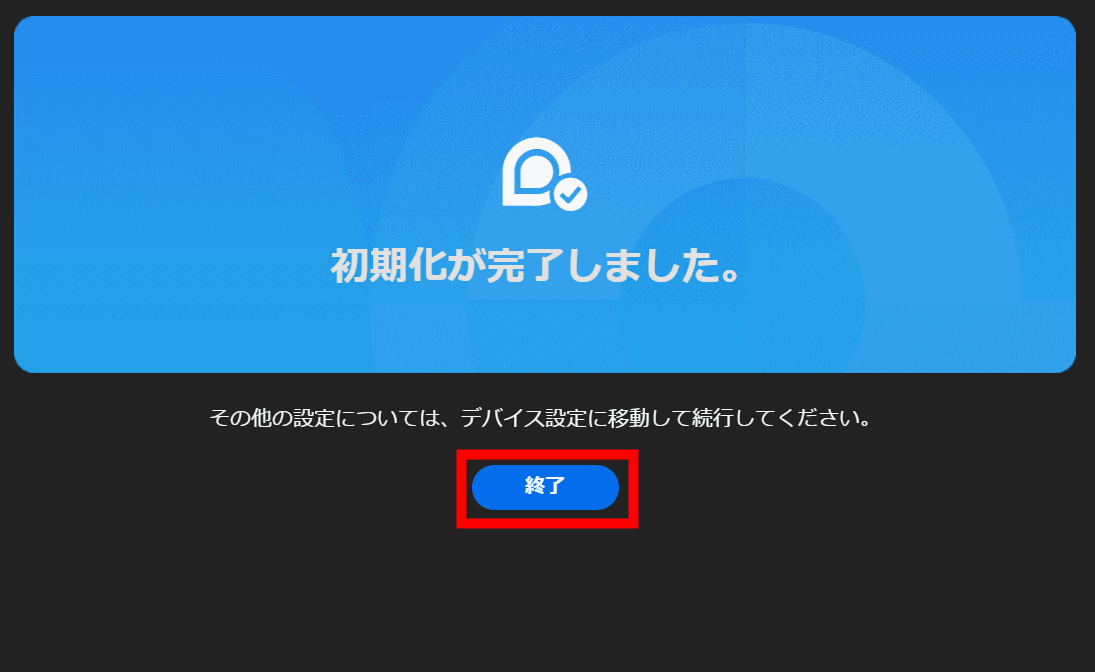
This completes the initial setup. Click Finish.
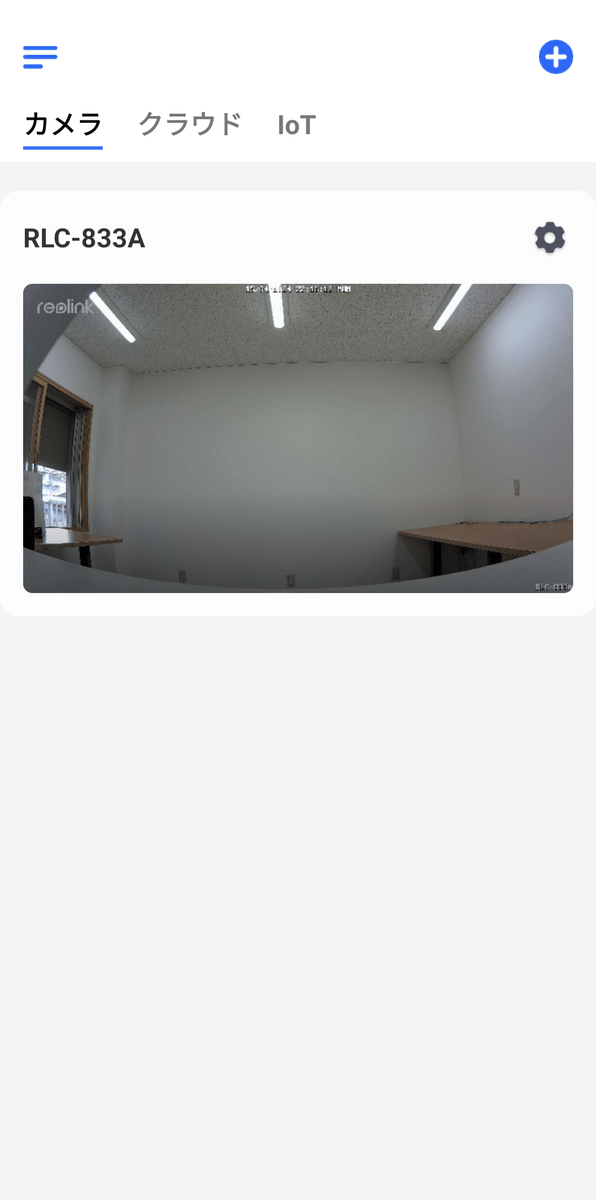
After the initial setup, the live image from the camera was displayed on the Reolink client.
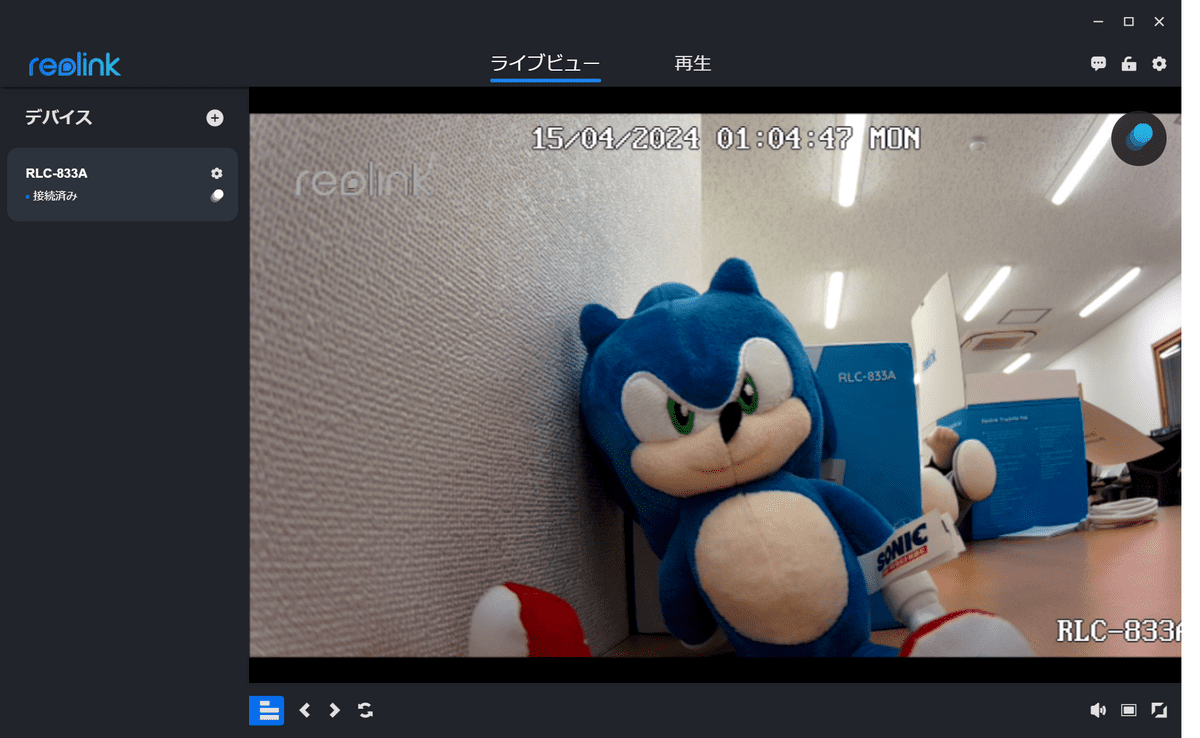
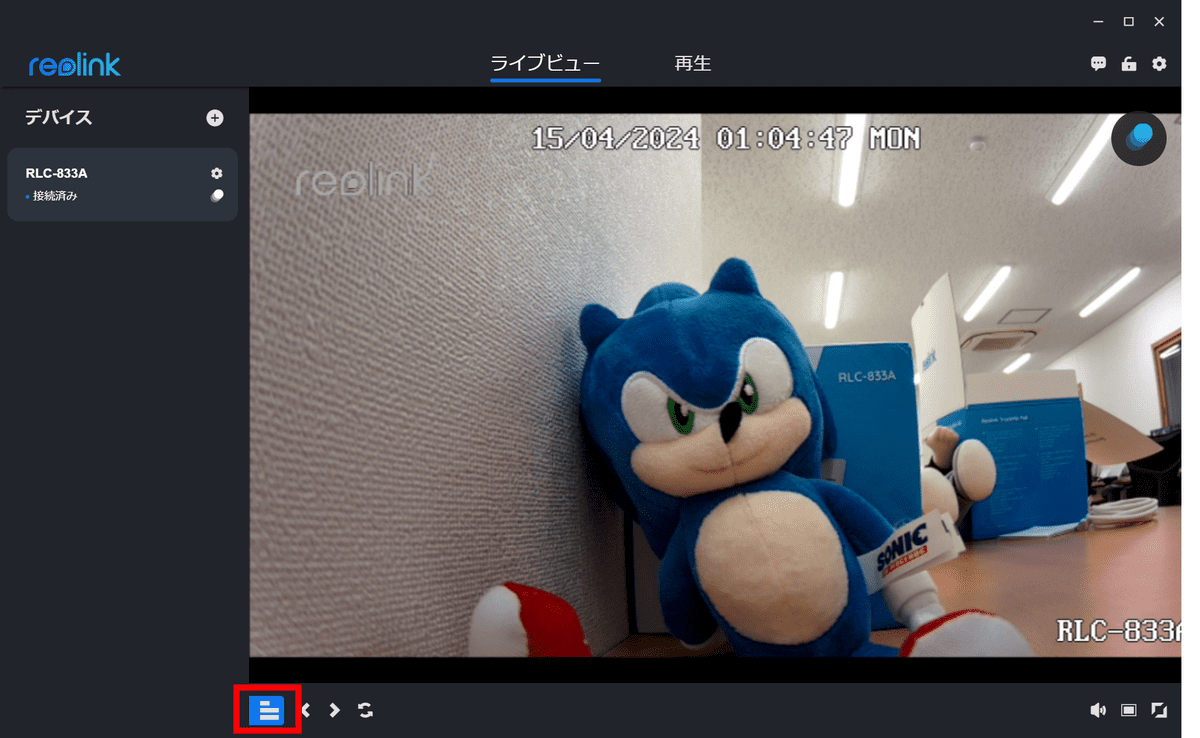
Some of the image is cut off, but if you click the menu bar at the bottom left, the menu tab will close and you will be able to see the edge of the image.
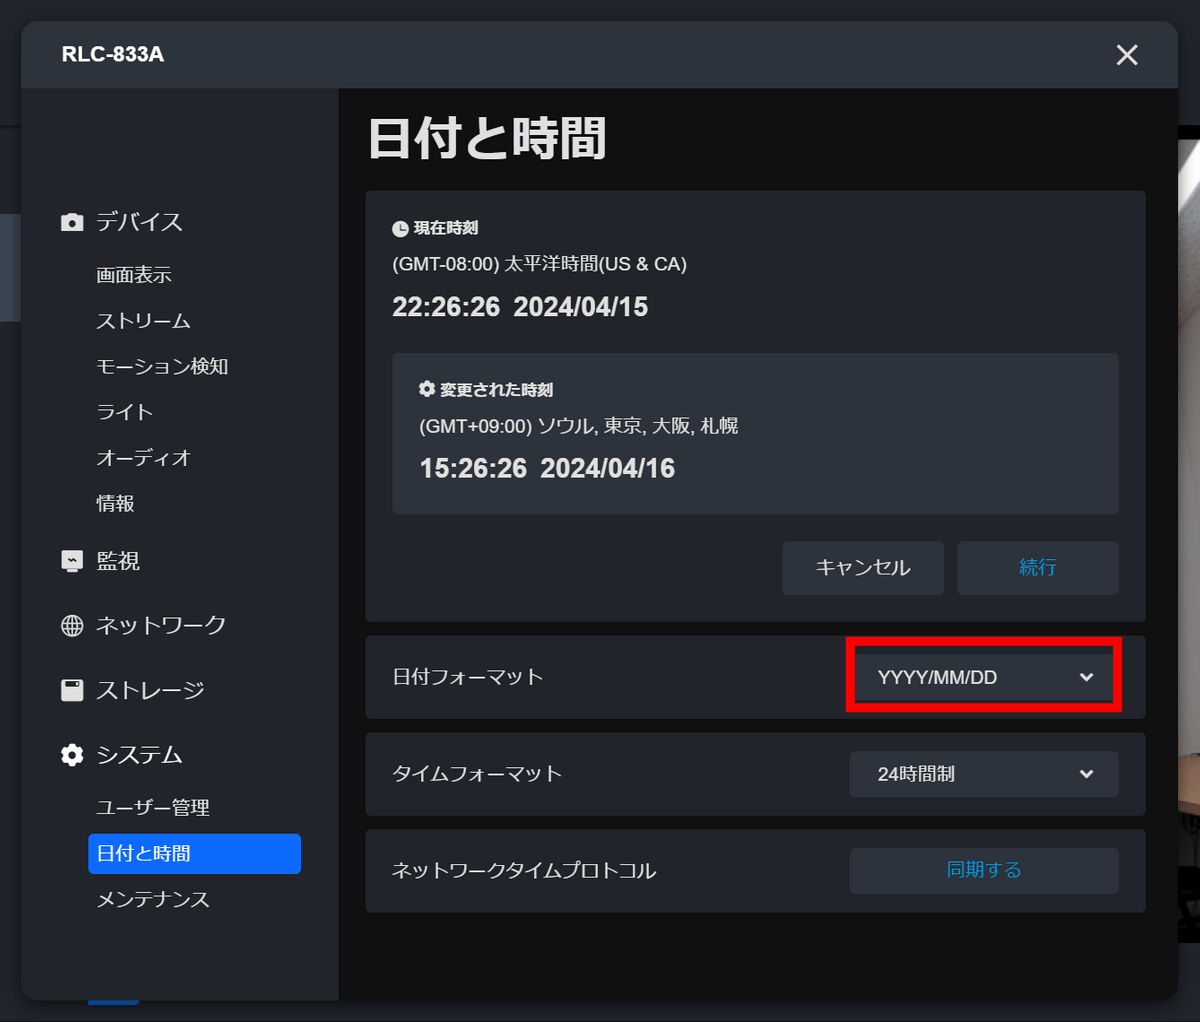
By default, the time zone is set to Pacific time, so you must change the time zone first. First, click the menu bar and then the camera settings icon.
Click 'System,' then 'Date and Time,' and then 'Settings.'
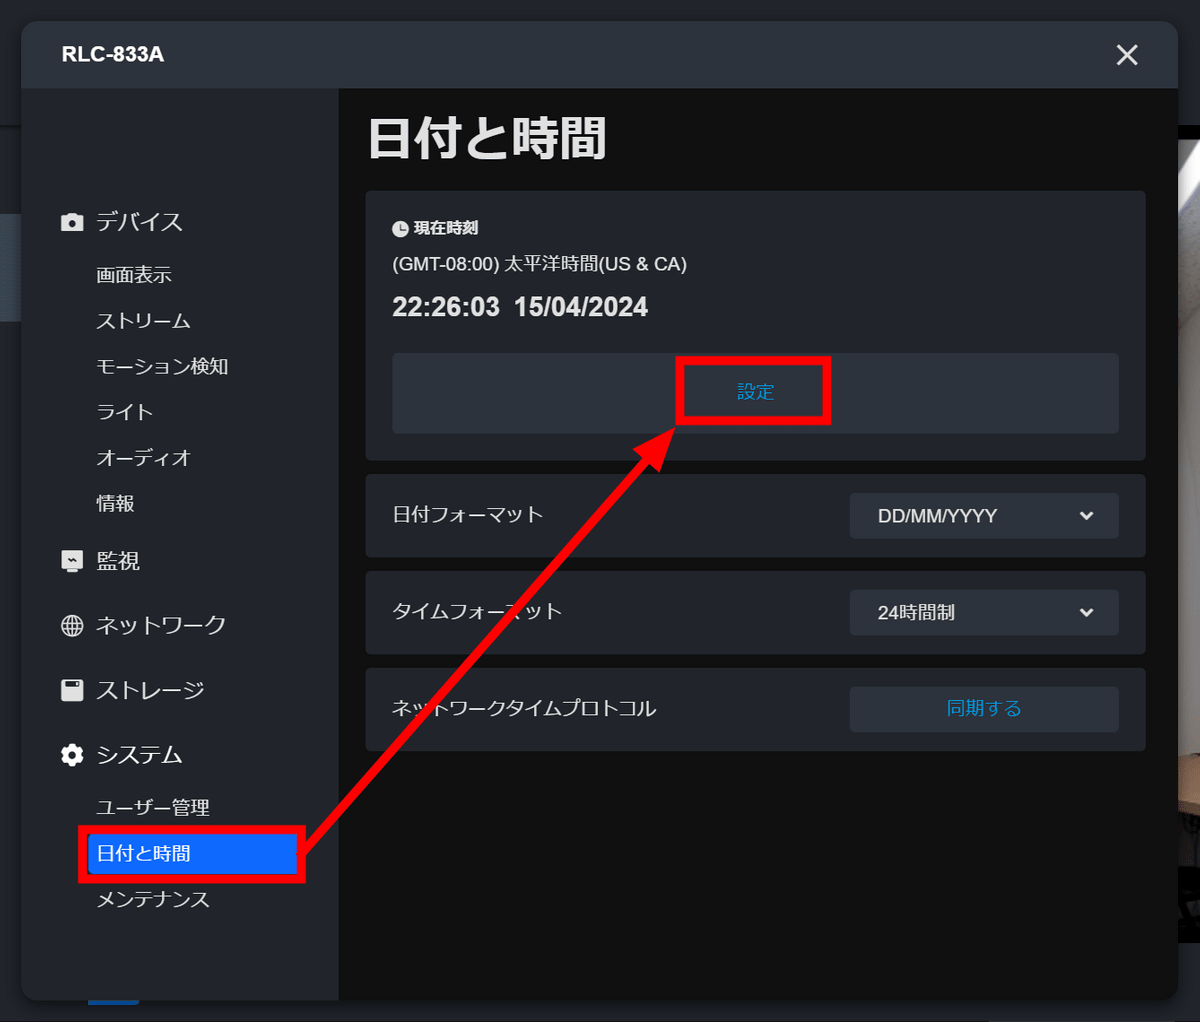
Set 'Time Zone' to 'GMT+09:00' and click 'Continue'.
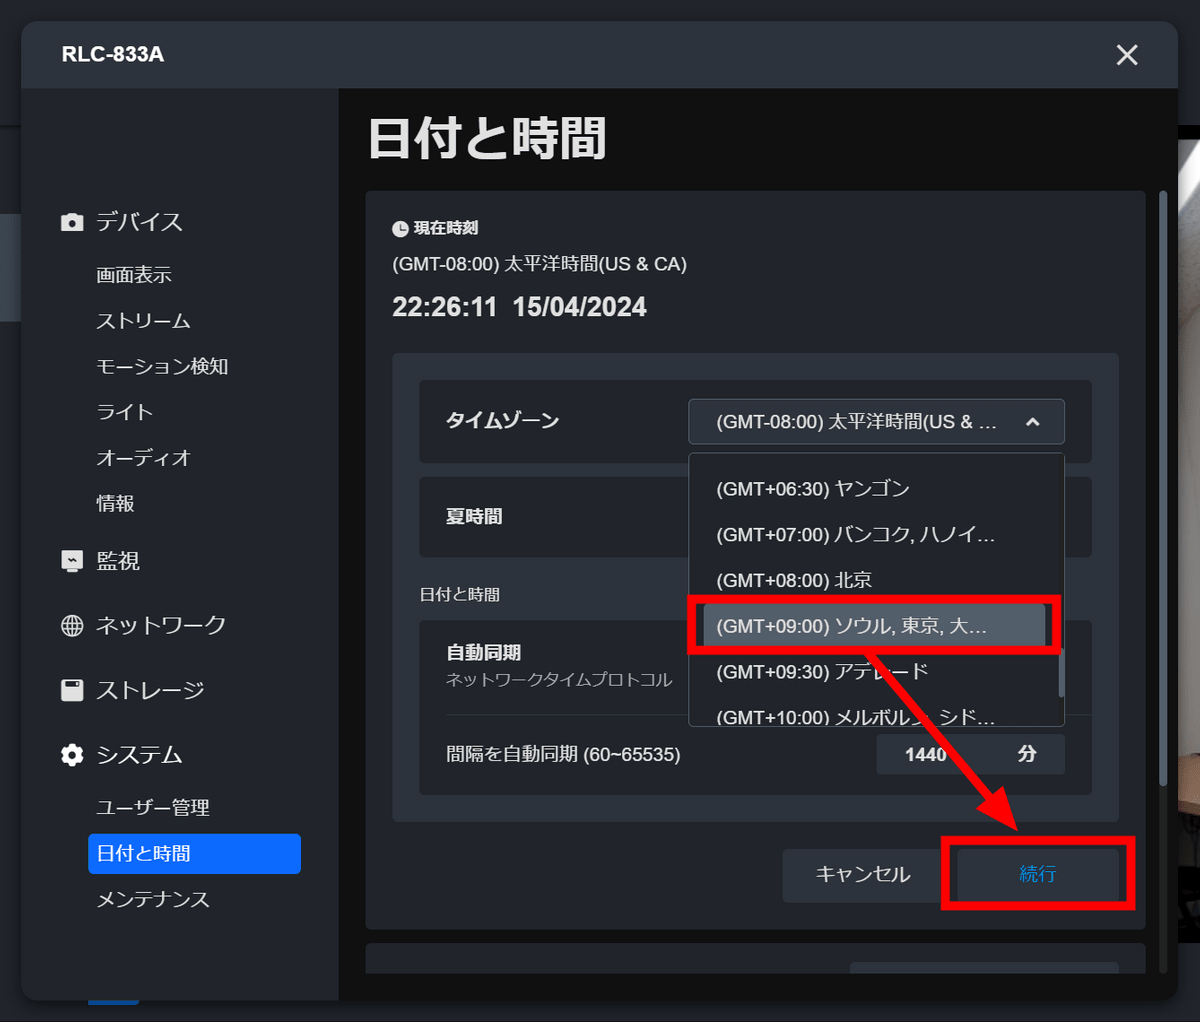
While you're there, change the date format from 'DD/MM/YYYY' to 'YYYY/MM/DD', which is more familiar to Japanese people.
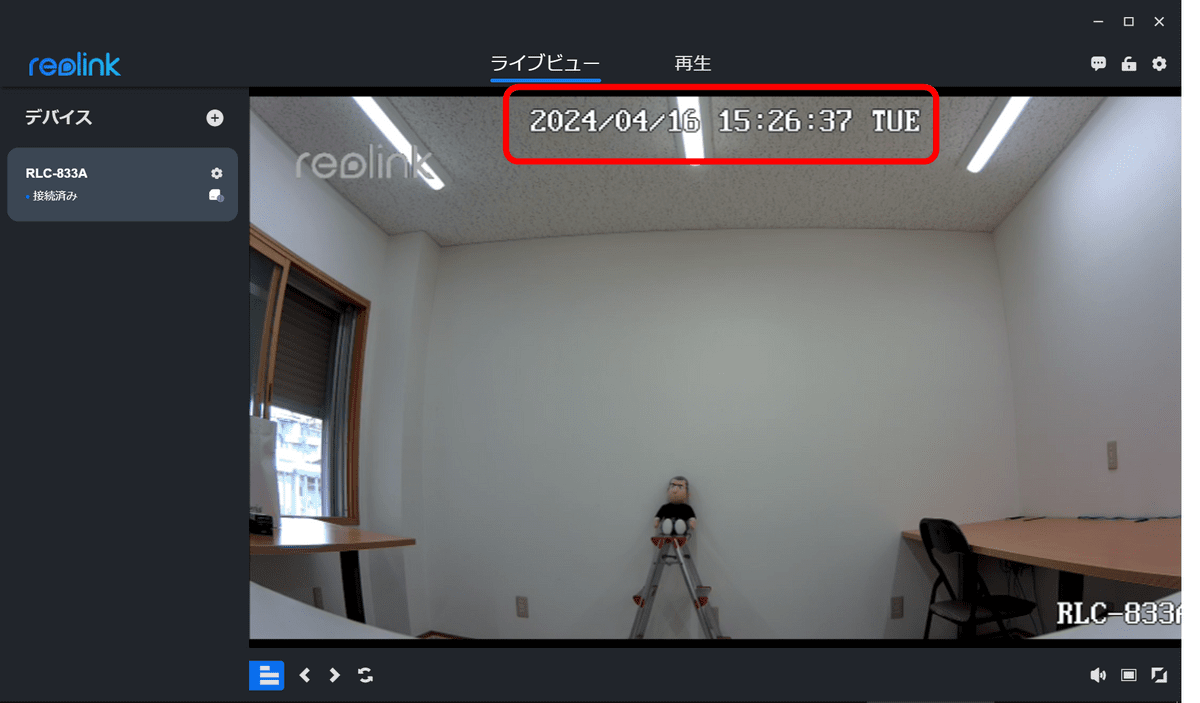
The time zone has now been adjusted to Japan time and the date format has also been changed.
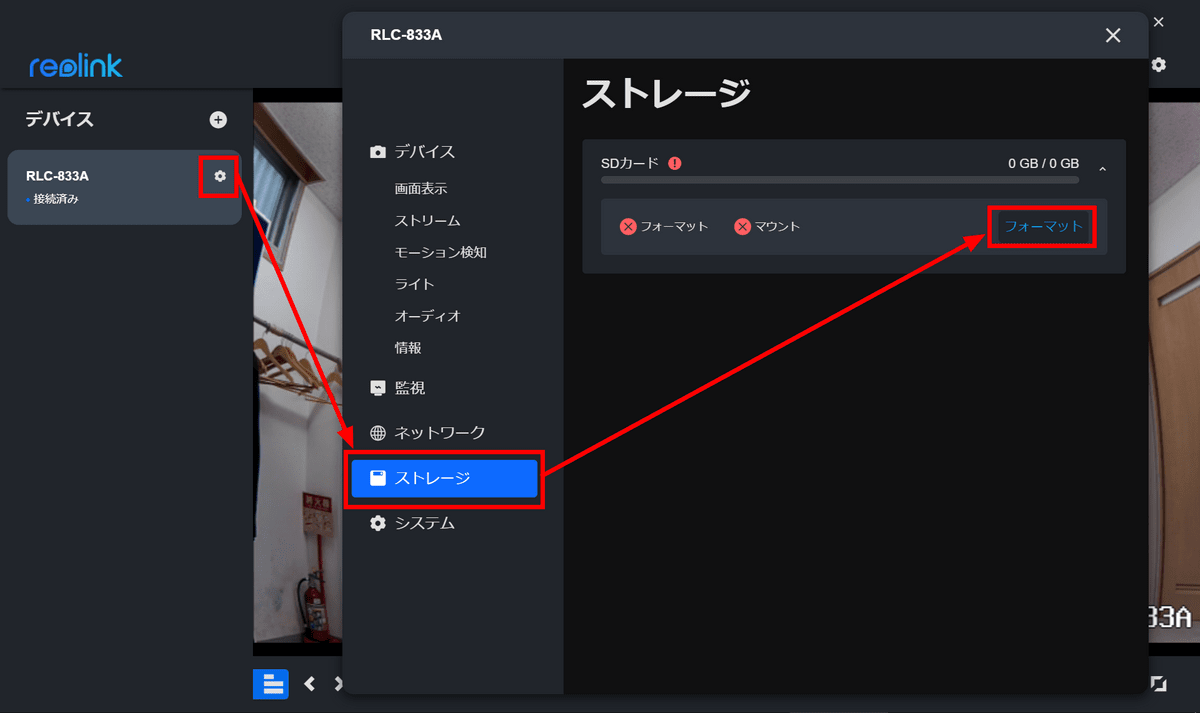
Next, format the microSD card. Click 'Storage' and then 'Format.'
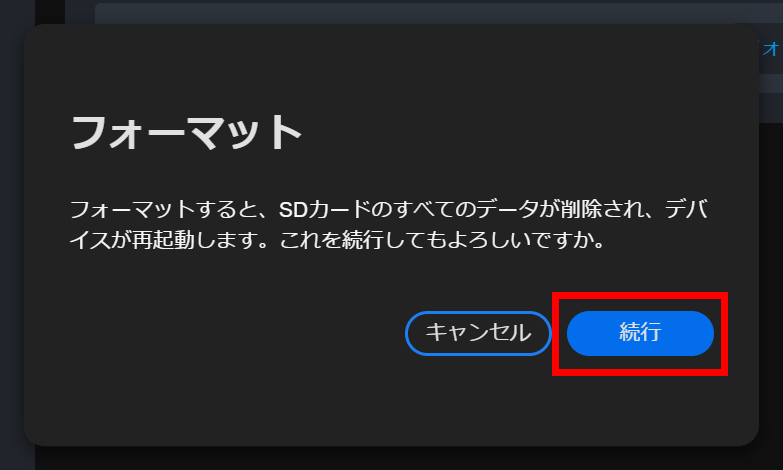
Click 'Continue'. Formatting will begin and the camera will reboot.
◆3: Basic functions
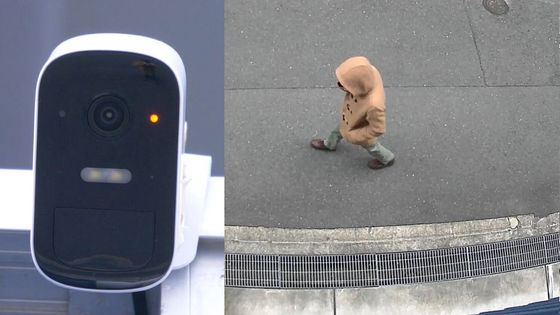
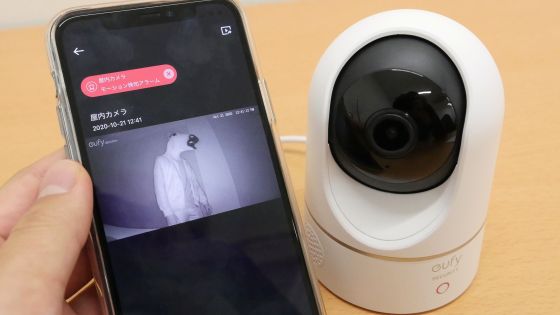
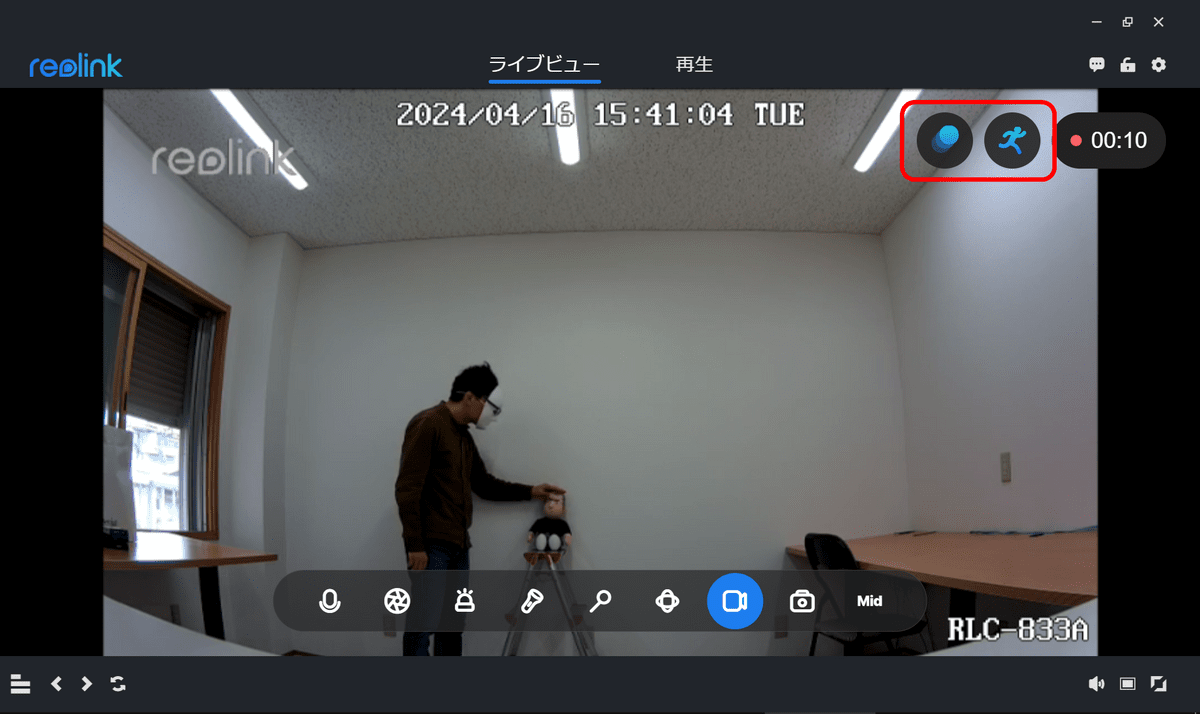
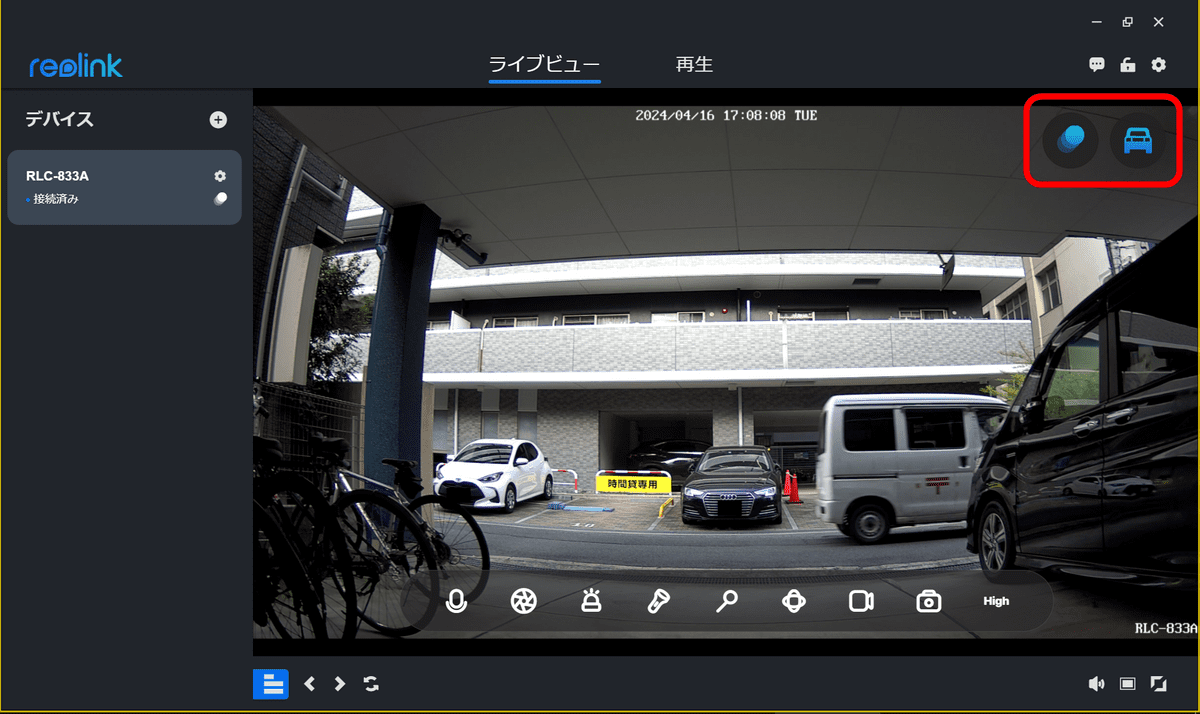
The RLC-833A constantly delivers live video to the Reolink client, and when it detects 'any movement,' 'a person,' 'a car,' or 'a pet,' by default it will capture the video from 3 to 8 seconds before the detection to 15 seconds after the detection ends and save it to the microSD card.
Below is what happens when a person appears while watching live footage, and the 'any movement' and 'person' icons are displayed instantly.
When a car appears on the screen, the 'Any movement' and 'Car' icons will appear.
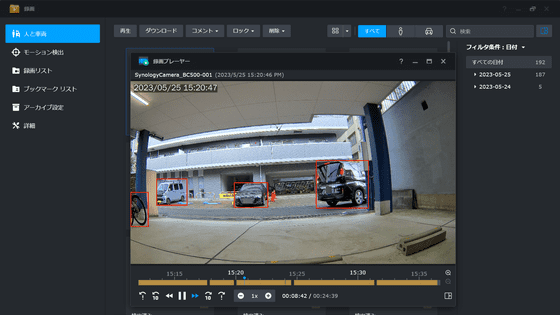
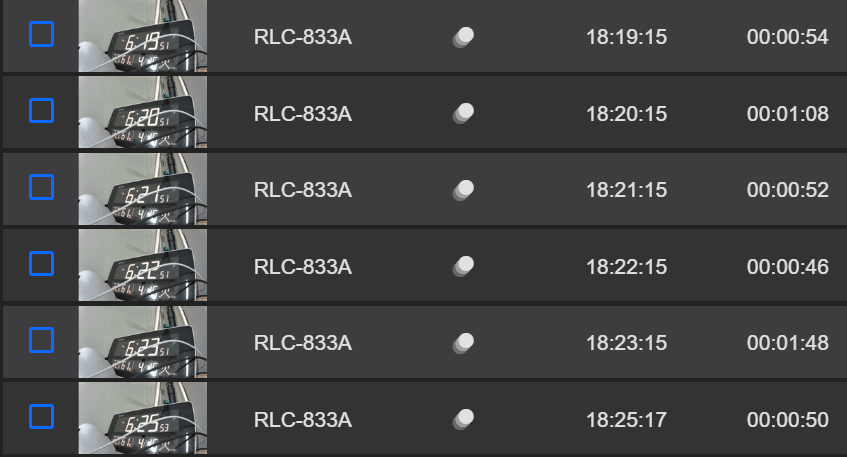
All of these actions are recorded and saved, and can be viewed later by clicking 'Play' in the Reolink client. At the bottom is the timeline, with blue lines indicating the time periods when the recordings were made.
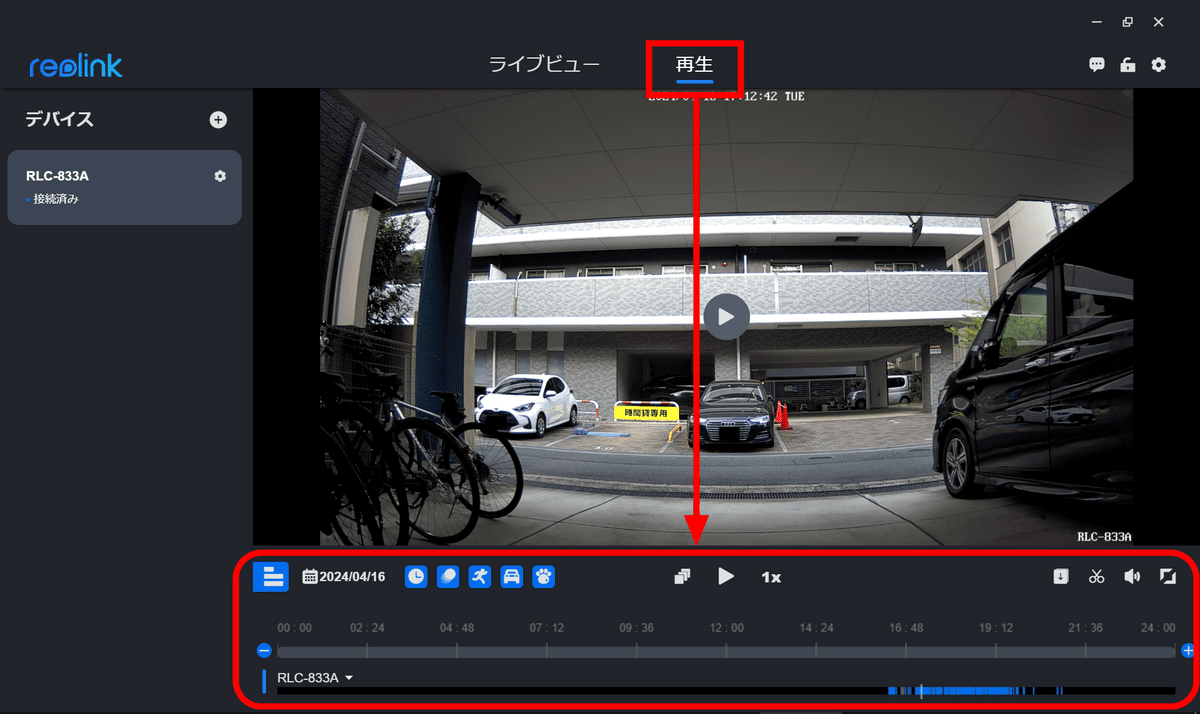
You can zoom in and out on the timeline with the mouse wheel to get a more detailed view. You can also filter the display by date or detected motion.

The icons displayed at the bottom right of the playback screen are, from left to right, 'Download,' 'Cut,' 'Volume,' and 'Full screen.'
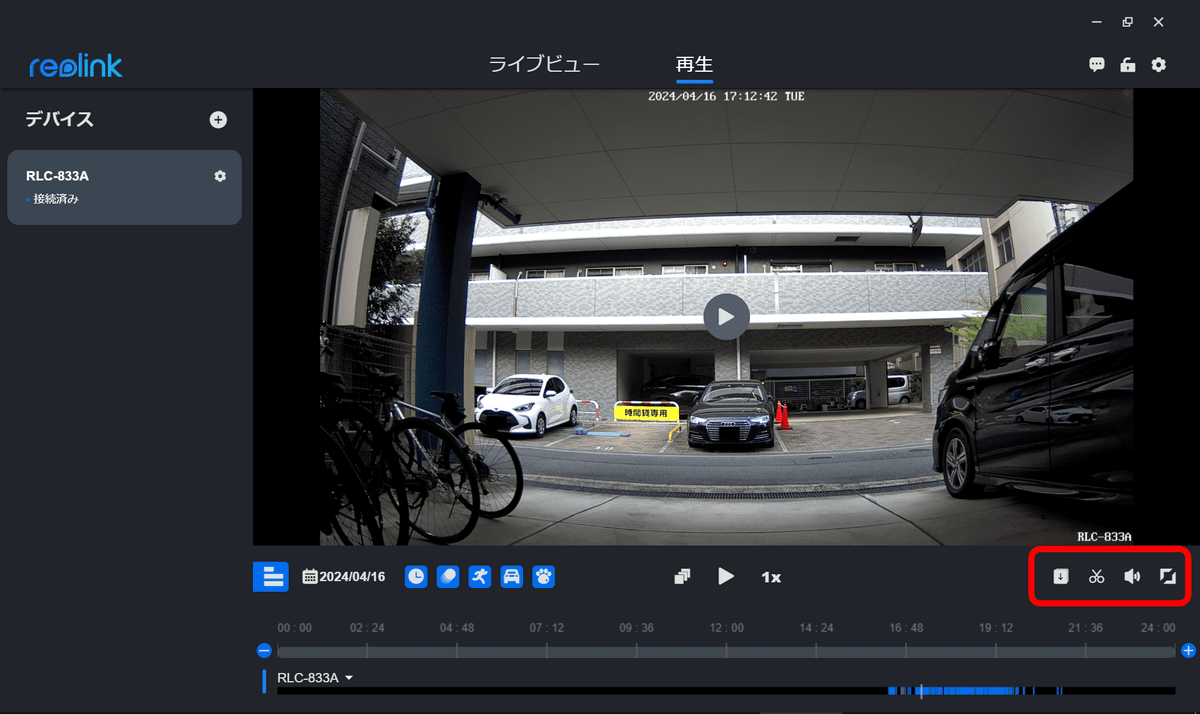
A list of recordings is displayed under 'Downloads.' On this screen, you can check the start time, time zone (recording time), and size of each recording. Recordings will continue to be saved as long as there is free space on the microSD card, and when the capacity becomes full, the recording will be overwritten or stopped depending on the settings.
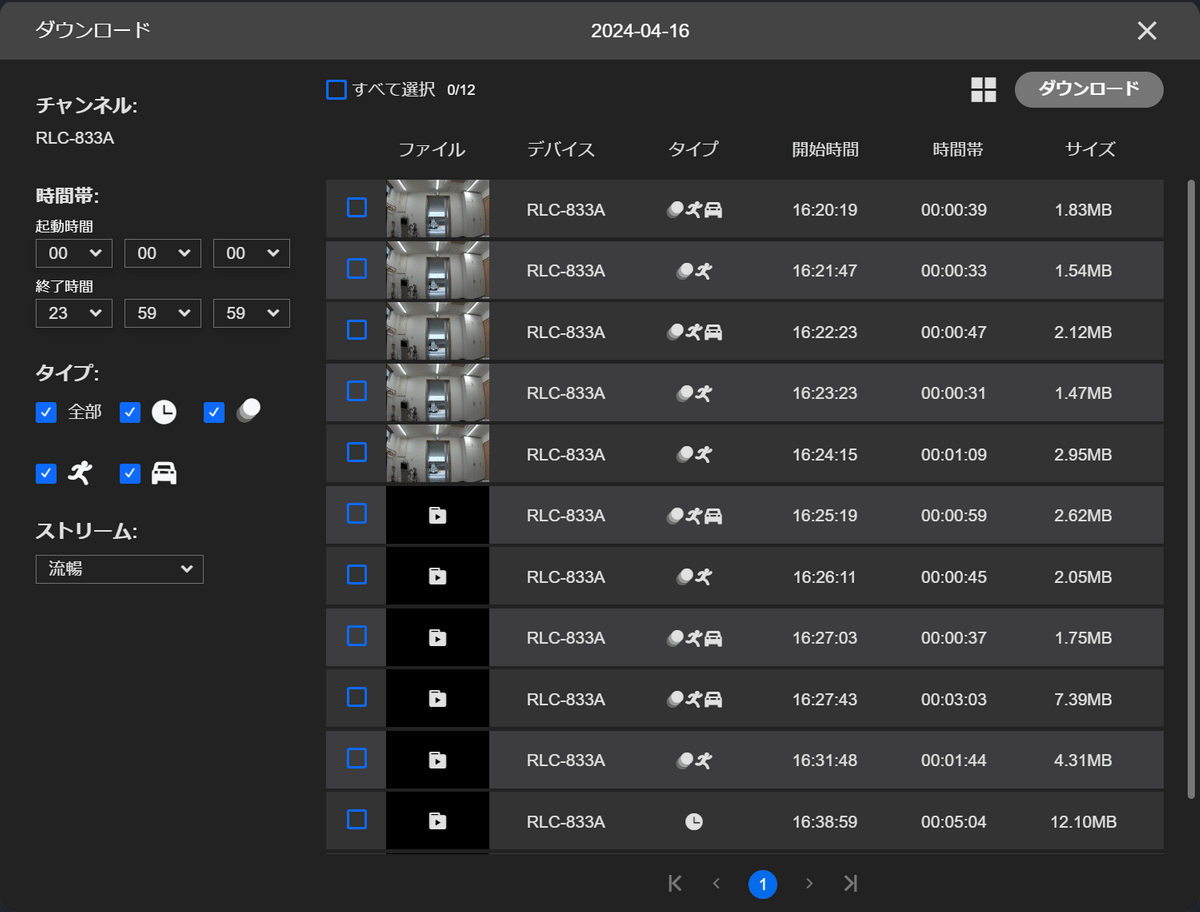
If there is something you want to pick up, check the box and click 'Download.'
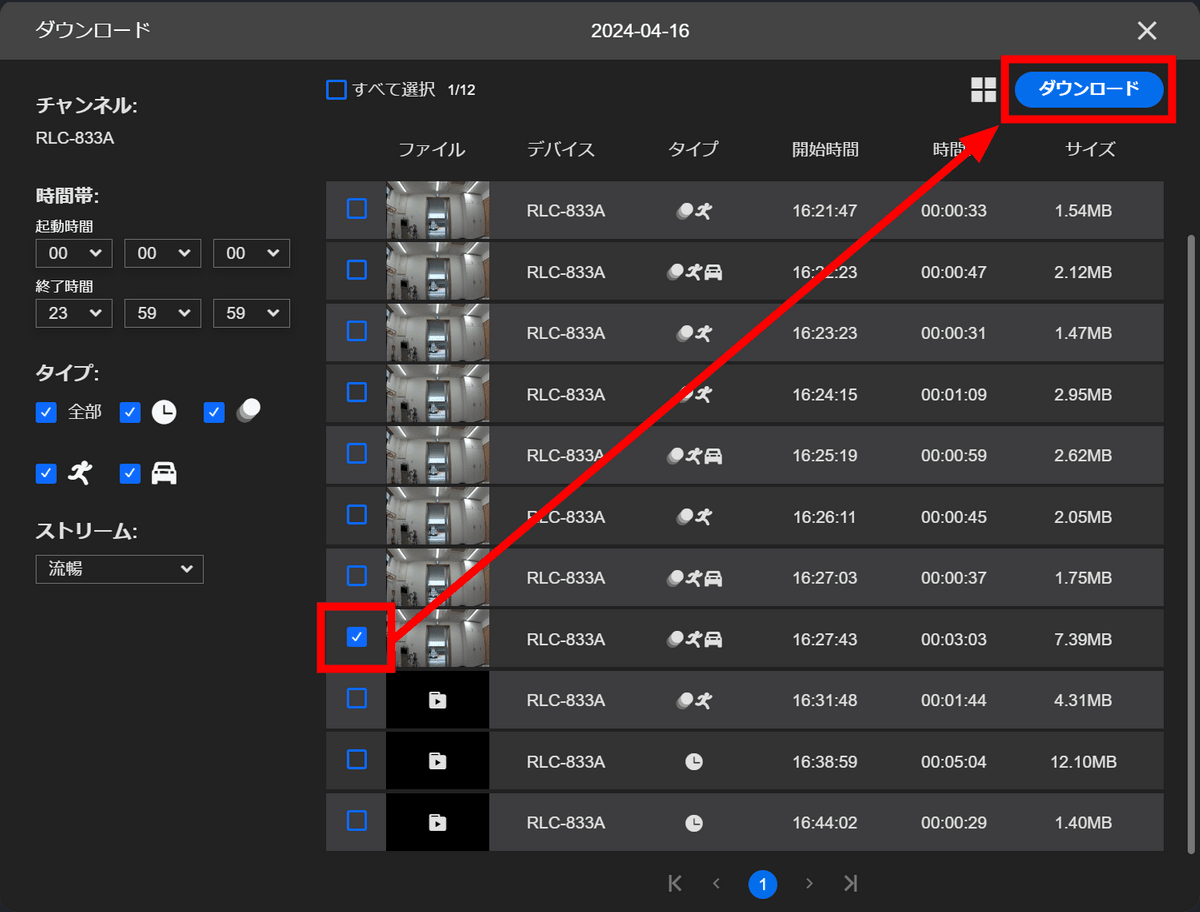
The file will be saved in the Downloads folder on your PC.
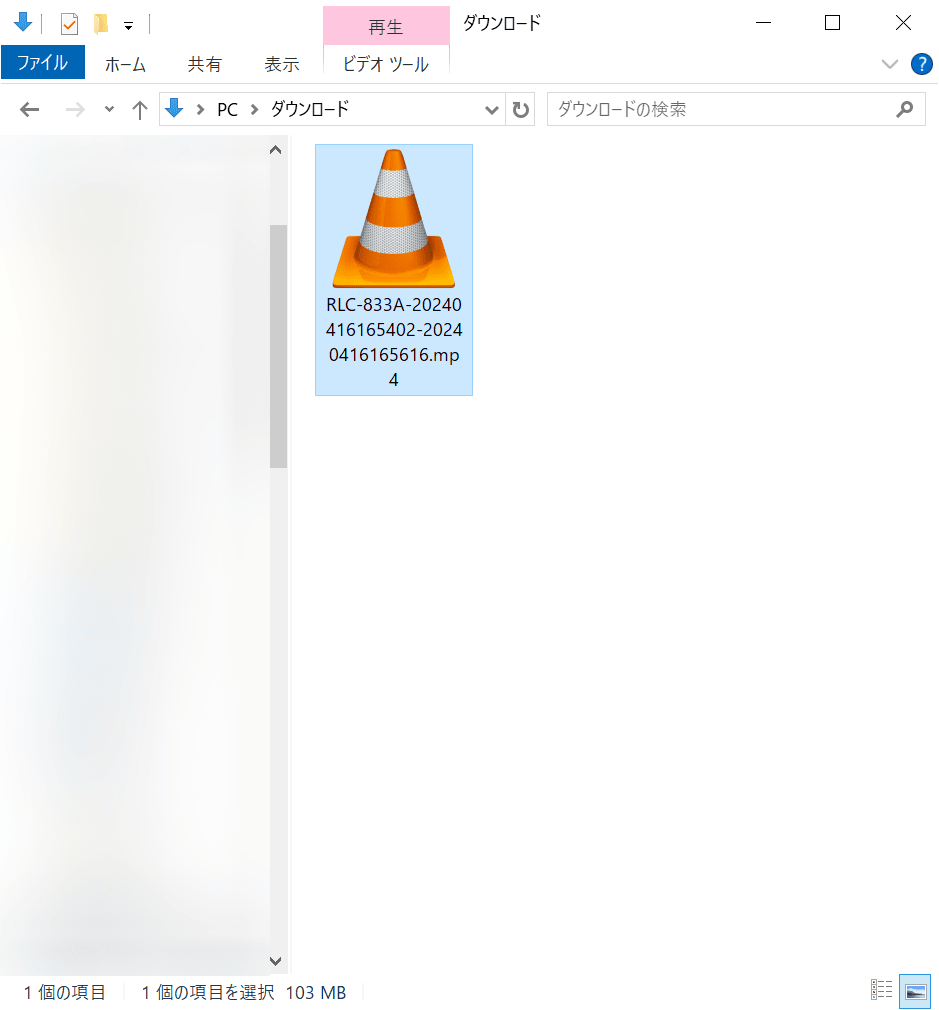
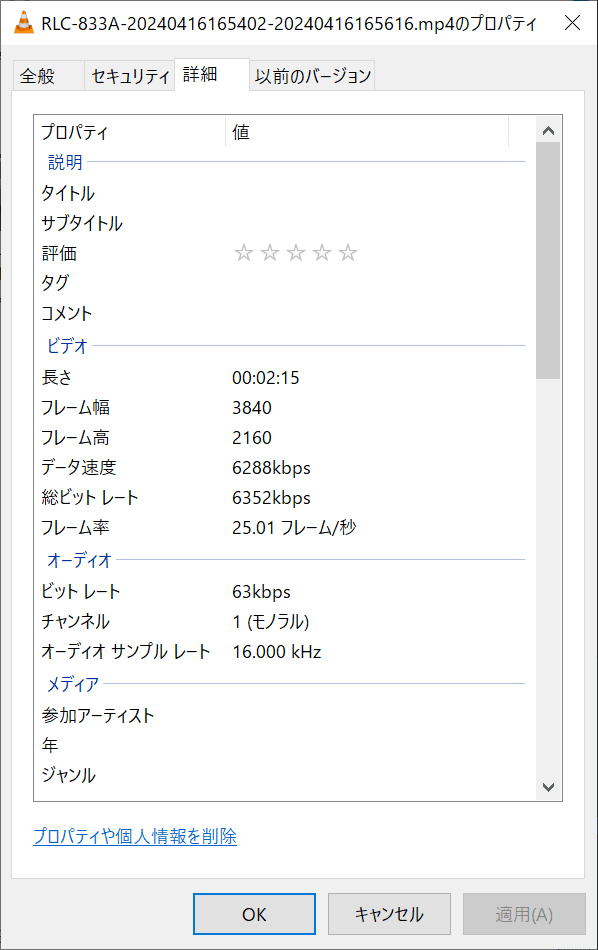
The file recorded at the highest quality was 2 minutes 15 seconds long, had a file size of 103MB, a resolution of 3840x2160 and a frame rate of 25.01FPS.
Below is the video recorded with the RLC-833A. Please note that there is some distortion in the sound due to the microphone's performance.
I tried shooting video with Reolink's security camera 'RLC-833A' capable of 4K shooting - YouTube
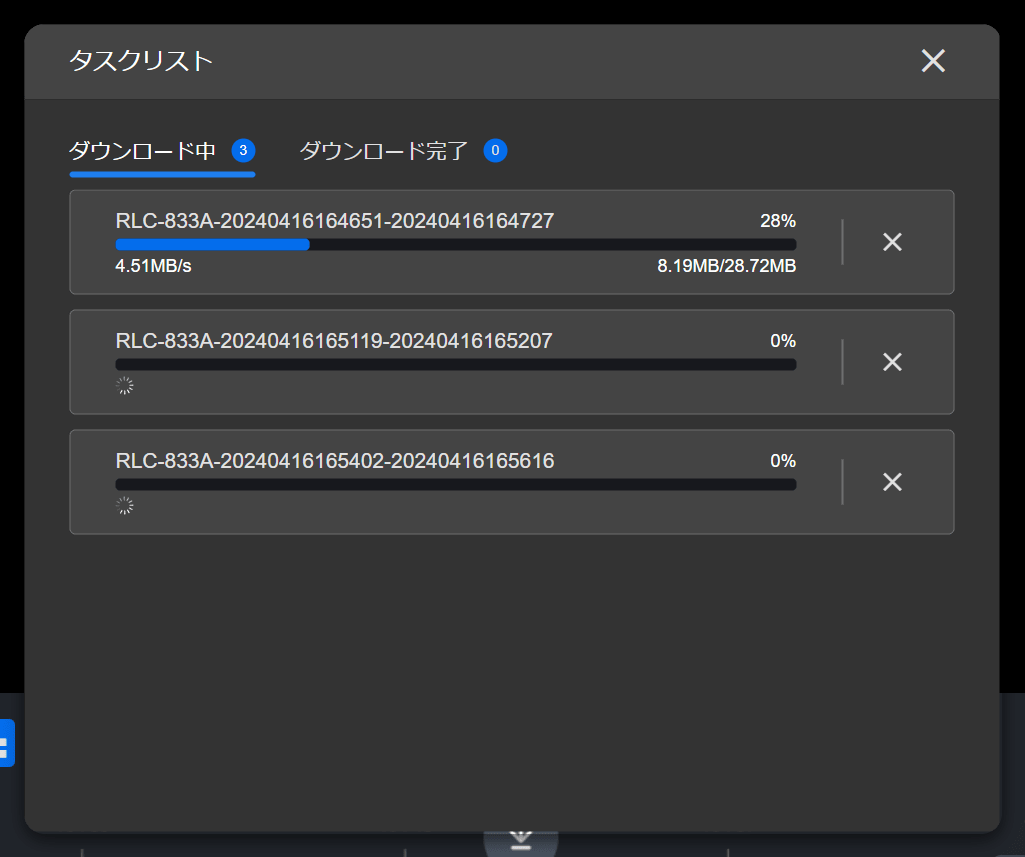
'Cut' is a function that allows you to select a time range on the timeline and download all the recordings within the selected range at once. Once you have made your selection, click the download icon.
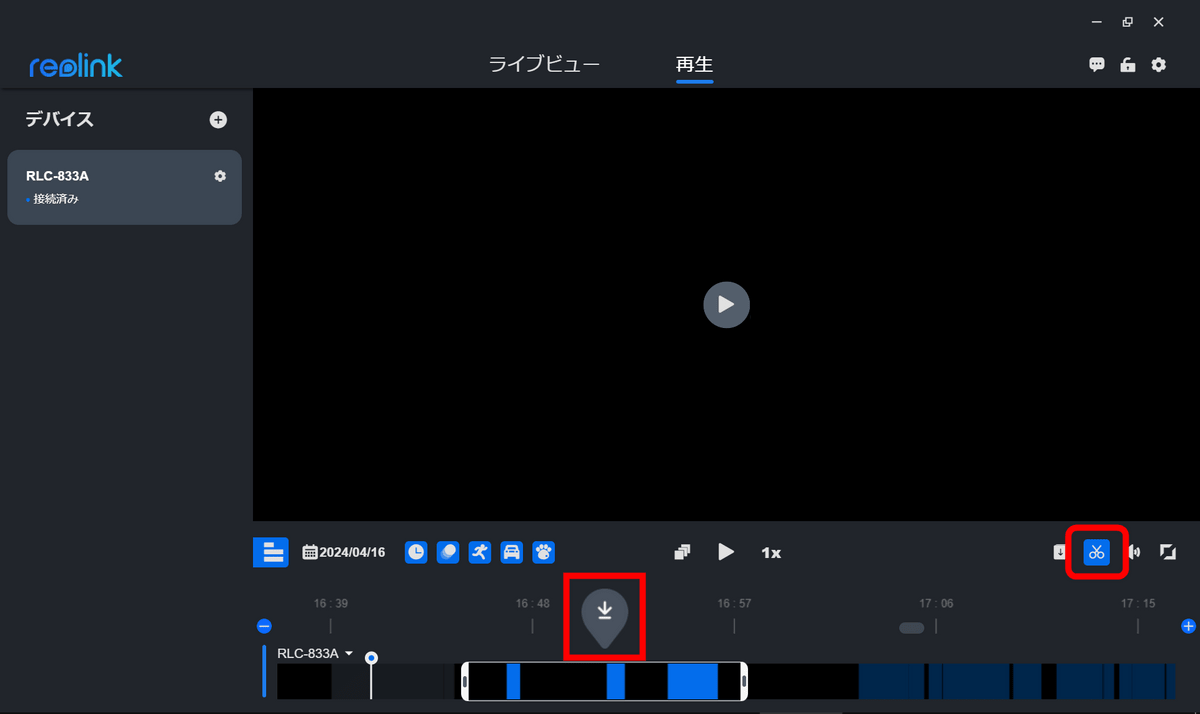
The files in the range will be saved all at once as shown below. If you know the time period of the recording you want to save, it may be more convenient to cut it than to search the list from 'Download'.
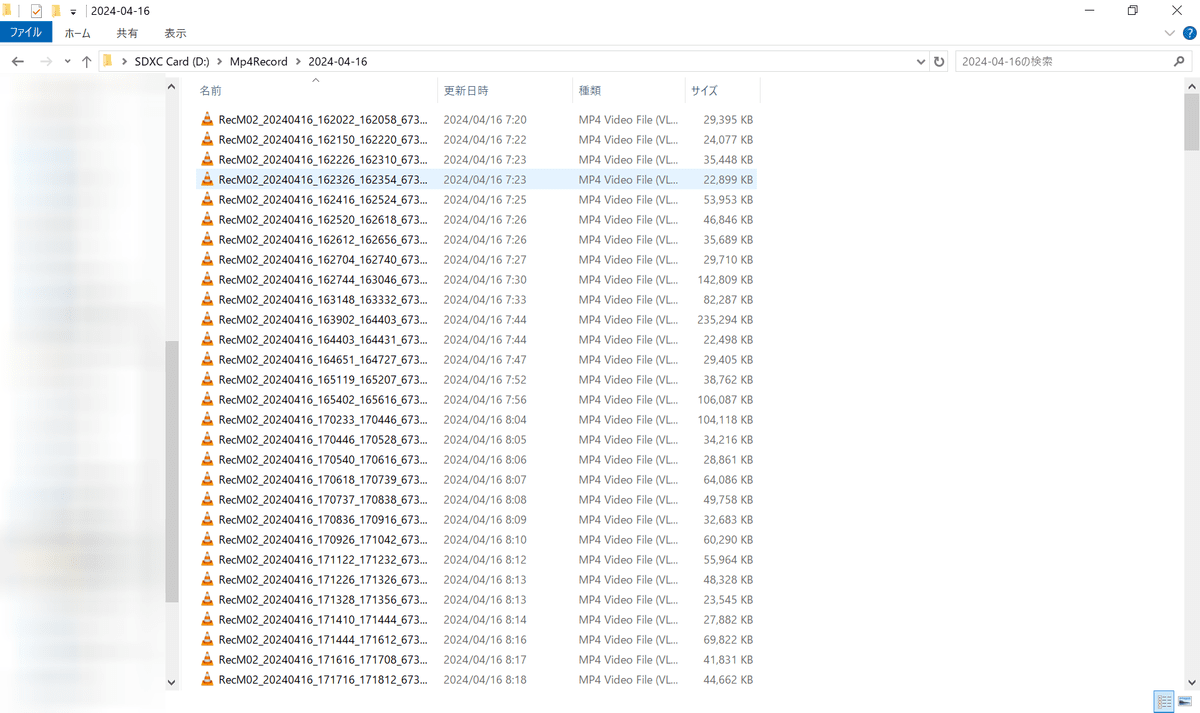
You can also remove the microSD card from the camera and check the recorded files directly.
◆4: Useful features
When you move the mouse cursor over the video, an overlay button will appear.
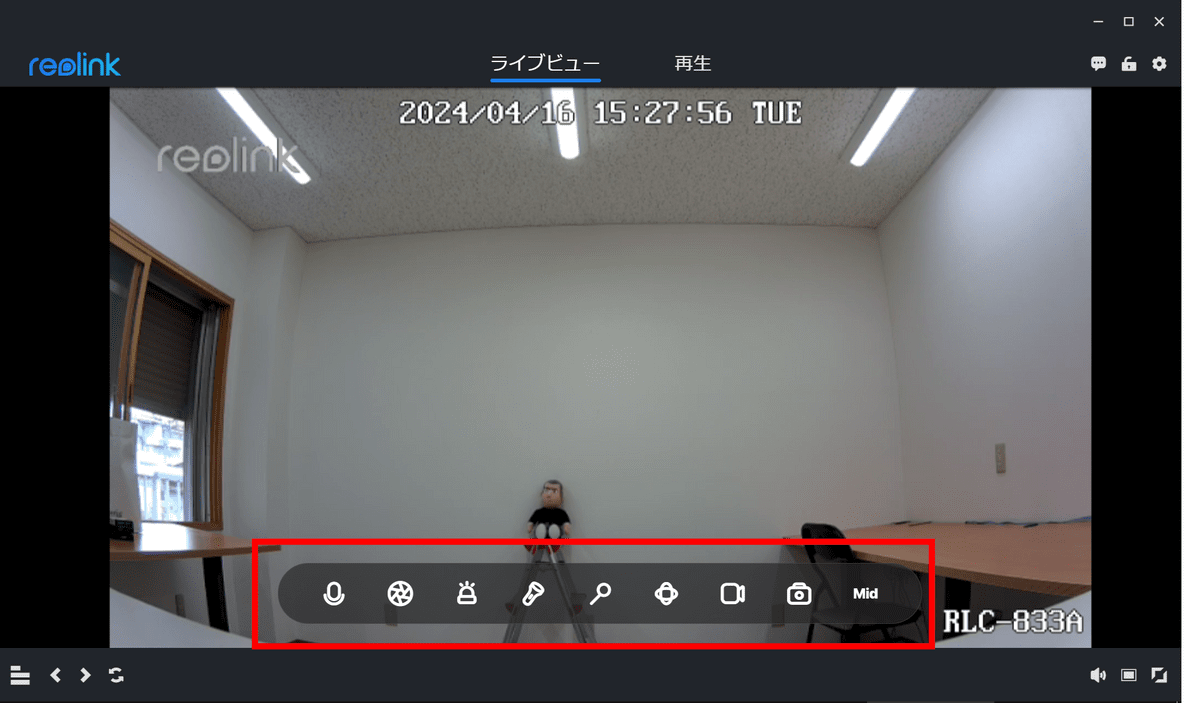
From the left, each icon represents a function: 'Talk,' 'Time Lapse,' 'Alarm,' 'Spotlight,' 'Video Crop,' 'PTZ,' 'Record,' 'Snapshot,' and 'Stream (image quality change).' I tried using these in order.

◆ Talk
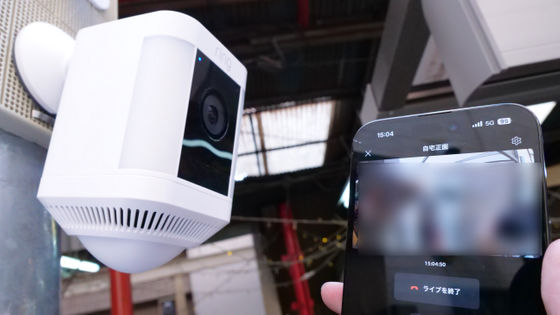
Clicking the 'Talk' icon will cause the microphone icon to appear. Clicking the icon will turn on the microphone, and the sound input to the PC will be output from the camera.
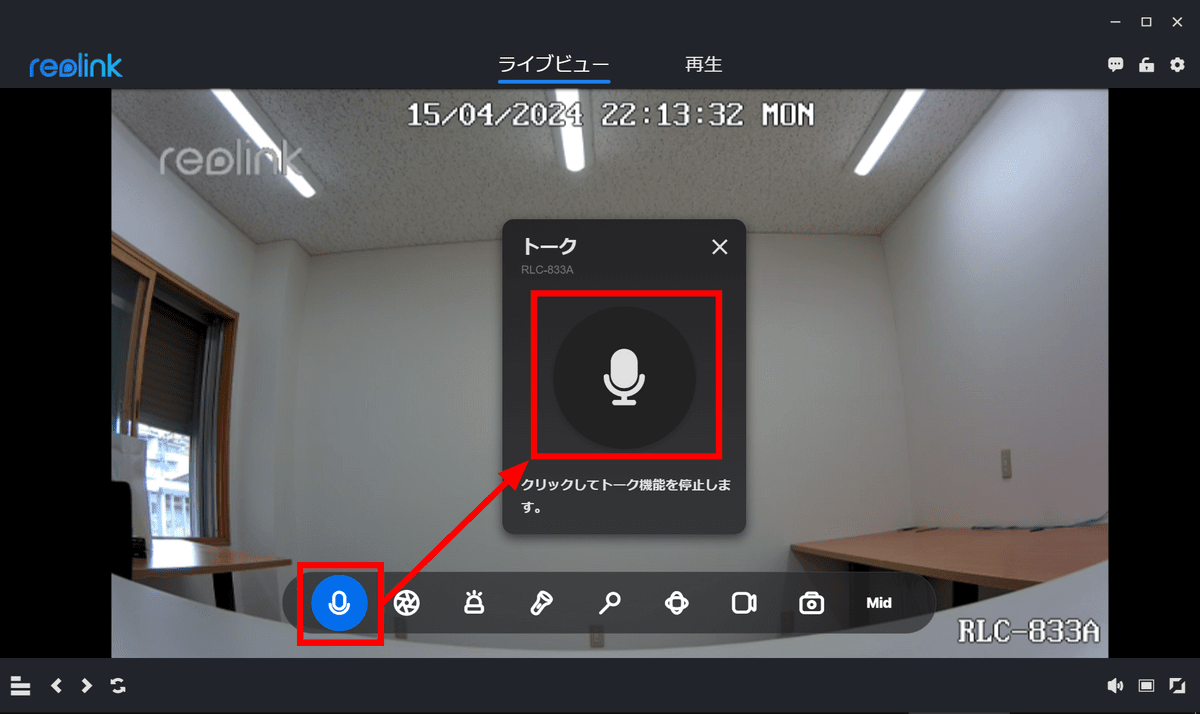
The actual audio is as follows. The volume is sufficient, but the sound quality is not very good. However, the situation in which you would use the camera's microphone to talk is limited to a situation such as calling a delivery person who has come to your front door, and in such a situation, it seems that there would be no particular problem if you just wanted to communicate with the other party.
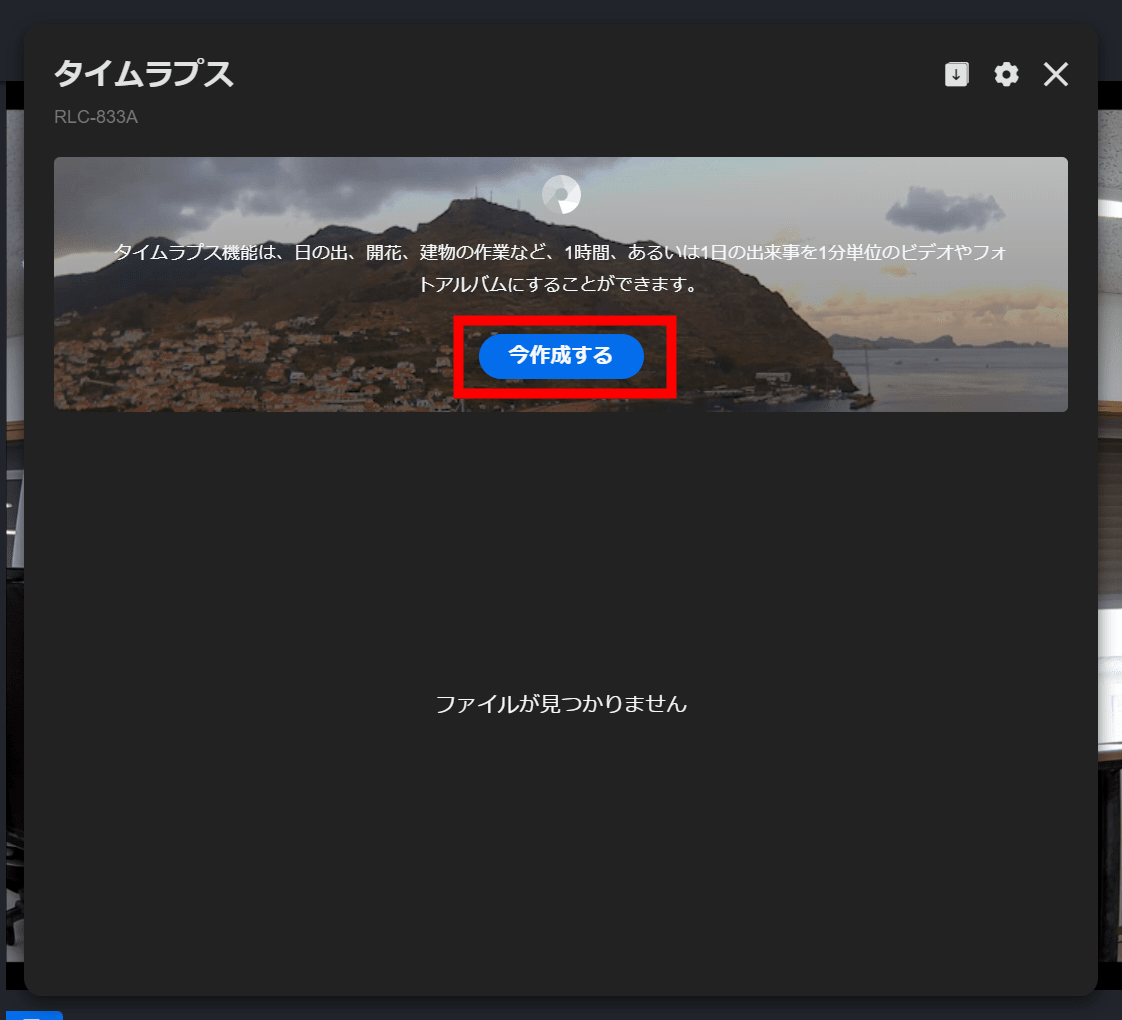
◆ Time Lapse
'Time Lapse' is a feature that allows you to create videos and photo albums of events that occur over an hour or a day, such as sunrise, flowering, or building work, in one-minute increments. If you specify a future time, it will record at regular intervals and automatically create a time lapse after the recording is finished. Click 'Create Now' to start.
Several templates such as 'Events, People, Traffic' and 'Cloud Movement' are displayed. 'Events, People, Traffic' allows you to record for a specific time, such as 1 hour at 2 second intervals for 1 hour, 'Cloud Movement' for 10 second intervals for 1 hour, and 'Farm' for 90 days at 2 hour intervals from 8am to 5pm.

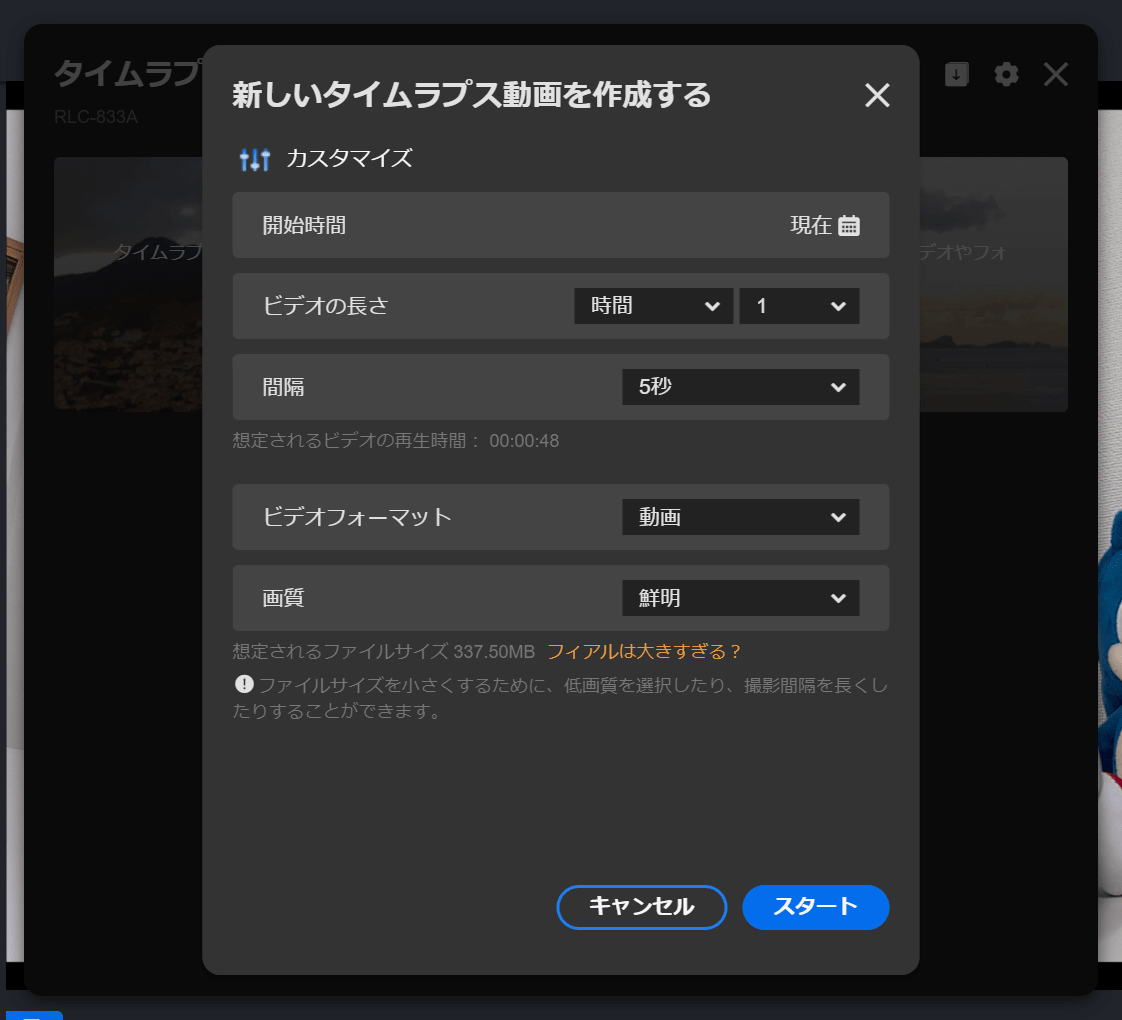
If you select 'Customize', you can create a time lapse by deciding the start time, video length, and interval yourself.
◆Alarm sound
'Alarm' is a function that sounds an alarm as its name suggests. When you click the icon, the alarm button appears, and when you click the alarm button, the camera will immediately sound an alarm.
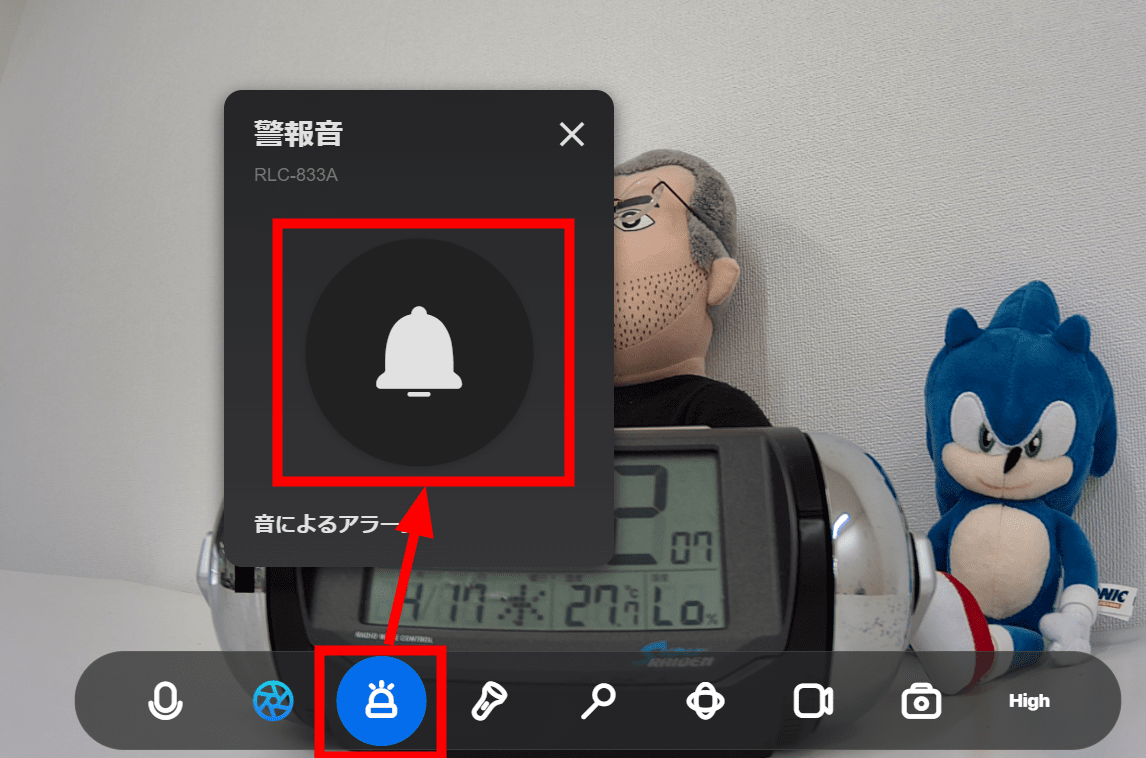
I recorded the alarm sound. In the video below, I clicked the alarm sound button three times.
◆ Spotlight
Clicking the 'Spotlight' icon will turn on the spotlight immediately.
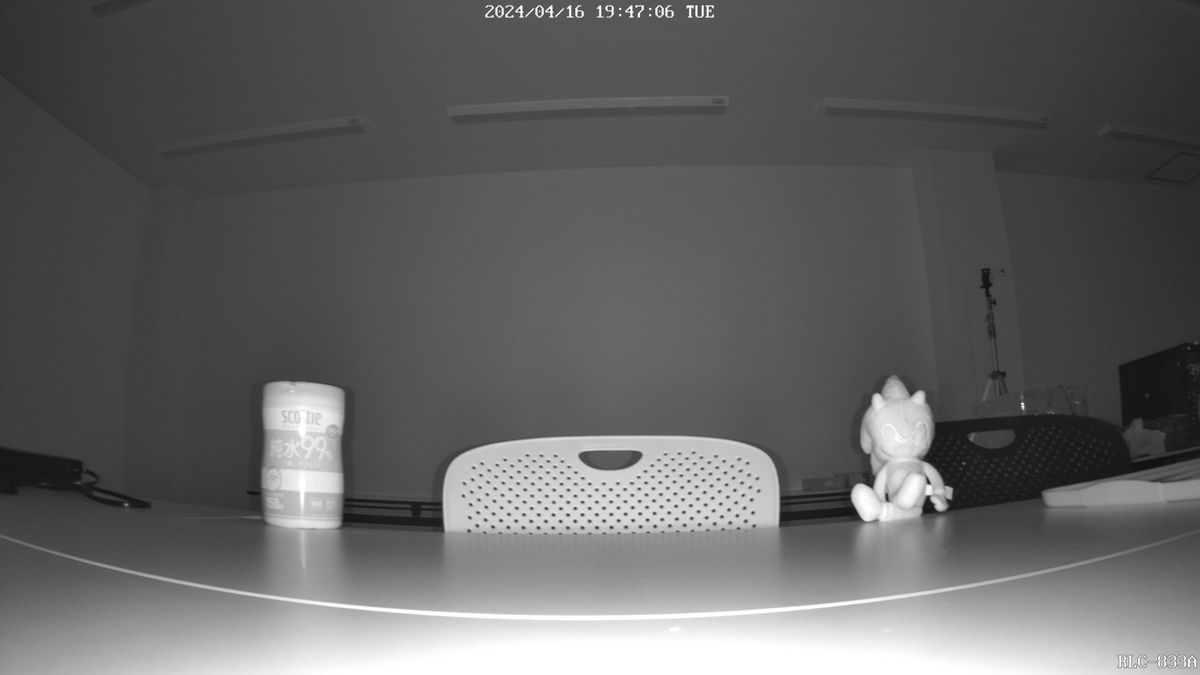
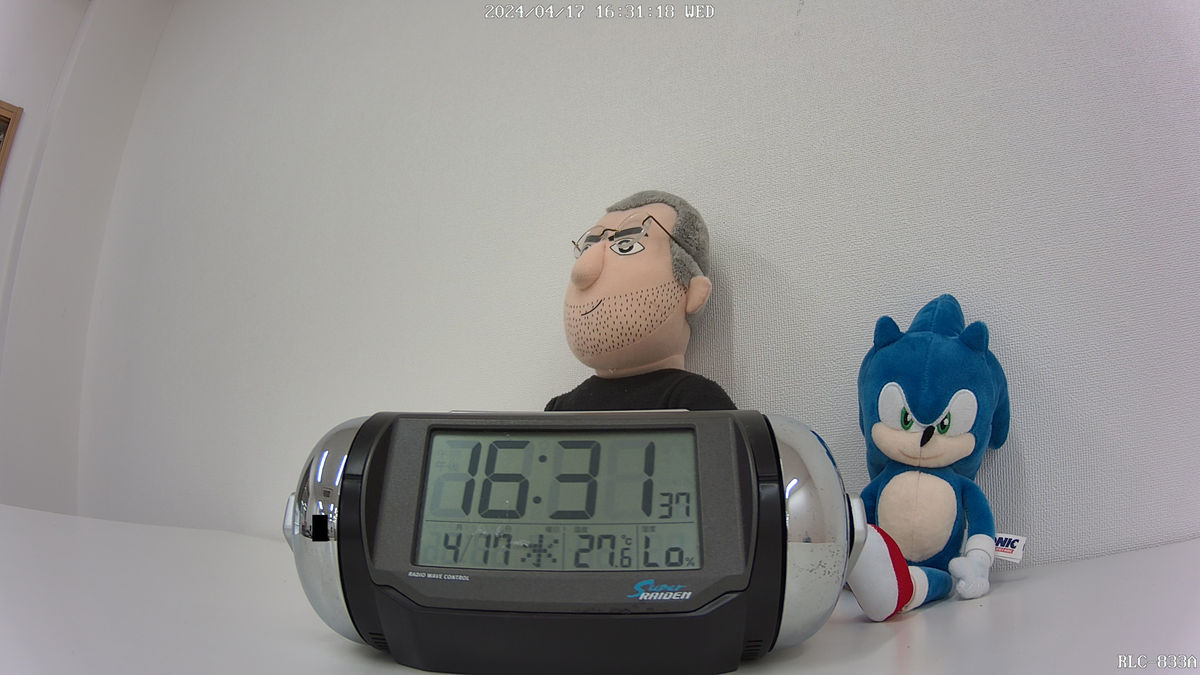
The RLC-833A is equipped with infrared night vision, allowing it to capture black and white footage at night.
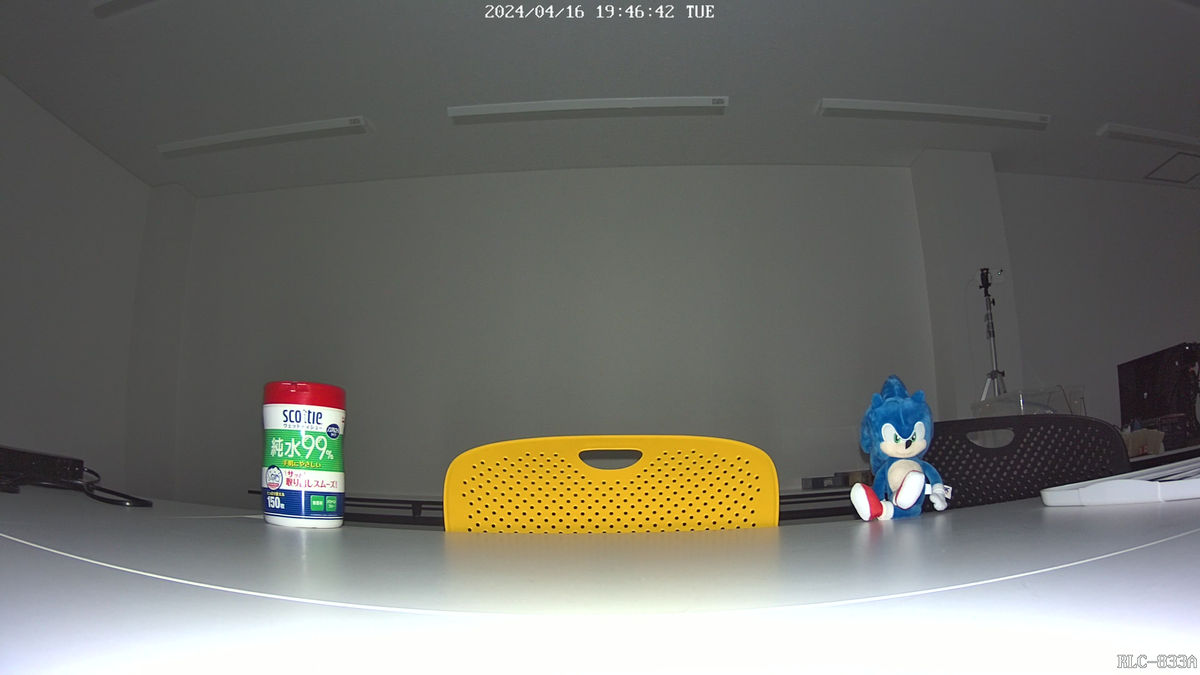
When the spotlight is turned on, the color night vision camera is activated, allowing you to capture full color images even at night. The brightness of the spotlight is 700 lumens.
In the 'Lights' settings, you can also set the spotlights to turn on when people, cars, or pets are detected at night, and to keep them on for the set period of time.

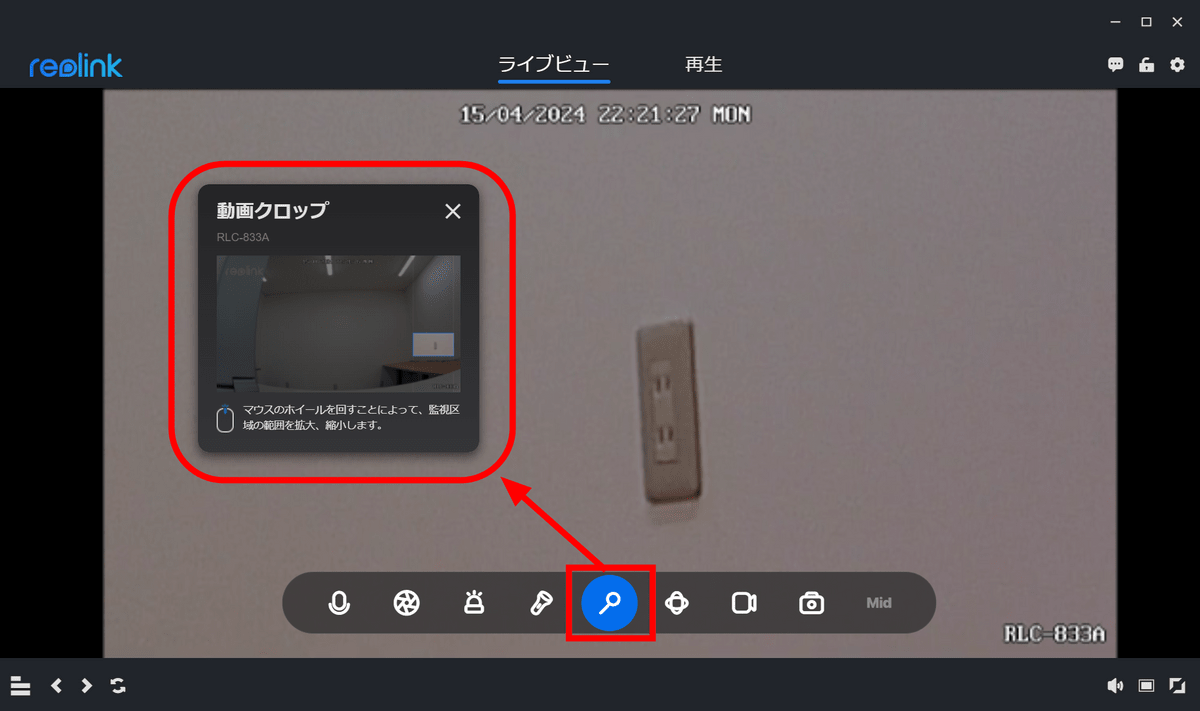
◆Video crop
'Video Crop' is a function to enlarge a part of the image. When watching live video, you can use this function if you want to enlarge only a specific area. It only enlarges the live video and does not affect the recording.
◆PTZ
'PTZ' stands for 'pan (horizontal rotation),' 'tilt (vertical rotation),' and 'zoom.' The RLC-833A does not support pan and tilt, only zoom is available. When you actually zoom, the focus is automatically adjusted as shown in the video below. Zooming affects recording.
◆Recording
Click this button to start recording. Click it again to stop recording and save it to a local folder on your PC immediately.
◆Snapshot
The snapshot button captures a still image from the live feed, with a timestamp of the moment you clicked, and saves it to your PC. Below is an actual snapshot.
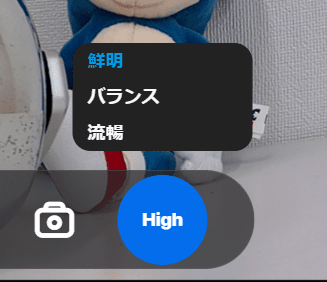
◆Stream (image quality change)
This button switches the shooting image quality between 'Clear (High)', 'Balanced (Medium)' and 'Fluent (Small)'. In 'Clear', the resolution was 3140 x 2160, but in 'Fluent', it drops to 640 x 360 and 10 FPS.
◆5: Other settings
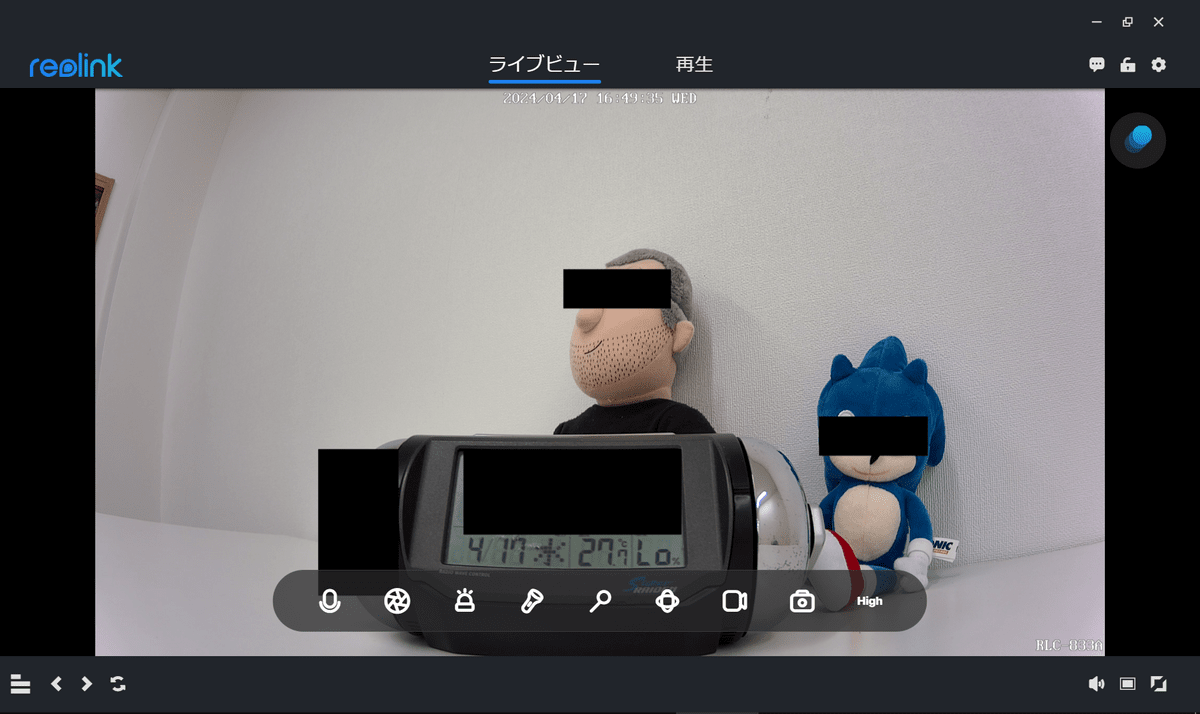
In the 'Screen Display' settings, you can add a 'Reolink logo' watermark to the image, flip the image left/right, top/bottom, or set a 'Privacy Mask' to black out part of the image.
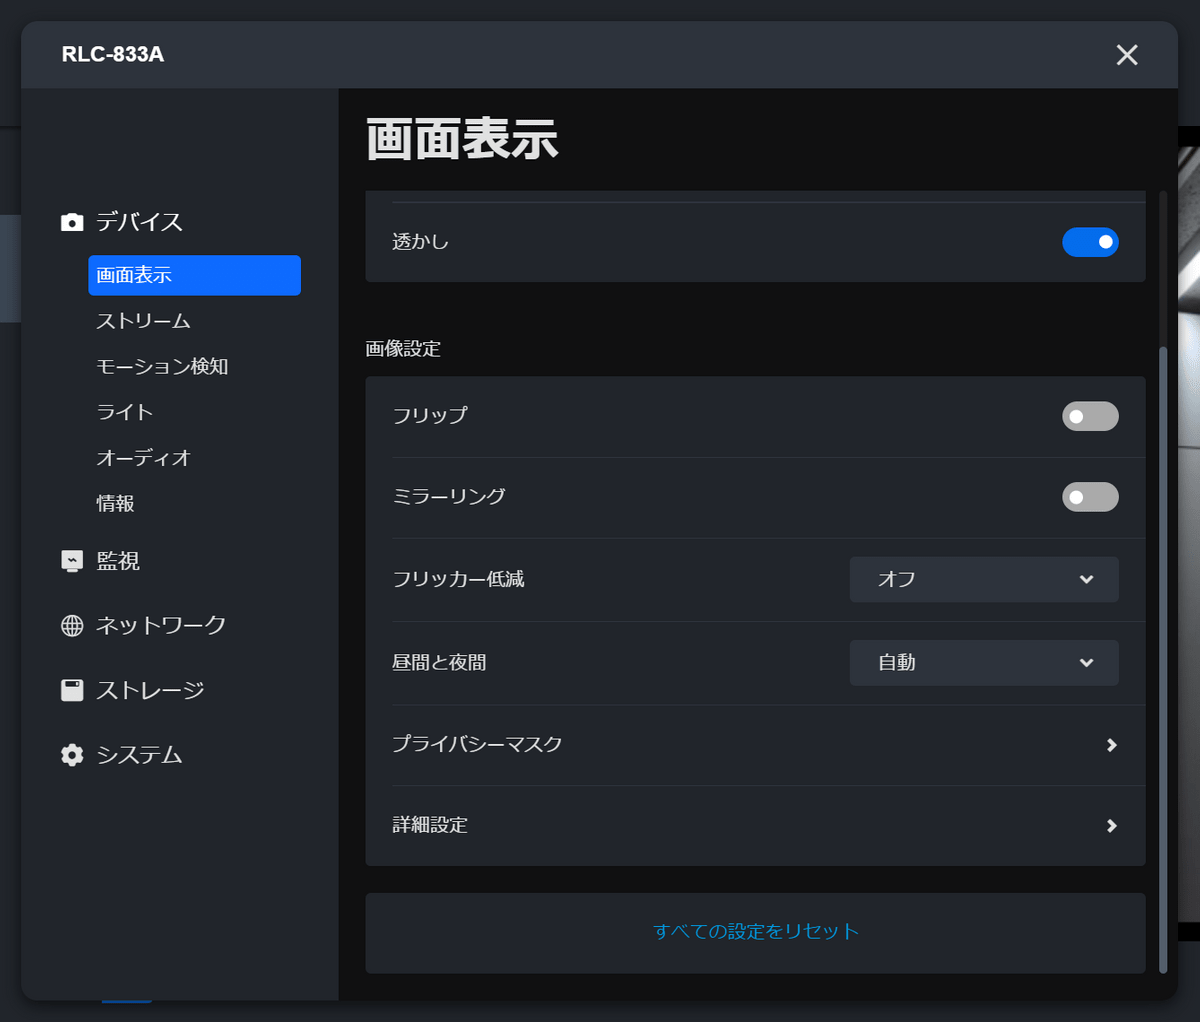
The RLC-833A allows for the installation of up to four square 'privacy masks.'
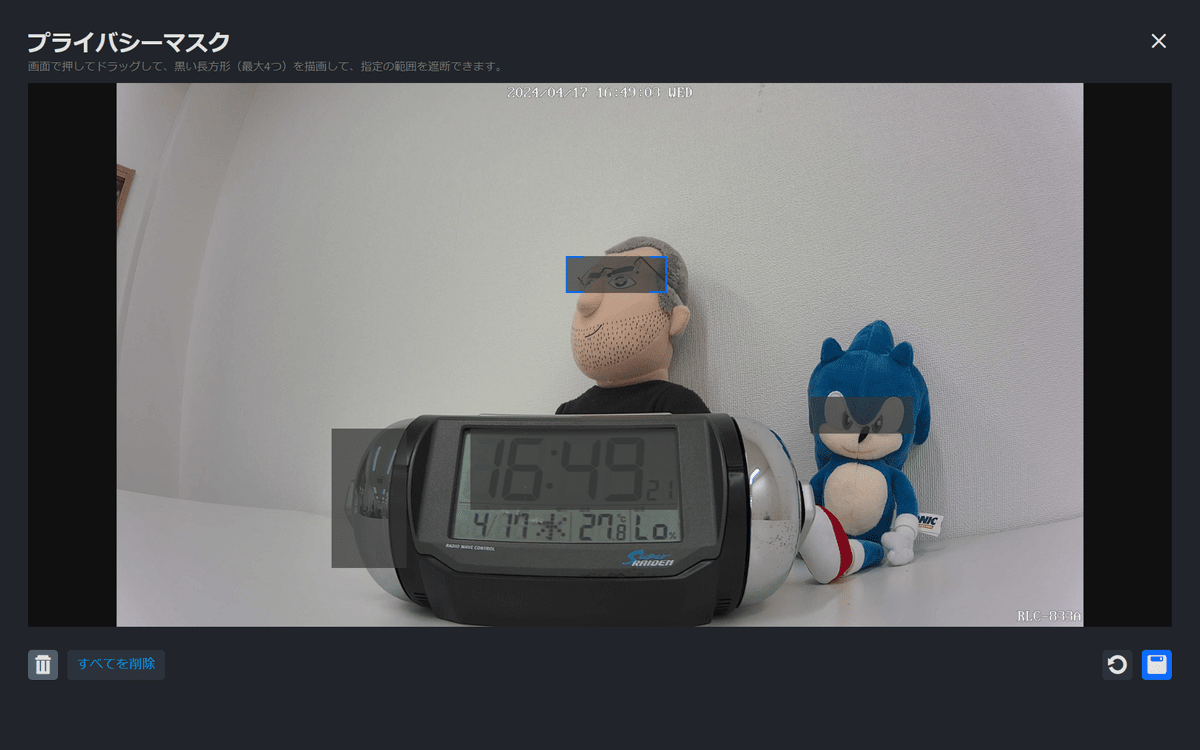
The location where it is installed will be blacked out and will no longer be recorded in live footage or recordings.
If you feel that the recorded image is dark, click 'Advanced Settings' under 'Screen Display.'
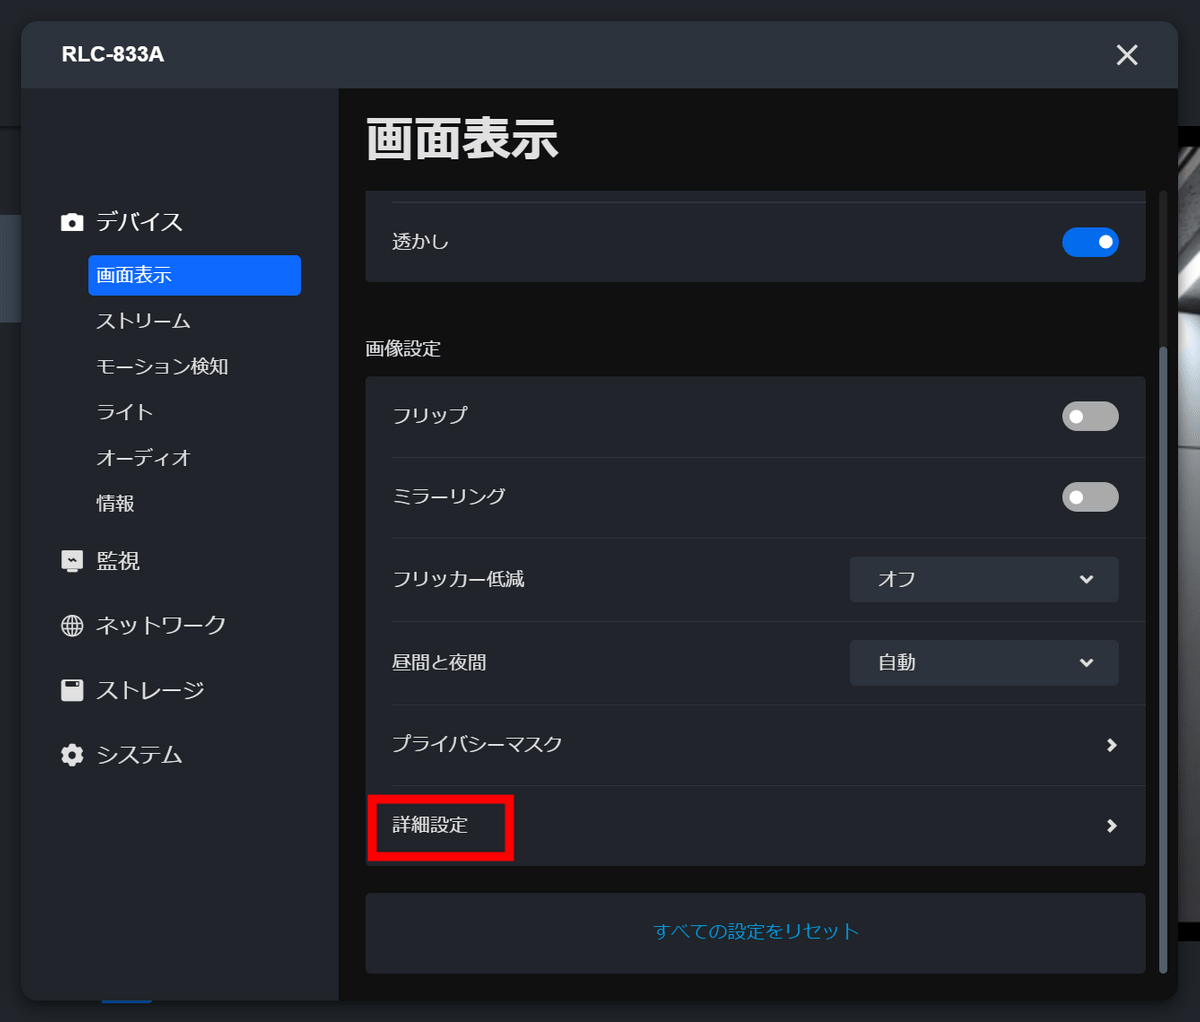
You can change the brightness and contrast.
The 'Motion Detection' settings allow you to configure the sensitivity, size of the object to be detected, etc.
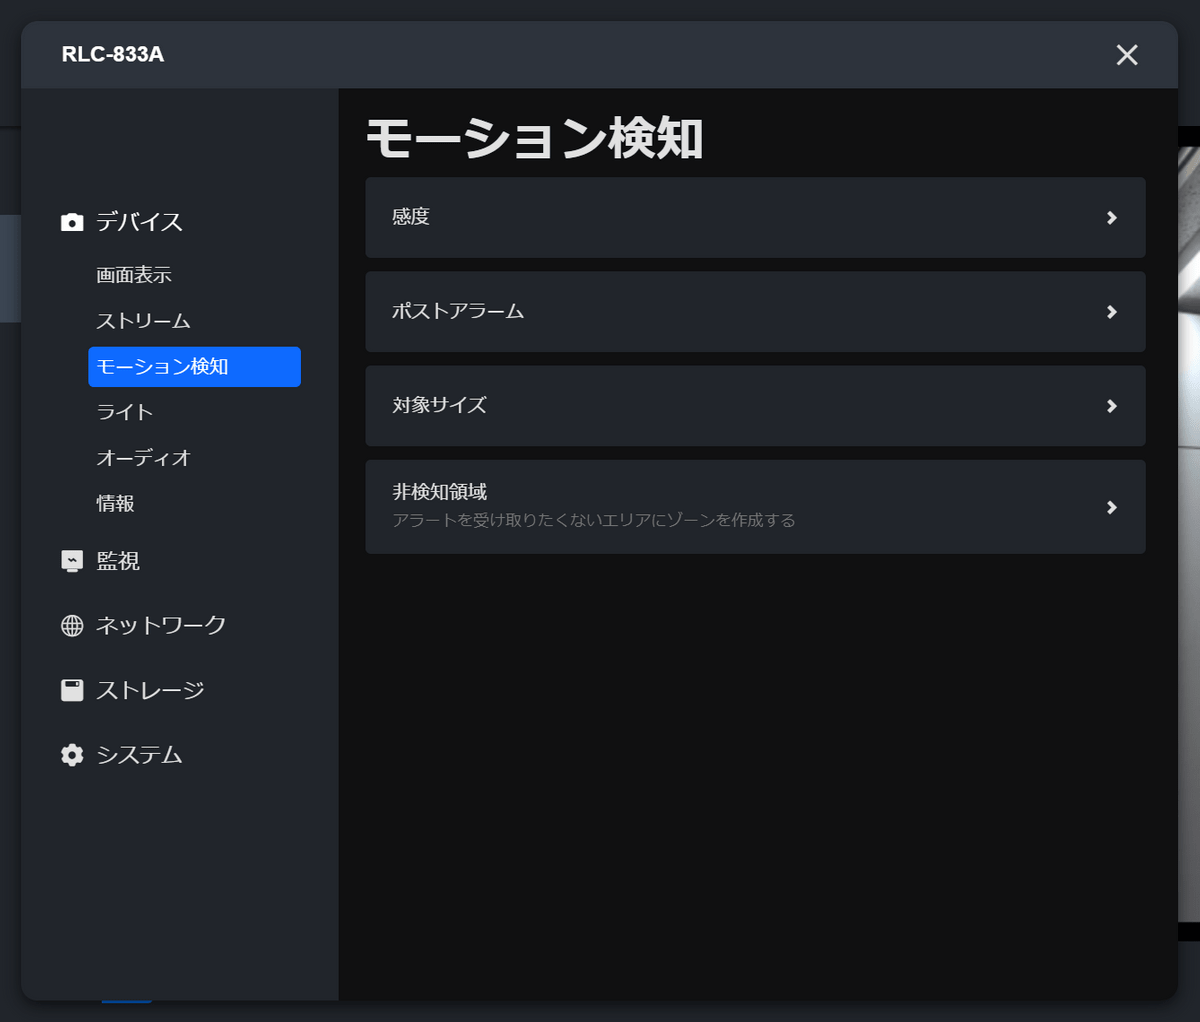
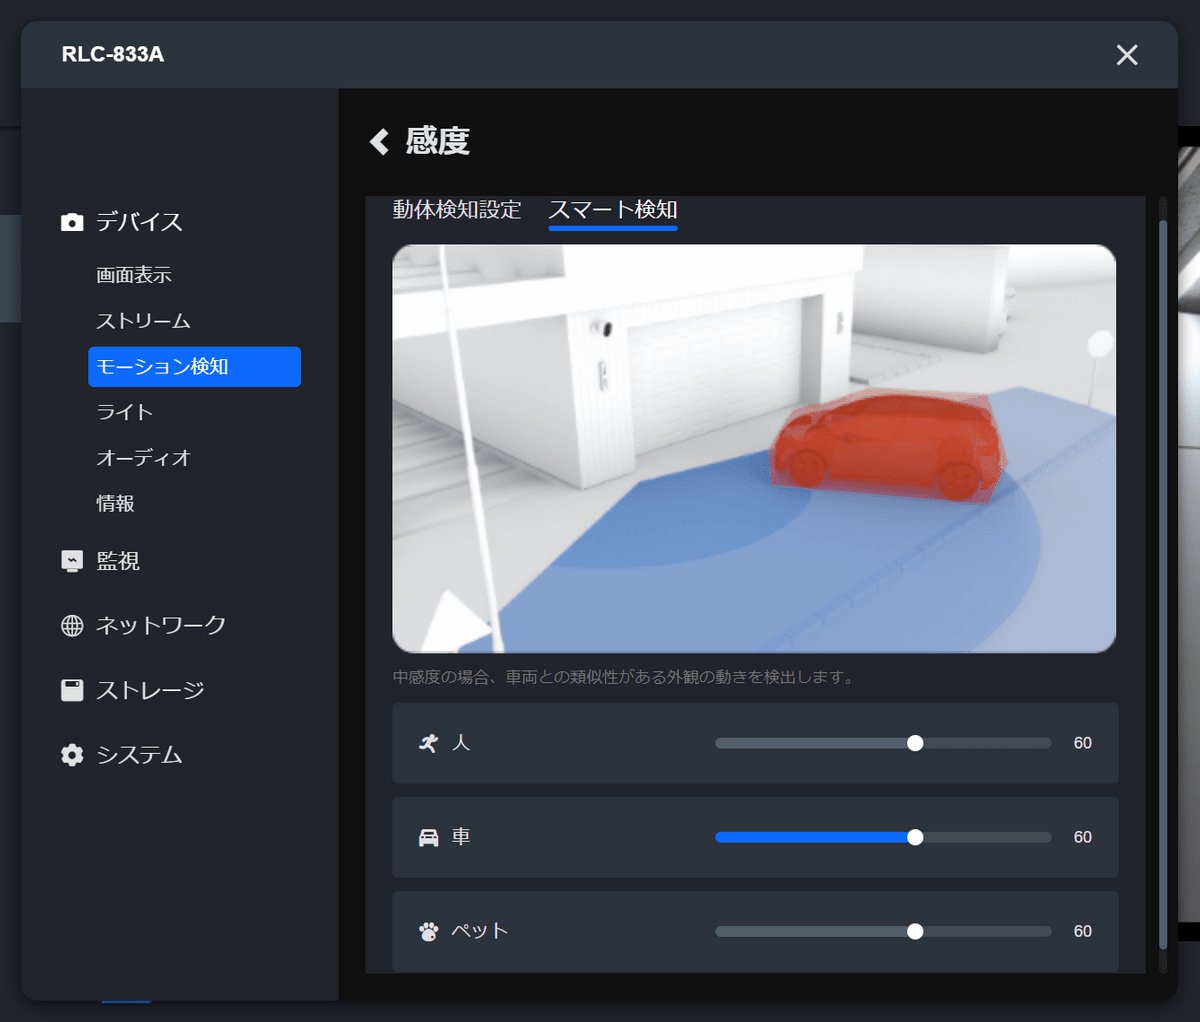
'Sensitivity' is divided into 'Motion Detection Setting', which adjusts the sensitivity to any particular movement, and 'Smart Detection', which adjusts the sensitivity to people, cars, and pets. The motion detection setting allows you to fine-tune the sensitivity for each time period.
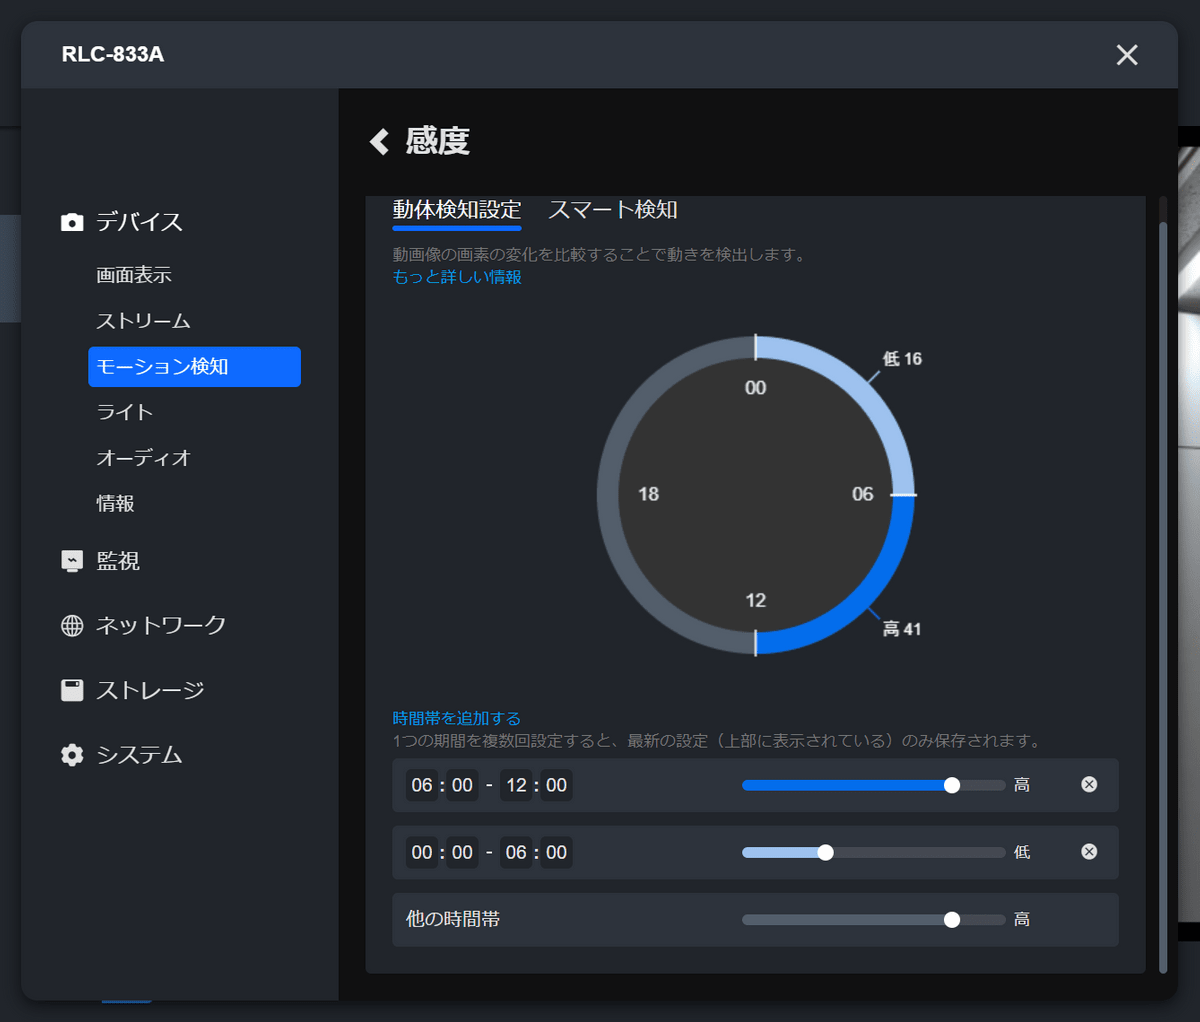
The RLC-833A's motion detection sensitivity is quite high at the default settings, and it will detect movement and continue to record even if the time on the digital clock changes, so it is safer to lower the sensitivity except at specific times.
The 'Smart Detection' settings screen is as follows. You can set the sensitivity for people, cars, and pets.
In the 'Monitoring' settings, you can configure recording timing, email notifications, FTP, etc.
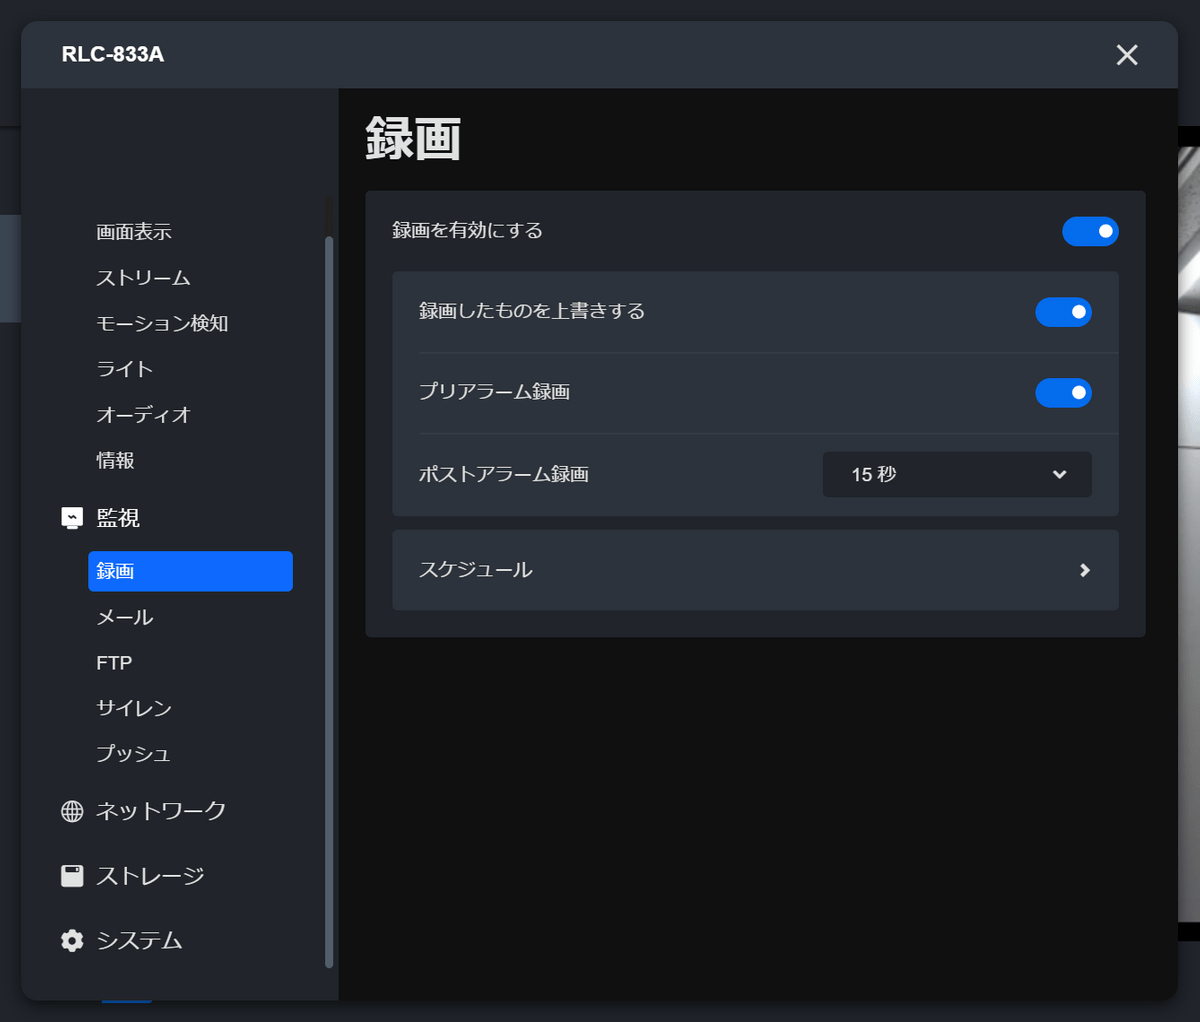
By default, the RLC-833A will record only when it detects any motion. Recording when motion is detected is called 'Alarm.' In the alarm settings, you can change the recording time and the detection target.

On the other hand, you can also set it to record only at a specific time regardless of motion detection. This is called 'Timer'.

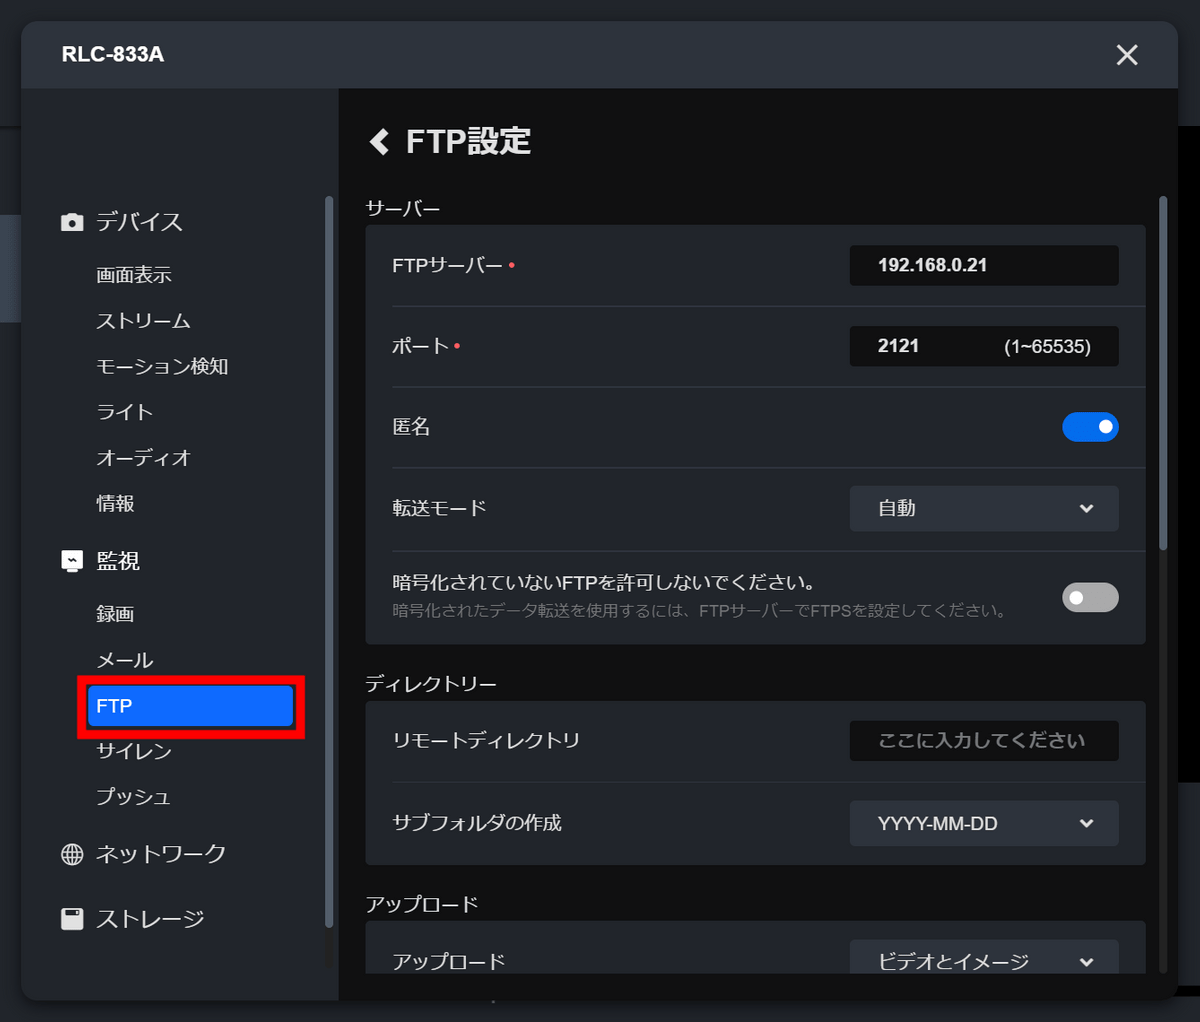
'FTP' allows you to set up automatic uploading of recordings to an FTP server.
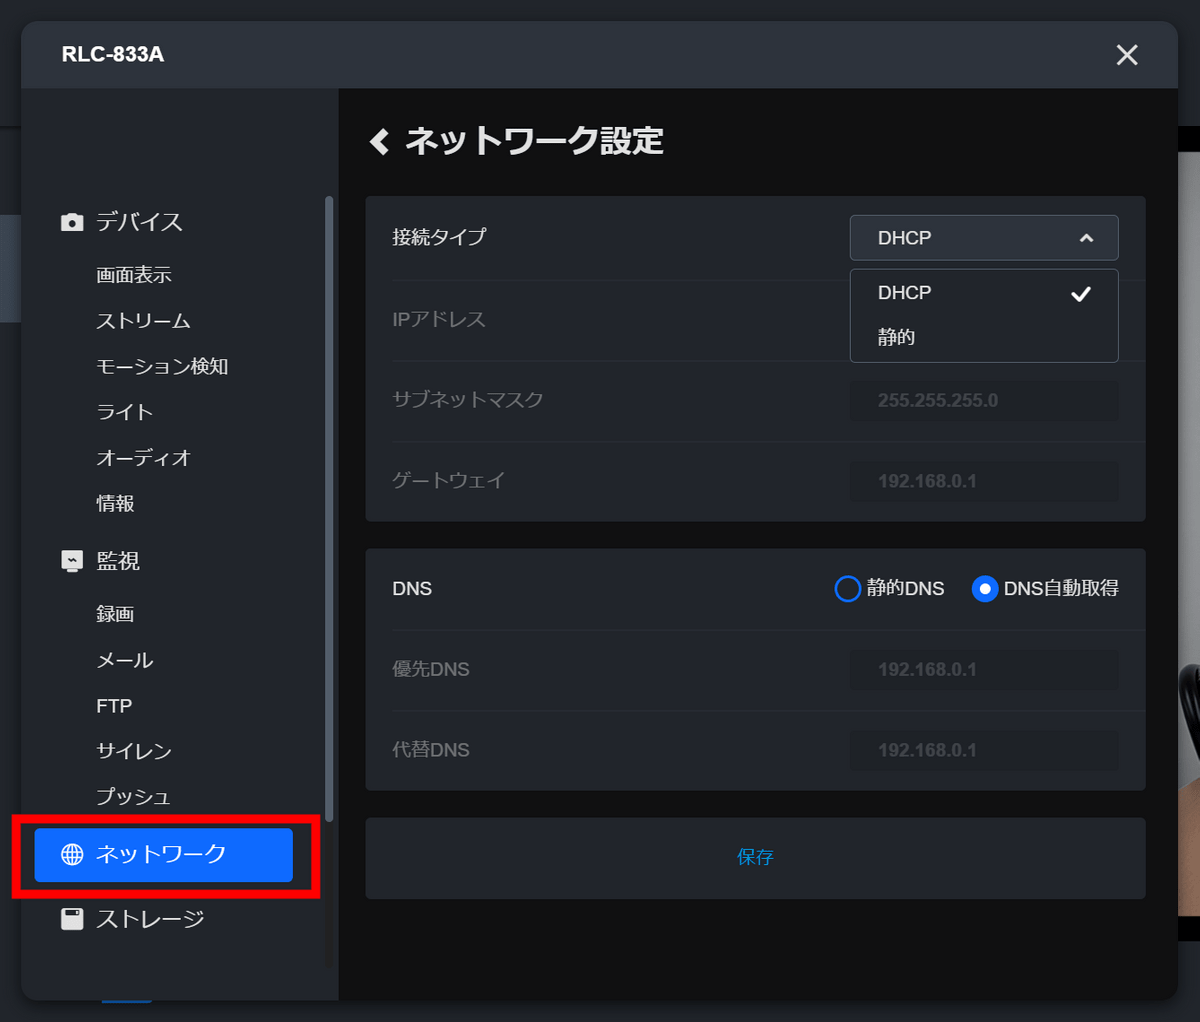
'Network' allows you to set up connections with third-party clients using RTSP.

You can also change your network connection type from the default DHCP to static.
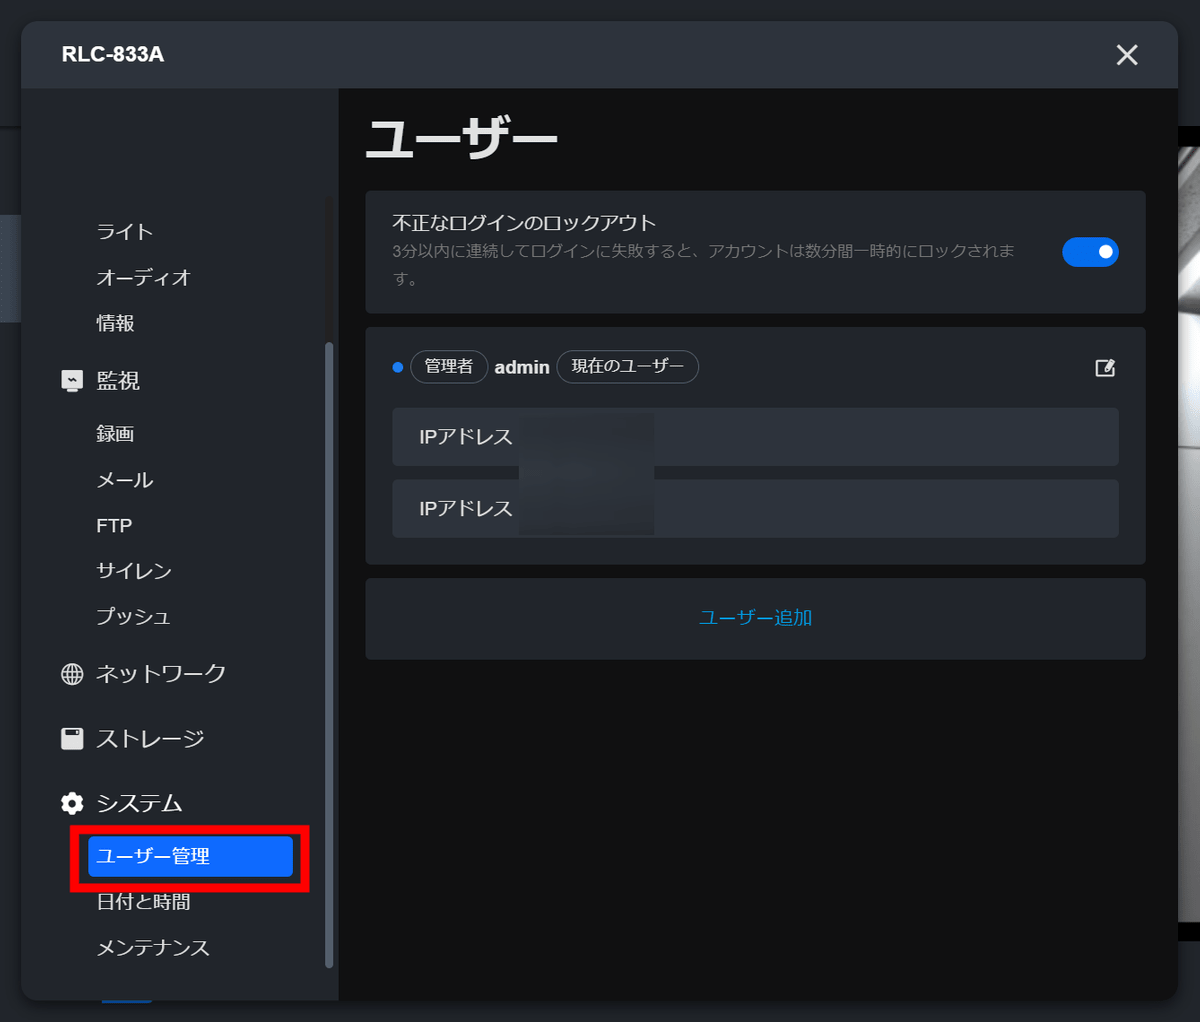
In 'User Management' under 'System,' you can check the IP address of the device that accessed the camera, and in addition to being able to create an 'Administrator' who can tweak various settings, you can also create a 'User' who can only view live footage and recordings and grant them to others.
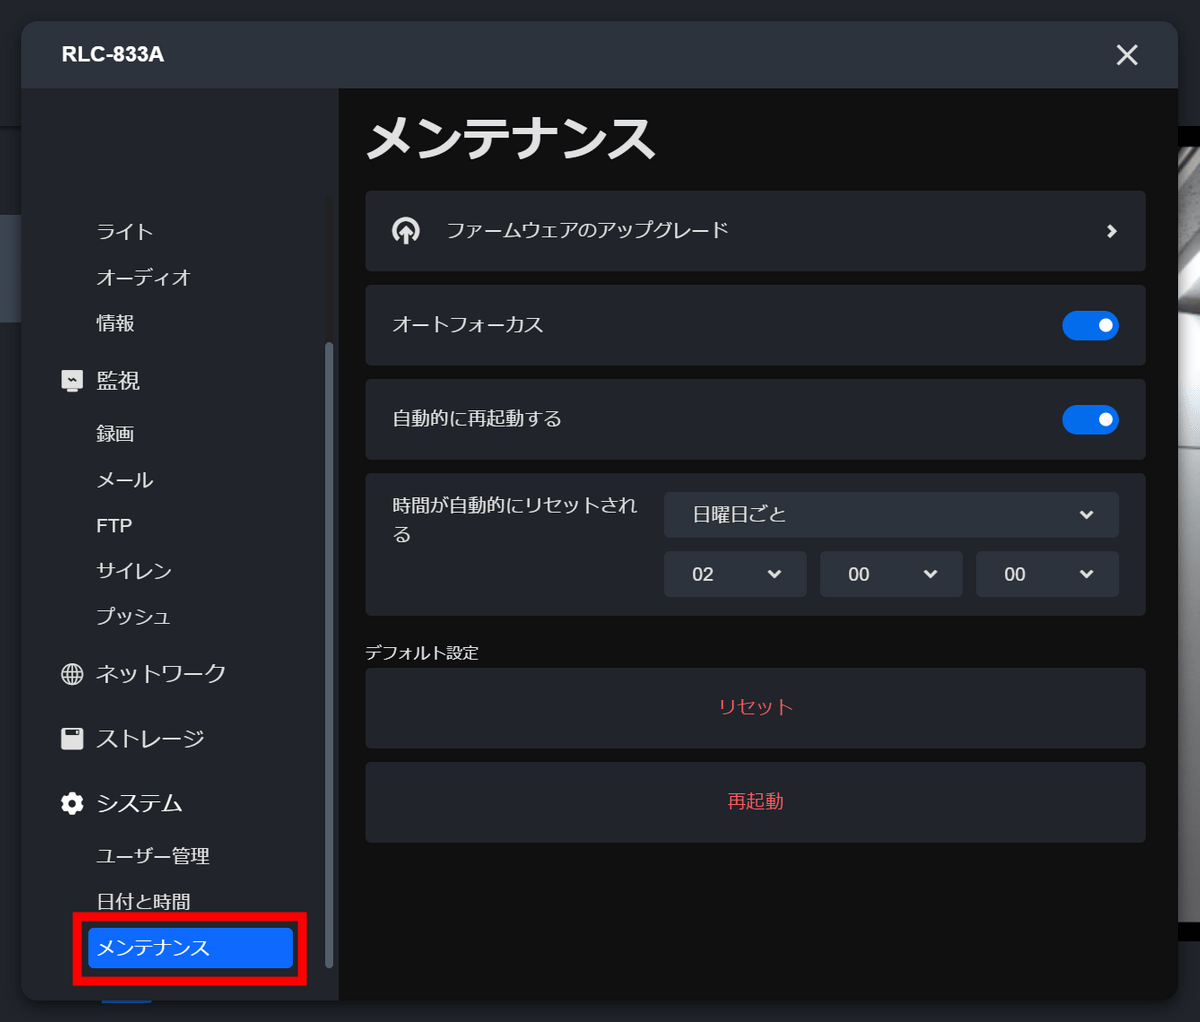
Under 'System' and 'Maintenance,' you can upgrade the firmware or reset and restart the camera.
◆6: Smartphone app
Reolink also offers
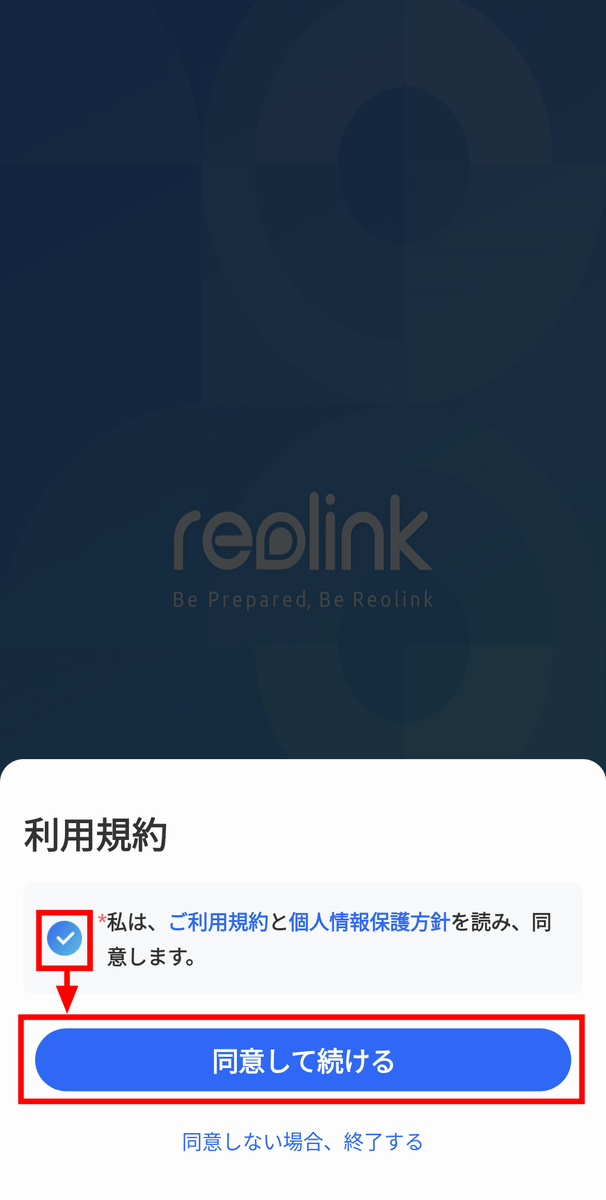
When you open the app, a screen will appear asking you to agree to the terms of use. Check the box and click 'Agree and continue.'
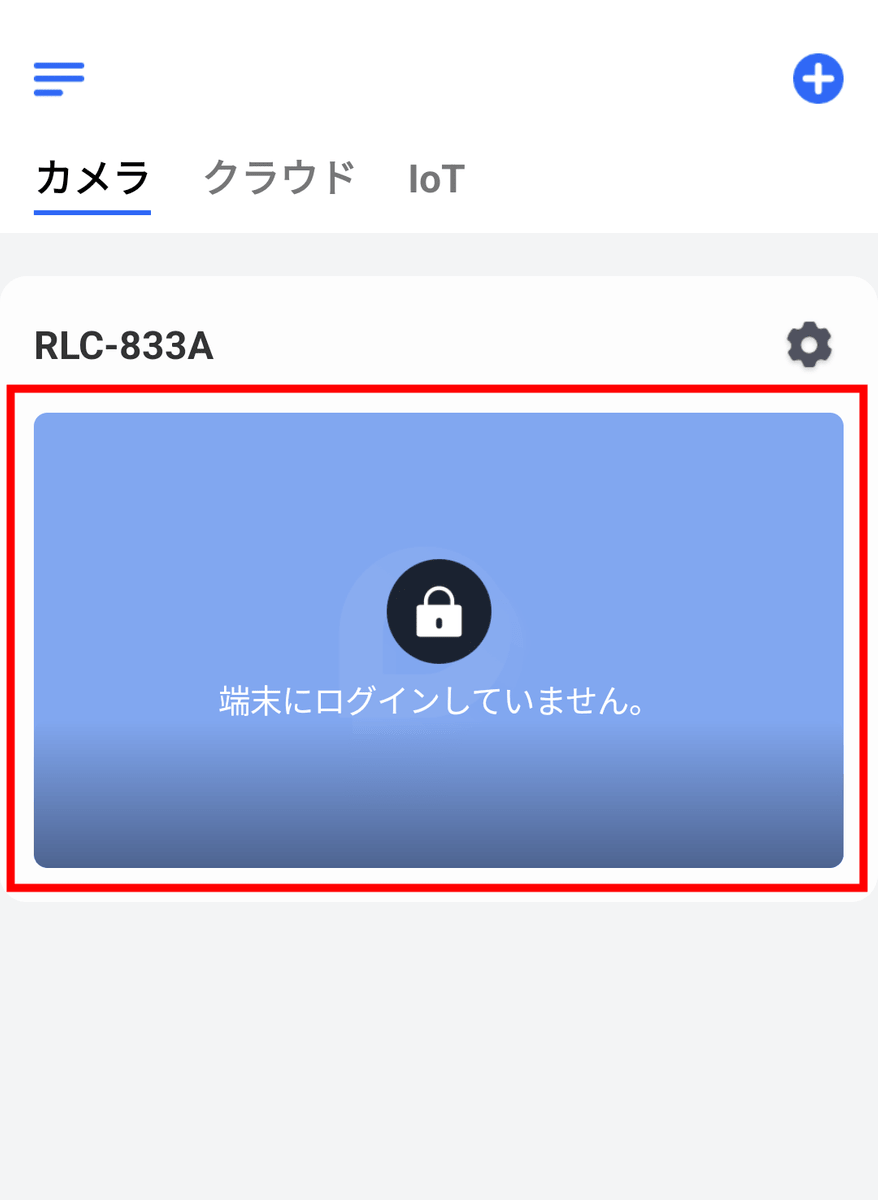
Cameras on the same LAN are displayed, but you are not logged in, so tap it first.
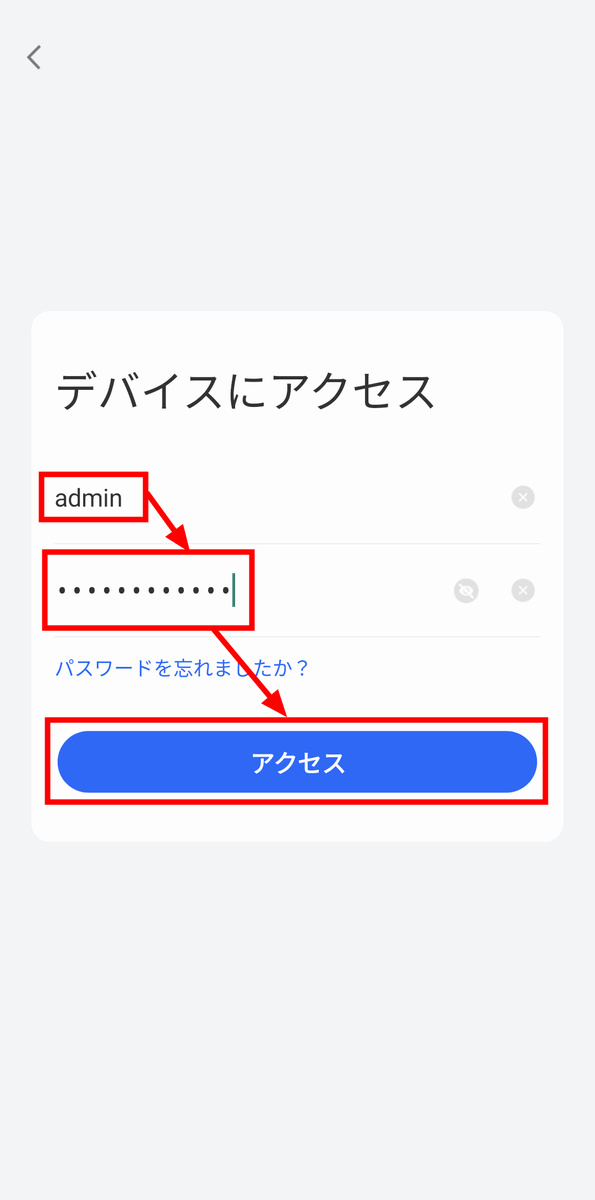
Enter your username and password and tap Access.
Now you can check the live video and recordings of RLC-833A. The smartphone app only has additional items that allow you to access '
◆7: Summary
Although the RLC-833A requires manual adjustment of the camera's orientation, it fulfills its role as a security camera that can be set up and left alone, by automatically capturing clear images at night and automatically recording when it detects motion. Some commercially available security cameras use a system where you cannot view recordings that are several days old unless you subscribe to a subscription, but one of the points that differentiates the RLC-833A is that you can view all of them for free.
After operating the camera for about three hours in a room with a room temperature of about 26 degrees, the camera's temperature rose to nearly 53 degrees. According to

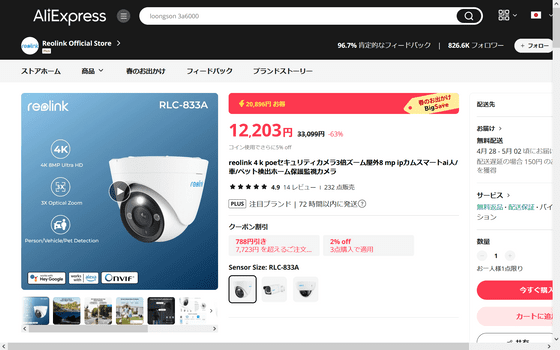
The RLC-833A is not available on Amazon.co.jp, but can be purchased from Japan through AliExpress . The list price is 33,099 yen, but at the time of writing it was on sale for 12,203 yen including tax during a 63% off sale.
Related Posts: