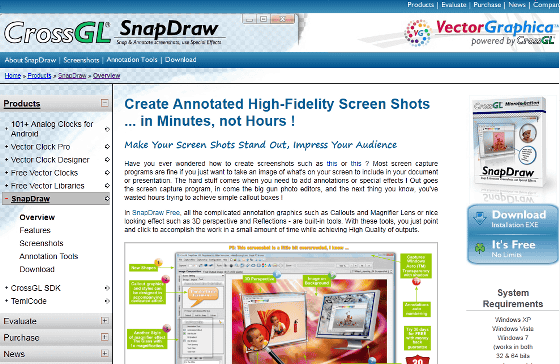
Super charged multifunctional screen shot software which was charged but free of charge "SnapDraw"
In addition to saving desktops and windows of the screen you are just viewing as image files, you can add special bubbles with arrows or explanations later, special effects such as specular reflection, rotation, parsing, and other special effects Is also realizing even advanced editing functions such as addition of borders, watermarks and margins to this free software "SnapDraw"is.
Previously it was paid shareware, but on local time August 19, 2011 suddenly "Make it free softwareIt was released as a free version without any functional restrictions. There is only thing that was originally charged, and it is packed with functions that far surpass the category of regular free software.
Print Screen Capture Software with Special Effects, Annotation Tools and support for Windows 7, Vista and XP Alpha Transparency (Translucency).
http://www.crossgl.com/asc_overview.htm
◆ Download and Installation
Click "Download" on the right of the above site

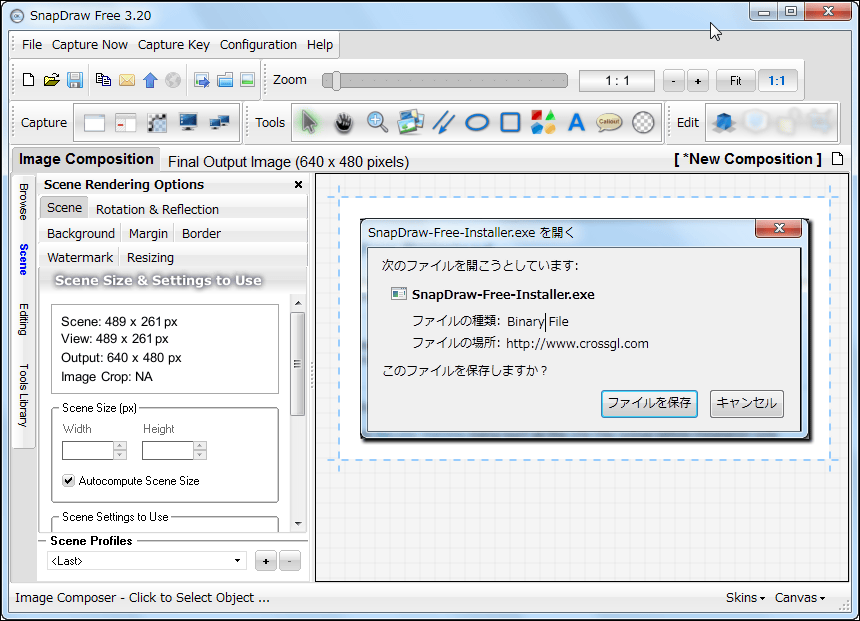
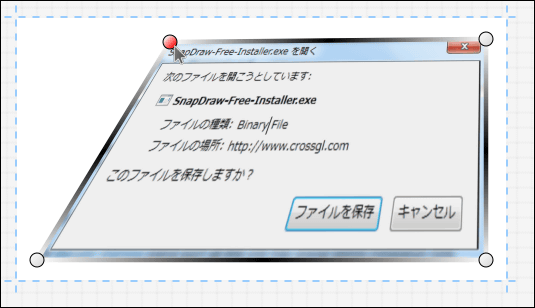
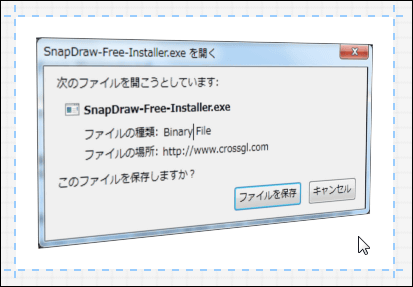
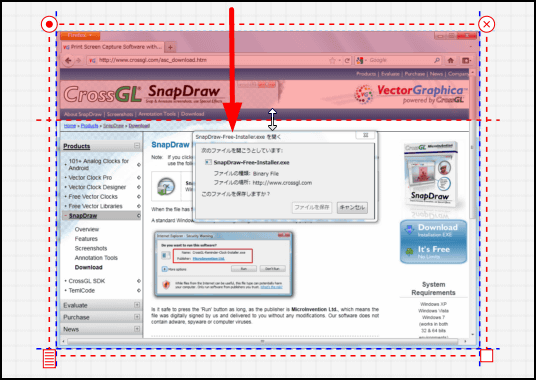
Click on the downloaded installer to start up
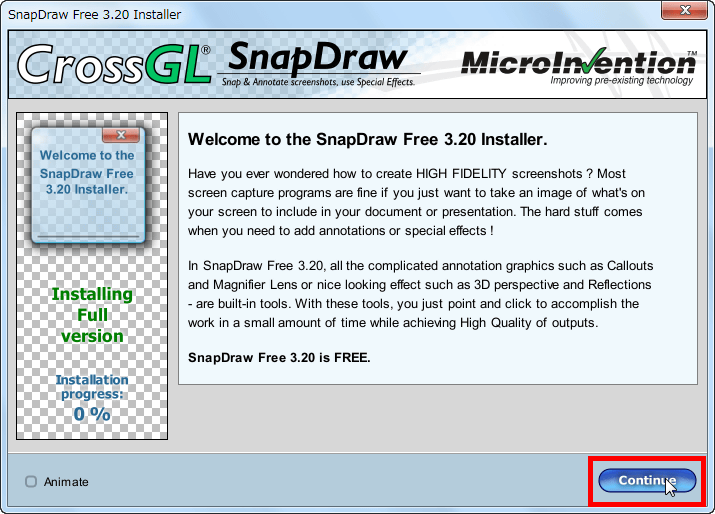
Click "Continue"
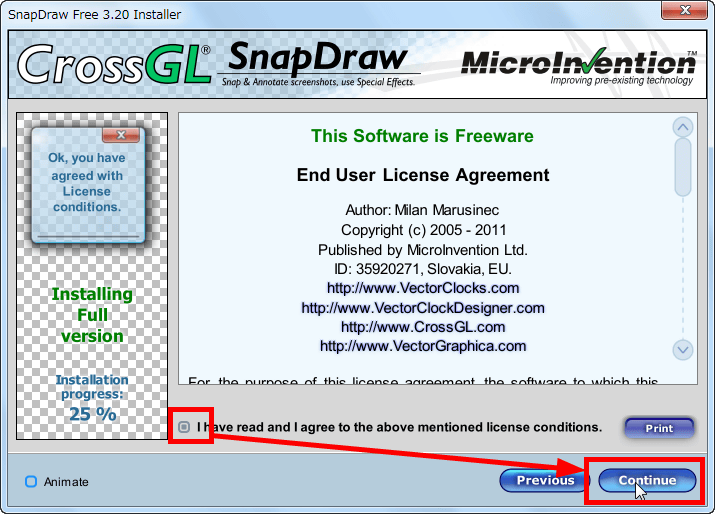
Please check it and click "Continue"
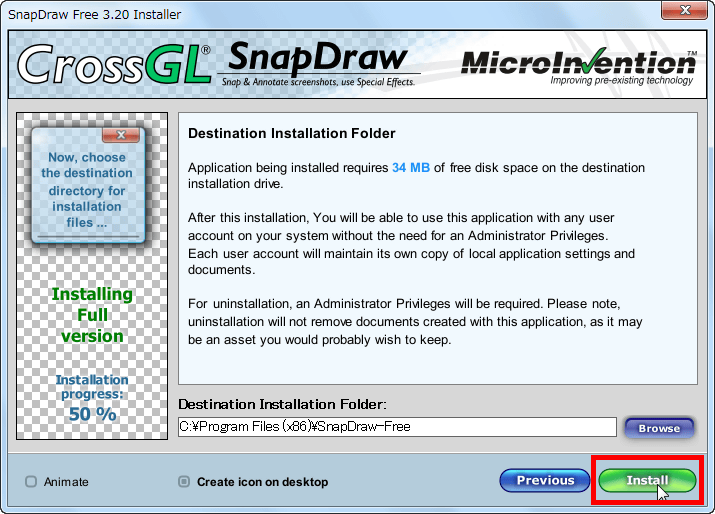
Click "Install"
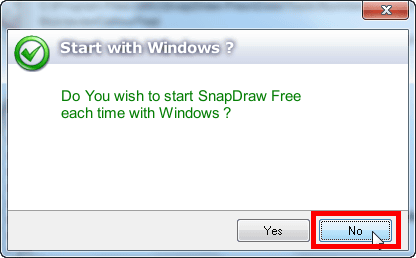
When asked if you want to start at the same time when Windows starts up, click "No"
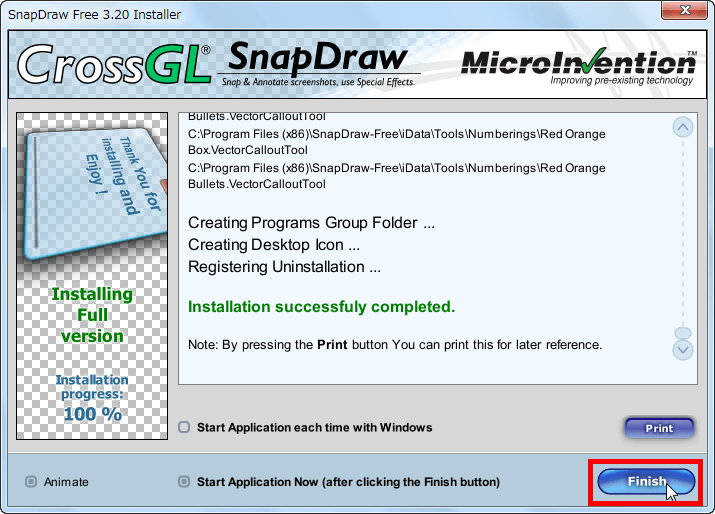
Click "Finish"
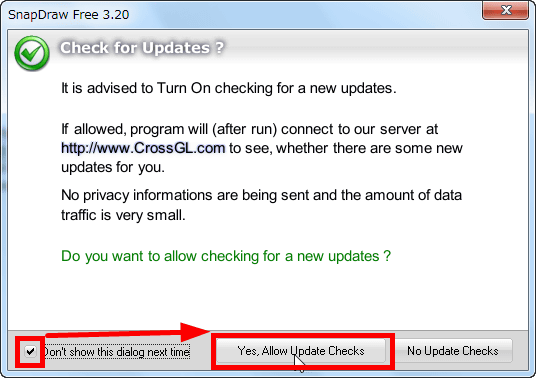
A confirmation screen will be displayed asking whether the new version is released or not, so please click "Yes" after checking it
Please uncheck and click "Close"
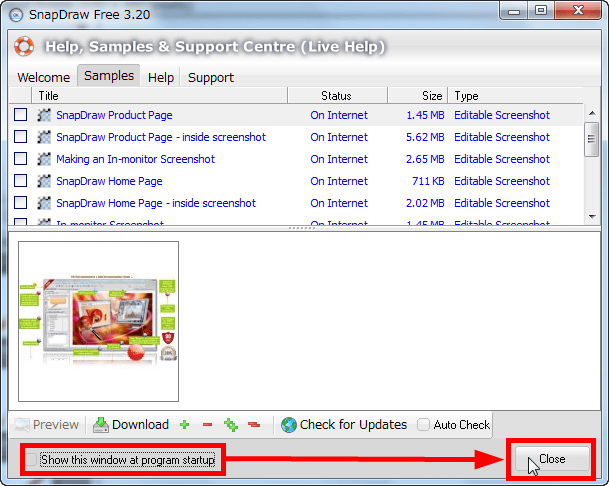
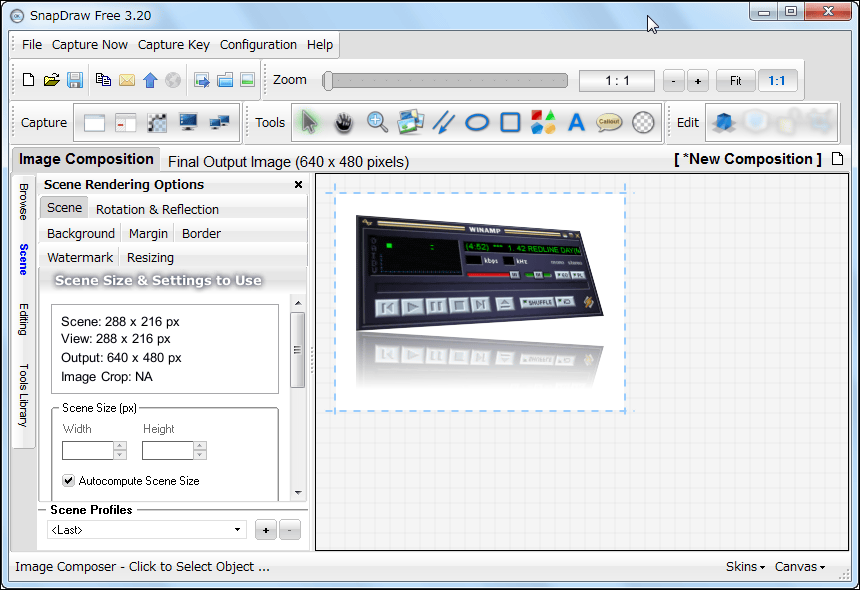
Then it will be such a screen. You are ready.
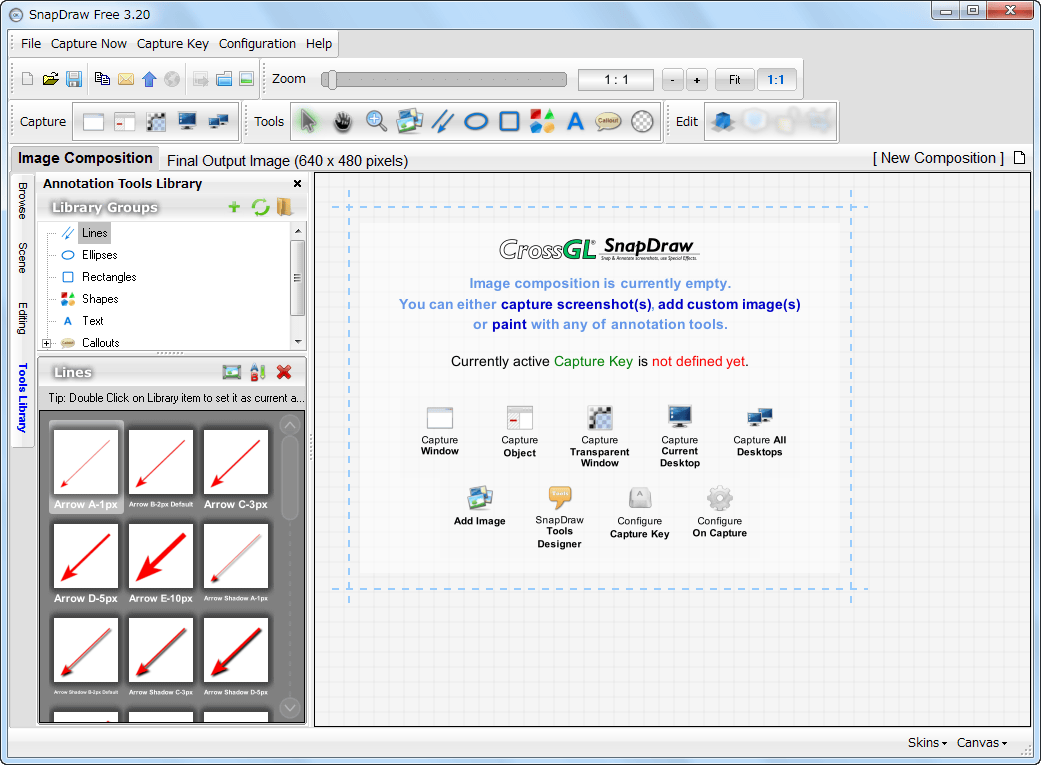
◆ From shooting screenshots to preserving default settings
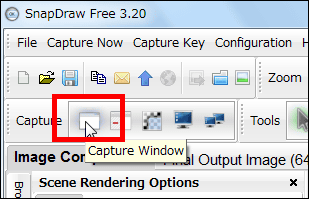
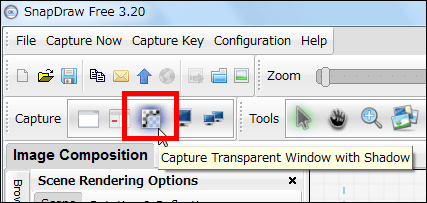
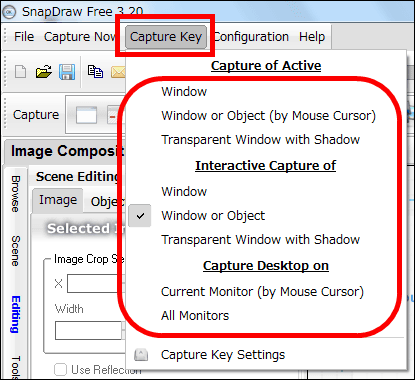
There are five types of capture, so first click on one of the buttons. This will capture by choosing window capture, window.
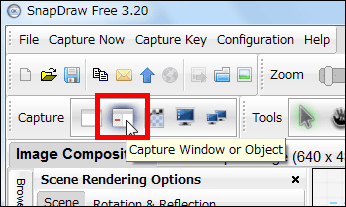
This chooses either window or object capture. Parts constituting Windows can be called objects, and can be selected and picked up on an object basis. For example, you want to capture only the menu, use it. It is convenient because there is no need to trim later.
Capture transparent window with shadow
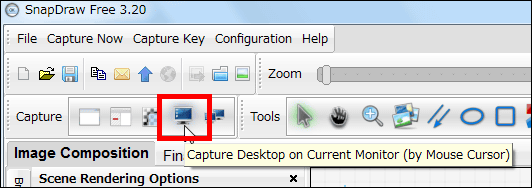
Capture the entire desktop. In the case of multiple monitor environment, capture the desktop with the mouse cursor currently.
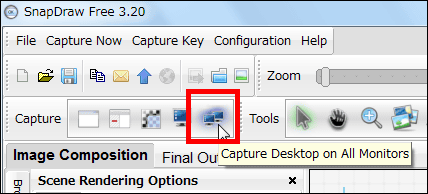
Capture all desktops in multiple monitor environment
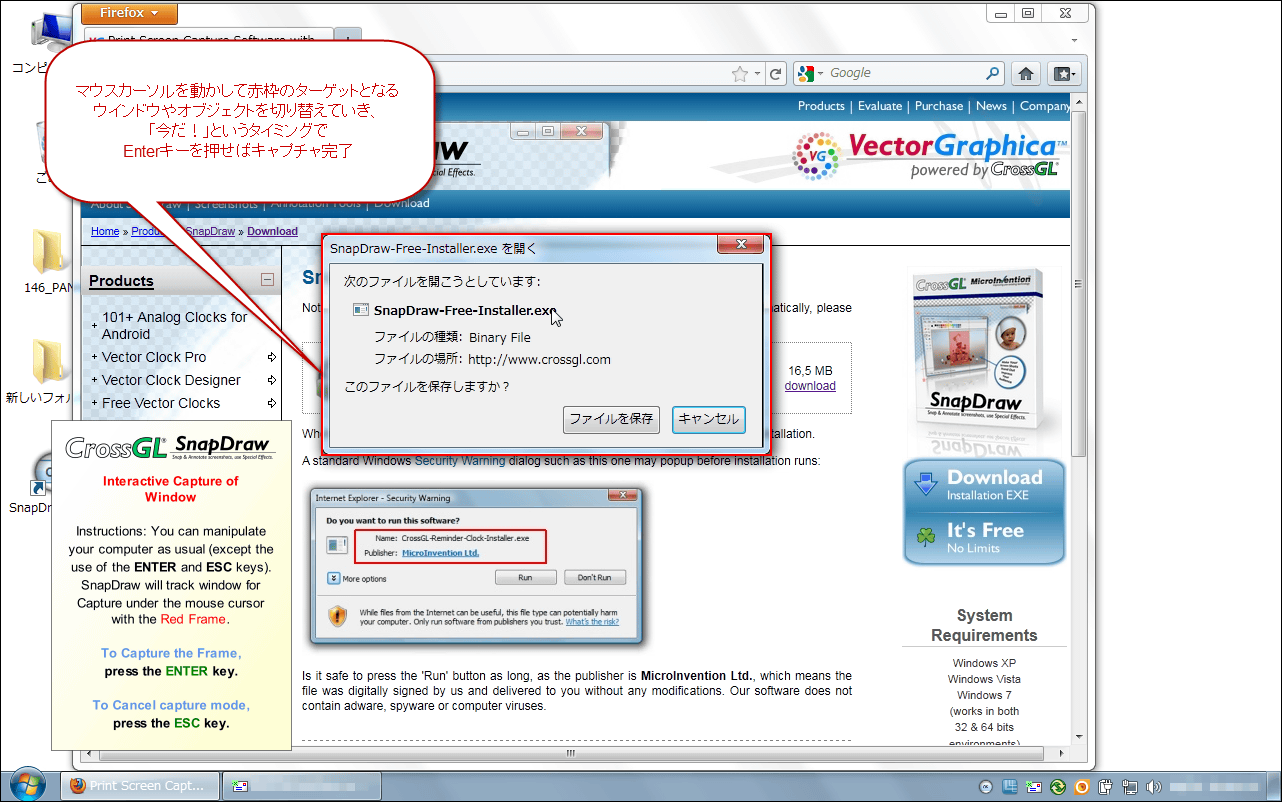
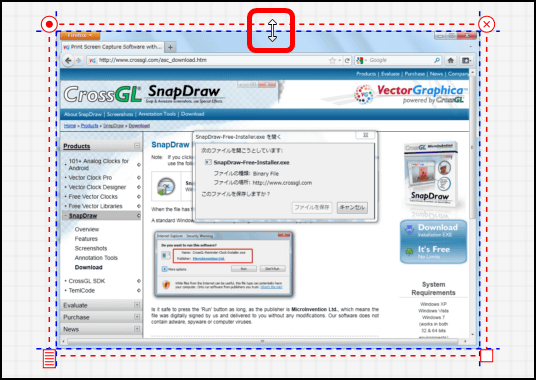
This time the first window capture selected. When you move the mouse cursor, the red frame will be attached to the window right under the cursor.

Move the mouse cursor over the window you want to capture to make it a red frame target and press the Enter key at the "Now!" Timing to capture. When not only the window but also the object is targeted, it is easy to capture menus in operation, so the timer function is unnecessary.
After capture it will be
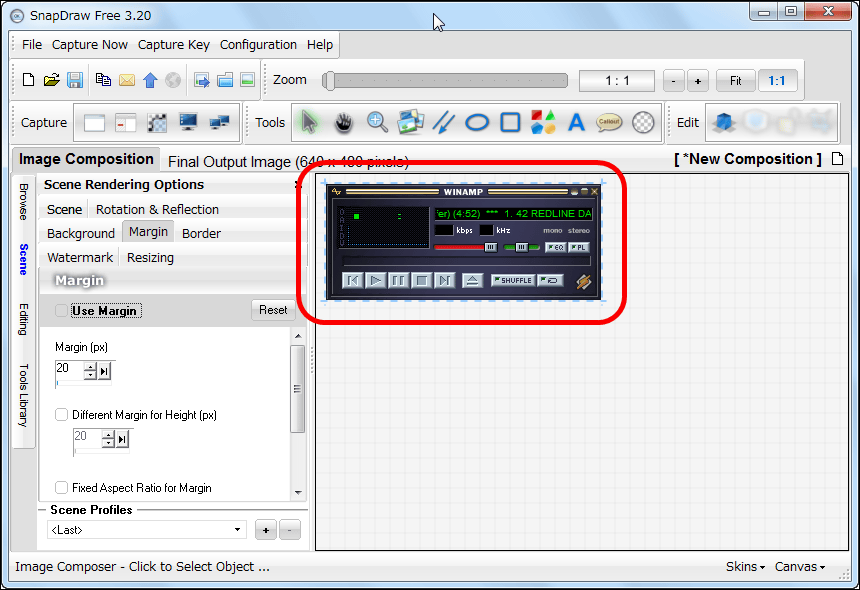
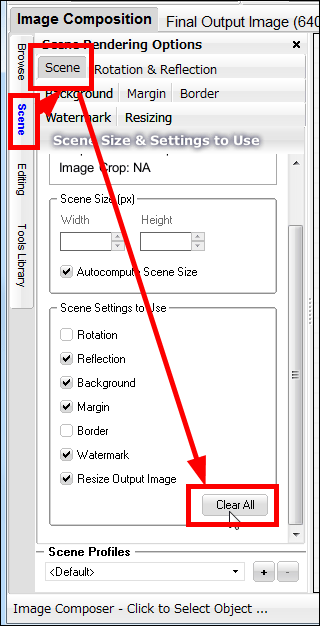
Since the margin is arbitrarily inserted in the surroundings and the specular reflection effect is also added, I erase them all at once. From the "Scene" tab, select "Scene" tab and click "Clear All" button.

Then it becomes a screen like this and it's refreshing

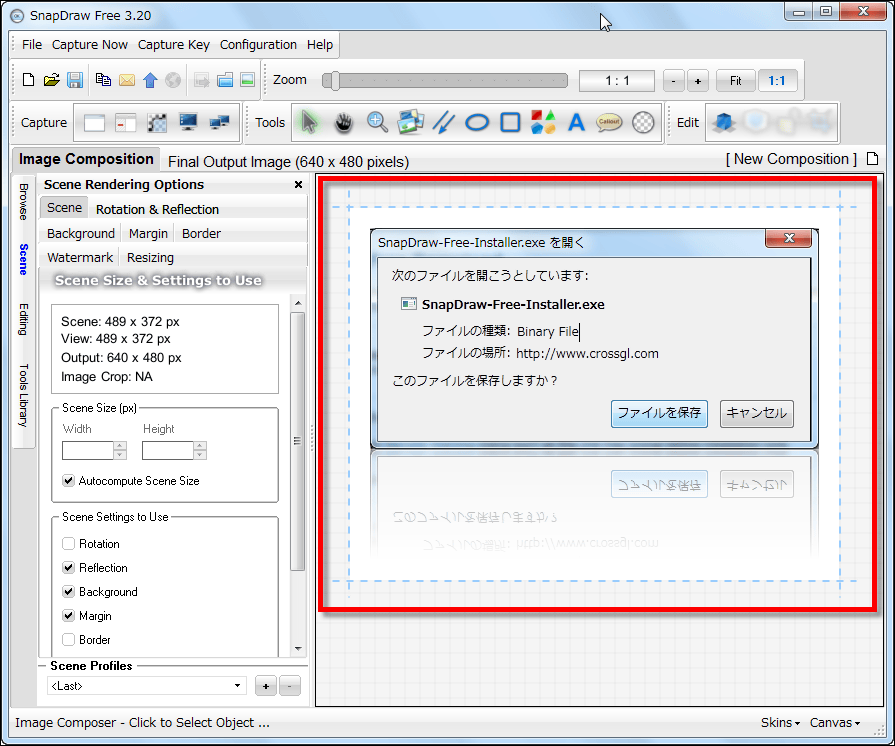
To save the captured image, click the tab labeled "Final Output Image"
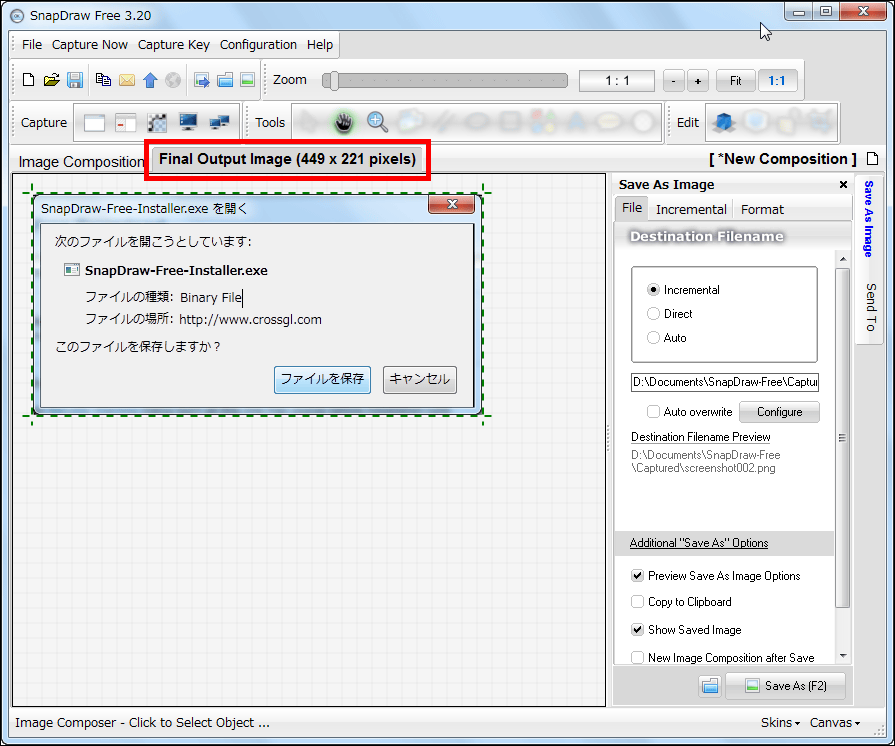
Click the "Format" tab, select the JPEG / PNG / BMP / JNG file format, click the "Save As" button

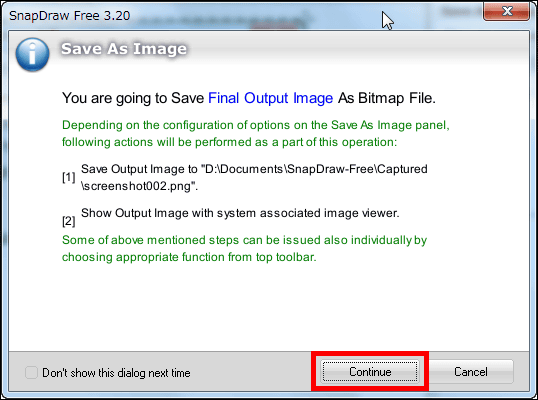
Click "Continue" button
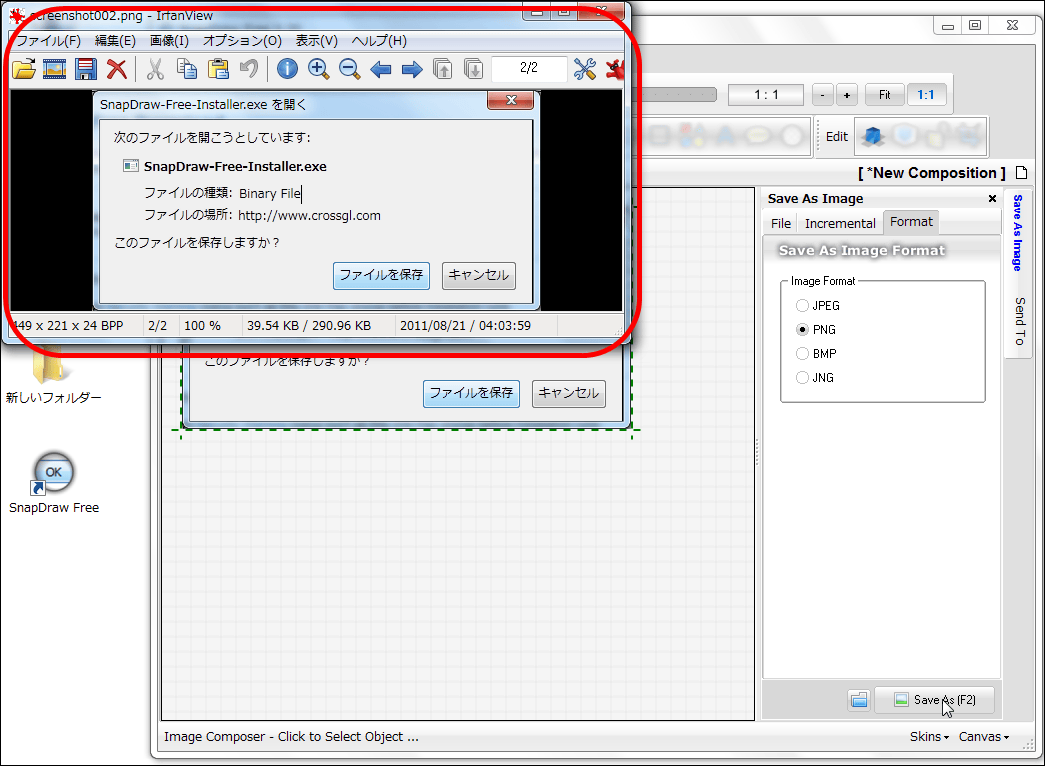
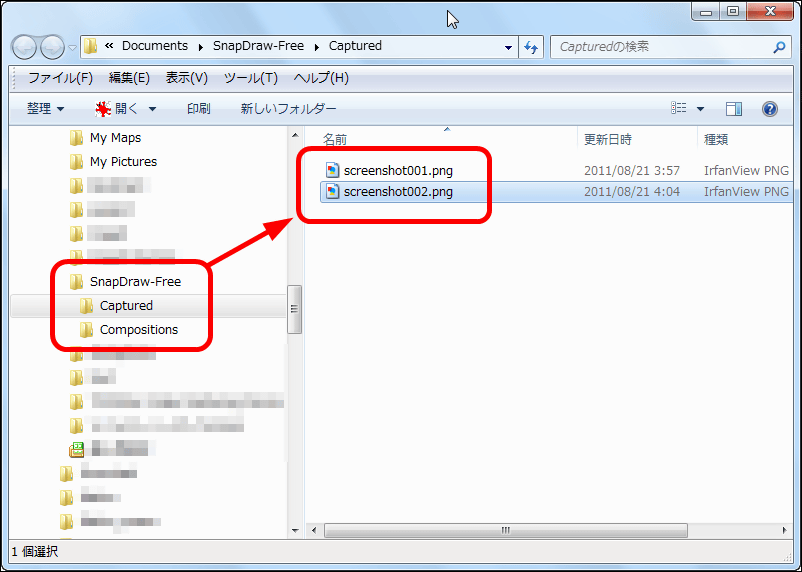
Then it will automatically be numbered and saved, and it automatically opens in the image viewer associated with the selected file format. In this test environment IrfanView is used, so it was displayed in the upper left like this.
Click this icon if you want to copy or cut the saved file and use it
Because the folder where the file is saved is opened automatically, file operation such as copy etc. becomes easy to operate
◆ Do not overlap from the top every time you capture, make individual new images (method not overlapping existing captured images)
If you capture continuously, it will overlap one after another in this way. Feeling like a layer of Photoshop feeling.
In this way, overlapping capture images can be moved by dragging and dropping with the mouse cursor
You can shift it like this
You can also rotate by pointing the cursor to the upper left circle icon
Like this
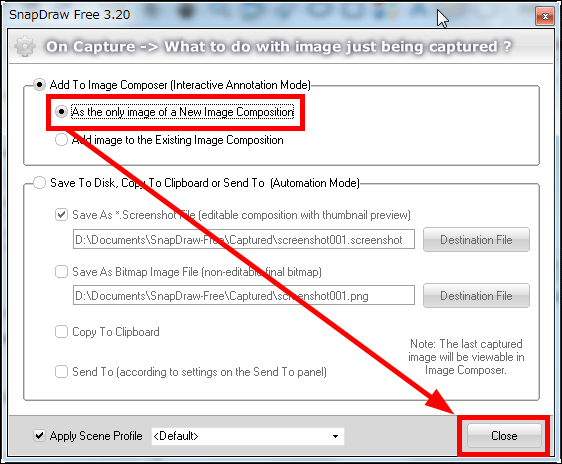
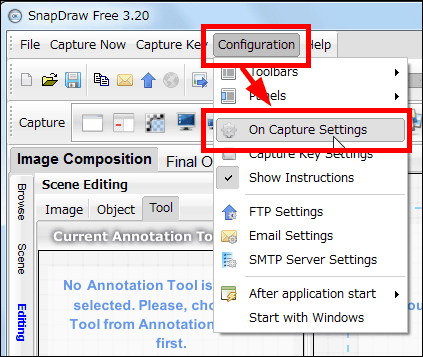
Although it is convenient to overlap one after another, it is actually inconvenient, so set it so that it does not overlap the previous image each time it is captured. From "Configuration" click "On Capture Settings".

Please check above and click "Close". This will not overlap, you will be able to capture newly each time.
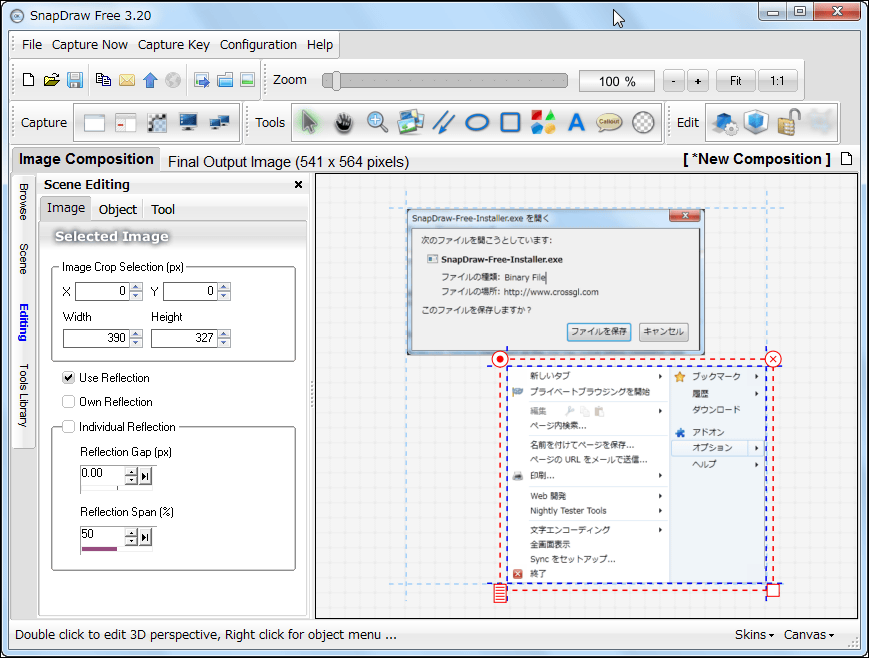
◆ Turn specular reflection on and off
Select the captured image and click the note icon in the lower left
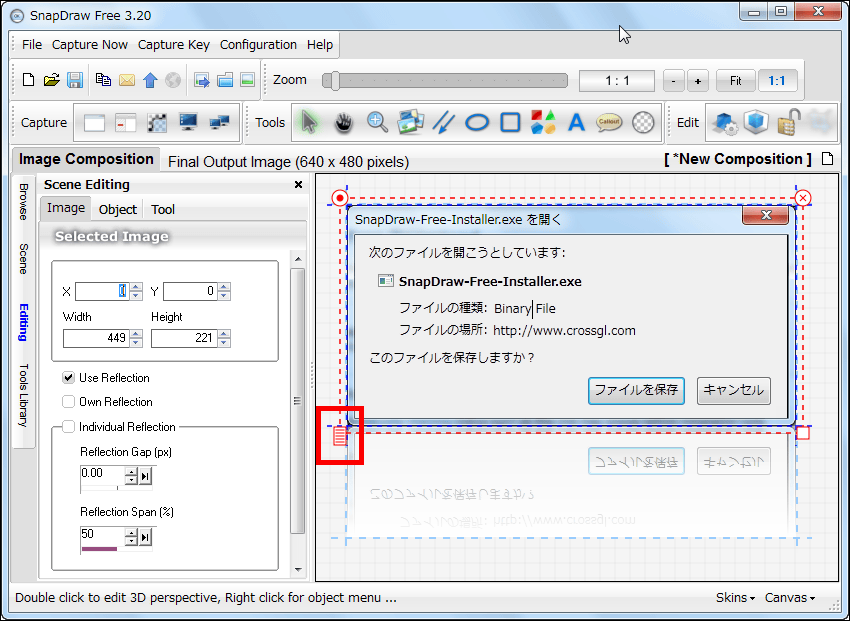
Click "Use Reflection"
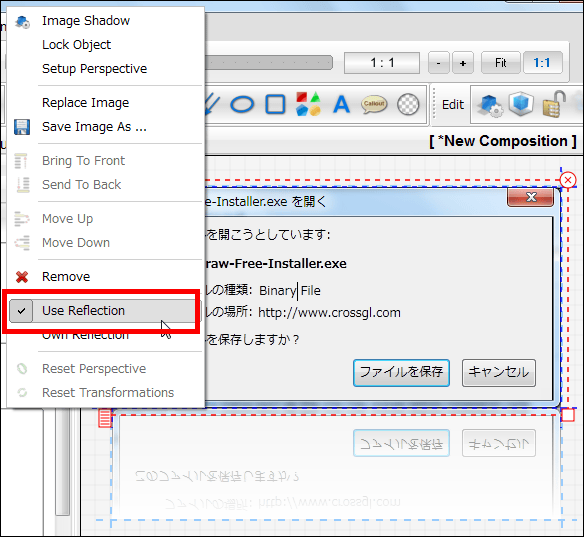
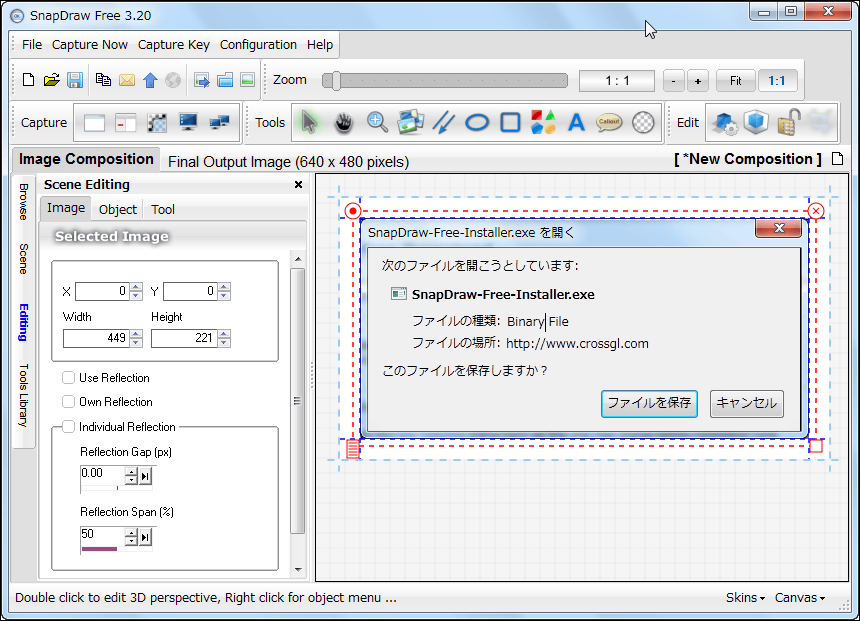
Then the specular reflection effect disappears
◆ Shadow (Drop Shadow)
Select the image after capture, click the note icon in the lower left, click "Image Shadow"

Check "Use Shadow", adjust the direction and length of the shadow, then click "Apply" to apply
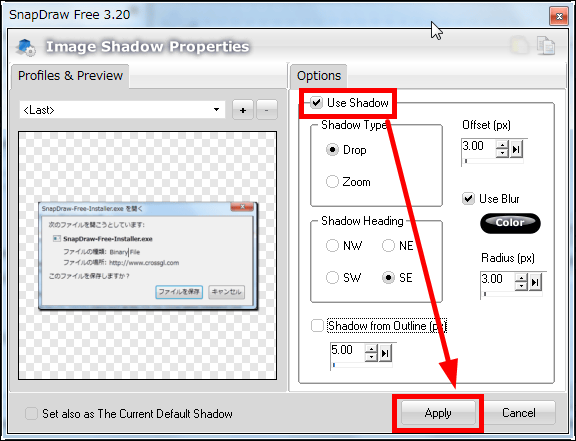
Then you will see a shadow in this way
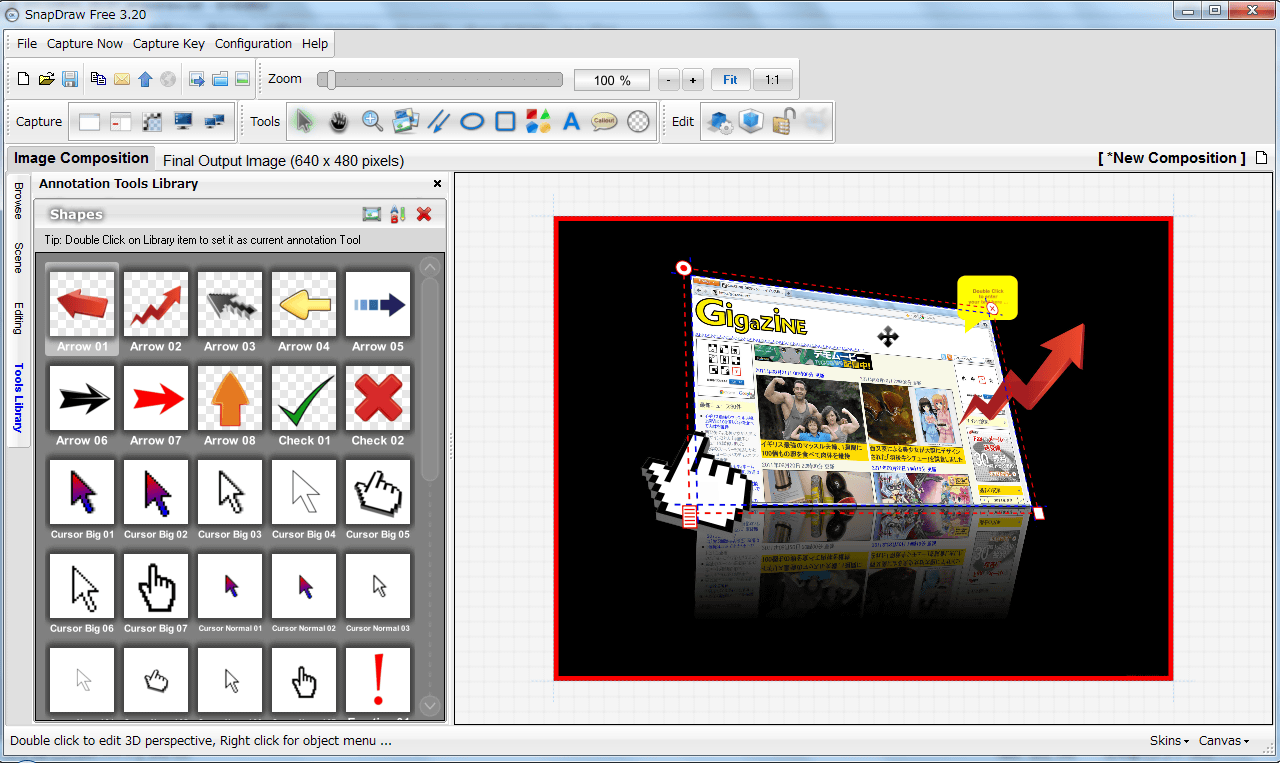
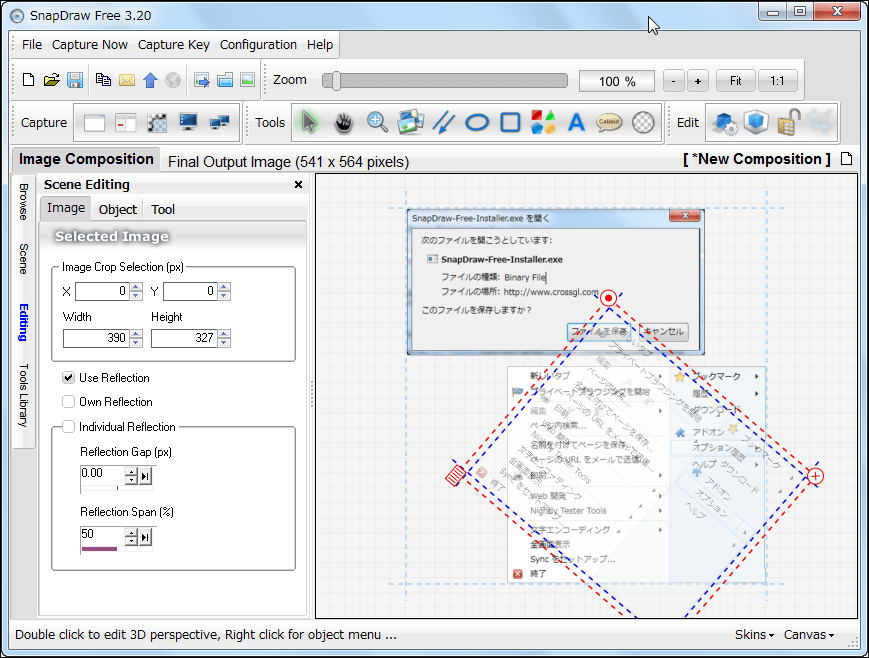
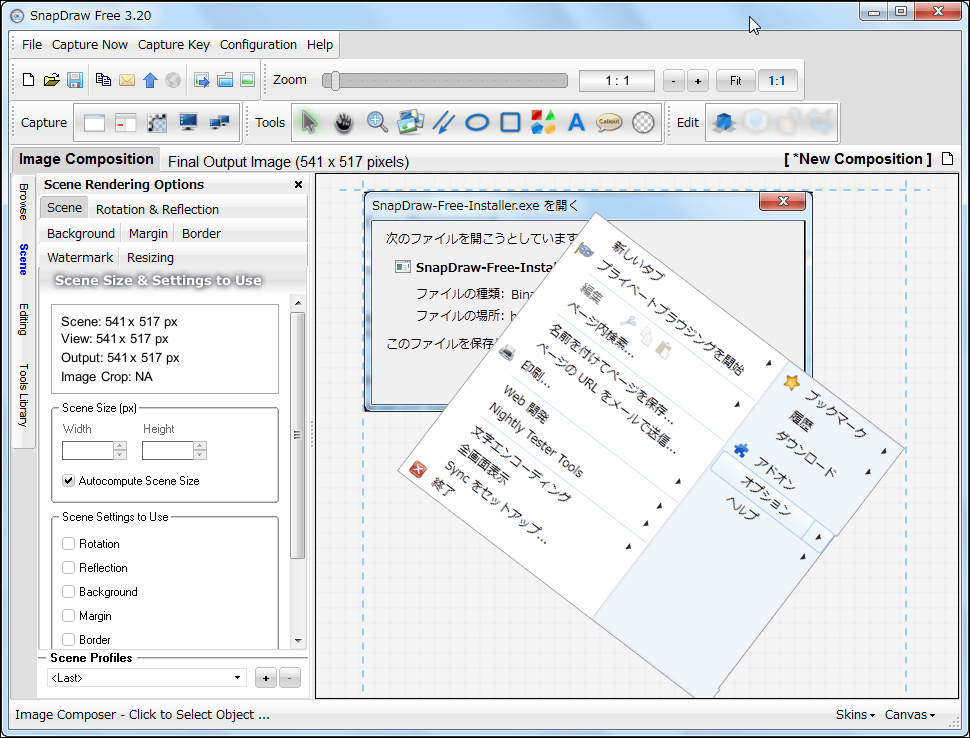
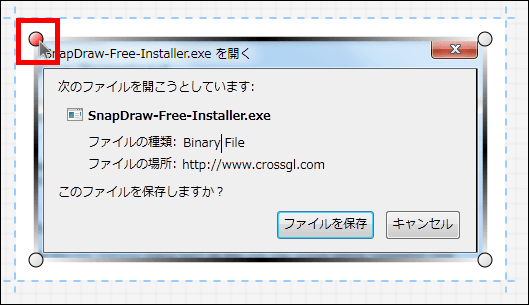
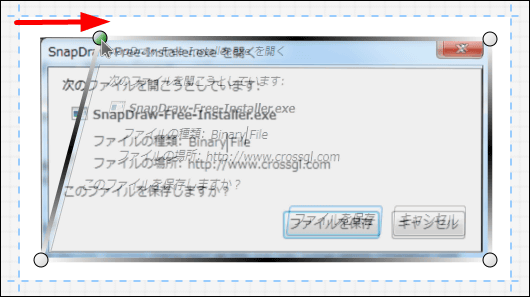
◆ Add a perspective and make it three-dimensional
Select the image after capture, click the note icon in the lower left, click "Setup Perspective"

The four corner icons will change
When you hold the mouse cursor it becomes selectable
By dragging as it is, it is possible to attach a parse.
Ugun
This is also possible
If it works well in conjunction with the specular reflection effect, you can easily create a little cool image with such feeling
◆ Set the surrounding margin (margin) to zero
Click the "Scene" tab, click the "Margin" tab, then uncheck "Use Margin"
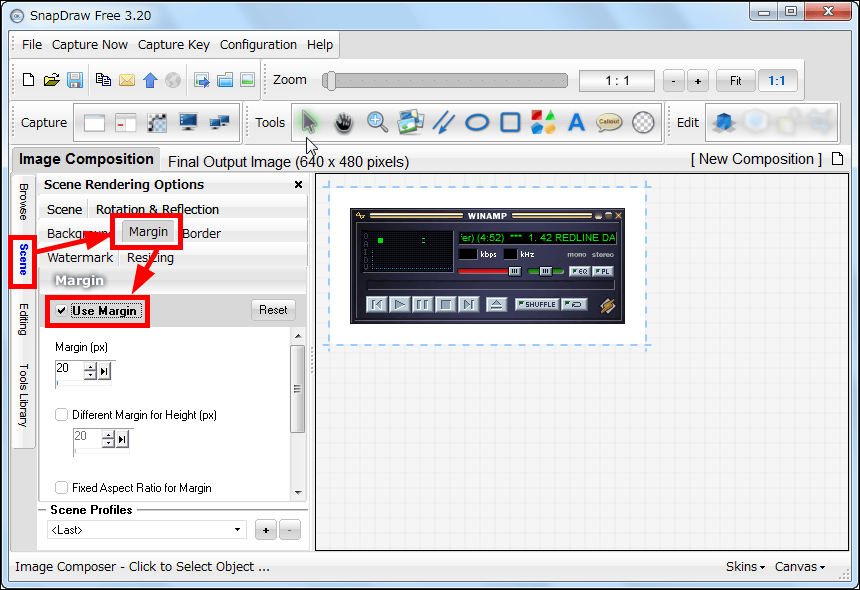
Then extra margins disappear
◆ Other usable special effects
· Background color / image specification
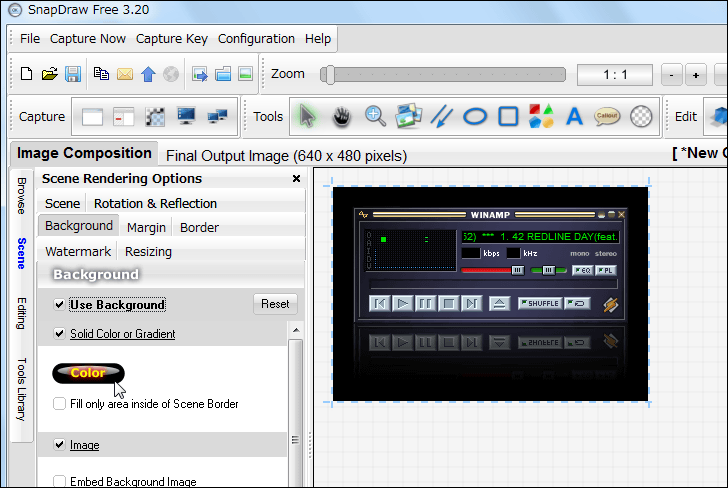
You can select the background color by clicking the "Scene" tab, clicking the "Background" tab, then "Color"
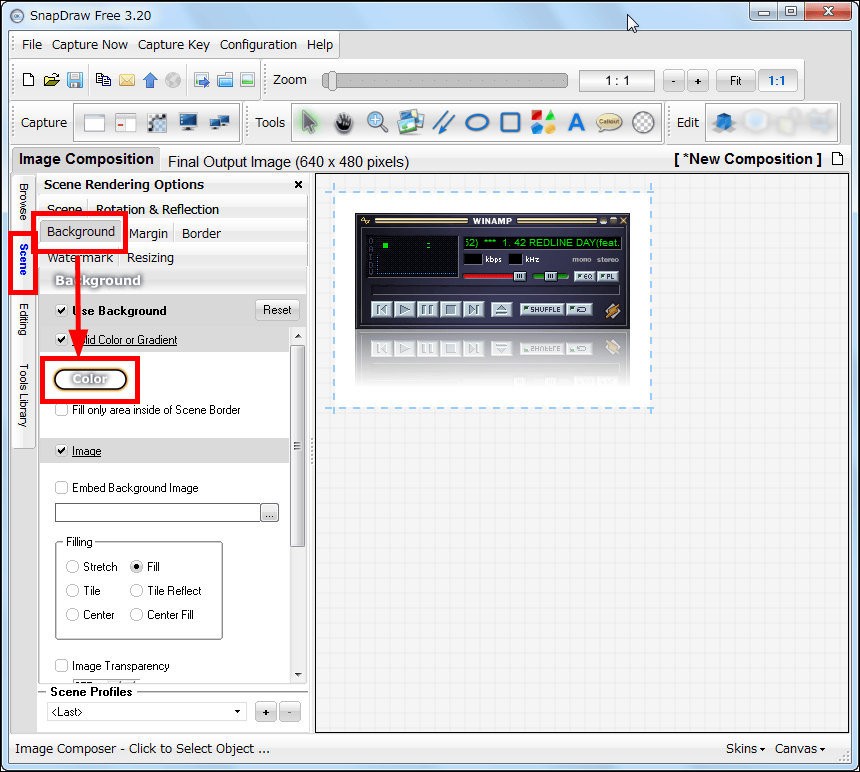
Like this. You can also select a background image instead of a single color.
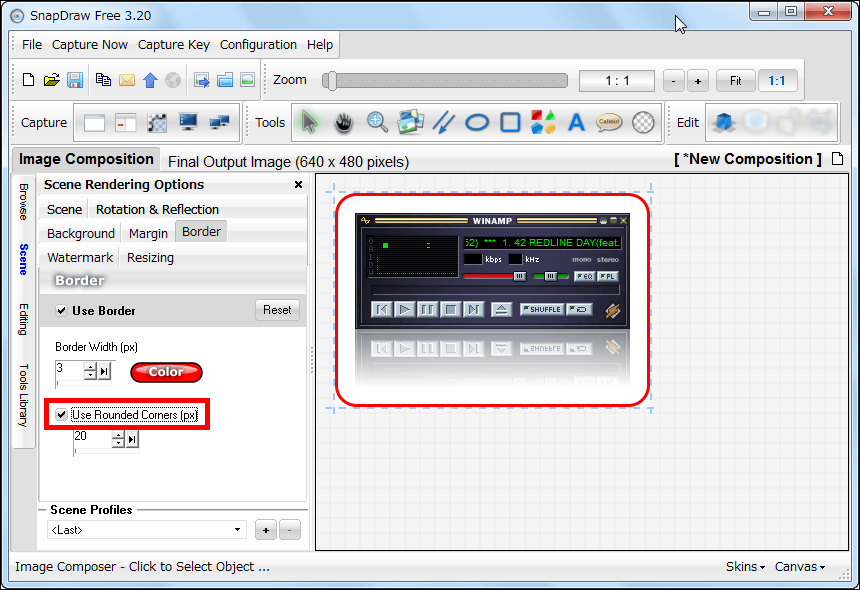
· Addition of border line
Click the "Scene" tab, click the "Border" tab, then click "Use Border" to enable border drawing
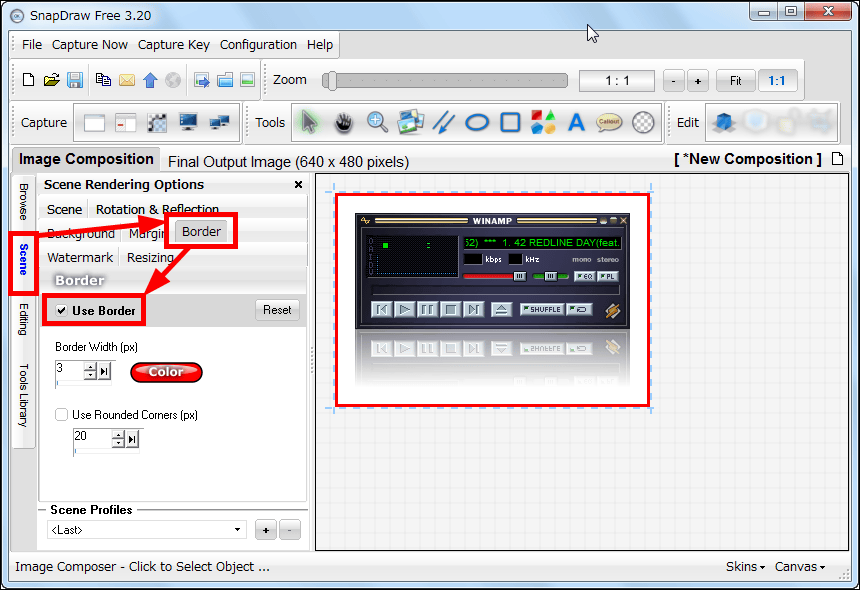
If you check further, you can make it rounded
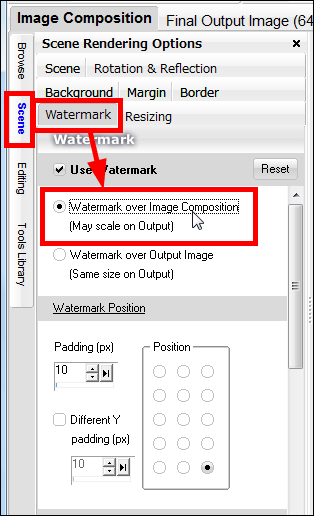
· Addition of watermark
Click the "Scene" tab, click the "Watermark" tab, then check the top to see a watermark image (a function to synthesize Marchesi notation, copyright notation, rights expression as a watermark image) on the preview screen It will be able to do.
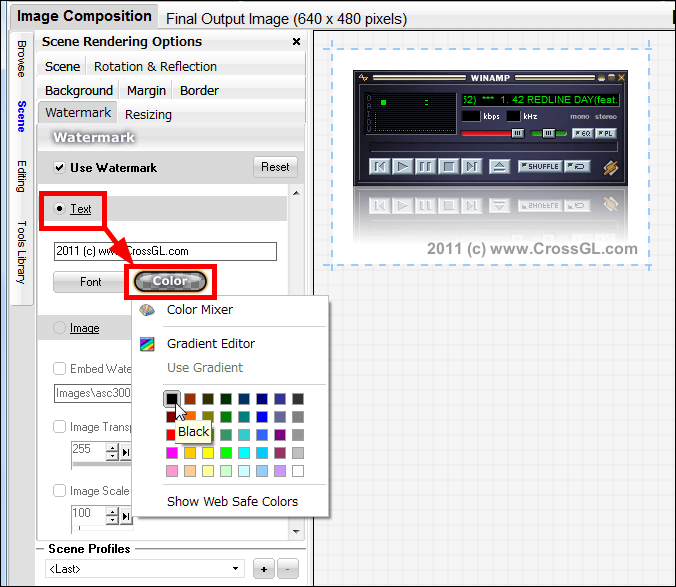
Even if you can not prepare a watermark image, you can put a letter like this if you select a font and then choose a color after entering a character string with "Text" checked. The point of this letter can also be changed flexibly flexibly.
· Automatic resizing when saving
By clicking the "Scene" tab and clicking the "Resizing" tab, you can resize it when saving images.

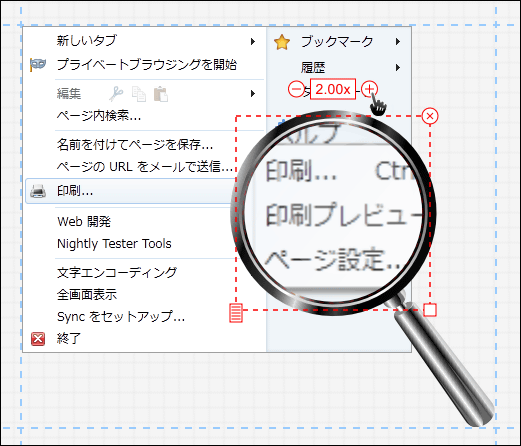
· Close up with a magnifying glass
Click the "Tools Library" tab, select "Magnifiers", a list of magnifying glasses is displayed at the bottom, so choose what you want to use
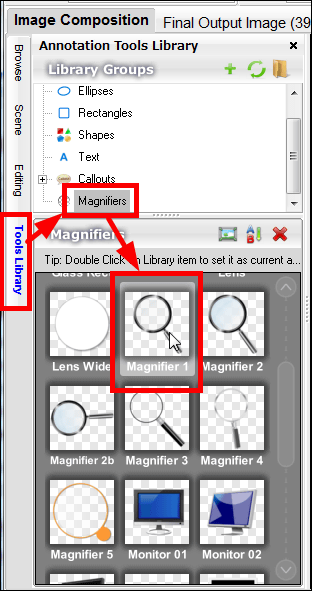
Click on the point where you want to give close-up effect with the magnifying glass

Drag to decide the size of the magnifying glass
Then it looks like this, a magnifying glass that will enlarge within the specified range appears. The enlarging magnification can be changed by clicking on the plus and minus above, the diameter can be changed with a rectangular icon on the lower right. You can use it to enlarge the part with small characters and to show it clearly.
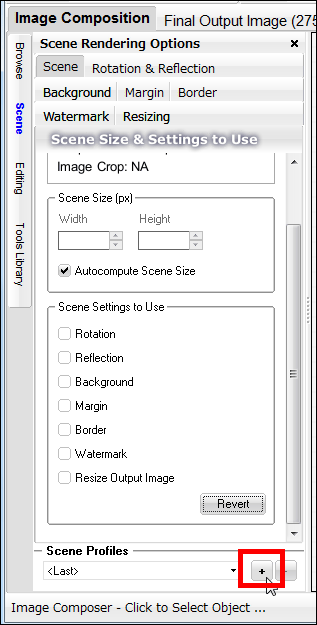
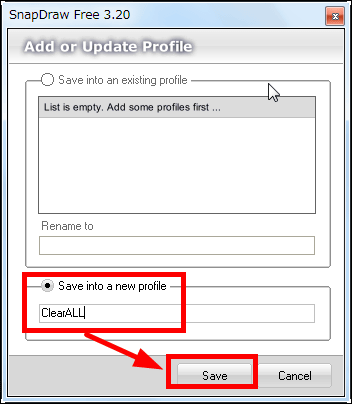
◆ Capture simple without adding any extra special effects from the beginning (creation of profiles)
Click the "Scene" tab and click "Clear All" button from "Scene" tab
Click "+" button
Give a name that is reasonably easy to understand and click "Save"
From "Configuration" click "On Capture Settings".
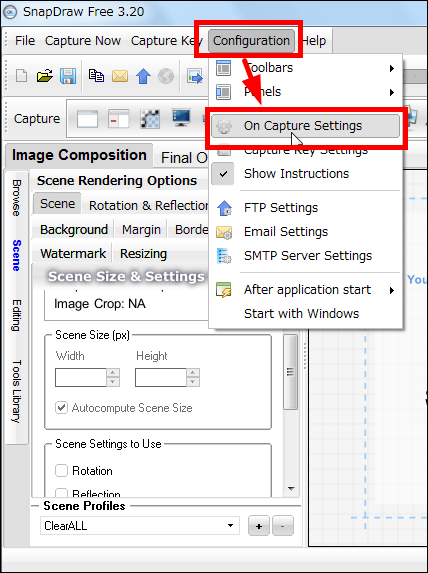
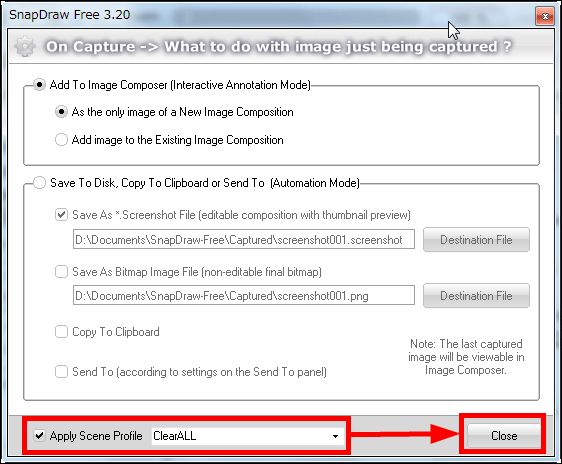
Select "Profile name" created earlier from "Apply Scene Profile" and click "Close" to complete. By the same procedure, it is possible to switch predefined settings, such as border drawing, be sure to switch profiles like background color is black, margin is none.
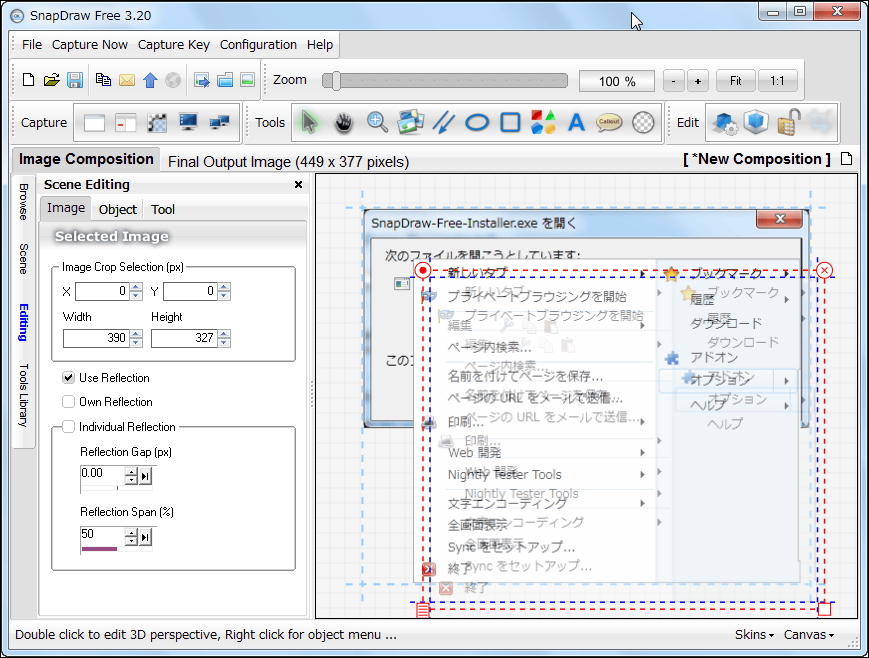
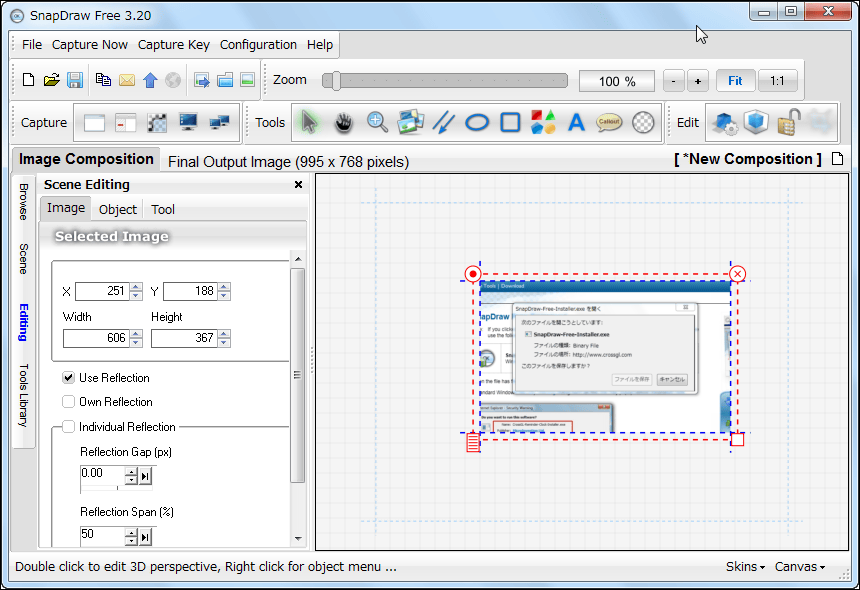
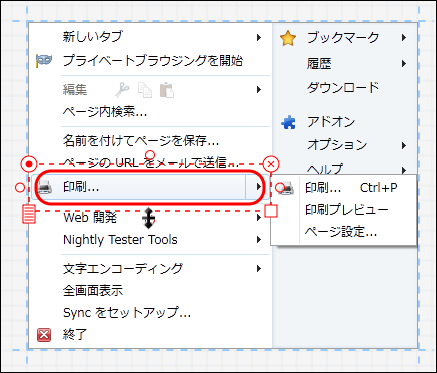
◆ Cut out only the specified range (cropping)
Select the image after capture, move the mouse cursor over the blue line, and drag to move it
Then it is covered with a translucent red mask in this way. This part where the covered part is cut off and disappears.
You can also adjust it by dragging and dropping and moving the square white part in the middle, that is, the remaining part, which can be clipped from any direction, up and down, left and right.
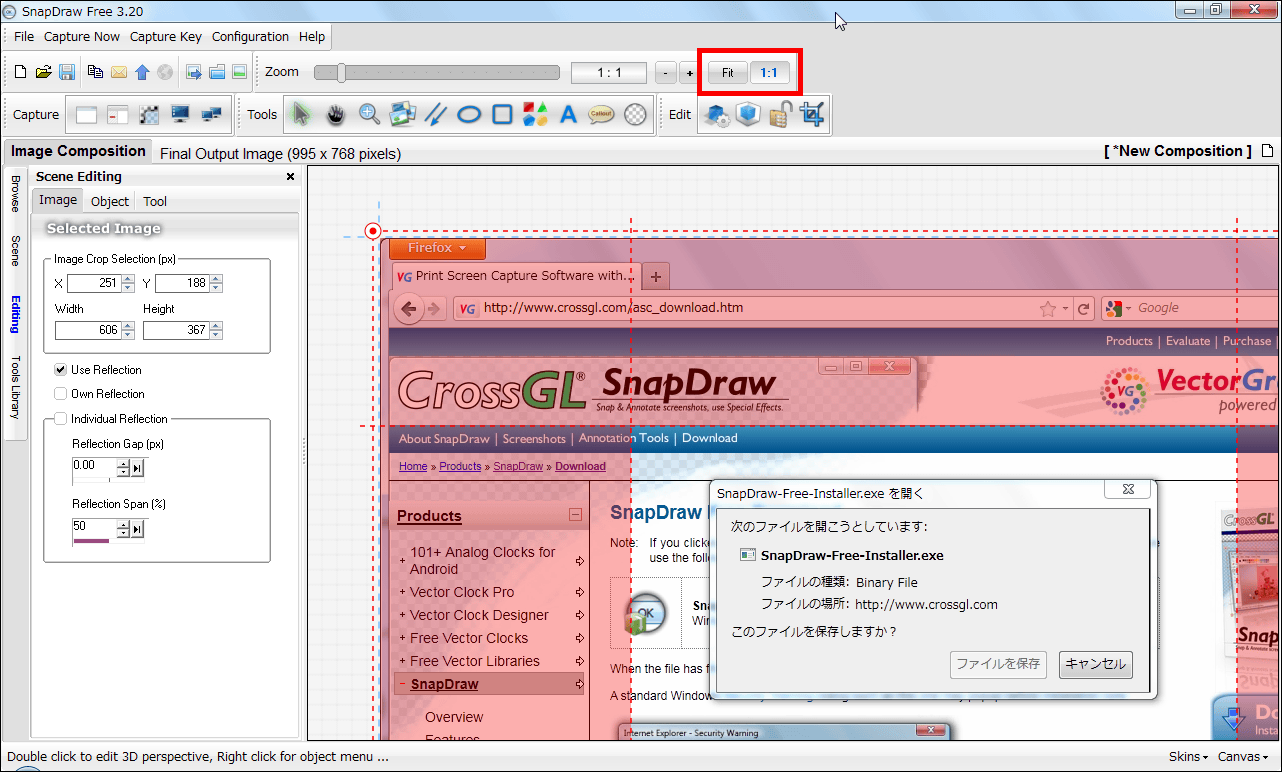
If you need to enlarge to fine-tune, click "1: 1" to display the actual size, "Fit" will zoom in and out according to the window size.
Once you decide where you want to cut and where you want to cut it, right click and select "Crop Image"
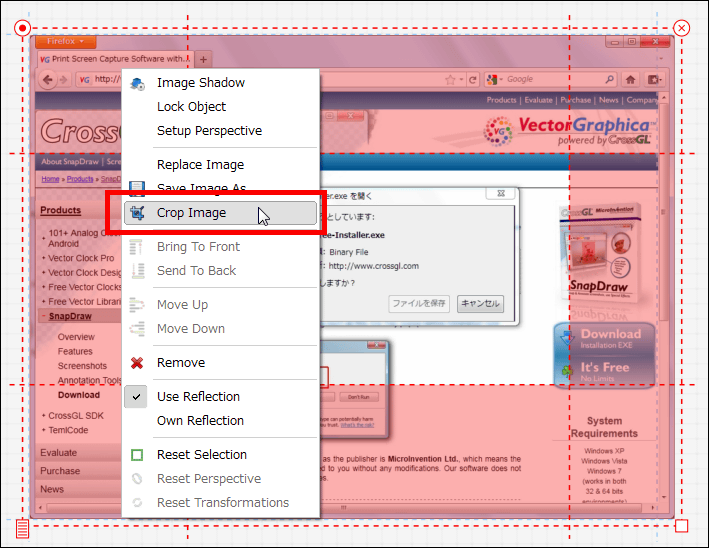
Select "Yes"
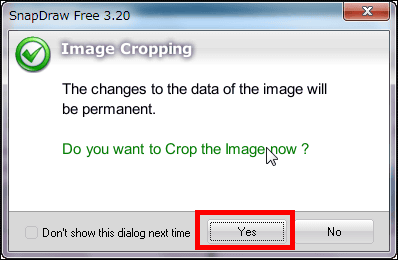
Then it will be
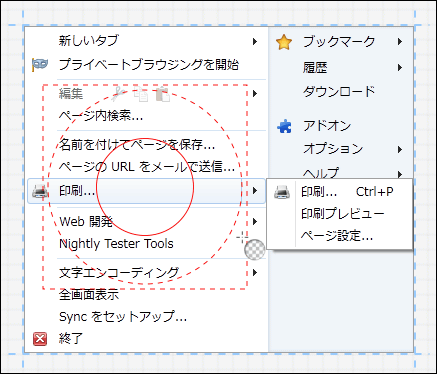
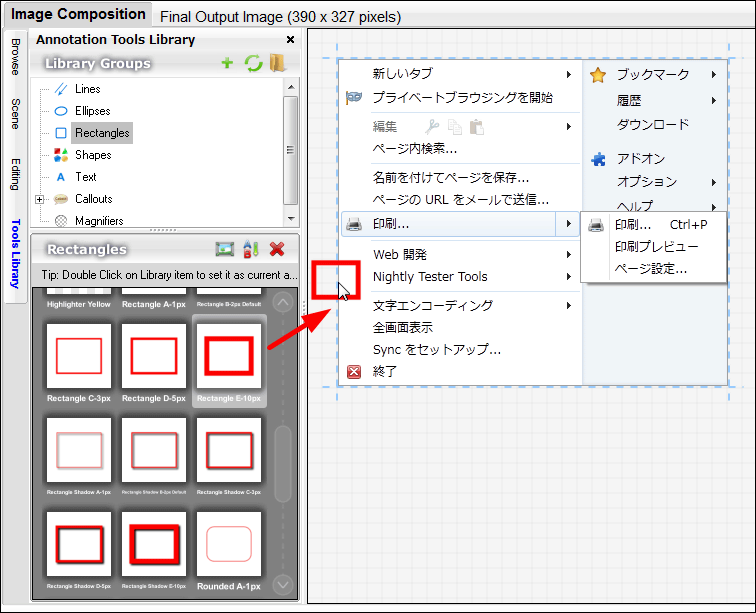
◆ Surrounded by a red frame
Click on the "Tools Library" tab, select "Rectangles", the red frame list will be displayed at the bottom, so choose what you want to use
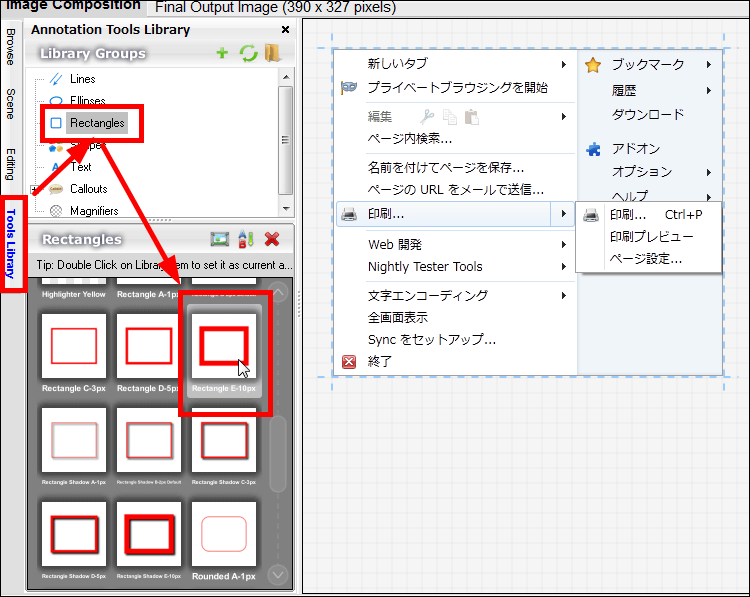
Move up the capture image with drag & drop
Then it becomes like this, it will be possible to move, resize and rotate

This is how the red frame can be applied
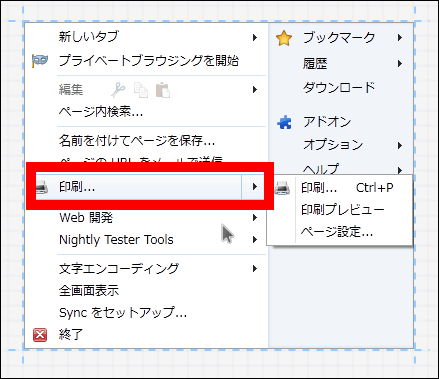
There are various patterns of red frames, and there is also such a corner circle
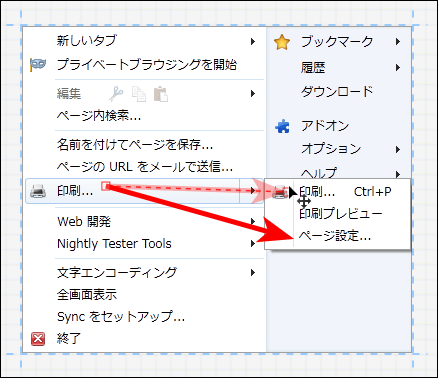
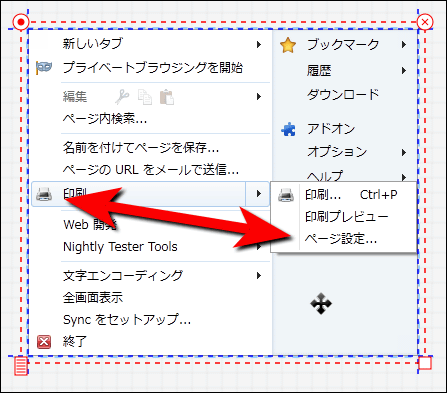
◆ Attach an arrow
Click the "Tools Library" tab, select "Lines", a list of red arrows is displayed at the bottom, so select what you want to use and drag and drop
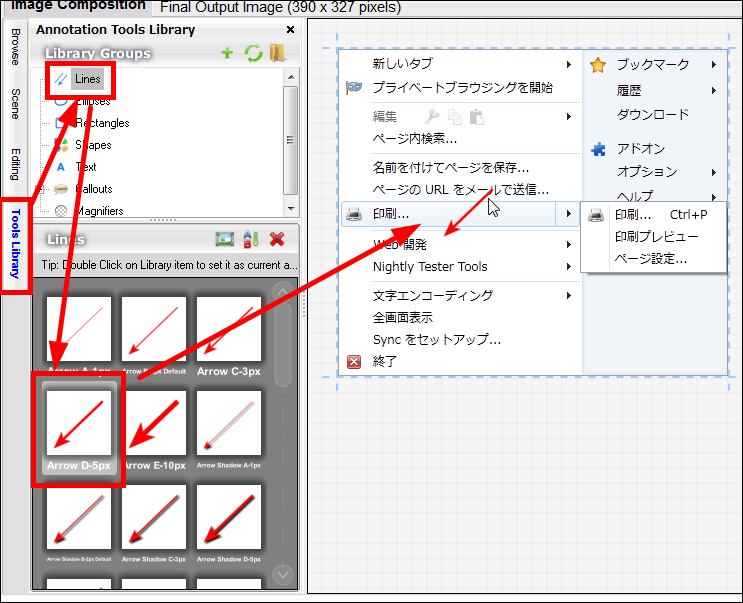
It is possible to change the length and direction with this feeling
There is also such an arrow
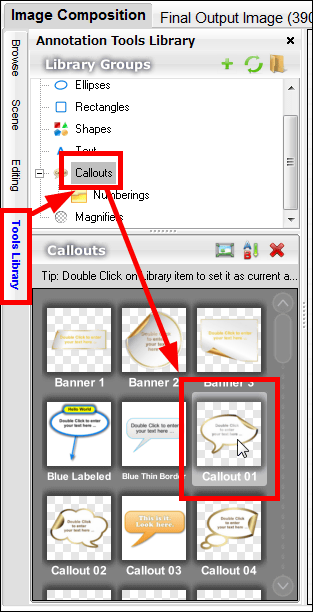
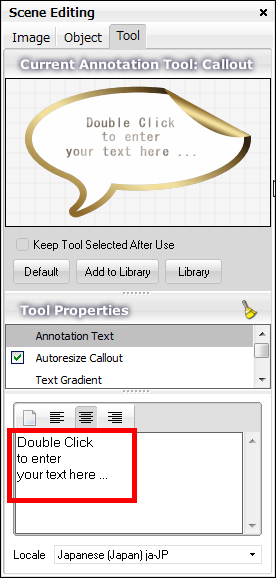
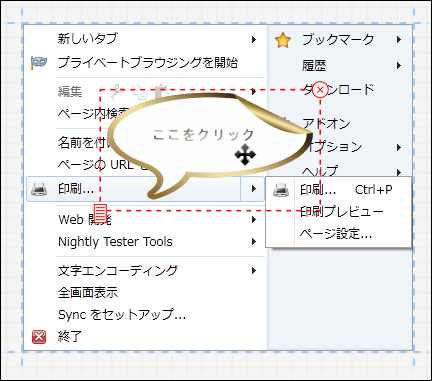
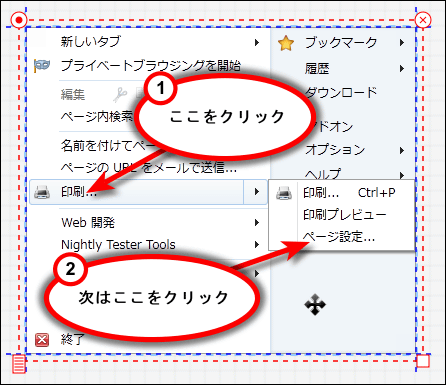
◆ Attach a speech bubble
Click the "Tools Library" tab, select "Callouts", a list of callouts at the bottom appears, so select and double-click the one you want to use
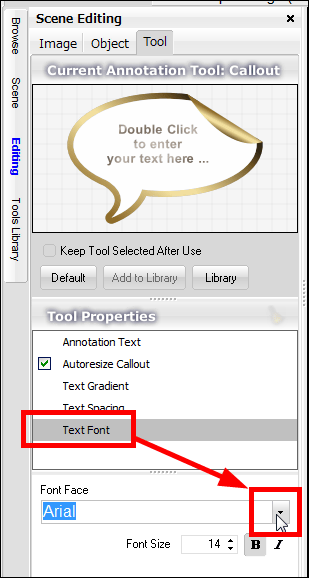
Click "TextFont" and select the Japanese font from the list
Next, choose "Annotation Text"
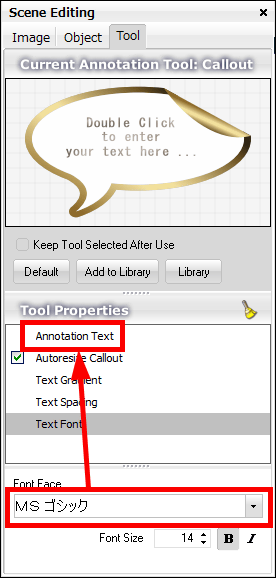
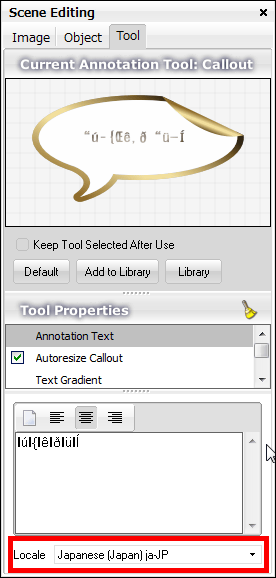
Input the Japanese you want to display in the balloon, erasing all the characters from the beginning
Although it is garbled, if you select "Japanese (Japan) ja-JP" at the bottom displayed from the beginning again from the list, it will be displayed properly.
It became Japanese with such feeling
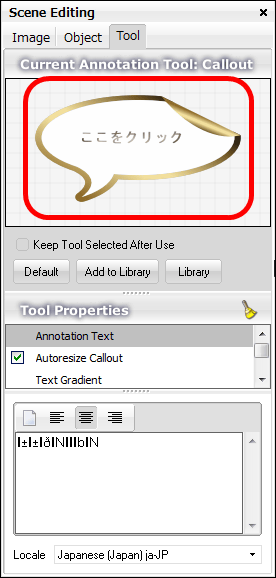
Then click at the position where you want to put a balloon
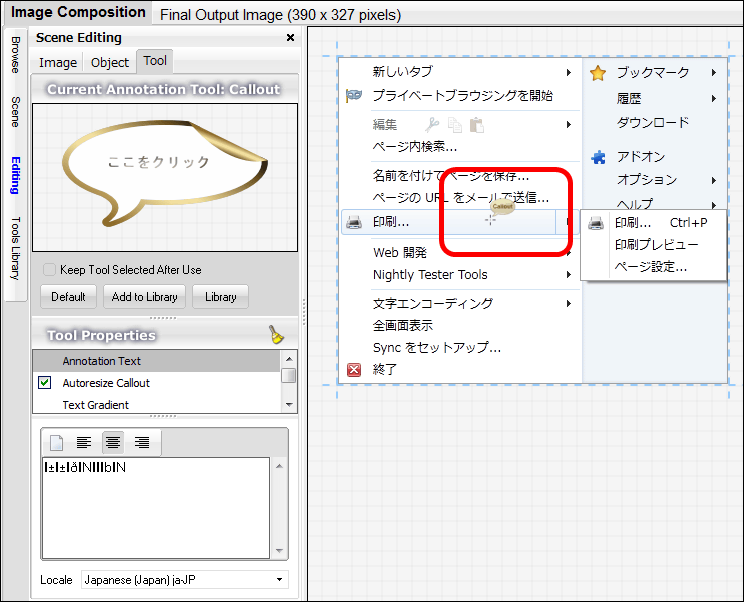
Can be installed like this
There are also other types with callouts numbered
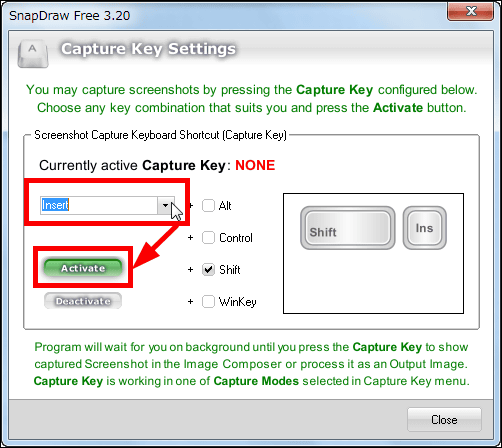
◆ Quickly capture by setting the shortcut key without pressing the button
Click "Capture Key Settings" from "Capture Key"
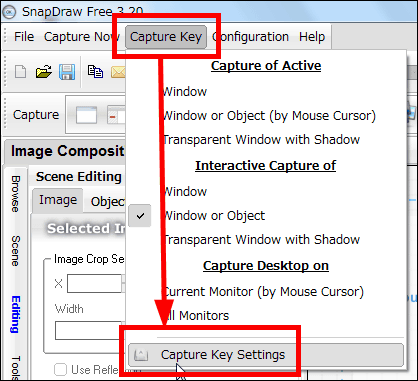
Since it will be such a window, decide the combination of shortcut keys
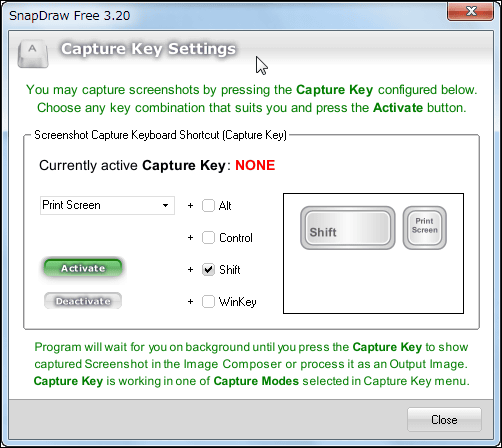
Select "Insert" from the list, also check "Shift", "Take the screenshot by pressing the Insert key and Shift key at the same time", click "Activate"
Then "Shift + Insert" is displayed, so click "Close"
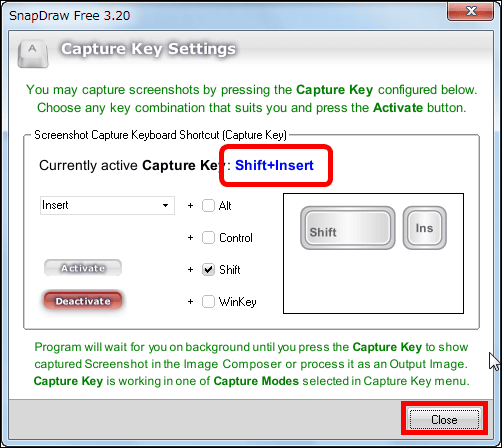
After that you can select the method to shoot screenshots from "Capture Key" and press the shortcut key to capture easily.
◆ Automatically save captured images in preset image file format automatically (a way not to save each time with a name)
From "Configuration" click "On Capture Settings".
Check "Save To Disk, Copy To Clipboard or Send To" and check the bottom two. The top is the original original format, the bottom is the specified image format. In the case of the original format, it is possible to insert balloons and arrows later.
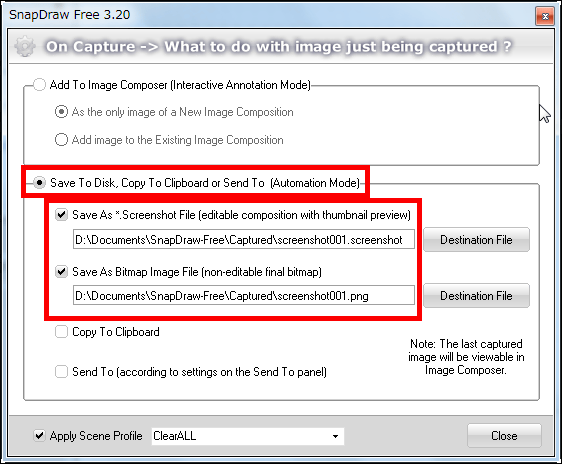
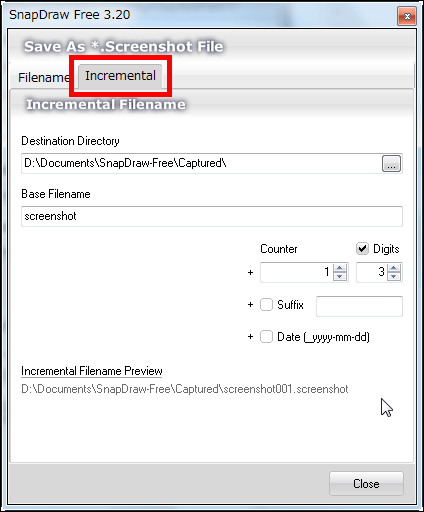
Furthermore, by clicking the "Destination File" button on the previous screen, you can set the file name rule for automatic saving.
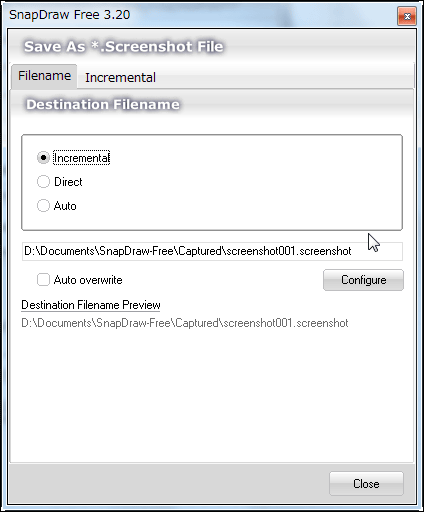
"Incremental" is a sequential number preservation, furthermore it can set the number of digits, the character string to be added, the date, etc.
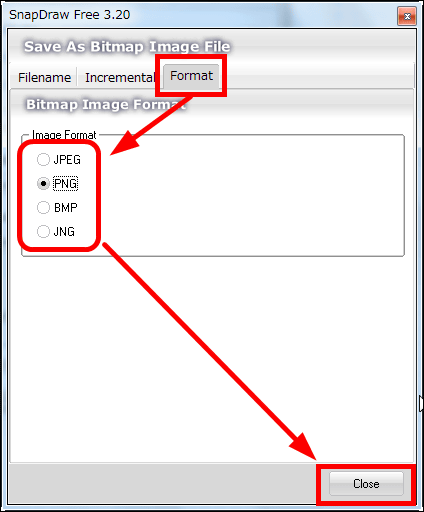
In the case of the specified image format, you can decide which image format to save further
Related Posts: